Creating and managing workspaces
This article covers how to create, set up, and manage your workspaces.
What is a workspace?
Workspaces are a shared environment for you to track and manage engagement for related mobile apps or websites. Workspaces group the same or very similar apps together: for example, the Android and iOS versions of your mobile app. Everything you do in Braze happens within a workspace.
Creating a workspace
Step 1: Have a plan
Before you begin, make sure you’ve worked with your team and your Braze onboarding manager to determine the best workspace configuration for your use case. To learn more about planning your workspaces in Braze, check out our Getting Started: Workspaces guide.
Step 2: Add your workspace
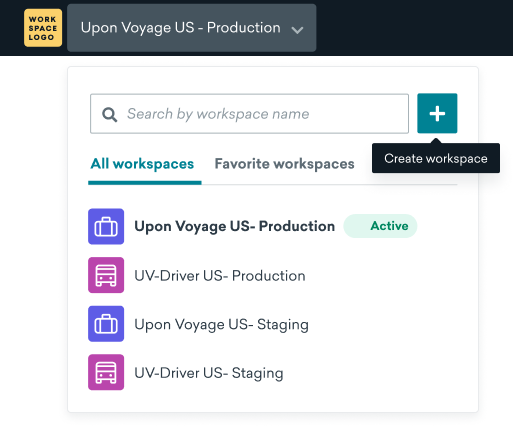
You can create new workspaces or switch between existing workspaces from the workspace dropdown in the global header.
- Select the workspace dropdown and click Create workspace.
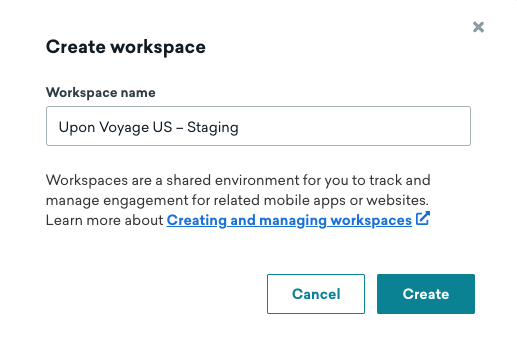
- Give your workspace a name.
You might want to adopt a naming convention so that others in your company can easily find your workspace. For example: “Upon Voyage US – Production” and “Upon Voyage US – Staging”.
- Click Create. It may take a few seconds for Braze to create your workspace.
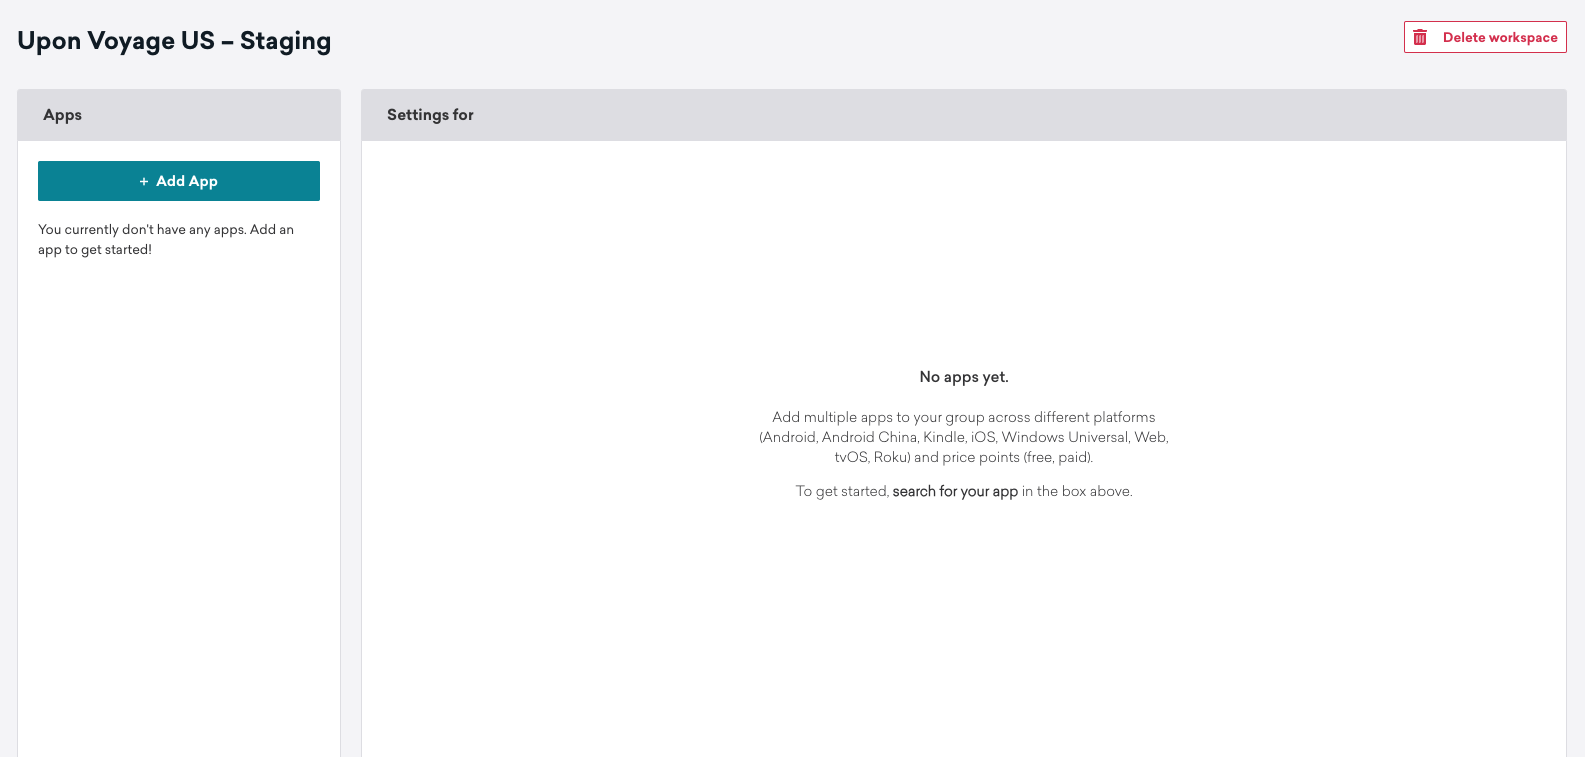
You will be taken to the App Settings page to begin adding your app instances. You can access this page at any time from Settings > App Settings.
Step 3: Add your app instances
We refer to the different sites and apps that are collected within a workspace as “app instances”.
- From the App Settings page, click + Add app.
- Give your app instance a name and select what platform or platforms this app instance is on. If you select multiple platforms, Braze will create one app instance for each platform.
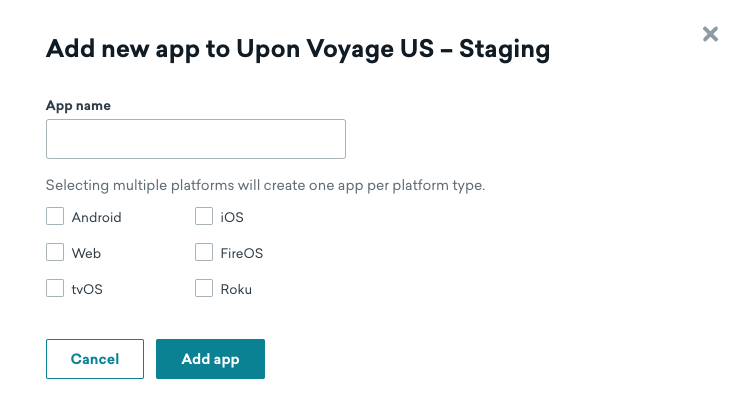
- Click Add app to confirm.
App API keys
After adding your app instance, you will have access to its API key. The API key is used when making requests between your app instance and the Braze API. The API key is also important for integrating the Braze SDK with your app or website.
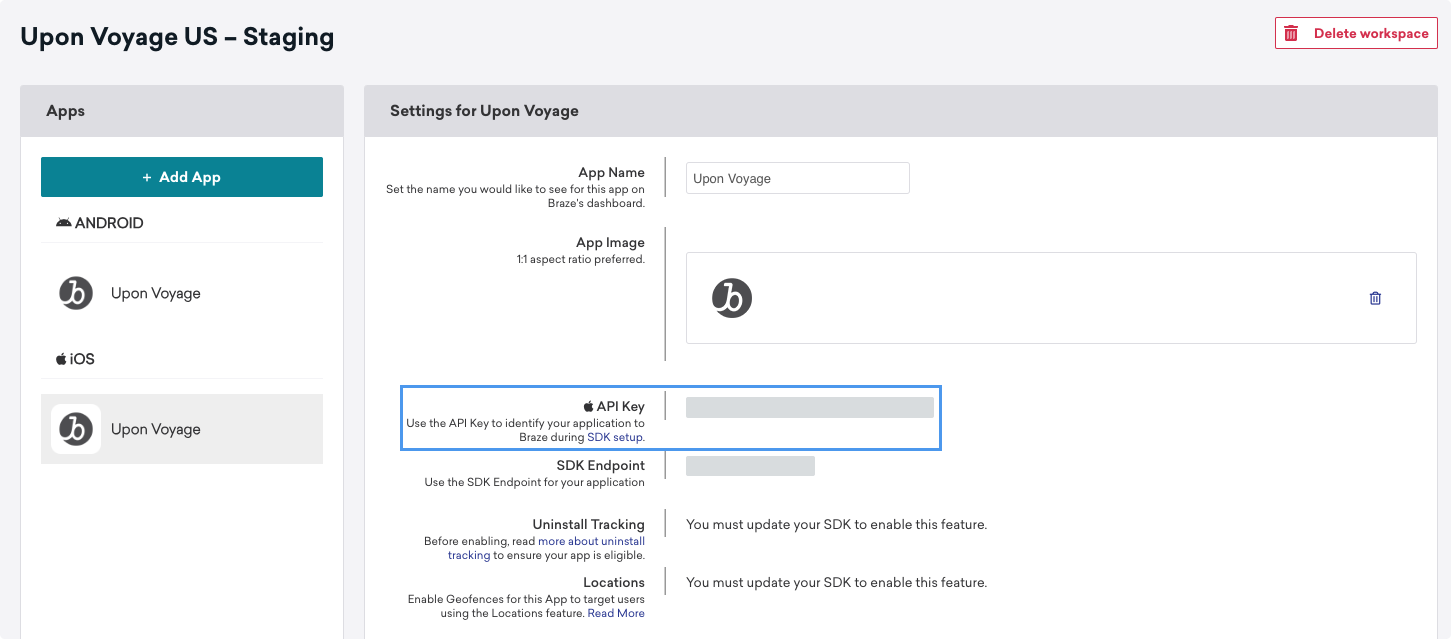
You must create separate app instances for each version of your app on each platform. For example, if you have Free and Pro versions of your app on both iOS and Android, create four app instances within your workspace (Free iOS app, free Android app, pro iOS app, and pro Android app). This will give you four API keys to use, one for each app instance.
Live SDK version
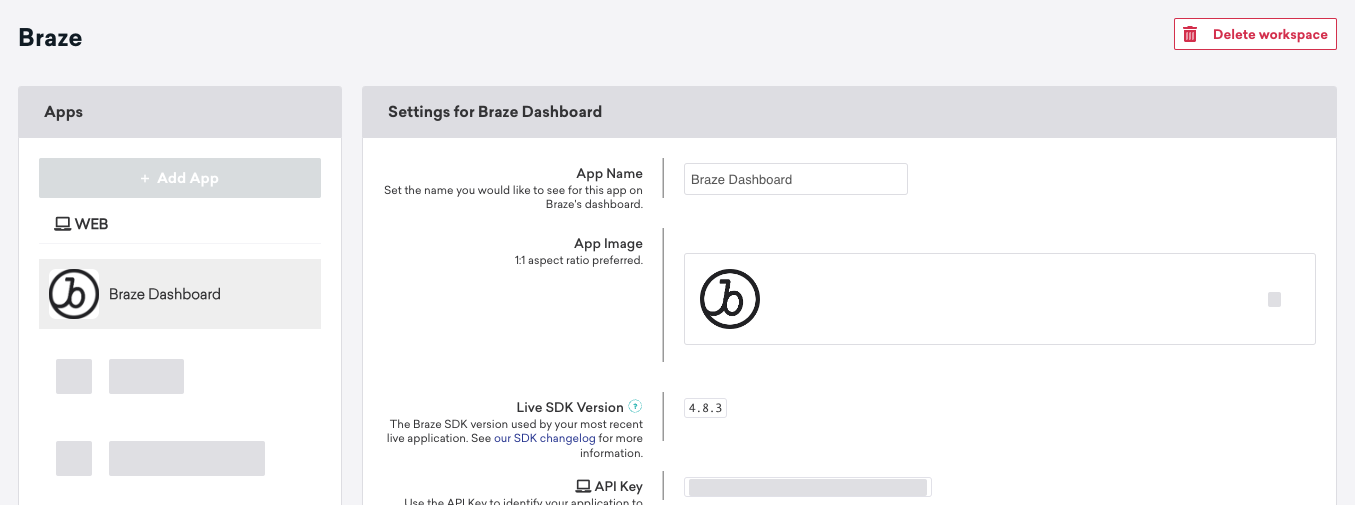
The Live SDK Version displayed on the App Settings page for a specific app is the highest app version with at least 5% of your total daily sessions and has at least 500 sessions in the past day.
This field appears after you have integrated the Braze SDK with your app or website. If a newer version of the Braze SDK is available for your platform, it will be noted here with the tag “Newer Version Available.”

Step 4: Repeat as needed
Repeat steps 2 and 3 to set up as many workspaces as your plan requires. As a best practice, we recommend that you create a testing workspace for integration and campaign testing.
Tip: Add a testing workspace
You can perform app testing by completely sandboxing certain users from your production instance. Create a new workspace, and when you publish your application, be sure to change the API key that Braze is using to match that of your production workspace rather than your testing workspace.
Managing workspaces
Adding favorites
You can add favorite workspaces to access the workspaces you use the most even faster.
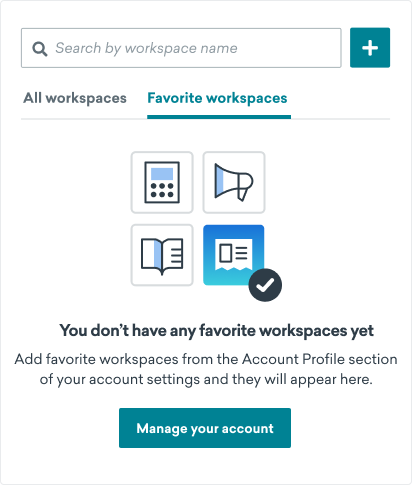
To add favorite workspaces:
- Select your profile dropdown and click Manage your account.
- In the Account Profile section, locate the Favorite workspaces field.
- Select your workspaces from the list.
- Click Save changes.
There’s no limit to the number of workspaces you can favorite, but we recommend keeping this list short for convenience.
Renaming workspaces
To rename your workspace:
- Go to Settings > App Settings.
- Hover over your workspace’s name and click .
- Give your workspace a new name, then click Save.

Deleting workspaces
To delete your workspace:
- Go to Settings > App Settings.
- Click Delete workspace.
Be careful when deleting workspaces! After a workspace is deleted, it can’t be restored.
Frequently asked questions
Should I create a new workspace when I’m releasing an updated app?
If users only need to update their app and you’re not releasing an entirely new app to the app store, you should not create a new workspace unless you don’t plan to message users on the older version anymore.
By creating a new workspace, all historical data and user profiles from the older app version won’t exist in this new workspace. So, after existing users upgrade to the new app version, they’ll have a new profile created without any of the behavioral data from the old app.
Additionally, your users would exist in two places: the old workspace and the new workspace. They can also potentially have the same push token. This may lead to users receiving a marketing message intended for only old workspace users, even if they’ve already upgraded.
What should I do instead?
To separate old and new apps, create a new app instance within the same workspace. This way, you can effectively target users on the new version when you select that app during segmentation. If you want to message users who are on the old version, you can use filters to target the previous app version.
I have multiple app instances in one workspace—how can I make sure to only target a single app with my message?
To make sure your message only targets a specific app, add a segment that only targets users from your chosen app instances. This is especially important if a user might have two push tokens to different app instances in the same workspace. In this scenario, users could receive a notification for a different app than the one they’re on. Not an ideal experience!
By default, a segment targets all apps and websites in the workspace. To set up a segment that only targets one app or website:
- Create a segment with a meaningful name. At Braze, we use the format “All Users ({Name} {Platform})”. For example, “All Users (Upon Voyage iOS)”.
- For Apps and websites targeted, select Users from specific apps.
- In the Specific apps dropdown, select your app or site.
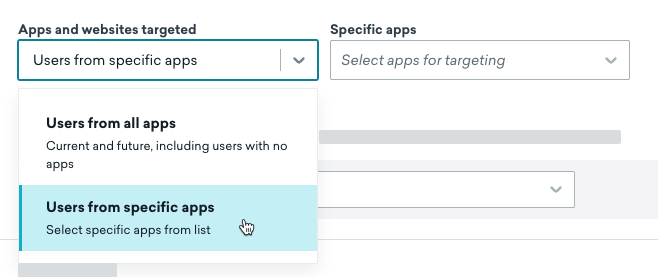
You can then add this segment to your message and begin further refining your audience with additional segments and filters if needed.
Campaigns
For campaigns, add your segment to the Target Users step of the composer.
Canvas Flow
In Canvas Flow, add your segment to your Message steps, in the Delivery Validations section. Delivery validations double-check that your audience meets your delivery criteria at message send. Remember to specify delivery validations for each Message step to make sure it will be delivered to the correct app. There’s no need to segment at the entry level.
Expand for steps in the original Canvas workflow
As of February 28, 2023, you can no longer create or duplicate Canvases using the original editor. This content is available for reference to understand segments and targeting in the original editor.
Braze recommends that customers who use the original Canvas experience move to Canvas Flow. It’s an improved editing experience to better build and manage Canvases. Learn more about cloning your Canvases to Canvas Flow.
In the original Canvas workflow, add your segment to the Canvas component level in the Audience section. There’s no need to segment at the entry level.
 Edit this page on GitHub