Creating a catalog
With catalogs, you can reference non-user data in your Braze campaigns through Liquid.
Creating a catalog involves importing a CSV file of non-user data into Braze. This allows you to then access that information to enrich your messages. You can bring in any type of data into a catalog. This data is typically some sort of metadata from your company such as product information for an ecommerce business, or course information for an education provider.
Some common use cases for catalogs include:
- Products
- Services
- Food
- Upcoming events
- Music
- Packages
Once this information is imported, you can begin accessing it in messages in a similar way to accessing custom attributes or custom event properties through Liquid.
Preparing your CSV file
Before creating a catalog, be sure to have your CSV file ready if your preferred catalog creation method is to upload.
Need more space to accommodate for your CSV files? Contact your Braze account manager for more information about upgrading your catalogs.
CSV file guidelines
Note these guidelines when creating your CSV file. The first column of the CSV file must be a header of id, and each item’s id must be unique. All other column names must be unique. Additionally, the following limitations apply to catalog CSV files:
- Maximum of 500 fields (columns)
- Maximum field (column) name of 250 characters
- Maximum 100 MB for all CSV files combined across your company (Free)
- Maximum CSV file size of 2 GB (Pro)
- Maximum field value (cell) of 5,000 characters
- Only letters, numbers, hyphens, and underscores for
idand header values
We also recommend formatting all text in your CSV files as lowercase. Make sure you’re encoding your CSV file using the UTF-8 format to upload your CSV file in the next step successfully.
Selecting your method
To create a catalog, go to Data Settings > Catalogs.
If you are using the older navigation, you can find Catalogs under Data.
Click Create New Catalog, then choose to either Upload CSV or Create in browser.
Method 1: Upload CSV
- Drag and drop your file to the upload zone, or click Upload CSV and choose your file.

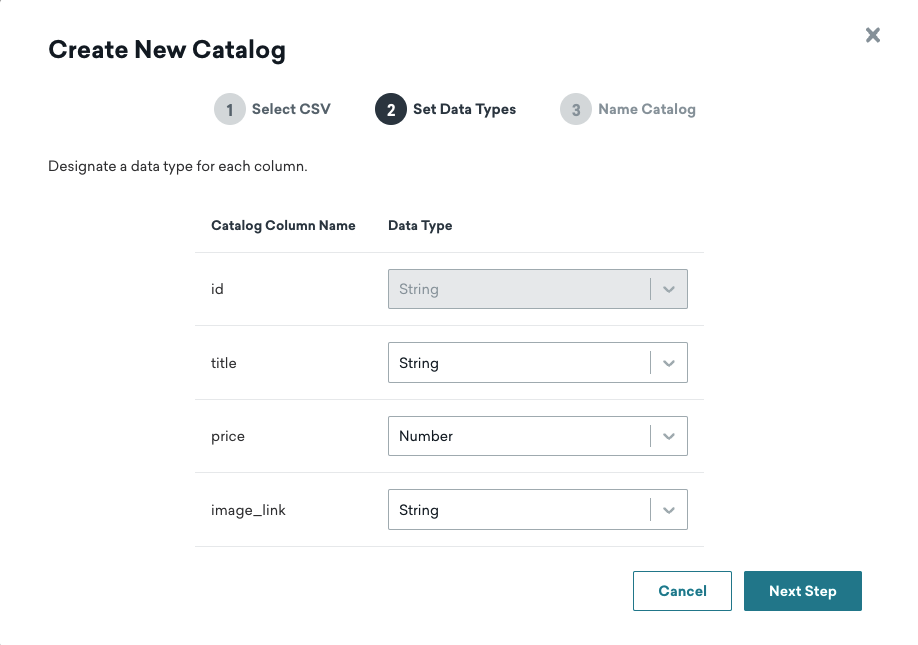
- Select one of the following data types for each column: boolean, number, string, or time.
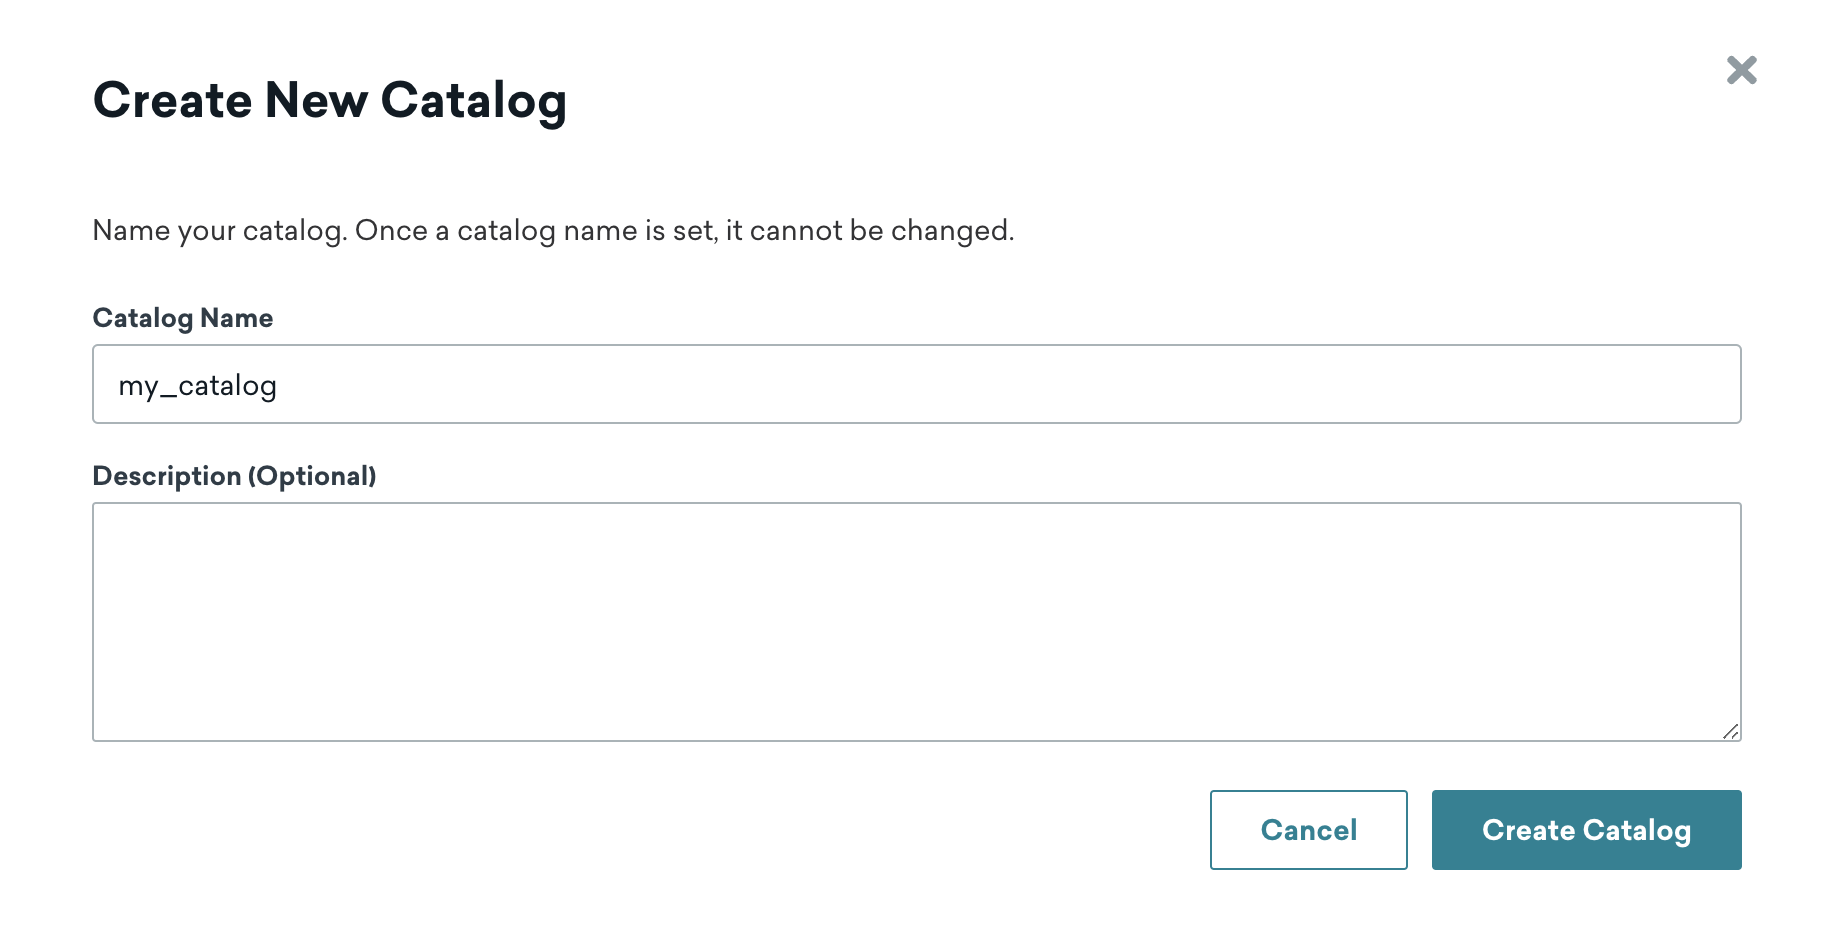
- Give your catalog a name. Keep in mind the following requirements for a catalog name:
- Must be unique
- Maximum of 250 characters
- Can only include numbers, letters, hyphens, and underscores
- (optional) Add a description for the catalog.
- Click Process Catalog to create the catalog.
This data type cannot be edited after you set up your catalog.
Note that you cannot use templates in a catalog name. For example, you cannot have the following as the catalog name, or the call will fail.
1
{% catalog_items custom_attribute.${catalog} item1, item2 %}
Your CSV file can be rejected if you go above your tier.
You can also update the CSV file after selecting to create a catalog in the browser. Click Update Catalog > Upload CSV, then select whether to update, add, or delete items in your catalog.
Method 2: Create in the browser
- Enter a name for your catalog. Keep in mind the following requirements for your catalog name:
- Must be unique
- Maximum of 250 characters
- Can only include numbers, letters, hyphens, and underscores
- (optional) Type a description for your catalog.
- Select the catalog you’ve just created from the list Catalogs page to update your catalog.
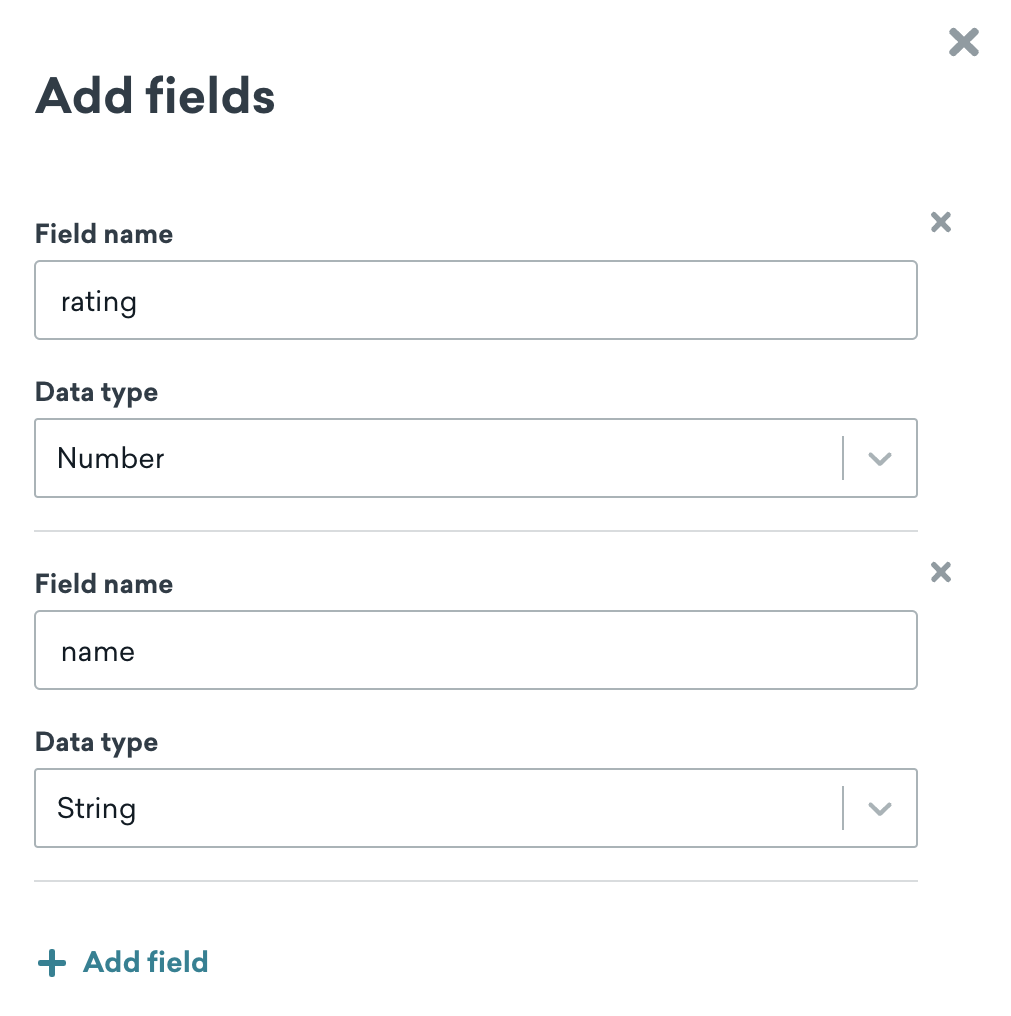
- Click Update Catalog > Add fields to add your fields. Then, enter the Field name and use the dropdown to select the data type. Repeat as needed.
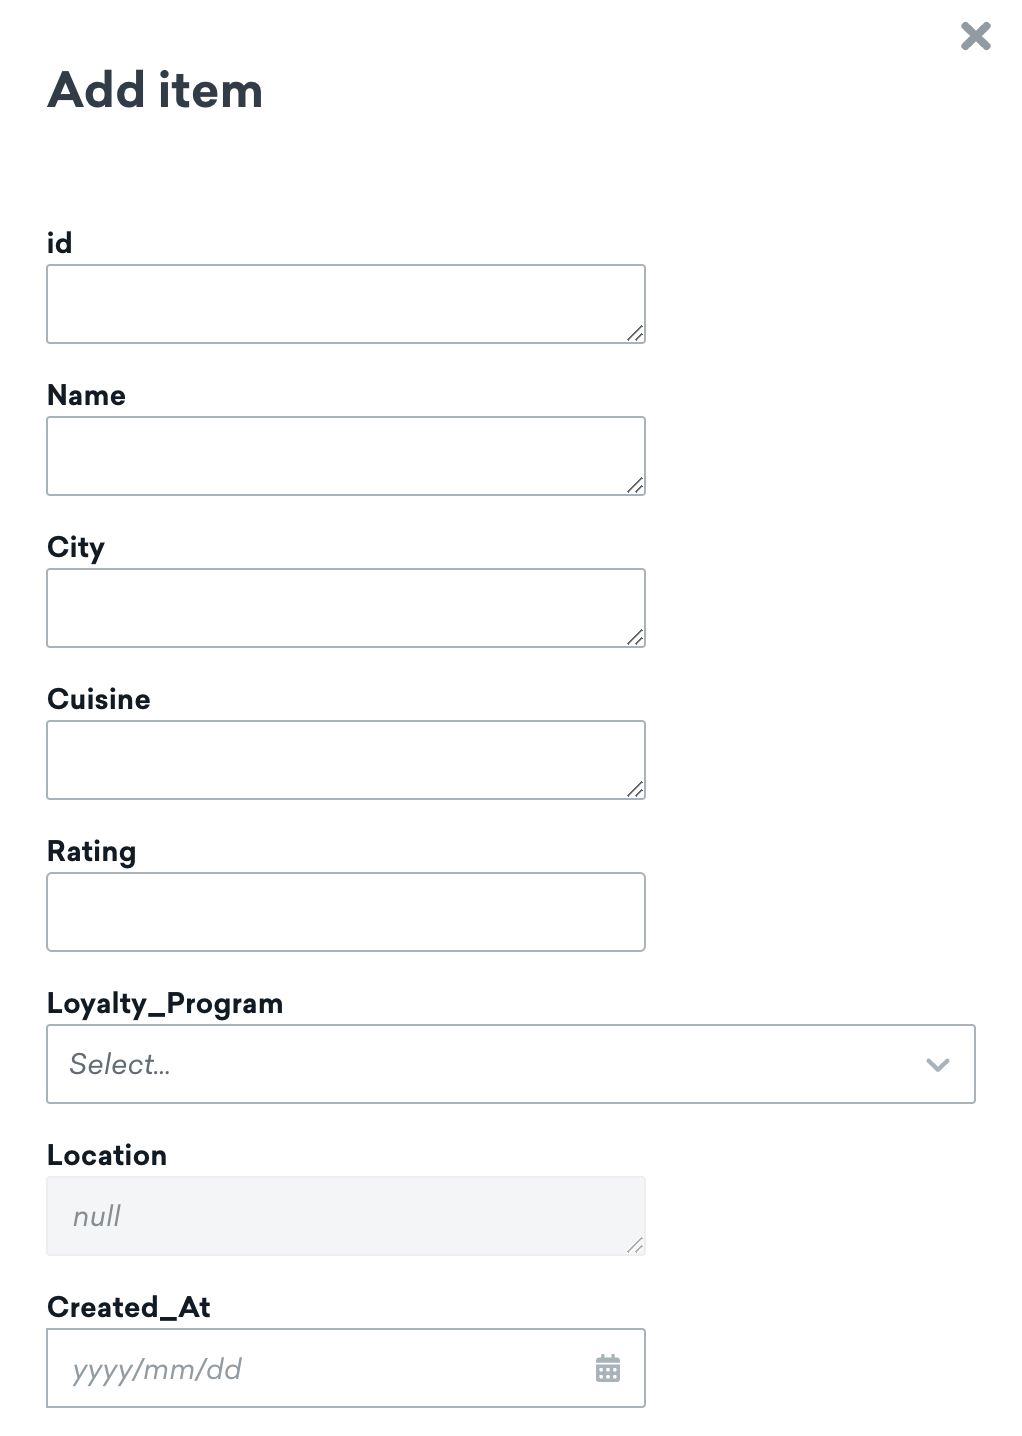
- Click Update Catalog > Add items to add an item to your catalog by entering the information based on the fields you previously added. Then, click Save Item or Save and Add Another to continue adding your items.
You can also upload a CSV file after selecting to create a catalog in the browser.
Braze processes time values based on the dashboard timestamp. For example, if a column has a value of “03/13/2024” and your time zone is the Pacific Time Zone, this time would be imported to Braze as “Mar 12, 2024, 5:00 PM”.
Example catalog
For this tutorial, we’re using a catalog that lists two games, their cost, and an image link.
| id | title | price | image_link |
|---|---|---|---|
| 1234 | Tales | 7.49 USD | https://picsum.photos/200 |
| 1235 | Regeneration | 22.49 USD | https://picsum.photos/200 |
In this example, we’ll create the catalog by uploading a CSV file. The data types for id, title, price, and image_link are string, string, number, and string, respectively.
This data type cannot be edited after you set up your catalog.
Next, we’ll name this catalog “games_catalog” and click the Process Catalog button. Then, Braze will check the catalog for any errors before catalog creation.
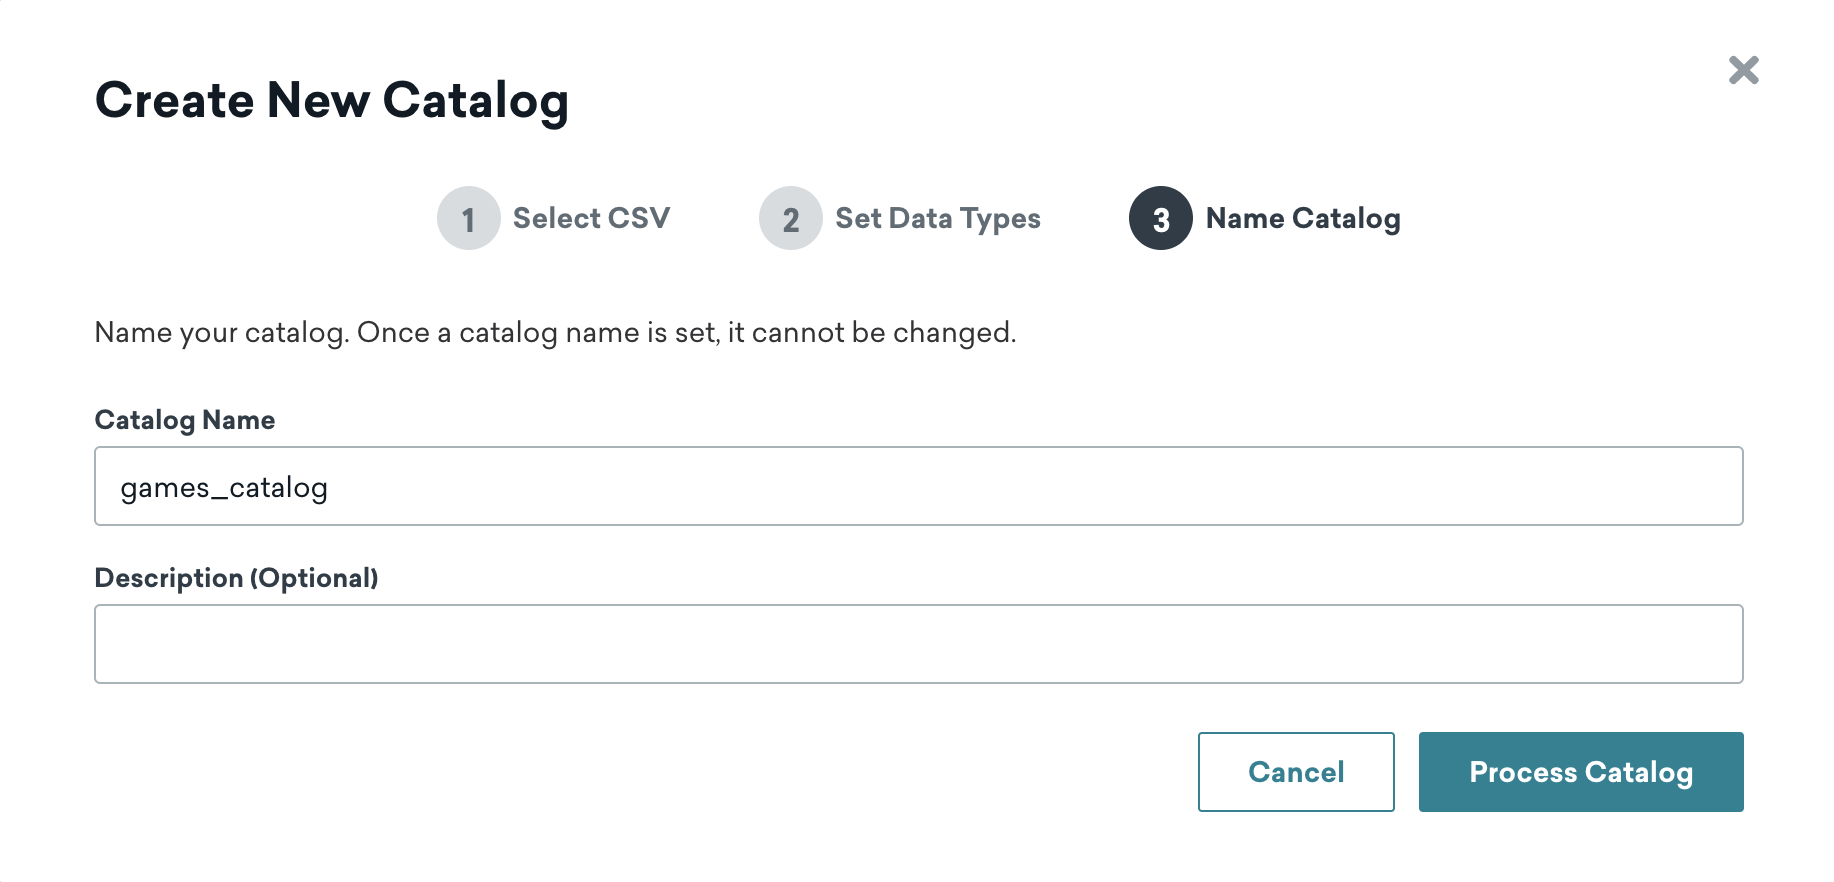
Note that you won’t be able to edit this name after the catalog is created. You can delete a catalog and re-upload an updated version using the same catalog name.
Using catalogs in a message
You can use catalogs in all of your messaging channels, including anywhere in the Drag & Drop Editor where Liquid is supported.
Step 1: Add personalization type
In the message composer of your choice, click the plus icon to open the Add Personalization modal and select Catalogs Items for the Personalization Type. Then, select your Catalog Name. Using our previous example, we’ll select the “Games” catalog.
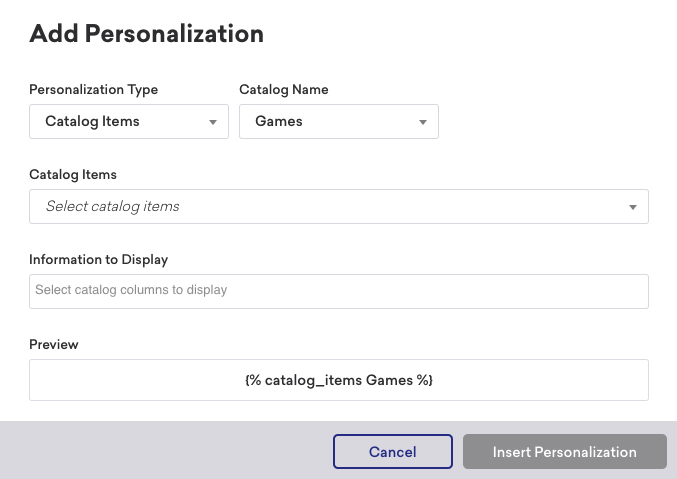
We can immediately see the following Liquid preview:
1
{% catalog_items Games %}
Step 2: Select catalog items
Next, it’s time to add your catalog items! Using the dropdown, select the catalog items and the information to display. This information corresponds to the columns in your uploaded CSV file used to generate your catalog.
For example, to reference the title and price of our Tales game, we could select the id for Tales (1234) as the catalog item and request title and price for the displayed information.
1
2
3
{% catalog_items Games 1234 %}

Get {{ items[0].title }} for just {{ items[0].price }}!
This renders as the following:
Get Tales for just 7.49 USD!
Catalogs via API
You can leverage our Catalogs endpoints to manage the growing data and information.
Managing catalogs
You can create a catalog using the Create catalogs endpoint.
As you build more catalogs, you can also use the List catalogs endpoint to return a list of the catalogs in a workspace.
Managing catalog items
In addition to managing your catalogs, you can also use asynchronous and synchronous endpoints to manage the catalog items. This includes the ability to edit and delete catalog items, and to list catalog item details.
For example, if you want to edit an individual catalog item, you can use the /catalogs/catalog_name/items/item_id endpoint.
Additional use cases
Multiple items
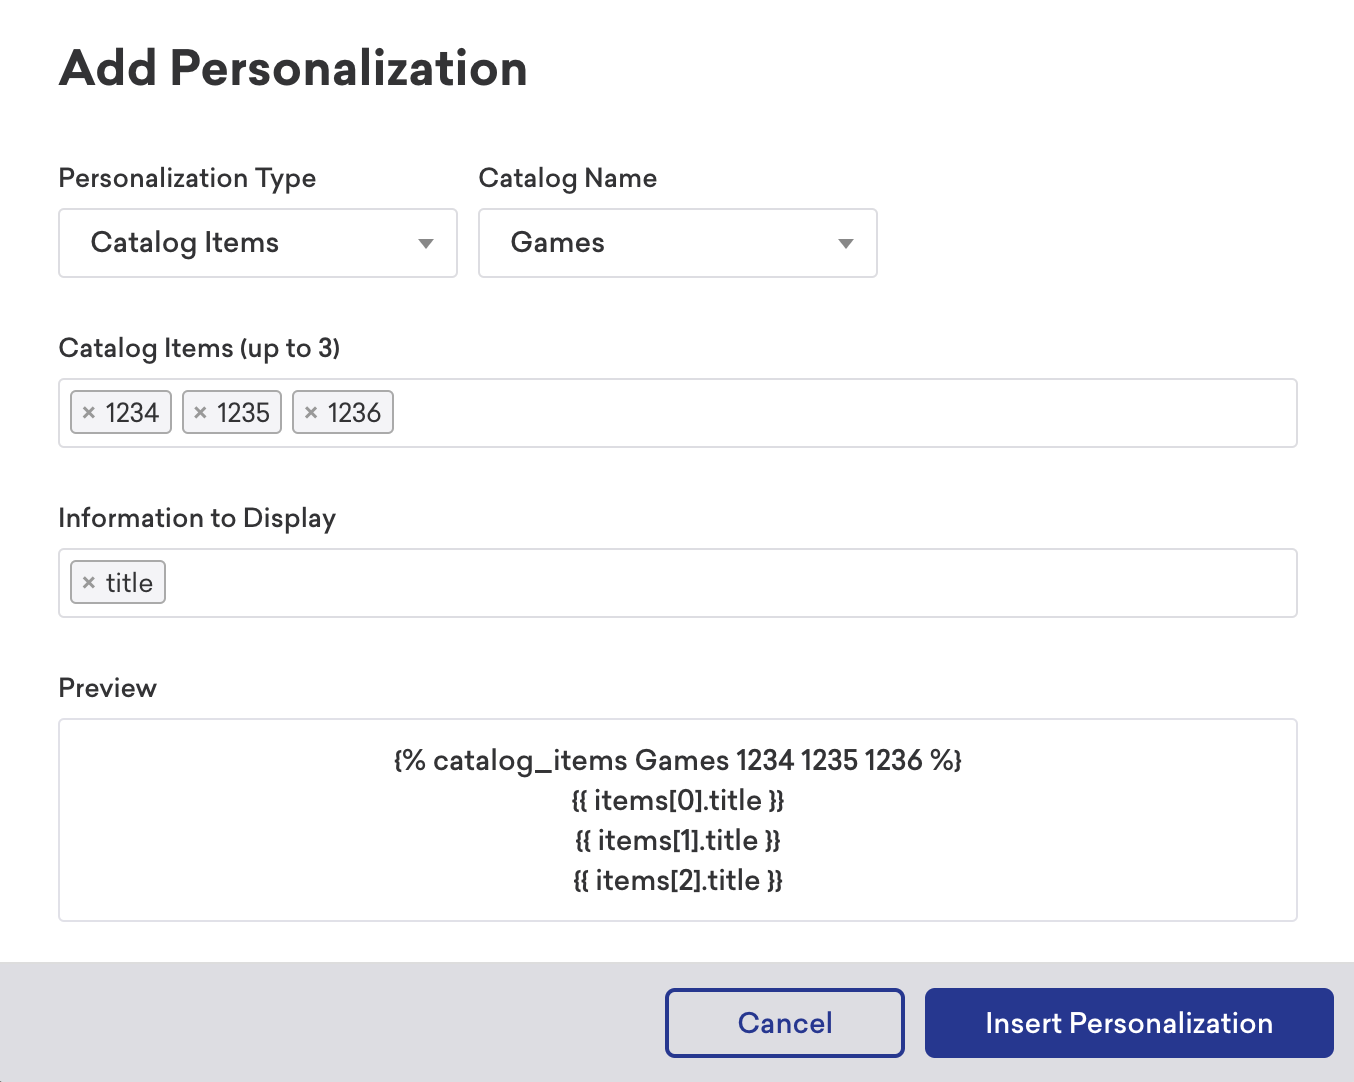
You aren’t limited to just one item in a single message! Simply insert the additional catalog items and information to display using the Add Personalization modal. Note that you can add up to three catalog items only.
Check out this example where we add the id of three games, Tales, Teslagrad, and Acaratus, for Catalog Items and select title for Information to Display.
We can further personalize our message by adding some text around our Liquid:
1
2
Get the ultimate trio {% catalog_items games 1234 1235 1236 %}
{{ items[0].title }}, {{ items[1].title }}, and {{ items[2].title }} today!
This returns as the following:
Get the ultimate trio Tales, Teslagrad, and Acaratus today!
Check out selections to create groups of data for more personalized messaging!
Using Liquid if statements
You can use catalog items to create conditional statements. For example, you can trigger a certain message to display when a specific item is selected in your campaign.
To do this, you’ll use a Liquid if statement in a format like this:
1
2
3
4
5
6
{% catalog_items Test-list %}
{% if {{items[0].first-item}} == true %}
Do this
{% else %}
Do that
{% endif %}
Note that you must declare the catalog list before using if statements. In the example above, Test-list is the catalog list.
Example Liquid if snippet
In this example, different messages will display if the custom attribute venue_name has more then 10 characters or less then 10 characters. If venue_name is blank, nothing will display.
1
2
3
4
5
6
7
8
{% catalog_selection_items item-list selections %}
{% if items[0].venue_name.size > 10 %}
Message if the venue name's size is more than 10 characters.
{% elsif items[0].venue_name.size < 10 %}
Message if the venue name's size is less than 10 characters.
{% else %}
{% abort_message(no venue_name) %}
{% endif %}
Using images
You can also reference images in the catalog to use in your messaging. To do so, use the catalogs tag and item object in the Liquid field for images.
For example, to add the image_link from our Games catalog to our promotional message for Tales, select the id for the Catalog Items field and image_link for the Information to Display field. This adds the following Liquid tags to our image field:
1
2
3
{% catalog_items Games 1234 %}

{{ items[0].image_link }}
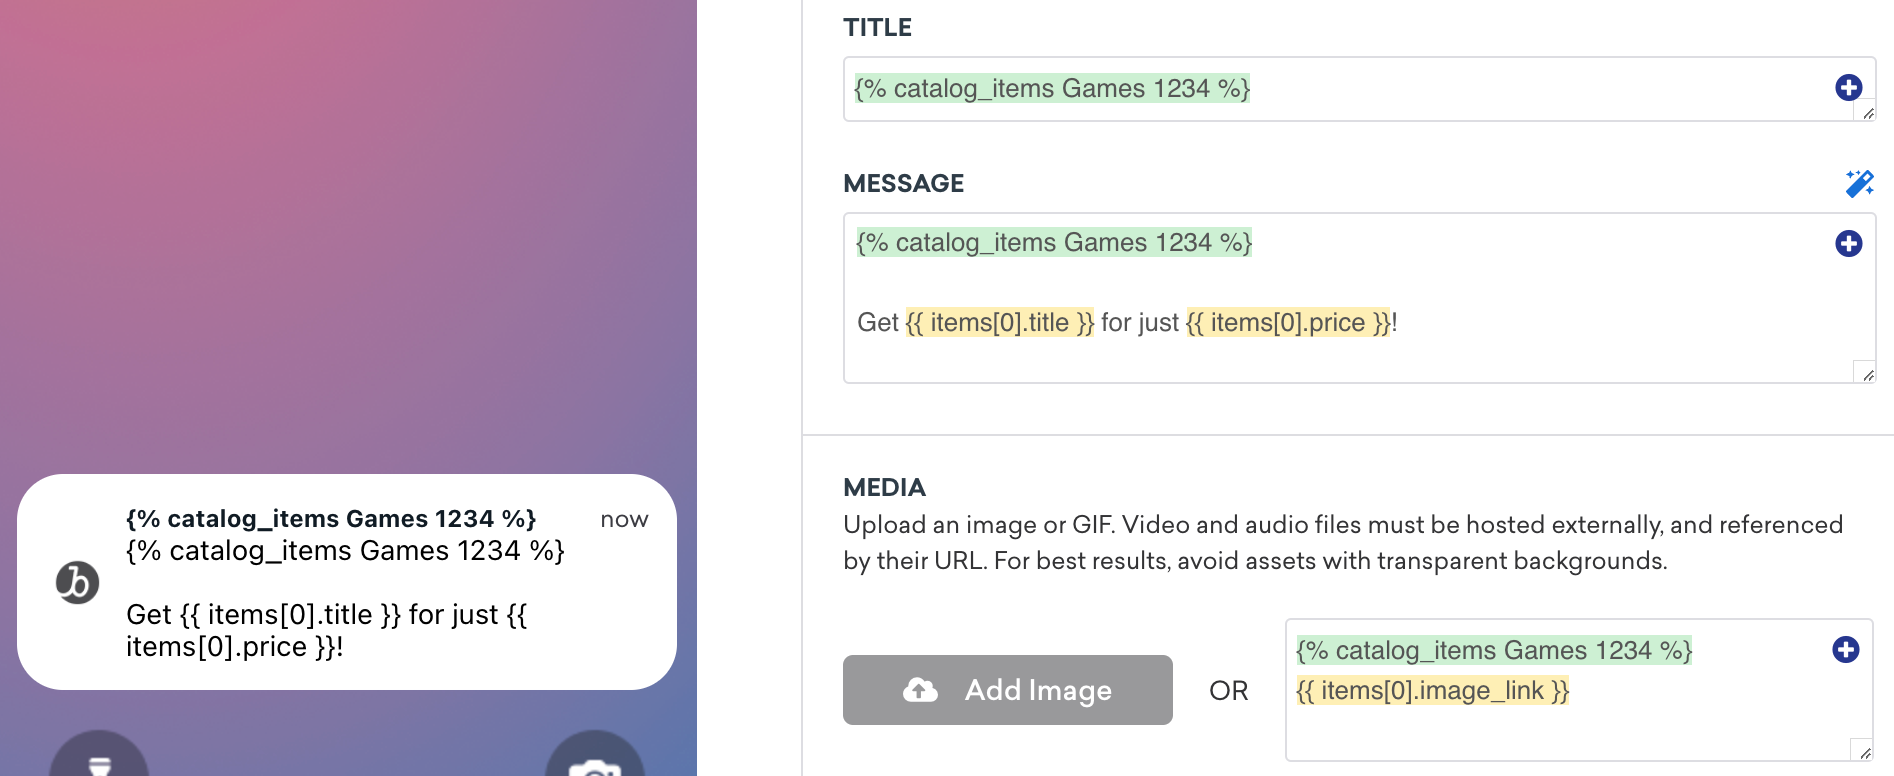
Here’s what this looks like when the Liquid is rendered:

Templating catalog items
You can also use templating to dynamically pull catalog items based on custom attributes. For example, let’s say a user has the custom attribute wishlist, which contains an array of game IDs from your catalog.
1
2
3
4
5
6
7
8
{
    "attributes": [
        {
            "external_id": "user_id",
            "wishlist": ["1234", "1235"]
        }
    ]
}
Using Liquid templating, you can dynamically pull out the wishlist IDs and then use them in your message. To do so, assign a variable to your custom attribute, then use the Add Personalization modal to pull a specific item from the array.
Remember, arrays start at 0, not 1.
For example, to let a user know that Tales (an item in our catalog that they’ve wished for) is on sale, we can add the following to our message composer:
1
2
3
4
{% assign wishlist = {{custom_attribute.${wishlist}}}%}
{% catalog_items Games {{ wishlist[0] }} %}

Get {{ items[0].title }} now, for just {{ items[0].price }}!
Which will display as the following:
Get Tales now, for just 7.49 USD!
With templating, you can render a different catalog item for each user based on their individual custom attributes, event properties, or any other templatable field.
Uploading a CSV
You can upload a CSV of new catalog items to add or catalog items to update. To delete a list of items, you can upload a CSV of item IDs to delete them.
Using Liquid
You can also manually piece together catalogs Liquid logic. However, note that if you type in an ID that doesn’t exist, Braze will still return an items array without objects. We recommend that you include error handling, such as checking the size of the array and using an if statement to account for an empty array case.
Managing catalogs
As you create more catalogs, you can leverage the Catalogs Endpoints to manage the growing data and information. This includes the ability to create, edit, and delete catalog items, and to list catalog item details.
Catalog tiers
The following table describes the differences between the free and pro version of catalogs:
| Area | Free version | Catalogs Pro |
|---|---|---|
| CSV file size | Up to 100 MB for all CSV files combined across your company | Up to 2 GB for a single CSV file |
| Characters limit for item value | Up to 5,000 characters in one value. For example, if you had a field labeled description, the maximum number of characters within the field is 5,000. |
Up to 5,000 characters in one value. For example, if you had a field labeled description, the maximum number of characters within the field is 5,000. |
| Characters limit for item column name | Up to 250 characters | Up to 250 characters |
| Selections | Up to 30 selections per catalog | Up to 30 selections per catalog |
Catalog storage
The package entitlement shown in the Braze dashboard is rounded to the nearest unit for visual purposes; however, you are still entitled to the full entitlement purchased. To request an upgrade for catalog storage, contact your Braze account manager.
Free version
The storage size for the free version of catalogs is up to 100 MB. You can have unlimited items as long as it’s under 100 MB. Selections will contribute to your storage. The more complex a selection is, the more storage it will take up.
Catalogs Pro
At a company level, the maximum storage for Catalogs Pro will be based on the size of catalog data: 5 GB, 10 GB, or 15 GB. Note that the free version’s storage (100 MB) is included in each of these plans.
 Edit this page on GitHub