Push primer in-app messages
You get one chance to ask users for push permission, so optimizing your push registration is crucial to maximize the reach of your push messages. Use in-app messages to explain what type of messages your users can expect to receive if they choose to opt in, before showing them the native push prompt. This is referred to as a push primer.
To create a push primer in-app message in Braze, you can use the button on-click behavior “Request Push Permission” when creating an in-app message for iOS, Android, or Web.
Prerequisites
This feature requires button on-click behavior, which is supported in the following minimum versions or later:
Additionally, note the following platform-specific details:
| OS version | Additional information |
|---|---|
| Android 12 and earlier | Implementing push primers is not recommended because push is opted-in by default. |
| Android 13+ | If a user denies your push permission prompt twice, Android blocks further prompts—including Braze push primer messages. To grant permission after this, users must manually enable push for your app in their device settings. |
General information
- The push prompt can be displayed only once per install, enforced by the operating system.
- The prompt doesn’t display if the app’s push setting is explicitly on or off. It only displays for users with provisional authorization.
- App’s push setting is on: Braze doesn’t show the in-app message, as the user has already opted-in.
- App’s push setting is off: You need to redirect the user to your app’s push notification settings within the device settings.
- Retesting after deny: If a user denies the native prompt, iOS does not show it again for that app install. To retest the push primer flow, users typically need to uninstall and reinstall the app, or change notification permission for your app in Settings.
Manual code removal
The in-app message that you set up using this tutorial calls the native push prompt code automatically when a user clicks on the in-app message button. To avoid requesting push notification permission twice, or at the wrong time, a developer should modify any existing push notification integration they implemented to make sure that your in-app message is the first push notification primer your users see.
Your development team should review your implementation of push notifications for your app or site and manually remove any code that requests push permission. For example, remove references to the following code:
1
requestAuthorizationWithOptions
1
requestAuthorization
1
2
3
braze.requestPushPermission()
// or
appboy.registerAppboyPushMessages()
1
android.permission.POST_NOTIFICATIONS
Step 1: Create an in-app message
First, create an in-app message, then select your message type and layout.
To ensure you have enough space for both your message and buttons, use a fullscreen or modal message layout. If you choose fullscreen, note that an image is required.
Step 2: Build your message
Now it’s time to add your copy! Remember that a push primer is supposed to prime the user to turn on push notifications. In your message body, we suggest highlighting the reasons your users should have push notifications turned on. Be specific about what type of notifications you want to send and what value they can provide.
For example, a news app might use the following push primer:
1
Breaking news on the go! Enable push notifications to get alerts for major stories and topics that matter to you.
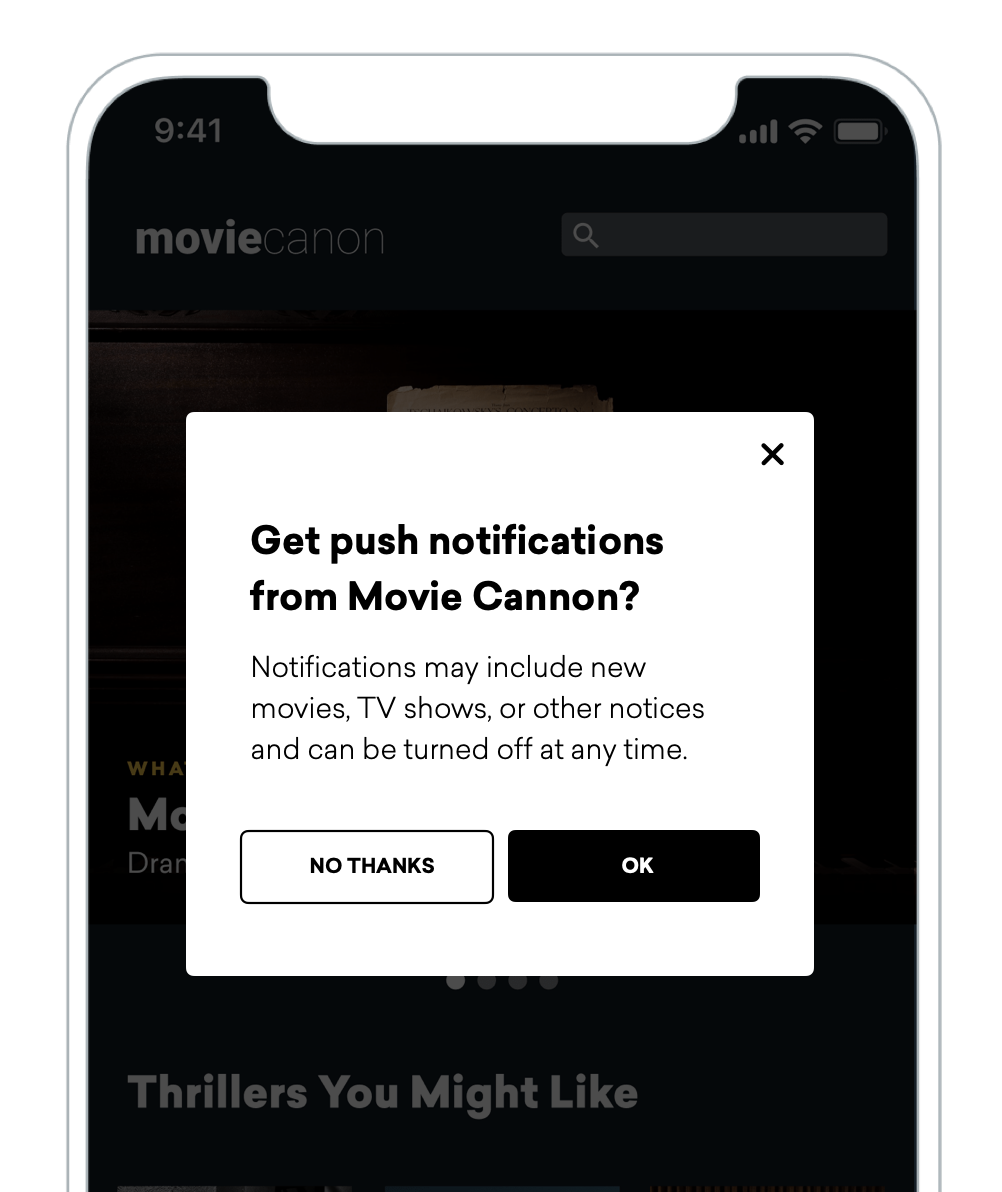
While a streaming app might use the following:
1
Get push notifications from Movie Cannon? Notifications may include new movies, TV shows, or other notices and can be turned off at any time.
For best practices and additional resources, refer to Creating custom opt-in prompts.
Step 3: Specify button behavior
To add buttons to your in-app message, drag two Button blocks into your message, which act as the primary and secondary buttons in your in-app message. You can also drag a row into your message, and then drag the buttons into the row, so that the buttons are on the same horizontal row (as opposed to stacked on top of each other). We recommend “Allow notifications” and “Not now” as starter buttons, but there are many different button prompts you can assign.
After you’ve added button copy, specify the on-click behavior for each button:
- Button 1: Set this to “Close Message”. This is your secondary button, or the “Not now” option.
- Button 2: Set this to “Request Push Permission”. This is your primary button, or the “Allow notifications” option.

Step 4: Schedule delivery
To set your push primer to send at a relevant time, you must schedule your in-app message as an action-based message with Perform Custom Event as the trigger action.
While the ideal time will vary, Braze suggests waiting until a user completes some sort of high-value action, indicating that they’re starting to see value in your app or site, or when there’s a compelling need that push notifications can address (such as after they’ve placed an order and you want to offer them shipping tracking information). This way, the prompt is beneficial to the customer rather than only to your brand.

Step 5: Target users
The goal of a push primer campaign is to prompt users on any device where they have not yet granted push permissions. This can include first-time users or existing users who get a new device or reinstall your application.

Automatic suppression with no-code push primer: If you use the no-code push primer (the “Request Push Permission” button action), you don’t need to add push subscription filters to your segmentation. The SDK automatically suppresses the in-app message on devices that already have an active push token, regardless of the user’s push status on other devices. For more information about targeting users with multiple devices, see Targeting users with multiple devices.
If you’re not using the no-code push primer, add a filter where Foreground Push Enabled For App is false. This filter identifies individual app installations that are not yet opted in to foreground push notifications.
Using a user-level filter like Push Subscription Status is not Opted In excludes users who are already opted-in on another device, preventing them from receiving the prompt on their new device.
Beyond that, you can decide what additional segments you feel are most appropriate. For example, you might target users that have completed a second purchase, users that have just made an account to become a member, or even users that visit your app more than twice a week. Targeting users for these crucial segments increases the likelihood of users opting in and becoming push enabled.
Targeting users with multiple devices
Because Braze captures user data at the profile level rather than the device level, targeting users who own multiple devices can be challenging. Push subscription filters in segmentation include or exclude users based on a single device’s subscription state rather than the specific targeted device’s subscription state. Additionally, provisional states on iOS add complexity, as these devices technically have foreground push tokens, but users aren’t explicitly opted in.
The problem with push subscription filters
When a user has multiple devices with different push subscription states, push subscription filters in your segmentation may fail to target some devices. Consider these scenarios:
Scenario 1: User has two devices on different platforms
User has two devices:
- Device A: Android, opted in to push
- Device B: iOS, not opted in to push
Segment filters that don’t work:
Push enabled = false- User is push enabled on their Android device, so they don’t fall into the segment. The segment doesn’t include the iOS device.Push subscription status is not opted in- User is push enabled on their Android device, so they don’t fall into the segment. The segment doesn’t include the iOS device.
Segment filters that work:
Push enabled for iOS = false- User is push enabled on their Android device, but we’re only targeting iOS devices, so the user falls into the segment. The segment includes the iOS device.
Scenario 2: User has two iOS devices with different states
User has two iOS devices:
- Device A: Opted in to push
- Device B: Provisionally enabled but not opted in
Segment filters that don’t work:
Push enabled = false- Device A is opted in to push, so the user doesn’t fall into the segment. The segment doesn’t include Device B.Provisionally opted in = true- Device A is fully opted in, which means they’re not in a provisional state. The user doesn’t fall into the segment. The segment doesn’t include Device B.Push enabled for app > iOS = false- Device A is opted in to push on iOS, so the user doesn’t fall into the segment. The segment doesn’t include Device B.Push subscription status is not opted in- Device A is opted in to push, so the user doesn’t fall into the segment. The segment doesn’t include Device B.
Result: Using any combination of these push filters results in the segment excluding at least one device.
Scenario 3: User has three or more devices on the same OS
User has three devices:
- Device A: Opted in to push
- Device B: Not opted in to push
- Device C: Not opted in to push
Segment filters that don’t work:
Push enabled = false- Device A is opted in to push, so the user doesn’t fall into the segment. The segment doesn’t include Devices B and C.Push enabled for app > X = false- Device A is opted in to push on the specified app, so the user doesn’t fall into the segment. The segment doesn’t include Devices B and C.Push subscription status is not opted in- Device A is opted in to push, so the user doesn’t fall into the segment. The segment doesn’t include Devices B and C.
Result: Using any combination of these push filters leaves at least one device untargeted.
Solution: Use the no-code push primer
The recommended solution is to use the no-code push primer (the “Request Push Permission” button action) with no additional push status segmentation filters.
Automatic suppression: The no-code push primer automatically suppresses on devices that already have an active push token. The SDK checks if a user on their specific device already has a push token. If the SDK finds that the user has already opted in (for example, from a previous request or through device settings), the SDK automatically suppresses the in-app message without the need for any additional segmentation filters. The primer shows in all other scenarios, including if a user is provisionally opted into push.
The benefit of using the no-code push primer is that the functionality is supported by the Braze SDK. Because the SDK can detect the push token status on the specific device that displays the message, you don’t need to rely on profile-level segmentation filters that may exclude users with multiple devices.
Considerations
No-code push primer required: You must use the no-code push primer for automatic suppression to work. If you set up custom logic or deep links instead of using the “Request Push Permission” button action, the SDK can’t identify that you’re trying to display a push primer. This results in displaying the message regardless of that device’s subscription state.
Suppressing for users who opted out: You may want to suppress the in-app message for users who have explicitly opted out of push (for example, from the native request or device settings) and retarget those users with a separate nurture campaign. To do this, use the following Liquid logic in combination with the no-code primer:
1
2
3
4
{% if targeted_device.${foreground_push_enabled} == false %}
{% abort_message('user turned off push notifications') %}
{% endif %}
- message goes here -
The targeted_device Liquid filter looks only at the device where the message is being displayed, rather than the user profile. On that device, foreground_push_enabled is set to true when there is an active foreground push token and set to false when the operating system reports that push notifications have been disabled (for example, the user explicitly turned them off). For completely new devices that haven’t responded to a push permission state yet, foreground_push_enabled is unset and has no value. Because the Liquid condition checks for ```false` specifically, it suppresses the primer only for devices with an explicit opt-out, while devices in this unknown state still qualify and can receive the push primer.
Step 6: Conversion events
Braze suggests default settings for conversions, but you may want to set up conversion events surrounding push primers.