Audience Paths
Canvas Audience Paths allow you to intuitively filter and segment users on a large scale by sending each user down the first path whose criteria they meet.
This Canvas component replaces the need to create excessive audience-based full steps, allowing you to combine what might have been eight full components into one. This helps you simplify user targeting while clearing up your Canvases from unnecessary clutter and complexity.
How it works
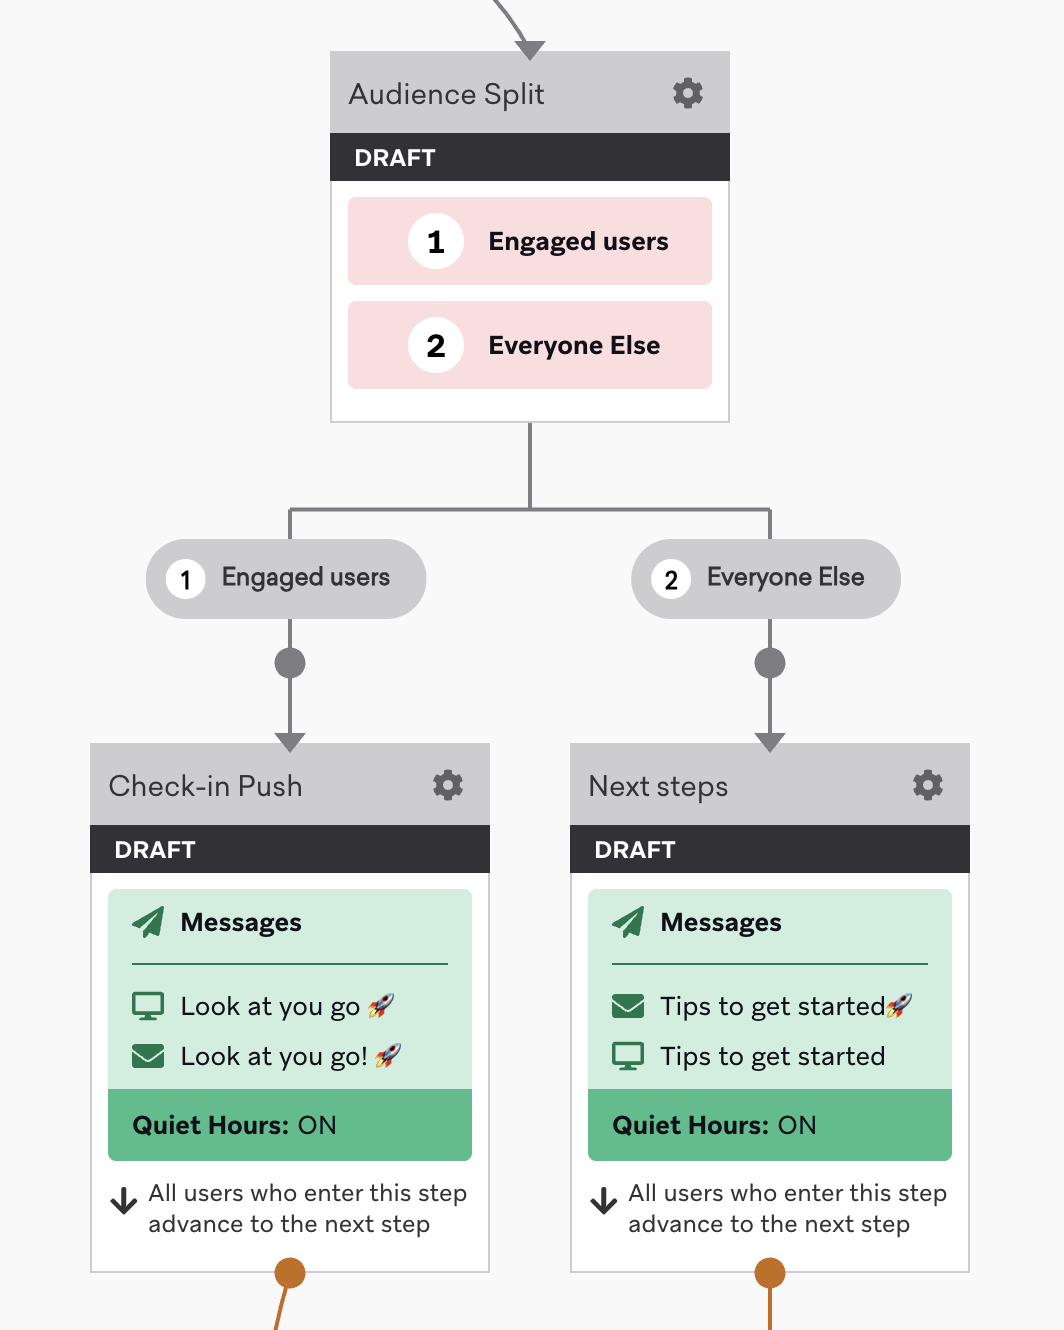
Users are progressed down the first branch whose criteria they meet, so put the most important path first. This reduces ambiguity about where users go and which messages they receive. Note that this order isn’t editable after launch.
With Audience Paths, you can:
- Send users down different Canvas paths based on audience criteria.
- Put your most important audience groups first; users take the first path they qualify for.
- Precisely target users on a large scale.
- You can create up to eight audience groups (two default and six additional groups) per Audience Paths step, but you may want to connect multiple Audience Paths steps to further sort your users.
Within a single Audience Paths step, users are evaluated against audience groups in order and move down the first path they qualify for. If you connect multiple Audience Paths steps in a Canvas, users are evaluated again each time they reach a new Audience Paths step.
How users are evaluated
Users are evaluated against filters and segment membership at the moment they reach the Audience Path step—not when they entered the Canvas. After evaluation, they immediately progress to the matching path. When a user is placed in an audience group, they stay in that group even if their user profile changes afterward.

Audience Paths evaluate based on a user’s current attributes, filters, and segment membership at the time of evaluation. They do not evaluate based on the specific event that triggered Canvas entry. To route users based on an action they perform (such as a custom event), use Action Paths instead.
Users aren’t re-evaluated against their audience group after they move down a path. If the message that follows is delayed by a Delay step, Quiet Hours, Intelligent Timing, rate limiting, or local time zone delivery, a user’s profile can change before that message sends.
To confirm that users still meet segment and filter criteria before the Message step sends, turn on Validate audience at message send in the Message step’s delivery validations. Delivery validations check only the segments and filters you add to that Message step, so they don’t reuse the criteria from your Audience Path. For in-app messages, delivery validations are checked when a user enters the Message step, not when the message displays.
Allowing time for user evaluations
Because evaluation is immediate, it’s important to add a delay before the Audience Path if the path criteria depend on a user interaction with a previous step.
For example, if users are sent Message A and the next step is an Audience Path that evaluates whether they interacted with that message, all users will progress to the step for those who haven’t interacted with that message. This is because the users immediately progressed to the Audience Path step without time to interact with the message. In other words, users are evaluated for an interaction with the message almost immediately after the message sends.
To give users time to interact with a sent message, add a delay between the Message step and Audience Path. For example, a 24-hour delay gives users 24 hours after the message sends to interact with Message A before evaluation.
Creating an Audience Path
To add an Audience Paths step, do the following:
- Add a step to your Canvas.
- Drag and drop the component from the sidebar, or select Add at the bottom of a step and select Audience Paths.
The default Audience Paths component contains two default audience groups, Group 1 and Everybody Else. The Everybody Else group includes any user who does not fall into a defined audience group. This group is always last in the order.
Defining audience groups
You can define up to eight audience groups (one preset and seven customizable). To define an audience group, select the group name from the Audience Paths editor.
You can rename your audience group, choose the filters and segments that apply to your group, and add or delete groups. For example, to target onboarding messaging to a group of users, select retargeting filters, such as “Has clicked email” and “Has clicked in-app message”.
After the Audience Paths step is complete, each audience group has a separate branch. Add more Audience Paths to further filter your audience, or continue your Canvas journey with the standard Canvas steps.
Using comparison filters with context variables
When splitting on a context variable that holds a date, see Day of Year and Time filters for date context variables to choose the correct comparison type.
Testing audience groups
After adding segments and filters to your audience, you can test if your audience groups are set up as expected by looking up a user to confirm they match the audience criteria.
Using Audience Paths
Audience Paths work best when the groups you care about most are listed first. Users move down the first path they qualify for, so prioritize narrower or higher-value segments before broader fallback groups.
Placing those segments first lets you target users who meet specific filters while still covering users who don’t—all in a single Canvas step.
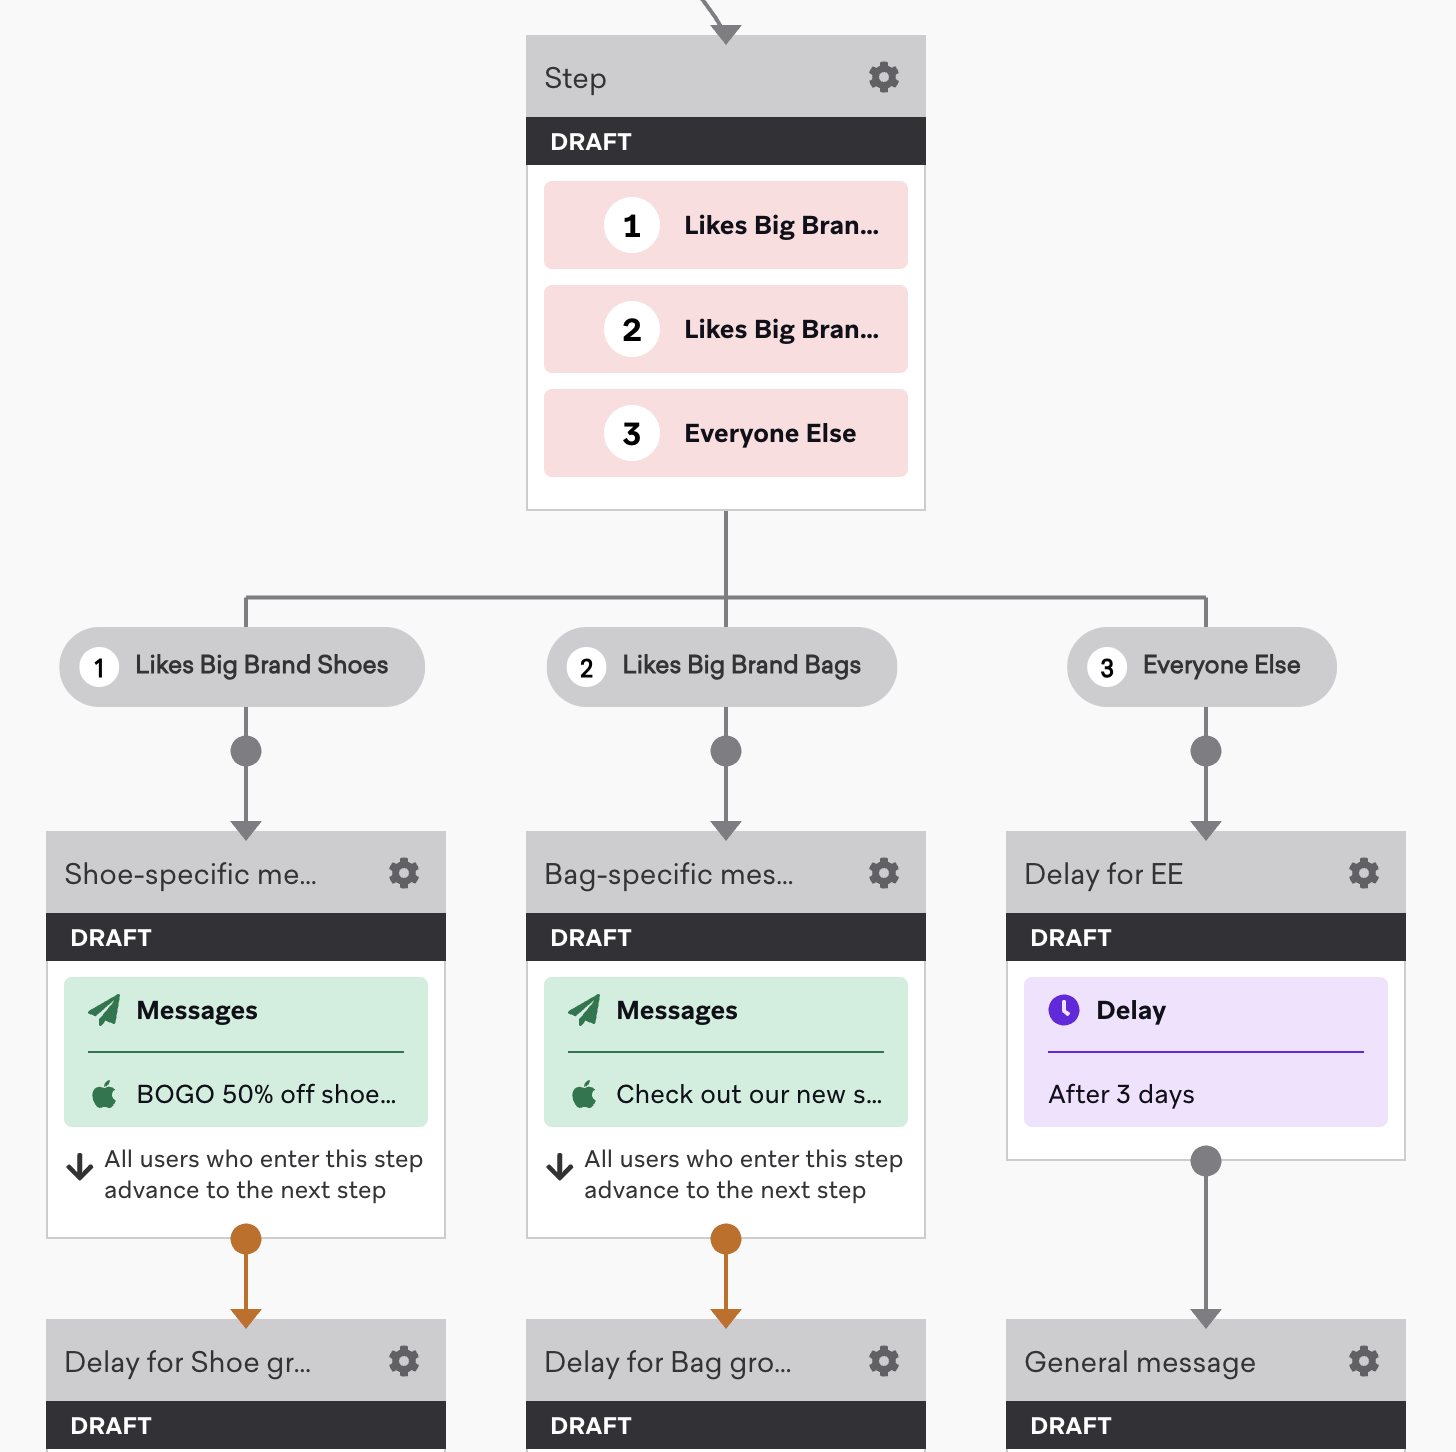
For example, Flash & Thread, a fictional retail brand, is promoting a limited-edition product drop and wants different emails by product interest. The Audience Path lists product filters first:
- Audience Group 1: “Likes Flash & Thread Shoes”
- Audience Group 2: “Likes Flash & Thread Bags”
- Everybody Else
When users enter this step, Braze evaluates Audience Group 1 first. Matching users continue to the next Canvas step on that path. Users who don’t match are evaluated against Audience Group 2. Remaining users fall into Everybody Else and continue on that path.
You can also see the performance of this step using Canvas analytics.
Segmenting Audience Paths with random bucket numbers
If your Canvas uses a rate limit (such as limiting the total number of users who receive the Canvas), Braze recommends that you don’t use random bucket numbers to segment your Audience Paths.
A random bucket number is a user attribute that can be used to create uniformly distributed segments of random users. Braze uses the random bucket number to group users during the segmentation phase of Canvas entry, and each group is processed separately. Depending on which groups finish processing first, some users may be capped at entry due to the rate limit, which could cause an uneven distribution of users when they reach the Audience Paths step.
In this scenario, try using Experiment Paths instead.
Using Intelligent Channel filter with Audience Paths
Using a combination of Audience Paths steps and Intelligent Channel filters, you can tailor your messaging experience to each user’s preferences and behaviors. This way, your users receive the most relevant messages through the appropriate channels.
For example, in an Audience Paths step, you can create three audiences: Email, Mobile Push, and Everyone Else. For the Email audience, add the filter Intelligent Channel is Email. For the Mobile Push audience, add the filter Intelligent Channel is Mobile Push. Then, you can add a Message step for each of the audience paths to deliver personalized and relevant messages.

Check out our Braze Canvas templates for examples on how you can customize these pre-built templates to your advantage.