Creating an email template
The Braze dashboard has an email template editor that allows you to create custom-tailored, eye-catching emails and save them for later use in campaigns. You can also upload your own HTML email template.
Step 1: Navigate to the email template editor
Go to Templates > Email Templates.
If you are using the older navigation, this page is located at Engagement > Templates & Media > Email Templates.
Step 2: Select your editing experience
Select between Drag-And-Drop Editor or HTML Editor for your editing experience.
Next, you can choose from predesigned Braze templates, create a new template, or edit an existing template (plain or mobile responsive).
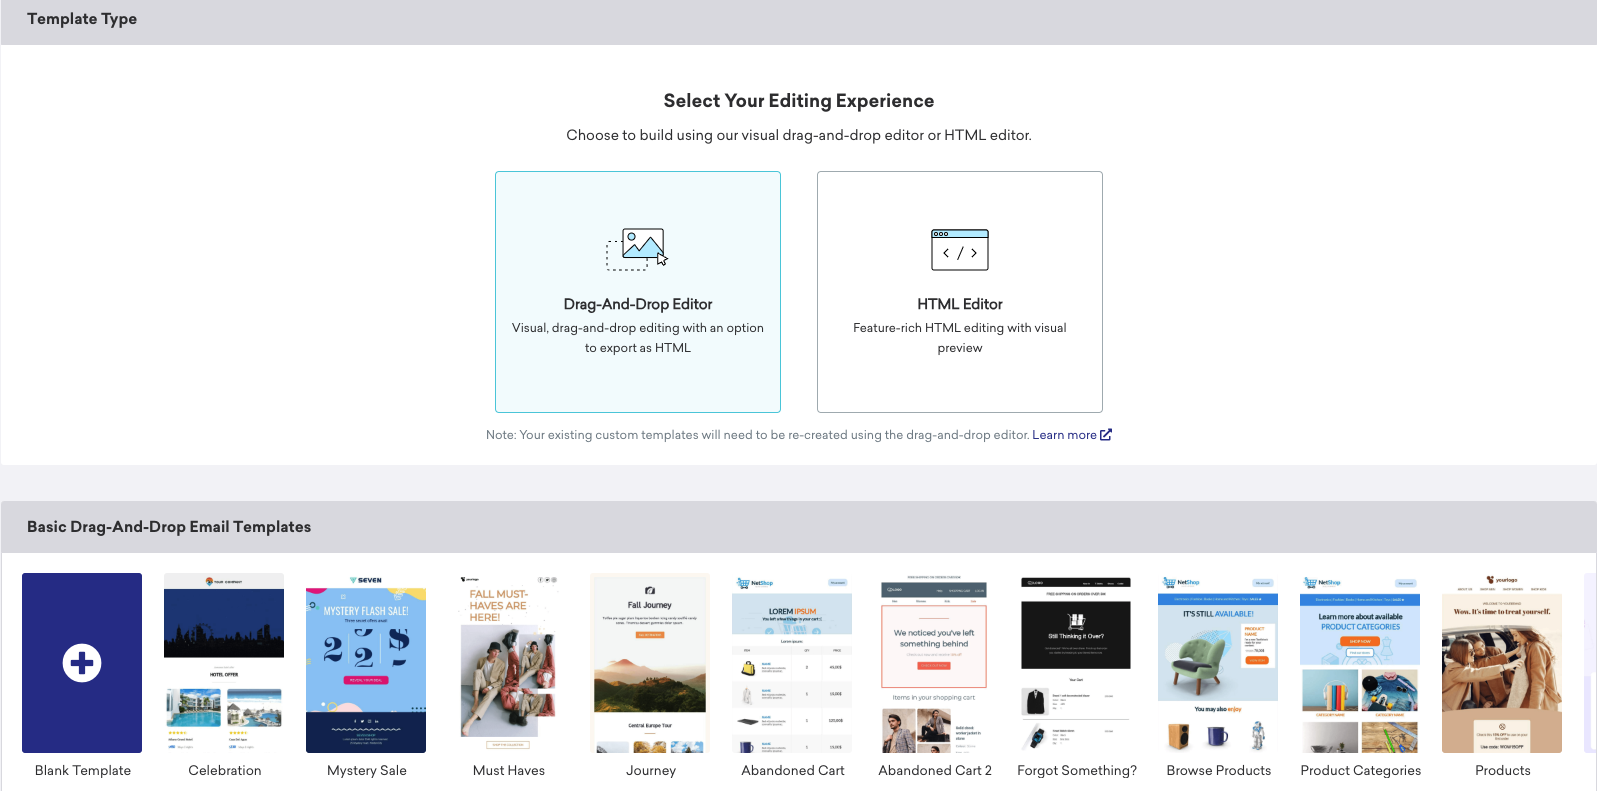
Any existing custom HTML templates will need to be re-created using the drag-and-drop editor.
Step 3: Customize your template
After selecting your editor experience, this is your opportunity to get creative with customizing your email template. You can use HTML to create and emulate your branding in the HTML editor, or include a variety of creative details in the drag-and-drop editor.
Including an unsubscribe link
As you design your email template, if you do not include an unsubscribe link, Braze will prompt you to add this in your email as it’s required by law on all marketing emails. You can add this unsubscribe link as a footer at the bottom of your emails by using the Liquid tag ${email_footer}, or by customizing the footer in your template.
Step 4: Check for email errors
Email errors are presented on the Compose tab of the message workflow. Errors prevent you from progressing forward. “Warnings” indicate reminders to help you follow best practices. Depending on your business, you might choose to ignore them.

Here’s a list of errors that are accounted for in our editor:
- Incorrect Liquid syntax
- Email bodies larger than 400kb; bodies are highly recommended to be less than 102kb
- Templates without an unsubscribe link
- Emails with a blank Body or Subject
- Emails with no unsubscribe link
Step 5: Preview and test your message
After you finish composing your template, you can test it before sending it out.
From the bottom of the overview screen, click Preview and Test. Here, you can preview how your email will appear in a customer’s inbox. With Preview as User selected, you can preview your email as a random user, select a specific user, or create a custom user. This allows you to test that your Connected Content and personalization calls are working as they should.
You can also switch between desktop, mobile, and plaintext views to get a sense of how your message will appear in different contexts.
When you’re ready for a final check, select Test Send and send a test message to yourself or a group of content testers to ensure that your email displays properly on a variety of devices and email clients.
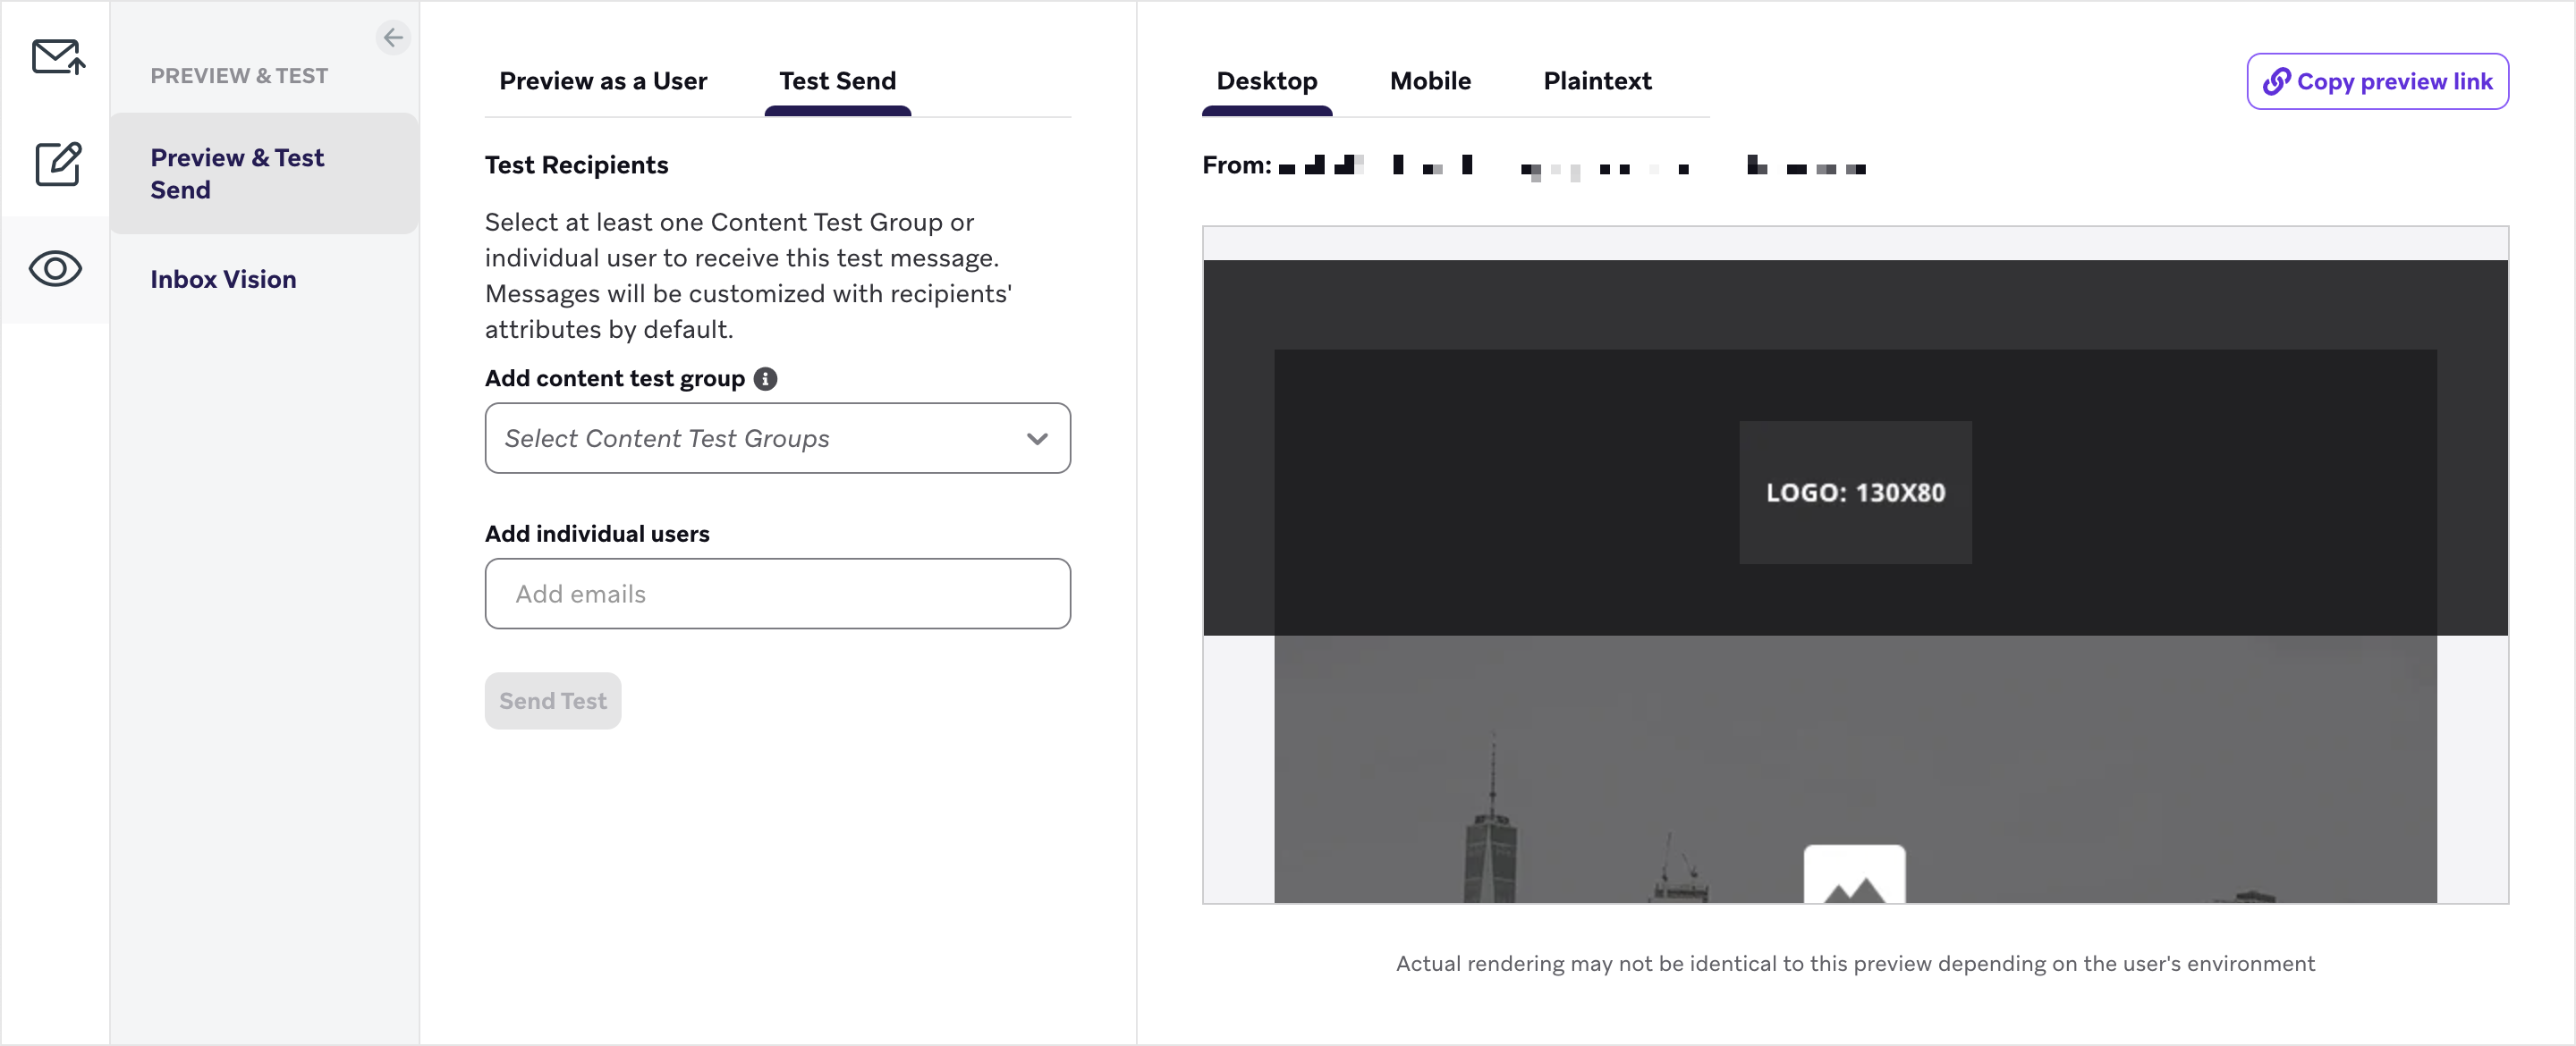
If you see any issues with your template or want to make any changes, click Edit Email to return to the editor.
Step 6: Save your template
Be sure to save your template by clicking Save Template. You’re now ready to use this template in any campaign or Canvas component you choose. To access your template, select the editing experience you built it with, and then select it from the list of available templates.
If you make any edits to an existing template, those changes will not be reflected in campaigns created using previous versions of that template.
Managing your templates
As you create more email templates, you can duplicate and archive email templates. Learn more about creating and managing your library of templates and creative content in Templates and Media.
Using your templates in API campaigns
To use your email for an API campaign, you need an email_template_id, which can be found at the bottom of any email template created in Braze.

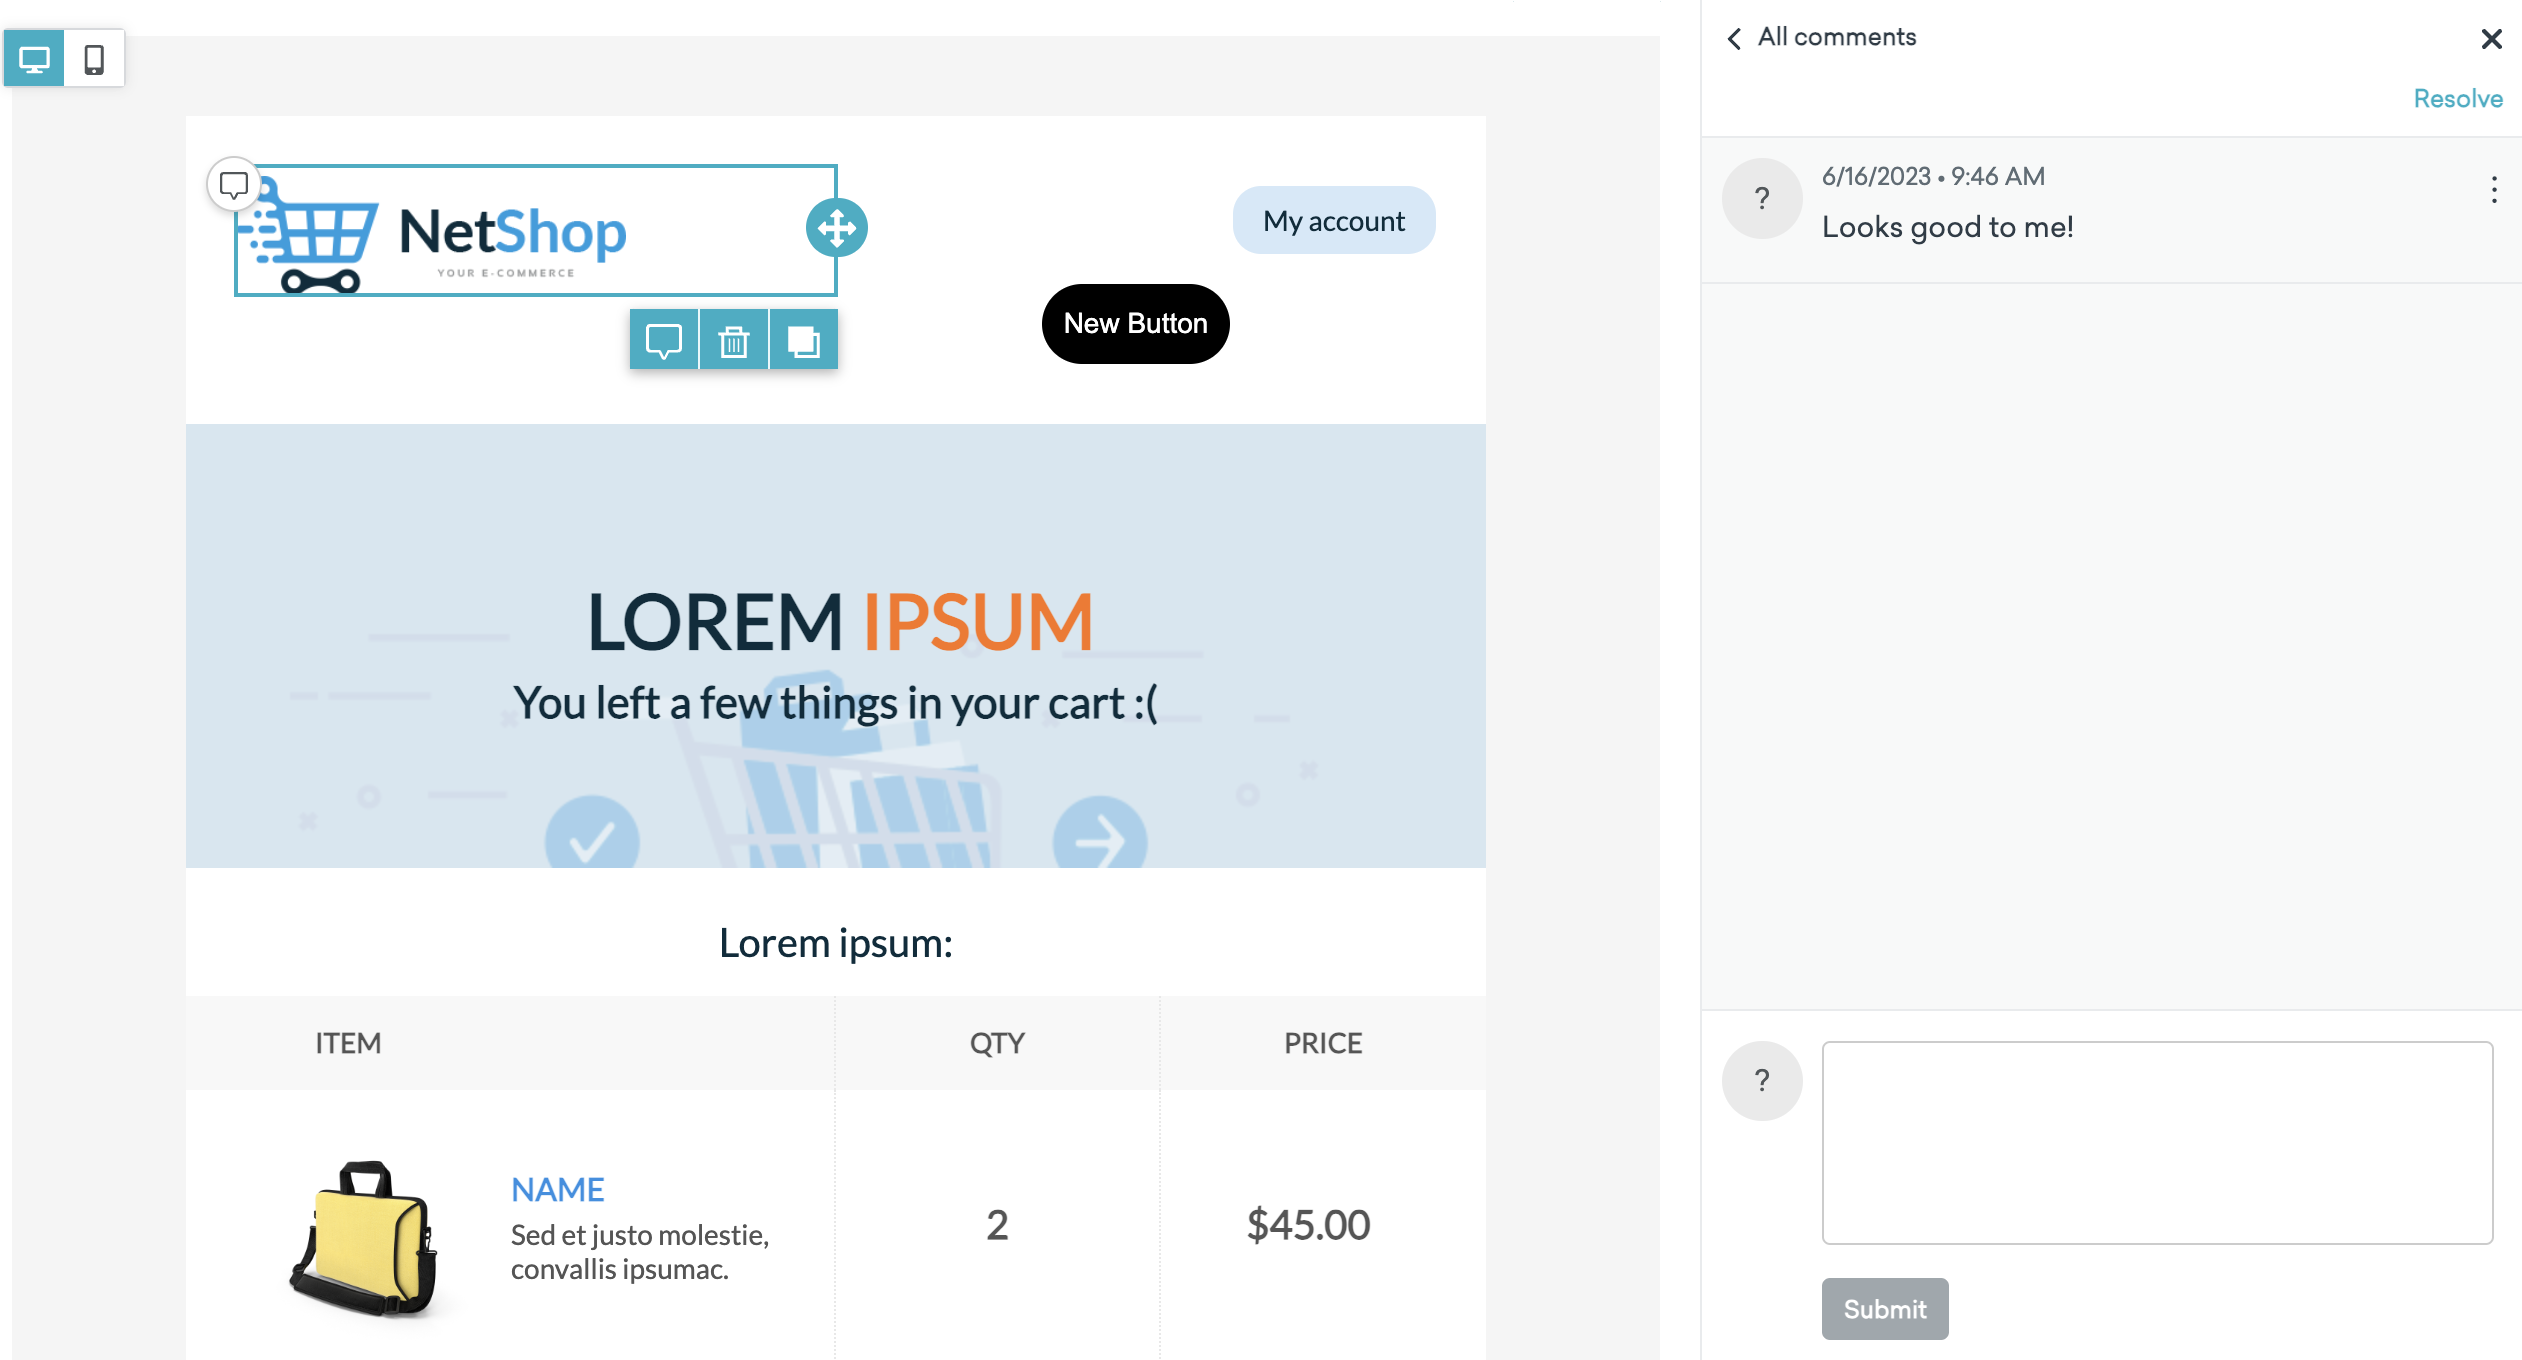
Commenting on email templates
You can collaborate and comment on email templates in the drag-and-drop editor.
- Click the Content Block or row in the email body that you’d like to comment on.
- Select the comment icon.
- Enter your comment in the sidebar, then click Submit.
- After entering your comments, click Done.
- Click Save Template to save your comments.
After your template is saved, users can see icons over unaddressed comments. Select Resolve to resolve these comments.
For answers to frequently asked questions about email templates, check out our Templates FAQ.
 Edit this page on GitHub