Engagement reports
Engagement Reports let you pull engagement statistics for specific messages from campaigns and Canvases to receive as an email at your preferred time.
You need “Export User Data” permissions to run Engagement Reports.
Overview
With Engagement Reports, you can manually select campaigns and Canvases to include in your email report, or specify rules to automatically select relevant campaigns and Canvases.
Regardless of the number of campaigns or Canvases you select, up to two CSV files are generated—one for all campaign data and one for all Canvas data. You can access these CSV files from the link embedded inside your report email. Engagement Reports are not saved in the Braze dashboard.
Certain data is aggregated at the campaign or Canvas level versus at the individual campaign variant or Canvas step level.
You can re-run the report to generate updated statistics.
Creating a new report
Step 1: Create a report
In your dashboard account, navigate to Analytics > Engagement Reports. Click + Create New Report.
If you are using the older navigation, you can find Engagement Reports under Data.
Step 2: Add messages
Add the campaigns and Canvas messages that you would like to compile in your report. You can select your messages in two ways:
- Manually select campaigns and Canvases
- Automatically select campaigns and Canvases based on specific rules

Manually select campaigns or Canvases
This option gives you the freedom to choose whichever campaigns or Canvases you would like in this report.
Automatically select campaigns or Canvases
This option lets you automatically include all messages that include a specific tag. You can target messages that have any one or all of the tags listed. This option is useful if you are setting up recurring reports and you regularly tag your engagement messages.
Step 3: Add statistics
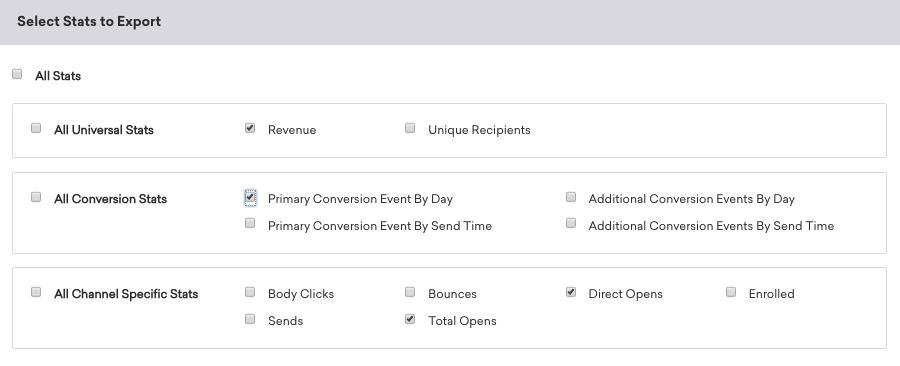
The Add Stats step shows you statistics for the types of campaigns or Canvases you have selected. For example, if you selected email messages, you will only see relevant email statistics. If you picked a combination of email and push, you will see the statistics for those two channels.

| Channel | Available statistics |
|---|---|
| Sends, Opens, Unique Opens, Clicks, Unique Clicks, Click to Open, Unsubscribes, Bounces, Delivered, Reported Spam | |
| Push | Sends, Opens, Influenced Opens, Bounces, Body Clicks |
| Web Push | Sends, Opens, Bounces, Body Clicks |
| In-app message | Impressions, Clicks, First Button Clicks, Second Button Clicks |
| Webhook | Sends, Errors |
| SMS | Sends, Sends to Carrier, Confirmed Deliveries, Delivery Failures, Rejections |
Sends to Carrier is deprecated, but will continue to be supported for users that already have it.
Step 4: Complete report setup
Give your report a name, choose how your report will be formatted, and select your recipients. By default, Engagement Reports are sent as a ZIP file where data is comma-delimited (where each piece of data is separated by a comma).
You can select from the following compression and delimiter options:
- Compression: ZIP, Uncompressed, or gzip
- Delimiter: Comma (
,), Colon (:), Semicolon (;), or Pipe (|)
Statistics are only collected for the date range specified by the report. To receive accurate open and click rate statistics, select a date range that includes when the Sends events were performed for your campaigns and Canvases.
Select time frame
By default, the data range shown will go from the earliest message selected until the present date. You can customize this by selecting the date dropdown and using the custom range selection OR by selecting the next radio button and defining your date range with the dropdown options available.
Select data display
By default, the data displayed in the engagement reports is daily (1 day). If you want to view this data across different intervals, you can choose an explicit number of days or weeks to aggregate the data for the report. So instead of seeing daily metrics, you can look at your engagement by week, month, quarter, etc. Should a time-centric aggregation not suffice, you can also elect to export data at the campaign or Canvas level.

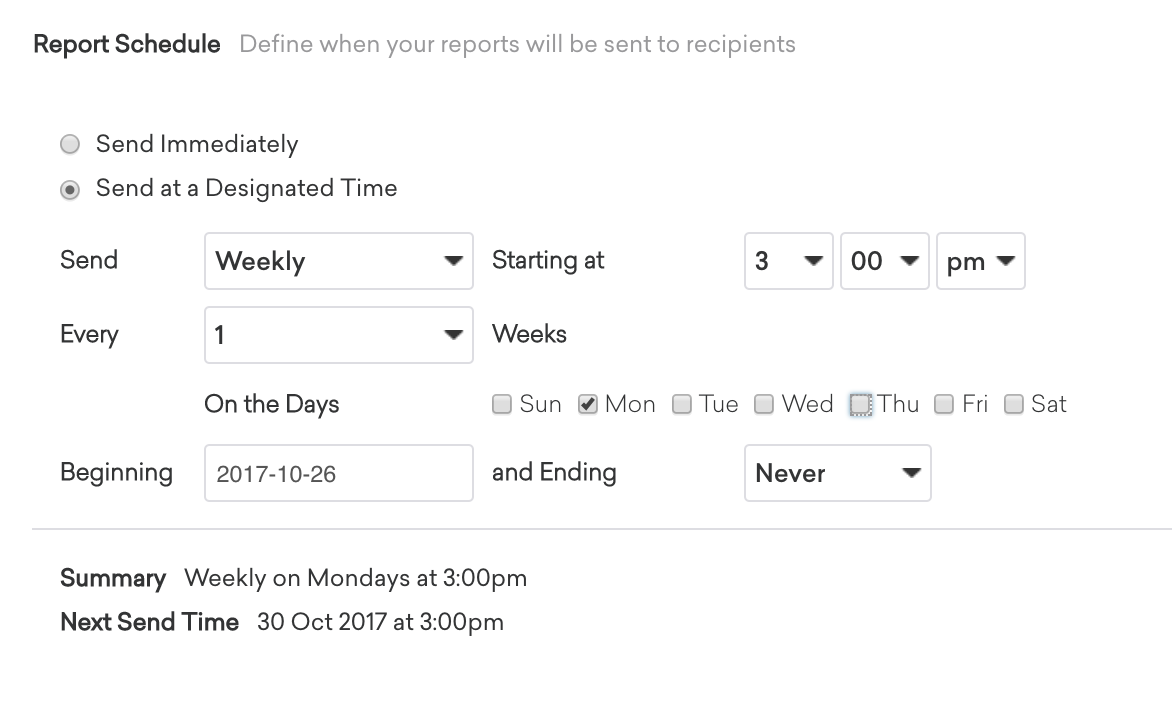
Schedule your report
There are two options when scheduling your report:
- Send immediately: After the report is launched, Braze will send this report immediately.
- Send at a designated time: This option gives you the flexibility to choose how frequently you would like to receive this report. You can choose to send this report every set number of days, weeks or months. You can also define when to stop sending the report.

Step 5: Review and launch
The final step of setting up your report shows a view-only overview of your configured options. Review your report, and when you’re satisfied, click Launch Report.
Step 6: Check your email
You will receive an email with links to your reports at your chosen time or schedule. These links expire 1 hour after the report was sent. When you click on the provided links you will automatically download a ZIP file containing your CSV files-one for all campaigns.
The report contains all statistics selected in the Add Stats section of the setup process.
 Edit this page on GitHub