Email capture form
Email capture messages allow you to easily prompt users of your site to submit their email address, after which it will be available within their user profile for use in all your messaging campaigns.
When an end-user enters their email address to this form, the email address will get added to their user profile.
- For anonymous users who don’t yet have an account, the email address will live on the anonymous user profile that is tied to the user’s device.
- If an email address already exists on the user profile, then the existing email address will be overwritten by the newly entered email address.
- If a user enters an invalid email address, the user will see the error message: “Please enter a valid email.”
- Invalid email addresses:
exampleexample@@gmail.comexample@gmail
- Valid email addresses:
[email protected][email protected](with a typo)
- For more information on email validation in Braze, refer to Email technical guidelines and notes.
- Invalid email addresses:
More on identified versus anonymous users
In general, the logic behind the email capture form is straightforward. It will set the email address on the user profile in Braze for the user that is currently active. However, that means the behavior differs based on whether the user is identified (logged in, changeUser called) or not.
If an anonymous user enters their email in the form and submits it, Braze adds the email address to their profile. If changeUser is called later on in their web journey and a new external_id is assigned (such as when a new user registers with the service), all anonymous user profile data is merged including the email address.
If changeUser is called with an existing external_id, the anonymous user profile is orphaned and specific user profile data fields that do not already exist on the identified user are merged, but any fields that do already exist are lost, including the email address.
For more information, refer to the User profile lifecycle.
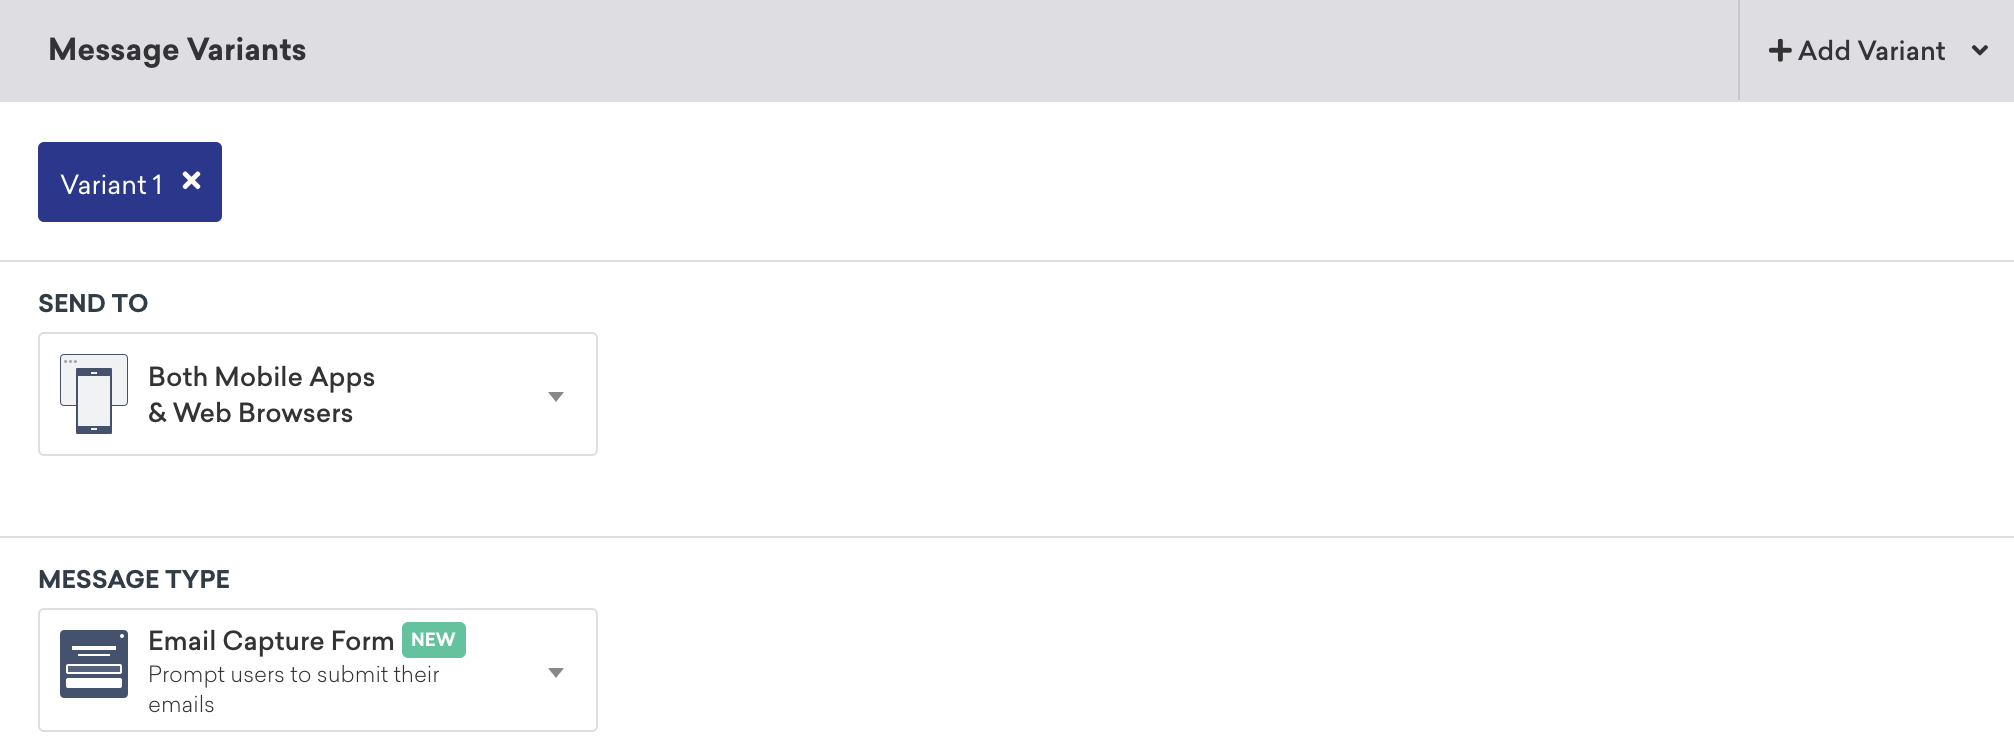
Step 1: Create an in-app message campaign
To navigate to this option, you must create an in-app messaging campaign. From there, depending on your use case, set Send To to either Web Browsers, Mobile Apps, or Both Mobile Apps & Web Browsers, then select Email Capture Form as your Message Type.
To enable HTML in-app messages through the Web SDK, you must supply the allowUserSuppliedJavascript initialization option to Braze, for example, braze.initialize('YOUR-API_KEY', {allowUserSuppliedJavascript: true}). This is for security reasons since HTML in-app messages can execute JavaScript, so we require a site maintainer to enable them.
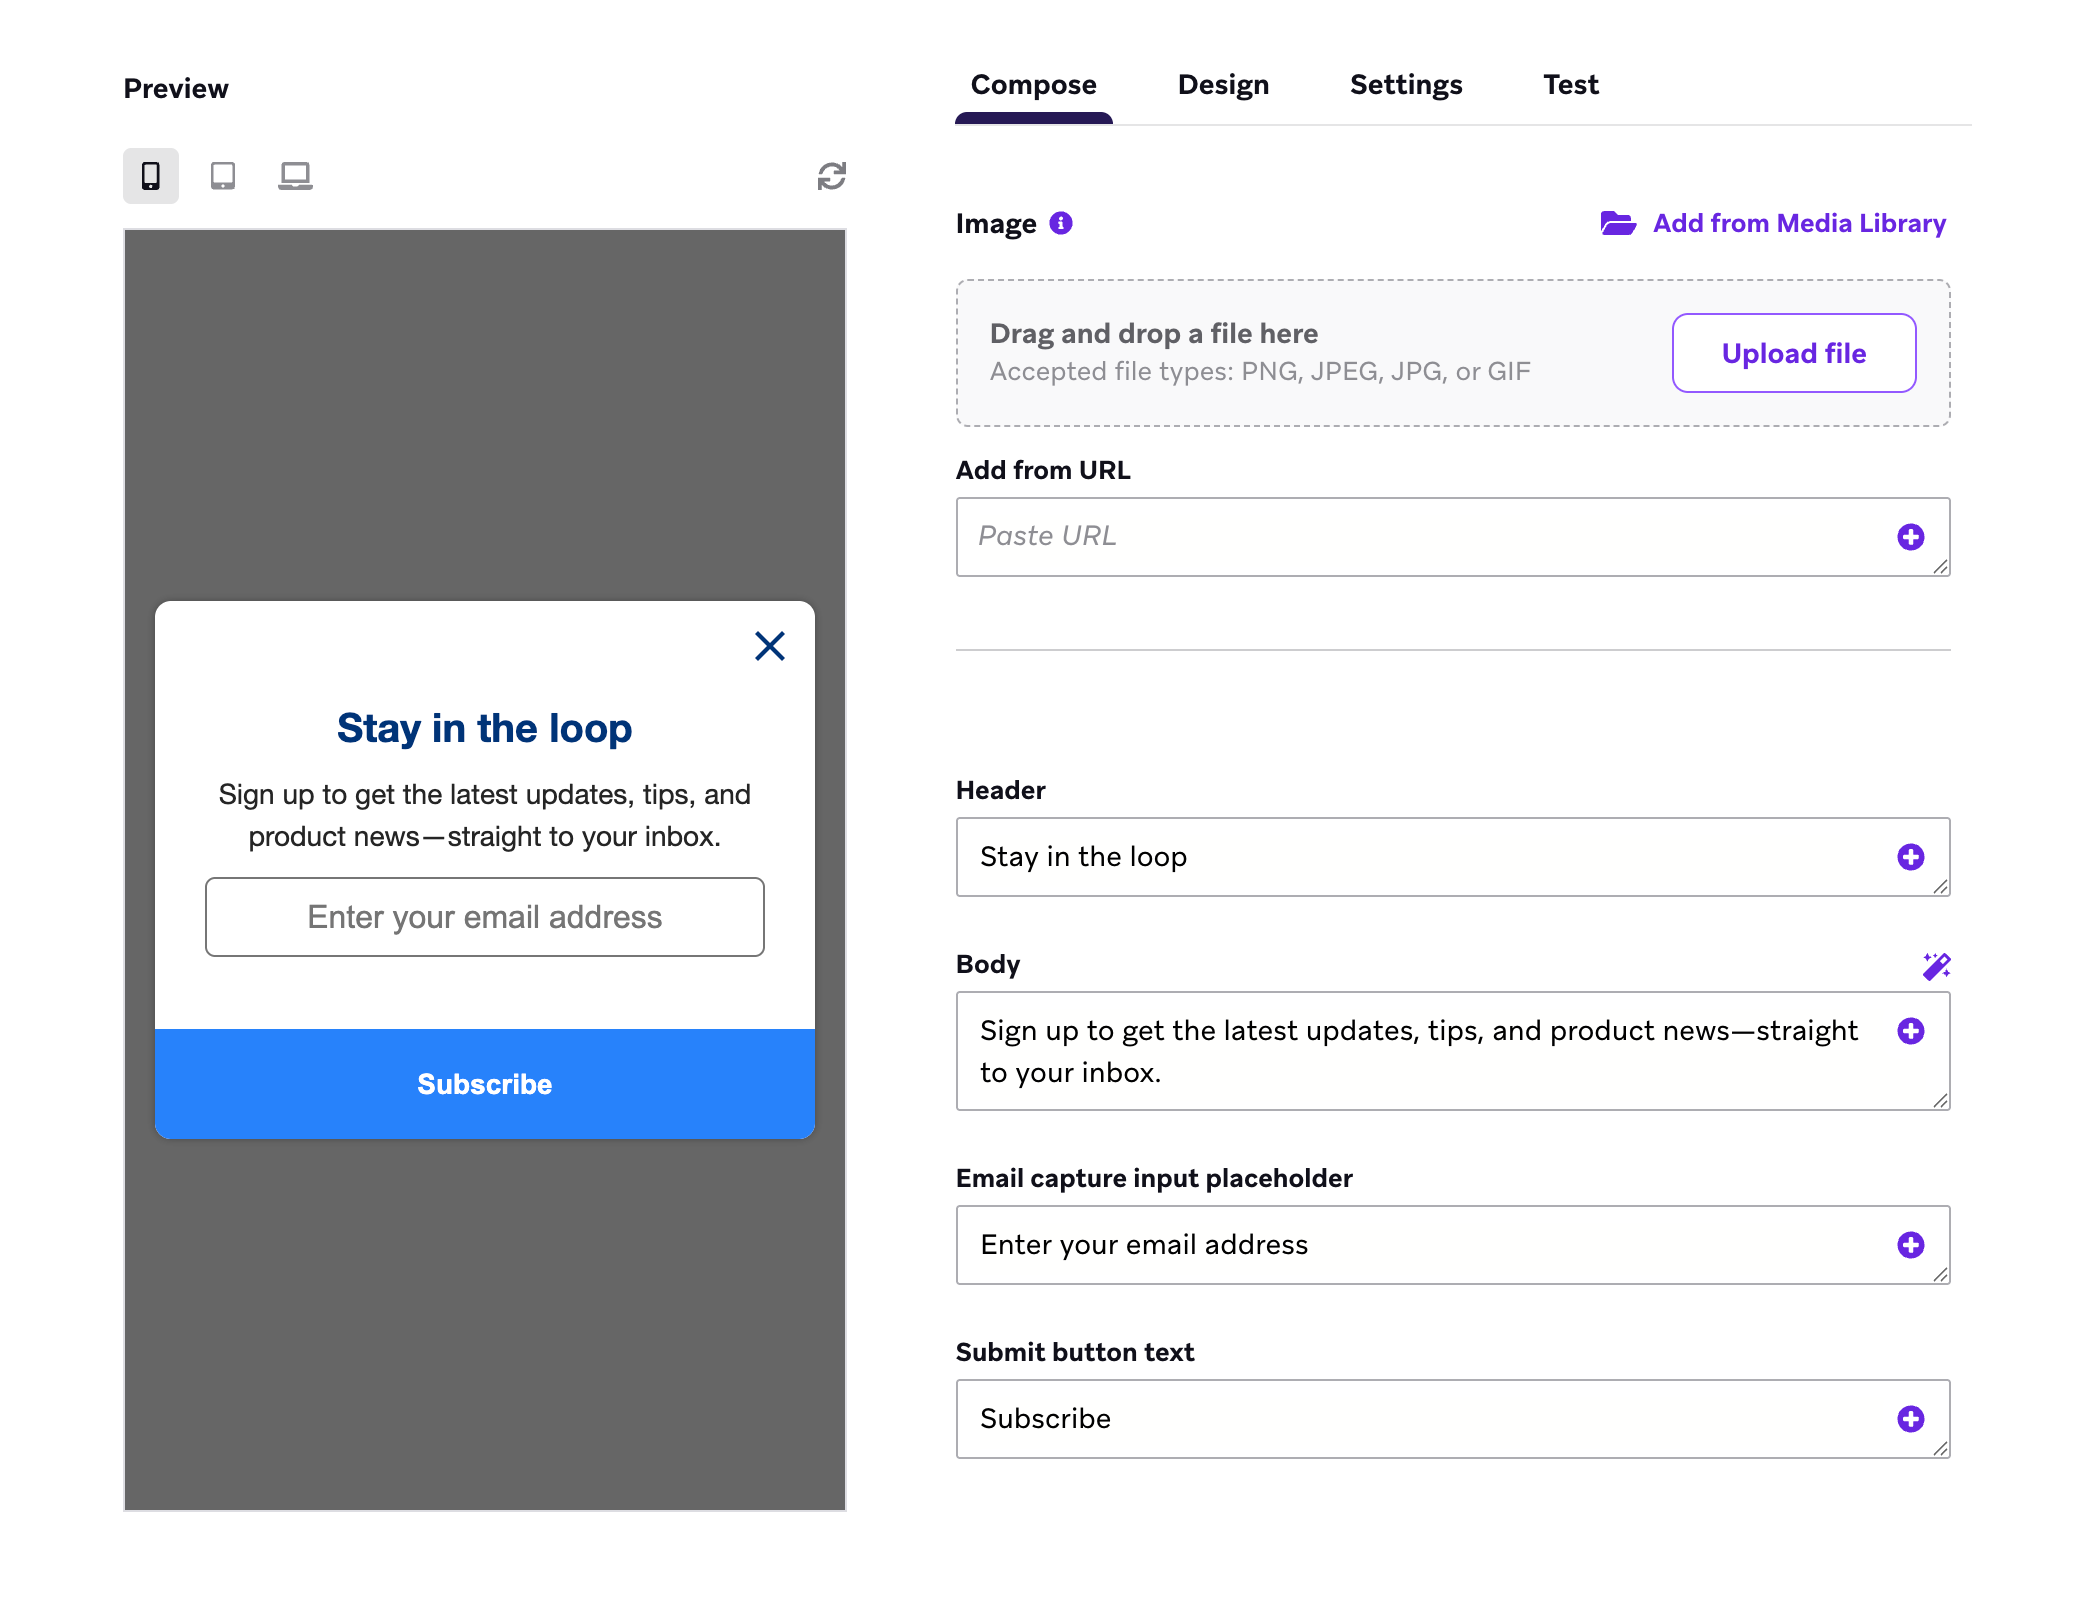
Step 2: Customize the form
Next, customize your form as needed. You can customize the following features for your email capture form:
- Header, body, and submit button text
- An optional image
- An optional “Terms of Service” link
- Different colors for the header and body text, buttons, and background
- Key-value pairs
- Style for header and body text, buttons, button border color, background, and overlay
If you need to make further customization, choose Custom Code for your Message Type. You can use this email capture modal template from the Braze Templates GitHub repository as your starter code.
Step 3: Set your entry audience
If you only want to send this form to users without existing email addresses, use the filter Email Available is false.

If you only want to send this form to users without external IDs (anonymous users), use the filter External User ID is blank.

You can also combine the two filters using AND logic, if desired.
Step 4: Target users who filled out the form (optional)
After you’ve launched the email capture form and collected email addresses from your users, you can target those users with the filter Clicked/Opened Campaign.
Set the filter to Has clicked in-app message button 1 for campaign <CAMPAIGN_NAME>. Replace <CAMPAIGN_NAME> with the name of your email capture form campaign.

 Edit this page on GitHub