Notification channels
Notification Channels are a way to organize push notifications that were added with Android O. Starting with O, all push notifications must have a Notification Channel that indicates the type of message (for example, “chat notifications,” or “follow notifications”). Your users can then control aspects of their notification (for example, snoozing, noise/vibration settings, or opting-out, etc.) based upon individual Channels.
Transitioning to Android O
Notification channels can only be created in the code of your application and cannot be created programmatically in the Braze dashboard. We recommend your engineering team work with your marketers to ensure the desired notification channels are properly added to the dashboard.
Starting with Android O, push notifications require a valid channel to display. If your app targets Android O or later, you must use Braze SDK version 2.1.0 or later. Your development team should define the channels that you want to use as well as suggested notification settings (for example, importance, sound, lights) for each channel in your application code. You can find Android’s developer documentation here and Braze’s developer documentation here.
Android supports localization for channel names, so in the code of your application, you can associate one channel ID with multiple translations of a channel name.
Once these channels are created, your engineers will need to pass on the associated channel IDs to your marketing team. Your team should enter your channel names and channel IDs into the Braze dashboard for use in your campaigns and Canvases.
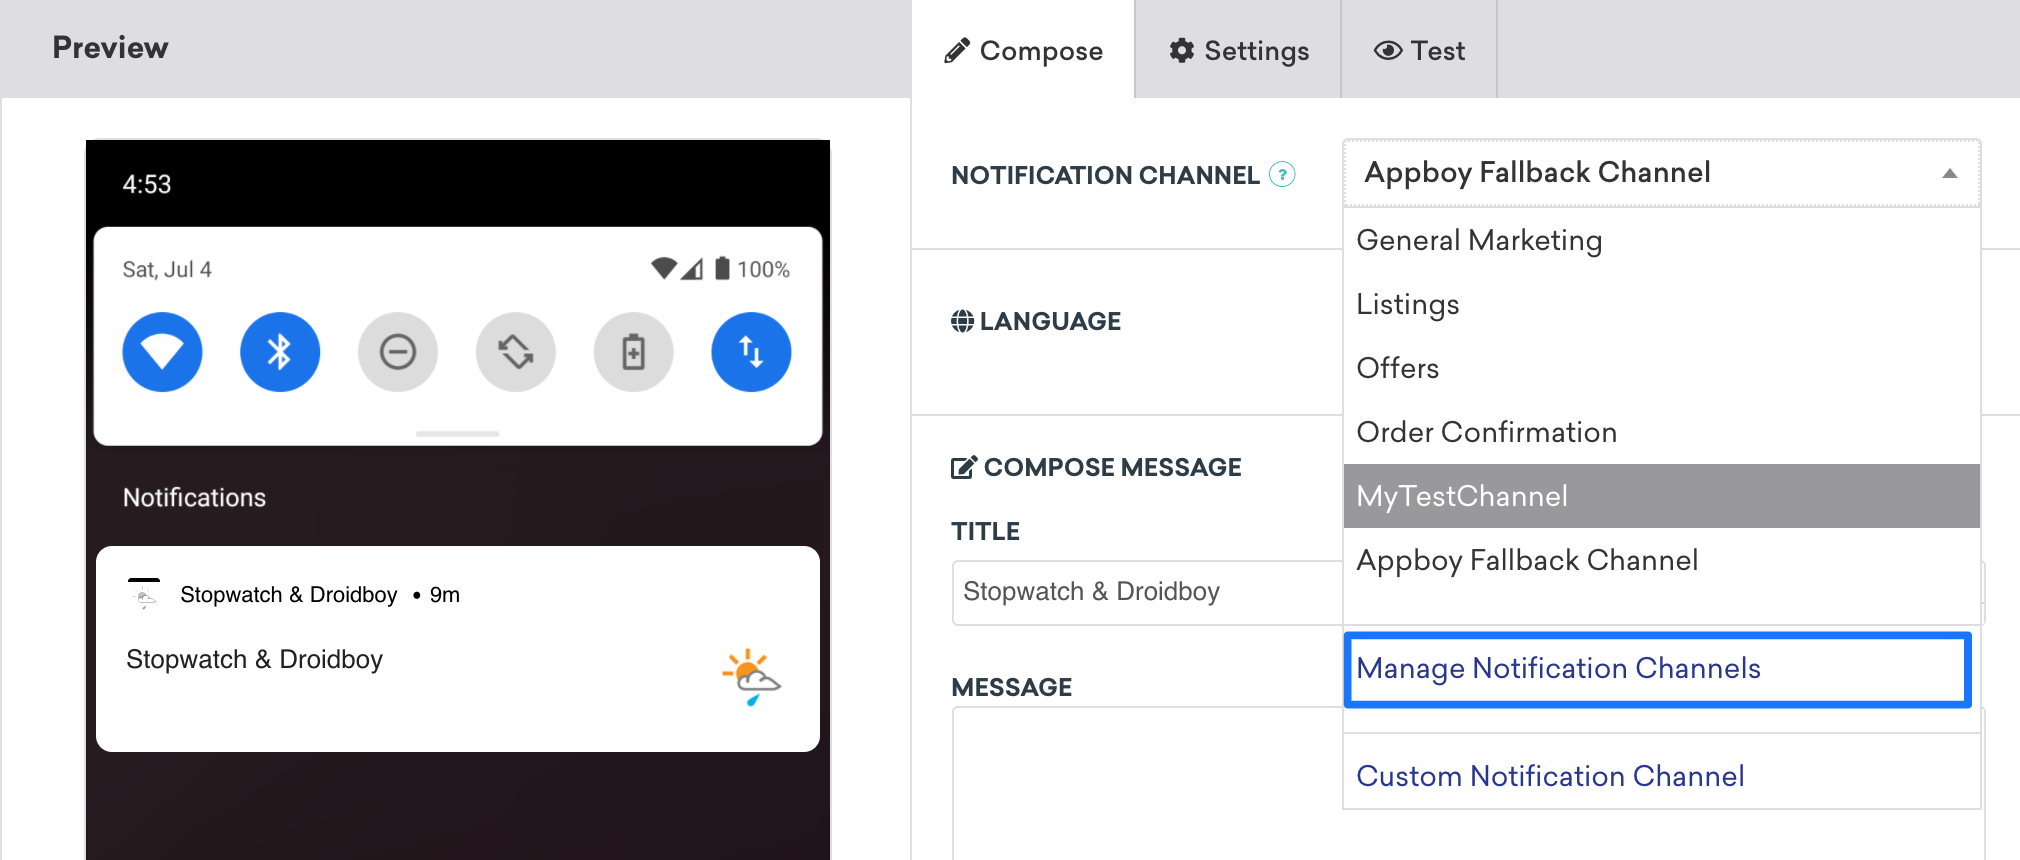
To add a channel to the Braze dashboard, navigate to the Android push composer, select the notification channels field and then select “manage channels.”
Only users with permissions that include “manage apps” will be able to manage channels.
SDK default channel
Android requires a valid channel to display push notifications on API level 26 (Android O) or later. Braze Android SDK 2.1.0 includes a default channel called “General,” which will be created and used if you do not specify additional channels in the dashboard or if you attempt to send to an invalid channel. You can rename this label in the SDK and provide a description of the channel. We recommend that you consider this to provide a better user experience.
Once a channel is added to your application, you can opt to remove it. However, consumers will always be able to see the number of channels that you’ve [removed].3 The Braze dashboard does not include support for programmatically creating channels - channels must be created and defined in the code of your application to provide a seamless experience.
Again, we recommend that you coordinate with your engineering team to ensure a seamless transition to targeting Android O.
Dashboard fallback channel
Braze allows you to specify a dashboard fallback channel. The purpose of the dashboard fallback channel is to provide a channel ID for legacy push messages with no explicit channel selection. We define a channel selection as choosing a channel in our Android push composer.
Messages that do not have a channel selected will be sent with the dashboard fallback Channel ID. When you change your dashboard fallback channel, any message that does not have a channel explicitly selected will send with the ID of the new fallback channel.
Here’s an example of the dashboard fallback channel expected behavior:
Your dashboard fallback channel is called “Marketing” and you have 10 Android push messages that you have never selected a channel for. These campaigns are sending through the “Marketing” channel because the “Marketing” Channel is the dashboard fallback channel.
Additionally, you have 15 messages that you’ve selected to send through the “Social Notifications” channel and five messages that you’ve selected to send through the “Marketing” channel.
You then decide to change your dashboard default channel from “Marketing” to “Updates”.
In this situation, all 10 campaigns with no channel selection that were previously sent through the “Marketing” Channel will now send through the “Updates” channel because these messages send through the fallback channel. The 15 messages that were sent through the “Social Notifications” channel will continue to send through the “Social Notifications” channel. The five messages that were sent through the “Marketing” channel will continue to send through the “Marketing” channel.
In the event that an invalid channel ID is supplied to Braze (such as if you provide a channel ID that your developers did not create in the SDK), we will deliver the notification through your SDK default channel. Therefore, we highly encourage you to test your notification channels via Braze’s dashboard during development.
To better understand the expected behavior for channels, refer to the following table:
| Scenario | Outcome |
|---|---|
| Company ABC updates to an SDK that supports Android O Company ABC does not add any channels to the Braze dashboard Company ABC does not rename their SDK default channel |
Push notifications sent to Android O devices will create a channel called “General” and notifications will be sent through the “General” channel |
| Company XYZ updates to an SDK that supports Android O Company XYZ does not add any channels to the Braze dashboard Company XYZ renames their SDK default channel to “Marketing” |
Push notifications sent to Android O devices will create a channel called “Marketing” and notifications will be sent through the “Marketing” channel |
| Company LMN updates to an SDK that supports Android O Company LMN defines two channels in their application code, “Promotions” and “Order Updates” Company LMN adds the channel IDs for “Promotions” and “Order Updates” to the Braze dashboard Company LMN designates “Promotions” as the dashboard fallback channel Company LMN renames their SDK default channel to “Marketing” |
Push notifications sent to Android O devices will not create a channel Unless the marketer explicitly specifies that notifications should send through the “Order Updates” or “Marketing” channel, all notifications created before the channels were added to the dashboard will send through the “Promotions” channel The SDK default channel, “Marketing” is only created and used if the company attempts to send a notification through an invalid channel ID or if explicitly selected |
| Company HIJ updates to Android O but does not update to Braze Android SDK to 2.1.0 or later | Notifications sent to users running Android O or later do not appear |
Adding channels to the Braze dashboard
- Open any campaign or Canvas that includes an Android push and click Edit Campaign.
- Navigate to the Android push message composer.
- Click Manage Notification Channels. Any channels added here will be available globally for all campaigns and Canvases. You must have “Manage Apps” permissions for your workspace to manage channels.
When you apply a notification channel to a specific campaign or Canvas step, your Reachable Users tally (located in the Target Audience step) for Android Push will not appear to change. However, only users subscribed to the selected notification channel will see the message, and your campaign analytics (like clicks) will be measured based on this audience.

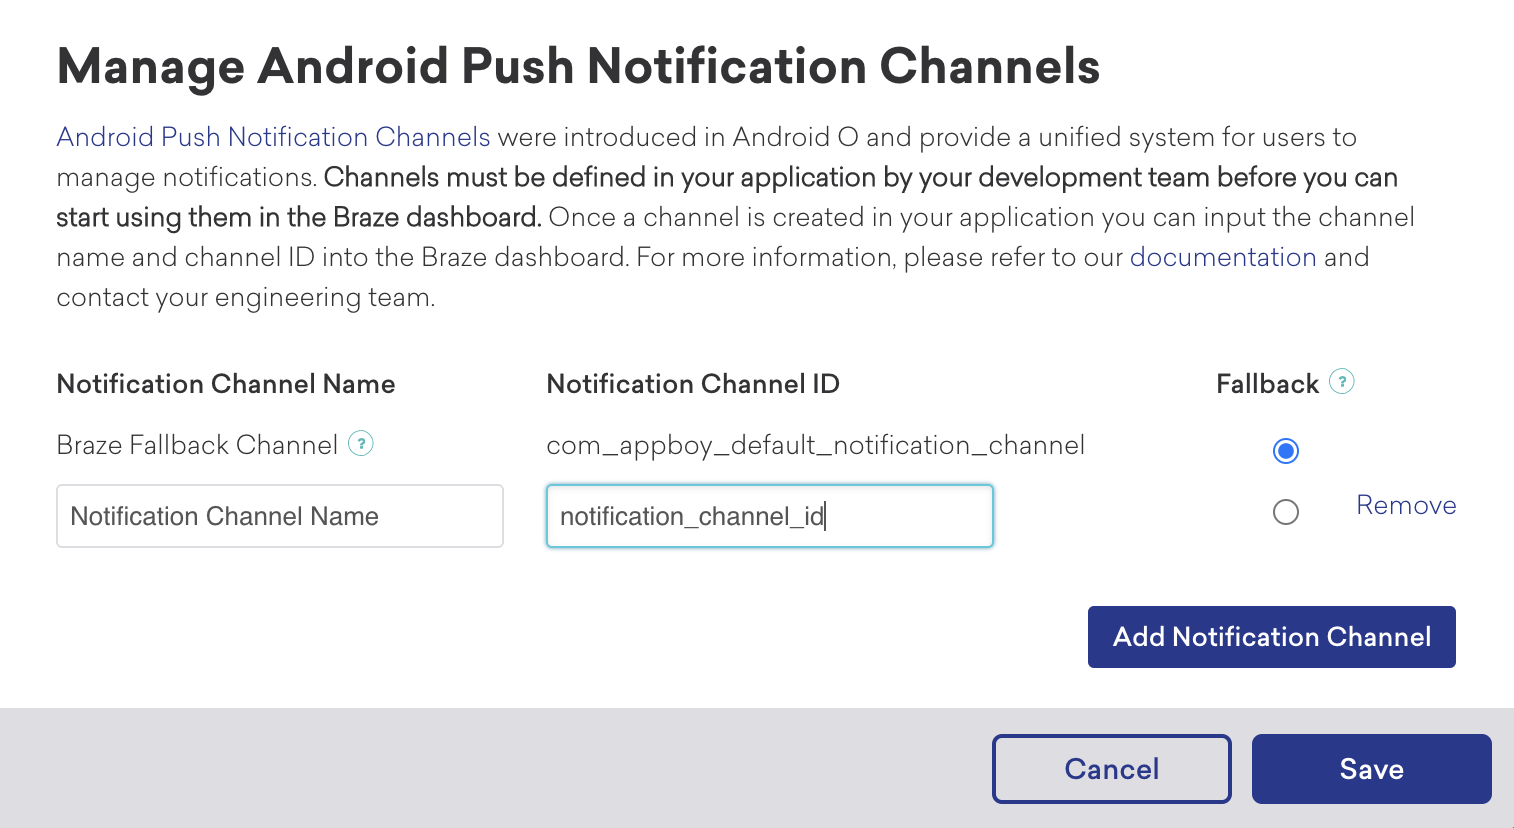
- Click Add Notification Channel.
- Enter the name and ID of the notification channel you want to add.

- Repeat steps 4 and 5 for each notification channel that you’d like to add.
- Press Save to save your changes.
Specifying your fallback channel
Your fallback channel is the channel that Braze will attempt to send your Android message with if you have not selected a channel for the message. The only campaigns and Canvases that will have Android messages without a channel selection are campaigns and Canvases that were created before your team added channels to the Braze dashboard. If you change your fallback channel, the change will be applied globally to all campaigns and Canvases without an explicit channel selection.
- Open any existing campaign or Canvas.
- Navigate to the Android push composer.
- Select Manage Notification Channels after expanding the notification channel options.

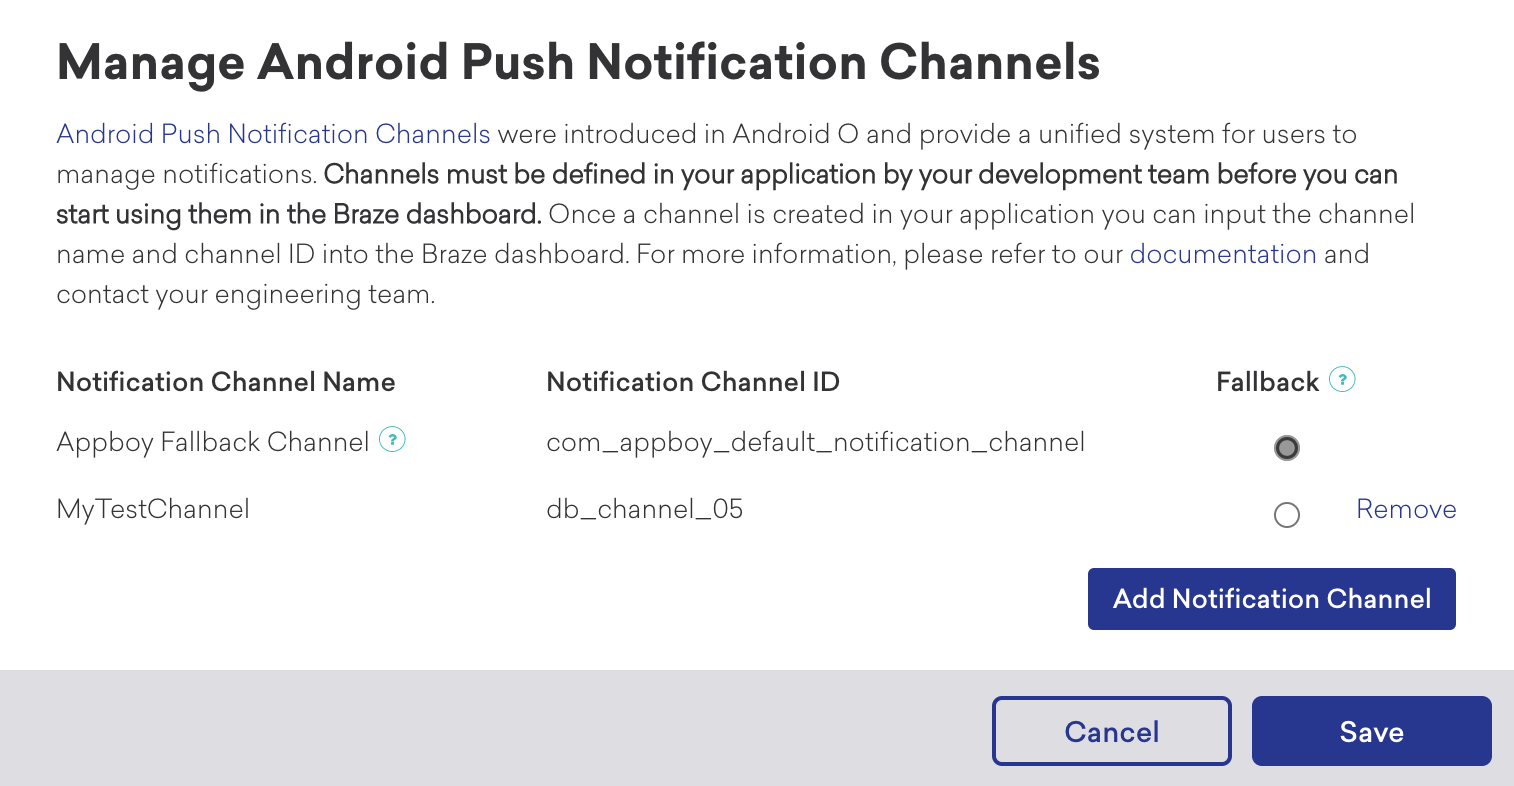
- Add the channel to the dashboard (if it has not already been added).
- Select the radio dial next to the channel that you’d like to designate as the fallback channel.
- Save your changes. Your changes will be applied globally.
Adding channels to your Android push messages
- Navigate to the Android push composer on any campaign or Canvas.
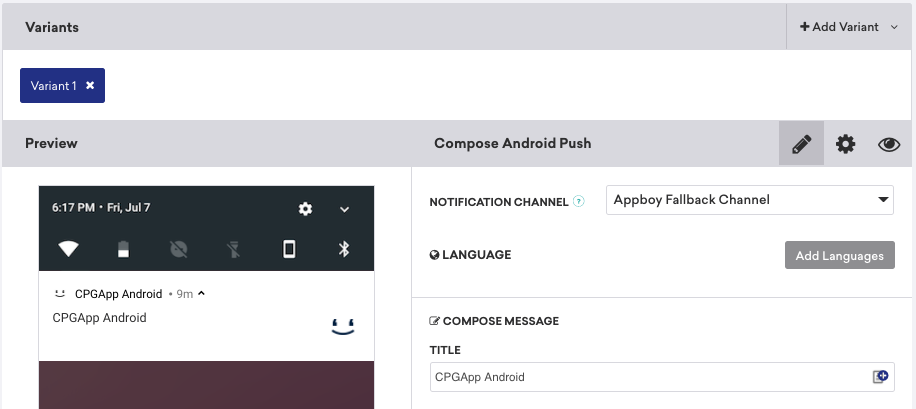
- Select the channel you’d like to use from the dropdown. If you do not have a dropdown but rather have the following view, you’ll need to add channels before selecting them for campaigns.

 Edit this page on GitHub