Canvas QA checklist
Use this checklist to validate your Canvas before launch and monitor performance in the first hours after go-live. Not every item applies to every Canvas, so work through the phases that match your entry type, channels, and journey complexity.

For channel-specific considerations (push subscription states, SMS throughput, in-app message behavior, and more), also review Know before you send.
Phase 1: Setup and governance
Complete these checks in Basics and Send Settings before you build audience filters or journey steps. Every downstream check depends on getting these details right.
- Confirm entry type: Verify whether your Canvas uses scheduled, action-based, or API-triggered entry when you determine your Canvas entry schedule.
- Use consistent naming: Name your Canvas so teammates can find it in search and reporting.
- Add tags: Tags feed frequency capping rules, segment filters for retargeting, and custom reporting.
- Set a primary conversion event: Conversion events power Canvas optimization and reporting.
- Configure exit criteria: Align exit events with your primary conversion, or add segment-based exits so users leave the journey when they convert or no longer qualify. For pairing entry and exit events, see Matching exit criteria to entry events.
- Review suppression lists: Workspace suppression lists exclude matching users from campaigns and Canvases unless the Canvas uses an exception tag configured on that list.
- Review re-eligibility: Set the re-eligibility window correctly to prevent over-messaging or retargeting issues.
- Review subscription settings: In Subscription Settings, choose who can receive email and push in this Canvas—subscribed or opted-in users, opted-in users only, or all users including unsubscribed (use the last option only for transactional email). This setting applies to every Email and Push step in the Canvas.
- Enable quiet hours (optional): For action-based journeys, confirm quiet hours won’t delay messages that require urgent delivery.
- Set frequency capping and rate limiting (optional): Cap delivery frequency and protect downstream systems that handle message volume.
- Add a seed group (optional): Seed groups let stakeholders receive live copies of emails. If your email content references context variables, use Test Canvas preview with test sends instead—seed copies don’t evaluate context variables.
- Set up approvals (optional): If your team requires launch governance, configure approvals for campaigns and Canvases.
Phase 2: Audience and targeting
Review Entry Audience and Entry Schedule after setup is complete.
- Check estimated audience size: In the Target Population summary, confirm the reachable audience looks right. Unexpectedly low numbers often point to a filter issue.
- Spot-check user eligibility: Use User Lookup in the Target Audience step to confirm a known test user matches your segment and filters.
- Filter reachable channels: Route push-enabled users toward push steps and email-subscribed users toward email using Audience Paths so reporting sizes stay accurate and users aren’t sent down unreachable channels.
- Test for race conditions: For action-based entry, confirm the trigger action can’t fire before audience criteria are met—otherwise eligible users may never enter. Don’t use the same trigger in both Entry Schedule and Target Audience.
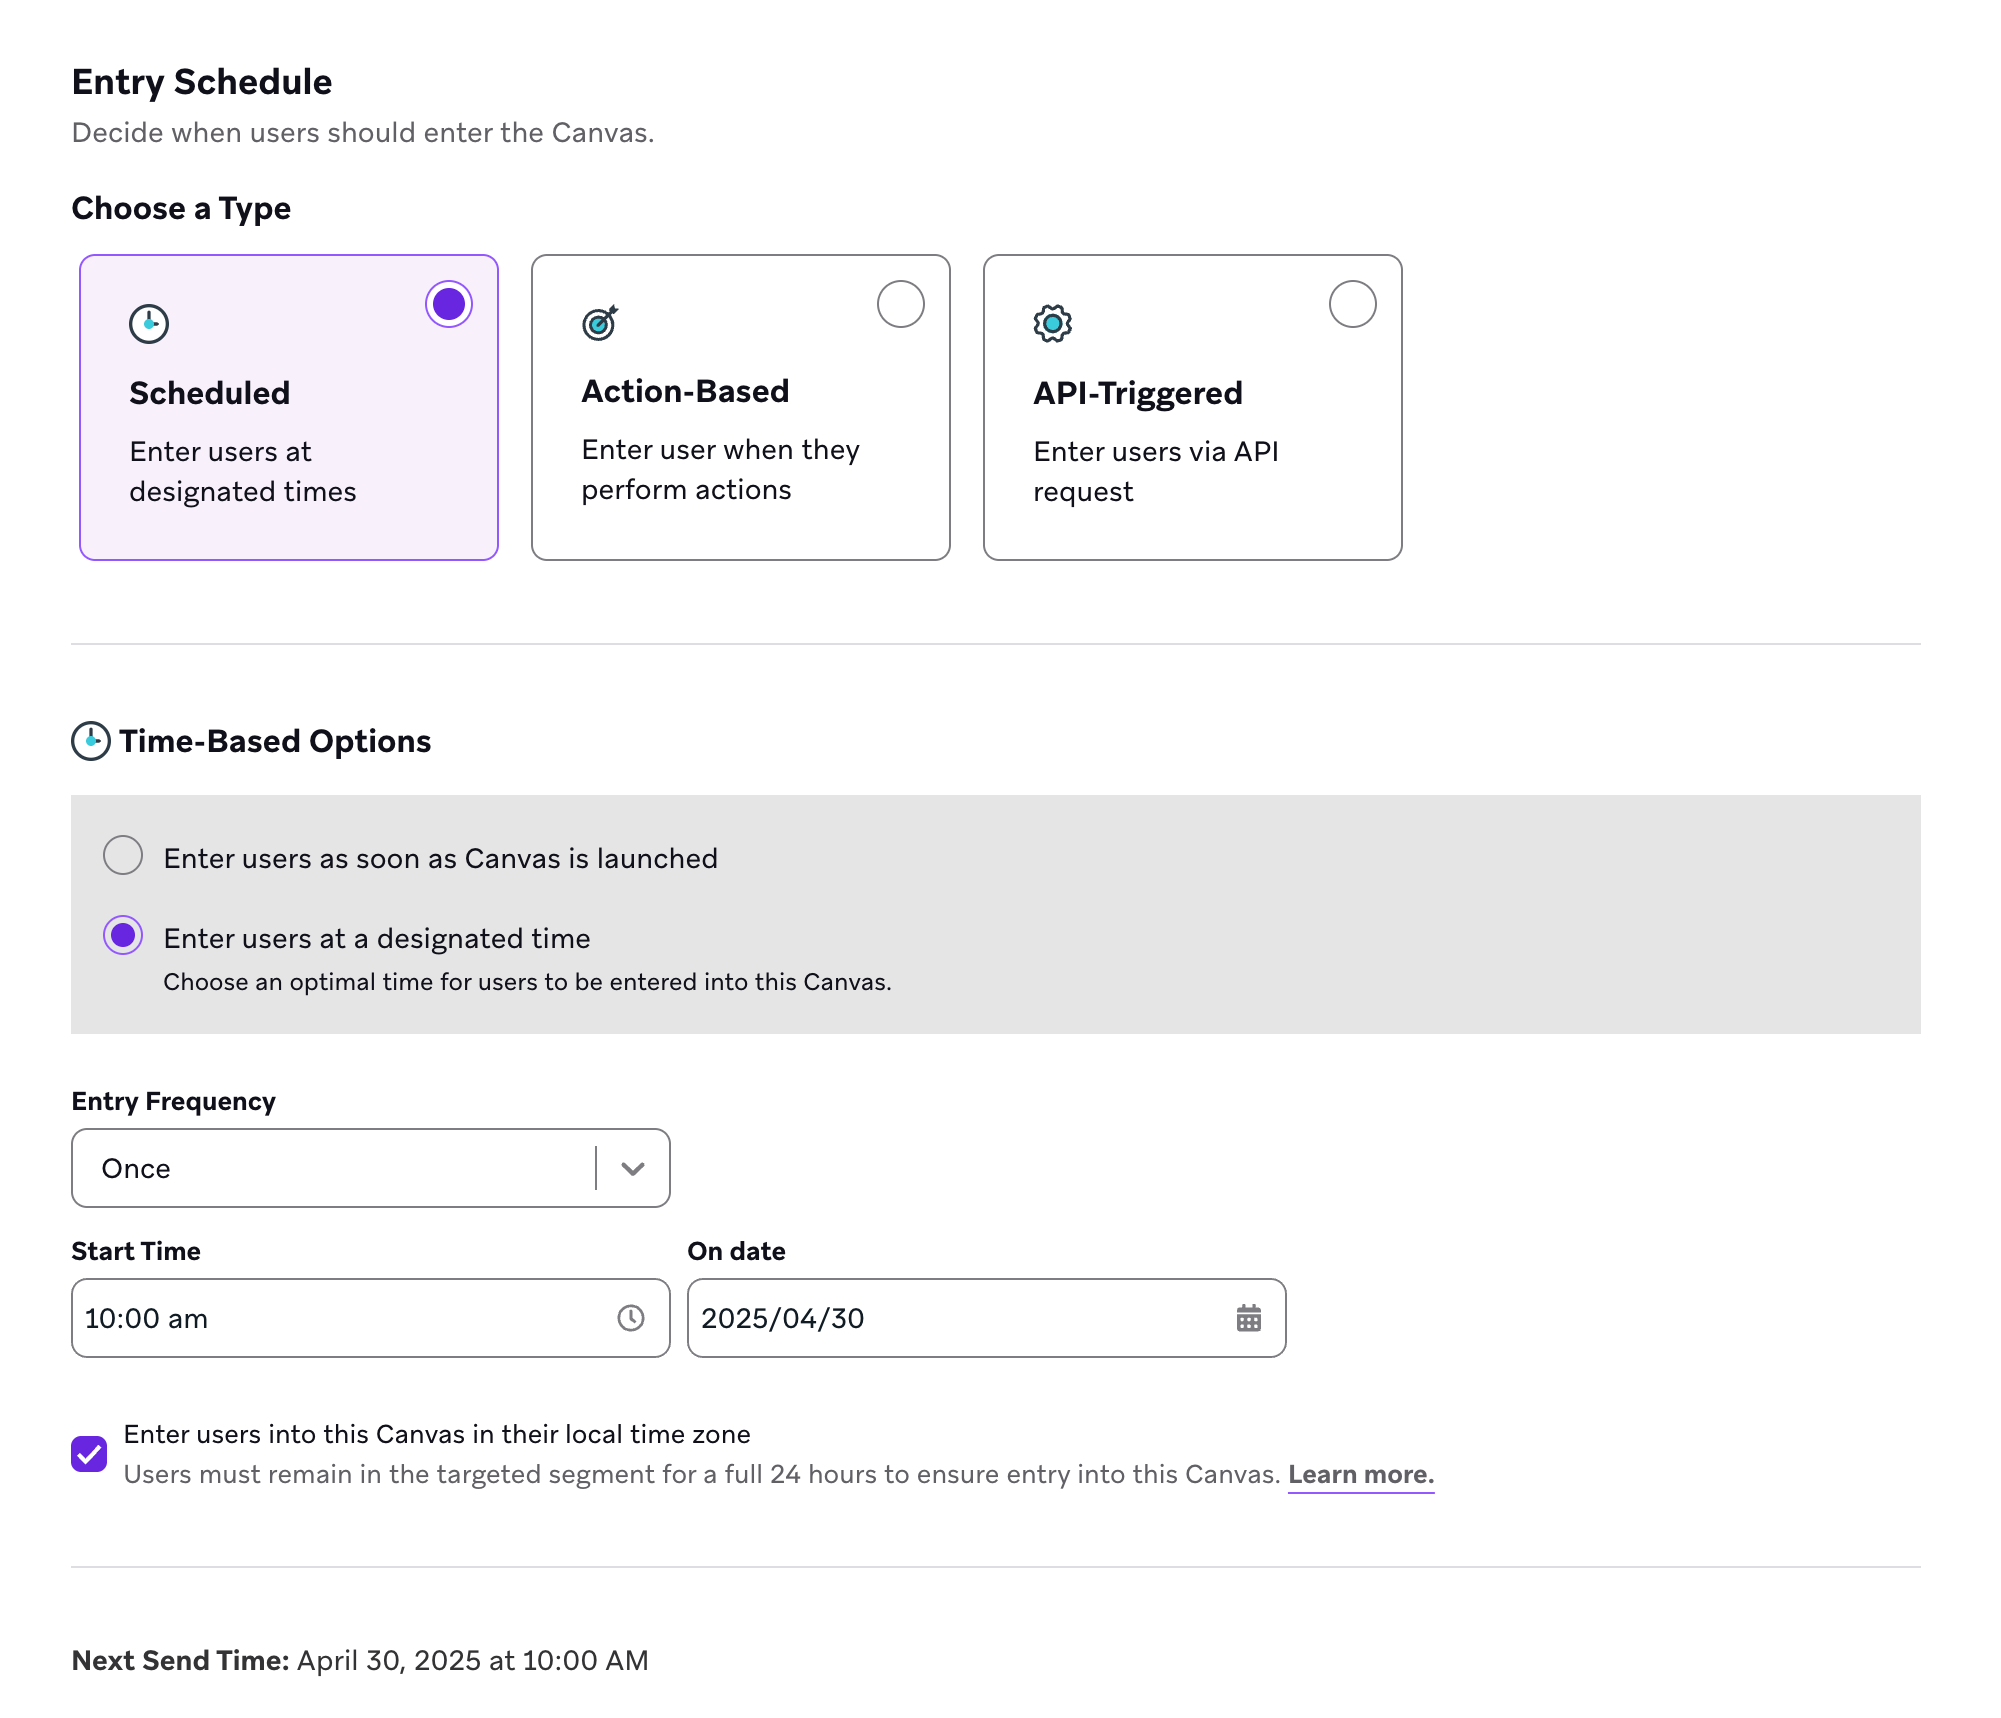
- Check time zone entry: For local-time scheduled entry, launch the Canvas at least 24 hours before the intended entry time so no time zone misses the window.

You’ll see an alert if you haven’t scheduled enough of a buffer. A quick solution is to adjust the send time to ensure that users can remain in the targeted segment for a full 24 hours.
- Review cross-Canvas overlap: When several Canvases run at once, check audience and persona overlap and suppression lists so users don’t receive competing messages from multiple journeys.
- Consider regular expressions for filters: In Target Audience, Audience Paths, and delivery validations, regular expressions can catch values that
Equalsfilters miss because of capitalization or formatting. If your target audience is smaller than expected, tryMatches RegexorDoes Not Match Regex.
Phase 3: Content and personalization
With setup and audience in place, open each Message step and validate personalization, media, and channel-specific content before you test the journey.
- Verify entry, event, and context properties: Confirm properties from events, attributes, catalogs, Connected Content, and API payloads populate correctly in previews.
- Test Liquid logic and fallbacks: Ensure personalization renders for every variant, and default values populate when data is missing.
- Add abort logic for Connected Content: Use abort message logic or abort Connected Content so failed API calls don’t send broken messages.
- Review delivery settings: Check per-step timing, Intelligent Timing, quiet hours, and delivery validations.
- Apply brand guidelines (optional): If your workspace uses brand guidelines, confirm copy aligns with your defined voice and tone—or use BrazeAI Operator to apply them when drafting content.
- Test all media: Confirm images, rich push media, and attachments render across the channels in your journey.
- Review email rendering with Inbox Vision: Preview across major clients and devices, not just one inbox.
- Perform content quality assurance: Proofread spelling, grammar, and tone in message content.
- Confirm unsubscribe and opt-out links: Verify required footers and opt-out links for email and SMS are present and tested.
- Check character limits: Confirm push and SMS copy won’t be silently truncated. For SMS, use the SMS segment calculator.
Phase 4: Review journey logic, test, and preview
After content is built, review the journey map and test in the following order.
- Preview user paths: Confirm Delays, Decision Splits, Audience Paths, and Action Paths behave as expected.
- Check for conflicting delivery controls: Intelligent Timing and quiet hours conflict—choose one. Intelligent Timing and rate limiting also conflict—choose one.
- Confirm action-based triggers reach Braze: Verify the triggering datapoint appears on a live user profile in Messaging History before launch.
- Send test messages: Send to an internal test group.
- Complete a live end-to-end Canvas test (optional): Recommended for complex journeys:
- Duplicate your Canvas and restrict entry to test users only (filter on external ID, email address, or phone number).
- Reduce delays to about one second to speed up QA, then launch the test Canvas.
- Perform real behaviors in your app (web, iOS, and Android) to drive each branch and confirm expected messages arrive and all links—including deep links—work as expected.
For step-by-step testing and API-based branch testing, see Send test Canvases.

Connected Content executes during preview user paths. Webhooks execute when test messages are sent, not during the preview run itself. Remove Connected Content or webhooks that alter user profiles or data referenced in other Canvases before testing.
Review Message steps for user advancement
By default, users advance through all Message steps regardless of whether they received the message. If you want to advance only users who receive a particular message, add a Decision Split step directly after your Message component. Add the filter Received Message from Canvas Step, then select the Canvas and Message step.
For Message steps with in-app messaging, use an Action Paths component instead of Decision Split. Define an action group with the filter Interact with Step and select View in app message. Set the evaluation window to the in-app message expiration window.
For a multi-channel Message component, do the following:
- Include a Delay step between your Message and Decision Split steps, and set the delay to at least five seconds.
- If the component includes Intelligent Timing, set the delay to 24 hours.
- If the component includes rate limiting, split your messages into several single-channel Message steps and connect them together. Then, connect the Decision Split step directly after the last Message step to check whether a user received any of the messages.
Phase 5: Post-launch monitoring
In the first minutes and hours after go-live, watch for these patterns.
- Watch deliverability early: Check for bounce, error, or rejection spikes before volume ramps in Email reporting and Messaging Observability.
- Investigate many entries with few sends: This is most often a channel-eligibility or subscription-state filter, an overly tight delivery control, or control-group size. Check the entry audience and the first step’s send breakdown in Canvas analytics, then review Entry audience, First component of the Canvas, and Canvas control group.
Entry audience
If you’re using a scheduled send, double-check your target audience by reviewing your target population. How do the numbers look across channels, and how does that relate to the channels in your Canvas? If the lowest numbers correspond with the channels you’ve used, you may have found the issue.
First component of the Canvas
Review audience filters, action triggers, or segments in the beginning components. Look for misspellings or overly strict conditions. Confirm you aren’t using Equals when Matches Regex is more appropriate.
Canvas control group
Review the distribution between variants and your control group. Is the control group larger than intended? If Optimize with BrazeAI™ (shown as Intelligent Selection in some workspaces) is on and the control group is winning, consider stopping the Canvas and trying a new approach.
- Investigate empty audience: Usually a race condition or an over-restrictive filter. Confirm the segment has users via Target Population. For action-based entry, verify you haven’t duplicated the trigger in Target Audience.
- Investigate unexpected drop-off between steps: Check filters for typos and capitalization errors. Review Intelligent Timing, quiet hours, and delivery validations.
- Investigate suspicious send volumes between paths: When sends between Audience Paths or Action Paths don’t match expectations, review segments, filters, and trigger actions. Remove overlapping filters.
For a full investigation workflow, see Troubleshoot Canvases.
Common final checks
Action only the items that apply to your Canvas:
- Plan scheduled local-time entry: Allow a 24-hour lead time for optimal delivery across all global time zones. See Check time zone entry in Phase 2.
- Prefer Intelligent Timing with a 3-day window: Intelligent Timing works best with at least a 3-day segment window so users don’t drop out before their optimal send time.
- Confirm control group size before launch: You can’t add a control group retrospectively. Set variant and control percentages in the builder or Experiment Paths before go-live.
- Test deep links on a real device: Confirm links open the correct in-app screen and provide a sensible fallback for users without the app installed. For platform-specific failures, see Deep linking troubleshooting.
- Confirm tracking fires end-to-end: Verify UTMs append correctly and click tracking registers on a live test send, not only in preview.
Channel-specific checks
If your Canvas includes these channels, check these additional details:
- Push: Confirm rich media and images load, action buttons work, and you’ve tested both iOS and Android. Confirm badge and sound behavior if used.
- SMS and MMS: Confirm the correct sender ID or short code, opt-out keyword footer, link shortening, and per-segment cost.
- In-app messages and Content Cards: Conduct a live test inside the app or web—these channels depend on an SDK session rather than a dashboard test send. Also review Content Cards.
- WhatsApp: Confirm an approved template is in use and template variables map to the correct data.