Suppressions
Suppressions help you keep unwanted or low-quality recipients out of messaging. Use a suppression list to exclude users defined by segment filters from campaigns and Canvases. Use a soft bounce rule to automatically hard-bounce email addresses that soft bounce repeatedly on a sending domain.

Soft bounce rules are currently in beta with the Deliverability Assistant. Contact your Braze account manager if you’re interested in participating. Without soft bounce rules enabled, the dashboard page is labeled Suppression Lists.
Suppression types
| Type | How it works | What it affects |
|---|---|---|
| Suppression list | Membership is defined with segment filters. Users enter and exit the list as they meet or leave the filter criteria. Optional exception tags let tagged campaigns or Canvases still reach list members. | Campaigns and Canvases across channels (with the exceptions in Message types and channels affected by suppression lists). |
| Soft bounce rule | Counts soft bounces for an email address on a selected sending domain. Multiple soft bounces on the same day count once. When the address meets your threshold and evaluation window—and has had no successful delivery since those soft bounces started—Braze marks the address as hard bounced. | Stops email to that address after Braze hard-bounces it. Soft bounce rules don’t use exception tags. |

Hard-bouncing from a soft bounce rule is permanent for that email address. Deactivating or archiving the rule doesn’t reverse hard bounces that already applied. To restore an address, use the Remove hard bounced emails endpoint.
Soft bounce rules
Soft bounce rules stop emailing addresses that keep soft bouncing for list-quality reasons, before they hurt your sender reputation. Braze only counts an unbroken run of soft bounces since the address’s last successful delivery—any delivery resets the count.
How soft bounce rules work
- Soft bounces on the rule’s sending domain are grouped by day (multiple soft bounces on the same day count once).
- Braze only counts soft bounces in the bounce categories you select.
- Braze only counts soft bounces that happened after the address’s last successful delivery.
- Braze hard-bounces the address when both are true:
- The day-deduplicated soft bounce count meets your threshold
- The first and last counted soft bounces are at least as many days apart as your evaluation window
A workspace can have multiple soft bounce rules, but only one active rule can cover a given sending domain. One rule can include more than one sending domain.
Setting up a soft bounce rule
Soft bounce rules use the same create and manage permissions as suppression lists.
- Go to Audience > Suppressions (or Suppression Lists, if soft bounce rules aren’t enabled yet).
- Select Create Suppression, then choose Soft bounce rule and add a name.
- On the soft bounce rule page, select the Sending domain or domains the rule applies to.
- Choose a Sender profile that matches how often you send from that domain:
- Daily: About five to seven send days a week
- Weekly: About two or fewer sends a week
- Choose a suppression preset, or select Custom to set your own values:
| Preset | Daily sender profile | Weekly sender profile |
|---|---|---|
| Conservative | 10 soft bounces over a 14-day evaluation window | Six soft bounces over a 14-day evaluation window |
| Recommended (default) | Five soft bounces over a 14-day evaluation window | Four soft bounces over a 14-day evaluation window |
| Aggressive | Three soft bounces over a 14-day evaluation window | Two soft bounces over a 14-day evaluation window |
| Custom | Set the number of soft bounces and evaluation window in days yourself | Same |
- Optionally open Advanced configurations to change which bounce categories count toward the rule. By default, the rule uses list-quality categories only.
- Save or activate the rule.
- Save keeps the rule inactive so it doesn’t hard-bounce addresses yet.
- Activate turns the rule on for future evaluation. Addresses that already meet the criteria can be hard-bounced after Braze evaluates them.

Start with Recommended. Use Aggressive only when you send frequently and trust your list quality.
Bounce categories
By default, a soft bounce rule counts these categories:
| Category | When it typically applies |
|---|---|
| Invalid Domain | The recipient domain isn’t valid or can’t receive mail. |
| Invalid Recipient | The mailbox or recipient address isn’t valid. |
| Mailbox Unavailable | The recipient mailbox is unavailable to accept emails. |
| Undetermined | The soft bounce doesn’t map to a more specific category. |
These defaults focus on list quality. They don’t count soft bounces caused by authentication, blocking, throttling, or content issues. You can narrow the selected categories in Advanced configurations, but you must leave at least one selected.
Deactivate or archive a soft bounce rule
- Deactivate turns the rule off for future evaluations. Previously hard-bounced addresses stay hard-bounced.
- Archive removes the rule from active use. You can restore it later if needed.
Suppression lists
Suppression lists are groups of users who automatically don’t receive campaigns or Canvases. They’re defined by segment filters, and users enter and exit as they meet filter criteria. You can set exception tags so the list doesn’t apply to campaigns or Canvases with those tags. Messages from campaigns or Canvases with exception tags still reach suppression list users who are in the target segments.
Why use suppression lists?
Suppression lists are dynamic and automatically apply to all forms of messaging, but you can set exceptions for selected tags. If your selected exception tags are used in a campaign or Canvas, that suppression list won’t apply to that campaign or Canvas. Messages from campaigns or Canvases with exception tags still reach any suppression list users that are part of your target segments.
Message types and channels affected by suppression lists
Suppression lists apply to all message types and channels except for feature flags. By default they apply to all channels, campaigns, and Canvases, including:
- API campaigns
- API-triggered campaigns and Canvases
- Transactional emails
Users in a suppression list aren’t suppressed from feature flags, but they are suppressed from all other channels.
You can use exception tags so suppression list users are still targeted by particular campaigns and Canvases. For details, refer to step 4 in Setting up suppression lists. If you don’t add exception tags, users in that suppression list aren’t targeted with any messaging besides feature flags.
Suppression lists are applied to API campaigns that are created in the Braze dashboard with a campaign_id. Suppression lists don’t apply to messages sent through Braze messaging endpoints without an associated campaign_id.
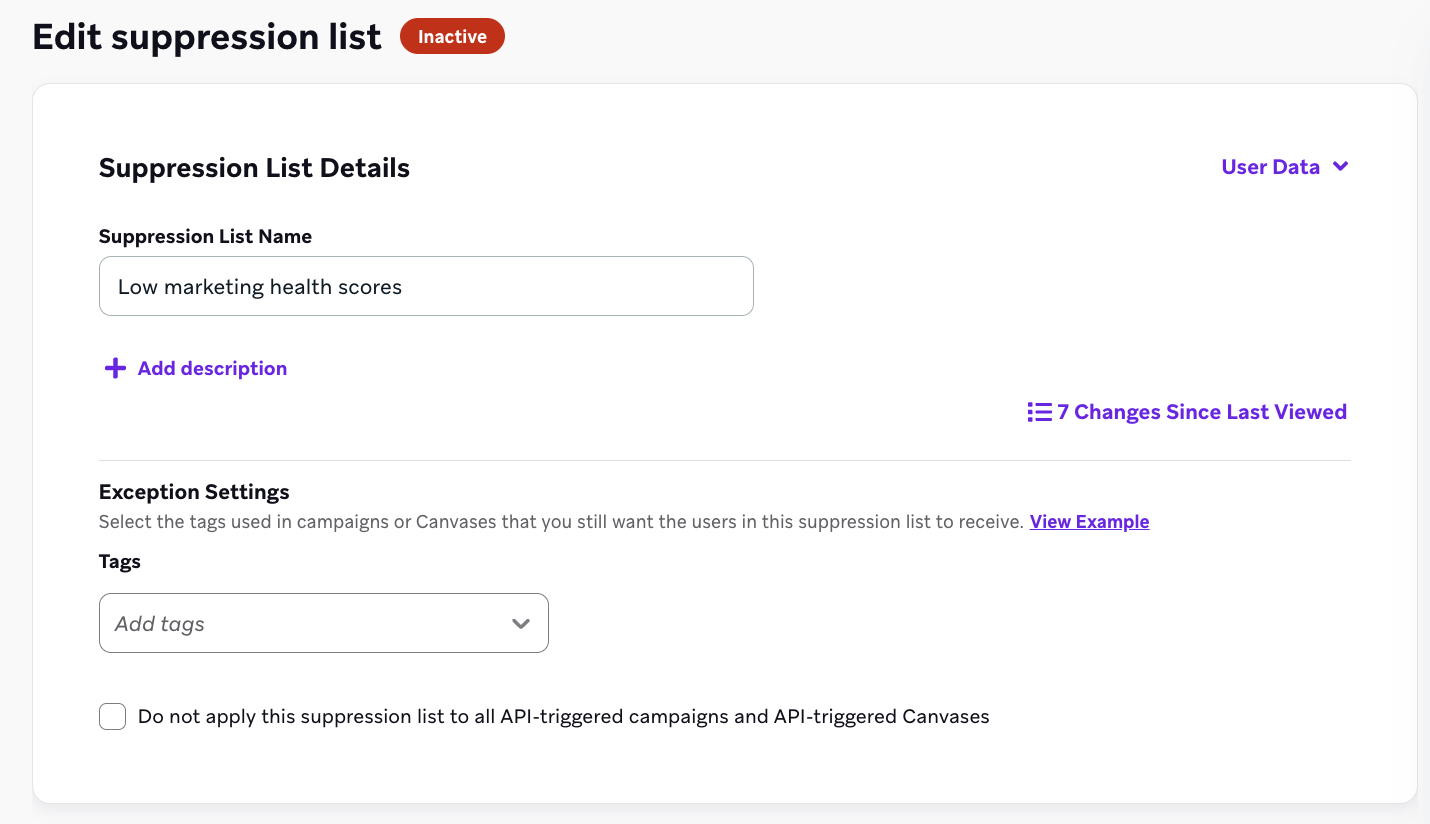
Setting up suppression lists
All users can view suppression lists, but only users with admin permissions can create and manage suppression lists.
- Go to Audience > Suppressions (or Suppression Lists).
- Select Create Suppression (or Create Suppression List) and add a name. If prompted, choose Suppression list.
- Use segment filters to identify the users in your suppression list. You must select at least one.
Though the setup process seems similar to segment creation, a suppression list is a group of users that you do not want to send messages to regardless of segment membership.
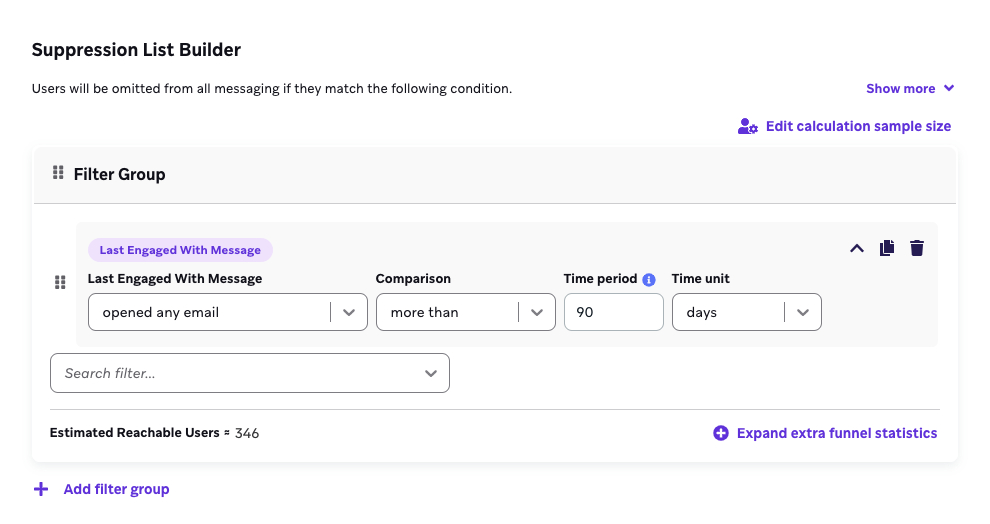
- Determine whether to have exceptions based on tag by checking the box beneath your segment name (refer to Why use suppression lists? for more information), then add the tags of campaigns or Canvases that users in this suppression list should still receive.
In other words, if you add the exception tag “Shipping confirmation”, users in your suppression list are excluded from all messaging except those that use the tag “Shipping confirmation”.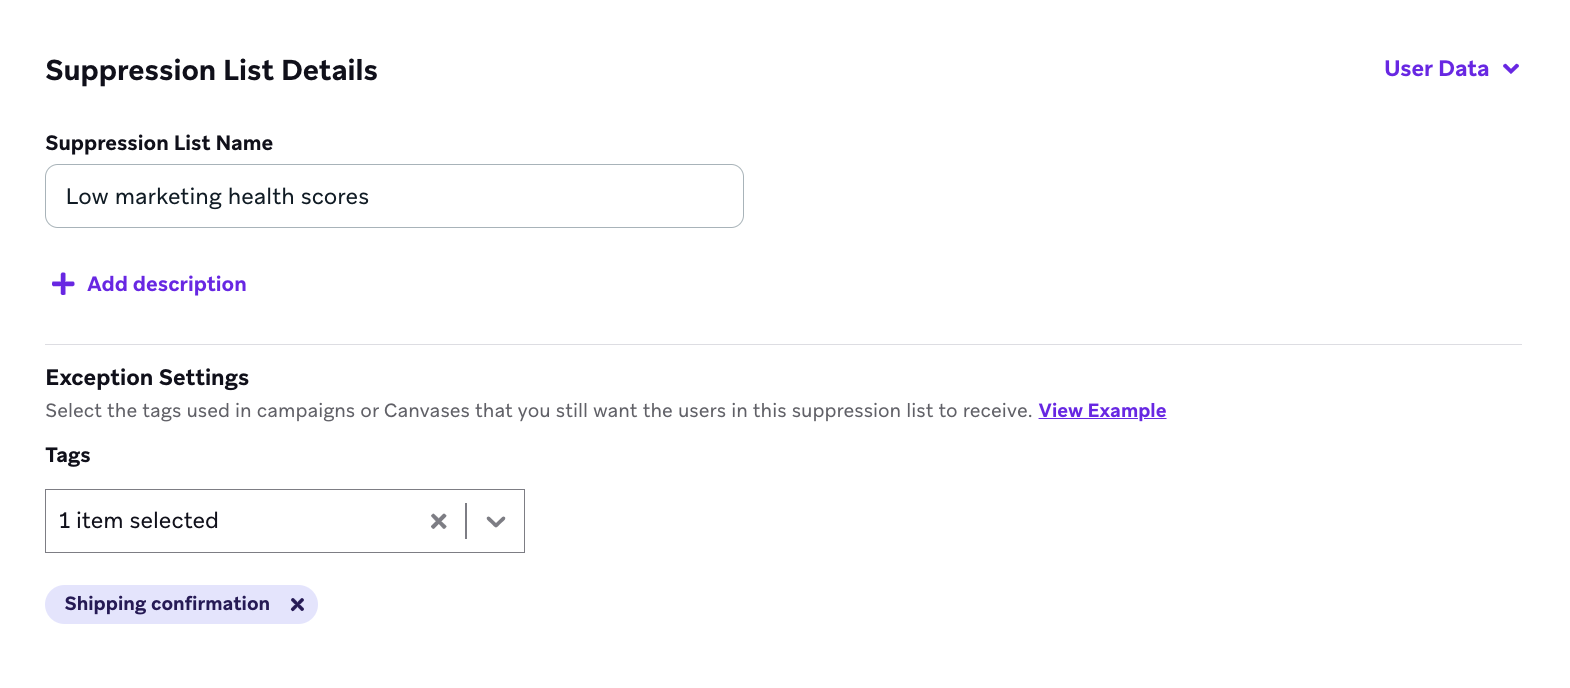
- Save or activate your suppression list.
- When you save, your suppression list is saved but isn’t activated, so it doesn’t go into effect. Inactive suppression lists don’t exclude users from messages.
- When you activate, your suppression list is saved and immediately goes into effect, so users in your suppression list are immediately excluded from campaigns or Canvases (except ones that contain an exception tag).
Only admins can save or activate suppression lists. You can have up to five active suppression lists at a time in the beta.
You can deactivate or archive suppression lists when you no longer need them.
- To deactivate, select an active suppression list and select Deactivate. Deactivated suppression lists can be reactivated later.
- To archive, do so from the Suppressions (or Suppression Lists) page.
Suppression list usage
To check if your suppression list prevented a user from receiving a message, use User Lookup in the Target Audience step within your campaign or Canvas. Here, you’ll be able to see which suppression list they’re part of.
Suppression lists update before a message sends, not after a campaign launches. This means a user who is added to a suppression list after campaign launch but before the message sends could still receive the message.
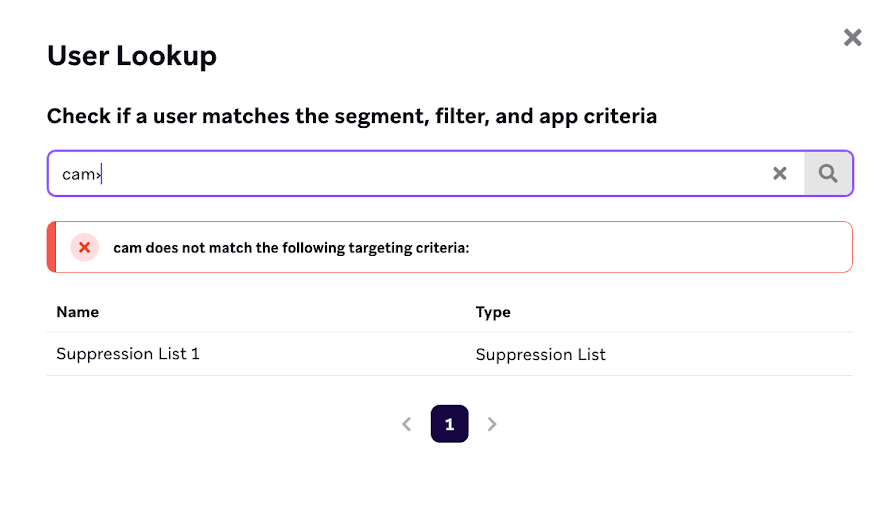
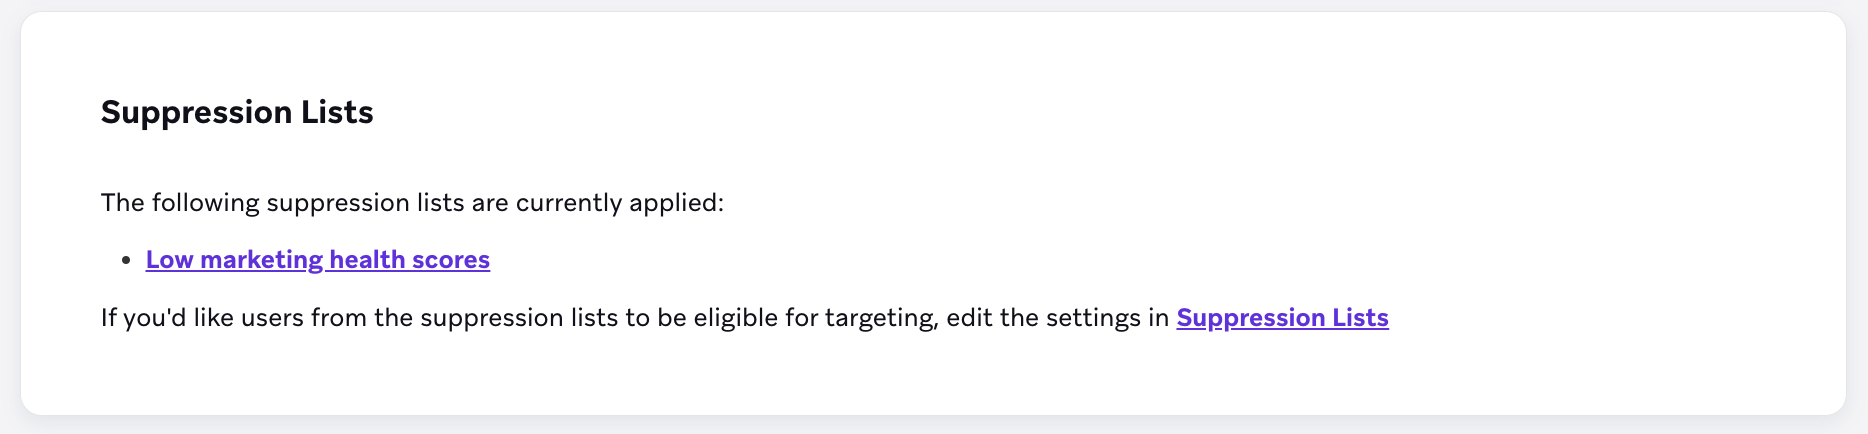
You can also find applied suppression lists in the Summary step.
Campaign
If a user is in a suppression list, they won’t receive a campaign for which that suppression list applies. Refer to Message types and channels affected by suppression lists for cases when a suppression list won’t apply.
Canvas
From the moment a user is added to a suppression list, they won’t enter Canvases. If they have already entered a Canvas, they won’t receive Message steps. If a user is already inside a Canvas when they’re added to a suppression list, they advance through the Canvas until the next Message step, then exit without receiving that Message step.
For example, if a Canvas has a User Update step followed by a Message step, and a user enters the Canvas and then is added to a suppression list, that user still proceeds through the User Update step (where they may be updated), then exits at the Message step and is included in the exited metrics.