Security events export to cloud storage
You can automatically export security events to Amazon S3, Microsoft Azure Blob Storage, or Google Cloud Storage with a daily job that runs at midnight UTC. After setting up, you don’t need to manually export security events from the dashboard. The job exports the security events for the past 24 hours in CSV format to your configured storage. The CSV file uses the same columns as a manually exported report, plus a
Versioncolumn.

Security event cloud export availability depends on your platform edition. If this feature isn’t in your workspace, contact your customer success manager for information.
Starting December 2026, this export is planned to run hourly instead of daily. Review any downstream jobs that expect a single daily file.

Security event cloud exports aren’t subject to the 10,000-row limit that applies to manual CSV report downloads from the dashboard.
Set up cloud export in Braze
You can configure only one cloud storage provider at a time. Saving credentials for a provider removes any previous security event export configuration for a different provider.
- In Braze, go to Settings > Company Settings > Admin Settings > Security Settings and scroll to the Security Event Download section.
- Under Export to cloud storage, turn on Export security event report to cloud storage.
- For Cloud storage provider, select AWS S3, Azure, or Google Cloud Storage.
- Follow the steps for your provider.
Braze supports two S3 authentication and authorization methods:
- AWS secret access key method
- AWS role ARN method
AWS secret access key method
This method generates a secret key and an access key ID that allows Braze to authenticate as a user on your AWS account to write data to your bucket.
Step 1: Create an Identity and Access Management (IAM) user
To retrieve your secret access key and access key ID, you’ll need to create an IAM user, following the instructions in Setting up your AWS account.
Step 2: Get credentials
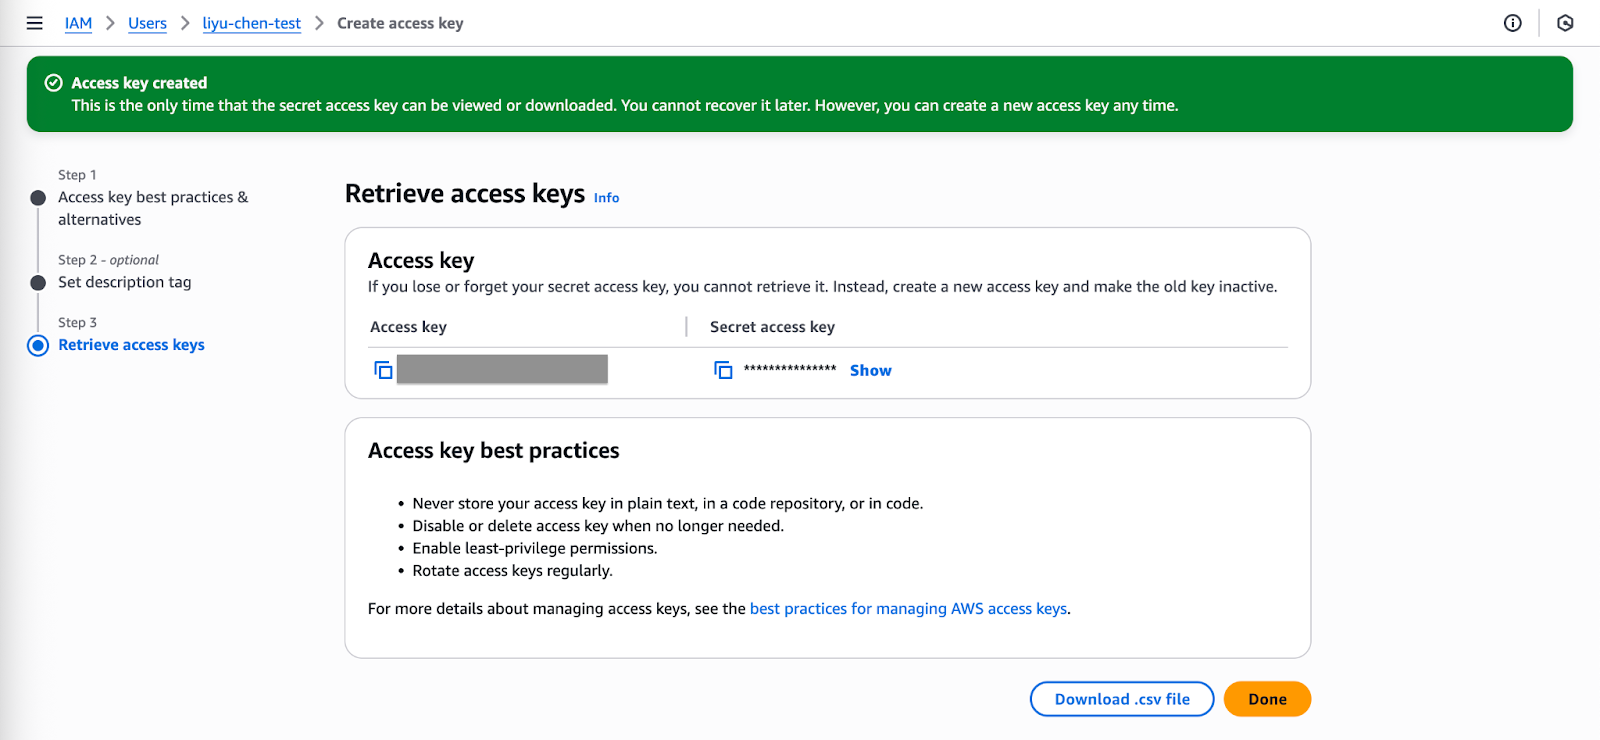
- After creating a new user, generate the access key and download your access key ID and secret access key.
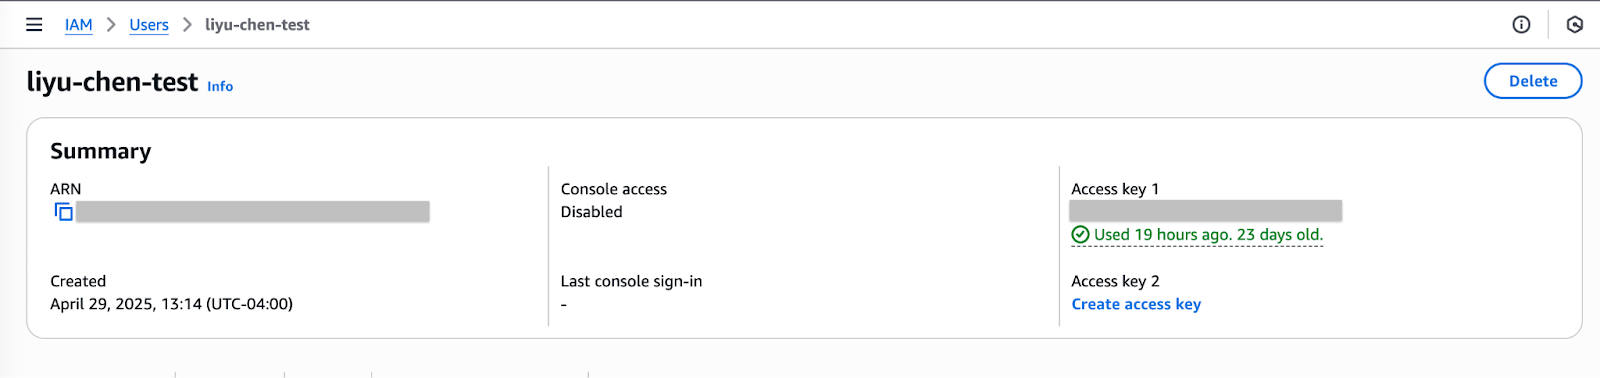
- Take note of these credentials somewhere or download the credential files, because you’ll need to input these into Braze later on.
Step 3: Create policy
- Go to IAM (Identity and Access Management) > Policies > Create Policy to add permissions for your user.
- Select Create Your Own Policy, which gives limited permissions so Braze can only access the specified buckets.
- Specify a policy name of your choice.
- Input the following code snippet into the Policy Document section. Be sure to replace “INSERTBUCKETNAME” with your bucket name. Without these permissions, the integration will fail a credentials check and not be created.
{
"Version": "2012-10-17",
"Statement": [
{
"Effect": "Allow",
"Action": ["s3:ListBucket", "s3:GetBucketLocation"],
"Resource": ["arn:aws:s3:::INSERTBUCKETNAME"]
},
{
"Effect": "Allow",
"Action": ["s3:GetObject", "s3:PutObject", "s3:DeleteObject"],
"Resource": ["arn:aws:s3:::INSERTBUCKETNAME*", "arn:aws:s3:::INSERTBUCKETNAME/", "arn:aws:s3:::INSERTBUCKETNAME"]
}
]
}
Step 4: Attach policy
- After creating a new policy, go to Users and select your specific user.
- In the Permissions tab, select Add Permissions, directly attach the policy, and then select that policy.
Now, you’re ready to link your AWS credentials to your Braze account!
Step 5: Link Braze to AWS
- In Braze, go to Settings > Company Settings > Admin Settings > Security Settings and scroll to the Security Event Download section.
- Turn on Export security event report to cloud storage, then select AWS S3 as the Cloud storage provider.
- Select AWS secret access key.
- Input the following:
- AWS access key ID
- AWS bucket name
- AWS secret access key
- When inputting this key, first select Test Credentials to confirm your credentials work.
- Select Save Changes.
You’ve integrated AWS S3 into your Braze account!
AWS role ARN method
The AWS role ARN method generates a role Amazon Resource Name (ARN) that allows the Braze Amazon account to authenticate as a member of that role.
Step 1: Create policy
- Sign in to the AWS management console as an account administrator.
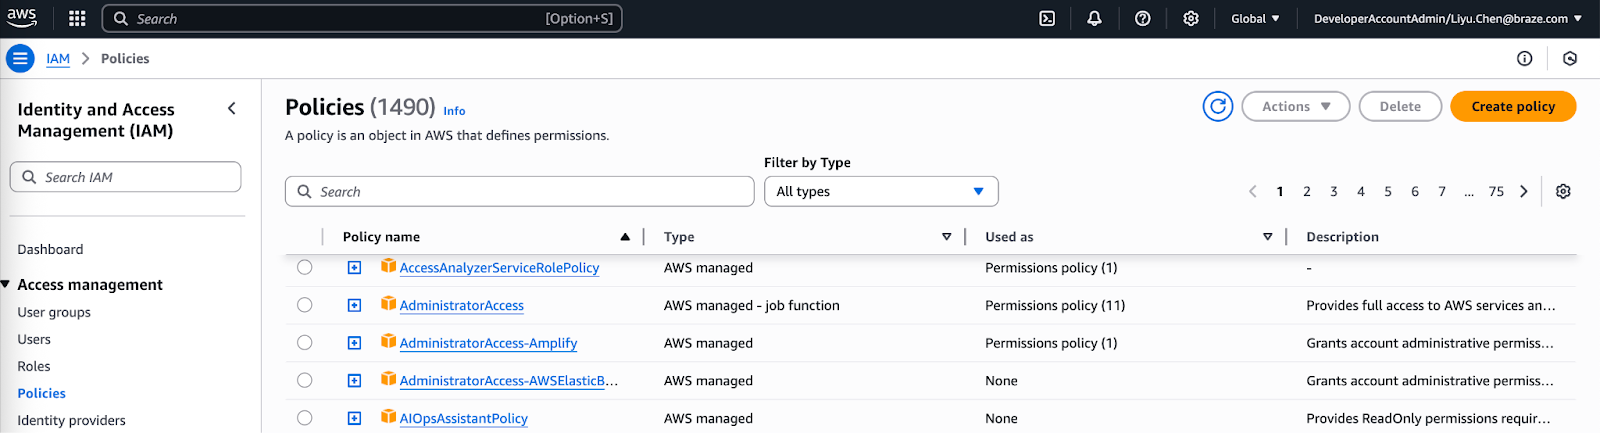
- In the AWS console, go to the IAM (Identity and Access Management) section > Policies, and then select Create Policy.
- Open the JSON tab and input the following code snippet into the Policy Document section. Be sure to replace
INSERTBUCKETNAMEwith your bucket name.
{
"Version": "2012-10-17",
"Statement": [
{
"Effect": "Allow",
"Action": ["s3:ListBucket", "s3:GetBucketLocation"],
"Resource": ["arn:aws:s3:::INSERTBUCKETNAME"]
},
{
"Effect": "Allow",
"Action": ["s3:PutObject", "s3:GetObject","s3:DeleteObject"],
"Resource": ["arn:aws:s3:::INSERTBUCKETNAME/*"]
}
]
}
- Select Next after reviewing the policy.
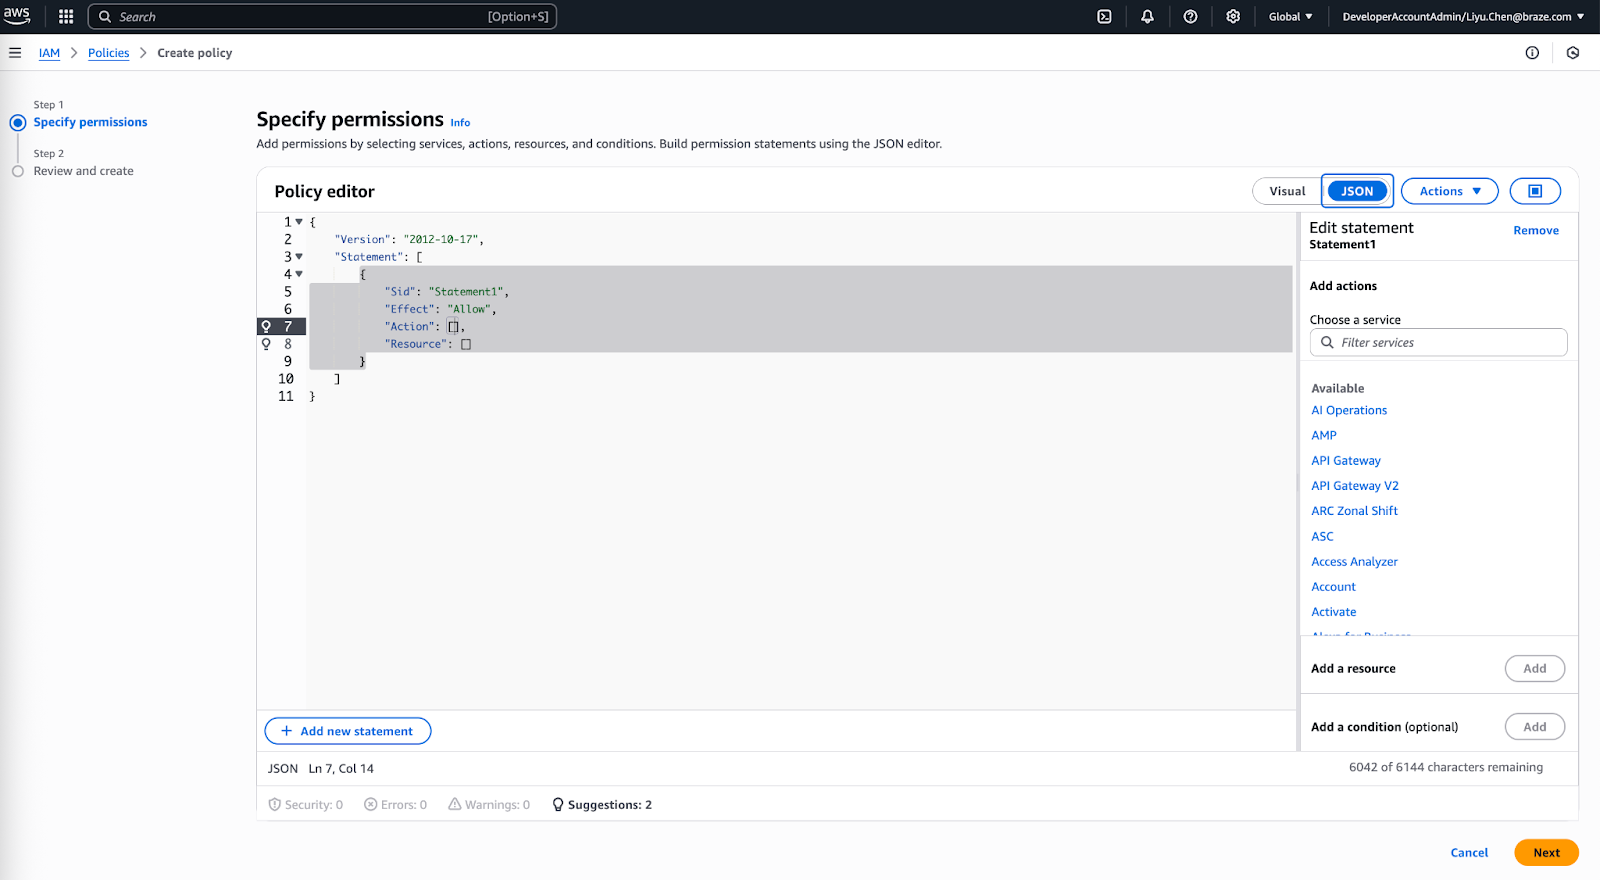
- Give the policy a name and description, and then select Create Policy.
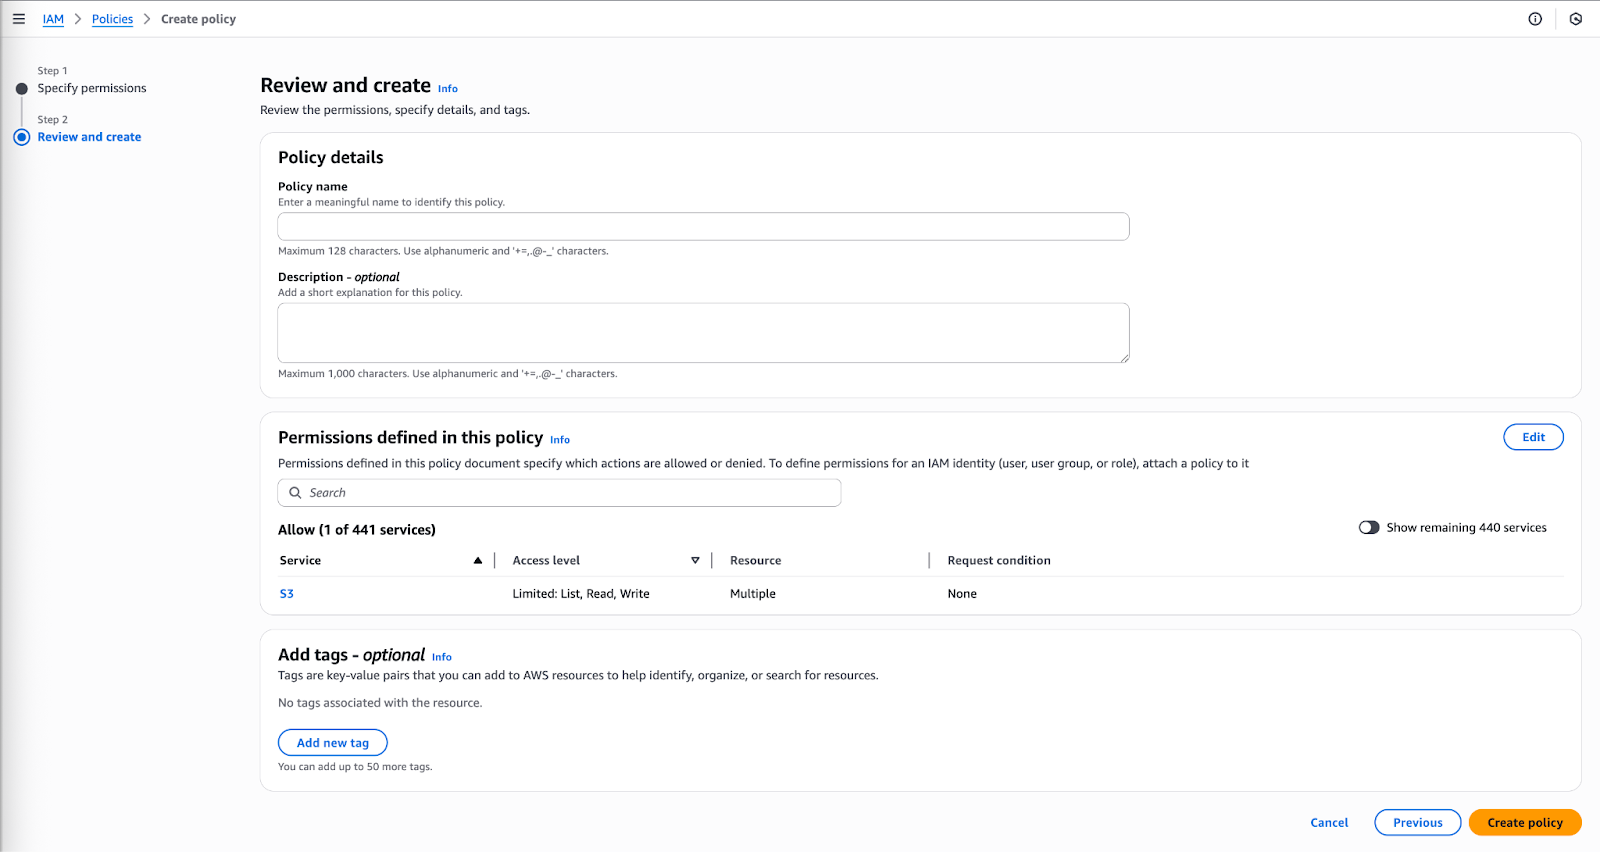
Step 2: Create role
- In Braze, go to Settings > Company Settings > Admin Settings > Security Settings and scroll to the Security Event Download section.
- Turn on Export security event report to cloud storage, then select AWS S3 as the Cloud storage provider.
- Select AWS Role ARN.
- Take note of the identifiers, Braze account ID, and Braze external ID needed to create your role.
- In the AWS console, go to the IAM (Identity and Access Management) section > Roles > Create Role.
- Select Another AWS Account as the trusted entity selector type.
- Provide your Braze account ID, check the Require external ID box, and then enter your Braze external ID.
- Select Next when complete.
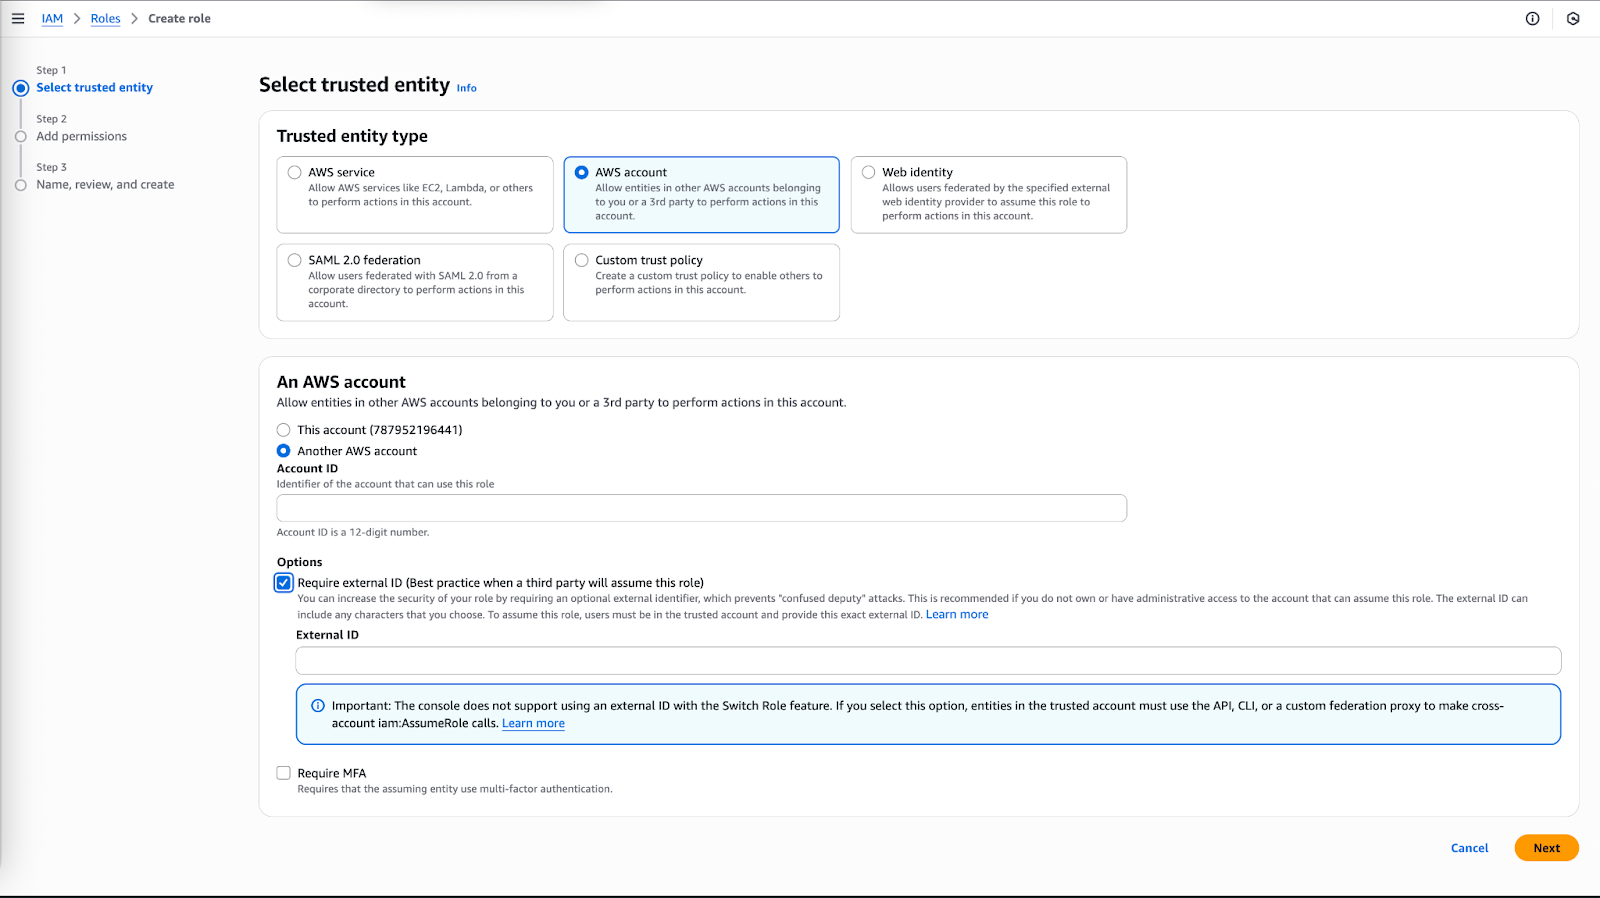
Step 3: Attach policy
- Search for the policy you created earlier in the search bar, and then place a checkmark next to the policy to attach it.
- Select Next.
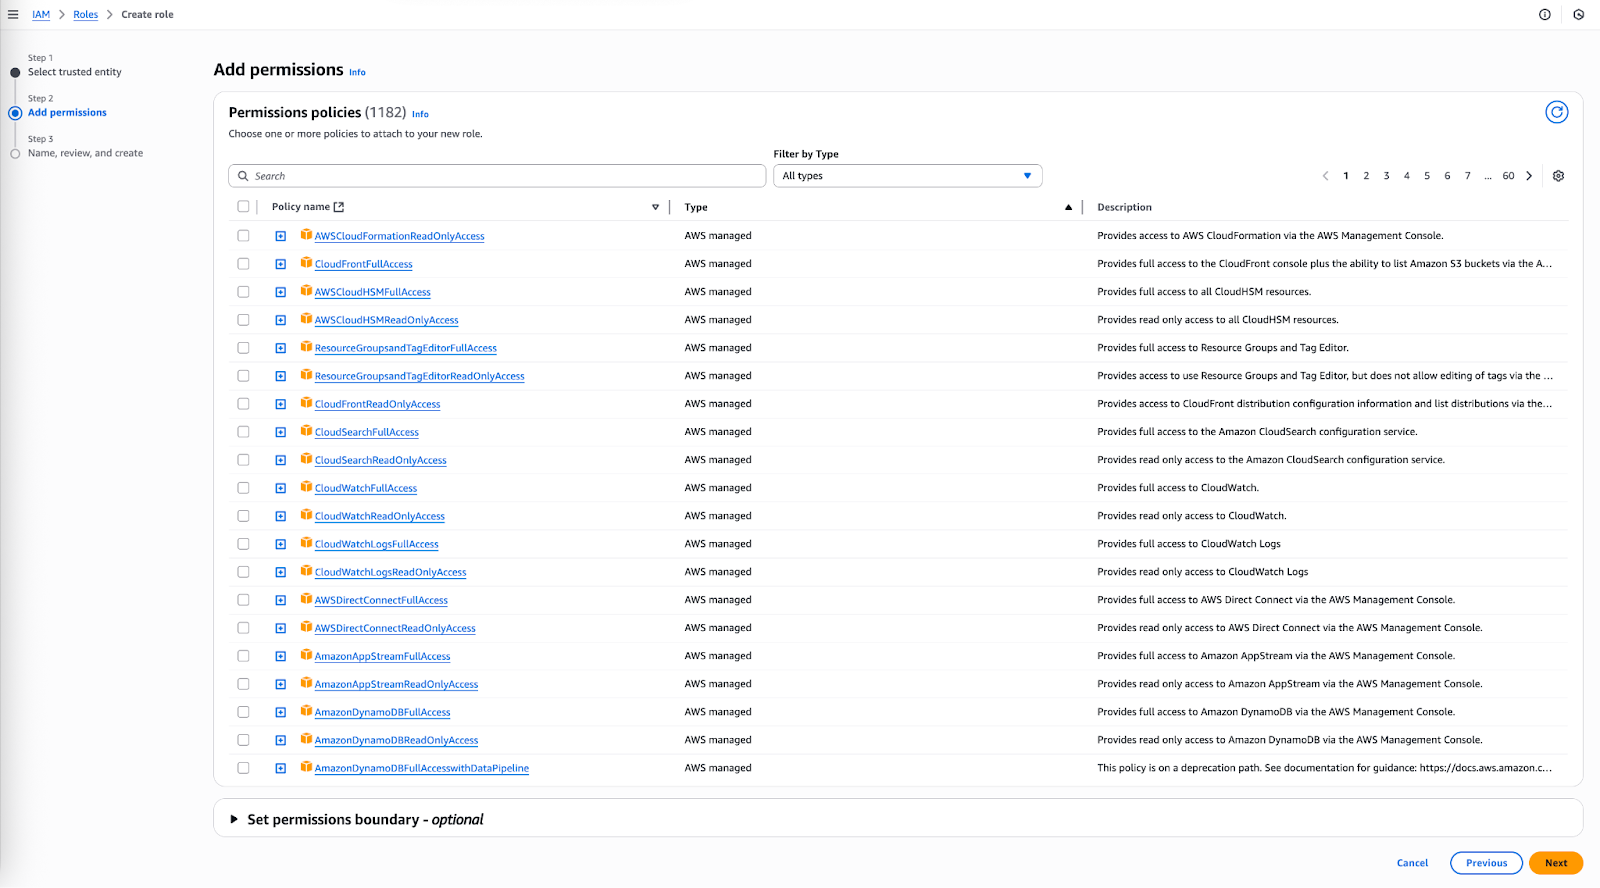
- Give the role a name and a description, and select Create Role.
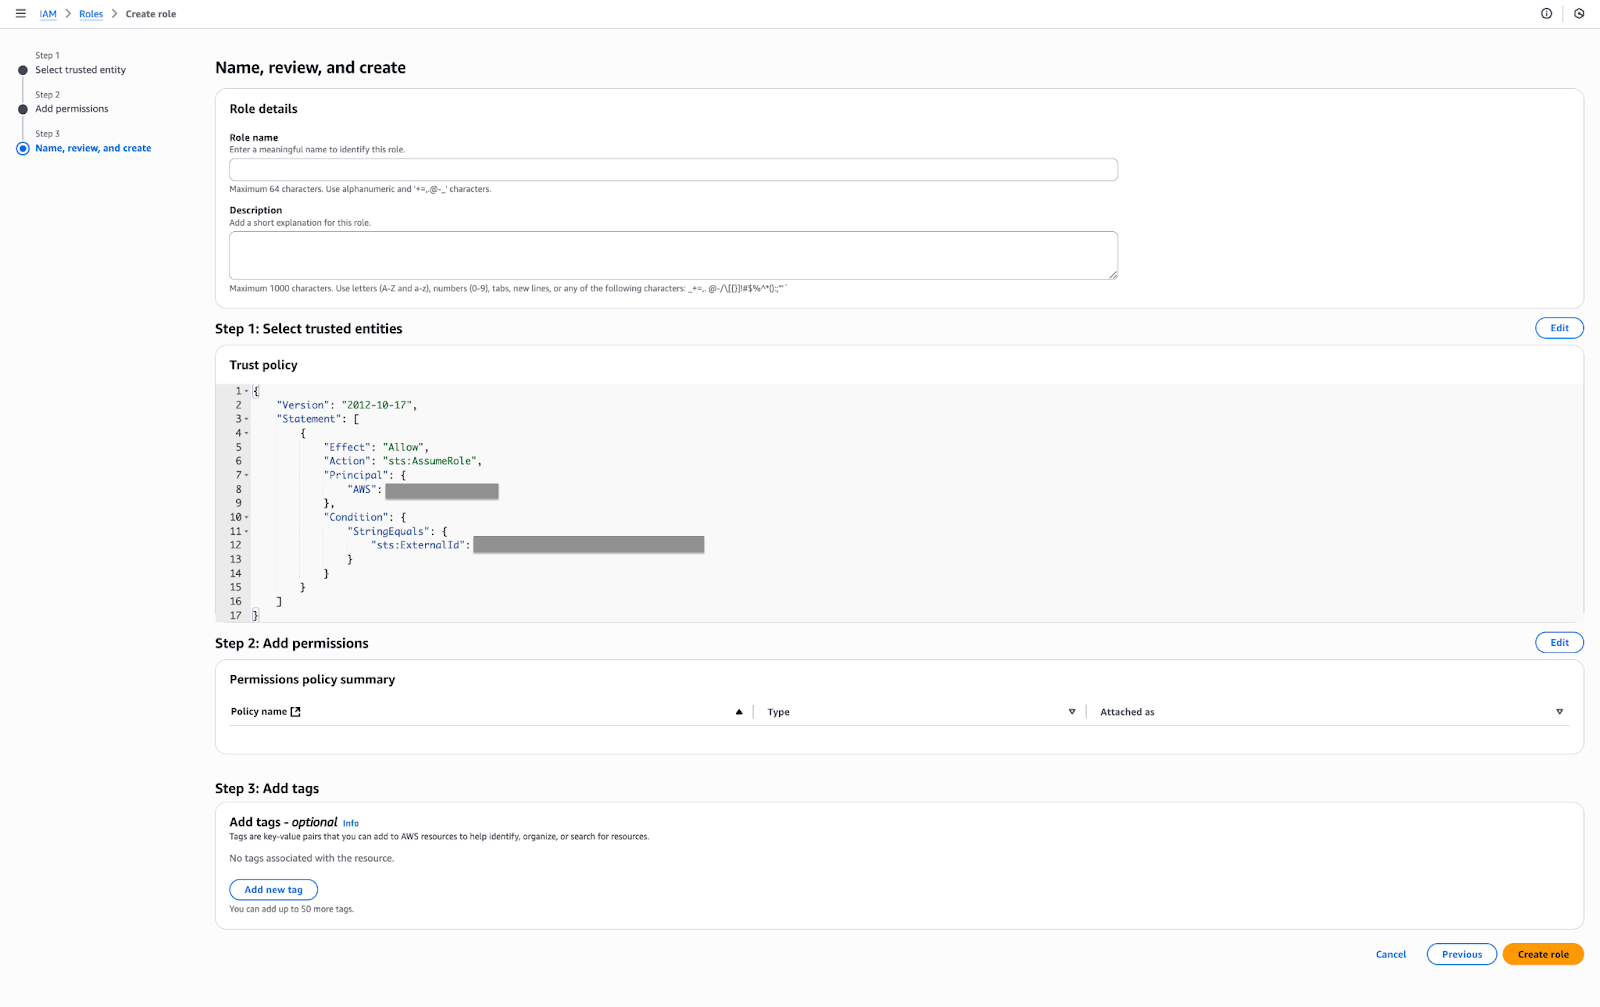
Your newly created role will appear in the list!
Step 4: Link to Braze AWS
- In the AWS Console, find your newly created role in the list. Select the name to open up the details of that role, and take note of the ARN.
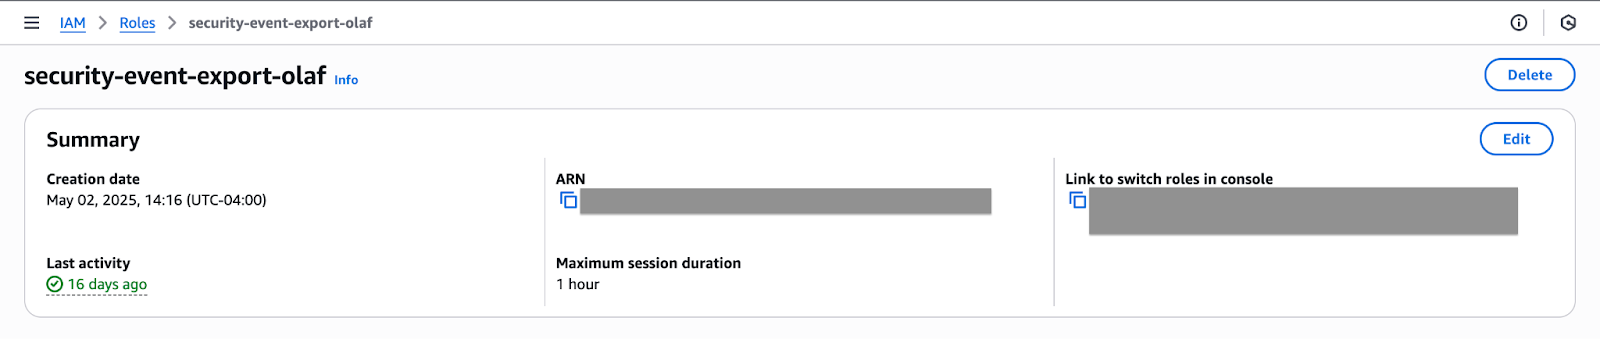
- In Braze, go to Settings > Company Settings > Admin Settings > Security Settings and scroll to the Security Event Download section.
- Make sure AWS S3 is selected as the Cloud storage provider and AWS role ARN is selected, then input your role ARN and AWS S3 bucket name in the designated fields.
- Select Test Credentials to confirm your credentials work properly.
- Select Save Changes.
You’ve integrated AWS S3 into your Braze account!
Security event export to Microsoft Azure Blob Storage is currently in early access. Contact your Braze account manager if you’re interested in participating in the early access.
Use a Microsoft Azure storage account connection string and a blob container for security event exports. For more detail on creating an Azure storage account, retrieving a connection string, and creating a blob container, see Microsoft Azure Blob Storage.
Step 1: Get Azure credentials
- In Microsoft Azure, create or open a storage account you want to use for security event exports.
- From the storage account, open Access keys and copy a Connection string. Braze uses the connection string, not the key alone.
- Under Blob service, create a blob container (or use an existing one) and note the container name.
- Optionally choose a storage prefix Braze should use when writing files.
Step 2: Link Braze to Azure
- In Braze, go to Settings > Company Settings > Admin Settings > Security Settings and scroll to the Security Event Download section.
- Turn on Export security event report to cloud storage, then select Azure as the Cloud storage provider.
- Input the following:
- Azure storage container name
- Azure connection string
- Azure storage prefix (optional)
- Select Test Credentials to confirm your credentials work properly.
- Select Save Changes.
You’ve integrated Azure Blob Storage into your Braze account!
Security event export to Google Cloud Storage is currently in early access. Contact your Braze account manager if you’re interested in participating in the early access.
Use a Google Cloud Storage bucket and a service account JSON key for security event exports. Braze needs permission to get information about the bucket (storage.buckets.get) and create objects in it (storage.objects.create).
For more detail on creating a custom role, service account, and JSON key, see Google Cloud Storage.
Step 1: Get Google Cloud Storage credentials
- In Google Cloud, create a custom role that includes at least:
storage.buckets.getstorage.objects.create
- Create a service account, grant it that role, and create a JSON key.
- Note your GCS bucket name and, optionally, a prefix Braze should use when writing files.
Step 2: Link Braze to Google Cloud Storage
- In Braze, go to Settings > Company Settings > Admin Settings > Security Settings and scroll to the Security Event Download section.
- Turn on Export security event report to cloud storage, then select Google Cloud Storage as the Cloud storage provider.
- Input the following:
- Google Cloud Storage bucket name
- Google Cloud Storage credentials JSON
- Google Cloud Storage prefix (optional)
- Select Test Credentials to confirm your credentials work properly.
- Select Save Changes.
You’ve integrated Google Cloud Storage into your Braze account!