Lytics
Lytics is the customer data platform (CDP) of choice for the next generation of customer-centric businesses. Lytics Decision Engine, Conductor, and Cloud Connect solutions provide marketers and data teams opportunities to perform identity resolution, orchestration, and campaign optimization in real time and in a privacy-compliant manner.
The Braze and Lytics integration provides a unified view of your customers to enable powerful personalization and to drive optimized campaigns using the next best action orchestration and decisions.
The integration allows brands to:
- Export audiences to Braze directly from Lytics
- Send events from Braze campaigns or Canvases to Lytics in real-time for personalized campaigns and to build rich user profiles
Use cases
Connect Braze to Lytics to import email, SMS, and push activity to enrich Lytics user profiles. Using Braze and Lytics together, you can also export Lytics’ cross-channel, behavioral-driven audiences to build highly personalized Braze customer journeys using first-party data.
Prerequisites
| Requirement | Description |
|---|---|
| Lytics account | A Lytics account is required to take advantage of this integration. |
| Lytics account number | A Lytics account number is necessary for configuring the webhook endpoint URL. |
| Lytics API Token | A Lytics REST API Token with Data Manager permissions. This can be created within the Lytics dashboard from Account Settings Console > Access Tokens > Create New Token. |
| Braze REST API key | A Braze REST API key with users.track permission. This can be created in the Braze dashboard from Settings > API Keys. |
| Braze instance | Your Braze instance. Contact your Braze onboarding manager for this information if you aren’t sure. |
Integration
This section describes how to export Lytics data into Braze.
Step 1: Create an authorization
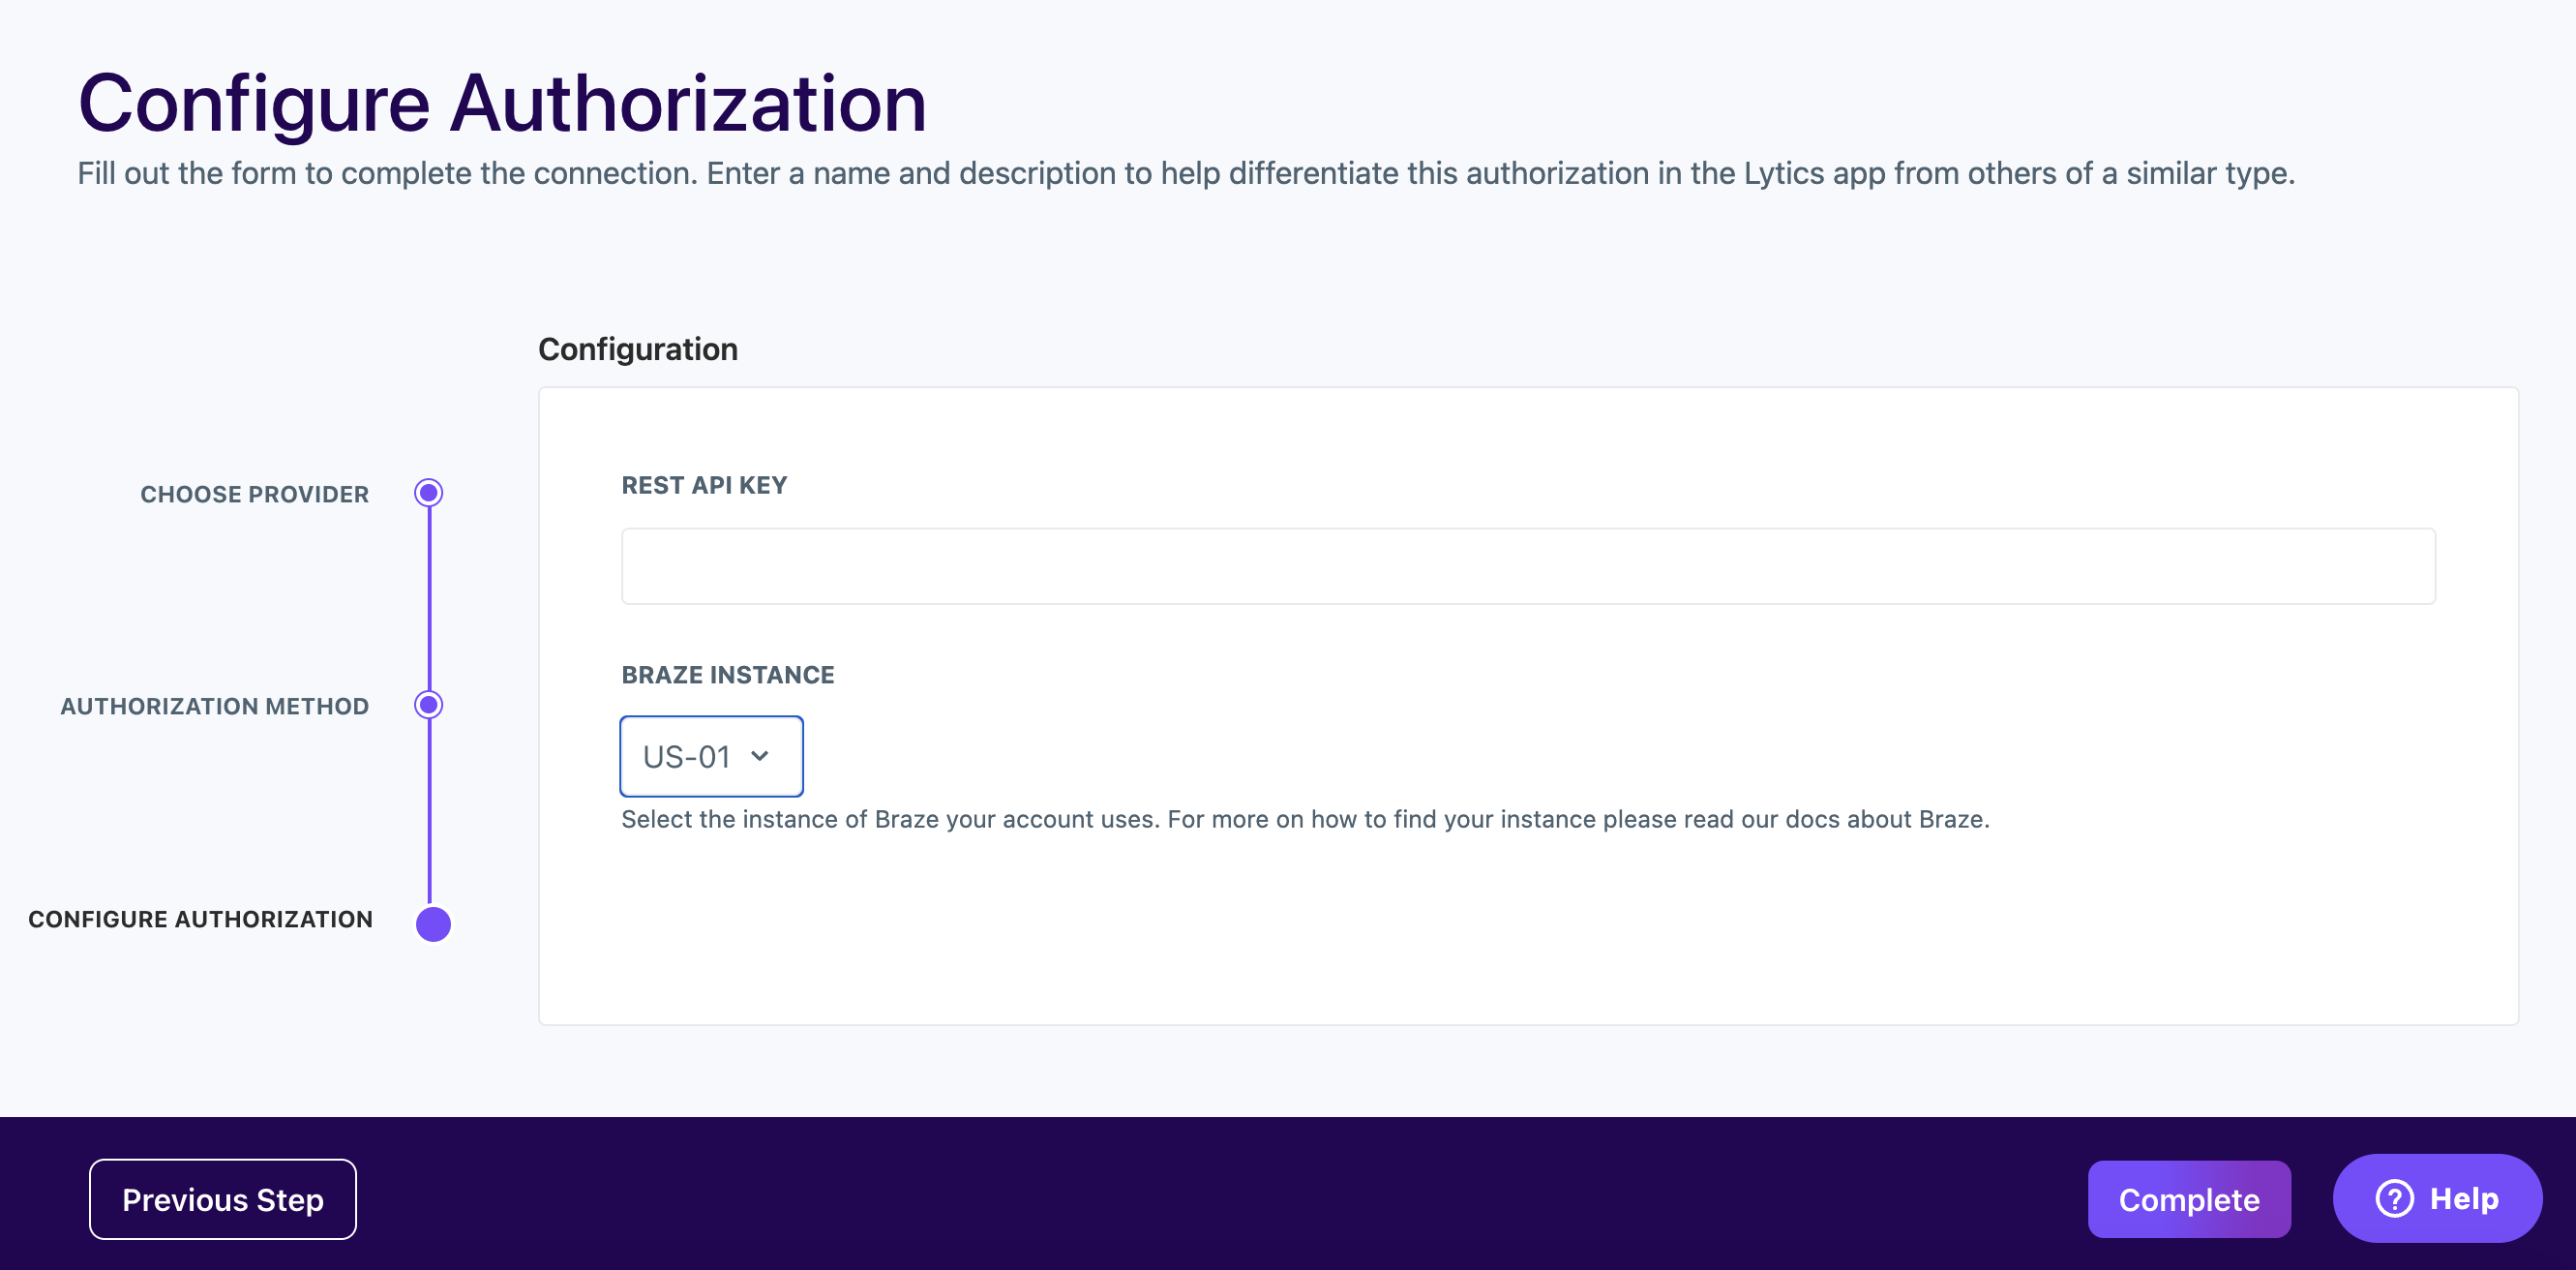
In Lytics, navigate to the Authorization dashboard within the Data console in the navigation bar. Select Create New Authorization and search for and select Braze.
In the Configure Authorization prompt that appears, provide a label and a description and input your REST API key and Braze instance. Select Complete when finished.
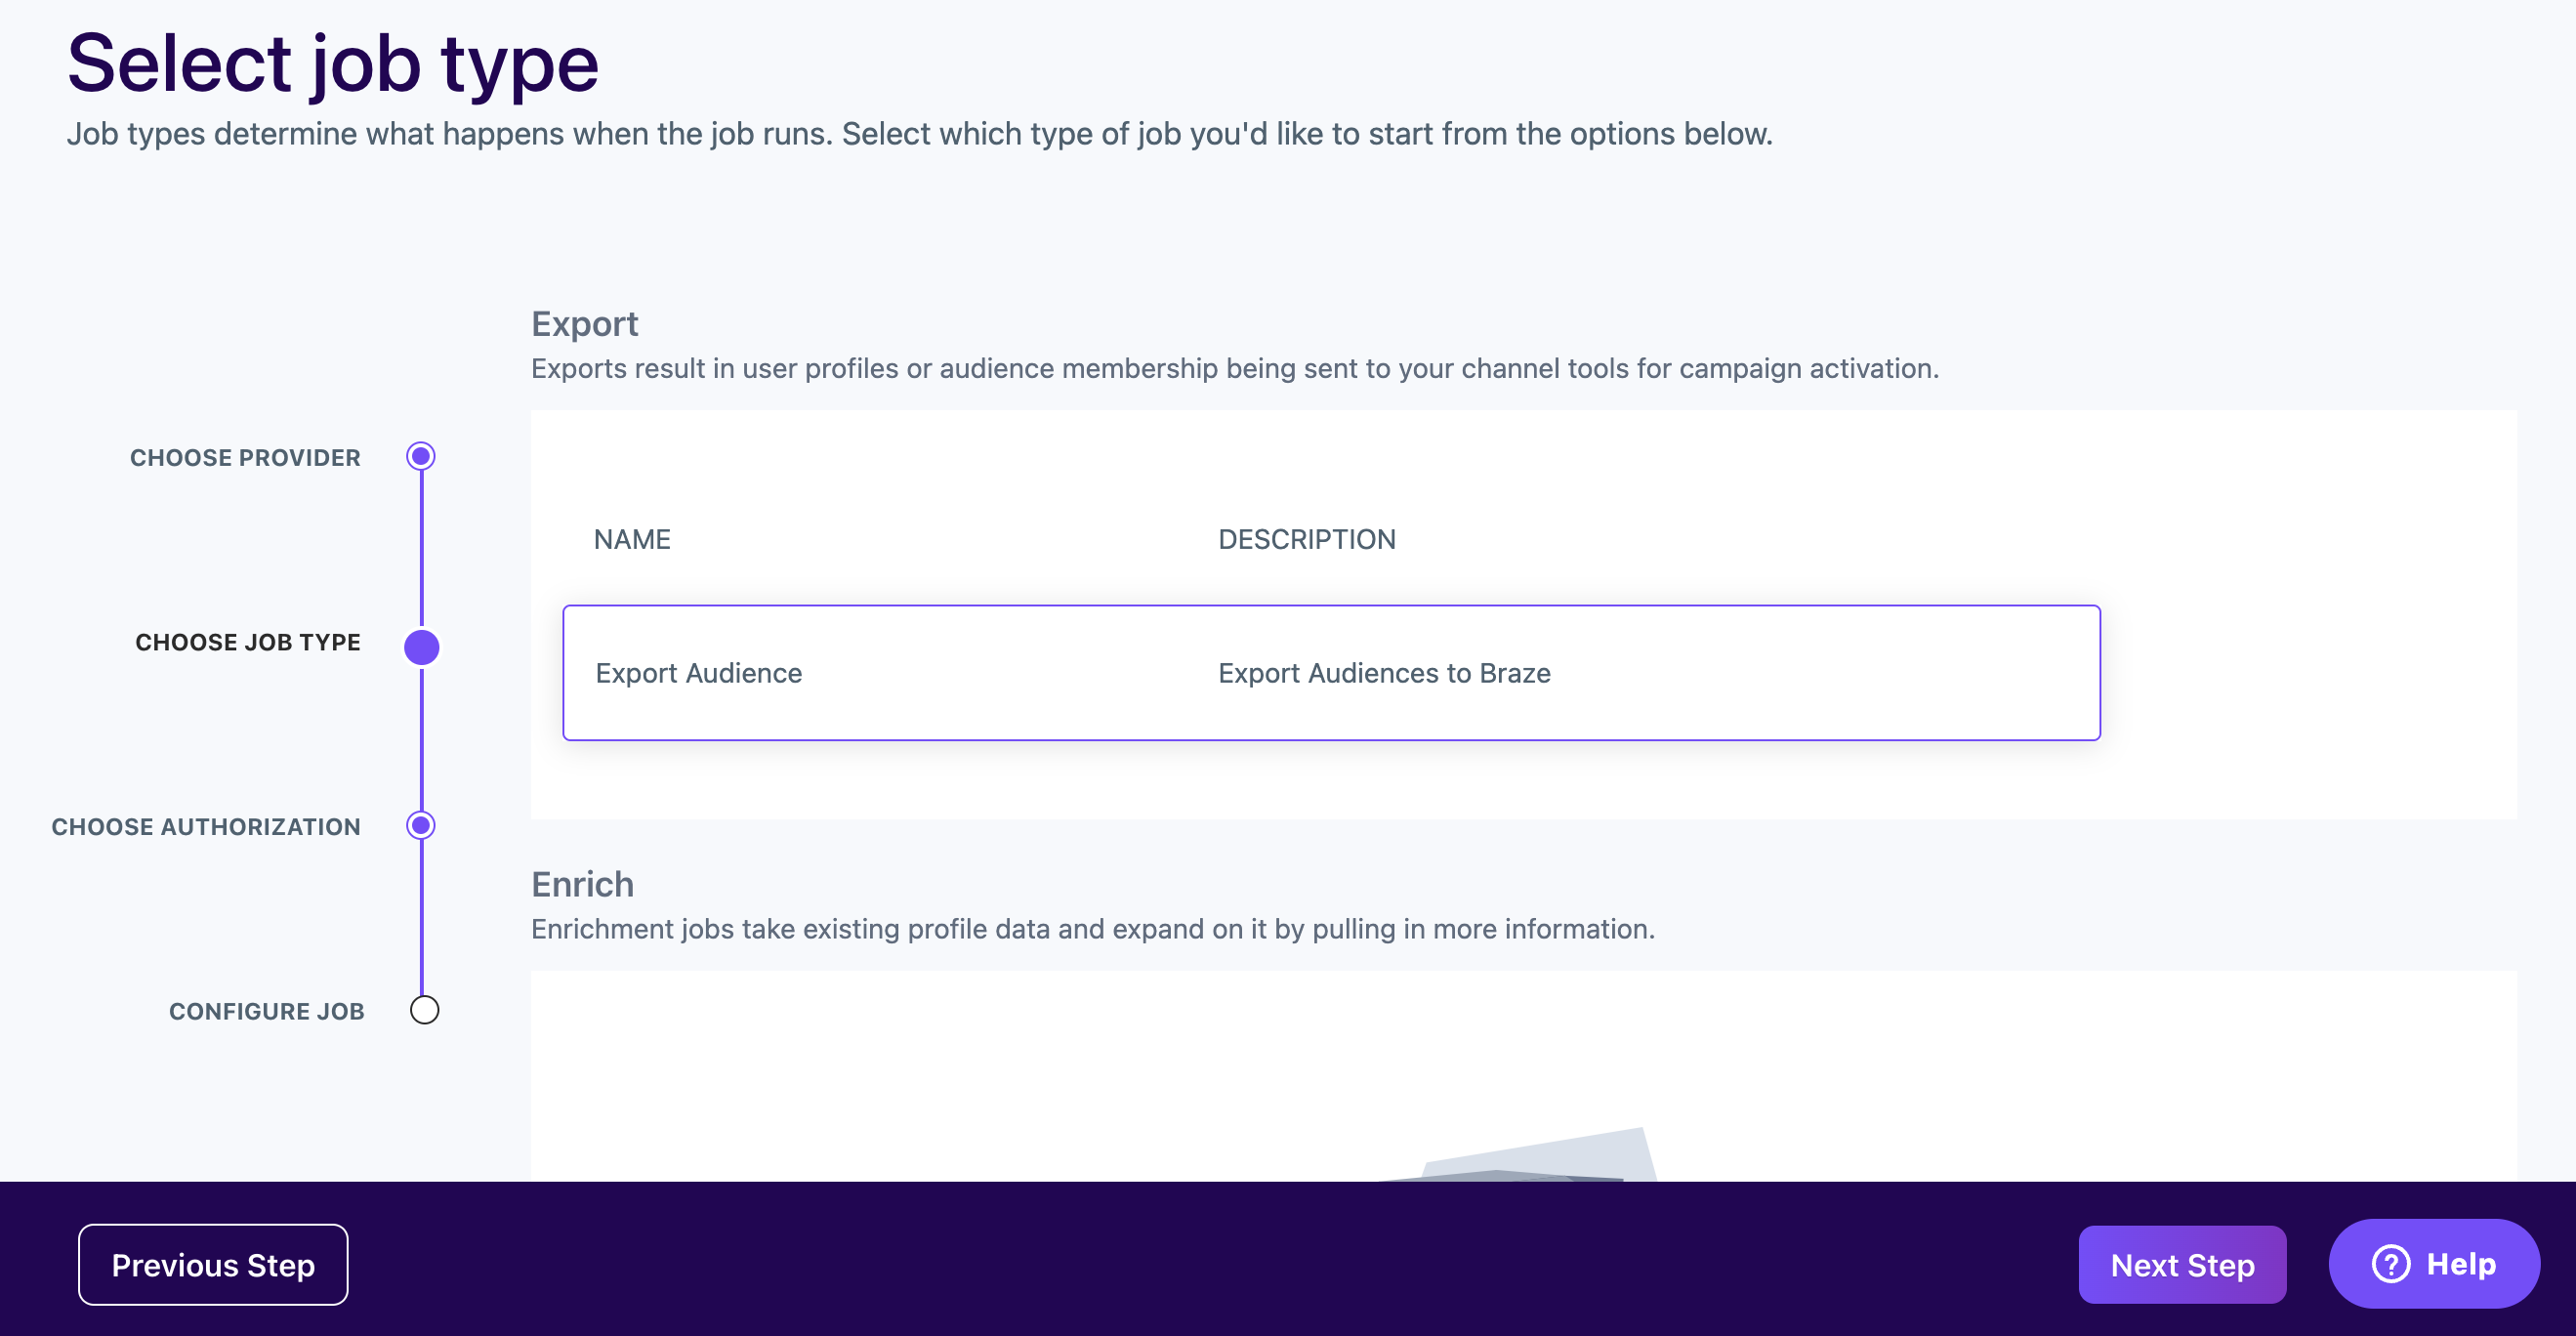
Step 2: Create a new job
In Lytics, navigate to the Jobs dashboard within the Data console in the navigation bar. Select Create New Job and search for and select Braze. In the Select Job Type prompt that appears, select Export Audience.
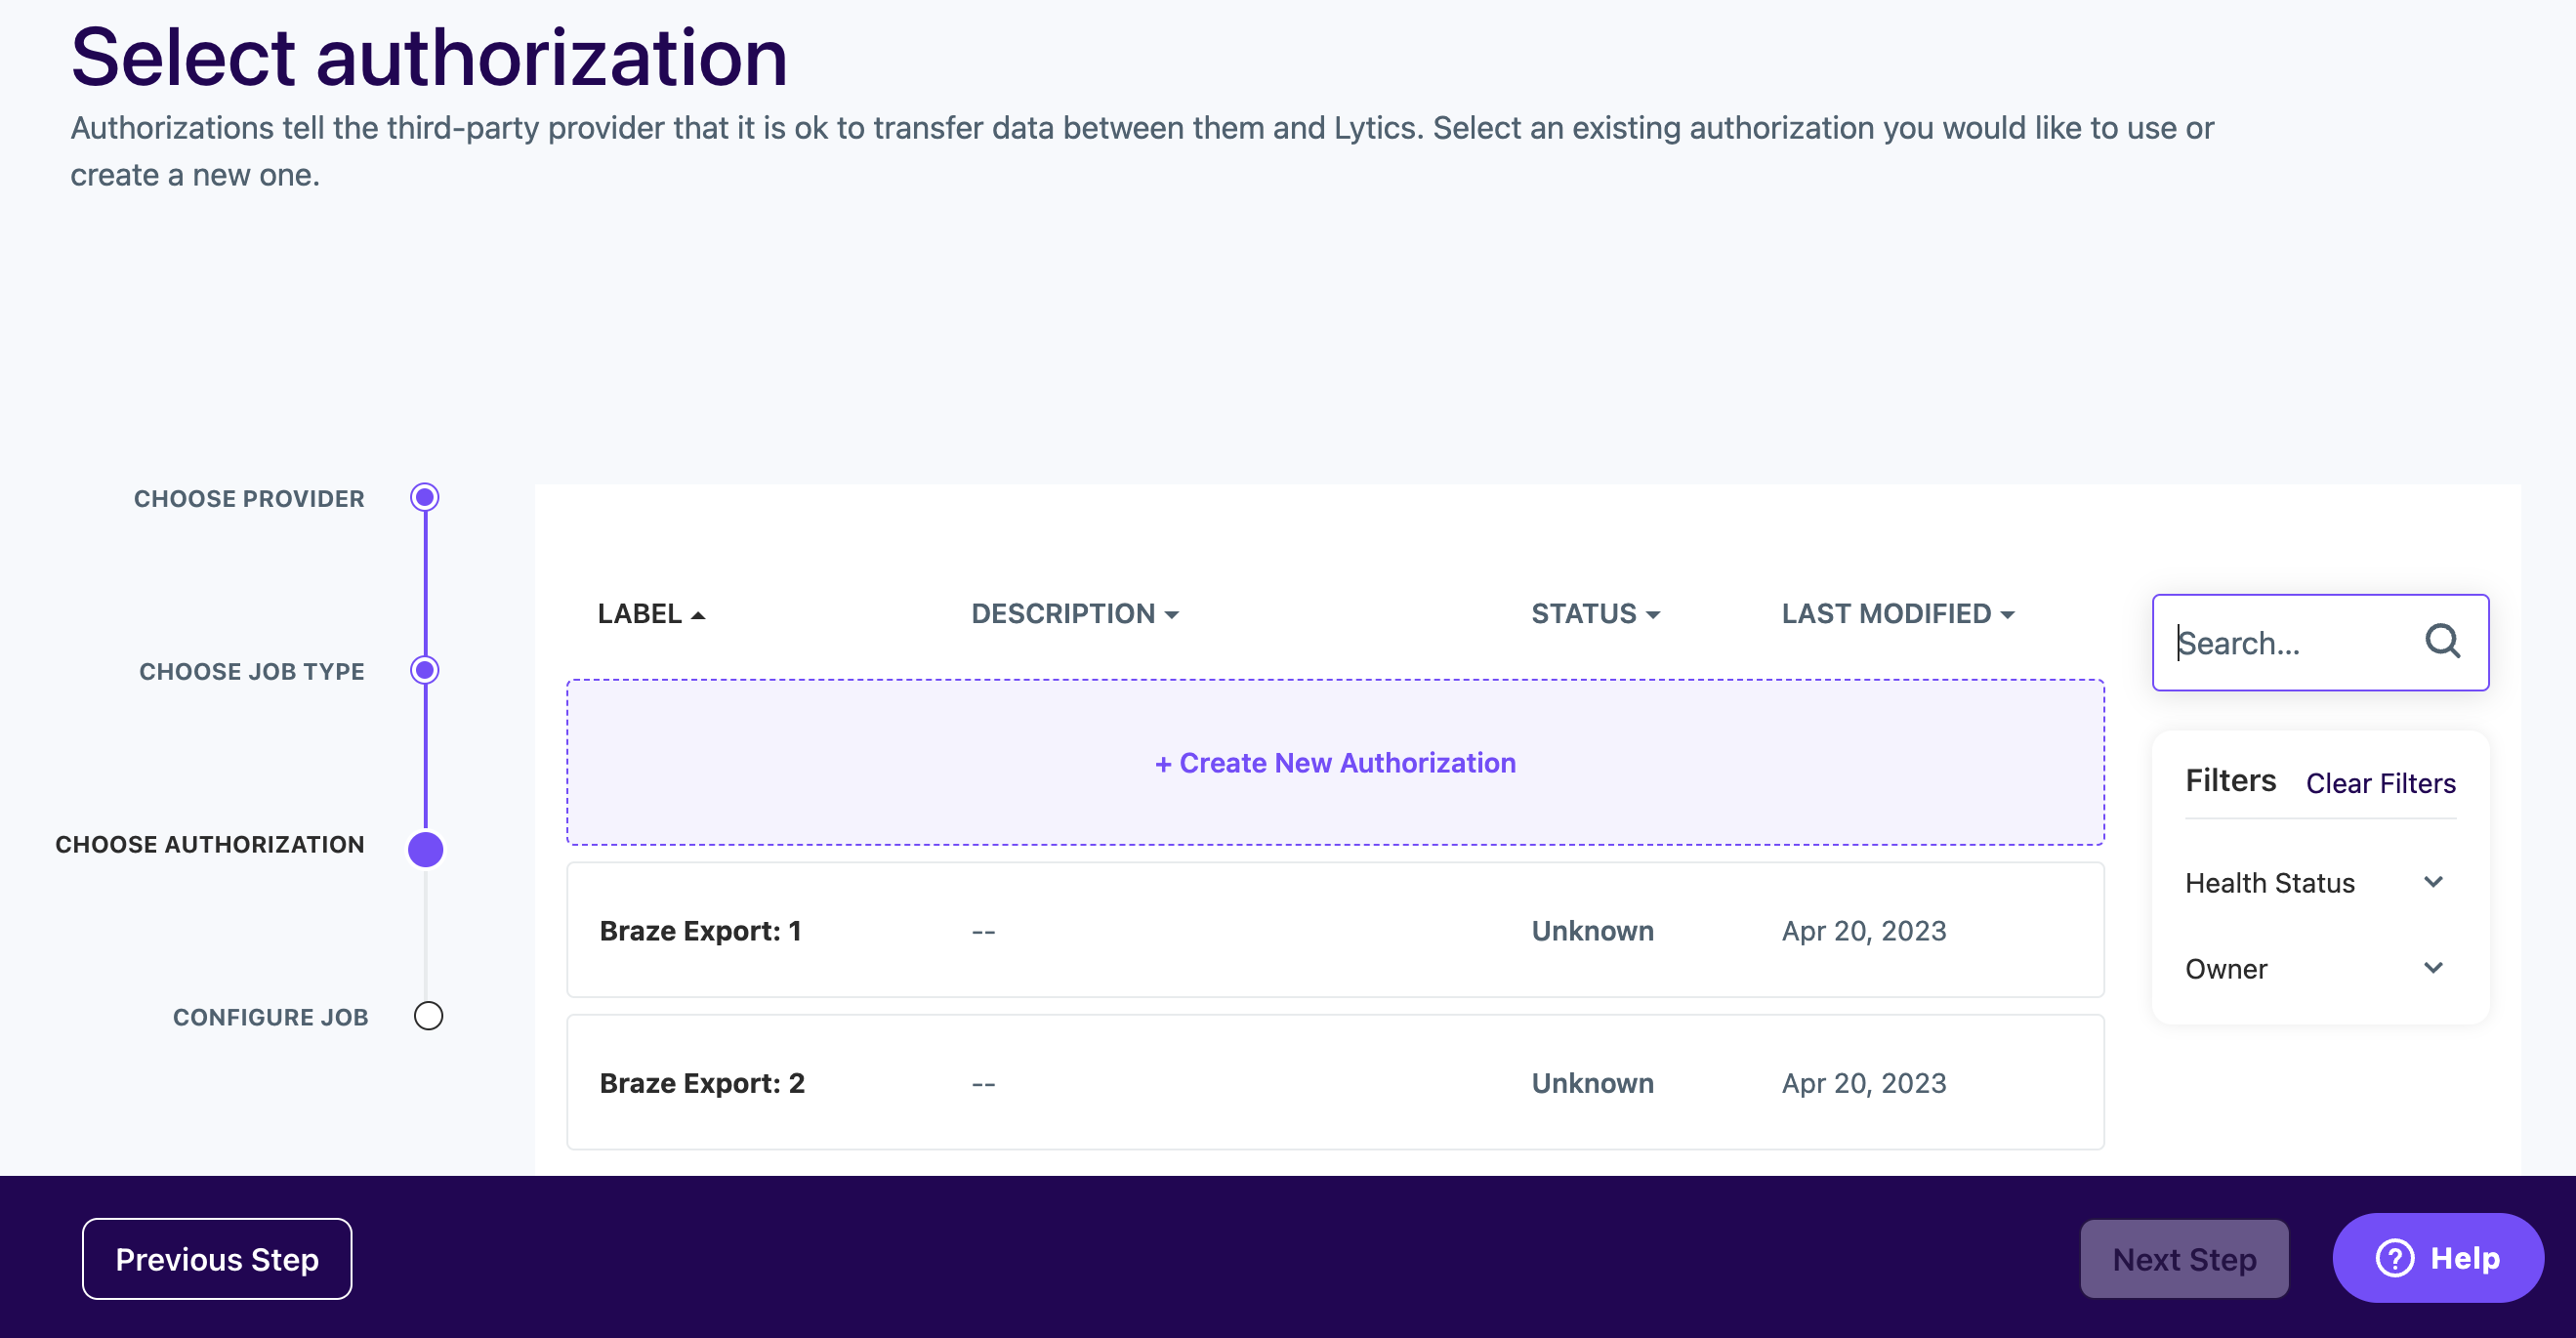
Next, choose an authorization within the Select Authorization options.
Step 3: Configure the job
Within the Configure Job prompt, provide a label and an optional description. Next, From the Braze External User ID Field input, select the field in Lytics that contains the Braze external user ID (braze_id). The next step is the most important—select the audiences to export to Braze.
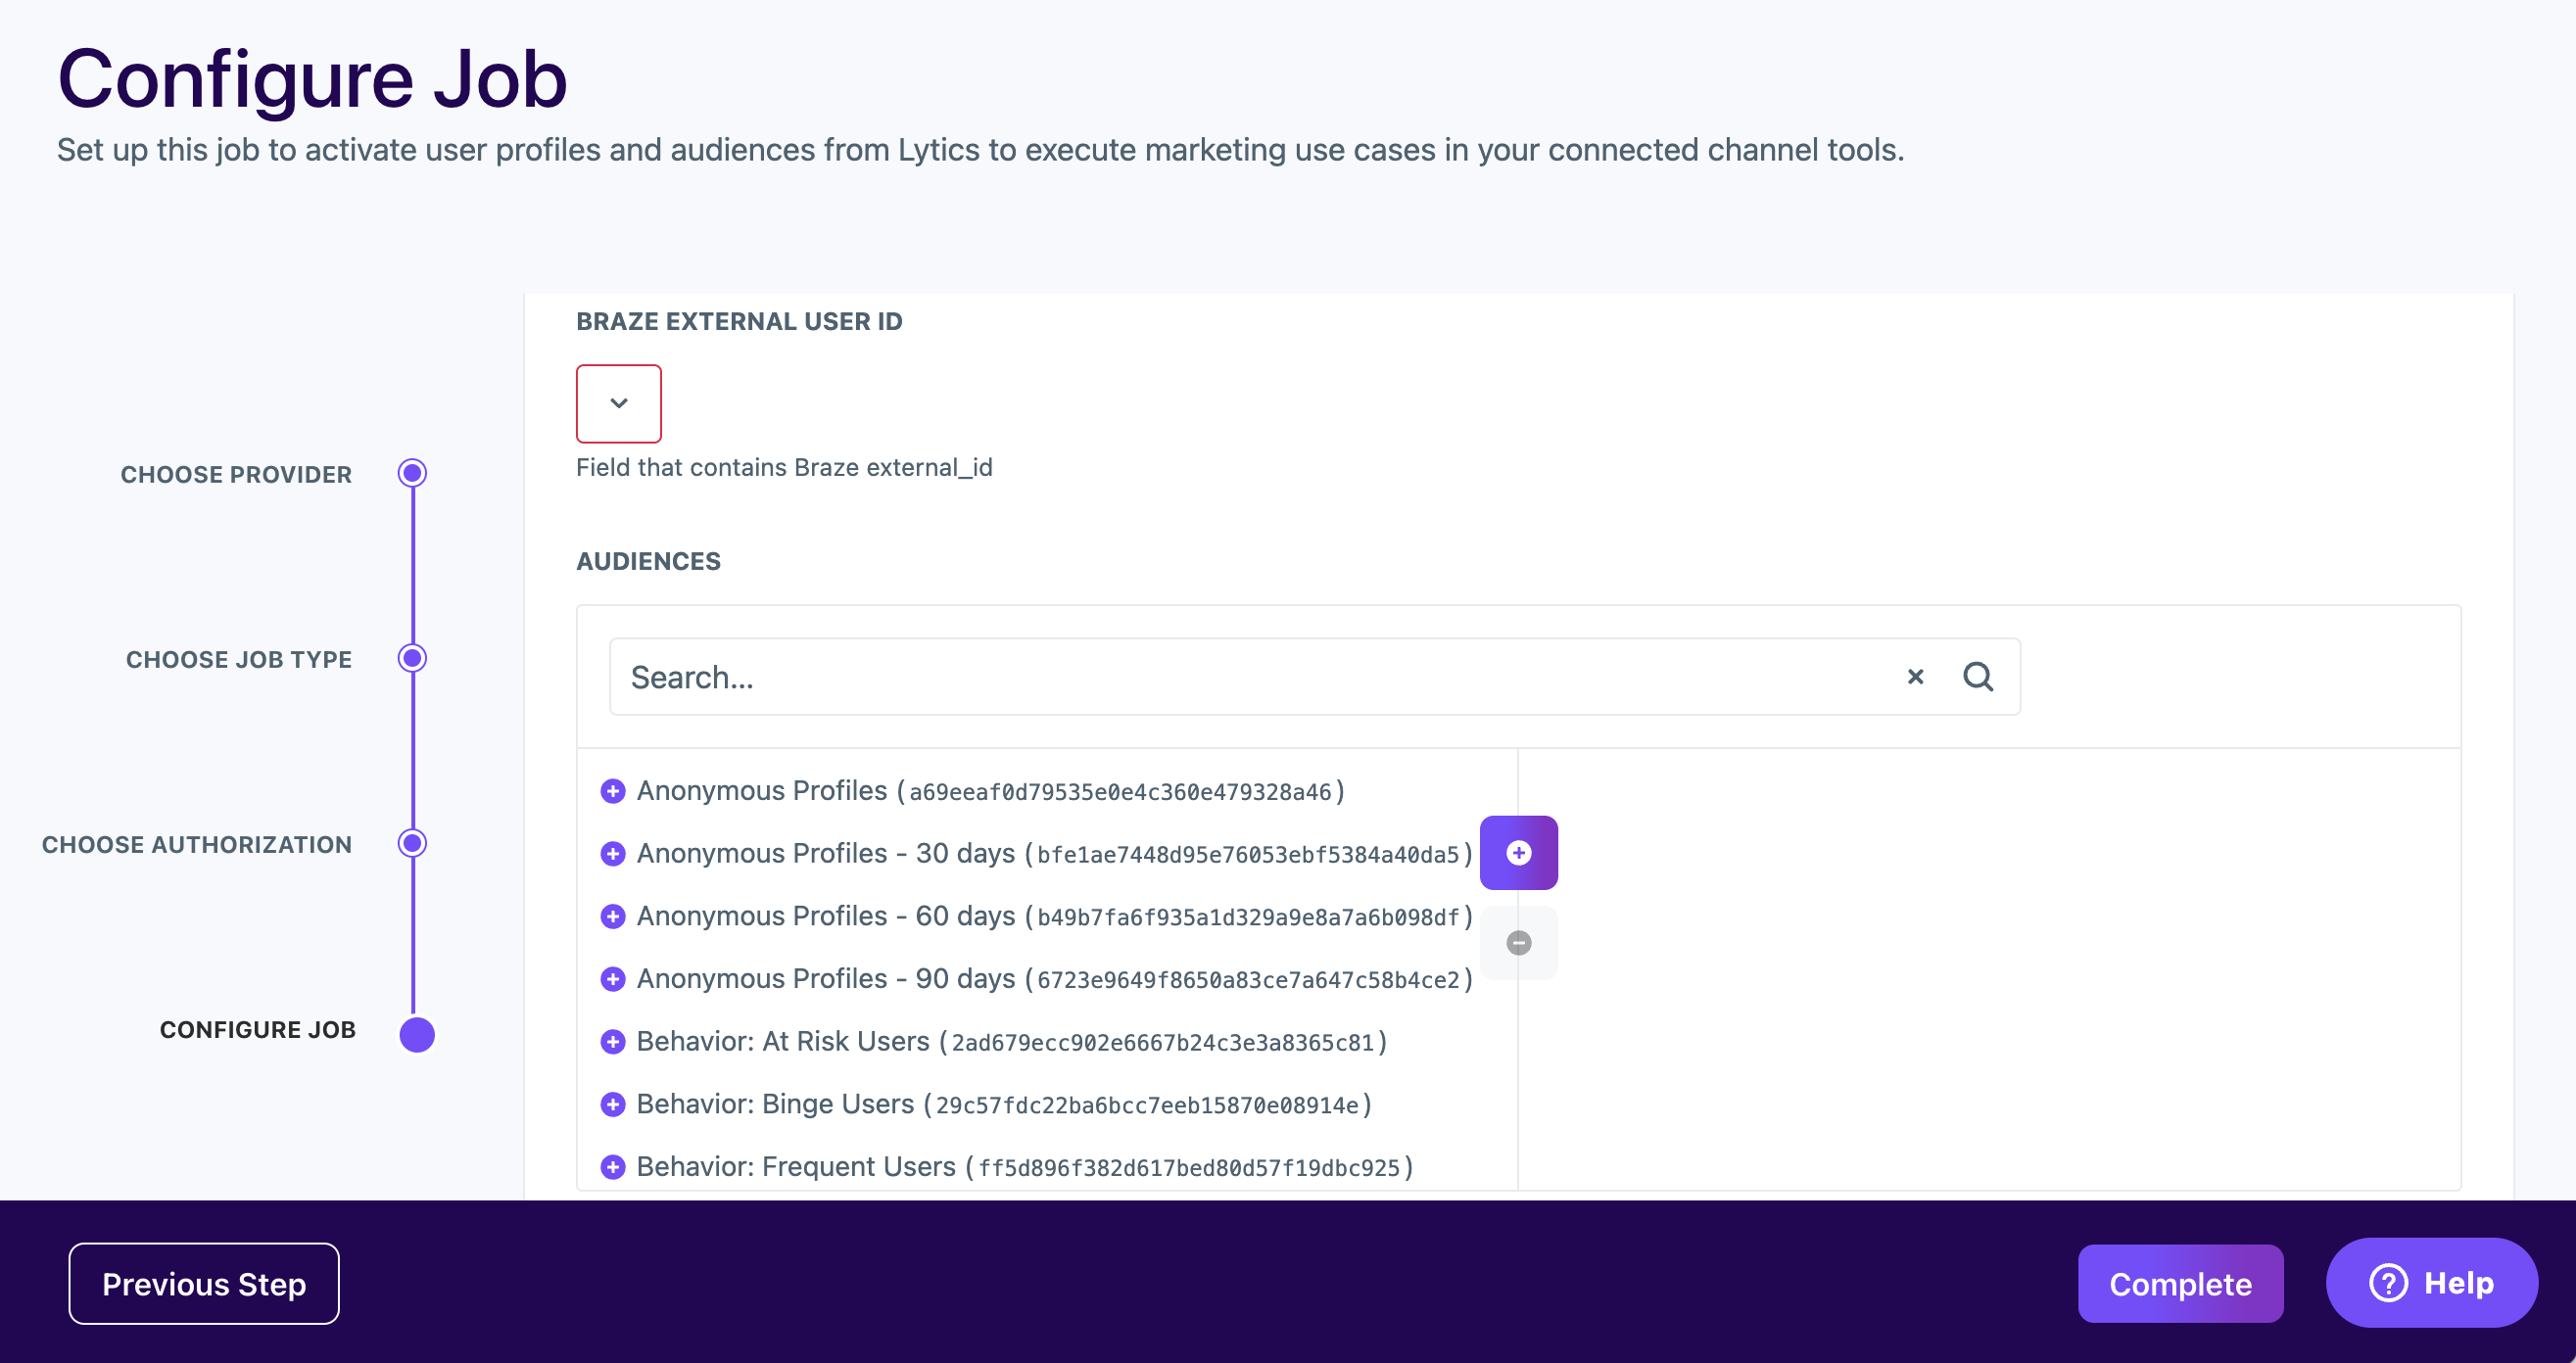
Finally, choose the preferable option for the Existing Users checkbox. Leaving this box checked will add users who already exist in the selected Lytics audience. If unchecked, users will only be exported to Braze when entering or exiting the audience after the workflow begins.
By checking this box, all existing users in the selected audience will be pushed into Braze. This will result in a data point being incurred per user per audience for the initial sync.
Click Complete when finished to initiate the export and save.

After the export job is configured, Lytics will send the selected audiences to Braze through the native integration. The following is a sample audience showing the JSON structure of the audience sent to Braze.
1
2
3
4
5
6
7
8
9
10
11
12
13
14
15
16
17
18
19
20
21
22
23
{
    "lytics_to_braze_audience": [{
            "external_id": "ABC124ID",
            "lytics_segments": {
                "add": [
                    "lytics_all",
                    "lytics_new"
                ]
            }
        },
        {
            "external_id": "XYZ234ID",
            "lytics_segments": {
                "add": [
                    "lytics_known"
                ],
                "remove": [
                    "lytics_new"
                ]
            }
        }
    ]
}
A new user will be created in Braze for any external_id included within the audience export that does not yet exist in Braze.
Importing data from Braze to Lytics
You can import audience data from Braze to Lytics using the following methods:
Using webhooks
Step 1: Create a Lytics API Token
Navigate to the Lytics Account Menu in the bottom left corner by selecting your account name, and select Access Tokens from the dropdown menu. Next, select Create API Token
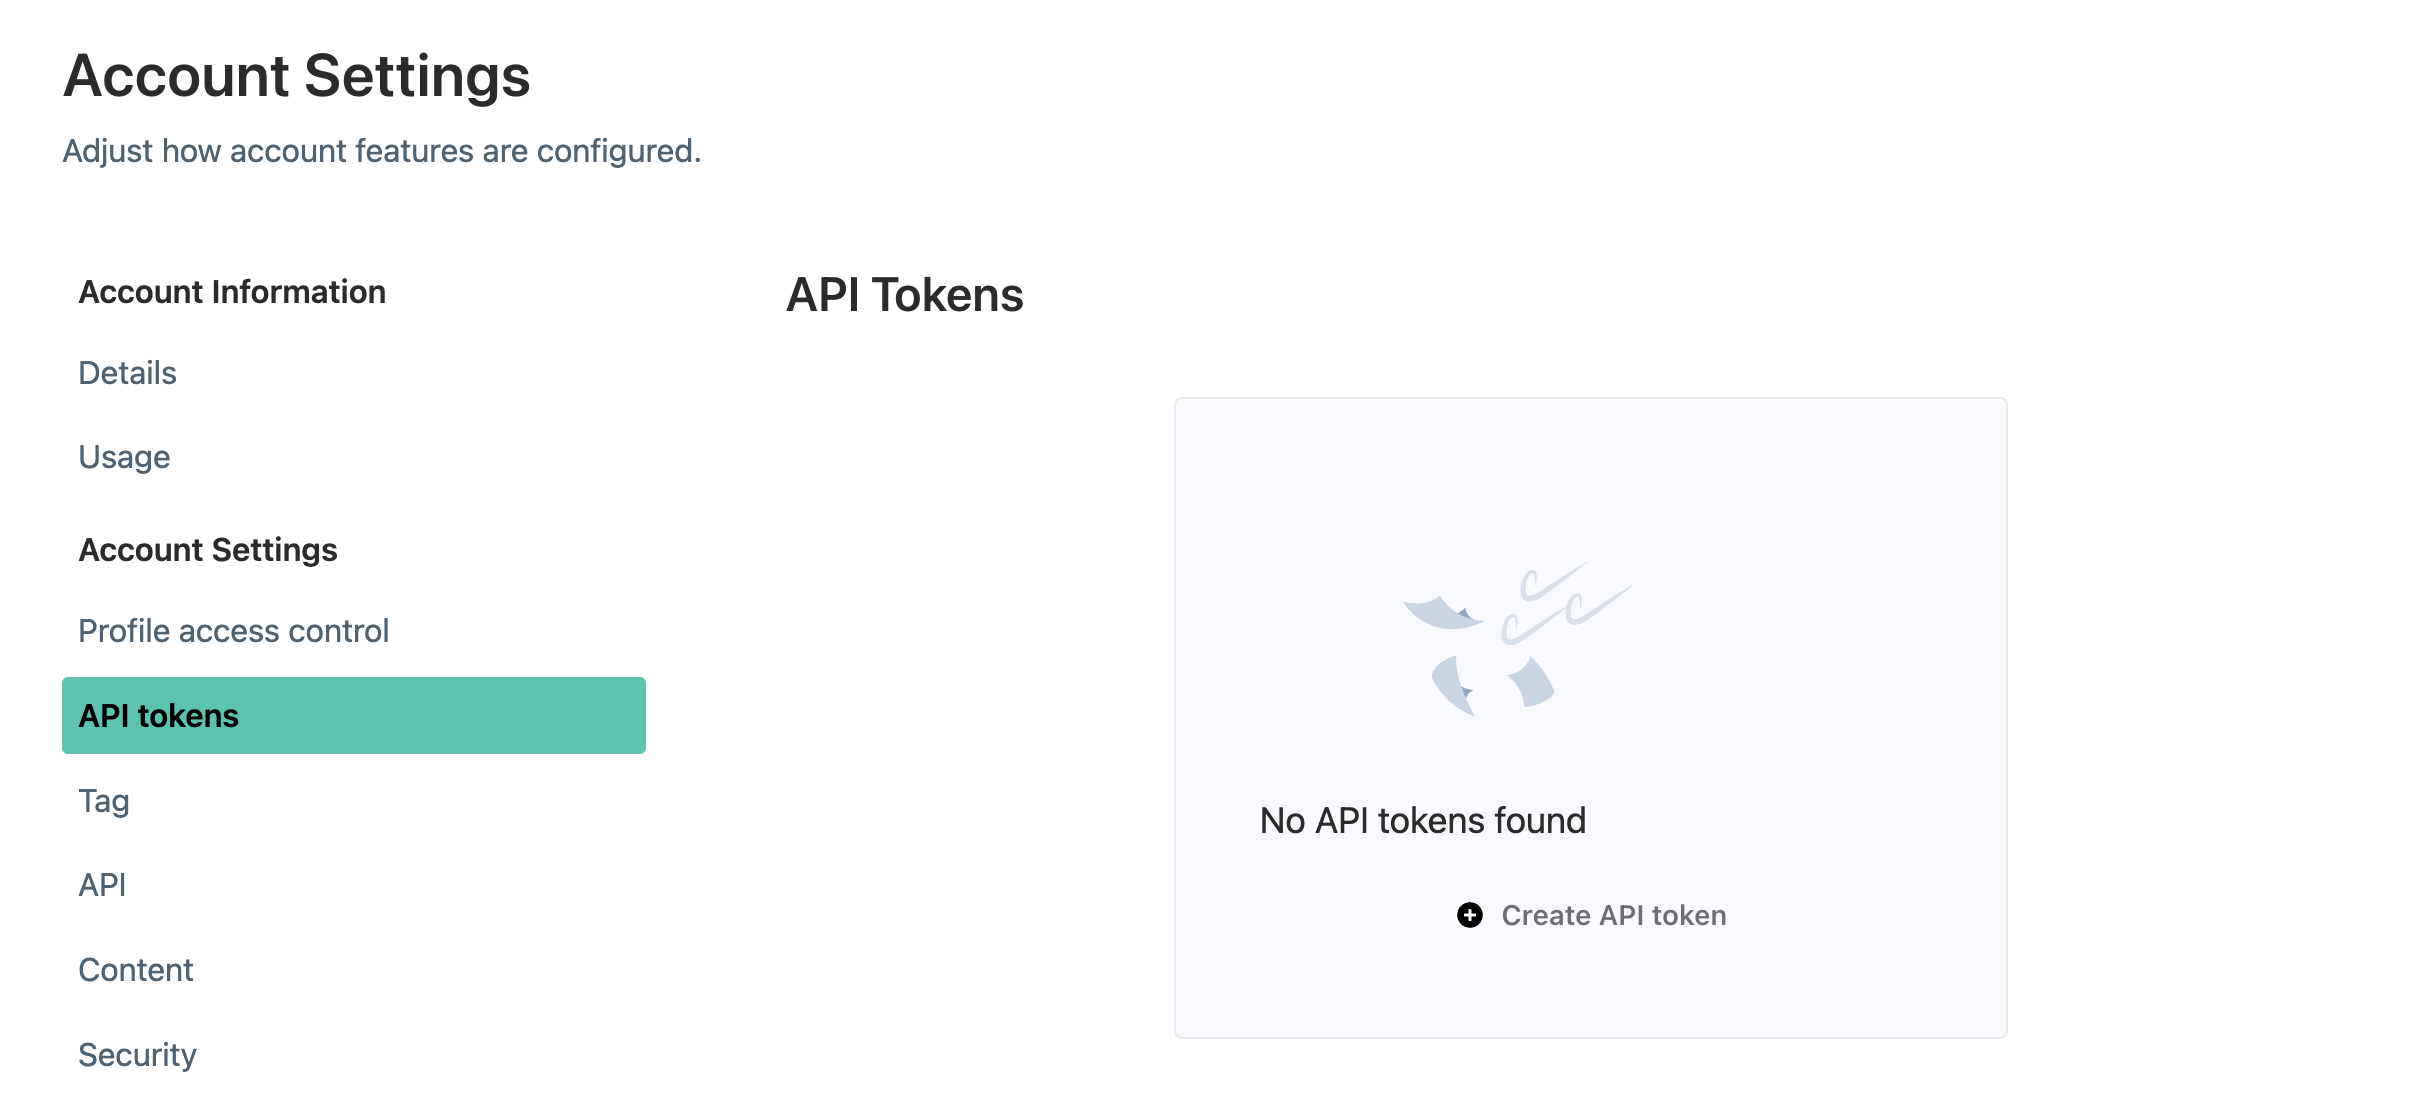
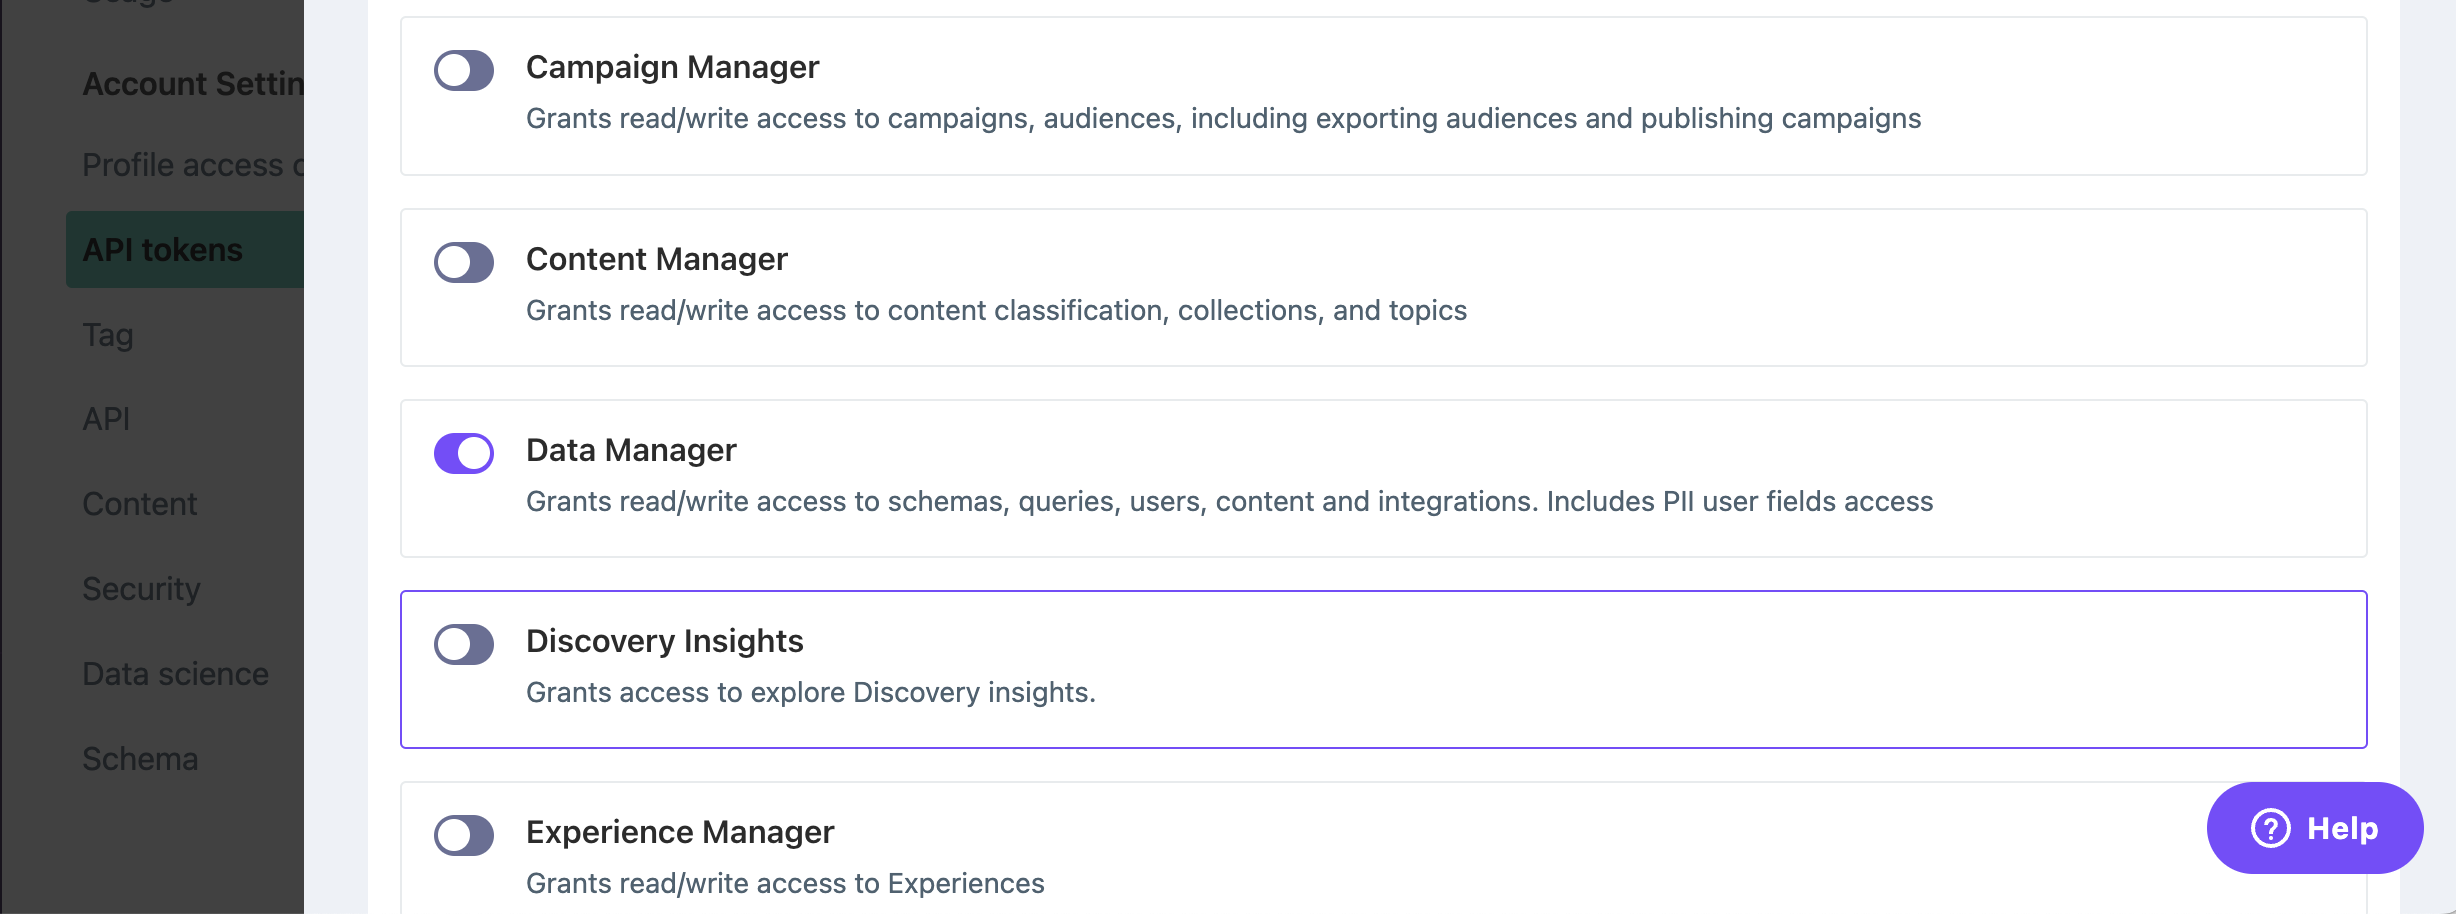
Input a name, an optional description, and a token expiration period. Next, toggle the Data Manager scope for API Permissions and click on Generate Token. Copy the token and store it in a secure place.
Step 2: Configure the Lytics webhook URL
The Lytics webhook URL is used by Braze to send a message to the Lytics API from Braze. This message can be used to personalize your campaigns in Lytics or can be used to enrich your Lytics Customer Profile. The following two parameters are required to be added within the Lytics webhook URL:
- Lytics Account Number
- Lytics API token
Configure your webhook URL as follows:
1
https://api.lytics.io/c/<ACCOUNT-NUMBER>/braze_users?key=<LYTICS-API-TOKEN>
Replace <ACCOUNT-NUMBER> with your account number and <LYTICS-API-TOKEN> with your Lytics API token.
Step 3: Create a Webhook on Braze
In Braze, create a new webhook campaign. Add the Lytics webhook URL in the Webhook URL field.
After defining the request type (HTTP POST method) and configuring the rest of the webhook details, your webhook is ready for testing and deployment. Here is a sample body of the POST request after configuring the webhook in Braze:
1
2
3
4
5
6
7
8
9
10
11
12
13
14
{
  "city": "AnyTown",
  "country": "United States",
  "first_name": "John",
  "gender": "male",
  "language": "English",
  "last_name": "Smith",
  "date_of_birth": "19820101",
  "phone_number": "5551231234",
  "time_zone": "GMT+7",
  "twitter_handle": "johnsmith",
  "email": "[email protected]",
  "braze_id": "xxxxxx"
}
From a CSV file
This section describes how to import Braze user data from a segment into Lytics.
Step 1: Create an authorization
In Lytics, navigate to the Authorization dashboard within the Data console in the navigation bar. Select Create New Authorization and search for and select Custom Integrations.
Select the preferred type of SFTP authorization based on your business and security requirements. The following authorization types are supported for importing files into Lytics via SFTP:
- Client SFTP Server Authorization
- Client SFTP Server Authorization with PGP Private Key
- Lytics Managed SFTP Server Authorization
Public key SFTP authorizations are for SFTP export only.
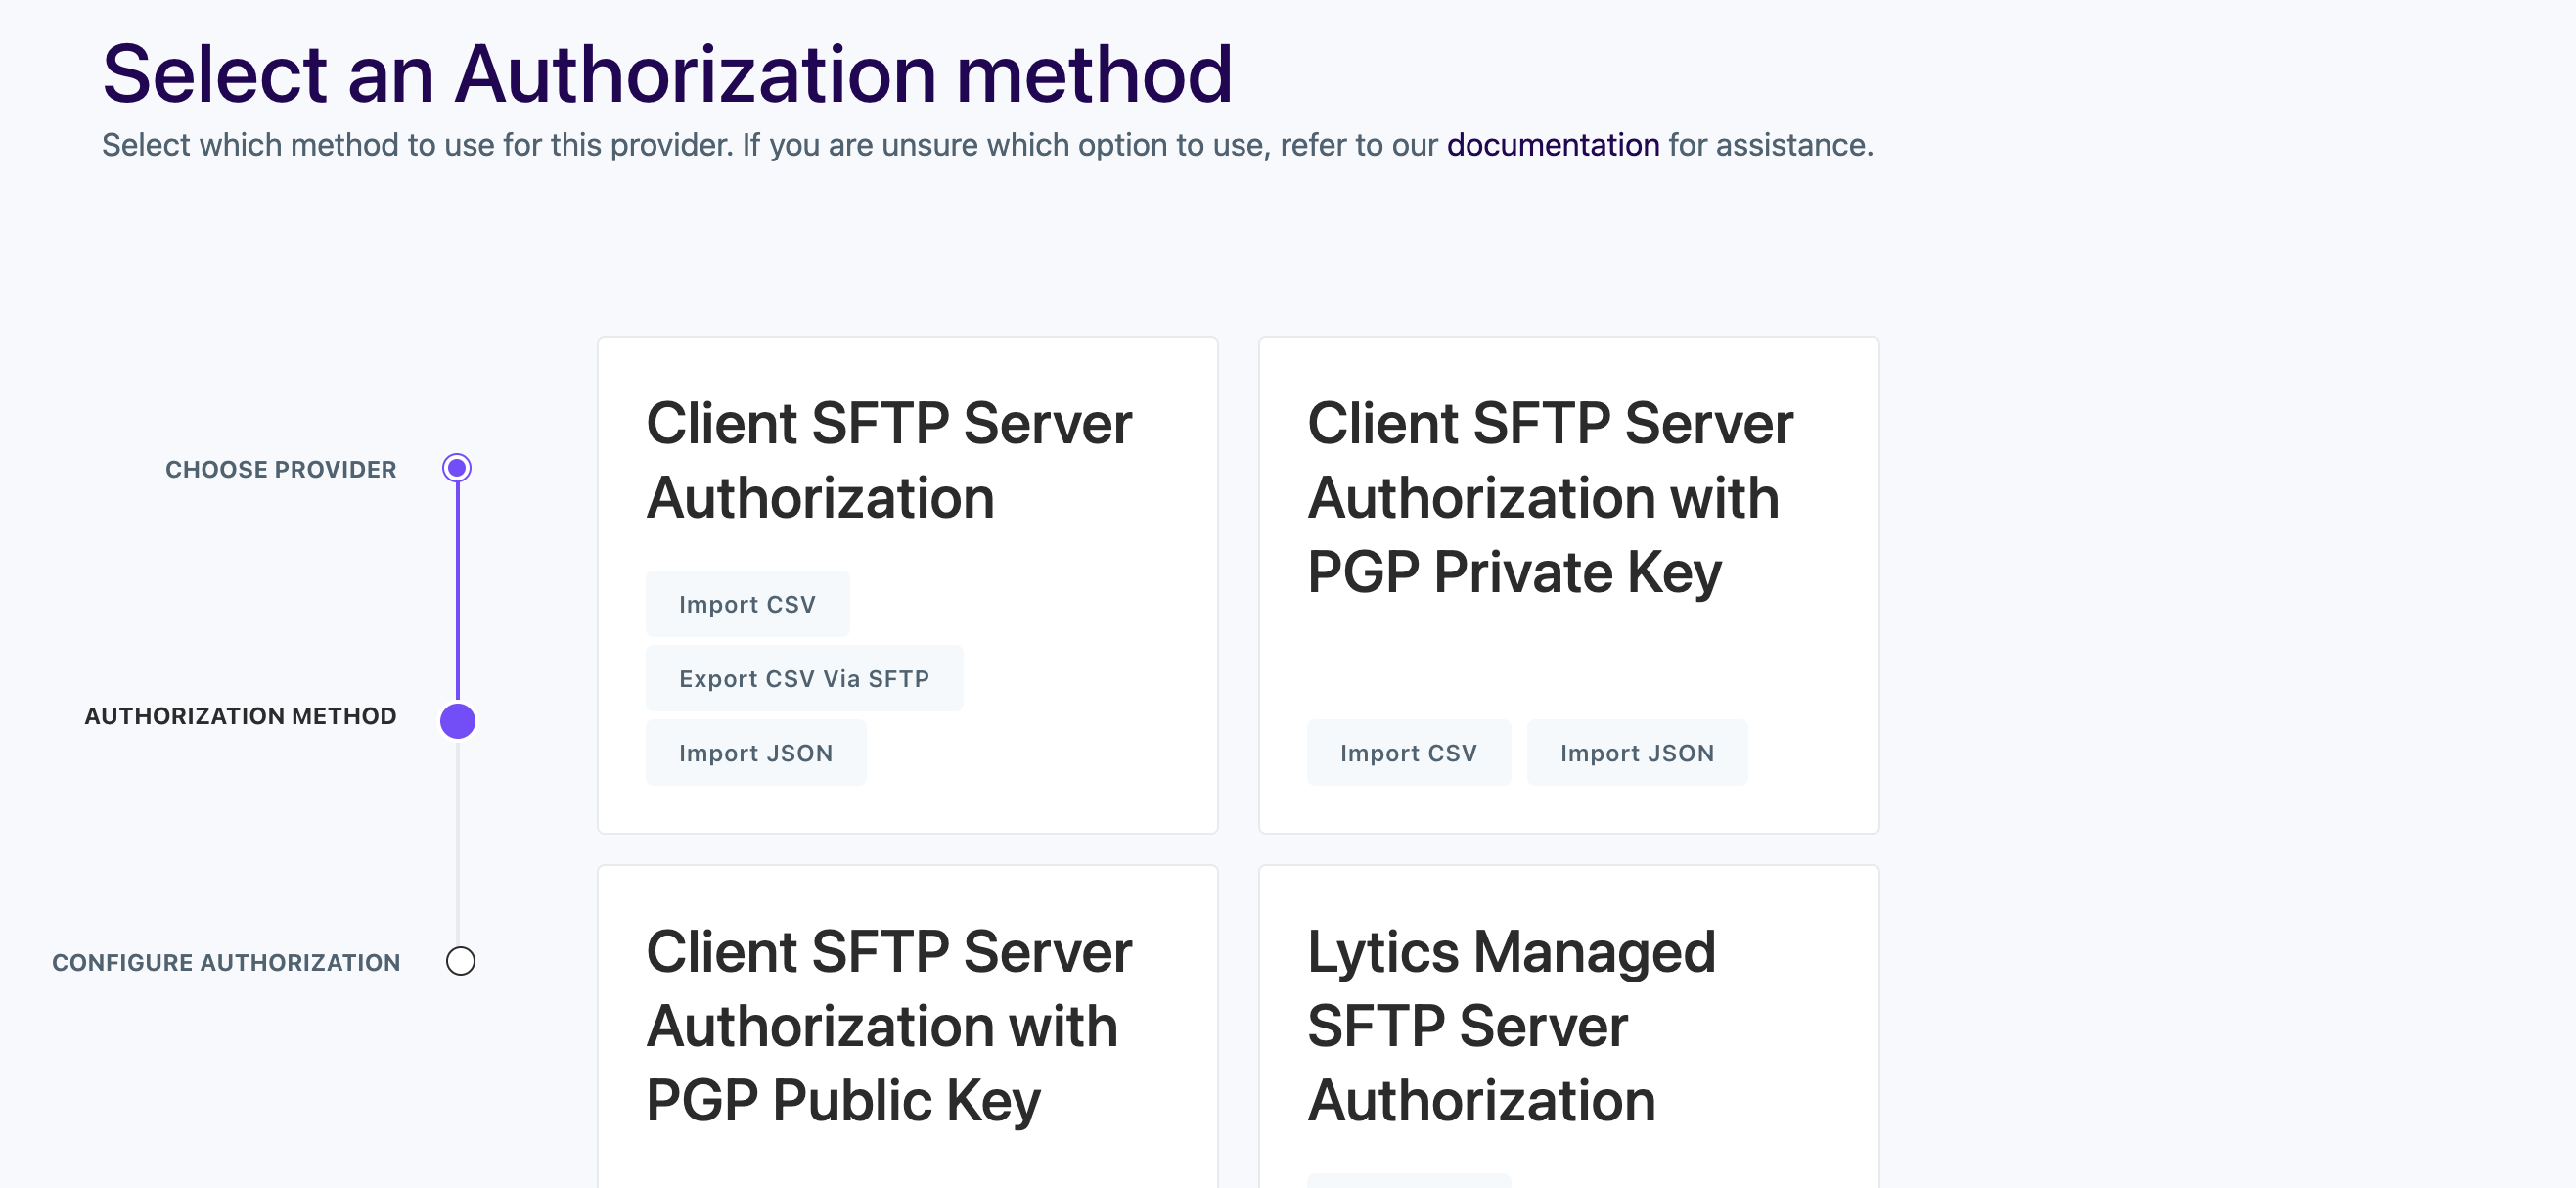
In the Configure Authorization prompt that appears, provide a label and a description and complete the rest of the configuration requirements. Click Complete when finished.
Step 2: Export your segment data to CSV
In Braze, navigate to Audience > Segments. Locate the segment you want to export, then select and then CSV Export User Data. You can export up to 500,000 users in a segment. For details, refer to Exporting segment data to CSV.
Step 3: Configure a CSV Import Job
In Lytics, navigate to the Jobs dashboard within the Data console in the navigation bar. Select Create New Job and search for and select Custom Integrations.
Next, select the job type. To import Braze CSV files into Lytics, select Import CSV as the job type.

Finally, input a label and optional description for the job and configure any other required details. Click Complete to initiate and save the job.
 Edit this page on GitHub