Selections
Selections are groups of data that you can use to personalize a message for each user in your campaign. When you use a selection, you’re essentially setting up custom filters based on specific columns in your catalog. This could include filters for brand, size, location, date added, and more. It gives you control over what you’re showing to users by allowing you to define criteria that items must meet first.
This page covers how to create and use selections with your catalogs.
After creating a catalog, you can further reference your catalog data by incorporating selections in your Braze campaigns or recommendations.

Things to know
- You can create up to 30 selections per catalog.
- You can add up to 10 filters per selection.
- Selections are great for refining recommendations from Braze catalog data. If you’re looking for inspiration, check out About item recommendations for example use cases.
Geolocation filters
If your catalog includes a Geolocation field type, you can use geolocation-based filters in your selections to surface catalog items based on their proximity to a geographic point.
Two geolocation operators are available:
| Operator | Description |
|---|---|
geo within |
Returns items whose geolocation field falls within a specified radius of a center point. |
geo outside |
Returns items whose geolocation field falls outside a specified radius of a center point. |
When a geolocation filter is applied, results are sorted by distance with the nearest item first.
Setting the center point with Liquid
You can set the center point dynamically using Liquid. For example, to filter items relative to each user’s most recent location, use the {{${most_recent_location}}} attribute as the filter value:
1
{{${most_recent_location}}}
Use case: show the nearest store locations
Say your catalog contains a store_location field of type Geolocation. You can create a selection that uses the geo within operator to return store locations within a set radius of each user’s most recent location. Set the filter value to {{${most_recent_location}}} so the center point updates per user. Because results are sorted by distance, the first item returned is always the nearest store.
Creating a selection
To create a selection, do the following.
- Go to Catalogs and select your catalog from the list.
- Select the Selection tab and click Create Selection.
- Give your selection a name and optional description.
- For Filter Field, select the catalog column you want to filter by. String fields with more than 1,000 characters can’t be selected for filters.
- Finish defining your filter criteria by selecting the relevant operator (for example, “equals” or “does not equal”) and attribute.
- In the Sort type section, determine how results are sorted. By default, results are returned in no particular order. To specify sorting by a specific field, turn off Randomize Sort Order and specify the Sort Field and Sort Order (ascending or descending).
- In the Results limit section, enter the results (up to 50).
- Select Create Selection.
Test and preview
After creating a selection, you can use the Preview for user section to view what a selection would return for either a random user or a specific user. For selections that use personalization, you can only view the preview after selecting a user.
Liquid in selection results
Using any Liquid in catalogs, such as custom attributes and custom events, can result in different results returned for each user in your selection.

Connected Content Liquid isn’t supported in these filter settings.

Using selections in messaging
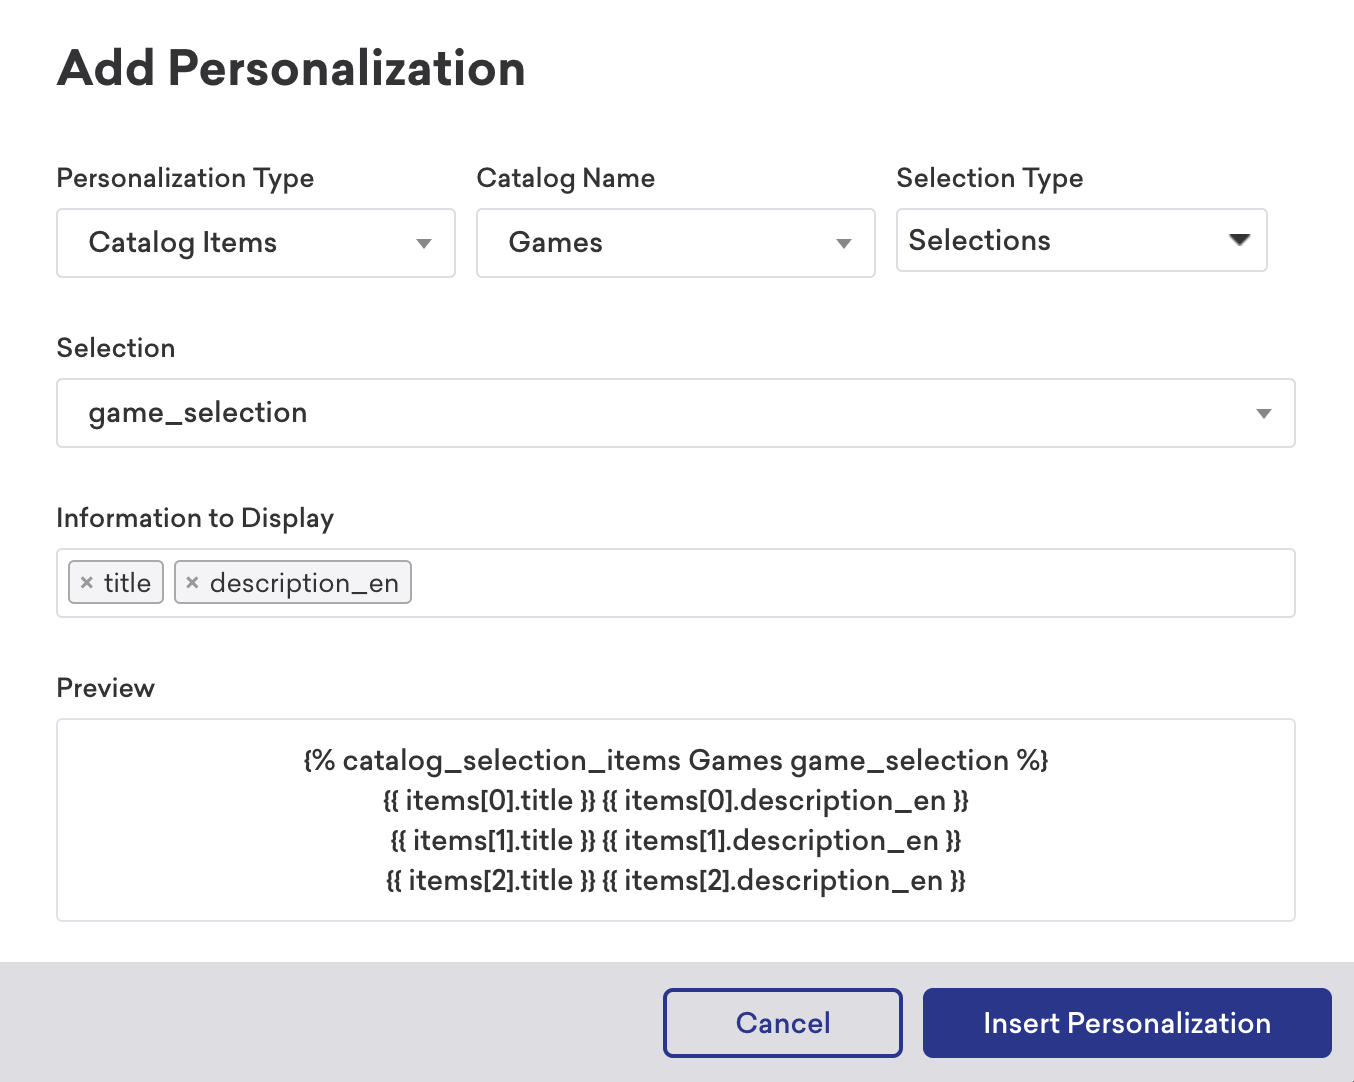
After creating your selection, personalize your messages with Liquid to insert the filtered items from that catalog. You can have Braze generate the Liquid for you from the personalization window found in message composers:
- In any message composers that support personalization, select Add personalization to open the personalization window.
- For Personalization Type, select Catalog Items.
- Select your catalog name.
- For Item selection method, select Use a selection.
- Select your selection from the list.
- For Information to Display, select which fields from the catalog should be included for each item.
- Select the Copy icon and paste the Liquid wherever it needs to go in your message.
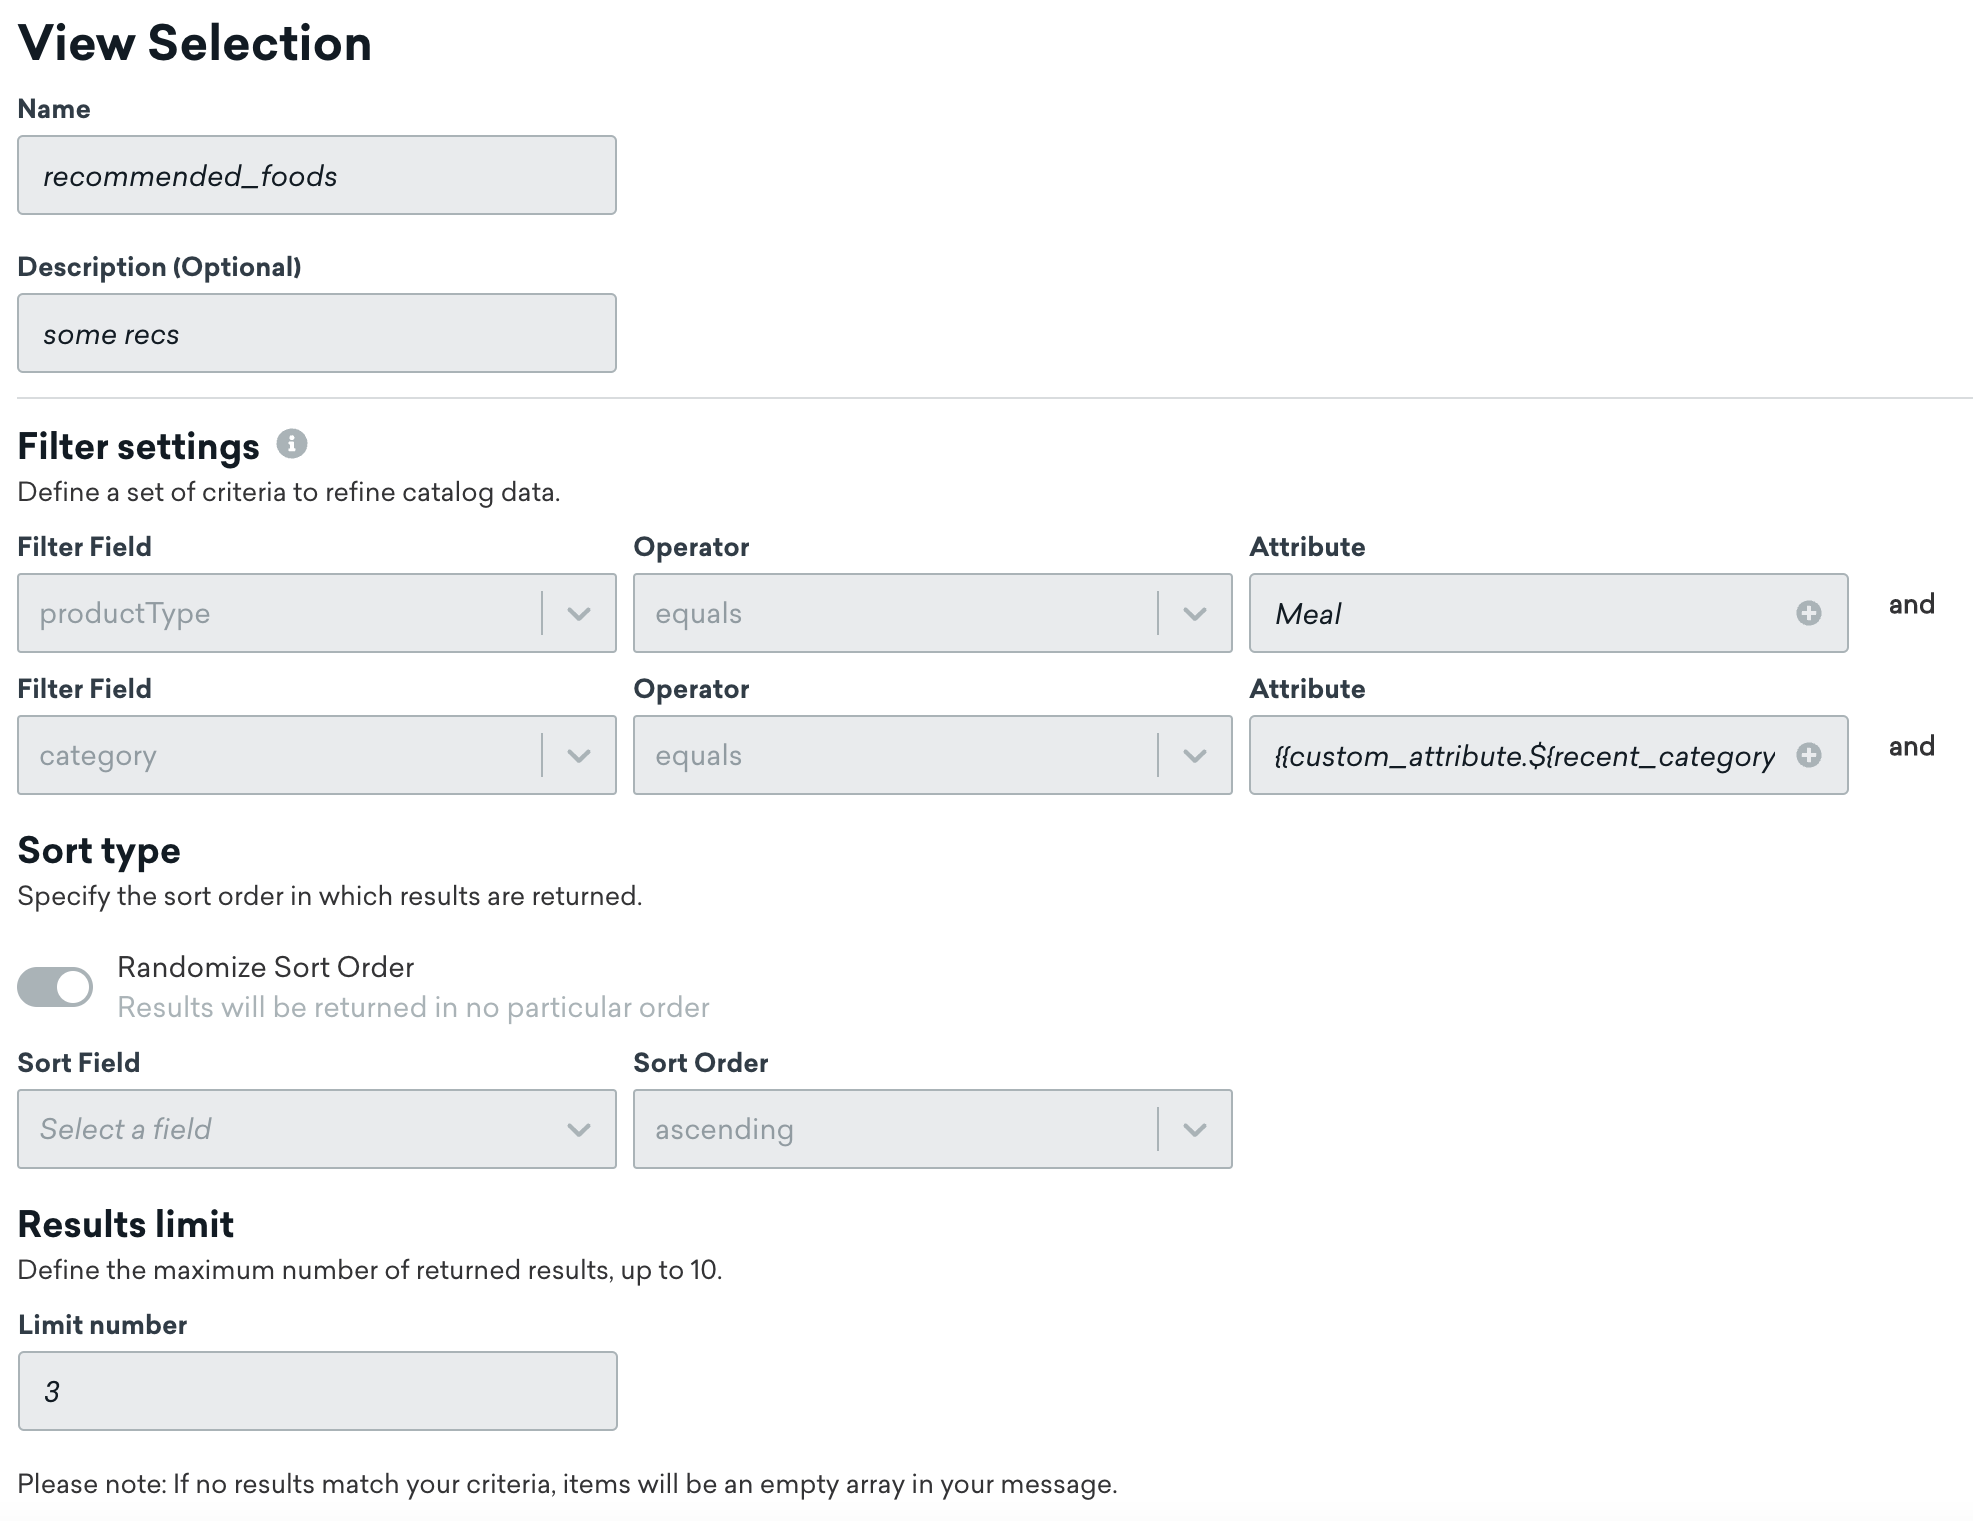
Use case
Let’s say you own a meal delivery service and want to send a personalized message to your users who have specific meal preferences based on their most recently viewed food category.
Using a catalog with your meal delivery service’s information for the meal name, price, image, and category of the meal, you can create a selection to recommend three meals based on a user’s most recently viewed category.
To use this catalog and selection in a campaign, use the Add Personalization modal in the message composition section of building a campaign. In this example, we’ve selected the catalog with your meal delivery service’s information, and the selection for meal recommendations based on the most recently viewed category. This allows us to display the meal name and price. To further build your message, you can use the selection to also add an image of the first recommended meal.
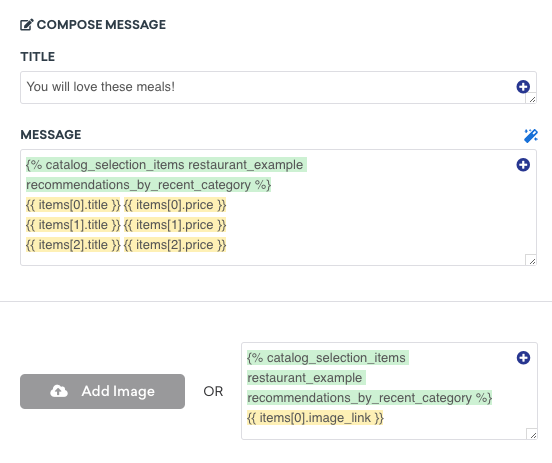
For example, say you have a user whose most recently viewed category is “Chicken”. Using the set personalization and a Content Card campaign, you can send three meal recommendations that include chicken for this user.

Using the same personalization, you can also send three meal recommendations for a user whose most recently viewed category is “Beef”.
