Delay
Delay components allow you to add a stand-alone delay to a Canvas. You can add a delay to your Canvas without needing to add an associated message.
Delays can make your Canvas look cleaner. You can also use this component to delay a different step until an exact date, until a specific day, or until a specific day of the week. A Delay component can connect to at most one subsequent step.
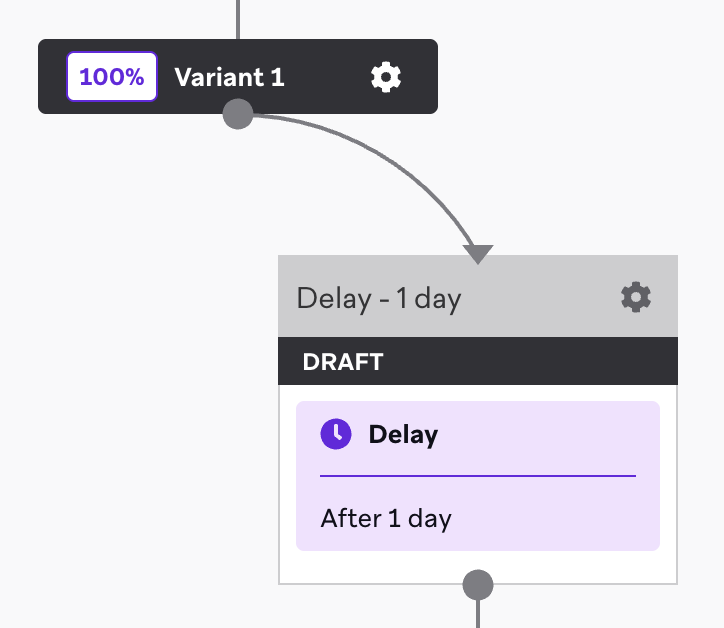
Create a delay
To create a delay, add a step to your Canvas. Drag and drop the Delay component from the sidebar, or select the plus button at the bottom of a step and then choose Delay.
Extended delays
You can extend Delay steps up to two years (730 days). For example, if you’re onboarding new users for your app, you can add an extended delay for two months before sending a Message step to nudge the users who haven’t started a session.
Time delay types
You can choose the type of delay before the next message in your Canvas. You can either set a delay for your users to last until after a designated time period, or delay your users until a specific date and time.
If there is a time delay, it’s expected that some users proceed only to the next step of the Canvas after the delay. Users who are in the delay won’t be added to the Proceeded to Next Step metric. For more information, see Delay analytics.
Selecting Duration allows you to delay users for a set number of seconds, minutes, hours, days, or weeks, and at a specific time. For example, you can delay users for four hours or for one day.
Note the difference between how “days” and “calendar days” are calculated.
- A “day” is 24 hours and is calculated from the time the user enters the Delay step.
- A “calendar day” defines the time to wait until the next specified time, which could be less than 24 hours. You can choose to delay at company time or at a user’s local time. If a time isn’t specified, the user is delayed until midnight the next day in company time.
Delay behavior: “calendar days” at a specific time versus “days”
When you select calendar days as the unit and enable At a specific time (for example, 1 calendar day at 9 AM), Canvas calculates the target calendar date first, then applies the scheduled time. For example, if a Canvas step sends at 9 PM on Monday and the Delay step is set to 1 calendar day at 9 AM, the next step sends at 9 AM on Tuesday. Canvas calculates Monday + 1 calendar day = Tuesday, then applies the 9 AM time.
By contrast, when you select days as the unit without At a specific time (for example, After 1 day), Canvas waits a full 24-hour period from the time the user enters the Delay step. For example, if a step sends at 9:35 AM on October 13 and the Delay step is After 1 day, the next step sends at 9:35 AM on October 14.
You can also select At a specific time to specify when the users advance in the Canvas. This option takes into account the time the user entered the Delay step. If this time is beyond the time configured in the settings, Braze appends more hours to the delay.
As an example, let’s say today is December 11, and our Delay step is set to Duration of one week at 8 am UTC. If a user enters the Delay step on December 4, they are released from the Delay step to continue their journey today if they originally entered the Delay step at a time before 8 am UTC. If they entered the Delay step after this time, the user is delayed until the next day (the next occurrence of this time).
Selecting Calendar date allows you to hold users in the step until a specific date and time.
Considerations
Users won’t receive past-dated steps or messages
If the selected date and time have already passed by the time users proceed to the Delay step, users exit the Canvas. There can be up to 31 days between the start of the Canvas and the dates chosen for “wait until an exact day” steps.
For example, users won’t receive steps or messages in these scenarios:
- A message is scheduled to be sent on May 3rd at 9 pm, but the Delay step expires on May 3rd at 9 am.
- A Canvas step delays until a specific time in the user’s local time zone, but the users don’t have a time zone set on their user profile. The delay then defaults to the company time zone for these users, which has already passed the specified time.
Users exit if a subsequent Delay step is within a prior Delay step’s timeline
If the Canvas has two Delay steps but the first Delay step is longer than the second Delay step, users also exit the Canvas.
For example, let’s say a Canvas has these steps:
- Step 1: Message step
- Step 2: Delay step until December 13th at 10 pm
- Step 3: Message step
- Step 4: Delay step until December 13th at 7 pm
- Step 5: Message step
The users who enter Step 4 exit the Canvas before receiving Step 5 because Step 4’s delay is part of Step 2’s timeframe.
Selecting Day of the week allows you to hold users in the step until a specific day of the week, at a specific time. For example, you can delay users until the next time Thursday arrives at 4 pm in the company’s time zone.
To successfully configure this, you must also select what happens if the user enters the Canvas on the selected day of the week (for example, Thursday), but after the specified time. You can choose to either advance the user on the same day or hold them until the following week.
Profile updates during delays
If a user enters a Canvas and adds a valid email address during the Delay step before it ends, they receive the email at the next step. This applies to other profile updates as well. Any changes to user attributes or contact information during the delay are reflected when the user advances to subsequent steps.
Using Delay steps
Let’s say that it’s June 10. On June 11, you’d like users to enter the Canvas and receive a message about an upcoming promotion. Then, you want to hold users in the Canvas until June 17 at 3 pm local time. At 3 pm local time on June 17, you want to send users a reminder message about the promotion.
The sequence of Canvas steps could look like the following:
- Start by adding a Message step that sends immediately after users enter the Canvas on June 11.
- Create a Delay step that holds users until 1 pm local time on June 17.
- Link the Delay step to another Message step that sends its message immediately.
Delay components at the end of a Canvas
If you add a Delay component to your Canvas and there are no subsequent steps, any user who reaches the last step is automatically advanced out of the Canvas. This is true even if the time of the Delay step hasn’t been reached yet. This means that users who have already reached the Delay step do not receive any messages you add after this step. However, if a user has not reached the Delay step and a message is added, they receive that message.
Personalized delays
Select the Personalize delay toggle to set up a personalized delay for your users. You can use this with a Context step to select the context variable to delay by. This overrides the time of day set in the selected attribute or property. This is useful when applying an offset in days or weeks, and you want users to move forward at a specific time. The time zone comes from the attribute or property, or uses the fallback if none is available.
Time zone behavior for “At a specific time”
When you select the At a specific time checkbox, the delivery time you set uses the same time zone that Braze uses for the personalized calendar date. Braze doesn’t apply a separate time zone to the date and the time. Both use the time zone from your attribute or context variable, or the fallback time zone when the variable is a string without time zone information.
Which time zone applies depends on the data type of your attribute or context variable:
- String data type with time zone: If the attribute or context variable is a string data type that includes time zone information, it conforms to the time zone specified in the string. For example,
2025-06-10T10:00:00-08:00uses UTC-8. - String data type without time zone: If the attribute or context variable is a string data type without time zone information, it conforms to the fallback time zone. For example,
2025-06-10uses the fallback time zone. - Time data type: If the attribute or context variable is a time data type, it conforms to UTC. This is because the time data type is always converted to UTC when saved in the database, so “at specific time” always references UTC when the variable is set to time data type. For example,
2025-06-10T10:00:00-08:00uses UTC+0.

It’s possible for a custom attribute or context variable to have neither a specific time nor a time zone if it’s a string data type. If it’s a time data type, you’ll need to specify the time and time zone. However, if the custom attribute or context variable is an “irrelevant” string (such as “product_name”), the user exits the Canvas.
Use case
Let’s say you want to remind your customers to purchase toothpaste 30 days from now. Using a combination of a Context step and a Delay step, you can select this context variable to delay by. In this case, your Context step would have the following fields:
- Context variable name: product_reminder_interval
- Data type: Time
- Value:
{{custom_attribute.${Order_filled_time}}}
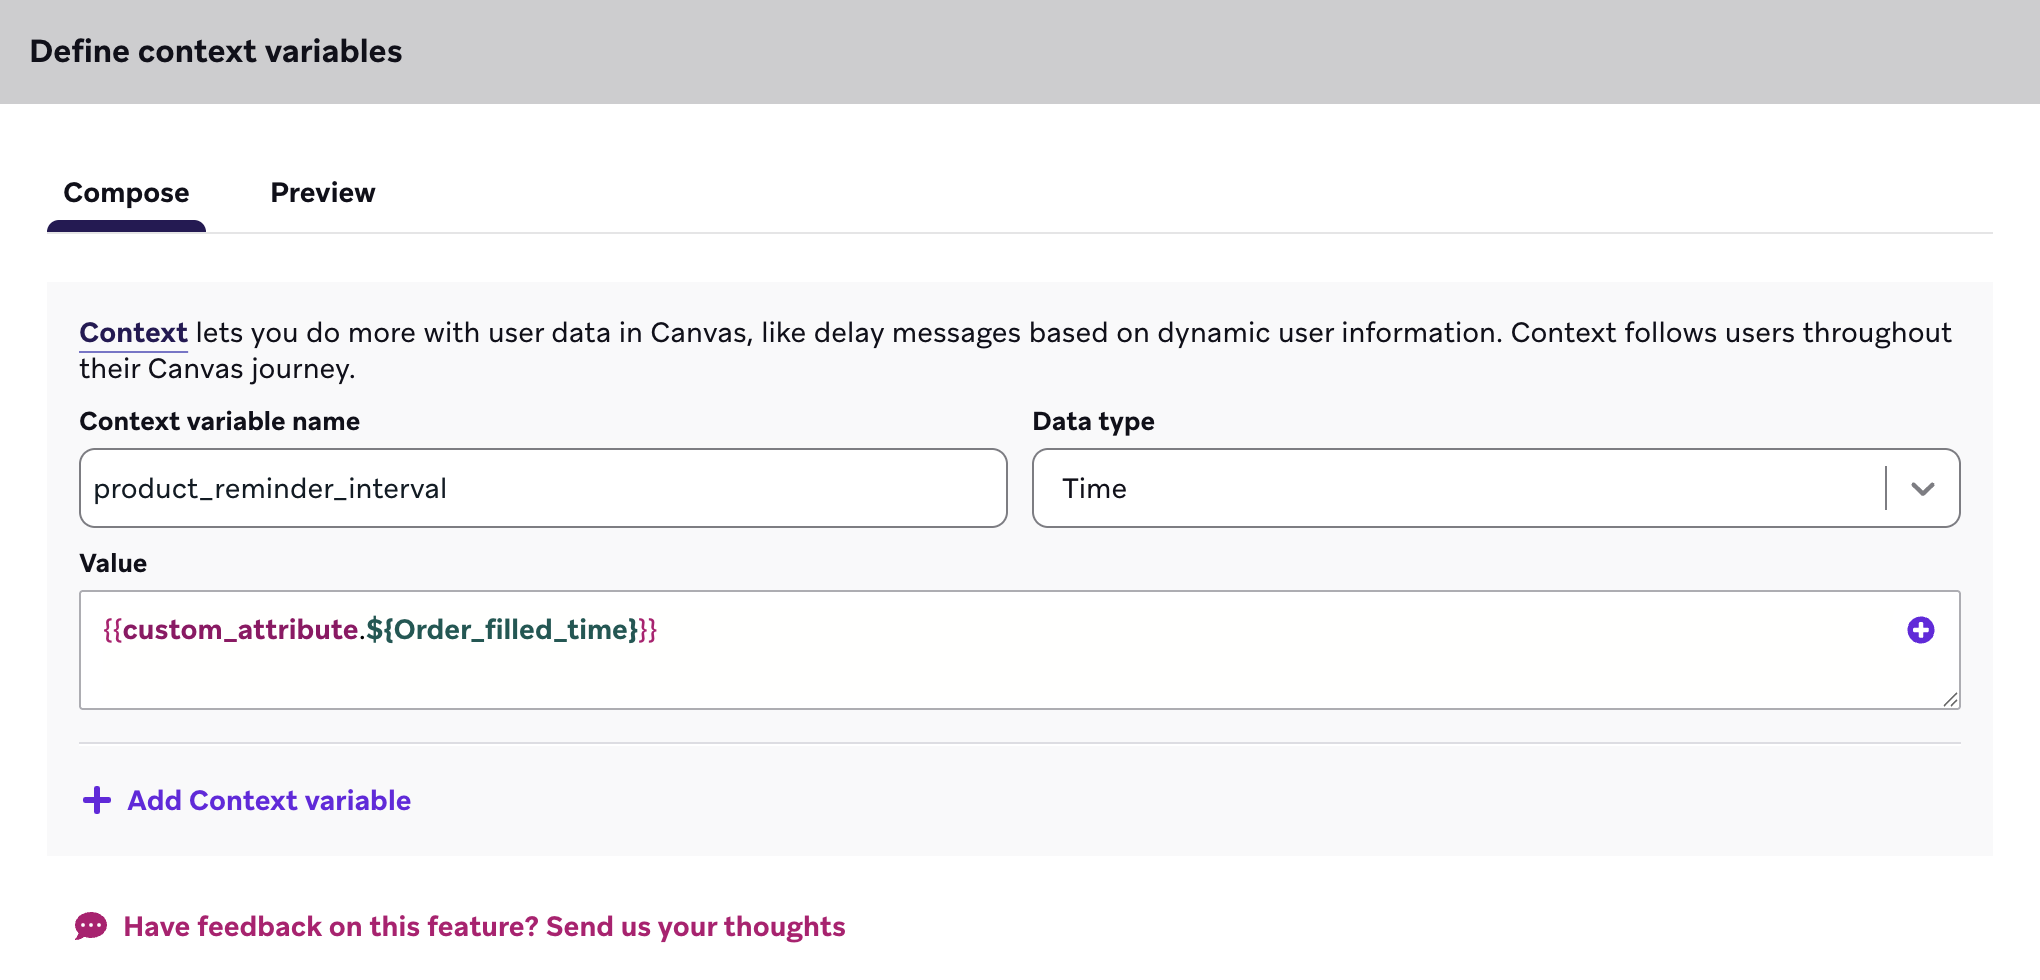
Next, because you want to remind your customers 30 days from now, you’ll select Until a specific day as the delay option and select Personalize delay to use the information from your Context step. This means your users are delayed until the selected Context variable.
Delay analytics
Delay components have the following metrics available in the analytics view of an active or previously active Canvas.
| Metric | Description |
|---|---|
| Entered | Reflects the number of times the step has been entered. If your Canvas has re-eligibility and a user enters a Delay step twice, two entries are recorded. |
| Proceeded to Next Step | Reflects the number of entries that proceeded to the next step in the Canvas. |
| Exited Canvas | Reflects the number of entries that exited the Canvas and did not proceed to the next step. |
| Personalization Failed | Reflects the number of times a personalized message or content intended for a user couldn’t be delivered due to the following:
See Personalization failed errors for more details. |
Time series for these analytics are available in the expanded component view.
Troubleshooting
Personalization failed errors
If users aren’t triggering a personalized delay, it could be because the Context step you set to qualify them for the Delay step is not working as you expected. When a context variable is invalid, a user continues through your Canvas without having their context set by the Context step. This can cause them to not qualify for steps later in your Canvas, such as personalized delays.
Troubleshooting
Users in a Delay step when a Canvas is stopped
When you stop a Canvas, users who are already waiting in a Delay step are not exited immediately. Braze still schedules delay completion, but no further messages are sent while the Canvas is stopped.
If you re-enable the Canvas before a user’s delay elapses, they can advance to the next step as scheduled. If the delay window has already passed while the Canvas was stopped, those users exit the Canvas instead of receiving the next step. For examples, see What happens when you stop a Canvas? and Stopping Canvases.