Shopify カスタム統合設定
このページでは、カスタムストアフロントを使用して、Shopify Hydrogen ストアやヘッドレス Shopify ストアとBrazeを統合する方法を説明します。
このガイドでは、Shopifyの Hydrogen フレームワークを例にしています。ただし、ブランドが「ヘッドレス」フロントエンド設定でストアのバックエンドに Shopify を使用している場合も、同様のアプローチをとることができます。
Shopify のヘッドレスストアをBrazeと統合するには、以下の2つの目標を達成する必要があります。
- Braze Web SDKを初期化してロードし、オンサイトトラッキングを有効にする
手動で Shopify Webサイトにコードを追加して、Brazeオンサイトトラッキングを有効にします。Shopify ヘッドレスストアにBraze SDKを実装することで、セッション、匿名のユーザー行動、チェックアウト前のショッパーアクション、そして開発チームと一緒に選択したカスタムイベントやカスタム属性を含むオンサイトアクティビティをトラッキングできます。また、アプリ内メッセージやContent Cardsなど、SDKがサポートするチャネルを追加することもできます。
- BrazeのShopify統合をインストールする
ShopifyストアをBrazeに接続すると、Shopify webhookを通じて顧客、チェックアウト、注文、商品データにアクセスできるようになります。

統合を開始する前に、Shopify ストアフロントのチェックアウトサブドメインが正しく設定されていることを確認してください。詳細については、Migrate from the online store to Hydrogen を参照してください。
この設定が正しく行われないと、BrazeはShopifyチェックアウトwebhookを処理できません。また、ローカルの開発環境で統合をテストすることもできません。ストアフロントとチェックアウトページ間の共有ドメインに依存しているためです。
これらの目標を達成するには、以下のステップに従ってください。
Braze Web SDKの初期化と読み込み
ステップ1:Web サイトアプリを選択してSDK認証情報をコピーする
Hydrogen ストアフロントにコードを追加する前に、Shopify ストアを接続してカスタム設定のオンボーディングを開始します。ストアをまだ接続していない場合は、Shopify ストアを接続するを完了してから、Braze SDKを有効にするに進み、カスタム設定を選択します。
カスタム設定フローでは、ヘッドレスストアフロント用のWeb サイトアプリを選択するよう Braze がプロンプトを表示します。
- 既存のWeb サイトアプリを選択するか、新しいアプリを作成します。アプリには Shopify 以外の任意の名前を付けることができます。Shopify は Braze が標準の Shopify 統合パス用に予約しています。
- Braze は、選択したアプリのAPIキーとベースURL(SDKエンドポイント)をオンボーディングステップに表示します。各値のコピーを選択します。設定 > アプリの設定を開く必要はありません。
- コピーしたAPIキーを
BRAZE_API_KEYとして、SDKエンドポイントをBRAZE_API_URLとして Shopify 環境変数で使用します(ステップ2)。
ストアを接続した後、設定 > アプリの設定で選択したWeb サイトアプリの名前を変更できます。Shopify 統合に接続されている間は、アプリを削除することはできません。

オンボーディング中に選択したWeb サイトアプリのAPIキーを使用してください。Hydrogen 環境が Shopify 統合に接続されているものと異なるAPIキーを使用している場合、Braze が重複ユーザーを作成したり、SDKメソッドが期待どおりに動作しない可能性があります。
ステップ2:サブドメインと環境変数を追加する
- Shopify サブドメインを設定して、オンラインストアから Hydrogen へトラフィックをリダイレクトします。
- ログイン用のコールバックURIを追加します。(ドメインが追加されると、URIは自動的に追加されます。)
- Shopify 環境変数を設定します。
- ステップ1のカスタム設定オンボーディングでコピーしたAPIキーとSDKエンドポイントを使用して、2つの環境変数を作成します。
BRAZE_API_KEYBRAZE_API_URL
ステップ3:オンサイトトラッキングを有効にする
最初のステップは、Braze Web SDKを初期化することです。NPM パッケージをインストールすることをお勧めします。
npm install --save @braze/web-sdk@6.8.0
# or, using yarn:
# yarn add @braze/web-sdk
サポートされる最低バージョンの Braze Web SDKは5.4.0です。Shopify カスタム統合(ヘッドレスストアフロントを含む)の場合、新しいSDKバージョンが利用可能になると通知を受け取りますが、ストアフロントのコードと統合設定のSDKバージョンの両方を更新することで、アップグレードはお客様側で管理します。
次に、vite.config.js ファイルのトップレベルキーとしてこの設定を含めます。
optimizeDeps: {
exclude: ['@braze/web-sdk']
}
NPM パッケージをインストールした後、Layout コンポーネント内の useEffect フック内でSDKを初期化する必要があります。Hydrogen のバージョンによって、このコンポーネントは root.jsx または layout.jsx ファイルに配置されている場合があります。
// Add these imports
import * as braze from "@braze/web-sdk";
import { useEffect } from 'react';
export function Layout({children}) {
const nonce = useNonce();
// @type {RootLoader}
const data = useRouteLoaderData('root');
// Add useEffect call to initialize Braze SDK
useEffect(() => {
if(!braze.isInitialized()) {
braze.initialize(data.brazeApiKey, {
baseUrl: data.brazeApiUrl,
});
braze.openSession()
}
}, [data])
return (...);
}
data.brazeApiKey と data.brazeApiUrl の値は、ステップ2で作成した環境変数を使用して、コンポーネントローダーに含める必要があります。
export async function loader(args) {
// Start fetching non-critical data without blocking time to first byte
const deferredData = loadDeferredData(args);
// Await the critical data required to render initial state of the page
const criticalData = await loadCriticalData(args);
const {storefront, env} = args.context;
return {
...deferredData,
...criticalData,
publicStoreDomain: env.PUBLIC_STORE_DOMAIN,
// Add the two properties below to the returned value
brazeApiKey: env.BRAZE_API_KEY,
brazeApiUrl: env.BRAZE_API_URL,
shop: getShopAnalytics({
storefront,
publicStorefrontId: env.PUBLIC_STOREFRONT_ID,
}),
consent: {
checkoutDomain: env.PUBLIC_CHECKOUT_DOMAIN,
storefrontAccessToken: env.PUBLIC_STOREFRONT_API_TOKEN,
withPrivacyBanner: false,
// Localize the privacy banner
country: args.context.storefront.i18n.country,
language: args.context.storefront.i18n.language,
},
};
}

コンテンツセキュリティポリシー(通常 Hydrogen の entry.server.jsx ファイルにあります)は、ローカル環境と本番環境の両方で Braze スクリプトの機能に影響を与える可能性があります。Oxygen を介して Shopify に送信されるプレビュービルドまたはカスタムデプロイメントを通じてテストすることをお勧めします。問題が発生した場合は、JavaScript が機能するようにCSPを設定する必要があります。
ステップ4:Shopify アカウントログインイベントを追加する
買い物客がアカウントにサインインし、ユーザー情報を Braze に同期するタイミングをトラッキングします。これには、Braze の external ID で顧客を識別するために changeUser メソッドを呼び出すことが含まれます。
現在、カスタム Braze external ID をサポートするためのガイダンスは提供していません。統合にこれが必要な場合は、カスタマーサクセスマネージャーにお問い合わせください。
始める前に、Hydrogen 内で顧客ログインが機能するためのコールバックURIを設定していることを確認してください。詳細については、Customer Account API と Hydrogen の使用を参照してください。
- コールバックURIを設定した後、Braze SDKを呼び出すための関数を定義します。新しいファイル(
Tracking.jsxなど)を作成し、コンポーネントからインポートします。
import * as braze from "@braze/web-sdk";
export function trackCustomerLogin(customerData, storefrontUrl) {
const customerId = customerData.id.substring(customerData.id.lastIndexOf('/') + 1)
const customerSessionKey = `ab.shopify.shopify_customer_${customerId}`;
const alreadySetCustomerInfo = sessionStorage.getItem(customerSessionKey);
if(!alreadySetCustomerInfo) {
const user = braze.getUser()
// To use Shopify customer ID as Braze External ID, use:
// braze.changeUser(customerId)
// To use Shopify customer email as Braze External ID, use:
// braze.changeUser(customerData.emailAddress?.emailAddress)
// To use hashing for email addresses, apply hashing before calling changeUser
// To use your own custom ID as the Braze External ID, pass that value to the changeUser call.
user.setFirstName(customerData.firstName);
user.setLastName(customerData.lastName);
if(customerData.emailAddress.emailAddress) {
user.setEmail(customerData.emailAddress?.emailAddress);
}
if(customerData.phoneNumber?.phoneNumber) {
user.setPhoneNumber(customerData.phoneNumber?.phoneNumber);
}
braze.logCustomEvent(
"shopify_account_login",
{ source: storefrontUrl }
)
sessionStorage.setItem(customerSessionKey, customerId);
}
}
- Braze SDKを初期化する同じ
useEffectフック内に、この関数の呼び出しを追加します。
import { trackCustomerLogin } from './Tracking';
export function Layout({children}) {
const nonce = useNonce();
// @type {RootLoader}
const data = useRouteLoaderData('root');
useEffect(() => {
if(!braze.isInitialized()) {
braze.initialize(data.brazeApiKey, {
baseUrl: data.brazeApiUrl,
enableLogging: true,
});
braze.openSession()
}
// Add call to trackCustomerLogin function
data.isLoggedIn.then((isLoggedIn) => {
if(isLoggedIn) {
trackCustomerLogin(data.customerData, data.publicStoreDomain)
}
})
}, [data])
app/graphql/customer-account/CustomerDetailsQuery.jsファイルにある Customer API GraphQL クエリで、顧客のメールアドレスと電話番号を取得します。
export const CUSTOMER_FRAGMENT = `#graphql
fragment Customer on Customer {
id
firstName
lastName
emailAddress {
emailAddress
}
phoneNumber {
phoneNumber
}
defaultAddress {
...Address
}
addresses(first: 6) {
nodes {
...Address
}
}
}
fragment Address on CustomerAddress {
id
formatted
firstName
lastName
company
address1
address2
territoryCode
zoneCode
city
zip
phoneNumber
}
`;
- 最後に、ローダー関数で顧客データを読み込みます。
// Add import for GraphQL Query
import { CUSTOMER_DETAILS_QUERY } from './graphql/customer-account/CustomerDetailsQuery';
export async function loader(args) {
// Start fetching non-critical data without blocking time to first byte
const deferredData = loadDeferredData(args);
// Await the critical data required to render initial state of the page
const criticalData = await loadCriticalData(args);
const {storefront, env} = args.context;
// Add GraphQL call to Customer API
const isLoggedIn = await deferredData.isLoggedIn;
let customerData;
if (isLoggedIn) {
const { data, errors } = await args.context.customerAccount.query(
CUSTOMER_DETAILS_QUERY,
);
customerData = data.customer
} else {
customerData = {}
}
return {
...deferredData,
...criticalData,
publicStoreDomain: env.PUBLIC_STORE_DOMAIN,
brazeApiKey: env.BRAZE_API_KEY,
brazeApiUrl: env.BRAZE_API_URL,
// Add the property below to the returned value
customerData: customerData,
shop: getShopAnalytics({
storefront,
publicStorefrontId: env.PUBLIC_STOREFRONT_ID,
}),
consent: {
checkoutDomain: env.PUBLIC_CHECKOUT_DOMAIN,
storefrontAccessToken: env.PUBLIC_STOREFRONT_API_TOKEN,
withPrivacyBanner: false,
// Localize the privacy banner
country: args.context.storefront.i18n.country,
language: args.context.storefront.i18n.language,
},
};
}
ステップ5:Product Viewed および Cart Updated イベントのトラッキングを追加する
Product Viewed イベント
Tracking.jsxファイルにこの関数を追加します。
export function trackProductViewed(product, storefrontUrl) {
const eventData = {
product_id: product.id.substring(product.id.lastIndexOf('/') + 1),
product_name: product.title,
variant_id: product.selectedOrFirstAvailableVariant.id.substring(product.selectedOrFirstAvailableVariant.id.lastIndexOf('/') + 1),
image_url: product.selectedOrFirstAvailableVariant.image?.url,
product_url: `${storefrontUrl}/products/${product.handle}`,
price: product.selectedOrFirstAvailableVariant.price.amount,
currency: product.selectedOrFirstAvailableVariant.price.currencyCode,
source: storefrontUrl,
type: ["price_drop", "back_in_stock"],
metadata: {
sku: product.selectedOrFirstAvailableVariant.sku
}
}
braze.logCustomEvent(
"ecommerce.product_viewed",
eventData
)
}
- ユーザーが商品ページにアクセスするたびに上記の関数を呼び出すために、
app/routes/products.$handle.jsxファイル内の Product コンポーネントにuseEffectフックを追加します。
import { trackProductViewed } from '~/tracking';
import { useEffect } from 'react';
export default function Product() {
// @type {LoaderReturnData}
// retrieve storefrontUrl to be passed into trackProductViewed
const {product, storefrontUrl} = useLoaderData();
// Add useEffect hook for tracking product_viewed event
useEffect(() => {
trackProductViewed(product, storefrontUrl)
}, [])
return (...)
}
- 「storefrontUrl」の値を追加します(デフォルトではコンポーネントローダーに含まれていないため)。
async function loadCriticalData({context, params, request}) {
const {handle} = params;
const {storefront} = context;
if (!handle) {
throw new Error('Expected product handle to be defined');
}
const [{product}] = await Promise.alll([
storefront.query(PRODUCT_QUERY, {
variables: {handle, selectedOptions: getSelectedProductOptions(request)},
}),
// Add other queries here, so that they are loaded in parallel
]);
if (!product?.id) {
throw new Response(null, {status: 404});
}
return {
product,
// Add this property to the returned value
storefrontUrl: context.env.PUBLIC_STORE_DOMAIN,
};
}
Cart Updated イベント
この連携では、BrazeがWebhookを正しいユーザープロファイルに一致させるために、ユーザーエイリアスは以下の形式を使用する必要があります。
alias_label:shopify_cart_${cartToken}alias_name:shopify_cart_token
cart_updatedイベントのトラッキングとカートトークンの設定のための関数を定義します。
export function trackCartUpdated(cart, storefrontUrl) {
const eventData = {
cart_id: cart.id,
total_value: cart.cost.totalAmount.amount,
currency: cart.cost.totalAmount.currencyCode,
products: cart.lines.nodes.map((line) => {
return {
product_id: line.merchandise.product.id.toString(),
product_name: line.merchandise.product.title,
variant_id: line.merchandise.id.toString(),
image_url: line.merchandise.image.url,
product_url: `${storefrontUrl}/products/${line.merchandise.product.handle}`,
quantity: Number(line.quantity),
price: Number(line.cost.totalAmount.amount / Number(line.quantity))
}
}),
source: storefrontUrl,
metadata: {},
};
braze.logCustomEvent(
"ecommerce.cart_updated",
eventData
)
}
export function setCartToken(cart) {
const cartId = cart.id.substring(cart.id.lastIndexOf('/') + 1)
const cartToken = cartId.substring(0, cartId.indexOf("?key="));
if (cartToken) {
const cartSessionKey = `ab.shopify.shopify_cart_${cartToken}`;
const alreadySetCartToken = sessionStorage.getItem(cartSessionKey);
if (!alreadySetCartToken) {
braze.getUser().addAlias("shopify_cart_token", `shopify_cart_${cartToken}`)
braze.requestImmediateDataFlush();
sessionStorage.setItem(cartSessionKey, cartToken);
}
}
}
- Braze がプロパティにアクセスできるように、フェッチャーアクションから
cartオブジェクトを返します。app/routes/cart.jsxファイルに移動し、action関数に以下を追加します。
export async function action({request, context}) {
const {cart} = context;
...
switch (action) {
case CartForm.ACTIONS.LinesAdd:
result = await cart.addLines(inputs.lines);
break;
...
}
const cartId = result?.cart?.id;
const headers = cartId ? cart.setCartId(result.cart.id) : new Headers();
const {cart: cartResult, errors, warnings} = result;
const redirectTo = formData.get('redirectTo') ?? null;
if (typeof redirectTo === 'string') {
status = 303;
headers.set('Location', redirectTo);
}
return data(
{
cart: cartResult,
// Add these two properties to the returned value
updatedCart: await cart.get(),
storefrontUrl: context.env.PUBLIC_STORE_DOMAIN,
errors,
warnings,
analytics: {
cartId,
},
},
{status, headers},
);
}
Remix フェッチャーの詳細については、useFetcher を参照してください。
- Hydrogen ストアでは通常、カートオブジェクトの状態を管理する
CartFormコンポーネントを定義しています。これはカートへのアイテムの追加、削除、数量変更時に使用されます。AddToCartButtonコンポーネントに別のuseEffectフックを追加して、フォームフェッチャーの状態が変化するたびに(ユーザーのカートが更新されるたびに)trackCartUpdated関数を呼び出します。
// Add imports
import { trackCartUpdated, setCartToken } from '~/tracking';
import { useEffect } from 'react';
import { useFetcher } from '@remix-run/react';
export function AddToCartButton({
analytics,
children,
disabled,
lines,
onClick,
}) {
// Define a new Fetcher to be used for tracking cart updates
const fetcher = useFetcher({ key: "cart-fetcher" });
// Add useEffect hook for tracking cart_updated event and setting cart token alias
useEffect(() => {
if(fetcher.state === "idle" && fetcher.data) {
trackCartUpdated(fetcher.data.updatedCart, fetcher.data.storefrontUrl)
setCartToken(fetcher.data.updatedCart);
}
}, [fetcher.state, fetcher.data])
// Add the fetcherKey prop to the CartForm component
return (
<CartForm route="/cart" inputs= fetcherKey="cart-fetcher" action={CartForm.ACTIONS.LinesAdd}>
{(fetcher) => (
<>
<input
name="analytics"
type="hidden"
value={JSON.stringify(analytics)}
/>
<button
type="submit"
onClick={onClick}
disabled={disabled ?? fetcher.state !== 'idle'}
>
{children}
</button>
</>
)}
</CartForm>
);
}
- カートの既存の商品を更新するアクションにも同じ
fetcherKeyを使用します。CartLineRemoveButtonおよびCartLineUpdateButtonコンポーネント(デフォルトではapp/components/CartLineItem.jsxファイルにあります)に以下を追加します。
function CartLineRemoveButton({lineIds, disabled}) {
// Add the fetcherKey prop to the CartForm component
return (
<CartForm
fetcherKey="cart-fetcher"
route="/cart"
action={CartForm.ACTIONS.LinesRemove}
inputs=
>
<button disabled={disabled} type="submit">
Remove
</button>
</CartForm>
);
}
function CartLineUpdateButton({children, lines}) {
// Add the fetcherKey prop to the CartForm component
return (
<CartForm
route="/cart"
fetcherKey="cart-fetcher"
action={CartForm.ACTIONS.LinesUpdate}
inputs=
>
{children}
</CartForm>
);
}
Braze Shopify インテグレーションのインストール
ステップ1: Shopify ストアを接続する
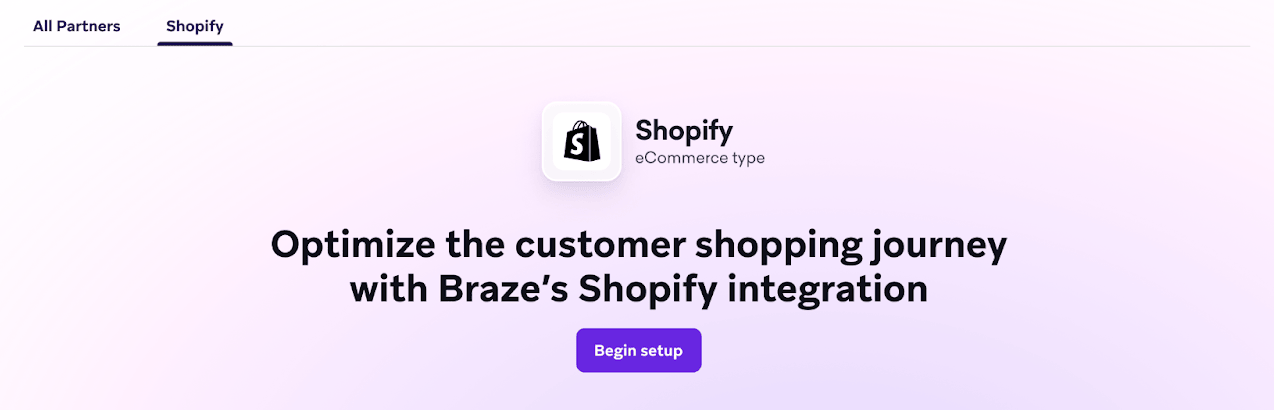
Shopify パートナーページに移動して設定を開始します。まず、Begin Setup を選択して、Shopify App Store から Braze アプリケーションをインストールします。ガイドに沿ってステップを進め、インストールプロセスを完了してください。
ステップ2: Braze SDKを有効にする
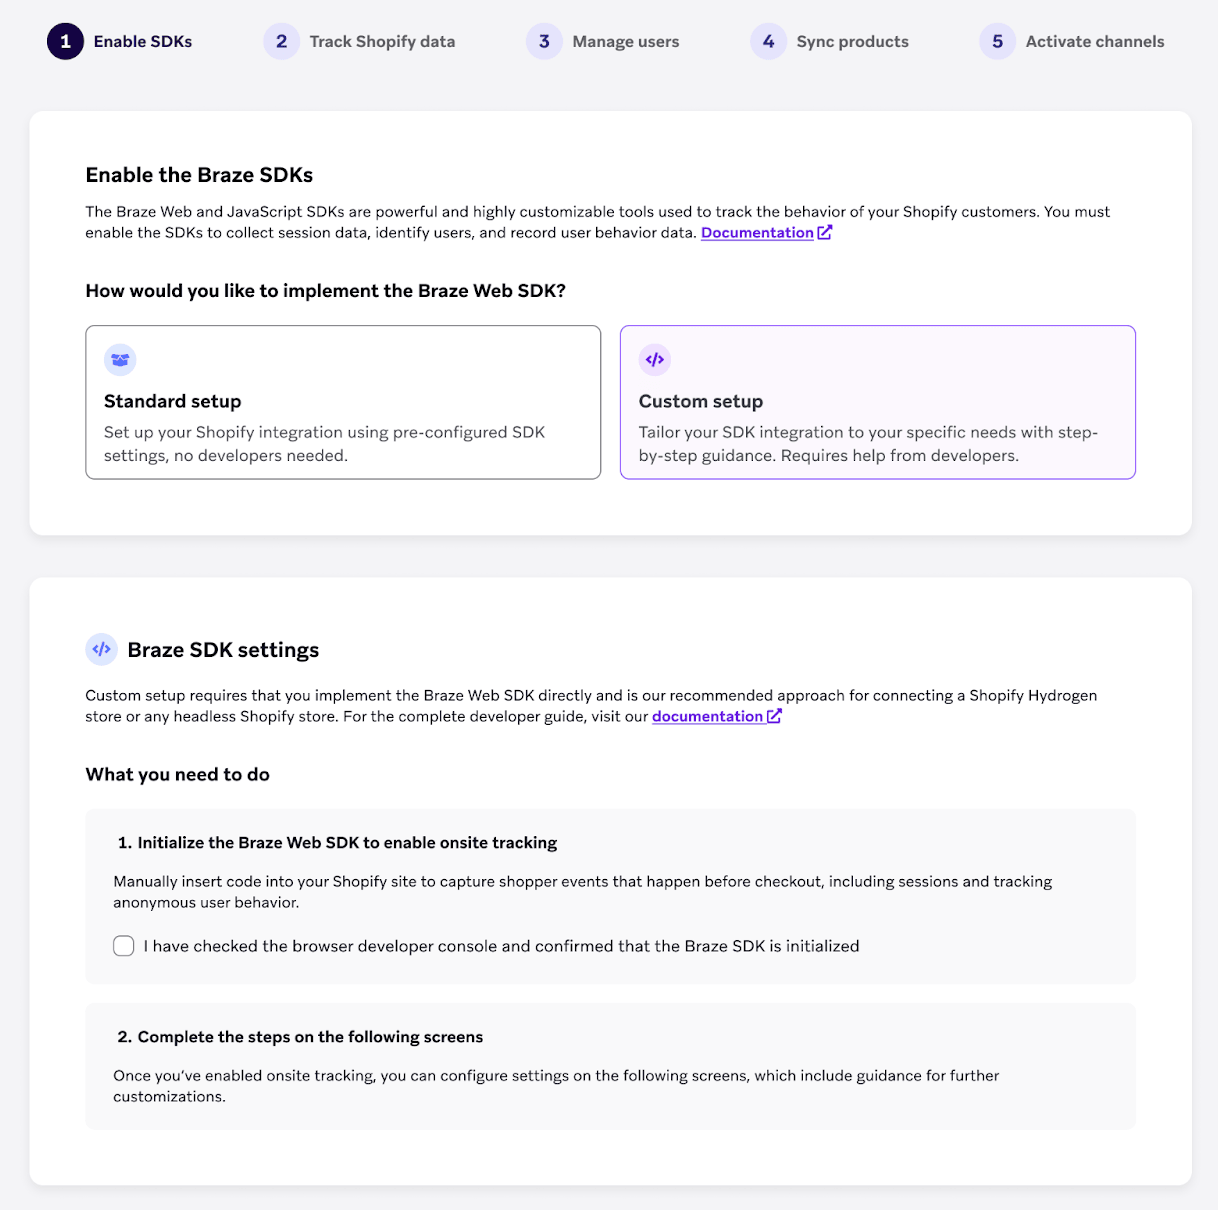
Shopify Hydrogen またはヘッドレスストアの場合は、Custom setup オプションを選択してください。
カスタム設定には Web サイトアプリピッカーが含まれます。ストアフロントを動かすアプリを選択または作成し、オンボーディングステップに表示されるAPIキーとSDKエンドポイントをコピーします。詳しくは、ステップ1: Web サイトアプリを選択してSDK認証情報をコピーするを参照してください。
オンボーディングプロセスを続行する前に、これらの認証情報を使用して Shopify Web サイトに Braze SDKを追加していることを確認してください。
ステップ3: Shopify データをトラッキングする
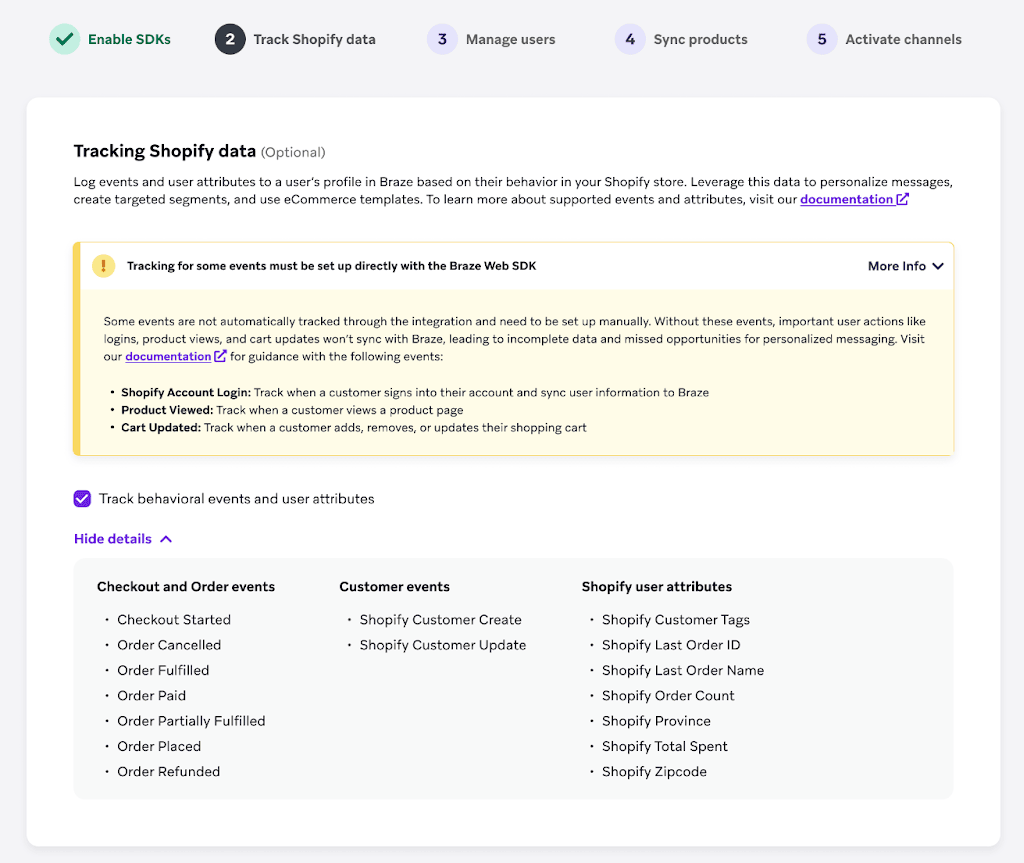
Shopify イベントや属性を追加してインテグレーションを強化します。これらは Shopify webhook によって提供されます。このインテグレーションでトラッキングされるデータの詳細については、Shopify データ機能を参照してください。
ステップ4: 過去データのバックフィル(任意)
カスタム設定を使用すると、標準インテグレーションと同じ過去の Shopify データの読み込みをオプションで含めることができます。過去90日間の注文イベントと過去1年間のユーザープロファイルを、インテグレーション完了日から遡ってカウントします。この初期データの読み込みを含めるには、初期データ読み込みオプションのチェックボックスを選択してください。
バックフィルを後で実行したい場合は、今すぐ初期設定を完了し、後からこのステップに戻ることができます。

初期読み込みのデータ一覧、収益レポートの動作、および同期の監視については、過去データのバックフィルを参照してください。
ステップ5: カスタムデータトラッキングの設定(上級)
Braze SDKを使用すると、このインテグレーションでサポートされるデータ以外のカスタムイベントやカスタム属性をトラッキングできます。カスタムイベントは、ストア内の固有のインタラクションをキャプチャします。例えば:
| カスタムイベント | カスタム属性 |
|---|---|
|
|
SDKがイベントやカスタム属性をログに記録するには、ユーザーのデバイス上でSDKが初期化(アクティビティをリスニング)されている必要があります。カスタムデータのログ記録について詳しくは、User objectおよびlogCustomEventを参照してください。
ステップ6: ユーザー管理方法を設定する(任意)
ドロップダウンから external_id タイプを選択します。
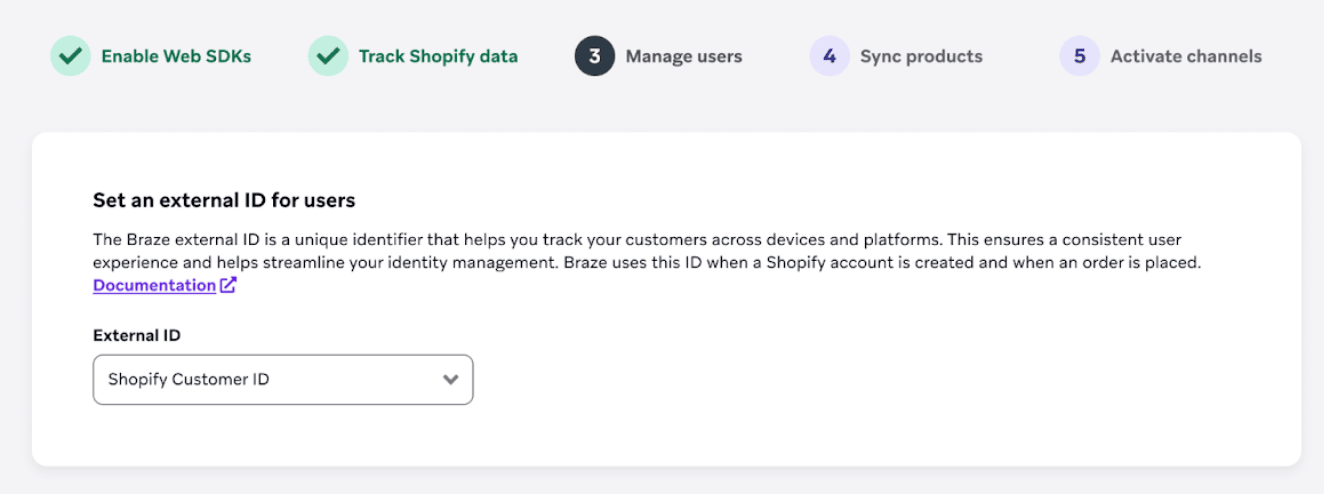
メールアドレスまたはハッシュ化されたメールアドレスを Braze の external ID として使用すると、データソース間のアイデンティティ管理を簡素化できます。ただし、ユーザーのプライバシーとデータセキュリティに対する潜在的なリスクを考慮することが重要です。
- 推測されやすい情報: メールアドレスは推測しやすいため、攻撃に対して脆弱です。
- 悪用のリスク: 悪意のあるユーザーが Web ブラウザーを変更して他人のメールアドレスを external ID として送信した場合、機密性の高いメッセージやアカウント情報にアクセスできる可能性があります。
デフォルトでは、Braze は Shopify からのメールアドレスを external ID として使用する前に自動的に小文字に変換します。メールアドレスまたはハッシュ化されたメールアドレスを external ID として使用している場合は、external ID として割り当てる前、または他のデータソースからハッシュ化する前に、メールアドレスが小文字に変換されていることを確認してください。これにより、external ID の不一致を防ぎ、Braze で重複するユーザープロファイルが作成されるのを回避できます。
次のステップは、選択した external ID によって異なります。
- カスタム external ID タイプを選択した場合: ステップ6.1~6.3を完了して、カスタム external ID の設定を行います。
- Shopify 顧客 ID、メール、またはハッシュ化されたメールを選択した場合: ステップ6.1~6.3をスキップし、直接ステップ6.4に進みます。
ステップ6.1: braze.external_id メタフィールドを作成する
- Shopify管理パネルで、設定 > メタフィールドに移動します。
- 顧客 > 定義を追加を選択します。
- 名前空間とキーに
braze.external_idと入力します。 - タイプでIDタイプを選択します。
メタフィールドが作成されたら、顧客に対して値を入力します。以下のアプローチを推奨します:
- 顧客作成 webhook をリッスンする:
customer/createイベントをリッスンする webhook を設定します。これにより、新しい顧客が作成されたときにメタフィールドを書き込むことができます。 - 既存顧客のバックフィル: Admin API または Customer API を使用して、以前に作成された顧客のメタフィールドをバックフィルします。
ステップ6.2: external ID を取得するエンドポイントを作成する
Braze が external ID を取得するために呼び出せるパブリックエンドポイントを作成する必要があります。これにより、Shopify が braze.external_id メタフィールドを直接提供できないシナリオで、Braze が ID を取得できるようになります。
エンドポイントの仕様
メソッド: GET
Braze はエンドポイントに以下のパラメーターを送信します:
| パラメーター | 必須 | データ型 | 説明 |
|---|---|---|---|
| shopify_customer_id | はい | String | Shopify の顧客 ID。 |
| shopify_storefront | はい | String | リクエストのストアフロント名。例: <storefront_name>.myshopify.com |
| email_address | いいえ | String | ログインユーザーのメールアドレス。 特定の webhook シナリオではこのフィールドが欠落する場合があります。エンドポイントのロジックでは、null 値を考慮する必要があります(例えば、内部ロジックで必要な場合は shopify_customer_id を使用してメールアドレスを取得します)。 |
エンドポイントの例
GET https://mystore.com/custom_id?shopify_customer_id=1234&[email protected]&shopify_storefront=dev-store.myshopify.com
期待されるレスポンス
Braze は external ID の JSON を返す 200 ステータスコードを期待します:
{
"external_id": "my_external_id"
}
バリデーション
shopify_customer_id と email_address(存在する場合)が Shopify の顧客値と一致することを検証することが重要です。Shopify Admin API または Customer API を使用して、これらのパラメーターを検証し、正しい braze.external_id メタフィールドを取得できます。
失敗時の動作とマージ
200 以外のステータスコードは失敗とみなされます。
- マージへの影響: エンドポイントが失敗した場合(非
200を返すかタイムアウトした場合)、Brazeはexternal IDを取得できません。その結果、ShopifyユーザーとBrazeユーザープロファイルのマージはその時点では行われません。 - リトライロジック: Brazeは標準的な即時ネットワークリトライを試みる場合がありますが、失敗が続く場合、マージは次の該当イベント(例えば、ユーザーが次にプロファイルを更新するかチェックアウトを完了するとき)まで延期されます。
- サポート性: タイムリーなユーザーマージをサポートするために、エンドポイントの高可用性を確保し、オプションの
email_addressフィールドを適切に処理するようにしてください。
ステップ6.3: external ID を入力する
ステップ6に戻り、Braze の external ID タイプとしてカスタム external ID を選択した後、エンドポイント URL を入力します。
考慮事項
- Brazeがエンドポイントにリクエストを送信した時点でexternal IDが生成されていない場合、
changeUser関数の呼び出し時にShopifyの顧客IDがデフォルトで使用されます。このステップは、匿名ユーザープロファイルと識別済みユーザープロファイルを統合するために重要です。その結果、ワークスペース内に異なるタイプのexternal IDが一時的に共存する期間が発生する場合があります。 braze.external_idメタフィールドでexternal IDが利用可能になると、インテグレーションはこのexternal IDを優先的に割り当てます。- Shopifyの顧客IDが以前Brazeのexternal IDとして設定されていた場合、
braze.external_idメタフィールドの値に置き換えられます。
- Shopifyの顧客IDが以前Brazeのexternal IDとして設定されていた場合、
ステップ6.4: Shopify からメールまたは SMS のオプトインを収集する(任意)
メールまたはSMSチャネルを使用している場合、ShopifyのメールおよびSMSマーケティングオプトイン状態をBrazeに同期できます。
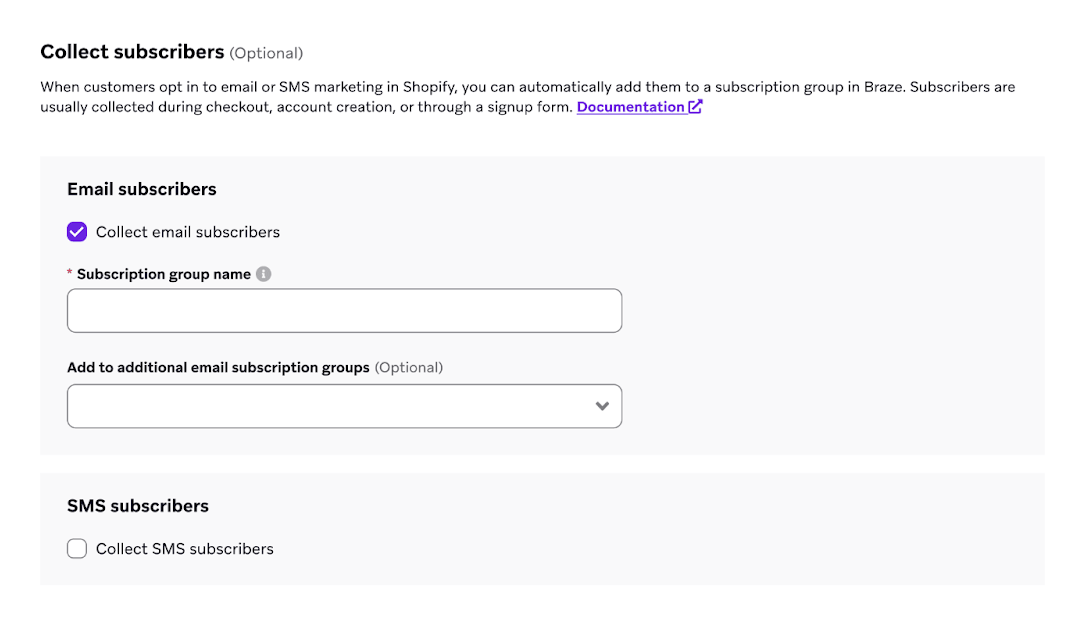
Shopifyからメールマーケティングのオプトインを同期すると、Brazeはその特定のストアに関連付けられたすべてのユーザーに対してメール購読グループを自動的に作成します。この購読グループには一意の名前を設定する必要があります。
Shopifyの概要で述べたように、サードパーティのキャプチャフォームを使用する場合、開発者がBraze SDKコードを統合する必要があります。これにより、フォーム送信からメールアドレスとグローバルメール購読ステータスをキャプチャできるようになります。具体的には、以下のメソッドをtheme.liquidファイルに実装してテストする必要があります。
- setEmail: ユーザープロファイルにメールアドレスを設定します
- setEmailNotificationSubscriptionType: グローバルメール購読ステータスを更新します
SMSダブルオプトインを使用すると、Shopifyの確認メールの代わりに、Brazeを通じてブランド確認テキストを送信できます。SMSダブルオプトインを有効にするには、以下の手順を実行します。
- Shopify管理画面で、設定 > 通知 > 顧客通知に移動します。
- SMSのマーケティングダブルオプトインをオフにします。
- チェックアウトSMSをシングルオプトインに設定します。
- BrazeのSMS設定で、Use Braze SMS double opt-inを選択します。
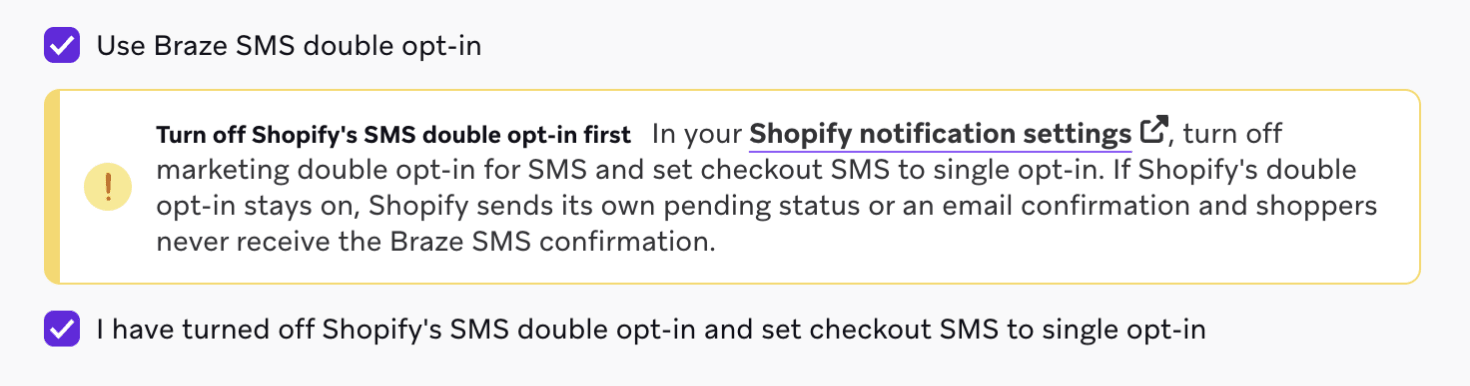
BrazeのSMSダブルオプトインと購読者フローの詳細については、Shopify概要を参照してください。
ステップ7: 商品を同期する(任意)
Shopify ストアのすべての商品を Braze カタログに同期して、より高度なメッセージングパーソナライゼーションを実現できます。自動更新はほぼリアルタイムで行われるため、カタログには常に最新の商品詳細が反映されます。詳しくは、Shopify 商品同期を参照してください。
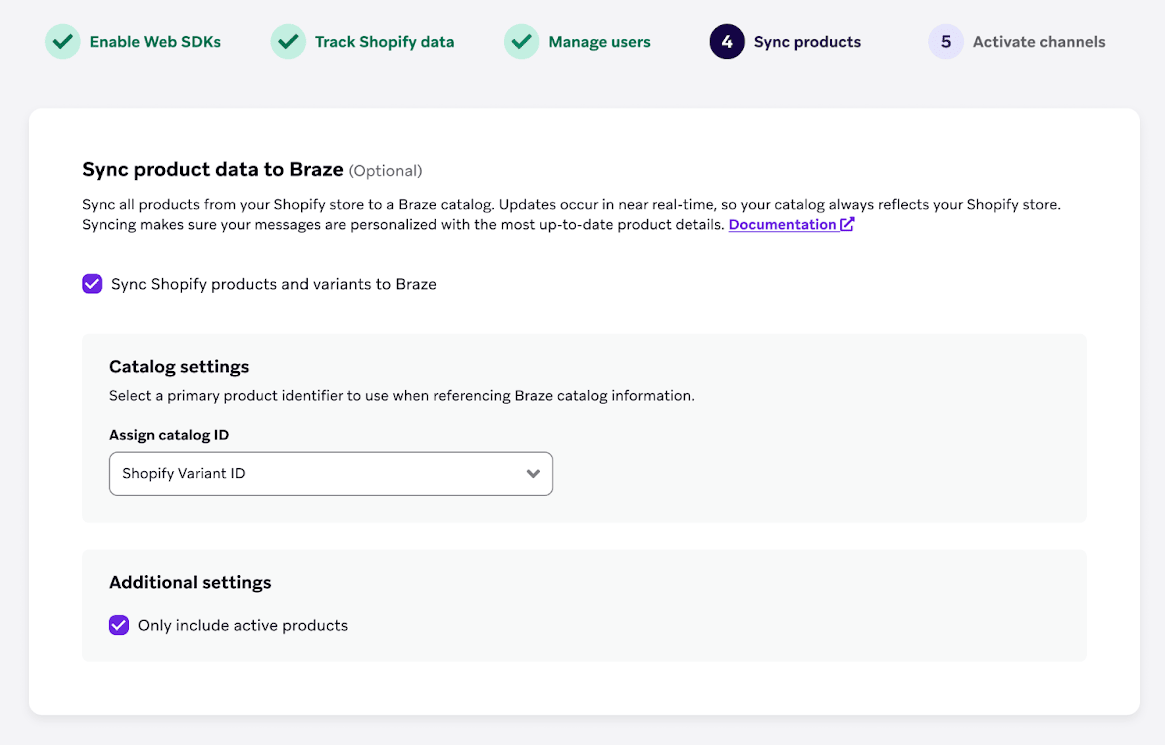
ステップ8: チャネルを有効にする
Shopify 直接インテグレーションを使用してアプリ内メッセージ、バナー、フィーチャーフラグを有効にするには、各チャネルをSDKに追加します。各チャネルについて提供されているドキュメントのリンクに従ってください:
- In-App Messages: リードキャプチャフォームのユースケースでアプリ内メッセージを有効にするには、In-App Messagesを参照してください。
- バナー: Shopify ストアフロントのパーソナライゼーションユースケースでバナーを有効にするには、バナーを参照してください。
- フィーチャーフラグ: Shopify ストアフロントの実験ユースケースでフィーチャーフラグを有効にするには、フィーチャーフラグを参照してください。
ステップ9: 設定を完了する
すべてのステップを完了したら、Finish Setup を選択してパートナーページに戻ります。次に、表示されるバナーの指示に従って、Shopify の管理ページで Braze アプリの埋め込みを有効にします。

サンプルコード
shopify-hydrogen-example は、前のステップで説明したすべてのコードを含む Hydrogen アプリのサンプルです。