Manual integration
If you don’t have access to a package manager, such as Swift Package Manager or CocoaPods, you can manually integrate the Swift SDK instead.
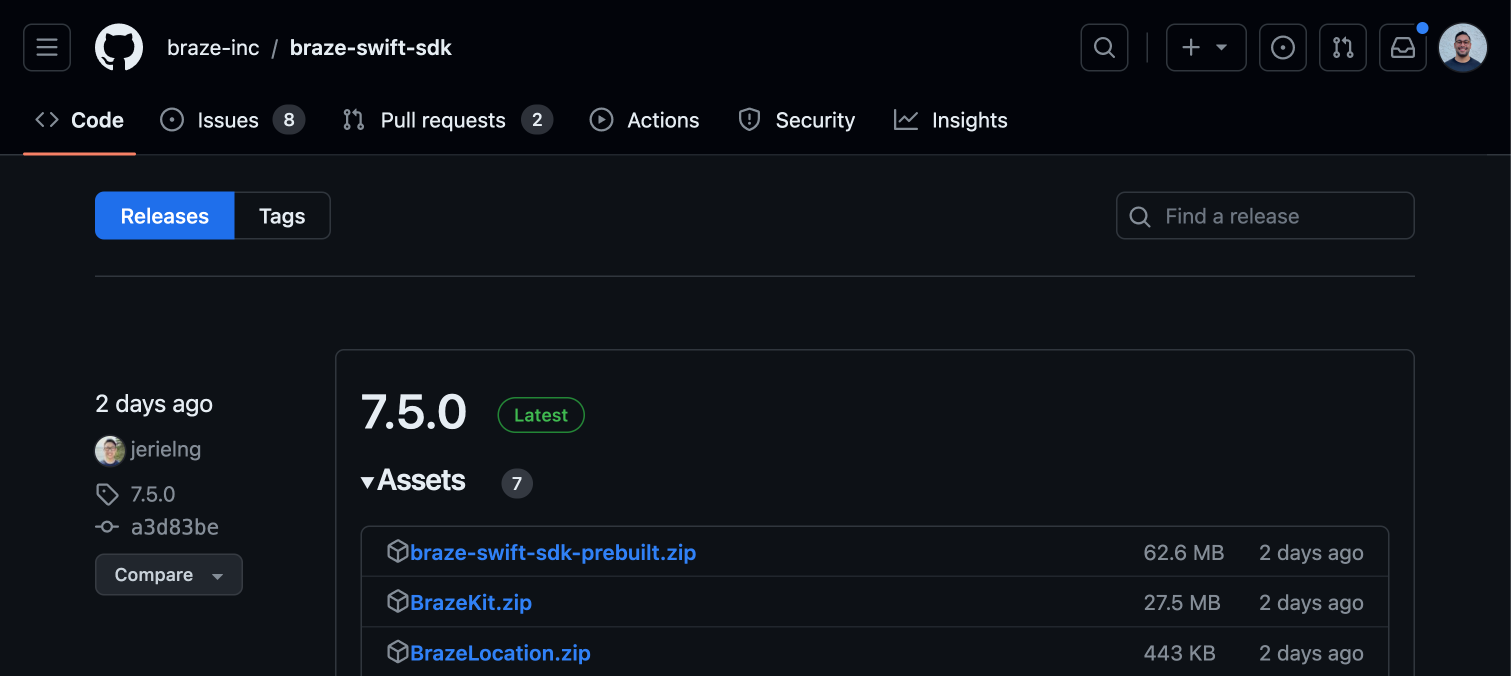
Step 1: Download the Braze SDK
Go to the Braze SDK release page on GitHub, then download braze-swift-sdk-prebuilt.zip.
Step 2: Choose your frameworks
The Braze Swift SDK contains a variety of standalone XCFrameworks, which gives you the freedom to integrate the features you want—without needing to integrate them all. Reference the following table to choose your XCFrameworks:
| Package | Required? | Description |
|---|---|---|
BrazeKit |
Yes | Main SDK library that provides support for analytics and push notifications. |
BrazeLocation |
No | Location library that provides support for location analytics and geofence monitoring. |
BrazeUI |
No | Braze-provided user interface library for in-app messages and Content Cards. |
BrazeNotificationService |
No | Notification service extension library that provides support for rich push notifications. Do not add this library directly to your main application target, instead add the BrazeNotificationService library separately. |
BrazePushStory |
No | Notification content extension library that provides support for Push Stories. Do not add this library directly to your main application target, instead add the BrazePushStory library separately. |
BrazeKitCompat |
No | Compatibility library containing all the Appboy and ABK* classes and methods that were available in the Appboy-iOS-SDK version 4.X.X. For usage details, refer to the minimal migration scenario in the migration guide. |
BrazeUICompat |
No | Compatibility library containing all the ABK* classes and methods that were available in the AppboyUI library from Appboy-iOS-SDK version 4.X.X. For usage details, refer to the minimal migration scenario in the migration guide. |
SDWebImage |
No | Dependency used only by BrazeUICompat in the minimal migration scenario. |
Step 3: Prepare your files
Decide whether you want to use Static or Dynamic XCFrameworks, then prepare your files:
- Create a temporary directory for your XCFrameworks.
- In
braze-swift-sdk-prebuilt, open thedynamicdirectory and moveBrazeKit.xcframeworkinto your directory. Your directory should be similar to the following:1 2
temp_dir └── BrazeKit.xcframework
- Move each of your chosen XCFrameworks into your temporary directory. Your directory should be similar to the following:
1
2
3
4
5
 temp_dir
 ├── BrazeKit.xcframework
 ├── BrazeKitCompat.xcframework
 ├── BrazeLocation.xcframework
 └── SDWebImage.xcframework
Step 3.1: Prepare your frameworks
- Create a temporary directory for your XCFrameworks.
- In
braze-swift-sdk-prebuilt, open thestaticdirectory and moveBrazeKit.xcframeworkinto your directory. Your directory should be similar to the following:1 2
temp_frameworks_dir └── BrazeKit.xcframework
- Move each of your chosen XCFrameworks into your temporary directory. Your directory should be similar to the following:
1
2
3
4
5
temp_frameworks_dir
├── BrazeKit.xcframework
├── BrazeKitCompat.xcframework
├── BrazeLocation.xcframework
└── SDWebImage.xcframework
Step 3.2: Prepare your bundles
- Create a temporary directory for your bundles.
- Open the
bundlesdirectory and moveBrazeKit.bundleinto your directory. Your directory should be similar to the following:1 2
temp_bundles_dir └── BrazeKit.bundle
- If you’re using the
BrazeLocation,BrazeUI,BrazeUICompat, orSDWebImageXCFrameworks, move their corresponding bundles into your temporary directory. Your directory should be similar to the following:1 2 3 4 5
temp_bundles_dir ├── BrazeLocation.bundle ├── BrazeUI.bundle ├── BrazeUICompat.bundle └── SDWebImage.bundle
Only move over bundles for the frameworks you prepared.
Step 4: Integrate your frameworks
Next, integrate the Dynamic or Static XCFrameworks you prepared previously:
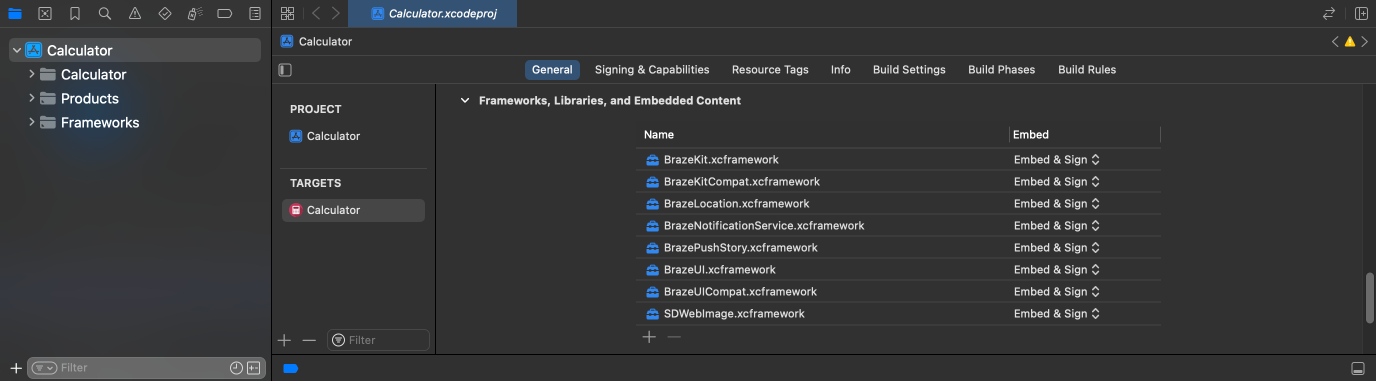
In your Xcode project, select your build target, then General. Under Frameworks, Libraries, and Embedded Content, drag and drop the files you prepared previously.
To enable GIF support, add SDWebImage.xcframework, located in braze-swift-sdk-prebuilt/dynamic.
In your Xcode project, select your build target, then General. Under Frameworks, Libraries, and Embedded Content, drag and drop the frameworks you prepared previously. Next to each framework, choose Do Not Embed.

To enable GIF support, add SDWebImage.xcframework, located in braze-swift-sdk-prebuilt/static.
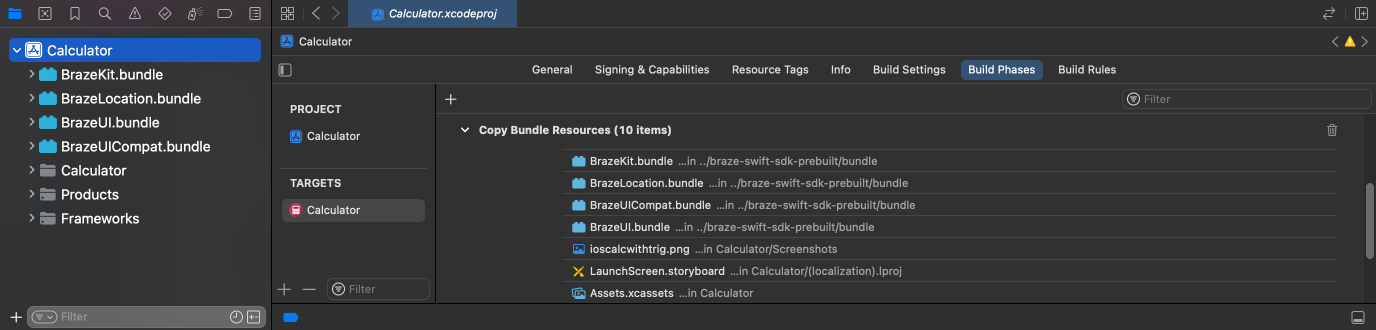
While in your build target, select Build Phases. Under Copy Bundle Resources drag and drop the bundles you prepared previously.
Common errors for Objective-C projects
If your Xcode project only contains Objective-C files, you may get “missing symbol” errors when you try to build your project. To fix these errors, open your project and add an empty Swift file to your file tree. This will force your build toolchain to embed Swift Runtime and link to the appropriate frameworks during build time.
1
FILE_NAME.swift
Replace FILE_NAME with any non-spaced string. Your file should look similar to the following:
1
empty_swift_file.swift
 Edit this page on GitHub