This page references our older Objective-C SDK. Check out our new Swift SDK to integrate our latest Swift-first library.
Push Story setup
The Push Story feature requires the UNNotification framework and iOS 10. The feature is only available from iOS SDK version 3.2.1.
Step 1: Enable push in your app
Follow the push notification integration to enable push in your app.
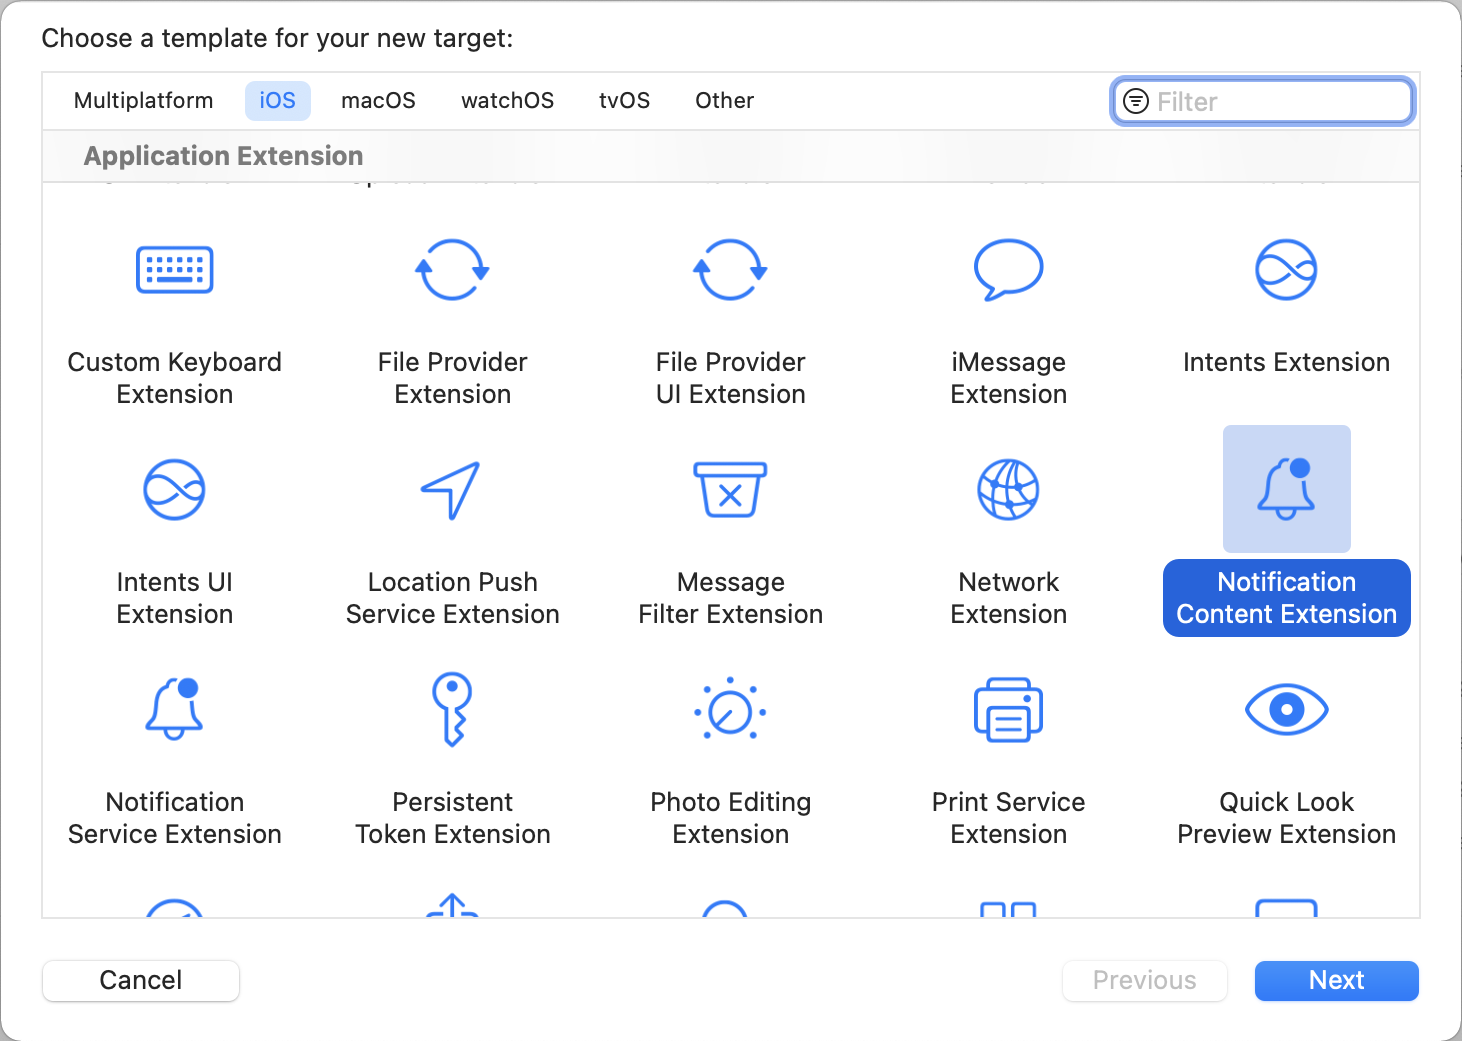
Step 2: Adding the Notification Content Extension target
In your app project, go to menu File > New > Target… and add a new Notification Content Extension target and activate it.
Xcode should generate a new target for you and create files automatically for you including:
NotificationViewController.hNotificationViewController.mMainInterface.storyboard
NotificationViewController.swiftMainInterface.storyboard
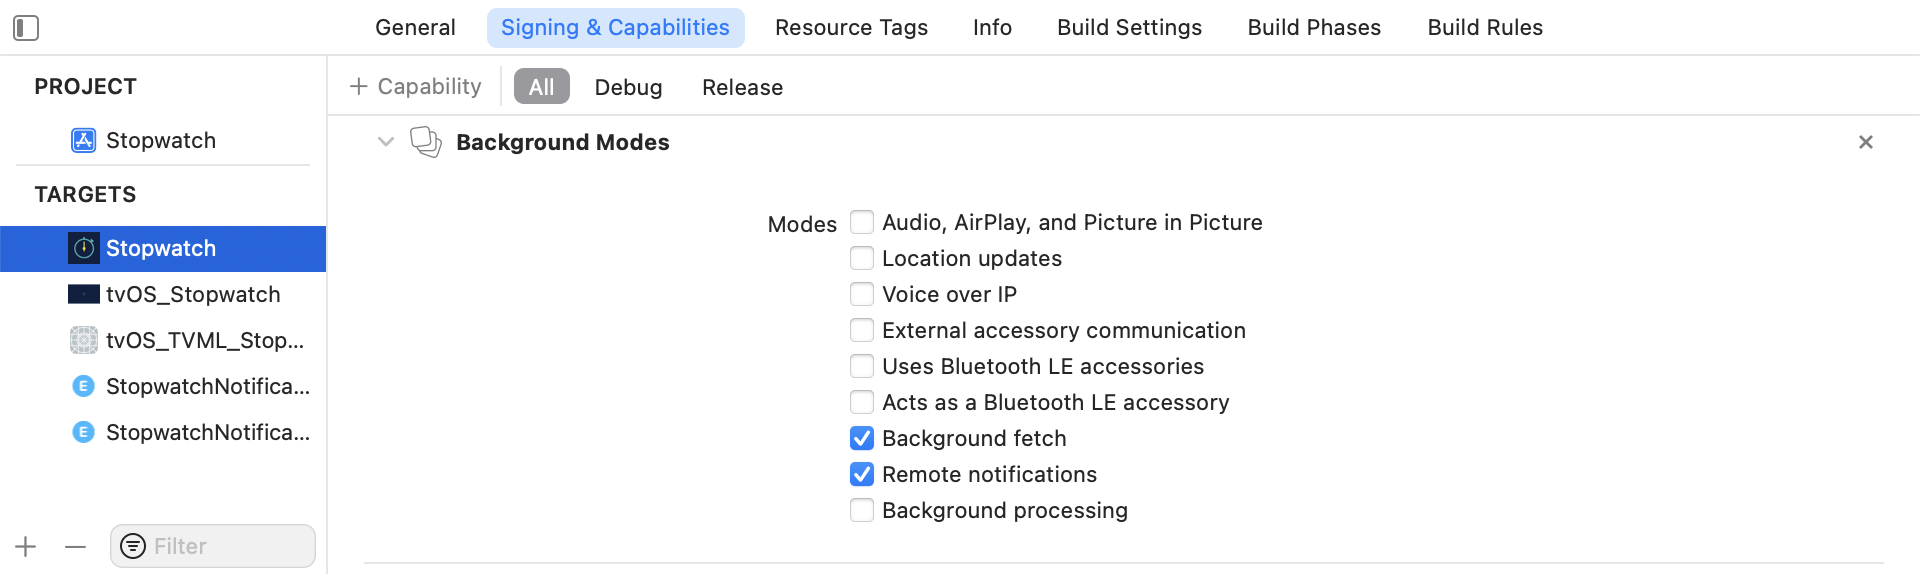
Step 3: Enable capabilities
The Push Story feature requires the background mode in the Capabilities section of the main app target. After turning on the background modes, select Background fetch and Remote notifications.
Adding an App Group
You also need to add Capability App Groups. If you haven’t had any app group in your app, go to the Capability of the main app target, turn on the App Groups, and click the + button. Use your app’s bundle ID to create the app group. For example, if your app’s bundle ID is com.company.appname, you can name your app group group.com.company.appname.xyz. You need to turn on the App Groups for both the main app and content extension targets.
App Groups in this context refer to Apple’s App Groups Entitlement and not your Braze workspace (previously app group) ID.
If you do not add your app to an App Group, your app may fail to populate certain fields from the push payload and will not work fully as expected.
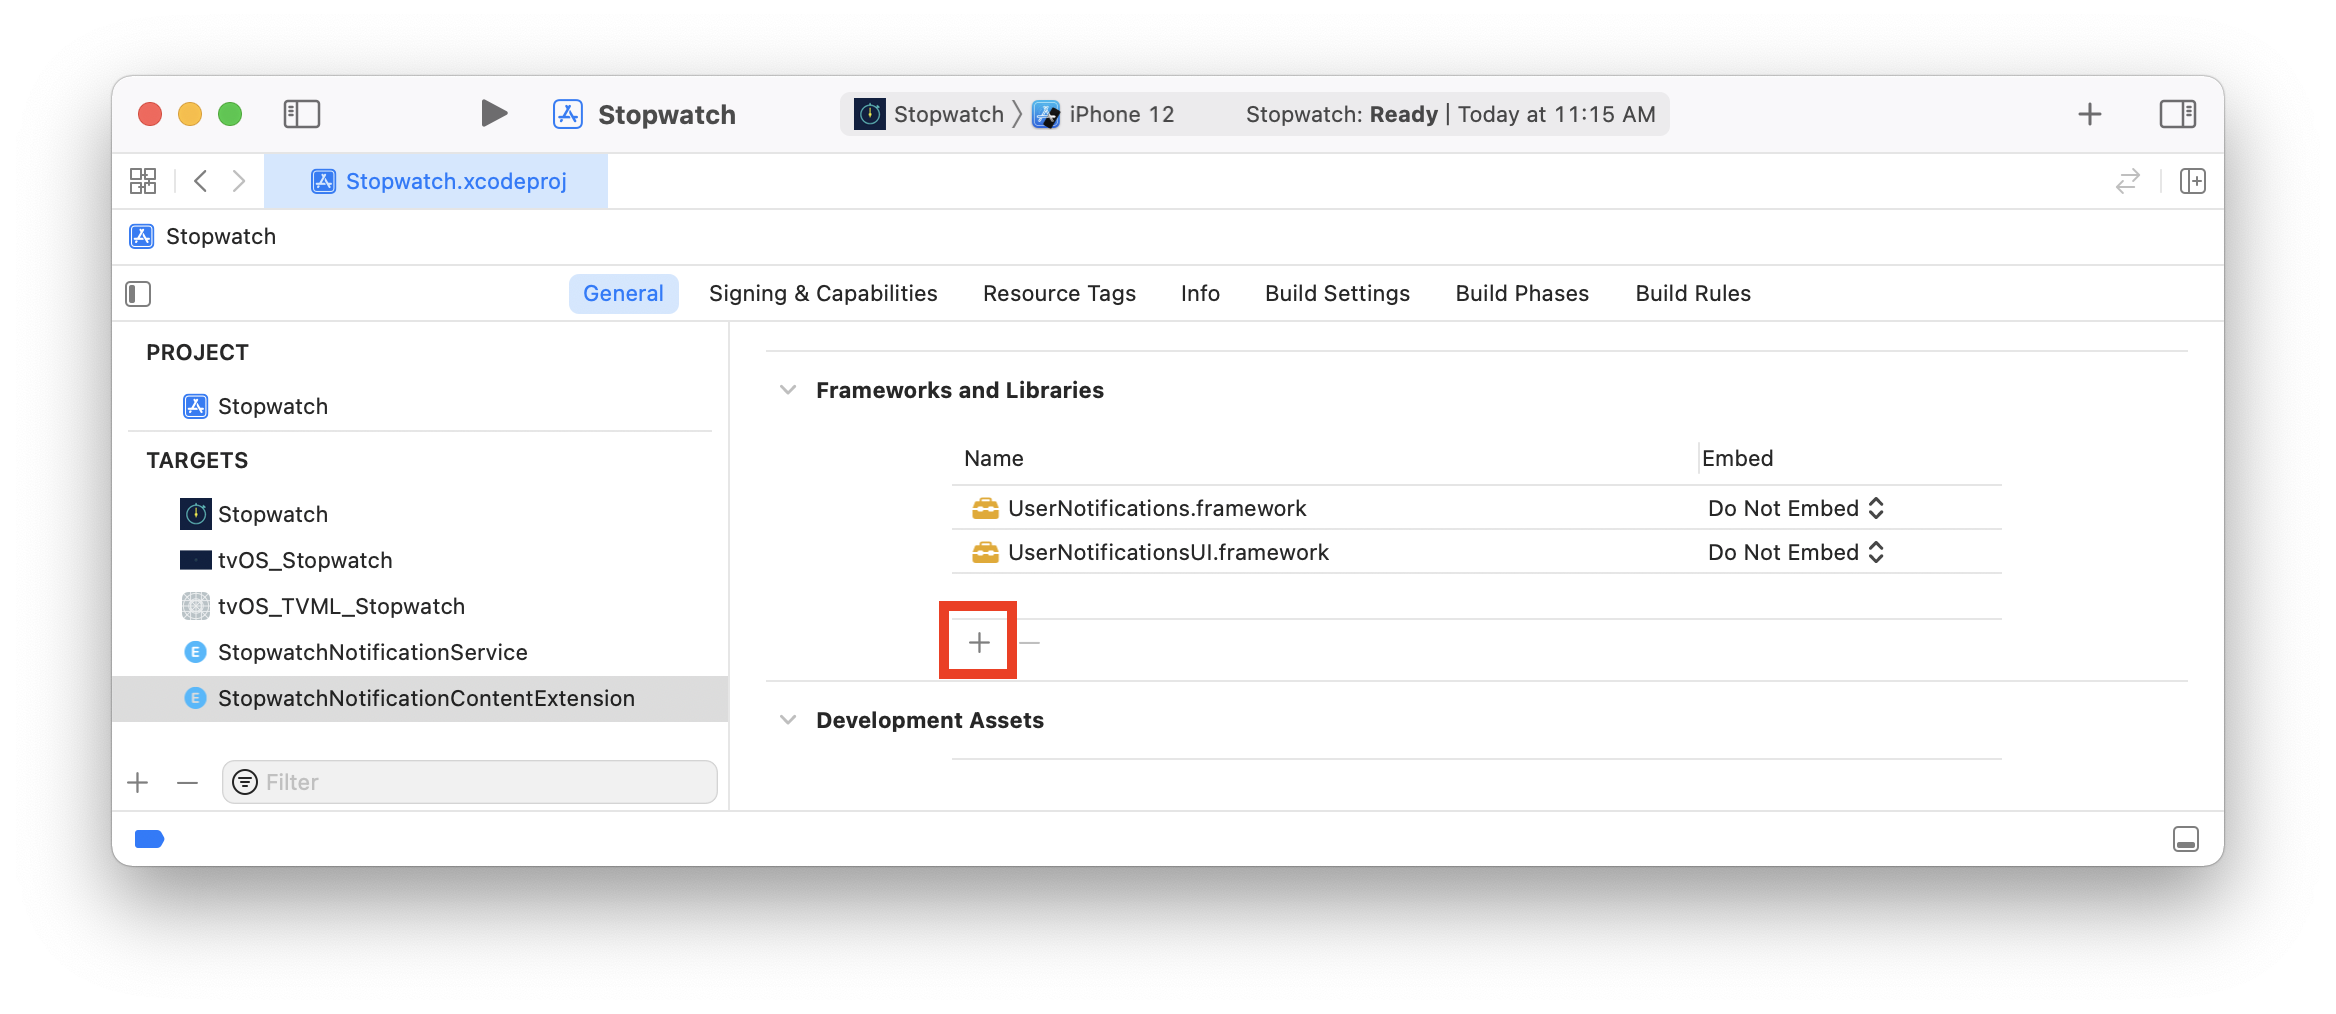
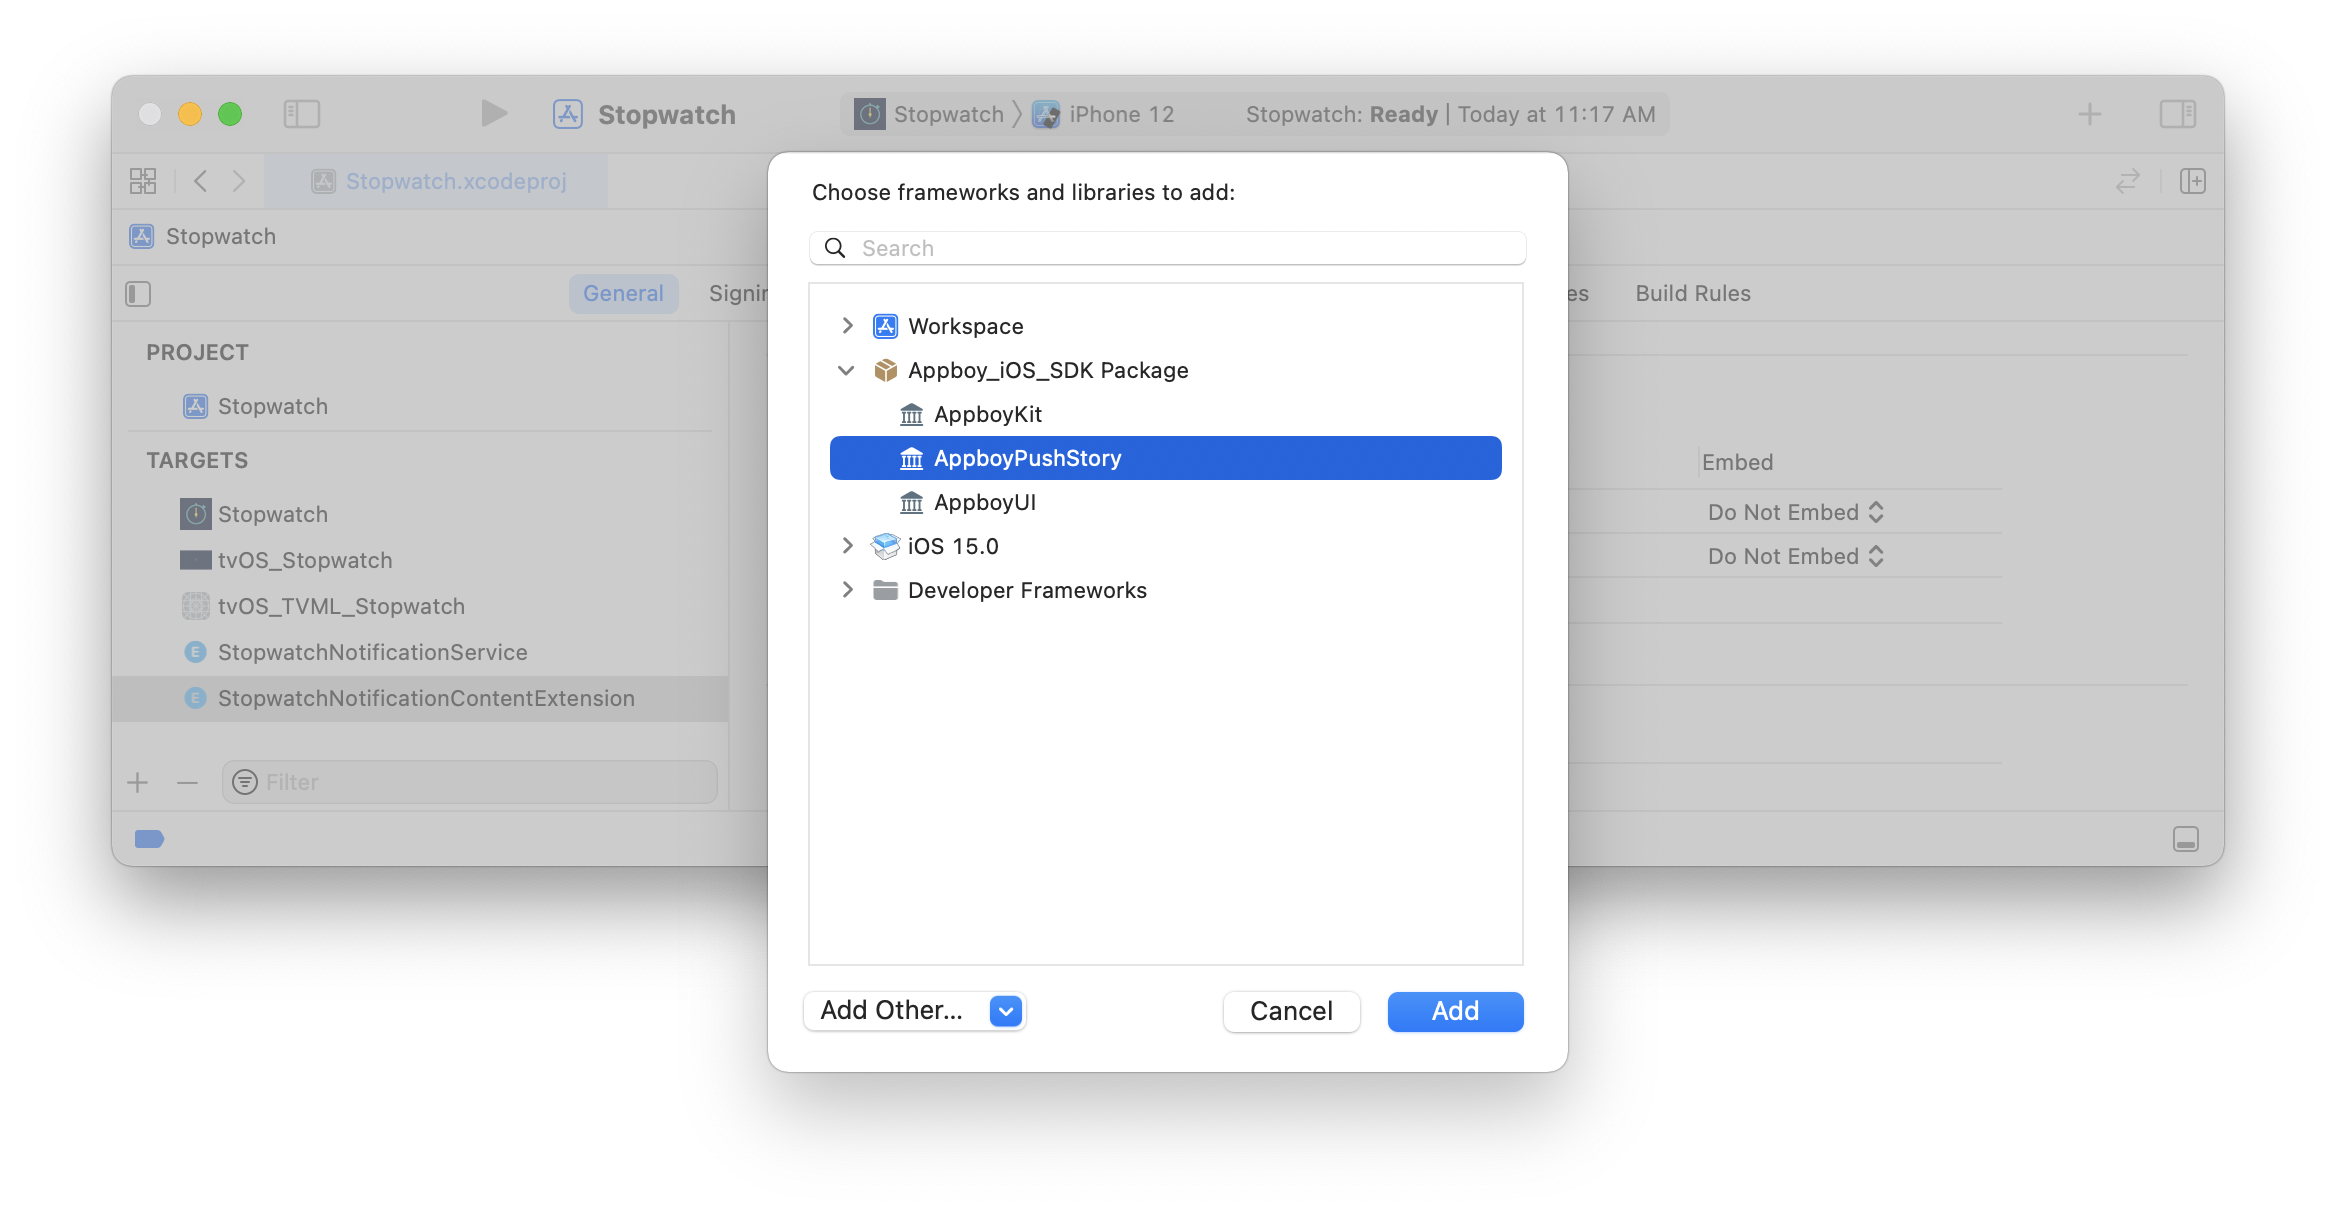
Step 4: Adding the Push Story framework to your app
After following the Swift Package Manager integration guide, add AppboyPushStory to your Notification Content Extension:
Add the following line to your Podfile:
1
2
3
target 'YourContentExtensionTarget' do
  pod 'Appboy-Push-Story'
end
After updating the Podfile, navigate to the directory of your Xcode app project within your terminal and run pod install.
Download the latest AppboyPushStory.zip from the GitHub release page, extract it, and add the following files to your project’s Notification Content Extension:
Resources/ABKPageView.nibAppboyPushStory.xcframework
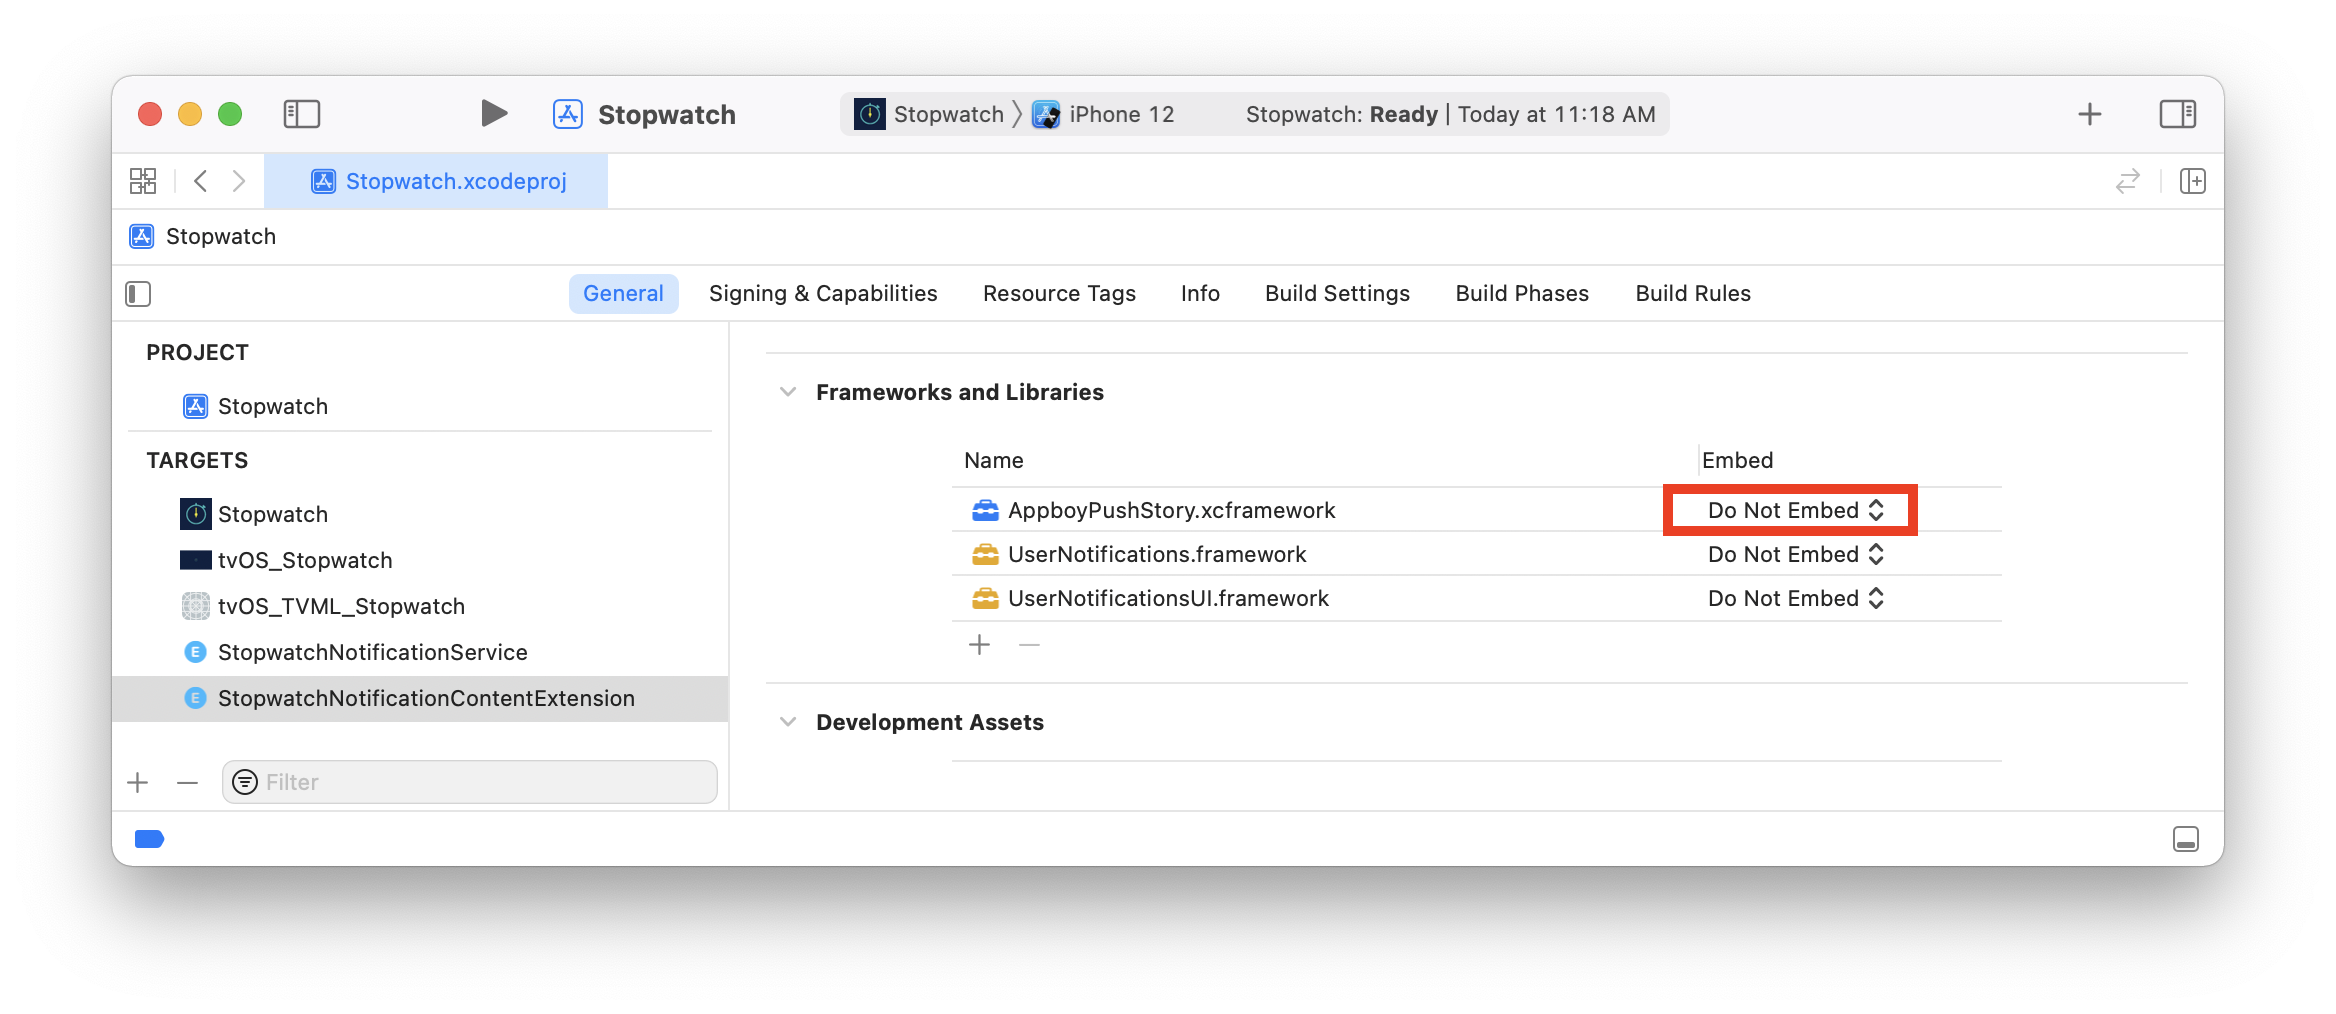
Make sure that Do Not Embed is selected for AppboyPushStory.xcframework under the Embed column.
Add the -ObjC flag to your project’s Notification Content Extension in Build Settings > Other Linker Flags.
Step 5: Updating your notification view controller
In your NotificationViewController.h, add following lines to add new properties and import the header files:
1
#import <AppboyPushStory/AppboyPushStory.h>
1
2
@property (nonatomic) IBOutlet ABKStoriesView *storiesView;
@property (nonatomic) ABKStoriesViewDataSource *dataSource;
In your NotificationViewController.m, remove the default implementation and add following code:
1
2
3
4
5
6
7
8
9
10
11
12
13
14
15
16
17
18
19
20
@implementation NotificationViewController

- (void)didReceiveNotification:(UNNotification *)notification {
  self.dataSource = [[ABKStoriesViewDataSource alloc] initWithNotification:notification
                                                               storiesView:self.storiesView
                                                                  appGroup:@"YOUR-APP-GROUP-IDENTIFIER"];
}

- (void)didReceiveNotificationResponse:(UNNotificationResponse *)response
                     completionHandler:(void (^)(UNNotificationContentExtensionResponseOption option))completion {
  UNNotificationContentExtensionResponseOption option = [self.dataSource didReceiveNotificationResponse:response];
  completion(option);
}

- (void)viewWillDisappear:(BOOL)animated {
  [self.dataSource viewWillDisappear];
  [super viewWillDisappear:animated];
}

@end
In your NotificationViewController.swift, add the following line to import the header files:
1
import AppboyPushStory
Next, remove the default implementation and add following code:
1
2
3
4
5
6
7
8
9
10
11
12
13
14
15
16
17
18
19
20
21
class NotificationViewController: UIViewController, UNNotificationContentExtension {

  @IBOutlet weak var storiesView: ABKStoriesView!
  var dataSource: ABKStoriesViewDataSource?

  func didReceive(_ notification: UNNotification) {
    dataSource = ABKStoriesViewDataSource(notification: notification, storiesView: storiesView, appGroup: "YOUR-APP-GROUP-IDENTIFIER")
  }

  func didReceive(_ response: UNNotificationResponse, completionHandler completion: @escaping (UNNotificationContentExtensionResponseOption) -> Void) {
    if dataSource != nil {
      let option: UNNotificationContentExtensionResponseOption = dataSource!.didReceive(response)
      completion(option)
    }
  }

  override func viewWillDisappear(_ animated: Bool) {
    dataSource?.viewWillDisappear()
    super.viewWillDisappear(animated)
  }
}
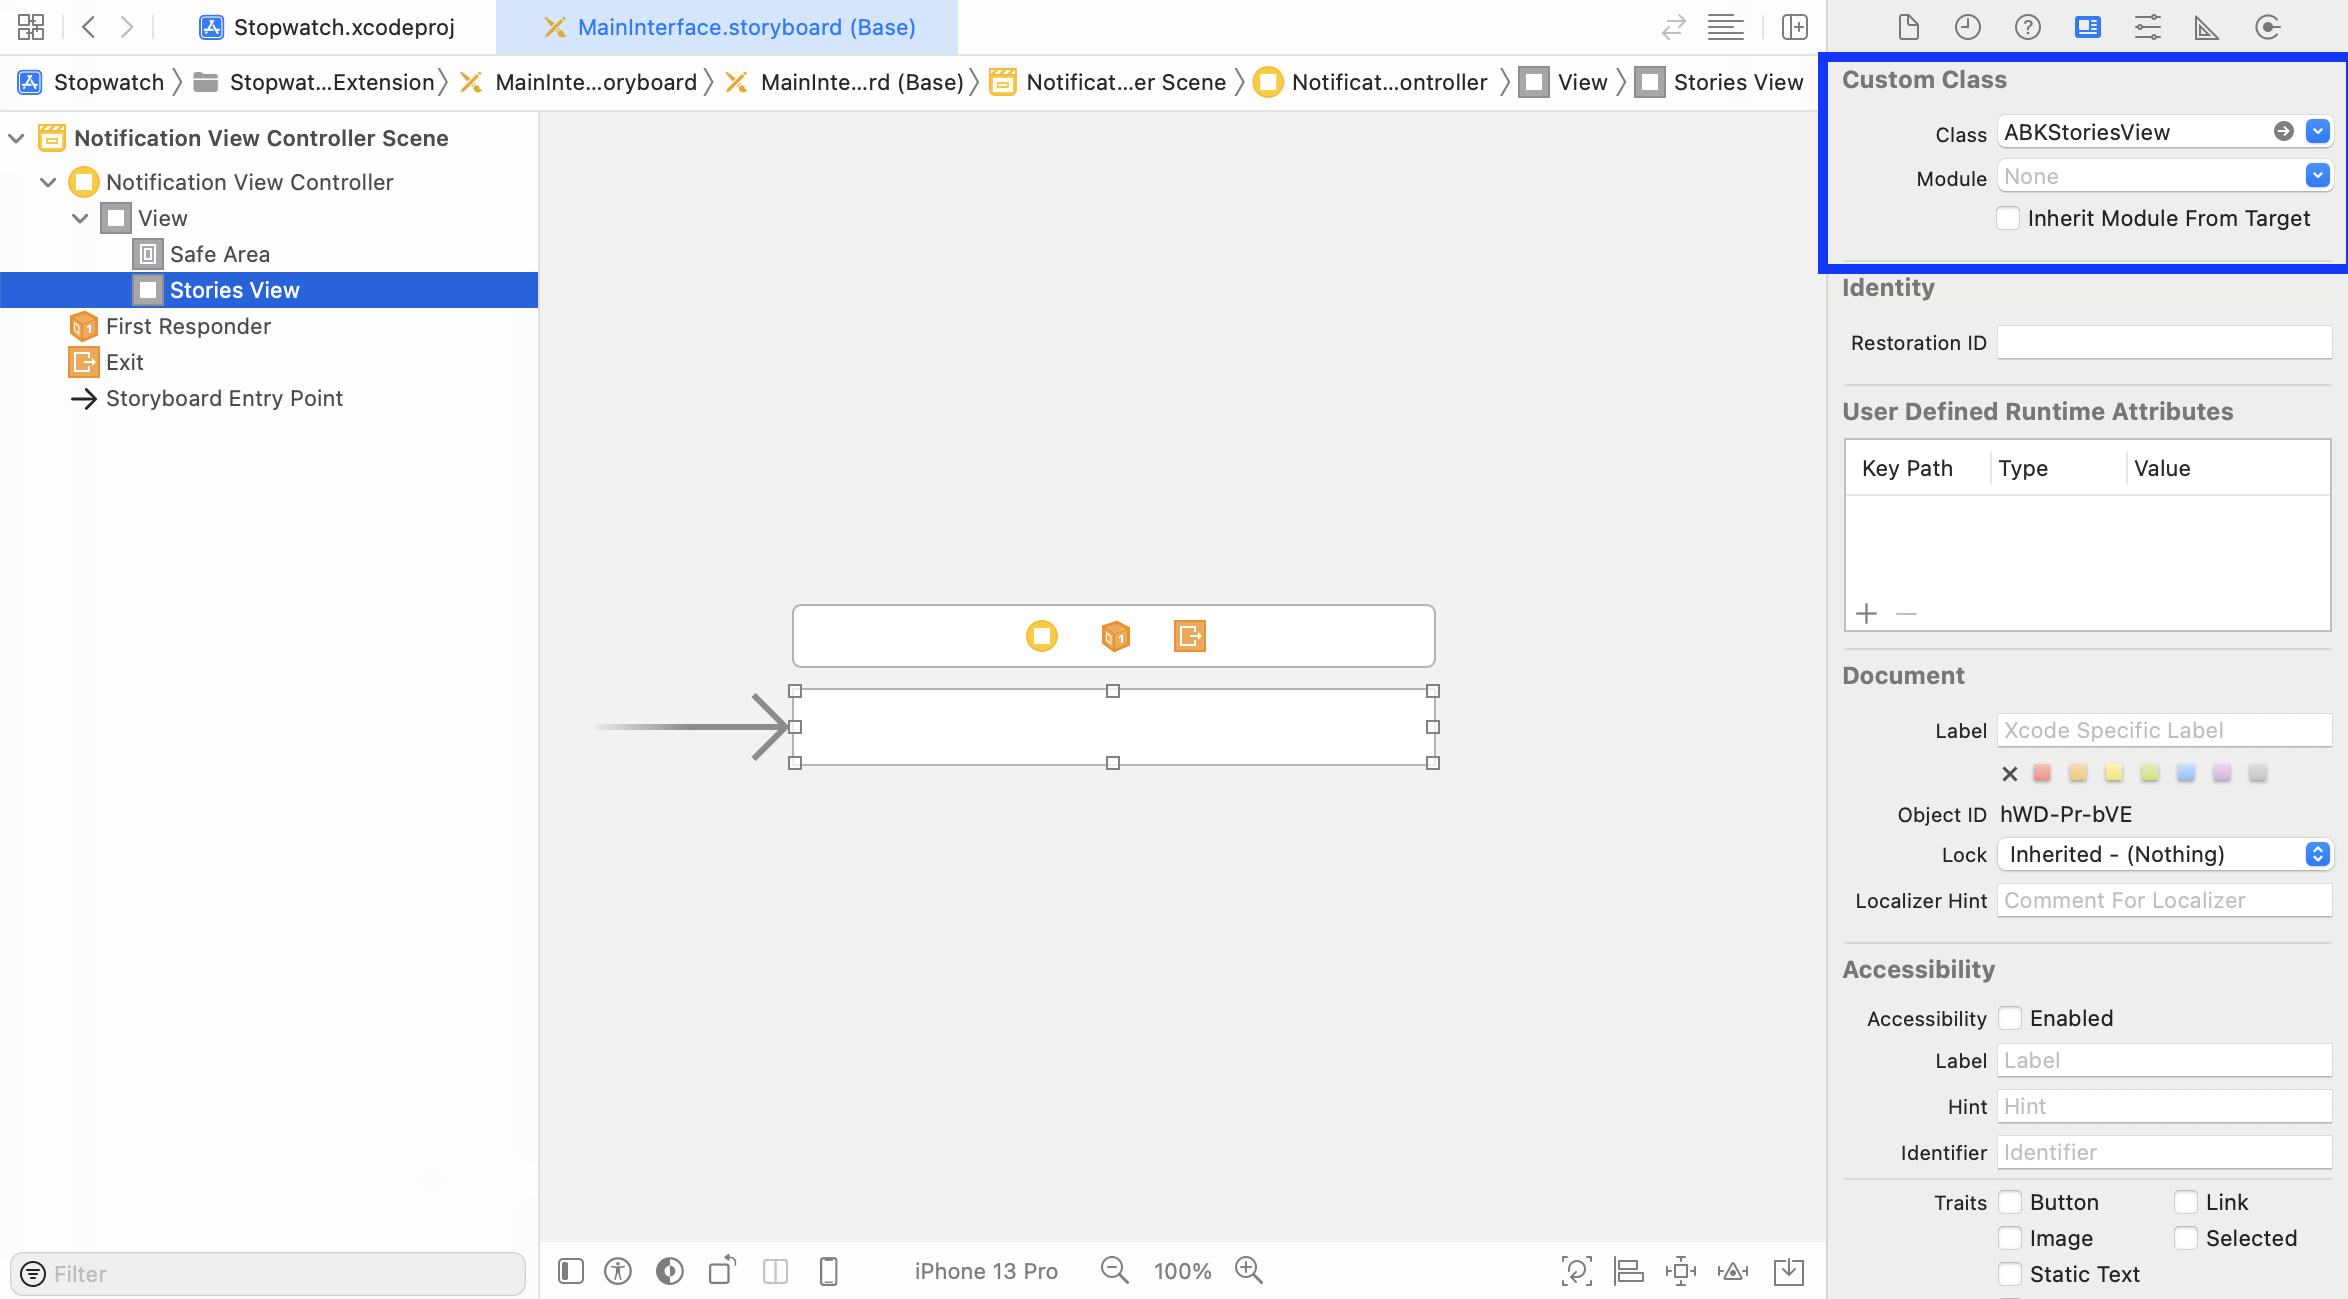
Step 6: Set the notification content extension storyboard
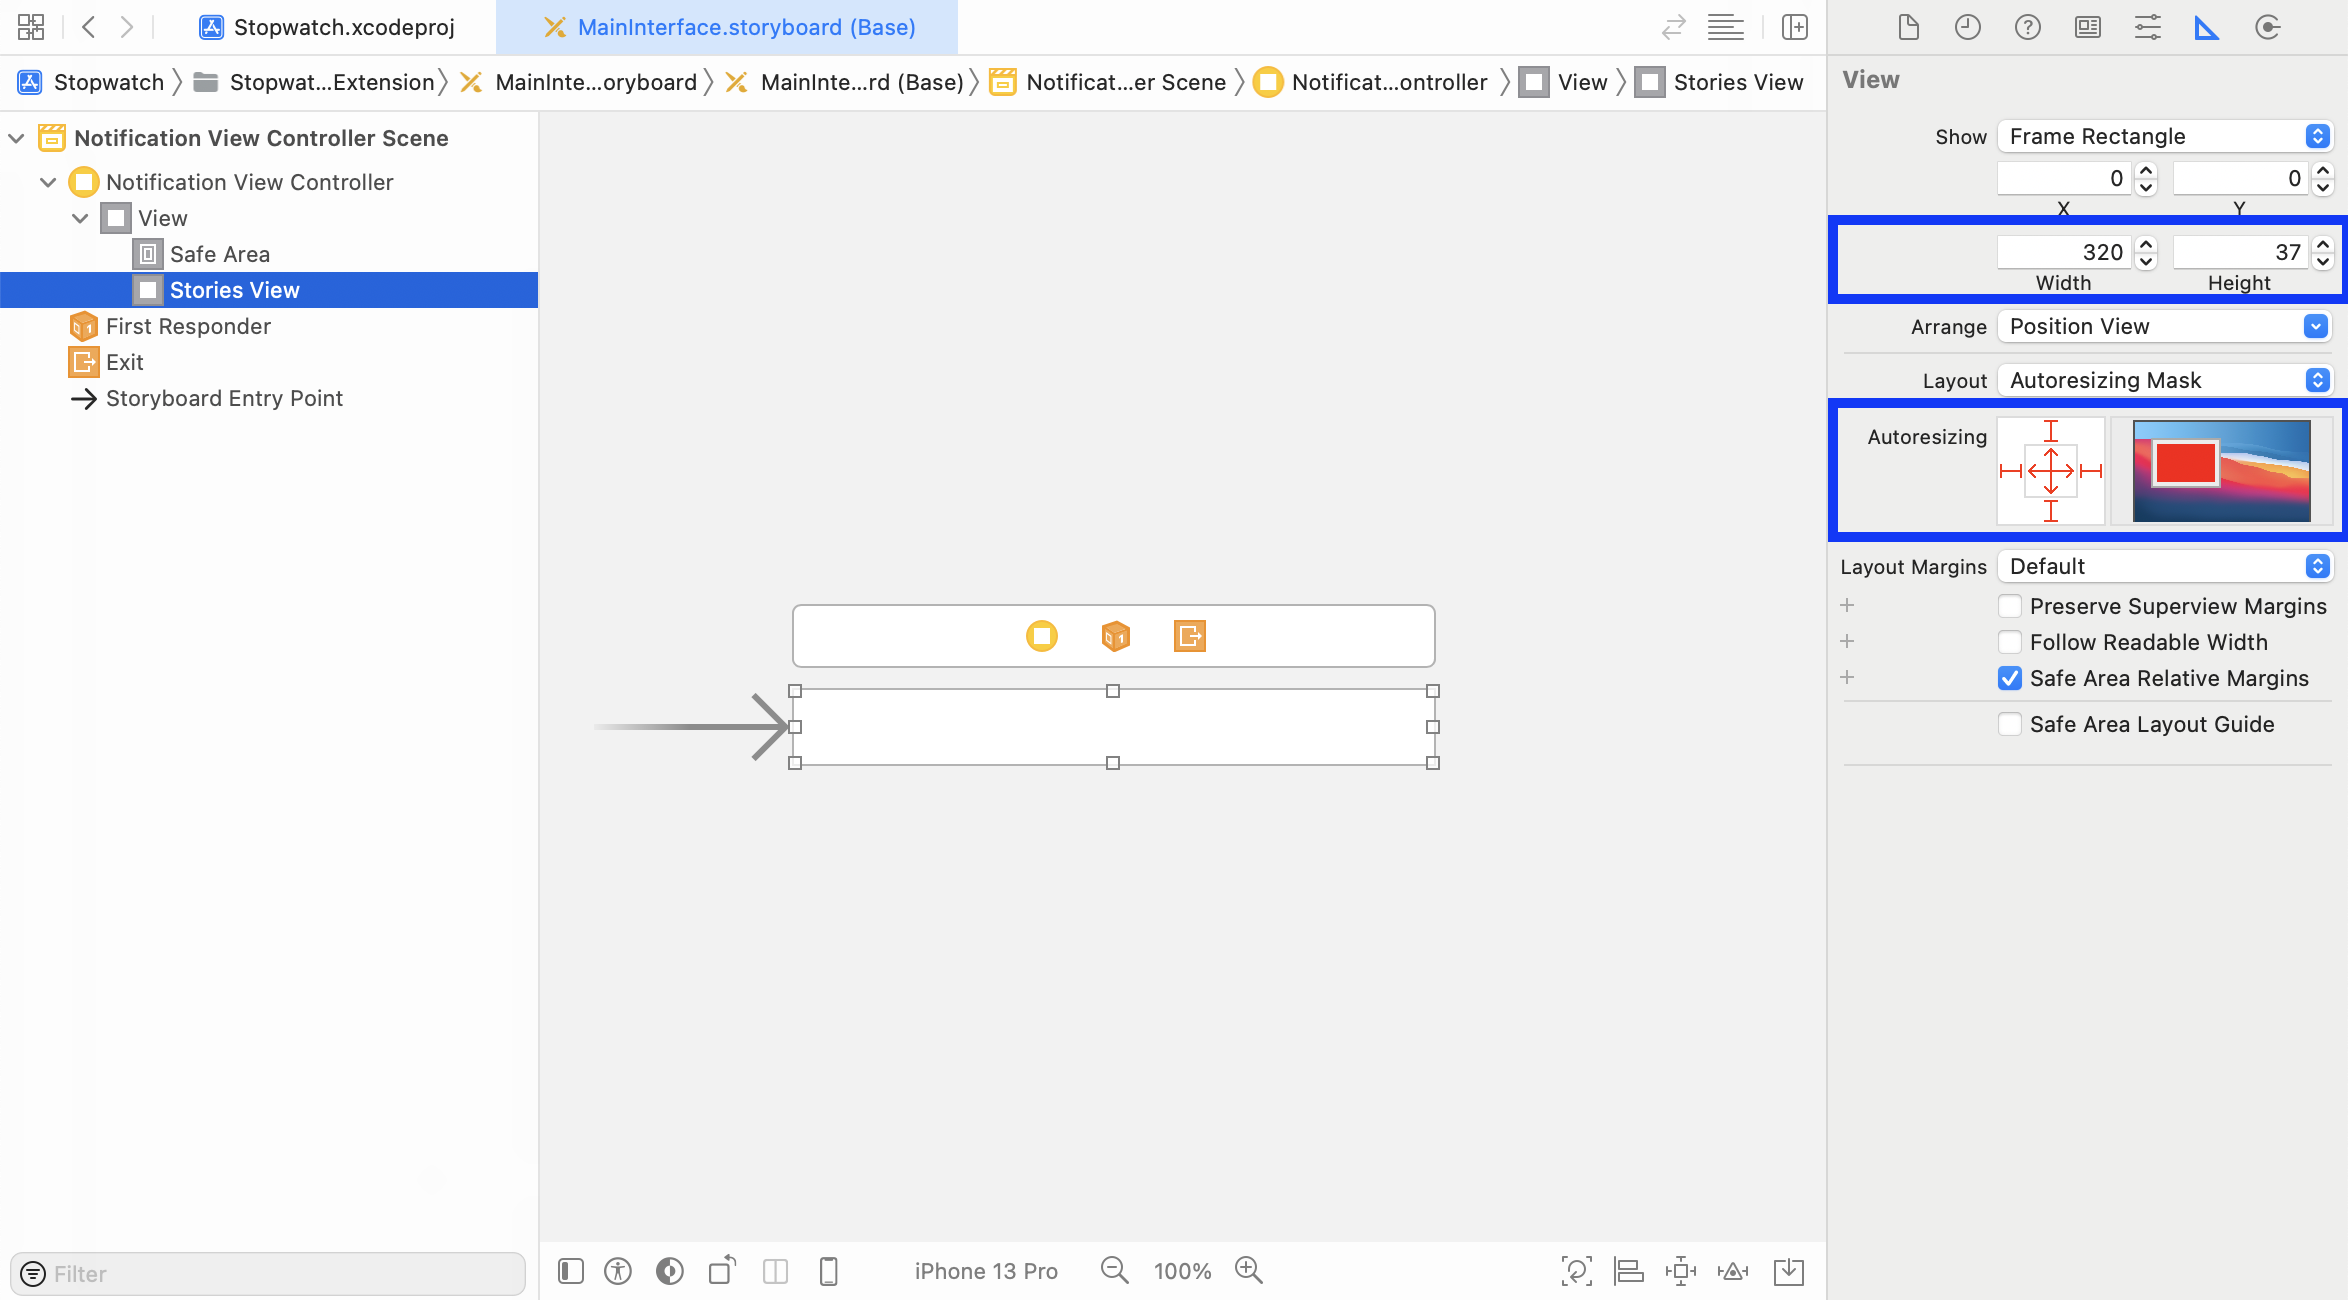
Open the Notification Content Extension storyboard and place a new UIView in the notification view controller. Rename the class to ABKStoriesView. Make the view width and height auto-resizable matching the notification view controller’s main view frame.
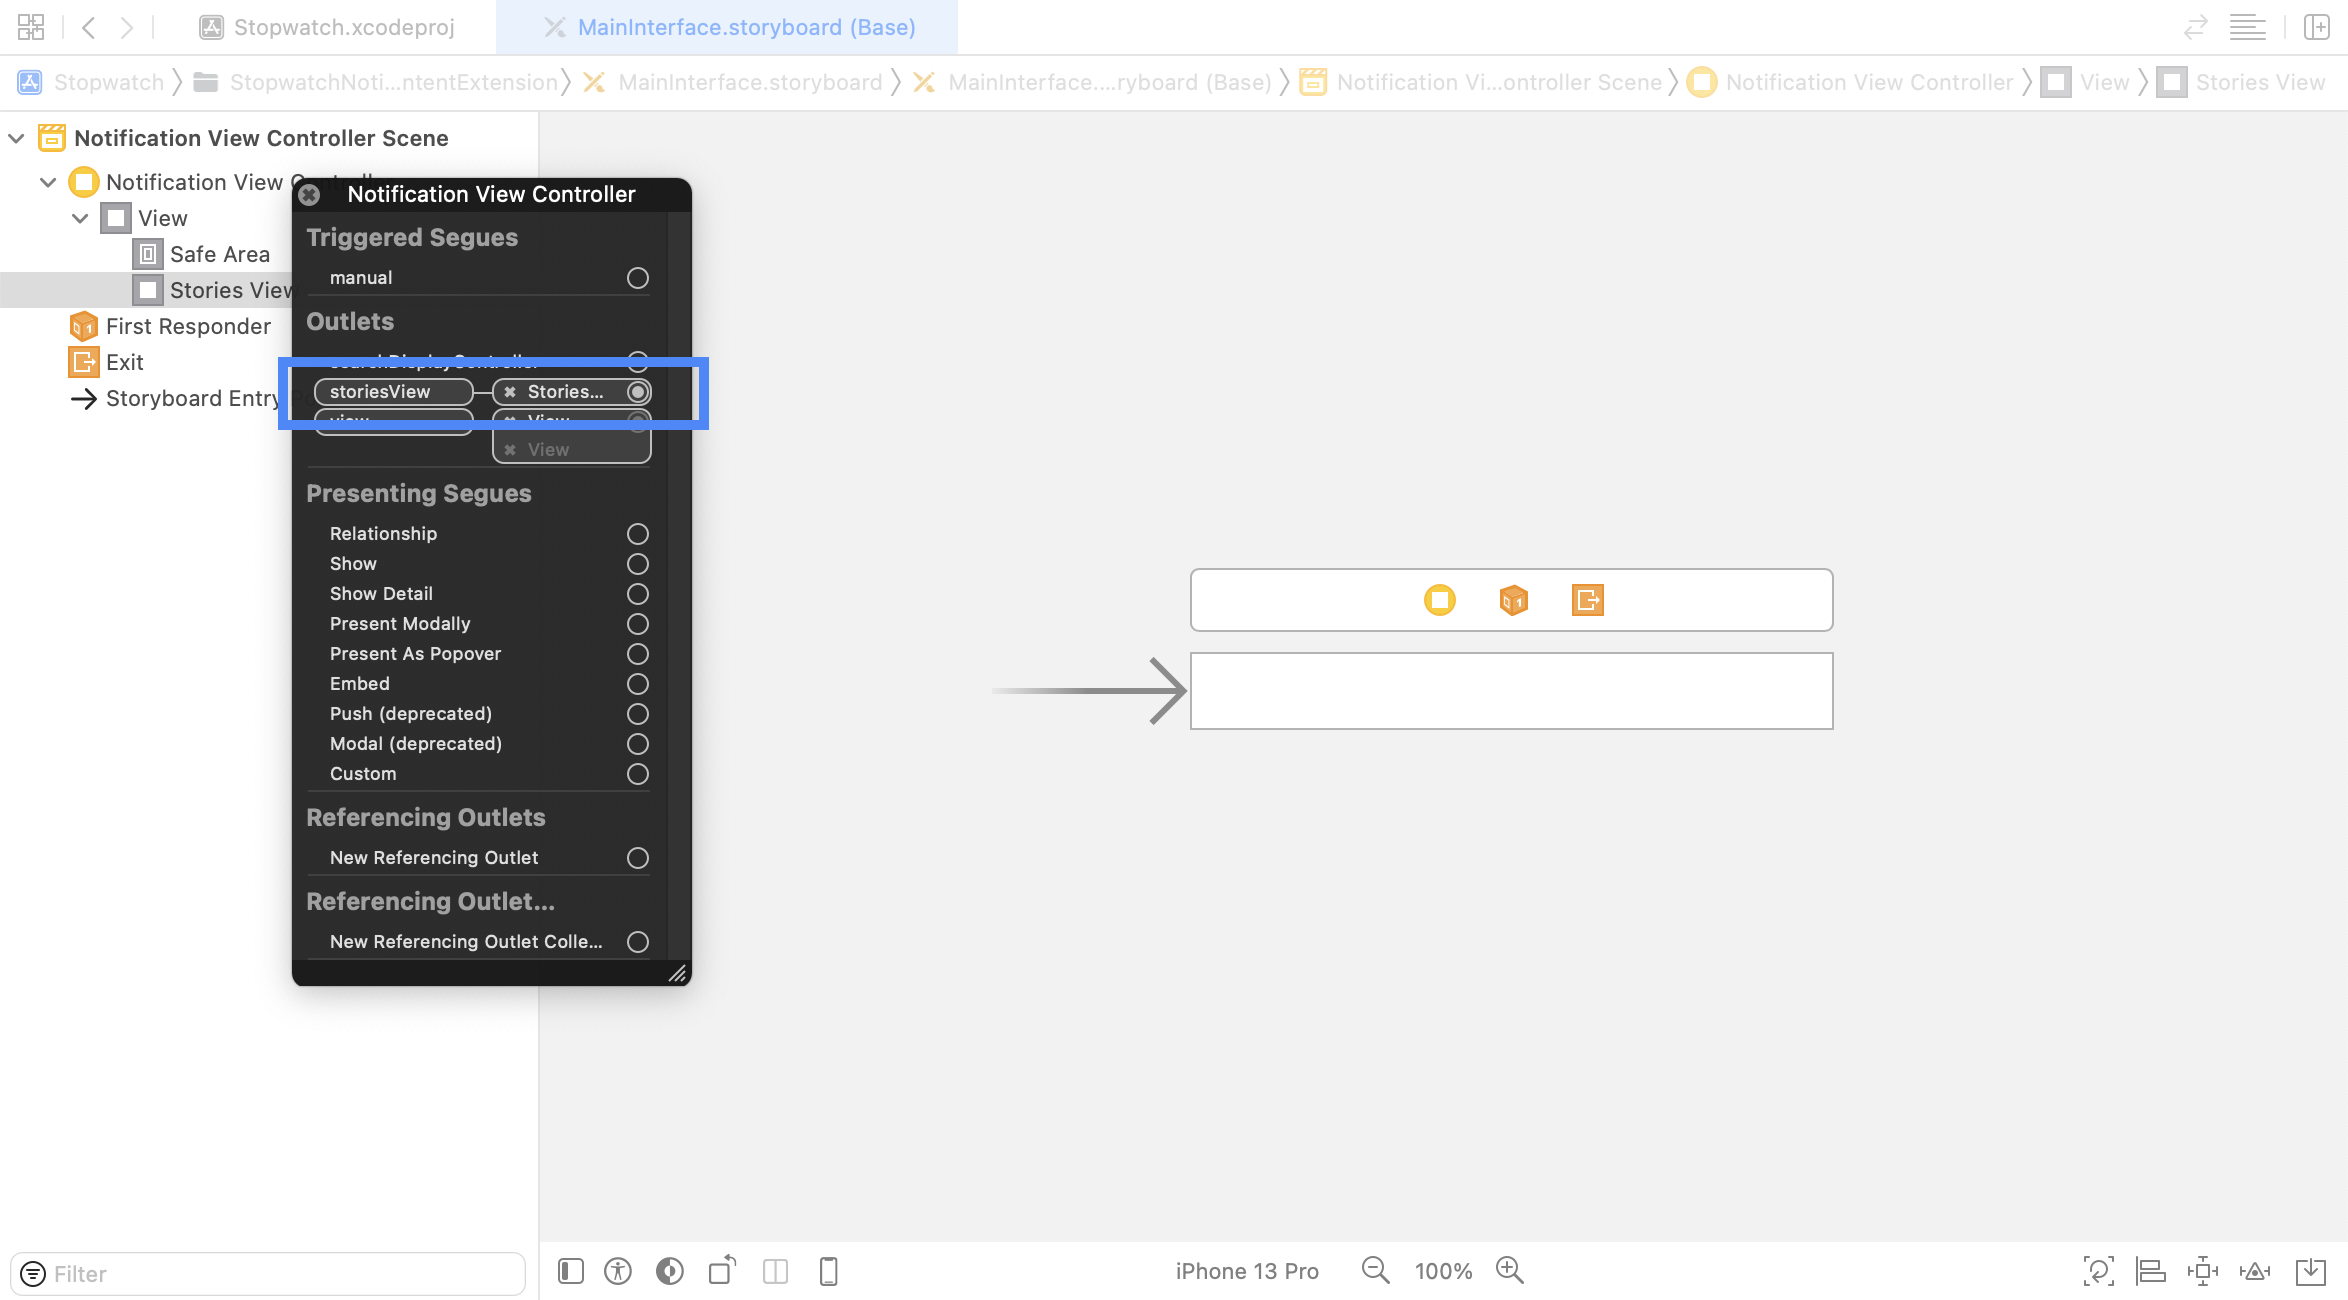
Next, link the notification view controller’s storiesView IBOutlet to the added ABKStoriesView.
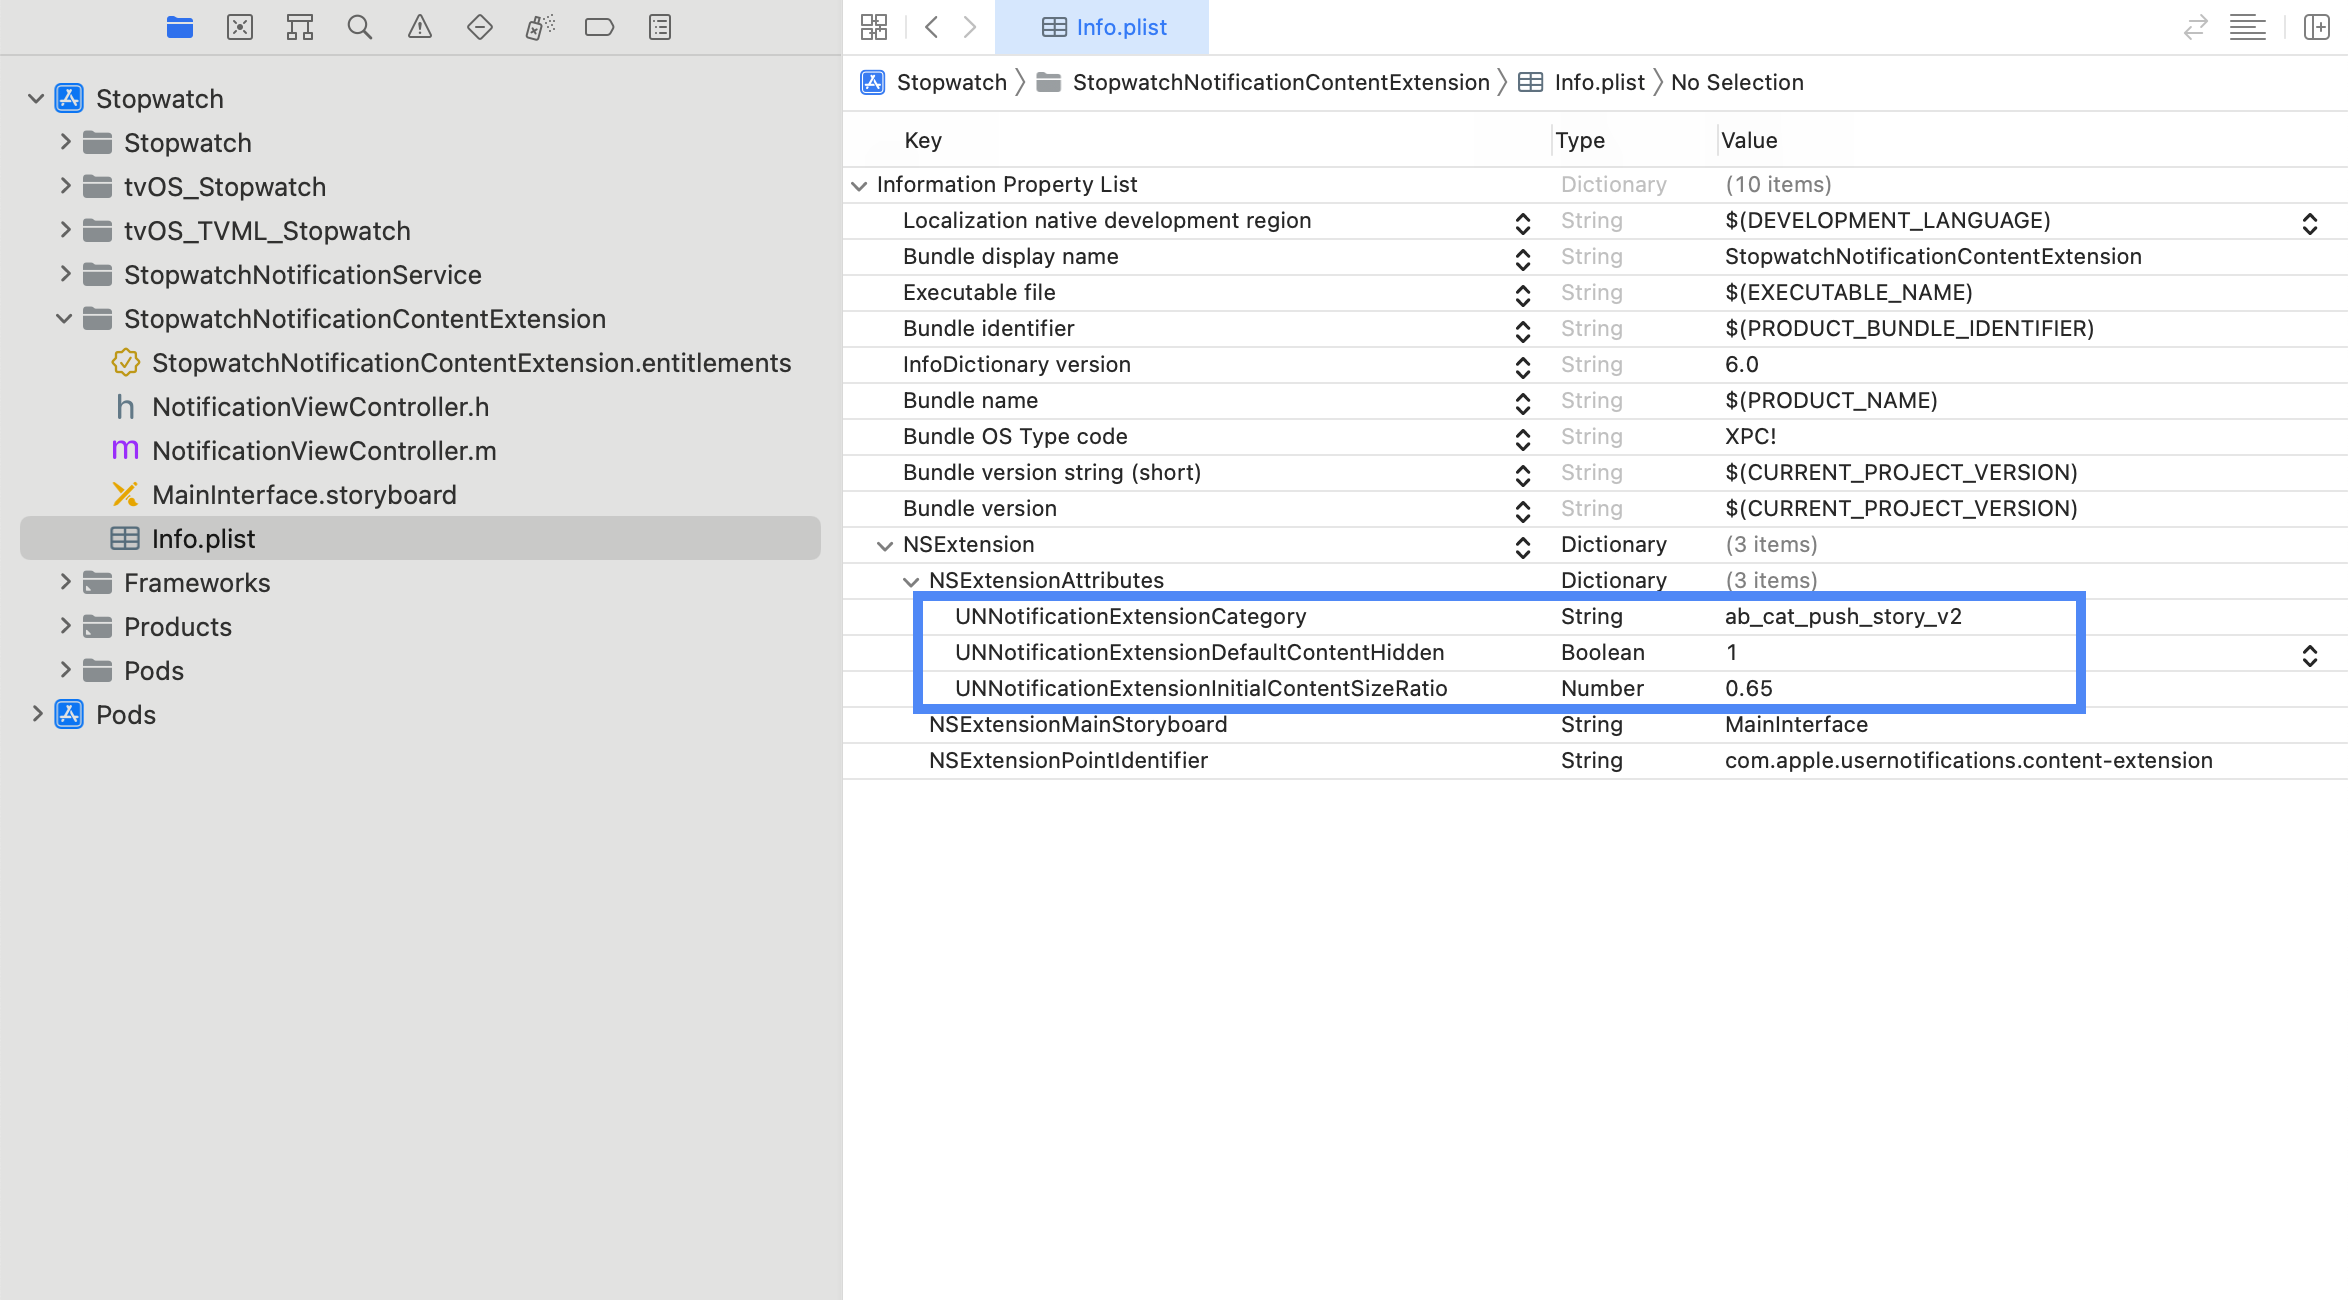
Step 7: Set the notification content extension plist
Open the Info.plist file of the Notification Content Extension and add and change the following keys under NSExtension \ NSExtensionAttributes:
UNNotificationExtensionCategory = ab_cat_push_story_v2 (String type)
UNNotificationExtensionDefaultContentHidden = YES (Boolean type)
UNNotificationExtensionInitialContentSizeRatio = 0.65 (Number type)
Step 8: Updating the Braze integration in your main app
Option 1: Runtime
In the appboyOptions dictionary used to configure your Braze instance, add an ABKPushStoryAppGroupKey entry and set the value to your workspace API identifier.
1
2
3
4
5
6
NSMutableDictionary *appboyOptions = [NSMutableDictionary dictionary];
appboyOptions[ABKPushStoryAppGroupKey] = @"YOUR-APP-GROUP-IDENTIFIER";
[Appboy startWithApiKey:@"YOUR-API-KEY"
          inApplication:application
      withLaunchOptions:launchOptions
      withAppboyOptions:appboyOptions];
1
2
3
4
let appboyOptions: [AnyHashable: Any] = [
  ABKPushStoryAppGroupKey : "YOUR-APP-GROUP-IDENTIFIER"
]
Appboy.start(withApiKey: "YOUR-API-KEY", in:application, withLaunchOptions:launchOptions, withAppboyOptions:appboyOptions)
Option 2: Info.plist
Alternatively, to configure the Push Story workspace from your Info.plist file, add a dictionary named Braze to your Info.plist file. Inside the Braze dictionary, add a string-typed PushStoryAppGroup subentry and set the value to your workspace identifier. Note that prior to Braze iOS SDK v4.0.2, the dictionary key Appboy must be used in place of Braze.
Next steps
Next refer to the steps for integrating action buttons, which is required for buttons to show on a Push Story message.
 Edit this page on GitHub