Amperity
Amperity is a comprehensive enterprise customer data platform, helping brands get to know their customers, make strategic decisions, and consistently take the right course of action to serve their consumers better. Amperity provides intelligent capabilities across data management unification, analytics, insights, and activation.
This integration is maintained by Amperity.
The Braze and Amperity integration offers a unified view of your customers across the two platforms. This integration allows you to:
- Sync customer profiles: Map user data and custom attributes from Amperity to Braze.
- Create and send audiences: Build segments that return lists of active customers and their associated custom attributes to Braze, and send them to Braze.
- Manage data updates: Control the frequency of sending updates for custom attributes to Braze.
- Unify data: Unify data across various Amperity-supported platforms and Braze.
- Sync Braze data to Amazon S3: Use Braze Currents to integrate engagement data from Braze campaigns, allowing you to sync data to Amazon S3 in Apache Avro format.
Prerequisites
| Requirement | Description |
|---|---|
| Amperity account | An Amperity account is required to take advantage of this partnership. |
| Braze REST API key | A Braze REST API key with users.track permissions. This can be created in the Braze dashboard by navigating to Developer Console > Rest API Key > Create New API Key. |
| Braze instance | Your Braze instance can be obtained from your Braze onboarding manager or be found on the API overview page. |
| Braze REST endpoint | Your Braze endpoint URL. Your endpoint will depend on your Braze instance. |
| Currents connector (optional) | The S3 Currents connector. |
Data mapping
Both standard and custom attributes can be sent from Amperity to Braze, allowing you to enrich customer profiles in Braze with data from various sources through Amperity. The specific attributes you can send will depend on the data in your Amperity system and the attributes that you’ve set up in Braze.
Review this section to learn about these attributes.
Standard attributes
Profile attributes describe who your customers are. They are often associated with the identity of the customer, such as:
- Names
- Birthdates
- Email addresses
- Phone numbers
Custom attributes
Custom attributes in Braze are fields that are determined by your brand. If you want Amperity to manage custom attributes that already exist in Braze, align the output that is sent from Amperity with the names already in your Braze workspace. This can include the following:
- Purchase histories
- Loyalty status
- Value tiers
- Recent engagement data
Verify the names of custom attributes that will be sent to Braze from Amperity. Amperity will add a custom attribute whenever there isn’t a matching name.
Custom attributes will be updated only for those users that have a matching external_id or braze_id within Braze.
Amperity Audiences
Audiences synced from Amperity to Braze will be logged to user profiles as custom attributes. These can then be used to target those users in Braze.


Data types
Supported data types include:
- Boolean
- Date
- Datetime
- Decimal
- Float
- Integer
- String
- Varchar
The data type used depends on the nature of the attribute. For example, an email address would be a string, while a customer’s age might be an integer.
Duplication of attributes
Avoid sending custom attributes that duplicate default user profile fields. For example, birthdates should be sent to Braze as a user profile field named “dob” to match the Braze standard attribute. If they are sent as “birthday”, “Birthdate”, or any other string, a custom attribute will be created, and the values in the “dob” field will not be updated.
Data points
Amperity keeps track of what changes between syncs to Braze and the status of sends overall. Amperity will only send Braze the list membership and other chosen attributes that have changed since the last sync.
Integration
Step 1: Capture configuration details for Braze
- Create a Braze REST API key for your Braze workspace with the
users.trackpermissions under User Data. Theusers.trackendpoint syncs the Amperity audience to Braze as a custom attribute. - Determine the REST API endpoint for your Braze instance. For example, if your Braze URL is
https://dashboard-03.braze.com, your REST API endpoint ishttps://rest.iad-03.braze.comand your instance is “US-03”. - Determine a list of user profile fields and custom attributes that may be sent to Braze from Amperity.
Step 2: Set up Braze as a destination—DataGrid Operator
Step 2a: Build the customer profiles table
Create a new table named “Braze Customer Attributes” within your Customer 360 database in Amperity. This table should contain all the attributes from Braze that your brand wants to manage from Amperity, including both default user profile fields required by Braze and any custom attributes. Use SQL to define the structure of this table as shown in the Amperity documentation.
Step 2b: Name, validate, and save the table
Name the table “Braze Customer Attributes” and save it. Verify that the table is accessible to the Segment Editor and the Edit Attributes editor within campaigns.
Step 2c: Add Braze as a destination
In the Amperity platform, navigate to the Destinations tab. Look for the option to add a new destination. From the available options, select Braze.

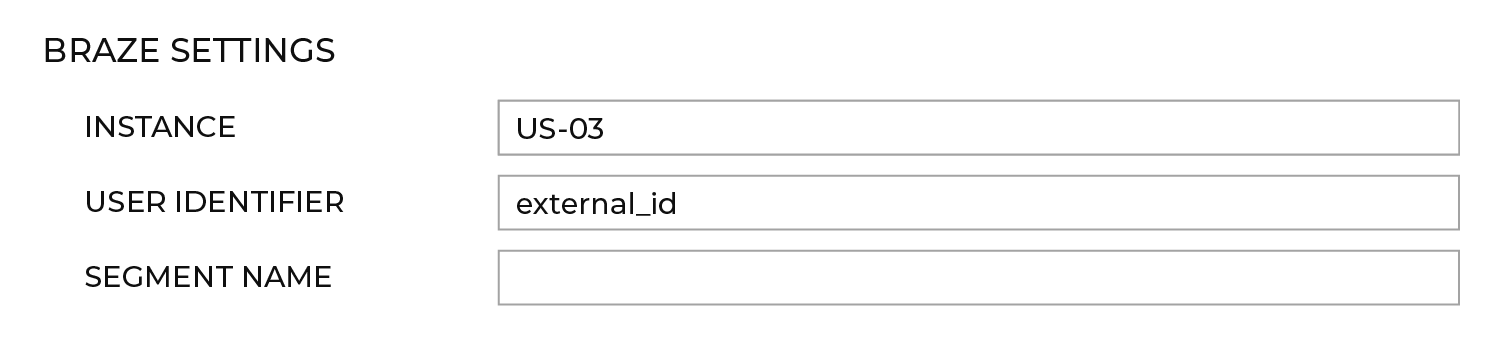
Step 2d: Configure destination details
Under Braze settings, provide the Braze credentials and destination settings, as shown in the Amperity documentation. Input the configuration details collected in the last step and define the Braze identifier. Available identifiers to match are:
braze_id: An automatically assigned Braze identifier that is unchangeable and associated with a particular user when they are created in Braze.external_id: A customer-assigned identifier, typically a UUID.
Step 2e: Add a data template
In the Destinations tab, open the menu for the Braze destination and select Add data template. Enter a name and description for the template (for example, “Braze” and “Send custom attributes to Braze”), verify business user access, and check all configuration settings.
If any required settings weren’t configured as part of the destination, configure them as part of the data template. Save the data template.

Step 2f: Save the configuration
After you fill in the necessary details, save the configuration. Now that Braze is configured as a destination, Amp360 and AmpIQ users can sync data to Braze.
Step 3: Sync data to Braze
Make sure Braze is enabled for your Amperity tenant. If it isn’t, contact your DataGrid Operator or Amperity representative for assistance.
Then, follow the syncing instructions for Amp360 or AmpIQ as applicable to your company.
Syncing option 1: Send query results to Braze via Amp360
Amp360 users can use SQL to write free-form queries and then configure a schedule that sends the results to Braze.
Step 1: Create a query in Amperity
Navigate to the query function in Amperity and construct an SQL query that will yield the desired set of customer data. The results should include the specific attributes you want to send to Braze. See this example of Amperity query for returning a list of users with their purchase histories.
Step 2: Add a new orchestration in Amperity
- Go to the Orchestration section and click the option to add a new orchestration.
- Specify what the orchestration should do. This usually involves specifying the SQL query that should be executed and where the results should be sent. In this case, select the SQL query you created to generate the list of active customers and specify Braze as the destination for the results.
- Define when and how often the orchestration should run. For example, you might run the orchestration daily at a specific time.
- Save the orchestration after configuring it to your liking. It will be added to your list of orchestrations in Amperity.
- Test the orchestration to make sure it works as expected. You can do this by manually triggering the orchestration and checking the results in Braze.
Step 3: Run the orchestration
Run the orchestration to execute the query and send the results to Braze. This can be done manually or on the schedule you set up in the orchestration settings.
Syncing option 2: Send audiences to Braze via AmpIQ
AmpIQ users can create segments in Amperity via a non-SQL interface and sync these to downstream destinations such as Braze. Users can select destinations and then configure a list of attributes to be sent to each destination.
Step 1: Create a segment in Amperity
Create a segment in Amperity that returns a list of customers. This segment should be associated with the custom attributes you want to update in Braze.

Check out Amperity’s documentation for examples of different segment types you might want to send to Braze.
Step 2: Build a campaign in Amperity
- Go to the Campaign section and click the option to create a new campaign.
- Give your campaign a descriptive and unique name that will help you identify it later, especially if you have multiple campaigns.
- Select the segment of customers that you want to target with this campaign. This should be the segment you created earlier.

- Choose the data you want to send as part of the campaign. This can include a range of customer attributes.

- Select Braze as the destination where the campaign data will be sent.
- Choose when and how often you want the campaign to run. This can be a one-time event or a recurring schedule.
- Save your campaign and run a test to make sure it works as expected.
Step 3: Run the Campaign
Run the campaign to send the segment to Braze. This can be done manually or based on the schedule you set up in the campaign settings.
Using Amperity with Braze Currents
To send Braze Currents data into Amperity:
- Set up a Braze Current to send data to an Amazon S3 bucket.
- Configure Amperity to read Apache Avro files from that Amazon S3 bucket.
- Configure feeds and automate data loads using standard workflows.