Zendesk
Zendesk Support Suite (ZSS) offers businesses the ability to have natural conversations with their customers through omnichannel support using email, webchat, voice, or social messaging apps. Zendesk offers a streamlined ticketing system that values tracking and prioritizing interactions, allowing businesses to have a unified historical view of their customers.
The Braze and Zendesk server-to-server integration allows you to utilize:
- Braze webhooks to automate the creation of support tickets in Zendesk due to message engagement in user journeys in Braze. For example, after successfully implementing and testing an integration, Braze can create a support ticket from a user answering negatively to an “Enjoying our App?” in-app message, allowing your support team to follow up with the customer.
- Zendesk webhooks to support bi-directional use cases like updating the user profile in Braze due to activity in Zendesk. For example, after a ticket is solved, log an event to the user profile in Braze.
Prerequisites
| Requirement | Description |
|---|---|
| Zendesk account | A Zendesk admin account is required to take advantage of this partnership. |
| Zendesk API token | A Zendesk API token is required to send requests from Braze to the Zendesk ticket endpoint. |
| Common identifier (recommended) | A common identifier between Braze and Zendesk is recommended. |
| Braze API key | A Braze API key is required to send requests from Zendesk to a Braze endpoint. Ensure that the API key you use has the correct permissions for the Braze endpoint your Zendesk webhook is using. |
Braze to Zendesk integration
Step 1: Create your Braze webhook
To create a webhook:
- Campaigns: Go to the Campaigns page in the Braze dashboard. Click Create Campaign and select Webhook.
- Canvas: From a new or existing Canvas, create a full or message step in the Canvas builder. Next, click Messages and select Webhook from the message options.
In your Webhook, fill out the following fields:
- Webhook URL:
<your-zendesk-instance>.zendesk.com/api/v2/tickets.json - Request Body: Raw Text
Further use cases can be handled through Zendesk support APIs, which would change the /api/v2/ endpoint accordingly at the end of the Webhook URL.
Request header and method
Zendesk requires an HTTP Header for authorization and an HTTP method. In the Settings tab, replace the
- HTTP Method: POST
- Request Headers:
- Authorization: Basic
{{ '<email_address>/token:<api_token>' | base64_encode }} - Content-Type: application/json
- Authorization: Basic
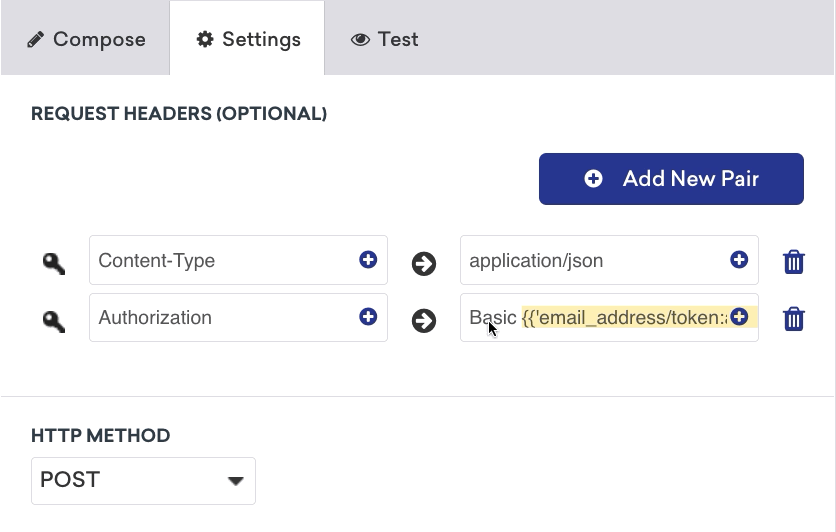
Request body
Define the ticket details like type, subject, and status in your webhook payload. Ticket details are extensible and customized based on the Zendesk ticket API. Use the following example to help structure your payload and enter your desired fields.
1
2
3
4
5
6
7
8
9
10
11
12
13
14
15
16
17
18
19
{% assign ticket_type = 'question/incident/task/problem' %} << Choose one >>
{% assign ticket_subject = '' %}
{% capture ticket_body %}
<< Your message here >>
{% endcapture %}
{% assign ticket_subject_tag = '' %}
{% assign ticket_status = 'New' %}

{
"ticket": {
"requester_id": "{{${user_id}}}",
"requester": { "name": "{{${first_name}}} {{${last_name}}}", "email": "{{${email_address}}}", "phone": "{{${phone_number}}}"},
"type": "{{ ticket_type }}",
"subject":  "{{ticket_subject}}",
"comment":  { "body": "{{ticket_body}}" },
"priority": "urgent",
"status": "{{ ticket_status }}"
  }
}
Step 2: Preview your request
Your raw text will automatically highlight if it is an applicable Braze tag.
Preview your request in the Preview panel or navigate to the Test tab, where you can select a random user or an existing user or customize your own to test your webhook.
Lastly, check if the ticket has been created on the Zendesk side.
Common identifier
If you have a common identifier between Braze and Zendesk, it is recommended to utilize this as the requester_id. This will help unify the two sets of users. Alternatively, if this is not the case, we recommend passing a set of identifying attributes such as name, email address, phone number, or others.
Zendesk to Braze integration
Step 1: Create a webhook
- In the Admin Center, click Apps and integrations in the sidebar, then select Webhooks > Webhooks.
- Click Create webhook.
- Select Trigger or Automation and click Next.
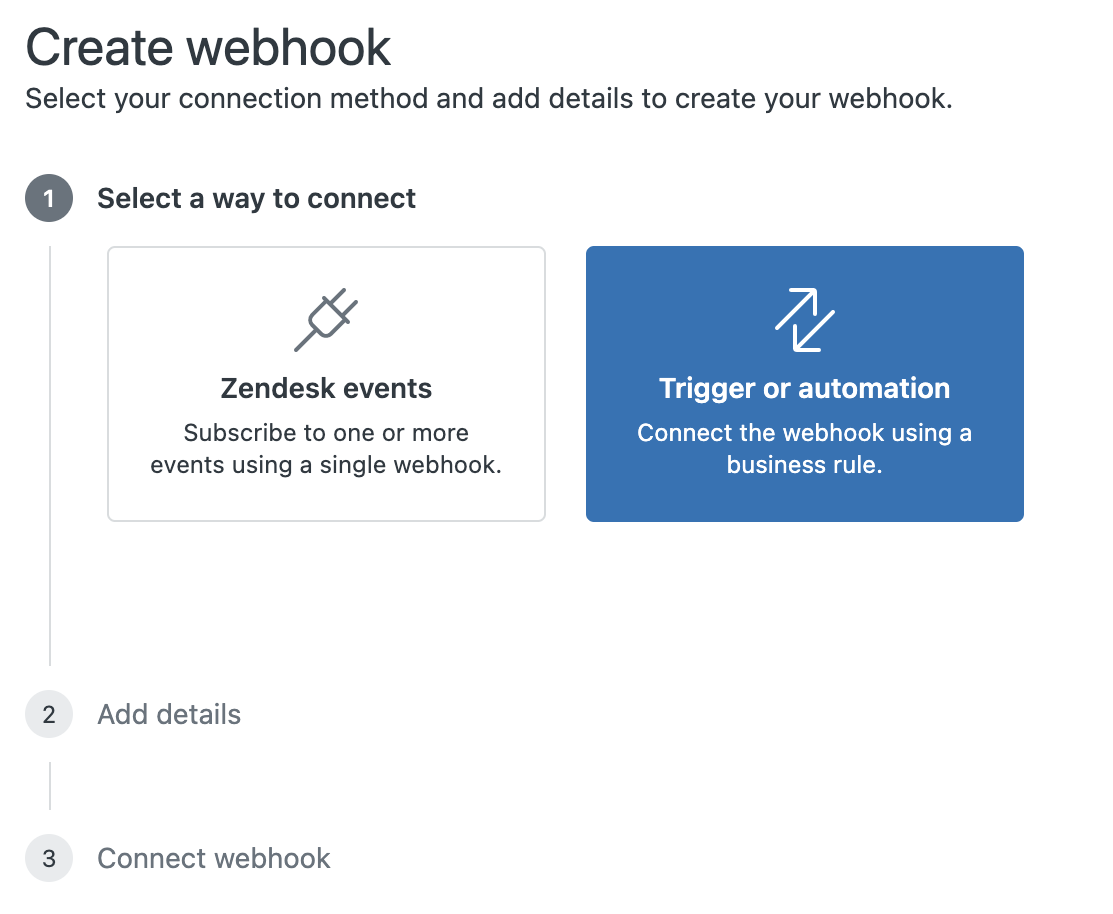
- Provide the following information in your webhook:
- Enter a name and description for the webhook.
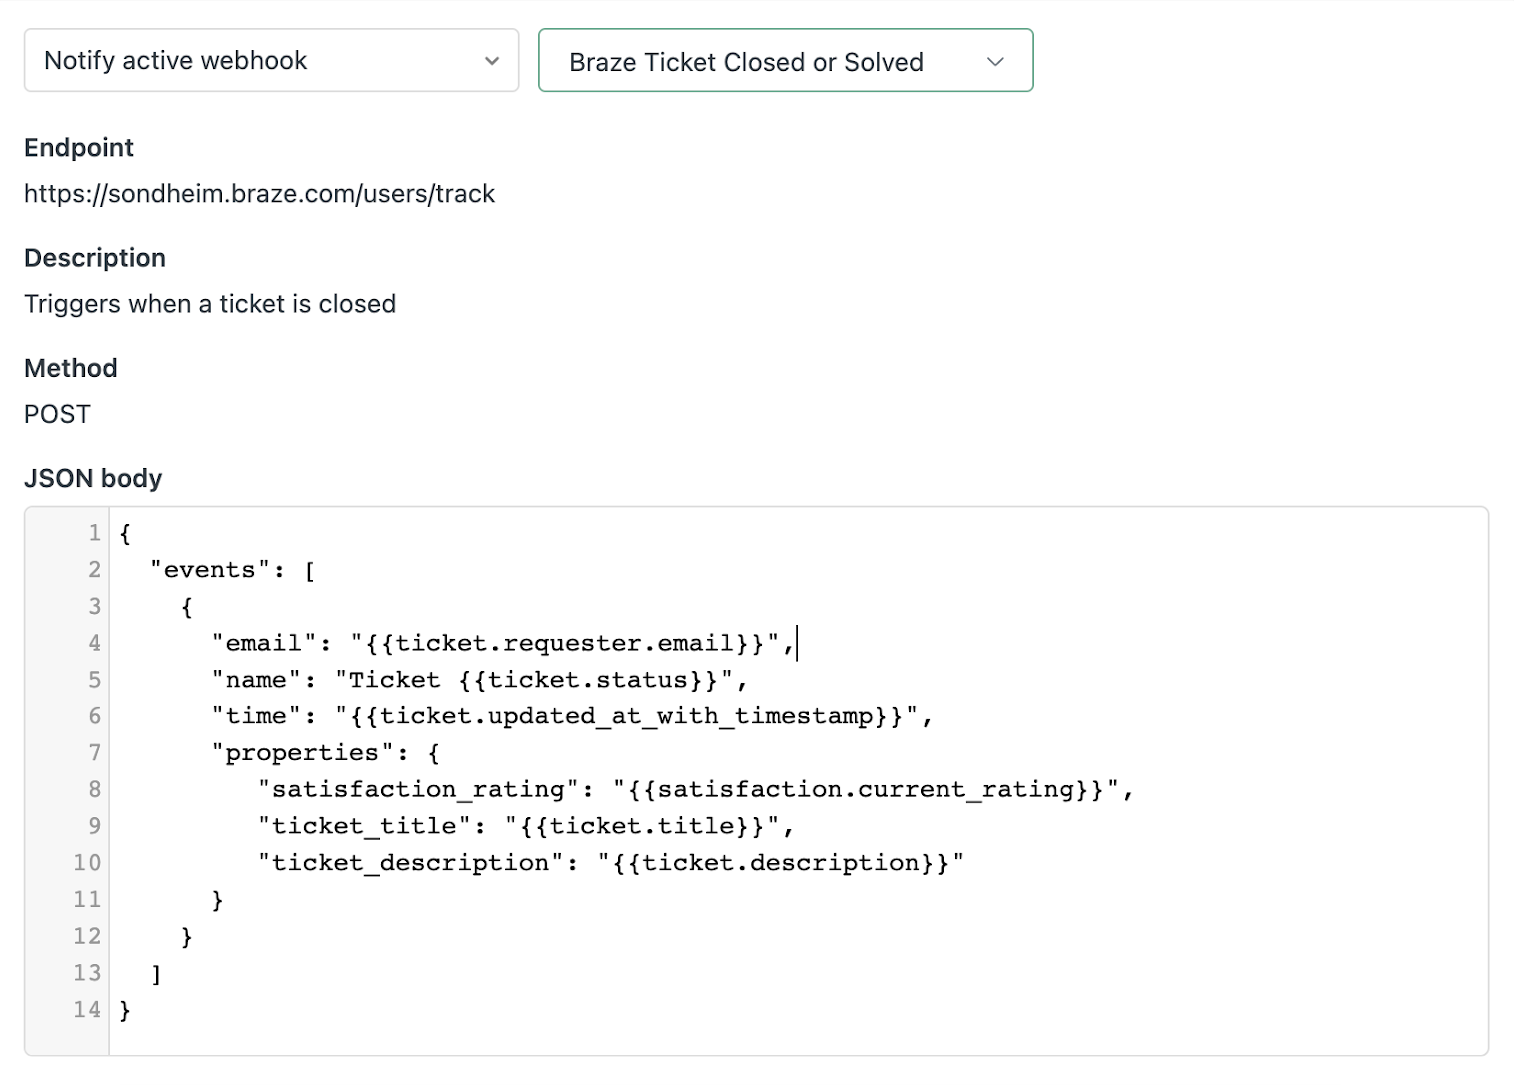
- Enter the Braze endpoint URL your webhook will use. Our example will use
https://{{instance_url}}/users/track. - Select POST as the webhook’s request method and set the request format to JSON.
- Select the bearer token authentication method for the webhook and provide your Braze API key.
- Make sure that the API key you are using has the correct permissions for the Braze endpoint your webhook is using.
- Make sure that the API key you are using has the correct permissions for the Braze endpoint your webhook is using.
- (Recommended) Test the webhook to ensure it’s working properly.
- For trigger and automation webhooks, you must connect the webhook to a trigger or automation before finishing the setup. See the following step for our example of creating a trigger for the webhook. After the trigger has been created, you can return to this page and click Finish setup.
Step 2: Create a trigger or automation
Follow Zendesk’s instructions on how to connect your webhook to a trigger or automation.
Our example below will use a trigger to invoke the webhook when a support case status has been changed to “Solved” or “Closed”.
- In the Admin Center, click Objects and rules in the sidebar, then select Business rules > Triggers.
- Click Add trigger.
- Name your trigger and select a category.
- Click Add condition to set up which conditions should trigger the webhook. For example, “Status category changed to closed” or “Status category changed to solved”.
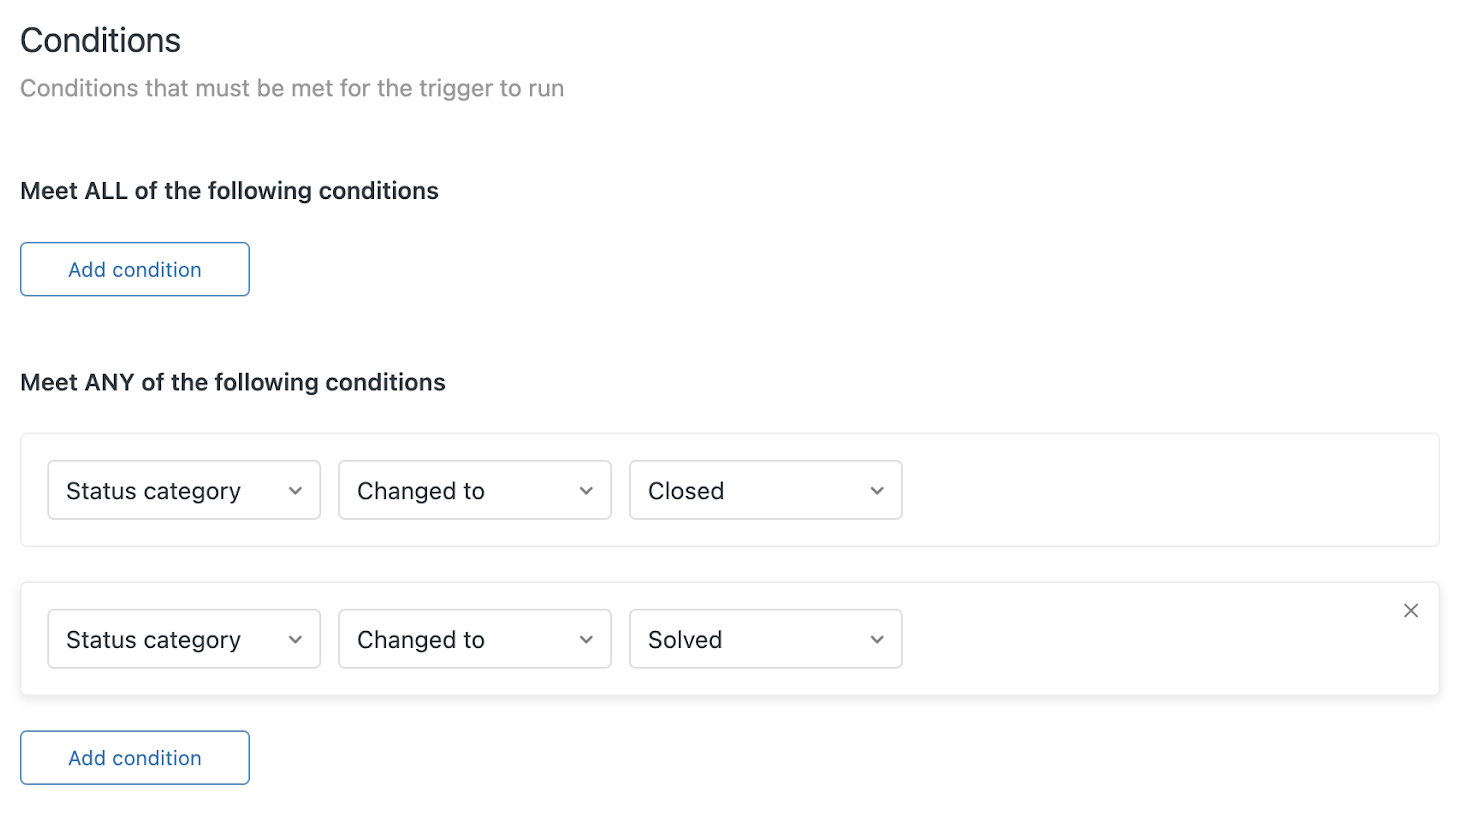
- Click Add action, choose Notify active webhook, and select from the dropdown the webhook created in the previous step.
- Define the JSON body to conform to your Braze endpoint, using Zendesk variable placeholders to dynamically populate the relevant fields.
- Click Create.
- Return to your webhook and click Finish setup.
 Edit this page on GitHub