Google Tag Manager
This article provides a step-by-step guide on how to add the Braze Web SDK to your website using the Google Tag Manager (GTM). Google Tag Manager lets you remotely add, remove, and edit tags on your website without requiring a production code release or engineering resources.
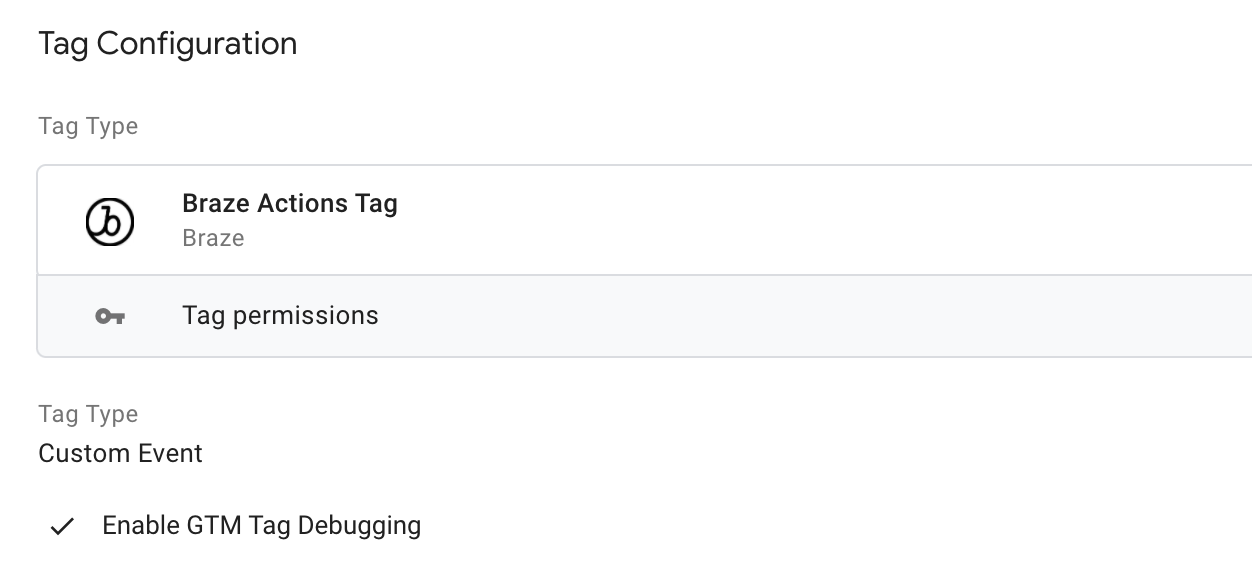
There are two Google Tag Manager templates built by Braze, the Initialization Tag and the Actions Tag.
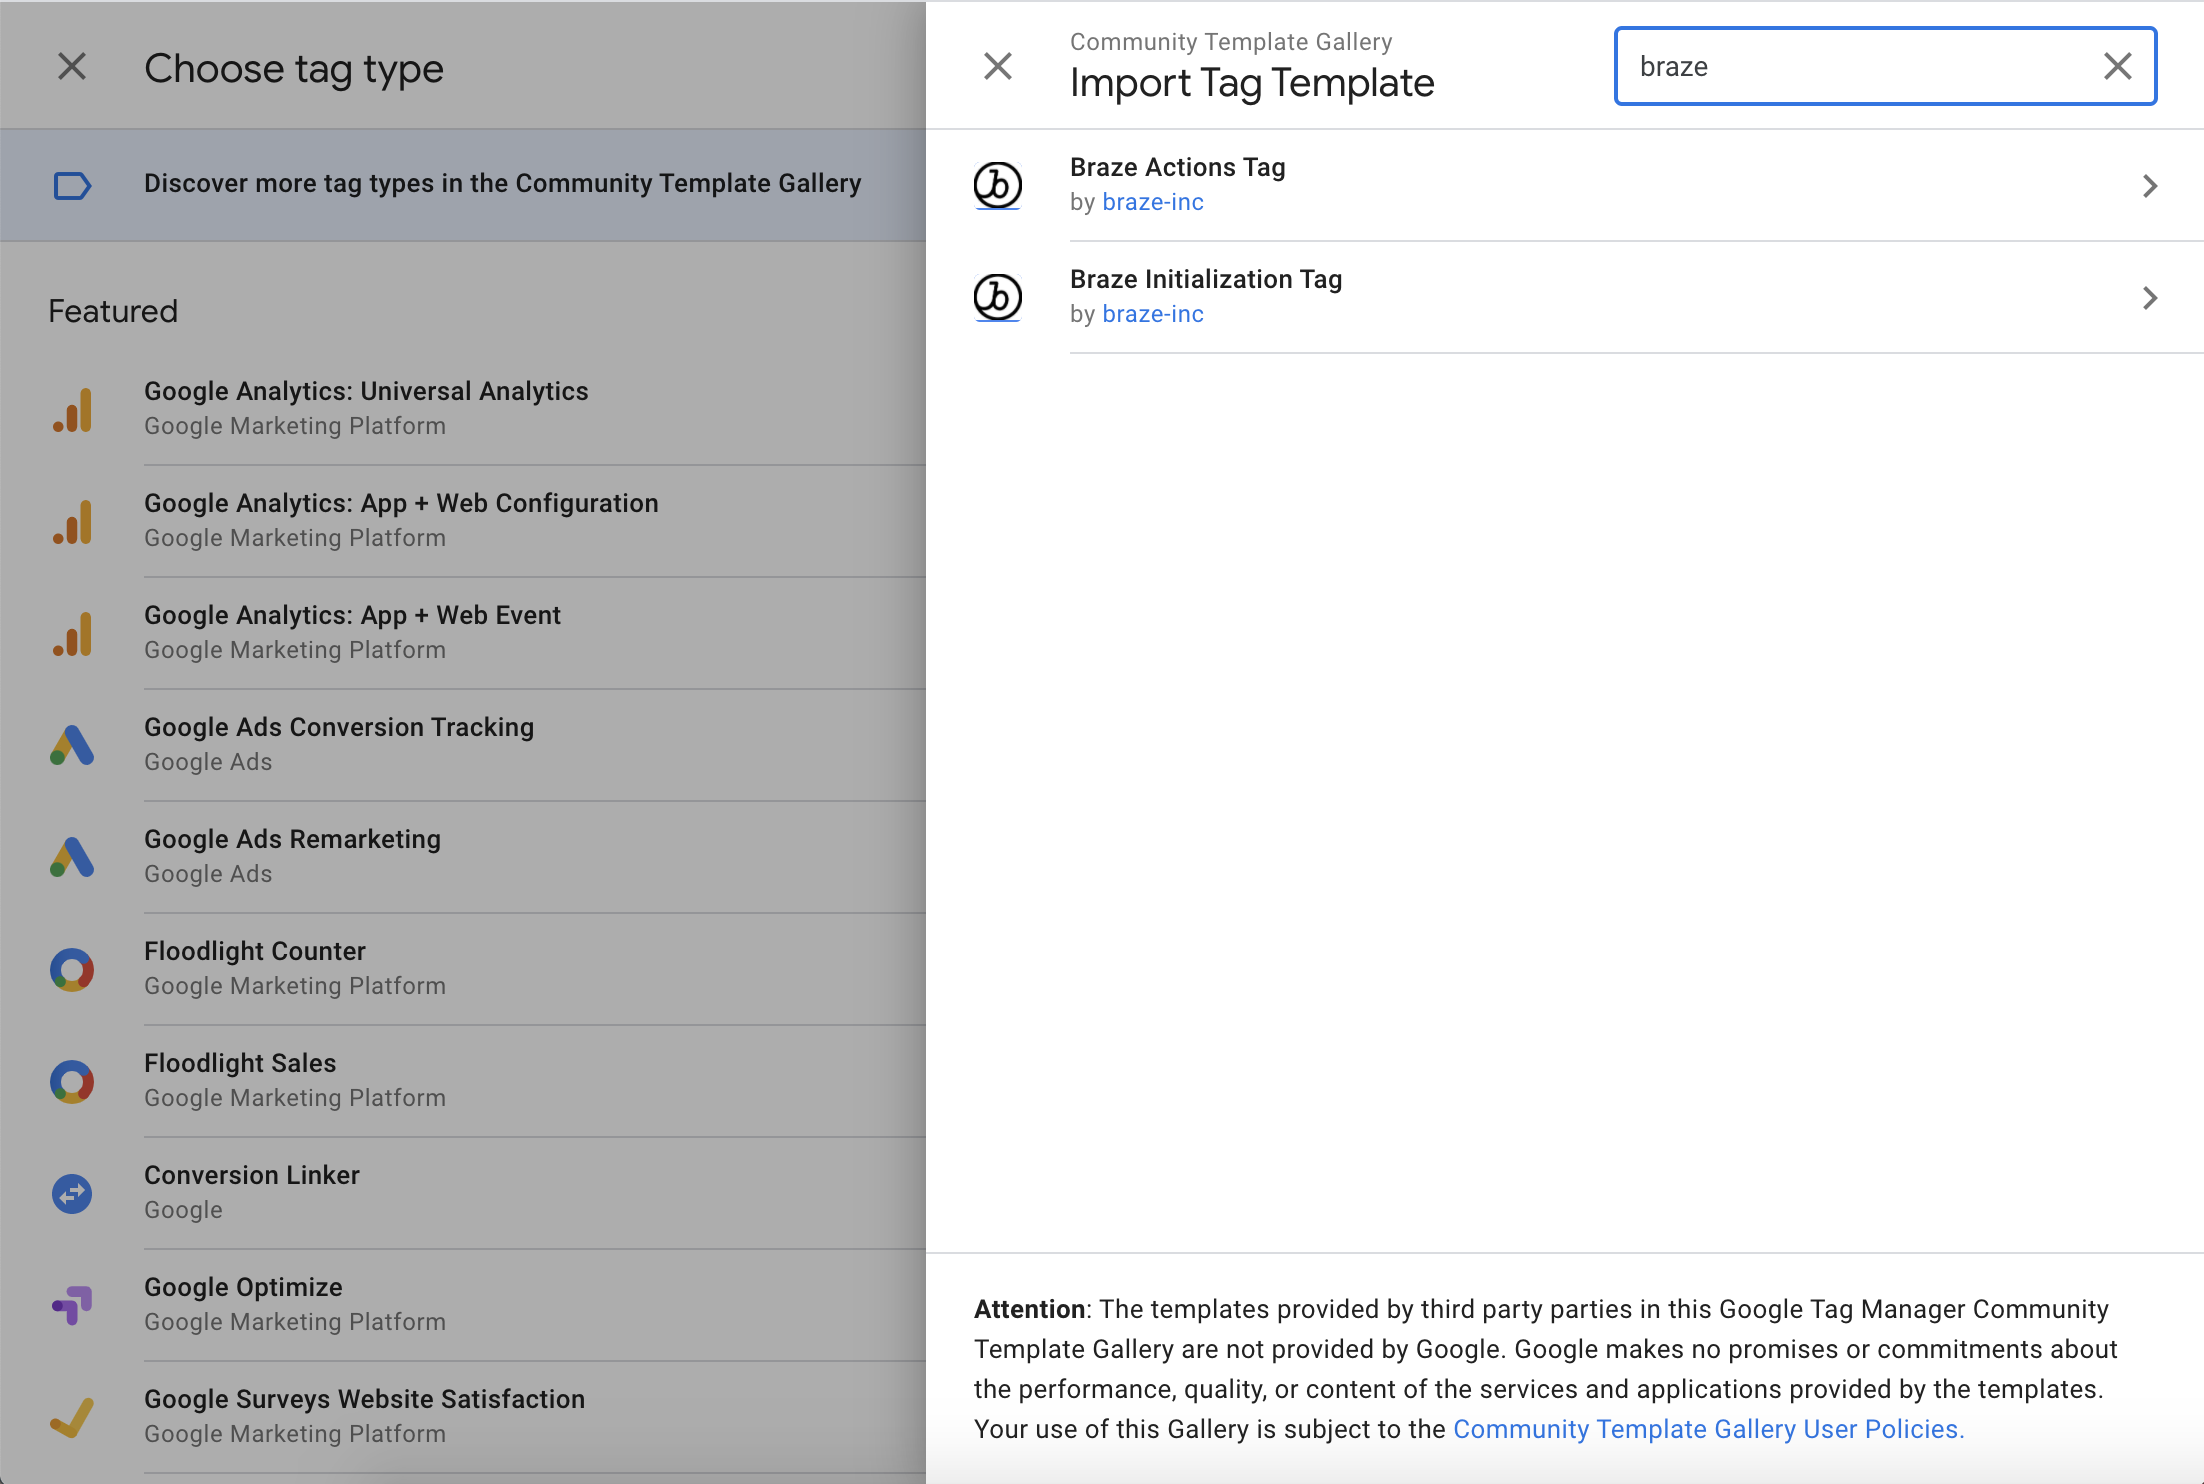
Both tags can be added to your workspace from Google’s community gallery or by searching for Braze when adding a new tag from the Community Templates.
Updated Google EU User Consent Policy
Google is updating their EU User Consent Policy in response to changes to the Digital Markets Act (DMA), which is in effect as of March 6, 2024. This new change requires advertisers to disclose certain information to their EEA and UK end users, as well as obtain necessary consents from them. Review the following documentation to learn more.
As part of Google’s EU User Consent Policy, the following boolean custom attributes need to be logged to user profiles:
$google_ad_user_data$google_ad_personalization
If setting these via the GTM integration, custom attributes require creating a custom HTML tag. The following is an example of how to log these values as boolean data types (not as strings):
1
2
3
<script>
window.braze.getUser().setCustomUserAttribute("$google_ad_personalization", true);
</script>
For more information, refer to Audience Sync to Google.
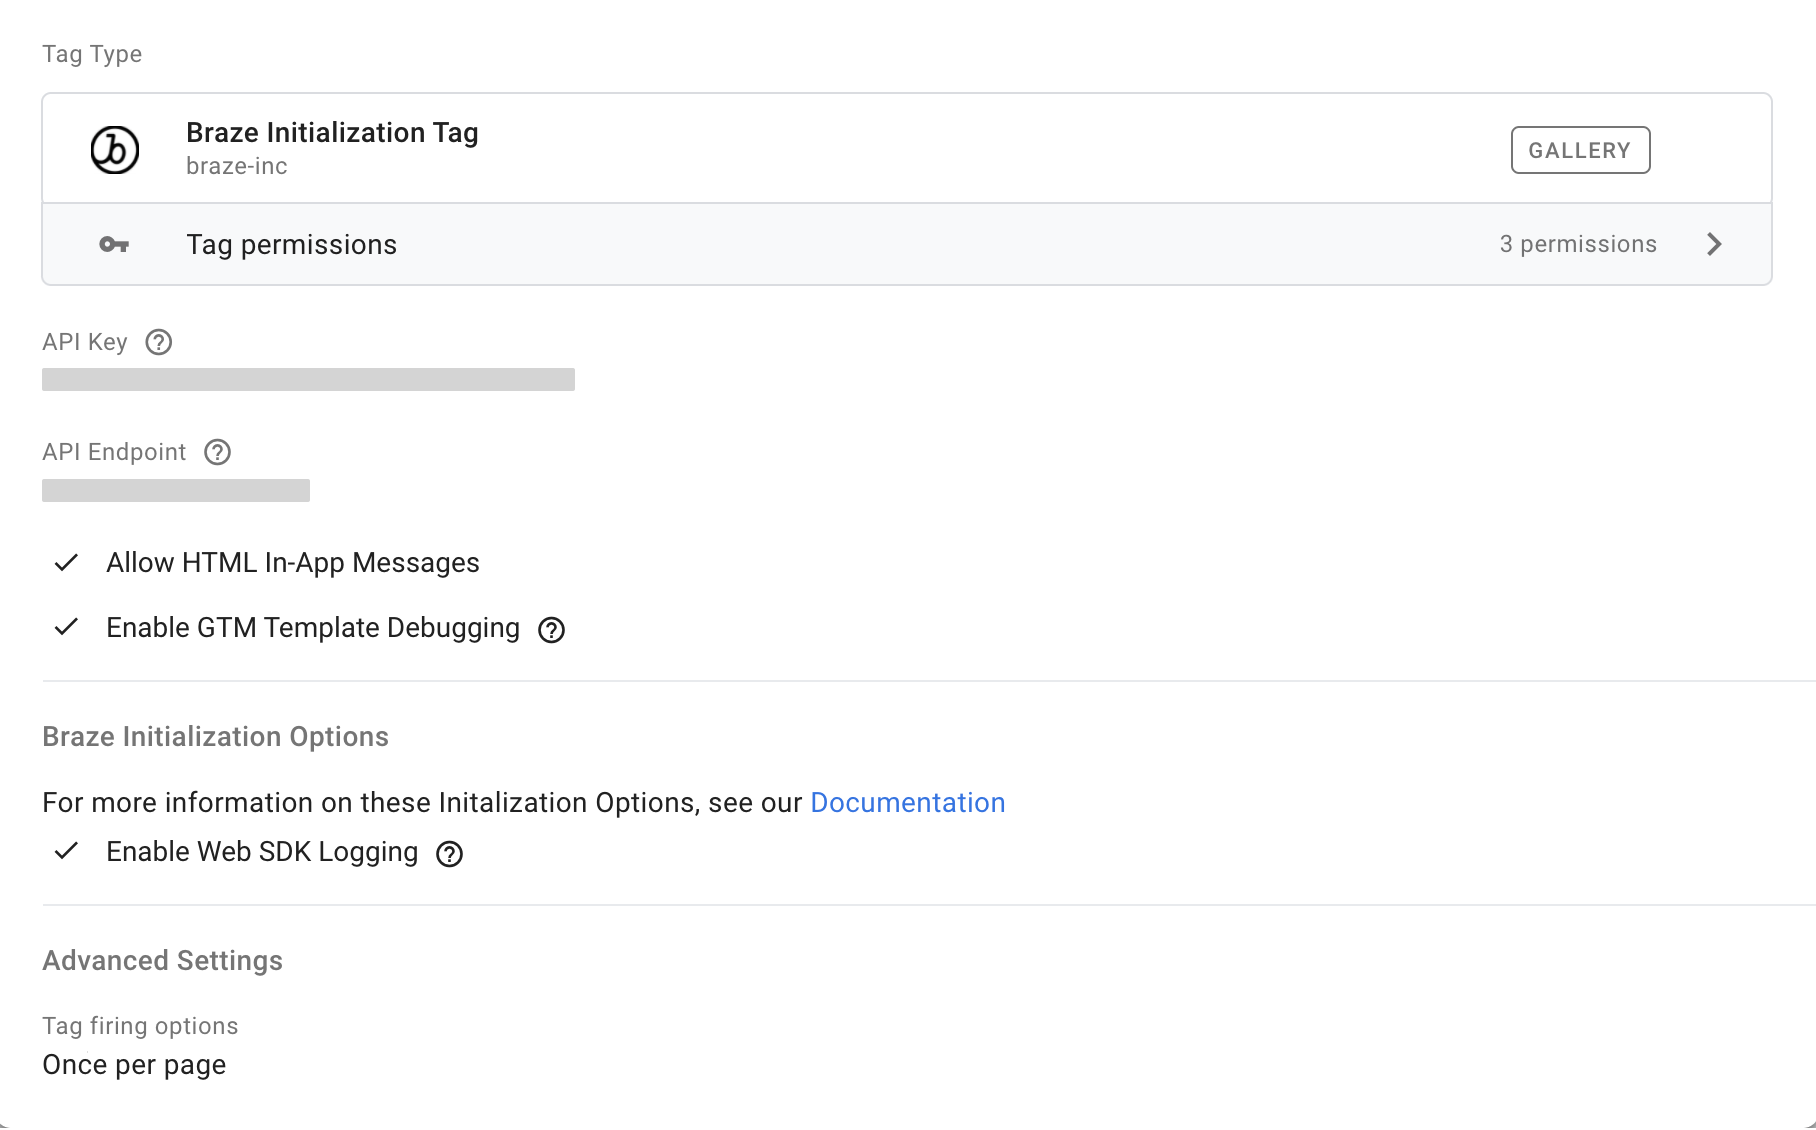
Initialization Tag template
Use the Initialization Tag to add the Braze Web SDK to your website.
Step 1: Push setup (optional)
Optionally, if you want to be able to send push through the Google Tag Manager, first follow the push integration guidelines to:
- Configure your site’s service worker, placing it in the root directory of your site
- Set up browser registration - After the service worker is configured, you must set the
braze.requestPushPermission()method either natively in their app or through a custom HTML tag (via the GTM dashboard). You will also need to make sure that the tag is fired after the SDK has been initialized.
Step 2: Select the Initialization Tag
Search for Braze in the community template gallery, and select the Braze Initialization Tag.
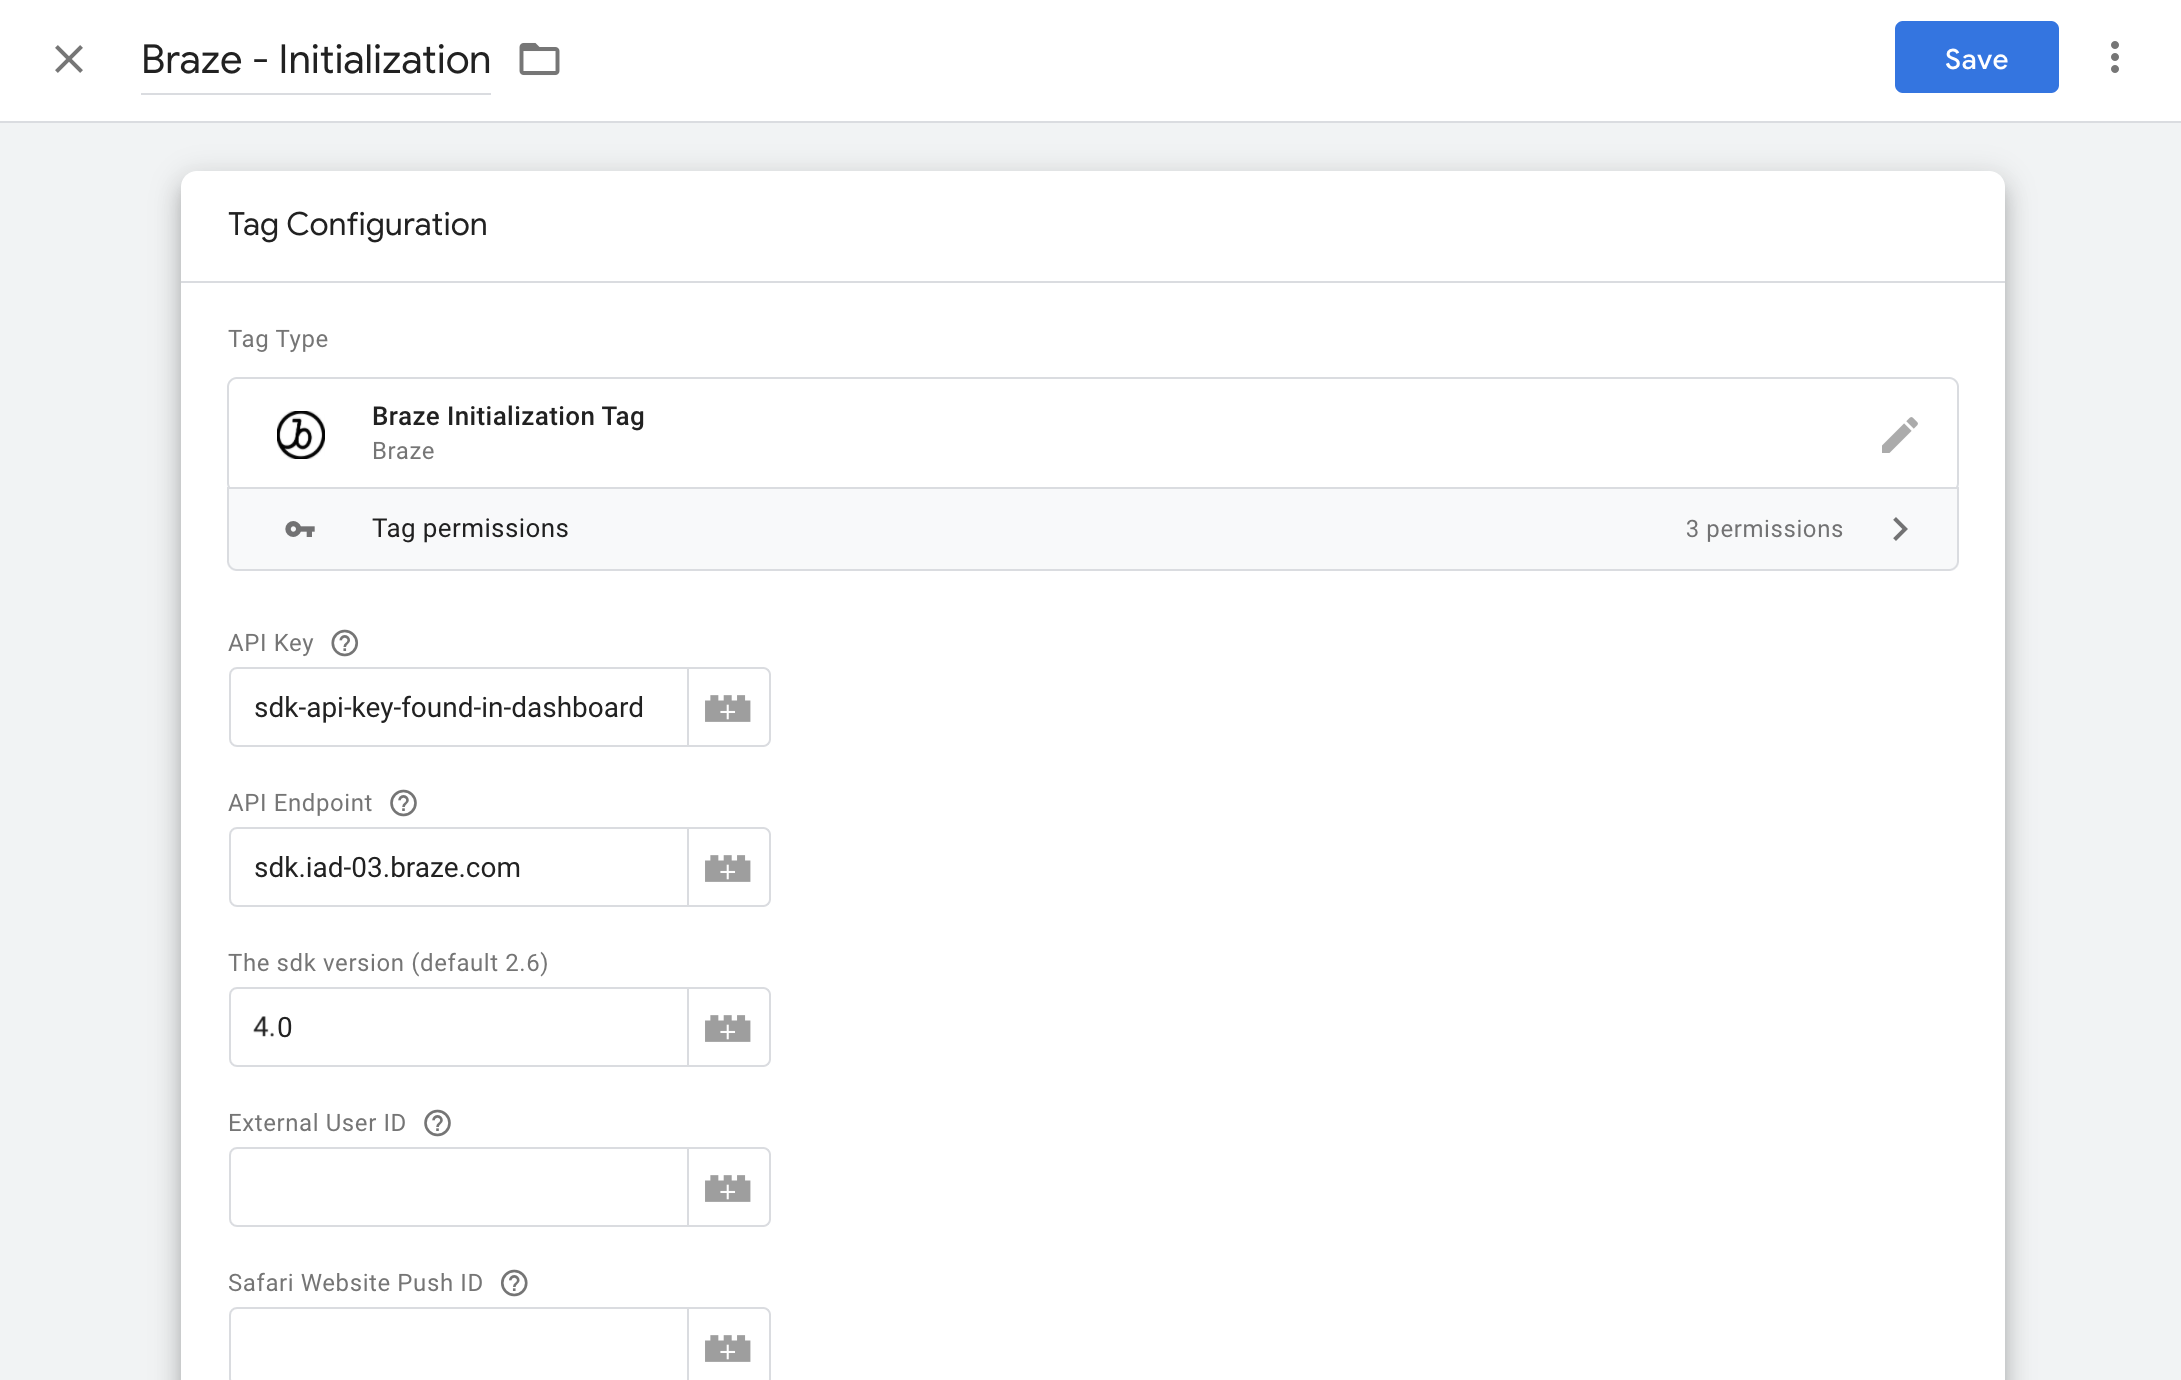
Step 3: Configure settings
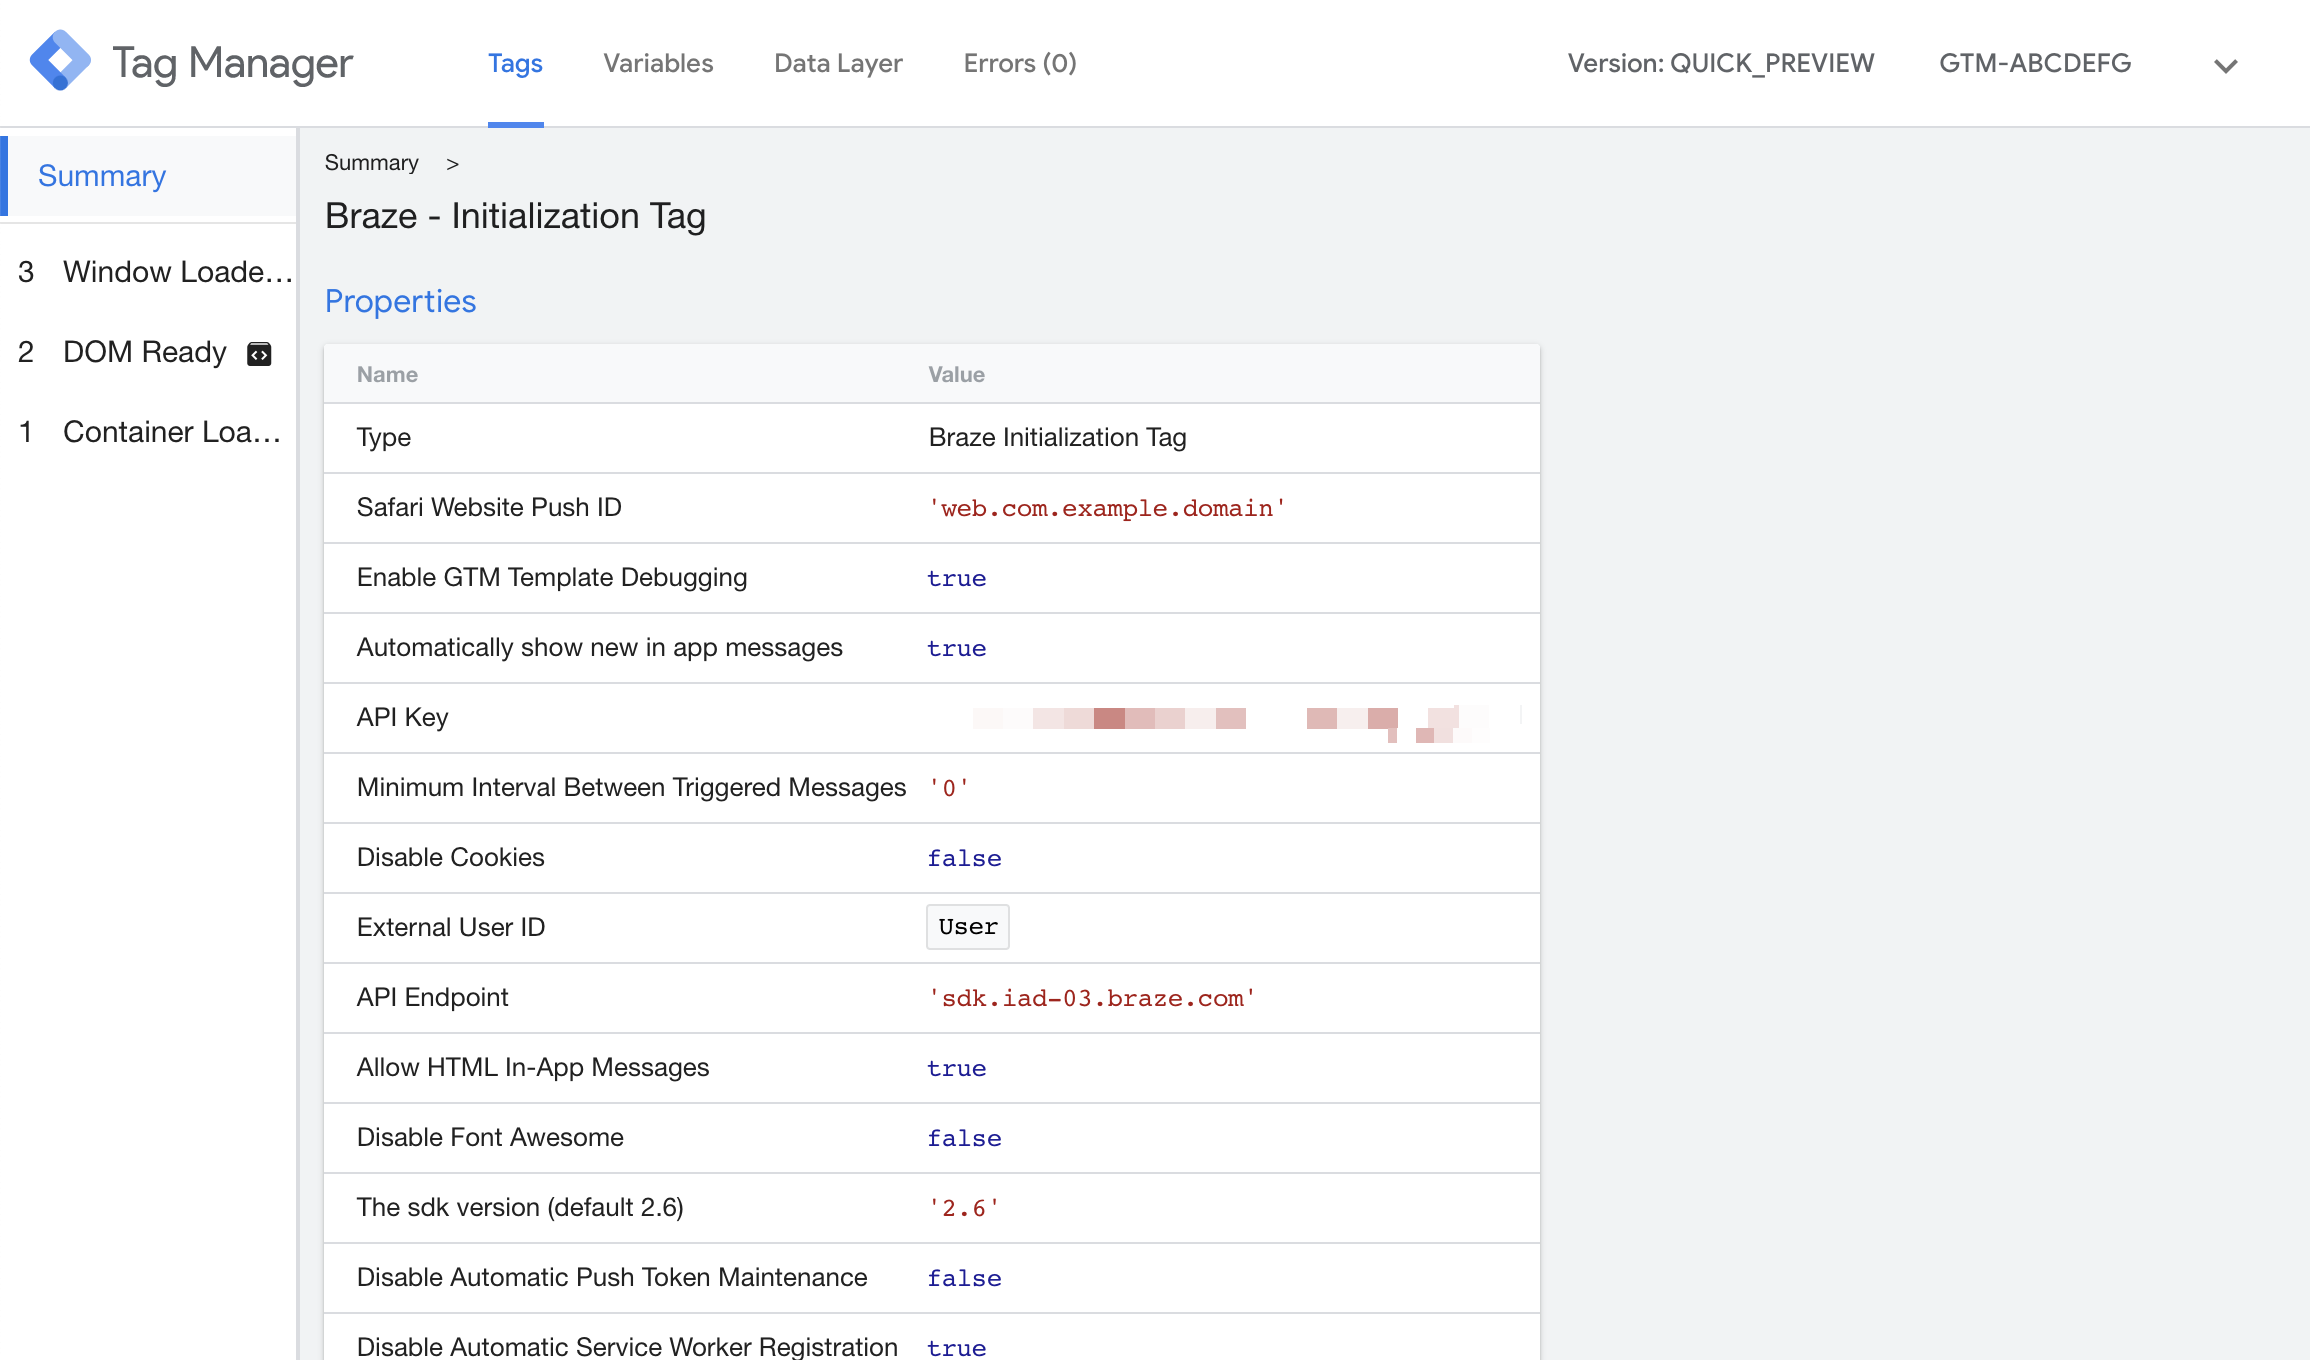
Enter your Braze API app identifier key and SDK endpoint, which can be found in your dashboard’s Manage Settings page. Enter the Web SDK’s most recent major.minor version. For example, if the latest version is 4.1.2, enter 4.1. You can view a list of SDK versions in our changelog.
Step 4: Choose initialization options
Choose from the optional set of additional initialization options described in the Initial setup guide.
Step 5: Verify and QA
Once you’ve deployed this tag, there are two ways you can verify a proper integration:
- Using Google Tag Manager’s debugging tool, you should see the Braze Initialization Tag has been triggered on your configured pages or events.
- You should see network requests made to Braze, and the global
window.brazelibrary should now be defined on your web page.
Actions Tag template
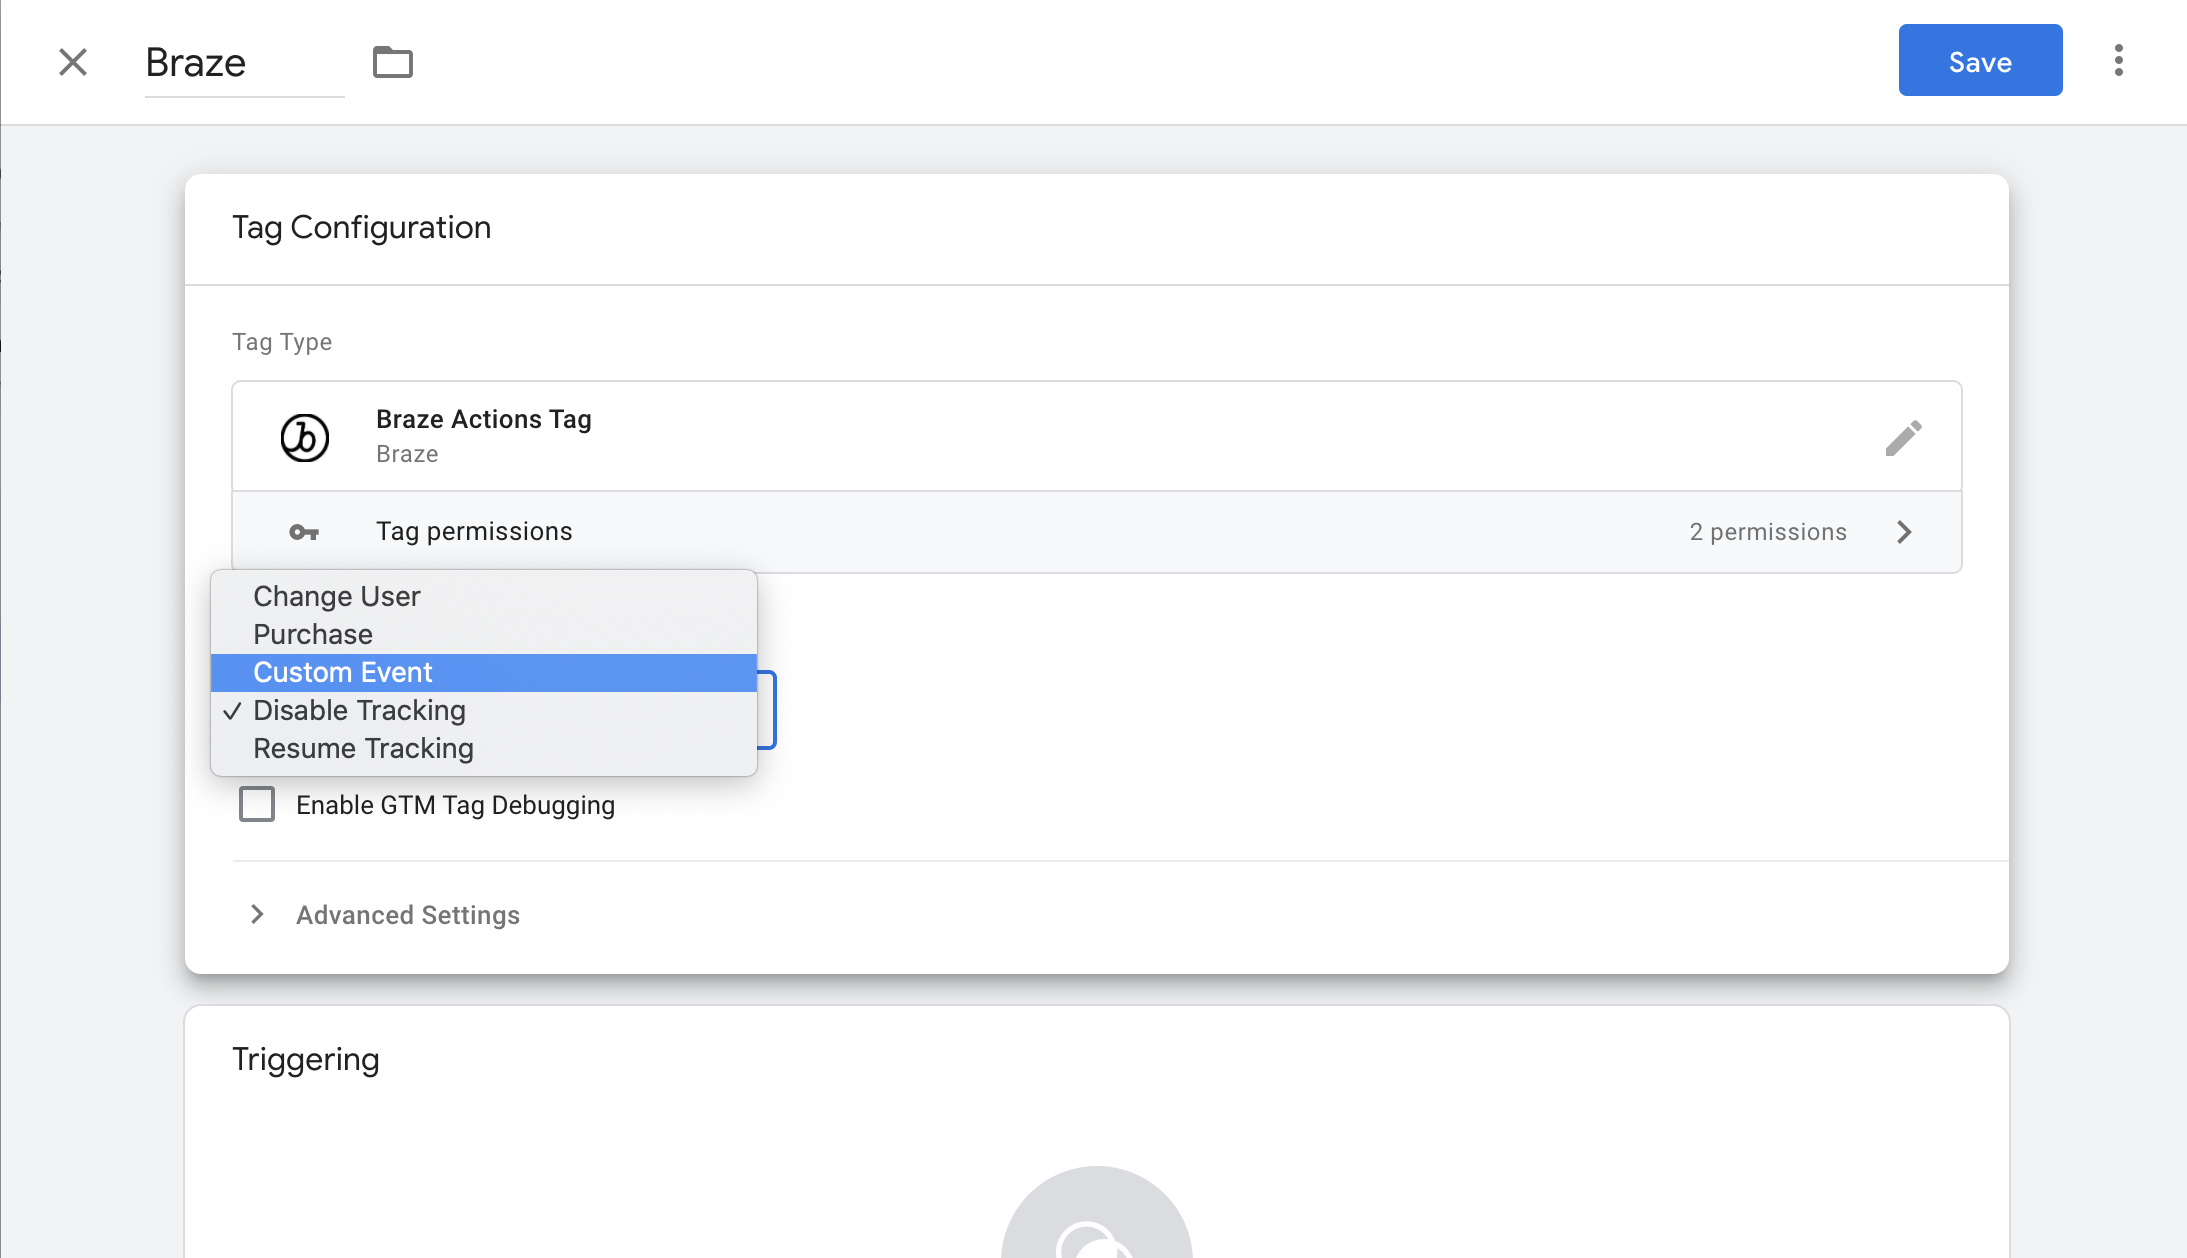
The Braze Actions Tag template lets you trigger custom events, track purchases, change user IDs, and stop or resume tracking for privacy requirements.
Changing user external ID
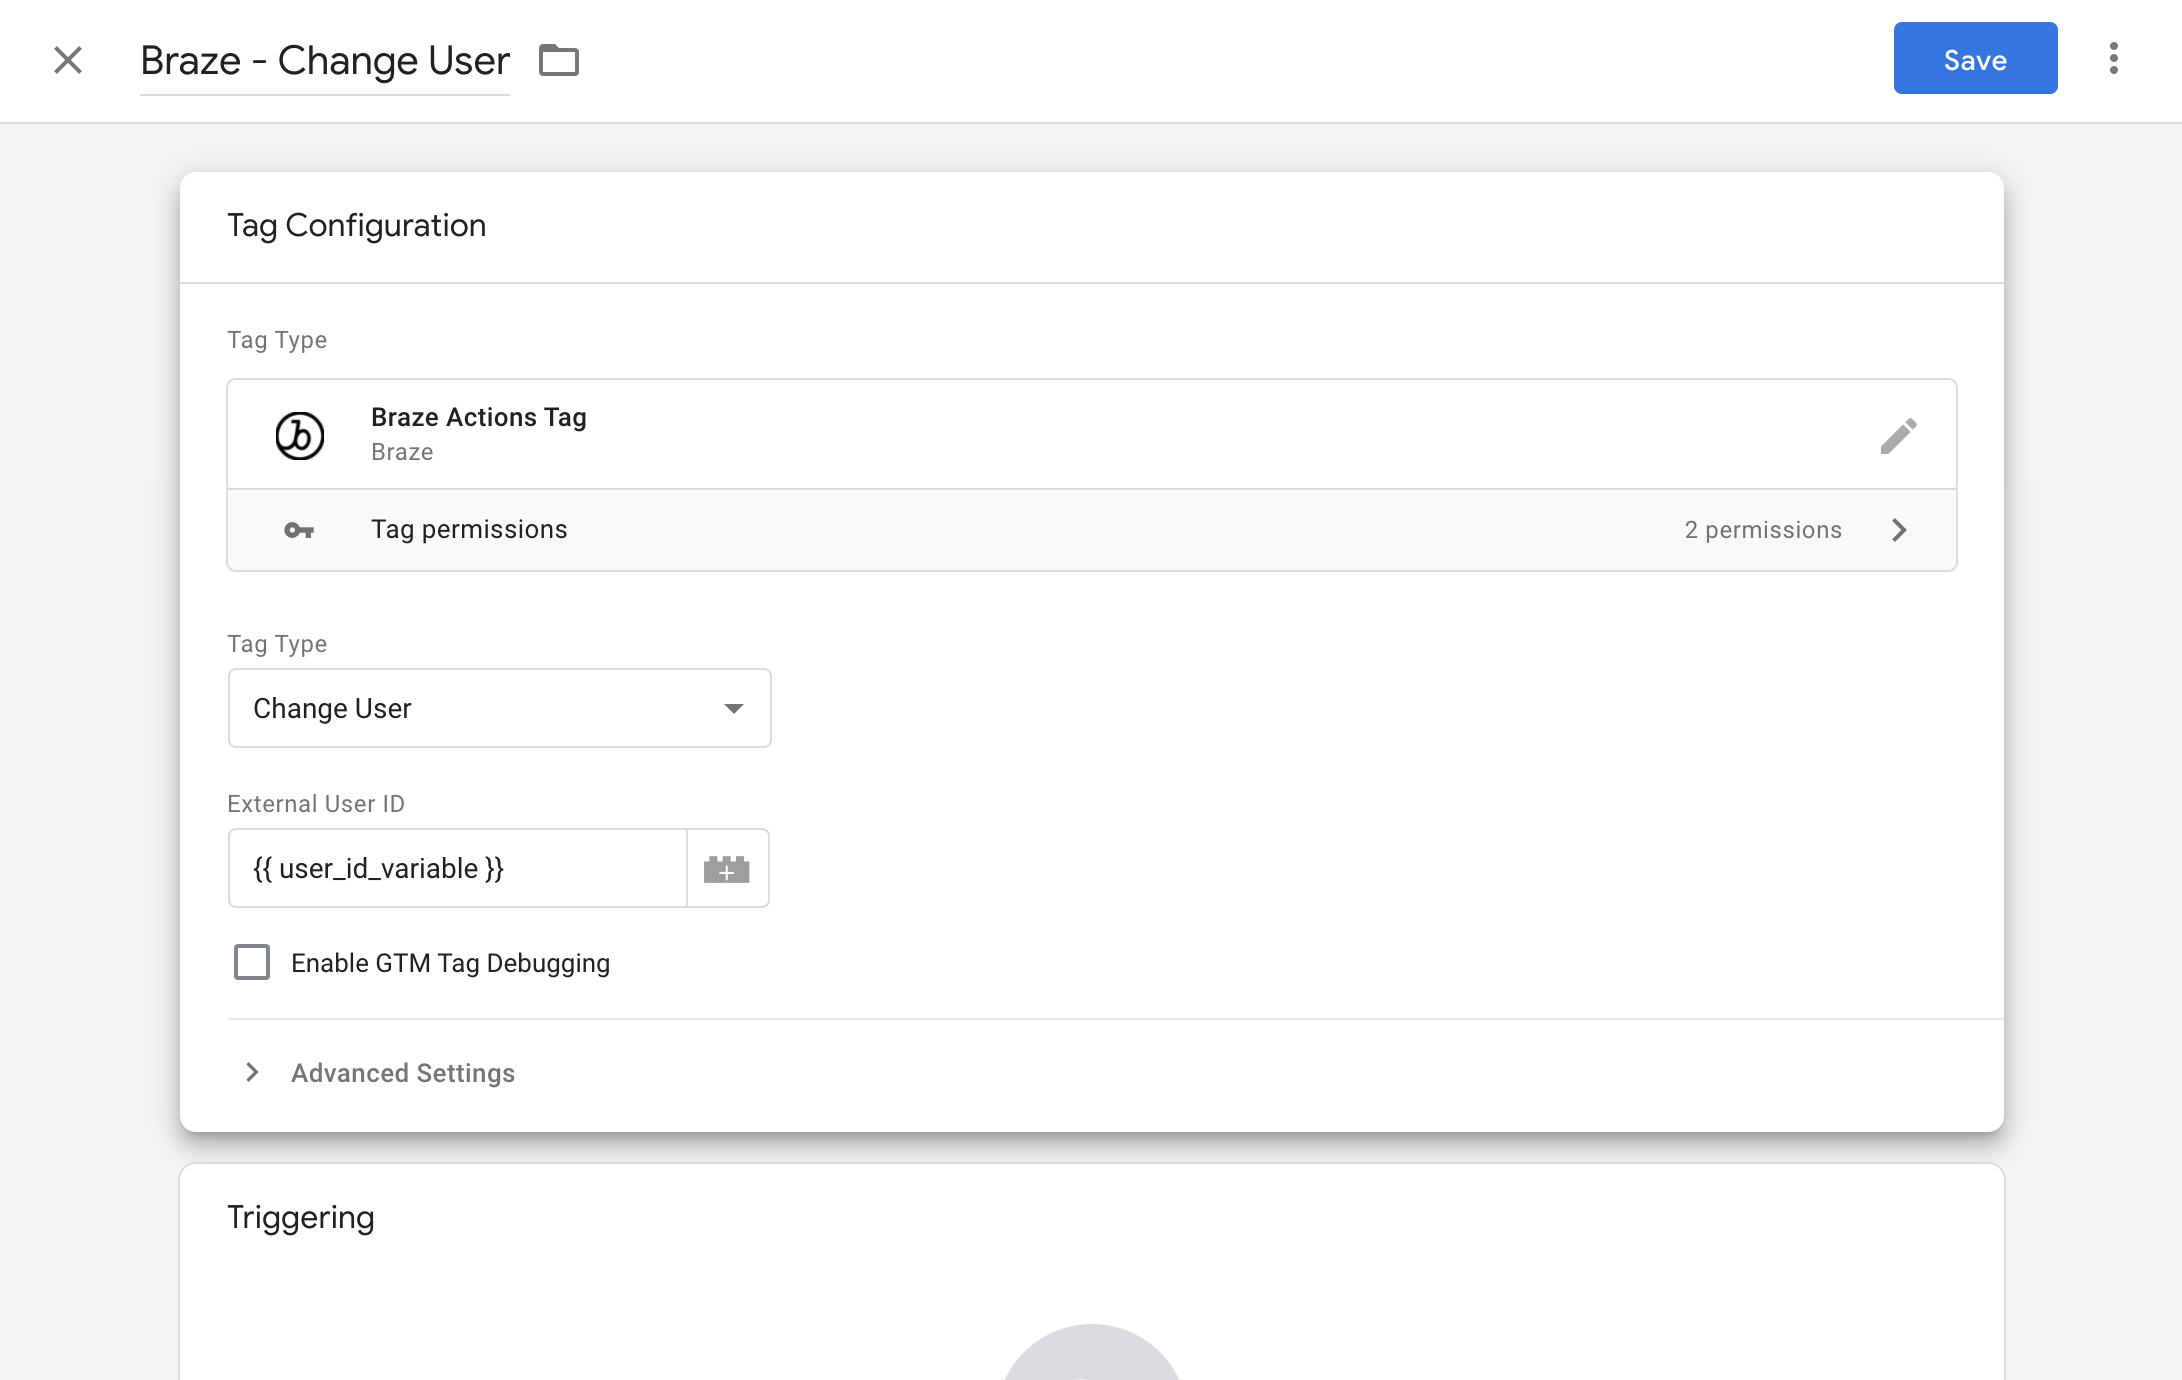
The Change User tag type calls the changeUser method.
Use this tag whenever a user logs in or is otherwise identified with their unique external_id identifier.
Be sure to enter the current user’s unique ID in the External User ID field, typically populated using a data layer variable sent by your website.
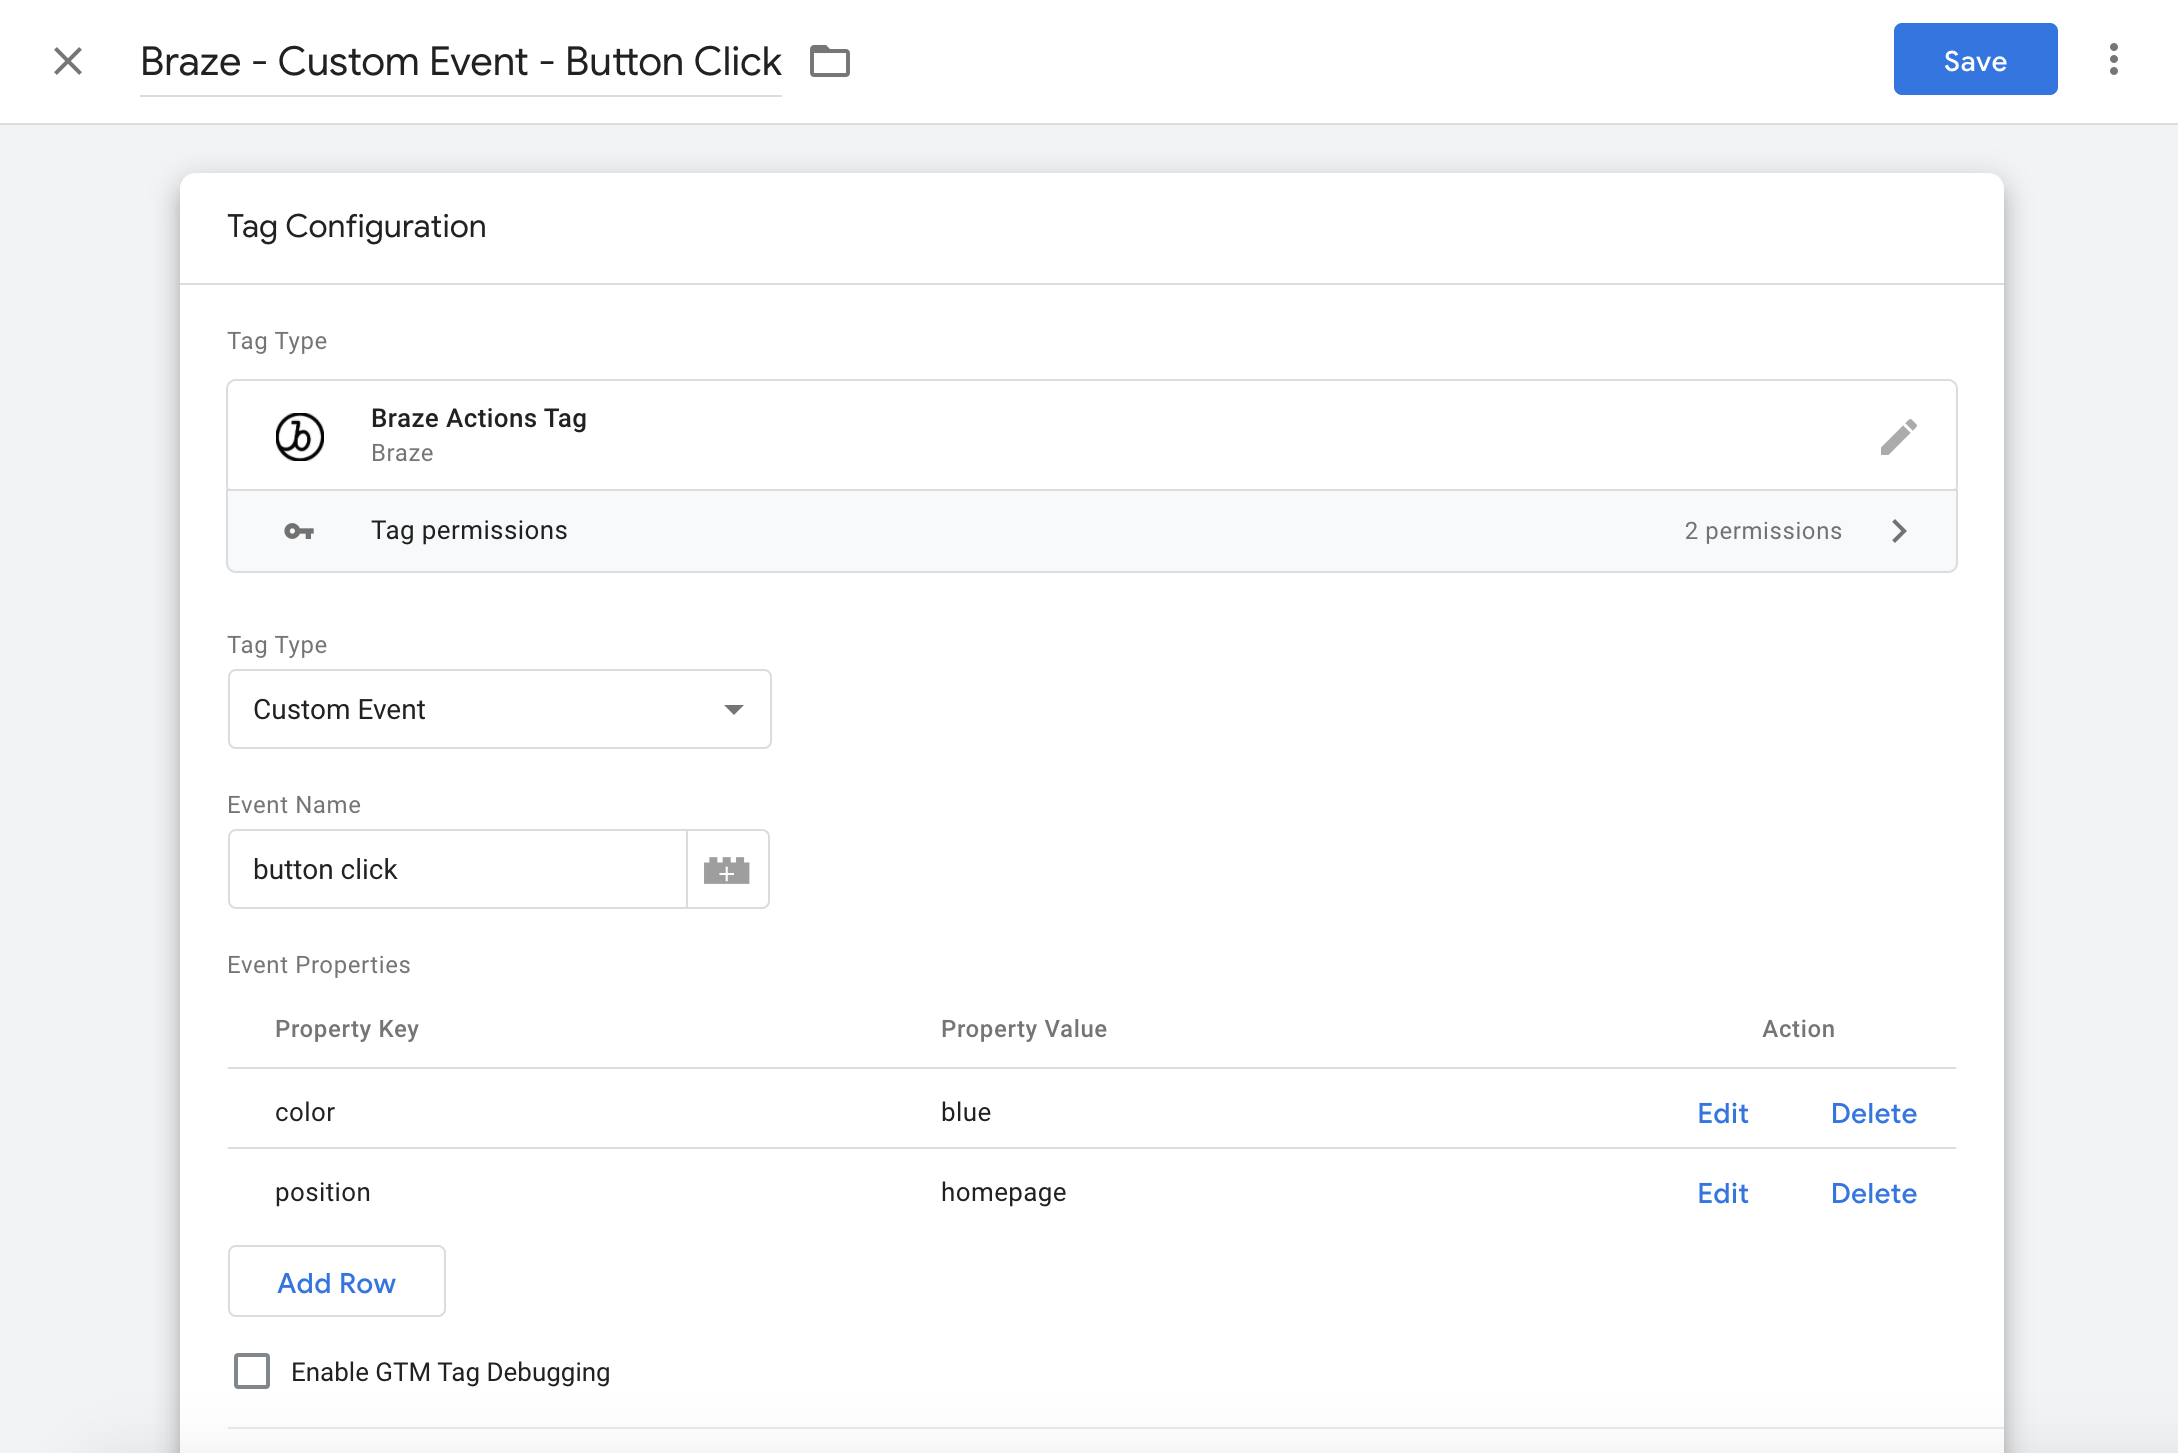
Log custom events
The Custom Event tag type calls the logCustomEvent method.
Use this tag to send custom events to Braze, optionally including custom event properties.
Enter the Event Name by either using a variable or typing an event name.
Use the Add Row button to add event properties.
Ecommerce events
If your site logs purchases using the standard ecommerce event data layer item to Google Tag Manager, then you can use the E-commerce Purchase tag type. This action type will log a separate “purchase” in Braze for each item sent in the list of items.
You can also specify additional property names you want to include as purchase properties by specifying their keys in the Purchase properties list. Note that Braze will look within the individual item that is being logged for any purchase properties you add to the list.
For example, let’s say your ecommerce payload contains the following items:
1
2
3
4
5
6
7
items: [{
  item_name: "5 L WIV ECO SAE 5W/30",
  item_id: "10801463",
  price: 24.65,
  item_brand: "EUROLUB",
  quantity: 1
}]
If you only want item_brand and item_name to be passed as purchase properties, then just add those two fields to the purchase properties table. If you don’t supply any properties, then no purchase properties will be sent in the logPurchase call to Braze.
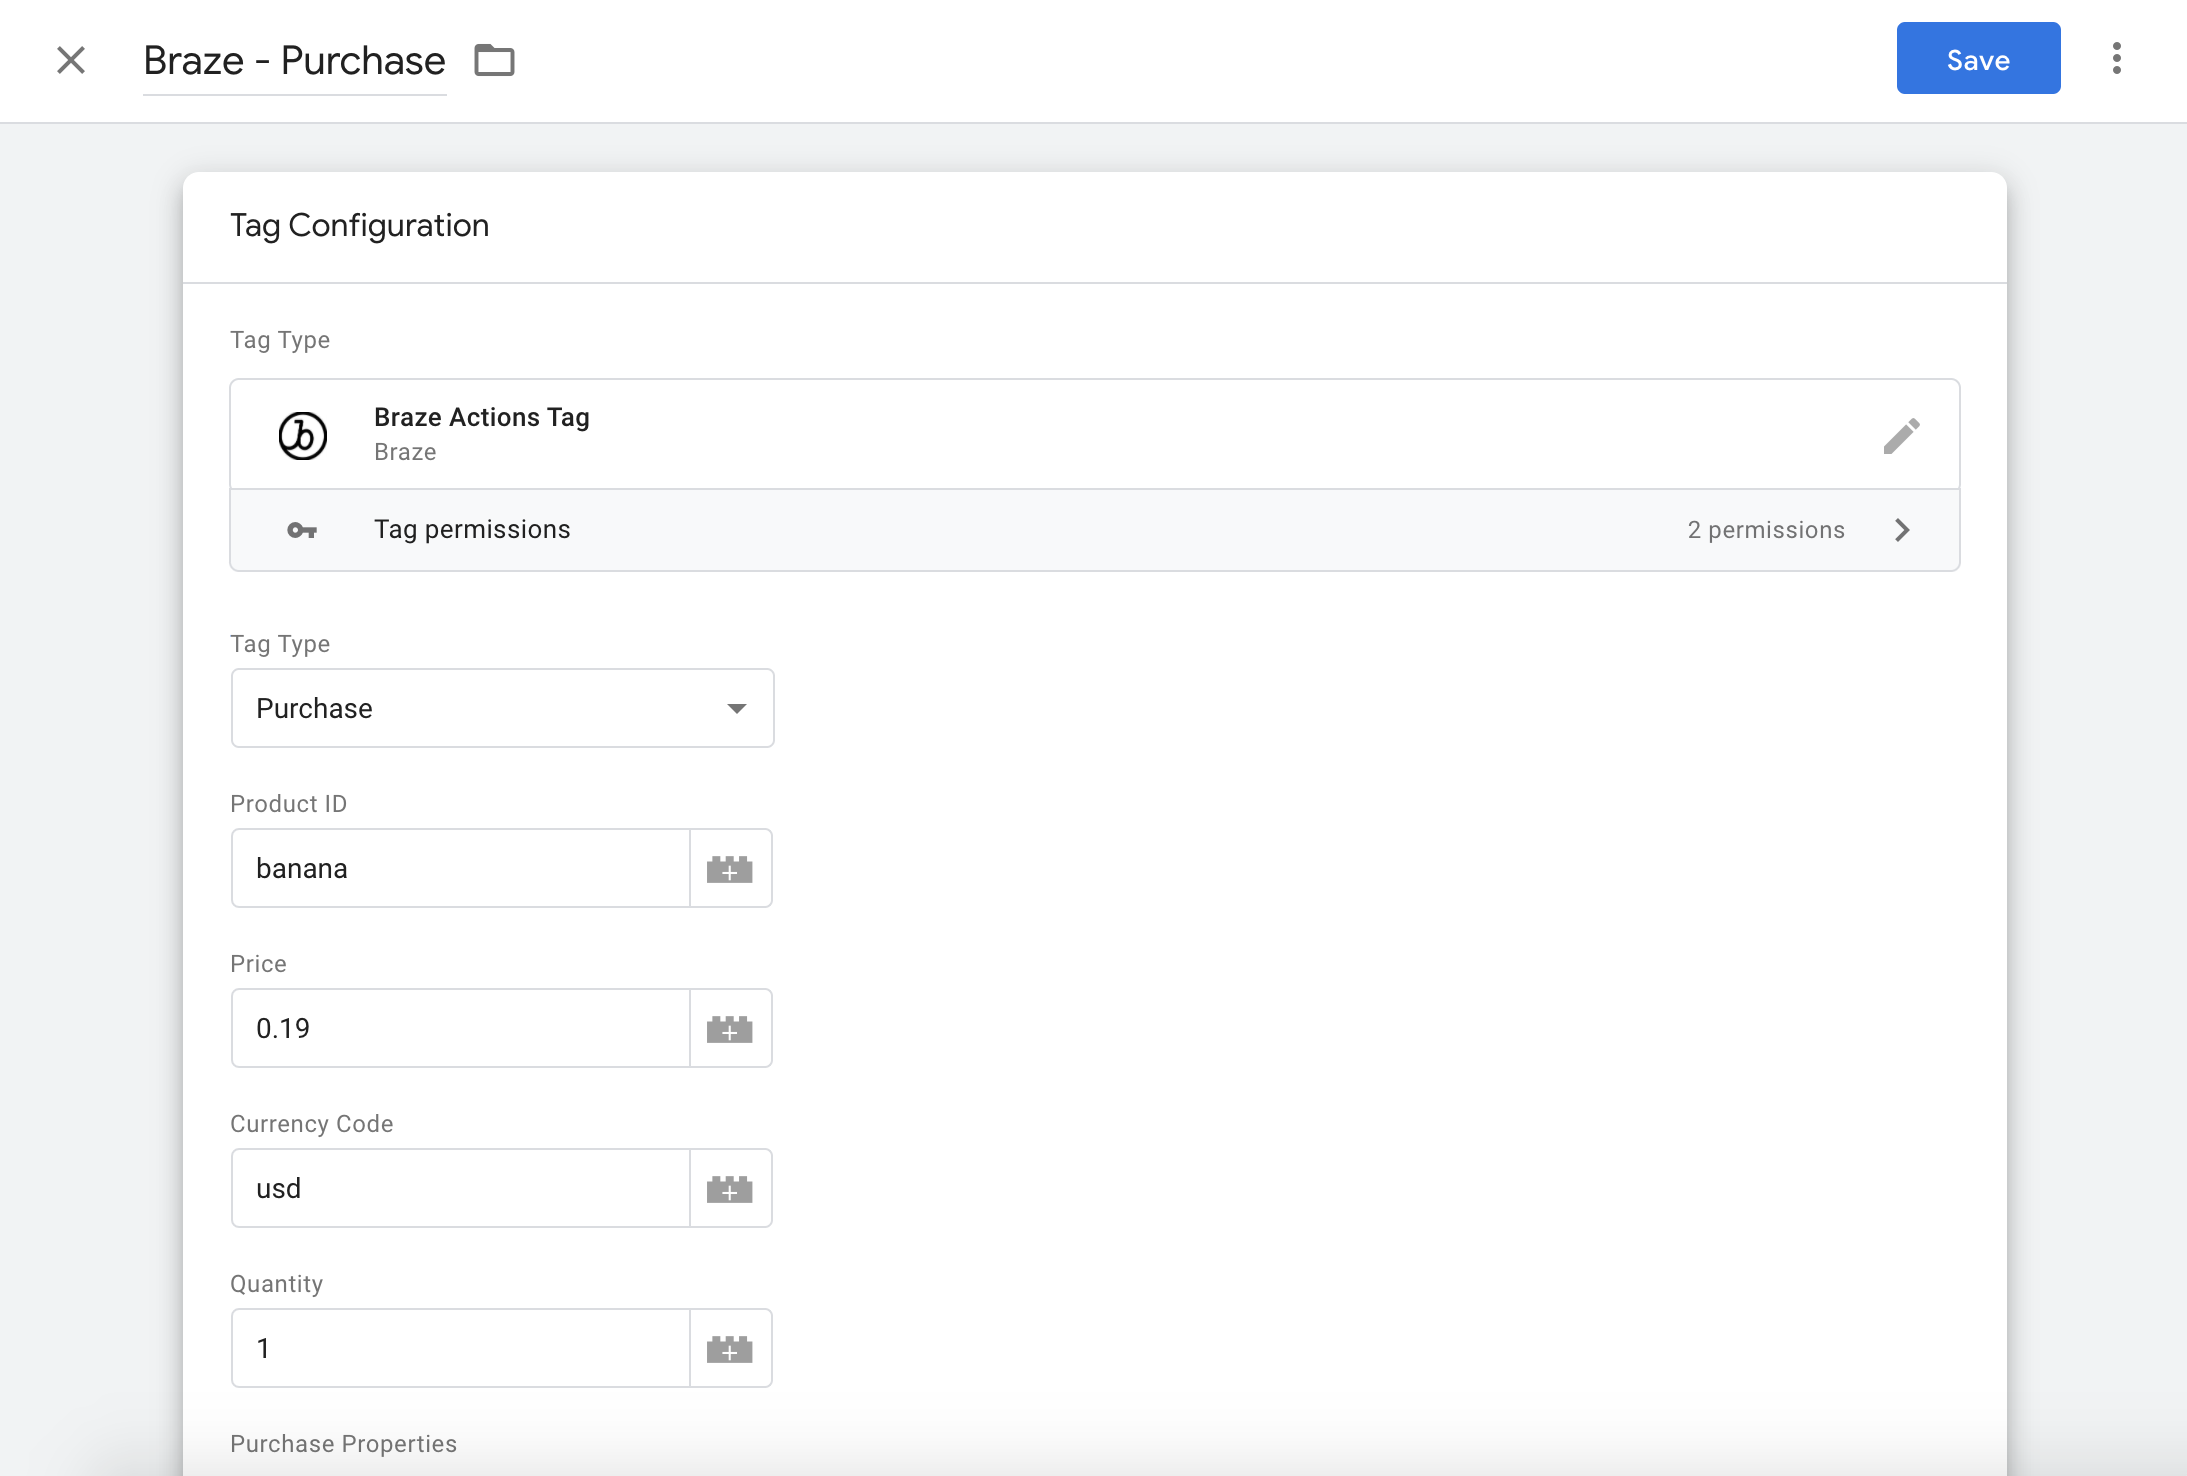
Track purchase
The Purchase tag type calls the logPurchase method.
Use this tag to track purchases to Braze, optionally including purchase properties.
The Product ID and Price fields are required.
Use the Add Row button to add purchase properties.
Stop and resume tracking
Sometimes, you might be required to disable or re-enable Braze tracking on your website, for example, after a user indicates they’ve opted out of web tracking for privacy reasons.
Use the Disable Tracking or Resume Tracking tag type to disable or re-enable web tracking, respectively. These two options call disableSDK and enableSDK.
Custom user attributes
Custom user attributes are not available due to a limitation in Google Tag Manager’s scripting language. To log custom attributes, create a Custom HTML tag with the following content:
1
2
3
4
5
<script>
  // Note: If using SDK version 3.x or below, use `window.appboy` instead of `window.braze`
  // Version 4 or greater should use `window.braze`
window.braze.getUser().setCustomUserAttribute("attribute name", "attribute value");
</script>
The GTM template does not support nested properties on events or purchases. You can use the preceding HTML to log any events or purchases that require nested properties.
Standard user attributes
Standard user attributes, such as a user’s first name, should be logged in the same manner as custom user attributes. Ensure the values you’re passing in for standard attributes match the expected format specified in the User class documentation.
For example, the gender attribute can accept any of the following as values: "m" | "f" | "o" | "u" | "n" | "p". Therefore to set a user’s gender as female, create a Custom HTML tag with the following content:
1
2
3
<script>
window.braze.getUser().setGender("f")
</script>
Integrating Content Cards
There are a few additional steps to integrate the Content Cards messaging channel using Google Tag Manager. Google Tag Manager works by injecting the Braze CDN (a version of our Web SDK) directly into your website code, which means that all SDK methods are available just as if you had integrated the SDK without Google Tag Manager, except when implementing Content Cards.
Option 1: Integrating using GTM
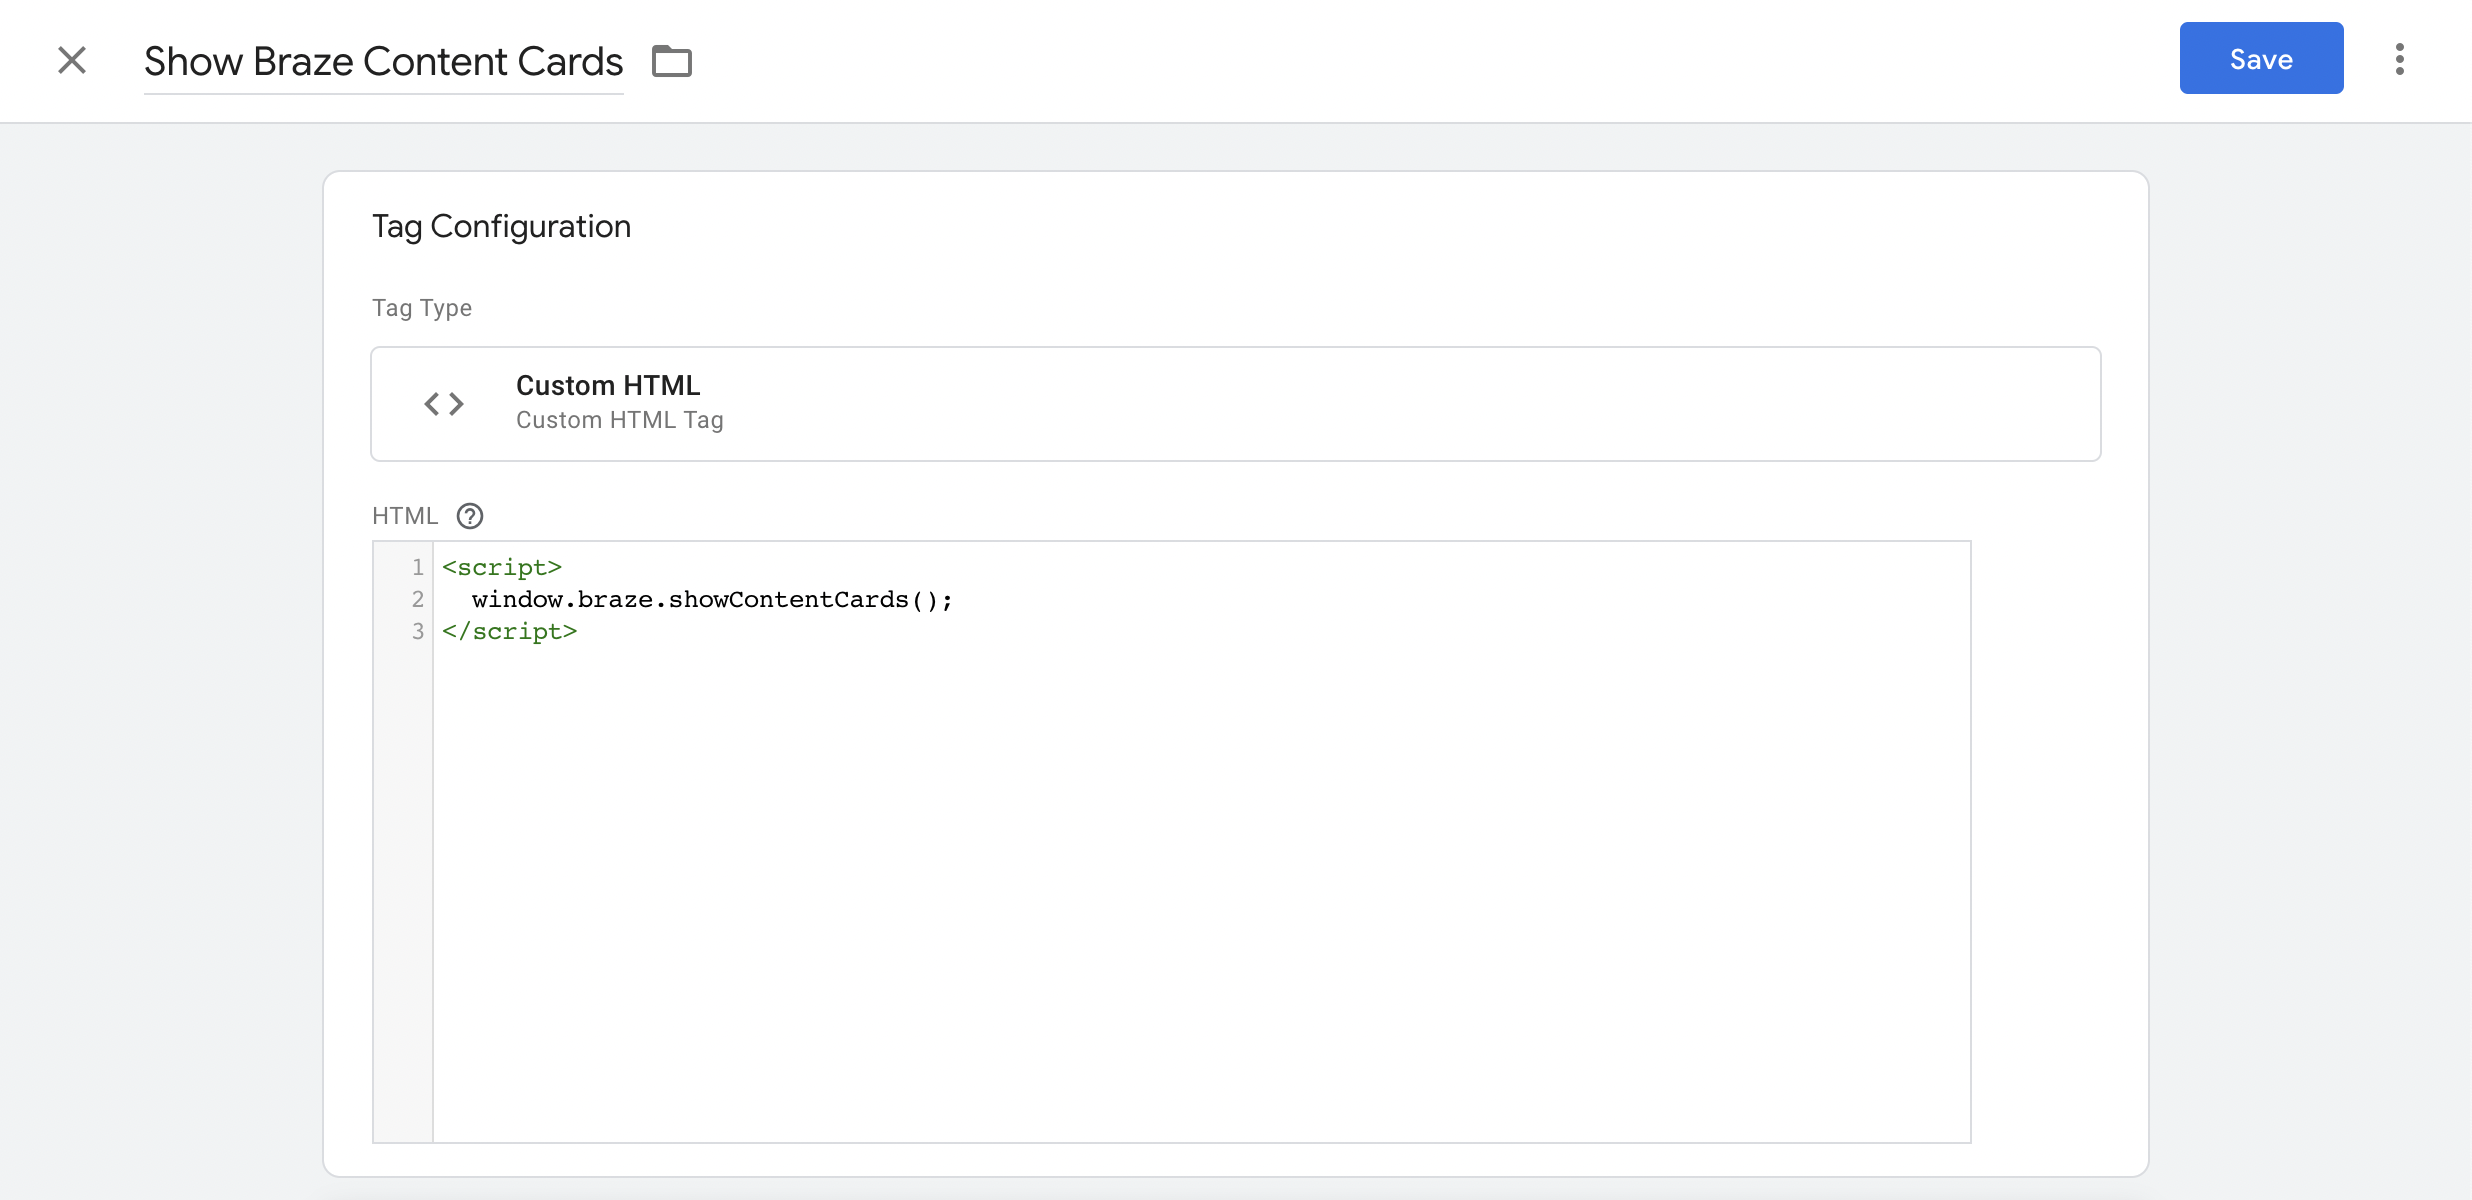
For a standard integration of the Content Card feed, you can use a Custom HTML tag in Google Tag Manager. Add the following to your Custom HTML tag, which will activate the standard Content Card feed:
1
2
3
<script>
   window.braze.showContentCards();
</script>
Option 2: Integrating directly in your website
For more freedom over customizing the appearance of Content Cards and their feed, you can directly integrate Content Cards into your native website. There are two approaches you can take with this: using the standard feed UI or creating a custom feed UI.
Standard feed
When implementing the standard feed UI, Braze methods must have window. added to the start of the method. For example, braze.showContentCards should instead be window.braze.showContentCards.
Custom feed UI
For custom feed styling, the steps are the same as if you had integrated the SDK without GTM. For example, if you want to customize the width of the Content Card feed, you can paste the following into your CSS file:
1
2
3
body .ab-feed {
    width: 800px;
}
Upgrading and updating templates
To upgrade to the latest version of the Braze Web SDK, take the following three steps in your Google Tag Manager dashboard:
- Update tag template
Go to the Templates page within your workspace. Here you should see an icon indicating an update is available.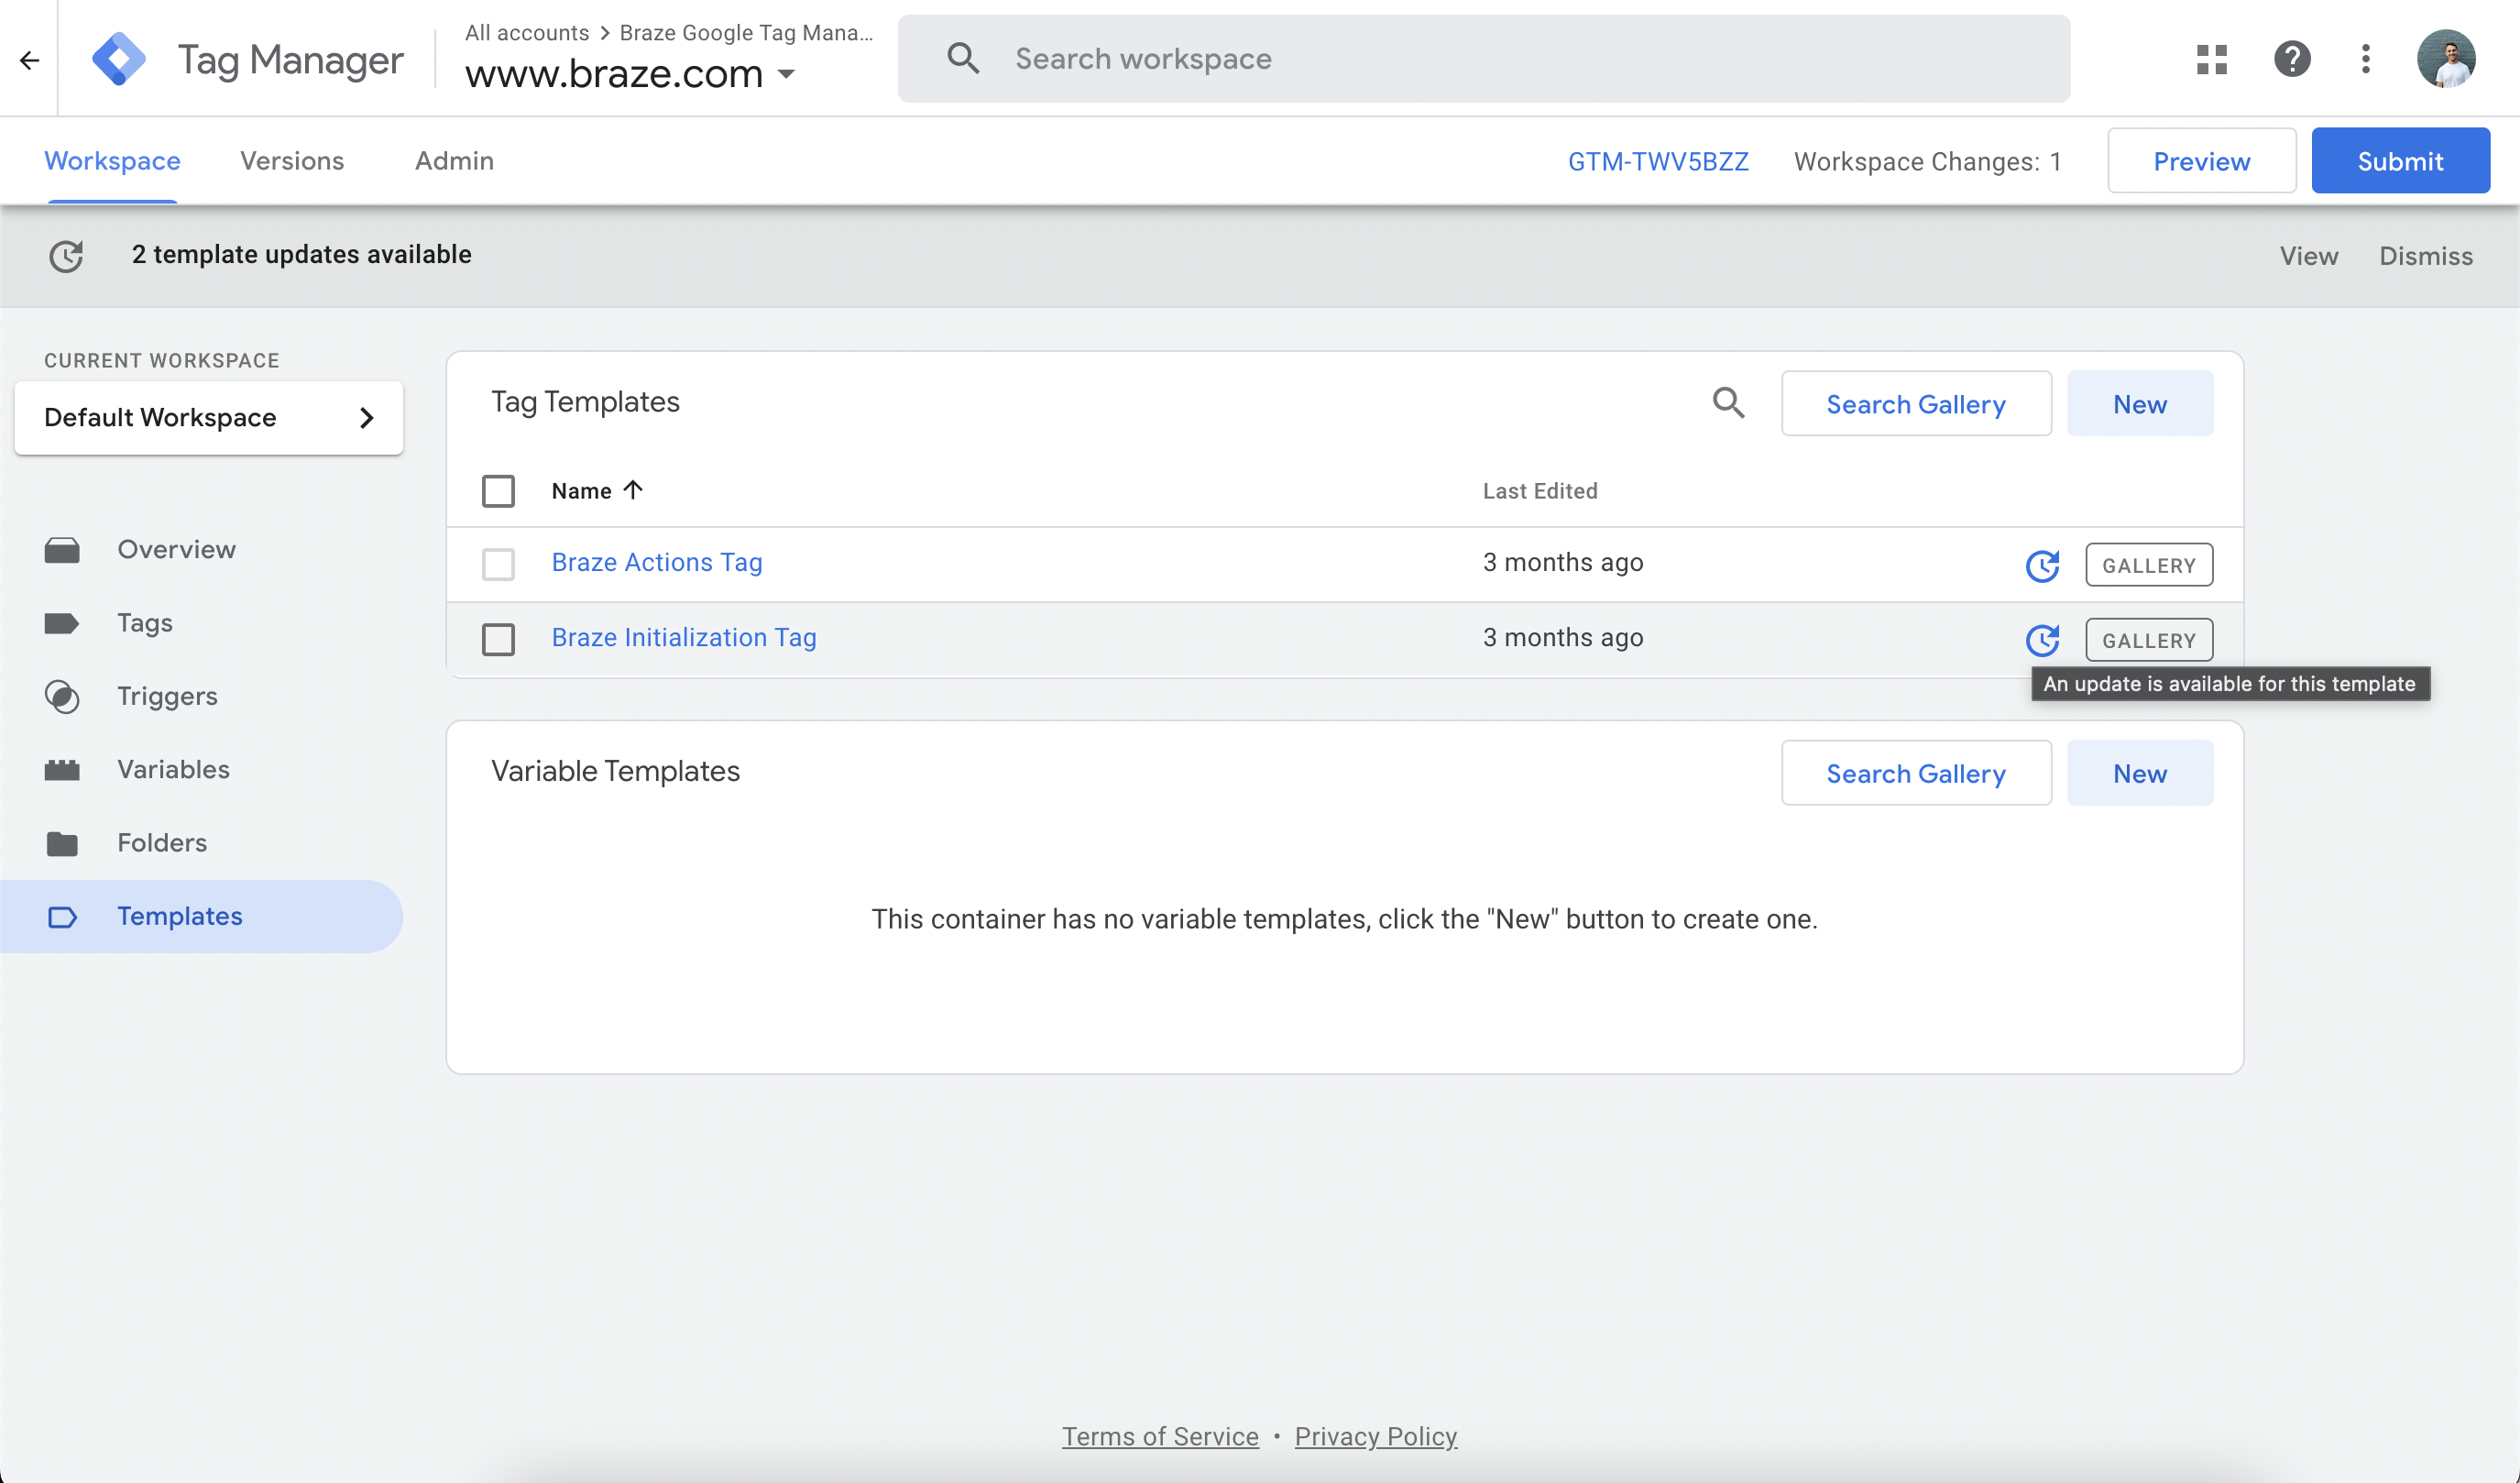
Click that icon and after reviewing the change, click to Accept Update.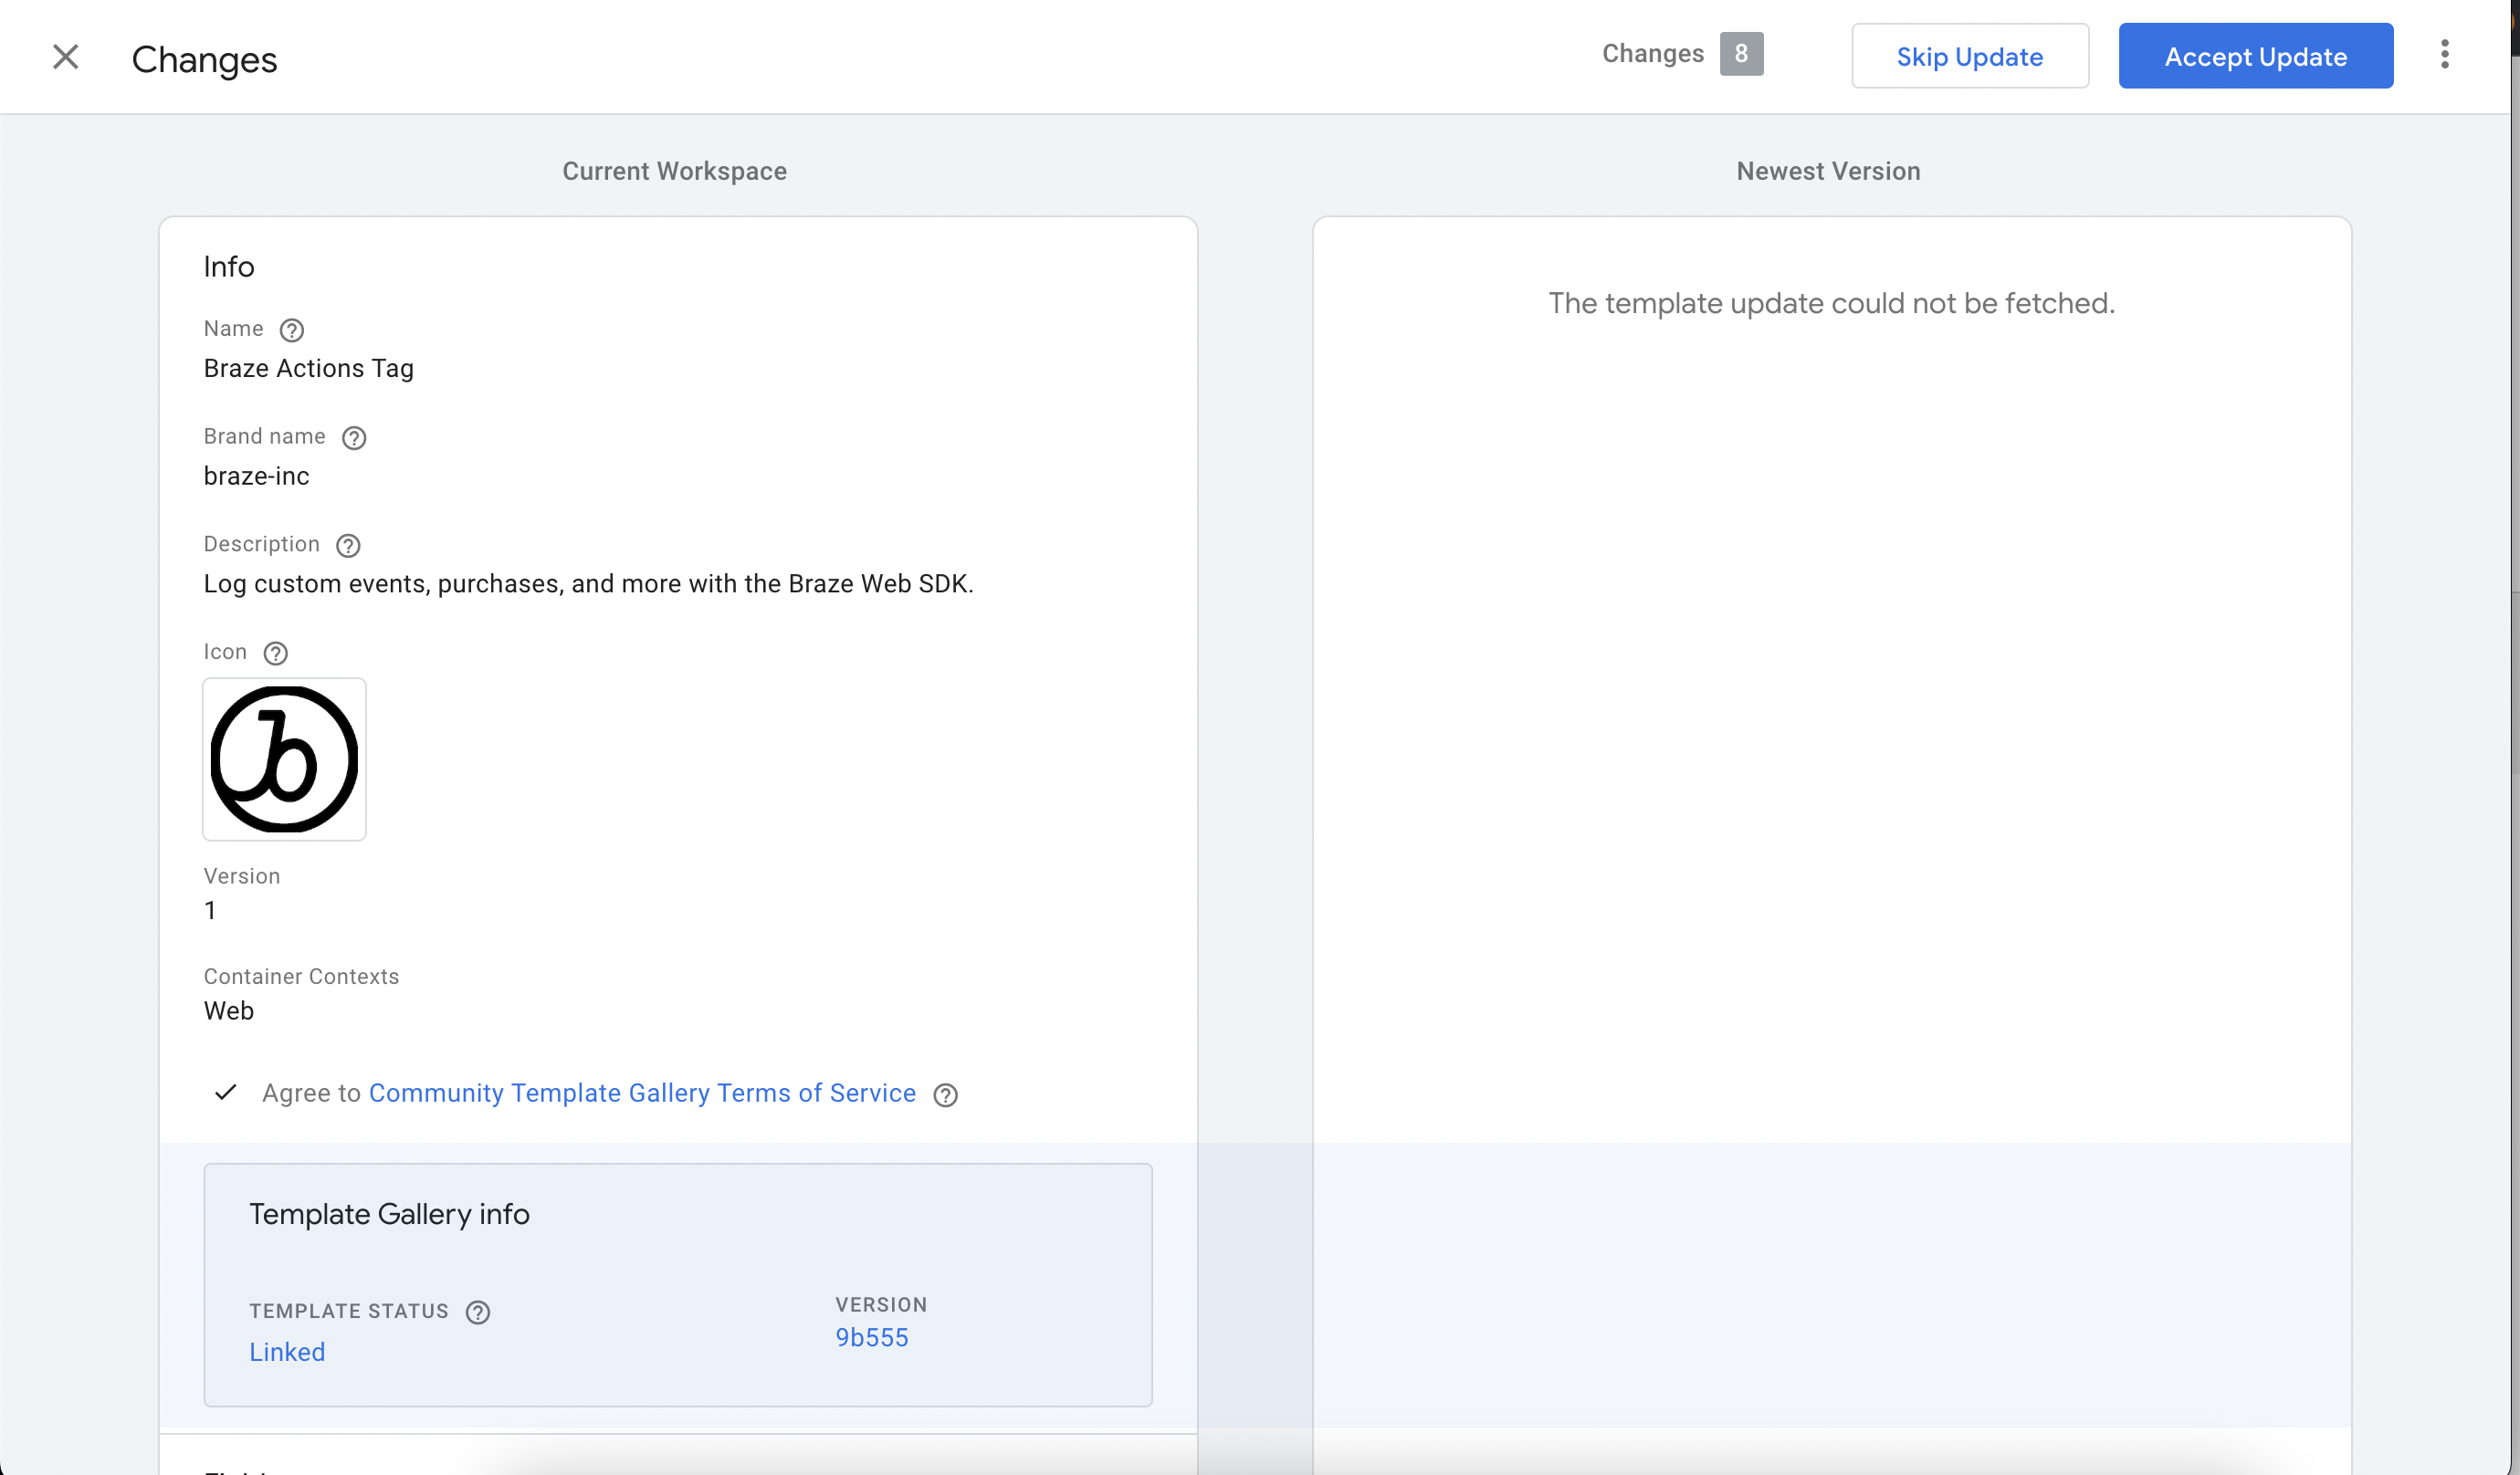
- Update version number
Once your tag template has been updated, edit the Braze Initialization Tag, and update the SDK version to the most recentmajor.minorversion. For example, if the latest version is4.1.2, enter4.1. You can view a list of SDK versions in our changelog.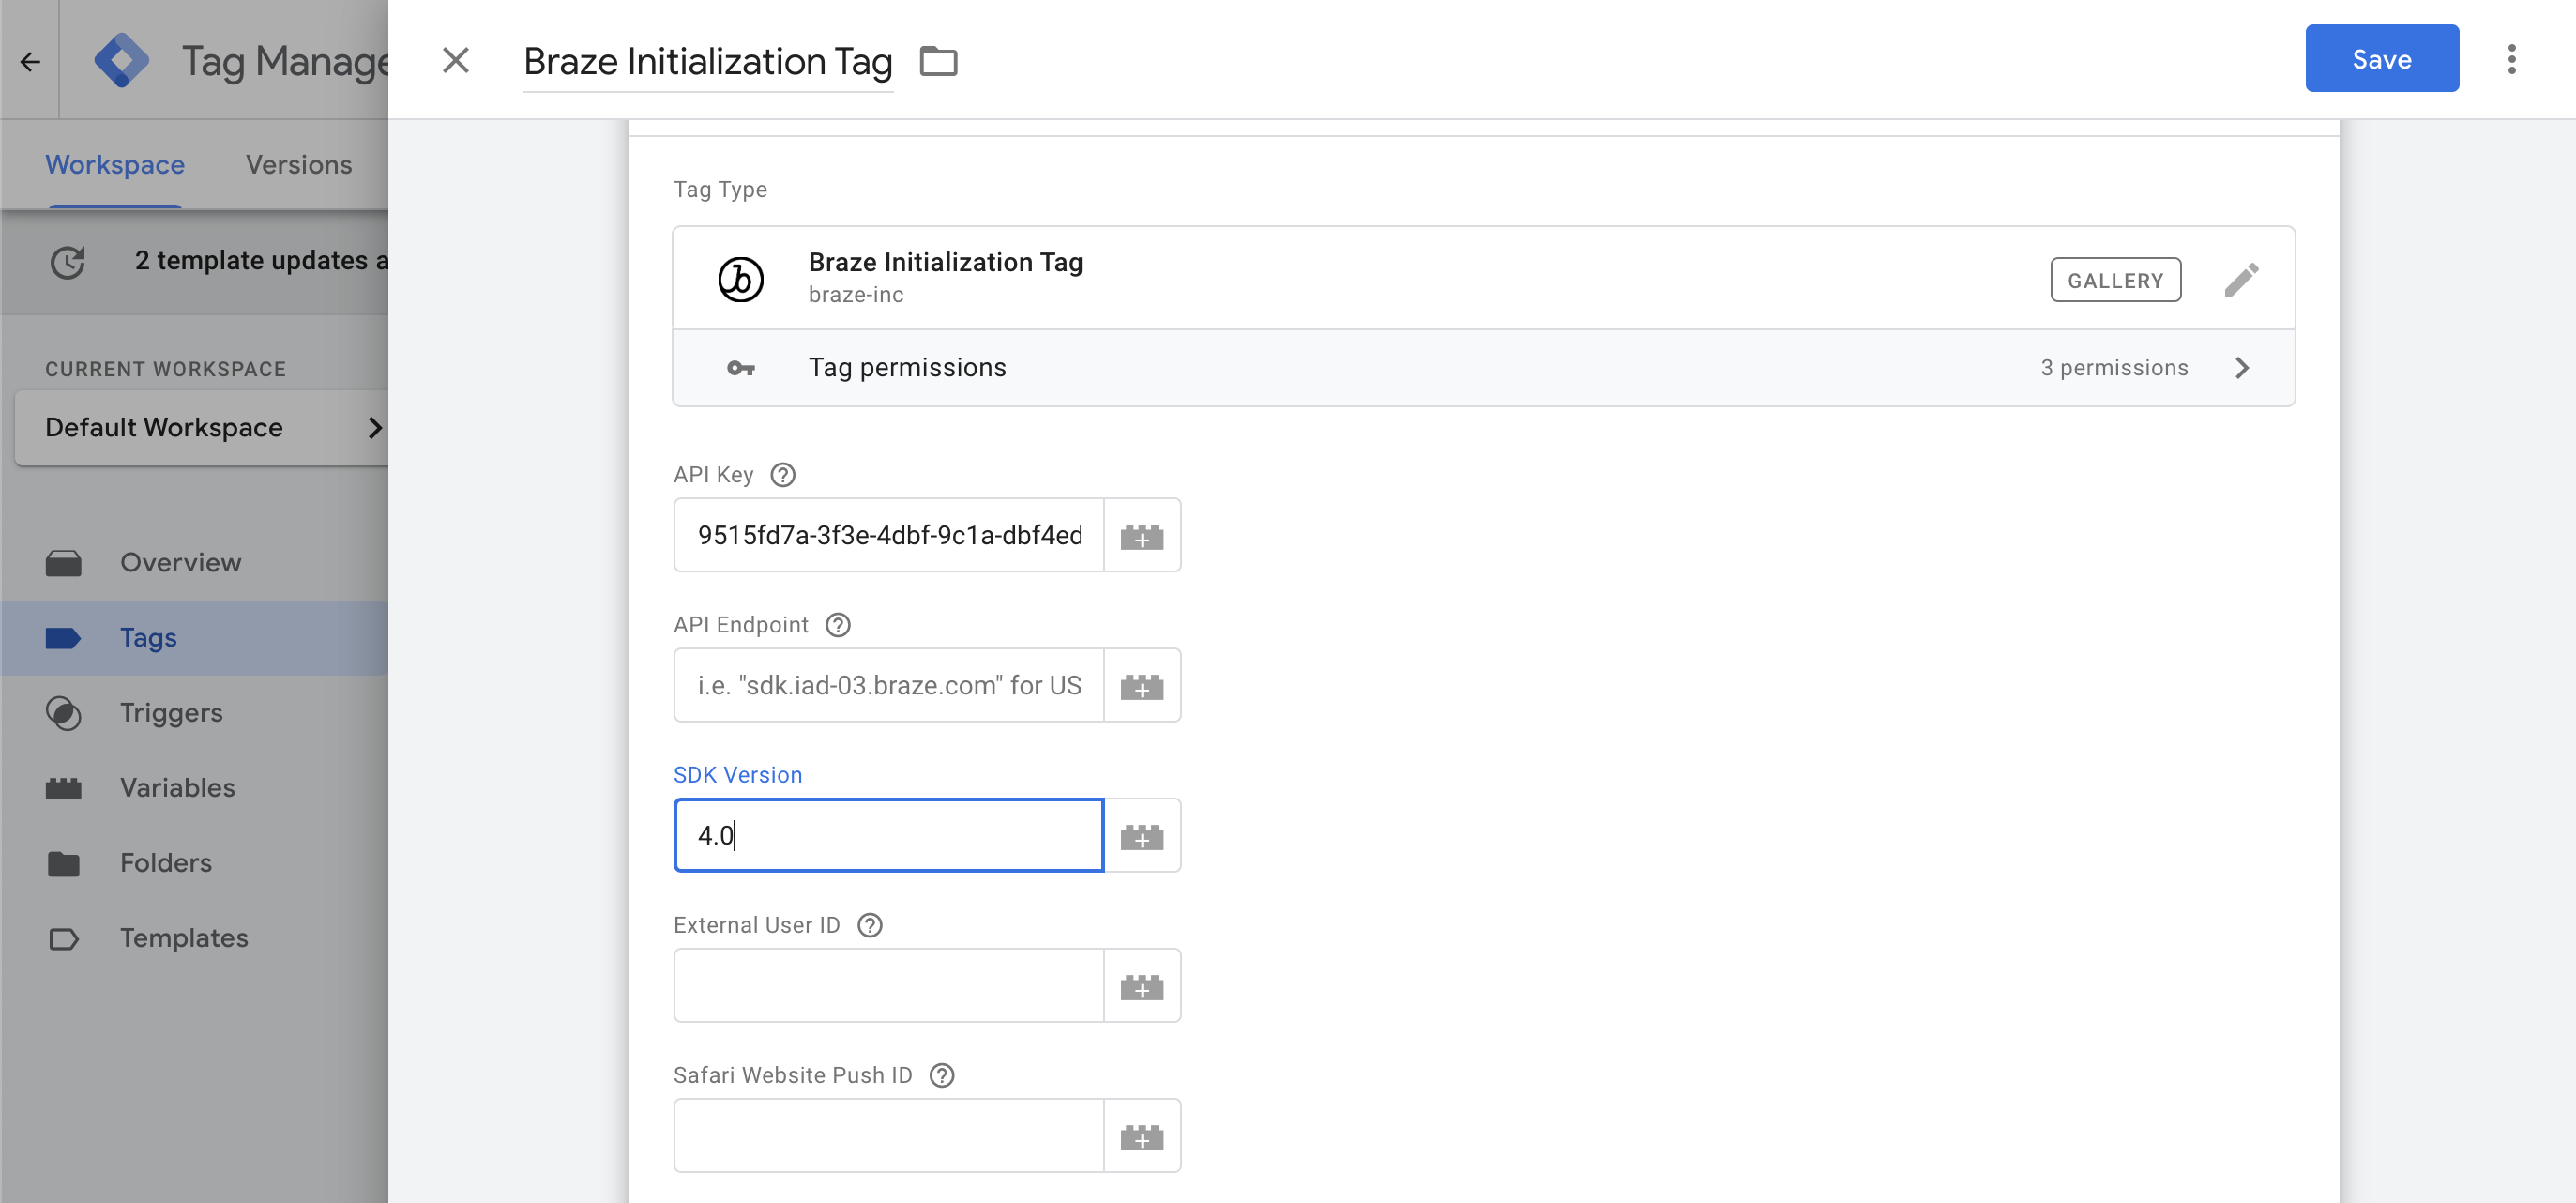
- QA and publish
Verify the new SDK version is working using Google Tag Manager’s debugging tool prior to publishing an update to your tag container.
Troubleshooting steps
Enable tag debugging
Each Braze tag template has an optional GTM Tag Debugging checkbox which can be used to log debug messages to your web page’s JavaScript console.
Enter debug mode
Another way to help debug your Google Tag Manager integration is using Google’s Preview mode feature.
This will help identify what values are being sent from your web page’s data layer to each triggered Braze tag and will also explain which tags were or were not triggered.
Enable verbose logging
To allow Braze technical support to access logs while testing, you can enable verbose logging on your Google Tag Manager integration. These logs will appear in the Console tab of your browser’s developer tools.
In your Google Tag Manager integration, navigate to your Braze Initialization Tag and select Enable Web SDK Logging.
 Edit this page on GitHub