Live Activities
Live Activities are persistent, interactive notifications displayed on your lock screen, allowing you to keep an eye on things in real-time. Because they appear on the lock screen, Live Activities ensure that your notifications won’t be missed. Because they’re persistent, you can display up-to-date content to your users without even having them unlock their phone.

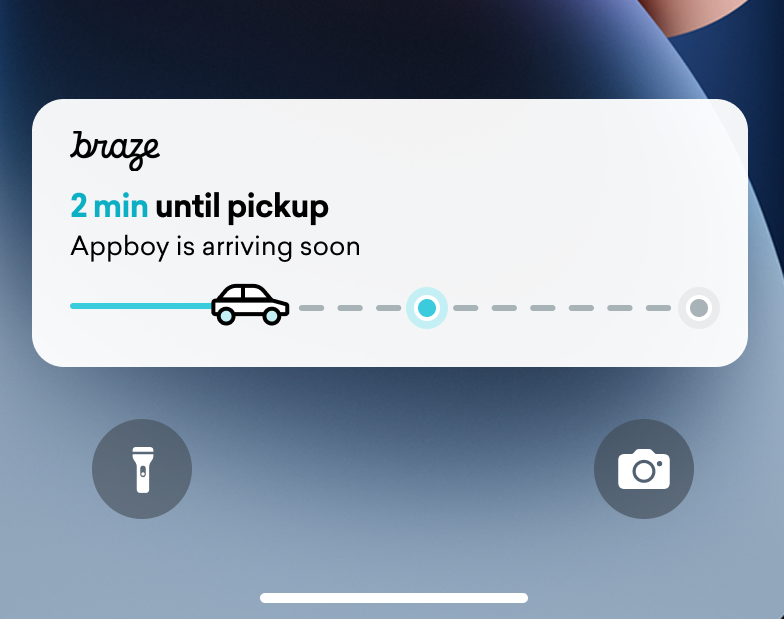
Live Activities present a combination of static information and dynamic information that you update. For example, you can create a Live Activity that provides a status tracker for a delivery. This Live Activity would have your company’s name as static information, as well as a dynamic “Time to delivery” that would be updated as the delivery driver approaches its destination.
As a developer, you can use Braze to manage your Live Activity lifecycles, make calls to the Braze REST API to make Live Activity updates, and have all subscribed devices receive the update as soon as possible. And, because you’re managing Live Activities through Braze, you can use them in tandem with your other messaging channels—push notifications, in-app messages, Content Cards—to drive adoption.
Prerequisites
Additional prerequisites include:
- Live Activities are only available for iPhones and iPads on iOS 16.1 and later. To use this feature, ensure that your project is targeting this iOS version.
- The
Push Notificationentitlement must be added under Signing & Capabilities in your Xcode project. - Starting with version 8.2.0 of the Braze Swift SDK, you can remotely register a Live Activity. To use this feature, iOS 17.2 or later is required.
While Live Activities and push notifications are similar, their system permissions are separate. By default, all Live Activity features are enabled, but users may disable this feature per app.
Implementing a Live Activity
Step 1: Create an activity
First, ensure that you have followed Displaying live data with Live Activities in Apple’s documentation to set up Live Activities in your iOS application. As part of this task, make sure you include NSSupportsLiveActivities set to YES in your Info.plist.
Because the exact nature of your Live Activity will be specific to your business case, you will need to set up and initialize the Activity objects. Importantly, you will define:
ActivityAttributes: This protocol defines the static (unchanging) and dynamic (changing) content that will appear in your Live Activity.ActivityAttributes.ContentState: This type defines the dynamic data that will be updated over the course of the activity.
You will also use SwiftUI to create the UI presentation of the lock screen and Dynamic Island on supported devices.
Make sure you’re familiar with Apple’s prerequisites and limitations for Live Activities, as these constraints are independent from Braze.
If you expect to send frequent pushes to the same Live Activity, you can avoid being throttled by Apple’s budget limit by setting NSSupportsLiveActivitiesFrequentUpdates to YES in your Info.plist file. For more details, refer to the Determine the update frequency section in the ActivityKit documentation.
Example
Let’s imagine that we want to create a Live Activity to give our users updates for the Superb Owl show, where two competing wildlife rescues are given points for the owls they have in residence. For this example, we have created a struct called SportsActivityAttributes, but you may use your own implementation of ActivityAttributes.
1
2
3
4
5
6
7
8
9
10
11
12
13
14
#if canImport(ActivityKit)
  import ActivityKit
#endif

@available(iOS 16.1, *)
struct SportsActivityAttributes: ActivityAttributes {
  public struct ContentState: Codable, Hashable {
    var teamOneScore: Int
    var teamTwoScore: Int
  }

  var gameName: String
  var gameNumber: String
}
Step 2: Start the activity
First, choose how you want to register your activity:
- Remotely: Use the
registerPushToStartmethod, then start an activity using the/messages/live_activity/startendpoint. - Locally: Create an instance of your Live Activity, then use the
launchActivitymethod to create push tokens for Braze to manage.
To remotely register a Live Activity, iOS 17.2 or later is required.
Step 2.1: Add BrazeKit to your widget extension
In your Xcode project, select your app name, then General. Under Frameworks and Libraries, confirm BrazeKit is listed.

Step 2.2: Add the BrazeLiveActivityAttributes protocol
In your ActivityAttributes implementation, add conformance to the BrazeLiveActivityAttributes protocol, then add the brazeActivityId string to your attributes model. You do not need to assign a value to this string.
1
2
3
4
5
6
7
8
9
10
11
12
13
14
15
16
17
import BrazeKit

#if canImport(ActivityKit)
  import ActivityKit
#endif

@available(iOS 16.1, *)
struct SportsActivityAttributes: ActivityAttributes, BrazeLiveActivityAttributes {
  public struct ContentState: Codable, Hashable {
    var teamOneScore: Int
    var teamTwoScore: Int
  }

  var gameName: String
  var gameNumber: String
  var brazeActivityId: String?
}
Step 2.3: Register for push-to-start
Next, register the Live Activity type, so Braze can track all push-to-start tokens and Live Activity instances associated with this type.
The iOS operating system only generates push-to-start tokens during the first app install after a device is restarted. To ensure your tokens are reliably registered, call registerPushToStart in your didFinishLaunchingWithOptions method.
Example
In the following example, the LiveActivityManager class handles Live Activity objects. Then, the registerPushToStart method registers SportActivityAttributes:
1
2
3
4
5
6
7
8
9
10
11
12
13
14
15
16
17
18
19
import BrazeKit

#if canImport(ActivityKit)
  import ActivityKit
#endif

class LiveActivityManager {

  @available(iOS 17.2, *)
  func registerActivityType() {
    // This method returns a Swift background task.
    // You may keep a reference to this task if you need to cancel it wherever appropriate, or ignore the return value if you wish.
    let pushToStartObserver: Task = Self.braze?.liveActivities.registerPushToStart(
      forType: Activity<SportsActivityAttributes>.self,
      name: "SportsActivityAttributes"
    )
  }

}
Step 2.4: Send a push-to-start notification
Send a remote push-to-start notification using the /messages/live_activity/start endpoint.
You can use Apple’s ActivityKit framework to get a push token, which the Braze SDK can manage for you. This allows you to update Live Activities through the Braze API, as Braze will send the push token to the Apple Push Notification service (APNs) on the backend.
- Create an instance of your Live Activity implementation using Apple’s ActivityKit APIs.
- Set the
pushTypeparameter as.token. - Pass in the Live Activities
ActivitiesAttributesandContentStateyou defined. - Register your activity with your Braze instance by passing it into
launchActivity(pushTokenTag:activity:). ThepushTokenTagparameter is a custom string you define. It should be unique for each Live Activity you create.
Once you have registered the Live Activity, the Braze SDK will extract and observe changes in the push tokens.
Example
For our example, we’ll create class called LiveActivityManager as an interface for our Live Activity objects. Then, we’ll set the pushTokenTag to "sports-game-2024-03-15".
1
2
3
4
5
6
7
8
9
10
11
12
13
14
15
16
17
18
19
20
21
22
23
24
25
26
import BrazeKit

#if canImport(ActivityKit)
  import ActivityKit
#endif

class LiveActivityManager {

  @available(iOS 16.2, *)
  func createActivity() {
    let activityAttributes = SportsActivityAttributes(gameName: "Superb Owl", gameNumber: "Game 1")
    let contentState = SportsActivityAttributes.ContentState(teamOneScore: "0", teamTwoScore: "0")
    let activityContent = ActivityContent(state: contentState, staleDate: nil)
    if let activity = try? Activity.request(attributes: activityAttributes,
                                            content: activityContent,
      // Setting your pushType as .token allows the Activity to generate push tokens for the server to watch.
                                            pushType: .token) {
      // Register your Live Activity with Braze using the pushTokenTag.
      // This method returns a Swift background task.
      // You may keep a reference to this task if you need to cancel it wherever appropriate, or ignore the return value if you wish.
      let liveActivityObserver: Task = AppDelegate.braze?.liveActivities.launchActivity(pushTokenTag: "sports-game-2024-03-15",
                                                                                        activity: activity)
    }
  }

}
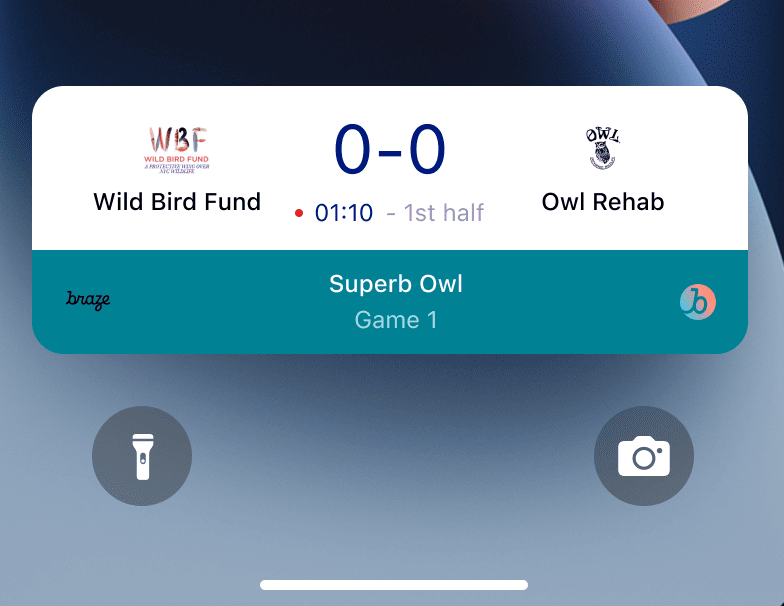
Your Live Activity widget would display this initial content to your users.

Step 3: Resume activity tracking
To ensure Braze tracks your Live Activity upon app launch:
- Open your
AppDelegatefile. - Import the
ActivityKitmodule if it’s available. - Call
resumeActivities(ofType:)inapplication(_:didFinishLaunchingWithOptions:)for allActivityAttributestypes you have registered in your application.
This allows Braze to resume tasks to track push token updates for all active Live Activities. Note that if a user has explicitly dismissed the Live Activity on their device, it is considered removed, and Braze will no longer track it.
Example
1
2
3
4
5
6
7
8
9
10
11
12
13
14
15
16
17
18
19
20
21
22
23
24
25
26
import UIKit
import BrazeKit

#if canImport(ActivityKit)
  import ActivityKit
#endif

@main
class AppDelegate: UIResponder, UIApplicationDelegate {

  static var braze: Braze? = nil

  func application(
    _ application: UIApplication,
    didFinishLaunchingWithOptions launchOptions: [UIApplication.LaunchOptionsKey: Any]?
  ) -> Bool {

    if #available(iOS 16.1, *) {
      Self.braze?.liveActivities.resumeActivities(
        ofType: Activity<SportsActivityAttributes>.self
      )
    }

    return true
  }
}
Step 4: Update the activity

The /messages/live_activity/update endpoint allows you to update a Live Activity through push notifications passed through the Braze REST API. Use this endpoint to update your Live Activity’s ContentState.
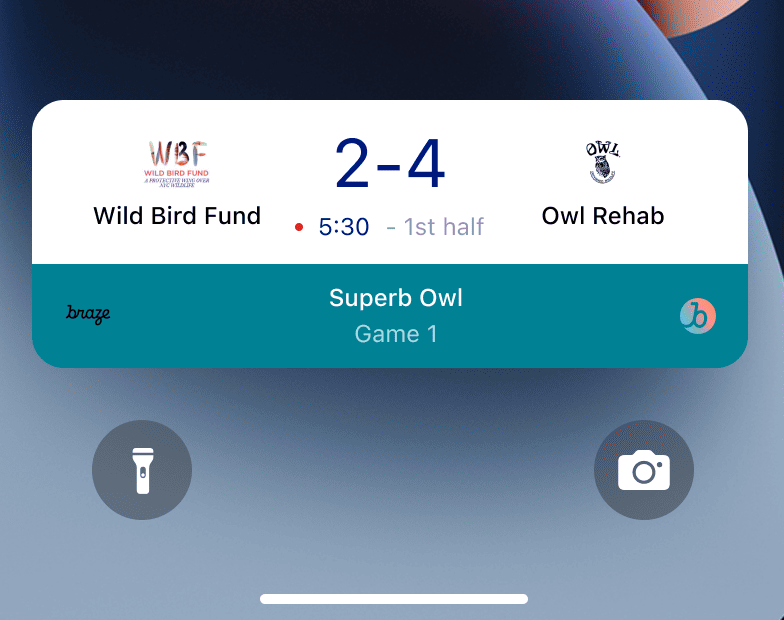
As you update your ContentState, your Live Activity widget will display the new information. Here’s what the Superb Owl show might look like at the end of the first half.
See our /messages/live_activity/update endpoint article for full details.
Step 5: End the activity
When a Live Activity is active, it is shown on both a user’s lock screen and Dynamic Island. There are a few different ways for a Live Activity to end and be removed from a user’s UI.
- User dismissal: A user can manually dismiss a Live Activity.
- Time out: After a default time of 8 hours, iOS will remove the Live Activity from the user’s Dynamic Island. After a default time of 12 hours, iOS will remove the Live Activity from the user’s lock screen.
- Dismissal date: You can provide a datetime for a Live Activity to be removed from a user’s UI prior to time out. This is defined either in the Activity’s
ActivityUIDismissalPolicyor using thedismissal_dateparameter in requests to the/messages/live_activity/updateendpoint. - End activity: You can set
end_activitytotruein a request to the/messages/live_activity/updateendpoint to immediately end a Live Activity.
See our /messages/live_activity/update endpoint article for full details.
Troubleshooting
For further troubleshooting details or frequently asked questions, refer to our FAQ.
 Edit this page on GitHub