 Integrate the Braze SDK
Learn how to integrate the Braze SDK. Each SDK is hosted in its own public GitHub repository, which includes fully-buildable sample apps you can use to test Braze features or implement alongside your own applications. To learn more, see References, Repositories, and Sample Apps. For more general information about the SDK, see Getting started: Integration overview.
For mirrored SDK README content in docs, see Repository guides.

After integrating the SDK, you can enable SDK Authentication to add an additional layer of security by preventing unauthorized SDK requests. SDK Authentication is available for Web, Android, Swift, React Native, Flutter, Unity, Cordova, .NET MAUI (Xamarin), and Expo.
About the Web Braze SDK
The Web Braze SDK lets you collect analytics and display rich in-app messages, push, and Content Card messages to your web users. For more information, see Braze JavaScript reference documentation.

This guide uses code samples from the Braze Web SDK 4.0.0+. To upgrade to the latest Web SDK version, see SDK Upgrade Guide.
Integrate the Web SDK
You can integrate the Web Braze SDK using the following methods. For additional options, see other integration methods.
- Code-based integration: Integrate the Web Braze SDK directly in your codebase using your preferred package manager or the Braze CDN. This gives you full control over how the SDK is loaded and configured.
- Google Tag Manager: A no-code solution that lets you integrate the Web Braze SDK without modifying your site’s code. For more information, see Google Tag Manager with the Braze SDK.

We recommend using the NPM integration method. Benefits include storing SDK libraries locally on your website, providing immunity from ad-blocker extensions, and contributing to faster load times as part of bundler support.
Step 1: Install the Braze library
You can install the Braze library using one of the following methods. However, if your website uses a Content-Security-Policy, review the Content Security Policy before continuing.
While most ad blockers do not block the Braze Web SDK, some more-restrictive ad blockers are known to cause issues.
If your site uses NPM or Yarn package managers, you can add the Braze NPM package as a dependency.
Typescript definitions are now included as of v3.0.0. For notes on upgrading from 2.x to 3.x, see our changelog.
1
2
3
npm install --save @braze/web-sdk
# or, using yarn:
# yarn add @braze/web-sdk
Once installed, you can import or require the library in the typical fashion:
1
2
3
import * as braze from "@braze/web-sdk";
// or, using `require`
const braze = require("@braze/web-sdk");
Add the Braze Web SDK directly to your HTML by referencing our CDN-hosted script, which loads the library asynchronously.
The default Prevent Cross-Site Tracking setting in Safari can prevent in-app message types like Banners and Content Cards from displaying when you use the CDN integration method. To avoid this issue, use the NPM integration method so that Safari does not classify these messages as cross-site traffic and your web users can see them in all supported browsers.
Step 2: Initialize the SDK
After the Braze Web SDK is added to your website, initialize the library with the API key and SDK endpoint URL found in Settings > App Settings within your Braze dashboard. For a complete list of options for braze.initialize(), along with our other JavaScript methods, see Braze JavaScript documentation.
Custom domains for Web SDK requests are not supported: The Web SDK baseUrl must be a Braze SDK endpoint (for example, sdk.iad-05.braze.com). Braze does not support routing Web SDK traffic through a customer-owned domain via CNAME records. If you need Web SDK requests to originate from your own domain, contact Braze support.
1
2
3
4
5
6
7
8
9
10
11
12
13
14
15
16
17
18
19
20
21
22
23
24
// initialize the SDK
braze.initialize('YOUR-API-KEY-HERE', {
    baseUrl: "YOUR-SDK-ENDPOINT-HERE",
    enableLogging: false, // set to `true` for debugging
    allowUserSuppliedJavascript: false, // set to `true` to support custom HTML messages
});

// Enable automatic display of in-app messages
// Required if you want in-app messages to display automatically when triggered
braze.automaticallyShowInAppMessages();

// if you use Content Cards
braze.subscribeToContentCardsUpdates(function(cards){
    // cards have been updated
});

// optionally set the current user's external ID before starting a new session
// you can also call `changeUser` later in the session after the user logs in
if (isLoggedIn){
    braze.changeUser(userIdentifier);
}

// `openSession` should be called last - after `changeUser` and `automaticallyShowInAppMessages`
braze.openSession();
In-App Message Display: To display in-app messages automatically when they’re triggered, you must call braze.automaticallyShowInAppMessages(). Without this call, in-app messages don’t display automatically. If you want to manage message display manually, remove this call and use braze.subscribeToInAppMessage() instead. For more information, see Disabling automatic triggers.
Troubleshooting missing sessions for anonymous users
If you’re seeing “Session missing” behavior, or you’re not able to track the session for users who stay anonymous on web, make sure your integration calls braze.openSession() during initialization.
- Scenario: Anonymous users can return a Braze ID, but session data is blank or missing.
- Cause: The implementation doesn’t call
braze.openSession(). - Resolution: Always call
braze.openSession()after initialization (and afterbraze.changeUser()if you set an external ID).
For more information, see Step 2: Initialize the SDK.
Anonymous users on mobile or web devices may be counted towards your MAU. As a result, you may want to conditionally load or initialize the SDK to exclude these users from your MAU count.
Prerequisites
Before you can use this integration method, you’ll need to create an account and container for Google Tag Manager.
Step 1: Open the tag template gallery
In Google Tag Manager, choose your workspace, then select Templates. In the Tag Template pane, select Search Gallery.

Step 2: Add the initialization tag template
In the template gallery, search for braze-inc, then select Braze Initialization Tag.

Select Add to workspace > Add.

Step 3: Configure the tag
From the Templates section, select your newly added template.

Select the pencil icon to open the Tag Configuration dropdown.

Enter the minimum required information:
| Field | Description |
|---|---|
| API Key | Your Braze API Key, found in the Braze dashboard under Settings > App Settings. |
| API Endpoint | Your REST endpoint URL. Your endpoint will depend on the Braze URL for your instance. |
| SDK Version | The most recent MAJOR.MINOR version of the Web Braze SDK listed in the changelog. For example, if the latest version is 4.1.2, enter 4.1. For more information, see About SDK version management. |
For additional initialization settings, select Braze Initialization Options and choose any options you need.

Step 4: Choose initialization options
The Braze Initialization Tag exposes the following options. Most of these map directly to the Web SDK InitializationOptions, and some correspond to Web SDK methods that the tag will call during initialization. Select the options that match your integration needs:
| GTM option | Web SDK configuration or method | Description |
|---|---|---|
| Allow HTML In-App Messages | allowUserSuppliedJavascript |
Enables HTML in-app messages, Banners, and user-supplied JavaScript click actions. Required for HTML in-app messages and Banners that use custom HTML. Only enable this when you trust the HTML and JavaScript content, as it allows user-supplied JavaScript execution. |
| App Version Number | appVersion, appVersionNumber |
App version for segmentation (for example, 1.2.3.4). |
| Automatically Open New Session | braze.openSession() |
Opens a new session after the SDK is initialized by calling this method for you. |
| Automatically show new in app messages | braze.automaticallyShowInAppMessages() |
Automatically displays new in-app messages when they arrive from the server by calling this method after initialization. |
| Disable Automatic Push Token Maintenance | disablePushTokenMaintenance |
Stops the SDK from syncing push tokens with the Braze backend on new sessions. |
| Disable Automatic Service Worker Registration | manageServiceWorkerExternally |
Use if you register and control the service worker yourself. |
| Disable Cookies | noCookies |
Uses localStorage instead of cookies for user/session data. Prevents cross-subdomain recognition. |
| Disable Font Awesome | doNotLoadFontAwesome |
Prevents the SDK from loading Font Awesome from the CDN. Use if your site has its own Font Awesome. |
| Enable SDK Authentication | enableSdkAuthentication |
Enables SDK Authentication. |
| Enable Web SDK Logging | enableLogging |
Enables console logging for debugging. Remove before production. |
| Minimum Interval Between Triggered Messages | minimumIntervalBetweenTriggerActionsInSeconds |
Minimum seconds between trigger actions (default: 30). |
| Open Cards in New Tab | openCardsInNewTab |
Opens Content Card links in a new tab when using the default Feed UI. |
| Service Worker Location | serviceWorkerLocation |
Custom path for the service worker file (default: /service-worker.js). |
| Session Timeout (seconds) | sessionTimeoutInSeconds |
Session timeout in seconds (default: 1800). |
To enable Custom HTML in-app messages when using the Google Tag Manager Braze Initialization Tag, select Allow HTML In-App Messages in Braze Initialization Options. This checkbox maps to the allowUserSuppliedJavascript initialization option in braze.initialize() and sets it to true. The Google Tag Manager Braze Initialization Tag uses this label instead of the option name.
For options not exposed in the GTM template (such as contentSecurityNonce, localization, or devicePropertyAllowlist), use runtime initialization instead.
Step 5: Set to Trigger on all pages
The initialization tag should be run on all pages of your site. This allows you to use Braze SDK methods and record web push analytics.
Step 6: Verify your integration
You can verify your integration using either of the following options:
- Option 1: Using Google Tag Manager’s debugging tool, you can check if the Braze Initialization Tag is triggering correctly on your configured pages or events.
- Option 2: Check for any network requests made to Braze from your web page. Additionally, the global
window.brazelibrary should now be defined.
Filtering bot traffic
MAU can include a percentage of bot users, which inflates your monthly active user count. While the Braze Web SDK includes built-in detection for some common web crawlers (such as search engine bots and social media preview bots), it is especially important to stay proactive with robust solutions to detect bots, as SDK updates alone cannot consistently detect every new bot.
Limitations of SDK-side bot detection
The Web SDK includes basic user-agent-based bot detection that filters out known crawlers. However, this approach has limitations:
- New bots emerge constantly: AI companies and other actors regularly create new bots that may disguise themselves to avoid detection.
- User-agent spoofing: Sophisticated bots can mimic legitimate browser user-agents.
- Custom bots: Non-technical users can now easily create bots using large language models (LLMs), making bot behavior unpredictable.
Implementing bot filtering
The following solutions are general suggestions. Tailor bot filtering logic to your unique environment and traffic patterns.
The most robust solution is to implement your own bot filtering logic before initializing the Braze SDK. Common approaches include:
Require user interaction
Consider delaying SDK initialization until a user performs a meaningful interaction, such as accepting a cookie consent banner, scrolling, or clicking. This approach is often easier to implement and can be highly effective at filtering bot traffic.
Delaying SDK initialization until user interaction might cause Banners and Content Cards to also not display until that interaction occurs.
Custom bot detection
Implement custom detection based on your specific bot traffic patterns, such as:
- Analyzing user-agent strings for patterns you’ve identified in your traffic
- Checking for headless browser indicators
- Using third-party bot detection services
- Monitoring behavioral signals specific to your site
Example of conditional initialization:
1
2
3
4
5
6
7
8
// Only initialize Braze if your custom bot detection determines this is not a bot
if (!isLikelyBot()) {
  braze.initialize('YOUR-API-KEY-HERE', {
    baseUrl: "YOUR-SDK-ENDPOINT-HERE"
  });
  braze.automaticallyShowInAppMessages();
  braze.openSession();
}
Best practices
- Regularly analyze your MAU data and web traffic patterns to identify new bot behavior.
- Test thoroughly to ensure your bot filtering doesn’t prevent legitimate users from being tracked.
- Update your filtering logic based on the bot traffic patterns you observe in your environment.
Optional configurations
Logging
To quickly enable logging, you can add ?brazeLogging=true as a parameter to your website URL. Alternatively, you can enable basic or custom logging. For a centralized overview across all platforms, see Verbose logging.
Basic logging
Use enableLogging to log basic debugging messages to the JavaScript console before the SDK is initialized.
1
enableLogging: true
Your method should be similar to the following:
1
2
3
4
5
braze.initialize('API-KEY', {
    baseUrl: 'API-ENDPOINT',
    enableLogging: true
});
braze.openSession();
Use braze.toggleLogging() to log basic debugging messages to the JavaScript console after the SDK is initialized. Your method should be similar to the following:
1
2
3
4
5
6
braze.initialize('API-KEY', {
    baseUrl: 'API-ENDPOINT',
});
braze.openSession();
...
braze.toggleLogging();
Basic logs are visible to all users, so consider disabling, or switch to setLogger, before releasing your code to production.
Custom logging
Use setLogger to log custom debugging messages to the JavaScript console. Unlike basic logs, these logs are not visible to users.
1
setLogger(loggerFunction: (message: STRING) => void): void
Replace STRING with your message as a single string parameter. Your method should be similar to the following:
1
2
3
4
5
braze.initialize('API-KEY');
braze.setLogger(function(message) {
    console.log("Braze Custom Logger: " + message);
});
braze.openSession();
Upgrading the SDK
This guide uses code samples from the Braze Web SDK 4.0.0+. To upgrade to the latest Web SDK version, see SDK Upgrade Guide.
When you reference the Braze Web SDK from our content delivery network, for example, https://js.appboycdn.com/web-sdk/a.a/braze.min.js (as recommended by our default integration instructions), your users receive minor updates (bug fixes and backward compatible features, versions a.a.a through a.a.z in this example) automatically when they refresh your site.
However, when we release major changes, we require you to upgrade the Braze Web SDK manually to ensure that breaking changes do not impact your integration. Additionally, if you download our SDK and host it yourself, you don’t receive any version updates automatically and should upgrade manually to receive the latest features and bug fixes.
You can keep up-to-date with our latest release following our release feed with the RSS Reader or service of your choice, and see our changelog for a full accounting of our Web SDK release history. To upgrade the Braze Web SDK:
- Update the Braze library version by changing the version number of
https://js.appboycdn.com/web-sdk/[OLD VERSION NUMBER]/braze.min.js, or in your package manager’s dependencies. - If you have web push integrated, update the service worker file on your site - by default, this is located at
/service-worker.jsat your site’s root directory, but the location may be customized in some integrations. You must access the root directory to host a service worker file.
You must update these two files in coordination with each other for proper functionality.
Other integration methods
Accelerated Mobile Pages (AMP)
See more
Step 1: Include AMP web push script
Add the following async script tag to your head:
1
<script async custom-element="amp-web-push" src="https://cdn.ampproject.org/v0/amp-web-push-0.1.js"></script>
Step 2: Add subscription widgets
Add a widget to the body of your HTML that allows users to subscribe and unsubscribe from push.
1
2
3
4
5
6
7
8
9
<!-- A subscription widget -->
<amp-web-push-widget visibility="unsubscribed" layout="fixed" width="250" height="80">
  <button on="tap:amp-web-push.subscribe">Subscribe to Notifications</button>
</amp-web-push-widget>

<!-- An unsubscription widget -->
<amp-web-push-widget visibility="subscribed" layout="fixed" width="250" height="80">
  <button on="tap:amp-web-push.unsubscribe">Unsubscribe from Notifications</button>
</amp-web-push-widget>
Step 3: Add helper-iframe and permission-dialog
The AMP Web Push component creates a popup to handle push subscriptions, so you must add the following helper files to your project to enable this feature:
Step 4: Create a service worker file
Create a service-worker.js file in the root directory of your website and add the following snippet:
Step 5: Configure the AMP web push HTML element
Add the following amp-web-push HTML element to your HTML body. Keep in mind, you need to append your apiKey and baseUrl as query parameters to service-worker-URL.
1
2
3
4
5
6
7
<amp-web-push
layout="nodisplay"
id="amp-web-push"
helper-iframe-url="FILE_PATH_TO_YOUR_HELPER_IFRAME"
permission-dialog-url="FILE_PATH_TO_YOUR_PERMISSION_DIALOG"
service-worker-url="FILE_PATH_TO_YOUR_SERVICE_WORKER?apiKey={YOUR_API_KEY}&baseUrl={YOUR_BASE_URL}"
>
Asynchronous Module Definition (AMD)
Disable support
If your site uses RequireJS or another AMD module-loader, but you prefer to load the Braze Web SDK through one of the other options in this list, you can load a version of the library that does not include AMD support. This version of the library can be loaded from the following CDN location:
Module loader
If you use RequireJS or other AMD module-loaders we recommend self-hosting a copy of our library and referencing it as you would with other resources:
1
2
3
4
5
6
require(['path/to/braze.min.js'], function(braze) {
  braze.initialize('YOUR-API-KEY-HERE', { baseUrl: 'YOUR-SDK-ENDPOINT' });
  // Required if you want in-app messages to display automatically
  braze.automaticallyShowInAppMessages();
  braze.openSession();
});
Electron
Electron does not officially support web push notifications (see: this GitHub issue). There are other open source workarounds you may try that have not been tested by Braze.
Jest framework
When using Jest, you may see an error similar to SyntaxError: Unexpected token 'export'. To fix this, adjust your configuration in package.json to ignore the Braze SDK:
1
2
3
4
5
"jest": {
  "transformIgnorePatterns": [
    "/node_modules/(?!@braze)"
  ]
}
SSR frameworks
The Web SDK runs in a browser environment. In SSR frameworks, initialize Braze in a client-only component so your server never executes SDK code.
Framework-agnostic dynamic import
If your framework isn’t listed in this section, you can dynamically import Braze from a client-only lifecycle hook.
1
2
3
4
5
6
7
8
9
10
11
12
13
14
// MyComponent/braze-exports.js
// Export the parts of the SDK that you need.
export { initialize, openSession } from "@braze/web-sdk";

// MyComponent/MyComponent.js
useEffect(() => {
    import("./braze-exports.js").then(({ initialize, openSession }) => {
        initialize("YOUR-API-KEY-HERE", {
            baseUrl: "YOUR-SDK-ENDPOINT",
            enableLogging: true,
        });
        openSession();
    });
}, []);
If you’re using webpack, you can dynamically import only specific SDK exports.
1
2
3
4
5
6
7
8
9
10
11
12
13
// MyComponent.js
useEffect(() => {
    import(
        /* webpackExports: ["initialize", "openSession"] */
        "@braze/web-sdk"
    ).then(({ initialize, openSession }) => {
        initialize("YOUR-API-KEY-HERE", {
            baseUrl: "YOUR-SDK-ENDPOINT",
            enableLogging: true,
        });
        openSession();
    });
}, []);
Shared hook for Next.js and Remix
Create a reusable useBraze hook and call it near your app root.
1
2
3
4
5
6
7
8
9
10
11
12
13
14
15
16
17
18
19
20
21
22
23
24
25
26
27
28
29
30
31
32
33
34
35
// hooks/useBraze.ts
import { useEffect, useRef } from "react";

export function useBraze() {
  const didInit = useRef(false);

  useEffect(() => {
    if (didInit.current) {
      return;
    }
    didInit.current = true;

    import("@braze/web-sdk")
      .then((braze) => {
        const initialized = braze.initialize("YOUR-API-KEY-HERE", {
          // Use your Braze Web SDK endpoint, such as sdk.iad-01.braze.com.
          baseUrl: "YOUR-SDK-ENDPOINT",
          enableLogging: false,
        });
        if (!initialized) {
          return;
        }

        // Optional: Identify signed-in users before opening a session.
        // braze.changeUser("external-id");

        // Optional: Automatically display in-app messages.
        // braze.automaticallyShowInAppMessages();
        braze.openSession();
      })
      .catch((error) => {
        console.error("Unable to load Braze SDK:", error);
      });
  }, []);
}
Next.js (App Router)
Call useBraze in a client component that wraps your app.
1
2
3
4
5
6
7
8
9
10
// app/components/AppRoot.tsx
"use client";

import type { ReactNode } from "react";
import { useBraze } from "../hooks/useBraze";

export function AppRoot({ children }: { children: ReactNode }) {
  useBraze();
  return <>{children}</>;
}
1
2
3
4
5
6
7
8
9
10
11
12
13
14
15
16
17
// app/layout.tsx
import type { ReactNode } from "react";
import { AppRoot } from "./components/AppRoot";

export default function RootLayout({
  children,
}: {
  children: ReactNode;
}) {
  return (
    <html lang="en">
      <body>
        <AppRoot>{children}</AppRoot>
      </body>
    </html>
  );
}
Next.js (Pages Router)
Call useBraze at the top of your custom app component.
1
2
3
4
5
6
7
8
9
10
11
// pages/_app.tsx
import type { AppProps } from "next/app";
import { useBraze } from "../hooks/useBraze";

export default function App({ Component, pageProps }: AppProps) {
  useBraze();

  return (
    <Component {...pageProps} />
  );
}
Remix
Call useBraze at the top of your root route component.
For local Remix validation examples, run PORT=4013 npm run dev.
1
2
3
4
5
6
7
8
9
// app/root.tsx
import { Outlet } from "@remix-run/react";
import { useBraze } from "./hooks/useBraze";

export default function App() {
  useBraze();

  return <Outlet />;
}
Logging events and updating users
After useBraze initializes the SDK at your app root, other client components can call Braze methods. A common pattern is to call them inside user actions, such as onClick or onSubmit. In the example, the SDK methods are loaded inside the click handler instead of at the top of the file. This keeps the Web SDK out of server code and loads only what that action needs. The webpackExports comment tells webpack which methods to include, so your bundle stays smaller.
1
2
3
4
5
6
7
8
9
10
11
12
13
14
15
16
17
// app/components/BuyButton.tsx
"use client";

export function BuyButton() {
  const handleClick = async () => {
    const { logCustomEvent, logPurchase, getUser } = await import(
      /* webpackExports: ["logCustomEvent", "logPurchase", "getUser"] */
      "@braze/web-sdk"
    );

    getUser()?.setCustomUserAttribute("last_purchase_date", "2026-05-04");
    logCustomEvent("clicked_buy", { source: "product_page" });
    logPurchase("sku_123", 19.99, "USD");
  };

  return <button onClick={handleClick}>Buy</button>;
}
This example shows a BuyButton component that logs activity when someone clicks Buy. First, it imports only logCustomEvent, logPurchase, and getUser at click time. Then it updates a user attribute, logs a custom event, and logs a purchase. This pattern helps you keep initialization centralized in useBraze, while still tracking meaningful actions from any client component.
If you’re using Remix with Vite and package-root imports fail at runtime, use the existing Vite workaround. For more information, see Vite.
For a full list of available methods, see the Braze JavaScript reference documentation.
Tealium iQ
Tealium iQ offers a basic turnkey Braze integration. To configure the integration, search for Braze in the Tealium Tag Management interface, and provide the Web SDK API key from your dashboard.
For more details or in-depth Tealium configuration support, check out our integration documentation or contact your Tealium account manager.
Vite
If you use Vite and see a warning around circular dependencies or Uncaught TypeError: Class extends value undefined is not a constructor or null, you may need to exclude the Braze SDK from its dependency discovery:
1
2
3
optimizeDeps: {
    exclude: ['@braze/web-sdk']
},
Other tag managers
Braze may also be compatible with other tag management solutions by following our integration instructions within a custom HTML tag. Contact a Braze representative if you need help evaluating these solutions.
Integrating the Android SDK
Step 1: Update your Gradle build configuration
In your project’s repository configuration (for example, settings.gradle, settings.gradle.kts, or top-level build.gradle), add mavenCentral() to your list of repositories. This syntax is the same for both Groovy and Kotlin DSL.
1
2
3
repositories {
  mavenCentral()
}
Next, add Braze to your dependencies. In the following examples, replace SDK_VERSION with the current version of your Android Braze SDK. For the full list of versions, see Changelogs.
- For Kotlin DSL (
build.gradle.kts), use theimplementation("...")syntax. - For Groovy (
build.gradle), use theimplementation '...'syntax. - For version catalogs, add entries to your
gradle/libs.versions.tomlfile and reference them using the generated accessors.
If you don’t plan on using Braze UI components, add the following to your dependencies.
1
2
3
4
dependencies {
    implementation 'com.braze:android-sdk-base:SDK_VERSION' // (Required) Adds dependencies for the base Braze SDK.
    implementation 'com.braze:android-sdk-location:SDK_VERSION' // (Optional) Adds dependencies for Braze location services.
}
1
2
3
4
dependencies {
    implementation("com.braze:android-sdk-base:SDK_VERSION") // (Required) Adds dependencies for the base Braze SDK.
    implementation("com.braze:android-sdk-location:SDK_VERSION") // (Optional) Adds dependencies for Braze location services.
}
In your gradle/libs.versions.toml file:
1
2
3
4
5
6
[versions]
braze = "SDK_VERSION"

[libraries]
braze-android-sdk-base = { group = "com.braze", name = "android-sdk-base", version.ref = "braze" }
braze-android-sdk-location = { group = "com.braze", name = "android-sdk-location", version.ref = "braze" }
Then, in your build.gradle or build.gradle.kts file, add the following dependencies. This syntax is the same for both Groovy and Kotlin DSL.
1
2
3
4
dependencies {
    implementation(libs.braze.android.sdk.base) // (Required) Adds dependencies for the base Braze SDK.
    implementation(libs.braze.android.sdk.location) // (Optional) Adds dependencies for Braze location services.
}
If you plan on using Braze UI components, add the following to your dependencies.
1
2
3
4
dependencies {
    implementation 'com.braze:android-sdk-ui:SDK_VERSION' // (Required) Adds dependencies for the Braze SDK and Braze UI components.
    implementation 'com.braze:android-sdk-location:SDK_VERSION' // (Optional) Adds dependencies for Braze location services.
}
1
2
3
4
dependencies {
    implementation("com.braze:android-sdk-ui:SDK_VERSION") // (Required) Adds dependencies for the Braze SDK and Braze UI components.
    implementation("com.braze:android-sdk-location:SDK_VERSION") // (Optional) Adds dependencies for Braze location services.
}
In your gradle/libs.versions.toml file:
1
2
3
4
5
6
[versions]
braze = "SDK_VERSION"

[libraries]
braze-android-sdk-ui = { group = "com.braze", name = "android-sdk-ui", version.ref = "braze" }
braze-android-sdk-location = { group = "com.braze", name = "android-sdk-location", version.ref = "braze" }
Then, in your build.gradle or build.gradle.kts file, add the following dependencies. This syntax is the same for both Groovy and Kotlin DSL.
1
2
3
4
dependencies {
    implementation(libs.braze.android.sdk.ui) // (Required) Adds dependencies for the Braze SDK and Braze UI components.
    implementation(libs.braze.android.sdk.location) // (Optional) Adds dependencies for Braze location services.
}
Step 2: Configure your braze.xml
As of December 2019, custom endpoints are no longer given out, if you have a pre-existing custom endpoint, you may continue to use it. For more details, refer to our list of available endpoints.
Create a braze.xml file in your project’s res/values folder. If you are on a specific data cluster or have a pre-existing custom endpoint, you need to specify the endpoint in your braze.xml file as well.
The contents of that file should resemble the following code snippet. Make sure to substitute YOUR_APP_IDENTIFIER_API_KEY with the identifier found in the Manage Settings page of the Braze dashboard. Log in at dashboard.braze.com to find your cluster address.
1
2
3
4
5
<?xml version="1.0" encoding="utf-8"?>
<resources>
  <string translatable="false" name="com_braze_api_key">YOUR_APP_IDENTIFIER_API_KEY</string>
  <string translatable="false" name="com_braze_custom_endpoint">YOUR_CUSTOM_ENDPOINT_OR_CLUSTER</string>
</resources>
Step 3: Add permissions to AndroidManifest.xml
Next, add the following permissions to your AndroidManifest.xml:
1
2
<uses-permission android:name="android.permission.INTERNET" />
<uses-permission android:name="android.permission.ACCESS_NETWORK_STATE" />
With the release of Android M, Android switched from an install-time to a runtime permissions model. However, both of these permissions are normal permissions and are granted automatically if listed in the app manifest. For more information, visit Android’s permission documentation.
Step 4: Enable delayed initialization (optional)
To use delayed initialization, the minimum Braze SDK version is required:
While delayed initialization is enabled, all network connections are canceled, preventing the SDK from sending data to the Braze servers.
Step 4.1: Update your braze.xml
Delayed initialization is disabled by default. To enable, use one of the following options:
In your project’s braze.xml file, set com_braze_enable_delayed_initialization to true.
1
<bool name="com_braze_enable_delayed_initialization">true</bool>
To enable delayed initialization at runtime, use the following method.
1
Braze.enableDelayedInitialization(context);
1
Braze.enableDelayedInitialization(context)
When delayed initialization is enabled and a push notification contains a deep link action, the deep link does not resolve.
Step 4.2: Configure push analytics (optional)
When delayed initialization is enabled, push analytics are queued by default. However, you can choose to explicitly queue or drop push analytics instead.
Explicitly queue
To explicitly queue push analytics, choose one of the following options:
In your braze.xml file, set com_braze_delayed_initialization_analytics_behavior to QUEUE:
1
<string name="com_braze_delayed_initialization_analytics_behavior">QUEUE</string>
Add QUEUE to your Braze.enableDelayedInitialization() method:
1
Braze.enableDelayedInitialization(context, DelayedInitializationAnalyticsBehavior.QUEUE);
1
Braze.enableDelayedInitialization(context, DelayedInitializationAnalyticsBehavior.QUEUE)
Drop
To drop push analytics, choose one of the following options:
In your braze.xml file, set com_braze_delayed_initialization_analytics_behavior to DROP:
1
<string name="com_braze_delayed_initialization_analytics_behavior">DROP</string>
Add DROP to the Braze.enableDelayedInitialization() method:
1
Braze.enableDelayedInitialization(context, DelayedInitializationAnalyticsBehavior.DROP);
1
Braze.enableDelayedInitialization(context, DelayedInitializationAnalyticsBehavior.DROP)
Step 4.3: Manually initialize the SDK
After your chosen delay period, use the Braze.disableDelayedInitialization() method to manually initialize the SDK.
1
Braze.disableDelayedInitialization(context);
1
Braze.disableDelayedInitialization(context)
Step 5: Enable user session tracking
When you enable user session tracking, calls to openSession(), closeSession(),ensureSubscribedToInAppMessageEvents(), and InAppMessageManager registration can be handled automatically.
To register activity lifecycle callbacks, add the following code to the onCreate() method of your Application class.
1
2
3
4
5
6
7
public class MyApplication extends Application {
  @Override
  public void onCreate() {
    super.onCreate();
    registerActivityLifecycleCallbacks(new BrazeActivityLifecycleCallbackListener());
  }
}
1
2
3
4
5
6
class MyApplication : Application() {
  override fun onCreate() {
    super.onCreate()
    registerActivityLifecycleCallbacks(BrazeActivityLifecycleCallbackListener())
  }
}
For the list of available parameters, see BrazeActivityLifecycleCallbackListener.
Testing session tracking
If you experience issues while testing, enable verbose logging, then use logcat to detect missing openSession and closeSession calls in your activities.
- In Braze, go to Overview, select your app, then in the Display Data For dropdown choose Today.

- Open your app, then refresh the Braze dashboard. Verify that your metrics have increased by 1.
- Navigate through your app and verify that only one session has been logged to Braze.
- Send the app to the background for at least 10 seconds, then bring it to the foreground. Verify that a new session was logged.
Optional configurations
Runtime configuration
To set your Braze options in code rather than your braze.xml file, use runtime configuration. If a value exists in both places, the runtime value will be used instead. After all required settings are supplied at runtime, you can delete your braze.xml file.
In the following example, a builder object is created and then passed to Braze.configure(). Note that only some of the available runtime options are shown—refer to our KDoc for the full list.
1
2
3
4
5
6
7
8
BrazeConfig brazeConfig = new BrazeConfig.Builder()
        .setApiKey("api-key-here")
        .setCustomEndpoint("YOUR_CUSTOM_ENDPOINT_OR_CLUSTER")
        .setSessionTimeout(60)
        .setHandlePushDeepLinksAutomatically(true)
        .setGreatNetworkDataFlushInterval(10)
        .build();
Braze.configure(this, brazeConfig);
1
2
3
4
5
6
7
8
val brazeConfig = BrazeConfig.Builder()
        .setApiKey("api-key-here")
        .setCustomEndpoint("YOUR_CUSTOM_ENDPOINT_OR_CLUSTER")
        .setSessionTimeout(60)
        .setHandlePushDeepLinksAutomatically(true)
        .setGreatNetworkDataFlushInterval(10)
        .build()
Braze.configure(this, brazeConfig)
Google Advertising ID
The Google Advertising ID (GAID) is an optional user-specific, anonymous, unique, and resettable ID for advertising, provided by Google Play services. GAID gives users the power to reset their identifier, opt-out of interest-based ads within Google Play apps, and provides developers with a simple, standard system to continue to monetize their apps.
The Google Advertising ID is not automatically collected by the Braze SDK and must be set manually via the Braze.setGoogleAdvertisingId() method.
1
2
3
4
5
6
7
8
9
10
11
new Thread(new Runnable() {
  @Override
  public void run() {
    try {
      AdvertisingIdClient.Info idInfo = AdvertisingIdClient.getAdvertisingIdInfo(getApplicationContext());
      Braze.getInstance(getApplicationContext()).setGoogleAdvertisingId(idInfo.getId(), idInfo.isLimitAdTrackingEnabled());
    } catch (Exception e) {
      e.printStackTrace();
    }
  }
}).start();
1
2
3
4
5
6
7
8
9
10
11
12
13
14
15
16
suspend fun fetchAndSetAdvertisingId(
  context: Context,
  scope: CoroutineScope = GlobalScope
) {
  scope.launch(Dispatchers.IO) {
    try {
      val idInfo = AdvertisingIdClient.getAdvertisingIdInfo(context)
      Braze.getInstance(context).setGoogleAdvertisingId(
        idInfo.id,
        idInfo.isLimitAdTrackingEnabled
      )
    } catch (e: Exception) {
      e.printStackTrace()
    }
  }
}
Google requires the Advertising ID to be collected on a non-UI thread.
Location tracking
To enable Braze location collection, set com_braze_enable_location_collection to true in your braze.xml file:
1
<bool name="com_braze_enable_location_collection">true</bool>
Starting with Braze Android SDK version 3.6.0, Braze location collection is disabled by default.
Logging
By default, the Braze Android SDK log level is set to INFO. You can suppress these logs or set a different log level, such as VERBOSE, DEBUG, or WARN.
Enabling logs
To help troubleshoot issues in your app, or reduce turnaround times with Braze Support, you can enable verbose logs for the SDK. When you send verbose logs to Braze Support, ensure they begin as soon as you launch your application and end far after your issue occurs. For a centralized overview, see Verbose logging. To learn how to interpret log output, see Reading verbose logs.
Keep in mind, verbose logs are only intended for your development environment, so you’ll want to disable them before releasing your app.
Enable verbose logs before any other calls in Application.onCreate() to ensure your logs are as complete as possible.
To enable logs directly in your app, add the following to your application’s onCreate() method before any other methods.
1
BrazeLogger.setLogLevel(Log.MIN_LOG_LEVEL);
1
BrazeLogger.logLevel = Log.MIN_LOG_LEVEL
Replace MIN_LOG_LEVEL with the Constant of the log level you’d like to set as your minimum log level. Any logs at a level >= to your set MIN_LOG_LEVEL will be forwarded to Android’s default Log method. Any logs < your set MIN_LOG_LEVEL will be discarded.
| Constant | Value | Description |
|---|---|---|
VERBOSE |
2 | Logs the most detailed messages for debugging and development. |
DEBUG |
3 | Logs descriptive messages for debugging and development. |
INFO |
4 | Logs informational messages for general highlights. |
WARN |
5 | Logs warning messages for identifying potentially harmful situations. |
ERROR |
6 | Logs error messages for indicating application failure or serious issues. |
ASSERT |
7 | Logs assertion messages when conditions are false during development. |
For example, the following code will forward log levels 2, 3, 4, 5, 6, and 7 to the Log method.
1
BrazeLogger.setLogLevel(Log.VERBOSE);
1
BrazeLogger.logLevel = Log.VERBOSE
To enable logs in the braze.xml, add the following to your file:
1
<integer name="com_braze_logger_initial_log_level">MIN_LOG_LEVEL</integer>
Replace MIN_LOG_LEVEL with the Value of the log level you’d like to set as your minimum log level. Any logs at a level >= to your set MIN_LOG_LEVEL will be forwarded to Android’s default Log method. Any logs < your set MIN_LOG_LEVEL will be discarded.
| Constant | Value | Description |
|---|---|---|
VERBOSE |
2 | Logs the most detailed messages for debugging and development. |
DEBUG |
3 | Logs descriptive messages for debugging and development. |
INFO |
4 | Logs informational messages for general highlights. |
WARN |
5 | Logs warning messages for identifying potentially harmful situations. |
ERROR |
6 | Logs error messages for indicating application failure or serious issues. |
ASSERT |
7 | Logs assertion messages when conditions are false during development. |
For example, the following code will forward log levels 2, 3, 4, 5, 6, and 7 to the Log method.
1
<integer name="com_braze_logger_initial_log_level">2</integer>
Verifying verbose logs
To verify that your logs are set to VERBOSE, check if V/Braze occurs somewhere in your logs. If it does, then verbose logs have been successfully enabled. For example:
1
2077-11-19 16:22:49.591 ? V/Braze v9.0.01 .bo.app.d3: Request started
Suppressing logs
To suppress all logs for the Braze Android SDK, set the log level to BrazeLogger.SUPPRESS in your application’s onCreate() method before any other methods.
1
BrazeLogger.setLogLevel(BrazeLogger.SUPPRESS);
1
BrazeLogger.setLogLevel(BrazeLogger.SUPPRESS)
Multiple API keys
The most common use case for multiple API keys is separating API keys for debug and release build variants.
To easily switch between multiple API keys in your builds, we recommend creating a separate braze.xml file for each relevant build variant. A build variant is a combination of build type and product flavor. By default, new Android projects are configured with debug and release build types and no product flavors.
For each relevant build variant, create a new braze.xml in the src/<build variant name>/res/values/ directory. When the build variant is compiled, it will use the new API key.
1
2
3
4
<?xml version="1.0" encoding="utf-8"?>
<resources>
<string name="com_braze_api_key">REPLACE_WITH_YOUR_BUILD_VARIANT_API_KEY</string>
</resources>
Exclusive in-app message TalkBack
In adherence to the Android accessibility guidelines, the Braze Android SDK offers Android Talkback by default. To ensure that only the contents of in-app messages are read out loud—without including other screen elements like the app title bar or navigation—you can enable exclusive mode for TalkBack.
To enable exclusive mode for in-app messages:
1
<bool name="com_braze_device_in_app_message_accessibility_exclusive_mode_enabled">true</bool>
1
2
3
val brazeConfigBuilder = BrazeConfig.Builder()
brazeConfigBuilder.setIsInAppMessageAccessibilityExclusiveModeEnabled(true)
Braze.configure(this, brazeConfigBuilder.build())
1
2
3
BrazeConfig.Builder brazeConfigBuilder = new BrazeConfig.Builder()
brazeConfigBuilder.setIsInAppMessageAccessibilityExclusiveModeEnabled(true);
Braze.configure(this, brazeConfigBuilder.build());
R8 and ProGuard
Code shrinking configuration is automatically included with your Braze integration.
Client apps that obfuscate Braze code must store release mapping files for Braze to interpret stack traces. If you want to continue to keep all Braze code, add the following to your ProGuard file:
1
2
-keep class bo.app.** { *; }
-keep class com.braze.** { *; }
Integrating the Swift SDK
You can integrate and customize the Braze Swift SDK using the Swift Package Manager (SPM), CocoaPods, or manual integration methods. For more information about the various SDK symbols, see Braze Swift reference documentation.
Prerequisites
Before you start, verify your environment is supported by the latest Braze Swift SDK version.
Step 1: Install the Braze Swift SDK
We recommend using the Swift Package Manager (SwiftPM) or CocoaPods to install the Braze Swift SDK. Alternatively, you can install the SDK manually.
Step 1.1: Import SDK version
Open your project and navigate to your project’s settings. Select the Swift Packages tab and click on the add button under the packages list.

Starting in version 7.4.0, the Braze Swift SDK has additional distribution channels as static XCFrameworks and dynamic XCFrameworks. If you’d like to use either of these formats instead, follow the installation instructions from its respective repository.
Enter the URL of our iOS Swift SDK repository https://github.com/braze-inc/braze-swift-sdk in the text field. Under the Dependency Rule section, select the SDK version. Finally, click Add Package.

Step 1.2: Select your packages
The Braze Swift SDK separates features into standalone libraries to provide developers with more control over which features to import into their projects.
| Package | Details |
|---|---|
BrazeKit |
Main SDK library providing support for analytics and push notifications. |
BrazeLocation |
Location library providing support for location analytics and geofence monitoring. |
BrazeUI |
Braze-provided user interface library for in-app messages, Content Cards, and Banners. Import this library if you intend to use the default UI components. |
About Extension libraries
BrazeNotificationService and BrazePushStory are extension modules that provide additional functionality and should not be added directly to your main application target. Instead follow the linked guides to integrate them separately into their respective target extensions.
| Package | Details |
|---|---|
BrazeNotificationService |
Notification service extension library providing support for rich push notifications. |
BrazePushStory |
Notification content extension library providing support for Push Stories. |
Select the package that best suits your needs and click Add Package. Make sure you select BrazeKit at a minimum.

Step 1.1: Install CocoaPods
For a full walkthrough, see CocoaPods’ Getting Started Guide. Otherwise, you can run the following command to get started quickly:
1
$ sudo gem install cocoapods
If you get stuck, checkout CocoaPods’ Troubleshooting Guide.
Step 1.2: Constructing the Podfile
Next, create a file in your Xcode project directory named Podfile.
Starting in version 7.4.0, the Braze Swift SDK has additional distribution channels as static XCFrameworks and dynamic XCFrameworks. If you’d like to use either of these formats instead, follow the installation instructions from its respective repository.
Add the following line to your Podfile:
1
2
3
target 'YourAppTarget' do
  pod 'BrazeKit'
end
BrazeKit contains the main SDK library, providing support for analytics and push notifications.
We suggest you version Braze so pod updates automatically grab anything smaller than a minor version update. This looks like pod 'BrazeKit' ~> Major.Minor.Build. If you want to automatically integrate the latest Braze SDK version, even with major changes, you can use pod 'BrazeKit' in your Podfile.
About additional libraries
The Braze Swift SDK separates features into standalone libraries to provide developers with more control over which features to import into their projects. In addition to BrazeKit, you may add the following libraries to your Podfile:
| Library | Details |
|---|---|
pod 'BrazeLocation' |
Location library providing support for location analytics and geofence monitoring. |
pod 'BrazeUI' |
Braze-provided user interface library for in-app messages, Content Cards, and Banners. Import this library if you intend to use the default UI components. |
Extension libraries
BrazeNotificationService and BrazePushStory are extension modules that provide additional functionality and should not be added directly to your main application target. Instead, you will need to create separate extension targets for each of these modules and import the Braze modules into their corresponding targets.
| Library | Details |
|---|---|
pod 'BrazeNotificationService' |
Notification service extension library providing support for rich push notifications. |
pod 'BrazePushStory' |
Notification content extension library providing support for Push Stories. |
Step 1.3: Install the SDK
To install the Braze SDK CocoaPod, navigate to the directory of your Xcode app project within your terminal and run the following command:
1
pod install
At this point, you should be able to open the new Xcode project workspace created by CocoaPods. Make sure to use this Xcode workspace instead of your Xcode project.

Updating the SDK using CocoaPods
To update a CocoaPod, simply run the following command within your project directory:
1
pod update
Step 1.1: Download the Braze SDK
Go to the Braze SDK release page on GitHub, then download braze-swift-sdk-prebuilt.zip.

Step 1.2: Choose your frameworks
The Braze Swift SDK contains a variety of standalone XCFrameworks, which gives you the freedom to integrate the features you want—without needing to integrate them all. Reference the following table to choose your XCFrameworks:
| Package | Required? | Description |
|---|---|---|
BrazeKit |
Yes | Main SDK library that provides support for analytics and push notifications. |
BrazeLocation |
No | Location library that provides support for location analytics and geofence monitoring. |
BrazeUI |
No | Braze-provided user interface library for in-app messages, Content Cards, and Banners. Import this library if you intend to use the default UI components. |
BrazeNotificationService |
No | Notification service extension library that provides support for rich push notifications. Do not add this library directly to your main application target, instead add the BrazeNotificationService library separately. |
BrazePushStory |
No | Notification content extension library that provides support for Push Stories. Do not add this library directly to your main application target, instead add the BrazePushStory library separately. |
BrazeKitCompat |
No | Compatibility library containing all the Appboy and ABK* classes and methods that were available in the Appboy-iOS-SDK version 4.X.X. For usage details, refer to the minimal migration scenario in the migration guide. |
BrazeUICompat |
No | Compatibility library containing all the ABK* classes and methods that were available in the AppboyUI library from Appboy-iOS-SDK version 4.X.X. For usage details, refer to the minimal migration scenario in the migration guide. |
SDWebImage |
No | Dependency used only by BrazeUICompat in the minimal migration scenario. |
Step 1.3: Prepare your files
Decide whether you want to use Static or Dynamic XCFrameworks, then prepare your files:
- Create a temporary directory for your XCFrameworks.
- In
braze-swift-sdk-prebuilt, open thedynamicdirectory and moveBrazeKit.xcframeworkinto your directory. Your directory should be similar to the following:1 2
temp_dir └── BrazeKit.xcframework
- Move each of your chosen XCFrameworks into your temporary directory. Your directory should be similar to the following:
1
2
3
4
5
 temp_dir
 ├── BrazeKit.xcframework
 ├── BrazeKitCompat.xcframework
 ├── BrazeLocation.xcframework
 └── SDWebImage.xcframework
Step 1.4: Integrate your frameworks
Next, integrate the Dynamic or Static XCFrameworks you prepared previously:
In your Xcode project, select your build target, then General. Under Frameworks, Libraries, and Embedded Content, drag and drop the files you prepared previously.

Starting with the Swift SDK 12.0.0, you should always select Embed & Sign for the Braze XCFrameworks for both the static and dynamic variants. This ensures that the frameworks resources are properly embedded in your app bundle.
To enable GIF support, add SDWebImage.xcframework, located in either braze-swift-sdk-prebuilt/static or braze-swift-sdk-prebuilt/dynamic.
Common errors for Objective-C projects
If your Xcode project only contains Objective-C files, you may get “missing symbol” errors when you try to build your project. To fix these errors, open your project and add an empty Swift file to your file tree. This will force your build toolchain to embed Swift Runtime and link to the appropriate frameworks during build time.
1
FILE_NAME.swift
Replace FILE_NAME with any non-spaced string. Your file should look similar to the following:
1
empty_swift_file.swift
Step 2: Set up delayed initialization (optional)
You can choose to delay when the Braze Swift SDK is initialized, which is useful if your app needs to load a configuration or wait for user consent before starting the SDK. Delayed initialization makes sure Braze push notifications and push tokens received before SDK initialization are enqueued and processed once the SDK is initialized.
To use delayed initialization, the minimum Braze SDK version is required:
Step 2.1: Prepare for delayed initialization
Call Braze.prepareForDelayedInitialization() as early as possible in your app’s lifecycle, ideally in or before application(_:didFinishLaunchingWithOptions:). This makes sure that push notifications received before the SDK is initialized are properly captured and processed later.
This only applies to push notifications from Braze. Other push notifications are handled normally by system delegates.
1
2
3
4
5
6
7
8
func application(_ application: UIApplication, didFinishLaunchingWithOptions launchOptions: [UIApplication.LaunchOptionsKey: Any]?) -> Bool {
  // Prepare the SDK for delayed initialization
  Braze.prepareForDelayedInitialization()

  // ... Additional non-Braze setup code

  return true
}
1
2
3
4
5
6
7
8
9
10
11
12
13
14
15
16
17
18
19
20
21
@main
struct MyApp: App {
  @UIApplicationDelegateAdaptor var appDelegate: AppDelegate

  var body: some Scene {
    WindowGroup {
      ContentView()
    }
  }
}

class AppDelegate: NSObject, UIApplicationDelegate {
  func application(_ application: UIApplication, didFinishLaunchingWithOptions launchOptions: [UIApplication.LaunchOptionsKey : Any]? = nil) -> Bool {
    // Prepare the SDK for delayed initialization
    Braze.prepareForDelayedInitialization()

    // ... Additional non-Braze setup code

    return true
  }
}
1
2
3
4
5
6
7
8
- (BOOL)application:(UIApplication *)application didFinishLaunchingWithOptions:(NSDictionary *)launchOptions {
  // Prepare the SDK for delayed initialization
  [Braze prepareForDelayedInitialization];

  // ... Additional non-Braze setup code

  return YES;
}
When using delayed initialization, push notification automation is implicitly enabled. You can customize the push automation configuration by passing a pushAutomation parameter.
Step 2.2: Configure push analytics behavior (optional)
When delayed initialization is enabled, push analytics are queued by default. However, you can choose to explicitly queue or drop push analytics instead.
Explicitly queue
To explicitly queue push analytics (default behavior), pass .queue to the analyticsBehavior parameter. Push analytics events that are queued prior to initialization will be processed and flushed to the server upon initialization.
1
Braze.prepareForDelayedInitialization(analyticsBehavior: .queue)
1
[Braze prepareForDelayedInitializationWithAnalyticsBehavior:BRZPushEnqueueBehaviorQueue];
Drop
To drop push analytics received before SDK initialization, pass .drop to the analyticsBehavior parameter. With this option, any push analytics event that occurs while the SDK is not initialized will be ignored.
1
Braze.prepareForDelayedInitialization(analyticsBehavior: .drop)
1
[Braze prepareForDelayedInitializationWithAnalyticsBehavior:BRZPushEnqueueBehaviorDrop];
Step 2.3: Customize push automation (optional)
You can customize the push automation configuration by passing a pushAutomation parameter. By default, all automation features are enabled except requestAuthorizationAtLaunch.
1
2
3
4
5
6
7
8
// Enable all push automation
featuresBraze.prepareForDelayedInitialization(pushAutomation: true)

// Or customize specific automation options
let automation = Braze.Configuration.Push.Automation()
automation.automaticSetup = true
automation.requestAuthorizationAtLaunch = false
Braze.prepareForDelayedInitialization(pushAutomation: automation)
1
2
3
4
5
6
7
8
// Enable all push automation features
[Braze prepareForDelayedInitializationWithPushAutomation:[[BRZConfigurationPushAutomation alloc] initWithAutomationEnabled:YES]];

// Or customize specific automation options
BRZConfigurationPushAutomation *automation = [[BRZConfigurationPushAutomation alloc] init];
automation.automaticSetup = YES;
automation.requestAuthorizationAtLaunch = NO;
[Braze prepareForDelayedInitializationWithPushAutomation:automation analyticsBehavior:BRZPushEnqueueBehaviorQueue];
Step 2.4: Initialize the SDK
After your chosen delay period (for example, after fetching configuration from a server or after user consent), initialize the SDK as normal:
1
2
3
4
5
6
7
8
9
10
func initializeBraze() {
  let configuration = Braze.Configuration(apiKey: "YOUR-API-KEY", endpoint: "YOUR-ENDPOINT")

  // Enable push automation to match the delayed initialization configuration
  configuration.push.automation = true
  let braze = Braze(configuration: configuration)

  // Store the Braze instance for later use
  AppDelegate.braze = braze
}
1
2
3
4
5
6
7
8
9
10
- (void)initializeBraze {
  BRZConfiguration *configuration = [[BRZConfiguration alloc] initWithApiKey:@"YOUR-API-KEY" endpoint:@"YOUR-ENDPOINT"];

  // Enable push automation to match the delayed initialization configuration
  configuration.push.automation = [[BRZConfigurationPushAutomation alloc] initWithAutomationEnabled:YES];
  Braze *braze = [[Braze alloc] initWithConfiguration:configuration];

  // Store the Braze instance for later use
  AppDelegate.braze = braze;
}
When the SDK is initialized, all queued push notifications, push tokens, and deep links are automatically processed.
Step 3: Update your app delegate
The following assumes you’ve already added an AppDelegate to your project (which are not generated by default) and you are not using the delayed initialization feature. If you don’t plan on using an AppDelegate, be sure to initialize the Braze SDK as early as possible, like during the app’s launch. If you are using the delayed initialization feature, refer to Step 2.4 for initializing the SDK and ignore this step.
Add the following line of code to your AppDelegate.swift file to import the features included in the Braze Swift SDK:
1
import BrazeKit
Next, add a static property to your AppDelegate class to keep a strong reference to the Braze instance throughout your application’s lifetime:
1
2
3
class AppDelegate: UIResponder, UIApplicationDelegate {
  static var braze: Braze? = nil
}
The SDK requires your application to retain a strong reference to the Braze instance throughout its usage. To prevent any unexpected side effects, ensure that you have fully captured that reference before accessing or modifying any properties or methods on the Braze instance.
Finally, in AppDelegate.swift, add the following snippet to your application:didFinishLaunchingWithOptions: method:
1
2
3
4
5
6
let configuration = Braze.Configuration(
    apiKey: "YOUR-APP-IDENTIFIER-API-KEY",
    endpoint: "YOUR-BRAZE-ENDPOINT"
)
let braze = Braze(configuration: configuration)
AppDelegate.braze = braze
Update YOUR-APP-IDENTIFIER-API-KEY and YOUR-BRAZE-ENDPOINT with the correct value from your App Settings page. Check out our API identifier types for more information on where to find your app identifier API key.
Add the following line of code to your AppDelegate.m file:
1
@import BrazeKit;
Next, add a static variable to your AppDelegate.m file to keep a reference to the Braze instance throughout your application’s lifetime:
1
2
3
4
5
6
7
8
9
10
11
static Braze *_braze;

@implementation AppDelegate
+ (Braze *)braze {
  return _braze;
}

+ (void)setBraze:(Braze *)braze {
  _braze = braze;
}
@end
The SDK requires your application to retain a strong reference to the Braze instance throughout its usage. To prevent any unexpected side effects, ensure that you have fully captured that reference before accessing or modifying any properties or methods on the Braze instance.
Finally, within your AppDelegate.m file, add the following snippet within your application:didFinishLaunchingWithOptions: method:
1
2
3
4
BRZConfiguration *configuration = [[BRZConfiguration alloc] initWithApiKey:"YOUR-APP-IDENTIFIER-API-KEY"
                                                                  endpoint:"YOUR-BRAZE-ENDPOINT"];
Braze *braze = [[Braze alloc] initWithConfiguration:configuration];
AppDelegate.braze = braze;
Update YOUR-APP-IDENTIFIER-API-KEY and YOUR-BRAZE-ENDPOINT with the correct value from your Manage Settings page. Check out our API documentation for more information on where to find your app identifier API key.
Braze.init returns immediately on the calling thread. The SDK processes startup work on an internal queue. Reading sync properties such as braze.deviceId directly after init on the main thread will block the calling thread until the SDK has completed its post-initialization operations. For main-thread or latency-sensitive contexts, use braze.getDeviceId(_:) (Swift) or [braze getDeviceIdWithCompletion:^(NSString *deviceId) { ... }] (Objective-C) to read the value without blocking.
Optional configurations
Logging
For a centralized overview across all platforms, see Verbose logging. To learn how to interpret log output, see Reading verbose logs.
Log levels
The default log level for the Braze Swift SDK is .error—it’s also the minimum supported level when logs are enabled. These are the full list of log levels:
| Swift | Objective-C | Description |
|---|---|---|
.debug |
BRZLoggerLevelDebug |
Log debugging information + .info + .error. |
.info |
BRZLoggerLevelInfo |
Log general SDK information (user changes, etc.) + .error. |
.error |
BRZLoggerLevelError |
Log errors. |
.disabled |
BRZLoggerLevelDisabled |
No logging occurs. |
Setting the log level
You can assign the log level at runtime in your Braze.Configuration object. For complete usage details, see Braze.Configuration.Logger.
1
2
3
4
5
6
7
let configuration = Braze.Configuration(
  apiKey: "<BRAZE_API_KEY>",
  endpoint: "<BRAZE_ENDPOINT>"
)
// Enable logging of general SDK information (such as user changes, etc.)
configuration.logger.level = .info
let braze = Braze(configuration: configuration)
1
2
3
4
5
BRZConfiguration *configuration = [[BRZConfiguration alloc] initWithApiKey:self.APIKey
                                                                  endpoint:self.apiEndpoint];
// Enable logging of general SDK information (such as user changes, etc.)
[configuration.logger setLevel:BRZLoggerLevelInfo];
Braze *braze = [[Braze alloc] initWithConfiguration:configuration];
Integrating the Cordova SDK
Prerequisites
Before you start, verify your environment is supported by the latest Braze Cordova SDK version.
Step 1: Add the SDK to your project
Only add the Braze Cordova SDK using the following methods. Do not attempt to install using other methods as it could lead to a security breach.
If you’re on Cordova 6 or later, you can add the SDK directly from GitHub. Alternatively, you can download a ZIP of the GitHub repository and add the SDK manually.
If you don’t plan on using location collection and geofences, use the master branch from GitHub.
1
cordova plugin add https://github.com/braze-inc/braze-cordova-sdk#master
If you plan on using location collection and geofences, use the geofence-branch from GitHub.
1
cordova plugin add https://github.com/braze-inc/braze-cordova-sdk#geofence-branch
You can switch between master and geofence-branch at anytime by repeating this step.
Step 2: Configure your project
Next, adding the following preferences to the platform element in your project’s config.xml file.
1
2
<preference name="com.braze.ios_api_key" value="BRAZE_API_KEY" />
<preference name="com.braze.ios_api_endpoint" value="CUSTOM_API_ENDPOINT" />
1
2
<preference name="com.braze.android_api_key" value="BRAZE_API_KEY" />
<preference name="com.braze.android_api_endpoint" value="CUSTOM_API_ENDPOINT" />
Replace the following:
| Value | Description |
|---|---|
BRAZE_API_KEY |
Your Braze REST API key. |
CUSTOM_API_ENDPOINT |
A custom API endpoint. This endpoint is used to route your Braze instance data to the correct App Group in your Braze dashboard. |
The platform element in your config.xml file should be similar to the following:
1
2
3
4
<platform name="ios">
    <preference name="com.braze.ios_api_key" value="BRAZE_API_KEY" />
    <preference name="com.braze.ios_api_endpoint" value="sdk.fra-01.braze.eu" />
</platform>
1
2
3
4
<platform name="android">
    <preference name="com.braze.android_api_key" value="BRAZE_API_KEY" />
    <preference name="com.braze.android_api_endpoint" value="sdk.fra-01.braze.eu" />
</platform>
Platform-specific syntax
The following section covers the platform-specific syntax when using Cordova with iOS or Android.
Integers
Integer preferences are read as string representations, like in the following example:
1
2
3
4
<platform name="ios">
    <preference name="com.braze.ios_flush_interval_seconds" value="10" />
    <preference name="com.braze.ios_session_timeout" value="5" />
</platform>
Due to how the Cordova 8.0.0+ framework handles preferences, integer-only preferences (such as sender IDs) must be set to strings prepended with str_, like in the following example:
1
2
3
4
<platform name="android">
    <preference name="com.braze.android_fcm_sender_id" value="str_64422926741" />
    <preference name="com.braze.android_default_session_timeout" value="str_10" />
</platform>
Booleans
Boolean preferences are read by the SDK using YES and NO keywords as a string representation, like in the following example:
1
2
3
4
<platform name="ios">
    <preference name="com.braze.should_opt_in_when_push_authorized" value="YES" />
    <preference name="com.braze.ios_disable_automatic_push_handling" value="NO" />
</platform>
Boolean preferences are read by the SDK using true and false keywords as a string representation, like in the following example:
1
2
3
4
<platform name="android">
    <preference name="com.braze.should_opt_in_when_push_authorized" value="true" />
    <preference name="com.braze.is_session_start_based_timeout_enabled" value="false" />
</platform>
Optional configurations
You can add any of the following preferences to the platform element in your project’s config.xml file:
| Method | Description |
|---|---|
ios_api_key |
Sets the API key for your application. |
ios_api_endpoint |
Sets the SDK endpoint for your application. |
ios_disable_automatic_push_registration |
Sets whether automatic push registration should be disabled. |
ios_disable_automatic_push_handling |
Sets whether automatic push handling should be disabled. |
ios_enable_idfa_automatic_collection |
Sets whether the Braze SDK should automatically collect the IDFA information. For more information, see the Braze IDFA method documentation. |
enable_location_collection |
Sets whether the automatic location collection is enabled (if the user permits). The geofence-branch |
geofences_enabled |
Sets whether geofences are enabled. |
ios_session_timeout |
Sets the Braze session timeout for your application in seconds. Defaults to 10 seconds. |
sdk_authentication_enabled |
Sets whether to enable the SDK Authentication feature. |
display_foreground_push_notifications |
Sets whether push notifications should be displayed while the application is in the foreground. |
ios_disable_un_authorization_option_provisional |
Sets whether UNAuthorizationOptionProvisional should be disabled. |
trigger_action_minimum_time_interval_seconds |
Sets the minimum time interval in seconds between triggers. Defaults to 30 seconds. |
ios_push_app_group |
Sets the app group ID for iOS push extensions. |
ios_forward_universal_links |
Sets whether the SDK automatically recognizes and forwards universal links to the system methods. Required for deep links from push notifications to work on iOS. Defaults to disabled. |
ios_log_level |
Sets the minimum logging level for Braze.Configuration.Logger. |
ios_use_uuid_as_device_id |
Sets if a randomly generated UUID should be used as the device ID. |
ios_flush_interval_seconds |
Sets the interval in seconds between automatic data flushes. Defaults to 10 seconds. |
ios_use_automatic_request_policy |
Sets whether the request policy for Braze.Configuration.Api should be automatic or manual. |
should_opt_in_when_push_authorized |
Sets if a user’s notification subscription state should automatically be set to optedIn when push permissions are authorized. |
| Method | Description |
|---|---|
android_api_key |
Sets the API key for your application. |
android_api_endpoint |
Sets the SDK endpoint for your application. |
android_small_notification_icon |
Sets the notification small icon. |
android_large_notification_icon |
Sets the notification large icon. |
android_notification_accent_color |
Sets the notification accent color using a hexadecimal representation. |
android_default_session_timeout |
Sets the Braze session timeout for your application in seconds. Defaults to 10 seconds. |
android_handle_push_deep_links_automatically |
Sets whether the Braze SDK automatically handles push deep links. Required for deep links from push notifications to work on Android. Defaults to disabled. |
android_log_level |
Sets the log level for your application. The default log level is 4 and will minimally log info. To enable verbose logging for debugging, use log level 2. |
firebase_cloud_messaging_registration_enabled |
Sets whether to use Firebase Cloud Messaging for push notifications. |
android_fcm_sender_id |
Sets the Firebase Cloud Messaging sender ID. |
enable_location_collection |
Sets whether the automatic location collection is enabled (if the user permits). |
geofences_enabled |
Sets whether geofences are enabled. |
android_disable_auto_session_tracking |
Disable the Android Cordova plugin from automatically tracking sessions. For more information, see Disabling automatic session tracking |
sdk_authentication_enabled |
Sets whether to enable the SDK Authentication feature. |
trigger_action_minimum_time_interval_seconds |
Sets the minimum time interval in seconds between triggers. Defaults to 30 seconds. |
is_session_start_based_timeout_enabled |
Sets whether the session timeout behavior to be based either on session start or session end events. |
default_notification_channel_name |
Sets the user-facing name as seen via NotificationChannel.getName for the Braze default NotificationChannel. |
default_notification_channel_description |
Sets the user-facing description as seen via NotificationChannel.getDescription for the Braze default NotificationChannel. |
does_push_story_dismiss_on_click |
Sets whether a Push Story is automatically dismissed when clicked. |
is_fallback_firebase_messaging_service_enabled |
Sets whether the use of a fallback Firebase Cloud Messaging Service is enabled. |
fallback_firebase_messaging_service_classpath |
Sets the classpath for the fallback Firebase Cloud Messaging Service. |
is_content_cards_unread_visual_indicator_enabled |
Sets whether the Content Cards unread visual indication bar is enabled. |
is_firebase_messaging_service_on_new_token_registration_enabled |
Sets whether the Braze SDK will automatically register tokens in com.google.firebase.messaging.FirebaseMessagingService.onNewToken. |
is_push_deep_link_back_stack_activity_enabled |
Sets whether Braze will add an activity to the back stack when automatically following deep links for push. |
push_deep_link_back_stack_activity_class_name |
Sets the activity that Braze will add to the back stack when automatically following deep links for push. |
should_opt_in_when_push_authorized |
Sets if Braze should automatically opt-in the user when push is authorized. |
The following is an example config.xml file with additional configurations:
1
2
3
4
5
6
7
8
9
10
11
12
13
14
15
16
17
18
19
<platform name="ios">
    <preference name="com.braze.ios_disable_automatic_push_registration" value="NO"/"YES" />
    <preference name="com.braze.ios_disable_automatic_push_handling" value="NO"/"YES" />
    <preference name="com.braze.ios_enable_idfa_automatic_collection" value="YES"/"NO" />
    <preference name="com.braze.enable_location_collection" value="NO"/"YES" />
    <preference name="com.braze.geofences_enabled" value="NO"/"YES" />
    <preference name="com.braze.ios_session_timeout" value="5" />
    <preference name="com.braze.sdk_authentication_enabled" value="YES"/"NO" />
    <preference name="com.braze.display_foreground_push_notifications" value="YES"/"NO" />
    <preference name="com.braze.ios_disable_un_authorization_option_provisional" value="NO"/"YES" />
    <preference name="com.braze.trigger_action_minimum_time_interval_seconds" value="30" />
    <preference name="com.braze.ios_push_app_group" value="PUSH_APP_GROUP_ID" />
    <preference name="com.braze.ios_forward_universal_links" value="YES"/"NO" />
    <preference name="com.braze.ios_log_level" value="2" />
    <preference name="com.braze.ios_use_uuid_as_device_id" value="YES"/"NO" />
    <preference name="com.braze.ios_flush_interval_seconds" value="10" />
    <preference name="com.braze.ios_use_automatic_request_policy" value="YES"/"NO" />
    <preference name="com.braze.should_opt_in_when_push_authorized" value="YES"/"NO" />
</platform>
1
2
3
4
5
6
7
8
9
10
11
12
13
14
15
16
17
18
19
20
21
22
23
24
25
26
<platform name="android">
    <preference name="com.braze.android_small_notification_icon" value="RESOURCE_ENTRY_NAME_FOR_ICON_DRAWABLE" />
    <preference name="com.braze.android_large_notification_icon" value="RESOURCE_ENTRY_NAME_FOR_ICON_DRAWABLE" />
    <preference name="com.braze.android_notification_accent_color" value="str_ACCENT_COLOR_INTEGER" />
    <preference name="com.braze.android_default_session_timeout" value="str_SESSION_TIMEOUT_INTEGER" />
    <preference name="com.braze.android_handle_push_deep_links_automatically" value="true"/"false" />
    <preference name="com.braze.android_log_level" value="str_LOG_LEVEL_INTEGER" />
    <preference name="com.braze.firebase_cloud_messaging_registration_enabled" value="true"/"false" />
    <preference name="com.braze.android_fcm_sender_id" value="str_YOUR_FCM_SENDER_ID" />
    <preference name="com.braze.enable_location_collection" value="true"/"false" />
    <preference name="com.braze.geofences_enabled" value="true"/"false" />
    <preference name="com.braze.android_disable_auto_session_tracking" value="true"/"false" />
    <preference name="com.braze.sdk_authentication_enabled" value="true"/"false" />
    <preference name="com.braze.trigger_action_minimum_time_interval_seconds" value="str_MINIMUM_INTERVAL_INTEGER" />
    <preference name="com.braze.is_session_start_based_timeout_enabled" value="false"/"true" />
    <preference name="com.braze.default_notification_channel_name" value="DEFAULT_NAME" />
    <preference name="com.braze.default_notification_channel_description" value="DEFAULT_DESCRIPTION" />
    <preference name="com.braze.does_push_story_dismiss_on_click" value="true"/"false" />
    <preference name="com.braze.is_fallback_firebase_messaging_service_enabled" value="true"/"false" />
    <preference name="com.braze.fallback_firebase_messaging_service_classpath" value="FALLBACK_FIREBASE_MESSAGING_CLASSPATH" />
    <preference name="com.braze.is_content_cards_unread_visual_indicator_enabled" value="true"/"false" />
    <preference name="com.braze.is_firebase_messaging_service_on_new_token_registration_enabled" value="true"/"false" />
    <preference name="com.braze.is_push_deep_link_back_stack_activity_enabled" value="true"/"false" />
    <preference name="com.braze.push_deep_link_back_stack_activity_class_name" value="DEEPLINK_BACKSTACK_ACTIVITY_CLASS_NAME" />
    <preference name="com.braze.should_opt_in_when_push_authorized" value="true"/"false" />
</platform>
Disabling automatic session tracking (Android only)
By default, the Android Cordova plugin automatically tracks sessions. To disable automatic session tracking, add the following preference to the platform element in your project’s config.xml file:
1
2
3
<platform name="android">
    <preference name="com.braze.android_disable_auto_session_tracking" value="true" />
</platform>
To start tracking sessions again, call BrazePlugin.startSessionTracking(). Keep in mind, only sessions started after the next Activity.onStart() will be tracked.
About the Flutter Braze SDK
After you integrate the Braze Flutter SDK on Android and iOS, you’ll be able to use the Braze API within your Flutter apps written in Dart. This plugin provides basic analytics functionality and lets you integrate in-app messages and Content Cards for both iOS and Android with a single codebase.
Integrating the Flutter SDK
Prerequisites
Before you integrate the Braze Flutter SDK, you’ll need to complete the following:
| Prerequisite | Description |
|---|---|
| Braze API app identifier | To locate your app’s identifier, go to Settings > APIs and Identifiers > App Identifiers. For more information see, API Identifier Types. |
| Braze SDK endpoint | Your SDK endpoint URL (for example, sdk.<cluster>.braze.com). Your endpoint will depend on the Braze URL for your instance. |
| Flutter SDK | Install the official Flutter SDK and ensure it meets the Braze Flutter SDK’s minimum supported version. |
Step 1: Integrate the Braze library
Add the Braze Flutter SDK package from the command line. This will add the appropriate line to your pubspec.yaml.
1
flutter pub add braze_plugin
Step 2: Complete native SDK setup
2.1 Set up Android
Provide credentials at compile time
Create a braze.xml file in your project’s android/res/values folder. The API key and endpoint are provided at runtime from Dart, so they are not required in this file. To enable delayed initialization, add com_braze_enable_delayed_initialization to the file:
1
2
3
4
5
<?xml version="1.0" encoding="utf-8"?>
<resources>
  <bool name="com_braze_enable_delayed_initialization">true</bool>
  <!-- API key and endpoint are not required here. They are set at runtime via Dart. -->
</resources>
Provide credentials at runtime
Alternatively, you can enable delayed initialization programmatically in your MainActivity.kt:
1
2
3
4
5
6
7
8
import com.braze.Braze

class MainActivity : FlutterActivity() {
  override fun onCreate(savedInstanceState: Bundle?) {
    super.onCreate(savedInstanceState)
    Braze.enableDelayedInitialization(context = this)
  }
}
Add the required permissions to your AndroidManifest.xml file:
1
2
<uses-permission android:name="android.permission.INTERNET" />
<uses-permission android:name="android.permission.ACCESS_NETWORK_STATE" />
2.2 Set up iOS
Within your existing application(_:didFinishLaunchingWithOptions:) method, add a call to BrazePlugin.configure(_:postInitialization:) to store your configuration. The Braze instance is created later when initialize() is called from Dart. The API key and endpoint are not set here.
Add the following code to your AppDelegate.swift:
1
2
3
4
5
6
7
8
9
10
11
12
13
14
15
16
17
18
19
20
21
22
23
24
25
26
27
28
import BrazeKit
import braze_plugin

// ...

override func application(
  _ application: UIApplication,
  didFinishLaunchingWithOptions launchOptions: [UIApplication.LaunchOptionsKey : Any]? = nil
) -> Bool {
  // ... your existing didFinishLaunchingWithOptions setup ...

  BrazePlugin.configure(
    { configuration in
      configuration.logger.level = .info
      // Set other non-API-key configurations here, such as:
      // configuration.push.automation = true
      // configuration.sessionTimeout = 60
    },
    postInitialization: { braze in
      // Optional: Customize the Braze instance after creation.
      // For example, set a custom in-app message presenter:
      // let customPresenter = CustomInAppMessagePresenter()
      // braze.inAppMessagePresenter = customPresenter
    }
  )

  return true
}
Add the following code to your AppDelegate.m:
1
2
3
4
5
6
7
8
9
10
11
12
13
14
15
16
17
18
@import BrazeKit;
@import braze_plugin;

// ...

- (BOOL)application:(UIApplication *)application
    didFinishLaunchingWithOptions:(NSDictionary *)launchOptions {
  [BrazePlugin configure:^(BRZConfiguration *configuration) {
    configuration.logger.level = BRZLoggerLevelInfo;
    // Set other non-API-key configurations here, such as:
    // configuration.push.automation = ...
    // configuration.sessionTimeout = 60;
  } postInitialization:^(Braze *braze) {
    // Optional: customize the Braze instance after creation.
  }];

  return YES;
}
BrazePlugin.configure() only stores your configuration. No Braze instance exists until initialize() is called from Dart, so do not call any Braze SDK methods in the AppDelegate after configure().
2.1 Set up Android
To connect to Braze servers, create a braze.xml file in your project’s android/res/values folder. Paste the following code and replace the API identifier key and endpoint with your values:
1
2
3
4
5
<?xml version="1.0" encoding="utf-8"?>
<resources>
  <string translatable="false" name="com_braze_api_key">YOUR_APP_IDENTIFIER_API_KEY</string>
  <string translatable="false" name="com_braze_custom_endpoint">YOUR_CUSTOM_ENDPOINT_OR_CLUSTER</string>
</resources>
Add the required permissions to your AndroidManifest.xml file:
1
2
<uses-permission android:name="android.permission.INTERNET" />
<uses-permission android:name="android.permission.ACCESS_NETWORK_STATE" />
2.2 Set up iOS
Add the Braze SDK imports at the top of the AppDelegate.swift file:
1
2
import BrazeKit
import braze_plugin
In the same file, create the Braze configuration object in the application(_:didFinishLaunchingWithOptions:) method and replace the API key and endpoint with your app’s values. Then, create the Braze instance using the configuration, and create a static property on the AppDelegate for easy access:
1
2
3
4
5
6
7
8
9
10
11
12
13
14
15
16
17
18
static var braze: Braze? = nil

override func application(
  _ application: UIApplication,
  didFinishLaunchingWithOptions launchOptions: [UIApplication.LaunchOptionsKey : Any]? = nil
) -> Bool {
  // Setup Braze
  let configuration = Braze.Configuration(
    apiKey: "<BRAZE_API_KEY>",
    endpoint: "<BRAZE_ENDPOINT>"
  )
  // - Enable logging or customize configuration here
  configuration.logger.level = .info
  let braze = BrazePlugin.initBraze(configuration)
  AppDelegate.braze = braze

  return true
}
Import the Braze SDK at the top of the AppDelegate.m file:
1
2
@import BrazeKit;
@import braze_plugin;
In the same file, create the Braze configuration object in the application:didFinishLaunchingWithOptions: method and replace the API key and endpoint with your app’s values. Then, create the Braze instance using the configuration, and create a static property on the AppDelegate for easy access:
1
2
3
4
5
6
7
8
9
10
11
12
13
14
15
16
17
18
19
20
21
22
23
24
25
26
- (BOOL)application:(UIApplication *)application
    didFinishLaunchingWithOptions:(NSDictionary *)launchOptions {
  // Setup Braze
  BRZConfiguration *configuration =
      [[BRZConfiguration alloc] initWithApiKey:@"<BRAZE_API_KEY>"
                                      endpoint:@"<BRAZE_ENDPOINT>"];
  // - Enable logging or customize configuration here
  configuration.logger.level = BRZLoggerLevelInfo;
  Braze *braze = [BrazePlugin initBraze:configuration];
  AppDelegate.braze = braze;

  [self.window makeKeyAndVisible];
  return YES;
}

#pragma mark - AppDelegate.braze

static Braze *_braze = nil;

+ (Braze *)braze {
  return _braze;
}

+ (void)setBraze:(Braze *)braze {
  _braze = braze;
}
Step 3: Set up the plugin
Import the plugin and create a single instance of BrazePlugin:
1
2
3
import 'package:braze_plugin/braze_plugin.dart';

final BrazePlugin braze = BrazePlugin();
Then call initialize() with your app identifier API key and SDK endpoint to create the Braze instance. See the following options for where to call this method in your app flow.
Standard initialization
To initialize the SDK when your app starts, call initialize() in initState():
1
2
3
4
5
@override
void initState() {
  super.initState();
  braze.initialize("<BRAZE_API_KEY>", "<BRAZE_ENDPOINT>");
}
Delayed initialization
To defer SDK initialization until a later point in the session — for example, after the user grants consent or completes login — call initialize() when you’re ready:
1
2
3
4
// ...
void onUserConsent() {
  braze.initialize("<BRAZE_API_KEY>", "<BRAZE_ENDPOINT>");
}
Push notifications and deep links received before initialize() is called are not processed on iOS. On Android, deep links from push notifications do not resolve while the SDK is waiting to be initialized. If your app relies on push or deep links at launch, use standard initialization instead.
Platform-specific API keys
Since your Android and iOS apps use different API keys, use platform detection:
1
2
3
4
5
6
7
import 'dart:io' show Platform;

if (Platform.isAndroid) {
  braze.initialize("<ANDROID_API_KEY>", "<BRAZE_ENDPOINT>");
} else if (Platform.isIOS) {
  braze.initialize("<IOS_API_KEY>", "<BRAZE_ENDPOINT>");
}
Re-initialization
You can call initialize() multiple times to re-initialize the SDK with a different API key and endpoint mid-session. Each call tears down the previous Braze instance and creates a new one.
To avoid undefined behaviors, only allocate and use a single instance of the BrazePlugin in your Dart code. All SDK method calls made before initialize() are ignored on iOS, so call initialize() before using any other Braze methods.
To import the plugin into your Dart code, use the following:
1
import 'package:braze_plugin/braze_plugin.dart';
Then, initialize an instance of the Braze plugin by calling new BrazePlugin() like in our sample app.
To avoid undefined behaviors, only allocate and use a single instance of the BrazePlugin in your Dart code.
Testing the integration
You can verify that the SDK is integrated by checking session statistics in the dashboard. If you run your application on either platform, you should see a new session in the dashboard (in the Overview section).
Open a session for a particular user by calling the following code in your app.
1
2
3
BrazePlugin braze = BrazePlugin();
braze.initialize("<BRAZE_API_KEY>", "<BRAZE_ENDPOINT>");
braze.changeUser("{some-user-id}");
1
2
BrazePlugin braze = BrazePlugin();
braze.changeUser("{some-user-id}");
Search for the user with {some-user-id} in the dashboard under Audience > Search Users. There, you can verify that session and device data have been logged.
About the React Native Braze SDK
Integrating the React Native Braze SDK provides basic analytics functionality and lets you integrate in-app messages and Content Cards for both iOS and Android with one codebase.
New Architecture compatibility
The following minimum SDK version is compatible with all apps using React Native’s New Architecture:
Starting with SDK version 6.0.0, Braze uses a React Native Turbo Module, which is compatible with both the New Architecture and legacy bridge architecture. This means no additional setup is required.
If your iOS app conforms to RCTAppDelegate and follows our previous AppDelegate setup, review the samples in Complete native setup to prevent crashes when subscribing to events in the Turbo Module.
React and React Native version requirements
Braze doesn’t publish separate minimum React versions beyond what the React Native SDK supports. To integrate the SDK, use React Native version 0.71 or later. For the full list of supported React Native versions, see the React Native SDK GitHub repository.
When you upgrade React, React Native, or the Braze SDK, review the SDK CHANGELOG for breaking changes before you deploy.
Integrating the React Native SDK
Prerequisites
For supported React Native versions and upgrade guidance, see React and React Native version requirements.
Step 1: Integrate the Braze library
1
npm install @braze/react-native-sdk
1
yarn add @braze/react-native-sdk
Step 2: Complete native setup
If your app uses Expo, see Using the Expo plugin. If your app uses pure React Native, see Using React Native CLI. Choose one setup method in each version tab: Expo plugin or React Native CLI.
Method 1: Using the Expo plugin
2.1 Install the Braze Expo plugin
Ensure that your version of the Braze Expo plugin is at least 4.1.0. For the full list of supported versions, see the Braze Expo plugin repository.
The following code snippet shows the command to install the Braze Expo plugin:
1
npx expo install @braze/expo-plugin
2.2 Add the plugin to your app.json
In your app.json, add the Braze Expo plugin. The API key and endpoint are no longer set here. Provide them at runtime through Braze.initialize() from JavaScript. Add the following optional configuration parameters based on your implementation needs:
| Method | Type | Description |
|---|---|---|
enableBrazeIosPush |
boolean | iOS only. Whether to use Braze to handle push notifications on iOS. |
enableFirebaseCloudMessaging |
boolean | Android only. Whether to use Firebase Cloud Messaging for push notifications. |
firebaseCloudMessagingSenderId |
string | Android only. Your Firebase Cloud Messaging sender ID. |
sessionTimeout |
integer | The Braze session timeout for your application in seconds. |
enableSdkAuthentication |
boolean | Whether to enable the SDK Authentication feature. |
logLevel |
integer | The log level for your application. The default log level is 8 and minimally logs info. To enable verbose logging for debugging, use log level 0. |
minimumTriggerIntervalInSeconds |
integer | The minimum time interval in seconds between triggers. Defaults to 30 seconds. |
enableAutomaticLocationCollection |
boolean | Whether automatic location collection is enabled (if the user permits). |
enableGeofence |
boolean | Whether geofences are enabled. |
enableAutomaticGeofenceRequests |
boolean | Whether geofence requests should be made automatically. |
dismissModalOnOutsideTap |
boolean | iOS only. Whether a modal in-app message is dismissed when the user clicks outside of the in-app message. |
androidHandlePushDeepLinksAutomatically |
boolean | Android only. Whether the Braze SDK should automatically handle push deep links. |
androidPushNotificationHtmlRenderingEnabled |
boolean | Android only. Sets whether the text content in a push notification should be interpreted and rendered as HTML using android.text.Html.fromHtml. |
androidNotificationAccentColor |
string | Android only. Sets the Android notification accent color. |
androidNotificationLargeIcon |
string | Android only. Sets the Android notification large icon. |
androidNotificationSmallIcon |
string | Android only. Sets the Android notification small icon. |
iosRequestPushPermissionsAutomatically |
boolean | iOS only. Whether the user should automatically be prompted for push permissions on app launch. |
enableBrazeIosRichPush |
boolean | iOS only. Whether to enable rich push features for iOS. |
enableBrazeIosPushStories |
boolean | iOS only. Whether to enable Braze Push Stories for iOS. |
iosPushStoryAppGroup |
string | iOS only. The app group used for iOS Push Stories. |
iosUseUUIDAsDeviceId |
boolean | iOS only. Whether the device ID uses a randomly generated UUID. |
iosForwardUniversalLinks |
boolean | iOS only. Specifies if the SDK should automatically recognize and forward universal links to the system methods (default: false). |
The following code snippet shows an example app.json configuration:
1
2
3
4
5
6
7
8
9
10
11
12
13
14
15
16
17
18
19
20
21
22
23
24
25
26
27
28
29
30
31
{
  "expo": {
    "plugins": [
      [
        "@braze/expo-plugin",
        {
          "sessionTimeout": 60,
          "enableGeofence": false,
          "enableBrazeIosPush": false,
          "enableFirebaseCloudMessaging": false,
          "firebaseCloudMessagingSenderId": "YOUR-FCM-SENDER-ID",
          "androidHandlePushDeepLinksAutomatically": true,
          "enableSdkAuthentication": false,
          "logLevel": 0,
          "minimumTriggerIntervalInSeconds": 0,
          "enableAutomaticLocationCollection": false,
          "enableAutomaticGeofenceRequests": false,
          "dismissModalOnOutsideTap": true,
          "androidPushNotificationHtmlRenderingEnabled": true,
          "androidNotificationAccentColor": "#ff3344",
          "androidNotificationLargeIcon": "@drawable/custom_app_large_icon",
          "androidNotificationSmallIcon": "@drawable/custom_app_small_icon",
          "iosRequestPushPermissionsAutomatically": false,
          "enableBrazeIosPushStories": true,
          "iosPushStoryAppGroup": "group.com.example.myapp.PushStories",
          "iosForwardUniversalLinks": false
        }
      ]
    ]
  }
}
Configuring Android push notification icons
When using androidNotificationLargeIcon and androidNotificationSmallIcon, follow these best practices for proper icon display:
Icon placement and format
To use custom push notification icons with the Braze Expo plugin:
- Create your icon files following the Icon requirements listed in the Icon requirements.
- Place them in your project’s Android native directories at
android/app/src/main/res/drawable-<density>/. For example, useandroid/app/src/main/res/drawable-mdpi/andandroid/app/src/main/res/drawable-hdpi/. - Alternatively, if you’re managing assets in your React Native directory, you can use Expo’s app.json icon configuration or create an Expo config plugin to copy the icons to the Android drawable folders during prebuild.
The Braze Expo plugin references these icons using Android’s drawable resource system.
Icon requirements
- Small icon: Must be a white silhouette on a transparent background (this is an Android platform requirement)
- Large icon: Can be a full-color image.
- Format: PNG format is recommended.
- Naming: Use lowercase letters, numbers, and underscores only (for example,
my_large_icon.png)
Configuration in app.json
The following code snippet shows how to reference Android notification icons in app.json using the @drawable/ prefix:
1
2
3
4
5
6
7
8
9
10
11
12
13
{
  "expo": {
    "plugins": [
      [
        "@braze/expo-plugin",
        {
          "androidNotificationLargeIcon": "@drawable/large_icon",
          "androidNotificationSmallIcon": "@drawable/small_icon"
        }
      ]
    ]
  }
}
Do not use relative file paths (such as src/assets/images/icon.png) or include the file extension when referencing icons. The Expo plugin requires the @drawable/ prefix to properly locate the icons in the Android native folders after the prebuild process.
How it works
The Braze Expo plugin references your icon files from the Android drawable directories. When you run npx expo prebuild, Expo generates the native Android project structure. Your icons must be present in the Android drawable folders (either placed manually or copied through a config plugin) before the build process. The plugin then configures the Braze SDK to use these drawable resources by their names (without path or extension), which is why the @drawable/ prefix is required in your configuration.
For more information on Android notification icons, see Android’s notification icon guidelines.
2.3 Build and run your application
Prebuilding your application generates the native files necessary for the Braze Expo plugin to work.
The following code snippet shows the command to prebuild your application:
1
npx expo prebuild
Run your application as specified in the Expo docs. If you make changes to the configuration options, prebuild and run the application again.
Method 2: Using React Native CLI
Set up Android
2.1 Add the Kotlin Gradle plugin
The following code snippet shows how to add the Kotlin Gradle plugin in your top-level project build.gradle under buildscript > dependencies:
1
2
3
4
5
6
7
buildscript {
    dependencies {
        ...
        // Choose your Kotlin version
        classpath("org.jetbrains.kotlin:kotlin-gradle-plugin:1.8.10")
    }
}
This adds Kotlin to your project.
2.2 Configure the Braze SDK
Create a braze.xml file in your project’s res/values folder. The API key and endpoint are provided at runtime from JavaScript, so they are not required in this file. The following code snippet shows how to enable delayed initialization with com_braze_enable_delayed_initialization:
1
2
3
4
<?xml version="1.0" encoding="utf-8"?>
<resources>
  <bool name="com_braze_enable_delayed_initialization">true</bool>
</resources>
You can still add other native configuration values to braze.xml (such as push, session timeout, and logging settings). These are applied automatically when Braze.initialize() is called from JavaScript.
The following code snippet shows the required permissions for your AndroidManifest.xml file:
1
2
<uses-permission android:name="android.permission.INTERNET" />
<uses-permission android:name="android.permission.ACCESS_NETWORK_STATE" />
On Braze Android SDK version 12.2.0 or later, you can automatically pull in the android-sdk-location library by setting importBrazeLocationLibrary=true in your gradle.properties file.
2.3 Implement user session tracking
The calls to openSession() and closeSession() are handled automatically.
The following code snippet shows what to add to the onCreate() method of your MainApplication class:
1
2
3
4
5
6
7
8
import com.braze.BrazeActivityLifecycleCallbackListener;

@Override
public void onCreate() {
    super.onCreate();
    ...
    registerActivityLifecycleCallbacks(new BrazeActivityLifecycleCallbackListener());
}
1
2
3
4
5
6
7
import com.braze.BrazeActivityLifecycleCallbackListener

override fun onCreate() {
    super.onCreate()
    ...
    registerActivityLifecycleCallbacks(BrazeActivityLifecycleCallbackListener())
}
2.4 Handle intent updates
If your MainActivity has android:launchMode set to singleTask, the following code snippet shows what to add to your MainActivity class:
1
2
3
4
5
@Override
public void onNewIntent(Intent intent) {
    super.onNewIntent(intent);
    setIntent(intent);
}
1
2
3
4
override fun onNewIntent(intent: Intent) {
    super.onNewIntent(intent)
    setIntent(intent)
}
Set up iOS
2.5 (Optional) Configure Podfile for dynamic XCFrameworks
To import certain Braze libraries, such as BrazeUI, into an Objective-C++ file, you must use the #import syntax. Starting in version 7.4.0 of the Braze Swift SDK, binaries have an optional distribution channel as dynamic XCFrameworks, which are compatible with this syntax.
If you’d like to use this distribution channel, manually override the CocoaPods source locations in your Podfile. Reference this sample and replace {your-version} with the relevant version you wish to import:
1
2
3
pod 'BrazeKit', :podspec => 'https://raw.githubusercontent.com/braze-inc/braze-swift-sdk-prebuilt-dynamic/{your-version}/BrazeKit.podspec'
pod 'BrazeUI', :podspec => 'https://raw.githubusercontent.com/braze-inc/braze-swift-sdk-prebuilt-dynamic/{your-version}/BrazeUI.podspec'
pod 'BrazeLocation', :podspec => 'https://raw.githubusercontent.com/braze-inc/braze-swift-sdk-prebuilt-dynamic/{your-version}/BrazeLocation.podspec'
2.6 Install pods
Since React Native automatically links the libraries to the native platform, you can install the SDK with the help of CocoaPods.
The following code snippet shows how to install pods from the root folder of the project:
1
2
3
4
5
# To install using the React Native New Architecture
cd ios && pod install

# To install using the React Native legacy architecture
cd ios && RCT_NEW_ARCH_ENABLED=0 pod install
2.7 Configure the Braze SDK
Use BrazeReactInitializer.configure in your AppDelegate to register native configuration. The closures you provide are stored and applied later when Braze.initialize(apiKey, endpoint) is called from JavaScript.
The following code snippet shows how to import the Braze SDK at the top of the AppDelegate.swift file:
1
2
import BrazeKit
import braze_react_native_sdk
In the application(_:didFinishLaunchingWithOptions:) method, register your native configuration using BrazeReactInitializer.configure. Do not set the API key or endpoint here. They are provided from JavaScript through Braze.initialize().
configureclosure: Receives aBraze.Configurationand lets you set native configuration properties (logging, push, sessions, and more).postInitializationclosure (optional): Receives the liveBrazeinstance after creation, for setup that requires the instance (for example, storing a reference or setting delegates).
The following code snippet shows an example AppDelegate.swift implementation that uses BrazeReactInitializer.configure:
1
2
3
4
5
6
7
8
9
10
11
12
13
14
15
16
17
18
19
20
@main
class AppDelegate: UIResponder, UIApplicationDelegate {
  static var braze: Braze? = nil

  func application(
    _ application: UIApplication,
    didFinishLaunchingWithOptions launchOptions: [UIApplication.LaunchOptionsKey: Any]? = nil
  ) -> Bool {
    BrazeReactInitializer.configure { configuration in
      configuration.logger.level = .info
      configuration.push.automation = true
    } postInitialization: { braze in
      AppDelegate.braze = braze
    }

    // ... React Native setup

    return true
  }
}
The following code snippet shows how to import the Braze SDK at the top of the AppDelegate.m file:
1
2
@import BrazeKit;
@import braze_react_native_sdk;
In the application:didFinishLaunchingWithOptions: method, register your native configuration using BrazeReactInitializer. Do not set the API key or endpoint here. They are provided from JavaScript through Braze.initialize().
The following code snippet shows an example AppDelegate.m implementation that uses BrazeReactInitializer:
1
2
3
4
5
6
7
8
9
10
11
12
13
- (BOOL)application:(UIApplication *)application
    didFinishLaunchingWithOptions:(NSDictionary *)launchOptions {
  [BrazeReactInitializer configure:^(BRZConfiguration *configuration) {
    configuration.logger.level = BRZLoggerLevelInfo;
    configuration.push.automation = [[BRZConfigurationPushAutomation alloc] initWithAutomationEnabled:YES];
  } postInitialization:^(Braze *braze) {
    // Store the Braze instance for later use.
  }];

  /* Other configuration */

  return YES;
}
BrazeReactInitializer.configure() only stores your configuration. No Braze instance exists until Braze.initialize() is called from JavaScript, so do not call any Braze SDK methods in the AppDelegate after configure().
When you call Braze.initialize() again, the same configure and postInitialization blocks are applied to the new Braze instance.
Method 1: Using the Expo plugin
Step 2.1: Install the Braze Expo plugin
Ensure that your version of the Braze React Native SDK is at least 1.37.0. For the full list of supported versions, see the Braze React Native repository.
The following code snippet shows the command to install the Braze Expo plugin:
1
npx expo install @braze/expo-plugin
Step 2.2: Add the plugin to your app.json
In your app.json, add the Braze Expo plugin. You can provide the following configuration options:
| Method | Type | Description |
|---|---|---|
androidApiKey |
string | Required. The API key for your Android application, located in your Braze dashboard under Manage Settings. |
iosApiKey |
string | Required. The API key for your iOS application, located in your Braze dashboard under Manage Settings. |
baseUrl |
string | Required. The SDK endpoint for your application, located in your Braze dashboard under Manage Settings. |
enableBrazeIosPush |
boolean | iOS only. Whether to use Braze to handle push notifications on iOS. Introduced in React Native SDK v1.38.0 and Expo Plugin v0.4.0. |
enableFirebaseCloudMessaging |
boolean | Android only. Whether to use Firebase Cloud Messaging for push notifications. Introduced in React Native SDK v1.38.0 and Expo Plugin v0.4.0. |
firebaseCloudMessagingSenderId |
string | Android only. Your Firebase Cloud Messaging sender ID. Introduced in React Native SDK v1.38.0 and Expo Plugin v0.4.0. |
sessionTimeout |
integer | The Braze session timeout for your application in seconds. |
enableSdkAuthentication |
boolean | Whether to enable the SDK Authentication feature. |
logLevel |
integer | The log level for your application. The default log level is 8 and minimally logs info. To enable verbose logging for debugging, use log level 0. |
minimumTriggerIntervalInSeconds |
integer | The minimum time interval in seconds between triggers. Defaults to 30 seconds. |
enableAutomaticLocationCollection |
boolean | Whether automatic location collection is enabled (if the user permits). |
enableGeofence |
boolean | Whether geofences are enabled. |
enableAutomaticGeofenceRequests |
boolean | Whether geofence requests should be made automatically. |
dismissModalOnOutsideTap |
boolean | iOS only. Whether a modal in-app message is dismissed when the user clicks outside of the in-app message. |
androidHandlePushDeepLinksAutomatically |
boolean | Android only. Whether the Braze SDK should automatically handle push deep links. |
androidPushNotificationHtmlRenderingEnabled |
boolean | Android only. Sets whether the text content in a push notification should be interpreted and rendered as HTML using android.text.Html.fromHtml. |
androidNotificationAccentColor |
string | Android only. Sets the Android notification accent color. |
androidNotificationLargeIcon |
string | Android only. Sets the Android notification large icon. |
androidNotificationSmallIcon |
string | Android only. Sets the Android notification small icon. |
iosRequestPushPermissionsAutomatically |
boolean | iOS only. Whether the user should automatically be prompted for push permissions on app launch. |
enableBrazeIosRichPush |
boolean | iOS only. Whether to enable rich push features for iOS. |
enableBrazeIosPushStories |
boolean | iOS only. Whether to enable Braze Push Stories for iOS. |
iosPushStoryAppGroup |
string | iOS only. The app group used for iOS Push Stories. |
iosUseUUIDAsDeviceId |
boolean | iOS only. Whether the device ID will use a randomly generated UUID. |
iosForwardUniversalLinks |
boolean | iOS only. Specifies if the SDK should automatically recognize and forward universal links to the system methods (default: false). When enabled, the SDK will automatically forward universal links to the system methods defined in Supporting universal links in your app. Introduced in React Native SDK v11.1.0 and Expo Plugin v3.2.0. |
The following code snippet shows an example app.json configuration:
1
2
3
4
5
6
7
8
9
10
11
12
13
14
15
16
17
18
19
20
21
22
23
24
25
26
27
28
29
30
31
32
33
34
{
  "expo": {
    "plugins": [
      [
        "@braze/expo-plugin",
        {
          "androidApiKey": "YOUR-ANDROID-API-KEY",
          "iosApiKey": "YOUR-IOS-API-KEY",
          "baseUrl": "YOUR-SDK-ENDPOINT",
          "sessionTimeout": 60,
          "enableGeofence": false,
          "enableBrazeIosPush": false,
          "enableFirebaseCloudMessaging": false,
          "firebaseCloudMessagingSenderId": "YOUR-FCM-SENDER-ID",
          "androidHandlePushDeepLinksAutomatically": true,
          "enableSdkAuthentication": false,
          "logLevel": 0,
          "minimumTriggerIntervalInSeconds": 0,
          "enableAutomaticLocationCollection": false,
          "enableAutomaticGeofenceRequests": false,
          "dismissModalOnOutsideTap": true,
          "androidPushNotificationHtmlRenderingEnabled": true,
          "androidNotificationAccentColor": "#ff3344",
          "androidNotificationLargeIcon": "@drawable/custom_app_large_icon",
          "androidNotificationSmallIcon": "@drawable/custom_app_small_icon",
          "iosRequestPushPermissionsAutomatically": false,
          "enableBrazeIosPushStories": true,
          "iosPushStoryAppGroup": "group.com.example.myapp.PushStories",
          "iosForwardUniversalLinks": false
        }
      ],
    ]
  }
}
Configuring Android push notification icons
When using androidNotificationLargeIcon and androidNotificationSmallIcon, follow these best practices for proper icon display:
Icon placement and format
To use custom push notification icons with the Braze Expo plugin:
- Create your icon files following the Icon requirements listed in the Icon requirements.
- Place them in your project’s Android native directories at
android/app/src/main/res/drawable-<density>/(for example,android/app/src/main/res/drawable-mdpi/,drawable-hdpi/, or similar.) - Alternatively, if you’re managing assets in your React Native directory, you can use Expo’s app.json icon configuration or create an Expo config plugin to copy the icons to the Android drawable folders during prebuild.
The Braze Expo plugin references these icons using Android’s drawable resource system.
Icon requirements
- Small icon: Must be a white silhouette on a transparent background (this is an Android platform requirement)
- Large icon: Can be a full-color image.
- Format: PNG format is recommended.
- Naming: Use lowercase letters, numbers, and underscores only (for example,
my_large_icon.png)
Configuration in app.json
The following code snippet shows how to reference Android notification icons in app.json using the @drawable/ prefix:
1
2
3
4
5
6
7
8
9
10
11
12
13
{
  "expo": {
    "plugins": [
      [
        "@braze/expo-plugin",
        {
          "androidNotificationLargeIcon": "@drawable/large_icon",
          "androidNotificationSmallIcon": "@drawable/small_icon"
        }
      ]
    ]
  }
}
Do not use relative file paths (such as src/assets/images/icon.png) or include the file extension when referencing icons. The Expo plugin requires the @drawable/ prefix to properly locate the icons in the Android native folders after the prebuild process.
How it works
The Braze Expo plugin references your icon files from the Android drawable directories. When you run npx expo prebuild, Expo generates the native Android project structure. Your icons must be present in the Android drawable folders (either placed manually or copied through a config plugin) before the build process. The plugin then configures the Braze SDK to use these drawable resources by their names (without path or extension), which is why the @drawable/ prefix is required in your configuration.
For more information on Android notification icons, see Android’s notification icon guidelines.
Step 2.3: Build and run your application
Prebuilding your application generates the native files necessary for the Braze Expo plugin to work.
The following code snippet shows the command to prebuild your application:
1
npx expo prebuild
Run your application as specified in the Expo docs. Keep in mind, if you make any changes to the configuration options, you’ll be required to prebuild and run the application again.
Method 2: Using React Native CLI
Set up Android
Step 2.1: Add the Kotlin Gradle plugin
The following code snippet shows how to add the Kotlin Gradle plugin in your top-level project build.gradle under buildscript > dependencies:
1
2
3
4
5
6
7
buildscript {
    dependencies {
        ...
        // Choose your Kotlin version
        classpath("org.jetbrains.kotlin:kotlin-gradle-plugin:1.8.10")
    }
}
This adds Kotlin to your project.
Step 2.2: Configure the Braze SDK
To connect to Braze servers, create a braze.xml file in your project’s res/values folder. The following code snippet shows an example braze.xml configuration. Replace the API key and endpoint with your values:
1
2
3
4
5
<?xml version="1.0" encoding="utf-8"?>
<resources>
  <string translatable="false" name="com_braze_api_key">YOU_APP_IDENTIFIER_API_KEY</string>
  <string translatable="false" name="com_braze_custom_endpoint">YOUR_CUSTOM_ENDPOINT_OR_CLUSTER</string>
</resources>
The following code snippet shows the required permissions for your AndroidManifest.xml file:
1
2
<uses-permission android:name="android.permission.INTERNET" />
<uses-permission android:name="android.permission.ACCESS_NETWORK_STATE" />
On Braze Android SDK version 12.2.0 or later, you can automatically pull in the android-sdk-location library by setting importBrazeLocationLibrary=true in your gradle.properties file.
Step 2.3: Implement user session tracking
The calls to openSession() and closeSession() are handled automatically.
The following code snippet shows what to add to the onCreate() method of your MainApplication class:
1
2
3
4
5
6
7
8
import com.braze.BrazeActivityLifecycleCallbackListener;

@Override
public void onCreate() {
    super.onCreate();
    ...
    registerActivityLifecycleCallbacks(new BrazeActivityLifecycleCallbackListener());
}
1
2
3
4
5
6
7
import com.braze.BrazeActivityLifecycleCallbackListener

override fun onCreate() {
    super.onCreate()
    ...
    registerActivityLifecycleCallbacks(BrazeActivityLifecycleCallbackListener())
}
Step 2.4: Handle intent updates
If your MainActivity has android:launchMode set to singleTask, the following code snippet shows what to add to your MainActivity class:
1
2
3
4
5
@Override
public void onNewIntent(Intent intent) {
    super.onNewIntent(intent);
    setIntent(intent);
}
1
2
3
4
override fun onNewIntent(intent: Intent) {
    super.onNewIntent(intent)
    setIntent(intent)
}
Set up iOS
Step 2.5: (Optional) Configure Podfile for dynamic XCFrameworks
To import certain Braze libraries, such as BrazeUI, into an Objective-C++ file, you must use the #import syntax. Starting in version 7.4.0 of the Braze Swift SDK, binaries have an optional distribution channel as dynamic XCFrameworks, which are compatible with this syntax.
If you’d like to use this distribution channel, manually override the CocoaPods source locations in your Podfile. The following code snippet shows a sample override. Replace {your-version} with the relevant version you wish to import:
1
2
3
pod 'BrazeKit', :podspec => 'https://raw.githubusercontent.com/braze-inc/braze-swift-sdk-prebuilt-dynamic/{your-version}/BrazeKit.podspec'
pod 'BrazeUI', :podspec => 'https://raw.githubusercontent.com/braze-inc/braze-swift-sdk-prebuilt-dynamic/{your-version}/BrazeUI.podspec'
pod 'BrazeLocation', :podspec => 'https://raw.githubusercontent.com/braze-inc/braze-swift-sdk-prebuilt-dynamic/{your-version}/BrazeLocation.podspec'
Step 2.6: Install pods
Since React Native automatically links the libraries to the native platform, you can install the SDK with the help of CocoaPods.
The following code snippet shows how to install pods from the root folder of the project:
1
2
3
4
5
# To install using the React Native New Architecture
cd ios && pod install

# To install using the React Native legacy architecture
cd ios && RCT_NEW_ARCH_ENABLED=0 pod install
Step 2.7: Configure the Braze SDK
The following code snippet shows how to import the Braze SDK at the top of the AppDelegate.swift file:
1
2
import BrazeKit
import braze_react_native_sdk
In the application(_:didFinishLaunchingWithOptions:) method, replace the API key and endpoint with your app’s values. Then, create the Braze instance using the configuration, and create a static property on the AppDelegate for easy access.
Our example assumes an implementation of RCTAppDelegate, which provides a number of abstractions in the React Native setup. If you are using a different setup for your app, be sure to adjust your implementation as needed.
The following code snippet shows an example AppDelegate.swift setup:
1
2
3
4
5
6
7
8
9
10
11
12
13
14
15
16
17
18
19
20
21
22
23
24
25
func application(
    _ application: UIApplication,
    didFinishLaunchingWithOptions launchOptions: [UIApplication.LaunchOptionsKey : Any]? = nil
) -> Bool {
    // Setup Braze
    let configuration = Braze.Configuration(
        apiKey: "{BRAZE_API_KEY}",
        endpoint: "{BRAZE_ENDPOINT}")
    // Enable logging and customize the configuration here.
    configuration.logger.level = .info
    let braze = BrazeReactBridge.perform(
      #selector(BrazeReactBridge.initBraze(_:)),
      with: configuration
    ).takeUnretainedValue() as! Braze

    AppDelegate.braze = braze

    /* Other configuration */

    return true
}

// MARK: - AppDelegate.braze

static var braze: Braze? = nil
The following code snippet shows how to import the Braze SDK at the top of the AppDelegate.m file:
1
2
#import <BrazeKit/BrazeKit-Swift.h>
#import "BrazeReactBridge.h"
In the application:didFinishLaunchingWithOptions: method, replace the API key and endpoint with your app’s values. Then, create the Braze instance using the configuration, and create a static property on the AppDelegate for easy access.
Our example assumes an implementation of RCTAppDelegate, which provides a number of abstractions in the React Native setup. If you are using a different setup for your app, be sure to adjust your implementation as needed.
The following code snippet shows an example AppDelegate.m setup:
1
2
3
4
5
6
7
8
9
10
11
12
13
14
15
16
17
18
19
20
21
22
23
24
25
26
- (BOOL)application:(UIApplication *)application
    didFinishLaunchingWithOptions:(NSDictionary *)launchOptions {
  // Setup Braze
  BRZConfiguration *configuration = [[BRZConfiguration alloc] initWithApiKey:@"{BRAZE_API_KEY}"
                                                                    endpoint:@"{BRAZE_ENDPOINT}"];
  // Enable logging and customize the configuration here.
  configuration.logger.level = BRZLoggerLevelInfo;
  Braze *braze = [BrazeReactBridge initBraze:configuration];
  AppDelegate.braze = braze;

  /* Other configuration */

  return YES;
}

#pragma mark - AppDelegate.braze

static Braze *_braze = nil;

+ (Braze *)braze {
  return _braze;
}

+ (void)setBraze:(Braze *)braze {
  _braze = braze;
}
Step 3: Initialize the SDK
The following code snippet shows how to import the library in your React Native code:
1
import Braze from "@braze/react-native-sdk";
Then call Braze.initialize() with your app identifier API key and SDK endpoint to create the Braze instance. See the following options for where to call this method in your app flow.
Standard initialization
The following code snippet shows how to initialize the SDK when your app starts by calling Braze.initialize() in a useEffect:
1
2
3
4
5
6
7
8
9
10
11
12
import React, { useEffect } from "react";
import Braze from "@braze/react-native-sdk";

const App = () => {
  useEffect(() => {
    Braze.initialize("YOUR-API-KEY", "YOUR-SDK-ENDPOINT");
  }, []);

  return (
    // Your app components
  );
};
Delayed initialization
The following code snippet shows how to defer SDK initialization until later in the session. For example, after the user grants consent or completes login:
1
2
3
function onUserConsent() {
  Braze.initialize("YOUR-API-KEY", "YOUR-SDK-ENDPOINT");
}
On iOS, push notifications received before Braze.initialize() are queued and processed after initialization. On Android, deep links from push notifications do not resolve while the SDK is waiting to be initialized. If your app relies on immediate deep link handling at launch, use standard initialization instead.
Platform-specific API keys
The following code snippet shows how to use platform detection when your Android and iOS apps use different API keys:
1
2
3
4
5
6
7
8
9
import { Platform } from "react-native";
import Braze from "@braze/react-native-sdk";

const apiKey = Platform.select({
  android: "YOUR-ANDROID-API-KEY",
  ios: "YOUR-IOS-API-KEY",
}) ?? "";

Braze.initialize(apiKey, "YOUR-SDK-ENDPOINT");
Re-initialization
You can call Braze.initialize() multiple times to re-initialize the SDK with a different API key and endpoint mid-session. Each call tears down the previous Braze instance and creates a new one.
All SDK method calls made before Braze.initialize() are ignored on iOS, so call Braze.initialize() before using any other Braze methods.
For React Native SDK 19.1.0 and earlier, native initialization happens in Step 2. Import the library in your React Native code to call Braze methods. For more details, check out our sample project.
1
import Braze from "@braze/react-native-sdk";
Step 4: Test the integration (optional)
You can verify that the SDK is integrated by checking session statistics in the dashboard. If you run your application on either platform, you should see a new session in the dashboard (in the Overview section).
The following code snippet shows how to open a session for a particular user in your app:
1
2
3
4
import Braze from "@braze/react-native-sdk";

Braze.initialize("YOUR-API-KEY", "YOUR-SDK-ENDPOINT");
Braze.changeUser("{some-user-id}");
Search for the user with {some-user-id} in the dashboard under Audience > Search Users. There, you can verify that session and device data have been logged.
To test your SDK integration, the following code snippet shows how to start a new session on either platform for a user.
1
Braze.changeUser("userId");
The following code snippet shows an example of assigning the user ID at app startup:
1
2
3
4
5
6
7
8
9
10
11
12
13
import React, { useEffect } from "react";
import Braze from "@braze/react-native-sdk";

const App = () => {
  useEffect(() => {
    Braze.changeUser("some-user-id");
  }, []);

  return (
    <div>
      ...
    </div>
  )
In the Braze dashboard, go to User Search and look for the user with the ID matching some-user-id. Here, you can verify that session and device data were logged.
Next steps
After integrating the Braze SDK, you can start implementing common messaging features:
- Push Notifications: Set up and send push notifications to your users.
- In-App Messages: Display contextual messages within your app.
- Banners: Show persistent banners in your app interface.
Integrating the Roku SDK
Step 1: Add files
Braze SDK files can be found in the sdk_files directory in the Braze Roku SDK repository.
- Add
BrazeSDK.brsto your app in thesourcedirectory. - Add
BrazeTask.brsandBrazeTask.xmlto your app in thecomponentsdirectory.
Step 2: Add references
Add a reference to BrazeSDK.brs in your main scene using the following script element:
1
<script type="text/brightscript" uri="pkg:/source/BrazeSDK.brs"/>
Step 3: Configure
Within main.brs, set the Braze configuration on the global node:
1
2
3
4
5
6
7
8
globalNode = screen.getGlobalNode()
config = {}
config_fields = BrazeConstants().BRAZE_CONFIG_FIELDS
config[config_fields.API_KEY] = {YOUR_API_KEY}
' example endpoint: "https://sdk.iad-01.braze.com/"
config[config_fields.ENDPOINT] = {YOUR_ENDPOINT}
config[config_fields.HEARTBEAT_FREQ_IN_SECONDS] = 5
globalNode.addFields({brazeConfig: config})
You can find your SDK endpoint and API key within the Braze dashboard.
Step 4: Initialize Braze
Initialize the Braze instance:
1
2
m.BrazeTask = createObject("roSGNode", "BrazeTask")
m.Braze = getBrazeInstance(m.BrazeTask)
Optional configurations
Logging
To debug your Braze integration, you can view the Roku debug console for Braze logs. Refer to Debugging code from Roku Developers to learn more.
About the Unity Braze SDK
For a full list of types, functions, variables, and more, see Unity Declaration File. Additionally, if you’ve already integrated Unity manually for iOS, you can switch to an automated integration instead.
Integrating the Unity SDK
Prerequisites
Before you start, verify your environment is supported by the latest Braze Unity SDK version.
Step 1: Choose your Braze Unity package
The Braze .unitypackage bundles native bindings for the Android and iOS platforms, along with a C# interface.
There are several Braze Unity packages available for download on the Braze Unity releases page:
Appboy.unitypackage- This package bundles the Braze Android and iOS SDKs and the SDWebImage dependency for the iOS SDK, which is required for the proper functionality of Braze in-app messaging, and Content Cards features on iOS. The SDWebImage framework is used for downloading and displaying images, including GIFs. If you intend on utilizing full Braze functionality, download and import this package.
Appboy-nodeps.unitypackage- This package is similar to
Appboy.unitypackageexcept for the SDWebImage framework is not present. This package is useful if you do not want the SDWebImage framework present in your iOS app.
- This package is similar to
As of Unity 2.6.0, the bundled Braze Android SDK artifact requires AndroidX dependencies. If you were previously using a jetified unitypackage, you can safely transition to the corresponding unitypackage.
If Android builds fail with “This project uses AndroidX dependencies, but the ‘android.useAndroidX’ property is not enabled”, enable Custom Gradle Properties Template in your Unity Publishing Settings. Then open Assets/Plugins/Android/gradleTemplate.properties and set android.useAndroidX=true. For a working template, see the Braze Unity sample app and its gradleTemplate.properties file.
The Braze .unitypackage bundles native bindings for the Android and iOS platforms, along with a C# interface.
The Braze Unity package is available for download on the Braze Unity releases page with two integration options:
Appboy.unitypackageonly- This package bundles the Braze Android and iOS SDKs without any additional dependencies. With this integration method, there will not be proper functionality of Braze in-app messaging and Content Cards features on iOS. If you intend on utilizing full Braze functionality without custom code, use the next option instead.
- To use this integration option, ensure that the box next to
Import SDWebImage dependencyis unchecked in the Unity UI under “Braze Configuration”.
Appboy.unitypackagewithSDWebImage- This integration option bundles the Braze Android and iOS SDKs and the SDWebImage dependency for the iOS SDK, which is required for the proper functionality of Braze in-app messaging, and Content Cards features on iOS. The
SDWebImageframework is used for downloading and displaying images, including GIFs. If you intend on utilizing full Braze functionality, download and import this package. - To automatically import
SDWebImage, be sure to check the box next toImport SDWebImage dependencyin the Unity UI under “Braze Configuration”.
- This integration option bundles the Braze Android and iOS SDKs and the SDWebImage dependency for the iOS SDK, which is required for the proper functionality of Braze in-app messaging, and Content Cards features on iOS. The
To see if you require the SDWebImage dependency for your iOS project, visit the iOS in-app message documentation.
Step 2: Import the package
In the Unity Editor, import the package into your Unity project by navigating to Assets > Import Package > Custom Package. Next, click Import.
Alternatively, follow the Unity asset package import instructions for a more detailed guide on importing custom Unity packages.
If you only wish to import the iOS or Android plugin, deselect the Plugins/Android or Plugins/iOS subdirectory when importing the Braze .unitypackage.
Step 3: Configure the SDK
Step 3.1: Configure AndroidManifest.xml
Configure AndroidManifest.xml so the Braze SDK can function. If your app does not have an AndroidManifest.xml, you can use the following as a template. Otherwise, if you already have an AndroidManifest.xml, ensure that any of the following missing sections are added to your existing AndroidManifest.xml.
- Go to the
Assets/Plugins/Android/directory and open yourAndroidManifest.xmlfile. This is the default location in the Unity editor. - In your
AndroidManifest.xml, add the required permissions and activities from in the following template. - When you’re finished, your
AndroidManifest.xmlshould only contain a single Activity with"android.intent.category.LAUNCHER"present.
1
2
3
4
5
6
7
8
9
10
11
12
13
14
15
16
17
18
19
20
21
22
23
24
25
26
27
28
29
30
31
32
33
<?xml version="1.0" encoding="utf-8"?>
<manifest xmlns:android="http://schemas.android.com/apk/res/android"
          package="REPLACE_WITH_YOUR_PACKAGE_NAME">

  <uses-permission android:name="android.permission.ACCESS_NETWORK_STATE" />
  <uses-permission android:name="android.permission.INTERNET" />

  <application android:icon="@drawable/app_icon"
               android:label="@string/app_name">

    <!-- Calls the necessary Braze methods to ensure that analytics are collected and that push notifications are properly forwarded to the Unity application. -->
    <activity android:name="com.braze.unity.BrazeUnityPlayerActivity"
      android:theme="@style/UnityThemeSelector"
      android:label="@string/app_name"
      android:configChanges="fontScale|keyboard|keyboardHidden|locale|mnc|mcc|navigation|orientation|screenLayout|screenSize|smallestScreenSize|uiMode|touchscreen"
      android:screenOrientation="sensor">
      <meta-data android:name="android.app.lib_name" android:value="unity" />
      <meta-data android:name="unityplayer.ForwardNativeEventsToDalvik" android:value="true" />
      <intent-filter>
        <action android:name="android.intent.action.MAIN" />
        <category android:name="android.intent.category.LAUNCHER" />
      </intent-filter>
    </activity>

    <!-- A Braze specific FirebaseMessagingService used to handle push notifications. -->
    <service android:name="com.braze.push.BrazeFirebaseMessagingService"
      android:exported="false">
      <intent-filter>
        <action android:name="com.google.firebase.MESSAGING_EVENT" />
      </intent-filter>
    </service>
  </application>
</manifest>
All Activity classes registered in your AndroidManifest.xml file should be fully integrated with the Braze Android SDK, otherwise your analytics won’t be collected. If you add your own Activity class, be sure you extend the Braze Unity player so you can prevent this.
Step 3.2: Update AndroidManifest.xml with your package name
To find your package name, click File > Build Settings > Player Settings > Android Tab.

In your AndroidManifest.xml, all instances of REPLACE_WITH_YOUR_PACKAGE_NAME should be replaced with your Package Name from the previous step.
Step 3.3: Add gradle dependencies
To add gradle dependencies to your Unity project, first enable “Custom Main Gradle Template” in your Publishing Settings. This will create a template gradle file that your project will use. A gradle file handles setting dependencies and other build-time project settings. For more information, check out the Braze Unity sample app’s mainTemplate.gradle.
The following dependencies are required:
1
2
3
4
5
6
implementation 'com.google.firebase:firebase-messaging:22.0.0'
implementation "androidx.swiperefreshlayout:swiperefreshlayout:1.1.0"
implementation "androidx.recyclerview:recyclerview:1.2.1"
implementation "org.jetbrains.kotlin:kotlin-stdlib:1.6.0"
implementation "org.jetbrains.kotlinx:kotlinx-coroutines-android:1.6.1"
implementation 'androidx.core:core:1.6.0'
You may also set these dependencies using the External Dependency Manager.
Step 3.4: Automate the Unity Android integration
Braze provides a native Unity solution for automating the Unity Android integration.
- In the Unity Editor, open the Braze Configuration Settings by navigating to Braze > Braze Configuration.
- Check the Automate Unity Android Integration box.
- In the Braze API Key field, input your application’s API key found in Manage Settings from the Braze dashboard.
This automatic integration should not be used with a manually created braze.xml file since the configuration values may conflict during project building. If you require a manual braze.xml, disable the automatic integration.
Step 3.1: Set your API key
Braze provides a native Unity solution for automating the Unity iOS integration. This solution modifies the built Xcode project using Unity’s PostProcessBuildAttribute and subclasses the UnityAppController using the IMPL_APP_CONTROLLER_SUBCLASS macro.
- In the Unity Editor, open the Braze Configuration Settings by navigating to Braze > Braze Configuration.
- Check the Automate Unity iOS Integration box.
- In the Braze API Key field, input your application’s API key found in Manage Settings.
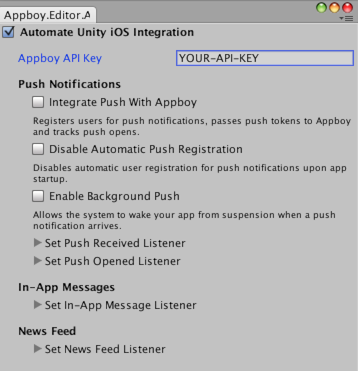
If your application is already using another UnityAppController subclass, you will need to merge your subclass implementation with AppboyAppDelegate.mm.
Customizing the Unity package
Step 1: Clone the repository
In your terminal, clone the Braze Unity SDK GitHub repository, then navigate to that folder:
1
2
git clone [email protected]:braze-inc/braze-unity-sdk.git
cd ~/PATH/TO/DIRECTORY/braze-unity-sdk
1
2
git clone git@github.com:braze-inc/braze-unity-sdk.git
cd C:\PATH\TO\DIRECTORY\braze-unity-sdk
Step 2: Export package from repository
First, launch Unity and keep it running in the background. Then, in the repository root, run the following command to export the package to braze-unity-sdk/unity-package/.
1
/Applications/Unity/Unity.app/Contents/MacOS/Unity -batchmode -nographics -projectPath "$(pwd)" -executeMethod Appboy.Editor.Build.ExportAllPackages -quit
1
"%UNITY_PATH%" -batchmode -nographics -projectPath "%PROJECT_ROOT%" -executeMethod Appboy.Editor.Build.ExportAllPackages -quit
If you experience any issues after running these commands, refer to Unity: Command Line Arguments.
Step 3: Import package into Unity
- In Unity, import the desired package into your Unity project by navigating to Assets > Import Package > Custom Package.
- If there’s any files you don’t want want to import, deselect them now.
- Customize the exported Unity package located in
Assets/Editor/Build.cs.
Switch to an automated integration (Swift only)
To take advantage of the automated iOS integration offered in the Braze Unity SDK, follow these steps on transitioning from a manual to an automated integration.
- Remove all Braze-related code from your Xcode project’s
UnityAppControllersubclass. - Remove Braze iOS libraries from your Unity or Xcode project (such as
Appboy_iOS_SDK.frameworkandSDWebImage.framework). - Import the Braze Unity package into your project again. For a full walkthrough, see Step 2: Import the package.
- Set your API key again. For a full walkthrough, see Step 3.1: Set your API key.
Optional configurations
Verbose logging
To enable verbose logging in the Unity Editor, do the following:
- Open the Braze Configuration Settings by navigating to Braze > Braze Configuration.
- Click the Show Braze Android Settings dropdown.
- In the SDK Log Level field, input the value “0”.
Prime 31 compatibility
To use the Braze Unity plugin with Prime31 plugins, edit your project’s AndroidManifest.xml to use the Prime31 compatible Activity classes. Change all references of
com.braze.unity.BrazeUnityPlayerActivity to com.braze.unity.prime31compatible.BrazeUnityPlayerActivity
Amazon Device Messaging (ADM)
Braze supports integrating ADM push into Unity apps. If you want to integrate ADM push, create a file called api_key.txt containing your ADM API key and place it in the Plugins/Android/assets/ folder. For more information on integrating ADM with Braze, visit our ADM push integration instructions.
Extending the Braze Unity player (Android only)
The example AndroidManifest.xml file provided has one Activity class registered, BrazeUnityPlayerActivity. This class is integrated with the Braze SDK and extends UnityPlayerActivity with session handling, in-app message registration, push notification analytics logging, and more. See Unity for more information on extending the UnityPlayerActivity class.
If you are creating your own custom UnityPlayerActivity in a library or plugin project, you will need to extend our BrazeUnityPlayerActivity to integrate your custom functionality with Braze. Before beginning work on extending BrazeUnityPlayerActivity, follow our instructions for integrating Braze into your Unity project.
- Add the Braze Android SDK as a dependency to your library or plugin project as described in the Braze Android SDK integration instructions.
- Integrate our Unity
.aar, which contains our Unity-specific functionality, to your Android library project you are building for Unity. Theappboy-unity.aaris available from our public repo. After our Unity library is successfully integrated, modify yourUnityPlayerActivityto extendBrazeUnityPlayerActivity. - Export your library or plugin project and drop it into
/<your-project>/Assets/Plugins/Androidas normal. Do not include any Braze source code in your library or plugin as they will already be present in/<your-project>/Assets/Plugins/Android. - Edit your
/<your-project>/Assets/Plugins/Android/AndroidManifest.xmlto specify yourBrazeUnityPlayerActivitysubclass as the main activity.
You should now be able to package an .apk from the Unity IDE that is fully integrated with Braze and contains your custom UnityPlayerActivity functionality.
Troubleshooting
Error: “File could not be read”
Errors resembling the following may be safely ignored. Apple software uses a proprietary PNG extension called CgBI, which Unity does not recognize. These errors will not affect your iOS build or the proper display of the associated images in the Braze bundle.
1
Could not create texture from Assets/Plugins/iOS/AppboyKit/Appboy.bundle/...png: File could not be read
Integrating the .NET MAUI SDK
Integrating the Braze .NET MAUI (formerly Xamarin) SDK will provide you with basic analytics functionality as well as working in-app messages with which you can engage your users.
Prerequisites
Before you can integrate the .NET MAUI Braze SDK, be sure you meet the following requirements:
- Starting in
version 3.0.0, this SDK requires using .NET 6+ and removes support for projects using the Xamarin framework. - Starting in
version 4.0.0, this SDK dropped support for Xamarin & Xamarin.Forms and added support for .NET MAUI. See Microsoft’s policy around the end of support for Xamarin.
Step 1: Get the .NET MAUI binding
A .NET MAUI binding is a way to use native libraries in .NET MAUI apps. The implementation of a binding consists of building a C# interface to the library, and then using that interface in your application. See the .NET MAUI documentation. There are two ways to include the Braze SDK binding: using NuGet or compiling from source.
The simplest integration method involves getting the Braze SDK from the NuGet.org central repository. In the Visual Studio sidebar, right click Packages folder and click Add Packages.... Search for ‘Braze’ and install the BrazePlatform.BrazeAndroidBinding package into your project.
To use Braze location services and geofences, also install the BrazePlatform.BrazeAndroidLocationBinding package.
The second integration method is to include the binding source. Under appboy-component/src/androidnet6 you will find our binding source code; adding a project reference to the BrazeAndroidBinding.csproj in your .NET MAUI application will cause the binding to be built with your project and provide you access to the Braze Android SDK.
To use Braze location services and geofences, also add a project reference to the BrazeAndroidLocationBinding.csproj found under appboy-component/src/androidnet6/BrazeAndroidLocationBinding.
The iOS bindings for .NET MAUI SDK version 4.0.0 and later use the Braze Swift SDK, while previous versions use the legacy AppboyKit SDK.
A .NET MAUI binding is a way to use native libraries in .NET MAUI apps. The implementation of a binding consists of building a C# interface to the library and then using that interface in your application. There are two ways to include the Braze SDK binding: using NuGet or compiling from source.
The simplest integration method involves getting the Braze SDK from the NuGet.org central repository. In the Visual Studio sidebar, right-click Packages folder and click Add Packages.... Search for ‘Braze’ and install the latest .NET MAUI iOS NuGet packages: Braze.iOS.BrazeKit, Braze.iOS.BrazeUI, and Braze.iOS.BrazeLocation into your project.
We also provide the compatibility libraries packages: Braze.iOS.BrazeKitCompat and Braze.iOS.BrazeUICompat, to help make your migration to .NET MAUI easier.
The second integration method is to include the binding source. Under appboy-component/src/iosnet6 you will find our binding source code; adding a project reference to the BrazeiOSBinding.csproj in your .NET MAUI application will cause the binding to be built with your project and provide you access to the Braze iOS SDK. Make sure BrazeiOSBinding.csproj is showing in your project’s “Reference” folder.
Step 2: Configure your Braze instance
Step 2.1: Configure the Braze SDK in Braze.xml
Now that the libraries have been integrated, you have to create an Braze.xml file in your project’s Resources/values folder. The contents of that file should resemble the following code snippet:
Be sure to substitute YOUR_API_KEY with the API key located at Settings > API Keys in the Braze dashboard.
1
2
3
4
5
6
7
8
9
  <?xml version="1.0" encoding="utf-8"?>
  <resources>
    <string translatable="false" name="com_braze_api_key">YOUR_API_KEY</string>
    <string translatable="false" name="com_braze_custom_endpoint">YOUR_CUSTOM_ENDPOINT_OR_CLUSTER</string>
    <string-array name="com_braze_internal_sdk_metadata">
      <item>XAMARIN</item>
      <item>NUGET</item>
    </string-array>
  </resources>
If you are including the binding source manually, remove <item>NUGET</item> from your code.
Step 2.2: Add required permissions to Android manifest
Now that you’ve added your API key, you need to add the following permissions to your AndroidManifest.xml file:
1
<uses-permission android:name="android.permission.INTERNET" />
For an example of your AndroidManifest.xml, see the Android MAUI sample application.
Step 2.3: Track user sessions and registering for in-app messages
To enable user session tracking and register your app for in-app messages, add the following call to the OnCreate() lifecycle method of the Application class in your app:
1
RegisterActivityLifecycleCallbacks(new BrazeActivityLifecycleCallbackListener());
When setting up your Braze instance, add the following snippet to configure your instance:
Be sure to substitute YOUR_API_KEY with the API key located at Settings > API Keys in the Braze dashboard.
1
2
3
var configuration = new BRZConfiguration("YOUR_API_KEY", "YOUR_ENDPOINT");
configuration.Api.AddSDKMetadata(new[] { BRZSDKMetadata.Xamarin });
braze = new Braze(configuration);
See the App.xaml.cs file in the iOS MAUI sample application.
Step 3: Test the integration
Now you can launch your application and see sessions being logged to the Braze dashboard (along with device information and other analytics). For a more in-depth discussion of best practices for the basic SDK integration, consult the Android integration instructions.
Now you can launch your application and see sessions being logged to the Braze dashboard. For a more in-depth discussion of best practices for the basic SDK integration, consult the iOS integration instructions.
Our current public .NET MAUI binding for the iOS SDK does not connect to the iOS Facebook SDK (linking social data) and does not include sending the IDFA to Braze.
ChatGPT app integration
Setup
Step 1: Get the Braze integration file
Copy the braze.js file from our ChatGPT apps integration repository to your project. This file contains all the necessary Braze SDK configuration and helper functions.
Step 2: Install dependencies
Install our Web SDK for Braze’s most up-to-date set of features:
For client-side integration:
1
npm install @braze/web-sdk
Implementation
There are two ways to integrate Braze with your ChatGPT app depending on your use case:
Client-side integration (custom widgets)
Recommended Approach: This method enables rich messaging experiences and real-time user interaction tracking within your ChatGPT app widgets.
For displaying Braze messaging and tracking user interactions within your custom ChatGPT app widgets, use the Web SDK integration. A full messaging example can be found in our sample repository here.
Configure widget metadata
Add the following metadata to your MCP server file to allow Braze domains, ensuring to update the CDN domain based on your region:
1
2
3
4
5
6
7
8
9
"openai/widgetCSP": {
  connect_domains: ["https://YOUR-SDK-ENDPOINT"],
  resource_domains: [
    "https://appboy-images.com",
    "https://braze-images.com",
    "https://cdn.braze.eu",
    "https://use.fontawesome.com"
  ],
}
Replace YOUR-SDK-ENDPOINT with your actual Braze SDK endpoint.
Set up the useBraze hook
1
2
3
4
5
6
7
8
9
10
11
12
13
14
15
16
17
18
19
20
21
22
23
24
import { useBraze } from "./utils/braze";

function YourWidget() {
  const braze = useBraze({
    apiKey: "your-braze-api-key",
    baseUrl: "your-braze-endpoint.braze.com",
  });

  useEffect(() => {
    if (!braze.isInitialized) {
      return;
    }

    // Set user identity
    braze.changeUser("user-id-123");

    // Log widget interactions
    braze.logCustomEvent("viewed_pizzaz_list");
  }, [braze.isInitialized]);

  return (
    // Your widget JSX
  );
}
Display Braze Content Cards
1
2
3
4
5
6
7
8
9
10
11
12
13
14
15
16
17
18
const [cards, setCards] = useState([]);

useEffect(() => {
  // Get cached content cards
  setCards(braze.getCachedContentCards()?.cards ?? []);

  // Subscribe to content card updates
  braze.subscribeToContentCardsUpdates((contentCards) => {
    setCards(contentCards.cards);
  });

  // Open session
  braze.openSession();

  return () => {
    braze.removeAllSubscriptions();
  }
}, []);
Track widget events
1
2
3
4
5
6
7
8
9
10
11
12
13
14
// Track user interactions within your widget
const handleButtonClick = () => {
  braze.logCustomEvent("widget_button_clicked", {
    button_type: "save_list",
    widget_name: "pizza_list"
  });
};

const handleItemInteraction = (itemId) => {
  braze.logCustomEvent("item_interacted", {
    item_id: itemId,
    interaction_type: "view_details"
  });
};
Server-side integration (MCP server)
If you also need a server-side integration for messaging functionality on your MCP server, contact [email protected]. For tracking events and purchases from your MCP server, use our REST API.
About the Braze Vega SDK
The Braze Vega SDK lets you collect analytics and display rich in-app messages to your users. Most methods in the Braze Vega SDK are asynchronous and return promises that should be awaited or resolved.
Integrating the Braze Vega SDK
Step 1: Install the Braze library
Install the Braze Vega SDK using your preferred package manager.
If your project uses NPM, you can add the Braze Vega SDK as a dependency.
1
npm install @braze/vega-sdk --save
After installation, you can import the methods you need:
1
import { initialize, changeUser, openSession } from "@braze/vega-sdk";
If your project uses Yarn, you can add the Braze Vega SDK as a dependency.
1
yarn add @braze/vega-sdk
After installation, you can import the methods you need:
1
import { initialize, changeUser, openSession } from "@braze/vega-sdk";
Step 2: Initialize the SDK
After the Braze Vega SDK is added to your project, initialize the library with the API key and SDK endpoint URL found in Settings > App Settings within your Braze dashboard.
You must await or resolve the changeUser promise before calling other Braze methods, or events and attributes may be set on the incorrect user.
1
2
3
4
5
6
7
8
9
10
11
12
13
14
15
16
17
18
19
20
21
22
23
24
25
26
27
28
29
30
31
32
33
34
35
36
37
38
39
import { useEffect } from "react-native";
import {
  initialize,
  changeUser,
  logCustomEvent,
  openSession,
  setCustomUserAttribute,
  setUserCountry
} from "@braze/vega-sdk";

const App = () => {
  useEffect(() => {
    const initBraze = async () => {
      // Initialize the SDK
      await initialize("YOUR-API-KEY", "YOUR-SDK-ENDPOINT", {
        sessionTimeoutInSeconds: 60,
        appVersionNumber: "1.2.3.4",
        enableLogging: true, // set to `true` for debugging
      });

      // Change user
      await changeUser("user-id-123");

      // Start a session
      await openSession();

      // Log custom events and set user attributes
      logCustomEvent("visited-page", { pageName: "home" });
      setCustomUserAttribute("my-attribute", "my-attribute-value");
      setUserCountry("USA");
    };

    initBraze();
  }, []);

  return (
    // Your app components
  );
};
Anonymous users may be counted towards your MAU. As a result, you may want to conditionally load or initialize the SDK to exclude these users from your MAU count.
Optional configurations
Logging
You can enable SDK logging to help with debugging and troubleshooting. There are multiple ways to enable logging.
Enable logging during initialization
Pass enableLogging: true to initialize() to log debugging messages to the console:
1
2
3
initialize("YOUR-API-KEY", "YOUR-SDK-ENDPOINT", {
  enableLogging: true
});
Basic logs are visible to all users, so consider disabling logging before releasing your code to production.
Enable logging after initialization
Use toggleLogging() to enable or disable SDK logging after initialization:
1
2
3
4
import { toggleLogging } from "@braze/vega-sdk";

// Enable logging
toggleLogging();
Custom logging
Use setLogger() to provide a custom logger function for more control over how SDK logs are handled:
1
2
3
4
5
6
import { setLogger } from "@braze/vega-sdk";

setLogger((message) => {
  console.log("Braze Custom Logger: " + message);
  // Add your custom logging logic here
});
Configuration options
You can pass additional configuration options to initialize() to customize the SDK behavior:
1
2
3
4
5
await initialize("YOUR-API-KEY", "YOUR-SDK-ENDPOINT", {
  sessionTimeoutInSeconds: 60,        // Configure session timeout (default is 1800 seconds)
  appVersionNumber: "1.2.3.4",        // Set your app version
  enableLogging: true,                 // Enable SDK logging
});
Upgrading the SDK
When you reference the Braze Vega SDK from NPM or Yarn, you can upgrade to the latest version by updating your package dependency:
1
2
3
npm update @braze/vega-sdk
# or, using yarn:
yarn upgrade @braze/vega-sdk
Testing your integration
To verify your SDK integration is working correctly:
- Initialize the SDK with
enableLogging: trueto see debug messages in the console - Ensure you
await changeUser()before calling other SDK methods - Call
await openSession()to start a session - Check your Braze dashboard under Overview to verify that session data is being recorded
- Test logging a custom event and verify it appears in your dashboard
While performing QA on your SDK integration, use the SDK Debugger to get troubleshoot issues without turning on verbose logging for your app.