This page references our older Objective-C SDK. Check out our new Swift SDK to integrate our latest Swift-first library.
CocoaPods integration
Step 1: Install CocoaPods
Installing the iOS SDK via CocoaPods automates the majority of the installation process for you. Before beginning this process, make sure you use Ruby version 2.0.0 or greater. Don’t worry, knowledge of Ruby syntax isn’t necessary to install this SDK.
Run the following command to get started:
1
$ sudo gem install cocoapods
If you have issues regarding CocoaPods, refer to the CocoaPods troubleshooting guide.
If prompted to overwrite the rake executable, refer to the Getting started directions on CocoaPods.org for more details.
Step 2: Constructing the Podfile
Now that you’ve installed the CocoaPods Ruby Gem, you will need to create a file in your Xcode project directory named Podfile.
Add the following line to your Podfile:
1
2
3
target 'YourAppTarget' do
  pod 'Appboy-iOS-SDK'
end
We suggest you version Braze so pod updates automatically grab anything smaller than a minor version update. This looks like pod 'Appboy-iOS-SDK' ~> Major.Minor.Build. If you want to automatically integrate the latest Braze SDK version, even with major changes, you can use pod 'Appboy-iOS-SDK' in your Podfile.
Subspecs
We recommend that integrators import our full SDK. However, if you are certain that you are only going to integrate a particular Braze feature, you can import just the desired UI subspec instead of the full SDK.
| Subspec | Details |
|---|---|
pod 'Appboy-iOS-SDK/InAppMessage' |
The InAppMessage subspec contains the Braze in-app message UI and the Core SDK. |
pod 'Appboy-iOS-SDK/ContentCards' |
The ContentCards subspec contains the Braze Content Card UI and the Core SDK. |
pod 'Appboy-iOS-SDK/NewsFeed' |
The NewsFeed subspec contains the Braze Core SDK. |
pod 'Appboy-iOS-SDK/Core' |
The Core subspec contains support for analytics, such as custom events and attributes. |
Step 3: Installing the Braze SDK
To install the Braze SDK CocoaPods, navigate to the directory of your Xcode app project within your terminal and run the following command:
1
pod install
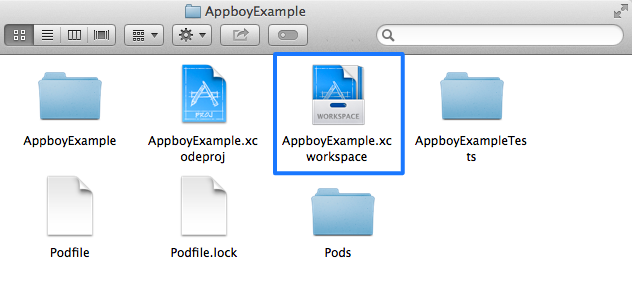
At this point, you should be able to open the new Xcode project workspace created by CocoaPods. Make sure to use this Xcode workspace instead of your Xcode project.

Next steps
Follow the instructions for completing the integration.
Updating the Braze SDK via CocoaPods
To update a CocoaPod, simply run the following command within your project directory:
1
pod update
 Edit this page on GitHub