푸시 스토리
Braze SDK용 푸시 스토리를 설정하는 방법을 알아보세요.
필수 조건
이 기능을 사용하려면 먼저 Swift Braze SDK를 통합해야 합니다. 푸시 알림도 설정해야 하며, 여기에는 UNNotification 프레임워크 구현이 포함됩니다.
Push Stories를 수신하려면 다음 최소 SDK 버전이 필요합니다:
Push Stories 설정
1단계: 알림 콘텐츠 확장 타겟 추가
앱 프로젝트에서 File > New > Target 메뉴로 이동하여 새 Notification Content Extension 타겟을 추가하고 활성화합니다.
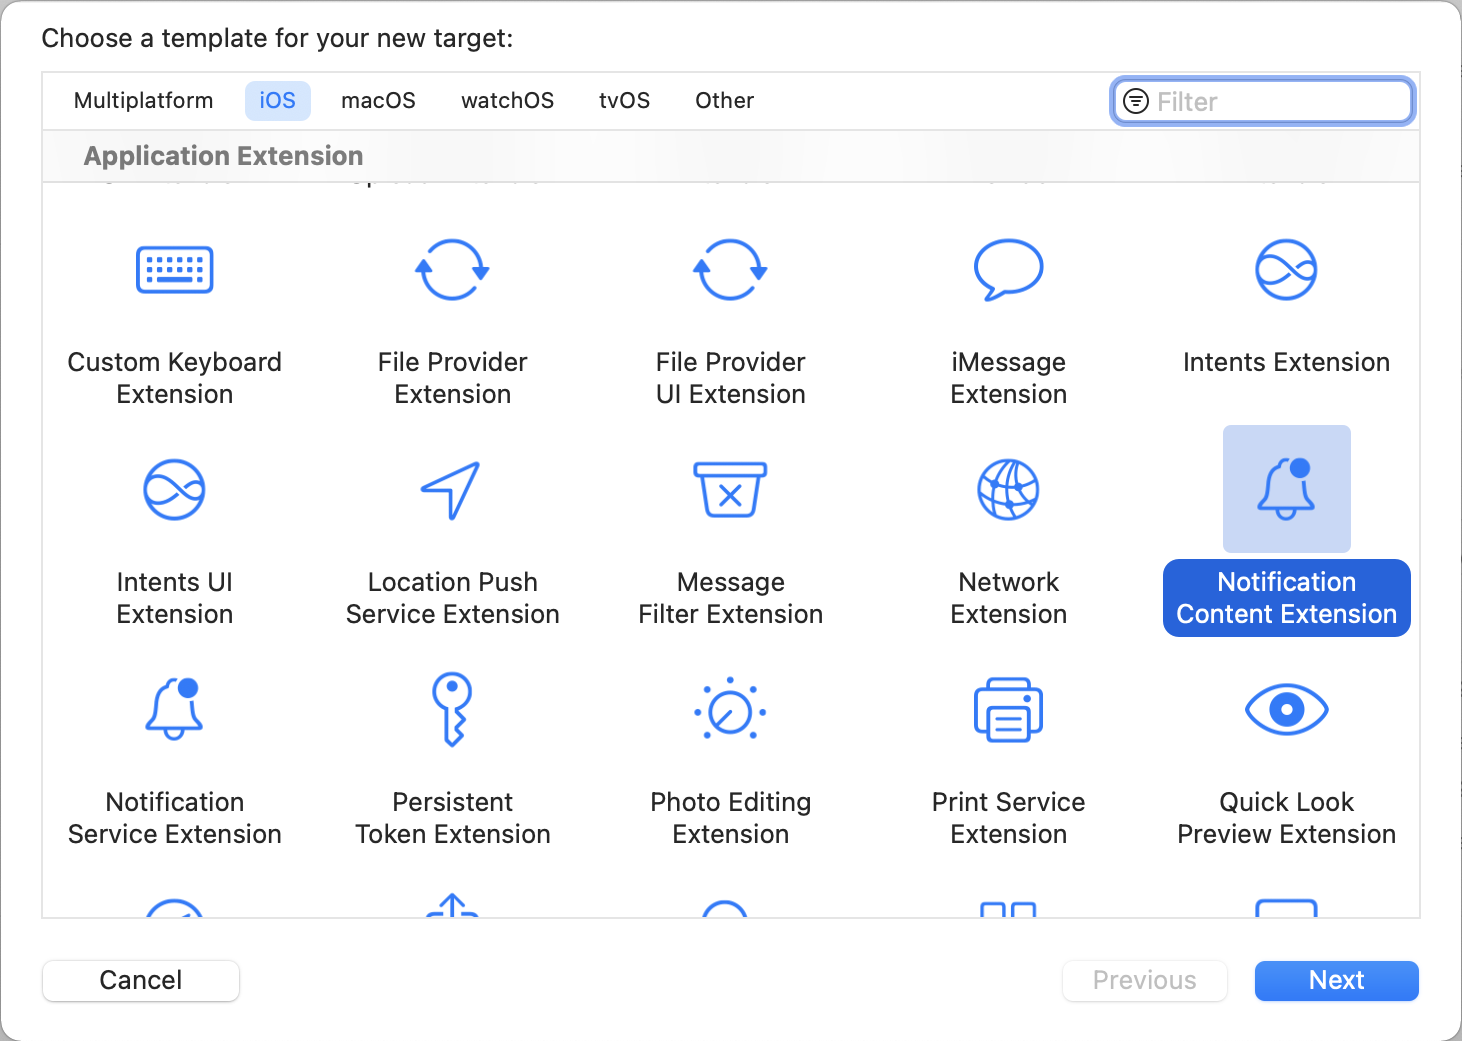
Xcode가 새 타겟을 생성하고 다음 파일을 자동으로 생성합니다:
NotificationViewController.swiftMainInterface.storyboard
2단계: 기능 활성화
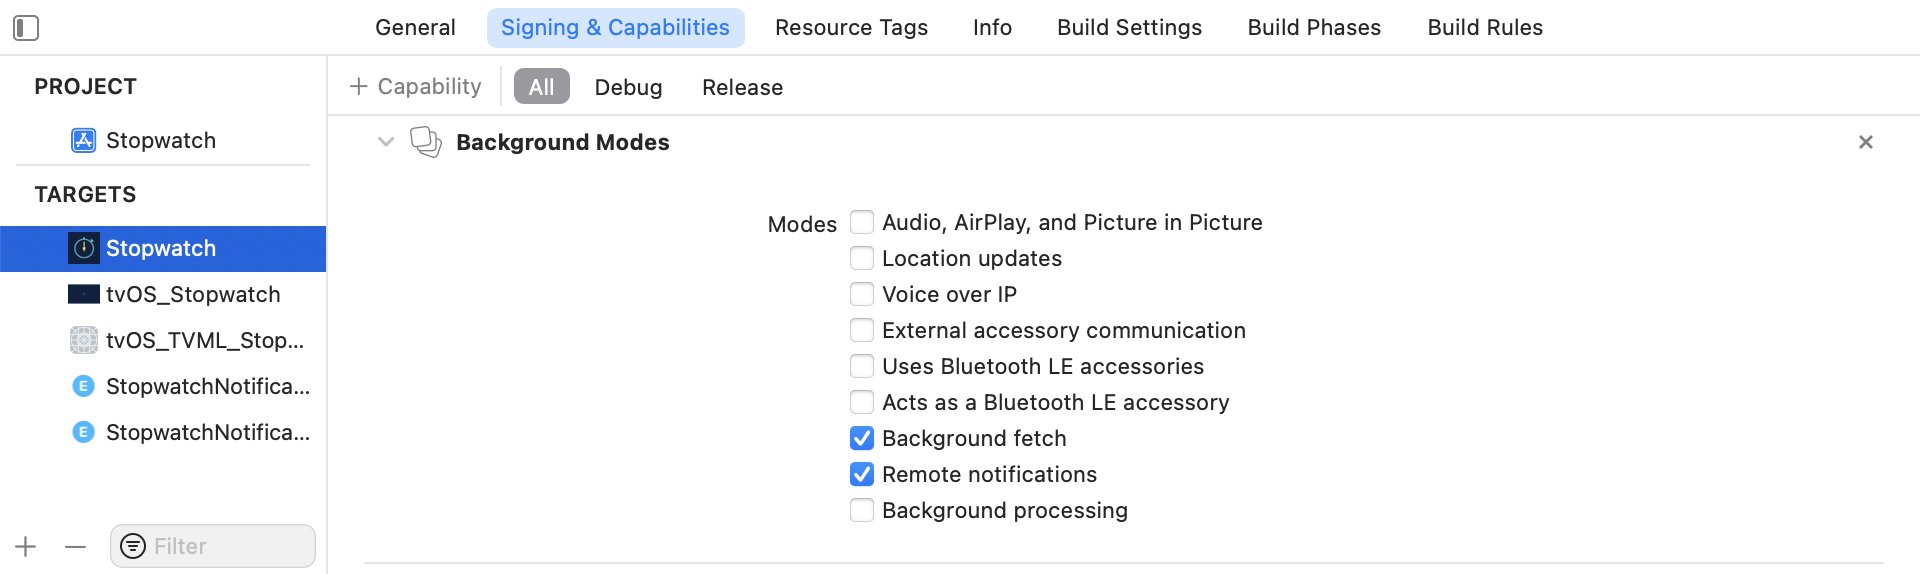
Xcode에서 메인 앱 타겟의 Signing & Capabilities 패널을 사용하여 Background Modes 기능을 추가합니다. Background fetch와 Remote notifications 체크박스를 모두 선택합니다.
앱 그룹 추가
또한 Xcode의 Signing & Capabilities 패널에서 메인 앱 타겟과 알림 콘텐츠 확장 타겟 모두에 App Groups 기능을 추가합니다. 그런 다음 + 버튼을 클릭합니다. 앱의 번들 ID를 사용하여 앱 그룹을 생성합니다. 예를 들어 앱의 번들 ID가 com.company.appname이면 앱 그룹 이름을 group.com.company.appname.xyz로 지정할 수 있습니다.

앱을 앱 그룹에 추가하지 않으면 앱이 푸시 페이로드에서 특정 필드를 채우지 못할 수 있으며, 예상대로 완전히 작동하지 않을 수 있습니다.
3단계: 앱에 Push Story 프레임워크 추가

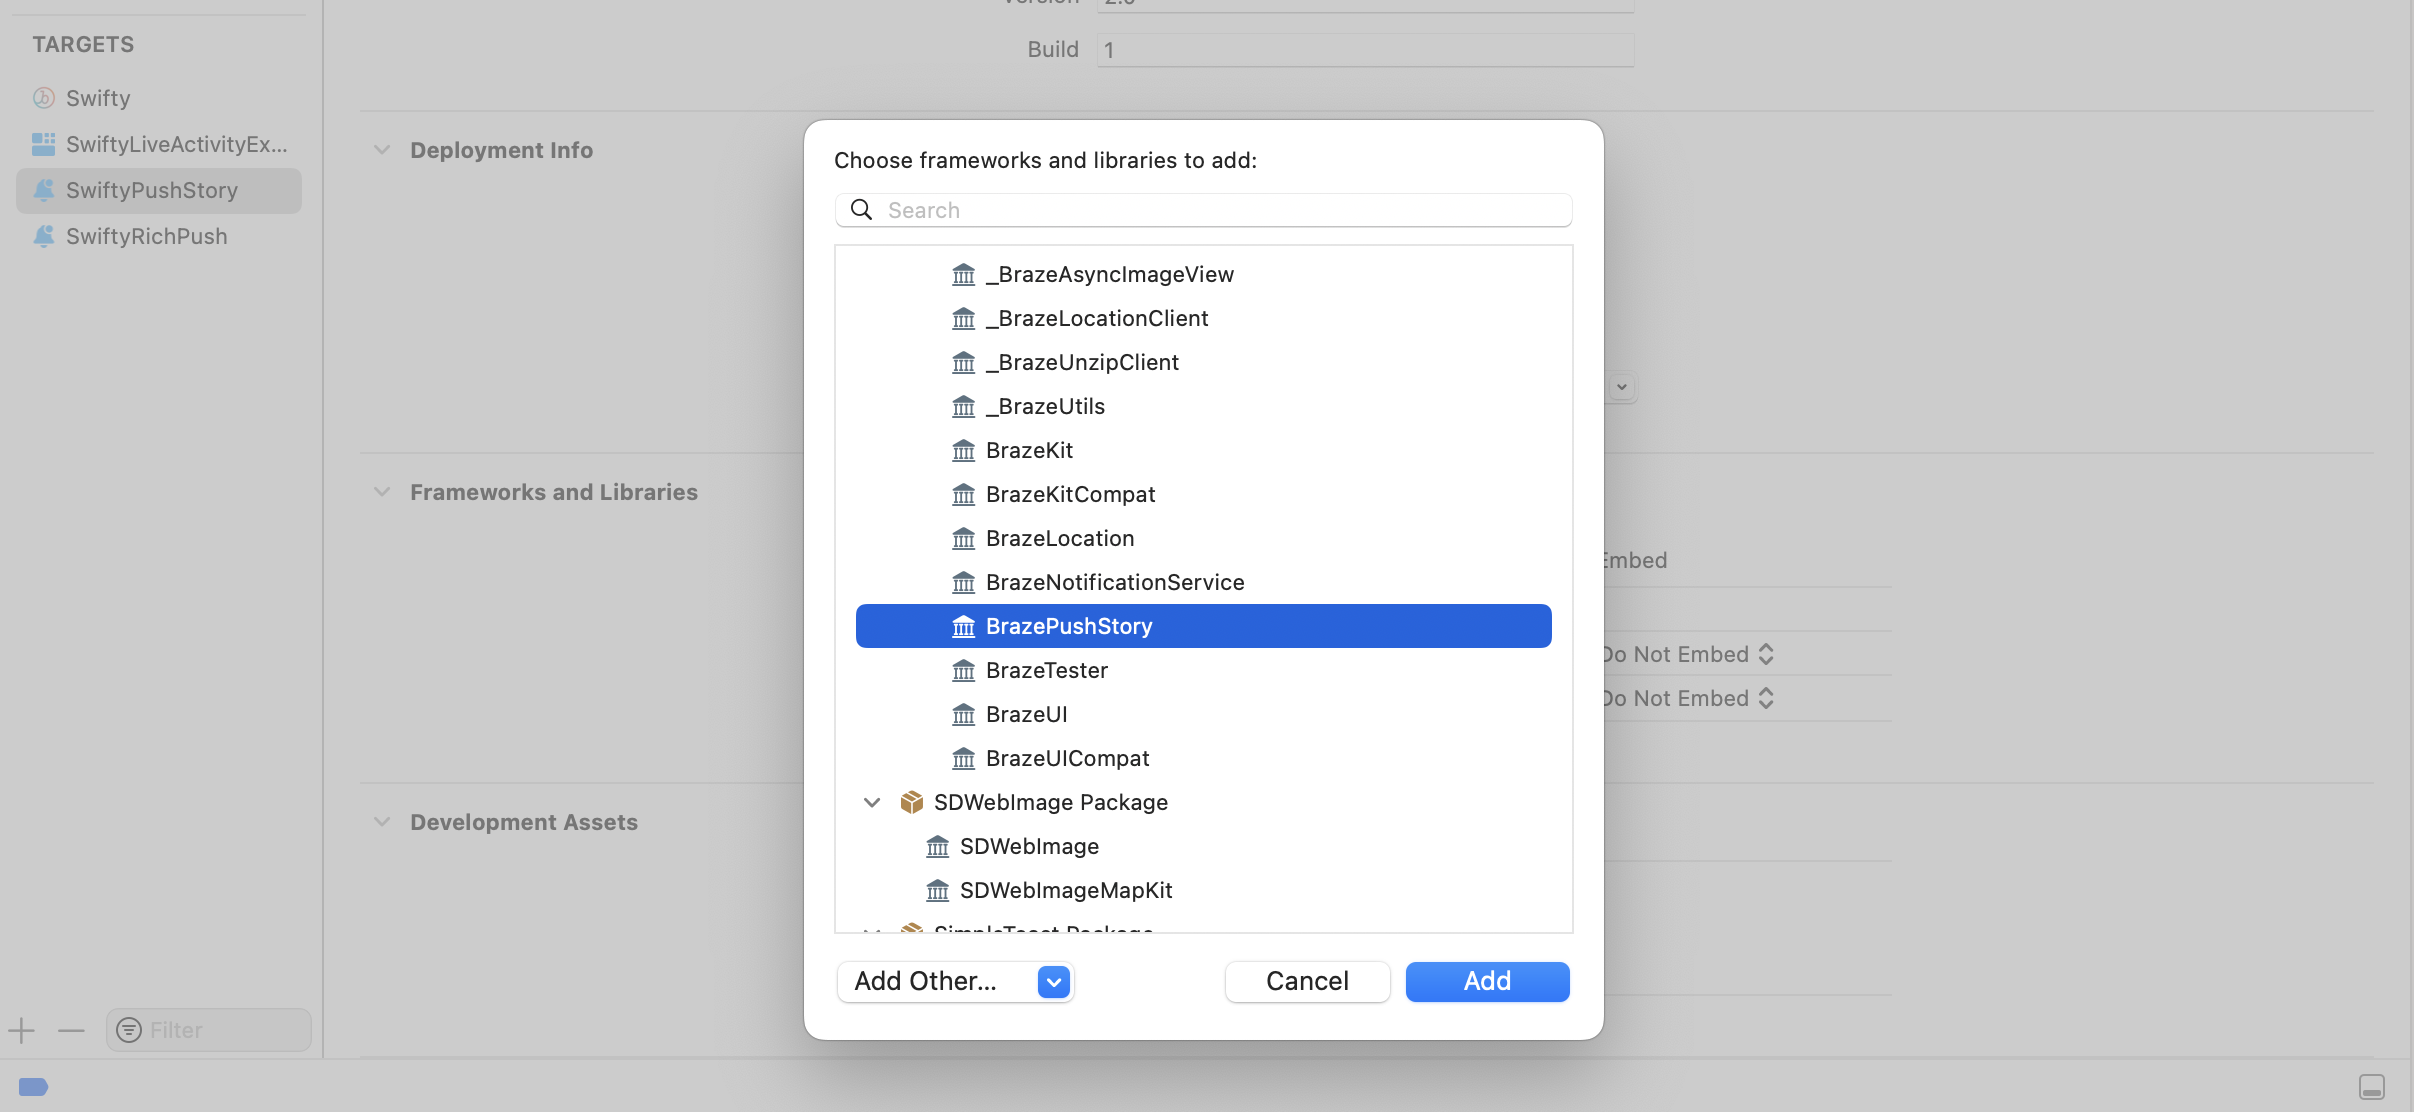
Podfile에 다음 줄을 추가합니다:
target 'YourAppTarget' do
pod 'BrazeKit'
pod 'BrazeUI'
pod 'BrazeLocation'
end
target 'YourNotificationContentExtensionTarget' do
pod 'BrazePushStory'
end
# Only include the below if you want to also integrate Rich Push
target 'YourNotificationServiceExtensionTarget' do
pod 'BrazeNotificationService'
end

Podfile을 업데이트한 후 터미널에서 Xcode 앱 프로젝트의 디렉토리로 이동하여 pod install을 실행합니다.
GitHub 릴리스 페이지에서 최신 BrazePushStory.zip을 다운로드하고 압축을 풀어 프로젝트의 Notification Content Extension에 BrazePushStory.xcframework를 추가합니다.

Embed 열에서 BrazePushStory.xcframework에 대해 Do Not Embed가 선택되어 있는지 확인하세요.
4단계: 알림 뷰 컨트롤러 업데이트
NotificationViewController.swift에서 다음 줄을 추가하여 헤더 파일을 가져옵니다:
import BrazePushStory
그런 다음 BrazePushStory.NotificationViewController를 상속하여 기본 구현을 대체합니다:
class NotificationViewController: BrazePushStory.NotificationViewController {}
Push Story 이벤트 커스텀 처리
푸시 스토리 알림 이벤트를 처리하기 위한 커스텀 로직을 구현하려면 앞의 예시처럼 BrazePushStory.NotificationViewController를 상속하고 다음 예시의 didReceive 메서드를 오버라이드합니다.
import BrazePushStory
import UserNotifications
import UserNotificationsUI
class NotificationViewController: BrazePushStory.NotificationViewController {
override func didReceive(_ notification: UNNotification) {
super.didReceive(notification)
// Custom handling logic
}
override func didReceive(_ response: UNNotificationResponse, completionHandler completion: @escaping (UNNotificationContentExtensionResponseOption) -> Void) {
super.didReceive(response, completionHandler: completion)
// Custom handling logic
}
}
5단계: 알림 콘텐츠 확장 plist 설정
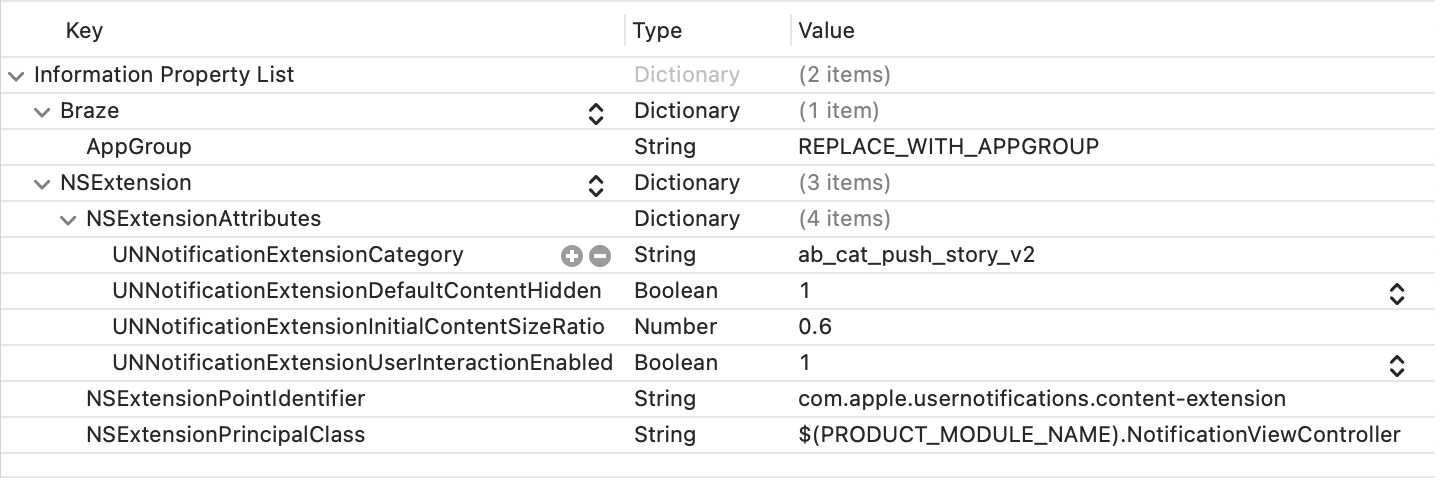
Notification Content Extension의 Info.plist 파일을 열고 NSExtension \ NSExtensionAttributes 아래에 다음 키를 추가하고 변경합니다:
| 키 | 유형 | 값 |
|---|---|---|
UNNotificationExtensionCategory |
String | ab_cat_push_story_v2 |
UNNotificationExtensionDefaultContentHidden |
Boolean | YES |
UNNotificationExtensionInitialContentSizeRatio |
Number | 0.6 |
UNNotificationExtensionUserInteractionEnabled |
Boolean | YES |
또한 동일한 Info.plist 파일에 다음 최상위 Braze 딕셔너리를 추가하고, REPLACE_WITH_APPGROUP을 2단계에서 생성한 앱 그룹으로 대체합니다:
| 키 | 유형 | 값 |
|---|---|---|
Braze.AppGroup |
String | REPLACE_WITH_APPGROUP |
Info.plist 파일은 다음 이미지와 일치해야 합니다:
6단계: 메인 앱에서 Braze 통합 업데이트
Braze를 초기화하기 전에 앱 그룹 이름을 Braze 구성의 push.appGroup 속성정보에 할당합니다.
let configuration = Braze.Configuration(apiKey: "<YOUR-BRAZE-API-KEY>",
endpoint: "<YOUR-BRAZE-ENDPOINT>")
configuration.push.appGroup = "REPLACE_WITH_APPGROUP"
let braze = Braze(configuration: configuration)
필수 조건
이 기능을 사용하려면 먼저 Cordova Braze SDK를 통합해야 합니다. 푸시 알림도 설정해야 합니다.
푸시 스토리 설정
1단계: 알림 콘텐츠 확장 만들기
Xcode 프로젝트에서 알림 콘텐츠 확장을 만듭니다. 전체 워크스루는 iOS Push Stories 튜토리얼을 참조하세요.
2단계: 푸시 앱 그룹 구성
프로젝트의 config.xml 파일에서 방금 만든 푸시 앱 그룹을 구성합니다.
<preference name="com.braze.ios_push_app_group" value="NOTIFICATION_CONTENT_EXTENTION" />
PUSH_APP_GROUP을 푸시 앱 그룹의 이름으로 바꿉니다. config.xml은 다음과 유사해야 합니다:
<preference name="com.braze.ios_push_app_group" value="MyPushAppGroup" />
3단계: 새 타겟 추가
Podfile을 열고 이전에 만든 알림 콘텐츠 확장 타겟에 BrazePushStory를 추가합니다. 중복 심볼 오류를 방지하려면 정적 링킹을 사용합니다.
target 'NOTIFICATION_CONTENT_EXTENSION' do
use_frameworks! :linkage => :static
pod 'BrazePushStory'
end
NOTIFICATION_CONTENT_EXTENSION을 알림 콘텐츠 확장의 이름으로 바꿉니다. Podfile은 다음과 유사해야 합니다:
target 'MyAppNotificationContentExtension' do
use_frameworks! :linkage => :static
pod 'BrazePushStory'
end
4단계: CocoaPods 종속성 재설치
터미널에서 iOS 디렉토리로 이동하여 CocoaPod 종속성을 다시 설치합니다.
cd PATH_TO_PROJECT/platform/ios
pod install
필수 조건
이 기능을 사용하려면 먼저 React Native Braze SDK를 통합해야 합니다. 푸시 알림도 설정해야 합니다.
푸시 스토리 활성화
React Native SDK의 경우 푸시 스토리는 Android에서 기본적으로 사용할 수 있습니다.
Expo를 사용하여 iOS에서 푸시 스토리를 활성화하려면 애플리케이션에 앱 그룹이 정의되어 있어야 합니다. 자세한 내용은 앱 그룹 추가를 참조하세요.
다음으로, app.json의 expo.plugins 객체에서 enableBrazeIosPushStories 속성정보를 true로 설정하고, iosPushStoryAppGroup에 앱 그룹 ID를 지정합니다:
{
"expo": {
"plugins": [
[
"@braze/expo-plugin",
{
...
"enableBrazeIosPushStories": true,
"iosPushStoryAppGroup": "group.com.company.myApp.PushStories"
}
]
]
}
}
마지막으로, 이 앱 확장의 번들 식별자를 프로젝트의 자격 증명 구성에 추가합니다: <your-app-bundle-id>.BrazeExpoPushStories. 이 과정에 대한 자세한 내용은 Expo Application Services에서 앱 확장 사용하기를 참조하세요.

Expo Application Services에서 Push Stories를 사용하는 경우, eas build를 실행할 때 반드시 EXPO_NO_CAPABILITY_SYNC=1 플래그를 사용하세요. 명령줄에 확장의 프로비저닝 프로필에서 App Groups 기능을 제거하는 알려진 문제가 있습니다.