# Braze Developer Guide Full Text
Consolidated full markdown text for all pages in the Developer Guide collection.
# Guía del desarrollador de Braze
Source: /docs/es/developer_guide/home/index.md
Guía del desarrollador de Braze
Aquí es donde los desarrolladores pueden encontrar todo lo que necesitan saber sobre el SDK de Braze. Cada SDK está alojado en su propio repositorio público de GitHub, que incluye aplicaciones de ejemplo totalmente compilables que puedes utilizar para probar las características de Braze o implementar junto con tus propias aplicaciones. Para obtener más información, consulta Referencias, repositorios y aplicaciones de ejemplo . ¿Quieres conectar, aprender e inspirarte con otros desarrolladores que crean con Braze? ¡Únete a la comunidad de desarrolladores de Braze !
Esta página de inicio es donde los desarrolladores pueden encontrar todas las integraciones disponibles con Braze.
Featured:
- Web
- Android
- Swift
# Guía de inicio
Source: /docs/es/developer_guide/getting_started/index.md
Puedes seguir esta guía o consultar [Braze Learning](https://learning.braze.com) para obtener cursos guiados, como nuestros itinerarios de aprendizaje [para especialistas en marketing](https://learning.braze.com/path/marketer) y [para desarrolladores](https://learning.braze.com/path/developer).
# Resumen del SDK para desarrolladores
Source: /docs/es/developer_guide/getting_started/sdk_overview/index.md
# [](https://learning.braze.com/path/developer/sdk-integration-basics){: style="float:right;width:120px;border:0;" class="noimgborder"}Resumen del SDK para desarrolladores {#braze-learning-course-image_buster-assetsimgbl_icon3png-httpslearningbrazecompathdevelopersdk-integration-basics-stylefloatrightwidth120pxborder0-classnoimgbordersdk-overview-for-developers}
> Antes de empezar a integrar los SDK de Braze, puede que te preguntes qué estás construyendo e integrando exactamente. Quizá tengas curiosidad por saber cómo puedes personalizar el SDK para adaptarlo aún más a tus necesidades. Este artículo puede ayudarte a responder a todas tus preguntas sobre el SDK.
¿Eres especialista en marketing y buscas un resumen básico del SDK? Echa un vistazo a nuestro [resumen para especialistas en marketing](https://www.braze.com/docs/es/es/user_guide/get_started/sdk_overview).
En resumen, el SDK de Braze:
* Recoge y sincroniza los datos de usuario en un perfil de usuario consolidado
* Recoge automáticamente datos de sesión, información del dispositivo y tokens de notificaciones push
* Captura datos de interacción de marketing y datos personalizados específicos de tu empresa
* Potencia las notificaciones push, los mensajes dentro de la aplicación y los canales de mensajería de Content Cards
Mira el siguiente video para una breve introducción a los conceptos básicos de integración del SDK de Braze y su funcionalidad principal.
## Rendimiento de la aplicación {#app-performance}
Braze no debería tener ningún impacto negativo en el rendimiento de tu aplicación.
Los SDK de Braze ocupan muy poco espacio. Cambiamos automáticamente la tasa de vaciado de datos de usuario en función de la calidad de la red, además de permitir el control manual de la red. Agrupamos automáticamente las solicitudes de API del SDK para asegurarnos de que los datos se registren rápidamente y se mantenga, al mismo tiempo, la máxima eficiencia de la red. Por último, la cantidad de datos enviados desde el cliente a Braze en cada llamada a la API es extremadamente pequeña.
## Compatibilidad del SDK {#sdk-compatibility}
El SDK de Braze está diseñado para comportarse muy bien y no interferir con otros SDK presentes en tu aplicación. Si experimentas algún problema que creas que puede deberse a una incompatibilidad con otro SDK, ponte en contacto con el soporte de Braze.
## Análisis predeterminados y gestión de sesiones {#default-analytics-and-session-handling}
Nuestro SDK recopila automáticamente determinados datos de usuario, por ejemplo, primera aplicación utilizada, última aplicación utilizada, recuento total de sesiones, sistema operativo del dispositivo, etc. Si sigues nuestras guías de integración para implementar nuestros SDK, podrás aprovechar esta [recopilación de datos predeterminada](https://www.braze.com/docs/es/es/user_guide/data/unification/user_data/sdk_data_collection). Comprobar esta lista puede ayudarte a evitar almacenar la misma información sobre los usuarios más de una vez. A excepción del inicio y el final de la sesión, el resto de datos registrados automáticamente no se tienen en cuenta para el uso de puntos de datos.
**Note:**
Todas nuestras características son configurables, pero es una buena idea implementar completamente el modelo predeterminado de recopilación de datos.
Si es necesario para tu caso de uso, puedes [limitar la recogida de determinados datos](#blocking-data-collection) una vez finalizada la integración.
## Carga y descarga de datos {#data-upload-and-download}
El SDK de Braze almacena en caché los datos (sesiones, eventos personalizados, etc.) y los carga periódicamente. Solo cuando se hayan cargado los datos se actualizarán los valores en el dashboard. El intervalo de carga tiene en cuenta el estado del dispositivo y se rige por la calidad de la conexión a la red:
| Calidad de la conexión a la red | Intervalo de vaciado de datos |
|---|---|
| Excelente | 10 segundos |
| Buena | 30 segundos |
| Deficiente | 60 segundos |
{: .reset-td-br-1 .reset-td-br-2 aria-label="Carga y descarga de datos" }
Si no hay conexión de red, los datos se almacenan en caché localmente en el dispositivo hasta que se restablezca la conexión de red. Cuando se restablezca la conexión, los datos se cargarán en Braze.
Braze envía datos al SDK al inicio de una sesión en función de los segmentos en los que se encuentra el usuario en el momento de la sesión. Los nuevos mensajes dentro de la aplicación no se actualizarán durante la sesión. Sin embargo, los datos de usuario durante la sesión se procesarán continuamente a medida que se envíen desde el cliente. Por ejemplo, un usuario inactivo (que utilizó la aplicación por última vez hace más de 7 días) seguirá recibiendo contenido dirigido a usuarios inactivos en su primera sesión de vuelta a la aplicación.
## Bloqueo de la recopilación de datos {#blocking-data-collection}
Es posible (aunque no se recomienda) bloquear la recopilación automática de ciertos datos de tu integración de SDK, o incluir en una lista de permitidos los procesos que lo hagan.
No se recomienda bloquear la recopilación de datos porque eliminar los datos de análisis reduce la capacidad de personalización y segmentación de tu plataforma. Por ejemplo:
- Si decides no realizar una integración completa para la ubicación en uno de los SDK, no podrás personalizar tu mensajería en función del idioma o la ubicación.
- Si decides no realizar la integración para la zona horaria, es posible que no puedas enviar mensajes dentro de la zona horaria de un usuario.
- Si decides no realizar la integración para la información visual de un dispositivo específico, es posible que el contenido de los mensajes no esté optimizado para ese dispositivo.
Recomendamos encarecidamente integrar completamente los SDK para aprovechar al máximo las capacidades de nuestro producto.
Puedes simplemente no integrar determinadas partes del SDK, o utilizar [`disableSDK`](https://js.appboycdn.com/web-sdk/latest/doc/modules/braze.html#disablesdk) para un usuario. Este método sincronizará los datos registrados antes de que se llamara a `disableSDK()`, y hará que se ignoren todas las llamadas posteriores al SDK Web de Braze para esta página y para futuras cargas de páginas. Si deseas reanudar la recopilación de datos en un momento posterior, puedes utilizar el método [`enableSDK()`](https://js.appboycdn.com/web-sdk/latest/doc/modules/braze.html#enablesdk) en el futuro para reanudar la recopilación de datos. Puedes obtener más información al respecto en nuestro artículo [Desactivar el seguimiento Web](https://www.braze.com/docs/es/es/developer_guide/analytics/managing_data_collection?sdktab=web).
Puedes utilizar [`setDeviceObjectAllowlist`](https://braze-inc.github.io/braze-android-sdk/kdoc/braze-android-sdk/com.braze.configuration/-braze-config/-builder/set-device-object-allowlist.html?query=fun%20setDeviceObjectAllowlist(deviceObjectAllowlist:%20EnumSet%3CDeviceKey%3E):%20BrazeConfig.Builder) para configurar el SDK para que solo envíe un subconjunto de claves o valores del objeto dispositivo según una lista de permitidos establecida. Esto debe habilitarse mediante [`setDeviceObjectAllowlistEnabled`](https://braze-inc.github.io/braze-android-sdk/kdoc/braze-android-sdk/com.braze.configuration/-braze-config/-builder/set-device-object-allowlist-enabled.html?query=fun%20setDeviceObjectAllowlistEnabled(enabled:%20Boolean):%20BrazeConfig.Builder).
**Important:**
Si la lista de permitidos está vacía, **no se** enviarán datos de dispositivo a Braze.
Puedes asignar un conjunto de campos elegibles a [`configuration.devicePropertyAllowList`](https://braze-inc.github.io/braze-swift-sdk/documentation/brazekit/braze/configuration-swift.class/devicepropertyallowlist) en tu `Braze.Configuration` para especificar una lista de permitidos para los campos del dispositivo que recoge el SDK. La lista completa de campos se define en [`Braze.Configuration.DeviceProperty`](https://braze-inc.github.io/braze-swift-sdk/documentation/brazekit/braze/configuration-swift.class/deviceproperty). Para desactivar la recopilación de todos los campos del dispositivo, establece el valor de esta propiedad en un conjunto vacío (`[]`).
**Important:**
De manera predeterminada, todos los campos son recogidos por el SDK Swift de Braze. Eliminar algunas propiedades del dispositivo puede desactivar características del SDK.
Para más detalles de uso, consulta [Almacenamiento](https://www.braze.com/docs/es/es/developer_guide/storage?tab=swift) en la documentación del SDK Swift.
## ¿En qué versión del SDK estoy? {#what-version-of-the-sdk-am-i-on}
Puedes utilizar el dashboard para ver la versión del SDK de una aplicación concreta visitando **Configuración** > **Configuración de la aplicación**. La **Versión del SDK en vivo** muestra la versión más alta del SDK de Braze utilizada por tu aplicación en vivo más reciente para al menos el 5 % de tus usuarios.
{: style="max-width:80%"}
**Tip:**
Si tienes una aplicación iOS, puedes confirmar que estás utilizando el [SDK Swift](https://www.braze.com/docs/es/es/developer_guide/sdk_integration?sdktab=swift) en lugar del [SDK Objective-C de iOS](https://www.braze.com/docs/es/es/developer_guide/platforms/legacy_sdks/ios/initial_sdk_setup/overview) heredado si la **versión de tu SDK en vivo** es igual o superior a la 5.0.0, que fue la primera versión publicada del SDK Swift.
# Resumen de la plataforma
Source: /docs/es/developer_guide/getting_started/platform_overview/index.md
# [](https://learning.braze.com/path/developer){: style="float:right;width:120px;border:0;" class="noimgborder"}Primeros pasos: Resumen de la plataforma {#braze-learning-course-image_buster-assetsimgbl_icon3png-httpslearningbrazecompathdeveloper-stylefloatrightwidth120pxborder0-classnoimgbordergetting-started-platform-overview}
> En este artículo se cubren las partes básicas y las capacidades de la plataforma Braze. Los enlaces de este artículo conectan con temas esenciales de Braze.
**Tip:**
Echa un vistazo a nuestro curso gratuito [Ruta de aprendizaje para desarrolladores](https://learning.braze.com/path/developer) junto con estos artículos.
## ¿Qué es Braze? {#what-is-braze}
Braze es una plataforma de interacción con los clientes. Ingesta datos de usuario, muestra sus acciones y comportamientos, y te permite actuar en consecuencia. La plataforma tiene tres componentes principales: el SDK, el dashboard y la REST API.
Si eres especialista en marketing y buscas un resumen más general de Braze, consulta la [sección Primeros pasos para especialistas en marketing](https://www.braze.com/docs/es/es/user_guide/get_started).
{: style="max-width:55%;float:right;margin-left:15px;"}
### SDK
Los [SDK de Braze](#integrating-braze) pueden integrarse en tus aplicaciones móviles y web para proporcionar potentes herramientas de marketing, gestión de usuarios y análisis.
En resumen, cuando está totalmente integrado, el SDK:
* Recoge y sincroniza los datos de usuario en un perfil de usuario consolidado
* Recoge automáticamente datos de sesión, información del dispositivo y tokens de notificaciones push
* Captura datos de interacción de marketing y datos personalizados específicos de tu empresa
* Está diseñado para la seguridad y sometido a pruebas de penetración por terceros
* Está optimizado para dispositivos con poca batería o red lenta
* Admite firmas JWT en el servidor para mayor seguridad
* Tiene acceso de solo escritura a tus sistemas (no puede recuperar datos de usuario)
* Potencia las notificaciones push, los mensajes dentro de la aplicación y los canales de mensajería de Content Cards
### Interfaz de usuario del dashboard {#dashboard-user-interface}
El dashboard es la interfaz de usuario que controla todos los datos e interacciones en el corazón de la plataforma Braze. Los especialistas en marketing utilizarán el dashboard para hacer su trabajo y crear contenidos. Los desarrolladores utilizan el dashboard para administrar la configuración para integrar aplicaciones, como claves de API y credenciales de notificación push.
Si acabas de empezar, el administrador de tu equipo debería añadirte a ti (y a todos los demás miembros del equipo que necesiten acceso a Braze) como [usuarios en tu dashboard](https://www.braze.com/docs/es/es/user_guide/administer/personal).
### REST API
La API de Braze te permite mover datos dentro y fuera de Braze a escala. Utiliza la API para traer actualizaciones de tu backend, almacenes de datos y otras fuentes propias y de terceros. Además, utiliza la API para añadir eventos personalizados con fines de segmentación directamente desde aplicaciones basadas en web. Puedes desencadenar y enviar mensajes a través de la API, lo que permite a los recursos técnicos incluir metadatos JSON complejos como parte de tus campañas.
La API también proporciona un servicio web en el que puedes registrar las acciones realizadas por tus usuarios directamente a través de HTTP, en lugar de a través de los SDK móviles y web. Combinado con webhooks, esto significa que puedes hacer un seguimiento de las acciones y desencadenar actividades para los usuarios dentro y fuera de la experiencia de la aplicación. La [guía de la API](https://www.braze.com/docs/es/es/api/home) enumera los puntos finales de la API de Braze disponibles y sus usos.
Para saber más sobre las partes y piezas de Braze, consulta: [Primeros pasos: Resumen de la arquitectura](https://www.braze.com/docs/es/es/developer_guide/getting_started/architecture_overview).
## Análisis de datos y acción {#data-analysis-and-action}
Los datos almacenados en Braze se conservan y pueden utilizarse para segmentación, personalización y orientación mientras seas cliente de Braze. Eso te permite actuar sobre los datos de perfil de usuario (por ejemplo, la actividad de la sesión o las compras) hasta que decidas eliminar esa información. Por ejemplo, un servicio de streaming podría hacer un seguimiento de los contenidos vistos por cada suscriptor desde su primer día en el servicio (aunque fuera hace muchos años) y utilizar esos datos para impulsar la mensajería relevante.
{: style="max-width:80%"}
### Análisis de la aplicación {#app-analytics}
El dashboard de Braze muestra gráficos actualizados en tiempo real basados en métricas de análisis y eventos personalizados que tú implementas. La medición y optimización constantes mediante pruebas A/B, informes personalizados, análisis e inteligencia automatizada te ayudan a fomentar la interacción con los clientes y la diferenciación.
### Segmentación de usuarios {#user-segmentation}
La segmentación te permite crear grupos de usuarios basados en potentes filtros de su comportamiento dentro de la aplicación, datos demográficos y similares. Braze también te permite definir cualquier acción del usuario dentro de la aplicación como un «evento personalizado» si la acción deseada no se captura de forma predeterminada. Lo mismo ocurre con las características del usuario mediante «atributos personalizados». Una vez creado un segmento de usuarios en el dashboard, tus usuarios entrarán y saldrán del segmento a medida que cumplan (o no) los criterios definidos. Por ejemplo, puedes crear un segmento que incluya a todos los usuarios que han gastado dinero in-app y que utilizaron la aplicación por última vez hace más de dos semanas.
Para saber más sobre nuestros modelos de datos, consulta: [Primeros pasos: Resumen de análisis](https://www.braze.com/docs/es/es/developer_guide/getting_started/architecture_overview).
## Mensajería multicanal {#multichannel-messaging}
Después de definir un segmento, las herramientas de mensajería de Braze te permiten interactuar con tus usuarios de forma dinámica y personalizada. Braze se diseñó con un modelo de datos independiente del canal y centrado en el usuario. La mensajería se realiza dentro de tu aplicación o sitio web (como el envío de mensajes dentro de la aplicación o a través de elementos gráficos como carruseles de Content Cards y banners) o fuera de la experiencia de la aplicación (como el envío de notificaciones push o correos electrónicos). Por ejemplo, tus especialistas en marketing pueden enviar una notificación push y un correo electrónico al segmento de ejemplo definido en la sección anterior.
{: style="border:none" }
| Canal | Descripción |
| ---------------------------------------------------------------------------------------------------- | ------------------------------------------------------------------------------------------------------------------------------------------------------ |
| [Content Cards](https://www.braze.com/docs/es/es/user_guide/channels/content_cards)* | Envía notificaciones in-app dinámicas y altamente segmentadas sin interrumpir al cliente. |
| [Correo electrónico](https://www.braze.com/docs/es/es/user_guide/channels/email) | Envía mensajes HTML enriquecidos creando tu correo electrónico con el editor de texto enriquecido, nuestro editor de arrastrar y soltar, o cargando una de tus plantillas HTML existentes. |
| [In-App Messages](https://www.braze.com/docs/es/es/in-app_messages) | Envía notificaciones discretas dentro de la aplicación utilizando la interfaz de usuario nativa personalizada de Braze. |
| [Push](https://www.braze.com/docs/es/es/user_guide/channels/push) | Desencadena automáticamente notificaciones push de campañas de mensajería o noticias utilizando el servicio de notificaciones push de Apple (APNs) para iOS o Firebase Cloud Messaging (FCM) para Android. |
| [SMS, MMS y RCS](https://www.braze.com/docs/es/es/user_guide/channels/sms_mms_and_rcs)* | Utiliza SMS, MMS o RCS para enviar notificaciones transaccionales, compartir promociones, enviar recordatorios y mucho más. |
| [Notificación push web](https://www.braze.com/docs/es/es/user_guide/channels/push/platform_specific_resources/web) | Envía notificaciones al navegador web, aunque tus usuarios no estén activos en tu sitio. |
| [Webhooks](https://www.braze.com/docs/es/es/about_webhooks) | Utiliza webhooks para desencadenar acciones no relacionadas con la aplicación, proporcionando a otros sistemas y aplicaciones datos en tiempo real. |
| [WhatsApp](https://www.braze.com/docs/es/es/user_guide/channels/whatsapp/whatsapp_setup)* | Conecta directamente con tus usuarios y clientes aprovechando la popular plataforma de mensajería entre iguales: WhatsApp. |
{: .reset-td-br-1 .reset-td-br-2 aria-label="Mensajería multicanal" }
*Disponible como característica adicional.*
### Componentes personalizables {#customizable-components}
Todos los componentes de Braze están diseñados para ser accesibles, adaptables y personalizables. Puedes empezar con Braze utilizando los componentes predeterminados de BrazeUI y personalizándolos para adaptarlos a las necesidades de tu marca y a tus casos de uso.
Para ir más allá de las opciones predeterminadas, puedes escribir código personalizado para actualizar el aspecto de un canal de mensajería para que se ajuste más a tu marca. Esto incluye cambiar el tipo de letra, el tamaño de letra y los colores de un componente. Los especialistas en marketing mantienen el control de la audiencia, el contenido, el comportamiento al hacer clic y la caducidad directamente en el dashboard de Braze.
También puedes crear componentes completamente personalizados para controlar el aspecto de tu mensajería, cómo se comporta y cómo interactúa con otros canales de mensajería (por ejemplo, desencadenar una Content Card basada en una notificación push). Braze proporciona métodos del SDK que te permiten registrar métricas como impresiones, clics y descartes en el dashboard de Braze. Cada canal de mensajería dispone de un artículo de análisis para facilitar esta tarea.
## Integración de Braze {#integrating-braze}
Braze está diseñado para una integración rápida. El tiempo medio de obtención de valor es de seis semanas en toda nuestra base de clientes. Para obtener más información sobre el proceso de integración, consulta [Primeros pasos: Resumen de la integración](https://www.braze.com/docs/es/es/developer_guide/getting_started/integration_overview).
## Recursos para marcar {#resources-to-bookmark}
Como recurso técnico, participarás en muchos de los aspectos prácticos de Braze. Aquí tienes buenos recursos para agregar a marcadores fuera de nuestra documentación. A medida que vayas avanzando, ten a mano nuestro glosario de [Términos que debes conocer](https://www.braze.com/docs/es/es/user_guide/get_started/terms_to_know) en caso de que tengas preguntas sobre términos de Braze.
| Recurso | Lo que aprenderás |
|---|---|
| [Depuración del SDK](https://www.braze.com/docs/es/es/developer_guide/sdk_integration/debugging) | A la hora de solucionar problemas de integración, la herramienta de depuración del SDK te resultará muy útil. ¡Asegúrate de tenerla a mano! |
| [GitHub público de Braze](https://github.com/braze-inc/) | Encontrarás información detallada sobre la integración y código de muestra en nuestro repositorio de GitHub. |
| [Repositorio de GitHub del SDK de Android](https://github.com/braze-inc/braze-android-sdk/) | El repositorio de GitHub del SDK de Android. |
| [Referencia del SDK de Android](https://appboy.github.io/appboy-android-sdk/kdoc/index.html) | Documentación de clases para el SDK de Android. |
| [Repositorio de GitHub del SDK para iOS (Swift)](https://github.com/braze-inc/braze-swift-sdk) | El repositorio de GitHub del SDK de Swift. |
| [Referencia del SDK de iOS (Swift)](https://braze-inc.github.io/braze-swift-sdk/) | Documentación de clases para el SDK de iOS. |
| [Repositorio de GitHub del SDK Web](https://github.com/braze-inc/braze-web-sdk) | El repositorio de GitHub del SDK Web. |
| [Referencia del SDK Web](https://js.appboycdn.com/web-sdk/5.0/doc/modules/braze.html) | Documentación de clases para el SDK Web. |
| [Registros de cambios del SDK](https://www.braze.com/docs/es/es/developer_guide/changelogs) | Braze tiene lanzamientos mensuales predecibles, además de lanzamientos para cualquier problema crítico y actualizaciones importantes del SO. |
| [Colección Postman de la API de Braze](https://documenter.getpostman.com/view/4689407/SVYrsdsG?version=latest) | Descarga aquí nuestra colección de Postman. |
| [Monitor de estado del sistema Braze](https://braze.statuspage.io/) | Nuestra página de estado se actualiza siempre que hay incidentes o interrupciones. Ve a esta página para suscribirte a las alertas. |
{: .reset-td-br-1 .reset-td-br-2 aria-label="Recursos para marcar" }
# Resumen de la integración
Source: /docs/es/developer_guide/getting_started/integration_overview/index.md
# [](https://learning.braze.com/sdk-integration-basics){: style="float:right;width:120px;border:0;" class="noimgborder"} Primeros pasos: Resumen de la integración {#braze-learning-course-image_buster-assetsimgbl_icon3png-httpslearningbrazecomsdk-integration-basics-stylefloatrightwidth120pxborder0-classnoimgbordergetting-started-integration-overview}
> En este artículo se ofrece un resumen básico del proceso de incorporación.
{: style="max-width:50%;float:right;margin-left:15px;border:none;"}
Como recurso técnico, potenciarás a tu equipo integrando Braze en tu pila tecnológica. A grandes rasgos, la incorporación se divide en cuatro pasos:
* [Descubrimiento y planificación](#discovery): Trabaja con tu equipo para alinear el alcance, planificar una estructura para los datos y las campañas, y crear una estructura adecuada del espacio de trabajo.
* [Integración](#integration): Ejecuta tu plan integrando el SDK y la API, habilitando canales de mensajería y configurando la importación y exportación de datos.
* [Garantía de calidad](#qa): Confirma que el bucle de datos y mensajería entre la plataforma Braze y tu aplicación o sitio funciona como se espera.
* [Mantenimiento](#maintenance): Una vez que hayas pasado Braze a tu equipo de marketing, seguirás asegurándote de que todo siga funcionando sin problemas.
**Tip:**
Reconocemos que cada organización tiene sus propias necesidades, y Braze está construido para atender a una diversa gama de opciones de personalización que pueden adaptarse a tus requisitos específicos. Los tiempos de integración variarán en función de tu caso de uso.
## Descubrimiento y planificación {#discovery}
Durante esta fase, trabajarás con tu equipo para delimitar las tareas de incorporación y asegurarte de que todas las partes interesadas están alineadas en un objetivo común.
Tu equipo realizará una planificación de extremo a extremo de tus casos de uso para asegurarse de que todo puede construirse como se espera, con los datos correctos disponibles para ello. Esta fase incluye al jefe de proyecto, al jefe de CRM, a los ingenieros de front-end y back-end, a los propietarios del producto y a los especialistas en marketing.
La fase de descubrimiento y planificación dura, en promedio, unas seis semanas. Los jefes de ingeniería pueden dedicar de 2 a 4 horas a la semana durante esta fase. Los desarrolladores que trabajen con el producto pueden esperar dedicar entre 10 y 20 horas semanales a Braze durante la fase de descubrimiento y planificación.
**Tip:**
Durante el periodo de incorporación de tu empresa, Braze organizará sesiones de resumen técnico. Recomendamos encarecidamente a los ingenieros que asistan a estas sesiones. Las sesiones de resumen técnico te ofrecen la oportunidad de mantener conversaciones sobre la escalabilidad de la arquitectura de la plataforma y ver ejemplos prácticos de cómo empresas de tu tamaño han tenido éxito anteriormente con casos de uso similares.
{: style="max-width:40%;float:right;margin-left:15px;"}
### Planificación de campañas {#campaign-planning}
Tu equipo de CRM planificará los casos de uso de la mensajería que lanzarás en un futuro próximo. Esto incluye lo siguiente:
* [Canal](https://www.braze.com/docs/es/es/user_guide/channels) (por ejemplo, notificaciones push o mensajes dentro de la aplicación)
* [Método de entrega](https://www.braze.com/docs/es/es/user_guide/messaging/campaigns/schedule_your_campaign) (por ejemplo, entrega programada o entrega basada en acciones)
* [Público objetivo](https://www.braze.com/docs/es/es/user_guide/audience/segments)
* [Métricas de éxito](https://www.braze.com/docs/es/es/user_guide/messaging/messaging_fundamentals/conversion_events)
Por ejemplo, una campaña para nuevos clientes podría ser: un correo electrónico enviado diariamente a las 10 de la mañana a un segmento de clientes que iniciaron ayer su primera sesión. El evento de conversión (la métrica de éxito) es registrar una sesión.
**Important:**
La integración no puede comenzar hasta que se haya completado el paso de planificación de la campaña. Este paso determinará qué partes y piezas de Braze deben configurarse durante la fase de integración.
### Crear requisitos de datos {#creating-data-requirements}
A continuación, tu equipo de CRM debe definir qué datos son necesarios para lanzar las campañas que han planificado, creando requisitos de datos.
Muchos tipos comunes de atributos de usuario, como nombre, correo electrónico, fecha de nacimiento, país y similares, son objeto de seguimiento automático tras la integración del SDK de Braze. Otros tipos de datos deberán definirse como datos personalizados.
Como desarrollador, trabajarás con tu equipo para definir qué datos adicionales y personalizados tiene sentido seguir. Tus datos personalizados influirán en cómo se clasificará y segmentará tu base de usuarios. Configurarás una taxonomía de eventos en todo tu stack de crecimiento, estructurando tus datos para que sean compatibles con tus sistemas cuando entren y salgan de Braze.
**Tip:**
Mantén la nomenclatura de los datos coherente en todas las herramientas. Por ejemplo, tu almacén de datos puede registrar la "oferta de compra por tiempo limitado" de una forma determinada. Tendrás que decidir si es necesario un evento personalizado en Braze para que coincida con este formato.
Más información sobre [datos recopilados automáticamente y datos personalizados](https://www.braze.com/docs/es/es/developer_guide/analytics).
### Planificación de personalizaciones {#customizations-planning}
Habla con tus especialistas en marketing sobre las personalizaciones que desean. Por ejemplo, ¿quieres implementar las Content Cards predeterminadas de Braze? ¿Quieres modificar ligeramente su aspecto para que se ajuste a las directrices de tu marca? ¿Quieres desarrollar una interfaz de usuario completamente nueva para un componente y que Braze haga un seguimiento de sus análisis? Los diferentes niveles de personalización requieren diferentes niveles de alcance.
### Acceder al dashboard {#getting-dashboard-access}
El dashboard de Braze es nuestra interfaz de usuario web. Los especialistas en marketing utilizarán el dashboard para hacer su trabajo y crear contenidos. Los desarrolladores utilizan el dashboard para administrar la configuración para integrar aplicaciones, como claves de API y credenciales de notificación push.
El administrador de tu equipo debe añadirte a ti (y a todos los demás miembros del equipo que necesiten acceso a Braze) como usuarios en tu dashboard.
### Espacios de trabajo y claves de API {#workspaces-and-api-keys}
El administrador de tu equipo también creará diferentes [espacios de trabajo](https://www.braze.com/docs/es/es/user_guide/administer/global/create_and_manage_workspaces). Los espacios de trabajo agrupan tus datos —usuarios, segmentos, claves de API— en una sola ubicación. Como práctica recomendada, te sugerimos que solo agrupes diferentes versiones de la misma aplicación o de aplicaciones muy similares en un mismo espacio de trabajo.
Es importante destacar que los espacios de trabajo proporcionan claves de API para múltiples plataformas (como iOS y Android). Utilizarás las claves de API correlacionadas para asociar los datos del SDK a un espacio de trabajo concreto. Navega hasta tus espacios de trabajo para acceder a la clave de API de cada una de tus aplicaciones. Asegúrate de que cada clave de API tiene los permisos correctos para realizar el trabajo que le has asignado. Para más detalles, consulta [el artículo sobre el aprovisionamiento de la API](https://www.braze.com/docs/es/es/api/basics#rest-api-key).
**Important:**
Es importante que configures entornos diferentes para desarrollo y producción. Configurar un entorno de pruebas evitará que gastes dinero real durante la incorporación y el control de calidad. Para crear un entorno de pruebas, configura un espacio de trabajo de pruebas y asegúrate de utilizar su clave de API para no llenar tu espacio de trabajo de producción con datos de prueba.
## Integración {#integration}
{: style="max-width:45%;float:right;margin-left:15px;"}
Braze es compatible con aplicaciones iOS, aplicaciones Android, aplicaciones web y mucho más. También puedes optar por utilizar un SDK envolvente multiplataforma, como React Native o Unity. Normalmente, los clientes realizan la integración en un plazo de 1 a 6 semanas. Muchos clientes han integrado Braze con un solo ingeniero, en función de su amplitud de conocimientos técnicos y ancho de banda. Depende totalmente del alcance específico de tu integración y del tiempo que tu equipo dedique al proyecto Braze.
Necesitarás desarrolladores que estén familiarizados con:
* Trabajar en la capa nativa de tu aplicación o sitio web
* Crear procesos para llamar a nuestra REST API
* Pruebas de integración
* Autenticación con token web JSON
* Conocimientos generales de gestión de datos
* Configuración de registros de DNS
### Socios de integración de CDP {#cdp-integration-partners}
Muchos clientes utilizan la incorporación a Braze como una oportunidad para integrarse también con una plataforma de datos de los clientes (CDP) como socio de integración. Braze proporciona seguimiento y análisis de datos, mientras que un CDP puede proporcionar enrutamiento y orquestación de datos adicionales. Braze ofrece una integración sin problemas con muchos CDP, como [mParticle](https://www.braze.com/docs/es/es/partners/data_and_analytics/customer_data_platform/mparticle/mparticle) y [Segment](https://www.braze.com/docs/es/es/partners/data_and_analytics/customer_data_platform/segment/segment).
Si realizas una integración en paralelo con un CDP, mapearás las llamadas del SDK de tu CDP al SDK de Braze. Esencialmente, harás lo siguiente:
* Mapear las llamadas de identificación a `changeUser` ([Android](https://braze-inc.github.io/braze-android-sdk/kdoc/braze-android-sdk/com.braze/-i-braze/change-user.html), [iOS](https://braze-inc.github.io/braze-swift-sdk/documentation/brazekit/braze/changeuser(userid:sdkauthsignature:fileid:line:)/), [web](https://js.appboycdn.com/web-sdk/latest/doc/modules/braze.html#changeuser)) y establecer atributos.
* Mapear las llamadas de descarga de datos a `requestImmediateDataFlush` ([Android](https://braze-inc.github.io/braze-android-sdk/kdoc/braze-android-sdk/com.braze/-i-braze/request-immediate-data-flush.html?query=abstract%20fun%20requestImmediateDataFlush()), [iOS](https://braze-inc.github.io/braze-swift-sdk/documentation/brazekit/braze/requestimmediatedataflush()), [web](https://js.appboycdn.com/web-sdk/latest/doc/modules/braze.html#requestimmediatedataflush)).
* Registrar eventos personalizados o compras.
Puede haber ejemplos de integración entre el SDK de Braze y el CDP que elijas, dependiendo de la plataforma que hayas elegido. Consulta nuestra [lista de socios tecnológicos de CDP](https://www.braze.com/docs/es/es/partners/data_and_analytics) para obtener más información.
### Integración del SDK de Braze {#braze-sdk-integration}
El SDK de Braze proporciona dos funciones fundamentales: recopila y sincroniza los datos de usuario en un perfil de usuario consolidado, y potencia canales de mensajería como las notificaciones push, los mensajes dentro de la aplicación y Content Cards.
**Tip:**
Cuando se integra completamente con tu aplicación o sitio web, el SDK de Braze ofrece un nivel integral de sofisticación de marketing. Si pospones la integración del SDK de Braze, algunas de las funciones descritas en la documentación no estarán disponibles.
**Note:**
Para añadir una capa adicional de seguridad, puedes habilitar la [Autenticación SDK](https://www.braze.com/docs/es/es/developer_guide/sdk_integration/authentication) para evitar solicitudes de SDK no autorizadas. Esta característica está disponible en todas las plataformas principales, incluyendo Web, iOS, Android, React Native, Flutter, Unity, Cordova, .NET MAUI (Xamarin) y Expo.
Durante la implementación del SDK, harás lo siguiente:
* Escribir el código de integración del SDK para cada plataforma que quieras admitir.
* Activar los canales de mensajería de cada plataforma, asegurándote de que el SDK de Braze hace un seguimiento de los datos de las interacciones con tus clientes a través de correo electrónico, SMS, notificaciones push y otros canales.
* Crear cualquier personalización planificada de los componentes de la interfaz de usuario (por ejemplo, Content Cards personalizadas). Para un contenido completamente personalizado, tendrás que registrar los análisis, ya que la recopilación de datos automática del SDK no tendrá en cuenta tus nuevos componentes. Puedes seguir el patrón de esta implementación en nuestros componentes predeterminados.
### Uso de la API de Braze {#using-the-braze-api}
Utilizarás nuestra REST API para diferentes tareas en distintos momentos a lo largo del tiempo que utilices Braze. La API de Braze es útil para:
1. Importar datos históricos; y
2. Actualizaciones continuas que no se desencadenan en Braze. Por ejemplo, un perfil de usuario se actualiza a VIP sin que inicie sesión en una aplicación, por lo que la API debe comunicar esta información a Braze.
Empieza a utilizar la [API de Braze](https://www.braze.com/docs/es/es/api/basics).
**Important:**
Cuando utilices la API, asegúrate de que realizas las solicitudes por lotes y de que solo envías valores delta. Braze reescribe todos los atributos que se envían. No actualices ningún atributo personalizado si su valor no ha cambiado.
### Configuración de los análisis de productos {#setting-up-product-analytics}
Braze se centra en los datos. Los datos en Braze se almacenan en el perfil de usuario.
Los puntos de datos son una estructura mediante la cual te aseguras de que estás captando los datos adecuados para tus especialistas en marketing, y no "cualquier" dato que puedas conseguir. Familiarízate con los [puntos de datos](https://www.braze.com/docs/es/es/user_guide/data/infrastructure/data_points).
### Migración de datos de usuario heredados {#migrating-legacy-user-data}
Puedes utilizar el [`/users/track endpoint`](https://www.braze.com/docs/es/es/api/endpoints/user_data/post_user_track) de Braze para migrar datos históricos registrados fuera de Braze. Algunos ejemplos de datos importados habitualmente son los tokens de notificaciones push y las compras anteriores. Este punto de conexión puede utilizarse para importaciones puntuales o actualizaciones periódicas por lotes.
También puedes importar usuarios y actualizar los valores de los atributos de los clientes mediante una única [carga de CSV](https://www.braze.com/docs/es/es/user_guide/data_and_analytics/user_data_collection/user_import#importing-a-csv) al dashboard. Cargar CSV puede ser útil para los especialistas en marketing, mientras que nuestra REST API permite una mayor flexibilidad.
### Configuración del seguimiento de la sesión {#setting-up-session-tracking}
El SDK de Braze genera puntos de datos de "sesión abierta" y "sesión cerrada". El SDK de Braze también descarga los datos a intervalos regulares. Consulta estos enlaces para conocer los valores predeterminados de seguimiento de sesión, todos ellos personalizables ([Android](https://www.braze.com/docs/es/es/developer_guide/analytics/tracking_sessions?tab=android), [iOS](https://www.braze.com/docs/es/es/developer_guide/analytics/tracking_sessions?tab=swift), [web](https://www.braze.com/docs/es/es/developer_guide/analytics/tracking_sessions?tab=web)).
### Seguimiento de eventos personalizados, atributos y eventos de compra {#tracking-custom-events-attributes-and-purchase-events}
Coordínate con tu equipo para configurar el esquema de datos previsto, incluidos los eventos personalizados, los atributos de usuario y los eventos de compra. Tu [esquema de datos personalizado](https://www.braze.com/docs/es/es/user_guide/data/activation/events/custom_events) se introducirá utilizando el dashboard y debe coincidir exactamente con lo que implementes durante la integración del SDK.
**Tip:**
Los ID de usuario, llamados `external_id`s en Braze, deben establecerse para todos los usuarios conocidos. Deben ser inmutables y accesibles cuando un usuario abra la aplicación, permitiéndote hacer un seguimiento de tus usuarios en todos los dispositivos y plataformas. Consulta el artículo [Ciclo de vida del usuario](https://www.braze.com/docs/es/es/user_guide/data/unification/user_data/user_profile_lifecycle) para conocer las mejores prácticas.
### Otras herramientas {#other-tools}
Según tu caso de uso, puede haber otras herramientas que necesites configurar. Por ejemplo, puede que necesites configurar una herramienta como las [geovallas](https://www.braze.com/docs/es/es/user_guide/engagement_tools/locations_and_geofences#about-locations-and-geofences) para realizar tus historias de usuario. Hemos comprobado que los clientes que tienen la posibilidad de configurar estas herramientas adicionales después de completar los pasos esenciales de la integración son los que tienen más éxito.
## Garantía de calidad {#qa}
A medida que ejecutes tu integración, proporcionarás una garantía de calidad para asegurarte de que todo lo que estás configurando funciona según lo esperado. Este control de calidad se divide en dos categorías generales: la ingesta de datos y los canales de mensajes.
**Important:**
Asegúrate de que tus entornos de producción y pruebas están configurados antes de empezar el control de calidad.
| **Ingesta de datos del control de calidad** | **Mensajería del control de calidad** |
|---------------------------|---------------------------------------------------------------|
| Realizarás el control de calidad de la forma en que se ingieren, almacenan y exportan los datos. | Te asegurarás de que tus mensajes se envían correctamente a tus usuarios y de que todo tiene un aspecto excelente. |
| Realiza pruebas para confirmar que los datos se almacenan correctamente. | Crea segmentos de usuarios. |
| Confirma que los datos de la sesión se atribuyen correctamente al espacio de trabajo previsto dentro de Braze. | Lanza Campaigns y Canvas con éxito. |
| Confirma que se están registrando los inicios y los finales de sesión. | Confirma que se están mostrando las Campaigns correctas a los segmentos de usuarios correctos. |
| Confirma que la información sobre los atributos del usuario se registra correctamente en los perfiles de usuario. | Confirma que los tokens de notificaciones push se están registrando correctamente. |
| Comprueba que los datos personalizados se registran correctamente en los perfiles de usuario. | Confirma que los tokens de notificaciones push se han eliminado correctamente. |
| Crea perfiles de usuario anónimos. | Comprueba que las Campaigns push se envían correctamente a los dispositivos y que se registra la interacción. |
| Confirma que los perfiles de usuario anónimos se convierten en perfiles de usuario conocidos cuando se llama al método `changeUser()`. | Comprueba que se entregan los mensajes dentro de la aplicación y que se registran las métricas. |
| | Comprueba que se entregan las Content Cards y se registran las métricas. |
| | Facilita contenido conectado (por ejemplo, AccuWeather). |
| | Confirma que todas las integraciones del canal de mensajería funcionan correctamente. |
{: .reset-td-br-1 .reset-td-br-2 aria-label="Garantía de calidad" }
**Note:**
Mientras realizas el control de calidad de la integración del SDK, utiliza el [Depurador de SDK](https://www.braze.com/docs/es/es/developer_guide/sdk_integration/debugging) para solucionar problemas sin activar el registro detallado de tu aplicación.
### Pasar Braze a los especialistas en marketing {#passing-braze-off-to-marketers}
Una vez que hayas integrado tu plataforma o sitio web, querrás implicar a tu equipo de marketing para pasarles la propiedad de la plataforma. Este proceso es diferente en cada empresa, pero puede incluir lo siguiente:
* Componer la compleja [lógica Liquid](https://www.braze.com/docs/es/es/user_guide/personalization_and_dynamic_content/liquid#about-liquid)
* Ayudar a facilitar el [calentamiento de IP del correo electrónico](https://www.braze.com/docs/es/es/user_guide/channels/email/email_setup/ip_warming)
* Asegurarse de que otras partes interesadas comprenden el tipo de datos que se están siguiendo
### Desarrollar para el futuro {#develop-for-the-future}
¿Alguna vez has heredado una base de código y no tenías ni idea de lo que estaba pensando el desarrollador inicial? Peor aún, ¿alguna vez has escrito código, lo has entendido completamente y luego te has sentido totalmente desconcertado cuando has vuelto a él un año después?
Cuando incorpores Braze, las decisiones colectivas que tomes en relación con los datos, los perfiles de usuario, qué integraciones estaban y no estaban dentro del alcance, cómo se supone que deben funcionar las personalizaciones, y mucho más, te parecerán recientes y, por tanto, obvias. Cuando tu equipo quiera ampliar Braze o cuando se asignen otros recursos técnicos a tu proyecto Braze, esta información será difícil de encontrar.
Crea un recurso para consolidar la información que aprendiste durante tus sesiones de resumen técnico. Este recurso te ayudará a reducir el tiempo de incorporación de los nuevos desarrolladores que se incorporen a tu equipo (o te servirá de recordatorio cuando necesites ampliar tu actual implementación de Braze).
## Mantenimiento {#maintenance}
Tras el traspaso a tus especialistas en marketing, seguirás siendo un recurso para el mantenimiento. Prestarás atención a las actualizaciones de iOS y Android que puedan afectar al SDK de Braze y te asegurarás de que tus proveedores externos estén al día.
Realizarás un seguimiento de las actualizaciones de la plataforma Braze a través del [GitHub](https://github.com/braze-inc/) de Braze. Ocasionalmente, tu administrador también recibirá correos electrónicos sobre actualizaciones urgentes y correcciones de errores directamente de Braze.
## Límites de velocidad del SDK {#sdk-rate-limits}
### Usuarios activos al mes CY 24-25, MAU universal, MAU web y MAU móvil {#monthly-active-users-cy-24-25-universal-mau-web-mau-and-mobile-mau}
Para los clientes que hayan adquirido usuarios activos al mes CY 24-25, MAU universal, MAU web y MAU móvil, Braze aplica límites de velocidad del lado del servidor en las solicitudes de API utilizadas por nuestros SDK para actualizar sesiones, atributos de usuario, eventos y otros datos del perfil de usuario. Esto se hace para garantizar la estabilidad de la plataforma y mantener un servicio rápido y fiable.
* Los límites de velocidad por hora se establecen en función del tráfico de SDK previsto en tu cuenta, que puede corresponder al número de usuarios activos al mes (MAU) que hayas adquirido, al sector, a la estacionalidad o a otros factores. Cuando se alcance el límite de velocidad por hora, Braze ralentizará las solicitudes hasta la hora siguiente.
* El SDK reintenta automáticamente todas las solicitudes con límite de velocidad.
* Las solicitudes del SDK se correlacionan con la cantidad de datos personalizados recopilados en tu implementación. Si estás constantemente cerca o en tu límite de velocidad por hora, considera:
* Revisar tu integración de SDK para reducir la recopilación excesiva de datos.
* Bloquear los datos personalizados que no sean esenciales para tus casos de uso de marketing.
* Los límites de velocidad de ráfaga son límites de velocidad de corta duración que se aplican cuando llega un gran volumen de solicitudes en un periodo muy corto (es decir, en cuestión de segundos). No es necesario que actúes cuando se produzcan límites de ráfaga, y el SDK volverá a intentarlo poco después.
* Los límites de velocidad constantes controlan el volumen de solicitudes sostenido durante un intervalo de tiempo superior al intervalo de ráfaga (por ejemplo, varios minutos) y ayudan a suavizar el tráfico continuo entre los límites de ráfaga y tu límite de velocidad por hora.
### Encontrar tus límites de velocidad {#finding-your-rate-limits}
Para encontrar los límites actuales basados en el rendimiento esperado del SDK, ve a **Settings** > **APIs and Identifiers** > **API and SDK limits**.
Para el uso histórico, ve a **Settings** > **APIs and Identifiers** > **API and SDK dashboard**.
### Solicitar límites de velocidad más altos {#requesting-higher-rate-limits}
Si necesitas un límite de velocidad más alto en Braze, ponte en contacto con soporte de Braze o con tu administrador del éxito del cliente e incluye los siguientes datos:
* Si necesitas un aumento temporal o permanente.
* Por qué necesitas el aumento.
* Qué puntos finales y entornos se ven afectados.
* Tu volumen de tráfico aproximado y calendario, incluyendo la fecha de inicio, la duración y las horas punta.
* Si puedes agrupar llamadas o distribuir el tráfico a lo largo del tiempo.
Una vez enviada tu solicitud, Braze la revisará y te informará del resultado.
### Cambios y soporte {#changes-and-support}
Braze puede modificar los límites de velocidad para proteger la estabilidad del sistema o permitir un mayor caudal de datos en tu cuenta. Ponte en contacto con soporte de Braze o con tu administrador del éxito del cliente si tienes preguntas o dudas sobre los límites de velocidad y cómo afectan a tu negocio.
# Resumen arquitectónico
Source: /docs/es/developer_guide/getting_started/architecture_overview/index.md
# Para empezar: Resumen arquitectónico {#getting-started-architectural-overview}
> Este artículo trata de las diferentes partes y piezas del stack tecnológico de Braze, con enlaces a artículos relevantes.
A un alto nivel, Braze se ocupa de datos. La plataforma Braze, impulsada por el SDK, la REST API y las integraciones de socios, te permite agregar tus datos y actuar sobre ellos.
{: style="display:block;margin:auto;" }
* [Ingesta de datos](#ingestion): Braze extrae datos de diversas fuentes.
* [Clasificación](#classification): Tu equipo de marketing segmenta dinámicamente tu base de usuarios utilizando estas métricas.
* [Orquestación](#orchestration): Braze coordina de forma inteligente los mensajes a diferentes segmentos de audiencia en el momento ideal.
* [Acción](#action): Tu equipo de marketing actúa a partir de los datos, creando contenidos a través de diversos canales de mensajería, como los SMS y el correo electrónico.
* [Personalización](#personalization): Los datos se transforman en tiempo real con información personalizada sobre tu audiencia.
* [Exportación](#exporting-data): Después, Braze hace un seguimiento de la interacción de tus usuarios con esta mensajería y la vuelve a introducir en la plataforma, creando un bucle. Obtendrás información sobre estos datos mediante informes y análisis en tiempo real.
Todo esto funciona conjuntamente para crear interacciones satisfactorias entre tu base de usuarios y tu marca, de modo que puedas alcanzar tus objetivos. Braze hace todo esto en el contexto de lo que llamamos nuestra pila integrada verticalmente. Profundicemos en cada capa, de una en una.
## Ingesta de datos {#ingestion}
Braze se basa en una arquitectura de datos de transmisión que aprovecha Snowflake, Kafka, MongoDB y Redis. Los datos de muchos orígenes se pueden cargar en Braze a través del SDK y la API. La plataforma puede manejar cualquier dato en tiempo real, independientemente de cómo esté anidado o estructurado. Los datos en Braze se almacenan en el perfil de usuario.
**Tip:**
Braze puede hacer un seguimiento de los datos de un usuario a lo largo de su trayecto contigo, desde que es anónimo hasta que inicia sesión en tu aplicación y es conocido. Los ID de usuario, llamados `external_id`s en Braze, deben establecerse para cada uno de tus usuarios. Deben ser inmutables y accesibles cuando un usuario abra la aplicación, permitiéndote hacer un seguimiento de tus usuarios en todos los dispositivos y plataformas. Consulta el [artículo Ciclo de vida del usuario](https://www.braze.com/docs/es/es/user_guide/data/unification/user_data/user_profile_lifecycle) para conocer las mejores prácticas.
{: style="display:block;margin:auto;" }
**Note:**
Esta base de datos de perfiles de usuario centrada en la persona permite una velocidad interactiva en tiempo real. Braze precalcula los valores cuando llegan los datos y almacena los resultados en nuestro formato de documento ligero para una rápida recuperación. Y como la plataforma se diseñó así desde el principio, es ideal para la mayoría de los casos de uso de la mensajería, especialmente combinada con otros conceptos de datos como el contenido conectado, los catálogos de productos y los atributos anidados.
### Desglose de los orígenes de datos {#data-source-breakdown}
Braze utiliza diferentes sistemas de almacenamiento de datos para diversas características. Comprender qué características utilizan qué orígenes de datos es importante para la gestión de datos y la solución de problemas.
#### Características basadas en MongoDB {#mongodb-powered-features}
- Eventos personalizados (rastreados por SDK y API)
- Atributos personalizados
- Perfiles de usuario
- Eventos de compra
- La mayoría de las características de segmentación y orientación
#### Características impulsadas por Snowflake {#snowflake-powered-features}
- [Extensiones de segmento SQL](https://www.braze.com/docs/es/es/user_guide/audience/segments/segment_extension/sql_segments)
- [Paquete de predicción](https://www.braze.com/docs/es/es/user_guide/brazeai)
- [Rutas personalizadas](https://www.braze.com/docs/es/es/user_guide/messaging/canvas/canvas_components/experiment_step/personalized_paths) y [variante personalizada](https://www.braze.com/docs/es/es/user_guide/engagement_tools/testing/multivariant_testing/optimizations#personalized-variant)
- [Recomendaciones de artículos personalizadas mediante IA](https://www.braze.com/docs/es/es/user_guide/brazeai/item_recommendations/creating_recommendations/ai)
- [Tasa de apertura real estimada](https://www.braze.com/docs/es/es/user_guide/message_building_by_channel/email/reporting_and_analytics/email_reporting#estimated-real-open-rate) (no utiliza eventos personalizados)
**Important:**
**Consideraciones sobre la eliminación de datos:** Los eventos personalizados se almacenan en MongoDB y están separados de los datos de Snowflake. Si necesitas eliminar datos de eventos personalizados erróneos, debes hacerlo en MongoDB. Las características basadas en Snowflake (como las extensiones de segmento SQL y otras características basadas en Snowflake) utilizan datos de Snowflake, que se gestionan por separado. Eliminar datos de un sistema no los elimina automáticamente del otro.
### Orígenes de datos backend a través de la API de Braze {#backend-data-sources-through-the-braze-api}
Braze puede extraer datos de bases de datos de usuarios, transacciones offline y almacenes de datos a través de nuestra [REST API](https://www.braze.com/docs/es/es/api/endpoints/user_data).
### Orígenes de datos frontend a través del SDK de Braze {#frontend-data-sources-through-braze-sdk}
Braze captura automáticamente datos propios de orígenes de datos frontend, como los dispositivos de los usuarios, mediante el [SDK de Braze](https://www.braze.com/docs/es/es/user_guide/get_started/sdk_overview). El SDK gestiona los usuarios nuevos (anónimos) y administra los datos de su perfil de usuario a lo largo de su ciclo de vida.
### Integraciones de socios {#partner-integrations}
Braze tiene más de 150 socios tecnológicos, a los que llamamos "Alloys". Puedes complementar tus fuentes de datos mediante una red significativamente sólida de [tecnologías interoperables y API de datos.](https://www.braze.com/docs/es/es/partners/home)
### Conexión directa con el almacén a través de la Ingesta de datos de Cloud de Braze {#direct-warehouse-connection-through-braze-cloud-data-ingestion}
Puedes transmitir datos de clientes desde tu almacén de datos a la plataforma a través de la [Ingesta de datos de Cloud de Braze](https://www.braze.com/docs/es/es/user_guide/data/unification/cloud_ingestion) en solo unos minutos, lo que te permitirá sincronizar los atributos, eventos y compras relevantes de los usuarios. La integración de la Ingesta de datos de Cloud admite estructuras de datos complejas, como JSON anidado y matrices de objetos.
La Ingesta de datos de Cloud puede sincronizar datos de Snowflake, Amazon Redshift, Databricks y Google BigQuery.
## Clasificación {#classification}
La capa de clasificación habilita a tu equipo para clasificar y construir dinámicamente audiencias, llamadas [segmentos](https://www.braze.com/docs/es/es/user_guide/audience/segments), basándose en los datos que pasan por Braze.
**Note:**
En las capas de clasificación, orquestación y personalización es donde tu equipo de marketing realizará gran parte de su trabajo. La mayoría de las veces interactúan con estas capas a través del dashboard de Braze, nuestra interfaz web. Los desarrolladores tienen un papel en la configuración y personalización de estas capas.
Muchos tipos comunes de atributos de usuario, como el nombre, el correo electrónico, la fecha de nacimiento, el país y otros, son seguidos automáticamente por el SDK de forma predeterminada. Como desarrollador, trabajarás con tu equipo para definir qué datos adicionales y personalizados tiene sentido seguir para tu caso de uso. Tus datos personalizados influirán en cómo se clasificará y segmentará tu base de usuarios. Configurarás este modelo de datos durante el proceso de implementación.
Más información sobre [datos recopilados automáticamente y datos personalizados](https://www.braze.com/docs/es/es/developer_guide/analytics).
## Orquestación {#orchestration}
La capa de orquestación permite a tu equipo de marketing diseñar recorridos de usuario basados en los datos de usuario y la interacción previa. Este trabajo se realiza principalmente a través de la interfaz de nuestro dashboard, pero también tienes la opción de lanzar [Campaigns a través de la API](https://www.braze.com/docs/es/es/api/api_campaigns#api-campaigns). Por ejemplo, puedes hacer que tu backend le diga a Braze cuándo enviar los mensajes y las Campaigns que tus especialistas en marketing diseñaron en el dashboard, y desencadenarlos según la lógica de tu backend. Un ejemplo de mensaje desencadenado por la API podrían ser los restablecimientos de contraseña o las confirmaciones de envío.
**Note:**
Las Campaigns desencadenadas por la API son ideales para casos de uso transaccional más avanzados. Permiten a los especialistas en marketing gestionar el texto de la Campaign, las pruebas multivariante y las reglas de reelegibilidad dentro del dashboard de Braze, a la vez que desencadenan la entrega de ese contenido desde tus servidores y sistemas. La solicitud de la API para desencadenar el mensaje también puede incluir datos adicionales que se incorporarán al mensaje en tiempo real.
### Conmutadores de características {#feature-flags}
Braze te permite habilitar o deshabilitar a distancia la funcionalidad de una selección de usuarios mediante [conmutadores de características](https://www.braze.com/docs/es/es/developer_guide/feature_flags). Esto permite a tus especialistas en marketing dirigirse al segmento correcto de tu base de usuarios con mensajería para características que aún no has desplegado a toda tu audiencia. Pero, además, los conmutadores de características pueden utilizarse para activar y desactivar una característica en producción sin necesidad de desplegar código adicional ni actualizar la tienda de aplicaciones. Esto te permite desplegar nuevas características con seguridad y confianza.
## Personalización {#personalization}
La capa de personalización representa la capacidad de entregar contenido dinámico en tus mensajes. Utilizando Liquid, un lenguaje de personalización muy extendido, tu equipo puede extraer dinámicamente los datos existentes para mostrar el mensaje adaptado a cada destinatario. Además, puedes insertar cualquier información accesible en tu servidor web o a través de la API directamente en los mensajes que envías, como notificaciones push o correos electrónicos, utilizando [Contenido conectado](https://www.braze.com/docs/es/es/user_guide/messaging/design_and_edit/personalize/connected_content). El Contenido conectado se basa en Liquid y utiliza una sintaxis familiar.
Y como este contenido dinámico es programable, los especialistas en marketing pueden incluir valores calculados, respuestas de otras llamadas o elementos del catálogo de productos. Una vez que hayas configurado estos sistemas durante la implementación, tu equipo de marketing podrá hacerlo sin apenas ayuda de los equipos técnicos.
## Acción {#action}
La capa de acción habilita la mensajería real a tus usuarios. El objetivo de la capa de acción es enviar el mensaje adecuado al usuario adecuado en el momento adecuado, basándose en los datos disponibles a través de todas las capas comentadas anteriormente. La mensajería se realiza dentro de tu aplicación o sitio web (como el envío de mensajes dentro de la aplicación o a través de elementos gráficos como carruseles de Content Cards y banners) o fuera de tu experiencia de la aplicación (como el envío de notificaciones push o correos electrónicos).
### Canales de mensajería {#messaging-channels}
Braze se diseñó para gestionar un panorama tecnológico en evolución con su modelo de datos centrado en el usuario e independiente del canal. El dashboard gestiona la entrega de mensajes y los desencadenantes transaccionales. Por ejemplo, tus especialistas en marketing pueden desencadenar un mensaje SMS ofreciendo un cupón para uno de tus escaparates recién abiertos cuando un usuario entre en la geovalla establecida cerca de esta ubicación, o enviar a un usuario un correo electrónico para informarle de que su programa favorito tiene una nueva temporada.
El [SDK de Braze](https://www.braze.com/docs/es/es/user_guide/get_started/sdk_overview) potencia canales de mensajería adicionales: push, mensajes dentro de la aplicación y Content Cards. Integras el SDK con tu aplicación o sitio web para permitir que tu equipo de marketing utilice el dashboard de Braze para coordinar sus Campaigns en todos los canales de mensajería admitidos.

## Exportar datos {#exporting-data}
Fundamentalmente, todas las interacciones del usuario final con Braze son objeto de seguimiento para que puedas medir tu interacción y alcance. Después de que Braze haya agregado tus datos de todas estas fuentes, se pueden exportar de nuevo a tu stack tecnológico utilizando una variedad de herramientas, cerrando el bucle.
### Currents
[Currents](https://www.braze.com/docs/es/es/user_guide/data/distribution/braze_currents) es un complemento opcional de Braze que proporciona una exportación de streaming granular que alimenta continuamente otros destinos de tu stack. Currents es una fuente de datos brutos por usuario y evento que exporta datos cada cinco minutos o cada 15.000 eventos, lo que ocurra primero. Ejemplos de algunos destinos descendentes para Currents serían Segment, S3, Redshift y Mixpanel, entre otros.
### Uso compartido de datos de Snowflake {#snowflake-data-sharing}
La funcionalidad de [Compartición segura de datos](https://www.braze.com/docs/es/es/partners/data_and_analytics/data_warehouses/snowflake) de Snowflake permite a Braze darte acceso seguro a los datos de nuestro portal Snowflake sin preocuparte de las fricciones del flujo de trabajo, los puntos de fallo y los costes innecesarios que conllevan las típicas relaciones con los proveedores de datos. Todo el intercambio se realiza a través de la capa de servicios y el almacén de metadatos únicos de Snowflake: en realidad, no se copia ni se transfiere ningún dato entre cuentas. Se trata de un concepto importante porque los datos compartidos no ocupan almacenamiento en una cuenta de consumidor y, por tanto, no contribuyen a tus gastos mensuales de almacenamiento de datos. Lo único que se cobra a los consumidores son los recursos informáticos (es decir, los almacenes virtuales) utilizados para consultar los datos compartidos.
### API de exportación de Braze {#braze-export-apis}
La API de Braze proporciona [puntos finales](https://www.braze.com/docs/es/es/api/endpoints/export) que te permiten exportar mediante programación análisis agregados, así como exportar datos de usuario individuales. Estos datos pueden exportarse para audiencias y segmentos de cualquier tamaño.
### CSV {#csvs}
Por último, existe una opción para descargar tus datos a nivel agregado directamente desde el dashboard como [CSV](https://www.braze.com/docs/es/es/user_guide/data/distribution/export_braze_data). La opción CSV permite fácilmente a los miembros de tu equipo exportar datos desde Braze.
**Tip:**
Mientras que la exportación CSV tiene un límite base de 500.000 filas, las API no tienen límite en este sentido.
## Todo junto {#putting-it-all-together}
Uno de tus usuarios, llamémosle Mel, acaba de recibir el anuncio de tu producto. Entre bastidores, todas las capas de la plataforma Braze trabajaron juntas para garantizar que este proceso se desarrollara sin problemas.
La información de Mel se introdujo en Braze desde tu plataforma heredada de interacción con los clientes mediante una importación CSV. Cada vez que Mel interactuaba con tu aplicación tras la integración, se añadían más datos a su perfil de cliente.
El anuncio de tu producto se envió a todos los clientes a los que les gustó un artículo similar en tu aplicación. Definiste estos datos como un evento personalizado. El SDK hizo un seguimiento de este evento y segmentó tu base de usuarios en consecuencia. Braze orquestó la mejor hora del día para enviar este anuncio, y personalizó el anuncio llamando a Mel por su nombre preferido.
Cuando Mel abre el anuncio, añade tu nuevo producto a su lista de deseos. Braze hace un seguimiento de que hizo clic en el correo electrónico automáticamente. El SDK hace un seguimiento de que ha incluido tu nuevo producto en la lista de deseos. Cada vez que interactúan con tu marca, tú y tus usuarios aprendéis más el uno del otro.

# Construcción con un LLM
Source: /docs/es/developer_guide/getting_started/build_with_llm/index.md
# Construcción con un LLM {#building-with-an-llm}
> Utiliza asistentes de codificación con IA para acelerar tu flujo de trabajo de integración con Braze. Conecta tu IDE al servidor MCP de Braze Docs a través de Context7 y obtén orientación precisa y actualizada sobre el SDK directamente en tu entorno de desarrollo.
Los asistentes de codificación con IA pueden ayudarte a escribir código de integración, solucionar problemas y explorar las características del SDK de Braze—pero solo si disponen del contexto adecuado. El servidor Braze Docs MCP proporciona a tu asistente de IA acceso directo a la documentación de Braze, para que pueda generar fragmentos de código precisos y responder a preguntas técnicas basándose en las últimas referencias del SDK.
## Conexión a Braze Docs MCP {#connecting-to-the-braze-docs-mcp}
[Context7](https://context7.com/braze-inc/braze-docs) sirve de puente entre tu asistente de IA y la biblioteca de documentación de Braze. Al añadir Context7 a la configuración MCP de tu IDE, tu asistente de IA puede realizar consultas sobre toda la documentación de Braze y recuperar referencias relevantes del SDK, ejemplos de código y guías de integración bajo demanda.
### Configuración de Context7 {#setting-up-context7}
Para conectar tu asistente de IA al MCP de Braze Docs a través de Context7, añade la siguiente configuración al archivo `mcp.json` de tu IDE.
En [Cursor](https://cursor.com/), ve a **Settings** > **Tools and Integrations** > **MCP Tools** > **Add Custom MCP** y, a continuación, añade el siguiente fragmento de código:
```json
{
"mcpServers": {
"context7": {
"command": "npx",
"args": ["-y", "@upstash/context7-mcp@latest"]
}
}
}
```
Guarda la configuración y reinicia Cursor. Tu asistente de IA ahora puede acceder a la documentación de Braze a través de Context7 cuando incluyes `use context7` en tus prompts.
En Claude Desktop, ve a **Settings** > **Developer** > **Edit Config** y, a continuación, añade lo siguiente a tu archivo `claude_desktop_config.json`:
```json
{
"mcpServers": {
"context7": {
"command": "npx",
"args": ["-y", "@upstash/context7-mcp@latest"]
}
}
}
```
Guarda la configuración y reinicia Claude Desktop.
Añade lo siguiente a tu archivo `settings.json` o `.vscode/mcp.json` de VS Code:
```json
{
"mcpServers": {
"context7": {
"command": "npx",
"args": ["-y", "@upstash/context7-mcp@latest"]
}
}
}
```
Guarda la configuración y reinicia VS Code.
**Note:**
Context7 es diferente del [servidor MCP de Braze](https://www.braze.com/docs/es/es/developer_guide/mcp_server). Context7 proporciona a tu asistente de IA acceso a **la documentación de Braze**, mientras que el servidor MCP de Braze proporciona acceso de solo lectura a **los datos de tu espacio de trabajo de Braze** (como campañas, segmentos y análisis). Puedes utilizar ambos juntos para disfrutar de una experiencia de desarrollo asistida por IA más completa.
## Redacción de prompts para el desarrollo del SDK de Braze {#writing-prompts-for-braze-sdk-development}
Después de configurar Context7, incluye `use context7` en tus prompts para indicar a tu asistente de IA que utilice la documentación de Braze como contexto. Los siguientes ejemplos muestran cómo escribir prompts eficaces para tareas comunes del SDK.
### SDK de React Native {#react-native-sdk}
Estos prompts muestran tareas de integración comunes para el [SDK de Braze React Native](https://www.braze.com/docs/es/es/developer_guide/sdk_integration?sdktab=react%20native).
#### Inicialización del SDK {#initializing-the-sdk}
```text
Using the Braze React Native SDK, show me how to initialize the SDK
in my App.tsx with an API key and custom endpoint. Include the
configuration for automatic session tracking. Use context7.
```
#### Registro de eventos personalizados con propiedades {#logging-custom-events-with-properties}
```text
I need to track user activity in my React Native app using the Braze
React Native SDK. Show me how to log a custom event called
"ProductViewed" with properties for product_id, category, and price.
Use context7.
```
#### Configuración de notificaciones push {#setting-up-push-notifications}
```text
Using the Braze React Native SDK, walk me through requesting push
notification permissions on both iOS and Android 13+. Include the
code for registering the push token with Braze. Use context7.
```
#### Gestión de mensajes dentro de la aplicación {#handling-in-app-messages}
```text
Show me how to subscribe to in-app messages using the Braze React
Native SDK, including how to log impressions and button clicks
programmatically. Use context7.
```
### SDK Web {#web-sdk}
Estos prompts muestran tareas de integración comunes para el [SDK Web de Braze](https://www.braze.com/docs/es/es/developer_guide/sdk_integration?sdktab=web).
#### Inicialización del SDK
```text
Using the Braze Web SDK, show me how to initialize the SDK with
braze.initialize(), including the API key, base URL, and options
for enabling logging and automatic in-app message display.
Use context7.
```
#### Seguimiento de eventos personalizados y compras {#tracking-custom-events-and-purchases}
```text
Using the Braze Web SDK, create a JavaScript module that logs a
custom event called "VideoPlayed" with properties for video_id,
duration_seconds, and completion_percentage. Also show how to log
a purchase with product ID, price, currency code, and quantity.
Use context7.
```
#### Registro para notificaciones push web {#registering-for-web-push}
```text
Using the Braze Web SDK, provide the HTML and JavaScript needed to
register a user for web push notifications after they click a
"Subscribe to updates" button. Include the service worker setup.
Use context7.
```
#### Gestión de atributos de usuario {#managing-user-attributes}
```text
Using the Braze Web SDK, show me how to set standard user attributes
(first name, email, country) and custom user attributes (favorite_genre,
subscription_tier) for the current user. Use context7.
```
## Documentación en texto sin formato {#plain-text-documentation}
Puedes acceder a la documentación de la Guía para desarrolladores de Braze como archivos de texto sin formato optimizados para herramientas de IA y LLM. Estos archivos proporcionan documentación de Braze en un formato que los asistentes de IA pueden analizar y comprender sin la sobrecarga que supone la representación HTML.
| Archivo | Descripción |
|------|-------------|
| [llms.txt](https://www.braze.com/docs/es/es/developer_guide/llms.txt) | Un índice de las páginas de documentación para desarrolladores de Braze con títulos y descripciones. Utilízalo como punto de partida para descubrir la documentación disponible. |
| [llms-full.txt](https://www.braze.com/docs/es/es/developer_guide/llms-full.txt) | La documentación completa para desarrolladores de Braze en un único archivo de texto sin formato, formateado para su uso con LLM. |
{: .reset-td-br-1 .reset-td-br-2 aria-label="Documentación en texto sin formato" }
Estos archivos siguen el [estándar llms.txt](https://llmstxt.org/), una convención emergente para hacer que la documentación sea accesible para las herramientas de IA. Puedes hacer referencia a estos archivos directamente en tus prompts o pegar su contenido en un LLM como contexto.
# Resumen de la personalización
Source: /docs/es/developer_guide/getting_started/customization_overview/index.md
# Resumen de la personalización {#customization-overview}
> ¡Casi todo en Braze es totalmente personalizable! Los artículos de esta guía de personalización te muestran cómo enfocar el perfeccionamiento de tu experiencia con Braze mediante una mezcla de configuración y personalización. Durante este proceso, los equipos de marketing e ingeniería deben colaborar estrechamente para coordinar exactamente cómo personalizar los canales de mensajería de Braze.
**Note:**
El SDK de Braze es un potente conjunto de herramientas, pero a alto nivel proporciona dos importantes funciones: ayuda a recopilar y sincronizar los datos de usuario entre plataformas en un perfil de usuario consolidado, y también gestiona canales de mensajería como mensajes dentro de la aplicación, notificaciones push y Content Cards. Los artículos de la guía de personalización asumen que ya has pasado por el [proceso de implementación del SDK](https://www.braze.com/docs/es/es/developer_guide/home).
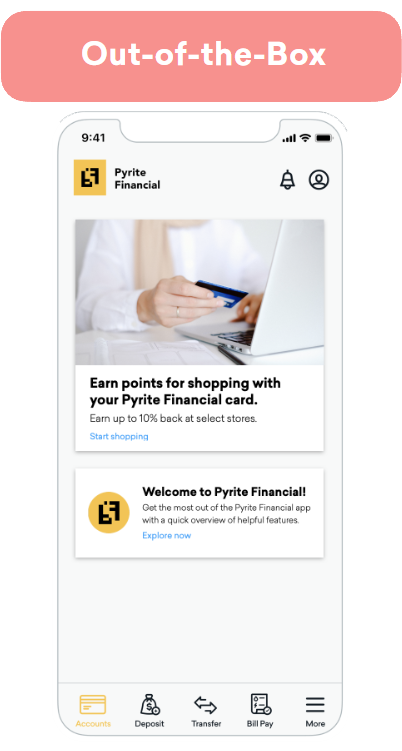
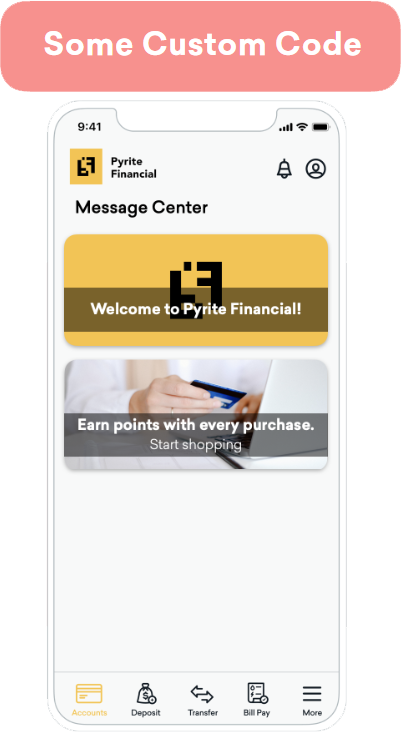
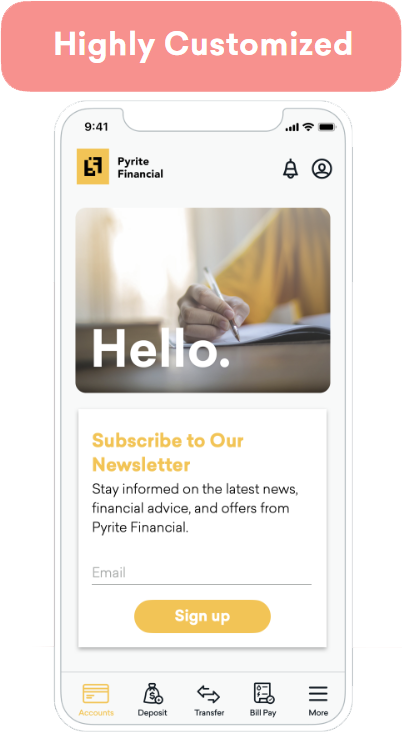
Todos los componentes de Braze están diseñados para ser accesibles, adaptables y personalizables. Por ello, te recomendamos que empieces con los componentes predeterminados de `BrazeUI` y los personalices para adaptarlos a las necesidades de tu marca y a tu caso de uso. En Braze, dividimos la personalización en tres enfoques diferentes, según el esfuerzo asociado y el nivel de flexibilidad proporcionado. Estos enfoques se denominan "gatear", "caminar" o "correr".
- **Gatear:** Aprovecha las opciones básicas de estilo para una implementación rápida y de poco esfuerzo.
- **Caminar:** Añade un estilo personalizado a las plantillas predeterminadas para adaptarlas mejor a la experiencia de tu marca.
- **Correr:** Personaliza cada parte de tu mensajería, desde el estilo hasta el comportamiento y las conexiones entre canales.
{: style="max-width:35%;float:right;margin-left:15px;border:none;"}
El enfoque Gatear pone el poder de la personalización directamente en manos de los especialistas en marketing. Aunque para integrar los canales de mensajería de Braze en tu aplicación o sitio web es necesario un ligero trabajo de desarrollo previo, este enfoque te permite ponerte en marcha antes.
Los especialistas en marketing determinan el contenido, la audiencia y el momento de envío de los mensajes a través del dashboard. Sin embargo, las opciones de estilo son limitadas. Este enfoque es el más adecuado para equipos con recursos limitados de desarrolladores o que desean compartir rápidamente contenidos sencillos.
Resumen de la personalización
Personalización
Descripción
Esfuerzo
Bajo
Trabajo de desarrollador
0-1 horas
Estilo de tarjeta
Utiliza las plantillas predeterminadas de Braze.
Comportamiento
Elige entre las opciones de comportamiento predeterminadas.
Seguimiento de análisis
Los análisis se capturan en Braze.
Pares clave-valor
Opcional, potencia la personalización adicional de IU/UX.
{: style="max-width:35%;float:right;margin-left:15px;border:none;"}
Un enfoque híbrido de la implementación, el enfoque Caminar implica que tanto el equipo de marketing como el de desarrolladores colaboren para hacer coincidir la marca de tu aplicación o sitio web.
Durante el proceso de implementación, los desarrolladores escriben código personalizado para actualizar el aspecto de un canal de mensajería y que se ajuste más a tu marca. Esto incluye cambiar el tipo y tamaño de letra, las esquinas redondeadas y los colores. Este enfoque sigue utilizando las opciones predeterminadas, solo que con un estilo de plantilla programático.
Los especialistas en marketing siguen manteniendo el control de la audiencia, el contenido, el comportamiento al hacer clic y la caducidad directamente en el dashboard de Braze.
Resumen de la personalización
Personalización
Descripción
Esfuerzo
Bajo
Trabajo de desarrollador
0-4 horas
IU
Utiliza plantillas de Braze o utiliza plantillas creadas por tus propios desarrolladores.
Comportamiento
Elige entre las opciones de comportamiento predeterminadas.
Seguimiento de análisis
Los análisis predeterminados se capturan en Braze.
Pares clave-valor
Opcional, potencia la personalización adicional de IU/UX.
{: style="max-width:35%;float:right;margin-left:15px;border:none;"}
Con el enfoque Correr, los desarrolladores toman la iniciativa con pleno control de la experiencia del usuario. El código personalizado dicta qué aspecto tendrán los mensajes, cómo se comportan y cómo interactúan con otros canales de mensajería (por ejemplo, desencadenar una Content Card a partir de una notificación push).
Cuando crees contenido personalizado completamente nuevo, como nuevos tipos de Content Cards o mensajes dentro de la aplicación con una interfaz de usuario a medida, el SDK de Braze no hará un [seguimiento automático de los análisis](https://www.braze.com/docs/es/es/developer_guide/analytics). Debes gestionar los análisis mediante programación para que los especialistas en marketing sigan teniendo acceso a métricas como impresiones, clics y descartes en el dashboard de Braze. Llama a los métodos de análisis del SDK de Braze para que el SDK devuelva estos datos a Braze. Cada canal de mensajería dispone de un artículo de análisis para facilitar esta tarea.
Resumen de la personalización
Personalización
Descripción
Esfuerzo
Depende del caso de uso.
Trabajo de desarrollador
Poco esfuerzo: 1-4 horas Esfuerzo medio: 4-8 horas Mucho esfuerzo: más de 8 horas
IU
Personalizada
Comportamiento
Personalizado
Seguimiento de análisis
Personalizado
Pares clave-valor
Obligatorio
**Tip:**
Cuando los desarrolladores e implementadores crean contenido personalizado para Braze, existe la oportunidad de una colaboración interfuncional con los especialistas en marketing. Por ejemplo, si desarrollas una nueva interfaz de usuario o una nueva funcionalidad para un componente concreto, prepara a tu equipo para el éxito documentando el nuevo comportamiento y cómo se integra con tu backend.
# Tutoriales de Braze SDK
Source: /docs/es/developer_guide/tutorials/index.md
# Integra el SDK de Braze
Source: /docs/es/developer_guide/sdk_integration/index.md
# {: style="float:right;width:120px;border:0;" class="noimgborder"}Integra el SDK de Braze {#braze-logo-image_buster-assetsbraze_primary_icon_blacksvg-stylefloatrightwidth120pxborder0-classnoimgborderintegrate-the-braze-sdk}
> Aprende a integrar el SDK de Braze. Cada SDK está alojado en su propio repositorio público de GitHub, que incluye aplicaciones de muestra totalmente compilables que puedes utilizar para probar las características de Braze o implementar junto con tus propias aplicaciones. Para obtener más información, consulta [Referencias, repositorios y aplicaciones de ejemplo](https://www.braze.com/docs/es/es/developer_guide/references). Para obtener información más general sobre el SDK, consulta [Introducción: Resumen de la integración](https://www.braze.com/docs/es/es/developer_guide/getting_started/integration_overview).
Para ver el contenido del README del SDK reflejado en la documentación, consulta [Guías de repositorios](https://www.braze.com/docs/es/es/developer_guide/sdk_repository_guides).
**Tip:**
Después de integrar el SDK, puedes habilitar la [Autenticación SDK](https://www.braze.com/docs/es/es/developer_guide/sdk_integration/authentication) para añadir una capa adicional de seguridad evitando las solicitudes no autorizadas al SDK. La Autenticación SDK está disponible para Web, Android, Swift, React Native, Flutter, Unity, Cordova, .NET MAUI (Xamarin) y Expo.
## About the Web Braze SDK
The Web Braze SDK lets you collect analytics and display rich in-app messages, push, and Content Card messages to your web users. For more information, see [Braze JavaScript reference documentation](https://js.appboycdn.com/web-sdk/latest/doc/modules/braze.html).
**Note:**
This guide uses code samples from the Braze Web SDK 4.0.0+. To upgrade to the latest Web SDK version, see [SDK Upgrade Guide](https://github.com/braze-inc/braze-web-sdk/blob/master/UPGRADE_GUIDE.md).
## Integrate the Web SDK
You can integrate the Web Braze SDK using the following methods. For additional options, see [other integration methods](#web_other-integration-methods).
- **Code-based integration:** Integrate the Web Braze SDK directly in your codebase using your preferred package manager or the Braze CDN. This gives you full control over how the SDK is loaded and configured.
- **Google Tag Manager:** A no-code solution that lets you integrate the Web Braze SDK without modifying your site's code. For more information, see [Google Tag Manager with the Braze SDK](https://www.braze.com/docs/es/es/developer_guide/sdk_integration/google_tag_manager/).
**Important:**
We recommend using the [NPM integration method](https://www.braze.com/docs/es/es/developer_guide/sdk_integration/?subtab=package%20manager&sdktab=web). Benefits include storing SDK libraries locally on your website, providing immunity from ad-blocker extensions, and contributing to faster load times as part of bundler support.
### Step 1: Install the Braze library
You can install the Braze library using one of the following methods. However, if your website uses a `Content-Security-Policy`, review the [Content Security Policy](https://www.braze.com/docs/es/es/developer_guide/platforms/web/content_security_policy/) before continuing.
**Important:**
While most ad blockers do not block the Braze Web SDK, some more-restrictive ad blockers are known to cause issues.
If your site uses NPM or Yarn package managers, you can add the [Braze NPM package](https://www.npmjs.com/package/@braze/web-sdk) as a dependency.
Typescript definitions are now included as of v3.0.0. For notes on upgrading from 2.x to 3.x, see our [changelog](https://github.com/braze-inc/braze-web-sdk/blob/master/UPGRADE_GUIDE.md).
```bash
npm install --save @braze/web-sdk
# or, using yarn:
# yarn add @braze/web-sdk
```
Once installed, you can `import` or `require` the library in the typical fashion:
```typescript
import * as braze from "@braze/web-sdk";
// or, using `require`
const braze = require("@braze/web-sdk");
```
Add the Braze Web SDK directly to your HTML by referencing our CDN-hosted script, which loads the library asynchronously.
**Important:**
The default **Prevent Cross-Site Tracking** setting in Safari can prevent in-app message types like Banners and Content Cards from displaying when you use the CDN integration method. To avoid this issue, use the NPM integration method so that Safari does not classify these messages as cross-site traffic and your web users can see them in all supported browsers.
### Step 2: Initialize the SDK
After the Braze Web SDK is added to your website, initialize the library with the API key and [SDK endpoint URL](https://www.braze.com/docs/es/es/user_guide/administrative/access_braze/sdk_endpoints) found in **Settings** > **App Settings** within your Braze dashboard. For a complete list of options for `braze.initialize()`, along with our other JavaScript methods, see [Braze JavaScript documentation](https://js.appboycdn.com/web-sdk/latest/doc/modules/braze.html#initialize).
**Note:**
**Custom domains for Web SDK requests are not supported**: The Web SDK `baseUrl` must be a Braze SDK endpoint (for example, `sdk.iad-05.braze.com`). Braze does not support routing Web SDK traffic through a customer-owned domain via CNAME records. If you need Web SDK requests to originate from your own domain, contact Braze support.
```javascript
// initialize the SDK
braze.initialize('YOUR-API-KEY-HERE', {
baseUrl: "YOUR-SDK-ENDPOINT-HERE",
enableLogging: false, // set to `true` for debugging
allowUserSuppliedJavascript: false, // set to `true` to support custom HTML messages
});
// Enable automatic display of in-app messages
// Required if you want in-app messages to display automatically when triggered
braze.automaticallyShowInAppMessages();
// if you use Content Cards
braze.subscribeToContentCardsUpdates(function(cards){
// cards have been updated
});
// optionally set the current user's external ID before starting a new session
// you can also call `changeUser` later in the session after the user logs in
if (isLoggedIn){
braze.changeUser(userIdentifier);
}
// `openSession` should be called last - after `changeUser` and `automaticallyShowInAppMessages`
braze.openSession();
```
**Important:**
**In-App Message Display**: To display in-app messages automatically when they're triggered, you must call `braze.automaticallyShowInAppMessages()`. Without this call, in-app messages don't display automatically. If you want to manage message display manually, remove this call and use `braze.subscribeToInAppMessage()` instead. For more information, see [In-app message delivery](https://www.braze.com/docs/es/es/developer_guide/in_app_messages/delivery/).
#### Troubleshooting missing sessions for anonymous users
If you're seeing "Session missing" behavior, or you're not able to track the session for users who stay anonymous on web, make sure your integration calls `braze.openSession()` during initialization.
- **Scenario:** Anonymous users can return a Braze ID, but session data is blank or missing.
- **Cause:** The implementation doesn't call `braze.openSession()`.
- **Resolution:** Always call `braze.openSession()` after initialization (and after `braze.changeUser()` if you set an external ID).
For more information, see [Step 2: Initialize the SDK](https://www.braze.com/docs/es/es/developer_guide/sdk_integration/?sdktab=web&tab=code-based%20integration#step-2-initialize-the-sdk).
**Important:**
Anonymous users on mobile or web devices may be counted towards your [MAU](https://www.braze.com/docs/es/es/user_guide/data_and_analytics/reporting/understanding_your_app_usage_data/#monthly-active-users). As a result, you may want to conditionally load or initialize the SDK to exclude these users from your MAU count.
### Prerequisites
Before you can use this integration method, you'll need to [create an account and container for Google Tag Manager](https://support.google.com/tagmanager/answer/14842164).
### Step 1: Open the tag template gallery
In [Google Tag Manager](https://tagmanager.google.com/), choose your workspace, then select **Templates**. In the **Tag Template** pane, select **Search Gallery**.
{: style="max-width:95%;"}
### Step 2: Add the initialization tag template
In the template gallery, search for `braze-inc`, then select **Braze Initialization Tag**.
{: style="max-width:80%;"}
Select **Add to workspace** > **Add**.
{: style="max-width:70%;"}
### Step 3: Configure the tag
From the **Templates** section, select your newly added template.
{: style="max-width:95%;"}
Select the pencil icon to open the **Tag Configuration** dropdown.

Enter the minimum required information:
| Field | Description |
| ------------- | ----------- |
| **API Key** | Your [Braze API Key](https://www.braze.com/docs/es/es/api/basics/#about-rest-api-keys), found in the Braze dashboard under **Settings** > **App Settings**. |
| **API Endpoint** | Your REST endpoint URL. Your endpoint will depend on the Braze URL for [your instance](https://www.braze.com/docs/es/es/api/basics/#endpoints). |
| **SDK Version** | The most recent `MAJOR.MINOR` version of the Web Braze SDK listed in the [changelog](https://www.braze.com/docs/es/es/developer_guide/changelogs/?sdktab=web). For example, if the latest version is `4.1.2`, enter `4.1`. For more information, see [About SDK version management](https://www.braze.com/docs/es/es/developer_guide/sdk_integration/version_management/). |
{: .reset-td-br-1 .reset-td-br-2 aria-label="Step 3: Configure the tag" }
For additional initialization settings, select **Braze Initialization Options** and choose any options you need.
{: style="max-width:65%;"}
### Step 4: Choose initialization options
The Braze Initialization Tag exposes the following options. Most of these map directly to the [Web SDK `InitializationOptions`](https://js.appboycdn.com/web-sdk/latest/doc/modules/braze.html#initializationoptions), and some correspond to Web SDK methods that the tag will call during initialization. Select the options that match your integration needs:
| GTM option | Web SDK configuration or method | Description |
| --- | --- | --- |
| **Allow HTML In-App Messages** | `allowUserSuppliedJavascript` | Enables HTML in-app messages, Banners, and user-supplied JavaScript click actions. Required for [HTML in-app messages](https://www.braze.com/docs/es/es/user_guide/channels/in_app_messages/message_types/custom_html/) and [Banners](https://www.braze.com/docs/es/es/developer_guide/banners/placements/?sdktab=web) that use custom HTML. Only enable this when you trust the HTML and JavaScript content, as it allows user-supplied JavaScript execution. |
| **App Version Number** | `appVersion`, `appVersionNumber` | App version for segmentation (for example, `1.2.3.4`). |
| **Automatically Open New Session** | `braze.openSession()` | Opens a new session after the SDK is initialized by calling this method for you. |
| **Automatically show new in app messages** | `braze.automaticallyShowInAppMessages()` | Automatically displays new in-app messages when they arrive from the server by calling this method after initialization. |
| **Disable Automatic Push Token Maintenance** | `disablePushTokenMaintenance` | Stops the SDK from syncing push tokens with the Braze backend on new sessions. |
| **Disable Automatic Service Worker Registration** | `manageServiceWorkerExternally` | Use if you register and control the service worker yourself. |
| **Disable Cookies** | `noCookies` | Uses localStorage instead of cookies for user/session data. Prevents cross-subdomain recognition. |
| **Disable Font Awesome** | `doNotLoadFontAwesome` | Prevents the SDK from loading Font Awesome from the CDN. Use if your site has its own Font Awesome. |
| **Enable SDK Authentication** | `enableSdkAuthentication` | Enables [SDK Authentication](https://www.braze.com/docs/es/es/developer_guide/sdk_integration/authentication/). |
| **Enable Web SDK Logging** | `enableLogging` | Enables console logging for debugging. Remove before production. |
| **Minimum Interval Between Triggered Messages** | `minimumIntervalBetweenTriggerActionsInSeconds` | Minimum seconds between trigger actions (default: 30). |
| **Open Cards in New Tab** | `openCardsInNewTab` | Opens Content Card links in a new tab when using the default Feed UI. |
| **Service Worker Location** | `serviceWorkerLocation` | Custom path for the service worker file (default: `/service-worker.js`). |
| **Session Timeout (seconds)** | `sessionTimeoutInSeconds` | Session timeout in seconds (default: 1800). |
{: .reset-td-br-1 .reset-td-br-2 .reset-td-br-3 aria-label="Step 4: Choose initialization options" }
**Note:**
To enable [Custom HTML in-app messages](https://www.braze.com/docs/es/es/user_guide/channels/in_app_messages/message_types/custom_html/) when using the Google Tag Manager Braze Initialization Tag, select **Allow HTML In-App Messages** in **Braze Initialization Options**. This checkbox maps to the `allowUserSuppliedJavascript` initialization option in `braze.initialize()` and sets it to `true`. The Google Tag Manager Braze Initialization Tag uses this label instead of the option name.
For options not exposed in the GTM template (such as `contentSecurityNonce`, `localization`, or `devicePropertyAllowlist`), use [runtime initialization](https://www.braze.com/docs/es/es/developer_guide/sdk_integration/?sdktab=web) instead.
### Step 5: Set to Trigger on *all pages*
The initialization tag should be run on all pages of your site. This allows you to use Braze SDK methods and record web push analytics.
### Step 6: Verify your integration
You can verify your integration using either of the following options:
- **Option 1:** Using Google Tag Manager's [debugging tool](https://support.google.com/tagmanager/answer/6107056?hl=en), you can check if the Braze Initialization Tag is triggering correctly on your configured pages or events.
- **Option 2:** Check for any network requests made to Braze from your web page. Additionally, the global `window.braze` library should now be defined.
## Filtering bot traffic {#bot-filtering}
MAU can include a percentage of bot users, which inflates your monthly active user count. While the Braze Web SDK includes built-in detection for some common web crawlers (such as search engine bots and social media preview bots), it is especially important to stay proactive with robust solutions to detect bots, as SDK updates alone cannot consistently detect every new bot.
### Limitations of SDK-side bot detection
The Web SDK includes basic user-agent-based bot detection that filters out known crawlers. However, this approach has limitations:
- **New bots emerge constantly**: AI companies and other actors regularly create new bots that may disguise themselves to avoid detection.
- **User-agent spoofing**: Sophisticated bots can mimic legitimate browser user-agents.
- **Custom bots**: Non-technical users can now easily create bots using large language models (LLMs), making bot behavior unpredictable.
### Implementing bot filtering
**Important:**
The following solutions are general suggestions. Tailor bot filtering logic to your unique environment and traffic patterns.
The most robust solution is to implement your own bot filtering logic before initializing the Braze SDK. Common approaches include:
#### Require user interaction
Consider delaying SDK initialization until a user performs a meaningful interaction, such as accepting a cookie consent banner, scrolling, or clicking. This approach is often easier to implement and can be highly effective at filtering bot traffic.
**Important:**
Delaying SDK initialization until user interaction might cause Banners and Content Cards to also not display until that interaction occurs.
#### Custom bot detection
Implement custom detection based on your specific bot traffic patterns, such as:
- Analyzing user-agent strings for patterns you've identified in your traffic
- Checking for headless browser indicators
- Using third-party bot detection services
- Monitoring behavioral signals specific to your site
**Example of conditional initialization:**
```javascript
// Only initialize Braze if your custom bot detection determines this is not a bot
if (!isLikelyBot()) {
braze.initialize('YOUR-API-KEY-HERE', {
baseUrl: "YOUR-SDK-ENDPOINT-HERE"
});
braze.automaticallyShowInAppMessages();
braze.openSession();
}
```
### Best practices
- Regularly analyze your MAU data and web traffic patterns to identify new bot behavior.
- Test thoroughly to ensure your bot filtering doesn't prevent legitimate users from being tracked.
- Update your filtering logic based on the bot traffic patterns you observe in your environment.
## Optional configurations
### Logging
To quickly enable logging, you can add `?brazeLogging=true` as a parameter to your website URL. Alternatively, you can enable [basic](#web_basic-logging) or [custom](#web_custom-logging) logging. For a centralized overview across all platforms, see [Verbose logging](https://www.braze.com/docs/es/es/developer_guide/sdk_integration/verbose_logging).
#### Basic logging
Use `enableLogging` to log basic debugging messages to the JavaScript console before the SDK is initialized.
```javascript
enableLogging: true
```
Your method should be similar to the following:
```javascript
braze.initialize('API-KEY', {
baseUrl: 'API-ENDPOINT',
enableLogging: true
});
braze.openSession();
```
Use `braze.toggleLogging()` to log basic debugging messages to the JavaScript console after the SDK is initialized. Your method should be similar to the following:
```javascript
braze.initialize('API-KEY', {
baseUrl: 'API-ENDPOINT',
});
braze.openSession();
...
braze.toggleLogging();
```
**Important:**
Basic logs are visible to all users, so consider disabling, or switch to [`setLogger`](#web_custom-logging), before releasing your code to production.
#### Custom logging
Use `setLogger` to log custom debugging messages to the JavaScript console. Unlike basic logs, these logs are not visible to users.
```javascript
setLogger(loggerFunction: (message: STRING) => void): void
```
Replace `STRING` with your message as a single string parameter. Your method should be similar to the following:
```javascript
braze.initialize('API-KEY');
braze.setLogger(function(message) {
console.log("Braze Custom Logger: " + message);
});
braze.openSession();
```
## Upgrading the SDK
**Note:**
This guide uses code samples from the Braze Web SDK 4.0.0+. To upgrade to the latest Web SDK version, see [SDK Upgrade Guide](https://github.com/braze-inc/braze-web-sdk/blob/master/UPGRADE_GUIDE.md).
When you reference the Braze Web SDK from our content delivery network, for example, `https://js.appboycdn.com/web-sdk/a.a/braze.min.js` (as recommended by our default integration instructions), your users receive minor updates (bug fixes and backward compatible features, versions `a.a.a` through `a.a.z` in this example) automatically when they refresh your site.
However, when we release major changes, we require you to upgrade the Braze Web SDK manually to ensure that breaking changes do not impact your integration. Additionally, if you download our SDK and host it yourself, you don't receive any version updates automatically and should upgrade manually to receive the latest features and bug fixes.
You can keep up-to-date with our latest release [following our release feed](https://github.com/braze-inc/braze-web-sdk/tags.atom) with the RSS Reader or service of your choice, and see [our changelog](https://github.com/braze-inc/braze-web-sdk/blob/master/CHANGELOG.md) for a full accounting of our Web SDK release history. To upgrade the Braze Web SDK:
- Update the Braze library version by changing the version number of `https://js.appboycdn.com/web-sdk/[OLD VERSION NUMBER]/braze.min.js`, or in your package manager's dependencies.
- If you have web push integrated, update the service worker file on your site - by default, this is located at `/service-worker.js` at your site's root directory, but the location may be customized in some integrations. You must access the root directory to host a service worker file.
You must update these two files in coordination with each other for proper functionality.
## Other integration methods
### Accelerated Mobile Pages (AMP)
**See more**
#### Step 1: Include AMP web push script
Add the following async script tag to your head:
```js
```
#### Step 2: Add subscription widgets
Add a widget to the body of your HTML that allows users to subscribe and unsubscribe from push.
```js
```
#### Step 3: Add `helper-iframe` and `permission-dialog`
The AMP Web Push component creates a popup to handle push subscriptions, so you must add the following helper files to your project to enable this feature:
- [`helper-iframe.html`](https://cdn.ampproject.org/v0/amp-web-push-helper-frame.html)
- [`permission-dialog.html`](https://cdn.ampproject.org/v0/amp-web-push-permission-dialog.html)
#### Step 4: Create a service worker file
Create a `service-worker.js` file in the root directory of your website and add the following snippet:
#### Step 5: Configure the AMP web push HTML element
Add the following `amp-web-push` HTML element to your HTML body. Keep in mind, you need to append your [`apiKey` and `baseUrl`](https://documenter.getpostman.com/view/4689407/SVYrsdsG) as query parameters to `service-worker-URL`.
```js
```
### Asynchronous Module Definition (AMD)
#### Disable support
If your site uses RequireJS or another AMD module-loader, but you prefer to load the Braze Web SDK through one of the other options in this list, you can load a version of the library that does not include AMD support. This version of the library can be loaded from the following CDN location:
#### Module loader
If you use RequireJS or other AMD module-loaders we recommend self-hosting a copy of our library and referencing it as you would with other resources:
```javascript
require(['path/to/braze.min.js'], function(braze) {
braze.initialize('YOUR-API-KEY-HERE', { baseUrl: 'YOUR-SDK-ENDPOINT' });
// Required if you want in-app messages to display automatically
braze.automaticallyShowInAppMessages();
braze.openSession();
});
```
### Electron {#electron}
Electron does not officially support web push notifications (see: this [GitHub issue](https://github.com/electron/electron/issues/6697)). There are other [open source workarounds](https://github.com/MatthieuLemoine/electron-push-receiver) you may try that have not been tested by Braze.
### Jest framework {#jest}
When using Jest, you may see an error similar to `SyntaxError: Unexpected token 'export'`. To fix this, adjust your configuration in `package.json` to ignore the Braze SDK:
```
"jest": {
"transformIgnorePatterns": [
"/node_modules/(?!@braze)"
]
}
```
### SSR frameworks {#ssr}
The Web SDK runs in a browser environment. In SSR frameworks, initialize Braze in a client-only component so your server never executes SDK code.
#### Framework-agnostic dynamic import
If your framework isn't listed in this section, you can dynamically import Braze from a client-only lifecycle hook.
```javascript
// MyComponent/braze-exports.js
// Export the parts of the SDK that you need.
export { initialize, openSession } from "@braze/web-sdk";
// MyComponent/MyComponent.js
useEffect(() => {
import("./braze-exports.js").then(({ initialize, openSession }) => {
initialize("YOUR-API-KEY-HERE", {
baseUrl: "YOUR-SDK-ENDPOINT",
enableLogging: true,
});
openSession();
});
}, []);
```
If you're using webpack, you can dynamically import only specific SDK exports.
```javascript
// MyComponent.js
useEffect(() => {
import(
/* webpackExports: ["initialize", "openSession"] */
"@braze/web-sdk"
).then(({ initialize, openSession }) => {
initialize("YOUR-API-KEY-HERE", {
baseUrl: "YOUR-SDK-ENDPOINT",
enableLogging: true,
});
openSession();
});
}, []);
```
#### Shared hook for Next.js and Remix
Create a reusable `useBraze` hook and call it near your app root.
```tsx
// hooks/useBraze.ts
import { useEffect, useRef } from "react";
export function useBraze() {
const didInit = useRef(false);
useEffect(() => {
if (didInit.current) {
return;
}
didInit.current = true;
import("@braze/web-sdk")
.then((braze) => {
const initialized = braze.initialize("YOUR-API-KEY-HERE", {
// Use your Braze Web SDK endpoint, such as sdk.iad-01.braze.com.
baseUrl: "YOUR-SDK-ENDPOINT",
enableLogging: false,
});
if (!initialized) {
return;
}
// Optional: Identify signed-in users before opening a session.
// braze.changeUser("external-id");
// Optional: Automatically display in-app messages.
// braze.automaticallyShowInAppMessages();
braze.openSession();
})
.catch((error) => {
console.error("Unable to load Braze SDK:", error);
});
}, []);
}
```
#### Next.js (App Router)
Call `useBraze` in a client component that wraps your app.
```tsx
// app/components/AppRoot.tsx
"use client";
import type { ReactNode } from "react";
import { useBraze } from "../hooks/useBraze";
export function AppRoot({ children }: { children: ReactNode }) {
useBraze();
return <>{children};
}
```
```tsx
// app/layout.tsx
import type { ReactNode } from "react";
import { AppRoot } from "./components/AppRoot";
export default function RootLayout({
children,
}: {
children: ReactNode;
}) {
return (
{children}
);
}
```
#### Next.js (Pages Router)
Call `useBraze` at the top of your custom app component.
```tsx
// pages/_app.tsx
import type { AppProps } from "next/app";
import { useBraze } from "../hooks/useBraze";
export default function App({ Component, pageProps }: AppProps) {
useBraze();
return (
);
}
```
#### Remix
Call `useBraze` at the top of your root route component.
For local Remix validation examples, run `PORT=4013 npm run dev`.
```tsx
// app/root.tsx
import { Outlet } from "@remix-run/react";
import { useBraze } from "./hooks/useBraze";
export default function App() {
useBraze();
return ;
}
```
#### Logging events and updating users
After `useBraze` initializes the SDK at your app root, other client components can call Braze methods. A common pattern is to call them inside user actions, such as `onClick` or `onSubmit`. In the example, the SDK methods are loaded inside the click handler instead of at the top of the file. This keeps the Web SDK out of server code and loads only what that action needs. The `webpackExports` comment tells webpack which methods to include, so your bundle stays smaller.
```tsx
// app/components/BuyButton.tsx
"use client";
export function BuyButton() {
const handleClick = async () => {
const { logCustomEvent, logPurchase, getUser } = await import(
/* webpackExports: ["logCustomEvent", "logPurchase", "getUser"] */
"@braze/web-sdk"
);
getUser()?.setCustomUserAttribute("last_purchase_date", "2026-05-04");
logCustomEvent("clicked_buy", { source: "product_page" });
logPurchase("sku_123", 19.99, "USD");
};
return ;
}
```
This example shows a `BuyButton` component that logs activity when someone clicks **Buy**. First, it imports only `logCustomEvent`, `logPurchase`, and `getUser` at click time. Then it updates a user attribute, logs a custom event, and logs a purchase. This pattern helps you keep initialization centralized in `useBraze`, while still tracking meaningful actions from any client component.
If you're using Remix with Vite and package-root imports fail at runtime, use the existing Vite workaround. For more information, see [Vite](https://www.braze.com/docs/es/es/developer_guide/sdk_integration/?sdktab=web#web_vite).
For a full list of available methods, see the [Braze JavaScript reference documentation](https://js.appboycdn.com/web-sdk/latest/doc/modules/braze.html).
### Tealium iQ
Tealium iQ offers a basic turnkey Braze integration. To configure the integration, search for Braze in the Tealium Tag Management interface, and provide the Web SDK API key from your dashboard.
For more details or in-depth Tealium configuration support, check out our [integration documentation](https://www.braze.com/docs/es/es/partners/data_and_infrastructure_agility/customer_data_platform/tealium/#about-tealium) or contact your Tealium account manager.
### Vite {#vite}
If you use Vite and see a warning around circular dependencies or `Uncaught TypeError: Class extends value undefined is not a constructor or null`, you may need to exclude the Braze SDK from its [dependency discovery](https://vitejs.dev/guide/dep-pre-bundling.html#customizing-the-behavior):
```
optimizeDeps: {
exclude: ['@braze/web-sdk']
},
```
### Other tag managers
Braze may also be compatible with other tag management solutions by following our integration instructions within a custom HTML tag. Contact a Braze representative if you need help evaluating these solutions.
## Integrating the Android SDK
### Step 1: Update your Gradle build configuration
In your project's repository configuration (for example, `settings.gradle`, `settings.gradle.kts`, or top-level `build.gradle`), add [`mavenCentral()`](https://docs.gradle.org/current/kotlin-dsl/gradle/org.gradle.api.artifacts.dsl/-repository-handler/maven-central.html) to your list of repositories. This syntax is the same for both Groovy and Kotlin DSL.
```groovy
repositories {
mavenCentral()
}
```
Next, add Braze to your dependencies. In the following examples, replace `SDK_VERSION` with the current version of your Android Braze SDK. For the full list of versions, see [Changelogs](https://www.braze.com/docs/es/es/developer_guide/changelogs/?sdktab=android).
**Note:**
- For Kotlin DSL (`build.gradle.kts`), use the `implementation("...")` syntax.
- For Groovy (`build.gradle`), use the `implementation '...'` syntax.
- For [version catalogs](https://developer.android.com/build/migrate-to-catalogs), add entries to your `gradle/libs.versions.toml` file and reference them using the generated accessors.
If you don't plan on using Braze UI components, add the following to your dependencies.
```groovy
dependencies {
implementation 'com.braze:android-sdk-base:SDK_VERSION' // (Required) Adds dependencies for the base Braze SDK.
implementation 'com.braze:android-sdk-location:SDK_VERSION' // (Optional) Adds dependencies for Braze location services.
}
```
```kotlin
dependencies {
implementation("com.braze:android-sdk-base:SDK_VERSION") // (Required) Adds dependencies for the base Braze SDK.
implementation("com.braze:android-sdk-location:SDK_VERSION") // (Optional) Adds dependencies for Braze location services.
}
```
In your `gradle/libs.versions.toml` file:
```toml
[versions]
braze = "SDK_VERSION"
[libraries]
braze-android-sdk-base = { group = "com.braze", name = "android-sdk-base", version.ref = "braze" }
braze-android-sdk-location = { group = "com.braze", name = "android-sdk-location", version.ref = "braze" }
```
Then, in your `build.gradle` or `build.gradle.kts` file, add the following dependencies. This syntax is the same for both Groovy and Kotlin DSL.
```groovy
dependencies {
implementation(libs.braze.android.sdk.base) // (Required) Adds dependencies for the base Braze SDK.
implementation(libs.braze.android.sdk.location) // (Optional) Adds dependencies for Braze location services.
}
```
If you plan on using Braze UI components, add the following to your dependencies.
```groovy
dependencies {
implementation 'com.braze:android-sdk-ui:SDK_VERSION' // (Required) Adds dependencies for the Braze SDK and Braze UI components.
implementation 'com.braze:android-sdk-location:SDK_VERSION' // (Optional) Adds dependencies for Braze location services.
}
```
```kotlin
dependencies {
implementation("com.braze:android-sdk-ui:SDK_VERSION") // (Required) Adds dependencies for the Braze SDK and Braze UI components.
implementation("com.braze:android-sdk-location:SDK_VERSION") // (Optional) Adds dependencies for Braze location services.
}
```
In your `gradle/libs.versions.toml` file:
```toml
[versions]
braze = "SDK_VERSION"
[libraries]
braze-android-sdk-ui = { group = "com.braze", name = "android-sdk-ui", version.ref = "braze" }
braze-android-sdk-location = { group = "com.braze", name = "android-sdk-location", version.ref = "braze" }
```
Then, in your `build.gradle` or `build.gradle.kts` file, add the following dependencies. This syntax is the same for both Groovy and Kotlin DSL.
```groovy
dependencies {
implementation(libs.braze.android.sdk.ui) // (Required) Adds dependencies for the Braze SDK and Braze UI components.
implementation(libs.braze.android.sdk.location) // (Optional) Adds dependencies for Braze location services.
}
```
### Step 2: Configure your `braze.xml`
**Note:**
As of December 2019, custom endpoints are no longer given out, if you have a pre-existing custom endpoint, you may continue to use it. For more details, refer to our list of available endpoints.
Create a `braze.xml` file in your project's `res/values` folder. If you are on a specific data cluster or have a pre-existing custom endpoint, you need to specify the endpoint in your `braze.xml` file as well.
The contents of that file should resemble the following code snippet. Make sure to substitute `YOUR_APP_IDENTIFIER_API_KEY` with the identifier found in the **Manage Settings** page of the Braze dashboard. Log in at [dashboard.braze.com](https://dashboard.braze.com) to find your [cluster address](https://www.braze.com/docs/es/es/user_guide/administrative/access_braze/sdk_endpoints).
```xml
YOUR_APP_IDENTIFIER_API_KEYYOUR_CUSTOM_ENDPOINT_OR_CLUSTER
```
### Step 3: Add permissions to `AndroidManifest.xml`
Next, add the following permissions to your `AndroidManifest.xml`:
```xml
```
**Note:**
With the release of Android M, Android switched from an install-time to a runtime permissions model. However, both of these permissions are normal permissions and are granted automatically if listed in the app manifest. For more information, visit Android's [permission documentation](https://developer.android.com/training/permissions/index.html).
### Step 4: Enable delayed initialization (optional)
To use delayed initialization, the minimum Braze SDK version is required:
**Note:**
While delayed initialization is enabled, all network connections are canceled, preventing the SDK from sending data to the Braze servers.
#### Step 4.1: Update your `braze.xml`
Delayed initialization is disabled by default. To enable, use one of the following options:
In your project's `braze.xml` file, set `com_braze_enable_delayed_initialization` to `true`.
```xml
true
```
To enable delayed initialization at runtime, use the following method.
```java
Braze.enableDelayedInitialization(context);
```
```kotlin
Braze.enableDelayedInitialization(context)
```
**Note:**
When delayed initialization is enabled and a push notification contains a deep link action, the deep link does not resolve.
#### Step 4.2: Configure push analytics (optional)
When delayed initialization is enabled, push analytics are queued by default. However, you can choose to [explicitly queue](#explicitly-queue-push-analytics) or [drop](#drop-push-analytics) push analytics instead.
##### Explicitly queue {#explicitly-queue-push-analytics}
To explicitly queue push analytics, choose one of the following options:
In your `braze.xml` file, set `com_braze_delayed_initialization_analytics_behavior` to `QUEUE`:
```xml
QUEUE
```
Add `QUEUE` to your [`Braze.enableDelayedInitialization()`](https://braze-inc.github.io/braze-android-sdk/kdoc/braze-android-sdk/com.braze/-braze/-companion/enable-delayed-initialization.html) method:
```java
Braze.enableDelayedInitialization(context, DelayedInitializationAnalyticsBehavior.QUEUE);
```
```kotlin
Braze.enableDelayedInitialization(context, DelayedInitializationAnalyticsBehavior.QUEUE)
```
##### Drop {#drop-push-analytics}
To drop push analytics, choose one of the following options:
In your `braze.xml` file, set `com_braze_delayed_initialization_analytics_behavior` to `DROP`:
```xml
DROP
```
Add `DROP` to the [`Braze.enableDelayedInitialization()`](https://braze-inc.github.io/braze-android-sdk/kdoc/braze-android-sdk/com.braze/-braze/-companion/enable-delayed-initialization.html) method:
```java
Braze.enableDelayedInitialization(context, DelayedInitializationAnalyticsBehavior.DROP);
```
```kotlin
Braze.enableDelayedInitialization(context, DelayedInitializationAnalyticsBehavior.DROP)
```
#### Step 4.3: Manually initialize the SDK
After your chosen delay period, use the [`Braze.disableDelayedInitialization()`](https://braze-inc.github.io/braze-android-sdk/kdoc/braze-android-sdk/com.braze/-braze/-companion/disable-delayed-initialization.html) method to manually initialize the SDK.
```java
Braze.disableDelayedInitialization(context);
```
```kotlin
Braze.disableDelayedInitialization(context)
```
### Step 5: Enable user session tracking
When you enable user session tracking, calls to `openSession()`, `closeSession()`,[`ensureSubscribedToInAppMessageEvents()`](https://braze-inc.github.io/braze-android-sdk/kdoc/braze-android-sdk/com.braze.ui.inappmessage/-braze-in-app-message-manager/ensure-subscribed-to-in-app-message-events.html), and `InAppMessageManager` registration can be handled automatically.
To register activity lifecycle callbacks, add the following code to the `onCreate()` method of your `Application` class.
```java
public class MyApplication extends Application {
@Override
public void onCreate() {
super.onCreate();
registerActivityLifecycleCallbacks(new BrazeActivityLifecycleCallbackListener());
}
}
```
```kotlin
class MyApplication : Application() {
override fun onCreate() {
super.onCreate()
registerActivityLifecycleCallbacks(BrazeActivityLifecycleCallbackListener())
}
}
```
For the list of available parameters, see [`BrazeActivityLifecycleCallbackListener`](https://braze-inc.github.io/braze-android-sdk/kdoc/braze-android-sdk/com.braze/-braze-activity-lifecycle-callback-listener/index.html).
## Testing session tracking
**Tip:**
You can also use the [SDK Debugger](https://www.braze.com/docs/es/es/developer_guide/debugging) to diagnose SDK issues.
If you experience issues while testing, enable [verbose logging](#android_enabling-logs), then use logcat to detect missing `openSession` and `closeSession` calls in your activities.
1. In Braze, go to **Overview**, select your app, then in the **Display Data For** dropdown choose **Today**.

2. Open your app, then refresh the Braze dashboard. Verify that your metrics have increased by 1.
3. Navigate through your app and verify that only one session has been logged to Braze.
4. Send the app to the background for at least 10 seconds, then bring it to the foreground. Verify that a new session was logged.
## Optional configurations
### Runtime configuration
To set your Braze options in code rather than your `braze.xml` file, use [runtime configuration](https://braze-inc.github.io/braze-android-sdk/kdoc/braze-android-sdk/com.braze/-braze/-companion/configure.html). If a value exists in both places, the runtime value will be used instead. After all required settings are supplied at runtime, you can delete your `braze.xml` file.
In the following example, a [builder object](https://braze-inc.github.io/braze-android-sdk/kdoc/braze-android-sdk/com.braze.configuration/-braze-config/-builder/index.html) is created and then passed to [`Braze.configure()`](https://braze-inc.github.io/braze-android-sdk/kdoc/braze-android-sdk/com.braze/-braze/-companion/configure.html). Note that only some of the available runtime options are shown—refer to our [KDoc](https://braze-inc.github.io/braze-android-sdk/kdoc/braze-android-sdk/com.braze.configuration/-braze-config/-builder/index.html) for the full list.
```java
BrazeConfig brazeConfig = new BrazeConfig.Builder()
.setApiKey("api-key-here")
.setCustomEndpoint("YOUR_CUSTOM_ENDPOINT_OR_CLUSTER")
.setSessionTimeout(60)
.setHandlePushDeepLinksAutomatically(true)
.setGreatNetworkDataFlushInterval(10)
.build();
Braze.configure(this, brazeConfig);
```
```kotlin
val brazeConfig = BrazeConfig.Builder()
.setApiKey("api-key-here")
.setCustomEndpoint("YOUR_CUSTOM_ENDPOINT_OR_CLUSTER")
.setSessionTimeout(60)
.setHandlePushDeepLinksAutomatically(true)
.setGreatNetworkDataFlushInterval(10)
.build()
Braze.configure(this, brazeConfig)
```
**Tip:**
Looking for another example? Check out our [Hello Braze sample app](https://github.com/braze-inc/braze-android-sdk/blob/master/samples/hello-braze/src/main/java/com/braze/helloworld/CustomApplication.java).
### Google Advertising ID
The [Google Advertising ID (GAID)](https://support.google.com/googleplay/android-developer/answer/6048248/advertising-id?hl=en) is an optional user-specific, anonymous, unique, and resettable ID for advertising, provided by Google Play services. GAID gives users the power to reset their identifier, opt-out of interest-based ads within Google Play apps, and provides developers with a simple, standard system to continue to monetize their apps.
The Google Advertising ID is not automatically collected by the Braze SDK and must be set manually via the [`Braze.setGoogleAdvertisingId()`](https://braze-inc.github.io/braze-android-sdk/kdoc/braze-android-sdk/com.braze/-i-braze/set-google-advertising-id.html) method.
```java
new Thread(new Runnable() {
@Override
public void run() {
try {
AdvertisingIdClient.Info idInfo = AdvertisingIdClient.getAdvertisingIdInfo(getApplicationContext());
Braze.getInstance(getApplicationContext()).setGoogleAdvertisingId(idInfo.getId(), idInfo.isLimitAdTrackingEnabled());
} catch (Exception e) {
e.printStackTrace();
}
}
}).start();
```
```kotlin
suspend fun fetchAndSetAdvertisingId(
context: Context,
scope: CoroutineScope = GlobalScope
) {
scope.launch(Dispatchers.IO) {
try {
val idInfo = AdvertisingIdClient.getAdvertisingIdInfo(context)
Braze.getInstance(context).setGoogleAdvertisingId(
idInfo.id,
idInfo.isLimitAdTrackingEnabled
)
} catch (e: Exception) {
e.printStackTrace()
}
}
}
```
**Important:**
Google requires the Advertising ID to be collected on a non-UI thread.
### Location tracking
To enable Braze location collection, set `com_braze_enable_location_collection` to `true` in your `braze.xml` file:
```xml
true
```
**Important:**
Starting with Braze Android SDK version 3.6.0, Braze location collection is disabled by default.
### Logging
By default, the Braze Android SDK log level is set to `INFO`. You can [suppress these logs](#android_suppressing-logs) or [set a different log level](#android_enabling-logs), such as `VERBOSE`, `DEBUG`, or `WARN`.
#### Enabling logs
To help troubleshoot issues in your app, or reduce turnaround times with Braze Support, you can enable verbose logs for the SDK. When you send verbose logs to Braze Support, ensure they begin as soon as you launch your application and end far after your issue occurs. For a centralized overview, see [Verbose logging](https://www.braze.com/docs/es/es/developer_guide/sdk_integration/verbose_logging). To learn how to interpret log output, see [Reading verbose logs](https://www.braze.com/docs/es/es/developer_guide/sdk_integration/reading_verbose_logs).
Keep in mind, verbose logs are only intended for your development environment, so you'll want to disable them before releasing your app.
**Important:**
Enable verbose logs before any other calls in `Application.onCreate()` to ensure your logs are as complete as possible.
To enable logs directly in your app, add the following to your application's `onCreate()` method before any other methods.
```java
BrazeLogger.setLogLevel(Log.MIN_LOG_LEVEL);
```
```kotlin
BrazeLogger.logLevel = Log.MIN_LOG_LEVEL
```
Replace `MIN_LOG_LEVEL` with the **Constant** of the log level you'd like to set as your minimum log level. Any logs at a level `>=` to your set `MIN_LOG_LEVEL` will be forwarded to Android's default [`Log`](https://developer.android.com/reference/android/util/Log) method. Any logs `<` your set `MIN_LOG_LEVEL` will be discarded.
| Constant | Value | Description |
|-------------|----------------|---------------------------------------------------------------------------|
| `VERBOSE` | 2 | Logs the most detailed messages for debugging and development. |
| `DEBUG` | 3 | Logs descriptive messages for debugging and development. |
| `INFO` | 4 | Logs informational messages for general highlights. |
| `WARN` | 5 | Logs warning messages for identifying potentially harmful situations. |
| `ERROR` | 6 | Logs error messages for indicating application failure or serious issues. |
| `ASSERT` | 7 | Logs assertion messages when conditions are false during development. |
{: .reset-td-br-1 .reset-td-br-2 .reset-td-br-3 aria-label="Enabling logs" }
For example, the following code will forward log levels `2`, `3`, `4`, `5`, `6`, and `7` to the `Log` method.
```java
BrazeLogger.setLogLevel(Log.VERBOSE);
```
```kotlin
BrazeLogger.logLevel = Log.VERBOSE
```
To enable logs in the `braze.xml`, add the following to your file:
```xml
MIN_LOG_LEVEL
```
Replace `MIN_LOG_LEVEL` with the **Value** of the log level you'd like to set as your minimum log level. Any logs at a level `>=` to your set `MIN_LOG_LEVEL` will be forwarded to Android's default [`Log`](https://developer.android.com/reference/android/util/Log) method. Any logs `<` your set `MIN_LOG_LEVEL` will be discarded.
| Constant | Value | Description |
|-------------|----------------|---------------------------------------------------------------------------|
| `VERBOSE` | 2 | Logs the most detailed messages for debugging and development. |
| `DEBUG` | 3 | Logs descriptive messages for debugging and development. |
| `INFO` | 4 | Logs informational messages for general highlights. |
| `WARN` | 5 | Logs warning messages for identifying potentially harmful situations. |
| `ERROR` | 6 | Logs error messages for indicating application failure or serious issues. |
| `ASSERT` | 7 | Logs assertion messages when conditions are false during development. |
{: .reset-td-br-1 .reset-td-br-2 .reset-td-br-3 aria-label="Enabling logs" }
For example, the following code will forward log levels `2`, `3`, `4`, `5`, `6`, and `7` to the `Log` method.
```xml
2
```
#### Verifying verbose logs
To verify that your logs are set to `VERBOSE`, check if `V/Braze` occurs somewhere in your logs. If it does, then verbose logs have been successfully enabled. For example:
```
2077-11-19 16:22:49.591 ? V/Braze v9.0.01 .bo.app.d3: Request started
```
#### Suppressing logs
To suppress all logs for the Braze Android SDK, set the log level to `BrazeLogger.SUPPRESS` in your application's `onCreate()` method _before_ any other methods.
```java
BrazeLogger.setLogLevel(BrazeLogger.SUPPRESS);
```
```kotlin
BrazeLogger.setLogLevel(BrazeLogger.SUPPRESS)
```
### Multiple API keys
The most common use case for multiple API keys is separating API keys for debug and release build variants.
To easily switch between multiple API keys in your builds, we recommend creating a separate `braze.xml` file for each relevant [build variant](https://developer.android.com/studio/build/build-variants.html). A build variant is a combination of build type and product flavor. By default, new Android projects are configured with [`debug` and `release` build types](https://developer.android.com/reference/tools/gradle-api/8.3/null/com/android/build/api/dsl/BuildType) and no product flavors.
For each relevant build variant, create a new `braze.xml` in the `src//res/values/` directory. When the build variant is compiled, it will use the new API key.
```xml
REPLACE_WITH_YOUR_BUILD_VARIANT_API_KEY
```
**Tip:**
To learn how to set up the API key in your code, see [Runtime configuration](https://www.braze.com/docs/es/es/developer_guide/sdk_initalization/?sdktab=android).
### Exclusive in-app message TalkBack
In adherence to the [Android accessibility guidelines](https://developer.android.com/guide/topics/ui/accessibility), the Braze Android SDK offers Android Talkback by default. To ensure that only the contents of in-app messages are read out loud—without including other screen elements like the app title bar or navigation—you can enable exclusive mode for TalkBack.
To enable exclusive mode for in-app messages:
```xml
true
```
```kotlin
val brazeConfigBuilder = BrazeConfig.Builder()
brazeConfigBuilder.setIsInAppMessageAccessibilityExclusiveModeEnabled(true)
Braze.configure(this, brazeConfigBuilder.build())
```
```java
BrazeConfig.Builder brazeConfigBuilder = new BrazeConfig.Builder()
brazeConfigBuilder.setIsInAppMessageAccessibilityExclusiveModeEnabled(true);
Braze.configure(this, brazeConfigBuilder.build());
```
### R8 and ProGuard
[Code shrinking](https://developer.android.com/build/shrink-code) configuration is automatically included with your Braze integration.
Client apps that obfuscate Braze code must store release mapping files for Braze to interpret stack traces. If you want to continue to keep all Braze code, add the following to your ProGuard file:
```
-keep class bo.app.** { *; }
-keep class com.braze.** { *; }
```
## Integrating the Swift SDK
You can integrate and customize the Braze Swift SDK using the Swift Package Manager (SPM), CocoaPods, or manual integration methods. For more information about the various SDK symbols, see [Braze Swift reference documentation](https://braze-inc.github.io/braze-swift-sdk/documentation/brazekit/).
### Prerequisites
Before you start, verify your environment is supported by the [latest Braze Swift SDK version](https://github.com/braze-inc/braze-swift-sdk#version-information).
### Step 1: Install the Braze Swift SDK
We recommend using the [Swift Package Manager (SwiftPM)](https://swift.org/package-manager/) or [CocoaPods](http://cocoapods.org/) to install the Braze Swift SDK. Alternatively, you can install the SDK manually.
#### Step 1.1: Import SDK version
Open your project and navigate to your project's settings. Select the **Swift Packages** tab and click on the add button under the packages list.

**Note:**
Starting in version 7.4.0, the Braze Swift SDK has additional distribution channels as [static XCFrameworks](https://github.com/braze-inc/braze-swift-sdk-prebuilt-static) and [dynamic XCFrameworks](https://github.com/braze-inc/braze-swift-sdk-prebuilt-dynamic). If you'd like to use either of these formats instead, follow the installation instructions from its respective repository.
Enter the URL of our iOS Swift SDK repository `https://github.com/braze-inc/braze-swift-sdk` in the text field. Under the **Dependency Rule** section, select the SDK version. Finally, click **Add Package**.

#### Step 1.2: Select your packages
The Braze Swift SDK separates features into standalone libraries to provide developers with more control over which features to import into their projects.
| Package | Details |
| --------------- | --------------------------------------------------------------------------------------------------------------------------------------------------------------- |
| `BrazeKit` | Main SDK library providing support for analytics and push notifications. |
| `BrazeLocation` | Location library providing support for location analytics and geofence monitoring. |
| `BrazeUI` | Braze-provided user interface library for in-app messages, Content Cards, and Banners. Import this library if you intend to use the default UI components. |
{: .reset-td-br-1 .reset-td-br-2 aria-label="Step 1.2: Select your packages" }
{: .ws-td-nw-1}
##### About Extension libraries
**Warning:**
[BrazeNotificationService](https://braze-inc.github.io/braze-swift-sdk/tutorials/braze/b2-rich-push-notifications) and [BrazePushStory](https://braze-inc.github.io/braze-swift-sdk/tutorials/braze/b3-push-stories) are extension modules that provide additional functionality and should not be added directly to your main application target. Instead follow the linked guides to integrate them separately into their respective target extensions.
| Package | Details |
| -------------------------- | ------------------------------------------------------------------------------------- |
| `BrazeNotificationService` | Notification service extension library providing support for rich push notifications. |
| `BrazePushStory` | Notification content extension library providing support for Push Stories. |
{: .reset-td-br-1 .reset-td-br-2 aria-label="About Extension libraries" }
{: .ws-td-nw-1}
Select the package that best suits your needs and click **Add Package**. Make sure you select `BrazeKit` at a minimum.

#### Step 1.1: Install CocoaPods
For a full walkthrough, see CocoaPods' [Getting Started Guide](https://guides.cocoapods.org/using/getting-started.html). Otherwise, you can run the following command to get started quickly:
```bash
$ sudo gem install cocoapods
```
If you get stuck, checkout CocoaPods' [Troubleshooting Guide](http://guides.cocoapods.org/using/troubleshooting.html).
#### Step 1.2: Constructing the Podfile
Next, create a file in your Xcode project directory named `Podfile`.
**Note:**
Starting in version 7.4.0, the Braze Swift SDK has additional distribution channels as [static XCFrameworks](https://github.com/braze-inc/braze-swift-sdk-prebuilt-static) and [dynamic XCFrameworks](https://github.com/braze-inc/braze-swift-sdk-prebuilt-dynamic). If you'd like to use either of these formats instead, follow the installation instructions from its respective repository.
Add the following line to your Podfile:
```
target 'YourAppTarget' do
pod 'BrazeKit'
end
```
`BrazeKit` contains the main SDK library, providing support for analytics and push notifications.
We suggest you version Braze so pod updates automatically grab anything smaller than a minor version update. This looks like `pod 'BrazeKit' ~> Major.Minor.Build`. If you want to automatically integrate the latest Braze SDK version, even with major changes, you can use `pod 'BrazeKit'` in your Podfile.
##### About additional libraries
The Braze Swift SDK separates features into standalone libraries to provide developers with more control over which features to import into their projects. In addition to `BrazeKit`, you may add the following libraries to your Podfile:
| Library | Details |
| --------------------- | --------------------------------------------------------------------------------------------------------------------------------------------------------------- |
| `pod 'BrazeLocation'` | Location library providing support for location analytics and geofence monitoring. |
| `pod 'BrazeUI'` | Braze-provided user interface library for in-app messages, Content Cards, and Banners. Import this library if you intend to use the default UI components. |
{: .reset-td-br-1 .reset-td-br-2 aria-label="About additional libraries" }
{: .ws-td-nw-1}
###### Extension libraries
[BrazeNotificationService](https://braze-inc.github.io/braze-swift-sdk/tutorials/braze/b2-rich-push-notifications) and [BrazePushStory](https://braze-inc.github.io/braze-swift-sdk/tutorials/braze/b3-push-stories) are extension modules that provide additional functionality and should not be added directly to your main application target. Instead, you will need to create separate extension targets for each of these modules and import the Braze modules into their corresponding targets.
| Library | Details |
| -------------------------------- | ------------------------------------------------------------------------------------- |
| `pod 'BrazeNotificationService'` | Notification service extension library providing support for rich push notifications. |
| `pod 'BrazePushStory'` | Notification content extension library providing support for Push Stories. |
{: .reset-td-br-1 .reset-td-br-2 aria-label="Extension libraries" }
{: .ws-td-nw-1}
#### Step 1.3: Install the SDK
To install the Braze SDK CocoaPod, navigate to the directory of your Xcode app project within your terminal and run the following command:
```
pod install
```
At this point, you should be able to open the new Xcode project workspace created by CocoaPods. Make sure to use this Xcode workspace instead of your Xcode project.

#### Updating the SDK using CocoaPods
To update a CocoaPod, simply run the following command within your project directory:
```
pod update
```
#### Step 1.1: Download the Braze SDK
Go to the [Braze SDK release page on GitHub](https://github.com/braze-inc/braze-swift-sdk/releases), then download `braze-swift-sdk-prebuilt.zip`.

#### Step 1.2: Choose your frameworks
The Braze Swift SDK contains a variety of standalone XCFrameworks, which gives you the freedom to integrate the features you want—without needing to integrate them all. Reference the following table to choose your XCFrameworks:
| Package | Required? | Description |
| -------------------------- | --------- | ------------------------------------------------------------------------------------------------------------------------------------------------------------------------------------------------------------------------------------------------------------------------------------------------------------------------------------ |
| `BrazeKit` | Yes | Main SDK library that provides support for analytics and push notifications. |
| `BrazeLocation` | No | Location library that provides support for location analytics and geofence monitoring. |
| `BrazeUI` | No | Braze-provided user interface library for in-app messages, Content Cards, and Banners. Import this library if you intend to use the default UI components. |
| `BrazeNotificationService` | No | Notification service extension library that provides support for rich push notifications. Do not add this library directly to your main application target, instead [add the `BrazeNotificationService` library separately](https://braze-inc.github.io/braze-swift-sdk/tutorials/braze/b2-rich-push-notifications). |
| `BrazePushStory` | No | Notification content extension library that provides support for Push Stories. Do not add this library directly to your main application target, instead [add the `BrazePushStory` library separately](https://braze-inc.github.io/braze-swift-sdk/tutorials/braze/b3-push-stories). |
| `BrazeKitCompat` | No | Compatibility library containing all the `Appboy` and `ABK*` classes and methods that were available in the `Appboy-iOS-SDK` version 4.X.X. For usage details, refer to the minimal migration scenario in the [migration guide](https://braze-inc.github.io/braze-swift-sdk/documentation/braze/appboy-migration-guide/). |
| `BrazeUICompat` | No | Compatibility library containing all the `ABK*` classes and methods that were available in the `AppboyUI` library from `Appboy-iOS-SDK` version 4.X.X. For usage details, refer to the minimal migration scenario in the [migration guide](https://braze-inc.github.io/braze-swift-sdk/documentation/braze/appboy-migration-guide/). |
| `SDWebImage` | No | Dependency used only by `BrazeUICompat` in the minimal migration scenario. |
{: .reset-td-br-1 .reset-td-br-2 .reset-td-br-3 aria-label="Step 1.2: Choose your frameworks" }
{: .ws-td-nw-1 .reset-td-br-1 .reset-td-br-2 aria-label="Step 1.2: Choose your frameworks" }
#### Step 1.3: Prepare your files
Decide whether you want to use **Static** or **Dynamic** XCFrameworks, then prepare your files:
1. Create a temporary directory for your XCFrameworks.
2. In `braze-swift-sdk-prebuilt`, open the `dynamic` directory and move `BrazeKit.xcframework` into your directory. Your directory should be similar to the following:
```bash
temp_dir
└── BrazeKit.xcframework
```
3. Move each of your [chosen XCFrameworks](#swift_step-2-choose-your-frameworks) into your temporary directory. Your directory should be similar to the following:
```bash
temp_dir
├── BrazeKit.xcframework
├── BrazeKitCompat.xcframework
├── BrazeLocation.xcframework
└── SDWebImage.xcframework
```
#### Step 1.4: Integrate your frameworks
Next, integrate the **Dynamic** or **Static** XCFrameworks you [prepared previously](#swift_step-3-prepare-your-files):
In your Xcode project, select your build target, then **General**. Under **Frameworks, Libraries, and Embedded Content**, drag and drop the [files you prepared previously](#swift_step-3-prepare-your-files).

**Note:**
Starting with the Swift SDK 12.0.0, you should always select **Embed & Sign** for the Braze XCFrameworks for both the static and dynamic variants. This ensures that the frameworks resources are properly embedded in your app bundle.
**Tip:**
To enable GIF support, add `SDWebImage.xcframework`, located in either `braze-swift-sdk-prebuilt/static` or `braze-swift-sdk-prebuilt/dynamic`.
#### Common errors for Objective-C projects
If your Xcode project only contains Objective-C files, you may get "missing symbol" errors when you try to build your project. To fix these errors, open your project and add an empty Swift file to your file tree. This will force your build toolchain to embed [Swift Runtime](https://support.apple.com/kb/dl1998) and link to the appropriate frameworks during build time.
```bash
FILE_NAME.swift
```
Replace `FILE_NAME` with any non-spaced string. Your file should look similar to the following:
```bash
empty_swift_file.swift
```
### Step 2: Set up delayed initialization (optional)
You can choose to delay when the Braze Swift SDK is initialized, which is useful if your app needs to load a configuration or wait for user consent before starting the SDK. Delayed initialization makes sure Braze push notifications and push tokens received before SDK initialization are enqueued and processed once the SDK is initialized.
To use delayed initialization, the minimum Braze SDK version is required:
#### Step 2.1: Prepare for delayed initialization
Call `Braze.prepareForDelayedInitialization()` as early as possible in your app's lifecycle, ideally in or before `application(_:didFinishLaunchingWithOptions:)`. This makes sure that push notifications received before the SDK is initialized are properly captured and processed later.
**Note:**
This only applies to push notifications from Braze. Other push notifications are handled normally by system delegates.
```swift
func application(_ application: UIApplication, didFinishLaunchingWithOptions launchOptions: [UIApplication.LaunchOptionsKey: Any]?) -> Bool {
// Prepare the SDK for delayed initialization
Braze.prepareForDelayedInitialization()
// ... Additional non-Braze setup code
return true
}
```
```swift
@main
struct MyApp: App {
@UIApplicationDelegateAdaptor var appDelegate: AppDelegate
var body: some Scene {
WindowGroup {
ContentView()
}
}
}
class AppDelegate: NSObject, UIApplicationDelegate {
func application(_ application: UIApplication, didFinishLaunchingWithOptions launchOptions: [UIApplication.LaunchOptionsKey : Any]? = nil) -> Bool {
// Prepare the SDK for delayed initialization
Braze.prepareForDelayedInitialization()
// ... Additional non-Braze setup code
return true
}
}
```
```objc
- (BOOL)application:(UIApplication *)application didFinishLaunchingWithOptions:(NSDictionary *)launchOptions {
// Prepare the SDK for delayed initialization
[Braze prepareForDelayedInitialization];
// ... Additional non-Braze setup code
return YES;
}
```
When using delayed initialization, push notification automation is implicitly enabled. You can [customize the push automation](#swift_step-23-customize-push-automation-optional) configuration by passing a `pushAutomation` parameter.
#### Step 2.2: Configure push analytics behavior (optional)
When delayed initialization is enabled, push analytics are queued by default. However, you can choose to explicitly queue or drop push analytics instead.
##### Explicitly queue
To explicitly queue push analytics (default behavior), pass `.queue` to the `analyticsBehavior` parameter. Push analytics events that are queued prior to initialization will be processed and flushed to the server upon initialization.
```swift
Braze.prepareForDelayedInitialization(analyticsBehavior: .queue)
```
```objc
[Braze prepareForDelayedInitializationWithAnalyticsBehavior:BRZPushEnqueueBehaviorQueue];
```
##### Drop
To drop push analytics received before SDK initialization, pass `.drop` to the `analyticsBehavior` parameter. With this option, any push analytics event that occurs while the SDK is not initialized will be ignored.
```swift
Braze.prepareForDelayedInitialization(analyticsBehavior: .drop)
```
```objc
[Braze prepareForDelayedInitializationWithAnalyticsBehavior:BRZPushEnqueueBehaviorDrop];
```
#### Step 2.3: Customize push automation (optional)
You can customize the push automation configuration by passing a `pushAutomation` parameter. By default, all automation features are enabled except `requestAuthorizationAtLaunch`.
```swift
// Enable all push automation
featuresBraze.prepareForDelayedInitialization(pushAutomation: true)
// Or customize specific automation options
let automation = Braze.Configuration.Push.Automation()
automation.automaticSetup = true
automation.requestAuthorizationAtLaunch = false
Braze.prepareForDelayedInitialization(pushAutomation: automation)
```
```objc
// Enable all push automation features
[Braze prepareForDelayedInitializationWithPushAutomation:[[BRZConfigurationPushAutomation alloc] initWithAutomationEnabled:YES]];
// Or customize specific automation options
BRZConfigurationPushAutomation *automation = [[BRZConfigurationPushAutomation alloc] init];
automation.automaticSetup = YES;
automation.requestAuthorizationAtLaunch = NO;
[Braze prepareForDelayedInitializationWithPushAutomation:automation analyticsBehavior:BRZPushEnqueueBehaviorQueue];
```
#### Step 2.4: Initialize the SDK
After your chosen delay period (for example, after fetching configuration from a server or after user consent), initialize the SDK as normal:
```swift
func initializeBraze() {
let configuration = Braze.Configuration(apiKey: "YOUR-API-KEY", endpoint: "YOUR-ENDPOINT")
// Enable push automation to match the delayed initialization configuration
configuration.push.automation = true
let braze = Braze(configuration: configuration)
// Store the Braze instance for later use
AppDelegate.braze = braze
}
```
```objc
- (void)initializeBraze {
BRZConfiguration *configuration = [[BRZConfiguration alloc] initWithApiKey:@"YOUR-API-KEY" endpoint:@"YOUR-ENDPOINT"];
// Enable push automation to match the delayed initialization configuration
configuration.push.automation = [[BRZConfigurationPushAutomation alloc] initWithAutomationEnabled:YES];
Braze *braze = [[Braze alloc] initWithConfiguration:configuration];
// Store the Braze instance for later use
AppDelegate.braze = braze;
}
```
**Note:**
When the SDK is initialized, all queued push notifications, push tokens, and deep links are automatically processed.
### Step 3: Update your app delegate
**Important:**
The following assumes you've already added an `AppDelegate` to your project (which are not generated by default) and you are not using the delayed initialization feature. If you don't plan on using an `AppDelegate`, be sure to initialize the Braze SDK as early as possible, like during the app's launch. If you are using the delayed initialization feature, refer to [Step 2.4](#swift_step-24-initialize-the-sdk) for initializing the SDK and ignore this step.
Add the following line of code to your `AppDelegate.swift` file to import the features included in the Braze Swift SDK:
```swift
import BrazeKit
```
Next, add a static property to your `AppDelegate` class to keep a strong reference to the Braze instance throughout your application's lifetime:
```swift
class AppDelegate: UIResponder, UIApplicationDelegate {
static var braze: Braze? = nil
}
```
The SDK requires your application to retain a strong reference to the Braze instance throughout its usage. To prevent any unexpected side effects, ensure that you have fully captured that reference before accessing or modifying any properties or methods on the Braze instance.
Finally, in `AppDelegate.swift`, add the following snippet to your `application:didFinishLaunchingWithOptions:` method:
```swift
let configuration = Braze.Configuration(
apiKey: "YOUR-APP-IDENTIFIER-API-KEY",
endpoint: "YOUR-BRAZE-ENDPOINT"
)
let braze = Braze(configuration: configuration)
AppDelegate.braze = braze
```
Update `YOUR-APP-IDENTIFIER-API-KEY` and `YOUR-BRAZE-ENDPOINT` with the correct value from your **App Settings** page. Check out our [API identifier types](https://www.braze.com/docs/es/es/api/identifier_types/?tab=app%20ids) for more information on where to find your app identifier API key.
Add the following line of code to your `AppDelegate.m` file:
```objc
@import BrazeKit;
```
Next, add a static variable to your `AppDelegate.m` file to keep a reference to the Braze instance throughout your application's lifetime:
```objc
static Braze *_braze;
@implementation AppDelegate
+ (Braze *)braze {
return _braze;
}
+ (void)setBraze:(Braze *)braze {
_braze = braze;
}
@end
```
The SDK requires your application to retain a strong reference to the Braze instance throughout its usage. To prevent any unexpected side effects, ensure that you have fully captured that reference before accessing or modifying any properties or methods on the Braze instance.
Finally, within your `AppDelegate.m` file, add the following snippet within your `application:didFinishLaunchingWithOptions:` method:
```objc
BRZConfiguration *configuration = [[BRZConfiguration alloc] initWithApiKey:"YOUR-APP-IDENTIFIER-API-KEY"
endpoint:"YOUR-BRAZE-ENDPOINT"];
Braze *braze = [[Braze alloc] initWithConfiguration:configuration];
AppDelegate.braze = braze;
```
Update `YOUR-APP-IDENTIFIER-API-KEY` and `YOUR-BRAZE-ENDPOINT` with the correct value from your **Manage Settings** page. Check out our [API documentation](https://www.braze.com/docs/es/es/api/api_key/#the-app-identifier-api-key) for more information on where to find your app identifier API key.
**Note:**
`Braze.init` returns immediately on the calling thread. The SDK processes startup work on an internal queue. Reading sync properties such as `braze.deviceId` directly after `init` on the main thread will block the calling thread until the SDK has completed its post-initialization operations. For main-thread or latency-sensitive contexts, use `braze.getDeviceId(_:)` (Swift) or `[braze getDeviceIdWithCompletion:^(NSString *deviceId) { ... }]` (Objective-C) to read the value without blocking.
## Optional configurations
### Logging
For a centralized overview across all platforms, see [Verbose logging](https://www.braze.com/docs/es/es/developer_guide/sdk_integration/verbose_logging). To learn how to interpret log output, see [Reading verbose logs](https://www.braze.com/docs/es/es/developer_guide/sdk_integration/reading_verbose_logs).
#### Log levels
The default log level for the Braze Swift SDK is `.error`—it's also the minimum supported level when logs are enabled. These are the full list of log levels:
| Swift | Objective-C | Description |
| ----------- | ------------------------ | ------------------------------------------------------------ |
| `.debug` | `BRZLoggerLevelDebug` | Log debugging information + `.info` + `.error`. |
| `.info` | `BRZLoggerLevelInfo` | Log general SDK information (user changes, etc.) + `.error`. |
| `.error` | `BRZLoggerLevelError` | Log errors. |
| `.disabled` | `BRZLoggerLevelDisabled` | No logging occurs. |
{: .reset-td-br-1 .reset-td-br-2 .reset-td-br-3 aria-label="Log levels" }
{: .reset-td-br-1 .reset-td-br-2 .reset-td-br-3 aria-label="Log levels" }
#### Setting the log level
You can assign the log level at runtime in your `Braze.Configuration` object. For complete usage details, see [`Braze.Configuration.Logger`](https://braze-inc.github.io/braze-swift-sdk/documentation/brazekit/braze/configuration-swift.class/logger-swift.class).
```swift
let configuration = Braze.Configuration(
apiKey: "",
endpoint: ""
)
// Enable logging of general SDK information (such as user changes, etc.)
configuration.logger.level = .info
let braze = Braze(configuration: configuration)
```
```objc
BRZConfiguration *configuration = [[BRZConfiguration alloc] initWithApiKey:self.APIKey
endpoint:self.apiEndpoint];
// Enable logging of general SDK information (such as user changes, etc.)
[configuration.logger setLevel:BRZLoggerLevelInfo];
Braze *braze = [[Braze alloc] initWithConfiguration:configuration];
```
## Integrating the Cordova SDK
### Prerequisites
Before you start, verify your environment is supported by the [latest Braze Cordova SDK version](https://github.com/braze-inc/braze-cordova-sdk?tab=readme-ov-file#minimum-version-requirements).
### Step 1: Add the SDK to your project
**Warning:**
Only add the Braze Cordova SDK using the following methods. Do not attempt to install using other methods as it could lead to a security breach.
If you're on Cordova 6 or later, you can add the SDK directly from GitHub. Alternatively, you can download a ZIP of the [GitHub repository](https://github.com/braze-inc/braze-cordova-sdk) and add the SDK manually.
If you don't plan on using location collection and geofences, use the `master` branch from GitHub.
```bash
cordova plugin add https://github.com/braze-inc/braze-cordova-sdk#master
```
If you plan on using location collection and geofences, use the `geofence-branch` from GitHub.
```bash
cordova plugin add https://github.com/braze-inc/braze-cordova-sdk#geofence-branch
```
**Tip:**
You can switch between `master` and `geofence-branch` at anytime by repeating this step.
### Step 2: Configure your project
Next, adding the following preferences to the `platform` element in your project's `config.xml` file.
```xml
```
```xml
```
Replace the following:
| Value | Description |
| --------------------- | -------------------------------------------------------------------------------------------------------------------------------- |
| `BRAZE_API_KEY` | Your [Braze REST API key](https://www.braze.com/docs/es/es/user_guide/administrative/app_settings/api_settings_tab/#rest-api-keys). |
| `CUSTOM_API_ENDPOINT` | A custom API endpoint. This endpoint is used to route your Braze instance data to the correct App Group in your Braze dashboard. |
{: .reset-td-br-1 .reset-td-br-2 aria-label="Step 2: Configure your project" }
The `platform` element in your `config.xml` file should be similar to the following:
```xml
```
```xml
```
## Platform-specific syntax
The following section covers the platform-specific syntax when using Cordova with iOS or Android.
### Integers
Integer preferences are read as string representations, like in the following example:
```xml
```
Due to how the Cordova 8.0.0+ framework handles preferences, integer-only preferences (such as sender IDs) must be set to strings prepended with `str_`, like in the following example:
```xml
```
### Booleans
Boolean preferences are read by the SDK using `YES` and `NO` keywords as a string representation, like in the following example:
```xml
```
Boolean preferences are read by the SDK using `true` and `false` keywords as a string representation, like in the following example:
```xml
```
## Optional configurations {#optional}
You can add any of the following preferences to the `platform` element in your project's `config.xml` file:
| Method | Description |
| ------------------------------------------------- | ----------------------------------------------------------------------------------------------------------------------------------------------------------------------------------------------------------------------------------------------------- |
| `ios_api_key` | Sets the API key for your application. |
| `ios_api_endpoint` | Sets the [SDK endpoint](https://www.braze.com/docs/es/es/api/basics/#endpoints) for your application. |
| `ios_disable_automatic_push_registration` | Sets whether automatic push registration should be disabled. |
| `ios_disable_automatic_push_handling` | Sets whether automatic push handling should be disabled. |
| `ios_enable_idfa_automatic_collection` | Sets whether the Braze SDK should automatically collect the IDFA information. For more information, see [the Braze IDFA method documentation](https://braze-inc.github.io/braze-swift-sdk/documentation/brazekit/braze/set(identifierforadvertiser:)/). |
| `enable_location_collection` | Sets whether the automatic location collection is enabled (if the user permits). The `geofence-branch` |
| `geofences_enabled` | Sets whether geofences are enabled. |
| `ios_session_timeout` | Sets the Braze session timeout for your application in seconds. Defaults to 10 seconds. |
| `sdk_authentication_enabled` | Sets whether to enable the [SDK Authentication](https://www.braze.com/docs/es/es/developer_guide/platform_wide/sdk_authentication#sdk-authentication) feature. |
| `display_foreground_push_notifications` | Sets whether push notifications should be displayed while the application is in the foreground. |
| `ios_disable_un_authorization_option_provisional` | Sets whether `UNAuthorizationOptionProvisional` should be disabled. |
| `trigger_action_minimum_time_interval_seconds` | Sets the minimum time interval in seconds between triggers. Defaults to 30 seconds. |
| `ios_push_app_group` | Sets the app group ID for iOS push extensions. |
| `ios_forward_universal_links` | Sets whether the SDK automatically recognizes and forwards universal links to the system methods. Required for deep links from push notifications to work on iOS. Defaults to disabled. |
| `ios_log_level` | Sets the minimum logging level for `Braze.Configuration.Logger`. |
| `ios_use_uuid_as_device_id` | Sets if a randomly generated UUID should be used as the device ID. |
| `ios_flush_interval_seconds` | Sets the interval in seconds between automatic data flushes. Defaults to 10 seconds. |
| `ios_use_automatic_request_policy` | Sets whether the request policy for `Braze.Configuration.Api` should be automatic or manual. |
| `should_opt_in_when_push_authorized` | Sets if a user’s notification subscription state should automatically be set to `optedIn` when push permissions are authorized. |
{: .reset-td-br-1 .reset-td-br-2 aria-label="Optional configurations #optional" }
**Tip:**
For more detailed information, see [GitHub: Braze iOS Cordova plugin](https://github.com/braze-inc/braze-cordova-sdk/blob/master/src/ios/BrazePlugin.m).
| Method | Description |
| ----------------------------------------------------------------- | --------------------------------------------------------------------------------------------------------------------------------------------------------------------------------------------- |
| `android_api_key` | Sets the API key for your application. |
| `android_api_endpoint` | Sets the [SDK endpoint](https://www.braze.com/docs/es/es/api/basics/#endpoints) for your application. |
| `android_small_notification_icon` | Sets the notification small icon. |
| `android_large_notification_icon` | Sets the notification large icon. |
| `android_notification_accent_color` | Sets the notification accent color using a hexadecimal representation. |
| `android_default_session_timeout` | Sets the Braze session timeout for your application in seconds. Defaults to 10 seconds. |
| `android_handle_push_deep_links_automatically` | Sets whether the Braze SDK automatically handles push deep links. Required for deep links from push notifications to work on Android. Defaults to disabled. |
| `android_log_level` | Sets the log level for your application. The default log level is 4 and will minimally log info. To enable verbose logging for debugging, use log level 2. |
| `firebase_cloud_messaging_registration_enabled` | Sets whether to use Firebase Cloud Messaging for push notifications. |
| `android_fcm_sender_id` | Sets the Firebase Cloud Messaging sender ID. |
| `enable_location_collection` | Sets whether the automatic location collection is enabled (if the user permits). |
| `geofences_enabled` | Sets whether geofences are enabled. |
| `android_disable_auto_session_tracking` | Disable the Android Cordova plugin from automatically tracking sessions. For more information, see [Disabling automatic session tracking](#cordova_disable-automatic-session-tracking) |
| `sdk_authentication_enabled` | Sets whether to enable the [SDK Authentication](https://www.braze.com/docs/es/es/developer_guide/platform_wide/sdk_authentication#sdk-authentication) feature. |
| `trigger_action_minimum_time_interval_seconds` | Sets the minimum time interval in seconds between triggers. Defaults to 30 seconds. |
| `is_session_start_based_timeout_enabled` | Sets whether the session timeout behavior to be based either on session start or session end events. |
| `default_notification_channel_name` | Sets the user-facing name as seen via `NotificationChannel.getName` for the Braze default `NotificationChannel`. |
| `default_notification_channel_description` | Sets the user-facing description as seen via `NotificationChannel.getDescription` for the Braze default `NotificationChannel`. |
| `does_push_story_dismiss_on_click` | Sets whether a Push Story is automatically dismissed when clicked. |
| `is_fallback_firebase_messaging_service_enabled` | Sets whether the use of a fallback Firebase Cloud Messaging Service is enabled. |
| `fallback_firebase_messaging_service_classpath` | Sets the classpath for the fallback Firebase Cloud Messaging Service. |
| `is_content_cards_unread_visual_indicator_enabled` | Sets whether the Content Cards unread visual indication bar is enabled. |
| `is_firebase_messaging_service_on_new_token_registration_enabled` | Sets whether the Braze SDK will automatically register tokens in `com.google.firebase.messaging.FirebaseMessagingService.onNewToken`. |
| `is_push_deep_link_back_stack_activity_enabled` | Sets whether Braze will add an activity to the back stack when automatically following deep links for push. |
| `push_deep_link_back_stack_activity_class_name` | Sets the activity that Braze will add to the back stack when automatically following deep links for push. |
| `should_opt_in_when_push_authorized` | Sets if Braze should automatically opt-in the user when push is authorized. |
{: .reset-td-br-1 .reset-td-br-2 aria-label="Optional configurations #optional" }
**Tip:**
For more detailed information, see [GitHub: Braze Android Cordova plugin](https://github.com/braze-inc/braze-cordova-sdk/blob/master/src/android/BrazePlugin.kt).
The following is an example `config.xml` file with additional configurations:
```xml
```
```xml
```
## Disabling automatic session tracking (Android only) {#disable-automatic-session-tracking}
By default, the Android Cordova plugin automatically tracks sessions. To disable automatic session tracking, add the following preference to the `platform` element in your project's `config.xml` file:
```xml
```
To start tracking sessions again, call `BrazePlugin.startSessionTracking()`. Keep in mind, only sessions started after the next `Activity.onStart()` will be tracked.
## About the Flutter Braze SDK
After you integrate the Braze Flutter SDK on Android and iOS, you'll be able to use the Braze API within your [Flutter apps](https://flutter.dev/) written in Dart. This plugin provides basic analytics functionality and lets you integrate in-app messages and Content Cards for both iOS and Android with a single codebase.
## Integrating the Flutter SDK
### Prerequisites
Before you integrate the Braze Flutter SDK, you'll need to complete the following:
| Prerequisite | Description |
| --- | --- |
| Braze API app identifier | To locate your app's identifier, go to **Settings** > **APIs and Identifiers** > **App Identifiers**. For more information see, [API Identifier Types](https://www.braze.com/docs/es/es/api/identifier_types/#app-identifier).|
| Braze SDK endpoint | Your SDK endpoint URL (for example, `sdk..braze.com`). Your endpoint will depend on the [Braze URL for your instance](https://www.braze.com/docs/es/es/developer_guide/rest_api/basics/#endpoints).|
| Flutter SDK | Install the official [Flutter SDK](https://docs.flutter.dev/get-started/install) and ensure it meets the Braze Flutter SDK's [minimum supported version](https://github.com/braze-inc/braze-flutter-sdk#requirements). |
{: .reset-td-br-1 .reset-td-br-2 aria-label="Prerequisites" }
### Step 1: Integrate the Braze library
Add the Braze Flutter SDK package from the command line. This will add the appropriate line to your `pubspec.yaml`.
```bash
flutter pub add braze_plugin
```
### Step 2: Complete native SDK setup
#### 2.1 Set up Android
##### Provide credentials at compile time
Create a `braze.xml` file in your project's `android/res/values` folder. The API key and endpoint are provided at runtime from Dart, so they are not required in this file. To enable delayed initialization, add `com_braze_enable_delayed_initialization` to the file:
```xml
true
```
##### Provide credentials at runtime
Alternatively, you can enable delayed initialization programmatically in your `MainActivity.kt`:
```kotlin
import com.braze.Braze
class MainActivity : FlutterActivity() {
override fun onCreate(savedInstanceState: Bundle?) {
super.onCreate(savedInstanceState)
Braze.enableDelayedInitialization(context = this)
}
}
```
Add the required permissions to your `AndroidManifest.xml` file:
```xml
```
#### 2.2 Set up iOS
Within your existing `application(_:didFinishLaunchingWithOptions:)` method, add a call to `BrazePlugin.configure(_:postInitialization:)` to store your configuration. The Braze instance is created later when `initialize()` is called from Dart. The API key and endpoint are not set here.
Add the following code to your `AppDelegate.swift`:
```swift
import BrazeKit
import braze_plugin
// ...
override func application(
_ application: UIApplication,
didFinishLaunchingWithOptions launchOptions: [UIApplication.LaunchOptionsKey : Any]? = nil
) -> Bool {
// ... your existing didFinishLaunchingWithOptions setup ...
BrazePlugin.configure(
{ configuration in
configuration.logger.level = .info
// Set other non-API-key configurations here, such as:
// configuration.push.automation = true
// configuration.sessionTimeout = 60
},
postInitialization: { braze in
// Optional: Customize the Braze instance after creation.
// For example, set a custom in-app message presenter:
// let customPresenter = CustomInAppMessagePresenter()
// braze.inAppMessagePresenter = customPresenter
}
)
return true
}
```
Add the following code to your `AppDelegate.m`:
```objc
@import BrazeKit;
@import braze_plugin;
// ...
- (BOOL)application:(UIApplication *)application
didFinishLaunchingWithOptions:(NSDictionary *)launchOptions {
[BrazePlugin configure:^(BRZConfiguration *configuration) {
configuration.logger.level = BRZLoggerLevelInfo;
// Set other non-API-key configurations here, such as:
// configuration.push.automation = ...
// configuration.sessionTimeout = 60;
} postInitialization:^(Braze *braze) {
// Optional: customize the Braze instance after creation.
}];
return YES;
}
```
**Important:**
`BrazePlugin.configure()` only stores your configuration. No Braze instance exists until `initialize()` is called from Dart, so do not call any Braze SDK methods in the AppDelegate after `configure()`.
#### 2.1 Set up Android
To connect to Braze servers, create a `braze.xml` file in your project's `android/res/values` folder. Paste the following code and replace the API identifier key and endpoint with your values:
```xml
YOUR_APP_IDENTIFIER_API_KEYYOUR_CUSTOM_ENDPOINT_OR_CLUSTER
```
Add the required permissions to your `AndroidManifest.xml` file:
```xml
```
#### 2.2 Set up iOS
Add the Braze SDK imports at the top of the `AppDelegate.swift` file:
```swift
import BrazeKit
import braze_plugin
```
In the same file, create the Braze configuration object in the `application(_:didFinishLaunchingWithOptions:)` method and replace the API key and endpoint with your app's values. Then, create the Braze instance using the configuration, and create a static property on the `AppDelegate` for easy access:
```swift
static var braze: Braze? = nil
override func application(
_ application: UIApplication,
didFinishLaunchingWithOptions launchOptions: [UIApplication.LaunchOptionsKey : Any]? = nil
) -> Bool {
// Setup Braze
let configuration = Braze.Configuration(
apiKey: "",
endpoint: ""
)
// - Enable logging or customize configuration here
configuration.logger.level = .info
let braze = BrazePlugin.initBraze(configuration)
AppDelegate.braze = braze
return true
}
```
Import the Braze SDK at the top of the `AppDelegate.m` file:
```objc
@import BrazeKit;
@import braze_plugin;
```
In the same file, create the Braze configuration object in the `application:didFinishLaunchingWithOptions:` method and replace the API key and endpoint with your app's values. Then, create the Braze instance using the configuration, and create a static property on the `AppDelegate` for easy access:
```objc
- (BOOL)application:(UIApplication *)application
didFinishLaunchingWithOptions:(NSDictionary *)launchOptions {
// Setup Braze
BRZConfiguration *configuration =
[[BRZConfiguration alloc] initWithApiKey:@""
endpoint:@""];
// - Enable logging or customize configuration here
configuration.logger.level = BRZLoggerLevelInfo;
Braze *braze = [BrazePlugin initBraze:configuration];
AppDelegate.braze = braze;
[self.window makeKeyAndVisible];
return YES;
}
#pragma mark - AppDelegate.braze
static Braze *_braze = nil;
+ (Braze *)braze {
return _braze;
}
+ (void)setBraze:(Braze *)braze {
_braze = braze;
}
```
### Step 3: Set up the plugin
Import the plugin and create a single instance of `BrazePlugin`:
```dart
import 'package:braze_plugin/braze_plugin.dart';
final BrazePlugin braze = BrazePlugin();
```
Then call `initialize()` with your app identifier API key and SDK endpoint to create the Braze instance. See the following options for where to call this method in your app flow.
#### Standard initialization
To initialize the SDK when your app starts, call `initialize()` in `initState()`:
```dart
@override
void initState() {
super.initState();
braze.initialize("", "");
}
```
#### Delayed initialization
To defer SDK initialization until a later point in the session — for example, after the user grants consent or completes login — call `initialize()` when you're ready:
```dart
// ...
void onUserConsent() {
braze.initialize("", "");
}
```
**Warning:**
Push notifications and deep links received before `initialize()` is called are not processed on iOS. On Android, deep links from push notifications do not resolve while the SDK is waiting to be initialized. If your app relies on push or deep links at launch, use [standard initialization](#standard-initialization) instead.
#### Platform-specific API keys
Since your Android and iOS apps use different API keys, use platform detection:
```dart
import 'dart:io' show Platform;
if (Platform.isAndroid) {
braze.initialize("", "");
} else if (Platform.isIOS) {
braze.initialize("", "");
}
```
#### Re-initialization
You can call `initialize()` multiple times to re-initialize the SDK with a different API key and endpoint mid-session. Each call tears down the previous Braze instance and creates a new one.
**Important:**
To avoid undefined behaviors, only allocate and use a single instance of the `BrazePlugin` in your Dart code. All SDK method calls made before `initialize()` are ignored on iOS, so call `initialize()` before using any other Braze methods.
To import the plugin into your Dart code, use the following:
```dart
import 'package:braze_plugin/braze_plugin.dart';
```
Then, initialize an instance of the Braze plugin by calling `new BrazePlugin()` like in [our sample app](https://github.com/braze-inc/braze-flutter-sdk/blob/master/example/lib/main.dart).
**Important:**
To avoid undefined behaviors, only allocate and use a single instance of the `BrazePlugin` in your Dart code.
## Testing the integration
You can verify that the SDK is integrated by checking session statistics in the dashboard. If you run your application on either platform, you should see a new session in the dashboard (in the **Overview** section).
Open a session for a particular user by calling the following code in your app.
```dart
BrazePlugin braze = BrazePlugin();
braze.initialize("", "");
braze.changeUser("{some-user-id}");
```
```dart
BrazePlugin braze = BrazePlugin();
braze.changeUser("{some-user-id}");
```
Search for the user with `{some-user-id}` in the dashboard under **Audience** > **Search Users**. There, you can verify that session and device data have been logged.
## About the React Native Braze SDK
Integrating the React Native Braze SDK provides basic analytics functionality and lets you integrate in-app messages and Content Cards for both iOS and Android with one codebase.
## New Architecture compatibility
The following minimum SDK version is compatible with all apps using [React Native's New Architecture](https://reactnative.dev/docs/the-new-architecture/landing-page):
Starting with SDK version 6.0.0, Braze uses a React Native Turbo Module, which is compatible with both the New Architecture and legacy bridge architecture. This means no additional setup is required.
**Warning:**
If your iOS app conforms to `RCTAppDelegate` and follows our previous `AppDelegate` setup, review the samples in [Complete native setup](#reactnative_step-2-complete-native-setup) to prevent crashes when subscribing to events in the Turbo Module.
## React and React Native version requirements
Braze doesn't publish separate minimum React versions beyond what the React Native SDK supports. To integrate the SDK, use React Native version 0.71 or later. For the full list of supported React Native versions, see the [React Native SDK GitHub repository](https://github.com/braze-inc/braze-react-native-sdk?tab=readme-ov-file#version-support).
When you upgrade React, React Native, or the Braze SDK, review the SDK [CHANGELOG](https://github.com/braze-inc/braze-react-native-sdk/blob/master/CHANGELOG.md) for breaking changes before you deploy.
## Integrating the React Native SDK
### Prerequisites
For supported React Native versions and upgrade guidance, see [React and React Native version requirements](#react-and-react-native-version-requirements).
### Step 1: Integrate the Braze library
```bash
npm install @braze/react-native-sdk
```
```bash
yarn add @braze/react-native-sdk
```
### Step 2: Complete native setup
If your app uses Expo, see [Using the Expo plugin](#reactnative-using-the-expo-plugin). If your app uses pure React Native, see [Using React Native CLI](#reactnative-using-react-native-cli).
Choose one setup method in each version tab: Expo plugin or React Native CLI.
#### Method 1: Using the Expo plugin {#reactnative-using-the-expo-plugin}
##### 2.1 Install the Braze Expo plugin
Ensure that your version of the Braze Expo plugin is at least 4.1.0. For the full list of supported versions, see the [Braze Expo plugin repository](https://github.com/braze-inc/braze-expo-plugin?tab=readme-ov-file#version-support).
The following code snippet shows the command to install the Braze Expo plugin:
```bash
npx expo install @braze/expo-plugin
```
##### 2.2 Add the plugin to your app.json
In your `app.json`, add the Braze Expo plugin. The API key and endpoint are no longer set here. Provide them at runtime through `Braze.initialize()` from JavaScript. Add the following optional configuration parameters based on your implementation needs:
| Method | Type | Description |
| --------------------------------------------- | ------- | -------------------------------------------------------------------------------------------------------------------------------------------------------- |
| `enableBrazeIosPush` | boolean | iOS only. Whether to use Braze to handle push notifications on iOS. |
| `enableFirebaseCloudMessaging` | boolean | Android only. Whether to use Firebase Cloud Messaging for push notifications. |
| `firebaseCloudMessagingSenderId` | string | Android only. Your Firebase Cloud Messaging sender ID. |
| `sessionTimeout` | integer | The Braze session timeout for your application in seconds. |
| `enableSdkAuthentication` | boolean | Whether to enable the [SDK Authentication](https://www.braze.com/docs/es/es/developer_guide/platform_wide/sdk_authentication#sdk-authentication) feature. |
| `logLevel` | integer | The log level for your application. The default log level is 8 and minimally logs info. To enable verbose logging for debugging, use log level 0. |
| `minimumTriggerIntervalInSeconds` | integer | The minimum time interval in seconds between triggers. Defaults to 30 seconds. |
| `enableAutomaticLocationCollection` | boolean | Whether automatic location collection is enabled (if the user permits). |
| `enableGeofence` | boolean | Whether geofences are enabled. |
| `enableAutomaticGeofenceRequests` | boolean | Whether geofence requests should be made automatically. |
| `dismissModalOnOutsideTap` | boolean | iOS only. Whether a modal in-app message is dismissed when the user clicks outside of the in-app message. |
| `androidHandlePushDeepLinksAutomatically` | boolean | Android only. Whether the Braze SDK should automatically handle push deep links. |
| `androidPushNotificationHtmlRenderingEnabled` | boolean | Android only. Sets whether the text content in a push notification should be interpreted and rendered as HTML using `android.text.Html.fromHtml`. |
| `androidNotificationAccentColor` | string | Android only. Sets the Android notification accent color. |
| `androidNotificationLargeIcon` | string | Android only. Sets the Android notification large icon. |
| `androidNotificationSmallIcon` | string | Android only. Sets the Android notification small icon. |
| `iosRequestPushPermissionsAutomatically` | boolean | iOS only. Whether the user should automatically be prompted for push permissions on app launch. |
| `enableBrazeIosRichPush` | boolean | iOS only. Whether to enable rich push features for iOS. |
| `enableBrazeIosPushStories` | boolean | iOS only. Whether to enable Braze Push Stories for iOS. |
| `iosPushStoryAppGroup` | string | iOS only. The app group used for iOS Push Stories. |
| `iosUseUUIDAsDeviceId` | boolean | iOS only. Whether the device ID uses a randomly generated UUID. |
| `iosForwardUniversalLinks` | boolean | iOS only. Specifies if the SDK should automatically recognize and forward universal links to the system methods (default: `false`). |
{: .reset-td-br-1 .reset-td-br-2 .reset-td-br-3 aria-label="2.2 Add the plugin to your app.json" }
The following code snippet shows an example `app.json` configuration:
```json
{
"expo": {
"plugins": [
[
"@braze/expo-plugin",
{
"sessionTimeout": 60,
"enableGeofence": false,
"enableBrazeIosPush": false,
"enableFirebaseCloudMessaging": false,
"firebaseCloudMessagingSenderId": "YOUR-FCM-SENDER-ID",
"androidHandlePushDeepLinksAutomatically": true,
"enableSdkAuthentication": false,
"logLevel": 0,
"minimumTriggerIntervalInSeconds": 0,
"enableAutomaticLocationCollection": false,
"enableAutomaticGeofenceRequests": false,
"dismissModalOnOutsideTap": true,
"androidPushNotificationHtmlRenderingEnabled": true,
"androidNotificationAccentColor": "#ff3344",
"androidNotificationLargeIcon": "@drawable/custom_app_large_icon",
"androidNotificationSmallIcon": "@drawable/custom_app_small_icon",
"iosRequestPushPermissionsAutomatically": false,
"enableBrazeIosPushStories": true,
"iosPushStoryAppGroup": "group.com.example.myapp.PushStories",
"iosForwardUniversalLinks": false
}
]
]
}
}
```
###### Configuring Android push notification icons {#android-push-icons}
When using `androidNotificationLargeIcon` and `androidNotificationSmallIcon`, follow these best practices for proper icon display:
**Icon placement and format**
To use custom push notification icons with the Braze Expo plugin:
1. Create your icon files following the Icon requirements listed in the Icon requirements.
2. Place them in your project's Android native directories at `android/app/src/main/res/drawable-/`.
For example, use `android/app/src/main/res/drawable-mdpi/` and `android/app/src/main/res/drawable-hdpi/`.
3. Alternatively, if you're managing assets in your React Native directory, you can use Expo's [app.json icon configuration](https://docs.expo.dev/versions/latest/config/app/#icon) or create an [Expo config plugin](https://docs.expo.dev/config-plugins/introduction/) to copy the icons to the Android drawable folders during prebuild.
The Braze Expo plugin references these icons using Android's drawable resource system.
**Icon requirements**
- **Small icon:** Must be a white silhouette on a transparent background (this is an Android platform requirement)
- **Large icon:** Can be a full-color image.
- **Format:** PNG format is recommended.
- **Naming:** Use lowercase letters, numbers, and underscores only (for example, `my_large_icon.png`)
**Configuration in app.json**
The following code snippet shows how to reference Android notification icons in `app.json` using the `@drawable/` prefix:
```json
{
"expo": {
"plugins": [
[
"@braze/expo-plugin",
{
"androidNotificationLargeIcon": "@drawable/large_icon",
"androidNotificationSmallIcon": "@drawable/small_icon"
}
]
]
}
}
```
**Important:**
Do not use relative file paths (such as `src/assets/images/icon.png`) or include the file extension when referencing icons. The Expo plugin requires the `@drawable/` prefix to properly locate the icons in the Android native folders after the prebuild process.
**How it works**
The Braze Expo plugin references your icon files from the Android `drawable` directories. When you run `npx expo prebuild`, Expo generates the native Android project structure. Your icons must be present in the Android `drawable` folders (either placed manually or copied through a config plugin) before the build process. The plugin then configures the Braze SDK to use these drawable resources by their names (without path or extension), which is why the `@drawable/` prefix is required in your configuration.
For more information on Android notification icons, see [Android's notification icon guidelines](https://developer.android.com/develop/ui/views/notifications#icon).
##### 2.3 Build and run your application
Prebuilding your application generates the native files necessary for the Braze Expo plugin to work.
The following code snippet shows the command to prebuild your application:
```bash
npx expo prebuild
```
Run your application as specified in the [Expo docs](https://docs.expo.dev/workflow/customizing/). If you make changes to the configuration options, prebuild and run the application again.
#### Method 2: Using React Native CLI {#reactnative-using-react-native-cli}
##### Set up Android
**2.1 Add the Kotlin Gradle plugin**
The following code snippet shows how to add the Kotlin Gradle plugin in your top-level project `build.gradle` under `buildscript` > `dependencies`:
```groovy
buildscript {
dependencies {
...
// Choose your Kotlin version
classpath("org.jetbrains.kotlin:kotlin-gradle-plugin:1.8.10")
}
}
```
This adds Kotlin to your project.
**2.2 Configure the Braze SDK**
Create a `braze.xml` file in your project's `res/values` folder. The API key and endpoint are provided at runtime from JavaScript, so they are not required in this file. The following code snippet shows how to enable delayed initialization with `com_braze_enable_delayed_initialization`:
```xml
true
```
**Note:**
You can still add other native configuration values to `braze.xml` (such as push, session timeout, and logging settings). These are applied automatically when `Braze.initialize()` is called from JavaScript.
The following code snippet shows the required permissions for your `AndroidManifest.xml` file:
```xml
```
**Tip:**
On Braze Android SDK version 12.2.0 or later, you can automatically pull in the android-sdk-location library by setting `importBrazeLocationLibrary=true` in your `gradle.properties` file.
**2.3 Implement user session tracking**
The calls to `openSession()` and `closeSession()` are handled automatically.
The following code snippet shows what to add to the `onCreate()` method of your `MainApplication` class:
```java
import com.braze.BrazeActivityLifecycleCallbackListener;
@Override
public void onCreate() {
super.onCreate();
...
registerActivityLifecycleCallbacks(new BrazeActivityLifecycleCallbackListener());
}
```
```kotlin
import com.braze.BrazeActivityLifecycleCallbackListener
override fun onCreate() {
super.onCreate()
...
registerActivityLifecycleCallbacks(BrazeActivityLifecycleCallbackListener())
}
```
**2.4 Handle intent updates**
If your MainActivity has `android:launchMode` set to `singleTask`, the following code snippet shows what to add to your `MainActivity` class:
```java
@Override
public void onNewIntent(Intent intent) {
super.onNewIntent(intent);
setIntent(intent);
}
```
```kotlin
override fun onNewIntent(intent: Intent) {
super.onNewIntent(intent)
setIntent(intent)
}
```
##### Set up iOS
**2.5 (Optional) Configure Podfile for dynamic XCFrameworks**
To import certain Braze libraries, such as BrazeUI, into an Objective-C++ file, you must use the `#import` syntax. Starting in version `7.4.0` of the Braze Swift SDK, binaries have an [optional distribution channel as dynamic XCFrameworks](https://github.com/braze-inc/braze-swift-sdk-prebuilt-dynamic), which are compatible with this syntax.
If you'd like to use this distribution channel, manually override the CocoaPods source locations in your Podfile. Reference this sample and replace `{your-version}` with the relevant version you wish to import:
```ruby
pod 'BrazeKit', :podspec => 'https://raw.githubusercontent.com/braze-inc/braze-swift-sdk-prebuilt-dynamic/{your-version}/BrazeKit.podspec'
pod 'BrazeUI', :podspec => 'https://raw.githubusercontent.com/braze-inc/braze-swift-sdk-prebuilt-dynamic/{your-version}/BrazeUI.podspec'
pod 'BrazeLocation', :podspec => 'https://raw.githubusercontent.com/braze-inc/braze-swift-sdk-prebuilt-dynamic/{your-version}/BrazeLocation.podspec'
```
**2.6 Install pods**
Since React Native automatically links the libraries to the native platform, you can install the SDK with the help of CocoaPods.
The following code snippet shows how to install pods from the root folder of the project:
```bash
# To install using the React Native New Architecture
cd ios && pod install
# To install using the React Native legacy architecture
cd ios && RCT_NEW_ARCH_ENABLED=0 pod install
```
**2.7 Configure the Braze SDK**
Use `BrazeReactInitializer.configure` in your `AppDelegate` to register native configuration. The closures you provide are stored and applied later when `Braze.initialize(apiKey, endpoint)` is called from JavaScript.
The following code snippet shows how to import the Braze SDK at the top of the `AppDelegate.swift` file:
```swift
import BrazeKit
import braze_react_native_sdk
```
In the `application(_:didFinishLaunchingWithOptions:)` method, register your native configuration using `BrazeReactInitializer.configure`. Do not set the API key or endpoint here. They are provided from JavaScript through `Braze.initialize()`.
- **`configure` closure**: Receives a `Braze.Configuration` and lets you set native configuration properties (logging, push, sessions, and more).
- **`postInitialization` closure** _(optional)_: Receives the live `Braze` instance after creation, for setup that requires the instance (for example, storing a reference or setting delegates).
The following code snippet shows an example `AppDelegate.swift` implementation that uses `BrazeReactInitializer.configure`:
```swift
@main
class AppDelegate: UIResponder, UIApplicationDelegate {
static var braze: Braze? = nil
func application(
_ application: UIApplication,
didFinishLaunchingWithOptions launchOptions: [UIApplication.LaunchOptionsKey: Any]? = nil
) -> Bool {
BrazeReactInitializer.configure { configuration in
configuration.logger.level = .info
configuration.push.automation = true
} postInitialization: { braze in
AppDelegate.braze = braze
}
// ... React Native setup
return true
}
}
```
The following code snippet shows how to import the Braze SDK at the top of the `AppDelegate.m` file:
```objc
@import BrazeKit;
@import braze_react_native_sdk;
```
In the `application:didFinishLaunchingWithOptions:` method, register your native configuration using `BrazeReactInitializer`. Do not set the API key or endpoint here. They are provided from JavaScript through `Braze.initialize()`.
The following code snippet shows an example `AppDelegate.m` implementation that uses `BrazeReactInitializer`:
```objc
- (BOOL)application:(UIApplication *)application
didFinishLaunchingWithOptions:(NSDictionary *)launchOptions {
[BrazeReactInitializer configure:^(BRZConfiguration *configuration) {
configuration.logger.level = BRZLoggerLevelInfo;
configuration.push.automation = [[BRZConfigurationPushAutomation alloc] initWithAutomationEnabled:YES];
} postInitialization:^(Braze *braze) {
// Store the Braze instance for later use.
}];
/* Other configuration */
return YES;
}
```
**Important:**
`BrazeReactInitializer.configure()` only stores your configuration. No Braze instance exists until `Braze.initialize()` is called from JavaScript, so do not call any Braze SDK methods in the AppDelegate after `configure()`.
When you call `Braze.initialize()` again, the same `configure` and `postInitialization` blocks are applied to the new Braze instance.
#### Method 1: Using the Expo plugin
##### Step 2.1: Install the Braze Expo plugin
Ensure that your version of the Braze React Native SDK is at least 1.37.0. For the full list of supported versions, see the [Braze React Native repository](https://github.com/braze-inc/braze-react-native-sdk?tab=readme-ov-file#version-support).
The following code snippet shows the command to install the Braze Expo plugin:
```bash
npx expo install @braze/expo-plugin
```
##### Step 2.2: Add the plugin to your app.json
In your `app.json`, add the Braze Expo plugin. You can provide the following configuration options:
| Method | Type | Description |
| --------------------------------------------- | ------- | -------------------------------------------------------------------------------------------------------------------------------------------------------- |
| `androidApiKey` | string | Required. The [API key](https://www.braze.com/docs/es/es/api/identifier_types/) for your Android application, located in your Braze dashboard under **Manage Settings**. |
| `iosApiKey` | string | Required. The [API key](https://www.braze.com/docs/es/es/api/identifier_types/) for your iOS application, located in your Braze dashboard under **Manage Settings**. |
| `baseUrl` | string | Required. The [SDK endpoint](https://www.braze.com/docs/es/es/api/basics/#endpoints) for your application, located in your Braze dashboard under **Manage Settings**. |
| `enableBrazeIosPush` | boolean | iOS only. Whether to use Braze to handle push notifications on iOS. Introduced in React Native SDK v1.38.0 and Expo Plugin v0.4.0. |
| `enableFirebaseCloudMessaging` | boolean | Android only. Whether to use Firebase Cloud Messaging for push notifications. Introduced in React Native SDK v1.38.0 and Expo Plugin v0.4.0. |
| `firebaseCloudMessagingSenderId` | string | Android only. Your Firebase Cloud Messaging sender ID. Introduced in React Native SDK v1.38.0 and Expo Plugin v0.4.0. |
| `sessionTimeout` | integer | The Braze session timeout for your application in seconds. |
| `enableSdkAuthentication` | boolean | Whether to enable the [SDK Authentication](https://www.braze.com/docs/es/es/developer_guide/platform_wide/sdk_authentication#sdk-authentication) feature. |
| `logLevel` | integer | The log level for your application. The default log level is 8 and minimally logs info. To enable verbose logging for debugging, use log level 0. |
| `minimumTriggerIntervalInSeconds` | integer | The minimum time interval in seconds between triggers. Defaults to 30 seconds. |
| `enableAutomaticLocationCollection` | boolean | Whether automatic location collection is enabled (if the user permits). |
| `enableGeofence` | boolean | Whether geofences are enabled. |
| `enableAutomaticGeofenceRequests` | boolean | Whether geofence requests should be made automatically. |
| `dismissModalOnOutsideTap` | boolean | iOS only. Whether a modal in-app message is dismissed when the user clicks outside of the in-app message. |
| `androidHandlePushDeepLinksAutomatically` | boolean | Android only. Whether the Braze SDK should automatically handle push deep links. |
| `androidPushNotificationHtmlRenderingEnabled` | boolean | Android only. Sets whether the text content in a push notification should be interpreted and rendered as HTML using `android.text.Html.fromHtml`. |
| `androidNotificationAccentColor` | string | Android only. Sets the Android notification accent color. |
| `androidNotificationLargeIcon` | string | Android only. Sets the Android notification large icon. |
| `androidNotificationSmallIcon` | string | Android only. Sets the Android notification small icon. |
| `iosRequestPushPermissionsAutomatically` | boolean | iOS only. Whether the user should automatically be prompted for push permissions on app launch. |
| `enableBrazeIosRichPush` | boolean | iOS only. Whether to enable rich push features for iOS. |
| `enableBrazeIosPushStories` | boolean | iOS only. Whether to enable Braze Push Stories for iOS. |
| `iosPushStoryAppGroup` | string | iOS only. The app group used for iOS Push Stories. |
| `iosUseUUIDAsDeviceId` | boolean | iOS only. Whether the device ID will use a randomly generated UUID. |
| `iosForwardUniversalLinks` | boolean | iOS only. Specifies if the SDK should automatically recognize and forward universal links to the system methods (default: `false`). When enabled, the SDK will automatically forward universal links to the system methods defined in [Supporting universal links in your app](https://braze-inc.github.io/braze-swift-sdk/documentation/brazekit/braze/configuration-swift.class/forwarduniversallinks/). Introduced in React Native SDK v11.1.0 and Expo Plugin v3.2.0. |
{: .reset-td-br-1 .reset-td-br-2 .reset-td-br-3 aria-label="Step 2.2: Add the plugin to your app.json" }
The following code snippet shows an example `app.json` configuration:
```json
{
"expo": {
"plugins": [
[
"@braze/expo-plugin",
{
"androidApiKey": "YOUR-ANDROID-API-KEY",
"iosApiKey": "YOUR-IOS-API-KEY",
"baseUrl": "YOUR-SDK-ENDPOINT",
"sessionTimeout": 60,
"enableGeofence": false,
"enableBrazeIosPush": false,
"enableFirebaseCloudMessaging": false,
"firebaseCloudMessagingSenderId": "YOUR-FCM-SENDER-ID",
"androidHandlePushDeepLinksAutomatically": true,
"enableSdkAuthentication": false,
"logLevel": 0,
"minimumTriggerIntervalInSeconds": 0,
"enableAutomaticLocationCollection": false,
"enableAutomaticGeofenceRequests": false,
"dismissModalOnOutsideTap": true,
"androidPushNotificationHtmlRenderingEnabled": true,
"androidNotificationAccentColor": "#ff3344",
"androidNotificationLargeIcon": "@drawable/custom_app_large_icon",
"androidNotificationSmallIcon": "@drawable/custom_app_small_icon",
"iosRequestPushPermissionsAutomatically": false,
"enableBrazeIosPushStories": true,
"iosPushStoryAppGroup": "group.com.example.myapp.PushStories",
"iosForwardUniversalLinks": false
}
],
]
}
}
```
###### Configuring Android push notification icons
When using `androidNotificationLargeIcon` and `androidNotificationSmallIcon`, follow these best practices for proper icon display:
**Icon placement and format**
To use custom push notification icons with the Braze Expo plugin:
1. Create your icon files following the Icon requirements listed in the Icon requirements.
2. Place them in your project's Android native directories at `android/app/src/main/res/drawable-/` (for example, `android/app/src/main/res/drawable-mdpi/`, `drawable-hdpi/`, or similar.)
3. Alternatively, if you're managing assets in your React Native directory, you can use Expo's [app.json icon configuration](https://docs.expo.dev/versions/latest/config/app/#icon) or create an [Expo config plugin](https://docs.expo.dev/config-plugins/introduction/) to copy the icons to the Android drawable folders during prebuild.
The Braze Expo plugin references these icons using Android's drawable resource system.
**Icon requirements**
- **Small icon:** Must be a white silhouette on a transparent background (this is an Android platform requirement)
- **Large icon:** Can be a full-color image.
- **Format:** PNG format is recommended.
- **Naming:** Use lowercase letters, numbers, and underscores only (for example, `my_large_icon.png`)
**Configuration in app.json**
The following code snippet shows how to reference Android notification icons in `app.json` using the `@drawable/` prefix:
```json
{
"expo": {
"plugins": [
[
"@braze/expo-plugin",
{
"androidNotificationLargeIcon": "@drawable/large_icon",
"androidNotificationSmallIcon": "@drawable/small_icon"
}
]
]
}
}
```
**Important:**
Do not use relative file paths (such as `src/assets/images/icon.png`) or include the file extension when referencing icons. The Expo plugin requires the `@drawable/` prefix to properly locate the icons in the Android native folders after the prebuild process.
**How it works**
The Braze Expo plugin references your icon files from the Android `drawable` directories. When you run `npx expo prebuild`, Expo generates the native Android project structure. Your icons must be present in the Android `drawable` folders (either placed manually or copied through a config plugin) before the build process. The plugin then configures the Braze SDK to use these drawable resources by their names (without path or extension), which is why the `@drawable/` prefix is required in your configuration.
For more information on Android notification icons, see [Android's notification icon guidelines](https://developer.android.com/develop/ui/views/notifications#icon).
##### Step 2.3: Build and run your application
Prebuilding your application generates the native files necessary for the Braze Expo plugin to work.
The following code snippet shows the command to prebuild your application:
```bash
npx expo prebuild
```
Run your application as specified in the [Expo docs](https://docs.expo.dev/workflow/customizing/). Keep in mind, if you make any changes to the configuration options, you'll be required to prebuild and run the application again.
#### Method 2: Using React Native CLI
##### Set up Android
**Step 2.1: Add the Kotlin Gradle plugin**
The following code snippet shows how to add the Kotlin Gradle plugin in your top-level project `build.gradle` under `buildscript` > `dependencies`:
```groovy
buildscript {
dependencies {
...
// Choose your Kotlin version
classpath("org.jetbrains.kotlin:kotlin-gradle-plugin:1.8.10")
}
}
```
This adds Kotlin to your project.
**Step 2.2: Configure the Braze SDK**
To connect to Braze servers, create a `braze.xml` file in your project's `res/values` folder. The following code snippet shows an example `braze.xml` configuration. Replace the API [key](https://www.braze.com/docs/es/es/api/identifier_types/) and [endpoint](https://www.braze.com/docs/es/es/api/basics/#endpoints) with your values:
```xml
YOU_APP_IDENTIFIER_API_KEYYOUR_CUSTOM_ENDPOINT_OR_CLUSTER
```
The following code snippet shows the required permissions for your `AndroidManifest.xml` file:
```xml
```
**Tip:**
On Braze Android SDK version 12.2.0 or later, you can automatically pull in the android-sdk-location library by setting `importBrazeLocationLibrary=true` in your `gradle.properties` file.
**Step 2.3: Implement user session tracking**
The calls to `openSession()` and `closeSession()` are handled automatically.
The following code snippet shows what to add to the `onCreate()` method of your `MainApplication` class:
```java
import com.braze.BrazeActivityLifecycleCallbackListener;
@Override
public void onCreate() {
super.onCreate();
...
registerActivityLifecycleCallbacks(new BrazeActivityLifecycleCallbackListener());
}
```
```kotlin
import com.braze.BrazeActivityLifecycleCallbackListener
override fun onCreate() {
super.onCreate()
...
registerActivityLifecycleCallbacks(BrazeActivityLifecycleCallbackListener())
}
```
**Step 2.4: Handle intent updates**
If your MainActivity has `android:launchMode` set to `singleTask`, the following code snippet shows what to add to your `MainActivity` class:
```java
@Override
public void onNewIntent(Intent intent) {
super.onNewIntent(intent);
setIntent(intent);
}
```
```kotlin
override fun onNewIntent(intent: Intent) {
super.onNewIntent(intent)
setIntent(intent)
}
```
##### Set up iOS
**Step 2.5: (Optional) Configure Podfile for dynamic XCFrameworks**
To import certain Braze libraries, such as BrazeUI, into an Objective-C++ file, you must use the `#import` syntax. Starting in version `7.4.0` of the Braze Swift SDK, binaries have an [optional distribution channel as dynamic XCFrameworks](https://github.com/braze-inc/braze-swift-sdk-prebuilt-dynamic), which are compatible with this syntax.
If you'd like to use this distribution channel, manually override the CocoaPods source locations in your Podfile. The following code snippet shows a sample override. Replace `{your-version}` with the relevant version you wish to import:
```ruby
pod 'BrazeKit', :podspec => 'https://raw.githubusercontent.com/braze-inc/braze-swift-sdk-prebuilt-dynamic/{your-version}/BrazeKit.podspec'
pod 'BrazeUI', :podspec => 'https://raw.githubusercontent.com/braze-inc/braze-swift-sdk-prebuilt-dynamic/{your-version}/BrazeUI.podspec'
pod 'BrazeLocation', :podspec => 'https://raw.githubusercontent.com/braze-inc/braze-swift-sdk-prebuilt-dynamic/{your-version}/BrazeLocation.podspec'
```
**Step 2.6: Install pods**
Since React Native automatically links the libraries to the native platform, you can install the SDK with the help of CocoaPods.
The following code snippet shows how to install pods from the root folder of the project:
```bash
# To install using the React Native New Architecture
cd ios && pod install
# To install using the React Native legacy architecture
cd ios && RCT_NEW_ARCH_ENABLED=0 pod install
```
**Step 2.7: Configure the Braze SDK**
The following code snippet shows how to import the Braze SDK at the top of the `AppDelegate.swift` file:
```swift
import BrazeKit
import braze_react_native_sdk
```
In the `application(_:didFinishLaunchingWithOptions:)` method, replace the API [key](https://www.braze.com/docs/es/es/api/identifier_types/) and [endpoint](https://www.braze.com/docs/es/es/api/basics/#endpoints) with your app's values. Then, create the Braze instance using the configuration, and create a static property on the `AppDelegate` for easy access.
**Note:**
Our example assumes an implementation of [RCTAppDelegate](https://github.com/facebook/react-native/blob/e64756ae5bb5c0607a4d97a134620fafcb132b3b/packages/react-native/Libraries/AppDelegate/RCTAppDelegate.h), which provides a number of abstractions in the React Native setup. If you are using a different setup for your app, be sure to adjust your implementation as needed.
The following code snippet shows an example `AppDelegate.swift` setup:
```swift
func application(
_ application: UIApplication,
didFinishLaunchingWithOptions launchOptions: [UIApplication.LaunchOptionsKey : Any]? = nil
) -> Bool {
// Setup Braze
let configuration = Braze.Configuration(
apiKey: "{BRAZE_API_KEY}",
endpoint: "{BRAZE_ENDPOINT}")
// Enable logging and customize the configuration here.
configuration.logger.level = .info
let braze = BrazeReactBridge.perform(
#selector(BrazeReactBridge.initBraze(_:)),
with: configuration
).takeUnretainedValue() as! Braze
AppDelegate.braze = braze
/* Other configuration */
return true
}
// MARK: - AppDelegate.braze
static var braze: Braze? = nil
```
The following code snippet shows how to import the Braze SDK at the top of the `AppDelegate.m` file:
```objc
#import
#import "BrazeReactBridge.h"
```
In the `application:didFinishLaunchingWithOptions:` method, replace the API [key](https://www.braze.com/docs/es/es/api/identifier_types/) and [endpoint](https://www.braze.com/docs/es/es/api/basics/#endpoints) with your app's values. Then, create the Braze instance using the configuration, and create a static property on the `AppDelegate` for easy access.
**Note:**
Our example assumes an implementation of [RCTAppDelegate](https://github.com/facebook/react-native/blob/e64756ae5bb5c0607a4d97a134620fafcb132b3b/packages/react-native/Libraries/AppDelegate/RCTAppDelegate.h), which provides a number of abstractions in the React Native setup. If you are using a different setup for your app, be sure to adjust your implementation as needed.
The following code snippet shows an example `AppDelegate.m` setup:
```objc
- (BOOL)application:(UIApplication *)application
didFinishLaunchingWithOptions:(NSDictionary *)launchOptions {
// Setup Braze
BRZConfiguration *configuration = [[BRZConfiguration alloc] initWithApiKey:@"{BRAZE_API_KEY}"
endpoint:@"{BRAZE_ENDPOINT}"];
// Enable logging and customize the configuration here.
configuration.logger.level = BRZLoggerLevelInfo;
Braze *braze = [BrazeReactBridge initBraze:configuration];
AppDelegate.braze = braze;
/* Other configuration */
return YES;
}
#pragma mark - AppDelegate.braze
static Braze *_braze = nil;
+ (Braze *)braze {
return _braze;
}
+ (void)setBraze:(Braze *)braze {
_braze = braze;
}
```
### Step 3: Initialize the SDK
The following code snippet shows how to import the library in your React Native code:
```javascript
import Braze from "@braze/react-native-sdk";
```
Then call `Braze.initialize()` with your app identifier API key and SDK endpoint to create the Braze instance. See the following options for where to call this method in your app flow.
#### Standard initialization
The following code snippet shows how to initialize the SDK when your app starts by calling `Braze.initialize()` in a `useEffect`:
```javascript
import React, { useEffect } from "react";
import Braze from "@braze/react-native-sdk";
const App = () => {
useEffect(() => {
Braze.initialize("YOUR-API-KEY", "YOUR-SDK-ENDPOINT");
}, []);
return (
// Your app components
);
};
```
#### Delayed initialization
The following code snippet shows how to defer SDK initialization until later in the session. For example, after the user grants consent or completes login:
```javascript
function onUserConsent() {
Braze.initialize("YOUR-API-KEY", "YOUR-SDK-ENDPOINT");
}
```
**Warning:**
On iOS, push notifications received before `Braze.initialize()` are queued and processed after initialization. On Android, deep links from push notifications do not resolve while the SDK is waiting to be initialized. If your app relies on immediate deep link handling at launch, use [standard initialization](#standard-initialization) instead.
#### Platform-specific API keys
The following code snippet shows how to use platform detection when your Android and iOS apps use different API keys:
```javascript
import { Platform } from "react-native";
import Braze from "@braze/react-native-sdk";
const apiKey = Platform.select({
android: "YOUR-ANDROID-API-KEY",
ios: "YOUR-IOS-API-KEY",
}) ?? "";
Braze.initialize(apiKey, "YOUR-SDK-ENDPOINT");
```
#### Re-initialization
You can call `Braze.initialize()` multiple times to re-initialize the SDK with a different API key and endpoint mid-session. Each call tears down the previous Braze instance and creates a new one.
**Important:**
All SDK method calls made before `Braze.initialize()` are ignored on iOS, so call `Braze.initialize()` before using any other Braze methods.
For React Native SDK 19.1.0 and earlier, native initialization happens in Step 2. Import the library in your React Native code to call Braze methods. For more details, check out our [sample project](https://github.com/braze-inc/braze-react-native-sdk/tree/master/BrazeProject).
```javascript
import Braze from "@braze/react-native-sdk";
```
### Step 4: Test the integration (optional)
You can verify that the SDK is integrated by checking session statistics in the dashboard. If you run your application on either platform, you should see a new session in the dashboard (in the **Overview** section).
The following code snippet shows how to open a session for a particular user in your app:
```javascript
import Braze from "@braze/react-native-sdk";
Braze.initialize("YOUR-API-KEY", "YOUR-SDK-ENDPOINT");
Braze.changeUser("{some-user-id}");
```
Search for the user with `{some-user-id}` in the dashboard under **Audience** > **Search Users**. There, you can verify that session and device data have been logged.
To test your SDK integration, the following code snippet shows how to start a new session on either platform for a user.
```javascript
Braze.changeUser("userId");
```
The following code snippet shows an example of assigning the user ID at app startup:
```javascript
import React, { useEffect } from "react";
import Braze from "@braze/react-native-sdk";
const App = () => {
useEffect(() => {
Braze.changeUser("some-user-id");
}, []);
return (
...
)
```
In the Braze dashboard, go to [User Search](https://www.braze.com/docs/es/es/user_guide/engagement_tools/segments/using_user_search#using-user-search) and look for the user with the ID matching `some-user-id`. Here, you can verify that session and device data were logged.
## Next steps
After integrating the Braze SDK, you can start implementing common messaging features:
- [Push Notifications](https://www.braze.com/docs/es/es/developer_guide/push_notifications/): Set up and send push notifications to your users.
- [In-App Messages](https://www.braze.com/docs/es/es/developer_guide/in_app_messages/): Display contextual messages within your app.
- [Banners](https://www.braze.com/docs/es/es/developer_guide/banners/): Show persistent banners in your app interface.
## Integrating the Roku SDK
### Step 1: Add files
Braze SDK files can be found in the `sdk_files` directory in the [Braze Roku SDK repository](https://github.com/braze-inc/braze-roku-sdk).
1. Add `BrazeSDK.brs` to your app in the `source` directory.
2. Add `BrazeTask.brs` and `BrazeTask.xml` to your app in the `components` directory.
### Step 2: Add references
Add a reference to `BrazeSDK.brs` in your main scene using the following `script` element:
```
```
### Step 3: Configure
Within `main.brs`, set the Braze configuration on the global node:
```brightscript
globalNode = screen.getGlobalNode()
config = {}
config_fields = BrazeConstants().BRAZE_CONFIG_FIELDS
config[config_fields.API_KEY] = {YOUR_API_KEY}
' example endpoint: "https://sdk.iad-01.braze.com/"
config[config_fields.ENDPOINT] = {YOUR_ENDPOINT}
config[config_fields.HEARTBEAT_FREQ_IN_SECONDS] = 5
globalNode.addFields({brazeConfig: config})
```
You can find your [SDK endpoint](https://www.braze.com/docs/es/es/user_guide/administrative/access_braze/sdk_endpoints/) and API key within the Braze dashboard.
### Step 4: Initialize Braze
Initialize the Braze instance:
```brightscript
m.BrazeTask = createObject("roSGNode", "BrazeTask")
m.Braze = getBrazeInstance(m.BrazeTask)
```
## Optional configurations
### Logging
To debug your Braze integration, you can view the Roku debug console for Braze logs. Refer to [Debugging code](https://developer.roku.com/docs/developer-program/debugging/debugging-channels.md) from Roku Developers to learn more.
## About the Unity Braze SDK
For a full list of types, functions, variables, and more, see [Unity Declaration File](https://github.com/braze-inc/braze-unity-sdk/blob/master/Assets/Plugins/Appboy/BrazePlatform.cs). Additionally, if you've already integrated Unity manually for iOS, you can [switch to an automated integration](#unity_automated-integration) instead.
## Integrating the Unity SDK
### Prerequisites
Before you start, verify your environment is supported by the [latest Braze Unity SDK version](https://github.com/braze-inc/braze-unity-sdk/releases).
### Step 1: Choose your Braze Unity package
The Braze [`.unitypackage`](https://docs.unity3d.com/Manual/AssetPackages.html) bundles native bindings for the Android and iOS platforms, along with a C# interface.
There are several Braze Unity packages available for download on the [Braze Unity releases page](https://github.com/Appboy/appboy-unity-sdk/releases):
- `Appboy.unitypackage`
- This package bundles the Braze Android and iOS SDKs and the [SDWebImage](https://github.com/SDWebImage/SDWebImage) dependency for the iOS SDK, which is required for the proper functionality of Braze in-app messaging, and Content Cards features on iOS. The SDWebImage framework is used for downloading and displaying images, including GIFs. If you intend on utilizing full Braze functionality, download and import this package.
- `Appboy-nodeps.unitypackage`
- This package is similar to `Appboy.unitypackage` except for the [SDWebImage](https://github.com/SDWebImage/SDWebImage) framework is not present. This package is useful if you do not want the SDWebImage framework present in your iOS app.
**Note:**
As of Unity 2.6.0, the bundled Braze Android SDK artifact requires [AndroidX](https://developer.android.com/jetpack/androidx) dependencies. If you were previously using a `jetified` unitypackage, you can safely transition to the corresponding `unitypackage`.
If Android builds fail with "This project uses AndroidX dependencies, but the 'android.useAndroidX' property is not enabled", enable [Custom Gradle Properties Template](https://docs.unity3d.com/Manual/class-PlayerSettingsAndroid.html#Publishing) in your Unity Publishing Settings. Then open `Assets/Plugins/Android/gradleTemplate.properties` and set `android.useAndroidX=true`. For a working template, see the [Braze Unity sample app](https://github.com/braze-inc/braze-unity-sdk/tree/master/unity-samples) and its [`gradleTemplate.properties`](https://github.com/braze-inc/braze-unity-sdk/blob/master/unity-samples/Assets/Plugins/Android/gradleTemplate.properties) file.
The Braze [`.unitypackage`](https://docs.unity3d.com/Manual/AssetPackages.html) bundles native bindings for the Android and iOS platforms, along with a C# interface.
The Braze Unity package is available for download on the [Braze Unity releases page](https://github.com/Appboy/appboy-unity-sdk/releases) with two integration options:
1. `Appboy.unitypackage` only
- This package bundles the Braze Android and iOS SDKs without any additional dependencies. With this integration method, there will not be proper functionality of Braze in-app messaging and Content Cards features on iOS. If you intend on utilizing full Braze functionality without custom code, use the next option instead.
- To use this integration option, ensure that the box next to `Import SDWebImage dependency` is *unchecked* in the Unity UI under "Braze Configuration".
2. `Appboy.unitypackage` with `SDWebImage`
- This integration option bundles the Braze Android and iOS SDKs and the [SDWebImage](https://github.com/SDWebImage/SDWebImage) dependency for the iOS SDK, which is required for the proper functionality of Braze in-app messaging, and Content Cards features on iOS. The `SDWebImage` framework is used for downloading and displaying images, including GIFs. If you intend on utilizing full Braze functionality, download and import this package.
- To automatically import `SDWebImage`, be sure to *check* the box next to `Import SDWebImage dependency` in the Unity UI under "Braze Configuration".
**Note:**
To see if you require the [SDWebImage](https://github.com/SDWebImage/SDWebImage) dependency for your iOS project, visit the [iOS in-app message documentation](https://www.braze.com/docs/es/es/developer_guide/platform_integration_guides/swift/in-app_messaging/overview/).
### Step 2: Import the package
In the Unity Editor, import the package into your Unity project by navigating to **Assets > Import Package > Custom Package**. Next, click **Import**.
Alternatively, follow the [Unity asset package import](https://docs.unity3d.com/Manual/AssetPackages.html) instructions for a more detailed guide on importing custom Unity packages.
**Note:**
If you only wish to import the iOS or Android plugin, deselect the `Plugins/Android` or `Plugins/iOS` subdirectory when importing the Braze `.unitypackage`.
In the Unity Editor, import the package into your Unity project by navigating to **Assets > Import Package > Custom Package**. Next, click **Import**.
Alternatively, follow the [Unity asset package import](https://docs.unity3d.com/Manual/AssetPackages.html) instructions for a more detailed guide on importing custom Unity packages.
**Note:**
If you only wish to import the iOS or Android plugin, deselect the `Plugins/Android` or `Plugins/iOS` subdirectory when importing the Braze `.unitypackage`.
### Step 3: Configure the SDK
#### Step 3.1: Configure `AndroidManifest.xml`
Configure [`AndroidManifest.xml`](https://docs.unity3d.com/Manual/android-manifest.html) so the Braze SDK can function. If your app does not have an `AndroidManifest.xml`, you can use the following as a template. Otherwise, if you already have an `AndroidManifest.xml`, ensure that any of the following missing sections are added to your existing `AndroidManifest.xml`.
1. Go to the `Assets/Plugins/Android/` directory and open your `AndroidManifest.xml` file. This is the [default location in the Unity editor](https://docs.unity3d.com/Manual/android-manifest.html).
2. In your `AndroidManifest.xml`, add the required permissions and activities from in the following template.
3. When you're finished, your `AndroidManifest.xml` should only contain a single Activity with `"android.intent.category.LAUNCHER"` present.
```xml
```
**Important:**
All Activity classes registered in your `AndroidManifest.xml` file should be fully integrated with the Braze Android SDK, otherwise your analytics won't be collected. If you add your own Activity class, be sure you [extend the Braze Unity player](#unity_extend-unity-player) so you can prevent this.
#### Step 3.2: Update `AndroidManifest.xml` with your package name
To find your package name, click **File > Build Settings > Player Settings > Android Tab**.

In your `AndroidManifest.xml`, all instances of `REPLACE_WITH_YOUR_PACKAGE_NAME` should be replaced with your `Package Name` from the previous step.
#### Step 3.3: Add gradle dependencies
To add gradle dependencies to your Unity project, first enable ["Custom Main Gradle Template"](https://docs.unity3d.com/Manual/class-PlayerSettingsAndroid.html#Publishing) in your Publishing Settings. This will create a template gradle file that your project will use. A gradle file handles setting dependencies and other build-time project settings. For more information, check out the Braze Unity sample app's [mainTemplate.gradle](https://github.com/braze-inc/braze-unity-sdk/blob/master/unity-samples/Assets/Plugins/Android/mainTemplate.gradle).
The following dependencies are required:
```groovy
implementation 'com.google.firebase:firebase-messaging:22.0.0'
implementation "androidx.swiperefreshlayout:swiperefreshlayout:1.1.0"
implementation "androidx.recyclerview:recyclerview:1.2.1"
implementation "org.jetbrains.kotlin:kotlin-stdlib:1.6.0"
implementation "org.jetbrains.kotlinx:kotlinx-coroutines-android:1.6.1"
implementation 'androidx.core:core:1.6.0'
```
You may also set these dependencies using the [External Dependency Manager](https://github.com/googlesamples/unity-jar-resolver).
#### Step 3.4: Automate the Unity Android integration
Braze provides a native Unity solution for automating the Unity Android integration.
1. In the Unity Editor, open the Braze Configuration Settings by navigating to **Braze > Braze Configuration**.
2. Check the **Automate Unity Android Integration** box.
3. In the **Braze API Key** field, input your application's API key found in **Manage Settings** from the Braze dashboard.
**Note:**
This automatic integration should not be used with a manually created `braze.xml` file since the configuration values may conflict during project building. If you require a manual `braze.xml`, disable the automatic integration.
#### Step 3.1: Set your API key
Braze provides a native Unity solution for automating the Unity iOS integration. This solution modifies the built Xcode project using Unity's [`PostProcessBuildAttribute`](http://docs.unity3d.com/ScriptReference/Callbacks.PostProcessBuildAttribute.html) and subclasses the `UnityAppController` using the `IMPL_APP_CONTROLLER_SUBCLASS` macro.
1. In the Unity Editor, open the Braze Configuration Settings by navigating to **Braze > Braze Configuration**.
2. Check the **Automate Unity iOS Integration** box.
3. In the **Braze API Key** field, input your application's API key found in **Manage Settings**.

If your application is already using another `UnityAppController` subclass, you will need to merge your subclass implementation with `AppboyAppDelegate.mm`.
## Customizing the Unity package
### Step 1: Clone the repository
In your terminal, clone the [Braze Unity SDK GitHub repository](https://github.com/braze-inc/braze-unity-sdk), then navigate to that folder:
```bash
git clone git@github.com:braze-inc/braze-unity-sdk.git
cd ~/PATH/TO/DIRECTORY/braze-unity-sdk
```
```powershell
git clone git@github.com:braze-inc/braze-unity-sdk.git
cd C:\PATH\TO\DIRECTORY\braze-unity-sdk
```
### Step 2: Export package from repository
First, launch Unity and keep it running in the background. Then, in the repository root, run the following command to export the package to `braze-unity-sdk/unity-package/`.
```bash
/Applications/Unity/Unity.app/Contents/MacOS/Unity -batchmode -nographics -projectPath "$(pwd)" -executeMethod Appboy.Editor.Build.ExportAllPackages -quit
```
```powershell
"%UNITY_PATH%" -batchmode -nographics -projectPath "%PROJECT_ROOT%" -executeMethod Appboy.Editor.Build.ExportAllPackages -quit
```
**Tip:**
If you experience any issues after running these commands, refer to [Unity: Command Line Arguments](https://docs.unity3d.com/2017.2/Documentation/Manual/CommandLineArguments.html).
### Step 3: Import package into Unity
1. In Unity, import the desired package into your Unity project by navigating to **Assets** > **Import Package** > **Custom Package**.
2. If there's any files you don't want want to import, deselect them now.
3. Customize the exported Unity package located in `Assets/Editor/Build.cs`.
## Switch to an automated integration (Swift only) {#automated-integration}
To take advantage of the automated iOS integration offered in the Braze Unity SDK, follow these steps on transitioning from a manual to an automated integration.
1. Remove all Braze-related code from your Xcode project's `UnityAppController` subclass.
2. Remove Braze iOS libraries from your Unity or Xcode project (such as `Appboy_iOS_SDK.framework` and `SDWebImage.framework`).
3. Import the Braze Unity package into your project again. For a full walkthrough, see [Step 2: Import the package](#unity_step-2-import-the-package).
4. Set your API key again. For a full walkthrough, see [Step 3.1: Set your API key](#unity_step-31-set-your-api-key).
## Optional configurations
### Verbose logging
To enable verbose logging in the Unity Editor, do the following:
1. Open the Braze Configuration Settings by navigating to **Braze** > **Braze Configuration**.
2. Click the **Show Braze Android Settings** dropdown.
3. In the **SDK Log Level** field, input the value "0".
### Prime 31 compatibility
To use the Braze Unity plugin with Prime31 plugins, edit your project's `AndroidManifest.xml` to use the Prime31 compatible Activity classes. Change all references of
`com.braze.unity.BrazeUnityPlayerActivity` to `com.braze.unity.prime31compatible.BrazeUnityPlayerActivity`
### Amazon Device Messaging (ADM)
Braze supports integrating [ADM push](https://developer.amazon.com/public/apis/engage/device-messaging) into Unity apps. If you want to integrate ADM push, create a file called `api_key.txt` containing your ADM API key and place it in the `Plugins/Android/assets/` folder. For more information on integrating ADM with Braze, visit our [ADM push integration instructions](https://www.braze.com/docs/es/es/developer_guide/push_notifications/?sdktab=unity).
### Extending the Braze Unity player (Android only) {#extend-unity-player}
The example `AndroidManifest.xml` file provided has one Activity class registered, [`BrazeUnityPlayerActivity`](https://github.com/braze-inc/braze-android-sdk/blob/e804cb3a10ae68364b354b52abf1bef8a0d1a9dc/android-sdk-unity/src/main/java/com/braze/unity/BrazeUnityPlayerActivity.kt). This class is integrated with the Braze SDK and extends `UnityPlayerActivity` with session handling, in-app message registration, push notification analytics logging, and more. See [Unity](https://docs.unity3d.com/Manual/AndroidUnityPlayerActivity.html) for more information on extending the `UnityPlayerActivity` class.
If you are creating your own custom `UnityPlayerActivity` in a library or plugin project, you will need to extend our `BrazeUnityPlayerActivity` to integrate your custom functionality with Braze. Before beginning work on extending `BrazeUnityPlayerActivity`, follow our instructions for integrating Braze into your Unity project.
1. Add the Braze Android SDK as a dependency to your library or plugin project as described in the [Braze Android SDK integration instructions](https://www.braze.com/docs/es/es/developer_guide/sdk_integration/?sdktab=android).
2. Integrate our Unity `.aar`, which contains our Unity-specific functionality, to your Android library project you are building for Unity. The `appboy-unity.aar` is available from our [public repo](https://github.com/braze-inc/braze-unity-sdk/tree/master/Assets/Plugins/Android). After our Unity library is successfully integrated, modify your `UnityPlayerActivity` to extend `BrazeUnityPlayerActivity`.
3. Export your library or plugin project and drop it into `//Assets/Plugins/Android` as normal. Do not include any Braze source code in your library or plugin as they will already be present in `//Assets/Plugins/Android`.
4. Edit your `//Assets/Plugins/Android/AndroidManifest.xml` to specify your `BrazeUnityPlayerActivity` subclass as the main activity.
You should now be able to package an `.apk` from the Unity IDE that is fully integrated with Braze and contains your custom `UnityPlayerActivity` functionality.
## Troubleshooting
### Error: "File could not be read"
Errors resembling the following may be safely ignored. Apple software uses a proprietary PNG extension called CgBI, which Unity does not recognize. These errors will not affect your iOS build or the proper display of the associated images in the Braze bundle.
```
Could not create texture from Assets/Plugins/iOS/AppboyKit/Appboy.bundle/...png: File could not be read
```
## Integrating the .NET MAUI SDK
Integrating the Braze .NET MAUI (formerly Xamarin) SDK will provide you with basic analytics functionality as well as working in-app messages with which you can engage your users.
### Prerequisites
Before you can integrate the .NET MAUI Braze SDK, be sure you meet the following requirements:
- Starting in `version 3.0.0`, this SDK requires using .NET 6+ and removes support for projects using the Xamarin framework.
- Starting in `version 4.0.0`, this SDK dropped support for Xamarin & Xamarin.Forms and added support for .NET MAUI. See [Microsoft's policy](https://dotnet.microsoft.com/en-us/platform/support/policy/xamarin) around the end of support for Xamarin.
### Step 1: Get the .NET MAUI binding
A .NET MAUI binding is a way to use native libraries in .NET MAUI apps. The implementation of a binding consists of building a C# interface to the library, and then using that interface in your application. See the [.NET MAUI documentation](http://developer.xamarin.com/guides/android/advanced_topics/java_integration_overview/binding_a_java_library_%28.jar%29/). There are two ways to include the Braze SDK binding: using NuGet or compiling from source.
The simplest integration method involves getting the Braze SDK from the [NuGet.org](https://www.nuget.org/) central repository. In the Visual Studio sidebar, right click `Packages` folder and click `Add Packages...`. Search for 'Braze' and install the [`BrazePlatform.BrazeAndroidBinding`](https://www.nuget.org/packages/BrazePlatform.BrazeAndroidBinding/) package into your project.
To use Braze location services and geofences, also install the [`BrazePlatform.BrazeAndroidLocationBinding`](https://www.nuget.org/packages/BrazePlatform.BrazeAndroidLocationBinding/) package.
The second integration method is to include the [binding source](https://github.com/braze-inc/braze-xamarin-sdk). Under [`appboy-component/src/androidnet6`](https://github.com/braze-inc/braze-xamarin-sdk/tree/master/appboy-component/src/androidnet6/BrazeAndroidNet6Binding) you will find our binding source code; adding a project reference to the ```BrazeAndroidBinding.csproj``` in your .NET MAUI application will cause the binding to be built with your project and provide you access to the Braze Android SDK.
To use Braze location services and geofences, also add a project reference to the ```BrazeAndroidLocationBinding.csproj``` found under [`appboy-component/src/androidnet6/BrazeAndroidLocationBinding`](https://github.com/braze-inc/braze-xamarin-sdk/tree/master/appboy-component/src/androidnet6/BrazeAndroidLocationBinding).
**Important:**
The iOS bindings for .NET MAUI SDK version 4.0.0 and later use the [Braze Swift SDK](https://github.com/braze-inc/braze-swift-sdk/), while previous versions use the [legacy AppboyKit SDK](https://github.com/Appboy/Appboy-ios-sdk).
A .NET MAUI binding is a way to use native libraries in .NET MAUI apps. The implementation of a binding consists of building a C# interface to the library and then using that interface in your application. There are two ways to include the Braze SDK binding: using NuGet or compiling from source.
The simplest integration method involves getting the Braze SDK from the [NuGet.org](https://www.nuget.org/) central repository. In the Visual Studio sidebar, right-click `Packages` folder and click `Add Packages...`. Search for 'Braze' and install the latest .NET MAUI iOS NuGet packages: [Braze.iOS.BrazeKit](https://www.nuget.org/packages/Braze.iOS.BrazeKit), [Braze.iOS.BrazeUI](https://www.nuget.org/packages/Braze.iOS.BrazeUI), and [Braze.iOS.BrazeLocation](https://www.nuget.org/packages/Braze.iOS.BrazeLocation) into your project.
We also provide the compatibility libraries packages: [Braze.iOS.BrazeKitCompat](https://www.nuget.org/packages/Braze.iOS.BrazeKitCompat) and [Braze.iOS.BrazeUICompat](https://www.nuget.org/packages/Braze.iOS.BrazeUICompat), to help make your migration to .NET MAUI easier.
The second integration method is to include the [binding source](https://github.com/braze-inc/braze-xamarin-sdk). Under [`appboy-component/src/iosnet6`](https://github.com/braze-inc/braze-xamarin-sdk/tree/master/appboy-component/src/iosnet6/BrazeiOSNet6Binding) you will find our binding source code; adding a project reference to the ```BrazeiOSBinding.csproj``` in your .NET MAUI application will cause the binding to be built with your project and provide you access to the Braze iOS SDK. Make sure `BrazeiOSBinding.csproj` is showing in your project's "Reference" folder.
### Step 2: Configure your Braze instance
#### Step 2.1: Configure the Braze SDK in Braze.xml
Now that the libraries have been integrated, you have to create an `Braze.xml` file in your project's `Resources/values` folder. The contents of that file should resemble the following code snippet:
**Note:**
Be sure to substitute `YOUR_API_KEY` with the API key located at **Settings** > **API Keys** in the Braze dashboard.
```xml
YOUR_API_KEYYOUR_CUSTOM_ENDPOINT_OR_CLUSTERXAMARINNUGET
```
If you are including the binding source manually, remove `NUGET` from your code.
**Tip:**
To see an example `Braze.xml`, check out our [Android MAUI sample app](https://github.com/braze-inc/braze-xamarin-sdk/blob/master/appboy-component/samples/android-net-maui/BrazeAndroidMauiSampleApp/BrazeAndroidMauiSampleApp/Resources/values/Braze.xml).
#### Step 2.2: Add required permissions to Android manifest
Now that you've added your API key, you need to add the following permissions to your `AndroidManifest.xml` file:
```xml
```
For an example of your `AndroidManifest.xml`, see the [Android MAUI](https://github.com/braze-inc/braze-xamarin-sdk/blob/master/appboy-component/samples/android-net-maui/BrazeAndroidMauiSampleApp/BrazeAndroidMauiSampleApp/AndroidManifest.xml) sample application.
#### Step 2.3: Track user sessions and registering for in-app messages
To enable user session tracking and register your app for in-app messages, add the following call to the `OnCreate()` lifecycle method of the `Application` class in your app:
```kotlin
RegisterActivityLifecycleCallbacks(new BrazeActivityLifecycleCallbackListener());
```
When setting up your Braze instance, add the following snippet to configure your instance:
**Note:**
Be sure to substitute `YOUR_API_KEY` with the API key located at **Settings** > **API Keys** in the Braze dashboard.
```csharp
var configuration = new BRZConfiguration("YOUR_API_KEY", "YOUR_ENDPOINT");
configuration.Api.AddSDKMetadata(new[] { BRZSDKMetadata.Xamarin });
braze = new Braze(configuration);
```
See the `App.xaml.cs` file in the [iOS MAUI](https://github.com/braze-inc/braze-xamarin-sdk/blob/master/appboy-component/samples/ios-net-maui/BrazeiOSMauiSampleApp/BrazeiOSMauiSampleApp/App.xaml.cs) sample application.
### Step 3: Test the integration
Now you can launch your application and see sessions being logged to the Braze dashboard (along with device information and other analytics). For a more in-depth discussion of best practices for the basic SDK integration, consult the [Android integration instructions](https://www.braze.com/docs/es/es/developer_guide/sdk_integration/?sdktab=android).
Now you can launch your application and see sessions being logged to the Braze dashboard. For a more in-depth discussion of best practices for the basic SDK integration, consult the [iOS integration instructions](https://www.braze.com/docs/es/es/developer_guide/sdk_integration/?sdktab=swift).
**Important:**
Our current public .NET MAUI binding for the iOS SDK does not connect to the iOS Facebook SDK (linking social data) and does not include sending the IDFA to Braze.
# ChatGPT app integration
## Setup
### Step 1: Get the Braze integration file
Copy the `braze.js` file from our [ChatGPT apps integration repository](https://github.com/braze-inc/chatgpt-apps-braze-integration/blob/main/src/braze/braze.ts) to your project. This file contains all the necessary Braze SDK configuration and helper functions.
### Step 2: Install dependencies
Install our Web SDK for Braze's most up-to-date set of features:
**For client-side integration:**
```bash
npm install @braze/web-sdk
```
## Implementation
There are two ways to integrate Braze with your ChatGPT app depending on your use case:
### Client-side integration (custom widgets)
**Tip:**
**Recommended Approach:** This method enables rich messaging experiences and real-time user interaction tracking within your ChatGPT app widgets.
For displaying Braze messaging and tracking user interactions within your custom ChatGPT app widgets, use the Web SDK integration. A full messaging example can be found in our sample repository [here](https://github.com/braze-inc/chatgpt-apps-braze-integration/tree/main/src/inbox).
#### Configure widget metadata
Add the following metadata to your MCP server file to allow Braze domains, ensuring to update the CDN domain based on [your region](https://www.braze.com/docs/es/es/developer_guide/platforms/web/content_security_policy):
```javascript
"openai/widgetCSP": {
connect_domains: ["https://YOUR-SDK-ENDPOINT"],
resource_domains: [
"https://appboy-images.com",
"https://braze-images.com",
"https://cdn.braze.eu",
"https://use.fontawesome.com"
],
}
```
Replace `YOUR-SDK-ENDPOINT` with your actual Braze SDK endpoint.
#### Set up the useBraze hook
```javascript
import { useBraze } from "./utils/braze";
function YourWidget() {
const braze = useBraze({
apiKey: "your-braze-api-key",
baseUrl: "your-braze-endpoint.braze.com",
});
useEffect(() => {
if (!braze.isInitialized) {
return;
}
// Set user identity
braze.changeUser("user-id-123");
// Log widget interactions
braze.logCustomEvent("viewed_pizzaz_list");
}, [braze.isInitialized]);
return (
// Your widget JSX
);
}
```
#### Display Braze Content Cards
```javascript
const [cards, setCards] = useState([]);
useEffect(() => {
// Get cached content cards
setCards(braze.getCachedContentCards()?.cards ?? []);
// Subscribe to content card updates
braze.subscribeToContentCardsUpdates((contentCards) => {
setCards(contentCards.cards);
});
// Open session
braze.openSession();
return () => {
braze.removeAllSubscriptions();
}
}, []);
```
#### Track widget events
```javascript
// Track user interactions within your widget
const handleButtonClick = () => {
braze.logCustomEvent("widget_button_clicked", {
button_type: "save_list",
widget_name: "pizza_list"
});
};
const handleItemInteraction = (itemId) => {
braze.logCustomEvent("item_interacted", {
item_id: itemId,
interaction_type: "view_details"
});
};
```
### Server-side integration (MCP server)
If you also need a server-side integration for messaging functionality on your MCP server, contact `mcp-product@braze.com`. For tracking events and purchases from your MCP server, use our [REST API](https://www.braze.com/docs/es/es/api/home).
## About the Braze Vega SDK
The Braze Vega SDK lets you collect analytics and display rich in-app messages to your users. Most methods in the Braze Vega SDK are asynchronous and return promises that should be awaited or resolved.
## Integrating the Braze Vega SDK
### Step 1: Install the Braze library
Install the Braze Vega SDK using your preferred package manager.
If your project uses NPM, you can add the Braze Vega SDK as a dependency.
```bash
npm install @braze/vega-sdk --save
```
After installation, you can import the methods you need:
```javascript
import { initialize, changeUser, openSession } from "@braze/vega-sdk";
```
If your project uses Yarn, you can add the Braze Vega SDK as a dependency.
```bash
yarn add @braze/vega-sdk
```
After installation, you can import the methods you need:
```javascript
import { initialize, changeUser, openSession } from "@braze/vega-sdk";
```
### Step 2: Initialize the SDK
After the Braze Vega SDK is added to your project, initialize the library with the API key and [SDK endpoint URL](https://www.braze.com/docs/es/es/user_guide/administrative/access_braze/sdk_endpoints) found in **Settings** > **App Settings** within your Braze dashboard.
**Important:**
You must await or resolve the `changeUser` promise before calling other Braze methods, or events and attributes may be set on the incorrect user.
```javascript
import { useEffect } from "react-native";
import {
initialize,
changeUser,
logCustomEvent,
openSession,
setCustomUserAttribute,
setUserCountry
} from "@braze/vega-sdk";
const App = () => {
useEffect(() => {
const initBraze = async () => {
// Initialize the SDK
await initialize("YOUR-API-KEY", "YOUR-SDK-ENDPOINT", {
sessionTimeoutInSeconds: 60,
appVersionNumber: "1.2.3.4",
enableLogging: true, // set to `true` for debugging
});
// Change user
await changeUser("user-id-123");
// Start a session
await openSession();
// Log custom events and set user attributes
logCustomEvent("visited-page", { pageName: "home" });
setCustomUserAttribute("my-attribute", "my-attribute-value");
setUserCountry("USA");
};
initBraze();
}, []);
return (
// Your app components
);
};
```
**Important:**
Anonymous users may be counted towards your [MAU](https://www.braze.com/docs/es/es/user_guide/data_and_analytics/reporting/understanding_your_app_usage_data/#monthly-active-users). As a result, you may want to conditionally load or initialize the SDK to exclude these users from your MAU count.
## Optional configurations
### Logging
You can enable SDK logging to help with debugging and troubleshooting. There are multiple ways to enable logging.
#### Enable logging during initialization
Pass `enableLogging: true` to `initialize()` to log debugging messages to the console:
```javascript
initialize("YOUR-API-KEY", "YOUR-SDK-ENDPOINT", {
enableLogging: true
});
```
**Important:**
Basic logs are visible to all users, so consider disabling logging before releasing your code to production.
#### Enable logging after initialization
Use `toggleLogging()` to enable or disable SDK logging after initialization:
```javascript
import { toggleLogging } from "@braze/vega-sdk";
// Enable logging
toggleLogging();
```
#### Custom logging
Use `setLogger()` to provide a custom logger function for more control over how SDK logs are handled:
```javascript
import { setLogger } from "@braze/vega-sdk";
setLogger((message) => {
console.log("Braze Custom Logger: " + message);
// Add your custom logging logic here
});
```
### Configuration options
You can pass additional configuration options to `initialize()` to customize the SDK behavior:
```javascript
await initialize("YOUR-API-KEY", "YOUR-SDK-ENDPOINT", {
sessionTimeoutInSeconds: 60, // Configure session timeout (default is 1800 seconds)
appVersionNumber: "1.2.3.4", // Set your app version
enableLogging: true, // Enable SDK logging
});
```
## Upgrading the SDK
When you reference the Braze Vega SDK from NPM or Yarn, you can upgrade to the latest version by updating your package dependency:
```bash
npm update @braze/vega-sdk
# or, using yarn:
yarn upgrade @braze/vega-sdk
```
## Testing your integration
To verify your SDK integration is working correctly:
1. Initialize the SDK with `enableLogging: true` to see debug messages in the console
2. Ensure you `await changeUser()` before calling other SDK methods
3. Call `await openSession()` to start a session
4. Check your Braze dashboard under **Overview** to verify that session data is being recorded
5. Test logging a custom event and verify it appears in your dashboard
**Note:**
Mientras realizas el control de calidad de tu integración de SDK, utiliza el [Depurador de SDK](https://www.braze.com/docs/es/es/developer_guide/sdk_integration/debugging) para solucionar problemas sin necesidad de activar el registro detallado en tu aplicación.
# Google Tag Manager con el SDK de Braze
Source: /docs/es/developer_guide/sdk_integration/google_tag_manager/index.md
# Google Tag Manager con el SDK de Braze {#google-tag-manager-with-the-braze-sdk}
> Aprende a utilizar [Google Tag Manager (GTM)](https://developers.google.com/tag-platform/tag-manager) con el SDK de Braze, para que puedas controlar de forma remota el seguimiento de eventos y las actualizaciones de atributos de usuario de Braze sin necesidad de realizar cambios en el código ni lanzar nuevas versiones de la aplicación.
## About Google Tag Manager for Web {#google-tag-manager}
Google Tag Manager (GTM) lets you remotely add, remove, and edit tags on your website without requiring a production code release or engineering resources. Braze offers the following templates for the Web SDK:
|Tag Type|Use Case|
|--------|--------|
| Initialization tag | This tag lets you [integrate the Web Braze SDK](https://www.braze.com/docs/es/es/developer_guide/sdk_integration/?tab=google%20tag%20manager&sdktab=web) without needing to modify your site’s code.|
| Action tag | This tag lets you [create Content Cards](https://www.braze.com/docs/es/es/developer_guide/content_cards/?sdktab=web#web_using-google-tag-manager), [set user attributes](https://www.braze.com/docs/es/es/developer_guide/analytics/setting_user_attributes/?tab=google%20tag%20manager&sdktab=web), and [manage data collection](https://www.braze.com/docs/es/es/developer_guide/analytics/managing_data_collection/?tab=google%20tag%20manager&sdktab=web).|
{: .reset-td-br-1 .reset-td-br-2 aria-label="About Google Tag Manager for Web #google-tag-manager" }
## Tag sequencing for Braze action tags
Custom events and other Braze action tags can fail when they fire before the **Braze Initialization** tag finishes loading the Web SDK. In Google Tag Manager, open the action tag, go to **Advanced Settings** > **Tag Sequencing**, select **A tag that fires before [this tag] is fired**, and choose your Braze Initialization tag.
For more detail, see [Verify tag sequencing for custom events](https://www.braze.com/docs/es/es/developer_guide/content_cards/?sdktab=web#tag-sequencing).
## Log purchases with GTM
In Braze action tags and Custom HTML tags, call `braze.logPurchase()` to record revenue. The legacy `appboy.logPurchase()` namespace is not supported in current Web SDK integrations.
## Logging custom events with GTM
You can log custom events using a **Custom HTML** tag in GTM. This approach uses the GTM [data layer](https://developers.google.com/tag-platform/tag-manager/datalayer) to pass event data from your site to a GTM tag that calls the Braze Web SDK.
### Step 1: Push the event to the data layer
In your site's code, push an event to the data layer wherever you want to trigger the custom event. For example, to log a custom event when a button is clicked:
```html
```
### Step 2: Create a trigger in GTM
1. In your GTM container, go to **Triggers** and create a new trigger.
2. Set the **Trigger Type** to **Custom Event**.
3. Set the **Event Name** to the same value you pushed to the data layer (for example, `my_custom_event`).
4. Choose when the trigger should fire (for example, **All Custom Events**).
### Step 3: Create a Custom HTML tag
1. In GTM, go to **Tags** and create a new tag.
2. Set the **Tag Type** to **Custom HTML**.
3. In the HTML field, add the following:
```html
```
4. Under **Triggering**, select the trigger you created in step 2.
5. Save and publish your container.
To include event properties, pass them as the second argument:
```html
```
## Google's EU User Consent Policy
**Important:**
Google is updating their [EU User Consent Policy](https://www.google.com/about/company/user-consent-policy/) in response to changes to the [Digital Markets Act (DMA)](https://ads-developers.googleblog.com/2023/10/updates-to-customer-match-conversion.html), which is in effect as of March 6, 2024. This new change requires advertisers to disclose certain information to their EEA and UK end users, as well as obtain necessary consents from them. Review the following documentation to learn more.
As part of Google's EU User Consent Policy, the following boolean custom attributes need to be logged to user profiles:
- `$google_ad_user_data`
- `$google_ad_personalization`
If setting these via the GTM integration, custom attributes require creating a custom HTML tag. The following is an example of how to log these values as boolean data types (not as strings):
```js
```
For more information, refer to [Audience Sync to Google](https://www.braze.com/docs/es/es/partners/canvas_audience_sync/google_audience_sync/).
## Prerequisites
Before you can use this feature, you'll need to [integrate the Android Braze SDK](https://www.braze.com/docs/es/es/developer_guide/sdk_integration/?sdktab=android).
## Using Google Tag Manager for Android
In the following example, a music streaming app wants to log different events as users listen to songs. Using Google Tag Manager for Android, they can control which of the Braze third-party vendors receive this event, and create tags specific to Braze.
### Step 1: Create a trigger for custom events
Custom events are logged with `actionType` set to `logEvent`. The Braze custom tag provider in this example is expecting the custom event name to be set using `eventName`.
To get started, create a trigger that looks for an "Event Name" that equals `played song`

Next, create a new tag (also known as a "Function Call") and enter the class path of your [custom tag provider](#adding-android-google-tag-provider) described later in this article. This tag will be triggered when you log the `played song` event.
In the tag's custom parameters (also known as the key-value pairs), set `eventName` to `played song`. This will be the custom event name logged to Braze.

**Important:**
When sending a custom event, be sure to set `actionType` to `logEvent`, and set a value for `eventName` so Braze receives the correct event name and action to take.
You can also include additional key-value pair arguments to the tag, which will be sent as custom event properties to Braze. `eventName` and `actionType` will not be ignored for custom event properties. In the following example tag, `genre` is passed and defined using a tag variable in Google Tag Manager, which is sourced from the custom event logged in the app.
Because Google Tag Manager for Android uses Firebase as the data layer, the `genre` event property is sent to Google Tag Manager as a "Firebase - Event Parameter" variable.

When a user plays a song in the app, an event will be logged through Firebase and Google Tag Manager using the Firebase analytics event name that matches the tag's trigger name, `played song`:
```java
Bundle params = new Bundle();
params.putString("genre", "pop");
params.putInt("number of times listened", 42);
mFirebaseAnalytics.logEvent("played song", params);
```
```kotlin
val params = Bundle()
params.putString("genre", "pop")
params.putInt("number of times listened", 42);
mFirebaseAnalytics.logEvent("played song", params)
```
### Step 2: Log custom attributes
Custom attributes are set via an `actionType` set to `customAttribute`. The Braze custom tag provider is expecting the custom attribute key-value to be set via `customAttributeKey` and `customAttributeValue`:
```java
Bundle params = new Bundle();
params.putString("customAttributeKey", "favorite song");
params.putString("customAttributeValue", "Private Eyes");
mFirebaseAnalytics.logEvent("customAttribute", params);
```
```kotlin
val params = Bundle()
params.putString("customAttributeKey", "favorite song")
params.putString("customAttributeValue", "Private Eyes")
mFirebaseAnalytics.logEvent("customAttribute", params)
```
### Step 3: Call `changeUser()`
Calls to `changeUser()` are made via an `actionType` set to `changeUser`. The Braze custom tag provider is expecting the Braze user ID to be set via an `externalUserId` key-value pair within your tag:
```java
Bundle params = new Bundle();
params.putString("externalUserId", userId);
mFirebaseAnalytics.logEvent("changeUser", params);
```
```kotlin
val params = Bundle()
params.putString("externalUserId", userId)
mFirebaseAnalytics.logEvent("changeUser", params)
```
### Step 4: Add a custom tag provider {#adding-android-google-tag-provider}
With the tags and triggers set up, you will also need to implement Google Tag Manager in your Android app which can be found in Google's [documentation](https://developers.google.com/tag-manager/android/v5/).
After the Google Tag Manager is installed in your app, add a custom tag provider to call Braze SDK methods based on the tags you've configured within Google Tag Manager.
Be sure to note the "Class Path" to the file - this is what you'll enter when setting up a Tag in the [Google Tag Manager](https://tagmanager.google.com/) console.
This example highlights one of many ways you can structure your custom tag provider. Specifically, it shows how to determine which Braze SDK method to call based on the `actionType` key-value pair sent from the GTM Tag.
The `actionType` shown in this example are `logEvent`, `customAttribute`, and `changeUser`, but you may prefer to change how your tag provider handles data from Google Tag Manager.
```java
public class BrazeGtmTagProvider implements CustomTagProvider {
private static final String TAG = BrazeLogger.getBrazeLogTag(BrazeGtmTagProvider.class);
private static final String ACTION_TYPE_KEY = "actionType";
// Custom Events
private static final String LOG_EVENT_ACTION_TYPE = "logEvent";
private static final String EVENT_NAME_VARIABLE = "eventName";
// Custom Attributes
private static final String CUSTOM_ATTRIBUTE_ACTION_TYPE = "customAttribute";
private static final String CUSTOM_ATTRIBUTE_KEY = "customAttributeKey";
private static final String CUSTOM_ATTRIBUTE_VALUE_KEY = "customAttributeValue";
// Change User
private static final String CHANGE_USER_ACTION_TYPE = "changeUser";
private static final String CHANGE_USER_ID_VARIABLE = "externalUserId";
private static Context sApplicationContext;
/**
* Must be set before calling any of the following methods
* so that the proper application context is available when needed.
*
* Recommended to be called in your {@link Application#onCreate()}.
*/
public static void setApplicationContext(Context applicationContext) {
if (applicationContext != null) {
sApplicationContext = applicationContext.getApplicationContext();
}
}
@Override
public void execute(Map map) {
BrazeLogger.i(TAG, "Got google tag manager parameters map: " + map);
if (sApplicationContext == null) {
BrazeLogger.w(TAG, "No application context provided to this tag provider.");
return;
}
if (!map.containsKey(ACTION_TYPE_KEY)) {
BrazeLogger.w(TAG, "Map does not contain the Braze action type key: " + ACTION_TYPE_KEY);
return;
}
String actionType = String.valueOf(map.remove(ACTION_TYPE_KEY));
switch (actionType) {
case LOG_EVENT_ACTION_TYPE:
logEvent(map);
break;
case CUSTOM_ATTRIBUTE_ACTION_TYPE:
setCustomAttribute(map);
break;
case CHANGE_USER_ACTION_TYPE:
changeUser(map);
break;
default:
BrazeLogger.w(TAG, "Got unknown action type: " + actionType);
break;
}
}
private void logEvent(Map tagParameterMap) {
String eventName = String.valueOf(tagParameterMap.remove(EVENT_NAME_VARIABLE));
Braze.getInstance(sApplicationContext).logCustomEvent(eventName, parseMapIntoProperties(tagParameterMap));
}
private BrazeProperties parseMapIntoProperties(Map map) {
BrazeProperties brazeProperties = new BrazeProperties();
for (Map.Entry entry : map.entrySet()) {
final Object value = entry.getValue();
final String key = entry.getKey();
if (value instanceof Boolean) {
brazeProperties.addProperty(key, (Boolean) value);
} else if (value instanceof Integer) {
brazeProperties.addProperty(key, (Integer) value);
} else if (value instanceof Date) {
brazeProperties.addProperty(key, (Date) value);
} else if (value instanceof Long) {
brazeProperties.addProperty(key, (Long) value);
} else if (value instanceof String) {
brazeProperties.addProperty(key, (String) value);
} else if (value instanceof Double) {
brazeProperties.addProperty(key, (Double) value);
} else {
BrazeLogger.w(TAG, "Failed to parse value into an BrazeProperties "
+ "accepted type. Key: '" + key + "' Value: '" + value + "'");
}
}
return brazeProperties;
}
private void setCustomAttribute(Map tagParameterMap) {
String key = String.valueOf(tagParameterMap.get(CUSTOM_ATTRIBUTE_KEY));
Object value = tagParameterMap.get(CUSTOM_ATTRIBUTE_VALUE_KEY);
Braze.getInstance(sApplicationContext).getCurrentUser(new IValueCallback() {
@Override
public void onSuccess(BrazeUser brazeUser) {
if (value instanceof Boolean) {
brazeUser.setCustomUserAttribute(key, (Boolean) value);
} else if (value instanceof Integer) {
brazeUser.setCustomUserAttribute(key, (Integer) value);
} else if (value instanceof Long) {
brazeUser.setCustomUserAttribute(key, (Long) value);
} else if (value instanceof String) {
brazeUser.setCustomUserAttribute(key, (String) value);
} else if (value instanceof Double) {
brazeUser.setCustomUserAttribute(key, (Double) value);
} else if (value instanceof Float) {
brazeUser.setCustomUserAttribute(key, (Float) value);
} else {
BrazeLogger.w(TAG, "Failed to parse value into a custom "
+ "attribute accepted type. Key: '" + key + "' Value: '" + value + "'");
}
}
});
}
private void changeUser(Map tagParameterMap) {
String userId = String.valueOf(tagParameterMap.get(CHANGE_USER_ID_VARIABLE));
Braze.getInstance(sApplicationContext).changeUser(userId);
}
}
```
```kotlin
class BrazeGtmTagProvider : CustomTagProvider {
override fun execute(map: MutableMap) {
BrazeLogger.i(TAG, "Got google tag manager parameters map: $map")
if (sApplicationContext == null) {
BrazeLogger.w(TAG, "No application context provided to this tag provider.")
return
}
if (!map.containsKey(ACTION_TYPE_KEY)) {
BrazeLogger.w(TAG, "Map does not contain the Braze action type key: $ACTION_TYPE_KEY")
return
}
val actionType = map.remove(ACTION_TYPE_KEY).toString()
when (actionType) {
LOG_EVENT_ACTION_TYPE -> logEvent(map)
CUSTOM_ATTRIBUTE_ACTION_TYPE -> setCustomAttribute(map)
CHANGE_USER_ACTION_TYPE -> changeUser(map)
else -> BrazeLogger.w(TAG, "Got unknown action type: $actionType")
}
}
private fun logEvent(tagParameterMap: MutableMap) {
val eventName = tagParameterMap.remove(EVENT_NAME_VARIABLE).toString()
Braze.getInstance(sApplicationContext).logCustomEvent(eventName, parseMapIntoProperties(tagParameterMap))
}
private fun parseMapIntoProperties(map: Map): BrazeProperties {
val brazeProperties = BrazeProperties()
map.forEach { param ->
val key = param.key
val value = param.value
when (value) {
is Boolean -> brazeProperties.addProperty(key, value)
is Int -> brazeProperties.addProperty(key, value)
is Date -> brazeProperties.addProperty(key, value)
is Long -> brazeProperties.addProperty(key, value)
is String -> brazeProperties.addProperty(key, value)
is Double -> brazeProperties.addProperty(key, value)
else -> BrazeLogger.w(TAG, "Failed to parse value into an BrazeProperties "
+ "accepted type. Key: '" + key + "' Value: '" + value + "'")
}
}
return brazeProperties
}
private fun setCustomAttribute(tagParameterMap: Map) {
val key = tagParameterMap[CUSTOM_ATTRIBUTE_KEY].toString()
val value = tagParameterMap[CUSTOM_ATTRIBUTE_VALUE_KEY]
Braze.getInstance(sApplicationContext).getCurrentUser { brazeUser ->
when (value) {
is Boolean -> brazeUser.setCustomUserAttribute(key, value)
is Int -> brazeUser.setCustomUserAttribute(key, value)
is Long -> brazeUser.setCustomUserAttribute(key, value)
is String -> brazeUser.setCustomUserAttribute(key, value)
is Double -> brazeUser.setCustomUserAttribute(key, value)
is Float -> brazeUser.setCustomUserAttribute(key, value)
else -> BrazeLogger.w(
TAG, "Failed to parse value into a custom "
+ "attribute accepted type. Key: '" + key + "' Value: '" + value + "'"
)
}
}
}
private fun changeUser(tagParameterMap: Map) {
val userId = tagParameterMap[CHANGE_USER_ID_VARIABLE].toString()
Braze.getInstance(sApplicationContext).changeUser(userId)
}
companion object {
private val TAG = BrazeLogger.getBrazeLogTag(BrazeGtmTagProvider::class.java)
private val ACTION_TYPE_KEY = "actionType"
// Custom Events
private val LOG_EVENT_ACTION_TYPE = "logEvent"
private val EVENT_NAME_VARIABLE = "eventName"
// Custom Attributes
private val CUSTOM_ATTRIBUTE_ACTION_TYPE = "customAttribute"
private val CUSTOM_ATTRIBUTE_KEY = "customAttributeKey"
private val CUSTOM_ATTRIBUTE_VALUE_KEY = "customAttributeValue"
// Change User
private val CHANGE_USER_ACTION_TYPE = "changeUser"
private val CHANGE_USER_ID_VARIABLE = "externalUserId"
private var sApplicationContext: Context? = null
/**
* Must be set before calling any of the following methods so
* that the proper application context is available when needed.
*
* Recommended to be called in your [Application.onCreate].
*/
fun setApplicationContext(applicationContext: Context?) {
if (applicationContext != null) {
sApplicationContext = applicationContext.applicationContext
}
}
}
}
```
In your `Application.onCreate()` be sure to add the following initialization for the previous snippet:
```java
BrazeGtmTagProvider.setApplicationContext(this.getApplicationContext());
```
```kotlin
BrazeGtmTagProvider.setApplicationContext(this.applicationContext)
```
## Prerequisites
Before you can use this feature, you'll need to [integrate the Swift Braze SDK](https://www.braze.com/docs/es/es/developer_guide/sdk_integration/?sdktab=swift).
## Using Google Tag Manager for Swift
In the following example, a music streaming app wants to log different events as users listen to songs. Using Google Tag Manager for iOS, they can control which of the Braze third-party vendors receive this event and create tags specific to Braze.
### Step 1: Create a trigger for custom events
Custom events are logged with `actionType` set to `logEvent`. In this example, the Braze custom tag provider is expecting the custom event name to be set using `eventName`.
First, create a trigger that looks for an `eventName` that equals `played song`.

Next, create a new Tag (also known as a "Function Call") and enter the class path of your [custom tag provider](#adding-ios-google-tag-provider) described later in this article. This tag will be triggered when you log the `played song` event. Because `eventName` is set to `played song` it will be used as custom event name that's logged to Braze.
**Important:**
When sending a custom event, set `actionType` to `logEvent`, and set a value for `eventName` so Braze receives the correct event name and action to take.

You can also include additional key-value pair arguments to the tag, which will be sent as custom event properties to Braze. `eventName` and `actionType` will not be ignored for custom event properties. In the following example tag, pass in `genre`, which was defined using a tag variable in Google Tag Manager and sourced from the custom event logged in the app.
The `genre` event property is sent to Google Tag Manager as a "Firebase - Event Parameter" variable since Google Tag Manager for iOS uses Firebase as the data layer.

When a user plays a song in the app, log an event through Firebase and Google Tag Manager using the Firebase analytics event name that matches the tag's trigger name, `played song`:
```swift
let parameters: [String: Any] = ["genre": "pop",
"number of times listened": 42]
Analytics.logEvent("played song", parameters: parameters)
```
```obj-c
NSDictionary *parameters = @{@"genre" : @"pop",
@"number of times listened" : @42};
[FIRAnalytics logEventWithName:@"played song" parameters:parameters];
```
### Step 2: Log custom attributes
Custom attributes are set via an `actionType` set to `customAttribute`. The Braze custom tag provider is expecting the custom attribute key-value to be set via `customAttributeKey` and `customAttributeValue`:
```swift
let parameters: [String: Any] = ["customAttributeKey": "favoriteSong",
"customAttributeValue": "Private Eyes"]
FIRAnalytics.logEvent(withName:"customAttribute", parameters: parameters)
```
```obj-c
NSDictionary *parameters = @{@"customAttributeKey" : @"favoriteSong",
@"customAttributeValue" : @"Private Eyes"};
[FIRAnalytics logEventWithName:@"customAttribute" parameters:parameters];
```
### Step 3: Call `changeUser()`
Calls to `changeUser()` are made via an `actionType` set to `changeUser`. The Braze custom tag provider is expecting the Braze user ID to be set via an `externalUserId` key-value pair within your tag:
```swift
let parameters: [String: Any] = ["externalUserId": "favorite userId"]
Analytics.logEvent(withName:"changeUser", parameters: parameters)
```
```obj-c
NSDictionary *parameters = @{@"externalUserId" : userId};
[FIRAnalytics logEventWithName:@"changeUser" parameters:parameters];
```
### Step 4: Add a custom tag provider {#adding-ios-google-tag-provider}
With the tags and triggers set up, you will also need to implement Google Tag Manager in your iOS app which can be found in Google's [documentation](https://developers.google.com/tag-manager/ios/v5/).
After Google Tag Manager is installed in your app, add a custom tag provider to call Braze SDK methods based on the tags you've configured within Google Tag Manager.
Be sure to note the "Class Path" to the file - this is what you'll enter when setting up a tag in the [Google Tag Manager](https://tagmanager.google.com/) console.
This example highlights one of many ways you can structure your custom tag provider. Specifically, it shows how to determine which Braze SDK method to call based on the `actionType` key-value pair sent from the GTM Tag. This example assumes you've assigned the Braze instance as a variable in the AppDelegate.
The `actionType` supported in this example are `logEvent`, `customAttribute`, and `changeUser`, but you may prefer to change how your tag provider handles data from Google Tag Manager.
Add the following code to your `BrazeGTMTagManager.swift` file.
```swift
import FirebaseAnalytics
import GoogleTagManager
import BrazeKit
let ActionTypeKey: String = "actionType"
// Custom Events
let LogEventAction: String = "logEvent"
let LogEventName: String = "eventName"
// Custom Attributes
let CustomAttributeAction: String = "customAttribute"
let CustomAttributeKey: String = "customAttributeKey"
let CustomAttributeValueKey: String = "customAttributeValue"
// Change User
let ChangeUserAction: String = "changeUser"
let ChangeUserExternalUserId: String = "externalUserId"
@objc(BrazeGTMTagManager)
final class BrazeGTMTagManager : NSObject, TAGCustomFunction {
@objc func execute(withParameters parameters: [AnyHashable : Any]!) -> NSObject! {
var parameters: [String : Any] = parameters as! [String : Any]
guard let actionType: String = parameters[ActionTypeKey] as? String else {
print("There is no Braze action type key in this call. Doing nothing.")
return nil
}
parameters.removeValue(forKey: ActionTypeKey)
if actionType == LogEventAction {
logEvent(parameters: parameters)
} else if actionType == CustomAttributeAction {
logCustomAttribute(parameters: parameters)
} else if actionType == ChangeUserAction {
changeUser(parameters: parameters)
}
return nil
}
func logEvent(parameters: [String : Any]) {
var parameters: [String : Any] = parameters
guard let eventName: String = parameters[LogEventName] as? String else { return }
parameters.removeValue(forKey: LogEventName)
AppDelegate.braze?.logCustomEvent(name: eventName, properties: parameters)
}
func logCustomAttribute(parameters: [String: Any]) {
guard let customAttributeKey = parameters[CustomAttributeKey] as? String else { return }
let customAttributeValue = parameters[CustomAttributeValueKey]
if let customAttributeValue = customAttributeValue as? String {
AppDelegate.braze?.user.setCustomAttribute(key: customAttributeKey, value: customAttributeValue)
} else if let customAttributeValue = customAttributeValue as? Date {
AppDelegate.braze?.user.setCustomAttribute(key: customAttributeKey, value: customAttributeValue)
} else if let customAttributeValue = customAttributeValue as? Double {
AppDelegate.braze?.user.setCustomAttribute(key: customAttributeKey, value: customAttributeValue)
} else if let customAttributeValue = customAttributeValue as? Bool {
AppDelegate.braze?.user.setCustomAttribute(key: customAttributeKey, value: customAttributeValue)
} else if let customAttributeValue = customAttributeValue as? Int {
AppDelegate.braze?.user.setCustomAttribute(key: customAttributeKey, value: customAttributeValue)
} else if let customAttibuteValue = customAttributeValue as? [String] {
AppDelegate.braze?.user.setCustomAttributeArray(key: customAttributeKey, array: customAttibuteValue)
}
}
func changeUser(parameters: [String: Any]) {
guard let userId = parameters[ChangeUserExternalUserId] as? String else { return }
AppDelegate.braze?.changeUser(userId: userId)
}
}
```
Add the following code to your `BrazeGTMTagManager.h` file:
```obj-c
@import Firebase;
@import GoogleTagManager;
@interface BrazeGTMTagManager : NSObject
@end
```
And add the following code to your `BrazeGTMTagManager.m` file:
```obj-c
#import
#import "BrazeGTMTagManager.h"
#import "BrazeKit"
#import "AppDelegate.h"
static NSString *const ActionTypeKey = @"actionType";
// Custom Events
static NSString *const LogEventAction = @"logEvent";
static NSString *const LogEventEventName = @"eventName";
// Custom Attributes
static NSString *const CustomAttributeAction = @"customAttribute";
static NSString *const CustomAttributeKey = @"customAttributeKey";
static NSString *const CustomAttributeValueKey = @"customAttributeValue";
// Change User
static NSString *const ChangeUserAction = @"changeUser";
static NSString *const ChangeUserExternalUserId = @"externalUserId";
@implementation BrazeGTMTagManager
- (NSObject *)executeWithParameters:(NSDictionary *)parameters {
NSMutableDictionary *mutableParameters = [parameters mutableCopy];
NSString *actionType = mutableParameters[ActionTypeKey];
if (!actionType) {
NSLog(@"There is no Braze action type key in this call. Doing nothing.", nil);
return nil;
}
[mutableParameters removeObjectForKey:ActionTypeKey];
if ([actionType isEqualToString:LogEventAction]) {
[self logEvent:mutableParameters];
} else if ([actionType isEqualToString:CustomAttributeAction]) {
[self logCustomAttribute:mutableParameters];
} else if ([actionType isEqualToString:ChangeUserAction]) {
[self changeUser:mutableParameters];
} else {
NSLog(@"Invalid action type. Doing nothing.");
}
return nil;
}
- (void)logEvent:(NSMutableDictionary *)parameters {
NSString *eventName = parameters[LogEventEventName];
[parameters removeObjectForKey:LogEventEventName];
[AppDelegate.braze logCustomEvent:eventName
properties:parameters];
}
- (void)logCustomAttribute:(NSMutableDictionary *)parameters {
NSString *customAttributeKey = parameters[CustomAttributeKey];
id customAttributeValue = parameters[CustomAttributeValueKey];
if ([customAttributeValue isKindOfClass:[NSString class]]) {
[AppDelegate.braze logCustomEvent:customAttributeKey
properties:parameters];
} else if ([customAttributeValue isKindOfClass:[NSDate class]]) {
[AppDelegate.braze.user setCustomAttributeWithKey:customAttributeKey
dateValue:customAttributeValue];
} else if ([customAttributeValue isKindOfClass:[NSNumber class]]) {
if (strcmp([customAttributeValue objCType], [@(YES) objCType]) == 0) {
[AppDelegate.braze.user setCustomAttributeWithKey:customAttributeKey
boolValue:[(NSNumber *)customAttributeValue boolValue]];
} else if (strcmp([customAttributeValue objCType], @encode(short)) == 0 ||
strcmp([customAttributeValue objCType], @encode(int)) == 0 ||
strcmp([customAttributeValue objCType], @encode(long)) == 0) {
[AppDelegate.braze.user setCustomAttributeWithKey:customAttributeKey
intValue:[(NSNumber *)customAttributeValue integerValue]];
} else if (strcmp([customAttributeValue objCType], @encode(float)) == 0 ||
strcmp([customAttributeValue objCType], @encode(double)) == 0) {
[AppDelegate.braze.user setCustomAttributeWithKey:customAttributeKey
doubleValue:[(NSNumber *)customAttributeValue doubleValue]];
} else {
NSLog(@"Could not map NSNumber value to Braze custom attribute:%@", customAttributeValue);
}
} else if ([customAttributeValue isKindOfClass:[NSArray class]]) {
[AppDelegate.braze.user setCustomAttributeArrayWithKey:customAttributeKey
array:customAttributeValue];
}
}
- (void)changeUser:(NSMutableDictionary *)parameters {
NSString *userId = parameters[ChangeUserExternalUserId];
[AppDelegate.braze changeUser:userId];
}
@end
```
## Solución de problemas {#troubleshooting}
Si Braze no se inicializa o los eventos no aparecen como se esperaba, confirma que tu contenedor de GTM está publicado, que los desencadenantes y el orden de activación de las etiquetas están alineados con el [ciclo de vida y la estrategia de inicialización](https://www.braze.com/docs/es/es/developer_guide/sdk_integration) de tu SDK, y que los dispositivos de prueba no están bloqueando los puntos de conexión de Braze.
Para fallos de inicialización, verifica que la etiqueta de Braze o el proveedor de etiquetas personalizado reciba el `actionType` y los parámetros esperados (consulta las pestañas de Android, Swift y Web en esta página). Para habilitar el registro detallado mientras validas los eventos activados por GTM, activa el registro de depuración del SDK de tu plataforma como se describe en las guías de integración de plataforma enlazadas desde esas pestañas.
# Configurar la autenticación para el SDK de Braze
Source: /docs/es/developer_guide/sdk_integration/authentication/index.md
# Configurar la autenticación del SDK {#set-up-sdk-authentication}
> La autenticación del SDK te permite proporcionar una prueba criptográfica (generada en el servidor) a las solicitudes del SDK realizadas en nombre de usuarios que han iniciado sesión.
## Cómo funciona {#how-it-works}
Después de habilitar esta característica en tu aplicación, puedes configurar el panel de Braze para que rechace cualquier solicitud con un token web JSON (JWT) no válido o que falte, lo que incluye:
- Envío de eventos personalizados, atributos, compras y datos de sesión
- Crear nuevos usuarios en tu espacio de trabajo de Braze
- Actualización de los atributos estándar del perfil de usuario
- Recibir o desencadenar mensajes
Ahora puedes evitar que los usuarios que hayan iniciado sesión sin autenticarse utilicen la clave de API de SDK de tu aplicación para realizar acciones maliciosas, como la suplantación de identidad.
## Configuración de la autenticación {#setting-up-authentication}
### Paso 1: Configura tu servidor {#server-side-integration}
#### Paso 1.1: Generar un par de claves pública/privada {#generate-keys}
Genera un par de claves públicas/privadas RSA256. La clave pública se añadirá finalmente al panel de Braze, mientras que la clave privada debe almacenarse de forma segura en tu servidor.
Recomendamos usar una clave RSA con 2048 bits con el algoritmo RS256 JWT.
**Warning:**
Recuerda mantener _la privacidad de_ tus claves privadas. Nunca expongas o codifiques tu clave privada en tu aplicación o sitio web. Cualquiera que conozca tu clave privada puede suplantar o crear usuarios en nombre de tu aplicación.
#### Paso 1.2: Crear un token web JSON para el usuario actual {#create-jwt}
Una vez que tengas tu clave privada, tu aplicación del lado del servidor debe utilizarla para devolver un JWT a tu aplicación o sitio web para el usuario conectado en ese momento.
Normalmente, esta lógica podría ir allí donde tu aplicación solicitaría normalmente el perfil del usuario actual; como un punto de conexión de inicio de sesión o donde tu aplicación actualice el perfil del usuario actual.
Al generar el JWT, se esperan los siguientes campos:
**Encabezado JWT**
| Campo | Obligatorio | Descripción |
| ----- | -------- | ----------------------------------- |
| `alg` | Sí | El algoritmo admitido es `RS256`. |
| `typ` | Sí | El tipo debe ser igual a `JWT`. |
{: .reset-td-br-1 .reset-td-br-2 .reset-td-br-3 aria-label="Paso 1.2: Crear un token web JSON para el usuario actual" }
{: .reset-td-br-1 .reset-td-br-2 .reset-td-br-3 aria-label="Paso 1.2: Crear un token web JSON para el usuario actual #create-jwt" }
**Carga útil JWT**
| Campo | Obligatorio | Descripción |
| ----- | -------- | -------------------------------------------------------------------------------------- |
| `sub` | Sí | El "asunto" debe ser igual al ID de usuario que proporcionas al SDK de Braze cuando llamas a `changeUser` |
| `exp` | Sí | La "caducidad" de cuándo quieres que caduque este token, como una marca de tiempo Unix en segundos (por ejemplo, `1893456000` para el 1 de enero de 2030). |
{: .reset-td-br-1 .reset-td-br-2 .reset-td-br-3 aria-label="Paso 1.2: Crear un token web JSON para el usuario actual" }
{: .reset-td-br-1 .reset-td-br-2 .reset-td-br-3 aria-label="Paso 1.2: Crear un token web JSON para el usuario actual #create-jwt" }
**Tip:**
Para saber más sobre los tokens web JSON, o para echar un vistazo a las muchas bibliotecas de código abierto que simplifican este proceso de firma, consulta [https://jwt.io](https://jwt.io).
### Paso 2: Configura el SDK {#sdk-integration}
Esta característica está disponible en las siguientes [versiones del SDK](https://www.braze.com/docs/es/es/user_guide/engagement_tools/campaigns/ideas_and_strategies/new_features/#filtering-by-most-recent-app-versions):
**Note:**
Para las integraciones de iOS, en esta página se detallan los pasos para el SDK Swift de Braze. Para ver ejemplos de uso en el SDK heredado de AppboyKit para iOS, consulta [este archivo](https://github.com/Appboy/appboy-ios-sdk/blob/master/Example/Stopwatch/Sources/AppDelegate.m) y [este archivo](https://github.com/Appboy/appboy-ios-sdk/blob/master/Example/Stopwatch/Sources/Utils/SdkAuthDelegate.m).
#### Paso 2.1: Habilita la autenticación en el SDK de Braze {#step-21-enable-authentication-in-the-braze-sdk}
Cuando esta característica está habilitada, el SDK de Braze añadirá el último JWT conocido del usuario actual a las solicitudes de red realizadas a los servidores de Braze.
**Note:**
No te preocupes, inicializar solo con esta opción no afectará a la recopilación de datos en modo alguno, hasta que empieces a [aplicar la autenticación](#braze-dashboard) dentro del panel de Braze.
Cuando llames a `initialize`, establece la propiedad opcional `enableSdkAuthentication` en `true`.
```javascript
import * as braze from "@braze/web-sdk";
braze.initialize("YOUR-API-KEY-HERE", {
baseUrl: "YOUR-SDK-ENDPOINT-HERE",
enableSdkAuthentication: true,
});
```
La autenticación del SDK debe estar habilitada durante la inicialización del SDK nativo. Añade la siguiente configuración a tu código nativo de iOS y Android:
**iOS (AppDelegate.swift)**
```swift
import BrazeKit
import braze_react_native_sdk
let configuration = Braze.Configuration(
apiKey: "{YOUR-BRAZE-API-KEY}",
endpoint: "{YOUR-BRAZE-ENDPOINT}"
)
configuration.api.sdkAuthentication = true
let braze = BrazeReactBridge.perform(
#selector(BrazeReactBridge.initBraze(_:)),
with: configuration
).takeUnretainedValue() as! Braze
```
**Android (braze.xml)**
```xml
true
```
Después de habilitar la autenticación del SDK en la capa nativa, puedes utilizar los métodos JavaScript de React Native que se muestran en los siguientes pasos.
Al configurar la instancia de Braze, llama a `setIsSdkAuthenticationEnabled` con el valor `true`.
```java
BrazeConfig.Builder brazeConfigBuilder = new BrazeConfig.Builder()
.setIsSdkAuthenticationEnabled(true);
Braze.configure(this, brazeConfigBuilder.build());
```
Alternativamente, puedes añadir `true` a tu braze.xml.
Al configurar la instancia de Braze, llama a `setIsSdkAuthenticationEnabled` con el valor `true`.
```kotlin
BrazeConfig.Builder brazeConfigBuilder = BrazeConfig.Builder()
.setIsSdkAuthenticationEnabled(true)
Braze.configure(this, brazeConfigBuilder.build())
```
Alternativamente, puedes añadir `true` a tu braze.xml.
Para habilitar la autenticación del SDK, establece la propiedad `configuration.api.sdkAuthentication` de tu objeto `BRZConfiguration` en `YES` antes de inicializar la instancia de Braze:
```objc
BRZConfiguration *configuration =
[[BRZConfiguration alloc] initWithApiKey:@"{BRAZE_API_KEY}"
endpoint:@"{BRAZE_ENDPOINT}"];
configuration.api.sdkAuthentication = YES;
Braze *braze = [[Braze alloc] initWithConfiguration:configuration];
AppDelegate.braze = braze;
```
Para habilitar la autenticación del SDK, establece la propiedad `configuration.api.sdkAuthentication` de tu objeto `Braze.Configuration` en `true` al inicializar el SDK:
```swift
let configuration = Braze.Configuration(apiKey: "{YOUR-BRAZE-API-KEY}",
endpoint: "{YOUR-BRAZE-ENDPOINT}")
configuration.api.sdkAuthentication = true
let braze = Braze(configuration: configuration)
AppDelegate.braze = braze
```
Actualmente, la autenticación del SDK debe habilitarse como parte de la inicialización del SDK en el código nativo de iOS y Android. Para habilitar la autenticación del SDK en el SDK de Flutter, sigue las integraciones para iOS y Android desde las otras pestañas. Una vez habilitada la autenticación del SDK, el resto de la característica puede integrarse en Dart.
La autenticación del SDK debe estar habilitada como parte de la inicialización del SDK en el código nativo de iOS y Android. Cuando se habilita en la capa nativa, puedes utilizar los métodos del SDK de Flutter para pasar la firma JWT.
**iOS**
Para habilitar la autenticación del SDK, configura la propiedad `configuration.api.sdkAuthentication` en `true` en tu código iOS nativo:
```swift
let configuration = Braze.Configuration(apiKey: "{YOUR-BRAZE-API-KEY}", endpoint: "{YOUR-BRAZE-ENDPOINT}")
configuration.api.sdkAuthentication = true
let braze = Braze(configuration: configuration)
```
**Android (braze.xml)**
```xml
true
```
Después de habilitar la autenticación del SDK en la capa nativa, puedes utilizar los métodos del SDK de Flutter que se muestran en los siguientes pasos.
La autenticación del SDK debe estar habilitada durante la inicialización del SDK nativo. Añade la siguiente configuración a tu código nativo de iOS y Android:
**iOS**
Establece la propiedad `SDKAuthenticationEnabled` en `true` en tu archivo de configuración:
```xml
SDKAuthenticationEnabled
```
**Android (braze.xml)**
```xml
true
```
Después de habilitar la autenticación del SDK en la capa nativa, puedes utilizar los métodos Unity C# que se muestran en los siguientes pasos.
La autenticación del SDK debe estar habilitada durante la inicialización del SDK nativo. Añade la siguiente configuración a tu código nativo de iOS y Android:
**iOS**
Para habilitar la autenticación del SDK, configura la propiedad `enableSDKAuthentication` en `true` en tu `config.xml`:
```xml
```
**Android (braze.xml)**
```xml
true
```
Después de habilitar la autenticación del SDK en la capa nativa, puedes utilizar los métodos JavaScript de Cordova que se muestran en los siguientes pasos.
La autenticación del SDK debe estar habilitada durante la inicialización del SDK nativo. Configura la autenticación del SDK por separado para iOS y Android:
**iOS**
Para habilitar la autenticación del SDK, configura la propiedad `configuration.Api.SdkAuthentication` en `true` al inicializar el SDK:
```csharp
var configuration = new BRZConfiguration("YOUR-API-KEY", "YOUR-ENDPOINT");
configuration.Api.SdkAuthentication = true;
var braze = new Braze(configuration);
```
**Android (braze.xml)**
```xml
true
```
Después de habilitar la autenticación del SDK, puedes utilizar los métodos .NET MAUI que se muestran en los siguientes pasos.
Cuando utilices el complemento Braze Expo, configura la propiedad `enableSdkAuthentication` en `true` en la configuración de tu aplicación. Esto configura automáticamente la autenticación del SDK en las capas nativas de iOS y Android sin necesidad de realizar cambios manuales en el código nativo.
**app.json o app.config.js**
```json
{
"expo": {
"plugins": [
[
"@braze/expo-plugin",
{
"enableSdkAuthentication": true
}
]
]
}
}
```
Después de habilitar la autenticación del SDK en la configuración de tu aplicación, puedes utilizar los métodos JavaScript de React Native que se muestran en la pestaña React Native para los siguientes pasos.
**Note:**
Para ver un ejemplo completo de implementación, consulta la [aplicación de ejemplo del complemento Braze Expo](https://github.com/braze-inc/braze-expo-plugin/blob/main/example/components/Braze.tsx) en GitHub.
#### Paso 2.2: Establece el JWT del usuario actual {#step-22-set-the-current-users-jwt}
Cada vez que tu aplicación llame al método `changeUser` de Braze, proporciona también el JWT que se [generó en el servidor](#braze-dashboard).
También puedes configurar el token para que se actualice a mitad de sesión para el usuario actual.
**Note:**
Ten en cuenta que `changeUser` solo debe invocarse cuando el ID de usuario haya _cambiado realmente_. No debes utilizar este método como forma de actualizar el token de autenticación (JWT) si el ID de usuario no ha cambiado.
Proporciona el JWT al llamar a [`changeUser`](https://js.appboycdn.com/web-sdk/latest/doc/modules/braze.html#changeuser):
```javascript
import * as braze from "@braze/web-sdk";
braze.changeUser("NEW-USER-ID", "JWT-FROM-SERVER");
```
O, cuando hayas actualizado el token del usuario en mitad de la sesión:
```javascript
import * as braze from "@braze/web-sdk";
braze.setSdkAuthenticationSignature("NEW-JWT-FROM-SERVER");
```
Proporciona el JWT al llamar a [`changeUser`](https://braze-inc.github.io/braze-react-native-sdk/classes/Braze.Braze-1.html#changeUser):
```typescript
import Braze from '@braze/react-native-sdk';
Braze.changeUser("NEW-USER-ID", "JWT-FROM-SERVER");
```
O, cuando hayas actualizado el token del usuario en mitad de la sesión:
```typescript
import Braze from '@braze/react-native-sdk';
Braze.setSdkAuthenticationSignature("NEW-JWT-FROM-SERVER");
```
Proporciona el JWT al llamar a [`changeUser`](https://braze-inc.github.io/braze-android-sdk/kdoc/braze-android-sdk/com.braze/-i-braze/change-user.html):
```java
Braze.getInstance(this).changeUser("NEW-USER-ID", "JWT-FROM-SERVER");
```
O, cuando hayas actualizado el token del usuario en mitad de la sesión:
```java
Braze.getInstance(this).setSdkAuthenticationSignature("NEW-JWT-FROM-SERVER");
```
Proporciona el JWT al llamar a [`changeUser`](https://braze-inc.github.io/braze-android-sdk/kdoc/braze-android-sdk/com.braze/-i-braze/change-user.html):
```kotlin
Braze.getInstance(this).changeUser("NEW-USER-ID", "JWT-FROM-SERVER")
```
O, cuando hayas actualizado el token del usuario en mitad de la sesión:
```kotlin
Braze.getInstance(this).setSdkAuthenticationSignature("NEW-JWT-FROM-SERVER")
```
Proporciona el JWT al llamar a [`changeUser`](https://braze-inc.github.io/braze-swift-sdk/documentation/brazekit/braze/changeuser(userid:sdkauthsignature:fileid:line:)):
```objc
[AppDelegate.braze changeUser:@"userId" sdkAuthSignature:@"JWT-FROM-SERVER"];
```
O, cuando hayas actualizado el token del usuario en mitad de la sesión:
```objc
[AppDelegate.braze setSDKAuthenticationSignature:@"NEW-JWT-FROM-SERVER"];
```
Proporciona el JWT al llamar a [`changeUser`](https://braze-inc.github.io/braze-swift-sdk/documentation/brazekit/braze/changeuser(userid:sdkauthsignature:fileid:line:)):
```swift
AppDelegate.braze?.changeUser(userId: "userId", sdkAuthSignature: "JWT-FROM-SERVER")
```
O, cuando hayas actualizado el token del usuario en mitad de la sesión:
```swift
AppDelegate.braze?.set(sdkAuthenticationSignature: "NEW-JWT-FROM-SERVER")
```
Proporciona el JWT al llamar a [`changeUser`](https://js.appboycdn.com/web-sdk/latest/doc/modules/braze.html#changeuser):
```dart
braze.changeUser("userId", sdkAuthSignature: "JWT-FROM-SERVER")
```
O, cuando hayas actualizado el token del usuario en mitad de la sesión:
```dart
braze.setSdkAuthenticationSignature("NEW-JWT-FROM-SERVER")
```
Proporciona el JWT al llamar a `changeUser`:
```dart
import 'package:braze_plugin/braze_plugin.dart';
BrazePlugin braze = BrazePlugin();
braze.changeUser("NEW-USER-ID", sdkAuthSignature: "JWT-FROM-SERVER");
```
O, cuando hayas actualizado el token del usuario en mitad de la sesión:
```dart
import 'package:braze_plugin/braze_plugin.dart';
BrazePlugin braze = BrazePlugin();
braze.setSdkAuthenticationSignature("NEW-JWT-FROM-SERVER");
```
Proporciona el JWT al llamar a `ChangeUser`:
```csharp
BrazeBinding.ChangeUser("NEW-USER-ID", "JWT-FROM-SERVER");
```
O, cuando hayas actualizado el token del usuario en mitad de la sesión:
```csharp
BrazeBinding.SetSdkAuthenticationSignature("NEW-JWT-FROM-SERVER");
```
Proporciona el JWT al llamar a `changeUser`:
```javascript
BrazePlugin.changeUser("NEW-USER-ID", "JWT-FROM-SERVER");
```
O, cuando hayas actualizado el token del usuario en mitad de la sesión:
```javascript
BrazePlugin.setSdkAuthenticationSignature("NEW-JWT-FROM-SERVER");
```
Proporciona el JWT al llamar a `ChangeUser`:
**iOS**
```csharp
Braze.SharedInstance?.ChangeUser("NEW-USER-ID", "JWT-FROM-SERVER");
```
O, cuando hayas actualizado el token del usuario en mitad de la sesión:
```csharp
Braze.SharedInstance?.SetSDKAuthenticationSignature("NEW-JWT-FROM-SERVER");
```
**Android**
```csharp
Braze.GetInstance(this).ChangeUser("NEW-USER-ID", "JWT-FROM-SERVER");
```
O, cuando hayas actualizado el token del usuario en mitad de la sesión:
```csharp
Braze.GetInstance(this).SetSdkAuthenticationSignature("NEW-JWT-FROM-SERVER");
```
Cuando utilices el complemento Braze Expo, utiliza los mismos métodos del SDK de React Native. Proporciona el JWT al llamar a `changeUser`:
```typescript
import Braze from '@braze/react-native-sdk';
Braze.changeUser("NEW-USER-ID", "JWT-FROM-SERVER");
```
O, cuando hayas actualizado el token del usuario en mitad de la sesión:
```typescript
import Braze from '@braze/react-native-sdk';
Braze.setSdkAuthenticationSignature("NEW-JWT-FROM-SERVER");
```
#### Paso 2.3: Registra una función de devolución de llamada para tokens no válidos {#sdk-callback}
Cuando esta característica se establece como [Obligatoria](#enforcement-options), los siguientes escenarios harán que las solicitudes del SDK sean rechazadas por Braze:
- El JWT había caducado en el momento en que lo recibió la API de Braze
- El JWT estaba vacío o faltaba
- No se ha podido verificar el JWT para las claves públicas que cargaste en el panel de Braze
Puedes utilizar `subscribeToSdkAuthenticationFailures` para suscribirte y recibir una notificación cuando las solicitudes del SDK fallen por uno de estos motivos. Una función de devolución de llamada contiene un objeto con el [`errorCode`](#error-codes) relevante, el motivo (`reason`) del error, el `userId` de la solicitud (el usuario no puede ser anónimo) y el token de autenticación (JWT) que causó el error.
Las solicitudes fallidas se reintentarán periódicamente hasta que tu aplicación proporcione un nuevo JWT válido. Si ese usuario sigue conectado, puedes utilizar esta devolución de llamada como una oportunidad para solicitar un nuevo JWT a tu servidor y suministrar al SDK de Braze este nuevo token válido.
Cuando recibas un error de autenticación, comprueba que el `userId` del error coincide con tu usuario actualmente conectado, luego obtén una nueva firma de tu servidor y proporciónala al SDK de Braze. También puedes registrar estos errores en tu servicio de supervisión o de notificación de errores.
**Tip:**
Estos métodos de devolución de llamada son un buen lugar para añadir tu propio servicio de seguimiento o registro de errores para controlar la frecuencia con la que se rechazan tus solicitudes de Braze.
```javascript
import * as braze from "@braze/web-sdk";
braze.subscribeToSdkAuthenticationFailures((error) => {
console.error("SDK authentication failed:", error);
console.log("Error code:", error.errorCode);
console.log("User ID:", error.userId);
// Note: Do not log error.signature as it contains sensitive authentication credentials
// Verify the error.userId matches the currently logged-in user
// Fetch a new token from your server and set it
fetchNewSignature(error.userId).then((newSignature) => {
braze.setSdkAuthenticationSignature(newSignature);
});
});
```
```typescript
import Braze from '@braze/react-native-sdk';
const sdkAuthErrorSubscription = Braze.addListener(
Braze.Events.SDK_AUTHENTICATION_ERROR,
(error) => {
console.log(`SDK Authentication for ${error.userId} failed with error code ${error.errorCode}.`);
const updated_jwt = getNewTokenSomehow(error);
Braze.setSdkAuthenticationSignature(updated_jwt);
}
);
// Don't forget to remove the listener when done
// sdkAuthErrorSubscription.remove();
```
```java
Braze.getInstance(this).subscribeToSdkAuthenticationFailures(error -> {
String newToken = getNewTokenSomehow(error);
Braze.getInstance(getContext()).setSdkAuthenticationSignature(newToken);
});
```
```kotlin
Braze.getInstance(this).subscribeToSdkAuthenticationFailures({ error: BrazeSdkAuthenticationErrorEvent ->
val newToken: String = getNewTokenSomehow(error)
Braze.getInstance(getContext()).setSdkAuthenticationSignature(newToken)
})
```
```objc
Braze *braze = [[Braze alloc] initWithConfiguration:configuration];
braze.sdkAuthDelegate = delegate;
AppDelegate.braze = braze;
// Method to implement in delegate
- (void)braze:(Braze *)braze sdkAuthenticationFailedWithError:(BRZSDKAuthenticationError *)error {
NSLog(@"Invalid SDK Authentication Token.");
NSString *newSignature = getNewTokenSomehow(error);
[AppDelegate.braze setSDKAuthenticationSignature:newSignature];
}
```
```swift
let braze = Braze(configuration: configuration)
braze.sdkAuthDelegate = delegate
AppDelegate.braze = braze
// Method to implement in delegate
func braze(_ braze: Braze, sdkAuthenticationFailedWithError error: Braze.SDKAuthenticationError) {
print("Invalid SDK Authentication Token.")
let newSignature = getNewTokenSomehow(error)
AppDelegate.braze?.set(sdkAuthenticationSignature: newSignature)
}
```
```dart
braze.setBrazeSdkAuthenticationErrorCallback((BrazeSdkAuthenticationError error) async {
print("Invalid SDK Authentication Token.");
final newSignature = getNewTokenSomehow(error);
braze.setSdkAuthenticationSignature(newSignature);
});
```
```dart
import 'package:braze_plugin/braze_plugin.dart';
BrazePlugin braze = BrazePlugin();
braze.setBrazeSdkAuthenticationErrorCallback((BrazeSdkAuthenticationError error) async {
print("SDK Authentication for ${error.userId} failed with error code ${error.errorCode}.");
String newSignature = getNewTokenSomehow(error);
braze.setSdkAuthenticationSignature(newSignature);
});
```
**iOS**
Configura el delegado de autenticación del SDK en tu implementación nativa de iOS:
```csharp
public class SdkAuthDelegate : BRZSdkAuthDelegate
{
public void Braze(Braze braze, BRZSDKAuthenticationError error)
{
Debug.Log("Invalid SDK Authentication Token.");
string newSignature = GetNewTokenSomehow(error);
BrazeBinding.SetSdkAuthenticationSignature(newSignature);
}
}
```
**Android**
```csharp
Braze.GetInstance(this).SubscribeToSdkAuthenticationFailures((error) => {
string newToken = GetNewTokenSomehow(error);
Braze.GetInstance(this).SetSdkAuthenticationSignature(newToken);
});
```
```javascript
BrazePlugin.subscribeToSdkAuthenticationFailures((error) => {
console.log(`SDK Authentication for ${error.user_id} failed with error code ${error.error_code}.`);
const newSignature = getNewTokenSomehow(error);
BrazePlugin.setSdkAuthenticationSignature(newSignature);
});
```
**iOS**
Configura el delegado de autenticación del SDK en tu instancia de `Braze`:
```csharp
public class SdkAuthDelegate : BRZSdkAuthDelegate
{
public override void Braze(Braze braze, BRZSDKAuthenticationError error)
{
Console.WriteLine("Invalid SDK Authentication Token.");
string newSignature = GetNewTokenSomehow(error);
Braze.SharedInstance?.SetSDKAuthenticationSignature(newSignature);
}
}
// Set the delegate during initialization
var configuration = new BRZConfiguration("YOUR-API-KEY", "YOUR-ENDPOINT");
configuration.Api.SdkAuthentication = true;
var braze = new Braze(configuration);
braze.SdkAuthDelegate = new SdkAuthDelegate();
```
**Android**
```csharp
Braze.GetInstance(this).SubscribeToSdkAuthenticationFailures((error) => {
string newToken = GetNewTokenSomehow(error);
Braze.GetInstance(this).SetSdkAuthenticationSignature(newToken);
});
```
Cuando utilices el complemento Braze Expo, utiliza los mismos métodos del SDK de React Native:
```typescript
import Braze from '@braze/react-native-sdk';
const sdkAuthErrorSubscription = Braze.addListener(
Braze.Events.SDK_AUTHENTICATION_ERROR,
(error) => {
console.log(`SDK Authentication for ${error.userId} failed with error code ${error.errorCode}.`);
const updated_jwt = getNewTokenSomehow(error);
Braze.setSdkAuthenticationSignature(updated_jwt);
}
);
// Don't forget to remove the listener when done
// sdkAuthErrorSubscription.remove();
```
### Paso 3: Habilita la autenticación en el dashboard {#braze-dashboard}
A continuación, puedes habilitar la autenticación en el panel de Braze para las aplicaciones que hayas configurado anteriormente.
Ten en cuenta que las solicitudes del SDK seguirán fluyendo como de costumbre sin autenticación, a menos que la configuración de autenticación del SDK de la aplicación se establezca en **Obligatoria** en el panel de Braze.
Si algo va mal con tu integración (por ejemplo, tu aplicación está pasando tokens incorrectamente al SDK, o tu servidor está generando tokens no válidos), desactiva esta característica en el panel de Braze, y los datos volverán a fluir como de costumbre sin verificación.
#### Opciones de aplicación {#enforcement-options}
En la página **Administrar configuración** del dashboard, cada aplicación tiene tres estados de autenticación del SDK que controlan cómo verifica Braze las solicitudes.
| Configuración | Descripción |
| ------ | ---------- |
| **Deshabilitada** | Braze no verificará el JWT suministrado para un usuario. (Configuración predeterminada) |
| **Opcional** | Braze verificará las solicitudes de los usuarios registrados, pero no rechazará las solicitudes no válidas. |
| **Obligatoria** | Braze verificará las solicitudes de los usuarios registrados y rechazará los JWT no válidos. |
{: .reset-td-br-1 .reset-td-br-2 aria-label="Opciones de aplicación" }

La configuración **Opcional** es una forma útil de controlar el impacto potencial que esta característica tendrá en el tráfico del SDK de tu aplicación.
Se notificará un JWT no válido tanto en estado **Opcional** como **Obligatoria**, sin embargo, solo el estado **Obligatoria** rechazará las solicitudes del SDK, lo que provocará que las aplicaciones vuelvan a intentarlo y soliciten un nuevo JWT.
## Administración de claves públicas {#key-management}
### Añadir una clave pública {#adding-a-public-key}
Puedes añadir hasta tres claves públicas para cada aplicación: una principal, una secundaria y una terciaria. También puedes añadir la misma clave a más de una aplicación si es necesario. Para añadir una clave pública:
1. Ve al panel de Braze y selecciona **Configuración** > **Configuración de la aplicación**.
2. Elige una aplicación de tu lista de aplicaciones disponibles.
3. En **SDK Authentication**, selecciona **Add Public Key**.
4. Introduce una descripción opcional, pega tu clave pública y selecciona **Add Public Key**.
### Asignar una nueva clave primaria {#assign-a-new-primary-key}
Para asignar una clave secundaria o terciaria como nueva clave primaria:
1. Ve al panel de Braze y selecciona **Configuración** > **Configuración de la aplicación**.
2. Elige una aplicación de tu lista de aplicaciones disponibles.
3. En **SDK Authentication**, elige una clave y selecciona **Manage** > **Make Primary Key**.
### Eliminar una clave {#deleting-a-key}
Para eliminar una clave primaria, [asigna primero una nueva primaria](#assign-a-new-primary-key) y luego elimina tu clave. Para eliminar una clave no primaria:
1. Ve al panel de Braze y selecciona **Configuración** > **Configuración de la aplicación**.
2. Elige una aplicación de tu lista de aplicaciones disponibles.
3. En **SDK Authentication**, elige una clave no primaria y selecciona **Manage** > **Delete Public Key**.
## Análisis {#analytics}
Cada aplicación mostrará un desglose de los errores de autenticación del SDK recopilados mientras esta característica está en estado **Opcional** u **Obligatoria**.
Los datos están disponibles en tiempo real, y puedes pasar el ratón por encima de los puntos del gráfico para ver un desglose de los errores de una fecha determinada.
{: style="max-width:80%"}
## Códigos de error {#error-codes}
| Código de error | Motivo del error | Descripción | Pasos para resolver |
| -------- | ------------ | --------- | --------- |
| 10 | `EXPIRATION_REQUIRED` | La caducidad es un campo obligatorio para el uso de Braze. | Añade un campo `exp` o de caducidad a tu lógica de creación de JWT. |
| 20 | `DECODING_ERROR` | Clave pública no coincidente o error general no detectado. | Copia tu JWT en una herramienta de prueba de JWT para diagnosticar por qué tu JWT tiene un formato no válido. |
| 21 | `SUBJECT_MISMATCH` | Los sujetos esperados y los reales no son los mismos. | El campo `sub` debe ser el mismo ID de usuario que se pasa al método `changeUser` del SDK. |
| 22 | `EXPIRED` | El token proporcionado ha caducado. | Amplía tu caducidad o actualiza periódicamente los tokens antes de que caduquen. |
| 23 | `INVALID_PAYLOAD` | La carga útil del token no es válida. | Copia tu JWT en una herramienta de prueba de JWT para diagnosticar por qué tu JWT tiene un formato no válido. |
| 24 | `INCORRECT_ALGORITHM` | No se admite el algoritmo del token. | Cambia tu JWT para utilizar cifrado `RS256`. No se admiten otros tipos. |
| 25 | `PUBLIC_KEY_ERROR` | No se ha podido convertir la clave pública al formato adecuado. | Copia tu JWT en una herramienta de prueba de JWT para diagnosticar por qué tu JWT tiene un formato no válido. |
| 26 | `MISSING_TOKEN` | No se ha proporcionado ningún token en la solicitud. | Asegúrate de que estás pasando un token al llamar a `changeUser(id, token)` y de que tu token no está en blanco. |
| 27 | `NO_MATCHING_PUBLIC_KEYS` | Ninguna clave pública coincide con el token proporcionado. | La clave privada utilizada en el JWT no coincide con ninguna de las claves públicas configuradas para tu aplicación. Confirma que has añadido las claves públicas a la aplicación correcta de tu espacio de trabajo que coincide con esta clave de API. |
| 28 | `PAYLOAD_USER_ID_MISMATCH` | No todos los ID de usuario de la carga útil de la solicitud coinciden como se requiere. | Esto es inesperado y puede dar lugar a una carga útil malformada. Abre un ticket de soporte para obtener ayuda. |
{: .reset-td-br-1 .reset-td-br-2 .reset-td-br-3 .reset-td-br-4 aria-label="Códigos de error" }
## Preguntas frecuentes (FAQ) {#faq}
#### ¿Es necesario habilitar esta característica en todas mis aplicaciones al mismo tiempo? {#faq-app-by-app}
No, esta característica puede habilitarse para aplicaciones concretas y no es necesario utilizarla en todas tus aplicaciones a la vez.
#### ¿Qué ocurre con los usuarios que siguen utilizando versiones anteriores de mi aplicación? {#faq-sdk-backward-compatibility}
Cuando empieces a aplicar esta característica, las solicitudes realizadas por versiones anteriores de la aplicación serán rechazadas por Braze y reintentadas por el SDK. Después de que los usuarios actualicen su aplicación a una versión compatible, esas solicitudes en cola empezarán a aceptarse de nuevo.
Si es posible, debes animar a los usuarios a actualizarse como harías con cualquier otra actualización obligatoria. Alternativamente, puedes mantener la característica como [Opcional](#enforcement-options) hasta que veas que un porcentaje aceptable de usuarios se ha actualizado.
#### ¿Qué caducidad debo usar al generar un JWT? {#faq-expiration}
Te recomendamos que utilices el valor más alto de la duración media de la sesión, la caducidad de la cookie/token de sesión o la frecuencia con la que tu aplicación actualizaría el perfil del usuario actual.
#### ¿Qué ocurre si un JWT caduca en mitad de la sesión de un usuario? {#faq-jwt-expiration}
Si el token de un usuario caduca durante la sesión, el SDK tiene una [función de devolución de llamada](#sdk-callback) que invocará para informar a tu aplicación de que se necesita un nuevo JWT para continuar enviando datos a Braze.
#### ¿Qué ocurre si mi integración en servidor se rompe y ya no puedo crear un JWT? {#faq-server-downtime}
Si tu servidor no puede proporcionar un JWT o detectas algún problema de integración, siempre puedes desactivar la característica en el panel de Braze.
Una vez desactivada, el SDK reintentará cualquier solicitud fallida pendiente, y Braze la aceptará.
#### ¿Por qué esta característica utiliza claves públicas/privadas en lugar de secretos compartidos? {#faq-shared-secrets}
Al utilizar secretos compartidos, cualquiera con acceso a ese secreto compartido, como la página del panel de Braze, podría generar tokens y suplantar la identidad de tus usuarios finales.
En su lugar, utilizamos claves públicas/privadas para que ni siquiera los empleados de Braze (y mucho menos los usuarios de tu empresa) tengan acceso a tus claves privadas.
#### ¿Cómo se reintentarán las solicitudes rechazadas? {#faq-retry-logic}
Cuando una solicitud es rechazada debido a un error de autenticación, el SDK invocará tu devolución de llamada utilizada para actualizar el JWT del usuario.
Las solicitudes se reintentarán periódicamente utilizando una retirada exponencial. Después de 50 intentos fallidos consecutivos, los reintentos se pausarán hasta el siguiente inicio de sesión. Cada SDK también tiene un método para solicitar manualmente un vaciado de datos.
#### ¿Se puede utilizar la autenticación del SDK para usuarios anónimos? {#faq-anonymous-users}
No. La autenticación del SDK funciona cuando tu sitio web confirma la identidad de alguien, por lo que solo se aplica a usuarios identificados. Como usuario anónimo, no hay identidad que confirmar.
La aplicación comienza después de llamar a `changeUser`. Antes de que un usuario sea identificado (por ejemplo, mientras navega de forma anónima antes de registrarse), el SDK puede seguir enviando datos a Braze sin un JWT. Después de llamar a `changeUser`, las solicitudes para ese perfil identificado requieren un JWT válido.
Esto significa que un recorrido típico de usuario podría verse así:
1. Un usuario visita tu sitio o abre tu aplicación de forma anónima. Braze recopila esta actividad sin un JWT.
2. El usuario se registra o inicia sesión, y tu aplicación llama a `changeUser` con un `external_id`.
3. Braze continúa recopilando la actividad de ese usuario, y la autenticación del SDK se aplica a las solicitudes de ese perfil identificado.
#### ¿Funciona la autenticación del SDK con alias de usuario? {#faq-aliases}
No. La autenticación del SDK requiere un `external_id`. No puedes configurarla cuando solo hay un `braze_id` o `alias_id` disponible, por lo que los perfiles que solo tienen alias no pueden usar la autenticación del SDK.
#### ¿Habilitar la autenticación del SDK bloquea la recopilación de actividad no autenticada? {#faq-unauthenticated-collection}
No. La autenticación del SDK no bloquea la recopilación legítima de actividad anónima. Solo se aplica después de que un perfil es identificado con `changeUser`.
# Depuración del SDK de Braze
Source: /docs/es/developer_guide/sdk_integration/debugging/index.md
# Depuración del SDK de Braze {#debugging-the-braze-sdk}
> Aprende a utilizar el depurador integrado del SDK de Braze, para que puedas solucionar problemas de tus canales con SDK, sin necesidad de habilitar el registro detallado en tu aplicación.
**Tip:**
Para una investigación más profunda, también puedes [habilitar el registro detallado](https://www.braze.com/docs/es/es/developer_guide/sdk_integration/verbose_logging) para capturar la salida detallada del SDK y [aprender a leer los registros detallados](https://www.braze.com/docs/es/es/developer_guide/sdk_integration/reading_verbose_logs) de canales específicos.
## Requisitos previos {#prerequisites}
Para utilizar el Depurador de SDK de Braze, necesitarás los permisos "View PII" y "View User Profiles (PII Redacted)". Para descargar los registros de tus sesiones de depuración, también necesitarás el permiso "Export User Data". Además, tu SDK de Braze debe cumplir o apuntar a las siguientes versiones mínimas:
Para recopilar registros del depurador cuando `Braze.configuration.logger.level` es `.disabled`, usa Swift SDK 11.9.0 o posterior. Para más información, consulta el [registro de cambios de Swift](https://www.braze.com/docs/es/es/developer_guide/changelogs#swift_fixed-12).
## Depuración del SDK de Braze
**Tip:**
Para habilitar la depuración del SDK Web de Braze, puedes [utilizar un parámetro de URL](https://www.braze.com/docs/es/es/developer_guide/platform_integration_guides/web/initial_sdk_setup#logging).
### Paso 1: Cierra tu aplicación {#step-1-close-your-app}
Antes de iniciar la sesión de depuración, cierra la aplicación que esté experimentando problemas. Puedes relanzar la aplicación al inicio de tu sesión.
### Paso 2: Crea una sesión de depuración {#step-2-create-a-debugging-session}
En Braze, ve a **Configuración** y, en **Configuración y pruebas**, selecciona **Depurador de SDK**.

Selecciona **Crear sesión de depuración**.

### Paso 3: Selecciona un usuario {#step-3-select-a-user}
Busca a un usuario utilizando su dirección de correo electrónico, `external_id`, alias de usuario o token de notificaciones push. Cuando estés listo para iniciar la sesión, selecciona **Seleccionar usuario**.
{: style="max-width:85%;"}
### Paso 4: Vuelve a lanzar la aplicación {#step-4-relaunch-the-app}
Primero, inicia la aplicación y confirma que tu dispositivo está emparejado. Si el emparejamiento se realiza correctamente, relanza tu aplicación—así te asegurarás de que los registros de inicialización de la aplicación se capturan por completo.
### Paso 5: Completa los pasos de reproducción {#step-5-complete-the-reproduction-steps}
Tras relanzar tu aplicación, sigue los pasos para reproducir el error.
**Tip:**
Cuando reproduzcas el error, asegúrate de seguir los pasos de reproducción lo más fielmente posible, para que puedas crear [registros de calidad](#step-6-export-your-session-logs-optional).
### Paso 6: Finaliza tu sesión {#step-6-end-your-session}
Cuando hayas terminado con los pasos de reproducción, selecciona **Finalizar sesión** > **Cerrar**.
{: style="max-width:85%;"}
**Note:**
Puede tardar unos minutos en generar tus registros, dependiendo de la duración de la sesión y de la conectividad de la red.
### Paso 7: Comparte o exporta tu sesión (opcional) {#step-7-share-or-export-your-session-optional}
Después de la sesión, puedes exportar tus registros de sesión como archivo CSV. Además, otras personas pueden utilizar tu **ID de sesión** para buscar tu sesión de depuración, por lo que no necesitas enviarles tus registros directamente.

# Registro detallado
Source: /docs/es/developer_guide/sdk_integration/verbose_logging/index.md
# Registro detallado
> El registro detallado muestra información detallada y de bajo nivel del SDK de Braze, lo que te permite ver cómo se inicializa el SDK, cómo se comunica con los servidores y cómo procesa los canales de mensajería, como las notificaciones push, los mensajes dentro de la aplicación y las tarjetas de contenido.
Cuando algo no funciona como se espera, como por ejemplo, una notificación push que no llega, un mensaje dentro de la aplicación que no se muestra o datos de usuario que no se sincronizan, los registros detallados te ayudan a identificar la causa raíz. En lugar de hacer conjeturas, puedes ver exactamente lo que hace el SDK en cada paso.
**Tip:**
Si deseas depurar sin habilitar manualmente el registro detallado, puedes utilizar el [depurador del SDK](https://www.braze.com/docs/es/es/developer_guide/sdk_integration/debugging) para crear sesiones de depuración directamente en el panel de Braze.
## Cuándo utilizar el registro detallado
Activa el registro detallado cuando sea necesario:
- **Verifica la inicialización del SDK**: Confirma que el SDK se inicia correctamente con la clave de API y el punto final SDK correctos.
- **Solución de problemas con la entrega de mensajes**: Comprueba si los tokens de notificaciones push están registrados, si se desencadenan los mensajes dentro de la aplicación o si las tarjetas de contenido están sincronizadas.
- **Depurar vínculos profundos**: Comprueba que el SDK recibe y abre vínculos profundos desde notificaciones push, mensajes dentro de la aplicación o tarjetas de contenido.
- **Validar el seguimiento de la sesión**: Confirma que las sesiones comienzan y terminan según lo previsto.
- **Diagnosticar problemas de conectividad**: Inspecciona las solicitudes y respuestas de red entre el SDK y los servidores de Braze.
## Habilitar el registro detallado
**Important:**
Los registros detallados están destinados únicamente a entornos de desarrollo y pruebas. Desactiva el registro detallado antes de lanzar tu aplicación a producción para evitar que se exponga información confidencial.
Habilita el registro detallado antes de cualquier otra llamada al SDK en tu`Application.onCreate()`método para capturar la salida más completa.
**En código:**
```java
BrazeLogger.setLogLevel(Log.VERBOSE);
```
```kotlin
BrazeLogger.logLevel = Log.VERBOSE
```
**En`braze.xml`:**
```xml
2
```
Para verificar que la habilitación del registro detallado está activa, busca`V/Braze` en la salida de Logcat. Por ejemplo:
```
2077-11-19 16:22:49.591 ? V/Braze v9.0.01 .bo.app.d3: Request started
```
Para obtener más información, consulta [Registro de Android SDK](https://www.braze.com/docs/es/es/developer_guide/sdk_integration#android_enabling-logs).
Establece el nivel de registro en`.debug` en tu`Braze.Configuration` objeto durante la inicialización.
```swift
let configuration = Braze.Configuration(
apiKey: "",
endpoint: ""
)
configuration.logger.level = .debug
let braze = Braze(configuration: configuration)
```
```objc
BRZConfiguration *configuration = [[BRZConfiguration alloc] initWithApiKey:@""
endpoint:@""];
[configuration.logger setLevel:BRZLoggerLevelDebug];
Braze *braze = [[Braze alloc] initWithConfiguration:configuration];
```
El`.debug`nivel es el más detallado y se recomienda para la solución de problemas. Para obtener más información, consulta [Registro de SWIFT SDK](https://www.braze.com/docs/es/es/developer_guide/sdk_integration#swift_log-levels).
Añade`?brazeLogging=true` como parámetro URL o habilita la habilitación del registro durante la inicialización del SDK:
```javascript
braze.initialize('YOUR-API-KEY', {
baseUrl: 'YOUR-SDK-ENDPOINT',
enableLogging: true
});
```
También puedes alternar el registro después de la inicialización:
```javascript
braze.toggleLogging();
```
Los registros aparecen en la pestaña **Consola** de las herramientas de desarrollo de tu navegador. Para obtener más información, consulta [Registro de SDK Web](https://www.braze.com/docs/es/es/developer_guide/sdk_integration#web_logging).
1. Abre los ajustes de configuración de Braze navegando hasta **Braze** > **Configuración de Braze**.
2. Selecciona el menú desplegable **Mostrar configuración de Braze para Android**.
3. En el campo **Nivel de registro del SDK**, introduce `0`.
Establece el nivel de registro durante la configuración del SDK:
```javascript
const configuration = new Braze.BrazeConfiguration('YOUR-API-KEY', 'YOUR-SDK-ENDPOINT');
configuration.logLevel = Braze.LogLevel.Verbose;
```
## Recopilación de registros
Después de habilitar el registro detallado, reproduce el problema que estás resolviendo en la solución de problemas y, a continuación, recopila los registros de la consola o la herramienta de depuración de tu plataforma.
Utiliza **Logcat** en Android Studio para capturar registros:
1. Conecta tu dispositivo o inicia un emulador.
2. En Android Studio, abre **Logcat** desde el panel inferior.
3. Filtra por`V/Braze` o`D/Braze` para aislar la salida del SDK de Braze.
4. Reproduce el problema.
5. Copia los registros pertinentes y guárdalos en un archivo de texto.
Utiliza la aplicación **Consola** en MacOS para capturar registros:
1. Instala la aplicación en tu dispositivo con el registro detallado habilitado.
2. Conecta tu dispositivo al Mac.
3. Abre la aplicación **Consola** y selecciona tu dispositivo en la barra lateral **Dispositivos**.
4. Filtra los registros por`Braze` o`BrazeKit` en la barra de búsqueda.
5. Reproduce el problema.
6. Copia los registros pertinentes y guárdalos en un archivo de texto.
Utiliza las herramientas de desarrollo de tu navegador:
1. Abre las herramientas de desarrollador de tu navegador (normalmente **F12** o **Cmd+Option+I**).
2. Ve a la pestaña **Consola**.
3. Reproduce el problema.
4. Copia la salida de la consola y guárdala en un archivo de texto.
**Tip:**
Cuando recopiles registros para el soporte de Braze, comienza a registrarlos antes de iniciar la aplicación y continúa hasta mucho después de que se produzca el problema. Esto ayuda a capturar la secuencia completa de eventos.
## Lectura de registros detallados
Los registros detallados siguen una estructura coherente que te ayuda a rastrear lo que está haciendo el SDK. Para aprender a interpretar la salida del registro para canales específicos, incluyendo qué entradas clave buscar y patrones comunes de solución de problemas, consulta [Lectura de registros detallados](https://www.braze.com/docs/es/es/developer_guide/sdk_integration/reading_verbose_logs).
## Compartir registros con el soporte de Braze
Cuando te pongas en contacto con el soporte de Braze por un problema con el SDK, incluye lo siguiente:
1. **Archivo de registro detallado**: Un registro completo desde antes del inicio de la aplicación hasta la aparición del problema.
2. **Pasos para reproducir** el problema: Una descripción clara de las acciones que desencadenan el problema.
3. **Comportamiento esperado frente a comportamiento real**: Lo que esperabas que sucediera y lo que sucedió en realidad.
4. **Versión del SDK**: La versión del SDK de Braze que estás utilizando.
5. **Plataforma y versión del sistema operativo**: Por ejemplo, iOS 18.0, Android 14 o Chrome 120.
# Lectura de registros detallados
Source: /docs/es/developer_guide/sdk_integration/reading_verbose_logs/index.md
# Lectura de registros detallados {#reading-verbose-logs}
> En esta página se explica cómo interpretar la salida de registros detallados del SDK de Braze. Para cada canal de mensajería, encontrarás las entradas clave del registro que debes buscar, su significado y los problemas comunes a los que debes prestar atención.
Antes de empezar, asegúrate de haber [habilitado el registro detallado](https://www.braze.com/docs/es/es/developer_guide/sdk_integration/verbose_logging) y de saber cómo recopilar registros en tu plataforma.
## Sesiones {#sessions}
Las sesiones son la base de los análisis y la entrega de mensajes de Braze. Muchas características de mensajería, incluidos los mensajes dentro de la aplicación y las Content Cards, dependen de que se inicie una sesión válida antes de que puedan funcionar. Si las sesiones no se registran correctamente, investiga esto primero. Para obtener más información sobre cómo habilitar el seguimiento de sesiones, consulta [Paso 5: Habilita el seguimiento de sesiones de usuario](https://www.braze.com/docs/es/es/developer_guide/sdk_integration?sdktab=android#android_step-5-enable-user-session-tracking).
### Entradas clave del registro {#key-log-entries}
**Inicio de la sesión:**
```
Started user session (id: )
```
**Fin de la sesión:**
```
Ended user session (id: , duration: s)
Logged event:
- userId:
- sessionId:
- data: sessionEnd(duration: )
```
**Inicio de la sesión:**
Busca las siguientes entradas:
```
New session created with ID:
Session start event for new session received
Completed the openSession call
Opened session with activity:
```
Filtra las solicitudes de red para tu punto de conexión de Braze configurado (por ejemplo, sdk.iad-01.braze.com) para ver el evento de inicio de sesión (`ss`).
**Fin de la sesión:**
```
Closed session with activity:
Closed session with session ID:
Requesting data flush on internal session close flush timer.
```
### Qué hay que comprobar {#what-to-check}
- Comprueba que aparece un registro de inicio de sesión cuando se inicia la aplicación.
- Si no ves que se inicia una sesión, comprueba que el SDK esté correctamente inicializado y que se esté llamando a `openSession` (Android).
- En Android, confirma que se está realizando una solicitud de red al punto de conexión de Braze. Si no ves esto, verifica tu clave de API y la configuración del punto de conexión.
## Notificaciones push {#push-notifications}
Los registros de notificaciones push te ayudan a verificar que los tokens de los dispositivos estén registrados, que las notificaciones se entreguen correctamente y que se realice el seguimiento de los eventos de clic.
### Registro de tokens {#token-registration}
Cuando se inicia una sesión, el SDK registra el token de notificaciones push del dispositivo en Braze.
```
Updated push notification authorization:
- authorization: authorized
Received remote notifications device token:
```
Filtra las solicitudes a tu punto de conexión de Braze configurado (por ejemplo, sdk.iad-01.braze.com) y busca `push_token` en los atributos del cuerpo de la solicitud:
```
"attributes": [
{
"push_token": "",
"user_id": ""
}
]
```
Confirma también que la información del dispositivo incluye:
```
"device": {
"ios_push_auth": "authorized",
"remote_notification_enabled": 1
}
```
Busca el registro de inscripción en FCM:
```
Registering for Firebase Cloud Messaging token using sender id:
```
Verifica lo siguiente:
- `com_braze_firebase_cloud_messaging_registration_enabled` es `true`.
- El ID del remitente FCM coincide con tu proyecto de Firebase.
Un error común es `SENDER_ID_MISMATCH`, lo que significa que el ID de remitente configurado no coincide con tu proyecto de Firebase.
### Qué hay que comprobar
- Si `push_token` no aparece en el cuerpo de la solicitud, significa que no se ha capturado el token. Verifica la configuración de push en la configuración de tu aplicación.
- Si `ios_push_auth` muestra `denied` o `provisional`, el usuario no ha concedido permiso push completo.
- En Android, si ves `SENDER_ID_MISMATCH`, actualiza tu ID de remitente FCM para que coincida con tu proyecto de Firebase.
### Entrega push y clic {#push-delivery-and-click}
Cuando se pulsa una notificación push, el SDK registra los eventos de procesamiento y clic.
```
Processing push notification:
- date:
- silent: false
- userInfo: {
"ab": { ... },
"ab_uri": "",
"aps": {
"alert": {
"body": "",
"title": ""
}
}
}
```
Seguido del evento de clic:
```
Logged event:
- userId:
- sessionId:
- data: pushClick(campaignId: ...)
```
Si la push contiene un vínculo profundo, también verás:
```
Opening '':
- channel: notification
- useWebView: false
- isUniversalLink: false
```
```
BrazeFirebaseMessagingService: Got Remote Message from FCM
```
A continuación, se muestran los registros de carga útil y visualización. Para vínculos profundos, busca las entradas **Deep Link Delegate** o `UriAction`.
### Qué hay que comprobar
- Verifica que la carga útil del push contenga los valores esperados de `title`, `body` y cualquier vínculo profundo (`ab_uri`).
- Confirma que se registra un evento `pushClick` después de tocar.
- Si falta el evento de clic, comprueba que el delegado de tu aplicación o el controlador de notificaciones estén reenviando correctamente los eventos push al SDK de Braze.
## Mensajes dentro de la aplicación {#in-app-messages}
Los registros de mensajes dentro de la aplicación muestran el ciclo de vida completo: entrega desde el servidor, desencadenamiento basado en eventos, visualización, registro de impresiones y seguimiento de clics.
### Entrega de mensajes {#message-delivery}
Cuando un usuario inicia una sesión y es elegible para recibir un mensaje dentro de la aplicación, el SDK recibe la carga útil del mensaje desde el servidor.
Filtra las respuestas de tu punto de conexión de Braze configurado (por ejemplo, sdk.iad-01.braze.com) que contengan los datos de los mensajes dentro de la aplicación.
El cuerpo de la respuesta contiene la carga útil del mensaje, que incluye:
```
"templated_message": {
"data": {
"message": "...",
"type": "HTML",
"message_close": "SWIPE",
"trigger_id": ""
},
"type": "inapp"
}
```
Busca el registro que coincide con el evento desencadenante:
```
Triggering action:
```
Esto confirma que el mensaje dentro de la aplicación se correspondía con un evento desencadenante.
### Visualización e impresión de mensajes {#message-display-and-impression}
```
In-app message ready for display:
- triggerId: (campaignId: , ...)
- extras: { ... }
```
A continuación, el registro de impresiones:
```
Logged event:
- userId:
- sessionId:
- data: inAppMessageImpression(triggerIds: [...])
```
```
handleExistingInAppMessagesInStackWithDelegate:: Displaying in-app message
```
### Eventos de clic y botón {#click-and-button-events}
Cuando un usuario pulsa un botón o cierra el mensaje:
```
Logged event:
- userId:
- sessionId:
- data: inAppMessageButtonClick(triggerIds: [...], buttonId: "")
```
Si no hay más mensajes desencadenados que coincidan, también verás:
```
No matching trigger for event.
```
Este es el comportamiento esperado cuando no se configuran mensajes adicionales dentro de la aplicación para el evento.
Filtra las solicitudes a tu punto de conexión de Braze configurado (por ejemplo, sdk.iad-01.braze.com) y busca eventos con el nombre `sbc` (clic en el botón) o `si` (impresión) en el cuerpo de la solicitud.
### Qué hay que comprobar
- Si no se muestra el mensaje dentro de la aplicación, comprueba primero que se haya registrado el inicio de la sesión.
- Filtra las respuestas de tu punto de conexión de Braze configurado para confirmar que se ha entregado la carga útil del mensaje.
- Si las impresiones no se registran, comprueba que no hayas implementado un delegado `inAppMessageDisplay` personalizado que suprima el registro.
- Si aparece "No matching trigger for event", es normal e indica que no hay ningún mensaje adicional dentro de la aplicación configurado para ese evento.
## Content Cards
Los registros de Content Cards te ayudan a verificar que las tarjetas se sincronizan con el dispositivo, se muestran al usuario y que se realiza el seguimiento de las interacciones (impresiones, clics, rechazos).
### Sincronización de tarjetas {#card-sync}
Las Content Cards se sincronizan al inicio de la sesión y cuando se solicita una actualización manual. Si no hay ninguna sesión registrada, no se muestran Content Cards.
Filtra las respuestas de tu punto de conexión de Braze configurado (por ejemplo, sdk.iad-01.braze.com) que contengan los datos de la tarjeta.
El cuerpo de la respuesta contiene los datos de la tarjeta, incluyendo:
```
"cards": [
{
"id": "",
"tt": "",
"ds": "",
"tp": "short_news",
"v": 0,
"cl": 0,
"p": 1
}
]
```
Campos clave:
- `v` (visto): `0` = no visto, `1` = visto
- `cl` (clic): `0` = sin clic, `1` = clic
- `p` (fijado): `0` = no fijado, `1` = fijado
- `tp` (tipo): `short_news`, `captioned_image`, `classic`, etc.
```
Requesting content cards sync.
```
A continuación, se envía una solicitud POST al punto de conexión de Braze que hayas configurado (por ejemplo, sdk.iad-01.braze.com) con información sobre el usuario y el dispositivo.
### Impresiones, clics y rechazos {#impressions-clicks-and-dismissals}
**Impresión:**
```
Logged event:
- userId:
- sessionId:
- data: contentCardImpression(cardIds: [...])
```
**Clic:**
```
Logged event:
- userId:
- sessionId:
- data: contentCardClick(cardIds: [...])
```
Si la tarjeta tiene una URL, también verás:
```
Opening '':
- channel: contentCard
- useWebView: true
```
**Rechazo:**
```
Logged event:
- userId:
- sessionId:
- data: contentCardDismissed(cardIds: [...])
```
Filtra las solicitudes a tu punto de conexión de Braze configurado (por ejemplo, sdk.iad-01.braze.com) y busca los nombres de los eventos en el cuerpo de la solicitud:
- `cci` — Impresión de Content Card
- `ccc` — Clic en Content Card
- `ccd` — Content Card descartada
### Qué hay que comprobar
- **No se muestran tarjetas**: Verifica que se haya registrado el inicio de la sesión. Las Content Cards requieren una sesión activa para sincronizarse.
- **Faltan tarjetas para los nuevos usuarios**: Es posible que los nuevos usuarios no vean las Content Cards en su primera sesión hasta la siguiente sesión. Este es el comportamiento esperado.
- **La tarjeta supera el límite de tamaño**: Las Content Cards de más de 2 KB no se muestran y el mensaje se cancela.
- **La tarjeta persiste después de detener la campaña**: Comprueba que la sincronización se haya completado después de detener la campaña. Las Content Cards se eliminan del dispositivo después de una sincronización correcta. Al detener una campaña, asegúrate de que la opción para eliminar las tarjetas activas de las fuentes de los usuarios esté seleccionada.
## Vínculos profundos {#deep-links}
Los registros de vínculos profundos aparecen en las notificaciones push, los mensajes dentro de la aplicación y las Content Cards. La estructura del registro es coherente independientemente del canal de origen.
Cuando el SDK procesa un vínculo profundo:
```
Opening '':
- channel:
- useWebView: false
- isUniversalLink: false
- extras: { ... }
```
Donde `` es uno de los siguientes: `notification`, `inAppMessage` o `contentCard`.
Para los vínculos profundos, busca las entradas **Deep Link Delegate** o **UriAction** en Logcat. Para probar la resolución de vínculos profundos de forma independiente, ejecuta el siguiente comando:
```bash
adb shell am start -W -a android.intent.action.VIEW -d "" ""
```
Esto confirma si el vínculo profundo se resuelve correctamente fuera del SDK de Braze.
### Qué hay que comprobar
- Comprueba que la URL del vínculo profundo coincide con la que configuraste en la campaña.
- Si el vínculo profundo funciona desde un canal (por ejemplo, push), pero no desde otro (por ejemplo, Content Cards), comprueba que la implementación del manejo de vínculos profundos sea compatible con todos los canales.
- En iOS, los enlaces universales requieren un manejo adicional. Si los enlaces universales no funcionan desde los canales de Braze, comprueba que tu aplicación implemente el protocolo `BrazeDelegate` para el manejo de URL.
- En Android, comprueba que la gestión automática de vínculos profundos esté desactivada si utilizas un controlador personalizado. De lo contrario, el controlador predeterminado podría entrar en conflicto con tu implementación.
## Identificación del usuario {#user-identification}
Cuando se asigna un `external_id` a un usuario, el SDK registra un evento de cambio de usuario.
```
changeUser called with:
```
Aspectos clave que debes saber:
- Llama a `changeUser` tan pronto como el usuario inicie sesión; cuanto antes, mejor.
- Si un usuario cierra sesión, no hay forma de llamar a `changeUser` para revertirlo a un usuario anónimo.
- Si no deseas usuarios anónimos, llama a `changeUser` durante el inicio de la sesión o el inicio de la aplicación.
Filtra las solicitudes a tu punto de conexión de Braze configurado (por ejemplo, sdk.iad-01.braze.com) y busca la identificación del usuario en el cuerpo de la solicitud:
```
"user_id": ""
```
## Solicitudes de red {#network-requests}
Los registros detallados incluyen todos los detalles de las solicitudes y respuestas HTTP para la comunicación del SDK con los servidores de Braze. Son útiles para diagnosticar problemas de conectividad.
### Estructura de la solicitud {#request-structure}
Filtra las solicitudes a tu punto de conexión de Braze configurado (por ejemplo, sdk.iad-01.braze.com). La estructura de la solicitud incluye:
```
[http] request POST:
- Headers:
- Content-Type: application/json
- X-Braze-Api-Key:
- X-Braze-Req-Attempt: 1
- X-Braze-Req-Tokens-Remaining:
- Body: { ... }
```
```
Making request(id = ) to
```
### Qué hay que comprobar
- **Clave de API**: Verifica que `X-Braze-Api-Key` coincida con la clave de API de tu espacio de trabajo.
- **Punto de conexión**: Confirma que la URL de la solicitud coincide con el punto de conexión del SDK que has configurado.
- **Intentos de reintento**: Un valor de `X-Braze-Req-Attempt` superior a 1 indica que el SDK está reintentando una solicitud fallida, lo que puede indicar problemas de conectividad.
- **Límite de velocidad**: `X-Braze-Req-Tokens-Remaining` muestra los tokens de solicitud restantes. Un recuento bajo puede indicar que el SDK se está acercando a los límites de velocidad.
- **Solicitudes pendientes**: En Android, si no ves una solicitud al punto de conexión de Braze después del inicio de la sesión, verifica tu clave de API y la configuración del punto de conexión.
## Abreviaturas comunes de eventos {#common-event-abbreviations}
En las cargas útiles de registros detallados, Braze utiliza nombres de eventos abreviados. Aquí tienes una referencia:
| Abreviatura | Evento |
|---|---|
| `ss` | Inicio de la sesión |
| `se` | Fin de la sesión |
| `si` | Impresión de mensaje dentro de la aplicación |
| `sbc` | Clic en el botón de mensaje dentro de la aplicación |
| `cci` | Impresión de Content Card |
| `ccc` | Clic en Content Card |
| `ccd` | Descarte de Content Card |
| `lr` | Ubicación registrada |
{: .reset-td-br-1 .reset-td-br-2 aria-label="Abreviaturas comunes de eventos" }
## Solución de problemas {#troubleshooting}
### ¿Cuándo puede un usuario tener 0 sesiones registradas en su perfil? {#when-might-a-user-have-0-sessions-recorded-against-their-profile}
Un perfil de usuario puede mostrar 0 sesiones cuando importas al usuario a través de la REST API ([`/users/track`](https://www.braze.com/docs/es/es/api/endpoints/user_data/post_user_track)) o mediante importación CSV sin los campos **First session** o **Last session**. Las sesiones se registran cuando los usuarios interactúan con tu aplicación a través del SDK. Para más detalles, consulta [El perfil de usuario tiene 0 sesiones](https://www.braze.com/docs/es/es/developer_guide/analytics/tracking_sessions#user-profile-has-0-sessions).
### Discrepancias en los datos de usuario al usar el SDK y la REST API juntos {#user-data-discrepancies-when-using-the-sdk-and-rest-api-together}
Cuando usas el SDK y la REST API al mismo tiempo, las condiciones de carrera pueden causar discrepancias en los datos. Después de llamar a `changeUser()`, permite que el SDK vacíe los datos pendientes antes de realizar llamadas críticas a la REST API, evita agrupar actualizaciones sensibles al tiempo y considera agregar un breve retraso entre las solicitudes del SDK y de la API. Para conocer el comportamiento de `changeUser()`, consulta [Cómo funciona changeUser()](https://www.braze.com/docs/es/es/developer_guide/analytics/setting_user_ids#how-changeuser-works).
### Los datos no llegan a Braze {#data-not-reaching-braze}
Si los datos no llegan a Braze, confirma que tu firewall permite el tráfico saliente a los puntos de conexión de la API de Braze y a los proveedores de CDN. Ejecuta una prueba MTR y usa [Fastly Debug](https://www.fastly-debug.com/) mientras ocurre el problema. Para la lista de permitidos y la solución de problemas de conectividad, consulta [Problemas de conectividad de red de la API](https://www.braze.com/docs/es/es/api/network_connectivity_issues).
# Límites de velocidad del SDK de Braze
Source: /docs/es/developer_guide/sdk_integration/rate_limits/index.md
# Límites de velocidad del SDK de Braze {#braze-sdk-rate-limits}
> Descubre el límite de velocidad inteligente del SDK de Braze en el lado del cliente, que optimiza la duración de la batería, reduce el uso de ancho de banda y garantiza una entrega de datos fiable.
## Comprender los límites de velocidad del SDK {#understanding-sdk-rate-limits}
El límite de velocidad del SDK de Braze utiliza las siguientes características para optimizar el rendimiento, minimizar el consumo de batería, reducir el uso de datos y garantizar una entrega de datos fiable:
### Procesamiento asíncrono {#asynchronous-processing}
El SDK de Braze utiliza un algoritmo de contenedor de tokens para establecer el límite de velocidad. Este enfoque permite ráfagas de actividad mientras se mantiene el control de la tasa a largo plazo. En lugar de procesar las solicitudes en una cola estricta, el contenedor de tokens funciona de forma asíncrona:
- **Generación de tokens**: Los tokens se reponen a una tasa constante en el contenedor.
- **Gestión de solicitudes**: Cualquier llamada al SDK que llegue cuando haya un token disponible se procesa inmediatamente, independientemente de cuándo hayan llegado otras llamadas.
- **Sin orden estricto**: Las solicitudes no esperan en fila; varias llamadas pueden competir por el siguiente token disponible.
- **Gestión de ráfagas**: Se permiten breves ráfagas de actividad si hay suficientes tokens disponibles en el momento de las solicitudes.
- **Control de velocidad**: El rendimiento a largo plazo está limitado por la tasa de reposición constante de tokens.
Este flujo asíncrono ayuda al SDK a responder rápidamente a la capacidad de red disponible, al tiempo que mantiene unos niveles de tráfico generales predecibles.
### Limitación de velocidad adaptativa {#adaptive-rate-limiting}
El SDK de Braze puede ajustar los límites de velocidad en tiempo real para proteger la infraestructura de red y mantener un rendimiento óptimo. Este enfoque:
- **Evita la sobrecarga**: Ajusta los límites para evitar la congestión de la red.
- **Optimiza el rendimiento**: Mantiene el buen funcionamiento del SDK en condiciones variables.
- **Responde a las condiciones**: Se adapta en función de la red actual y los patrones de uso.
**Note:**
Dado que los límites se adaptan en tiempo real, no se proporcionan los tamaños exactos de los contenedores ni los valores estáticos. Pueden variar en función de las condiciones de la red y del uso.
### Optimizaciones de red {#networking-optimizations}
El SDK de Braze incluye varios comportamientos integrados para mejorar la eficiencia, reducir el consumo de batería y gestionar las diferentes condiciones de la red:
- **Procesamiento automático por lotes**: Pone en cola los eventos y los envía en lotes eficientes.
- **Comportamiento consciente de la red**: Ajusta las tasas de envío en función de la calidad de la conexión.
- **Optimización de la batería**: Minimiza las activaciones de radio y las llamadas de red.
- **Degradación gradual**: Mantiene la funcionalidad en condiciones de red deficientes.
- **Conciencia de segundo plano/primer plano**: Optimiza el comportamiento a medida que cambia el ciclo de vida de la aplicación.
## Buenas prácticas {#best-practices}
Sigue estas prácticas recomendadas para evitar problemas relacionados con los límites de velocidad:
| Haz esto | No esto |
| --- | --- |
| Realiza un seguimiento de las acciones y los hitos significativos de los usuarios | Realizar un seguimiento de cada interacción menor o evento de la interfaz de usuario |
| Actualiza el contenido solo cuando sea necesario | Actualizar el contenido con cada acción del usuario (como los eventos de desplazamiento) |
| Deja que el SDK se encargue automáticamente del procesamiento por lotes | Forzar la transmisión inmediata de datos (a menos que sea absolutamente necesario) |
| Céntrate en los eventos que aportan valor a los análisis | Llamar a los métodos del SDK en rápida sucesión sin tener en cuenta la frecuencia |
{: .reset-td-br-1 .reset-td-br-2 aria-label="Buenas prácticas" }
## Obtener ayuda {#getting-help}
Si tienes problemas con el límite de velocidad del SDK, revisa los siguientes métodos de red:
- `requestImmediateDataFlush()`
- `requestContentCardsRefresh()`
- `refreshFeatureFlags()`
- `logCustomEvent()`
- `logPurchase()`
Cuando te pongas en contacto con [soporte de Braze](https://www.braze.com/docs/es/es/user_guide/administer/personal/braze_support), incluye los siguientes detalles para cada uno de los métodos de red del SDK que utilices:
```plaintext
Method name:
Frequency:
[Describe how often this is called, e.g., at every app launch, once per session]
Trigger/context:
[Describe what causes it to be called, e.g., button click, scroll event]
Code snippet:
[Paste the exact code where this method is called, one snippet for each time it is called]
Patterns in user flow that may cause bursts or excessive calls:
[Describe here]
```
# Integra Braze con las aplicaciones ChatGPT
Source: /docs/es/developer_guide/sdk_integration/chatgpt_apps/index.md
# Integra Braze con las aplicaciones ChatGPT {#integrate-braze-with-chatgpt-apps}
> Esta guía explica cómo integrar Braze con las aplicaciones ChatGPT para habilitar análisis y registro de eventos dentro de aplicaciones basadas en inteligencia artificial.
{: style="float:right;max-width:30%;border:none;" }
## Resumen {#overview}
Las aplicaciones ChatGPT proporcionan una potente plataforma para crear aplicaciones conversacionales de IA. Al integrar Braze con tu aplicación ChatGPT, puedes seguir manteniendo el control de los datos propios en la era de la IA, incluyendo cómo:
- Realizar un seguimiento de la interacción y el comportamiento de los usuarios dentro de tu aplicación ChatGPT (por ejemplo, identificando qué preguntas o características de chat utilizan tus clientes).
- Segmentar y reorientar Campaigns de Braze basándote en patrones de interacción de IA (como el envío por correo electrónico a usuarios que hayan utilizado el chat más de tres veces por semana).
### Ventajas principales {#key-benefits}
- **Controla el recorrido del cliente:** Mientras los usuarios interactúan con tu marca a través de ChatGPT, tú mantienes la visibilidad de su comportamiento, preferencias y patrones de interacción. Estos datos se transfieren directamente a los perfiles de usuario de Braze, no solo a los análisis de la plataforma de IA.
- **Retargeting multiplataforma:** Realiza un seguimiento de las interacciones de los usuarios en tu aplicación ChatGPT y reoriéntalos a través de tus canales propios (correo electrónico, SMS, notificaciones push, mensajes dentro de la aplicación) con campañas personalizadas basadas en sus patrones de uso de la IA.
- **Devuelve contenido promocional 1:1 a las conversaciones de ChatGPT:** Entrega [mensajes dentro de la aplicación](https://www.braze.com/docs/es/es/user_guide/channels/in_app_messages) de Braze, [Content Cards](https://www.braze.com/docs/es/es/user_guide/channels/content_cards) y mucho más directamente dentro de tu experiencia ChatGPT utilizando los componentes personalizados de la interfaz de usuario conversacional que tu equipo ha creado para tu aplicación.
- **Atribución de ingresos:** Realiza un seguimiento de las compras y conversiones que se originan en las interacciones con la aplicación ChatGPT.
## Requisitos previos {#prerequisites}
Antes de integrar Braze con tu aplicación ChatGPT, debes disponer de lo siguiente:
- Una nueva aplicación web y una clave de API en tu espacio de trabajo de Braze
- Una [aplicación ChatGPT](https://openai.com/index/introducing-apps-in-chatgpt/) creada en la plataforma OpenAI ([aplicación de muestra de OpenAI](https://github.com/openai/openai-apps-sdk-examples))
# ChatGPT app integration
## Setup
### Step 1: Get the Braze integration file
Copy the `braze.js` file from our [ChatGPT apps integration repository](https://github.com/braze-inc/chatgpt-apps-braze-integration/blob/main/src/braze/braze.ts) to your project. This file contains all the necessary Braze SDK configuration and helper functions.
### Step 2: Install dependencies
Install our Web SDK for Braze's most up-to-date set of features:
**For client-side integration:**
```bash
npm install @braze/web-sdk
```
## Implementation
There are two ways to integrate Braze with your ChatGPT app depending on your use case:
### Client-side integration (custom widgets)
**Tip:**
**Recommended Approach:** This method enables rich messaging experiences and real-time user interaction tracking within your ChatGPT app widgets.
For displaying Braze messaging and tracking user interactions within your custom ChatGPT app widgets, use the Web SDK integration. A full messaging example can be found in our sample repository [here](https://github.com/braze-inc/chatgpt-apps-braze-integration/tree/main/src/inbox).
#### Configure widget metadata
Add the following metadata to your MCP server file to allow Braze domains, ensuring to update the CDN domain based on [your region](https://www.braze.com/docs/es/es/developer_guide/platforms/web/content_security_policy):
```javascript
"openai/widgetCSP": {
connect_domains: ["https://YOUR-SDK-ENDPOINT"],
resource_domains: [
"https://appboy-images.com",
"https://braze-images.com",
"https://cdn.braze.eu",
"https://use.fontawesome.com"
],
}
```
Replace `YOUR-SDK-ENDPOINT` with your actual Braze SDK endpoint.
#### Set up the useBraze hook
```javascript
import { useBraze } from "./utils/braze";
function YourWidget() {
const braze = useBraze({
apiKey: "your-braze-api-key",
baseUrl: "your-braze-endpoint.braze.com",
});
useEffect(() => {
if (!braze.isInitialized) {
return;
}
// Set user identity
braze.changeUser("user-id-123");
// Log widget interactions
braze.logCustomEvent("viewed_pizzaz_list");
}, [braze.isInitialized]);
return (
// Your widget JSX
);
}
```
#### Display Braze Content Cards
```javascript
const [cards, setCards] = useState([]);
useEffect(() => {
// Get cached content cards
setCards(braze.getCachedContentCards()?.cards ?? []);
// Subscribe to content card updates
braze.subscribeToContentCardsUpdates((contentCards) => {
setCards(contentCards.cards);
});
// Open session
braze.openSession();
return () => {
braze.removeAllSubscriptions();
}
}, []);
```
#### Track widget events
```javascript
// Track user interactions within your widget
const handleButtonClick = () => {
braze.logCustomEvent("widget_button_clicked", {
button_type: "save_list",
widget_name: "pizza_list"
});
};
const handleItemInteraction = (itemId) => {
braze.logCustomEvent("item_interacted", {
item_id: itemId,
interaction_type: "view_details"
});
};
```
### Server-side integration (MCP server)
If you also need a server-side integration for messaging functionality on your MCP server, contact `mcp-product@braze.com`. For tracking events and purchases from your MCP server, use our [REST API](https://www.braze.com/docs/es/es/api/home).
# Acerca de la gestión de versiones para el SDK de Braze
Source: /docs/es/developer_guide/sdk_integration/version_management/index.md
# Acerca de la gestión de versiones {#about-version-management}
> Obtén información sobre la gestión de versiones del SDK de Braze para que tu aplicación esté siempre actualizada con las últimas características y mejoras de calidad. Dado que es posible que las versiones anteriores del SDK no reciban los últimos parches, correcciones de errores o soporte, te recomendamos que lo mantengas siempre actualizado como parte de tu ciclo de desarrollo continuo.
## Recomendaciones sobre versiones {#versioning-recommendations}
Todos los SDK de Braze cumplen con la [especificación de versionado semántico (SemVer)](https://semver.org/), por lo que, dado un número de versión `MAJOR.MINOR.PATCH`, recomendamos lo siguiente:
| Versión | Acerca de esta versión | Recomendación |
|-------|------------------|--------------|
| `PATCH` | Las actualizaciones nunca son disruptivas e incluyen correcciones de errores importantes. Siempre serán seguras. | Siempre debes intentar actualizar inmediatamente a la última versión del parche de tu versión principal y secundaria actual. |
| `MINOR` | Las actualizaciones nunca son disruptivas e incluyen nuevas funcionalidades. Nunca requerirán cambios en el código de tu aplicación. | Aunque no es necesario que lo hagas inmediatamente, debes actualizar a la última versión menor de tu versión principal actual lo antes posible.
| `MAJOR` | Las actualizaciones son cambios disruptivos y pueden requerir modificaciones en el código de tu aplicación. | Dado que esto puede requerir cambios en el código, actualiza a la última versión principal en el plazo que mejor se adapte a tu equipo. |
{: .reset-td-br-1 .reset-td-br-2 .reset-td-br-3 aria-label="Recomendaciones sobre versiones" }
**Note:**
A veces, las nuevas actualizaciones del sistema operativo Android o Apple requieren cambios en el SDK de Braze. Para garantizar que tu aplicación sea compatible con los teléfonos más nuevos, es importante que mantengas tu SDK actualizado.
## Recibir notificaciones de nuevas versiones {#getting-notified-of-new-releases}
Para recibir notificaciones automáticas cuando se publique una nueva versión del SDK, puedes seguir el repositorio de GitHub de cualquier SDK de Braze:
1. Ve al repositorio de GitHub del SDK (por ejemplo, [braze-android-sdk](https://github.com/braze-inc/braze-android-sdk), [braze-swift-sdk](https://github.com/braze-inc/braze-swift-sdk) o [braze-web-sdk](https://github.com/braze-inc/braze-web-sdk)).
2. Haz clic en **Watch** en la esquina superior derecha.
3. Haz clic en **Custom**, selecciona **Releases** y haz clic en **Apply**.
Recibirás una notificación de GitHub (y un correo electrónico, dependiendo de tu [configuración de notificaciones](https://github.com/settings/notifications)) cada vez que se publique una nueva versión. Para consultar la lista completa de repositorios del SDK, visita [Referencias, repositorios y aplicaciones de ejemplo](https://www.braze.com/docs/es/es/developer_guide/references).
## Acerca de los problemas conocidos {#about-known-issues}
Para garantizar que nuestros cambios no afecten a tus procesos de compilación, **nunca modificaremos ni eliminaremos una versión después de que se haya publicado en un sistema de distribución**—incluso si esa versión en concreto tiene problemas conocidos.
En estos casos, documentaremos el problema en el [registro de cambios del SDK de Braze](https://www.braze.com/docs/es/es/developer_guide/changelogs) y, a continuación, lanzaremos un nuevo parche para las versiones principales o secundarias afectadas lo antes posible.
# Guía de actualización a Android 13
Source: /docs/es/developer_guide/platforms/android/android_13/index.md
# Upgrading to Android 13
> This guide describes relevant changes introduced in Android 13 (2022) and the required upgrade steps for your Braze Android SDK integration.
Refer to the [Android 13 developer documentation](https://developer.android.com/about/versions/13) for a full migration guide.
## Android 13 Braze SDK
To prepare for Android 13, please upgrade your Braze SDK to the [latest version (v21.0.0+)](https://github.com/braze-inc/braze-android-sdk/blob/master/CHANGELOG.md#2300). Doing so will give you access to our new ["no-code" push primer feature](https://www.braze.com/docs/es/es/user_guide/message_building_by_channel/push/best_practices/push_primer_messages/).
## Changes in Android 13
### Push permission {#push-permission}
Android 13 introduces a [major change](https://developer.android.com/about/versions/13/changes/notification-permission) in how users manage apps that send push notifications. In Android 13, apps are required to obtain permission before push notifications can be shown.
{: style="float:right;max-width:430px;width:50%;margin-left:15px;border:0"}
This new permission follows a similar pattern to iOS and Web push, where you only have one attempt to obtain permission. If a user chooses `Don't Allow` or dismisses the prompt, your app cannot ask for permission again.
Note that apps are granted an [exemption](https://developer.android.com/about/versions/13/changes/notification-permission#eligibility) for users who previously had push notifications enabled prior to updating to Android 13. These users [will remain eligible](https://developer.android.com/about/versions/13/changes/notification-permission#existing-apps) to receive push when they update to Android 13 without having to request permission.
#### Permission prompt timing {#push-permission-timing}
**Targeting Android 13**
Apps targeting Android 13 can control when to request permission and show the native push prompt.
If your user upgrades from Android 12 to 13, your app was previously installed, and you were already sending push, the system automatically pre-grants the new notification permission to all eligible apps. In other words, these apps can continue to send notifications to users, and users don't see a runtime permission prompt.
For more details on this see Android's Developer Documentation for [effects on updates to existing apps](https://developer.android.com/about/versions/13/changes/notification-permission#existing-apps).
**Targeting Android 12 or earlier**
If your app does not yet target Android 13, then a new user on Android 13 installs your app, they will automatically see a push permission prompt when your app creates its first notification channel (via `notificationManager.createNotificationChannel`). Users who already have your app installed and then upgrade to Android 13 are never shown a prompt and are automatically granted push permission.
**Note:**
Braze SDK v23.0.0 automatically creates a default notification channel if one does not already exist when a push notification is received. If you don't target Android 13, this will cause the push permission prompt to be shown, which is required to show the notification.
## Preparing for Android 13 {#next-steps}
It is strongly recommended that your app targets Android 13 in order to control when users are prompted for push permission.
This will allow you to optimize your [push opt-in rates](https://www.braze.com/resources/articles/android-13-developer-preview-push-opt-ins-arrive-for-android-apps) by prompting users at more appropriate times and will lead to a better user experience in how and when your app asks for push permission.
To start using our new ["no-code" push primer feature](https://www.braze.com/docs/es/es/user_guide/message_building_by_channel/push/best_practices/push_primer_messages/), upgrade your Android SDK to the [latest version (v23.0.0+)](https://github.com/braze-inc/braze-android-sdk/blob/master/CHANGELOG.md#2300).
# Actualizar a iOS 18
Source: /docs/es/developer_guide/platforms/swift/ios_18/index.md
# Actualizar a iOS 18 {#upgrading-to-ios-18}
> ¿Tienes curiosidad por saber cómo se está preparando Braze para el próximo lanzamiento de iOS? Este artículo resume nuestra información sobre la versión de iOS 18 para ayudarte a crear una experiencia fluida para ti y tus usuarios.
La [WWDC](https://developer.apple.com/wwdc24/) de Apple tuvo lugar del 9 al 11 de junio de 2024. Obtén más información sobre sus anuncios en nuestra [entrada de blog](https://www.braze.com/resources/articles/wwdc-announcements-bring-apple-intelligence-rcs-and-more-to-ios-18), o sigue leyendo para saber cómo puedes aprovechar iOS 18 con Braze.
## Cambios en iOS 18 {#changes-in-ios-18}
### Live Activities en Apple Watch {#live-activities-on-apple-watch}
Las [Live Activities](https://www.braze.com/docs/es/es/developer_guide/push_notifications/live_notifications?sdktab=swift) serán compatibles con watchOS 11. No se requiere ninguna configuración adicional. Sin embargo, Apple ofrece la opción de personalizar la interfaz del reloj.
### Apple Vision Pro
El Vision Pro ya está disponible en China, Japón, Singapur, Australia, Canadá, Francia, Alemania y Reino Unido. Consulta nuestro blog para ver cómo [Braze es compatible con visionOS](https://www.braze.com/resources/articles/building-braze-a-new-era-of-customer-engagement-braze-announces-visionos-support).
### Notificaciones del iPhone en macOS {#iphone-notifications-on-macos}
La nueva característica de [duplicación del iPhone](https://www.apple.com/newsroom/2024/06/macos-sequoia-takes-productivity-and-intelligence-on-mac-to-new-heights/) de Apple permite a los usuarios recibir notificaciones del iPhone en sus dispositivos macOS. Ten en cuenta que algunos tipos de medios, como las imágenes de historias push y los GIF, no son compatibles, ya que no se pueden representar como una notificación de macOS.
### Apple Intelligence
[Apple Intelligence](https://developer.apple.com/documentation/Updates/Apple-Intelligence) ya está disponible para dispositivos con iOS 18.1 y versiones posteriores.
Como usuario de Braze, la nueva característica más importante que debes conocer son los [resúmenes de notificaciones](https://support.apple.com/en-us/108781), que utilizan el procesamiento en el dispositivo para agrupar y generar automáticamente resúmenes de texto de notificaciones push relacionadas enviadas desde una única aplicación. Los usuarios finales pueden tocar para ampliar un resumen y ver cada notificación push tal y como se envió originalmente.
Debido a cómo se generan estos resúmenes, no tendrás control sobre su comportamiento específico ni sobre el texto generado. Sin embargo, esto no afectará a ninguna característica de análisis o informes, como el seguimiento de clics push.

# Compatibilidad con visionOS
Source: /docs/es/developer_guide/platforms/swift/visionos/index.md
# Compatibilidad con visionOS {#visionos-support}
> A partir de [Braze Swift SDK 8.0.0](https://github.com/braze-inc/braze-swift-sdk/blob/main/CHANGELOG.md#800), puedes aprovechar Braze con [visionOS](https://developer.apple.com/visionos/), la plataforma de computación espacial de Apple para el Apple Vision Pro. Para ver una aplicación visionOS de ejemplo que utiliza Braze, consulta [Aplicaciones de ejemplo](https://www.braze.com/docs/es/es/developer_guide/references?tab=swift).
## Características totalmente compatibles {#fully-supported-features}
La mayoría de las características disponibles en iOS también están disponibles en visionOS, entre ellas:
- Análisis (sesiones, eventos personalizados, compras, etc.)
- Mensajería dentro de la aplicación (modelos de datos e interfaz de usuario)
- Content Cards (modelos de datos e interfaz de usuario)
- Notificaciones push (visibles para el usuario con botones de acción y notificaciones silenciosas)
- Conmutadores de características
- Análisis de ubicación
## Características parcialmente compatibles {#partially-supported-features}
Algunas características solo son parcialmente compatibles con visionOS, pero es probable que Apple las aborde en el futuro:
- Notificaciones push enriquecidas
- Se admiten imágenes.
- Los GIF y videos muestran la miniatura de vista previa, pero no se pueden reproducir.
- No se admite la reproducción de audio.
- Push Stories
- Se puede desplazar y seleccionar la página de Push Stories.
- No es posible navegar entre páginas de Push Stories utilizando **Next**.
## Características no compatibles {#unsupported-features}
- No se admite la monitorización de geovallas. Apple no ha puesto a disposición de visionOS las API de Core Location para la monitorización de regiones.
- No se admiten las actividades en vivo. Actualmente, ActivityKit solo está disponible en iOS y iPadOS.
# Guía de actualización del SDK de iOS 14
Source: /docs/es/developer_guide/platforms/swift/_archived_updates/ios_14/index.md
# Guía de actualización del SDK de iOS 14 {#ios-14-sdk-upgrade-guide}
> Esta guía describe los cambios relacionados con Braze introducidos en iOS 14 y los pasos de actualización necesarios para tu integración del SDK de Braze para iOS. Para obtener una lista completa de las nuevas actualizaciones de iOS 14, consulta la [página de Apple sobre iOS 14](https://www.apple.com/ios/ios-14/).
**Tip:**
A partir de iOS 14.5, la recopilación de **IDFA** y el [intercambio de ciertos datos](https://developer.apple.com/app-store/user-privacy-and-data-use/#permission-to-track) requerirán la nueva solicitud de permiso del framework [AppTrackingTransparency](https://developer.apple.com/documentation/apptrackingtransparency) ([Más información sobre IDFA](#idfa)).
## Resumen de los cambios de última hora de iOS 14 {#summary-of-ios-14-breaking-changes}
- Las aplicaciones destinadas a iOS 14 / Xcode 12 deben utilizar nuestra [versión oficial de iOS 14](https://github.com/Appboy/appboy-ios-sdk/releases/tag/3.27.0).
- [iOS ya no admite](https://developer.apple.com/documentation/corelocation/cllocationmanager/3600215-accuracyauthorization) geovallas para los usuarios que elijan el nuevo permiso de _ubicación aproximada_.
- El uso de las características de segmentación "Última ubicación conocida" requerirá una actualización a Braze iOS SDK v3.26.1+ para la compatibilidad con el permiso de _ubicación aproximada_. Ten en cuenta que si utilizas Xcode 12, tendrás que actualizarte al menos a la versión 3.27.0.
- A partir de iOS 14.5, la recopilación de IDFA y el [intercambio de ciertos datos](https://developer.apple.com/app-store/user-privacy-and-data-use/#permission-to-track) requieren la nueva solicitud de permiso del framework [AppTrackingTransparency](https://developer.apple.com/documentation/apptrackingtransparency).
- Si utilizas el campo "Seguimiento de anuncios habilitado" para la segmentación de campañas o el análisis, tendrás que actualizar a Xcode 12 y utilizar el nuevo framework AppTrackingTransparency para informar del estado de adhesión voluntaria de los usuarios.
## Resumen de la actualización {#upgrade-summary}
| Si tu aplicación utiliza: | Recomendación de actualización | Descripción |
|------|--------|---|
| Xcode 12 | **Actualiza a iOS SDK v3.27 o posterior** | Los clientes que utilicen Xcode 12 deben usar v3.27.0+ para ser compatibles. Si tienes algún problema o pregunta relacionados con nuestra compatibilidad con iOS 14, abre una nueva [consulta en GitHub](https://github.com/Appboy/appboy-ios-sdk/issues). |
| Ubicación más reciente | **Actualiza a iOS SDK v3.26.1 o posterior** | Si utilizas la función de segmentación por ubicación más reciente y sigues utilizando Xcode 11, deberías actualizarte al menos al SDK de iOS v3.26.1, que es compatible con la nueva característica de _ubicación aproximada_. Los SDK más antiguos no podrán recopilar la ubicación de forma fiable cuando un usuario actualice a iOS 14 _y_ elija ubicación aproximada.
Aunque tu aplicación no esté orientada a iOS 14, es posible que tus usuarios actualicen a iOS 14 y empiecen a utilizar la nueva opción de precisión de ubicación. Las aplicaciones que no se actualicen al SDK de iOS v3.26.1+ no podrán recopilar de forma fiable atributos de ubicación cuando los usuarios faciliten su _ubicación aproximada_ en dispositivos iOS 14. |
| ID de seguimiento de anuncios IDFA | **Puede ser necesaria la actualización a Xcode 12 y al SDK de iOS v3.27** | En algún momento de 2021, Apple empezará a exigir una solicitud de permiso para la recopilación de IDFA. En ese momento, las aplicaciones deberán actualizarse a Xcode 12 y utilizar el nuevo framework `AppTrackingTransparency` para poder seguir recopilando IDFA. Si pasas IDFA al SDK de Braze, también deberás actualizarte a la versión 3.27.0+ en ese momento.
Las aplicaciones que no utilicen las nuevas API de iOS 14 no podrán recopilar IDFA, y en su lugar recopilarán un ID en blanco (`00000000-0000-0000-0000-000000000000`) después de que Apple empiece a aplicar este cambio en 2021. Para más información sobre si esto se aplica o no a tu aplicación, consulta [los detalles del IDFA](#idfa). |
{: .reset-td-br-1 .reset-td-br-2 .reset-td-br-3 aria-label="Resumen de la actualización" }
## Cambios de comportamiento en iOS 14 {#ios-14-behavior-changes}
### Permiso de ubicación aproximada {#approximate-location-permission}
{: style="float:right;max-width:45%;margin-left:15px;"}
#### Resumen {#overview}
Al solicitar permiso de ubicación, los usuarios tendrán ahora la opción de proporcionar su _ubicación exacta_ (comportamiento anterior), o la nueva _ubicación aproximada_. La ubicación aproximada devolverá un radio mayor en el que se encuentra el usuario, en lugar de sus coordenadas exactas.
#### Geovallas {#geofences}
[iOS ya no admite](https://developer.apple.com/documentation/corelocation/cllocationmanager/3600215-accuracyauthorization) geovallas para los usuarios que elijan el nuevo permiso de _ubicación aproximada_. Aunque no se requieren actualizaciones para tu integración del SDK de Braze, es posible que tengas que ajustar tu [estrategia de marketing basada en la ubicación](https://www.braze.com/blog/geofencing-geo-targeting-beaconing-when-to-use/) para las campañas que dependen de geovallas.
#### Segmentación por ubicación {#location-tracking}
Para seguir recopilando la _última ubicación conocida_ de los usuarios cuando se concede la _ubicación aproximada_, tu aplicación tendrá que actualizarse al menos a la versión 3.26.1 del SDK de Braze para iOS. Ten en cuenta que la ubicación será menos precisa, y según nuestras pruebas ha sido de más de 12.000 metros (7+ millas). Cuando utilices las opciones de segmentación por _última ubicación conocida_ en el dashboard de Braze, asegúrate de aumentar el radio de la ubicación para tener en cuenta las nuevas _ubicaciones aproximadas_ (recomendamos al menos un radio de 1 milla/1,6 km).
Las aplicaciones que no actualicen el SDK de Braze para iOS al menos a la versión 3.26.1 ya no podrán utilizar el seguimiento de ubicación cuando se conceda _una ubicación aproximada_ en dispositivos con iOS 14.
Los usuarios que ya hayan concedido acceso a la ubicación seguirán proporcionando _una ubicación precisa_ tras la actualización.
Ten en cuenta que si utilizas Xcode 12, tendrás que actualizarte al menos a la versión 3.27.0.
Para obtener más información sobre la ubicación aproximada, consulta el video WWDC de Apple [sobre las novedades en materia de ubicación](https://developer.apple.com/videos/play/wwdc2020/10660/).
### IDFA y transparencia en el seguimiento de las aplicaciones {#idfa}
#### Resumen
IDFA (Identificador para Anunciantes) es un identificador proporcionado por Apple para su uso con socios de publicidad y atribución para el seguimiento entre dispositivos y está vinculado al ID de Apple de una persona.
A partir de iOS 14.5, debe mostrarse una nueva solicitud de permiso (lanzada por el nuevo framework `AppTrackingTransparency`) para recabar el consentimiento explícito del usuario para el IDFA. Esta solicitud de permiso para "rastrearte a través de aplicaciones y sitios web propiedad de otras empresas" se solicitará de forma similar a como se solicita a los usuarios su ubicación.
Si un usuario no acepta la solicitud, o si no actualizas al framework `AppTrackingTransparency` de Xcode 12, se devolverá un valor IDFA en blanco (`00000000-0000-0000-0000-000000000000`), y tu aplicación no podrá volver a consultar al usuario.
**Important:**
Estas actualizaciones de IDFA entrarán en vigor después de que los usuarios finales actualicen su dispositivo a iOS 14.5. Asegúrate de que tu aplicación utilice el nuevo `AppTransparencyFramework` con Xcode 12 si piensas recopilar IDFA.
#### Cambios en la recopilación de IDFA de Braze {#changes-to-braze-idfa-collection}
{: style="float:right;max-width:25%;margin-left:15px;border:0"}
1. Braze seguirá permitiendo que las aplicaciones _proporcionen_ el valor IDFA de un usuario al SDK de Braze.
2. La macro de compilación `ABK_ENABLE_IDFA_COLLECTION`, que compilaría condicionalmente en la recopilación automática opcional de IDFA, ya no funcionará en iOS 14 y se eliminó en 3.27.0.
3. Si utilizas el campo "Seguimiento de anuncios habilitado" para la segmentación de campañas o el análisis, tendrás que actualizar a Xcode 12 y utilizar el nuevo framework AppTrackingTransparency para informar del estado de adhesión voluntaria de tus usuarios. El motivo de este cambio es que en iOS 14, el antiguo campo [`advertisingTrackingEnabled`](https://developer.apple.com/documentation/adsupport/asidentifiermanager/1614148-advertisingtrackingenabled) siempre devolverá No.
4. Si tu aplicación ha utilizado IDFA o IDFV como ID externo de Braze, te recomendamos encarecidamente que dejes de utilizar estos identificadores y uses un UUID. Para más información sobre la migración de ID externos, consulta nuestros [puntos de conexión de la API de migración de ID externo](https://www.braze.com/docs/es/es/api/endpoints/user_data/external_id_migration).
Lee más información de Apple sobre sus [actualizaciones de privacidad](https://developer.apple.com/app-store/user-privacy-and-data-use/) y el nuevo [framework de transparencia del seguimiento de aplicaciones](https://developer.apple.com/documentation/apptrackingtransparency).
### Autorización push {#push-provisional-auth}
**Important:**
En iOS 14 no se incluyen cambios en la autorización push provisional. En una versión beta anterior de iOS 14, Apple introdujo un cambio que desde entonces se ha revertido al comportamiento anterior.
## Nuevas características de iOS 14 {#ios-14-new-features}
### Resumen de la privacidad de la aplicación y la recopilación de datos {#app-privacy}
Desde el 8 de diciembre de 2020, todos los envíos a la App Store requieren pasos adicionales para cumplir [las nuevas normas de privacidad de las aplicaciones de Apple](https://developer.apple.com/app-store/app-privacy-details/).
#### Cuestionario del portal para desarrolladores de Apple {#apple-developer-portal-questionnaire}
En el _Portal del Desarrollador de Apple_:
* Se te pedirá que rellenes un cuestionario para describir cómo recopilan datos tu aplicación o los socios de terceros.
* Se espera que el cuestionario esté siempre actualizado con tu versión más reciente en la App Store.
* El cuestionario puede actualizarse incluso sin presentar una nueva aplicación.
* Se te pedirá que pegues un enlace a la URL de la política de privacidad de tu aplicación.
Cuando rellenes tu cuestionario, consulta a tu equipo jurídico y considera cómo puede afectar a tus requisitos de divulgación el uso de Braze para los siguientes campos.
#### Recopilación de datos predeterminada de Braze {#braze-default-data-collection}
**Identificadores**: el SDK de Braze siempre recoge un identificador anónimo del dispositivo. Actualmente está configurado para el dispositivo IDFV (identificador del vendedor).
**Datos de uso**: pueden incluir datos de sesión de Braze, así como cualquier recopilación de eventos o atributos que utilices para medir la interacción con el producto.
#### Recopilación de datos opcional {#optional-data-collection}
Datos que puedes estar recopilando opcionalmente a través de tu uso de Braze:
**Ubicación**: tanto la ubicación aproximada como la ubicación precisa pueden ser recogidas opcionalmente por el SDK de Braze. Estas características están deshabilitadas de forma predeterminada.
**Información de contacto**: puede incluir eventos y atributos relacionados con la identidad del usuario.
**Compras**: puede incluir eventos y compras registradas en nombre del usuario.
**Important:**
Ten en cuenta que esta no es una lista exhaustiva. Si recoges manualmente otra información sobre tus usuarios en Braze que se aplique a otras categorías del cuestionario de privacidad de la aplicación, tendrás que revelarlas también.
Para obtener más información sobre esta característica, consulta [Privacidad y uso de datos de Apple](https://developer.apple.com/app-store/user-privacy-and-data-use/).
# Guía de actualización al SDK de iOS 15
Source: /docs/es/developer_guide/platforms/swift/_archived_updates/ios_15/index.md
# Guía de actualización del SDK de iOS 15 {#ios-15-sdk-upgrade-guide}
> Esta guía describe los cambios introducidos en iOS 15 (WWDC21) y los pasos de actualización necesarios para tu integración del SDK de Braze para iOS. Para obtener una lista completa de las nuevas actualizaciones de iOS 15, consulta [las notas de la versión de iOS 15](https://developer.apple.com/documentation/ios-ipados-release-notes/ios-ipados-15-release-notes) de Apple.
## Cambios de transparencia en las navegaciones de la IU {#transparency-changes-to-ui-navigations}
Como parte de nuestras pruebas anuales de las betas de iOS, hemos identificado un cambio realizado por Apple que hace que determinadas barras de navegación de la interfaz de usuario aparezcan transparentes en lugar de opacas. Esto será visible en iOS 15 cuando utilices la interfaz de usuario predeterminada de Braze para Content Cards, o cuando los vínculos profundos web se abran dentro de tu aplicación en lugar de en una aplicación de navegador independiente.
Para evitar este cambio visual en iOS 15, te recomendamos encarecidamente que actualices al [SDK de Braze para iOS v4.3.2](https://github.com/Appboy/appboy-ios-sdk/releases/tag/4.3.2) lo antes posible, antes de que los usuarios empiecen a actualizar su teléfono al nuevo sistema operativo iOS 15.
## Nueva configuración de notificaciones {#notification-settings}
iOS 15 introdujo nuevas características de notificación para ayudar a los usuarios a mantenerse concentrados y evitar interrupciones frecuentes a lo largo del día. Nos complace ofrecer compatibilidad con estas nuevas características. Estas características no requieren ninguna actualización adicional del SDK y solo se aplicarán a los usuarios de dispositivos iOS 15.
### Modos de enfoque {#focus-mode}
Ahora, los usuarios de iOS 15 pueden crear "modos de enfoque", es decir, perfiles personalizados que se utilizan para determinar qué notificaciones quieren que atraviesen su enfoque y se muestren de forma destacada.
{: style="float:right;max-width:25%;margin-left:15px;border:0"}
### Niveles de interrupción {#interruption-levels}
En iOS 15, las notificaciones push pueden enviarse con uno de los cuatro niveles de interrupción:
* **Pasivo** (nuevo): sin sonido, sin vibración, sin despertar la pantalla, sin atravesar la configuración de enfoque.
* **Activo** (predeterminado): permite sonido, vibración, activación de la pantalla, sin atravesar la configuración de enfoque.
* **Sensible al tiempo** (nuevo): permite sonido, vibración, activación de la pantalla, puede atravesar los controles del sistema si se permite.
* **Crítico**: permite sonido, vibración, activación de la pantalla, puede atravesar los controles del sistema y anular el interruptor del timbre.
Consulta [Opciones de notificación de iOS](https://www.braze.com/docs/es/es/user_guide/message_building_by_channel/push/ios/notification_options#interruption-level) para saber más sobre cómo configurar esta opción en las notificaciones push de iOS.
### Resumen de notificaciones {#notification-summary}
{: style="float:right;max-width:25%;margin-left:15px;border:0"}
En iOS 15, los usuarios pueden (opcionalmente) elegir determinadas horas a lo largo del día para recibir un resumen de las notificaciones. Las notificaciones que no requieran atención inmediata (como las enviadas como "pasivas" o mientras el usuario está en modo de enfoque) se agruparán para evitar interrupciones constantes a lo largo del día.
Para cada notificación que envíes, pronto podrás especificar una "puntuación de relevancia" para controlar qué notificación debe aparecer en la parte superior del resumen.
Consulta [Opciones de notificación de iOS](https://www.braze.com/docs/es/es/user_guide/message_building_by_channel/push/ios/notification_options#relevance-score) para saber más sobre cómo establecer la "puntuación de relevancia" de una notificación.
## Botones de ubicación {#location-buttons}
iOS 15 introduce una nueva y cómoda forma para que los usuarios concedan temporalmente acceso a la ubicación dentro de una aplicación.
El nuevo botón de ubicación se basa en el permiso existente "Permitir una vez", sin preguntar repetidamente a los usuarios que hacen clic varias veces en la misma sesión.
Para más información, mira el video de Apple [Meet the Location Button](https://developer.apple.com/videos/play/wwdc2021/10102/) de la Conferencia Mundial de Desarrolladores (WWDC) de este año.
**Tip:**
Esta característica te da una oportunidad extra de pedir permiso a los usuarios. A los usuarios que hayan rechazado previamente los permisos de ubicación antes de iOS 15 se les mostrará un aviso al hacer clic en el botón de ubicación como una oportunidad para restablecer el permiso desde el estado rechazado por última vez.
### Utilizar botones de ubicación con Braze {#using-location-buttons-with-braze}
No es necesaria ninguna integración adicional cuando se utilizan botones de ubicación con Braze. Tu aplicación debe seguir pasando la ubicación del usuario (una vez que haya concedido permiso) como de costumbre.
Según Apple, para los usuarios que ya hayan compartido el acceso a la ubicación en segundo plano, la opción "Mientras se utiliza la aplicación" seguirá concediendo ese nivel de permiso después de que actualicen a iOS 15.
## Apple Mail {#mail}
Este año, Apple ha anunciado muchas actualizaciones sobre el seguimiento del correo electrónico y la privacidad. Para más información, consulta la [entrada de nuestro blog](https://www.braze.com/resources/articles/9-ways-email-marketers-can-respond-to-apples-mail-privacy-protection-feature).
## Ubicación de la dirección IP en Safari {#safari-ip-address-location}
En iOS 15, los usuarios podrán configurar Safari para anonimizar o generalizar la ubicación determinada a partir de sus direcciones IP. Tenlo en cuenta cuando utilices la segmentación basada en la ubicación.
# Guía de actualización a iOS 16
Source: /docs/es/developer_guide/platforms/swift/_archived_updates/ios_16/index.md
# Guía de actualización del SDK de iOS 16 {#ios-16-sdk-upgrade-guide}
> En esta guía se describen los cambios relevantes introducidos en iOS 16 (2022) y el impacto en tu integración del SDK de Braze para iOS. Consulta las [notas de la versión de iOS 16](https://developer.apple.com/documentation/ios-ipados-release-notes/ios-ipados-16-release-notes) para obtener una guía completa de migración.
## Cambios en iOS 16 {#changes-in-ios-16}
### Notificación push web de Safari {#safari-web-push}
Apple ha anunciado dos cambios en su funcionalidad de notificación push web.
#### Notificación push web de escritorio (MacOS) {#macos-push}
Anteriormente, Apple admitía notificaciones push en macOS (escritorio) utilizando sus propias API push de Safari.
A partir de macOS Ventura (publicado el 24 de octubre de 2022), [Safari ha añadido compatibilidad](https://webkit.org/blog/12824/news-from-wwdc-webkit-features-in-safari-16-beta/#web-push-for-macos) con las API de notificación push web, además de las notificaciones push de Safari. Se trata de un estándar de API entre navegadores que se utiliza en otros navegadores populares.
Si ya estás enviando notificaciones push web para Safari a través de Braze, no es necesario que realices ningún cambio.
#### Notificación push web móvil (iOS y iPadOS) {#ios-push}
Anteriormente, Safari en iPhone y iPad no permitía recibir notificaciones push.
En 2023, Apple añadirá soporte para notificación push web en dispositivos iPhone y iPad a través de Safari.
Braze admitirá esta nueva notificación push web de iOS y iPadOS sin necesidad de aplicar cambios ni actualizaciones adicionales.
## Preparación para iOS 16 {#next-steps}
Aunque no necesitas actualizar tu SDK de Braze para iOS a la versión iOS 16, hay otras dos actualizaciones interesantes:
1. Braze ha lanzado un [nuevo SDK Swift](https://github.com/braze-inc/braze-swift-sdk). Esto aporta un mayor rendimiento, nuevas características y muchas mejoras.
2. ¡Nuestro SDK Swift de Braze admite una nueva [característica de push primer "sin código"](https://www.braze.com/docs/es/es/user_guide/channels/push/best_practices/push_primer_messages)!
# Guía de actualización a iOS 17
Source: /docs/es/developer_guide/platforms/swift/_archived_updates/ios_17/index.md
# Guía de actualización a iOS 17 {#ios-17-upgrade-guide}
> ¿Tienes curiosidad por saber cómo se está preparando Braze para el próximo lanzamiento de iOS? Este artículo resume nuestra información sobre la versión iOS 17 para ayudarte a crear una experiencia fluida para ti y tus usuarios.
## Compatibilidad con iOS 17 y Xcode 15 {#ios-17-and-xcode-15-compatibility}
Tanto el SDK Swift como el SDK Objective-C de Braze son retrocompatibles con Xcode 14 y Xcode 15, y compatibles con dispositivos iOS 17.
## Cambios en iOS 17 {#changes-in-ios-17}
### Seguimiento de enlaces y eliminación de parámetros UTM {#link-tracking-and-utm-parameter-stripping}
Uno de los cambios importantes de iOS 17 es el bloqueo de los parámetros UTM en Safari. Los parámetros UTM son fragmentos de código que se añaden a las URL y que se utilizan con frecuencia en las campañas de marketing para medir la eficacia del correo electrónico, los SMS y otros canales de mensajería.
Este cambio no afecta al seguimiento de clics por correo electrónico de Braze ni a los envíos con acortamiento de enlaces SMS.
### Transparencia del seguimiento de la aplicación {#app-tracking-transparency}
Apple anunció su compromiso de ampliar el alcance de [la Transparencia del Seguimiento de Anuncios (ATT)](https://support.apple.com/en-us/HT212025), que permite a los usuarios controlar si una aplicación puede acceder a su actividad en aplicaciones y sitios web pertenecientes a otras empresas. La versión iOS 17 contiene dos características clave de ATT: manifiestos de privacidad y firma de código.
#### Manifiestos de privacidad {#privacy-manifests}
Apple exige ahora un archivo de manifiesto de privacidad que describa el motivo por el que tu aplicación y los SDK de terceros recopilan datos, junto con sus métodos de recopilación de datos. A partir de iOS 17.2, Apple bloqueará todos los puntos finales de seguimiento declarados en tu aplicación hasta que el usuario final acepte el aviso de ATT.
Braze ha publicado su propio manifiesto de privacidad, junto con nuevas API flexibles que redirigen automáticamente los datos declarados de seguimiento a puntos finales dedicados de `-tracking`. Para más información, consulta el [manifiesto de privacidad de Braze](https://www.braze.com/docs/es/es/developer_guide/analytics/managing_data_collection?sdktab=swift#swift_privacy-manifest).
#### Firma de código {#code-signing}
La firma de código permite a los desarrolladores que utilizan un SDK de terceros en su aplicación validar que el mismo desarrollador lo firmó en versiones anteriores en Xcode.
### SDK de Braze y privacidad {#braze-sdk-and-privacy}
Apple también ha anunciado que publicará una lista de SDK de terceros que se consideran "que afectan a la privacidad" a finales de 2023. Se espera que estos SDK tengan un impacto especialmente alto en la privacidad de los usuarios según Apple.
A diferencia de los SDK de seguimiento tradicionales, diseñados para supervisar a los usuarios en varios sitios web y aplicaciones, el SDK de Braze se centra en la mensajería de datos propios y en las experiencias de usuario.
Aunque no esperamos que el SDK de Braze se incluya en esta lista, tenemos la intención de seguir de cerca esta situación y publicar las actualizaciones necesarias.
# Integración de extensiones de navegador para Web
Source: /docs/es/developer_guide/platforms/web/browser_extensions/index.md
# Extensión del navegador {#browser-extension}
> Este artículo describe cómo utilizar el SDK Web de Braze dentro de las extensiones de tu navegador (Google Chrome, Firefox).
Integra el SDK Web de Braze en la extensión de tu navegador para recopilar análisis y mostrar mensajes enriquecidos a los usuarios. Esto incluye tanto **las extensiones de Google Chrome** como **los complementos de Firefox**.
## Qué se admite {#whats-supported}
En general, dado que las extensiones son HTML y JavaScript, puedes usar Braze para lo siguiente:
* **Análisis**: Captura eventos personalizados, atributos e incluso identifica a usuarios recurrentes dentro de tu extensión. Usa estos rasgos de perfil para potenciar la mensajería multicanal.
* **In-App Messages**: Desencadena mensajes dentro de la aplicación cuando los usuarios realicen una acción dentro de tu extensión, utilizando nuestra mensajería nativa o HTML personalizada.
* **Content Cards**: Añade una fuente de tarjetas nativas a tu extensión para la incorporación o el contenido promocional.
* **Notificación push web**: Envía notificaciones puntuales aunque tu página web no esté abierta en ese momento.
## Lo que no se admite {#whats-not-supported}
* No se admite el uso del SDK de Braze desde un prestador de servicios. Aun así, puedes usar el SDK de Braze en la ventana emergente o la página de configuración de tu extensión.
## Tipos de extensión {#extension-types}
Braze puede incluirse en las siguientes áreas de tu extensión:
| Área | Detalles | Qué se admite |
|--------|-------|------|
| Página emergente | La página [emergente](https://developer.mozilla.org/en-US/docs/Mozilla/Add-ons/WebExtensions/user_interface/Popups) es un diálogo que puede mostrarse a los usuarios al hacer clic en el icono de tu extensión en la barra de herramientas del navegador. | Análisis, mensajes dentro de la aplicación y Content Cards |
| Scripts de fondo | [Los scripts de fondo](https://developer.chrome.com/extensions/background_pages) (solo Manifest v2) permiten a tu extensión inspeccionar e interactuar con la navegación del usuario o modificar páginas web (por ejemplo, cómo los bloqueadores de anuncios detectan y cambian el contenido de las páginas). | Análisis, mensajes dentro de la aplicación y Content Cards.
Los scripts de fondo no son visibles para los usuarios, por lo que para la mensajería, necesitarías comunicarte con las pestañas del navegador o con tu página emergente al mostrar los mensajes. |
| Páginas de opciones | La [página de opciones](https://developer.mozilla.org/en-US/docs/Mozilla/Add-ons/WebExtensions/user_interface/Options_pages) permite a tus usuarios alternar la configuración dentro de tu extensión. Es una página HTML independiente que abre una nueva pestaña. | Análisis, mensajes dentro de la aplicación y Content Cards |
{: .reset-td-br-1 .reset-td-br-2, .reset-td-br-3 aria-label="Tipos de extensión" }
## Permisos {#permissions}
No se requieren permisos adicionales en tu `manifest.json` cuando se integra el SDK de Braze (`braze.min.js`) como un archivo local incluido con tu extensión.
Sin embargo, si utilizas [Google Tag Manager](https://www.braze.com/docs/es/es/developer_guide/platform_integration_guides/web/google_tag_manager/), o haces referencia al SDK de Braze desde una URL externa, o has establecido una política de seguridad de contenidos estricta para tu extensión, tendrás que ajustar la configuración de [`content_security_policy`](https://developer.chrome.com/extensions/contentSecurityPolicy) en tu `manifest.json` para permitir fuentes de scripts remotas.
## Cómo empezar {#getting-started}
**Tip:**
Antes de empezar, asegúrate de haber leído la [guía de configuración inicial del SDK](https://www.braze.com/docs/es/es/developer_guide/sdk_integration?sdktab=web) Web para saber más sobre nuestra integración de JavaScript en general.
También puedes marcar la [referencia del SDK de JavaScript](https://js.appboycdn.com/web-sdk/latest/doc/modules/braze.html) para obtener información detallada sobre los distintos métodos y opciones de configuración del SDK.
Para integrar el SDK Web de Braze, primero debes descargar una copia de la última biblioteca JavaScript. Esto se puede hacer utilizando NPM o descargándolo directamente desde el [CDN de Braze](https://js.appboycdn.com/web-sdk/latest/braze.min.js).
Alternativamente, si prefieres utilizar [Google Tag Manager](https://www.braze.com/docs/es/es/developer_guide/platform_integration_guides/web/google_tag_manager/) o utilizar una copia alojada externamente del SDK de Braze, ten en cuenta que cargar recursos externos requerirá que ajustes la configuración de [`content_security_policy`](https://developer.chrome.com/extensions/contentSecurityPolicy) en tu `manifest.json`.
Una vez descargado, asegúrate de copiar el archivo `braze.min.js` en algún lugar del directorio de tu extensión.
### Ventanas emergentes de extensión {#popup}
Para añadir Braze a una ventana emergente de extensión, haz referencia al archivo JavaScript local en tu `popup.html`, como harías en un sitio web normal. Si utilizas Google Tag Manager, puedes añadir Braze utilizando nuestras [plantillas de Google Tag Manager](https://www.braze.com/docs/es/es/developer_guide/platform_integration_guides/web/google_tag_manager/).
```html
popup.html
```
### Script de fondo (solo Manifest v2) {#background-script}
Para utilizar Braze dentro del script de fondo de tu extensión, añade la biblioteca Braze a tu `manifest.json` en la matriz `background.scripts`. Esto hará que la variable global `braze` esté disponible en el contexto de tu script de fondo.
```json
{
"manifest_version": 2,
"background": {
"scripts": [
"relative/path/to/braze.min.js",
"background.js"
]
}
}
```
### Página de opciones {#options-page}
Si utilizas una página de opciones (a través de las propiedades del manifiesto `options` o `options_ui`), puedes incluir Braze tal y como lo harías en las [instrucciones de `popup.html`](#popup).
## Inicialización {#initialization}
Una vez incluido el SDK, puedes inicializar la biblioteca como de costumbre.
Dado que las extensiones del navegador no admiten cookies, puedes desactivarlas inicializando con `noCookies: true`.
```javascript
braze.initialize("YOUR-API-KEY-HERE", {
baseUrl: "YOUR-API-ENDPOINT",
enableLogging: true,
noCookies: true
});
```
Para más información sobre las opciones de inicialización admitidas, visita la [referencia del SDK Web](https://js.appboycdn.com/web-sdk/latest/doc/modules/braze.html#initialize).
## Push {#push}
Los diálogos emergentes de las extensiones no permiten las solicitudes push (no tienen la barra de URL en la navegación). Así que para registrarte y solicitar el permiso push en el diálogo emergente de una extensión, tendrás que utilizar una solución alternativa de dominio, como se describe en [Dominio push alternativo](https://www.braze.com/docs/es/es/developer_guide/platform_integration_guides/web/push_notifications/alternate_push_domain).
# Cabeceras de política de seguridad de contenidos para Web
Source: /docs/es/developer_guide/platforms/web/content_security_policy/index.md
# Cabeceras de la política de seguridad de contenidos {#content-security-policy-headers}
> Content-Security-Policy proporciona seguridad añadida al restringir cómo y dónde se puede cargar contenido en tu sitio web. Este artículo de referencia cubre qué encabezados de políticas de seguridad de contenidos son necesarios con el SDK Web.
**Important:**
Este artículo está dirigido a los desarrolladores que trabajan en sitios web que aplican reglas CSP y se integran con Braze. No pretende ser un consejo sobre cómo debes enfocar la seguridad.
**Note:**
This guide uses code samples from the Braze Web SDK 4.0.0+. To upgrade to the latest Web SDK version, see [SDK Upgrade Guide](https://github.com/braze-inc/braze-web-sdk/blob/master/UPGRADE_GUIDE.md).
## Atributos nonce {#nonce}
Si utilizas un valor `nonce` en tus directivas `script-src` o `style-src`, pasa ese valor a la opción de inicialización `contentSecurityNonce` para propagarlo a los scripts y estilos recién creados generados por el SDK:
```javascript
import * as braze from "@braze/web-sdk";
braze.initialize(apiKey, {
baseUrl: baseUrl,
contentSecurityNonce: "YOUR-NONCE-HERE", // assumes a "nonce-YOUR-NONCE-HERE" CSP value
});
```
## Directivas {#directives}
### `connect-src` {#connect-src}
**Warning:**
Tu URL debe coincidir con el [punto final de SDK de la API](https://www.braze.com/docs/es/es/user_guide/administer/personal/sdk_endpoints) de la opción de inicialización `baseUrl` que hayas elegido.
| URL | Información |
| --- | ----------- |
| `connect-src https://sdk.iad-01.braze.com` | Permite al SDK comunicarse con las API de Braze. Cambia esta URL para que coincida con el [punto final de SDK de la API](https://www.braze.com/docs/es/es/user_guide/administer/personal/sdk_endpoints) de la opción de inicialización `baseUrl` que hayas elegido. |
{: .reset-td-br-1 .reset-td-br-2 aria-label="connect-src #connect-src" }
### `script-src` {#script-src}
| URL | Información |
| --- | ----------- |
| `script-src https://js.appboycdn.com` | Obligatoria cuando se utiliza la integración alojada en CDN. |
| `script-src 'unsafe-eval'` | Obligatoria cuando se utiliza el fragmento de código de integración que contiene la referencia a `appboyQueue`. Para evitar el uso de esta directiva, [integra el SDK utilizando NPM](https://www.braze.com/docs/es/es/developer_guide/platform_integration_guides/web/initial_sdk_setup?tab=package%20manager). |
| `script-src 'nonce-...'` o `script-src 'unsafe-inline'` | Obligatoria para determinados mensajes dentro de la aplicación, como HTML personalizado. |
{: .reset-td-br-1 .reset-td-br-2 aria-label="script-src #script-src" }
### `img-src` {#img-src}
| URL | Información |
| --- | ----------- |
| `img-src: appboy-images.com braze-images.com cdn.braze.eu` | Obligatoria cuando se utilizan imágenes alojadas en el CDN de Braze. Los nombres de host pueden variar según el clúster del dashboard.
**Importante:** Si utilizas fuentes personalizadas, también tienes que incluir `font-src`. |
{: .reset-td-br-1 .reset-td-br-2 aria-label="img-src #img-src" }
## Font Awesome {#font-awesome}
Para desactivar la inclusión automática de Font Awesome, utiliza la opción de inicialización `doNotLoadFontAwesome`:
```javascript
import * as braze from "@braze/web-sdk";
braze.initialize(apiKey, {
baseUrl: baseUrl,
doNotLoadFontAwesome: true,
});
```
Si decides utilizar Font Awesome, se requieren las siguientes directivas CSP:
- `font-src https://use.fontawesome.com`
- `style-src https://use.fontawesome.com`
- `style-src 'nonce-...'` o `style-src 'unsafe-inline'`
# Accesibilidad
Source: /docs/es/developer_guide/platforms/web/accessibility/index.md
# Accesibilidad {#accessibility}
> Este artículo ofrece un resumen de cómo Braze favorece la accesibilidad dentro de tu integración.
Braze Web SDK es compatible con los estándares establecidos por las [Pautas de Accesibilidad al Contenido en la Web (WCAG 2.1)](https://www.w3.org/TR/WCAG21/). Mantenemos una [puntuación de 100/100 en Lighthouse](https://developer.chrome.com/docs/lighthouse/accessibility/scoring) para las tarjetas de contenido y los mensajes dentro de la aplicación en todas nuestras nuevas versiones, con el fin de mantener nuestro estándar de accesibilidad.
## Requisitos previos {#prerequisites}
La versión mínima del SDK que cumple con WCAG 2.1 es cercana a la v3.4.0. Sin embargo, recomendamos actualizar al menos a la versión 6.0.0 para obtener correcciones importantes en las etiquetas de imagen.
### Correcciones notables en materia de accesibilidad {#notable-accessibility-fixes}
| Versión | Tipo | Cambios clave |
|---------|------|-------------|
| **6.0.0** | **Mayor** | Imágenes como etiquetas ``, campos `imageAltText` o `language`, mejoras generales en la accesibilidad de la interfaz de usuario |
| **3.5.0** | Menor | Mejoras en la accesibilidad del texto desplazable |
| **3.4.0** | Corrección | Corrección del rol `article` en Content Cards |
| **3.2.0** | Menor | Objetivos táctiles mínimos de 45x45 px para botones |
| **3.1.2** | Menor | Texto alternativo predeterminado para imágenes |
| **2.4.1** | **Mayor** | HTML semántico (`h1` o `button`), atributos ARIA, navegación con el teclado, gestión del foco |
| **2.0.5** | Menor | Gestión del foco, navegación con el teclado, etiquetas |
{: .reset-td-br-1, .reset-td-br-2 aria-label="Correcciones notables en materia de accesibilidad" }
## Características de accesibilidad compatibles {#supported-accessibility-features}
Admitimos estas características para Content Cards y mensajes dentro de la aplicación:
- Roles y etiquetas ARIA
- Compatibilidad con la navegación mediante teclado
- Gestión del foco
- Anuncios del lector de pantalla
- Compatibilidad con texto alternativo para imágenes
## Directrices de accesibilidad para integraciones de SDK {#accessibility-guidelines-for-sdk-integrations}
Consulta [Crea mensajes accesibles en Braze](https://www.braze.com/docs/es/es/user_guide/messaging/messaging_fundamentals/accessibility) para obtener directrices generales sobre accesibilidad. Esta guía proporciona consejos y prácticas recomendadas para lograr la máxima accesibilidad al integrar Braze Web SDK en tu aplicación web.
### Content Cards
#### Establecer una altura máxima {#setting-a-maximum-height}
Para evitar que las Content Cards ocupen demasiado espacio vertical y mejorar la accesibilidad, puedes establecer una altura máxima en el contenedor de la fuente, como en este ejemplo:
```css
/* Limit the height of the Content Cards feed */
.ab-feed {
max-height: 600px; /* Adjust to your needs */
overflow-y: auto;
}
/* For inline feeds (non-sidebar), you may want to limit individual cards */
.ab-card {
max-height: 400px; /* Optional: limit individual card height */
overflow: hidden;
}
```
#### Consideraciones sobre la ventana gráfica {#viewport-considerations}
Para las Content Cards que se muestran en línea, ten en cuenta las restricciones del área de visualización, como en este ejemplo.
```css
/* Limit feed height on mobile to prevent covering too much screen */
@media (max-width: 768px) {
body > .ab-feed {
max-height: 80vh; /* Leave space for other content */
}
}
```
### Mensajes dentro de la aplicación {#in-app-messages}
**Warning:**
No incluyas información importante en los mensajes dentro de la aplicación de tipo deslizable, ya que no son accesibles para los lectores de pantalla.
### Consideraciones sobre los dispositivos móviles {#mobile-considerations}
#### Diseño adaptable {#responsive-design}
El SDK incluye puntos de interrupción adaptables. Confirma que tus personalizaciones funcionan en todos los tamaños de pantalla, como en este ejemplo:
```css
/* Mobile-specific accessibility considerations */
@media (max-width: 768px) {
/* Ensure readable font sizes */
.ab-feed {
font-size: 14px; /* Minimum 14px for mobile readability */
}
/* Ensure sufficient touch targets */
.ab-card {
padding: 16px; /* Adequate padding for touch */
}
}
```
### Pruebas de accesibilidad {#testing-accessibility}
#### Lista de verificación de pruebas manuales {#manual-test-checklist}
Comprueba manualmente tu accesibilidad completando estas tareas:
- Navega por las Content Cards y los mensajes dentro de la aplicación solo con el teclado (Tab, Intro, Espacio)
- Prueba con un lector de pantalla (NVDA, JAWS, VoiceOver)
- Verifica que todas las imágenes tengan texto alternativo
- Comprueba las relaciones de contraste de color (utiliza herramientas como WebAIM Contrast Checker)
- Prueba en dispositivos móviles con pantalla táctil
- Comprueba que los indicadores de foco sean visibles
- Prueba la captura de foco en mensajes modales
- Verifica que se pueda acceder a todos los elementos interactivos mediante el teclado
### Problemas comunes de accesibilidad {#common-accessibility-issues}
Para evitar problemas comunes de accesibilidad, haz lo siguiente:
1. **Mantén los estilos de foco:** Los indicadores de foco del SDK son esenciales para los usuarios de teclado.
2. **Usa `display: none` solo en elementos no interactivos:** Usa `visibility: hidden` u `opacity: 0` para ocultar elementos interactivos.
3. **No anules los atributos ARIA:** El SDK establece los roles y etiquetas ARIA adecuados.
4. **Usa los atributos `tabindex`:** Estos controlan el orden de navegación del teclado.
5. **Proporciona un desplazamiento si configuras `overflow: hidden`:** Confirma que el contenido desplazable sigue siendo accesible.
6. **No interfieras con los controladores de teclado integrados:** Confirma que la navegación con el teclado existente funciona correctamente.
# Compatibilidad con Smart TV para el SDK Web de Braze
Source: /docs/es/developer_guide/platforms/web/smart_tvs/index.md
# Compatibilidad con Smart TV {#smart-tv-support}
> El SDK Web de Braze te permite recopilar análisis y mostrar mensajes enriquecidos dentro de la aplicación y mensajes de tarjeta de contenido a los usuarios de Smart TV, incluidos [los televisores Samsung Tizen](https://developer.samsung.com/smarttv/develop/specifications/tv-model-groups.html) y [LG (webOS)](https://webostv.developer.lge.com/discover). Este artículo explica cómo utilizar el SDK Web de Braze para la integración con Smart TV.
**Tip:**
Para una referencia técnica completa, consulta nuestra [documentación de JavaScript](https://js.appboycdn.com/web-sdk/latest/doc/modules/braze.html) o nuestras [aplicaciones de ejemplo](https://github.com/Appboy/smart-tv-sample-apps) para ver el SDK Web funcionando en un televisor.
## Prerequisites
Before you can use this feature, you'll need to [integrate the Web Braze SDK](https://www.braze.com/docs/es/es/developer_guide/sdk_integration/?sdktab=web).
## Configuración del SDK Web de Braze {#configuring-the-web-braze-sdk}
Hay dos cambios necesarios para la integración con Smart TV:
1. Cuando descargues o importes el SDK Web, asegúrate de utilizar el paquete "core" (disponible en `https://js.appboycdn.com/web-sdk/x.y/braze.core.min.js`, donde `x.y` es la versión deseada). Recomendamos utilizar la versión CDN de nuestro SDK Web, ya que la versión NPM está escrita en módulos ES nativos, mientras que la versión CDN está transpilada a ES5. Si prefieres utilizar la [versión de NPM](https://www.npmjs.com/package/@braze/web-sdk), asegúrate de que utilizas un bundler como webpack que elimine el código no utilizado y que el código se transpile a ES5.
2. Al inicializar el SDK Web, debes establecer las opciones de inicialización `disablePushTokenMaintenance` y `manageServiceWorkerExternally` en `true`.
## Análisis {#analytics}
Todos los mismos métodos del SDK Web para análisis se pueden utilizar en las Smart TV. Para obtener una guía completa sobre cómo realizar el seguimiento de eventos personalizados, atributos personalizados y mucho más, consulta [Análisis](https://www.braze.com/docs/es/es/developer_guide/analytics/tracking_sessions?tab=web).
## Mensajes dentro de la aplicación y Content Cards {#in-app-messages-and-content-cards}
El SDK Web de Braze admite tanto [mensajes dentro de la aplicación](https://www.braze.com/docs/es/es/developer_guide/in_app_messages?sdktab=web) como [Content Cards](https://www.braze.com/docs/es/es/developer_guide/content_cards?sdktab=web) en Smart TV. Ten en cuenta que debes utilizar el [SDK Web "Core"](https://www.npmjs.com/package/@braze/web-sdk), ya que la representación de mensajes dentro de la aplicación y de Content Cards no es compatible con nuestra visualización de interfaz de usuario estándar y, en su lugar, debe ser personalizada por tu aplicación para adaptarse a la experiencia de tu aplicación de TV.
Para obtener más información sobre cómo tu aplicación para Smart TV puede recibir y mostrar mensajes dentro de la aplicación, consulta [Desencadenamiento de mensajes](https://www.braze.com/docs/es/es/developer_guide/in_app_messages/triggering_messages?tab=web).
# Integraciones de TV y OTT para Braze
Source: /docs/es/developer_guide/platforms/tv_and_ott/index.md
# Integraciones TV y OTT {#tv-and-ott-integrations}
> A medida que la tecnología evoluciona hacia nuevas plataformas y dispositivos, ¡también puede hacerlo tu mensajería con Braze! Braze ofrece diferentes canales de interacción para varios sistemas operativos de televisión y métodos de entrega de contenido Over-the-Top (OTT).
## Plataformas y características {#platforms-and-features}
A continuación se enumeran las características y los canales de mensajería admitidos actualmente.
Plataformas y características
Tipo de dispositivo
Datos y análisis
Mensajes dentro de la aplicación
Content Cards
Notificaciones push
Canvas
Conmutadores de características
Banners
Amazon Fire TV
Kindle Fire
Android TV
LG TV (webOS)
N/A
Samsung Tizen TV
N/A
Roku
N/A
Apple TV OS
Apple Vision Pro
- = Compatible
- = Compatibilidad parcial
- = No compatible con Braze
- N/A = No admitido por la plataforma OTT
## Guías de integración {#integration-guides}
### Amazon Fire TV {#fire-tv}
Utiliza el SDK Braze Fire OS para integrarte con los dispositivos Amazon Fire TV.
Entre sus características se incluyen:
- Recopilación de datos y análisis para la interacción entre canales cruzados
- Notificaciones push (conocidas como ["Heads Up Notifications"](https://developer.amazon.com/docs/fire-tv/notifications.html#headsup))
- La prioridad debe configurarse como "HIGH" para que aparezcan. Todas las notificaciones aparecen en el menú de configuración de Fire TV.
- Content Cards
- Conmutadores de características
- Mensajes dentro de la aplicación
- Para mostrar mensajes HTML en entornos no táctiles como televisores, configura `com.braze.configuration.BrazeConfig.Builder.setIsTouchModeRequiredForHtmlInAppMessages` en `false` (disponible a partir de [Android SDK v23.1.0](https://github.com/braze-inc/braze-android-sdk/blob/master/CHANGELOG.md#2310))
- Banners
- Usa las [ubicaciones de Banner](https://www.braze.com/docs/es/es/developer_guide/banners/placements) para insertar mensajes directamente en tu aplicación Fire TV.
Para más información, visita la [guía de integración de Fire OS](https://www.braze.com/docs/es/es/developer_guide/sdk_integration?sdktab=android).
### Kindle Fire {#kindle-fire}
Utiliza el SDK Braze Fire OS para integrarte con los dispositivos Kindle Fire de Amazon.
Entre sus características se incluyen:
- Recopilación de datos y análisis para la interacción entre canales cruzados
- Notificaciones push
- Content Cards
- Conmutadores de características
- Mensajes dentro de la aplicación
- Banners
- Usa las [ubicaciones de Banner](https://www.braze.com/docs/es/es/developer_guide/banners/placements) para insertar mensajes directamente en tu Kindle Fire.
Para más información, visita la [guía de integración de Fire OS](https://www.braze.com/docs/es/es/developer_guide/sdk_integration?sdktab=android).
### Android TV {#android-tv}
Utiliza el SDK para Android de Braze para integrarte con dispositivos Android TV.
Entre sus características se incluyen:
- Recopilación de datos y análisis para la interacción entre canales cruzados
- Content Cards
- Conmutadores de características
- Mensajes dentro de la aplicación
- Para mostrar mensajes HTML en entornos no táctiles como televisores, configura `com.braze.configuration.BrazeConfig.Builder.setIsTouchModeRequiredForHtmlInAppMessages` en `false` (disponible a partir de [Android SDK v23.1.0](https://github.com/braze-inc/braze-android-sdk/blob/master/CHANGELOG.md#2310))
- * Notificaciones push (requiere integración manual)
- Las notificaciones push no son compatibles de forma nativa con Android TV. Para saber por qué, consulta las [directrices de diseño](https://designguidelines.withgoogle.com/android-tv/patterns/notifications.html) de Google. Sin embargo, puedes **hacer una integración manual de la interfaz de usuario de notificaciones push para conseguirlo**. Consulta nuestra [documentación](https://www.braze.com/docs/es/es/developer_guide/push_notifications?sdktab=android%20tv) sobre cómo configurarlo.
- Banners
- Usa las [ubicaciones de Banner](https://www.braze.com/docs/es/es/developer_guide/banners/placements) para insertar mensajes directamente en tu aplicación Android TV.
Para más información, visita la [guía de integración del SDK de Android](https://www.braze.com/docs/es/es/developer_guide/sdk_integration?sdktab=android).
**Note:**
Asegúrate de crear una nueva aplicación Android en el dashboard para tu integración OTT de Android.
### LG webOS {#lg-webos}
Utiliza el SDK Web de Braze para integrarte con [los televisores webOS de LG](https://webostv.developer.lge.com/discover).
Entre sus características se incluyen:
- Recopilación de datos y análisis para la interacción entre canales cruzados
- Content Cards (a través de [Headless UI](#custom-ui))
- Conmutadores de características
- Mensajes dentro de la aplicación (mediante [Headless UI](#custom-ui))
- Banners
- Usa las [ubicaciones de Banner](https://www.braze.com/docs/es/es/developer_guide/banners/placements) para insertar mensajes directamente en tu aplicación webOS.
Para más información, visita la [guía de integración de Web Smart TV](https://www.braze.com/docs/es/es/developer_guide/platforms/web/smart_tvs).
### Samsung Tizen {#tizen}
Utiliza el SDK Web de Braze para integrarte con los [televisores Samsung Tizen](https://developer.samsung.com/smarttv/develop/specifications/tv-model-groups.html).
Entre sus características se incluyen:
- Recopilación de datos y análisis para la interacción entre canales cruzados
- Content Cards (a través de [Headless UI](#custom-ui))
- Conmutadores de características
- Mensajes dentro de la aplicación (mediante [Headless UI](#custom-ui))
- Banners
- Usa las [ubicaciones de Banner](https://www.braze.com/docs/es/es/developer_guide/banners/placements) para insertar mensajes directamente en tu aplicación Tizen.
Para más información, visita la [guía de integración de Web Smart TV](https://www.braze.com/docs/es/es/developer_guide/platforms/web/smart_tvs).
### Roku {#roku}
Utiliza el SDK de Roku de Braze para integrarte con [los televisores Roku](https://developer.roku.com/docs/developer-program/getting-started/roku-dev-prog.md).
Entre sus características se incluyen:
- Recopilación de datos y análisis para la interacción entre canales cruzados
- Mensajes dentro de la aplicación (mediante [Headless UI](#custom-ui))
- Las vistas web no son compatibles con la plataforma Roku, por lo que los mensajes HTML dentro de la aplicación tampoco son compatibles.
- Conmutadores de características
Para más información, visita la [guía de integración de Roku](https://www.braze.com/docs/es/es/developer_guide/in_app_messages?sdktab=roku).
### Apple TV OS {#tvos}
Utiliza el SDK Swift de Braze para integrarte con tvOS. Ten en cuenta que el SDK Swift no incluye ninguna interfaz ni vistas predeterminadas para tvOS, así que tendrás que implementar las tuyas propias.
Entre sus características se incluyen:
- Recopilación de datos y análisis para la interacción entre canales cruzados
- Content Cards (a través de [Headless UI](#custom-ui))
- Conmutadores de características
- Mensajes dentro de la aplicación (mediante [Headless UI](#custom-ui))
- Las vistas web no son compatibles con la plataforma tvOS, por lo que los mensajes HTML dentro de la aplicación tampoco son compatibles.
- Consulta nuestra [aplicación de ejemplo](https://github.com/braze-inc/braze-swift-sdk/tree/main/Examples#inappmessages-custom-ui) para saber más sobre cómo utilizar Headless UI para mensajería personalizada en tvOS.
- Notificaciones push silenciosas y actualización de insignias
- Banners
- Usa las [ubicaciones de Banner](https://www.braze.com/docs/es/es/developer_guide/banners/placements) para insertar mensajes directamente en tu aplicación tvOS.
Para obtener más información, visita la [guía de integración del SDK Swift de iOS](https://github.com/braze-inc/braze-swift-sdk).
**Note:**
Para evitar mostrar mensajes dentro de la aplicación móvil a tus usuarios de TV, asegúrate de configurar la [segmentación por aplicaciones](#app-targeting) o de utilizar pares clave-valor para filtrar los mensajes. Por ejemplo, mostrar solo los mensajes de tvOS si contienen un par clave-valor especial `tv = true`.
### Apple Vision Pro {#vision-pro}
Utiliza el SDK Swift de Braze para integrarte con visionOS. La mayoría de las características disponibles en iOS también están disponibles en visionOS, entre ellas:
- Análisis (sesiones, eventos personalizados, compras, etc.)
- Mensajería dentro de la aplicación (modelos de datos e interfaz de usuario)
- Content Cards (modelos de datos e interfaz de usuario)
- Notificaciones push (visibles para el usuario con botones de acción y notificaciones silenciosas)
- Conmutadores de características
- Análisis de ubicación
- Banners
- Usa las [ubicaciones de Banner](https://www.braze.com/docs/es/es/developer_guide/banners/placements) para insertar mensajes directamente en tu aplicación visionOS.
Para obtener más información, visita la [guía de integración del SDK Swift de iOS](https://github.com/braze-inc/braze-swift-sdk).
**Important:**
Algunas características de iOS son parcialmente compatibles o no compatibles. Para ver la lista completa, consulta la [compatibilidad con visionOS](https://www.braze.com/docs/es/es/developer_guide/platform_integration_guides/swift/visionos).
## Segmentación por aplicaciones {#app-targeting}
Para segmentar las aplicaciones OTT para mensajería, te recomendamos que crees un segmento específico para tu aplicación OTT.

## Headless UI {#custom-ui}
**Important:**
Las plataformas que admiten mensajes dentro de la aplicación o Content Cards a través de Headless UI **no** incluyen ninguna interfaz de usuario ni vistas predeterminadas. Crea tu propia interfaz de usuario personalizada (por ejemplo, para mensajes dentro de la aplicación) y, a continuación, utiliza los modelos de datos proporcionados por el SDK para rellenar esas interfaces de usuario.
Con Headless UI, Braze entregará un modelo de datos, como JSON, que tu aplicación puede leer y utilizar dentro de una interfaz de usuario que tu aplicación controla. Estos datos contendrán los campos configurados en el dashboard (título, cuerpo, texto del botón, colores, etc.) que tu aplicación podrá leer y mostrar en consecuencia. Para más información sobre la gestión personalizada de mensajería, consulta lo siguiente:
**SDK para Android**
- [Personalización de mensajes dentro de la aplicación](https://www.braze.com/docs/es/es/developer_guide/in_app_messages/customization?sdktab=android#android_setting-custom-manager-listeners)
- [Personalización de Content Cards](https://www.braze.com/docs/es/es/developer_guide/content_cards/customizing_cards/style)
**SDK Swift**
- [Personalización de mensajes dentro de la aplicación](https://braze-inc.github.io/braze-swift-sdk/documentation/brazekit/brazeinappmessagepresenter/)
- [Aplicación de ejemplo de Headless UI](https://github.com/braze-inc/braze-swift-sdk/tree/main/Examples#inappmessages-custom-ui)
- [Personalización de Content Cards](https://braze-inc.github.io/braze-swift-sdk/documentation/brazekit/braze/contentcards-swift.class/)
**SDK Web**
- [Personalización de mensajes dentro de la aplicación](https://www.braze.com/docs/es/es/developer_guide/in_app_messages/triggering_messages?tab=web)
- [Personalización de Content Cards](https://www.braze.com/docs/es/es/developer_guide/content_cards/customizing_cards/style)
# Resumen de integración para iOS
Source: /docs/es/developer_guide/platforms/legacy_sdks/ios/initial_sdk_setup/overview/index.md
**Warning:**
[AppboyKit](https://github.com/Appboy/appboy-ios-sdk) (also known as the Objective-C SDK) is no longer supported and has been replaced by the [Swift SDK](https://www.braze.com/docs/es/es/developer_guide/sdk_integration/?sdktab=swift). It will no longer receive new features, bug fixes, security updates, or technical support—however, messaging and analytics will continue to function as normal. To learn more, see [Introducing the New Braze Swift SDK](https://www.braze.com/resources/articles/introducing-the-new-braze-swift-sdk).
La instalación del SDK de Braze para iOS te proporcionará una funcionalidad básica de análisis (gestión de sesiones) y mensajes básicos dentro de la aplicación. Debes personalizar aún más tu integración para canales y características adicionales.
El SDK de Braze para iOS puede instalarse o actualizarse mediante CocoaPods, Carthage, Swift Package Manager o una integración manual.
Además, el SDK de Braze para iOS es totalmente compatible con las aplicaciones RubyMotion.
**Important:**
El SDK de iOS añadirá de 1 MB a 2 MB al archivo IPA de la aplicación, además de un archivo APP, y 30 MB para el framework.
Una vez que te hayas integrado utilizando una de las opciones de la lista, hayas seguido los pasos para [completar la integración](https://www.braze.com/docs/es/es/developer_guide/platforms/legacy_sdks/ios/initial_sdk_setup/completing_integration) y hayas habilitado otras personalizaciones del SDK (opcional), pasa a integrar, habilitar y personalizar canales y características adicionales que se ajusten a las necesidades de tus futuras campañas.
# Integración de Carthage para iOS
Source: /docs/es/developer_guide/platforms/legacy_sdks/ios/initial_sdk_setup/installation_methods/carthage_integration/index.md
**Warning:**
[AppboyKit](https://github.com/Appboy/appboy-ios-sdk) (also known as the Objective-C SDK) is no longer supported and has been replaced by the [Swift SDK](https://www.braze.com/docs/es/es/developer_guide/sdk_integration/?sdktab=swift). It will no longer receive new features, bug fixes, security updates, or technical support—however, messaging and analytics will continue to function as normal. To learn more, see [Introducing the New Braze Swift SDK](https://www.braze.com/resources/articles/introducing-the-new-braze-swift-sdk).
# Integración de Carthage {#carthage-integration}
## Importa el SDK {#import-the-sdk}
A partir de la versión `4.4.0`, el SDK de Braze es compatible con XCFrameworks cuando se integra a través de Carthage. Para importar el SDK completo, incluye estas líneas en tu `Cartfile`:
```
binary "https://raw.githubusercontent.com/Appboy/appboy-ios-sdk/master/appboy_ios_sdk.json"
github "SDWebImage/SDWebImage"
```
Consulta la [guía de inicio rápido de Carthage](https://github.com/Carthage/Carthage#quick-start) para obtener más instrucciones sobre la importación del SDK.
Cuando migres desde una versión anterior a `4.4.0`, sigue la [guía de migración de Carthage para XCFrameworks](https://github.com/Carthage/Carthage#migrating-a-project-from-framework-bundles-to-xcframeworks).
**Note:**
Para más detalles sobre la sintaxis de `Cartfile` o características como la fijación de versiones, visita la [documentación de Carthage](https://github.com/Carthage/Carthage/blob/master/Documentation/Artifacts.md#cartfile).
Para conocer el uso específico de Carthage en cada plataforma, consulta su [guía del usuario](https://github.com/Carthage/Carthage#if-youre-building-for-ios-tvos-or-watchos).
### Versiones anteriores {#previous-versions}
Para las versiones `3.24.0` a `4.3.4`, incluye lo siguiente en tu `Cartfile`:
```
binary "https://raw.githubusercontent.com/Appboy/appboy-ios-sdk/master/appboy_ios_sdk_full.json"
```
Para importar versiones anteriores a `3.24.0`, incluye lo siguiente en tu `Cartfile`:
```
github "Appboy/Appboy-iOS-SDK" ""
```
Asegúrate de sustituir `` por la [versión adecuada](https://github.com/Appboy/appboy-ios-sdk/releases) del SDK de Braze para iOS en formato "x.y.z".
## Próximos pasos {#next-steps}
Sigue las instrucciones para [completar la integración](https://www.braze.com/docs/es/es/developer_guide/platforms/legacy_sdks/ios/initial_sdk_setup/completing_integration).
## Integración solo del núcleo {#core-only-integration}
Si quieres utilizar el SDK básico sin componentes de interfaz de usuario ni dependencias, instala la versión básica del framework Braze Carthage incluyendo la siguiente línea en tu `Cartfile`:
```
binary "https://raw.githubusercontent.com/Appboy/appboy-ios-sdk/master/appboy_ios_sdk_core.json"
```
# Integración de CocoaPods para iOS
Source: /docs/es/developer_guide/platforms/legacy_sdks/ios/initial_sdk_setup/installation_methods/cocoapods/index.md
**Warning:**
[AppboyKit](https://github.com/Appboy/appboy-ios-sdk) (also known as the Objective-C SDK) is no longer supported and has been replaced by the [Swift SDK](https://www.braze.com/docs/es/es/developer_guide/sdk_integration/?sdktab=swift). It will no longer receive new features, bug fixes, security updates, or technical support—however, messaging and analytics will continue to function as normal. To learn more, see [Introducing the New Braze Swift SDK](https://www.braze.com/resources/articles/introducing-the-new-braze-swift-sdk).
# Integración de CocoaPods {#cocoapods-integration}
## Paso 1: Instalar CocoaPods {#step-1-install-cocoapods}
La instalación del SDK de iOS a través de [CocoaPods](http://cocoapods.org/) automatiza la mayor parte del proceso de instalación por ti. Antes de comenzar este proceso, asegúrate de que utilizas [la versión 2.0.0 de Ruby](https://www.ruby-lang.org/en/installation/) o superior. No te preocupes, no es necesario conocer la sintaxis de Ruby para instalar este SDK.
Ejecuta el siguiente comando para empezar:
```bash
$ sudo gem install cocoapods
```
Si tienes problemas relacionados con CocoaPods, consulta la [guía de solución de problemas](http://guides.cocoapods.org/using/troubleshooting.html) de CocoaPods.
**Note:**
Si se te pide que sobrescribas el ejecutable `rake`, consulta las instrucciones de [primeros pasos](http://guides.cocoapods.org/using/getting-started.html) en CocoaPods.org para más detalles.
## Paso 2: Construir el Podfile {#step-2-constructing-the-podfile}
Ahora que has instalado la gema de Ruby de CocoaPods, tendrás que crear un archivo en el directorio de tu proyecto Xcode llamado `Podfile`.
Añade la siguiente línea a tu Podfile:
```
target 'YourAppTarget' do
pod 'Appboy-iOS-SDK'
end
```
Te sugerimos que versiones Braze para que las actualizaciones de pods recojan automáticamente cualquier cambio menor a una actualización de versión menor. Esto se ve así: `pod 'Appboy-iOS-SDK' ~> Major.Minor.Build`. Si quieres integrar automáticamente la última versión del SDK de Braze, incluso con cambios importantes, puedes utilizar `pod 'Appboy-iOS-SDK'` en tu Podfile.
### Subspecs {#subspecs}
Recomendamos que los integradores importen nuestro SDK completo. Sin embargo, si estás seguro de que solo vas a integrar una característica concreta de Braze, puedes importar solo la subspec de interfaz de usuario deseada en lugar del SDK completo.
| Subspec | Detalles |
| ------- | ------- |
| `pod 'Appboy-iOS-SDK/InAppMessage'` | La subspec `InAppMessage` contiene la interfaz de usuario de mensajes dentro de la aplicación de Braze y el SDK central.|
| `pod 'Appboy-iOS-SDK/ContentCards'` | La subspec `ContentCards` contiene la interfaz de usuario de Content Cards de Braze y el SDK central. |
| `pod 'Appboy-iOS-SDK/NewsFeed'` | La subspec `NewsFeed` contiene el SDK central de Braze. |
| `pod 'Appboy-iOS-SDK/Core'` | La subspec `Core` contiene soporte para análisis, como eventos personalizados y atributos. |
{: .ws-td-nw-1 aria-label="Subspecs" }
## Paso 3: Instalación del SDK de Braze {#step-3-installing-the-braze-sdk}
Para instalar el SDK de Braze mediante CocoaPods, navega al directorio de tu proyecto de aplicación Xcode en tu terminal y ejecuta el siguiente comando:
```
pod install
```
En este punto, deberías poder abrir el nuevo espacio de trabajo del proyecto Xcode creado por CocoaPods. Asegúrate de utilizar este espacio de trabajo de Xcode en lugar de tu proyecto de Xcode.

## Próximos pasos {#next-steps}
Sigue las instrucciones para [completar la integración](https://www.braze.com/docs/es/es/developer_guide/platforms/legacy_sdks/ios/initial_sdk_setup/completing_integration).
## Actualizar el SDK de Braze mediante CocoaPods {#updating-the-braze-sdk-via-cocoapods}
Para actualizar un CocoaPod, simplemente ejecuta el siguiente comando dentro del directorio de tu proyecto:
```
pod update
```
# Integración de Swift Package Manager para iOS
Source: /docs/es/developer_guide/platforms/legacy_sdks/ios/initial_sdk_setup/installation_methods/swift_package_manager/index.md
**Warning:**
[AppboyKit](https://github.com/Appboy/appboy-ios-sdk) (also known as the Objective-C SDK) is no longer supported and has been replaced by the [Swift SDK](https://www.braze.com/docs/es/es/developer_guide/sdk_integration/?sdktab=swift). It will no longer receive new features, bug fixes, security updates, or technical support—however, messaging and analytics will continue to function as normal. To learn more, see [Introducing the New Braze Swift SDK](https://www.braze.com/resources/articles/introducing-the-new-braze-swift-sdk).
# Integración con Swift Package Manager {#swift-package-manager-integration}
La instalación del SDK de iOS mediante [Swift Package Manager](https://swift.org/package-manager/) (SPM) automatiza la mayor parte del proceso de instalación. Antes de comenzar este proceso, asegúrate de que utilizas Xcode 12 o superior.
**Note:**
tvOS no está disponible actualmente a través de Swift Package Manager.
## Paso 1: Añadir la dependencia a tu proyecto {#step-1-adding-the-dependency-to-your-project}
### Importar versión del SDK {#import-sdk-version}
Abre tu proyecto y ve a la configuración del mismo. Selecciona la pestaña **Swift Packages** y haz clic en el botón añadir debajo de la lista de paquetes.

Al importar la versión del SDK `3.33.1` o posterior, introduce la URL de nuestro repositorio del SDK de iOS (`https://github.com/braze-inc/braze-ios-sdk`) en el campo de texto y haz clic en **Next**.
Para las versiones `3.29.0` a `3.32.0`, utiliza la URL `https://github.com/Appboy/Appboy-ios-sdk`.

En la siguiente pantalla, selecciona la versión del SDK y haz clic en **Next**. Las versiones `3.29.0` y posteriores son compatibles con Swift Package Manager.

### Seleccionar paquetes {#select-packages}
Selecciona el paquete que mejor se adapte a tus necesidades y haz clic en **Finish**. Asegúrate de seleccionar `AppboyKit` o `AppboyUI`. Incluir ambos paquetes puede provocar un comportamiento no deseado:
- `AppboyUI`
- Es el más adecuado si piensas utilizar componentes de interfaz de usuario proporcionados por Braze.
- Incluye `AppboyKit` automáticamente.
- `AppboyKit`
- Es el más adecuado si no necesitas utilizar ninguno de los componentes de interfaz de usuario proporcionados por Braze (por ejemplo, Content Cards, mensajes dentro de la aplicación, etc.).
- `AppboyPushStory`
- Incluye este paquete si has integrado Push Stories en tu aplicación. Esto se admite a partir de la versión `3.31.0`.
- En el menú desplegable de **Add to Target**, selecciona tu destino `ContentExtension` en lugar del destino de tu aplicación principal.

## Paso 2: Configurar tu proyecto {#step-2-configuring-your-project}
A continuación, ve a la **configuración de compilación** de tu proyecto y añade el indicador `-ObjC` a la opción **Other Linker Flags**. Hay que añadir este indicador y resolver cualquier [error](https://developer.apple.com/library/archive/qa/qa1490/_index.html) para poder seguir integrando el SDK.

**Note:**
Si no añades el indicador `-ObjC`, pueden faltar partes de la API y el comportamiento será indefinido. Puedes encontrarte con errores inesperados como "unrecognized selector sent to class", fallos de la aplicación y otros problemas.
## Paso 3: Editar el esquema del objetivo {#step-3-editing-the-targets-scheme}
**Important:**
Si utilizas Xcode 12.5 o posterior, omite este paso.
Si utilizas Xcode 12.4 o anterior, edita el esquema del objetivo que incluye el paquete Appboy (elemento del menú **Product > Scheme > Edit Scheme**):
1. Despliega el menú **Build** y selecciona **Post-actions**. Pulsa el botón más (+) y selecciona **New Run Script Action**.
2. En el desplegable **Provide build settings from**, selecciona el destino de tu aplicación.
3. Copia este script en el campo abierto:
```sh
# iOS
bash "$BUILT_PRODUCTS_DIR/Appboy_iOS_SDK_AppboyKit.bundle/Appboy.bundle/appboy-spm-cleanup.sh"
# macOS (if applicable)
bash "$BUILT_PRODUCTS_DIR/Appboy_iOS_SDK_AppboyKit.bundle/Contents/Resources/Appboy.bundle/appboy-spm-cleanup.sh"
```

## Próximos pasos {#next-steps}
Sigue las instrucciones para [completar la integración](https://www.braze.com/docs/es/es/developer_guide/platforms/legacy_sdks/ios/initial_sdk_setup/completing_integration).
# Opciones de integración manual para iOS
Source: /docs/es/developer_guide/platforms/legacy_sdks/ios/initial_sdk_setup/installation_methods/manual_integration_options/index.md
**Warning:**
[AppboyKit](https://github.com/Appboy/appboy-ios-sdk) (also known as the Objective-C SDK) is no longer supported and has been replaced by the [Swift SDK](https://www.braze.com/docs/es/es/developer_guide/sdk_integration/?sdktab=swift). It will no longer receive new features, bug fixes, security updates, or technical support—however, messaging and analytics will continue to function as normal. To learn more, see [Introducing the New Braze Swift SDK](https://www.braze.com/resources/articles/introducing-the-new-braze-swift-sdk).
# Integración manual {#manual-integration}
**Tip:**
Te recomendamos encarecidamente que implementes el SDK mediante un administrador de paquetes como [Swift Package Manager](../swift_package_manager/), [CocoaPods](../cocoapods/) o [Carthage](../carthage_integration/). Te ahorrará mucho tiempo y automatizará gran parte del proceso. Sin embargo, si no puedes hacerlo, puedes completar la integración manualmente siguiendo las instrucciones.
## Paso 1: Descarga del SDK de Braze {#step-1-downloading-the-braze-sdk}
### Opción 1: XCFramework dinámico {#option-1-dynamic-xcframework}
1. Descarga `Appboy_iOS_SDK.xcframework.zip` de la [página de la versión](https://github.com/appboy/appboy-ios-sdk/releases) y extrae el archivo.
2. En Xcode, arrastra y suelta este `.xcframework` en tu proyecto.
3. En la pestaña **General** del proyecto, selecciona **Embed & Sign** para `Appboy_iOS_SDK.xcframework`.
### Opción 2: XCFramework estático para integración estática {#option-2-static-xcframework-for-static-integration}
1. Descarga `Appboy_iOS_SDK.zip` desde la [página de la versión](https://github.com/appboy/appboy-ios-sdk/releases).
2. En Xcode, desde el navegador de proyectos, selecciona el proyecto o grupo de destino para Braze.
3. Navega hasta **File > Add Files > Project_Name**.
4. Añade las carpetas `AppboyKit` y `AppboyUI` a tu proyecto como un grupo.
- Asegúrate de que la opción **Copy items into destination group's folder** está seleccionada si es la primera vez que realizas la integración. Amplía **Options** en el selector de archivos para seleccionar **Copy items if needed** y **Create groups**.
- Elimina los directorios `AppboyKit/include` y `AppboyUI/include`.
5. (Opcional) Si se te aplica una de las siguientes opciones:
- Solo quieres las características principales de análisis del SDK y no utilizas ninguna característica de la interfaz de usuario (por ejemplo, mensajes dentro de la aplicación o Content Cards).
- Dispones de una interfaz de usuario personalizada para las características de la interfaz de usuario de Braze y te encargas tú mismo de la descarga de imágenes.
Puedes utilizar la versión básica del SDK eliminando el archivo `ABKSDWebImageProxy.m` y `Appboy.bundle`. Esto eliminará la dependencia del framework `SDWebImage` y todos los recursos relacionados con la interfaz de usuario (por ejemplo, archivos Nib, imágenes, archivos de localización) del SDK.
**Warning:**
Si intentas utilizar la versión básica del SDK sin las características de la interfaz de usuario de Braze, los mensajes dentro de la aplicación no se mostrarán. Si intentas mostrar la interfaz de usuario de Content Cards de Braze con la versión básica, se producirá un comportamiento impredecible.
## Paso 2: Añadir bibliotecas iOS necesarias {#step-2-adding-required-ios-libraries}
1. Haz clic en el objetivo de tu proyecto (utilizando la navegación de la izquierda) y selecciona la pestaña **Build Phases**.
2. Haz clic en el botón situado debajo de **Link Binary With Libraries**.
3. En el menú, selecciona `SystemConfiguration.framework`.
4. Marca esta biblioteca como necesaria utilizando el menú desplegable situado junto a `SystemConfiguration.framework`.
5. Repite la operación para añadir a tu proyecto cada uno de los siguientes frameworks necesarios, marcando cada uno como "required".
- `QuartzCore.framework`
- `libz.tbd`
- `CoreImage.framework`
- `CoreText.framework`
- `WebKit.framework`
6. Añade los siguientes frameworks y márcalos como opcionales:
- `CoreTelephony.framework`
7. Selecciona la pestaña **Build Settings**. En la sección **Linking**, localiza la configuración **Other Linker Flags** y añade el indicador `-ObjC`.
8. El framework `SDWebImage` es necesario para que Content Cards y la mensajería dentro de la aplicación funcionen correctamente. `SDWebImage` se utiliza para descargar y mostrar imágenes, incluidos los GIF. Si pretendes utilizar Content Cards o mensajes dentro de la aplicación, sigue los pasos de integración de SDWebImage.
### Integración de SDWebImage {#sdwebimage-integration}
Para instalar `SDWebImage`, sigue sus [instrucciones](https://github.com/SDWebImage/SDWebImage/wiki/Installation-Guide#build-sdwebimage-as-xcframework) y luego arrastra y suelta el `XCFramework` resultante en tu proyecto.
### Seguimiento de ubicación opcional {#optional-location-tracking}
1. Añade `CoreLocation.framework` para habilitar el seguimiento de ubicación.
2. Debes autorizar la ubicación de tus usuarios utilizando `CLLocationManager` en tu aplicación.
## Paso 3: Cabecera de puente Objective-C {#step-3-objective-c-bridging-header}
**Note:**
Si tu proyecto solo utiliza Objective-C, sáltate este paso.
Si tu proyecto utiliza Swift, necesitarás un archivo de cabecera puente.
Si no tienes un archivo de cabecera puente, crea uno y nómbralo `your-product-module-name-Bridging-Header.h` eligiendo **File > New > File > (iOS o OS X) > Source > Header File**. A continuación, añade la siguiente línea de código al principio de tu archivo de cabecera puente:
```
#import "AppboyKit.h"
```
En la **Build Settings** de tu proyecto, añade la ruta relativa de tu archivo de cabecera a la configuración de compilación de `Objective-C Bridging Header` en `Swift Compiler - Code Generation`.
## Próximos pasos {#next-steps}
Sigue las instrucciones para [completar la integración](https://www.braze.com/docs/es/es/developer_guide/platforms/legacy_sdks/ios/initial_sdk_setup/completing_integration).
# Completa la integración del SDK de iOS
Source: /docs/es/developer_guide/platforms/legacy_sdks/ios/initial_sdk_setup/completing_integration/index.md
**Warning:**
[AppboyKit](https://github.com/Appboy/appboy-ios-sdk) (also known as the Objective-C SDK) is no longer supported and has been replaced by the [Swift SDK](https://www.braze.com/docs/es/es/developer_guide/sdk_integration/?sdktab=swift). It will no longer receive new features, bug fixes, security updates, or technical support—however, messaging and analytics will continue to function as normal. To learn more, see [Introducing the New Braze Swift SDK](https://www.braze.com/resources/articles/introducing-the-new-braze-swift-sdk).
# Completa la integración {#complete-the-integration}
Antes de seguir estos pasos, asegúrate de haber integrado el SDK mediante [Carthage](https://www.braze.com/docs/es/es/developer_guide/platforms/legacy_sdks/ios/initial_sdk_setup/installation_methods/carthage_integration), [CocoaPods](https://www.braze.com/docs/es/es/developer_guide/platforms/legacy_sdks/ios/initial_sdk_setup/installation_methods/cocoapods), [Swift Package Manager](https://www.braze.com/docs/es/es/developer_guide/platforms/legacy_sdks/ios/initial_sdk_setup/installation_methods/swift_package_manager) o una integración [manual](https://www.braze.com/docs/es/es/developer_guide/platforms/legacy_sdks/ios/initial_sdk_setup/installation_methods/manual_integration_options).
## Paso 1: Actualiza el delegado de tu aplicación {#step-1-update-your-app-delegate}
Si estás integrando el SDK de Braze con CocoaPods, Carthage o con una [integración manual dinámica](https://www.braze.com/docs/es/es/developer_guide/platforms/legacy_sdks/ios/initial_sdk_setup/installation_methods/manual_integration_options), añade la siguiente línea de código a tu archivo `AppDelegate.m`:
```objc
#import "Appboy-iOS-SDK/AppboyKit.h"
```
Si estás integrando con Swift Package Manager o con una [integración manual estática](https://www.braze.com/docs/es/es/developer_guide/platforms/legacy_sdks/ios/initial_sdk_setup/installation_methods/manual_integration_options), utiliza esta línea en su lugar:
```objc
#import "AppboyKit.h"
```
A continuación, dentro de tu archivo `AppDelegate.m`, añade el siguiente fragmento de código dentro de tu método `application:didFinishLaunchingWithOptions:`:
```objc
[Appboy startWithApiKey:@"YOUR-APP-IDENTIFIER-API-KEY"
inApplication:application
withLaunchOptions:launchOptions];
```
Actualiza `YOUR-APP-IDENTIFIER-API-KEY` con el valor correcto desde tu página **Administrar configuración**. Consulta nuestra [documentación sobre la API](https://www.braze.com/docs/es/es/api/api_key#the-app-identifier-api-key) para obtener más información sobre dónde encontrar la clave de API del identificador de tu aplicación.
Si estás integrando el SDK de Braze con CocoaPods, Carthage o con una [integración manual dinámica](https://www.braze.com/docs/es/es/developer_guide/platforms/legacy_sdks/ios/initial_sdk_setup/installation_methods/manual_integration_options), añade la siguiente línea de código a tu archivo `AppDelegate.swift`:
```swift
import Appboy_iOS_SDK
```
Si estás integrando con Swift Package Manager o con una [integración manual estática](https://www.braze.com/docs/es/es/developer_guide/platforms/legacy_sdks/ios/initial_sdk_setup/installation_methods/manual_integration_options), utiliza esta línea en su lugar:
```swift
import AppboyKit
```
Consulta [la documentación para desarrolladores de Apple](https://developer.apple.com/library/ios/documentation/swift/conceptual/buildingcocoaapps/MixandMatch.html) para obtener más información sobre el uso de código Objective-C en proyectos Swift.
A continuación, en `AppDelegate.swift`, añade el siguiente fragmento de código a tu `application(application: UIApplication, didFinishLaunchingWithOptions launchOptions: [NSObject: AnyObject]?) -> Bool`:
```swift
Appboy.start(withApiKey: "YOUR-APP-IDENTIFIER-API-KEY", in:application, withLaunchOptions:launchOptions)
```
Actualiza `YOUR-APP-IDENTIFIER-API-KEY` con el valor correcto desde tu página **Administrar configuración**. Consulta nuestra [documentación sobre la API](https://www.braze.com/docs/es/es/api/api_key#the-app-identifier-api-key) para obtener más información sobre dónde encontrar la clave de API del identificador de tu aplicación.
**Note:**
El singleton `sharedInstance` será nulo antes de llamar a `startWithApiKey:`, ya que es un requisito previo para utilizar cualquier función de Braze.
**Warning:**
Asegúrate de inicializar Braze en el hilo principal de tu aplicación. Inicializar de forma asíncrona puede provocar fallos en la funcionalidad.
## Paso 2: Especifica tu clúster de datos {#step-2-specify-your-data-cluster}
**Note:**
Ten en cuenta que, a partir de diciembre de 2019, ya no se proporcionan puntos de conexión personalizados. Si tienes un punto de conexión personalizado preexistente, puedes seguir utilizándolo. Para más detalles, consulta nuestra lista de puntos de conexión disponibles.
### Configuración del punto de conexión en tiempo de compilación (recomendado) {#compile-time-endpoint-configuration-recommended}
Si se te proporcionó un punto de conexión personalizado preexistente:
- A partir de la versión 3.0.2 del SDK iOS de Braze, puedes establecer un punto de conexión personalizado utilizando el archivo `Info.plist`. Añade el diccionario `Braze` a tu archivo `Info.plist`. Dentro del diccionario `Braze`, añade la subentrada de cadena `Endpoint` y establece el valor en la autoridad de la URL de tu punto de conexión personalizado (por ejemplo, `sdk.iad-01.braze.com`, no `https://sdk.iad-01.braze.com`). Ten en cuenta que antes de la versión 4.0.2 del SDK iOS de Braze, se debe utilizar la clave de diccionario `Appboy` en lugar de `Braze`.
Tu representante de Braze ya debería haberte indicado el [punto de conexión correcto](https://www.braze.com/docs/es/es/user_guide/administer/personal/sdk_endpoints).
### Configuración del punto de conexión en tiempo de ejecución {#runtime-endpoint-configuration}
Si se te proporcionó un punto de conexión personalizado preexistente:
- A partir de la versión 3.17.0+ del SDK iOS de Braze, puedes anular la configuración de tu punto de conexión a través de `ABKEndpointKey` dentro del parámetro `appboyOptions` pasado a `startWithApiKey:inApplication:withLaunchOptions:withAppboyOptions:`. Establece el valor en la autoridad de la URL de tu punto de conexión personalizado (por ejemplo, `sdk.iad-01.braze.com`, no `https://sdk.iad-01.braze.com`).
## Integración del SDK completa {#sdk-integration-complete}
Ahora Braze debería estar recopilando datos de tu aplicación, y tu integración básica debería estar completa. Consulta los artículos siguientes para habilitar [el seguimiento de eventos personalizados](https://www.braze.com/docs/es/es/developer_guide/analytics/logging_events?tab=swift), la [mensajería push](https://www.braze.com/docs/es/es/developer_guide/platforms/legacy_sdks/ios/push_notifications/integration) y la línea completa de características de Braze.
## Personalizar Braze al iniciarse {#customizing-braze-on-startup}
Si deseas personalizar Braze al iniciarse, puedes utilizar en su lugar el método de inicialización de Braze `startWithApiKey:inApplication:withLaunchOptions:withAppboyOptions:` y pasar un `NSDictionary` opcional de claves de inicio de Braze.
En tu archivo `AppDelegate.m`, dentro de tu método `application:didFinishLaunchingWithOptions:`, añade el siguiente método de Braze:
```objc
[Appboy startWithApiKey:@"YOUR-APP-IDENTIFIER-API-KEY"
inApplication:application
withLaunchOptions:launchOptions
withAppboyOptions:appboyOptions];
```
Ten en cuenta que este método sustituiría al método de inicialización `startWithApiKey:inApplication:withLaunchOptions:`.
En `AppDelegate.swift`, dentro de tu método `application(application: UIApplication, didFinishLaunchingWithOptions launchOptions: [NSObject: AnyObject]?) -> Bool`, añade el siguiente método de Braze donde `appboyOptions` es un `Dictionary` de valores de configuración de inicio:
```swift
Appboy.start(withApiKey: "YOUR-APP-IDENTIFIER-API-KEY",
in:application,
withLaunchOptions:launchOptions,
withAppboyOptions:appboyOptions)
```
Ten en cuenta que este método sustituiría al método de inicialización `startWithApiKey:inApplication:withLaunchOptions:`.
Este método se llama con los siguientes parámetros:
- `YOUR-APP-IDENTIFIER-API-KEY` – Tu clave de API del [identificador de la aplicación](https://www.braze.com/docs/es/es/api/api_key#the-app-identifier-api-key) desde el panel de Braze.
- `application` – La aplicación actual.
- `launchOptions` – Las opciones `NSDictionary` que obtienes de `application:didFinishLaunchingWithOptions:`.
- `appboyOptions` – Un `NSDictionary` opcional con valores de configuración de inicio para Braze.
Consulta [Appboy.h](https://github.com/braze-inc/braze-ios-sdk/blob/master/AppboyKit/include/Appboy.h) para ver una lista de las claves de inicio de Braze.
## Appboy.sharedInstance() y anulabilidad en Swift {#appboysharedinstance-and-swift-nullability}
A diferencia de la práctica habitual, el singleton `Appboy.sharedInstance()` es opcional. Esto se debe a que `sharedInstance` es `nil` antes de que se llame a `startWithApiKey:`, y hay algunas implementaciones no estándar pero válidas en las que se puede utilizar una inicialización retardada.
Si llamas a `startWithApiKey:` en tu delegado `didFinishLaunchingWithOptions:` antes de cualquier acceso al `sharedInstance` de Appboy (la implementación estándar), puedes utilizar el encadenamiento opcional, como `Appboy.sharedInstance()?.changeUser("testUser")`, para evitar comprobaciones engorrosas. Esto tendrá paridad con una implementación de Objective-C que haya asumido un `sharedInstance` no nulo.
## Recursos adicionales {#additional-resources}
La [documentación completa de las clases de iOS](http://appboy.github.io/appboy-ios-sdk/docs/annotated.html) está disponible para proporcionar orientación adicional sobre cualquier método del SDK.
# Otras personalizaciones del SDK para iOS
Source: /docs/es/developer_guide/platforms/legacy_sdks/ios/initial_sdk_setup/other_sdk_customizations/index.md
**Warning:**
[AppboyKit](https://github.com/Appboy/appboy-ios-sdk) (also known as the Objective-C SDK) is no longer supported and has been replaced by the [Swift SDK](https://www.braze.com/docs/es/es/developer_guide/sdk_integration/?sdktab=swift). It will no longer receive new features, bug fixes, security updates, or technical support—however, messaging and analytics will continue to function as normal. To learn more, see [Introducing the New Braze Swift SDK](https://www.braze.com/resources/articles/introducing-the-new-braze-swift-sdk).
# Otras personalizaciones del SDK {#other-sdk-customizations}
## Nivel de registro de Braze {#braze-log-level}
El nivel de registro predeterminado para el SDK de Braze para iOS es mínimo, o `8` en la siguiente tabla. Este nivel suprime la mayoría de los registros para que no se registre ninguna información sensible en una aplicación lanzada en producción.
Consulta la siguiente lista de niveles de registro disponibles:
### Niveles de registro {#log-levels}
| Nivel | Descripción |
|----------|-------------|
| 0 | Verboso. Toda la información de registro se registrará en la consola de iOS. |
| 1 | Depuración. La información de depuración y de registro superior se registrará en la consola de iOS. |
| 2 | Advertencia. La información de advertencia y de registro superior se registrará en la consola de iOS. |
| 4 | Error. Los errores y la información de registro superior se registrarán en la consola de iOS. |
| 8 | Mínimo. Se registrará información mínima en la consola de iOS. La configuración predeterminada del SDK. |
{: .reset-td-br-1 .reset-td-br-2 aria-label="Niveles de registro" }
### Registro detallado {#verbose-logging}
Puedes configurar el nivel de registro a cualquier valor disponible. Sin embargo, establecer el nivel de registro en verboso, o `0`, puede ser muy útil para depurar problemas con tu integración. Este nivel solo está pensado para entornos de desarrollo y no debe establecerse en una aplicación publicada. El registro verboso no enviará ninguna información adicional o nueva del usuario a Braze.
### Configuración del nivel de registro {#setting-log-level}
El nivel de registro se puede asignar en tiempo de compilación o en tiempo de ejecución:
Añade un diccionario llamado `Braze` a tu archivo `Info.plist`. Dentro del diccionario `Braze`, añade la subentrada de cadena `LogLevel` y establece el valor en `0`.
**Note:**
Antes de la versión 4.0.2 del SDK de Braze para iOS, debe usarse la clave de diccionario `Appboy` en lugar de `Braze`.
Ejemplo de contenidos de `Info.plist`:
```
BrazeLogLevel0
```
Añade `ABKLogLevelKey` dentro del parámetro `appboyOptions` pasado a `startWithApiKey:inApplication:withLaunchOptions:withAppboyOptions:`. Establece su valor en el número entero `0`.
```objc
NSMutableDictionary *appboyOptions = [NSMutableDictionary dictionary];
appboyOptions[ABKLogLevelKey] = @(0);
[Appboy startWithApiKey:@"YOUR-API-KEY"
inApplication:application
withLaunchOptions:launchOptions
withAppboyOptions:appboyOptions];
```
```swift
let appboyOptions: [AnyHashable: Any] = [
ABKLogLevelKey : 0
]
Appboy.start(withApiKey: "YOUR-API-KEY", in:application, withLaunchOptions:launchOptions, withAppboyOptions:appboyOptions)
```
**Note:**
El nivel de registro solo se puede configurar en tiempo de ejecución con la versión 4.4.0 del SDK de Braze para iOS o posterior. Si utilizas una versión anterior del SDK, establece el nivel de registro en tiempo de compilación.
## Recopilación opcional de IDFV - Swift {#optional-idfv-collection-swift}
En versiones anteriores del SDK de Braze para iOS Swift, el campo IDFV (identificador del proveedor) se recopilaba automáticamente como ID del dispositivo del usuario.
A partir de la versión 5.7.0 del SDK Swift, el campo IDFV puede desactivarse opcionalmente y, en su lugar, Braze establecerá un UUID aleatorio como ID del dispositivo. Para más información, consulta [Recopilación de IDFV](https://www.braze.com/docs/es/es/developer_guide/analytics/managing_data_collection?sdktab=swift).
## Recopilación opcional de IDFA {#optional-idfa-collection}
La recopilación de IDFA es opcional dentro del SDK de Braze y está deshabilitada de forma predeterminada. La recopilación de IDFA solo es necesaria en Braze si pretendes utilizar nuestras [integraciones de atribución de instalación](https://www.braze.com/docs/es/es/partners/message_orchestration/attribution/adjust). Si optas por almacenar tu IDFA, lo haremos de forma gratuita, para que puedas aprovechar estas opciones inmediatamente después de la publicación, sin trabajo de desarrollo adicional.
Por ello, te recomendamos que sigas recopilando el IDFA si cumples alguno de los siguientes criterios:
- Estás atribuyendo la instalación de la aplicación a un anuncio publicado anteriormente.
- Estás atribuyendo una acción dentro de la aplicación a un anuncio servido previamente.
### iOS 14.5 AppTrackingTransparency
Apple exige a los usuarios que se adhieran voluntariamente a través de un mensaje de permiso para recopilar IDFA.
Para recopilar IDFA, además de implementar nuestro protocolo `ABKIDFADelegate`, tu aplicación tendrá que solicitar autorización al usuario utilizando `ATTrackingManager` de Apple en el marco de transparencia de seguimiento de aplicaciones. Consulta el artículo sobre [privacidad del usuario](https://developer.apple.com/app-store/user-privacy-and-data-use/) de Apple para obtener más información.
La solicitud de autorización de transparencia de seguimiento de la aplicación requiere una entrada en `Info.plist` para explicar el uso que haces del identificador:
```
NSUserTrackingUsageDescriptionTo retarget ads and build a global profile to better serve you things you would like.
```
### Implementar la recopilación de IDFA {#implementing-idfa-collection}
Sigue estos pasos para implementar la recopilación de IDFA:
#### Paso 1: Implementar ABKIDFADelegate {#step-1-implement-abkidfadelegate}
Crea una clase que se ajuste al protocolo [`ABKIDFADelegate`](https://github.com/Appboy/appboy-ios-sdk/blob/master/AppboyKit/include/ABKIDFADelegate.h):
```objc
#import "IDFADelegate.h"
#import
#import
@implementation IDFADelegate
- (NSString *)advertisingIdentifierString {
return [[[ASIdentifierManager sharedManager] advertisingIdentifier] UUIDString];
}
- (BOOL)isAdvertisingTrackingEnabledOrATTAuthorized {
if (@available(iOS 14, *)) {
return [ATTrackingManager trackingAuthorizationStatus] == ATTrackingManagerAuthorizationStatusAuthorized;
}
return [[ASIdentifierManager sharedManager] isAdvertisingTrackingEnabled];
}
@end
```
```swift
import Appboy_iOS_SDK
import AdSupport
import AppTrackingTransparency
class IDFADelegate: NSObject, ABKIDFADelegate {
func advertisingIdentifierString() -> String {
return ASIdentifierManager.shared().advertisingIdentifier.uuidString
}
func isAdvertisingTrackingEnabledOrATTAuthorized() -> Bool {
if #available(iOS 14, *) {
return ATTrackingManager.trackingAuthorizationStatus == ATTrackingManager.AuthorizationStatus.authorized
}
return ASIdentifierManager.shared().isAdvertisingTrackingEnabled
}
}
```
##### Paso 2: Configura el delegado durante la inicialización de Braze {#step-2-set-the-delegate-during-braze-initialization}
En el diccionario `appboyOptions` pasado a `startWithApiKey:inApplication:withAppboyOptions:`, establece la clave `ABKIDFADelegateKey` en una instancia de tu clase conforme a `ABKIDFADelegate`.
## Tamaño aproximado del SDK de iOS {#ios-sdk-size}
El tamaño de archivo aproximado del framework del SDK de iOS es de 30 MB, y el tamaño aproximado del .ipa (adición al archivo de la aplicación) está entre 1 MB y 2 MB.
Braze mide el tamaño de nuestro SDK para iOS observando el efecto del SDK en el tamaño del `.ipa`, según las [recomendaciones de Apple sobre el tamaño de las aplicaciones](https://developer.apple.com/library/content/qa/qa1795/_index.html). Si estás calculando la adición de tamaño del SDK de iOS a tu aplicación, te recomendamos seguir [Obtener un informe del tamaño de la aplicación](https://developer.apple.com/library/content/qa/qa1795/_index.html) para comparar la diferencia de tamaño en tu `.ipa` antes y después de integrar el SDK de Braze para iOS. Cuando compares los tamaños del informe sobre el tamaño de las aplicaciones, te recomendamos que mires también los tamaños de las aplicaciones para los archivos `.ipa` reducidos, ya que los archivos universales `.ipa` serán mayores que los binarios descargados de la App Store e instalados en los dispositivos de los usuarios.
**Note:**
Si estás integrando a través de CocoaPods con `use_frameworks!`, establece `Enable Bitcode = NO` en la configuración de compilación del objetivo para obtener un tamaño preciso.
# Guía de integración de Braze SDK para iOS (opcional)
Source: /docs/es/developer_guide/platforms/legacy_sdks/ios/initial_sdk_setup/ios_sdk_integration/index.md
**Warning:**
[AppboyKit](https://github.com/Appboy/appboy-ios-sdk) (also known as the Objective-C SDK) is no longer supported and has been replaced by the [Swift SDK](https://www.braze.com/docs/es/es/developer_guide/sdk_integration/?sdktab=swift). It will no longer receive new features, bug fixes, security updates, or technical support—however, messaging and analytics will continue to function as normal. To learn more, see [Introducing the New Braze Swift SDK](https://www.braze.com/resources/articles/introducing-the-new-braze-swift-sdk).
# Guía de integración del SDK de Braze para iOS {#braze-ios-sdk-integration-guide}
> Esta guía opcional de integración de iOS te lleva paso a paso por las mejores prácticas de configuración al integrar por primera vez el SDK de iOS y sus componentes principales en tu aplicación. Esta guía te ayudará a crear un archivo de ayuda `BrazeManager.swift` que desacoplará cualquier dependencia del SDK de Braze para iOS del resto de tu código de producción, dando como resultado un único `import AppboyUI` en toda tu aplicación. Este enfoque limita los problemas que surgen de un exceso de importaciones del SDK, lo que facilita el seguimiento, la depuración y la modificación del código.
**Important:**
Esta guía asume que ya has [añadido el SDK](https://www.braze.com/docs/es/es/developer_guide/platforms/legacy_sdks/ios/initial_sdk_setup/overview) a tu proyecto Xcode.
## Resumen de la integración {#integration-overview}
Los siguientes pasos te ayudarán a crear un archivo de ayuda `BrazeManager` al que llame tu código de producción. Este archivo de ayuda se ocupará de todas las dependencias relacionadas con Braze añadiendo varias extensiones para los siguientes temas de integración que se enumeran. Cada tema incluirá pasos en pestañas horizontales y fragmentos de código tanto en Swift como en Objective-C. Ten en cuenta que los pasos de Content Cards y mensajes dentro de la aplicación no son necesarios para la integración si no piensas utilizar estos canales en tu aplicación.
- [Crear BrazeManager.swift](#create-brazemanagerswift)
- [Inicializar el SDK](#initialize-the-sdk)
- [Notificaciones push](#push-notifications)
- [Acceder a variables y métodos de usuario](#access-user-variables-and-methods)
- [Registrar análisis](#log-analytics)
- [Mensajes dentro de la aplicación (opcional)](#in-app-messages)
- [Content Cards (opcional)](#content-cards)
- [Próximos pasos](#next-steps)
### Crear BrazeManager.swift {#create-brazemanagerswift}
#### Crear BrazeManager.swift
Para crear tu archivo `BrazeManager.swift`, crea un nuevo archivo Swift llamado _BrazeManager_ y añádelo a tu proyecto en la ubicación que desees. A continuación, sustituye `import Foundation` por `import AppboyUI` para SPM (`import Appboy_iOS_SDK` para CocoaPods) y luego crea una clase `BrazeManager` que se utilizará para alojar todos los métodos y variables relacionados con Braze. `Appboy_iOS_SDK`
**Note:**
- `BrazeManager` es una clase `NSObject` y no una estructura, por lo que puede ajustarse a delegados ABK como `ABKInAppMessageUIDelegate`.
- `BrazeManager` es una clase singleton por diseño, de modo que solo se utilizará una instancia de esta clase. Esto se hace para proporcionar un punto de acceso unificado al objeto.
1. Añade una variable estática llamada _shared_ que inicialice la clase `BrazeManager`. Se garantiza que se inicie de forma diferida solo una vez.
2. A continuación, añade una variable constante privada llamada _apiKey_ y establécela como el valor de la clave de API de tu espacio de trabajo en el panel de Braze.
3. Añade una variable privada calculada llamada _appboyOptions_, que almacenará valores de configuración para el SDK. Por ahora estará vacía.
```swift
class BrazeManager: NSObject {
// 1
static let shared = BrazeManager()
// 2
private let apikey = "YOUR-API-KEY"
// 3
private var appboyOptions: [String:Any] {
return [:]
}
}
```
```objc
@implementation BrazeManager
// 1
+ (instancetype)shared {
static BrazeManager *shared = nil;
static dispatch_once_t onceToken;
dispatch_once(&onceToken, ^{
shared = [[BrazeManager alloc] init];
// Do any other initialisation stuff here
});
return shared;
}
// 2
- (NSString *)apiKey {
return @"YOUR-API-KEY";
}
// 3
- (NSDictionary *)appboyOptions {
return [NSDictionary dictionary];
}
```
### Inicializar el SDK {#initialize-the-sdk}
#### Inicializar el SDK desde BrazeManager.swift {#initialize-sdk-from-brazemanagerswift}
A continuación, debes inicializar el SDK. Esta guía asume que ya has [añadido el SDK](https://www.braze.com/docs/es/es/developer_guide/platforms/legacy_sdks/ios/initial_sdk_setup/overview) a tu proyecto Xcode. También debes tener el [punto de conexión del SDK de tu espacio de trabajo](https://www.braze.com/docs/es/es/developer_guide/platform_integration_guides/ios/initial_sdk_setup/completing_integration#step-2-specify-your-data-cluster) y [`LogLevel`](https://www.braze.com/docs/es/es/developer_guide/platform_integration_guides/ios/initial_sdk_setup/other_sdk_customizations#braze-log-level) configurados en tu archivo `Info.plist` o en `appboyOptions`.
Añade el método `didFinishLaunchingWithOptions` del archivo `AppDelegate.swift` sin tipo de retorno en tu archivo `BrazeManager.swift`. Al crear un método similar en el archivo `BrazeManager.swift`, no habrá una declaración `import AppboyUI` en tu archivo `AppDelegate.swift`.
A continuación, inicializa el SDK utilizando las variables `apiKey` y `appboyOptions` que acabas de declarar.
**Important:**
La inicialización debe hacerse en el hilo principal.
```swift
func application(_ application: UIApplication, didFinishLaunchingWithOptions launchOptions: [UIApplication.LaunchOptionsKey: Any]?) {
Appboy.start(withApiKey: apikey, in: application, withLaunchOptions: launchOptions, withAppboyOptions: appboyOptions)
}
```
```objc
- (void)application:(UIApplication *)application didFinishLaunchingWithOptions:(NSDictionary *)launchOptions {
[Appboy startWithApiKey:[self apiKey] inApplication:application withLaunchOptions:launchOptions withAppboyOptions:[self appboyOptions]];
}
```
##### Gestionar la inicialización de Appboy en AppDelegate.swift {#handle-appboy-initialization-in-the-appdelegateswift}
A continuación, vuelve al archivo `AppDelegate.swift` y añade el siguiente fragmento de código en el método `didFinishLaunchingWithOptions` del AppDelegate para gestionar la inicialización de Appboy desde el archivo de ayuda `BrazeManager.swift`. Recuerda que no es necesario añadir una declaración `import AppboyUI` en `AppDelegate.swift`.
```swift
func application(
_ application: UIApplication,
didFinishLaunchingWithOptions launchOptions: [UIApplication.LaunchOptionsKey: Any]?
) -> Bool {
// Override point for customization after application launch
BrazeManager.shared.application(application, didFinishLaunchingWithOptions: launchOptions)
return true
}
```
```objc
- (BOOL)application:(UIApplication *)application didFinishLaunchingWithOptions:(NSDictionary *)launchOptions {
// Override point for customization after application launch
[[BrazeManager shared] application:application didFinishLaunchingWithOptions:launchOptions];
return YES;
}
```
**Checkpoint:**
Procede a compilar tu código y a ejecutar tu aplicación.
En este punto, el SDK debería estar funcionando. En tu dashboard, observa que se están registrando las sesiones antes de seguir avanzando.
### Notificaciones push {#push-notifications}
#### Añadir certificado push {#add-push-certificate}
Navega a tu espacio de trabajo existente en el panel de Braze. En **Configuración de notificación push**, sube tu archivo de certificado push a tu panel de Braze y guárdalo.
{: style="max-width:60%;"}
**Important:**
¡No te pierdas el punto de control dedicado al final de este paso!
##### Registrarse para notificaciones push {#register-for-push-notifications}
A continuación, regístrate para recibir notificaciones push. Esta guía asume que has [configurado correctamente tus credenciales push](https://www.braze.com/docs/es/es/developer_guide/platforms/legacy_sdks/ios/push_notifications/integration) en tu portal de desarrollador de Apple y en tu proyecto Xcode.
El código para registrar las notificaciones push se añadirá en el método `didFinishLaunching...` del archivo `BrazeManager.swift`. Tu código de inicialización debería acabar teniendo el siguiente aspecto:
1. Configura los contenidos para solicitar autorización para interactuar con el usuario. Estas opciones se indican a modo de ejemplo.
2. Solicita autorización para enviar notificaciones push a tus usuarios. La respuesta del usuario para permitir o denegar las notificaciones push se registra en la variable `granted`.
3. Reenvía los resultados de la autorización push a Braze después de que el usuario interactúe con la solicitud de notificación.
4. Inicia el proceso de registro con APNs; esto debe hacerse en el hilo principal. Si el registro tiene éxito, la aplicación llama al método `didRegisterForRemoteNotificationsWithDeviceToken` de tu objeto `AppDelegate`.
```swift
func application(_ application: UIApplication, didFinishLaunchingWithOptions launchOptions:[UIApplication.LaunchOptionsKey:Any]?) {
Appboy.start(withAPIKey: apikey, in: application, withLaunchOptions: launchOptions, withAppboyOptions: appboyOptions)
// 1
let options: UNAuthorizationOptions = [.alert, .sound, .badge]
// 2
UNUserNotificationCenter.current().requestAuthorization(option: options) { (granted, error) in
// 3
Appboy.sharedInstance()?.pushAuthorization(fromUserNotificationCenter: granted)
}
// 4
UIApplications.shared.registerForRemoteNotificiations()
}
```
```objc
- (void)application:(UIApplication *)application didFinishLaunchingWithOptions:(NSDictionary *)launchOptions {
[Appboy startWithApiKey:[self apiKey] inApplication:application withLaunchOptions:launchOptions withAppboyOptions:[self appboyOptions]];
// 1
UNAuthorizationOptions options = (UNAuthorizationOptionSound | UNAuthorizationOptionAlert | UNAuthorizationOptionBadge);
// 2
[[UNUserNotificationCenter currentNotificationCenter] requestAuthorizationWithOptions:options completionHandler:^(BOOL granted, NSError * _Nullable error) {
// 3
[[Appboy sharedInstance] pushAuthorizationFromUserNotificationCenter:granted];
}];
// 4
[[UIApplication sharedApplication] registerForRemoteNotifications];
}
```
**Checkpoint:**
Procede a compilar tu código y a ejecutar tu aplicación.
- En tu aplicación, confirma que se te solicitan notificaciones push antes de seguir avanzando.
- Si no se te solicita, prueba a borrar y volver a instalar la aplicación para asegurarte de que el aviso de notificación push no se mostró anteriormente.
Observa que se te solicitan notificaciones push antes de seguir avanzando.
##### Reenviar métodos de notificación push {#forward-push-notification-methods}
A continuación, reenvía los métodos de notificación push del sistema de `AppDelegate.swift` a `BrazeManager.swift` para que los gestione el SDK de Braze para iOS.
###### Paso 1: Crear extensión para código de notificación push {#step-1-create-extension-for-push-notification-code}
Crea una extensión para tu código de notificación push en tu archivo `BrazeManager.swift` para que se lea de forma más organizada en cuanto a la finalidad que se persigue en el archivo de ayuda, así:
1. Siguiendo el patrón de no incluir una declaración `import AppboyUI` en tu `AppDelegate`, gestionaremos los métodos de notificaciones push en el archivo `BrazeManager.swift`. Los tokens del dispositivo del usuario deberán pasarse a Braze desde el método `didRegisterForRemote...`. Este método es necesario para implementar notificaciones push silenciosas. A continuación, añade el mismo método del `AppDelegate` en tu clase `BrazeManager`.
2. Añade la siguiente línea dentro del método para registrar el token del dispositivo en Braze. Esto es necesario para que Braze asocie el token al dispositivo actual.
```swift
// MARK - Push Notifications
extension BrazeManager {
// 1
func application(
_ application: UIApplication,
didRegisterForRemoteNotificationsWithDeviceToken deviceToken: Data
) {
// 2
Appboy.sharedInstance().?registerDeviceToken(deviceToken)
}
}
```
```objc
// MARK - Push Notifications
// 1
- (void)application:(UIApplication *)application didRegisterForRemoteNotificationsWithDeviceToken:(NSData *)deviceToken {
// 2
[[Appboy sharedInstance] registerDeviceToken:deviceToken];
}
```
###### Paso 2: Soporte para notificaciones remotas {#step-2-support-remote-notifications}
En la pestaña **Signing & Capabilities**, añade la compatibilidad con **Background Modes** y selecciona **Remote notifications** para comenzar a admitir las notificaciones push remotas procedentes de Braze.

###### Paso 3: Gestión de notificaciones remotas {#step-3-remote-notification-handling}
El SDK de Braze puede gestionar notificaciones push remotas que se originen en Braze. Reenvía las notificaciones remotas a Braze; el SDK ignorará automáticamente las notificaciones push que no procedan de Braze. Añade el siguiente método a tu archivo `BrazeManager.swift` en la extensión de notificaciones push.
```swift
func application(
_ application: UIApplication,
didReceiveRemoteNotification userInfo: [AnyHashable : Any],
fetchCompletionHandler completionHandler: @escaping (UIBackgroundFetchResult) -> Void
) {
Appboy.sharedInstance()?.register(
application,
didReceiveRemoteNotification: userInfo,
fetchCompletionHandler: completionHandler
)
}
```
```objc
- (void)application:(UIApplication *)application didReceiveRemoteNotification:(NSDictionary *)userInfo fetchCompletionHandler:(void (^)(UIBackgroundFetchResult))completionHandler {
[[Appboy sharedInstance] registerApplication:application didReceiveRemoteNotification:userInfo fetchCompletionHandler:completionHandler];
}
```
###### Paso 4: Reenviar respuestas de notificación {#step-4-forward-notification-responses}
El SDK de Braze puede gestionar la respuesta de las notificaciones push que se originan en Braze. Reenvía la respuesta de las notificaciones a Braze; el SDK ignorará automáticamente las respuestas de las notificaciones push que no se originen en Braze. Añade el siguiente método a tu archivo `BrazeManager.swift`:
```swift
func userNotificationCenter(
_ center: UNUserNotificationCenter,
didReceive response: UNNotificationResponse,
withCompletionHandler completionHandler: @escaping () -> Void
) {
Appboy.sharedInstance()?.userNotificationCenter(
center,
didReceive: response,
withCompletionHandler: completionHandler
)
}
```
```objc
- (void)userNotificationCenter:(UNUserNotificationCenter *)center
didReceiveNotificationResponse:(UNNotificationResponse *)response
withCompletionHandler:(void (^)(void))completionHandler {
[[Appboy sharedInstance] userNotificationCenter:center
didReceiveNotificationResponse:response
withCompletionHandler:completionHandler];
}
```
**Checkpoint:**
Procede a compilar tu código y a ejecutar tu aplicación.
Prueba a enviarte una notificación push desde el panel de Braze y observa que se registran los análisis de las notificaciones push antes de seguir avanzando.
### Acceder a variables y métodos de usuario {#access-user-variables-and-methods}
#### Crear variables y métodos de usuario {#create-user-variables-and-methods}
A continuación, querrás acceder fácilmente a las variables y métodos de `ABKUser`. Crea una extensión para tu código de usuario en el archivo `BrazeManager.swift` para que se lea de forma más organizada en cuanto a qué propósito tiene en el archivo de ayuda, de esta forma:
1. Un objeto `ABKUser` representa a un usuario conocido o anónimo en tu aplicación iOS. Añade una variable calculada para recuperar el `ABKUser`; esta variable se reutilizará para recuperar variables sobre el usuario.
2. Consulta la variable de usuario para acceder fácilmente a `userId`. Entre otras variables, el objeto `ABKUser` es responsable de (`firstName`, `lastName`, `phone`, `homeCity`, etc.)
3. Configura el usuario llamando a `changeUser()` con un `userId` correspondiente.
```swift
// MARK: - User
extension BrazeManager {
// 1
var user: ABKUser? {
return Appboy.sharedInstance()?.user
}
// 2
var userId: String? {
return user?.userID
}
// 3
func changeUser(_ userId: String) {
Appboy.sharedInstance()?.changeUser(userId)
}
}
```
```objc
// MARK: - User
// 1
- (ABKUser *)user {
return [[Appboy sharedInstance] user];
}
// 2
- (NSString *)userId {
return [self user].userID;
}
// 3
- (void)changeUser:(NSString *)userId {
[[Appboy sharedInstance] changeUser:userId];
}
```
**Checkpoint:**
Procede a compilar tu código y a ejecutar tu aplicación.
Intenta identificar a los usuarios que se han registrado correctamente. Asegúrate de que comprendes bien qué es y qué no es un identificador de usuario apropiado.
En tu dashboard, observa que el identificador de usuario esté registrado antes de seguir avanzando.
### Registrar análisis {#log-analytics}
#### Crear método para registrar eventos personalizados {#create-log-custom-event-method}
Basándote en el siguiente método del SDK de Braze `logCustomEvent`, crea un método correspondiente.
**Método de referencia `logCustomEvent` de Braze**
Esto es así por diseño, ya que solo el archivo `BrazeManager.swift` puede acceder directamente a los métodos del SDK de Braze para iOS. Por lo tanto, al crear un método correspondiente, el resultado es el mismo y se realiza sin necesidad de depender directamente del SDK de Braze para iOS en tu código de producción.
```
open func logCustomEvent(_ eventName: String, withProperties properties: [AnyHashable : Any]?)
```
**Método correspondiente**
Registra en Braze los eventos personalizados del objeto `Appboy`. `Properties` es un parámetro opcional con valor predeterminado nulo. No es necesario que los eventos personalizados tengan propiedades, pero sí que tengan un nombre.
```swift
func logCustomEvent(_ eventName: String, withProperties properties: [AnyHashable: Any]? = nil) {
Appboy.sharedInstance()?.logCustomEvent(eventName, withProperties: properties)
}
```
```objc
- (void)logCustomEvent:(NSString *)eventName withProperties:(nullable NSDictionary *)properties {
[[Appboy sharedInstance] logCustomEvent:eventName withProperties:properties];
}
```
##### Crear método para registrar atributos personalizados {#create-log-custom-attributes-method}
El SDK puede registrar numerosos tipos como atributos personalizados. No es necesario crear métodos de ayuda para cada tipo de valor que se pueda establecer. En su lugar, solo expone un método que pueda filtrar hasta el valor adecuado.
```
- (BOOL)setCustomAttributeWithKey:(NSString *)key andBOOLValue:(BOOL)value;
- (BOOL)setCustomAttributeWithKey:(NSString *)key andIntegerValue:(NSIntenger)value;
- (BOOL)setCustomAttributeWithKey:(NSString *)key andDoubleValue:(double)value;
- (BOOL)setCustomAttributeWithKey:(NSString *)key andStringValue:(NSString *)value;
- (BOOL)setCustomAttributeWithKey:(NSString *)key andDateValue:(NSDate *)value;
```
Los atributos personalizados se registran desde el objeto `ABKUser`.
Crea **un método** que pueda englobar todos los tipos disponibles que se pueden establecer para un atributo. Añade este método en tu archivo `BrazeManager.swift` en la extensión de análisis. Esto puede hacerse filtrando los tipos de atributos personalizados válidos y llamando al método asociado con el tipo correspondiente.
- El parámetro `value` es un tipo genérico que se ajusta al protocolo `Equatable`. Esto se hace explícitamente, de modo que, si el tipo no es el que espera el SDK de Braze para iOS, se producirá un error en tiempo de compilación.
- Los parámetros `key` y `value` son parámetros opcionales que se desenvolverán condicionalmente en el método. Esta es solo una forma de garantizar que se pasen valores no nulos al SDK de Braze para iOS.
```swift
func setCustomAttributeWithKey(_ key: String?, andValue value: T?) {
guard let key = key, let value = value else { return }
switch value.self {
case let value as Date:
user?.setCustomAttributeWithKey(key, andDateValue: value)
case let value as Bool:
user?.setCustomAttributeWithKey(key, andBOOLValue: value)
case let value as String:
user?.setCustomAttributeWithKey(key, andStringValue: value)
case let value as Double:
user?.setCustomAttributeWithKey(key, andDoubleValue: value)
case let value as Int:
user?.setCustomAttributeWithKey(key, andIntegerValue: value)
default:
return
}
}
```
```objc
- (void)setCustomAttributeWith:(NSString *)key andValue:(id)value {
if ([value isKindOfClass:[NSDate class]]) {
[[self user] setCustomAttributeWithKey:key andDateValue:value];
} else if ([value isKindOfClass:[NSString class]]) {
[[self user] setCustomAttributeWithKey:key andStringValue:value];
} else if ([value isKindOfClass:[NSNumber class]]) {
if (strcmp([value objCType], @encode(double)) == 0) {
[[self user] setCustomAttributeWithKey:key andDoubleValue:[value doubleValue]];
} else if (strcmp([value objCType], @encode(int)) == 0) {
[[self user] setCustomAttributeWithKey:key andIntegerValue:[value integerValue]];
} else if ([value boolValue]) {
[[self user] setCustomAttributeWithKey:key andBOOLValue:[value boolValue]];
}
}
}
```
##### Crear método para registrar compras {#create-log-purchase-method}
A continuación, basándote en el siguiente método del SDK de Braze `logPurchase`, crea un método correspondiente.
**Método de referencia `logPurchase` de Braze**
Esto es así por diseño, ya que solo el archivo `BrazeManager.swift` puede acceder directamente a los métodos del SDK de Braze para iOS. Por lo tanto, al crear un método correspondiente, el resultado es el mismo y se realiza sin necesidad de depender directamente del SDK de Braze para iOS en tu código de producción.
```
open func logPurchase(_ productIdentifier: String, inCurrency currency: String, atPrice price: NSDecimalNumber, withoutQuantity quantity: UInt)
```
**Método correspondiente**
Registra las compras del objeto `Appboy` en Braze. El SDK tiene múltiples métodos para registrar las compras, y este es solo un ejemplo. Este método también se encarga de crear los objetos `NSDecimal` y `UInt`. Cómo quieras manejar esa parte depende de ti; lo proporcionado es solo un ejemplo.
```swift
func logPurchase(_ productIdentifier: String, inCurrency currency: String, atPrice price:
String, withQuantity quantity: Int) {
Appboy.sharedInstance()?.logPurchase(productIdentifier, inCurrency: currency, atPrice: NSDecimalNumber(string: price), withQuantity: UInt(quantity))
}
```
```objc
- (void)logPurchase:(NSString *)productIdentifier inCurrency:(nonnull NSString *)currencyCode atPrice:(nonnull NSDecimalNumber *)price withQuantity:(NSUInteger)quantity {
[[Appboy sharedInstance] logPurchase:productIdentifier inCurrency:currencyCode atPrice:price withQuantity:quantity];
}
```
**Checkpoint:**
Procede a compilar tu código y a ejecutar tu aplicación.
Prueba a registrar eventos personalizados.
En tu dashboard, observa que se registran los eventos personalizados antes de seguir avanzando.
### Mensajes dentro de la aplicación {#in-app-messages}
**Important:**
La siguiente sección de mensajes dentro de la aplicación no es necesaria para la integración si no piensas utilizar este canal en tu aplicación.
#### Ajustarse a ABKInAppMessageUIDelegate {#conform-to-abkinappmessageuidelegate}
A continuación, habilita el código de tu archivo `BrazeManager.swift` para que se ajuste a `ABKInAppMessageUIDelegate` y pueda gestionar directamente los métodos asociados.
El código para ajustarse al delegado se añadirá en los métodos `didFinishLaunching...` del archivo `BrazeManager.swift`. Tu código de inicialización debería tener este aspecto:
```swift
func application(_ application: UIApplication, didFinishLaunchingWithOptions launchOptions: [UIApplication.LaunchOptionsKey: Any]?) {
Appboy.start(withApiKey: apiKey, in: application, withLaunchOptions: launchOptions, withAppboyOptions: appboyOptions)
let options: UNAuthorizationOptions = [.alert, .sound, .badge]
UNUserNotificationCenter.current().requestAuthorization(options: options) { (granted, error) in
Appboy.sharedInstance()?.pushAuthorization(fromUserNotificationCenter: granted)
}
UIApplication.shared.registerForRemoteNotifications()
Appboy.sharedInstance()?.inAppMessageController.inAppMessageUIController?.setInAppMessageUIDelegate?(self)
}
```
```objc
- (void)application:(UIApplication *)application didFinishLaunchingWithOptions:(NSDictionary *)launchOptions {
[Appboy startWithApiKey:[self apiKey] inApplication:application withLaunchOptions:launchOptions withAppboyOptions:[self appboyOptions]];
UNAuthorizationOptions options = (UNAuthorizationOptionSound | UNAuthorizationOptionAlert | UNAuthorizationOptionBadge);
[[UNUserNotificationCenter currentNotificationCenter] requestAuthorizationWithOptions:options completionHandler:^(BOOL granted, NSError * _Nullable error) {
[[Appboy sharedInstance] pushAuthorizationFromUserNotificationCenter:granted];
}];
[[UIApplication sharedApplication] registerForRemoteNotifications];
[[Appboy sharedInstance].inAppMessageController.inAppMessageUIController setInAppMessageUIDelegate:self];
}
```
##### Añadir métodos delegados {#add-delegate-methods}
A continuación, crea una extensión que se ajuste a `ABKInAppMessageUIDelegate`.
Añade el siguiente fragmento de código a la sección de análisis. Observa que el objeto `BrazeManager.swift` se establece como delegado; será aquí donde el archivo `BrazeManager.swift` gestione todos los métodos de `ABKInAppMessageUIDelegate`.
**Important:**
`ABKInAppMessageUIDelegate` no incluye ningún método obligatorio, pero el siguiente es un ejemplo de uno.
```swift
// MARK: - ABKInAppMessage UI Delegate
extension AppboyManager: ABKInAppMessageUIDelegate{
func inAppMessageViewControllerWith(_ inAppMessage: ABKInAppMessage) -> ABKInAppMessageViewController {
switch inAppMessage {
case is ABKInAppMessageSlideup:
return ABKInAppMessageSlideupViewController(inAppMessage: inAppMessage)
case is ABKInAppMessageModal:
return ABKInAppMessageModalViewController(inAppMessage: inAppMessage)
case is ABKInAppMessageFull:
return ABKInAppMessageFullViewController(inAppMessage: inAppMessage)
case is ABKInAppMessageHTML:
return ABKInAppMessageHTMLViewController(inAppMessage: inAppMessage)
default:
return ABKInAppMessageViewController(inAppMessage: inAppMessage)
}
```
```objc
// MARK: - ABKInAppMessage UI Delegate
- (ABKInAppMessageViewController *)inAppMessageViewControllerWithInAppMessage:(ABKInAppMessage *)inAppMessage {
if ([inAppMessage isKindOfClass:[ABKInAppMessageSlideup class]]) {
return [[ABKInAppMessageSlideupViewController alloc] initWithInAppMessage:inAppMessage];
} else if ([inAppMessage isKindOfClass:[ABKInAppMessageModal class]]) {
return [[ABKInAppMessageModalViewController alloc] initWithInAppMessage:inAppMessage];
} else if ([inAppMessage isKindOfClass:[ABKInAppMessageFull class]]) {
return [[ABKInAppMessageFullViewController alloc] initWithInAppMessage:inAppMessage];
} else if ([inAppMessage isKindOfClass:[ABKInAppMessageHTML class]]) {
return [[ABKInAppMessageHTMLViewController alloc] initWithInAppMessage:inAppMessage];
}
return nil;
}
```
**Checkpoint:**
Procede a compilar tu código y a ejecutar tu aplicación.
Prueba a enviarte un mensaje dentro de la aplicación.
En el archivo `BrazeManager.swift`, establece un punto de interrupción en la entrada del método de ejemplo `ABKInAppMessageUIDelegate`. Envíate un mensaje dentro de la aplicación y confirma que se alcanza el punto de interrupción antes de seguir avanzando.
### Content Cards {#content-cards}
**Important:**
La siguiente sección de Content Cards no es necesaria para la integración si no piensas utilizar este canal en tu aplicación.
#### Crear variables y métodos de Content Cards {#create-content-card-variables-and-methods}
Habilita tu código de producción para mostrar el controlador de vista de Content Cards sin necesidad de declaraciones `import AppboyUI` innecesarias.
Crea una extensión para el código de tus Content Cards en tu archivo `BrazeManager.swift`, para que se lea de forma más organizada en cuanto a qué propósito tiene en el archivo de ayuda, como por ejemplo:
1. Muestra el `ABKContentCardsTableViewController`. Un `navigationController` opcional es el único parámetro necesario para presentar o hacer push de nuestro controlador de vista.
2. Inicializa un objeto `ABKContentCardsTableViewController` y, opcionalmente, cambia el título. También debes añadir el controlador de vista inicializado a la pila de navegación.
```swift
// MARK: - Content Cards
extension BrazeManager {
// 1
func displayContentCards(navigationController: UINavigationController?) {
// 2
let contentCardsVc = ABKContentCardsTableViewController()
contentCardsVc.title = "Content Cards"
navigationController?.pushViewController(contentCardsVc, animated: true)
}
}
```
```objc
// MARK: - Content Cards
// 1
- (void)displayContentCards:(UINavigationController *)navigationController {
// 2
ABKContentCardsTableViewController *contentCardsVc = [[ABKContentCardsTableViewController alloc] init];
contentCardsVc.title = @"Content Cards";
[navigationController pushViewController:contentCardsVc animated:YES];
}
```
**Checkpoint:**
Procede a compilar tu código y a ejecutar tu aplicación.
Prueba a mostrar el `ABKContentCardsTableViewController` en tu aplicación antes de seguir avanzando.
## Próximos pasos {#next-steps}
¡Enhorabuena! ¡Has completado esta guía de mejores prácticas de integración! Puedes encontrar un archivo de ayuda de ejemplo `BrazeManager` en [GitHub](https://github.com/braze-inc/braze-growth-shares-ios-demo-app/blob/master/Braze-Demo/BrazeManager.swift).
Ahora que has desacoplado cualquier dependencia del SDK de Braze para iOS del resto de tu código de producción, consulta algunas de nuestras guías opcionales de implementación avanzada:
- [Guía de implementación avanzada de notificaciones push](https://www.braze.com/docs/es/es/developer_guide/platforms/legacy_sdks/ios/push_notifications/implementation_guide)
- [Guía de implementación avanzada de mensajes dentro de la aplicación](https://www.braze.com/docs/es/es/developer_guide/platforms/legacy_sdks/ios/in-app_messaging/implementation_guide)
- [Guía de implementación avanzada de Content Cards](https://www.braze.com/docs/es/es/developer_guide/platforms/legacy_sdks/ios/content_cards/implementation_guide)
# Integración push para iOS
Source: /docs/es/developer_guide/platforms/legacy_sdks/ios/push_notifications/integration/index.md
**Warning:**
[AppboyKit](https://github.com/Appboy/appboy-ios-sdk) (also known as the Objective-C SDK) is no longer supported and has been replaced by the [Swift SDK](https://www.braze.com/docs/es/es/developer_guide/sdk_integration/?sdktab=swift). It will no longer receive new features, bug fixes, security updates, or technical support—however, messaging and analytics will continue to function as normal. To learn more, see [Introducing the New Braze Swift SDK](https://www.braze.com/resources/articles/introducing-the-new-braze-swift-sdk).
# Integración push {#push-integration}
## Paso 1: Sube tu token de APNs {#step-1-upload-your-apns-token}
Before you can send an iOS push notification using Braze, you need to upload your `.p8` push notification file, as described in [Apple's developer documentation](https://developer.apple.com/documentation/usernotifications/establishing-a-token-based-connection-to-apns):
1. In your Apple developer account, go to [**Certificates, Identifiers & Profiles**](https://developer.apple.com/account/ios/certificate).
2. Under **Keys**, select **All** and click the add button (+) at the top of the page.
3. Under **Key Description**, enter a unique name for the signing key.
4. Under **Key Services**, select the **Apple Push Notification service (APNs)** checkbox, then click **Continue**. Click **Confirm**.
5. Note the key ID. Click **Download** to generate and download the key. Make sure to save the downloaded file in a secure place, as you cannot download this more than once.
6. In Braze, go to **Settings** > **App Settings** and upload the `.p8` file under **Apple Push Certificate**. You can upload either your development or production push certificate. To test push notifications after your app is live in the App Store, its recommended to set up a separate workspace for the development version of your app.
7. When prompted, enter your app's [bundle ID](https://developer.apple.com/documentation/foundation/nsbundle/1418023-bundleidentifier), [key ID](https://developer.apple.com/help/account/manage-keys/get-a-key-identifier/), and [team ID](https://developer.apple.com/help/account/manage-your-team/locate-your-team-id). You'll also need to specify whether to send notifications to your app's development or production environment, which is defined by its provisioning profile.
8. When you're finished, select **Save**.
## Paso 2: Habilitar las capacidades push {#step-2-enable-push-capabilities}
En la configuración de tu proyecto, asegúrate de que, en la pestaña **Capabilities**, la opción **Push Notifications** está activada.

Si tienes certificados push de desarrollo y producción separados, asegúrate de desmarcar la casilla **Automatically manage signing** en la pestaña **General**. Esto te permitirá elegir distintos perfiles de aprovisionamiento para cada configuración de compilación, ya que la característica de firma automática de código de Xcode solo realiza la firma de desarrollo.

## Paso 3: Registro para notificaciones push {#step-3-register-for-push-notifications}
Para que el dispositivo de tus usuarios se registre en APNs, debes incluir el código de ejemplo adecuado en el método delegado `application:didFinishLaunchingWithOptions:` de tu aplicación. Asegúrate de llamar a todo el código de integración push en el hilo principal de tu aplicación.
Braze también proporciona categorías push predeterminadas para el soporte del botón de acción push, que deben añadirse manualmente a tu código de registro push. Consulta los [botones de acción para notificación push](https://www.braze.com/docs/es/es/developer_guide/platforms/legacy_sdks/ios/push_notifications/customization/action_buttons) para conocer los pasos adicionales de la integración.
**Warning:**
Si has implementado una solicitud push personalizada como se describe en nuestras [mejores prácticas push](https://www.braze.com/docs/es/es/developer_guide/platforms/legacy_sdks/ios/push_notifications/troubleshooting), asegúrate de que llamas al código siguiente **cada vez que se ejecuta la aplicación** después de que concedan permisos push a tu aplicación. **Las aplicaciones tienen que volver a registrarse con APNs, ya que [los tokens de los dispositivos pueden cambiar arbitrariamente](https://developer.apple.com/library/ios/documentation/iPhone/Conceptual/iPhoneOSProgrammingGuide/BackgroundExecution/BackgroundExecution.html).**
### Utilizar el framework UserNotification (iOS 10+) {#using-usernotification-framework-ios-10}
Si utilizas el framework `UserNotifications` (recomendado) introducido en iOS 10, añade el siguiente código al método `application:didFinishLaunchingWithOptions:` del delegado de tu aplicación.
**Important:**
El siguiente ejemplo de código incluye la integración para la autenticación push provisional (líneas 5 y 6). Si no piensas utilizar la autorización provisional en tu aplicación, puedes eliminar las líneas de código que añaden `UNAuthorizationOptionProvisional` a las opciones de `requestAuthorization`. Visita [las opciones de notificación de iOS](https://www.braze.com/docs/es/es/user_guide/channels/push/platform_specific_resources/ios/notification_options) para saber más sobre la autenticación provisional push.
```objc
if (floor(NSFoundationVersionNumber) > NSFoundationVersionNumber_iOS_9_x_Max) {
UNUserNotificationCenter *center = [UNUserNotificationCenter currentNotificationCenter];
center.delegate = self;
UNAuthorizationOptions options = UNAuthorizationOptionAlert | UNAuthorizationOptionSound | UNAuthorizationOptionBadge;
if (@available(iOS 12.0, *)) {
options = options | UNAuthorizationOptionProvisional;
}
[center requestAuthorizationWithOptions:options
completionHandler:^(BOOL granted, NSError * _Nullable error) {
[[Appboy sharedInstance] pushAuthorizationFromUserNotificationCenter:granted];
}];
[[UIApplication sharedApplication] registerForRemoteNotifications];
} else {
UIUserNotificationSettings *settings = [UIUserNotificationSettings settingsForTypes:(UIUserNotificationTypeBadge | UIUserNotificationTypeAlert | UIUserNotificationTypeSound) categories:nil];
[[UIApplication sharedApplication] registerForRemoteNotifications];
[[UIApplication sharedApplication] registerUserNotificationSettings:settings];
}
```
```swift
if #available(iOS 10, *) {
let center = UNUserNotificationCenter.current()
center.delegate = self as? UNUserNotificationCenterDelegate
var options: UNAuthorizationOptions = [.alert, .sound, .badge]
if #available(iOS 12.0, *) {
options = UNAuthorizationOptions(rawValue: options.rawValue | UNAuthorizationOptions.provisional.rawValue)
}
center.requestAuthorization(options: options) { (granted, error) in
Appboy.sharedInstance()?.pushAuthorization(fromUserNotificationCenter: granted)
}
UIApplication.shared.registerForRemoteNotifications()
} else {
let types : UIUserNotificationType = [.alert, .badge, .sound]
let setting : UIUserNotificationSettings = UIUserNotificationSettings(types:types, categories:nil)
UIApplication.shared.registerUserNotificationSettings(setting)
UIApplication.shared.registerForRemoteNotifications()
}
```
**Warning:**
Debes asignar tu objeto delegado utilizando `center.delegate = self` de forma sincrónica antes de que tu aplicación termine de iniciarse, preferiblemente en `application:didFinishLaunchingWithOptions:`. Si no lo haces, puede que tu aplicación no reciba notificaciones push entrantes. Visita la documentación [`UNUserNotificationCenterDelegate`](https://developer.apple.com/documentation/usernotifications/unusernotificationcenterdelegate) de Apple para obtener más información.
### Sin framework UserNotifications {#without-usernotifications-framework}
Si no utilizas el framework `UserNotifications`, añade el siguiente código al método `application:didFinishLaunchingWithOptions:` del delegado de tu aplicación:
```objc
UIUserNotificationSettings *settings = [UIUserNotificationSettings settingsForTypes:(UIUserNotificationTypeBadge | UIUserNotificationTypeAlert | UIUserNotificationTypeSound) categories:nil];
[[UIApplication sharedApplication] registerForRemoteNotifications];
[[UIApplication sharedApplication] registerUserNotificationSettings:settings];
```
```swift
let types : UIUserNotificationType = UIUserNotificationType.Badge | UIUserNotificationType.Sound | UIUserNotificationType.Alert
var setting : UIUserNotificationSettings = UIUserNotificationSettings(forTypes: types, categories: nil)
UIApplication.shared.registerUserNotificationSettings(setting)
UIApplication.shared.registerForRemoteNotifications()
```
## Paso 4: Registrar tokens de notificaciones push con Braze {#step-4-register-push-tokens-with-braze}
Una vez completado el registro de APNs, hay que modificar el siguiente método para pasar el `deviceToken` resultante a Braze, de modo que el usuario quede habilitado para las notificaciones push:
Añade el siguiente código a tu método `application:didRegisterForRemoteNotificationsWithDeviceToken:`:
```objc
[[Appboy sharedInstance] registerDeviceToken:deviceToken];
```
Añade el siguiente código al método `application(_:didRegisterForRemoteNotificationsWithDeviceToken:)` de tu aplicación:
```swift
Appboy.sharedInstance()?.registerDeviceToken(deviceToken)
```
**Important:**
Se llama al método delegado `application:didRegisterForRemoteNotificationsWithDeviceToken:` cada vez que se llama a `[[UIApplication sharedApplication] registerForRemoteNotifications]`. Si estás migrando a Braze desde otro servicio push y el dispositivo de tu usuario ya se ha registrado con APNs, este método recogerá tokens de los registros existentes la próxima vez que se llame al método, y los usuarios no tendrán que volver a adherirse a push.
## Paso 5: Habilitar la gestión push {#step-5-enable-push-handling}
El siguiente código pasa las notificaciones push recibidas a Braze y es necesario para registrar los análisis push y la gestión de enlaces. Asegúrate de llamar a todo el código de integración push en el hilo principal de tu aplicación.
### iOS 10+
Cuando compiles para iOS 10+, te recomendamos que integres el framework `UserNotifications` y hagas lo siguiente:
Añade el siguiente código al método `application:didReceiveRemoteNotification:fetchCompletionHandler:` de tu aplicación:
```objc
[[Appboy sharedInstance] registerApplication:application
didReceiveRemoteNotification:userInfo
fetchCompletionHandler:completionHandler];
```
A continuación, añade el siguiente código al método `(void)userNotificationCenter:didReceiveNotificationResponse:withCompletionHandler:` de tu aplicación:
```objc
[[Appboy sharedInstance] userNotificationCenter:center
didReceiveNotificationResponse:response
withCompletionHandler:completionHandler];
```
**Manejo del push en primer plano**
Para mostrar una notificación push mientras la aplicación está en primer plano, implementa `userNotificationCenter:willPresentNotification:withCompletionHandler:`:
```objc
- (void)userNotificationCenter:(UNUserNotificationCenter *)center
willPresentNotification:(UNNotification *)notification
withCompletionHandler:(void (^)(UNNotificationPresentationOptions options))completionHandler {
if (@available(iOS 14.0, *)) {
completionHandler(UNNotificationPresentationOptionList | UNNotificationPresentationOptionBanner);
} else {
completionHandler(UNNotificationPresentationOptionAlert);
}
}
```
Si se hace clic en la notificación en primer plano, se llamará al delegado push de iOS 10 `userNotificationCenter:didReceiveNotificationResponse:withCompletionHandler:`, y Braze registrará un evento de clic push.
Añade el siguiente código al método `application(_:didReceiveRemoteNotification:fetchCompletionHandler:)` de tu aplicación:
```swift
Appboy.sharedInstance()?.register(application,
didReceiveRemoteNotification: userInfo,
fetchCompletionHandler: completionHandler)
```
A continuación, añade el siguiente código al método `userNotificationCenter(_:didReceive:withCompletionHandler:)` de tu aplicación:
```swift
Appboy.sharedInstance()?.userNotificationCenter(center,
didReceive: response,
withCompletionHandler: completionHandler)
```
**Manejo del push en primer plano**
Para mostrar una notificación push mientras la aplicación está en primer plano, implementa `userNotificationCenter(_:willPresent:withCompletionHandler:)`:
```swift
func userNotificationCenter(_ center: UNUserNotificationCenter,
willPresent notification: UNNotification,
withCompletionHandler completionHandler: @escaping (UNNotificationPresentationOptions) -> Void) {
if #available(iOS 14.0, *) {
completionHandler([.list, .banner]);
} else {
completionHandler([.alert]);
}
}
```
Si se hace clic en la notificación en primer plano, se llamará al delegado push de iOS 10 `userNotificationCenter(_:didReceive:withCompletionHandler:)`, y Braze registrará un evento de clic push.
### Antes de iOS 10 {#pre-ios-10}
iOS 10 actualizó el comportamiento de forma que ya no llama a `application:didReceiveRemoteNotification:fetchCompletionHandler:` cuando se hace clic en un push. Por esta razón, si no actualizas a compilar para iOS 10+ y utilizas el framework `UserNotifications`, tendrás que llamar a Braze desde ambos delegados antiguos, lo que supone una ruptura con nuestra integración anterior.
Para aplicaciones compiladas con SDKs < iOS 10, utiliza las siguientes instrucciones:
Para habilitar el seguimiento de aperturas en las notificaciones push, añade el siguiente código al método `application:didReceiveRemoteNotification:fetchCompletionHandler:` de tu aplicación:
```objc
[[Appboy sharedInstance] registerApplication:application
didReceiveRemoteNotification:userInfo
fetchCompletionHandler:completionHandler];
```
Para soportar los análisis push en iOS 10, también debes añadir el siguiente código al método delegado `application:didReceiveRemoteNotification:` de tu aplicación:
```objc
[[Appboy sharedInstance] registerApplication:application
didReceiveRemoteNotification:userInfo];
```
Para habilitar el seguimiento de aperturas en las notificaciones push, añade el siguiente código al método `application(_:didReceiveRemoteNotification:fetchCompletionHandler:)` de tu aplicación:
```swift
Appboy.sharedInstance()?.register(application,
didReceiveRemoteNotification: userInfo,
fetchCompletionHandler: completionHandler)
```
Para soportar los análisis push en iOS 10, también debes añadir el siguiente código al método delegado `application(_:didReceiveRemoteNotification:)` de tu aplicación:
```swift
Appboy.sharedInstance()?.register(application,
didReceiveRemoteNotification: userInfo)
```
## Paso 6: Vínculos profundos {#step-6-deep-linking}
Los vínculos profundos desde un push a la aplicación se gestionan automáticamente a través de nuestra documentación estándar de integración push. Si quieres saber más sobre cómo añadir vínculos profundos a ubicaciones concretas de tu aplicación, consulta nuestros [casos de uso avanzados](https://www.braze.com/docs/es/es/developer_guide/platform_integration_guides/ios/advanced_use_cases/linking#linking-implementation).
## Paso 7: Pruebas unitarias (opcional) {#step-7-unit-tests-optional}
Para añadir cobertura de pruebas a los pasos de integración que acabas de seguir, implementa [pruebas unitarias push](https://www.braze.com/docs/es/es/developer_guide/platforms/legacy_sdks/ios/push_notifications/unit_tests).
# Personalización de push en iOS
Source: /docs/es/developer_guide/platforms/legacy_sdks/ios/push_notifications/customization/index.md
# Botones de acción push para iOS
Source: /docs/es/developer_guide/platforms/legacy_sdks/ios/push_notifications/customization/action_buttons/index.md
**Warning:**
[AppboyKit](https://github.com/Appboy/appboy-ios-sdk) (also known as the Objective-C SDK) is no longer supported and has been replaced by the [Swift SDK](https://www.braze.com/docs/es/es/developer_guide/sdk_integration/?sdktab=swift). It will no longer receive new features, bug fixes, security updates, or technical support—however, messaging and analytics will continue to function as normal. To learn more, see [Introducing the New Braze Swift SDK](https://www.braze.com/resources/articles/introducing-the-new-braze-swift-sdk).
# Botones de acción {#push-action-buttons-integration}
El SDK de Braze para iOS es compatible con las categorías push predeterminadas, incluida la compatibilidad con la gestión de URL para cada botón de acción push. Actualmente, las categorías predeterminadas tienen cuatro conjuntos de botones de acción para push: `Accept`/`Decline`, `Yes`/`No`, `Confirm`/`Cancel` y `More`.

Para registrar nuestras categorías push predeterminadas, sigue las instrucciones de integración:
## Paso 1: Añadir categorías push predeterminadas de Braze {#step-1-adding-braze-default-push-categories}
Utiliza el siguiente código para registrarte en nuestras categorías predeterminadas de push cuando te [registres en push](https://www.braze.com/docs/es/es/developer_guide/platform_integration_guides/ios/push_notifications/integration#step-4-register-push-tokens-with-braze):
```objc
// For UserNotification.framework (iOS 10+ only)
NSSet *appboyCategories = [ABKPushUtils getAppboyUNNotificationCategorySet];
[[UNUserNotificationCenter currentNotificationCenter] setNotificationCategories:appboyCategories];
// For UIUserNotificationSettings (before iOS 10)
NSSet *appboyCategories = [ABKPushUtils getAppboyUIUserNotificationCategorySet];
UIUserNotificationSettings *settings = [UIUserNotificationSettings settingsForTypes:UIUserNotificationTypeBadge
categories:appboyCategories];
[[UIApplication sharedApplication] registerUserNotificationSettings:settings];
```
```swift
// For UserNotification.framework (iOS 10+ only)
let appboyCategories = ABKPushUtils.getAppboyUNNotificationCategorySet()
UNUserNotificationCenter.current().setNotificationCategories(appboyCategories)
// For UIUserNotificationSettings (before iOS 10)
let appboyCategories = ABKPushUtils.getAppboyUIUserNotificationCategorySet()
let settings = UIUserNotificationSettings.init(types: .badge, categories: appboyCategories)
UIApplication.shared.registerUserNotificationSettings(settings)
```
Al hacer clic en los botones de acción push con modo de activación en segundo plano, solo se descartará la notificación y no se abrirá la aplicación. La próxima vez que el usuario abra la aplicación, los análisis de clics en el botón de estas acciones se enviarán al servidor.
Si quieres crear tus propias categorías de notificación personalizadas, consulta [personalización del botón de acción](https://www.braze.com/docs/es/es/developer_guide/platform_integration_guides/ios/push_notifications/customization/action_buttons#push-category-customization).
## Paso 2: Habilitar la gestión interactiva de push {#step-2-enable-interactive-push-handling}
Si utilizas el framework `UNNotification` y has implementado [delegados](https://www.braze.com/docs/es/es/developer_guide/platform_integration_guides/ios/push_notifications/integration#step-5-enable-push-handling) de Braze, ya deberías tener integrado este método.
Para habilitar la gestión de nuestro botón de acción push, incluidos los análisis de clics y el enrutamiento de URL, añade el siguiente código al método delegado `(void)userNotificationCenter:didReceiveNotificationResponse:withCompletionHandler:` de tu aplicación:
```objc
[[Appboy sharedInstance] userNotificationCenter:center
didReceiveNotificationResponse:response
withCompletionHandler:completionHandler];
```
```swift
Appboy.sharedInstance()?.userNotificationCenter(center,
didReceive: response,
withCompletionHandler: completionHandler)
```
Si no utilizas UNNotification Framework, tendrás que añadir el siguiente código al método `application:handleActionWithIdentifier:forRemoteNotification:completionHandler:` de tu aplicación para habilitar la gestión de nuestro botón de acción push:
```objc
[[Appboy sharedInstance] getActionWithIdentifier:identifier
forRemoteNotification:userInfo
completionHandler:completionHandler];
```
```swift
Appboy.sharedInstance()?.getActionWithIdentifier(identifier,
forRemoteNotification: userInfo,,
completionHandler: completionHandler)
```
**Important:**
Recomendamos encarecidamente que las personas que utilicen `handleActionWithIdentifier` empiecen a usar el framework `UNNotification`. Recomendamos esto debido a la obsolescencia de [`handleActionWithIdentifier`](https://developer.apple.com/documentation/uikit/uiapplicationdelegate/1623068-application?language=objc).
## Personalización de la categoría push {#push-category-customization}
Además de proporcionar un conjunto de [categorías push predeterminadas](https://www.braze.com/docs/es/es/developer_guide/platforms/legacy_sdks/ios/push_notifications/customization/action_buttons), Braze admite categorías y acciones de notificación personalizadas. Después de registrar categorías en tu aplicación, puedes utilizar el panel de Braze para enviar categorías de notificación a tus usuarios.
Si no utilizas el framework `UserNotifications`, consulta la documentación sobre [categorías alternativas](https://developer.apple.com/documentation/usernotifications/unnotificationcategory).
A continuación, estas categorías pueden asignarse a notificaciones push a través de nuestro panel para desencadenar las configuraciones del botón de acción de tu diseño. Aquí tienes un ejemplo que aprovecha la `LIKE_CATEGORY` que aparece en el dispositivo:

# Sonidos de notificación push personalizados para iOS
Source: /docs/es/developer_guide/platforms/legacy_sdks/ios/push_notifications/customization/custom_sounds/index.md
**Warning:**
[AppboyKit](https://github.com/Appboy/appboy-ios-sdk) (also known as the Objective-C SDK) is no longer supported and has been replaced by the [Swift SDK](https://www.braze.com/docs/es/es/developer_guide/sdk_integration/?sdktab=swift). It will no longer receive new features, bug fixes, security updates, or technical support—however, messaging and analytics will continue to function as normal. To learn more, see [Introducing the New Braze Swift SDK](https://www.braze.com/resources/articles/introducing-the-new-braze-swift-sdk).
# Sonidos personalizados {#custom-sounds}
## Paso 1: Alojar el sonido en la aplicación {#step-1-hosting-the-sound-in-the-app}
Los sonidos de notificación push personalizados deben alojarse localmente dentro del paquete principal de la aplicación cliente. Se aceptan los siguientes formatos de datos de audio:
- PCM lineal
- MA4
- µLaw
- aLaw
Puedes empaquetar los datos de audio en un archivo AIFF, WAV o CAF. En Xcode, añade el archivo de sonido a tu proyecto como un recurso no localizado del paquete de la aplicación.
Puedes utilizar la herramienta afconvert para convertir sonidos. Por ejemplo, para convertir el sonido del sistema PCM lineal de 16 bits Submarine.aiff a audio IMA4 en un archivo CAF, utiliza el siguiente comando en el terminal:
```bash
afconvert /System/Library/Sounds/Submarine.aiff ~/Desktop/sub.caf -d ima4 -f caff -v
```
Puedes inspeccionar un sonido para determinar su formato de datos abriéndolo en QuickTime Player y eligiendo **Show Movie Inspector** en el menú **Movie**.
Los sonidos personalizados deben durar menos de 30 segundos cuando se reproducen. Si un sonido personalizado supera ese límite, en su lugar se reproduce el sonido predeterminado del sistema.
## Paso 2: Proporcionar al dashboard una URL de protocolo para el sonido {#step-2-providing-the-dashboard-with-a-protocol-url-for-the-sound}
Tu sonido debe alojarse localmente dentro de la aplicación. Debes especificar una URL de protocolo que dirija a la ubicación del archivo de sonido en la aplicación dentro del campo **Sound** en el compositor push. Si especificas "default" en este campo, se reproducirá el sonido de notificación predeterminado en el dispositivo. Esto se puede especificar a través de nuestra [API de mensajería](https://www.braze.com/docs/es/es/api/endpoints/messaging) o de nuestro dashboard en **Settings** en el compositor push, como se muestra en la siguiente captura de pantalla:

Si el archivo de sonido especificado no existe o se introduce la palabra clave "default", Braze utilizará el sonido de alerta predeterminado del dispositivo. Aparte de nuestro dashboard, el sonido también se puede configurar a través de nuestra [API de mensajería](https://www.braze.com/docs/es/es/api/endpoints/messaging). Consulta la documentación para desarrolladores de Apple relativa a la [preparación de sonidos de alerta personalizados](https://developer.apple.com/library/content/documentation/NetworkingInternet/Conceptual/RemoteNotificationsPG/SupportingNotificationsinYourApp.html) para obtener información adicional.
# Notificaciones push enriquecidas para iOS
Source: /docs/es/developer_guide/platforms/legacy_sdks/ios/push_notifications/customization/rich_notifications/index.md
**Warning:**
[AppboyKit](https://github.com/Appboy/appboy-ios-sdk) (also known as the Objective-C SDK) is no longer supported and has been replaced by the [Swift SDK](https://www.braze.com/docs/es/es/developer_guide/sdk_integration/?sdktab=swift). It will no longer receive new features, bug fixes, security updates, or technical support—however, messaging and analytics will continue to function as normal. To learn more, see [Introducing the New Braze Swift SDK](https://www.braze.com/resources/articles/introducing-the-new-braze-swift-sdk).
# Notificaciones enriquecidas de iOS 10
iOS 10 introduce la posibilidad de enviar notificaciones push con imágenes, GIF y video. Para habilitar esta funcionalidad, los clientes deben crear un `Service Extension`, un nuevo tipo de extensión que permite modificar una carga útil push antes de que se muestre.
## Crear una extensión de servicio
Para crear [`Notification Service Extension`](https://developer.apple.com/reference/usernotifications/unnotificationserviceextension), ve a **Archivo > Nuevo > Destino** en Xcode y selecciona **Extensión de servicio de notificación**.
{: style="max-width:90%"}
Asegúrate de que la opción **Incrustar en la aplicación** está activada para incrustar la extensión en tu aplicación.
## Configuración de la extensión del servicio
Un `Notification Service Extension` es un binario propio que se incluye con tu aplicación. Debe configurarse en el [Portal del Desarrollador de Apple](https://developer.apple.com) con su propio ID de aplicación y perfil de aprovisionamiento.
El ID del paquete de `Notification Service Extension` debe ser distinto del ID del paquete de tu aplicación principal. Por ejemplo, si el ID del paquete de tu aplicación es `com.company.appname`, puedes utilizar `com.company.appname.AppNameServiceExtension` para la extensión de tu servicio.
### Configurar la extensión de servicio para que funcione con Braze
Braze envía una carga útil adjunta en la carga de APN bajo la clave `ab` que utilizamos para configurar, descargar y mostrar contenido enriquecido. Por ejemplo:
```json
{
"ab" :
{
...
"att" :
{
"url" : "http://mysite.com/myimage.jpg",
"type" : "jpg"
}
},
"aps" :
{
...
}
}
```
Los valores relevantes de la carga útil son:
```objc
// The Braze dictionary key
static NSString *const AppboyAPNSDictionaryKey = @"ab";
// The attachment dictionary
static NSString *const AppboyAPNSDictionaryAttachmentKey = @"att";
// The attachment URL
static NSString *const AppboyAPNSDictionaryAttachmentURLKey = @"url";
// The type of the attachment - a suffix for the file you save
static NSString *const AppboyAPNSDictionaryAttachmentTypeKey = @"type";
```
Para mostrar manualmente el push con una carga útil Braze, descarga el contenido del valor en `AppboyAPNSDictionaryAttachmentURLKey`, guárdalo como un archivo con el tipo de archivo almacenado en la clave `AppboyAPNSDictionaryAttachmentTypeKey`, y añádelo a los archivos adjuntos de la notificación.
### Ejemplo de código
Puedes escribir la extensión del servicio en Objective-C o Swift.
Para utilizar nuestro código de ejemplo Objective-C, sustituye el contenido del `NotificationService.m` autogenerado de tu destino `Notification Service Extension` por el contenido del código de ejemplo Appboy [`NotificationService.m`](https://github.com/Appboy/appboy-ios-sdk/blob/master/Example/StopwatchNotificationService/NotificationService.m).
Para utilizar nuestro código Swift de ejemplo, sustituye el contenido del `NotificationService.swift` autogenerado de tu destino `Notification Service Extension` por el contenido del Appboy [`NotificationService.swift`](https://github.com/Appboy/appboy-ios-sdk/blob/master/HelloSwift/HelloSwiftNotificationExtension/NotificationService.swift).
## Crear una notificación enriquecida en tu panel de control
Para crear una notificación push enriquecida en tu panel Braze, crea un push de iOS, adjunta una imagen o GIF, o proporciona una URL que aloje una imagen, GIF o video. Ten en cuenta que los activos se descargan al recibir las notificaciones push, por lo que debes prever grandes picos sincrónicos de solicitudes si alojas tus contenidos.
Consulta [`unnotificationattachment`](https://developer.apple.com/reference/usernotifications/unnotificationattachment) para consultar la lista de tipos y tamaños de archivo admitidos.
# Recuento de señales de notificaciones push para iOS
Source: /docs/es/developer_guide/platforms/legacy_sdks/ios/push_notifications/customization/badges/index.md
**Warning:**
[AppboyKit](https://github.com/Appboy/appboy-ios-sdk) (also known as the Objective-C SDK) is no longer supported and has been replaced by the [Swift SDK](https://www.braze.com/docs/es/es/developer_guide/sdk_integration/?sdktab=swift). It will no longer receive new features, bug fixes, security updates, or technical support—however, messaging and analytics will continue to function as normal. To learn more, see [Introducing the New Braze Swift SDK](https://www.braze.com/resources/articles/introducing-the-new-braze-swift-sdk).
# Señales
Puedes especificar el recuento de señales deseado cuando redactes una notificación push a través del panel de Braze. También puedes actualizar manualmente el recuento de señales a través de la propiedad [`applicationIconBadgeNumber`](https://developer.apple.com/library/ios/documentation/UIKit/Reference/UIApplication_Class/index.html#//apple_ref/occ/instp/UIApplication/applicationIconBadgeNumber) o la [carga útil de notificación remota](https://developer.apple.com/library/content/documentation/NetworkingInternet/Conceptual/RemoteNotificationsPG/CreatingtheNotificationPayload.html#//apple_ref/doc/uid/TP40008194-CH10-SW1). Braze también borrará el recuento de señales cuando se reciba una notificación Braze mientras la aplicación se está ejecutando en primer plano.
Si no tienes un plan para borrar las señales como parte del funcionamiento normal de la aplicación o mediante el envío de push que borren la señal, debes borrar la señal cuando la aplicación se active añadiendo el siguiente código al método delegado `applicationDidBecomeActive:` de tu aplicación:
```objc
// For iOS 16.0+
UNUserNotificationCenter *center = [UNUserNotificationCenter currentNotificationCenter];
[center setBadgeCount:0 withCompletionHandler:^(NSError * _Nullable error) {
if (error != nil) {
// Handle errors
}
}];
// Prior to iOS 16. Deprecated in iOS 17+.
[UIApplication sharedApplication].applicationIconBadgeNumber = 0;
```
```swift
// For iOS 16.0+
let center = UNUserNotificationCenter.current()
do {
try await center.setBadgeCount(0)
} catch {
// Handle errors
}
// Prior to iOS 16. Deprecated in iOS 17+.
UIApplication.shared.applicationIconBadgeNumber = 0
```
Ten en cuenta que, si estableces el número de la señal en 0, también se borrarán las notificaciones del centro de notificaciones. Por tanto, aunque no establezcas el número de la señal en las cargas útiles push, puedes establecer el número de la señal en 0 para eliminar las notificaciones push en el centro de notificaciones después de que los usuarios hagan clic en la notificación push.
# Ignorar las notificaciones push internas de Braze para iOS
Source: /docs/es/developer_guide/platforms/legacy_sdks/ios/push_notifications/customization/ignoring_internal_push/index.md
**Warning:**
[AppboyKit](https://github.com/Appboy/appboy-ios-sdk) (also known as the Objective-C SDK) is no longer supported and has been replaced by the [Swift SDK](https://www.braze.com/docs/es/es/developer_guide/sdk_integration/?sdktab=swift). It will no longer receive new features, bug fixes, security updates, or technical support—however, messaging and analytics will continue to function as normal. To learn more, see [Introducing the New Braze Swift SDK](https://www.braze.com/resources/articles/introducing-the-new-braze-swift-sdk).
# Ignorar las notificaciones push internas de Braze
Braze utiliza notificaciones push silenciosas para la implementación interna de ciertas características avanzadas. Para la mayoría de las integraciones, esto no requiere ningún cambio por parte de tu aplicación. Sin embargo, si integras una característica de Braze que depende de notificaciones push internas (por ejemplo, Uninstall Tracking o geovallas), puede que quieras actualizar tu aplicación para ignorar nuestras notificaciones push internas.
Si tu aplicación realiza acciones automáticas en el lanzamiento de la aplicación o en las notificaciones push en segundo plano, deberías plantearte controlar esa actividad para que no la desencadenen las notificaciones push internas. Por ejemplo, si tienes una lógica que llama a tus servidores para obtener nuevo contenido en cada push de fondo o lanzamiento de una aplicación, probablemente no querrás que nuestros push internos desencadenen eso porque incurrirías en un tráfico de red innecesario. Además, como Braze envía ciertos tipos de push internos a todos los usuarios aproximadamente al mismo tiempo, no separar las llamadas de red en el lanzamiento de los push internos podría introducir una carga significativa en el servidor.
## Comprobar las acciones automáticas de tu aplicación
Debes comprobar si tu aplicación realiza acciones automáticas en los siguientes lugares y actualizar tu código para ignorar nuestros push internos:
1. **Receptores push.** Las notificaciones push en segundo plano llamarán a `application:didReceiveRemoteNotification:fetchCompletionHandler:` en la dirección `UIApplicationDelegate`.
2. **Delegado de Aplicación.** Los push en segundo plano pueden lanzar aplicaciones [suspendidas](https://developer.apple.com/library/ios/documentation/iPhone/Conceptual/iPhoneOSProgrammingGuide/TheAppLifeCycle/TheAppLifeCycle.html#//apple_ref/doc/uid/TP40007072-CH2-SW3) en segundo plano, desencadenando los métodos `application:willFinishLaunchingWithOptions:` y `application:didFinishLaunchingWithOptions:` en tu `UIApplicationDelegate`. Puedes comprobar las `launchOptions` de estos métodos para determinar si la aplicación se ha lanzado desde un push en segundo plano.
## Utilizar los métodos internos de la utilidad push de Braze
Puedes utilizar los métodos de utilidad de `ABKPushUtils` para comprobar si tu aplicación ha recibido o ha sido lanzada por un push interno de Braze. `isAppboyInternalRemoteNotification:` devolverá `YES` en todas las notificaciones push internas de Braze, mientras que `isUninstallTrackingRemoteNotification:` y `isGeofencesSyncRemoteNotification:` devolverán `YES` para las notificaciones de seguimiento de desinstalación y de sincronización de geovallas, respectivamente. Consulta [`ABKPushUtils.h`](https://github.com/Appboy/appboy-ios-sdk/blob/master/AppboyKit/include/ABKPushUtils.h) para las declaraciones de métodos.
## Ejemplo de aplicación {#internal-push-implementation-example}
```objc
- (BOOL)application:(UIApplication *)application didFinishLaunchingWithOptions:(NSDictionary *)launchOptions {
NSDictionary *pushDictionary = launchOptions[UIApplicationLaunchOptionsRemoteNotificationKey];
BOOL launchedFromAppboyInternalPush = pushDictionary && [ABKPushUtils isAppboyInternalRemoteNotification:pushDictionary];
if (!launchedFromAppboyInternalPush) {
// ... Gated logic here (such as pinging your server to download content) ...
}
}
```
```objc
- (void)application:(UIApplication *)application didReceiveRemoteNotification:(NSDictionary *)userInfo fetchCompletionHandler:(void (^)(UIBackgroundFetchResult result))completionHandler {
if (![ABKPushUtils isAppboyInternalRemoteNotification:userInfo]) {
// ... Gated logic here (such as pinging server for content) ...
}
}
```
```swift
func application(_ application: UIApplication, didFinishLaunchingWithOptions launchOptions: [UIApplicationLaunchOptionsKey : Any]? = nil) -> Bool {
let pushDictionary = launchOptions?[UIApplicationLaunchOptionsKey.remoteNotification] as? NSDictionary as? [AnyHashable : Any] ?? [:]
let launchedFromAppboyInternalPush = ABKPushUtils.isAppboyInternalRemoteNotification(pushDictionary)
if (!launchedFromAppboyInternalPush) {
// ... Gated logic here (such as pinging your server to download content) ...
}
}
```
```swift
func application(_ application: UIApplication,
didReceiveRemoteNotification userInfo: [AnyHashable : Any],
fetchCompletionHandler completionHandler: @escaping (UIBackgroundFetchResult) -> Void) {
if (!ABKPushUtils.isAppboyInternalRemoteNotification(userInfo)) {
// ... Gated logic here (such as pinging server for content) ...
}
}
```
# Configuración push avanzada
Source: /docs/es/developer_guide/platforms/legacy_sdks/ios/push_notifications/customization/advanced_settings/index.md
**Warning:**
[AppboyKit](https://github.com/Appboy/appboy-ios-sdk) (also known as the Objective-C SDK) is no longer supported and has been replaced by the [Swift SDK](https://www.braze.com/docs/es/es/developer_guide/sdk_integration/?sdktab=swift). It will no longer receive new features, bug fixes, security updates, or technical support—however, messaging and analytics will continue to function as normal. To learn more, see [Introducing the New Braze Swift SDK](https://www.braze.com/resources/articles/introducing-the-new-braze-swift-sdk).
# Configuración avanzada {#advanced-settings}
Al crear una campaña push, en el paso de composición, selecciona **Settings** para ver la configuración avanzada disponible.

## Extraer datos de pares clave-valor push {#extracting-data-from-push-key-value-pairs}
Braze te permite enviar pares clave-valor de cadena definidos a medida, conocidos como `extras`, junto con una notificación push a tu aplicación. Los extras pueden definirse a través del dashboard o de la API y estarán disponibles como pares clave-valor dentro del diccionario `notification` pasado a tus implementaciones de delegados push.
## Opciones de alerta {#alert-options}
Marca la casilla **Alert Options** para ver un desplegable de valores clave disponibles para ajustar cómo aparece la notificación en los dispositivos.
## Añadir la flag de contenido disponible {#adding-content-available-flag}
Marca la casilla **Add Content-Available Flag** para indicar a los dispositivos que descarguen nuevos contenidos en segundo plano. Lo más habitual es marcar esta opción si te interesa enviar [notificaciones silenciosas](https://www.braze.com/docs/es/es/developer_guide/platforms/legacy_sdks/ios/push_notifications/silent_push_notifications).
## Añadir la flag de contenido mutable {#adding-mutable-content-flag}
Marca la casilla **Add Mutable-Content Flag** para habilitar la personalización avanzada del receptor en dispositivos iOS 10+. Esta flag se enviará automáticamente al componer una [notificación enriquecida](https://www.braze.com/docs/es/es/developer_guide/platforms/legacy_sdks/ios/push_notifications/customization/rich_notifications), independientemente del valor de esta casilla.
## Actualizar recuento de señales de la aplicación {#update-app-badge-count}
Introduce el número con el que quieres actualizar el recuento de tus señales, o utiliza la sintaxis Liquid para establecer tus condiciones personalizadas. También puedes actualizar manualmente el recuento de tus señales a través de la propiedad `applicationIconBadgeNumber` de tu aplicación o de la carga útil de la notificación push. Para saber más, consulta nuestro artículo dedicado al [recuento de señales](https://www.braze.com/docs/es/es/developer_guide/platforms/legacy_sdks/ios/push_notifications/customization/badges).
## Sonidos {#sounds}
Aquí puedes introducir una ruta a un archivo de sonido en el paquete de tu aplicación para especificar un sonido que se reproducirá cuando se reciba el mensaje push. Si el archivo de sonido especificado no existe o si se introduce la palabra clave "default", Braze utilizará el sonido de alerta predeterminado del dispositivo. Para más información sobre la personalización, consulta nuestro artículo dedicado a [los sonidos personalizados](https://www.braze.com/docs/es/es/developer_guide/platforms/legacy_sdks/ios/push_notifications/customization/custom_sounds).
## ID de colapso {#collapse-id}
Especifica un ID de colapso para agrupar notificaciones similares. Si envías varias notificaciones con el mismo ID de colapso, el dispositivo solo mostrará la notificación recibida más recientemente. Consulta la documentación de Apple sobre [notificaciones agrupadas](https://developer.apple.com/library/content/documentation/NetworkingInternet/Conceptual/RemoteNotificationsPG/APNSOverview.html#//apple_ref/doc/uid/TP40008194-CH8-SW1).
## Caducidad {#expiry}
Si marcas la casilla **Expiry**, podrás establecer un tiempo de caducidad para tu mensaje. Si el dispositivo de un usuario pierde la conectividad, Braze seguirá intentando enviar el mensaje hasta la hora especificada. Si no se configura, la plataforma tendrá una caducidad predeterminada de 30 días. Ten en cuenta que las notificaciones push que caducan antes de la entrega no se consideran fallidas y no se registrarán como rebotadas.
# Notificaciones push silenciosas para iOS
Source: /docs/es/developer_guide/platforms/legacy_sdks/ios/push_notifications/silent_push_notifications/index.md
**Warning:**
[AppboyKit](https://github.com/Appboy/appboy-ios-sdk) (also known as the Objective-C SDK) is no longer supported and has been replaced by the [Swift SDK](https://www.braze.com/docs/es/es/developer_guide/sdk_integration/?sdktab=swift). It will no longer receive new features, bug fixes, security updates, or technical support—however, messaging and analytics will continue to function as normal. To learn more, see [Introducing the New Braze Swift SDK](https://www.braze.com/resources/articles/introducing-the-new-braze-swift-sdk).
# Notificaciones push silenciosas {#silent-push-notifications}
Las notificaciones push te permiten avisar a tu aplicación cuando se producen eventos importantes. Puedes enviar una notificación push cuando tengas nuevos mensajes instantáneos que entregar, alertas de noticias de última hora que enviar o el último episodio del programa de TV favorito de tu usuario listo para que lo descargue para verlo sin conexión. Las notificaciones push también pueden ser silenciosas, no contener ningún mensaje de alerta ni sonido, y utilizarse solo para actualizar la interfaz de tu aplicación o desencadenar trabajo en segundo plano.
Las notificaciones push son estupendas para contenidos esporádicos pero de importancia inmediata, en los que la demora entre las búsquedas en segundo plano puede no ser aceptable. Las notificaciones push también pueden ser mucho más eficientes que la obtención en segundo plano, ya que tu aplicación solo se lanza cuando es necesario.
Las notificaciones push tienen una tasa limitada, así que no temas enviar tantas como necesite tu aplicación. iOS y los servidores APNs controlarán la frecuencia con la que se entregan, y no te meterás en problemas por enviar demasiadas. Si tus notificaciones push están limitadas, podrían retrasarse hasta la próxima vez que el dispositivo envíe un paquete de mantenimiento de conexión o reciba otra notificación.
## Enviar notificaciones push silenciosas {#sending-silent-push-notifications}
Para enviar una notificación push silenciosa, establece la marca `content-available` en `1` en una carga útil de notificación push. Al enviar una notificación push silenciosa, puede que también quieras incluir algunos datos en la carga útil de la notificación, para que tu aplicación pueda hacer referencia al evento. Esto podría ahorrarte unas cuantas peticiones de red y aumentar la capacidad de respuesta de tu aplicación.
**Warning:**
No se recomienda adjuntar un título y un cuerpo con `content-available=1` porque puede provocar un comportamiento indefinido. Para asegurarte de que una notificación es realmente silenciosa, excluye tanto el título como el cuerpo cuando configures la marca `content-available` en `1.` Para más detalles, consulta la [documentación oficial de Apple sobre actualizaciones en segundo plano](https://developer.apple.com/documentation/usernotifications/setting_up_a_remote_notification_server/pushing_background_updates_to_your_app).
La marca `content-available` puede establecerse en el panel de Braze, así como dentro de nuestro [objeto push de Apple](https://www.braze.com/docs/es/es/api/objects_filters/messaging/apple_object) en la [API de mensajería](https://www.braze.com/docs/es/es/api/endpoints/messaging).

## Utiliza notificaciones push silenciosas para desencadenar el trabajo en segundo plano {#use-silent-push-notifications-to-trigger-background-work}
Las notificaciones push silenciosas pueden despertar tu aplicación de un estado "Suspended" o "Not Running" para actualizar contenidos o ejecutar determinadas tareas sin notificárselo a tus usuarios.
Para utilizar notificaciones push silenciosas para desencadenar el trabajo en segundo plano, configura la marca `content-available` siguiendo las instrucciones anteriores sin mensaje ni sonido. Configura el modo en segundo plano de tu aplicación para habilitar `remote notifications` en la pestaña **Capabilities** de la configuración de tu proyecto. Una notificación remota no es más que una notificación push normal con la marca `content-available` activada.

Habilitar el modo en segundo plano para las notificaciones remotas es necesario para el [seguimiento de desinstalación](https://www.braze.com/docs/es/es/developer_guide/analytics/tracking_uninstalls?sdktab=swift).
Incluso con el modo en segundo plano de notificaciones remotas habilitado, el sistema no lanzará tu aplicación en segundo plano si el usuario ha forzado el cierre de la aplicación. El usuario debe iniciar explícitamente la aplicación o reiniciar el dispositivo para que el sistema pueda iniciar automáticamente la aplicación en segundo plano.
Para más información, consulta [enviar actualizaciones en segundo plano](https://developer.apple.com/documentation/usernotifications/setting_up_a_remote_notification_server/pushing_background_updates_to_your_app?language=objc) y [`application:didReceiveRemoteNotification:fetchCompletionHandler:`](https://developer.apple.com/library/ios/documentation/UIKit/Reference/UIApplicationDelegate_Protocol/index.html#//apple_ref/occ/intfm/UIApplicationDelegate/application:didReceiveRemoteNotification:fetchCompletionHandler:).
## Limitaciones de las notificaciones silenciosas de iOS {#ios-silent-notifications-limitations}
El sistema operativo iOS puede bloquear notificaciones para algunas características. Ten en cuenta que si experimentas dificultades con estas características, la restricción de notificaciones silenciosas de iOS podría ser la causa.
Braze tiene varias características que dependen de las notificaciones push silenciosas de iOS:
| Característica | Experiencia del usuario |
|---|---|
| Uninstall Tracking | El usuario recibe un push silencioso y nocturno de seguimiento de desinstalación. |
| Geovallas | Sincronización silenciosa de geovallas del servidor al dispositivo. |
{: .reset-td-br-1 .reset-td-br-2 aria-label="Limitaciones de las notificaciones silenciosas de iOS" }
Consulta la documentación de Apple sobre [el método de instancia](https://developer.apple.com/documentation/uikit/uiapplicationdelegate/1623013-application) y [las notificaciones no recibidas](https://developer.apple.com/library/content/technotes/tn2265/_index.html#//apple_ref/doc/uid/DTS40010376-CH1-TNTAG23) para obtener más detalles.
[8]:https://developer.apple.com/library/content/technotes/tn2265/_index.html#//apple_ref/doc/uid/DTS40010376-CH1-TNTAG23
# Push primer para iOS
Source: /docs/es/developer_guide/platforms/legacy_sdks/ios/push_notifications/push_primer/index.md
**Warning:**
[AppboyKit](https://github.com/Appboy/appboy-ios-sdk) (also known as the Objective-C SDK) is no longer supported and has been replaced by the [Swift SDK](https://www.braze.com/docs/es/es/developer_guide/sdk_integration/?sdktab=swift). It will no longer receive new features, bug fixes, security updates, or technical support—however, messaging and analytics will continue to function as normal. To learn more, see [Introducing the New Braze Swift SDK](https://www.braze.com/resources/articles/introducing-the-new-braze-swift-sdk).
# Integración de push primer {#push-primer-integration}
Las campañas de push primer animan a tus usuarios a habilitar push en su dispositivo para tu aplicación. Obtener el permiso de los usuarios para enviar mensajes directamente a sus dispositivos puede ser complejo, ¡pero nuestras guías pueden ayudarte! Esta guía muestra los pasos que deben dar los desarrolladores para integrar el push priming.
## Paso 1: Añade un fragmento de código en el archivo AppDelegate.m {#step-1-add-snippet-in-appdelegatem-file}
Añade la siguiente línea de código a tu archivo `AppDelegate.m` en lugar de la integración estándar:
```objc
- (BOOL)application:(UIApplication *)application didFinishLaunchingWithOptions:(NSDictionary *)launchOptions {
...
if (@available(iOS 10.0, *)) {
UNUserNotificationCenter *center = [UNUserNotificationCenter currentNotificationCenter];
[center getNotificationSettingsWithCompletionHandler:^(UNNotificationSettings * _Nonnull settings) {
if (settings.authorizationStatus != UNAuthorizationStatusNotDetermined) {
// authorization has already been requested, need to follow usual steps
[center requestAuthorizationWithOptions:(UNAuthorizationOptionAlert | UNAuthorizationOptionSound | UNAuthorizationOptionBadge) completionHandler:^(BOOL granted, NSError * _Nullable error) {
[[Appboy sharedInstance] pushAuthorizationFromUserNotificationCenter:granted];
}];
center.delegate = self;
[center setNotificationCategories:[ABKPushUtils getAppboyUNNotificationCategorySet]];
[[UIApplication sharedApplication] registerForRemoteNotifications];
}
}];
} else {
UIApplication *sharedApplication = [UIApplication sharedApplication];
UIUserNotificationSettings *notificationSettings = [sharedApplication currentUserNotificationSettings];
if (notificationSettings.types) {
UIUserNotificationSettings *settings = [UIUserNotificationSettings settingsForTypes:(UIUserNotificationTypeBadge | UIUserNotificationTypeAlert | UIUserNotificationTypeSound) categories:[ABKPushUtils getAppboyUIUserNotificationCategorySet]];
[sharedApplication registerUserNotificationSettings:settings];
[sharedApplication registerForRemoteNotifications];
}
}
```
```swift
if #available(iOS 10, *) {
let center = UNUserNotificationCenter.current()
center.getNotificationSettings(completionHandler: { (settings) in
if settings.authorizationStatus != .notDetermined {
// authorization has already been requested, need to follow usual steps
center.requestAuthorization(options: [.alert, .sound, .badge]) { (granted, error) in
Appboy.sharedInstance()?.pushAuthorization(fromUserNotificationCenter: granted)
}
center.delegate = self as? UNUserNotificationCenterDelegate
center.setNotificationCategories(ABKPushUtils.getAppboyUNNotificationCategorySet())
UIApplication.shared.registerForRemoteNotifications()
}
})
} else {
let notificationSettiings = UIApplication.shared.currentUserNotificationSettings
if notificationSettiings?.types != nil {
let setting = UIUserNotificationSettings(types: [.alert, .badge, .sound], categories:nil)
UIApplication.shared.registerUserNotificationSettings(setting)
UIApplication.shared.registerForRemoteNotifications()
}
}
```
## Paso 2: Añade un verificador de eventos personalizados al archivo AppDelegate.m {#step-2-append-custom-event-checker-to-appdelegatem-file}
El siguiente fragmento de código comprueba si es necesario lanzar un evento personalizado. Añade la siguiente línea de código a tu `AppDelegate.m`.
```objc
if (@available(iOS 10.0, *)) {
UNUserNotificationCenter *center = [UNUserNotificationCenter currentNotificationCenter];
[center getNotificationSettingsWithCompletionHandler:^(UNNotificationSettings * _Nonnull settings) {
if (settings.authorizationStatus == UNAuthorizationStatusNotDetermined) {
// ...
// fire custom event
// ...
}
}];
} else {
UIUserNotificationSettings *notificationSettings = [[UIApplication sharedApplication] currentUserNotificationSettings];
if (!notificationSettings.types) {
// …
// fire custom event
// ...
}
}
```
```swift
if #available(iOS 10, *) {
let center = UNUserNotificationCenter.current()
center.getNotificationSettings(completionHandler: { (settings) in
if settings.authorizationStatus == .notDetermined {
// ...
// fire custom event
// ...
}
})
} else {
let notificationSettiings = UIApplication.shared.currentUserNotificationSettings
if notificationSettiings?.types != nil {
// ...
// fire custom event
// ...
}
}
```
## Paso 3: Configura un controlador de vínculos profundos {#step-3-set-up-a-deep-link-handler}
Coloca el siguiente fragmento de código dentro de tu código de gestión de vínculos profundos. Solo debes ejecutar este código de vinculación en profundidad para tu mensaje push primer dentro de la aplicación.
Consulta la [personalización del manejo de enlaces](https://www.braze.com/docs/es/es/developer_guide/platform_integration_guides/ios/advanced_use_cases/linking#linking-handling-customization) para obtener más información sobre la vinculación en profundidad.
```objc
// ...
// check that this deep link relates to the push prompt
// ...
if (@available(iOS 10.0, *)) {
UNUserNotificationCenter *center = [UNUserNotificationCenter currentNotificationCenter];
[center requestAuthorizationWithOptions:(UNAuthorizationOptionAlert | UNAuthorizationOptionSound | UNAuthorizationOptionBadge) completionHandler:^(BOOL granted, NSError * _Nullable error) {
[[Appboy sharedInstance] pushAuthorizationFromUserNotificationCenter:granted];
}];
center.delegate = self;
[center setNotificationCategories:[ABKPushUtils getAppboyUNNotificationCategorySet]];
[[UIApplication sharedApplication] registerForRemoteNotifications];
} else {
UIUserNotificationSettings *settings = [UIUserNotificationSettings settingsForTypes:(UIUserNotificationTypeBadge | UIUserNotificationTypeAlert | UIUserNotificationTypeSound) categories:[ABKPushUtils getAppboyUIUserNotificationCategorySet]];
UIApplication *sharedApplication = [UIApplication sharedApplication];
[sharedApplication registerUserNotificationSettings:settings];
[sharedApplication registerForRemoteNotifications];
}
```
```swift
// ...
// check that this deep link relates to the push prompt
// ...
if #available(iOS 10, *) {
let center = UNUserNotificationCenter.current()
center.delegate = self as? UNUserNotificationCenterDelegate
center.requestAuthorization(options: [.alert, .sound, .badge]) { (granted, error) in
Appboy.sharedInstance()?.pushAuthorization(fromUserNotificationCenter: granted)
}
UIApplication.shared.registerForRemoteNotifications()
} else {
let setting = UIUserNotificationSettings(types: [.alert, .badge, .sound], categories:nil)
UIApplication.shared.registerUserNotificationSettings(setting)
UIApplication.shared.registerForRemoteNotifications()
}
```
# Push Stories para iOS
Source: /docs/es/developer_guide/platforms/legacy_sdks/ios/push_notifications/push_story/index.md
**Warning:**
[AppboyKit](https://github.com/Appboy/appboy-ios-sdk) (also known as the Objective-C SDK) is no longer supported and has been replaced by the [Swift SDK](https://www.braze.com/docs/es/es/developer_guide/sdk_integration/?sdktab=swift). It will no longer receive new features, bug fixes, security updates, or technical support—however, messaging and analytics will continue to function as normal. To learn more, see [Introducing the New Braze Swift SDK](https://www.braze.com/resources/articles/introducing-the-new-braze-swift-sdk).
# Configuración de Push Stories {#push-story-setup}
La función Push Stories requiere el framework `UNNotification` e iOS 10. La función solo está disponible a partir de la versión 3.2.1 del SDK de iOS.
## Paso 1: Habilitar push en tu aplicación {#step-1-enable-push-in-your-app}
Sigue la [integración de notificaciones push](https://www.braze.com/docs/es/es/developer_guide/platforms/legacy_sdks/ios/push_notifications/integration) para habilitar el push en tu aplicación.
## Paso 2: Añadir el objetivo de la extensión de contenido de notificación {#step-2-adding-the-notification-content-extension-target}
En el proyecto de tu aplicación, ve al menú **File > New > Target...** y añade un nuevo objetivo `Notification Content Extension` y actívalo.

Xcode debería generar un nuevo objetivo y crear archivos automáticamente para ti, entre ellos:
- `NotificationViewController.h`
- `NotificationViewController.m`
- `MainInterface.storyboard`
- `NotificationViewController.swift`
- `MainInterface.storyboard`
## Paso 3: Habilitar capacidades {#step-3-enable-capabilities}
La característica Push Stories requiere el modo en segundo plano en la sección **Capabilities** del objetivo principal de la aplicación. Después de activar los modos en segundo plano, selecciona **Background fetch** y **Remote notifications**.

### Añadir un grupo de aplicaciones {#adding-an-app-group}
También necesitas añadir `Capability App Groups`. Si no tienes ningún grupo de aplicaciones en tu aplicación, ve a la **Capability** del objetivo principal de la aplicación, activa `App Groups` y haz clic en el botón **+**. Utiliza el ID del paquete de tu aplicación para crear el grupo de aplicaciones. Por ejemplo, si el ID del paquete de tu aplicación es `com.company.appname`, puedes llamar a tu grupo de aplicaciones `group.com.company.appname.xyz`. Debes activar `App Groups` tanto para la aplicación principal como para los objetivos de extensión de contenido.
**Important:**
`App Groups` en este contexto se refiere al [derecho a grupos de aplicaciones](https://developer.apple.com/documentation/bundleresources/entitlements/com_apple_security_application-groups) de Apple y no a tu ID de espacio de trabajo de Braze (anteriormente grupo de aplicaciones).
Si no añades tu aplicación a un grupo de aplicaciones, es posible que tu aplicación no rellene determinados campos de la carga útil push y no funcione completamente como se espera.
## Paso 4: Añadir el framework de Push Stories a tu aplicación {#step-4-adding-the-push-story-framework-to-your-app}
Después de seguir la [guía de integración de Swift Package Manager](https://www.braze.com/docs/es/es/developer_guide/platforms/legacy_sdks/ios/initial_sdk_setup/installation_methods/swift_package_manager), añade `AppboyPushStory` a tu `Notification Content Extension`:


Añade la siguiente línea a tu archivo de bibliotecas:
```ruby
target 'YourContentExtensionTarget' do
pod 'Appboy-Push-Story'
end
```
Tras actualizar el archivo de bibliotecas, ve al directorio de tu proyecto de aplicación Xcode dentro de tu terminal y ejecuta `pod install`.
Descarga la última versión de `AppboyPushStory.zip` de la [página de versiones de GitHub](https://github.com/Appboy/appboy-ios-sdk/releases), extráela y añade los siguientes archivos a la `Notification Content Extension` de tu proyecto:
- `Resources/ABKPageView.nib`
- `AppboyPushStory.xcframework`

**Important:**
Asegúrate de que la opción **Do Not Embed** está seleccionada para **AppboyPushStory.xcframework** en la columna **Embed**.
Añade la bandera `-ObjC` a la `Notification Content Extension` de tu proyecto en **Build Settings > Other Linker Flags**.
## Paso 5: Actualizar tu controlador de vista de notificación {#step-5-updating-your-notification-view-controller}
En tu `NotificationViewController.h`, añade las siguientes líneas para añadir nuevas propiedades e importar los archivos de cabecera:
```objc
#import
```
```objc
@property (nonatomic) IBOutlet ABKStoriesView *storiesView;
@property (nonatomic) ABKStoriesViewDataSource *dataSource;
```
En tu `NotificationViewController.m`, elimina la implementación predeterminada y añade el siguiente código:
```objc
@implementation NotificationViewController
- (void)didReceiveNotification:(UNNotification *)notification {
self.dataSource = [[ABKStoriesViewDataSource alloc] initWithNotification:notification
storiesView:self.storiesView
appGroup:@"YOUR-APP-GROUP-IDENTIFIER"];
}
- (void)didReceiveNotificationResponse:(UNNotificationResponse *)response
completionHandler:(void (^)(UNNotificationContentExtensionResponseOption option))completion {
UNNotificationContentExtensionResponseOption option = [self.dataSource didReceiveNotificationResponse:response];
completion(option);
}
- (void)viewWillDisappear:(BOOL)animated {
[self.dataSource viewWillDisappear];
[super viewWillDisappear:animated];
}
@end
```
En tu `NotificationViewController.swift`, añade la siguiente línea para importar los archivos de cabecera:
```swift
import AppboyPushStory
```
A continuación, elimina la implementación predeterminada y añade el siguiente código:
```swift
class NotificationViewController: UIViewController, UNNotificationContentExtension {
@IBOutlet weak var storiesView: ABKStoriesView!
var dataSource: ABKStoriesViewDataSource?
func didReceive(_ notification: UNNotification) {
dataSource = ABKStoriesViewDataSource(notification: notification, storiesView: storiesView, appGroup: "YOUR-APP-GROUP-IDENTIFIER")
}
func didReceive(_ response: UNNotificationResponse, completionHandler completion: @escaping (UNNotificationContentExtensionResponseOption) -> Void) {
if dataSource != nil {
let option: UNNotificationContentExtensionResponseOption = dataSource!.didReceive(response)
completion(option)
}
}
override func viewWillDisappear(_ animated: Bool) {
dataSource?.viewWillDisappear()
super.viewWillDisappear(animated)
}
}
```
## Paso 6: Configurar el storyboard de la extensión de contenido de notificación {#step-6-set-the-notification-content-extension-storyboard}
Abre el storyboard de `Notification Content Extension` y coloca un nuevo `UIView` en el controlador de la vista de notificación. Cambia el nombre de la clase a `ABKStoriesView`. Haz que la anchura y la altura de la vista se ajusten automáticamente al marco de la vista principal del controlador de la vista de notificación.


A continuación, enlaza el IBOutlet `storiesView` del controlador de la vista de notificación con el `ABKStoriesView` añadido.

## Paso 7: Configurar el plist de la extensión de contenido de notificación {#step-7-set-the-notification-content-extension-plist}
Abre el archivo `Info.plist` de `Notification Content Extension` y añade y cambia las siguientes claves en `NSExtension \ NSExtensionAttributes`:
`UNNotificationExtensionCategory` = `ab_cat_push_story_v2` (tipo `String`)
`UNNotificationExtensionDefaultContentHidden` = `YES` (tipo `Boolean`)
`UNNotificationExtensionInitialContentSizeRatio` = `0.65` (tipo `Number`)

## Paso 8: Actualizar la integración de Braze en tu aplicación principal {#step-8-updating-the-braze-integration-in-your-main-app}
### Opción 1: Tiempo de ejecución {#option-1-runtime}
En el diccionario `appboyOptions` utilizado para configurar tu instancia de Braze, añade una entrada `ABKPushStoryAppGroupKey` y establece el valor en el identificador de API de tu espacio de trabajo.
```objc
NSMutableDictionary *appboyOptions = [NSMutableDictionary dictionary];
appboyOptions[ABKPushStoryAppGroupKey] = @"YOUR-APP-GROUP-IDENTIFIER";
[Appboy startWithApiKey:@"YOUR-API-KEY"
inApplication:application
withLaunchOptions:launchOptions
withAppboyOptions:appboyOptions];
```
```swift
let appboyOptions: [AnyHashable: Any] = [
ABKPushStoryAppGroupKey : "YOUR-APP-GROUP-IDENTIFIER"
]
Appboy.start(withApiKey: "YOUR-API-KEY", in:application, withLaunchOptions:launchOptions, withAppboyOptions:appboyOptions)
```
#### Opción 2: Info.plist {#option-2-infoplist}
Alternativamente, para configurar el espacio de trabajo de Push Stories desde tu archivo `Info.plist`, añade un diccionario llamado `Braze` a tu archivo `Info.plist`. Dentro del diccionario `Braze`, añade una subentrada de tipo cadena `PushStoryAppGroup` y establece el valor en el identificador de tu espacio de trabajo. Ten en cuenta que, antes de la versión 4.0.2 del SDK de iOS de Braze, debe usarse la clave de diccionario `Appboy` en lugar de `Braze`.
## Próximos pasos {#next-steps}
A continuación, consulta los pasos para la integración de [botones de acción](https://www.braze.com/docs/es/es/developer_guide/platforms/legacy_sdks/ios/push_notifications/customization/action_buttons), necesaria para que los botones se muestren en un mensaje de Push Stories.
# Implementación avanzada de notificaciones push para iOS (opcional)
Source: /docs/es/developer_guide/platforms/legacy_sdks/ios/push_notifications/implementation_guide/index.md
**Warning:**
[AppboyKit](https://github.com/Appboy/appboy-ios-sdk) (also known as the Objective-C SDK) is no longer supported and has been replaced by the [Swift SDK](https://www.braze.com/docs/es/es/developer_guide/sdk_integration/?sdktab=swift). It will no longer receive new features, bug fixes, security updates, or technical support—however, messaging and analytics will continue to function as normal. To learn more, see [Introducing the New Braze Swift SDK](https://www.braze.com/resources/articles/introducing-the-new-braze-swift-sdk).
**Important:**
¿Buscas la guía básica de integración para desarrolladores de notificaciones push? Encuéntrala [aquí](https://www.braze.com/docs/es/es/developer_guide/platforms/legacy_sdks/ios/push_notifications/integration).
# Guía de implementación de notificaciones push {#push-notification-implementation-guide}
> Esta guía de implementación opcional y avanzada cubre formas de aprovechar las extensiones de la aplicación de contenido de notificaciones push para sacar el máximo partido a tus mensajes push. Se incluyen tres casos de uso personalizados creados por nuestro equipo, fragmentos de código que los acompañan y orientaciones sobre el registro de análisis. ¡Visita el [repositorio de demostraciones de Braze](https://github.com/braze-inc/braze-growth-shares-ios-demo-app)! Ten en cuenta que esta guía de implementación se centra en una implementación Swift, pero se proporcionan fragmentos de código Objective-C para los interesados.
## Extensiones de la aplicación de contenido de notificación {#notification-content-app-extensions}
{: style="max-width:65%;border:0;margin-top:10px"}
Las notificaciones push, aunque parecen estándar en diferentes plataformas, ofrecen inmensas opciones de personalización más allá de lo que normalmente se implementa en la interfaz de usuario predeterminada. Cuando se amplía una notificación push, las extensiones de notificación de contenido habilitan una vista personalizada de la notificación push ampliada.
Las notificaciones push se pueden ampliar de tres formas distintas: - Una pulsación larga en el banner push - Deslizar hacia abajo el banner push - Deslizar el banner hacia la izquierda y seleccionar "Ver"
Estas vistas personalizadas ofrecen formas inteligentes de interacción con los clientes, permitiéndote mostrar muchos tipos distintos de contenido, como notificaciones interactivas, notificaciones rellenadas con datos de usuario e incluso mensajes push que pueden capturar información como números de teléfono y correo electrónico. Aunque implementar el push de esta forma puede resultar desconocido para algunos, una de nuestras características más conocidas en Braze, [Push Stories](https://www.braze.com/docs/es/es/user_guide/channels/push/create_a_push_message/push_stories), es un excelente ejemplo de cómo puede ser una vista personalizada para una extensión de aplicación de contenido de notificaciones.
### Requisitos {#requirements}
{: style="float:right;max-width:50%;margin-left:10px; border:0;margin-top:10px"}
- [Notificaciones push](https://www.braze.com/docs/es/es/developer_guide/platforms/legacy_sdks/ios/push_notifications/integration) integradas con éxito en tu aplicación
- iOS 10 o superior
- Los siguientes archivos generados por Xcode en función de tu lenguaje de codificación:
Swift
- `NotificationViewController.swift`
- `MainInterface.storyboard`
Objective-C
- `NotificationViewController.h`
- `NotificationViewController.m`
- `MainInterface.storyboard`
### Configuración personalizada de categorías {#custom-category-configuration}
Para configurar una vista personalizada en el dashboard, debes activar los botones de notificación e introducir tu categoría personalizada. La categoría personalizada de iOS prerregistrada que proporciones se cotejará con la `UNNotificationExtensionCategory` en el `.plist` de tu objetivo de extensión de contenido de notificaciones. El valor dado aquí debe coincidir con el establecido en el dashboard de Braze.
{: style="max-width:75%;border:0;margin-top:10px"}
{: style="max-width:75%;border:0;margin-top:10px"}
**Tip:**
Dado que los push con extensiones de contenido no siempre son evidentes, se recomienda incluir una llamada a la acción para animar a tus usuarios a ampliar sus notificaciones push.
## Recorrido de casos de uso e implementación {#use-case-and-implementation-walkthrough}
Hay tres tipos de extensión de aplicación de contenido de notificaciones push. Cada tipo tiene un recorrido conceptual, posibles casos de uso y un vistazo a cómo pueden verse y utilizarse las variables de notificación push en el dashboard de Braze:
- [Notificación push interactiva](#interactive-push-notification)
- [Notificaciones push personalizadas](#personalized-push-notifications)
- [Captura de información en notificaciones push](#information-capture-push-notification)
### Notificación push interactiva {#interactive-push-notification}
Las notificaciones push pueden responder a acciones del usuario dentro de una extensión de contenido. Para los usuarios que ejecuten iOS 12 o posterior, ¡esto significa que puedes convertir tus mensajes push en notificaciones push totalmente interactivas! Esta interactividad ofrece muchas posibilidades para que tus usuarios participen en tus notificaciones. El siguiente ejemplo muestra un push en el que los usuarios pueden jugar a un juego de correspondencias dentro de la notificación ampliada.
{: style="border:0"}
#### Configuración del dashboard {#dashboard-configuration}
Para configurar una vista personalizada en el dashboard, dentro de la configuración del botón de notificación introduce la categoría específica que quieres mostrar. A continuación, en el `.plist` de tu extensión de contenido de notificaciones, también debes establecer la categoría personalizada en el atributo `UNNotificationExtensionCategory`. El valor dado aquí debe coincidir con el establecido en el dashboard de Braze. Por último, para habilitar las interacciones del usuario en una notificación push, establece la clave `UNNotificationExtensionInteractionEnabled` en verdadero.
{: style="float:right;max-width:45%;"}
{: style="max-width:50%;"}
#### Otros casos de uso {#other-use-cases}
Las extensiones de contenido push son una opción interesante para introducir interactividad en tus promociones y aplicaciones. Algunos ejemplos son un juego para que jueguen los usuarios, una ruleta para ganar descuentos o un botón "me gusta" para guardar un anuncio o una canción.
##### ¿Listo para el registro de análisis? {#ready-to-log-analytics}
Visita la [sección siguiente](#logging-analytics) para comprender mejor cómo debe ser el flujo de datos.
### Notificaciones push personalizadas {#personalized-push-notifications}
{: style="float:right;max-width:40%;margin-left:15px;border:0"}
Las notificaciones push pueden mostrar información específica del usuario dentro de una extensión de contenido. El ejemplo de la derecha muestra una notificación push después de que un usuario haya completado una tarea específica (curso de Braze Learning) y ahora se le anima a ampliar esta notificación para comprobar su progreso. La información que se proporciona aquí es específica del usuario y puede dispararse cuando se completa una sesión o se realiza una acción específica del usuario aprovechando un desencadenante de la API.
#### Configuración del dashboard
Para configurar un push personalizado en el dashboard, debes registrar la categoría específica que quieres que se muestre y, a continuación, dentro de los pares clave-valor mediante Liquid estándar, establecer los atributos de usuario adecuados que quieres que muestre el mensaje. Estas vistas pueden personalizarse en función de atributos específicos de usuario de un perfil de usuario concreto.
{: style="max-width:60%;"}
#### Manejo de pares clave-valor {#handling-key-value-pairs}
El siguiente método, `didReceive`, se llama cuando la extensión de contenido ha recibido una notificación y se puede encontrar dentro de `NotificationViewController`. Los pares clave-valor proporcionados en el dashboard se representan en el código mediante el uso de un diccionario `userInfo`.
**Análisis sintáctico de los pares clave-valor de las notificaciones push**
``` swift
func didReceive(_ notification: UNNotification) {
let userInfo = notification.request.content.userInfo
guard let value = userInfo["YOUR-KEY-VALUE-PAIR"] as? String,
let otherValue = userInfo["YOUR-OTHER-KEY-VALUE-PAIR"] as? String,
else { fatalError("Key-Value Pairs are incorrect.")}
...
}
```
```objc
- (void)didReceiveNotification:(nonnull UNNotification *)notification {
NSDictionary *userInfo = notification.request.content.userInfo;
if (userInfo[@"YOUR-KEY-VALUE-PAIR"] && userInfo[@"YOUR-OTHER-KEY-VALUE-PAIR"]) {
...
} else {
[NSException raise:NSGenericException format:@"Key-Value Pairs are incorrect"];
}
}
```
#### Otros casos de uso
Las ideas para extensiones de contenido push basadas en el progreso y centradas en el usuario son infinitas; algunos ejemplos incluyen añadir la opción de compartir tu progreso en distintas plataformas, expresar los logros desbloqueados, tarjetas perforadas o incluso listas de control de incorporación.
##### ¿Listo para el registro de análisis?
Visita la [sección siguiente](#logging-analytics) para comprender mejor cómo debe ser el flujo de datos.
### Captura de información en notificaciones push {#information-capture-push-notification}
Las notificaciones push pueden capturar información del usuario dentro de una extensión de contenido, permitiéndote superar los límites de lo que es posible con un push. Examinando el siguiente flujo mostrado, la vista es capaz de responder a los cambios de estado. Esos componentes del cambio de estado están representados en cada imagen.
1. El usuario recibe una notificación push.
2. Se abre la notificación push y pide información al usuario.
3. Se proporciona información y, si es válida, se muestra el botón de registro.
3. Se muestra la vista de confirmación y se descarta la notificación push.
Ten en cuenta que la información solicitada aquí puede ser muy diversa, como la captura de números SMS; no tiene por qué ser específica del correo electrónico.
#### Configuración del dashboard
Para configurar un push capaz de capturar información en el dashboard, debes registrar y configurar tu categoría personalizada, y proporcionar los pares clave-valor necesarios. Como se ve en el ejemplo, también puedes incluir una imagen en tu push. Para ello, debes integrar [notificaciones enriquecidas](https://www.braze.com/docs/es/es/developer_guide/platforms/legacy_sdks/ios/push_notifications/customization/rich_notifications), establecer el estilo de notificación de tu Campaign en notificación enriquecida e incluir una imagen push enriquecida.

#### Manejar las acciones de los botones {#handling-button-actions}
Cada botón de acción tiene un identificador único. El código comprueba si tu identificador de respuesta es igual a `actionIdentifier`, y si es así, sabe que el usuario ha hecho clic en el botón de acción.
**Manejar las respuestas del botón de acción de notificaciones push**
``` swift
func didReceive(_ response: UNNotificationResponse, completionHandler completion: @escaping (UNNotificationContentExtensionResponseOption) -> Void) {
if response.actionIdentifier == "YOUR-REGISTER-IDENTIFIER" {
// do something
} else {
// do something else
}
}
```
```objc
- (void)didReceiveNotificationResponse:(UNNotificationResponse *)response completionHandler:(void (^)(UNNotificationContentExtensionResponseOption))completion {
if ([response.actionIdentifier isEqualToString:@"YOUR-REGISTER-IDENTIFIER"]) {
completion(UNNotificationContentExtensionResponseOptionDismiss);
} else {
completion(UNNotificationContentExtensionResponseOptionDoNotDismiss);
}
}
```
##### Descartar las notificaciones push {#dismissing-pushes}
Las notificaciones push pueden descartarse automáticamente al pulsar un botón de acción. Existen tres opciones preestablecidas de descarte de notificaciones push que se recomiendan:
1. `completion(.dismiss)` - Descarta la notificación
2. `completion(.doNotDismiss)` - La notificación permanece abierta
3. `completion(.dismissAndForward)` - La notificación se descarta y el usuario es redirigido a la aplicación.
#### Otros casos de uso
Solicitar información al usuario mediante notificaciones push es una oportunidad apasionante que muchas empresas no aprovechan. En estos mensajes push, no solo puedes solicitar información básica como nombre, correo electrónico o número, sino que también puedes pedir a los usuarios que completen un perfil de usuario si está inacabado, o incluso que envíen sus comentarios.
##### ¿Listo para el registro de análisis?
Visita la [sección siguiente](#logging-analytics) para comprender mejor cómo debe ser el flujo de datos.
## Registro de análisis {#logging-analytics}
### Registro con la API de Braze (recomendado) {#logging-with-the-braze-api-recommended}
El registro de análisis solo puede hacerse en tiempo real con la ayuda del servidor del cliente que accede a nuestro [punto de conexión `/users/track`](https://www.braze.com/docs/es/es/api/endpoints/user_data/post_user_track). Para registrar los análisis, envía el valor `braze_id` en el campo de los pares clave-valor (como se ve en la siguiente captura de pantalla) para identificar qué perfil de usuario hay que actualizar.
{: style="max-width:80%;"}
### Registrar manualmente {#logging-manually}
El registro manual requerirá que primero configures los grupos de aplicaciones en Xcode y luego crees, guardes y recuperes los análisis. Esto requerirá algún trabajo personalizado por parte de tu desarrollador. Los siguientes fragmentos de código te ayudarán a resolver esto.
También es importante tener en cuenta que los análisis no se envían a Braze hasta que se lanza posteriormente la aplicación móvil. Esto significa que, dependiendo de tu configuración de descarte, a menudo existe un periodo de tiempo indeterminado entre que se descarta una notificación push y se lanza la aplicación móvil y se recuperan los análisis. Aunque este búfer de tiempo puede no afectar a todos los casos de uso, los usuarios deben considerar el impacto y, si es necesario, ajustar su recorrido de usuario para incluir la apertura de la aplicación con el fin de solucionar este problema.

#### Paso 1: Configurar grupos de aplicaciones en Xcode {#step-1-configure-app-groups-within-xcode}
Añade una capacidad `App Groups`. Si no tienes ningún grupo de aplicaciones en tu aplicación, ve a la capacidad del objetivo principal de la aplicación, activa `App Groups` y haz clic en el "+". Utiliza el ID del paquete de tu aplicación para crear el grupo de aplicaciones. Por ejemplo, si el ID del paquete de tu aplicación es `com.company.appname`, puedes llamar a tu grupo de aplicaciones `group.com.company.appname.xyz`. Asegúrate de que `App Groups` está activado tanto para el destino principal de tu aplicación como para el destino de la extensión de contenido.

#### Paso 2: Integrar fragmentos de código {#step-2-integrate-code-snippets}
Los siguientes fragmentos de código son una referencia útil sobre cómo guardar y enviar eventos personalizados, atributos personalizados y atributos de usuario. En esta guía se hablará en términos de UserDefaults, pero la representación del código será en forma de archivo de ayuda `RemoteStorage`. También existen archivos de ayuda adicionales `UserAttributes` y `EventName Dictionary` que se utilizan al enviar y guardar atributos de usuario. Todos los archivos de ayuda se encuentran al final de esta guía.
##### Guardar eventos personalizados {#saving-custom-events}
Para guardar eventos personalizados debes crear el análisis desde cero. Esto se hace creando un diccionario, rellenándolo con metadatos y guardando los datos mediante el uso de un archivo de ayuda.
1. Inicializar un diccionario con metadatos de eventos
2. Inicializar `userDefaults` para recuperar y almacenar los datos del evento
3. Si hay una matriz existente, añadir los nuevos datos a la matriz existente y guardar
4. Si no existe una matriz, guardar la nueva matriz en `userDefaults`
``` swift
func saveCustomEvent(with properties: [String: Any]? = nil) {
// 1
let customEventDictionary = Dictionary(eventName: "YOUR-EVENT-NAME", properties: properties)
// 2
let remoteStorage = RemoteStorage(storageType: .suite)
// 3
if var pendingEvents = remoteStorage.retrieve(forKey: .pendingCustomEvents) as? [[String: Any]] {
pendingEvents.append(contentsOf: [customEventDictionary])
remoteStorage.store(pendingEvents, forKey: .pendingCustomEvents)
} else {
// 4
remoteStorage.store([customEventDictionary], forKey: .pendingCustomEvents)
}
}
```
```objc
- (void)saveCustomEvent:(NSDictionary *)properties {
// 1
NSDictionary *customEventDictionary = [[NSDictionary alloc] initWithEventName:@"YOUR-EVENT-NAME" properties:properties];
// 2
RemoteStorage *remoteStorage = [[RemoteStorage alloc] initWithStorageType:StorageTypeSuite];
NSMutableArray *pendingEvents = [[remoteStorage retrieveForKey:RemoteStorageKeyPendingCustomEvents] mutableCopy];
// 3
if (pendingEvents) {
[pendingEvents addObject:customEventDictionary];
[remoteStorage store:pendingEvents forKey:RemoteStorageKeyPendingCustomAttributes];
} else {
// 4
[remoteStorage store:@[ customEventDictionary ] forKey:RemoteStorageKeyPendingCustomAttributes];
}
}
```
##### Envío de eventos personalizados a Braze {#sending-custom-events-to-braze}
Después de inicializar el SDK es el mejor momento para registrar cualquier análisis guardado de una extensión de aplicación de contenido de notificación. Para ello, haz un bucle con los eventos pendientes, busca la clave "Event Name", configura los valores adecuados en Braze y, a continuación, borra el almacenamiento para la próxima vez que se necesite esta función.
1. Recorrer la matriz de eventos pendientes
2. Recorrer cada par clave-valor del diccionario `pendingEvents`
3. Comprobar explícitamente la clave "Event Name" para establecer el valor correspondiente
4. Cualquier otro par clave-valor se añadirá al diccionario `properties`
5. Registrar evento personalizado individual
6. Eliminar todos los eventos pendientes del almacén
``` swift
func logPendingCustomEventsIfNecessary() {
let remoteStorage = RemoteStorage(storageType: .suite)
guard let pendingEvents = remoteStorage.retrieve(forKey: .pendingCustomEvents) as? [[String: Any]] else { return }
// 1
for event in pendingEvents {
var eventName: String?
var properties: [AnyHashable: Any] = [:]
// 2
for (key, value) in event {
if key == PushNotificationKey.eventName.rawValue {
// 3
if let eventNameValue = value as? String {
eventName = eventNameValue
} else {
print("Invalid type for event_name key")
}
} else {
// 4
properties[key] = value
}
}
// 5
if let eventName = eventName {
logCustomEvent(eventName, withProperties: properties)
}
}
// 6
remoteStorage.removeObject(forKey: .pendingCustomEvents)
}
```
```objc
- (void)logPendingEventsIfNecessary {
RemoteStorage *remoteStorage = [[RemoteStorage alloc] initWithStorageType:StorageTypeSuite];
NSArray *pendingEvents = [remoteStorage retrieveForKey:RemoteStorageKeyPendingCustomEvents];
// 1
for (NSDictionary *event in pendingEvents) {
NSString *eventName = nil;
NSMutableDictionary *properties = [NSMutableDictionary dictionary];
// 2
for (NSString* key in event) {
if ([key isEqualToString:@"event_name"]) {
// 3
if ([[event objectForKey:key] isKindOfClass:[NSString class]]) {
eventName = [event objectForKey:key];
} else {
NSLog(@"Invalid type for event_name key");
}
} else {
// 4
properties[key] = event[key];
}
}
// 5
if (eventName != nil) {
[[Appboy sharednstance] logCustomEvent:eventName withProperties:properties];
}
}
// 6
[remoteStorage removeObjectForKey:RemoteStorageKeyPendingCustomEvents];
}
```
##### Guardar atributos personalizados {#saving-custom-attributes}
Para guardar atributos personalizados debes crear el análisis desde cero. Esto se hace creando un diccionario, rellenándolo con metadatos y guardando los datos mediante el uso de un archivo de ayuda.
1. Inicializar un diccionario con metadatos de atributos
2. Inicializar `userDefaults` para recuperar y almacenar los datos del atributo
3. Si hay una matriz existente, añadir los nuevos datos a la matriz existente y guardar
4. Si no existe una matriz, guardar la nueva matriz en `userDefaults`
``` swift
func saveCustomAttribute() {
// 1
let customAttributeDictionary: [String: Any] = ["YOUR-CUSTOM-ATTRIBUTE-KEY": "YOUR-CUSTOM-ATTRIBUTE-VALUE"]
// 2
let remoteStorage = RemoteStorage(storageType: .suite)
// 3
if var pendingAttributes = remoteStorage.retrieve(forKey: .pendingCustomAttributes) as? [[String: Any]] {
pendingAttributes.append(contentsOf: [customAttributeDictionary])
remoteStorage.store(pendingAttributes, forKey: .pendingCustomAttributes)
} else {
// 4
remoteStorage.store([customAttributeDictionary], forKey: .pendingCustomAttributes)
}
}
```
``` objc
- (void)saveCustomAttribute {
// 1
NSDictionary *customAttributeDictionary = @{ @"YOUR-CUSTOM-ATTRIBUTE-KEY": @"YOUR-CUSTOM-ATTRIBUTE-VALUE" };
// 2
RemoteStorage *remoteStorage = [[RemoteStorage alloc] initWithStorageType:StorageTypeSuite];
NSMutableArray *pendingAttributes = [[remoteStorage retrieveForKey:RemoteStorageKeyPendingCustomAttributes] mutableCopy];
// 3
if (pendingAttributes) {
[pendingAttributes addObject:customAttributeDictionary];
[remoteStorage store:pendingAttributes forKey:RemoteStorageKeyPendingCustomAttributes];
} else {
// 4
[remoteStorage store:@[ customAttributeDictionary ] forKey:RemoteStorageKeyPendingCustomAttributes];
}
}
```
##### Envío de atributos personalizados a Braze {#sending-custom-attributes-to-braze}
Después de inicializar el SDK es el mejor momento para registrar cualquier análisis guardado de una extensión de aplicación de contenido de notificación. Esto puede hacerse recorriendo en bucle los atributos pendientes, configurando el atributo personalizado apropiado en Braze y, a continuación, borrando el almacenamiento para la próxima vez que se necesite esta función.
1. Recorrer la matriz de atributos pendientes
2. Recorrer cada par clave-valor del diccionario `pendingAttributes`
3. Registrar un atributo personalizado individual con la clave y el valor correspondientes
4. Eliminar todos los atributos pendientes del almacén
``` swift
func logPendingCustomAttributesIfNecessary() {
let remoteStorage = RemoteStorage(storageType: .suite)
guard let pendingAttributes = remoteStorage.retrieve(forKey: .pendingCustomAttributes) as? [[String: Any]] else { return }
// 1
pendingAttributes.forEach { setCustomAttributesWith(keysAndValues: $0) }
// 4
remoteStorage.removeObject(forKey: .pendingCustomAttributes)
}
func setCustomAttributesWith(keysAndValues: [String: Any]) {
// 2
for (key, value) in keysAndValues {
// 3
if let value = value as? [String] {
setCustomAttributeArrayWithKey(key, andValue: value)
} else {
setCustomAttributeWithKey(key, andValue: value)
}
}
}
```
```objc
- (void)logPendingCustomAttributesIfNecessary {
RemoteStorage *remoteStorage = [[RemoteStorage alloc] initWithStorageType:StorageTypeSuite];
NSArray *pendingAttributes = [remoteStorage retrieveForKey:RemoteStorageKeyPendingCustomAttributes];
// 1
for (NSDictionary *attribute in pendingAttributes) {
[self setCustomAttributeWith:attribute];
}
// 4
[remoteStorage removeObjectForKey:RemoteStorageKeyPendingCustomAttributes];
}
- (void)setCustomAttributeWith:(NSDictionary *)keysAndValues {
// 2
for (NSString *key in keysAndValues) {
// 3
[self setCustomAttributeWith:key andValue:[keysAndValues objectForKey:key]];
}
}
```
##### Guardar atributos de usuario {#saving-user-attributes}
Al guardar atributos de usuario, se recomienda crear un objeto personalizado para descifrar qué tipo de atributo se está actualizando (`email`, `first_name`, `phone_number`, etc.). El objeto debe ser compatible con ser almacenado/recuperado desde `UserDefaults`. Consulta el archivo de ayuda `UserAttribute` para ver un ejemplo de cómo conseguirlo.
1. Inicializar un objeto `UserAttribute` codificado con el tipo correspondiente
2. Inicializar `userDefaults` para recuperar y almacenar los datos del evento
3. Si hay una matriz existente, añadir los nuevos datos a la matriz existente y guardar
4. Si no existe una matriz, guardar la nueva matriz en `userDefaults`
``` swift
func saveUserAttribute() {
// 1
guard let data = try? PropertyListEncoder().encode(UserAttribute.userAttributeType("USER-ATTRIBUTE-VALUE")) else { return }
// 2
let remoteStorage = RemoteStorage(storageType: .suite)
// 3
if var pendingAttributes = remoteStorage.retrieve(forKey: .pendingUserAttributes) as? [Data] {
pendingAttributes.append(contentsOf: [data])
remoteStorage.store(pendingAttributes, forKey: .pendingUserAttributes)
} else {
// 4
remoteStorage.store([data], forKey: .pendingUserAttributes)
}
}
```
```objc
- (void)saveUserAttribute {
// 1
UserAttribute *userAttribute = [[UserAttribute alloc] initWithUserField:@"USER-ATTRIBUTE-VALUE" attributeType:UserAttributeTypeEmail];
NSError *error;
NSData *data = [NSKeyedArchiver archivedDataWithRootObject:userAttribute requiringSecureCoding:YES error:&error];
if (error != nil) {
// log error
}
// 2
RemoteStorage *remoteStorage = [[RemoteStorage alloc] initWithStorageType:StorageTypeSuite];
NSMutableArray *pendingAttributes = [[remoteStorage retrieveForKey:RemoteStorageKeyPendingUserAttributes] mutableCopy];
// 3
if (pendingAttributes) {
[pendingAttributes addObject:data];
[remoteStorage store:pendingAttributes forKey:RemoteStorageKeyPendingUserAttributes];
} else {
// 4
[remoteStorage store:@[data] forKey:RemoteStorageKeyPendingUserAttributes];
}
}
```
##### Envío de atributos de usuario a Braze {#sending-user-attributes-to-braze}
Después de inicializar el SDK es el mejor momento para registrar cualquier análisis guardado de una extensión de aplicación de contenido de notificación. Esto puede hacerse recorriendo en bucle los atributos pendientes, configurando el atributo personalizado apropiado en Braze y, a continuación, borrando el almacenamiento para la próxima vez que se necesite esta función.
1. Recorrer la matriz de datos `pendingAttributes`
2. Inicializar un objeto `UserAttribute` codificado a partir de datos de atributos
3. Establecer un campo de usuario específico basado en el tipo de atributo de usuario (correo electrónico)
4. Eliminar todos los atributos de usuario pendientes del almacén
``` swift
func logPendingUserAttributesIfNecessary() {
let remoteStorage = RemoteStorage(storageType: .suite)
guard let pendingAttributes = remoteStorage.retrieve(forKey: .pendingUserAttributes) as? [Data] else { return }
// 1
for attributeData in pendingAttributes {
// 2
guard let userAttribute = try? PropertyListDecoder().decode(UserAttribute.self, from: attributeData) else { continue }
// 3
switch userAttribute {
case .email(let email):
user?.email = email
}
}
// 4
remoteStorage.removeObject(forKey: .pendingUserAttributes)
}
```
```objc
- (void)logPendingUserAttributesIfNecessary {
RemoteStorage *remoteStorage = [[RemoteStorage alloc] initWithStorageType:StorageTypeSuite];
NSArray *pendingAttributes = [remoteStorage retrieveForKey:RemoteStorageKeyPendingUserAttributes];
// 1
for (NSData *attributeData in pendingAttributes) {
NSError *error;
// 2
UserAttribute *userAttribute = [NSKeyedUnarchiver unarchivedObjectOfClass:[UserAttribute class] fromData:attributeData error:&error];
if (error != nil) {
// log error
}
// 3
if (userAttribute) {
switch (userAttribute.attributeType) {
case UserAttributeTypeEmail:
[self user].email = userAttribute.userField;
break;
}
}
}
// 4
[remoteStorage removeObjectForKey:RemoteStorageKeyPendingUserAttributes];
}
```
##### Archivos de ayuda {#helper-files}
**Archivo de ayuda RemoteStorage**
```swift
enum RemoteStorageKey: String, CaseIterable {
// MARK: - Notification Content Extension Analytics
case pendingCustomEvents = "pending_custom_events"
case pendingCustomAttributes = "pending_custom_attributes"
case pendingUserAttributes = "pending_user_attributes"
}
enum RemoteStorageType {
case standard
case suite
}
class RemoteStorage: NSObject {
private var storageType: RemoteStorageType = .standard
private lazy var defaults: UserDefaults = {
switch storageType {
case .standard:
return .standard
case .suite:
return UserDefaults(suiteName: "YOUR-DOMAIN-IDENTIFIER")!
}
}()
init(storageType: RemoteStorageType = .standard) {
self.storageType = storageType
}
func store(_ value: Any, forKey key: RemoteStorageKey) {
defaults.set(value, forKey: key.rawValue)
}
func retrieve(forKey key: RemoteStorageKey) -> Any? {
return defaults.object(forKey: key.rawValue)
}
func removeObject(forKey key: RemoteStorageKey) {
defaults.removeObject(forKey: key.rawValue)
}
func resetStorageKeys() {
for key in RemoteStorageKey.allCases {
defaults.removeObject(forKey: key.rawValue)
}
}
}
```
```objc
@interface RemoteStorage ()
@property (nonatomic) StorageType storageType;
@property (nonatomic, strong) NSUserDefaults *defaults;
@end
@implementation RemoteStorage
- (id)initWithStorageType:(StorageType)storageType {
if (self = [super init]) {
self.storageType = storageType;
}
return self;
}
- (void)store:(id)value forKey:(RemoteStorageKey)key {
[[self defaults] setValue:value forKey:[self rawValueForKey:key]];
}
- (id)retrieveForKey:(RemoteStorageKey)key {
return [[self defaults] objectForKey:[self rawValueForKey:key]];
}
- (void)removeObjectForKey:(RemoteStorageKey)key {
[[self defaults] removeObjectForKey:[self rawValueForKey:key]];
}
- (void)resetStorageKeys {
[[self defaults] removeObjectForKey:[self rawValueForKey:RemoteStorageKeyPendingCustomEvents]];
[[self defaults] removeObjectForKey:[self rawValueForKey:RemoteStorageKeyPendingCustomAttributes]];
[[self defaults] removeObjectForKey:[self rawValueForKey:RemoteStorageKeyPendingUserAttributes]];
}
- (NSUserDefaults *)defaults {
if (!self.defaults) {
switch (self.storageType) {
case StorageTypeStandard:
return [NSUserDefaults standardUserDefaults];
break;
case StorageTypeSuite:
return [[NSUserDefaults alloc] initWithSuiteName:@"YOUR-DOMAIN-IDENTIFIER"];
}
} else {
return self.defaults;
}
}
- (NSString*)rawValueForKey:(RemoteStorageKey)remoteStorageKey {
switch(remoteStorageKey) {
case RemoteStorageKeyPendingCustomEvents:
return @"pending_custom_events";
case RemoteStorageKeyPendingCustomAttributes:
return @"pending_custom_attributes";
case RemoteStorageKeyPendingUserAttributes:
return @"pending_user_attributes";
default:
[NSException raise:NSGenericException format:@"Unexpected FormatType."];
}
}
```
**Archivo de ayuda UserAttribute**
```swift
enum UserAttribute: Hashable {
case email(String?)
}
// MARK: - Codable
extension UserAttribute: Codable {
private enum CodingKeys: String, CodingKey {
case email
}
func encode(to encoder: Encoder) throws {
var values = encoder.container(keyedBy: CodingKeys.self)
switch self {
case .email(let email):
try values.encode(email, forKey: .email)
}
}
init(from decoder: Decoder) throws {
let values = try decoder.container(keyedBy: CodingKeys.self)
let email = try values.decode(String.self, forKey: .email)
self = .email(email)
}
}
```
```objc
@implementation UserAttribute
- (id)initWithUserField:(NSString *)userField attributeType:(UserAttributeType)attributeType {
if (self = [super init]) {
self.userField = userField;
self.attributeType = attributeType;
}
return self;
}
- (void)encodeWithCoder:(NSCoder *)encoder {
[encoder encodeObject:self.userField forKey:@"userField"];
[encoder encodeInteger:self.attributeType forKey:@"attributeType"];
}
- (id)initWithCoder:(NSCoder *)decoder {
if (self = [super init]) {
self.userField = [decoder decodeObjectForKey:@"userField"];
NSInteger attributeRawValue = [decoder decodeIntegerForKey:@"attributeType"];
self.attributeType = (UserAttributeType) attributeRawValue;
}
return self;
}
@end
```
**Archivo de ayuda EventName Dictionary**
```swift
extension Dictionary where Key == String, Value == Any {
init(eventName: String, properties: [String: Any]? = nil) {
self.init()
self[PushNotificationKey.eventName.rawValue] = eventName
if let properties = properties {
for (key, value) in properties {
self[key] = value
}
}
}
}
```
```objc
@implementation NSDictionary (Helper)
- (id)initWithEventName:(NSString *)eventName properties:(NSDictionary *)properties {
self = [self init];
if (self) {
dict[@"event_name"] = eventName;
for(id key in properties) {
dict[key] = properties[key];
}
}
return self;
}
@end
```
# Pruebas de notificación push para iOS
Source: /docs/es/developer_guide/platforms/legacy_sdks/ios/push_notifications/testing/index.md
**Warning:**
[AppboyKit](https://github.com/Appboy/appboy-ios-sdk) (also known as the Objective-C SDK) is no longer supported and has been replaced by the [Swift SDK](https://www.braze.com/docs/es/es/developer_guide/sdk_integration/?sdktab=swift). It will no longer receive new features, bug fixes, security updates, or technical support—however, messaging and analytics will continue to function as normal. To learn more, see [Introducing the New Braze Swift SDK](https://www.braze.com/resources/articles/introducing-the-new-braze-swift-sdk).
# Prueba {#push-testing}
Si quieres probar las notificaciones dentro de la aplicación y las notificaciones push a través de la línea de comandos, puedes enviar una única notificación a través del terminal mediante CURL y la [API de mensajería](https://www.braze.com/docs/es/es/api/endpoints/messaging). Tendrás que sustituir los siguientes campos por los valores correctos para tu caso de prueba:
Campos obligatorios:
- `YOUR-API-KEY-HERE` - disponible en **Configuración** > **Claves de API**. Asegúrate de que la clave está autorizada para enviar mensajes a través del punto de conexión de la REST API `/messages/send`.
- `EXTERNAL_USER_ID` - disponible en la página **Buscar usuarios**.
- `REST_API_ENDPOINT_URL` - listado en las [Instancias](https://www.braze.com/docs/es/es/api/basics#endpoints. Ensure using the endpoint corresponds to the Braze instance your workspace is on.
Optional fields:
- `YOUR_KEY1` (optional) de Braze. Asegúrate de que el punto de conexión corresponde a la instancia de Braze en la que se encuentra tu espacio de trabajo.
Campos opcionales:
- `YOUR_KEY1` (opcional)
- `YOUR_VALUE1` (opcional)
```bash
curl -X POST -H "Content-Type: application/json" -H "Authorization: Bearer YOUR-API-KEY-HERE" -d '{
"external_user_ids":["EXTERNAL_USER_ID"],
"messages": {
"apple_push": {
"alert":"Test push",
"extra": {
"YOUR_KEY1":"YOUR_VALUE1"
}
}
}
}' https://{REST_API_ENDPOINT_URL}/messages/send
```
# Pruebas unitarias de notificación push para iOS
Source: /docs/es/developer_guide/platforms/legacy_sdks/ios/push_notifications/unit_tests/index.md
**Warning:**
[AppboyKit](https://github.com/Appboy/appboy-ios-sdk) (also known as the Objective-C SDK) is no longer supported and has been replaced by the [Swift SDK](https://www.braze.com/docs/es/es/developer_guide/sdk_integration/?sdktab=swift). It will no longer receive new features, bug fixes, security updates, or technical support—however, messaging and analytics will continue to function as normal. To learn more, see [Introducing the New Braze Swift SDK](https://www.braze.com/resources/articles/introducing-the-new-braze-swift-sdk).
# Pruebas unitarias {#unit-tests}
Esta guía opcional describe cómo implementar algunas pruebas unitarias que verificarán si el delegado de tu aplicación sigue correctamente los pasos descritos en nuestras [instrucciones de integración push](https://www.braze.com/docs/es/es/developer_guide/platforms/legacy_sdks/ios/push_notifications/integration).
Si todas las pruebas pasan, en general, significa que la parte basada en código de tu configuración push es funcional. Si una prueba falla, puede significar que has seguido incorrectamente un paso, o puede ser el resultado de una personalización válida que no se ajusta exactamente a nuestras instrucciones predeterminadas.
En cualquier caso, esto puede ser útil para verificar que has seguido los pasos de la integración y para ayudar a detectar cualquier regresión.
## Paso 1: Crear un objetivo de pruebas unitarias {#step-1-creating-a-unit-tests-target}
Omite este paso si el proyecto de tu aplicación en Xcode ya contiene un paquete de pruebas unitarias.
En el proyecto de tu aplicación, ve al menú **File > New > Target** y añade un nuevo "Unit Testing Bundle". Este paquete puede utilizar Objective-C o Swift y tener cualquier nombre. Establece el "Target to be Tested" como el objetivo principal de tu aplicación.
## Paso 2: Añade el SDK de Braze a tus pruebas unitarias {#step-2-add-the-braze-sdk-to-your-unit-tests}
Utilizando el mismo método que utilizaste inicialmente para [instalar el SDK de Braze](https://www.braze.com/docs/es/es/developer_guide/platforms/legacy_sdks/ios/initial_sdk_setup/overview), asegúrate de que la misma instalación del SDK también esté disponible para el objetivo de tus pruebas unitarias. Por ejemplo, utilizando CocoaPods:
```
target 'YourAppTarget' do
pod 'Appboy-iOS-SDK'
target 'YourAppTargetTests' do
inherit! :search_paths
end
end
```
## Paso 3: Añade OCMock a tus pruebas unitarias {#step-3-add-ocmock-to-your-unit-tests}
Añade [OCMock](https://ocmock.org/) a tu objetivo de prueba mediante CocoaPods, Carthage o su biblioteca estática. Por ejemplo, utilizando CocoaPods:
```
target 'YourAppTarget' do
pod 'Appboy-iOS-SDK'
target 'YourAppTargetTests' do
inherit! :search_paths
pod 'OCMock'
end
end
```
## Paso 4: Termina de instalar las bibliotecas añadidas {#step-4-finish-installing-the-added-libraries}
Termina de instalar el SDK de Braze y OCMock. Por ejemplo, utilizando CocoaPods, navega hasta el directorio de tu proyecto de aplicación Xcode dentro de tu terminal y ejecuta el siguiente comando:
```
pod install
```
En este punto, deberías poder abrir el espacio de trabajo del proyecto Xcode creado por CocoaPods.
## Paso 5: Añadir pruebas push {#step-5-adding-push-tests}
Crea un nuevo archivo Objective-C en tu objetivo de pruebas unitarias.
Si el objetivo de las pruebas unitarias está en Swift, Xcode puede preguntar: "Would you like to configure an Objective-C bridging header?". El encabezado puente es opcional, por lo que puedes hacer clic en **Don't Create** y seguir ejecutando correctamente estas pruebas unitarias.
Añade el contenido de la aplicación de ejemplo HelloSwift [`AppboyPushUnitTests.m`](https://github.com/Appboy/appboy-ios-sdk/blob/master/HelloSwift/HelloSwiftTests/AppboyPushUnitTests.m) al nuevo archivo.
## Paso 6: Ejecuta el conjunto de pruebas {#step-6-run-test-suite}
Ejecuta las pruebas unitarias de tu aplicación. Puede ser un paso de verificación único, o puedes incluirlo indefinidamente en tu conjunto de pruebas para ayudar a detectar cualquier regresión.
# Solución de problemas de notificaciones push para iOS
Source: /docs/es/developer_guide/platforms/legacy_sdks/ios/push_notifications/troubleshooting/index.md
**Warning:**
[AppboyKit](https://github.com/Appboy/appboy-ios-sdk) (also known as the Objective-C SDK) is no longer supported and has been replaced by the [Swift SDK](https://www.braze.com/docs/es/es/developer_guide/sdk_integration/?sdktab=swift). It will no longer receive new features, bug fixes, security updates, or technical support—however, messaging and analytics will continue to function as normal. To learn more, see [Introducing the New Braze Swift SDK](https://www.braze.com/resources/articles/introducing-the-new-braze-swift-sdk).
# Solución de problemas {#push-troubleshooting}
## Comprender el flujo de trabajo Braze/APNs {#understanding-the-brazeapns-workflow}
El servicio de notificaciones push de Apple (APN) es la infraestructura de Apple para el envío de notificaciones push a las aplicaciones de iOS y OS X. Esta es la estructura simplificada de cómo se habilitan las notificaciones push para los dispositivos de tus usuarios y cómo Braze puede enviarles notificaciones push:
1. Configuras el certificado push y el perfil de aprovisionamiento
2. Los dispositivos se registran en APN y proporcionan a Braze tokens de notificaciones push
3. Lanzas una Campaign push de Braze
4. Braze elimina los tokens no válidos
### Paso 1: Configurar el certificado push y el perfil de aprovisionamiento {#step-1-configuring-the-push-certificate-and-provisioning-profile}
Al desarrollar tu aplicación, tendrás que crear un certificado SSL para habilitar las notificaciones push. Este certificado se incluirá en el perfil de aprovisionamiento con el que se cree tu aplicación y también deberá cargarse en el panel de Braze. El certificado permite a Braze indicar a los APN que estamos autorizados a enviar notificaciones push en tu nombre.
Hay dos tipos de [perfiles de aprovisionamiento](https://developer.apple.com/library/content/documentation/IDEs/Conceptual/AppDistributionGuide/MaintainingProfiles/MaintainingProfiles.html) y certificados: de desarrollo y de distribución. Recomendamos utilizar solo perfiles de distribución y certificados para evitar confusiones. Si decides utilizar perfiles y certificados diferentes para el desarrollo y la distribución, asegúrate de que el certificado cargado en el panel coincide con el perfil de aprovisionamiento que utilizas actualmente.
**Warning:**
No cambies el entorno del certificado push (desarrollo frente a producción). Cambiar el certificado push a un entorno incorrecto puede hacer que a tus usuarios se les elimine accidentalmente el token de notificaciones push, haciéndoles inaccesibles por push.
#### Paso 2: Los dispositivos se registran en APN y proporcionan a Braze tokens de notificaciones push {#step-2-devices-register-for-apns-and-provide-braze-with-push-tokens}
Cuando los usuarios abran tu aplicación, se les pedirá que acepten notificaciones push. Si aceptan esta indicación, los APN generarán un token de notificaciones push para ese dispositivo concreto. El SDK de iOS enviará de forma inmediata y asíncrona el token de notificaciones push para las aplicaciones que utilicen la [política predeterminada de descarga automática](https://www.braze.com/docs/es/es/developer_guide/platform_integration_guides/ios/advanced_use_cases/fine_network_traffic_control#automatic-request-processing). Una vez que tengamos un token de notificaciones push asociado a un usuario, aparecerá como "Push registrado" en el panel de su perfil de usuario, en la pestaña de **Interacción**, y será elegible para recibir notificaciones push de Campaigns de Braze.
**Note:**
A partir de Xcode 14, puedes probar las notificaciones push remotas en un simulador de iOS.
#### Paso 3: Lanzamiento de una Campaign push de Braze {#step-3-launching-a-braze-push-campaign}
Cuando se lanza una Campaign push, Braze hará peticiones a los APN para que entreguen tu mensaje. Braze utilizará el certificado SSL push cargado en el panel para autenticar y verificar que se nos permite enviar notificaciones push a los tokens de notificaciones push proporcionados. Si un dispositivo está en línea, la notificación debería recibirse poco después de que se haya enviado la Campaign. Ten en cuenta que Braze establece la [fecha de caducidad](https://developer.apple.com/documentation/usernotifications/setting_up_a_remote_notification_server/sending_notification_requests_to_apns#2947607) predeterminada de los APN para las notificaciones en 30 días.
#### Paso 4: Eliminar tokens no válidos {#step-4-removing-invalid-tokens}
Si los [APN](https://developer.apple.com/library/content/documentation/NetworkingInternet/Conceptual/RemoteNotificationsPG/APNSOverview.html#//apple_ref/doc/uid/TP40008194-CH8-SW1) nos informan de que alguno de los tokens de notificaciones push a los que intentábamos enviar un mensaje no es válido, eliminamos esos tokens de los perfiles de usuario a los que estaban asociados.
## Utilizar los registros de errores push {#utilizing-the-push-error-logs}
Braze proporciona un registro de errores de notificación push dentro del **Registro de actividad de mensajes**. Este registro de errores proporciona una serie de advertencias que pueden ser muy útiles para identificar por qué tus Campaigns no funcionan como esperabas. Si haces clic en un mensaje de error, se te redirigirá a la documentación pertinente para ayudarte a solucionar una incidencia concreta.

Los errores comunes que puedes ver aquí incluyen notificaciones específicas del usuario, como ["Se recibió envío no registrado a token de notificaciones push"](#received-unregistered-sending).
Además, Braze también proporciona un registro de cambios push en el perfil de usuario, en la pestaña de **Interacción**. Este registro de cambios proporciona información sobre el comportamiento del registro push, como la invalidación del token, los errores de registro push, los tokens que se mueven a nuevos usuarios, etc.
{: style="max-width:50%;" }
## Problemas de registro push {#push-registration-issues}
Para añadir verificación a la lógica de registro push de tu aplicación, implementa [pruebas unitarias push](https://www.braze.com/docs/es/es/developer_guide/platforms/legacy_sdks/ios/push_notifications/unit_tests).
### No hay aviso de registro push {#no-push-registration-prompt}
Si la aplicación no te pide que te registres para recibir notificaciones push, es probable que haya un problema con tu integración de registro push. Asegúrate de que has seguido nuestra [documentación](https://www.braze.com/docs/es/es/developer_guide/platforms/legacy_sdks/ios/push_notifications/integration) e integrado correctamente nuestro registro push. También puedes establecer puntos de interrupción en tu código para asegurarte de que el código de registro push se está ejecutando.
#### No se muestran los usuarios "push registrados" en el panel {#no-push-registered-users-showing-in-the-dashboard}
- Comprueba que tu aplicación te pide que permitas las notificaciones push. Normalmente, este mensaje aparecerá la primera vez que abras la aplicación, pero puedes programarlo para que aparezca en cualquier otro momento. Si no aparece donde debería, es probable que el problema esté en la configuración básica de las capacidades push de tu aplicación.
- Comprueba que los pasos para la [integración push](https://www.braze.com/docs/es/es/developer_guide/platforms/legacy_sdks/ios/push_notifications/integration) se han completado correctamente.
- Comprueba que el perfil de aprovisionamiento con el que se creó tu aplicación incluye permisos para push. Asegúrate de que obtienes todos los perfiles de aprovisionamiento disponibles de tu cuenta de desarrollador de Apple. Para confirmarlo, realiza los siguientes pasos:
1. En Xcode, ve a **Preferences > Accounts** (o utiliza el atajo de teclado Command+,).
2. Selecciona el ID de Apple que utilizas para tu cuenta de desarrollador y haz clic en **View Details**.
3. En la página siguiente, haz clic en ** Refresh** y confirma que estás extrayendo todos los perfiles de aprovisionamiento disponibles.
- Comprueba que has [habilitado correctamente la función push](https://www.braze.com/docs/es/es/developer_guide/platform_integration_guides/ios/push_notifications/integration#step-2-enable-push-capabilities) en tu aplicación.
- Comprueba que tu perfil de aprovisionamiento push coincide con el entorno en el que estás realizando las pruebas. Los certificados universales pueden configurarse en el panel de Braze para enviarlos al entorno de APN de desarrollo o de producción. Utilizar un certificado de desarrollo para una aplicación de producción o un certificado de producción para una aplicación de desarrollo no funcionará.
- Comprueba que estás llamando a nuestro método `registerPushToken` estableciendo un punto de interrupción en tu código.
- Comprueba que estás en un dispositivo (push no funcionará en un simulador) y que tienes una buena conectividad de red.
## Dispositivos que no reciben notificaciones push {#devices-not-receiving-push-notifications}
### Los usuarios ya no están "push registrados" tras enviar una notificación push {#users-no-longer-push-registered-after-sending-a-push-notification}
Esto probablemente indica que el usuario tenía un token de notificaciones push no válido. Esto puede ocurrir por varias razones:
#### Desajuste entre el panel y el certificado de la aplicación {#dashboard-and-app-certificate-mismatch}
Si el certificado push que has cargado en el panel no es el mismo que el del perfil de aprovisionamiento con el que se creó tu aplicación, los APN rechazarán el token. Comprueba que has cargado el certificado correcto y que has completado otra sesión en la aplicación antes de intentar otra notificación de prueba.
##### Desinstalaciones {#uninstalls}
Si un usuario ha desinstalado tu aplicación, su token de notificaciones push no será válido y se eliminará en el siguiente envío.
##### Regenerar tu perfil de aprovisionamiento {#regenerating-your-provisioning-profile}
Como último recurso, empezar de cero y crear un perfil de aprovisionamiento completamente nuevo puede eliminar los errores de configuración que se producen al trabajar con varios entornos, perfiles y aplicaciones al mismo tiempo. Hay muchas "partes móviles" en la configuración de las notificaciones push para aplicaciones de iOS, así que a veces es mejor volver a intentarlo desde el principio. Esto también te ayudará a aislar el problema si necesitas continuar con la solución de problemas.
#### Los usuarios siguen "push registrados" tras enviar una notificación push {#users-still-push-registered-after-sending-a-push-notification}
##### La aplicación está en primer plano {#app-is-foregrounded}
En las versiones de iOS que no integran push a través del framework `UserNotifications`, si la aplicación está en primer plano cuando se recibe el mensaje push, este no se mostrará. Debes poner la aplicación en segundo plano en tus dispositivos de prueba antes de enviar mensajes de prueba.
##### Notificación de prueba programada incorrectamente {#test-notification-scheduled-incorrectly}
Comprueba la programación que has establecido para tu mensaje de prueba. Si está configurada como entrega según la zona horaria local o [Intelligent Timing](https://www.braze.com/docs/es/es/user_guide/brazeai/intelligence_suite/intelligent_timing), es posible que aún no hayas recibido el mensaje (o que tuvieras la aplicación en primer plano cuando lo recibiste).
#### Usuario no "push registrado" para la aplicación que se está probando {#user-not-push-registered-for-the-app-being-tested}
Comprueba el perfil de usuario del usuario al que intentas enviar un mensaje de prueba. En la pestaña **Interacción**, debería haber una lista de "aplicaciones pushables". Comprueba que la aplicación a la que intentas enviar mensajes de prueba está en esta lista. Los usuarios aparecerán como "Push registrado" si tienen un token de notificaciones push para cualquier aplicación de tu espacio de trabajo, por lo que podría tratarse de un falso positivo.
Lo siguiente indicaría un problema con el registro push o que el token de notificaciones push del usuario ha sido devuelto a Braze como no válido por los APN después de haber sido enviado:
{: style="max-width:50%"}
## No se envían mensajes push {#push-messages-not-sending}
Para solucionar problemas de notificaciones push que no se envían, consulta [Solución de problemas de push](https://www.braze.com/docs/es/es/user_guide/channels/push/troubleshooting).
## Errores del registro de actividad de mensajes {#message-activity-log-errors}
### Se recibió envío no registrado a token de notificaciones push {#received-unregistered-sending}
- Asegúrate de que el token de notificaciones push que se envía a Braze desde el método `[[Appboy sharedInstance] registerPushToken:]` es válido. Puedes mirar en el **Registro de actividad de mensajes** para ver el token de notificaciones push. Debería parecerse a `6e407a9be8d07f0cdeb9e724733a89445f57a89ec890d63867c482a483506fa6`, una cadena larga que contiene una mezcla de letras y números. Si tu token de notificaciones push tiene un aspecto diferente, comprueba tu [código](https://www.braze.com/docs/es/es/developer_guide/platform_integration_guides/ios/push_notifications/integration#step-4-register-push-tokens-with-braze) para enviar a Braze los tokens de notificaciones push.
- Asegúrate de que tu perfil de aprovisionamiento push coincide con el entorno que estás probando. Los certificados universales pueden configurarse en el panel de Braze para enviarlos al entorno de APN de desarrollo o de producción. Utilizar un certificado de desarrollo para una aplicación de producción o un certificado de producción para una aplicación de desarrollo no funcionará.
- Comprueba que el token de notificaciones push que has cargado en Braze coincide con el perfil de aprovisionamiento que utilizaste para crear la aplicación desde la que enviaste el token de notificaciones push.
#### Token de dispositivo no para el tema {#device-token-not-for-topic}
Este error indica que el certificado push y el ID de paquete de tu aplicación no coinciden. Comprueba que el certificado push que subiste a Braze coincide con el perfil de aprovisionamiento utilizado para crear la aplicación desde la que se envió el token de notificaciones push.
#### BadDeviceToken enviando a token de notificaciones push {#baddevicetoken-sending-to-push-token}
El `BadDeviceToken` es un código de error de APNs y no tiene su origen en Braze. Puede haber varias razones para que se devuelva esta respuesta, entre ellas las siguientes:
- La aplicación recibió un token de notificaciones push que no era válido para las credenciales cargadas en el panel.
- Se ha desactivado la función push en este espacio de trabajo.
- El usuario ha optado por no recibir push.
- La aplicación fue desinstalada.
- Apple actualizó el token de notificaciones push, lo que invalidó el token antiguo.
- La aplicación se creó para un entorno de producción, pero las credenciales push cargadas en Braze están configuradas para un entorno de desarrollo (o al revés).
## Problemas tras la entrega push {#issues-after-push-delivery}
Para añadir verificación a la gestión push de tu aplicación, implementa [pruebas unitarias push](https://www.braze.com/docs/es/es/developer_guide/platforms/legacy_sdks/ios/push_notifications/unit_tests).
### Los clics push no se registran {#push-clicks-not-logged}
- Si esto solo ocurre en iOS 10, asegúrate de que has seguido los pasos de integración push para [iOS 10](https://www.braze.com/docs/es/es/developer_guide/platform_integration_guides/ios/push_notifications/integration#step-5-enable-push-handling).
- Braze no gestiona las notificaciones push recibidas silenciosamente en primer plano (por ejemplo, el comportamiento push predeterminado en primer plano antes del framework `UserNotifications`). Esto significa que los enlaces no se abrirán y los clics push no se registrarán. Si tu aplicación aún no ha integrado el framework `UserNotifications`, Braze no gestionará las notificaciones push cuando el estado de la aplicación sea `UIApplicationStateActive`. Debes asegurarte de que tu aplicación no retrasa las llamadas a nuestros [métodos de gestión push](https://www.braze.com/docs/es/es/developer_guide/platform_integration_guides/ios/push_notifications/integration#step-5-enable-push-handling); de lo contrario, el SDK de iOS puede tratar las notificaciones push como eventos push silenciosos en primer plano y no gestionarlas.
#### Los enlaces web de los clics push no se abren {#web-links-from-push-clicks-not-opening}
iOS 9+ requiere que los enlaces sean compatibles con ATS para abrirlos en vistas web. Asegúrate de que tus enlaces web utilizan HTTPS. Consulta nuestro artículo sobre [el cumplimiento de ATS](https://www.braze.com/docs/es/es/developer_guide/platform_integration_guides/ios/advanced_use_cases/linking#app-transport-security-ats) para obtener más información.
#### Los vínculos profundos de los clics push no se abren {#deep-links-from-push-clicks-not-opening}
La mayor parte del código que gestiona los vínculos profundos también gestiona las aperturas push. Primero, asegúrate de que se registran las aperturas push. Si no es así, [soluciona ese problema](#push-clicks-not-logged) (ya que la solución suele arreglar la gestión de enlaces).
Si se registran aperturas, comprueba si se trata de un problema con el vínculo profundo en general o con la gestión de los clics push de vinculación en profundidad. Para ello, prueba a ver si funciona un vínculo profundo desde un clic de mensaje dentro de la aplicación.
#### Pocas o ninguna apertura directa {#few-or-no-direct-opens}
Si al menos un usuario abre tu notificación push de iOS, pero se registran pocas o ninguna _Direct Opens_ en Braze, puede haber un problema con tu [integración de SDK](https://www.braze.com/docs/es/es/developer_guide/platforms/legacy_sdks/ios/initial_sdk_setup/overview). Ten en cuenta que las _Direct Opens_ no se registran en los envíos de prueba ni en las notificaciones push silenciosas.
- Asegúrate de que los mensajes no se envían como [notificaciones push silenciosas](https://www.braze.com/docs/es/es/developer_guide/platform_integration_guides/swift/push_notifications/silent_push_notifications#sending-silent-push-notifications). El mensaje debe tener texto en el título o en el cuerpo para que no se considere silencioso.
- Comprueba los siguientes pasos de la [guía de integración push](https://www.braze.com/docs/es/es/developer_guide/platforms/legacy_sdks/ios/push_notifications/integration):
- [Regístrate para push](https://www.braze.com/docs/es/es/developer_guide/platform_integration_guides/swift/push_notifications/integration#step-1-register-for-push-notifications-with-apns): En cada inicio de la aplicación, preferiblemente en `application:didFinishLaunchingWithOptions:`, debe ejecutarse el código del paso 3. La propiedad delegada de `UNUserNotificationCenter.current()` debe asignarse a un objeto que implemente `UNUserNotificationCenterDelegate` y contenga el método `(void)userNotificationCenter:didReceiveNotificationResponse:withCompletionHandler:`.
- [Habilita la gestión push](https://www.braze.com/docs/es/es/developer_guide/platform_integration_guides/legacy_sdks/ios/push_notifications/integration#step-5-enable-push-handling): Comprueba que se ha implementado el método `(void)userNotificationCenter:didReceiveNotificationResponse:withCompletionHandler:`.
# Resumen de mensajes dentro de la aplicación para iOS
Source: /docs/es/developer_guide/platforms/legacy_sdks/ios/in-app_messaging/overview/index.md
**Warning:**
[AppboyKit](https://github.com/Appboy/appboy-ios-sdk) (also known as the Objective-C SDK) is no longer supported and has been replaced by the [Swift SDK](https://www.braze.com/docs/es/es/developer_guide/sdk_integration/?sdktab=swift). It will no longer receive new features, bug fixes, security updates, or technical support—however, messaging and analytics will continue to function as normal. To learn more, see [Introducing the New Braze Swift SDK](https://www.braze.com/resources/articles/introducing-the-new-braze-swift-sdk).
# Mensajes dentro de la aplicación {#in-app-messages}
[Los mensajes dentro de la aplicación](https://www.braze.com/docs/es/es/user_guide/channels/in_app_messages) te ayudan a hacer llegar contenido a tu usuario sin interrumpir su día con una notificación push. Los mensajes dentro de la aplicación, personalizados y adaptados, mejoran la experiencia del usuario y ayudan a tu audiencia a obtener el máximo valor de tu aplicación. Con una gran variedad de diseños y herramientas de personalización para elegir, los mensajes dentro de la aplicación atraen a tus usuarios más que nunca.
Consulta nuestros [casos de estudio](https://www.braze.com/customers) para ver ejemplos de mensajes dentro de la aplicación.
## Tipos de mensajes dentro de la aplicación {#in-app-message-types}
Braze ofrece actualmente los siguientes tipos predeterminados de mensajes dentro de la aplicación:
- `Slideup`
- `Modal`
- `Full`
- `HTML Full`
Cada tipo de mensaje dentro de la aplicación es altamente personalizable en cuanto a contenido, imágenes, iconos, acciones de clic, análisis, visualización y entrega.
Todos los mensajes dentro de la aplicación son subclases de `ABKInAppMessage`, que define el comportamiento básico y los rasgos de todos los mensajes dentro de la aplicación. Las estructuras de las clases de mensajes dentro de la aplicación son las siguientes:

**Important:**
Por defecto, los mensajes dentro de la aplicación se habilitan tras completar la integración de SDK estándar, incluida la compatibilidad con GIF.
Ten en cuenta que la integración de `SDWebImage` es necesaria si piensas utilizar nuestra interfaz de usuario de Braze para mostrar imágenes en los mensajes dentro de la aplicación de iOS o en Content Cards.
### Comportamientos esperados por tipos de mensajes {#expected-behaviors-by-message-types}
Así es como tus usuarios ven uno de nuestros tipos predeterminados de mensajes dentro de la aplicación al abrirlo.
Los mensajes dentro de la aplicación [`Slideup`](https://appboy.github.io/appboy-ios-sdk/docs/interface_a_b_k_in_app_message_slideup.html) se llaman así porque "se deslizan hacia arriba" o "se deslizan hacia abajo" desde la parte superior o inferior de la pantalla. Cubren una pequeña parte de la pantalla y proporcionan una capacidad de mensajería eficaz y no intrusiva.
{: style="border:0px;"}
Los mensajes dentro de la aplicación [`Modal`](https://appboy.github.io/appboy-ios-sdk/docs/interface_a_b_k_in_app_message_modal.html) aparecen en el centro de la pantalla y están enmarcados por un panel translúcido. Útiles para una mensajería más crítica, pueden equiparse con hasta dos botones con acción de clic y habilitados para análisis.
{: style="border:0px;"}
Los mensajes dentro de la aplicación [`Full`](https://appboy.github.io/appboy-ios-sdk/docs/interface_a_b_k_in_app_message_full.html) son útiles para maximizar el contenido y el impacto de tu comunicación con el usuario. La mitad superior de un mensaje dentro de la aplicación `full` contiene una imagen, y la mitad inferior muestra texto y hasta dos botones con acción de clic y habilitados para análisis.
{: style="border:0px;"}
Los mensajes dentro de la aplicación [`HTML Full`](https://appboy.github.io/appboy-ios-sdk/docs/interface_a_b_k_in_app_message_h_t_m_l_full.html) son útiles para crear contenido de usuario totalmente personalizado. El contenido HTML completo de los mensajes dentro de la aplicación, definido por el usuario, se muestra en un `WKWebView` y puede contener opcionalmente otros contenidos enriquecidos, como imágenes y fuentes, lo que permite un control total sobre el aspecto y la funcionalidad de los mensajes.
Los mensajes dentro de la aplicación de iOS admiten una interfaz JavaScript `brazeBridge` para llamar a métodos del SDK web de Braze desde dentro de tu HTML; consulta nuestras [mejores prácticas](https://www.braze.com/docs/es/es/user_guide/channels/in_app_messages/best_practices) para obtener más detalles.
El siguiente ejemplo muestra un mensaje HTML completo paginado dentro de la aplicación:

El contenido completo de los mensajes dentro de la aplicación se muestra en un `WKWebView` y puede contener opcionalmente otros contenidos enriquecidos, como imágenes y fuentes, lo que permite un control total sobre el aspecto y la funcionalidad de los mensajes. Ten en cuenta que actualmente no admitimos la visualización de mensajes HTML personalizados dentro de la aplicación en un iFrame en las plataformas iOS y Android.
**Note:**
A partir de la versión 3.19.0 del SDK de iOS, los siguientes métodos JavaScript no funcionan en los mensajes HTML dentro de la aplicación: `alert`, `confirm`, `prompt`.
# Personalización de mensajes dentro de la aplicación iOS
Source: /docs/es/developer_guide/platforms/legacy_sdks/ios/in-app_messaging/customization/index.md
# Configurar delegados de mensajes dentro de la aplicación para iOS
Source: /docs/es/developer_guide/platforms/legacy_sdks/ios/in-app_messaging/customization/setting_delegates/index.md
**Warning:**
[AppboyKit](https://github.com/Appboy/appboy-ios-sdk) (also known as the Objective-C SDK) is no longer supported and has been replaced by the [Swift SDK](https://www.braze.com/docs/es/es/developer_guide/sdk_integration/?sdktab=swift). It will no longer receive new features, bug fixes, security updates, or technical support—however, messaging and analytics will continue to function as normal. To learn more, see [Introducing the New Braze Swift SDK](https://www.braze.com/resources/articles/introducing-the-new-braze-swift-sdk).
# Establecer delegados {#set-delegates}
Las personalizaciones de la visualización y entrega de mensajes dentro de la aplicación pueden realizarse en código configurando nuestros delegados opcionales.
## Delegado de mensajes dentro de la aplicación {#in-app-message-delegate}
El delegado [`ABKInAppMessageUIDelegate`](https://github.com/Appboy/appboy-ios-sdk/blob/master/AppboyUI/ABKInAppMessage/ABKInAppMessageUIDelegate.h) puede utilizarse para recibir cargas útiles de mensajes dentro de la aplicación desencadenados para su posterior procesamiento, recibir eventos del ciclo de vida de la visualización y controlar el tiempo de visualización.
Configura tu objeto delegado `ABKInAppMessageUIDelegate` en la instancia de Braze llamando a:
```objc
[[Appboy sharedInstance].inAppMessageController.inAppMessageUIController setInAppMessageUIDelegate:self];
```
```swift
Appboy.sharedInstance()?.inAppMessageController.inAppMessageUIController?.setInAppMessageUIDelegate?(self)
```
Echa un vistazo a nuestra [aplicación de ejemplo](https://github.com/Appboy/appboy-ios-sdk/blob/master/Samples/InAppMessage/BrazeInAppMessageSample/BrazeInAppMessageSample/ViewController.m) de mensajes dentro de la aplicación para ver un ejemplo de implementación. Ten en cuenta que si no incluyes la biblioteca Braze UI en tu proyecto (poco común), este delegado no estará disponible.
## Delegado central de mensajes dentro de la aplicación {#core-in-app-message-delegate}
Si no incluyes la biblioteca Braze UI en tu proyecto y quieres recibir cargas útiles de mensajes dentro de la aplicación desencadenados para su posterior procesamiento o visualización personalizada en tu aplicación, implementa el protocolo [`ABKInAppMessageControllerDelegate`](https://www.braze.com/docs/es/es/developer_guide/platforms/legacy_sdks/ios/in-app_messaging/customization/setting_delegates).
Configura tu objeto delegado `ABKInAppMessageControllerDelegate` en la instancia de Braze llamando a:
```objc
[Appboy sharedInstance].inAppMessageController.delegate = self;
```
```swift
Appboy.sharedInstance()?.inAppMessageController.delegate = self
```
También puedes configurar tu delegado central de mensajes dentro de la aplicación en el momento de la inicialización a través de `appboyOptions` utilizando la clave `ABKInAppMessageControllerDelegateKey`:
```objc
[Appboy startWithApiKey:@"YOUR-API_KEY"
inApplication:application
withLaunchOptions:options
withAppboyOptions:@{ ABKInAppMessageControllerDelegateKey : self }];
```
```swift
Appboy.start(withApiKey: "YOUR-API-KEY",
in:application,
withLaunchOptions:launchOptions,
withAppboyOptions:[ ABKInAppMessageControllerDelegateKey : self ])
```
## Declaraciones de métodos {#method-declarations}
Para más información, consulta los siguientes archivos de encabezado:
- [`ABKInAppMessage.h`](https://github.com/Appboy/appboy-ios-sdk/blob/master/AppboyKit/include/ABKInAppMessage.h)
- [`ABKInAppMessageControllerDelegate.h`](https://github.com/Appboy/appboy-ios-sdk/blob/master/AppboyKit/include/ABKInAppMessageControllerDelegate.h)
## Muestras de implementación {#implementation-samples}
Consulta [`ViewController.m`](https://github.com/Appboy/appboy-ios-sdk/blob/master/Samples/InAppMessage/BrazeInAppMessageSample/BrazeInAppMessageSample/ViewController.m) en la aplicación de ejemplo de mensajes dentro de la aplicación.
# Personalizar la orientación de los mensajes dentro de la aplicación para iOS
Source: /docs/es/developer_guide/platforms/legacy_sdks/ios/in-app_messaging/customization/customizing_orientation/index.md
**Warning:**
[AppboyKit](https://github.com/Appboy/appboy-ios-sdk) (also known as the Objective-C SDK) is no longer supported and has been replaced by the [Swift SDK](https://www.braze.com/docs/es/es/developer_guide/sdk_integration/?sdktab=swift). It will no longer receive new features, bug fixes, security updates, or technical support—however, messaging and analytics will continue to function as normal. To learn more, see [Introducing the New Braze Swift SDK](https://www.braze.com/resources/articles/introducing-the-new-braze-swift-sdk).
# Personalizar la orientación {#customize-orientation}
## Configurar la orientación de todos los mensajes dentro de la aplicación {#setting-orientation-for-all-in-app-messages}
Para establecer una orientación fija para todos los mensajes dentro de la aplicación, puedes configurar la propiedad `supportedOrientationMask` en `ABKInAppMessageUIController`. Añade el siguiente código después de la llamada de tu aplicación a `startWithApiKey:inApplication:withLaunchOptions:`:
```objc
// Set fixed in-app message orientation to portrait.
// Use UIInterfaceOrientationMaskLandscape to display in-app messages in landscape
id inAppMessageUIController = [Appboy sharedInstance].inAppMessageController.inAppMessageUIController;
((ABKInAppMessageUIController *)inAppMessageUIController).supportedOrientationMask = UIInterfaceOrientationMaskPortrait;
```
```swift
// Set fixed in-app message orientation to portrait
// Use .landscape to display in-app messages in landscape
if let controller = Appboy.sharedInstance()?.inAppMessageController.inAppMessageUIController as? ABKInAppMessageUIController {
controller.supportedOrientationMask = .portrait
}
```
A continuación, todos los mensajes dentro de la aplicación se mostrarán en la orientación admitida, independientemente de la orientación del dispositivo. Ten en cuenta que la orientación del dispositivo también debe ser compatible con la propiedad `orientation` del mensaje dentro de la aplicación para que el mensaje se muestre.
## Configurar la orientación por mensaje dentro de la aplicación {#setting-orientation-per-in-app-message}
También puedes configurar la orientación por mensaje. Para ello, establece un [delegado de mensajes dentro de la aplicación](https://www.braze.com/docs/es/es/developer_guide/platforms/legacy_sdks/ios/in-app_messaging/customization/setting_delegates). A continuación, en tu método delegado `beforeInAppMessageDisplayed:`, establece la propiedad `orientation` en `ABKInAppMessage`:
```objc
// Set inAppMessage orientation to portrait
inAppMessage.orientation = ABKInAppMessageOrientationPortrait;
// Set inAppMessage orientation to landscape
inAppMessage.orientation = ABKInAppMessageOrientationLandscape;
```
```swift
// Set inAppMessage orientation to portrait
inAppMessage.orientation = ABKInAppMessageOrientation.portrait
// Set inAppMessage orientation to landscape
inAppMessage.orientation = ABKInAppMessageOrientation.landscape
```
Los mensajes dentro de la aplicación no se mostrarán si la orientación del dispositivo no coincide con la propiedad `orientation` del mensaje dentro de la aplicación.
**Note:**
En los iPads, los mensajes dentro de la aplicación aparecerán en el estilo de orientación preferido por el usuario, independientemente de la orientación real de la pantalla.
## Declaraciones de métodos {#method-declarations}
Para más información, consulta el siguiente archivo de encabezado:
- [`ABKInAppMessage.h`](https://github.com/Appboy/appboy-ios-sdk/blob/master/AppboyKit/include/ABKInAppMessage.h)
# Personalizar la gestión de la visualización de mensajes dentro de la aplicación para iOS
Source: /docs/es/developer_guide/platforms/legacy_sdks/ios/in-app_messaging/customization/handling_in_app_display/index.md
**Warning:**
[AppboyKit](https://github.com/Appboy/appboy-ios-sdk) (also known as the Objective-C SDK) is no longer supported and has been replaced by the [Swift SDK](https://www.braze.com/docs/es/es/developer_guide/sdk_integration/?sdktab=swift). It will no longer receive new features, bug fixes, security updates, or technical support—however, messaging and analytics will continue to function as normal. To learn more, see [Introducing the New Braze Swift SDK](https://www.braze.com/resources/articles/introducing-the-new-braze-swift-sdk).
# Manejo personalizado de la visualización de mensajes dentro de la aplicación {#custom-handling-in-app-message-display}
Cuando está configurado [`ABKInAppMessageControllerDelegate`](https://github.com/Appboy/appboy-ios-sdk/blob/master/AppboyKit/include/ABKInAppMessageControllerDelegate.h), se llama al siguiente método delegado antes de que se muestren los mensajes dentro de la aplicación:
```objc
- (ABKInAppMessageDisplayChoice) beforeInAppMessageDisplayed:(ABKInAppMessage *)inAppMessage;
```
```swift
func beforeInAppMessageDisplayed(inAppMessage: ABKInAppMessage!) -> ABKInAppMessageDisplayChoice
```
Si solo has implementado [`ABKInAppMessageUIDelegate`](https://github.com/Appboy/appboy-ios-sdk/blob/master/AppboyUI/ABKInAppMessage/ABKInAppMessageUIDelegate.h), se llamará al siguiente método delegado de interfaz de usuario:
```objc
- (ABKInAppMessageDisplayChoice) beforeInAppMessageDisplayed:(ABKInAppMessage *)inAppMessage withKeyboardIsUp:(BOOL)keyboardIsUp;
```
```swift
func beforeInAppMessageDisplayed(inAppMessage: ABKInAppMessage!, withKeyboardIsUp keyboardIsUp: Bool) -> ABKInAppMessageDisplayChoice
```
Puedes personalizar la gestión de mensajes dentro de la aplicación implementando este método delegado y devolviendo uno de los siguientes valores para `ABKInAppMessageDisplayChoice`:
| `ABKInAppMessageDisplayChoice` | Comportamiento |
| -------------------------- | -------- |
| Objective-C: `ABKDisplayInAppMessageNow` Swift: `displayInAppMessageNow` | El mensaje se mostrará inmediatamente. |
| Objective-C: `ABKDisplayInAppMessageLater` Swift: `displayInAppMessageLater` | El mensaje no se mostrará y volverá a colocarse en la parte superior de la pila. |
| Objective-C: `ABKDiscardInAppMessage` Swift: `discardInAppMessage` | El mensaje se descartará y no se mostrará. |
{: .reset-td-br-1 .reset-td-br-2 aria-label="Custom handling in-app message display" }
Puedes utilizar el método delegado `beforeInAppMessageDisplayed:` para añadir lógica de visualización de mensajes dentro de la aplicación, personalizar los mensajes dentro de la aplicación antes de que Braze los muestre u optar por no utilizar la lógica de visualización de mensajes dentro de la aplicación y la interfaz de usuario de Braze por completo.
Consulta nuestra [aplicación de muestra](https://github.com/Appboy/appboy-ios-sdk/blob/master/Samples/InAppMessage/BrazeInAppMessageSample/BrazeInAppMessageSample/AppDelegate.m) para ver un ejemplo de implementación.
## Anulación de mensajes dentro de la aplicación antes de la visualización {#overriding-in-app-messages-before-display}
Si quieres modificar el comportamiento de visualización de los mensajes dentro de la aplicación, debes añadir la lógica de visualización necesaria a tu método delegado `beforeInAppMessageDisplayed:`. Por ejemplo, puede que quieras mostrar el mensaje dentro de la aplicación desde la parte superior de la pantalla si se está mostrando el teclado, o tomar el modelo de datos del mensaje dentro de la aplicación y mostrar tú mismo el mensaje dentro de la aplicación.
Si la campaña de mensajería dentro de la aplicación no se muestra cuando se ha iniciado la sesión, asegúrate de que has añadido la lógica de visualización necesaria a tu método delegado `beforeInAppMessageDisplayed:`. Esto permite que la campaña de mensajería dentro de la aplicación se muestre desde la parte superior de la pantalla aunque se esté mostrando el teclado.
## Desactivar el modo oscuro {#disabling-dark-mode}
Para evitar que los mensajes dentro de la aplicación adopten el estilo de modo oscuro cuando el dispositivo del usuario tiene habilitado el modo oscuro, utiliza la propiedad [`ABKInAppMessage.enableDarkTheme`](https://appboy.github.io/appboy-ios-sdk/docs/interface_a_b_k_in_app_message.html#ae89df6090bed623099ab0ecc0a74ad5d). Desde el método `ABKInAppMessageControllerDelegate.beforeInAppMessageDisplayed:` o `ABKInAppMessageUIDelegate.beforeInAppMessageDisplayed:`, establece la propiedad `enableDarkTheme` del parámetro `inAppMessage` del método en `NO`.
```objc
// ABKInAppMessageControllerDelegate
- (ABKInAppMessageDisplayChoice)beforeInAppMessageDisplayed:(ABKInAppMessage *)inAppMessage {
...
inAppMessage.enableDarkTheme = NO;
...
return ABKDisplayInAppMessageNow;
}
// ABKInAppMessageUIDelegate
- (ABKInAppMessageDisplayChoice)beforeInAppMesssageDisplayed:(ABKInAppMessage *)inAppMessage
withKeyboardIsUp:(BOOL)keyboardIsUp {
...
inAppMessage.enableDarkTheme = NO;
...
return ABKDisplayInAppMessageNow;
}
```
```swift
// ABKInAppMessageControllerDelegate
func before(inAppMessageDisplayed inAppMessage: ABKInAppMessage) -> ABKInAppMessageDisplayChoice {
...
inAppMessage.enableDarkTheme = false
...
return ABKInAppMessageDisplayChoice.displayInAppMessageNow
}
// ABKInAppMessageUIDelegate
func before(inAppMessageDisplayed inAppMessage: ABKInAppMessage, withKeyboardIsUp keyboardIsUp: Bool) -> ABKInAppMessageDisplayChoice {
...
inAppMessage.enableDarkTheme = false
...
return ABKInAppMessageDisplayChoice.displayInAppMessageNow
}
```
## Ocultar la barra de estado durante la visualización {#hiding-the-status-bar-during-display}
Para los mensajes dentro de la aplicación `Full` y `HTML`, el SDK intentará colocar el mensaje sobre la barra de estado de forma predeterminada. Sin embargo, en algunos casos, la barra de estado puede seguir apareciendo encima del mensaje dentro de la aplicación. A partir de la versión [3.21.1](https://github.com/Appboy/appboy-ios-sdk/blob/master/CHANGELOG.md#3211) del SDK de iOS, puedes forzar que la barra de estado se oculte al mostrar los mensajes dentro de la aplicación `Full` y `HTML` configurando `ABKInAppMessageHideStatusBarKey` a `YES` dentro del `appboyOptions` pasado a `startWithApiKey:`.
## Registro de impresiones y clics {#logging-impressions-and-clicks}
El registro de impresiones y clics de mensajes dentro de la aplicación no es automático cuando implementas un manejo completamente personalizado (por ejemplo, eludes la visualización de mensajes dentro de la aplicación de Braze devolviendo `ABKDiscardInAppMessage` en tu `beforeInAppMessageDisplayed:`). Si decides implementar tu propia interfaz de usuario utilizando nuestros modelos de mensajes dentro de la aplicación, debes registrar los análisis con los siguientes métodos en la clase `ABKInAppMessage`:
```objc
// Registers that a user has viewed an in-app message with the Braze server.
- (void) logInAppMessageImpression;
// Registers that a user has clicked on an in-app message with the Braze server.
- (void) logInAppMessageClicked;
```
```swift
// Registers that a user has viewed an in-app message with the Braze server.
func logInAppMessageImpression()
// Registers that a user has clicked on an in-app message with the Braze server.
func logInAppMessageClicked()
```
Además, deberías registrar los clics en los botones de las subclases de `ABKInAppMessageImmersive` (*es decir*, mensajes dentro de la aplicación `Modal` y `Full`):
```objc
// Logs button click analytics
- (void)logInAppMessageClickedWithButtonID:(NSInteger)buttonID;
```
```swift
// Logs button click analytics
func logInAppMessageClickedWithButtonID(buttonId: NSInteger)
```
## Declaraciones de métodos {#method-declarations}
Para más información, consulta los siguientes archivos de encabezado:
- [`ABKInAppMessage.h`](https://github.com/Appboy/appboy-ios-sdk/blob/master/AppboyKit/include/ABKInAppMessage.h)
- [`ABKInAppMessageControllerDelegate.h`](https://github.com/Appboy/appboy-ios-sdk/blob/master/AppboyKit/include/ABKInAppMessageControllerDelegate.h)
## Muestras de implementación {#implementation-samples}
Consulta la aplicación de muestra de mensajes dentro de la aplicación [`AppDelegate.m`](https://github.com/Appboy/appboy-ios-sdk/blob/master/Samples/InAppMessage/BrazeInAppMessageSample/BrazeInAppMessageSample/AppDelegate.m).
# Personalizar el comportamiento al hacer clic en los mensajes dentro de la aplicación para iOS
Source: /docs/es/developer_guide/platforms/legacy_sdks/ios/in-app_messaging/customization/behavior_on_click/index.md
**Warning:**
[AppboyKit](https://github.com/Appboy/appboy-ios-sdk) (also known as the Objective-C SDK) is no longer supported and has been replaced by the [Swift SDK](https://www.braze.com/docs/es/es/developer_guide/sdk_integration/?sdktab=swift). It will no longer receive new features, bug fixes, security updates, or technical support—however, messaging and analytics will continue to function as normal. To learn more, see [Introducing the New Braze Swift SDK](https://www.braze.com/resources/articles/introducing-the-new-braze-swift-sdk).
# Personalizar el comportamiento de los mensajes dentro de la aplicación al hacer clic {#customize-in-app-message-behavior-on-click}
La propiedad `inAppMessageClickActionType` de `ABKInAppMessage` define el comportamiento de la acción después de hacer clic en el mensaje dentro de la aplicación. Esta propiedad es de solo lectura. Si quieres cambiar el comportamiento de clic del mensaje dentro de la aplicación, puedes llamar al siguiente método en `ABKInAppMessage`:
```objc
[inAppMessage setInAppMessageClickAction:clickActionType withURI:uri];
```
```swift
inAppMessage.setInAppMessageClickAction(clickActionType: clickActionType, withURI: uri)
```
`inAppMessageClickActionType` puede establecerse en uno de los siguientes valores:
| `ABKInAppMessageClickActionType` | Comportamiento al hacer clic |
| -------------------------- | -------- |
| `ABKInAppMessageRedirectToURI` | La URI dada se mostrará cuando se haga clic en el mensaje, y este se descartará. Ten en cuenta que el parámetro `uri` no puede ser nulo. |
| `ABKInAppMessageNoneClickAction` | Al hacer clic en el mensaje, este se cerrará. Ten en cuenta que el parámetro `uri` se ignorará, y que la propiedad `uri` de `ABKInAppMessage` se establecerá en nulo. |
{: .reset-td-br-1 .reset-td-br-2 aria-label="Personalizar el comportamiento de los mensajes dentro de la aplicación al hacer clic" }
**Important:**
Para los mensajes dentro de la aplicación que contengan botones, el `clickAction` del mensaje también se incluirá en la carga útil final si la acción de clic se añade antes de añadir el texto del botón.
## Personalizar los clics del cuerpo de los mensajes dentro de la aplicación {#customizing-in-app-message-body-clicks}
El siguiente método delegado de [`ABKInAppMessageUIDelegate`](https://github.com/Appboy/appboy-ios-sdk/blob/master/AppboyUI/ABKInAppMessage/ABKInAppMessageUIDelegate.h) se llama cuando se hace clic en un mensaje dentro de la aplicación:
```objc
- (BOOL) onInAppMessageClicked:(ABKInAppMessage *)inAppMessage;
```
```swift
func onInAppMessageClicked(inAppMessage: ABKInAppMessage!) -> Bool
```
## Personalizar los clics de los botones de mensajes dentro de la aplicación {#customizing-in-app-message-button-clicks}
Para los clics en botones de mensajes dentro de la aplicación y botones de mensajes HTML dentro de la aplicación (como enlaces), [`ABKInAppMessageUIDelegate`](https://github.com/Appboy/appboy-ios-sdk/blob/master/AppboyUI/ABKInAppMessage/ABKInAppMessageUIDelegate.h) incluye los siguientes métodos delegados:
```objc
- (BOOL)onInAppMessageButtonClicked:(ABKInAppMessageImmersive *)inAppMessage
button:(ABKInAppMessageButton *)button;
- (BOOL)onInAppMessageHTMLButtonClicked:(ABKInAppMessageHTML *)inAppMessage
clickedURL:(nullable NSURL *)clickedURL
buttonID:(NSString *)buttonID;
```
```swift
func onInAppMessageButtonClicked(inAppMessage: ABKInAppMessageImmersive!,
button: ABKInAppMessageButton) -> Bool
func onInAppMessageHTMLButtonClicked(inAppMessage: ABKInAppMessageHTML!,
clickedURL: URL, buttonID: String) -> Bool
```
Cada método devuelve un valor `BOOL` para indicar si Braze debe seguir ejecutando la acción de clic.
Para acceder al tipo de acción de clic de un botón en un método delegado, puedes utilizar el siguiente código:
```objc
if ([inAppMessage isKindOfClass:[ABKInAppMessageImmersive class]]) {
ABKInAppMessageImmersive *immersiveIAM = (ABKInAppMessageImmersive *)inAppMessage;
NSArray *buttons = immersiveIAM.buttons;
for (ABKInAppMessageButton *button in buttons) {
// Button action type is accessible via button.buttonClickActionType
}
}
```
```swift
if inAppMessage is ABKInAppMessageImmersive {
let immersiveIAM = inAppMessage as! ABKInAppMessageImmersive;
for button in inAppMessage.buttons as! [ABKInAppMessageButton]{
// Button action type is accessible via button.buttonClickActionType
}
}
```
Cuando un mensaje dentro de la aplicación tiene botones, las únicas acciones de clic que se ejecutarán son las del modelo `ABKInAppMessageButton`. El cuerpo del mensaje dentro de la aplicación no será clicable, aunque al modelo `ABKInAppMessage` se le haya asignado la acción de clic predeterminada.
## Declaraciones de métodos {#method-declarations}
Para más información, consulta los siguientes archivos de encabezado:
- [`ABKInAppMessage.h`](https://github.com/Appboy/appboy-ios-sdk/blob/master/AppboyKit/include/ABKInAppMessage.h)
# Personalizar la activación de mensajes dentro de la aplicación para iOS
Source: /docs/es/developer_guide/platforms/legacy_sdks/ios/in-app_messaging/customization/custom_triggering/index.md
**Warning:**
[AppboyKit](https://github.com/Appboy/appboy-ios-sdk) (also known as the Objective-C SDK) is no longer supported and has been replaced by the [Swift SDK](https://www.braze.com/docs/es/es/developer_guide/sdk_integration/?sdktab=swift). It will no longer receive new features, bug fixes, security updates, or technical support—however, messaging and analytics will continue to function as normal. To learn more, see [Introducing the New Braze Swift SDK](https://www.braze.com/resources/articles/introducing-the-new-braze-swift-sdk).
# Desencadenado personalizado de mensajes dentro de la aplicación {#custom-in-app-message-triggering}
Por defecto, los mensajes dentro de la aplicación se desencadenan por tipos de eventos registrados por el SDK. Si quieres desencadenar mensajes dentro de la aplicación mediante eventos enviados por el servidor, también puedes conseguirlo.
Para habilitar esta característica, enviarías un push silencioso al dispositivo, lo que permitiría al dispositivo registrar un evento basado en el SDK. Este evento del SDK desencadenaría posteriormente el mensaje dentro de la aplicación dirigido al usuario.
## Paso 1: Manejar el push silencioso y los pares clave-valor {#step-1-handle-silent-push-and-key-value-pairs}
Añade el siguiente código dentro del método `application(_:didReceiveRemoteNotification:fetchCompletionHandler:)`:
```objc
- (void)handleExtrasFromPush:(NSDictionary *)userInfo {
NSLog(@"A push was received.");
if (userInfo !=nil && userInfo[@"IS_SERVER_EVENT"] !=nil && userInfo[@"CAMPAIGN_NAME"]!=nil) {
[[Appboy sharedInstance] logCustomEvent:@"IAM Trigger" withProperties:@{@"campaign_name": userInfo[@"CAMPAIGN_NAME"]}];
}
};
```
```swift
func handleExtras(userInfo: [AnyHashable : Any]) {
NSLog("A push was received");
if userInfo != nil && (userInfo["IS_SERVER_EVENT"] as? String) != nil && (userInfo["CAMPAIGN_NAME"] as? String) != nil {
Appboy.sharedInstance()?.logCustomEvent("IAM Trigger", withProperties: ["campaign_name": userInfo["CAMPAIGN_NAME"]])
}
}
```
Cuando se reciba el push silencioso, se registrará un evento del SDK "desencadenante de mensaje dentro de la aplicación" en el perfil de usuario. Ten en cuenta que estos mensajes dentro de la aplicación solo se desencadenarán si se recibe el push silencioso mientras la aplicación está en primer plano.
## Paso 2: Crear una Campaign push {#step-2-create-a-push-campaign}
Crea una Campaign push silenciosa que se desencadene a través del evento enviado por el servidor. Para más detalles sobre cómo crear una Campaign push silenciosa, consulta las [notificaciones push silenciosas](https://www.braze.com/docs/es/es/developer_guide/platforms/legacy_sdks/ios/push_notifications/silent_push_notifications).

La Campaign push debe incluir extras de par clave-valor, que indiquen que esta Campaign push se envía para registrar un evento personalizado del SDK. Este evento se utilizará para desencadenar el mensaje dentro de la aplicación:

El código del método `application(_:didReceiveRemoteNotification:fetchCompletionHandler:)` comprueba si existe la clave `IS_SERVER_EVENT` y registrará un evento personalizado del SDK si está presente.
Puedes modificar el nombre del evento o las propiedades del evento enviando el valor deseado dentro de los extras del par clave-valor de la carga útil push. Al registrar el evento personalizado, estos extras se pueden utilizar como parámetro del nombre del evento o como una propiedad del evento.
## Paso 3: Crear una Campaign de mensajes dentro de la aplicación {#step-3-create-an-in-app-message-campaign}
Crea tu Campaign de mensajes dentro de la aplicación, visible para el usuario, desde el dashboard de Braze. Esta Campaign debe tener una entrega basada en acciones y desencadenarse desde el evento personalizado registrado en el método `application(_:didReceiveRemoteNotification:fetchCompletionHandler:)`.
En el siguiente ejemplo, el mensaje específico dentro de la aplicación que se va a desencadenar se ha configurado enviando la propiedad del evento como parte del push silencioso inicial.

Debido a que se utiliza un mensaje push para registrar un evento personalizado del SDK, Braze necesitará almacenar un token de notificaciones push para cada usuario para habilitar esta solución. Tanto para iOS como para Android, Braze solo almacenará un token a partir del momento en que el usuario haya recibido el aviso push del sistema operativo. Antes de esto, el usuario no será localizable mediante push, y la solución anterior no será posible.
# Mensaje dentro de la aplicación en un controlador de vista personalizado para iOS
Source: /docs/es/developer_guide/platforms/legacy_sdks/ios/in-app_messaging/customization/custom_view_controller/index.md
**Warning:**
[AppboyKit](https://github.com/Appboy/appboy-ios-sdk) (also known as the Objective-C SDK) is no longer supported and has been replaced by the [Swift SDK](https://www.braze.com/docs/es/es/developer_guide/sdk_integration/?sdktab=swift). It will no longer receive new features, bug fixes, security updates, or technical support—however, messaging and analytics will continue to function as normal. To learn more, see [Introducing the New Braze Swift SDK](https://www.braze.com/resources/articles/introducing-the-new-braze-swift-sdk).
# Mostrar mensajes dentro de la aplicación en un controlador de vista personalizado
Los mensajes dentro de la aplicación también pueden mostrarse dentro de un controlador de vista personalizado, que pasas a Braze. Braze animará la entrada y salida del mensaje dentro de la aplicación personalizado y gestionará los análisis del mensaje dentro de la aplicación. El controlador de vista debe cumplir los siguientes requisitos
- Debe ser una subclase o una instancia de `ABKInAppMessageViewController`.
- La vista del controlador de vista devuelto debe ser una instancia de `ABKInAppMessageView` o de su subclase.
El siguiente método delegado de interfaz de usuario se llama cada vez que se ofrece un mensaje dentro de la aplicación a `ABKInAppMessageViewController` para permitir que la aplicación pase un controlador de vista personalizado a Braze para la visualización de mensajes dentro de la aplicación:
```objc
- (ABKInAppMessageViewController *)inAppMessageViewControllerWithInAppMessage:(ABKInAppMessage *)inAppMessage;
```
```swift
func inAppMessageViewControllerWithInAppMessage(inAppMessage: ABKInAppMessage!) -> ABKInAppMessageViewController!
```
Nuestros [controladores de vista de mensajes dentro de la aplicación](https://github.com/Appboy/appboy-ios-sdk/tree/master/AppboyUI/ABKInAppMessage/ViewControllers) son personalizables. Puedes utilizar subclases o categorías para personalizar la visualización o el comportamiento de los mensajes dentro de la aplicación.
## Declaraciones de métodos
Para más información, consulta los siguientes archivos de encabezado:
- [`ABKInAppMessage.h`](https://github.com/Appboy/appboy-ios-sdk/blob/master/AppboyKit/include/ABKInAppMessage.h)
## Muestras de aplicación
Consulta [`ViewController.m`](https://github.com/Appboy/appboy-ios-sdk/blob/master/Samples/InAppMessage/BrazeInAppMessageSample/BrazeInAppMessageSample/ViewController.m) y [`CustomInAppMessageViewController.m`](https://github.com/Appboy/appboy-ios-sdk/blob/master/Samples/InAppMessage/BrazeInAppMessageSample/BrazeInAppMessageSample/) en la aplicación de ejemplo de mensajes dentro de la aplicación.
# Descarte modal de mensajes dentro de la aplicación para iOS
Source: /docs/es/developer_guide/platforms/legacy_sdks/ios/in-app_messaging/customization/modal_dismissal/index.md
**Warning:**
[AppboyKit](https://github.com/Appboy/appboy-ios-sdk) (also known as the Objective-C SDK) is no longer supported and has been replaced by the [Swift SDK](https://www.braze.com/docs/es/es/developer_guide/sdk_integration/?sdktab=swift). It will no longer receive new features, bug fixes, security updates, or technical support—however, messaging and analytics will continue to function as normal. To learn more, see [Introducing the New Braze Swift SDK](https://www.braze.com/resources/articles/introducing-the-new-braze-swift-sdk).
# Descartar modal por toque externo {#dismiss-modal-on-outside-tap}
El valor predeterminado es `NO`. Determina si el mensaje modal dentro de la aplicación se descartará cuando el usuario pulse fuera del mensaje dentro de la aplicación.
Para habilitar los descartes por toque externo, añade un diccionario llamado `Braze` a tu archivo `Info.plist`. Dentro del diccionario `Braze`, añade la subentrada booleana `DismissModalOnOutsideTap` y establece el valor en `YES`, como se muestra en el siguiente fragmento de código. Ten en cuenta que, antes de la versión 4.0.2 del SDK de iOS de Braze, debe usarse la clave de diccionario `Appboy` en lugar de `Braze`.
```
BrazeDismissModalOnOutsideTapYES
```
También puedes habilitar la característica en tiempo de ejecución configurando `ABKEnableDismissModalOnOutsideTapKey` en `YES` en `appboyOptions`.
| `DismissModalOnOutsideTap` | Descripción |
|----------|-------------|
| `YES` | Los mensajes modales dentro de la aplicación se descartarán al tocar fuera. |
| `NO` | Predeterminado: los mensajes modales dentro de la aplicación no se descartarán al tocar fuera. |
{: .reset-td-br-1 .reset-td-br-2 aria-label="Descartar modal por toque externo" }
# Pares clave-valor de mensajes dentro de la aplicación para iOS
Source: /docs/es/developer_guide/platforms/legacy_sdks/ios/in-app_messaging/customization/key_value_pairs/index.md
**Warning:**
[AppboyKit](https://github.com/Appboy/appboy-ios-sdk) (also known as the Objective-C SDK) is no longer supported and has been replaced by the [Swift SDK](https://www.braze.com/docs/es/es/developer_guide/sdk_integration/?sdktab=swift). It will no longer receive new features, bug fixes, security updates, or technical support—however, messaging and analytics will continue to function as normal. To learn more, see [Introducing the New Braze Swift SDK](https://www.braze.com/resources/articles/introducing-the-new-braze-swift-sdk).
# Extras del par clave-valor
Los objetos `ABKInAppMessage` pueden llevar pares clave-valor como `extras`. Se especifican en el panel al crear una campaña. Los pares clave-valor pueden utilizarse para enviar datos hacia abajo con un mensaje dentro de la aplicación para que tu aplicación los gestione posteriormente.
# Entrega de mensajes dentro de la aplicación para iOS
Source: /docs/es/developer_guide/platforms/legacy_sdks/ios/in-app_messaging/in-app_message_delivery/index.md
**Warning:**
[AppboyKit](https://github.com/Appboy/appboy-ios-sdk) (also known as the Objective-C SDK) is no longer supported and has been replaced by the [Swift SDK](https://www.braze.com/docs/es/es/developer_guide/sdk_integration/?sdktab=swift). It will no longer receive new features, bug fixes, security updates, or technical support—however, messaging and analytics will continue to function as normal. To learn more, see [Introducing the New Braze Swift SDK](https://www.braze.com/resources/articles/introducing-the-new-braze-swift-sdk).
# Entrega de mensajes dentro de la aplicación {#in-app-message-delivery}
## Tipos de desencadenantes {#trigger-types}
Nuestro producto de mensajes dentro de la aplicación te permite desencadenar la visualización de mensajes dentro de la aplicación como resultado de varios tipos de eventos diferentes: `Any Purchase`, `Specific Purchase`, `Session Start`, `Custom Event` y `Push Click`. Además, los desencadenantes `Specific Purchase` y `Custom Event` contienen filtros de propiedades robustos.
**Note:**
Los mensajes desencadenados dentro de la aplicación solo funcionan con eventos personalizados registrados a través del SDK de Braze. Los mensajes dentro de la aplicación no pueden desencadenarse a través de la API ni por eventos de la API (como eventos de compra). Si trabajas con iOS, visita nuestro artículo sobre [seguimiento de eventos personalizados](https://www.braze.com/docs/es/es/developer_guide/analytics/logging_events?tab=swift) para obtener más información.
## Semántica de la entrega {#delivery-semantics}
Todos los mensajes dentro de la aplicación para los que un usuario es elegible se entregan al dispositivo del usuario al inicio de la sesión. Si un evento desencadena dos mensajes dentro de la aplicación, se mostrará el mensaje con mayor prioridad. Para más información sobre la semántica de inicio de sesión del SDK, lee sobre nuestro [ciclo de vida de la sesión](https://www.braze.com/docs/es/es/developer_guide/platform_integration_guides/ios/analytics/tracking_sessions#session-lifecycle). Tras la entrega, el SDK precargará los activos para que estén disponibles inmediatamente en el momento del desencadenamiento, minimizando la latencia de visualización.
Cuando un evento desencadenante tiene asociado más de un mensaje dentro de la aplicación elegible, solo se entregará el mensaje dentro de la aplicación con la prioridad más alta.
Puede haber cierta latencia en los mensajes dentro de la aplicación que se muestran inmediatamente después de la entrega (inicio de sesión, clic push) debido a que los activos no se han precargado.
## Intervalo de tiempo mínimo entre desencadenamientos {#minimum-time-interval-between-triggers}
De forma predeterminada, establecemos un límite de velocidad para los mensajes dentro de la aplicación de uno cada 30 segundos, para facilitar una experiencia de usuario de calidad.
Puedes anular este valor a través de `ABKMinimumTriggerTimeIntervalKey` dentro del parámetro `appboyOptions` pasado a `startWithApiKey:inApplication:withLaunchOptions:withAppboyOptions:`. Establece en `ABKMinimumTriggerTimeIntervalKey` el valor entero que desees como tiempo mínimo en segundos entre mensajes dentro de la aplicación:
```objc
// Sets the minimum trigger time interval to 5 seconds
[Appboy startWithApiKey:@"YOUR-API-KEY"
inApplication:application
withLaunchOptions:options
withAppboyOptions:@{ ABKMinimumTriggerTimeIntervalKey : @(5) }];
```
```swift
Appboy.start(withApiKey: "YOUR-API-KEY", in:application, withLaunchOptions:launchOptions, withAppboyOptions:[ABKMinimumTriggerTimeIntervalKey : 5])
```
## No se encuentra un desencadenante adecuado {#failing-to-find-a-matching-trigger}
Cuando Braze no encuentre un desencadenante que coincida con un evento determinado, llamará al método [noMatchingTriggerForEvent:name:](https://appboy.github.io/appboy-ios-sdk/docs/protocol_a_b_k_in_app_message_controller_delegate-p.html#ab4d57b13c51545d487227945a37d4ab8) de [`ABKInAppMessageControllerDelegate`](https://appboy.github.io/appboy-ios-sdk/docs/protocol_a_b_k_in_app_message_controller_delegate-p.html). Implementa este método en tu clase adoptando el protocolo de delegado para manejar este escenario.
## Entrega local de mensajes dentro de la aplicación {#local-in-app-message-delivery}
### La pila de mensajes dentro de la aplicación {#the-in-app-message-stack}
#### Mostrar mensajes dentro de la aplicación {#showing-in-app-messages}
Cuando un usuario sea elegible para recibir un mensaje dentro de la aplicación, se ofrecerá a `ABKInAppMessageController` el último mensaje dentro de la aplicación de la pila de mensajes dentro de la aplicación. La pila solo conserva los mensajes dentro de la aplicación almacenados en la memoria y se borra entre los lanzamientos de la aplicación desde el modo suspendido.
**Important:**
No muestres mensajes dentro de la aplicación cuando el teclado se muestra en pantalla, ya que la representación no está definida en esta circunstancia.
#### Añadir mensajes dentro de la aplicación a la pila {#adding-in-app-messages-to-the-stack}
Los usuarios son elegibles para recibir un mensaje dentro de la aplicación en las siguientes situaciones:
- Se dispara un evento desencadenador de mensajes dentro de la aplicación
- Evento de inicio de sesión
- La aplicación se abre desde una notificación push
Los mensajes desencadenados dentro de la aplicación se colocan en la pila cuando se dispara su evento desencadenante. Si hay varios mensajes dentro de la aplicación en la pila esperando a ser mostrados, Braze mostrará primero el mensaje dentro de la aplicación recibido más recientemente (último en entrar, primero en salir).
#### Devolver mensajes dentro de la aplicación a la pila {#returning-in-app-messages-to-the-stack}
Un mensaje dentro de la aplicación desencadenado puede volver a la pila en las siguientes situaciones:
- El mensaje dentro de la aplicación se desencadena cuando la aplicación está en segundo plano.
- Actualmente hay visible otro mensaje dentro de la aplicación.
- No se ha implementado el [método delegado de interfaz de usuario](https://www.braze.com/docs/es/es/developer_guide/platform_integration_guides/ios/in-app_messaging/customization/setting_delegates#in-app-message-delegate) obsoleto `beforeInAppMessageDisplayed:withKeyboardIsUp:`, y se está mostrando el teclado.
- El [método delegado](https://www.braze.com/docs/es/es/developer_guide/platform_integration_guides/ios/in-app_messaging/customization/setting_delegates#core-in-app-message-delegate) `beforeInAppMessageDisplayed:` o el [método delegado de interfaz de usuario](https://www.braze.com/docs/es/es/developer_guide/platform_integration_guides/ios/in-app_messaging/customization/setting_delegates#in-app-message-delegate) obsoleto `beforeInAppMessageDisplayed:withKeyboardIsUp:` devolvió `ABKDisplayInAppMessageLater`.
#### Descartar mensajes dentro de la aplicación {#discarding-in-app-messages}
Un mensaje dentro de la aplicación desencadenado se descartará en las siguientes situaciones:
- El [método delegado](https://www.braze.com/docs/es/es/developer_guide/platform_integration_guides/ios/in-app_messaging/customization/setting_delegates#core-in-app-message-delegate) `beforeInAppMessageDisplayed:` o el [método delegado de interfaz de usuario](https://www.braze.com/docs/es/es/developer_guide/platform_integration_guides/ios/in-app_messaging/customization/setting_delegates#in-app-message-delegate) obsoleto `beforeInAppMessageDisplayed:withKeyboardIsUp:` devolvió `ABKDiscardInAppMessage`.
- No se ha podido descargar el activo (imagen o archivo ZIP) del mensaje dentro de la aplicación.
- El mensaje dentro de la aplicación está listo para mostrarse, pero ya ha pasado el tiempo de espera.
- La orientación del dispositivo no coincide con la orientación del mensaje dentro de la aplicación desencadenado.
- El mensaje dentro de la aplicación es un mensaje completo dentro de la aplicación, pero no tiene imagen.
- El mensaje dentro de la aplicación es un mensaje modal dentro de la aplicación solo con imagen, pero no tiene imagen.
#### Poner en cola manualmente la visualización de mensajes dentro de la aplicación {#manually-queue-in-app-message-display}
Si quieres mostrar un mensaje dentro de la aplicación en otro momento dentro de tu aplicación, puedes mostrar manualmente el mensaje más alto de la pila llamando al siguiente método:
```objc
[[Appboy sharedInstance].inAppMessageController displayNextInAppMessage];
```
```swift
Appboy.sharedInstance()!.inAppMessageController.displayNextInAppMessage()
```
### Creación y visualización de mensajes dentro de la aplicación en tiempo real {#real-time-in-app-message-creation-and-display}
Los mensajes dentro de la aplicación también pueden crearse localmente dentro de la aplicación y mostrarse a través de Braze. Esto es especialmente útil para mostrar mensajes que deseas desencadenar dentro de la aplicación en tiempo real. Braze no admite análisis de mensajes dentro de la aplicación creados localmente.
```objc
ABKInAppMessageSlideup *customInAppMessage = [[ABKInAppMessageSlideup alloc] init];
customInAppMessage.message = @"YOUR_CUSTOM_SLIDEUP_MESSAGE";
customInAppMessage.duration = 2.5;
customInAppMessage.extras = @{@"key" : @"value"};
[[Appboy sharedInstance].inAppMessageController addInAppMessage:customInAppMessage];
```
```swift
let customInAppMessage = ABKInAppMessageSlideup.init()
customInAppMessage.message = "YOUR_CUSTOM_SLIDEUP_MESSAGE"
customInAppMessage.duration = 2.5
customInAppMessage.extras = ["key": "value"]
Appboy.sharedInstance()!.inAppMessageController.add(customInAppMessage)
```
# Aviso personalizado de revisión de la App Store
Source: /docs/es/developer_guide/platforms/legacy_sdks/ios/in-app_messaging/custom_app_store_review_prompt/index.md
**Warning:**
[AppboyKit](https://github.com/Appboy/appboy-ios-sdk) (also known as the Objective-C SDK) is no longer supported and has been replaced by the [Swift SDK](https://www.braze.com/docs/es/es/developer_guide/sdk_integration/?sdktab=swift). It will no longer receive new features, bug fixes, security updates, or technical support—however, messaging and analytics will continue to function as normal. To learn more, see [Introducing the New Braze Swift SDK](https://www.braze.com/resources/articles/introducing-the-new-braze-swift-sdk).
# Aviso personalizado de revisión de la App Store {#custom-app-store-review-prompt}
**Note:**
Una vez que implementes esta solicitud, Braze dejará de hacer un seguimiento automático de las impresiones, y deberás registrar tus propios [análisis](https://www.braze.com/docs/es/es/developer_guide/platform_integration_guides/ios/in-app_messaging/customization/handing_in_app_display#logging-impressions-and-clicks).
Crear una campaña para pedir a los usuarios una reseña de la App Store es un uso popular de los mensajes dentro de la aplicación.
Empieza por configurar el [delegado de mensajes dentro de la aplicación](#in-app-message-controller-delegate) en tu aplicación. A continuación, implementa el siguiente método delegado para desactivar el mensaje predeterminado de revisión de la App Store:
```objc
- (ABKInAppMessageDisplayChoice)beforeInAppMessageDisplayed:(ABKInAppMessage *)inAppMessage {
if (inAppMessage.extras != nil && inAppMessage.extras[@"Appstore Review"] != nil) {
[[UIApplication sharedApplication] openURL:inAppMessage.uri options:@{} completionHandler:nil];
return ABKDiscardInAppMessage;
} else {
return ABKDisplayInAppMessageNow;
}
}
```
```swift
func before(inAppMessageDisplayed inAppMessage: ABKInAppMessage) -> ABKInAppMessageDisplayChoice {
if inAppMessage.extras?["Appstore Review"] != nil && inAppMessage.uri != nil {
UIApplication.shared.open(inAppMessage.uri!, options: [:], completionHandler: nil)
return ABKInAppMessageDisplayChoice.discardInAppMessage
} else {
return ABKInAppMessageDisplayChoice.displayInAppMessageNow
}
}
```
En tu código de gestión de vínculos profundos, añade el siguiente código para procesar el vínculo profundo `{YOUR-APP-SCHEME}:appstore-review`. Ten en cuenta que tendrás que importar `StoreKit` para utilizar `SKStoreReviewController`:
```objc
- (BOOL)application:(UIApplication *)app openURL:(NSURL *)url options:(NSDictionary *)options {
NSString *urlString = url.absoluteString.stringByRemovingPercentEncoding;
if ([urlString isEqualToString:@"{YOUR-APP-SCHEME}:appstore-review"]) {
[SKStoreReviewController requestReview];
return YES;
}
// Other deep link handling code…
}
```
```swift
func application(_ app: UIApplication, open url: URL, options: [UIApplicationOpenURLOptionsKey : Any] = [:]) -> Bool {
let urlString = url.absoluteString.removingPercentEncoding
if (urlString == "{YOUR-APP-SCHEME}:appstore-review") {
SKStoreReviewController.requestReview()
return true;
}
// Other deep link handling code…
}
```
A continuación, crea una campaña de mensajería dentro de la aplicación con lo siguiente:
- El par clave-valor `"Appstore Review" : "true"`
- El comportamiento al hacer clic configurado como "Vínculo profundo dentro de la aplicación", utilizando el vínculo profundo `{YOUR-APP-SCHEME}:appstore-review`.
**Tip:**
Apple limita las solicitudes de revisión de la App Store a un máximo de tres (3) veces al año por cada usuario, por lo que tu campaña debe tener [limitación de frecuencia](https://www.braze.com/docs/es/es/user_guide/messaging/messaging_fundamentals/frequency_capping) a tres veces al año por usuario.
Los usuarios pueden desactivar los avisos de revisión de la App Store. En consecuencia, tu solicitud de revisión personalizada no debe prometer que aparecerá una solicitud de revisión nativa de la App Store ni pedir directamente una revisión.
# Guía de implementación de mensajes dentro de la aplicación para iOS (opcional)
Source: /docs/es/developer_guide/platforms/legacy_sdks/ios/in-app_messaging/implementation_guide/index.md
**Warning:**
[AppboyKit](https://github.com/Appboy/appboy-ios-sdk) (also known as the Objective-C SDK) is no longer supported and has been replaced by the [Swift SDK](https://www.braze.com/docs/es/es/developer_guide/sdk_integration/?sdktab=swift). It will no longer receive new features, bug fixes, security updates, or technical support—however, messaging and analytics will continue to function as normal. To learn more, see [Introducing the New Braze Swift SDK](https://www.braze.com/resources/articles/introducing-the-new-braze-swift-sdk).
**Important:**
¿Buscas la guía básica de integración del desarrollador de mensajes dentro de la aplicación? Encuéntrala [aquí](https://www.braze.com/docs/es/es/developer_guide/platforms/legacy_sdks/ios/in-app_messaging/overview).
# Guía de implementación de mensajería dentro de la aplicación {#in-app-messaging-implementation-guide}
> Esta guía de implementación opcional y avanzada abarca consideraciones sobre códigos de mensajes dentro de la aplicación, tres casos de uso personalizados creados por nuestro equipo y fragmentos de código que los acompañan. ¡Visita nuestro repositorio de demostraciones Braze [en GitHub](https://github.com/braze-inc/braze-growth-shares-ios-demo-app)! Esta guía de implementación se centra en una implementación Swift, pero se proporcionan fragmentos de código Objective-C para los interesados. ¿Buscas implementaciones HTML? ¡Echa un vistazo a nuestro [repositorio de plantillas HTML](https://github.com/braze-inc/in-app-message-templates)!
## Consideraciones sobre códigos {#code-considerations}
La siguiente guía ofrece una integración personalizada opcional para desarrolladores que se puede utilizar además de los mensajes predeterminados dentro de la aplicación. Se incluyen controladores de vista personalizados con cada caso de uso, que ofrecen ejemplos para ampliar la funcionalidad y personalizar de forma nativa el aspecto de tus mensajes dentro de la aplicación.
### Subclases de ABKInAppMessage {#abkinappmessage-subclasses}
El siguiente fragmento de código es un método delegado de interfaz de usuario del SDK de Braze que determina con qué vista de subclase quieres rellenar tu mensaje dentro de la aplicación. En esta guía cubrimos una implementación básica y mostramos cómo las subclases de pantalla completa, deslizamiento hacia arriba y modal pueden implementarse de forma cautivadora. Ten en cuenta que si quieres configurar tu controlador de vista personalizado, debes configurar todas las demás subclases de mensajes dentro de la aplicación. Una vez que tengas una sólida comprensión de los conceptos que hay detrás de las subclases, consulta nuestros [casos de uso](#sample-use-cases) para empezar a implementar subclases de mensajería dentro de la aplicación.
**Subclases de ABKInAppMessage**
```swift
extension AppboyManager: ABKInAppMessageUIDelegate {
func inAppMessageViewControllerWith(_ inAppMessage: ABKInAppMessage) -> ABKInAppMessageViewController {
switch inAppMessage {
case is ABKInAppMessageSlideup:
return slideupViewController(inAppMessage: inAppMessage) //Custom Method
case is ABKInAppMessageModal:
return modalViewController(inAppMessage: inAppMessage) //Custom Method
case is ABKInAppMessageFull:
return fullViewController(inAppMessage: inAppMessage) //Custom Method
case is ABKInAppMessageHTML:
return ABKInAppMessageHTMLViewController(inAppMessage: inAppMessage)
default:
return ABKInAppMessageViewController(inAppMessage: inAppMessage)
}
}
}
```
**Subclases de ABKInAppMessage**
```objc
- (ABKInAppMessageViewController *)inAppMessageViewControllerWithInAppMessage:(ABKInAppMessage *)inAppMessage {
if ([inAppMessage isKindOfClass:[ABKInAppMessageSlideup class]]) {
return [self slideupViewControllerWithInAppMessage:inAppMessage]; //Custom Method
} else if ([inAppMessage isKindOfClass:[ABKInAppMessageModal class]]) {
return [self modalViewControllerWithInAppMessage:inAppMessage]; //Custom Method
} else if ([inAppMessage isKindOfClass:[ABKInAppMessageFull class]]) {
return [self fullViewControllerWithInAppMessage:inAppMessage]; //Custom Method
} else if ([inAppMessage isKindOfClass:[ABKInAppMessageHTML class]]) {
return [[ABKInAppMessageHTMLViewController alloc] initWithInAppMessage:inAppMessage];
} else {
return [[ABKInAppMessageViewController alloc] initWithInAppMessage:inAppMessage];
}
}
```
## Casos de uso {#sample-use-cases}
A continuación te presentamos tres casos de uso. Cada caso de uso ofrece una explicación detallada, fragmentos de código relevantes y una visión de cómo pueden verse y utilizarse los mensajes dentro de la aplicación en el panel de Braze:
- [Mensaje personalizado deslizable dentro de la aplicación](#custom-slide-up-in-app-message)
- [Mensaje modal personalizado dentro de la aplicación](#custom-modal-in-app-message)
- [Mensaje completo personalizado dentro de la aplicación](#custom-full-in-app-message)
### Mensaje personalizado deslizable dentro de la aplicación {#custom-slide-up-in-app-message}
{: style="float:right;max-width:45%;margin-left:15px;border:0;"}
Mientras creas tu mensaje deslizable dentro de la aplicación, puede que notes que no puedes modificar la ubicación del mensaje utilizando los métodos predeterminados. Una modificación como esta es posible subclasificando `ABKInAppMessageSlideupViewController` y sustituyendo la variable `offset` por tu propia variable personalizada. La imagen de la derecha muestra un ejemplo de cómo se puede utilizar esto para ajustar tus mensajes deslizables dentro de la aplicación.
Visita [`SlideFromBottomViewController`](https://github.com/braze-inc/braze-growth-shares-ios-demo-app/blob/master/Braze-Demo/ViewController/In-App-Messages/SlideFromBottomViewController.swift) para empezar.
#### Añadir un comportamiento adicional a nuestra interfaz predeterminada
{#adding-additional-behavior-to-our-default-ui}
**Actualiza la variable `offset`**
Actualiza la variable `offset` y establece tu propio desplazamiento para adaptarlo a tus necesidades.
```swift
func setSlideConstraint() {
offset = 0
}
```
```swift
override var offset: CGFloat {
get {
return super.offset
}
set {
super.offset = newValue + adjustedOffset
}
}
```
**Versión 3.34.0 o anterior**
**Actualiza la variable `slideConstraint`**
La variable pública `slideConstraint` procede de la superclase `ABKInAppMessageSlideupViewController`.
```swift
func setSlideConstraint() {
slideConstraint?.constant = bottomSpacing
}
```
```swift
private var bottomSpacing: CGFloat {
return AppboyManager.shared.activeApplicationViewController.topMostViewController().view.safeAreaInsets.bottom
}
```
Visita el repositorio de demostraciones Braze para ver la función [`topMostViewController()`](https://github.com/braze-inc/braze-growth-shares-ios-demo-app/blob/master/Braze-Demo/Utils/UIViewController_Util.swift#L17).
**Actualiza la variable `offset`**
Actualiza la variable `offset` y establece tu propio desplazamiento para adaptarlo a tus necesidades.
```objc
- (void)setOffset {
self.offset = 0;
}
```
```objc
- (CGFloat)offset {
return [super offset];
}
- (void)setOffset:(CGFloat)offset {
[super setOffset:offset + [self adjustedOffset]];
}
```
**Versión 3.34.0 o anterior**
**Actualiza la variable `slideConstraint`**
La variable pública `slideConstraint` procede de la superclase `ABKInAppMessageSlideupViewController`.
```objc
- (void)self.setSlideConstraint:(NSLayoutConstraint *)slideConstraint {
slideConstraint.constant = bottomSpacing;
}
```
```objc
- (CGFloat)bottomSpacing {
return [AppboyManager shared].activeApplicationViewController.topMostViewController.view.safeAreaInsets.bottom;
}
```
**Anular y configurar restricción personalizada**
Anula `beforeMoveInAppMessageViewOnScreen()` y establece tu propio valor de restricción personalizado para adaptarlo a tus necesidades. El valor original se establece en la superclase.
```swift
override func beforeMoveInAppMessageViewOnScreen() {
super.beforeMoveInAppMessageViewOnScreen()
setOffset()
}
```
**Versión 3.34.0 o anterior**
```swift
override func beforeMoveInAppMessageViewOnScreen() {
setSlideConstraint()
}
```
**Anular y configurar restricción personalizada**
Anula `beforeMoveInAppMessageViewOnScreen()` y establece tu propio valor de restricción personalizado para adaptarlo a tus necesidades. El valor original se establece en la superclase.
```objc
- (void)beforeMoveInAppMessageViewOnScreen {
[super beforeMoveInAppMessageViewOnScreen];
[self setOffset];
}
```
**Versión 3.34.0 o anterior**
```objc
- (void)beforeMoveInAppMessageViewOnScreen {
[self setSlideConstraint:self.slideConstraint];
}
```
**Ajustar la restricción para la orientación del dispositivo**
Ajusta el valor correspondiente en `viewWillTransition()` porque la subclase asume la responsabilidad de mantener sincronizada la restricción durante los cambios de diseño.
### Mensaje modal personalizado dentro de la aplicación {#custom-modal-in-app-message}
{: style="float:right;max-width:23%;margin-left:15px;border:0;"}
Un `ABKInAppMessageModalViewController` puede subclasificarse para aprovechar un `UIPickerView` que ofrezca formas atractivas de recopilar valiosos atributos de usuario. El mensaje modal personalizado dentro de la aplicación te permite utilizar contenido conectado o cualquier lista disponible para mostrar y capturar atributos de una lista dinámica de elementos.
Puedes interponer tus propias vistas en mensajes dentro de la aplicación subclasificados. Este ejemplo muestra cómo puede utilizarse un `UIPickerView` para ampliar la funcionalidad de un `ABKModalInAppMessageViewController`.
Visita el [ModalPickerViewController](https://github.com/braze-inc/braze-growth-shares-ios-demo-app/blob/master/Braze-Demo/ViewController/In-App-Messages/ModalPickerViewController/ModalPickerViewController.swift) para empezar.
#### Configuración del dashboard {#dashboard-configuration}
Para configurar un mensaje modal dentro de la aplicación en el dashboard, debes proporcionar una lista de elementos formateada como una cadena separada por comas. En nuestro ejemplo, utilizamos contenido conectado para extraer una lista JSON de nombres de equipos y darles el formato correspondiente.

En los pares clave-valor, proporciona un `attribute_key`; esta clave, junto con el valor seleccionado por el usuario, se guardará en su perfil de usuario como un atributo personalizado. Tu lógica de vista personalizada debe gestionar los atributos de usuario enviados a Braze.
El diccionario `extras` del objeto `ABKInAppMessage` te permite consultar una clave `view_type` (si existe) que indique la vista correcta que se debe mostrar. Es importante tener en cuenta que los mensajes dentro de la aplicación se configuran para cada mensaje, por lo que las vistas modales personalizadas y predeterminadas pueden funcionar armoniosamente.
{: style="max-width:65%;"}
**Uso de `view_type` para el comportamiento de visualización de la IU**
Consulta el diccionario `extras` de tu `view_type` para cargar el controlador de vista subclase deseado.
```swift
func modalViewController(inAppMessage: ABKInAppMessage) -> ABKInAppMessageModalViewController {
switch inAppMessage.extras?[InAppMessageKey.viewType.rawValue] as? String {
case InAppMessageViewType.picker.rawValue:
return ModalPickerViewController(inAppMessage: inAppMessage)
default:
return ABKInAppMessageModalViewController(inAppMessage: inAppMessage)
}
}
```
**Uso de `view_type` para el comportamiento de visualización de la IU**
Consulta el diccionario `extras` de tu `view_type` para cargar el controlador de vista subclase deseado.
```objc
- (ABKInAppMessageModalViewController *)modalViewControllerWithInAppMessage:(ABKInAppMessage *)inAppMessage {
InAppMessageData *inAppMessageData = [[InAppMessageData alloc] init];
NSString *key = [inAppMessageData rawValueForInAppMessageKey:InAppMessageKeyViewType];
NSString *viewType = [inAppMessageData rawValueForInAppMessageViewType:InAppMessageViewTypePicker];
if ([inAppMessage.extras objectForKey:key] && [inAppMessage.extras[key] isEqualToString:viewType]) {
return [[ModalViewController alloc] initWithInAppMessage:inAppMessage];
} else {
return [[ABKInAppMessageModalViewController alloc] initWithInAppMessage:inAppMessage];
}
}
```
**Anula y proporciona una vista personalizada**
Anula `loadView()` y configura tu propia vista personalizada para adaptarla a tus necesidades.
```swift
override var nibname: String{
return "ModalPickerViewController"
}
override func loadView() {
Bundle.main.loadNibNamed(nibName, owner: self, options: nil)
}
```
**Anula y proporciona una vista personalizada**
Anula `loadView()` y configura tu propia vista personalizada para adaptarla a tus necesidades.
```objc
- (void)loadView {
NSString *nibName = @"ModalPickerViewController";
[[NSBundle mainBundle] loadNibNamed:nibName owner:self options:nil];
}
```
**Variables de formato para una lista dinámica**
Antes de recargar los componentes de `UIPickerView`, la variable de mensaje `inAppMessage` se muestra como una *cadena*. Este mensaje debe formatearse como una matriz de elementos para que se muestre correctamente. Como ejemplo, esto se puede conseguir utilizando [`components(separatedBy: ", ")`](https://developer.apple.com/documentation/foundation/nsstring/1413214-components).
```swift
override func viewDidLoad() {
super.viewDidLoad()
items = inAppMessage.message.separatedByCommaSpaceValue
pickerView.reloadAllComponents()
}
```
**Variables de formato para PickerView**
Antes de recargar los componentes de `UIPickerView`, la variable de mensaje `inAppMessage` se muestra como una *cadena*. Este mensaje debe formatearse como una matriz de elementos para que se muestre correctamente. Por ejemplo, esto se puede conseguir utilizando [`componentsSeparatedByString`](https://developer.apple.com/documentation/foundation/nsstring/1413214-componentsseparatedbystring?language=objc).
```objc
- (void)viewDidLoad {
[super viewDidLoad];
self.items = [[NSArray alloc] initWithArray:[self.inAppMessage.message componentsSeparatedByString:@", "]];
[self.pickerView reloadAllComponents];
}
```
**Asignar atributo personalizado**
Utilizando la subclase, después de que un usuario pulse enviar, pasa el atributo con su correspondiente valor seleccionado a Braze.
```swift
@IBAction func primaryButtonTapped(_ sender: Any) {
guard let item = selectedItem, !item.isEmpty, let attributeKey = inAppMessage.extras?[InAppMessageKey.attributeKey.rawValue] as? String else { return }
AppboyManager.shared.setCustomAttributeWithKey(attributeKey, andStringValue: item)
}
```
**Asignar atributo personalizado**
Utilizando la subclase, después de que un usuario pulse enviar, pasa el atributo con su correspondiente valor seleccionado a Braze.
```objc
- (IBAction)primaryButtonTapped:(id)sender {
InAppMessageData *inAppMessageData = [[InAppMessageData alloc] init];
NSString *key = [inAppMessageData rawValueForInAppMessageKey:InAppMessageKeyAttributeKey];
if (self.selectedItem.length > 0 && [self.inAppMessage.extras objectForKey:key]) {
[[AppboyManager shared] setCustomAttributeWithKey:self.inAppMessage.extras[key] andStringValue:self.selectedItem];
}
}
```
**Tip:**
¿Te interesa aprovechar nuestros mensajes modales personalizados dentro de la aplicación para compartir videos a través de FaceTime? Consulta nuestra [guía de implementación](https://www.braze.com/docs/es/es/developer_guide/platforms/legacy_sdks/ios/in-app_messaging/implementation_guide/shareplay) de mensajes dentro de la aplicación SharePlay.
### Mensaje completo personalizado dentro de la aplicación {#custom-full-in-app-message}
{: style="float:right;max-width:23%;margin-left:15px;border:0;"}
Utiliza mensajes completos personalizados dentro de la aplicación para crear avisos interactivos y fáciles de usar para recopilar valiosos datos de clientes. El ejemplo de la derecha muestra una implementación del mensaje completo personalizado dentro de la aplicación reimaginado como una cartilla push interactiva con preferencias de notificación.
Visita [`FullListViewController`](https://github.com/braze-inc/braze-growth-shares-ios-demo-app/blob/master/Braze-Demo/ViewController/In-App-Messages/FullListViewController/FullListViewController.swift) para empezar.
#### Configuración del dashboard
Para configurar un mensaje completo personalizado dentro de la aplicación en el dashboard, debes proporcionar una lista de tus etiquetas formateadas como una cadena separada por comas.
En los pares clave-valor, proporciona un `attribute_key`; esta clave, junto con los valores seleccionados por el usuario, se guardará en su perfil de usuario como un atributo personalizado. Tu lógica de vista personalizada debe gestionar los atributos de usuario enviados a Braze.
{: style="max-width:65%;"}
#### Interceptar toques de mensajes dentro de la aplicación {#intercepting-in-app-message-touches}
{: style="float:right;max-width:30%;margin-left:10px;border:0"}
Interceptar los toques de mensajes dentro de la aplicación es crucial para que los botones personalizados de mensajes completos dentro de la aplicación funcionen correctamente. De forma predeterminada, `ABKInAppMessageImmersive` añade un reconocedor de gestos de pulsación sobre el mensaje, para que los usuarios puedan descartar mensajes sin botones. Al añadir un `UISwitch` o un botón a la jerarquía de la vista `UITableViewCell`, los toques pasan a ser gestionados por nuestra vista personalizada. A partir de iOS 6, los botones y otros controles tienen preferencia cuando trabajan con reconocedores de gestos, lo que hace que nuestro mensaje completo personalizado dentro de la aplicación funcione como debería.
# Guía de implementación de mensajes dentro de la aplicación SharePlay
Source: /docs/es/developer_guide/platforms/legacy_sdks/ios/in-app_messaging/implementation_guide/shareplay/index.md
**Warning:**
[AppboyKit](https://github.com/Appboy/appboy-ios-sdk) (also known as the Objective-C SDK) is no longer supported and has been replaced by the [Swift SDK](https://www.braze.com/docs/es/es/developer_guide/sdk_integration/?sdktab=swift). It will no longer receive new features, bug fixes, security updates, or technical support—however, messaging and analytics will continue to function as normal. To learn more, see [Introducing the New Braze Swift SDK](https://www.braze.com/resources/articles/introducing-the-new-braze-swift-sdk).
# Guía de implementación de mensajes dentro de la aplicación SharePlay {#shareplay-in-app-message-implementation-guide}
> SharePlay es una característica recién lanzada que habilita a los usuarios de FaceTime de iOS 15 a tener una experiencia multimedia compartida en todos sus dispositivos, ofreciendo sincronización de audio y video en tiempo real. SharePlay es una forma estupenda de que los usuarios experimenten el contenido con amigos y familiares, ofreciendo a los clientes de Braze una vía adicional para el contenido de video y oportunidades para presentar tu aplicación a nuevos usuarios.
{: style="border:0;margin-top:10px;"}
## Resumen {#overview}
El nuevo framework `GroupActivities` que lanzó Apple como parte de la actualización de iOS 15 te permite aprovechar FaceTime integrando SharePlay en tus aplicaciones con la ayuda de los mensajes dentro de la aplicación de Braze.
{: style="float:right;max-width:30%;margin-left:15px;margin-top:10px;"}
Cuando los usuarios inicien un video SharePlay en una llamada FaceTime, aparecerá un botón "Abrir" en la parte superior de la pantalla de todos. Cuando se abra, el audio y el video se sincronizarán en todos los dispositivos compatibles, permitiendo a los usuarios ver videos juntos en tiempo real. Los que no tengan la aplicación descargada serán redirigidos a la App Store.
**Reproducción multimedia sincronizada**
Con la reproducción multimedia sincronizada, si una persona pausa el video de SharePlay, se pausará en todos los dispositivos.
{: style="border:0"}
## Integración {#integration}
El mensaje dentro de la aplicación utilizado en esta integración es un controlador de vista de mensaje modal dentro de la aplicación subclaseado. Encontrarás una guía de configuración en la [guía de implementación](https://www.braze.com/docs/es/es/developer_guide/platforms/legacy_sdks/ios/in-app_messaging/implementation_guide) de casos de uso avanzados de mensajes dentro de la aplicación de iOS. Antes de la integración, asegúrate de añadir el derecho `GroupActivities` a tu proyecto de Xcode.
**Important:**
Recomendamos abrir la [documentación de Apple SharePlay](https://developer.apple.com/documentation/avfoundation/media_playback_and_selection/supporting_coordinated_media_playback) junto a esta guía para completar la integración.
### Paso 1: Sustitución y carga de XIB {#step-1-overriding-and-loading-xib}
```swift
override var nibName: String {
return "ModalVideoViewController"
}
/// Overriding loadView() from ABKInAppMessageModalViewController to provide our own view for the in-app message
override func loadView() {
Bundle.main.loadNibNamed(nibName, owner: self, options: nil)
}
```
### Paso 2: Configurar AVPlayer para mensajes dentro de la aplicación {#step-2-configure-avplayer-for-in-app-messages}
Los mensajes dentro de la aplicación pueden reproducir videos de forma nativa con un ligero trabajo de desarrollo. Al hacerlo, tendrás acceso a todas las funciones de `AVPlayerVideoController`, como SharePlay. El mensaje dentro de la aplicación utilizado para este ejemplo es una subclase de `ABKInAppMessageModalViewController` que tiene una vista personalizada para incrustar un reproductor de video nativo.
```swift
func configureVideoPlayer() {
guard let urlString = inAppMessage.extras?["video_url"] as? String,
let url = URL(string: urlString) else { return }
let videoTitle = inAppMessage.extras?["video_title"] as? String
mediaItem = MediaItem(title: videoTitle ?? "Video Content", url: url)
let asset = AVAsset(url: url)
let playerItem = AVPlayerItem(asset: asset)
player.replaceCurrentItem(with: playerItem)
playerViewController.player = player
addChild(playerViewController)
videoPlayerContainer.addSubview(playerViewController.view)
playerViewController.didMove(toParent: self)
}
```
#### Configuración del dashboard {#dashboard-configuration}
**Pares clave-valor**: El archivo de video debe establecerse en los pares clave-valor del mensaje dentro de la aplicación y no puede adjuntarse al propio elemento multimedia. También puedes añadir la comprobación de validez de la URL en `beforeInAppMessageDisplayed` como barrera antes de mostrar el contenido.
**Desencadenamiento**: El mensaje dentro de la aplicación debe ser elegible para todos los usuarios con la reelegibilidad habilitada. Esto se puede hacer estableciendo dos desencadenantes: uno predeterminado para lanzar el mensaje y otro para lanzar el mensaje cuando se inicie desde SharePlay. Los usuarios que no usen iOS 15 solo podrán ver los mensajes localmente.
**Important:**
Ten en cuenta cualquier otro mensaje dentro de la aplicación desencadenado al iniciar la sesión que pueda entrar en conflicto entre sí.
### Paso 3: Crear actividad de visualización en grupo {#step-3-create-group-watching-activity}
Crea un objeto conforme al protocolo `GroupActivity`. El objeto serán los metadatos del `GroupSession` compartidos a lo largo del ciclo de vida de SharePlay.
```swift
struct MediaItem: Hashable, Codable {
let title: String
let url: URL
}
@available(iOS 15, *)
struct MediaItemActivity: GroupActivity {
static let activityIdentifier = "com.book-demo.GroupWatching"
let mediaItem: MediaItem
var metadata: GroupActivityMetadata {
var metadata = GroupActivityMetadata()
metadata.type = .watchTogether
metadata.title = mediaItem.title
metadata.fallbackURL = mediaItem.url
return metadata
}
}
```
#### Prepararse para reproducir {#prepare-to-play}
Cuando te preparas para reproducir el elemento multimedia, cada actividad de grupo tiene tres estados de `prepareForActivation()`:
- `.activationDisabled` - ver individualmente
- `.activationPreferred` - visualización conjunta
- `.cancelled` - ignorar y manejar con elegancia
Cuando el estado vuelva a ser `activationPreferred`, esa será tu señal para activar el resto del ciclo de vida de la actividad de grupo.
{: style="border:0;"}
### Paso 4: Lanzar mensaje dentro de la aplicación desde la API de SharePlay {#step-4-launch-in-app-message-from-shareplay-api}
La API `GroupActivities` determina si hay un video presente. Si es así, debes desencadenar el evento personalizado para lanzar tu mensaje dentro de la aplicación apto para SharePlay. El `CoordinationManager` es responsable de los cambios de estado de SharePlay, como si el usuario o usuarios abandonan la llamada o se unen a ella.
```swift
private var subscriptions = Set()
private var selectedMediaItem: MediaItem? {
didSet {
// Ensure the UI selection always represents the currently playing media.
guard let _ = selectedMediaItem else { return }
if !BrazeManager.shared.inAppMessageCurrentlyVisible {
BrazeManager.shared.logCustomEvent("SharePlay Event")
}
}
}
private func launchVideoPlayerIfNecessary() {
CoordinationManager.shared.$enqueuedMediaItem
.receive(on: DispatchQueue.main)
.compactMap { $0 }
.assign(to: \.selectedMediaItem, on: self)
.store(in: &subscriptions)
}
```
### Paso 5: Abandonar una sesión de grupo al descartar el mensaje dentro de la aplicación {#step-5-leaving-a-group-session-on-in-app-message-dismissal}
Cuando se descarta el mensaje dentro de la aplicación es el momento apropiado para abandonar la sesión de SharePlay y descartar el objeto de sesión.
```swift
override func viewDidDisappear(_ animated: Bool) {
super.viewDidDisappear(animated)
groupSession?.leave()
CoordinationManager.shared.leave()
}
class CoordinationManager() {
...
// Published values that the player, and other UI items, observe.
@Published var enqueuedMediaItem: MediaItem?
@Published var groupSession: GroupSession?
// Clear activity when the user leaves
func leave() {
groupSession = nil
enqueuedMediaItem = nil
}
...
}
```
### Configurar la visibilidad del botón SharePlay {#configure-shareplay-button-visibility}
Es una buena práctica ocultar o mostrar dinámicamente cualquier indicador de SharePlay. Utiliza la variable `isEligibleForGroupSession` para observar si el usuario está actualmente en una llamada FaceTime o no. Si se encuentra en una llamada FaceTime, debe aparecer un botón para compartir el video entre los dispositivos compatibles en el chat. La primera vez que el usuario inicie SharePlay, aparecerá un aviso en el dispositivo original para seleccionar las opciones. A continuación, en los dispositivos de los usuarios compartidos aparecerá una solicitud para interactuar con el contenido.
```swift
private var isEligibleForSharePlay: Bool = false {
didSet {
sharePlayButton.isHidden = !isEligibleForSharePlay
}
}
override func viewDidLoad() {
super.viewDidLoad()
// SharePlay button eligibility
groupStateObserver.$isEligibleForGroupSession
.receive(on: DispatchQueue.main)
.assign(to: \.isEligibleForSharePlay, on: self)
.store(in: &subscriptions)
}
```
# Solución de problemas de mensajería dentro de la aplicación para iOS
Source: /docs/es/developer_guide/platforms/legacy_sdks/ios/in-app_messaging/troubleshooting/index.md
**Warning:**
[AppboyKit](https://github.com/Appboy/appboy-ios-sdk) (also known as the Objective-C SDK) is no longer supported and has been replaced by the [Swift SDK](https://www.braze.com/docs/es/es/developer_guide/sdk_integration/?sdktab=swift). It will no longer receive new features, bug fixes, security updates, or technical support—however, messaging and analytics will continue to function as normal. To learn more, see [Introducing the New Braze Swift SDK](https://www.braze.com/resources/articles/introducing-the-new-braze-swift-sdk).
# Solución de problemas con los mensajes dentro de la aplicación {#troubleshoot-in-app-messages}
## Impresiones {#impressions}
### Los análisis de impresiones o clics no se están registrando {#impression-or-click-analytics-arent-being-logged}
Si has configurado un delegado de mensajes dentro de la aplicación para que gestione manualmente la visualización del mensaje o las acciones de clic, tendrás que registrar manualmente los clics y las impresiones en el mensaje dentro de la aplicación.
#### Las impresiones son inferiores a lo esperado {#impressions-are-lower-than-expected}
Los desencadenantes tardan en sincronizarse con el dispositivo al iniciar la sesión, por lo que puede darse una condición de carrera si los usuarios registran un evento o una compra justo después de iniciar la sesión. Una posible solución podría ser cambiar la campaña para que se desencadene al inicio de la sesión, y luego segmentar en función del evento o la compra previstos. Ten en cuenta que esto entregaría el mensaje dentro de la aplicación en el siguiente inicio de sesión tras producirse el evento.
## No se ha mostrado el mensaje dentro de la aplicación esperado {#expected-in-app-message-did-not-display}
La mayoría de los problemas de mensajes dentro de la aplicación pueden dividirse en dos categorías principales: entrega y visualización. Para solucionar el problema de que un mensaje dentro de la aplicación no se muestre en tu dispositivo, primero debes asegurarte de que el [mensaje dentro de la aplicación se entregó al dispositivo](#troubleshooting-in-app-message-delivery) y, a continuación, [solucionar el problema de la visualización del mensaje](#troubleshooting-in-app-message-display).
### Entrega de mensajes dentro de la aplicación {#troubleshooting-in-app-message-delivery}
El SDK solicita mensajes dentro de la aplicación a los servidores de Braze al iniciar la sesión. Para comprobar si los mensajes dentro de la aplicación se entregan a tu dispositivo, tendrás que asegurarte de que los mensajes dentro de la aplicación son solicitados por el SDK y devueltos por los servidores de Braze.
#### Comprueba si se solicitan y devuelven mensajes {#check-if-messages-are-requested-and-returned}
1. Añádete como [usuario de prueba](https://www.braze.com/docs/es/es/user_guide/administrative/app_settings/developer_console/internal_groups_tab/#adding-test-users) en el dashboard.
2. Configura una campaña de mensajes dentro de la aplicación dirigida a tu usuario.
3. Asegúrate de que se produce una nueva sesión en tu aplicación.
4. Utiliza los [registros de eventos de usuario](https://www.braze.com/docs/es/es/user_guide/administrative/app_settings/developer_console/event_user_log_tab/#event-user-log-tab) para comprobar que tu dispositivo solicita mensajes dentro de la aplicación al inicio de la sesión. Busca la solicitud del SDK asociada al evento de inicio de sesión de tu usuario de prueba.
- Si tu aplicación debía solicitar mensajes dentro de la aplicación desencadenados, deberías ver `trigger` en el campo **Requested Responses**, en **Response Data**.
- Si tu aplicación debía solicitar mensajes originales dentro de la aplicación, deberías ver `in_app` en el campo **Requested Responses**, en **Response Data**.
5. Utiliza los [registros de eventos de usuario](https://www.braze.com/docs/es/es/user_guide/administrative/app_settings/developer_console/event_user_log_tab/#event-user-log-tab) para comprobar si los mensajes correctos dentro de la aplicación se devuelven en los datos de respuesta. 
#### Solución de problemas de mensajes no solicitados {#troubleshoot-messages-not-being-requested}
Si tus mensajes dentro de la aplicación no se solicitan, es posible que tu aplicación no esté haciendo un seguimiento correcto de las sesiones, ya que los mensajes dentro de la aplicación se actualizan al iniciar la sesión. Además, asegúrate de que tu aplicación está iniciando realmente una sesión según la semántica de tiempo de espera de sesión de tu aplicación:

### Solución de problemas de mensajes no devueltos {#troubleshoot-messages-not-being-returned}
Si tus mensajes dentro de la aplicación no se devuelven, es probable que estés experimentando un problema de segmentación de la campaña:
- Tu segmento no contiene a tu usuario.
- Comprueba la pestaña [**Interacción**](https://www.braze.com/docs/es/es/user_guide/audience/manage_audience/user_profiles/#engagement-tab) de tu usuario para ver si aparece el segmento correcto en **Segments**.
- Tu usuario ha recibido previamente el mensaje dentro de la aplicación y no era elegible para volver a recibirlo.
- Comprueba la [configuración de reelegibilidad de la campaña](https://www.braze.com/docs/es/es/user_guide/engagement_tools/campaigns/building_campaigns/delivery_types/reeligibility/) en el paso **Delivery** del **Campaign Composer** y asegúrate de que la configuración de reelegibilidad se ajusta a tu configuración de prueba.
- Tu usuario alcanzó el límite de frecuencia de la campaña.
- Comprueba la [configuración de limitación de frecuencia](https://www.braze.com/docs/es/es/user_guide/engagement_tools/campaigns/building_campaigns/rate-limiting/#frequency-capping) de la campaña y asegúrate de que se ajusta a tu configuración de prueba.
- Si había un grupo de control en la campaña, tu usuario puede haber caído en el grupo de control.
- Puedes comprobar si esto ha ocurrido creando un segmento con un filtro de variante de campaña recibida, en el que la variante de campaña esté configurada como **Control**, y comprobando si tu usuario cayó en ese segmento.
- Cuando crees campañas para realizar pruebas de integración, asegúrate de no añadir un grupo de control.
### Visualización de mensajes dentro de la aplicación {#troubleshooting-in-app-message-display}
Si tu aplicación solicita y recibe correctamente mensajes dentro de la aplicación, pero no se muestran, es posible que alguna lógica del dispositivo esté impidiendo la visualización:
- Los mensajes desencadenados dentro de la aplicación tienen una tasa limitada en función del [intervalo de tiempo mínimo entre desencadenamientos](https://www.braze.com/docs/es/es/developer_guide/platform_integration_guides/ios/in-app_messaging/in-app_message_delivery#minimum-time-interval-between-triggers), predeterminado en 30 segundos.
- Si has configurado un delegado para personalizar la gestión de mensajes dentro de la aplicación, comprueba que no afecte a la visualización de mensajes dentro de la aplicación.
- Las descargas de imágenes fallidas impedirán que se muestren los mensajes dentro de la aplicación con imágenes. Las descargas de imágenes siempre fallarán si el marco `SDWebImage` no está bien integrado. Comprueba los registros de tu dispositivo para asegurarte de que las descargas de imágenes no fallan.
- Si la orientación del dispositivo no coincide con la orientación especificada por el mensaje dentro de la aplicación, el mensaje dentro de la aplicación no se mostrará. Asegúrate de que tu dispositivo está en la orientación correcta.
# Integración del controlador de vista de Content Cards para iOS
Source: /docs/es/developer_guide/platforms/legacy_sdks/ios/content_cards/integration/index.md
**Warning:**
[AppboyKit](https://github.com/Appboy/appboy-ios-sdk) (also known as the Objective-C SDK) is no longer supported and has been replaced by the [Swift SDK](https://www.braze.com/docs/es/es/developer_guide/sdk_integration/?sdktab=swift). It will no longer receive new features, bug fixes, security updates, or technical support—however, messaging and analytics will continue to function as normal. To learn more, see [Introducing the New Braze Swift SDK](https://www.braze.com/resources/articles/introducing-the-new-braze-swift-sdk).
# Integración de Content Cards {#content-card-integration}
## Modelo de datos de Content Cards {#content-cards-data-model}
El modelo de datos de Content Cards está disponible en el SDK de iOS.
### Obtener los datos {#getting-the-data}
Para acceder al modelo de datos de Content Cards, suscríbete a los eventos de actualización de Content Cards:
```objc
// Subscribe to Content Cards updates
// Note: you should remove the observer where appropriate
[[NSNotificationCenter defaultCenter] addObserver:self
selector:@selector(contentCardsUpdated:)
name:ABKContentCardsProcessedNotification
object:nil];
```
```objc
// Called when Content Cards are refreshed (via `requestContentCardsRefresh`)
- (void)contentCardsUpdated:(NSNotification *)notification {
BOOL updateIsSuccessful = [notification.userInfo[ABKContentCardsProcessedIsSuccessfulKey] boolValue];
if (updateIsSuccessful) {
// get the cards using [[Appboy sharedInstance].contentCardsController getContentCards];
}
}
```
```swift
// Subscribe to content card updates
// Note: you should remove the observer where appropriate
NotificationCenter.default.addObserver(self, selector:
#selector(contentCardsUpdated),
name:NSNotification.Name.ABKContentCardsProcessed, object: nil)
```
```swift
// Called when the Content Cards are refreshed (via `requestContentCardsRefresh`)
@objc private func contentCardsUpdated(_ notification: Notification) {
if let updateIsSuccessful = notification.userInfo?[ABKContentCardsProcessedIsSuccessfulKey] as? Bool {
if (updateIsSuccessful) {
// get the cards using Appboy.sharedInstance()?.contentCardsController.contentCards
}
}
}
```
Si quieres cambiar los datos de la tarjeta después de que los haya enviado Braze, te recomendamos que almacenes localmente una copia profunda de los datos de la tarjeta, actualices los datos y los muestres tú mismo. Se puede acceder a las tarjetas a través de [`ABKContentCardsController`](https://appboy.github.io/appboy-ios-sdk/docs/interface_a_b_k_content_cards_controller.html).
## Modelo de Content Cards {#content-card-model}
Braze ofrece tres tipos de Content Cards: banner, imagen con subtítulo y clásica. Cada tipo hereda propiedades comunes de una clase base `ABKContentCard` y tiene las siguientes propiedades adicionales.
### Propiedades del modelo base de Content Cards - ABKContentCard {#base-content-card-model-properties-abkcontentcard}
| Propiedad | Descripción |
|---|---|
| `idString` | (Solo lectura) El ID de la tarjeta configurado por Braze. |
| `viewed` | Esta propiedad refleja si el usuario ha visto la tarjeta o no. |
| `created` | (Solo lectura) Esta propiedad es la marca de tiempo unix de la hora de creación de la tarjeta desde Braze. |
| `expiresAt` | (Solo lectura) Esta propiedad es la marca de tiempo unix de la hora de caducidad de la tarjeta. |
| `dismissible` | Esta propiedad refleja si el usuario puede descartar la tarjeta. |
| `pinned` | Esta propiedad refleja si la tarjeta se configuró como "anclada" en el dashboard. |
| `dismissed` | Esta propiedad refleja si el usuario ha descartado la tarjeta. |
| `url` | La URL que se abrirá al hacer clic en la tarjeta. Puede ser una URL HTTP(s) o una URL de protocolo. |
| `openURLInWebView` | Esta propiedad determina si la URL se abrirá dentro de la aplicación o en un navegador web externo. |
| `extras` | Un `NSDictionary` opcional de valores `NSString`. |
{: .reset-td-br-1 .reset-td-br-2 aria-label="Base Content Card model properties - ABKContentCard" }
### Propiedades de la tarjeta de contenido de banner - ABKBannerContentCard {#banner-content-card-properties-abkbannercontentcard}
| Propiedad | Descripción |
|---|---|
| `image` | Esta propiedad es la URL de la imagen de la tarjeta. |
| `imageAspectRatio` | Esta propiedad es la relación de aspecto de la imagen de la tarjeta y sirve como pista antes de que se complete la carga de la imagen. Ten en cuenta que la propiedad puede no proporcionarse en determinadas circunstancias. |
{: .reset-td-br-1 .reset-td-br-2 aria-label="Banner Content Card properties - ABKBannerContentCard" }
### Propiedades de la tarjeta de contenido de imagen con subtítulo - ABKCaptionedImageCard {#captioned-image-content-card-properties-abkcaptionedimagecard}
| Propiedad | Descripción |
|---|---|
| `image` | Esta propiedad es la URL de la imagen de la tarjeta. |
| `imageAspectRatio` | Esta propiedad es la relación de aspecto de la imagen de la tarjeta. |
| `title` | El texto del título de la tarjeta. |
| `cardDescription` | El texto del cuerpo de la tarjeta. |
| `domain` | El texto del enlace para la URL de la propiedad, como @"blog.braze.com". Se puede mostrar en la interfaz de usuario de la tarjeta para indicar la acción/dirección de hacer clic en la tarjeta. |
{: .reset-td-br-1 .reset-td-br-2 aria-label="Captioned image Content Card properties - ABKCaptionedImageCard" }
### Propiedades de la tarjeta de contenido clásica - ABKClassicContentCard {#classic-content-card-properties-abkclassiccontentcard}
| Propiedad | Descripción |
|---|---|
| `image` | (Opcional) Esta propiedad es la URL de la imagen de la tarjeta. |
| `title` | El texto del título de la tarjeta. |
| `cardDescription` | El texto del cuerpo de la tarjeta. |
| `domain` | El texto del enlace para la URL de la propiedad, como @"blog.braze.com". Se puede mostrar en la interfaz de usuario de la tarjeta para indicar la acción y la dirección al hacer clic en la tarjeta. |
{: .reset-td-br-1 .reset-td-br-2 aria-label="Classic Content Card properties - ABKClassicContentCard" }
## Métodos de tarjeta {#card-methods}
| Método | Descripción |
|---|---|
| `logContentCardImpression` | Registra manualmente una impresión en Braze para una tarjeta concreta. |
| `logContentCardClicked` | Registra manualmente un clic en Braze para una tarjeta concreta. El SDK solo registrará un clic de tarjeta cuando la tarjeta tenga la propiedad `url` con un valor válido. |
| `logContentCardDismissed` | Registra manualmente en Braze el descarte de una tarjeta concreta. El SDK solo registrará un descarte de tarjeta si la propiedad `dismissed` de la tarjeta no está ya establecida en `true`. |
| `isControlCard` | Determina si una tarjeta es la tarjeta de control para una prueba A/B. |
{: .reset-td-br-1 .reset-td-br-2 aria-label="Card methods" }
Para más detalles, consulta la [documentación de referencia de la clase](https://appboy.github.io/appboy-ios-sdk/docs/interface_a_b_k_content_card.html).
## Integración del controlador de vista de Content Cards {#content-cards-view-controller-integration}
Las Content Cards pueden integrarse con dos contextos de controlador de vista: navegación o modal.
### Contexto de navegación {#navigation-context}
Ejemplo de inserción de una instancia de `ABKContentCardsTableViewController` en un controlador de navegación:
```objc
ABKContentCardsTableViewController *contentCards = [[ABKContentCardsTableViewController alloc] init];
contentCards.title = @"Content Cards Title";
contentCards.disableUnreadIndicator = YES;
[self.navigationController pushViewController:contentCards animated:YES];
```
```swift
let contentCards = ABKContentCardsTableViewController()
contentCards.title = "Content Cards Title"
contentCards.disableUnreadIndicator = true
navigationController?.pushViewController(contentCards, animated: true)
```
**Note:**
Para personalizar el título de la barra de navegación, establece la propiedad title del `navigationItem` de la instancia `ABKContentCardsTableViewController`.
### Contexto modal {#modal-context}
Este modal se utiliza para presentar el controlador de vista en una vista modal, con una barra de navegación en la parte superior y un botón **Done** en el lateral de la barra.
```objc
ABKContentCardsViewController *contentCards = [[ABKContentCardsViewController alloc] init];
contentCards.contentCardsViewController.title = @"Content Cards Title";
contentCards.contentCardsViewController.disableUnreadIndicator = YES;
[self.navigationController presentViewController:contentCards animated:YES completion:nil];
```
```swift
let contentCards = ABKContentCardsViewController()
contentCards.contentCardsViewController.title = "Content Cards Title"
contentCards.contentCardsViewController.disableUnreadIndicator = true
self.present(contentCards, animated: true, completion: nil)
```
Para ver ejemplos de controladores de vista, consulta nuestra [aplicación de ejemplo de Content Cards](https://github.com/Appboy/appboy-ios-sdk/tree/master/Samples/ContentCards/BrazeContentCardsSampleApp).
**Note:**
Para personalizar el encabezado, establece la propiedad title del `navigationItem` perteneciente a la instancia `ABKContentCardsTableViewController` incrustada en la instancia padre `ABKContentCardsViewController`.
# Personalización de tarjetas de contenido iOS
Source: /docs/es/developer_guide/platforms/legacy_sdks/ios/content_cards/customization/index.md
# Estilo personalizado de tarjeta de contenido para iOS
Source: /docs/es/developer_guide/platforms/legacy_sdks/ios/content_cards/customization/custom_styling/index.md
**Warning:**
[AppboyKit](https://github.com/Appboy/appboy-ios-sdk) (also known as the Objective-C SDK) is no longer supported and has been replaced by the [Swift SDK](https://www.braze.com/docs/es/es/developer_guide/sdk_integration/?sdktab=swift). It will no longer receive new features, bug fixes, security updates, or technical support—however, messaging and analytics will continue to function as normal. To learn more, see [Introducing the New Braze Swift SDK](https://www.braze.com/resources/articles/introducing-the-new-braze-swift-sdk).
# Estilo personalizado
## Sustitución de imágenes predeterminadas
**Important:**
La integración de `SDWebImage` es necesaria si planeas utilizar nuestra interfaz de usuario Braze para mostrar imágenes en los mensajes dentro de la aplicación iOS o en las tarjetas de contenido.
Braze permite a los clientes sustituir las imágenes predeterminadas existentes por sus propias imágenes personalizadas. Para ello, crea un nuevo archivo `png` con la imagen personalizada y añádelo al paquete de imágenes de la aplicación. A continuación, renombra el archivo con el nombre de la imagen para anular la imagen predeterminada en nuestra biblioteca. Además, asegúrate de subir las versiones `@2x` y `@3x` de las imágenes para adaptarlas a los distintos tamaños de teléfono. Las imágenes disponibles para anular en las tarjetas de contenido incluyen:
- Imagen del marcador de posición: `appboy_cc_noimage_lrg`
- Imagen del icono anclado: `appboy_cc_icon_pinned`
Como las tarjetas de contenido tienen un tamaño máximo de 2 KB para el contenido que introduzcas en el panel (incluido el texto del mensaje, las URL de las imágenes, los enlaces y todos los pares clave-valor), comprueba el tamaño antes de enviarlas. Si se supera esta cantidad, no se podrá enviar la tarjeta.
**Important:**
Actualmente, nuestra integración .NET MAUI iOS no admite la sustitución de imágenes predeterminadas.
## Desactivar el modo oscuro
Para evitar que la interfaz de usuario de la tarjeta de contenido adopte un estilo de tema oscuro cuando el dispositivo del usuario tenga habilitado el modo oscuro, establece la propiedad `ABKContentCardsTableViewController.enableDarkTheme`. Puedes acceder a la propiedad `enableDarkTheme` directamente en una instancia de `ABKContentCardsTableViewController` o a través de la propiedad `ABKContentCardsViewController.contentCardsViewController` para adaptarla mejor a tu propia interfaz de usuario.
```objc
// Accessing enableDarkTheme via ABKContentCardsViewController.contentCardsViewController.
- (IBAction)presentModalContentCards:(id)sender {
ABKContentCardsViewController *contentCardsVC = [ABKContentCardsViewController new];
contentCardsVC.contentCardsViewController.enableDarkTheme = NO;
...
[self.navigationController presentViewController:contentCardsVC animated:YES completion:nil];
}
// Accessing enableDarkTheme directly.
- (IBAction)presentNavigationContentCards:(id)sender {
ABKContentCardsTableViewController *contentCardsTableVC = [[ABKContentCardsTableViewController alloc] init];
contentCardsTableVC.enableDarkTheme = NO;
...
[self.navigationController pushViewController:contentCardsTableVC animated:YES];
}
```
```swift
// Accessing enableDarkTheme via ABKContentCardsViewController.contentCardsViewController.
@IBAction func presentModalContentCards(_ sender: Any) {
let contentCardsVC = ABKContentCardsViewController()
contentCardsVC.contentCardsViewController.enableDarkTheme = false
...
self.navigationController?.present(contentCardsVC, animated: true, completion: nil)
}
// Accessing enableDarkTheme directly.
@IBAction func presentNavigationContentCards(_ sender: Any) {
let contentCardsTableVC = ABKContentCardsTableViewController()
contentCardsTableVC.enableDarkTheme = false
...
self.navigationController?.present(contentCardsTableVC, animated: true, completion: nil)
}
```
# Personalizar la fuente de Content Cards para iOS
Source: /docs/es/developer_guide/platforms/legacy_sdks/ios/content_cards/customization/customizing_feed/index.md
**Warning:**
[AppboyKit](https://github.com/Appboy/appboy-ios-sdk) (also known as the Objective-C SDK) is no longer supported and has been replaced by the [Swift SDK](https://www.braze.com/docs/es/es/developer_guide/sdk_integration/?sdktab=swift). It will no longer receive new features, bug fixes, security updates, or technical support—however, messaging and analytics will continue to function as normal. To learn more, see [Introducing the New Braze Swift SDK](https://www.braze.com/resources/articles/introducing-the-new-braze-swift-sdk).
# Personalizar la fuente de Content Cards {#customize-the-content-cards-feed}
Puedes crear tu propia interfaz de Content Cards extendiendo `ABKContentCardsTableViewController` para personalizar todos los elementos de la interfaz de usuario y el comportamiento de Content Cards. Las celdas de las tarjetas de contenido también pueden subclasificarse y luego utilizarse mediante programación o introduciendo un storyboard personalizado que registre las nuevas clases. Consulta la [aplicación de muestra](https://github.com/Appboy/appboy-ios-sdk/tree/master/Samples/ContentCards/BrazeContentCardsSampleApp) de Content Cards para ver un ejemplo completo.
También es importante considerar si debes utilizar una estrategia de subclase frente a un controlador de vista completamente personalizado y [suscribirte a las actualizaciones de datos](https://www.braze.com/docs/es/es/developer_guide/platforms/legacy_sdks/ios/content_cards/integration). Por ejemplo, si subclasificas `ABKContentCardsTableViewController`, puedes utilizar el [método `populateContentCards`](#overriding-populated-content-cards) para filtrar y ordenar las tarjetas (recomendado). Sin embargo, si utilizas una personalización completa del controlador de vista, tendrás más control sobre el comportamiento de la tarjeta —como mostrarla en un carrusel o añadir elementos interactivos—, pero entonces tendrás que depender de un observador para implementar la lógica de ordenación y filtrado. También debes implementar los métodos de análisis respectivos para registrar correctamente las impresiones, los eventos de descarte y los clics.
## Personalización de la interfaz de usuario {#customizing-ui}
Los siguientes fragmentos de código muestran cómo dar estilo y modificar Content Cards para adaptarlas a tus necesidades de interfaz de usuario utilizando los métodos proporcionados por el SDK. Estos métodos te permiten personalizar todos los aspectos de la interfaz de usuario de Content Cards, incluyendo fuentes personalizadas, componentes de color personalizados, texto personalizado y mucho más.
Existen dos formas distintas de personalizar la interfaz de usuario de Content Cards:
- Método dinámico: actualizar la interfaz de usuario de la tarjeta por tarjeta
- Método estático: actualizar la interfaz de usuario en todas las tarjetas
### Interfaz de usuario dinámica {#dynamic-ui}
El método `applyCard` de Content Cards puede hacer referencia al objeto tarjeta y pasarle pares clave-valor que se utilizarán para actualizar la interfaz de usuario:
```objc
- (void)applyCard:(ABKCaptionedImageContentCard *)captionedImageCard {
[super applyCard:captionedImageCard];
if ([card.extras objectForKey:ContentCardKeyBackgroundColorValue]) {
NSString *backgroundColor = [card.extras objectForKey:ContentCardKeyBackgroundColor];
if ([backgroundColor colorValue]) {
self.rootView.backgroundColor = [backgroundColor colorValue];
} else {
self.rootView.backgroundColor = [UIColor lightGray];
}
} else {
self.rootView.backgroundColor = [UIColor lightGray];
}
}
```
```swift
override func apply(_ captionedImageCard: ABKCaptionedImageContentCard!) {
super.apply(captionedImageCard)
if let backgroundColor = card.extras?[ContentCardKey.backgroundColor.rawValue] as? String,
let backgroundColorValue = backgroundColor.colorValue() {
rootView.backgroundColor = backgroundColorValue
} else {
rootView.backgroundColor = .lightGray
}
}
```
### Interfaz de usuario estática {#static-ui}
El método `setUpUI` puede asignar valores a los componentes estáticos de Content Cards en todas las tarjetas:
```objc
#import "CustomClassicContentCardCell.h"
@implementation CustomClassicContentCardCell
- (void)setUpUI {
[super setUpUI];
self.rootView.backgroundColor = [UIColor lightGrayColor];
self.rootView.layer.borderColor = [UIColor purpleColor].CGColor;
self.unviewedLineView.backgroundColor = [UIColor redColor];
self.titleLabel.font = [UIFont italicSystemFontOfSize:20];
}
```
```swift
override func setUpUI() {
super.setUpUI()
rootView.backgroundColor = .lightGray
rootView.layer.borderColor = UIColor.purple.cgColor
unviewedLineViewColor = .red
titleLabel.font = .italicSystemFont(ofSize: 20)
}
```
## Proporcionar interfaces personalizadas {#providing-custom-interfaces}
Se pueden proporcionar interfaces personalizadas registrando clases personalizadas para cada tipo de tarjeta deseado.
{: style="max-width:35%;margin-left:15px;"}
{: style="max-width:25%;margin-left:15px;"}
{: style="max-width:18%;margin-left:15px;"}
Braze proporciona tres plantillas de Content Cards (banner, imagen subtitulada y clásica). Alternativamente, si quieres proporcionar tus propias interfaces personalizadas, consulta los siguientes fragmentos de código:
```objc
- (void)registerTableViewCellClasses {
[super registerTableViewCellClasses];
// Replace the default class registrations with custom classes for these two types of cards
[self.tableView registerClass:[CustomCaptionedImageContentCardCell class] forCellReuseIdentifier:@"ABKCaptionedImageContentCardCell"];
[self.tableView registerClass:[CustomClassicContentCardCell class] forCellReuseIdentifier:@"ABKClassicCardCell"];
}
```
```swift
override func registerTableViewCellClasses() {
super.registerTableViewCellClasses()
// Replace the default class registrations with custom classes
tableView.register(CustomCaptionedImageContentCardCell.self, forCellReuseIdentifier: "ABKCaptionedImageContentCardCell")
tableView.register(CustomBannerContentCardCell.self, forCellReuseIdentifier: "ABKBannerContentCardCell")
tableView.register(CustomClassicImageContentCardCell.self, forCellReuseIdentifier: "ABKClassicImageCardCell")
tableView.register(CustomClassicContentCardCell.self, forCellReuseIdentifier: "ABKClassicCardCell")
}
```
## Sobrescribir Content Cards pobladas {#overriding-populated-content-cards}
Las Content Cards pueden modificarse mediante programación utilizando el método `populateContentCards`:
```objc
- (void)populateContentCards {
NSMutableArray *cards = [NSMutableArray arrayWithArray:[Appboy.sharedInstance.contentCardsController getContentCards]];
for (ABKContentCard *card in cards) {
// Replaces the card description for all Classic Content Cards
if ([card isKindOfClass:[ABKClassicContentCard class]]) {
((ABKClassicContentCard *)card).cardDescription = @"Custom Feed Override title [classic cards only]!";
}
}
super.cards = cards;
}
```
```swift
override func populateContentCards() {
guard let cards = Appboy.sharedInstance()?.contentCardsController.contentCards else { return }
for card in cards {
// Replaces the card description for all Classic Content Cards
if let classicCard = card as? ABKClassicContentCard {
classicCard.cardDescription = "Custom Feed Override title [classic cards only]!"
}
}
super.cards = (cards as NSArray).mutableCopy() as? NSMutableArray
}
```
# Gestionar manualmente los clics en tarjetas de contenido para iOS
Source: /docs/es/developer_guide/platforms/legacy_sdks/ios/content_cards/customization/handling_clicks_manually/index.md
**Warning:**
[AppboyKit](https://github.com/Appboy/appboy-ios-sdk) (also known as the Objective-C SDK) is no longer supported and has been replaced by the [Swift SDK](https://www.braze.com/docs/es/es/developer_guide/sdk_integration/?sdktab=swift). It will no longer receive new features, bug fixes, security updates, or technical support—however, messaging and analytics will continue to function as normal. To learn more, see [Introducing the New Braze Swift SDK](https://www.braze.com/resources/articles/introducing-the-new-braze-swift-sdk).
# Gestionar los clics manualmente
Puedes gestionar manualmente los clics de la tarjeta de contenido implementando el protocolo [`ABKContentCardsTableViewControllerDelegate`](https://appboy.github.io/appboy-ios-sdk/docs/protocol_a_b_k_content_cards_table_view_controller_delegate-p.html) y configurando tu objeto delegado como la propiedad `delegate` de `ABKContentCardsTableViewController`. Consulta la [aplicación de muestra Tarjetas de contenido](https://github.com/Appboy/appboy-ios-sdk/tree/master/Samples/ContentCards/BrazeContentCardsSampleApp) para ver un ejemplo.
```objc
contentCardsTableViewController.delegate = delegate;
// Methods to implement in delegate
- (BOOL)contentCardTableViewController:(ABKContentCardsTableViewController *)viewController
shouldHandleCardClick:(NSURL *)url {
if ([[url.host lowercaseString] isEqualToString:@"my-domain.com"]) {
// Custom handle link here
NSLog(@"Manually handling Content Card click with URL %@", url.absoluteString);
return NO;
}
// Let the Braze SDK handle the click action
return YES;
}
- (void)contentCardTableViewController:(ABKContentCardsTableViewController *)viewController
didHandleCardClick:(NSURL *)url {
NSLog(@"Braze SDK handled Content Card click with URL %@", url.absoluteString);
}
```
```swift
contentCardsTableViewController.delegate = delegate
// Methods to implement in delegate
func contentCardTableViewController(_ viewController: ABKContentCardsTableViewController!,
shouldHandleCardClick url: URL!) -> Bool {
if (url.host?.lowercased() == "my-domain.com") {
// Custom handle link here
NSLog("Manually handling Content Card click with URL %@", url.absoluteString)
return false
}
// Let the Braze SDK handle the click action
return true
}
func contentCardTableViewController(_ viewController: ABKContentCardsTableViewController!,
didHandleCardClick url: URL!) {
NSLog("Braze SDK handled Content Card click with URL %@", url.absoluteString)
}
```
**Important:**
Si sobrescribes el método `handleCardClick:` en `ABKContentCardsTableViewController`, es posible que no se llame a estos métodos delegados.
# Indicadores de tarjetas de contenido leídas y no leídas para iOS
Source: /docs/es/developer_guide/platforms/legacy_sdks/ios/content_cards/customization/read_unread_indicators/index.md
**Warning:**
[AppboyKit](https://github.com/Appboy/appboy-ios-sdk) (also known as the Objective-C SDK) is no longer supported and has been replaced by the [Swift SDK](https://www.braze.com/docs/es/es/developer_guide/sdk_integration/?sdktab=swift). It will no longer receive new features, bug fixes, security updates, or technical support—however, messaging and analytics will continue to function as normal. To learn more, see [Introducing the New Braze Swift SDK](https://www.braze.com/resources/articles/introducing-the-new-braze-swift-sdk).
# Indicadores de leído y no leído
## Desactivar el indicador de no visto
{: style="max-width:80%"}
Puedes elegir desactivar la línea azul en la parte inferior de la tarjeta, que indica si la tarjeta ha sido vista o no, configurando la propiedad `disableUnviewedIndicator` en `ABKContentCardsTableViewController` a `YES`.
## Personalizar el indicador de no visto
Se puede acceder al indicador de no visto a través de la propiedad `unviewedLineView` de la clase `ABKBaseContentCardCell`. Si utilizas implementaciones de `UITableViewCell`, debes acceder a la propiedad antes de que se dibuje la celda.
Por ejemplo, para establecer el color del indicador de no visto en rojo:
```objc
((ABKBaseContentCardCell *)cell).unviewedLineView.backgroundColor = [UIColor redColor];
```
```swift
(card as? ABKBaseContentCardCell).unviewedLineView.backgroundColor = UIColor.red
```
# Señales de tarjetas de contenido para iOS
Source: /docs/es/developer_guide/platforms/legacy_sdks/ios/content_cards/customization/badges/index.md
**Warning:**
[AppboyKit](https://github.com/Appboy/appboy-ios-sdk) (also known as the Objective-C SDK) is no longer supported and has been replaced by the [Swift SDK](https://www.braze.com/docs/es/es/developer_guide/sdk_integration/?sdktab=swift). It will no longer receive new features, bug fixes, security updates, or technical support—however, messaging and analytics will continue to function as normal. To learn more, see [Introducing the New Braze Swift SDK](https://www.braze.com/resources/articles/introducing-the-new-braze-swift-sdk).
# Señales
## Solicitar recuentos de tarjetas de contenido no leídas
Si quieres mostrar el número de tarjetas de contenido no leídas que tiene tu usuario, te sugerimos que solicites un recuento de tarjetas y lo representes con una Señal. Las señales son una forma estupenda de llamar la atención sobre los nuevos contenidos que esperan a tus usuarios en las tarjetas de contenido. Si quieres añadir una señal a tus tarjetas de contenido, el SDK de Braze proporciona métodos para consultar lo siguiente:
- Tarjetas de contenido sin ver para el usuario actual
- Total de tarjetas de contenido visible para el usuario actual
Las siguientes declaraciones de métodos en [`ABKContentCardsController`](https://appboy.github.io/appboy-ios-sdk/docs/interface_a_b_k_content_cards_controller.html) describen esto en detalle:
```objc
- (NSInteger)unviewedContentCardCount;
/*
This method returns the number of currently active Content Cards that have not been viewed.
A "view" happens when a card becomes visible in the Content Cards view. This differentiates between cards that are off-screen in the scrolling view and those which are on-screen; when a card scrolls onto the screen, it's counted as viewed.
Cards are counted as viewed only once -- if a card scrolls off the screen and back on, it's not re-counted.
Cards are counted only once, even if they appear in multiple Content Cards views or across multiple devices.
*/
- (NSInteger)contentCardCount;
/*
This method returns the total number of currently active Content Cards. Cards are counted only once even if they appear in multiple Content Cards views.
*/
```
## Mostrar el número de tarjetas de contenido no vistas en el recuento de señales de la aplicación
Además de servir como recordatorios de notificaciones push para una aplicación, las señales también pueden utilizarse para indicar elementos no vistos en la fuente de tarjetas de contenido del usuario. Actualizar el recuento de señales en función de las actualizaciones de las tarjetas de contenido no vistas puede ser valioso para atraer a los usuarios de nuevo a tu aplicación y aumentar las sesiones.
Este método registra el recuento de señales después de que se cierre la aplicación y finalice la sesión del usuario:
```objc
(void)applicationDidEnterBackground:(UIApplication *)application
```
Dentro de este método, implementa el siguiente código, que actualiza activamente el recuento de señales mientras el usuario ve las tarjetas durante una sesión determinada:
```objc
[UIApplication sharedApplication].applicationIconBadgeNumber = [[Appboy sharedInstance].contentCardsController unviewedContentCardCount];
```
```swift
func applicationDidEnterBackground(_ application: UIApplication)
```
Dentro de este método, implementa el siguiente código, que actualiza activamente el recuento de señales mientras el usuario ve las tarjetas durante una sesión determinada:
```swift
UIApplication.shared.applicationIconBadgeNumber =
Appboy.sharedInstance()?.contentCardsController.unviewedContentCardCount() ?? 0
```
Para más información, consulta el [archivo de cabecera](https://github.com/Appboy/appboy-ios-sdk/blob/master/AppboyKit/include/Appboy.h) `Appboy.h`.
# Vista de carrusel de Content Cards para iOS
Source: /docs/es/developer_guide/platforms/legacy_sdks/ios/content_cards/customization/use_cases/carousel_view/index.md
**Warning:**
[AppboyKit](https://github.com/Appboy/appboy-ios-sdk) (also known as the Objective-C SDK) is no longer supported and has been replaced by the [Swift SDK](https://www.braze.com/docs/es/es/developer_guide/sdk_integration/?sdktab=swift). It will no longer receive new features, bug fixes, security updates, or technical support—however, messaging and analytics will continue to function as normal. To learn more, see [Introducing the New Braze Swift SDK](https://www.braze.com/resources/articles/introducing-the-new-braze-swift-sdk).
# Caso de uso: vista de carrusel {#use-case-carousel-view}
{: style="max-width:35%;float:right;margin-left:15px;border:none;"}
Esta sección explica cómo implementar una fuente de carrusel de varias tarjetas en la que el usuario puede deslizar horizontalmente el dedo para ver más tarjetas destacadas. Para integrar una vista de carrusel, tendrás que utilizar una implementación de Content Cards totalmente personalizada: la fase "correr" del [enfoque "rastrear, caminar, correr"](https://www.braze.com/docs/es/es/user_guide/message_building_by_channel/content_cards/customize#customization-approaches).
Con este enfoque, no utilizarás las vistas de Braze ni la lógica predeterminada, sino que mostrarás las Content Cards de forma totalmente personalizada utilizando tus propias vistas pobladas con datos de los modelos de Braze.
En términos de nivel de esfuerzo de desarrollo, las diferencias clave entre la implementación básica y la implementación de carrusel incluyen:
- Construir tus propias vistas
- Registrar análisis de Content Cards
- Introducir lógica adicional en el lado del cliente para dictar cuántas y qué tarjetas mostrar en el carrusel
## Implementación {#implementation}
### Paso 1: Crear un controlador de vista personalizado {#step-1-create-a-custom-view-controller}
Para crear el carrusel de Content Cards, crea tu propio controlador de vista personalizado (como `UICollectionViewController`) y [suscríbete para recibir actualizaciones de datos](https://www.braze.com/docs/es/es/developer_guide/platform_integration_guides/legacy_sdks/ios/content_cards/integration#getting-the-data). Ten en cuenta que no podrás ampliar o subclasificar nuestro `ABKContentCardTableViewController` predeterminado, ya que solo puede gestionar los tipos de Content Cards predeterminados.
### Paso 2: Implementar análisis {#step-2-implement-analytics}
Al crear un controlador de vista totalmente personalizado, las impresiones, los clics y los rechazos de Content Cards no se registran automáticamente. Debes implementar los métodos de análisis respectivos para asegurarte de que las impresiones, los eventos de rechazo y los clics se registran correctamente en los análisis del dashboard de Braze.
Para obtener información sobre los métodos de análisis, consulta [Métodos de tarjeta](https://www.braze.com/docs/es/es/developer_guide/platform_integration_guides/legacy_sdks/ios/content_cards/integration#card-methods).
**Note:**
En la misma página también se detallan las distintas propiedades heredadas de nuestra clase modelo genérica de Content Cards, que pueden resultarte útiles durante la implementación de tu vista.
### Paso 3: Crear un observador de Content Cards {#step-3-create-a-content-card-observer}
Crea un [observador de Content Cards](https://www.braze.com/docs/es/es/developer_guide/platform_integration_guides/ios/content_cards/multiple_feeds#step-2-set-up-a-content-card-listener) que se encargue de gestionar la llegada de Content Cards e implementa una lógica condicional para mostrar un número específico de tarjetas en el carrusel en un momento dado. Por defecto, las Content Cards se ordenan por fecha de creación (la más reciente primero), y el usuario ve todas las tarjetas para las que es elegible.
Dicho esto, podrías ordenar y aplicar lógica de visualización adicional de varias formas. Por ejemplo, podrías seleccionar los cinco primeros objetos de Content Cards de la matriz o introducir pares clave-valor (la propiedad `extras` en el modelo de datos) para construir una lógica condicional en torno a ellos.
Si estás implementando un carrusel como fuente secundaria de Content Cards, consulta [Utilizar múltiples fuentes de Content Cards](https://www.braze.com/docs/es/es/developer_guide/platforms/legacy_sdks/ios/content_cards/multiple_feeds) para asegurarte de que ordenas las tarjetas en la fuente correcta basándote en los pares clave-valor.
**Important:**
Es importante asegurarse de que tus equipos de marketing y desarrollo se coordinan para decidir qué pares clave-valor se utilizarán (por ejemplo, `feed_type = brand_homepage`), ya que cualquier par clave-valor que los especialistas en marketing introduzcan en el dashboard de Braze debe coincidir exactamente con los pares clave-valor que los desarrolladores incorporen a la lógica de la aplicación.
Para obtener documentación específica para desarrolladores de iOS sobre la clase, los métodos y los atributos de Content Cards, consulta la [referencia de la clase `ABKContentCard`](https://appboy.github.io/appboy-ios-sdk/docs/interface_a_b_k_content_card.html) de iOS.
## Consideraciones {#considerations}
- Al utilizar vistas completamente personalizadas, no podrás ampliar ni subclasificar los métodos utilizados en `ABKContentCardsController`. En su lugar, tendrás que integrar tú mismo los métodos y propiedades del modelo de datos.
- La lógica y la implementación de la vista de carrusel no es un tipo predeterminado de Content Cards en Braze, y por lo tanto la lógica para lograr el caso de uso debe ser proporcionada y mantenida por tu equipo de desarrollo.
- Tendrás que implementar la lógica del lado del cliente para mostrar un número específico de tarjetas en el carrusel en un momento dado.
# Actualizar la fuente de tarjetas de contenido para iOS
Source: /docs/es/developer_guide/platforms/legacy_sdks/ios/content_cards/refreshing_the_feed/index.md
**Warning:**
[AppboyKit](https://github.com/Appboy/appboy-ios-sdk) (also known as the Objective-C SDK) is no longer supported and has been replaced by the [Swift SDK](https://www.braze.com/docs/es/es/developer_guide/sdk_integration/?sdktab=swift). It will no longer receive new features, bug fixes, security updates, or technical support—however, messaging and analytics will continue to function as normal. To learn more, see [Introducing the New Braze Swift SDK](https://www.braze.com/resources/articles/introducing-the-new-braze-swift-sdk).
# Actualizar la fuente
## Actualizar tarjetas de contenido
Puedes solicitar manualmente a Braze que actualice las tarjetas de contenido del usuario utilizando el método `requestContentCardsRefresh:` en la interfaz `Appboy`:
```objc
[[Appboy sharedInstance] requestContentCardsRefresh];
```
```swift
Appboy.sharedInstance()?.requestContentCardsRefresh()
```
Para más información, consulta el [archivo de encabezado](https://github.com/Appboy/appboy-ios-sdk/blob/master/AppboyKit/include/Appboy.h) `Appboy.h`.
# Usa varias fuentes de tarjetas de contenido para iOS
Source: /docs/es/developer_guide/platforms/legacy_sdks/ios/content_cards/multiple_feeds/index.md
**Warning:**
[AppboyKit](https://github.com/Appboy/appboy-ios-sdk) (also known as the Objective-C SDK) is no longer supported and has been replaced by the [Swift SDK](https://www.braze.com/docs/es/es/developer_guide/sdk_integration/?sdktab=swift). It will no longer receive new features, bug fixes, security updates, or technical support—however, messaging and analytics will continue to function as normal. To learn more, see [Introducing the New Braze Swift SDK](https://www.braze.com/resources/articles/introducing-the-new-braze-swift-sdk).
# Utilizar varias fuentes de tarjetas de contenido
Las tarjetas de contenido pueden filtrarse en la aplicación para mostrar sólo tarjetas específicas, lo que te habilita para tener varias fuentes de tarjetas de contenido para diferentes casos de uso (como tener una fuente transaccional frente a una fuente de marketing).
La siguiente documentación muestra un ejemplo de implementación que puede modificarse para adaptarlo a tu integración específica.
## Paso 1: Configuración de los pares clave-valor en las tarjetas
Al crear una campaña de tarjeta de contenido, se pueden establecer datos de par clave-valor en cada tarjeta. Nuestra lógica de filtrado utilizará estos datos par clave-valor para categorizar las tarjetas.
En este ejemplo, estableceremos un par clave-valor con la clave `feed_type` que designará la fuente de la tarjeta de contenido que debe mostrarse. El valor será el que tengan tus fuentes personalizadas, como `Transactional`, `Marketing`, etc.
## Paso 2: Configurar una escucha de tarjeta de contenido
Utiliza el siguiente fragmento de código para añadir un observador que escuche las actualizaciones de la tarjeta de contenido.
```objc
[[NSNotificationCenter defaultCenter] addObserver:self
selector:@selector(contentCardsUpdatedNotificationReceived:)
name:ABKContentCardsProcessedNotification
object:nil];
```
```swift
NotificationCenter.default.addObserver(self, selector:
#selector(contentCardsUpdated),
name:NSNotification.Name.ABKContentCardsProcessed, object: nil)
```
Añade los siguientes métodos para responder a las actualizaciones del observador y filtrar las tarjetas devueltas por tipo.
El primer método, `contentCardsUpdatedNotificationReceived:`, se encarga de las actualizaciones del observador. Llama al segundo método, `getCardsForFeedType:`, con el tipo de fuente deseado, en este caso, `Transactional`.
```objc
- (void)contentCardsUpdatedNotificationReceived:(NSNotification *)notification {
BOOL updateIsSuccessful = [notification.userInfo[ABKContentCardsProcessedIsSuccessfulKey] boolValue];
if (updateIsSuccessful) {
// Get an array containing only cards that have the "Transactional" feed type set in their extras.
NSArray *filteredArray = [self getCardsForFeedType:@"Transactional"];
NSLog(@"Got filtered array of length: %lu", [filteredArray count]);
// Pass filteredArray to your UI layer for display.
}
}
- (NSArray *)getCardsForFeedType:(NSString *)type {
NSArray *cards = [Appboy.sharedInstance.contentCardsController getContentCards];
NSArray *filteredArray = [cards filteredArrayUsingPredicate:[NSPredicate predicateWithBlock:^BOOL(ABKContentCard * card, NSDictionary *bindings) {
NSDictionary *extras = [card extras];
if (extras != nil && [extras objectForKey:@"feed_type"] != nil && [[extras objectForKey:@"feed_type"] isEqualToString:type]) {
NSLog(@"Got card: %@ ", card.idString);
return YES;
}
return NO;
}]];
return filteredArray;
}
```
```swift
@objc private func contentCardsUpdatedNotificationReceived(notification: NSNotification) {
guard let updateSuccessful = notification.userInfo?[ABKContentCardsProcessedIsSuccessfulKey] as? Bool else { return }
if updateSuccessful {
// Get an array containing only cards that have the "Transactional" feed type set in their extras.
let filteredArray = getCards(forFeedType: "Transactional")
NSLog("Got filtered array of length: %@",filteredArray?.count ?? 0)
// Pass filteredArray to your UI layer for display.
}
}
func getCards(forFeedType type: String) -> [ABKContentCard]? {
guard let allCards = Appboy.sharedInstance()?.contentCardsController.contentCards as? [ABKContentCard] else { return nil }
// return filtered cards
return allCards.filter {
if $0.extras?["feed_type"] as? String == type {
NSLog("%@","Got card: \($0.idString)")
return true
} else {
return false
}
}
}
```
# Guía de implementación de Content Cards para iOS (Opcional)
Source: /docs/es/developer_guide/platforms/legacy_sdks/ios/content_cards/implementation_guide/index.md
**Warning:**
[AppboyKit](https://github.com/Appboy/appboy-ios-sdk) (also known as the Objective-C SDK) is no longer supported and has been replaced by the [Swift SDK](https://www.braze.com/docs/es/es/developer_guide/sdk_integration/?sdktab=swift). It will no longer receive new features, bug fixes, security updates, or technical support—however, messaging and analytics will continue to function as normal. To learn more, see [Introducing the New Braze Swift SDK](https://www.braze.com/resources/articles/introducing-the-new-braze-swift-sdk).
**Important:**
¿Buscas la guía básica de integración del desarrollador de Content Cards? Encuéntrala [aquí](https://www.braze.com/docs/es/es/developer_guide/platforms/legacy_sdks/ios/content_cards/integration).
# Guía de implementación de Content Cards {#content-card-implementation-guide}
> Esta guía de implementación opcional y avanzada abarca consideraciones sobre códigos de Content Cards, tres casos de uso personalizados creados por nuestro equipo, fragmentos de código que los acompañan y orientaciones sobre el registro de impresiones, clics y descartes. ¡Visita nuestro repositorio de demostraciones Braze [aquí](https://github.com/braze-inc/braze-growth-shares-ios-demo-app)! Ten en cuenta que esta guía de implementación se centra en una implementación Swift, pero se proporcionan fragmentos de código Objective-C para los interesados.
## Consideraciones sobre códigos {#code-considerations}
### Content Cards como objetos personalizados {#content-cards-as-custom-objects}
Al igual que un cohete que añade un propulsor, tus propios objetos personalizados pueden ampliarse para funcionar como Content Cards. Las superficies API limitadas como esta proporcionan flexibilidad para trabajar con diferentes backends de datos indistintamente. Esto puede hacerse ajustándose al protocolo `ContentCardable` e implementando el inicializador (como se ve en los siguientes fragmentos de código) y, mediante el uso de la estructura `ContentCardData`, te permite acceder a los datos de `ABKContentCard`. La carga útil `ABKContentCard` se utilizará para inicializar la estructura `ContentCardData` y el propio objeto personalizado, todo ello a partir de un tipo `Dictionary` mediante el inicializador que incluye el protocolo.
El inicializador también incluye una enumeración `ContentCardClassType`. Esta enumeración se utiliza para decidir qué objeto inicializar. Mediante el uso de pares clave-valor dentro del panel de Braze, puedes establecer una clave `class_type` explícita que se utilizará para determinar qué objeto inicializar. Estos pares clave-valor de Content Cards aparecen en la variable `extras` en `ABKContentCard`. Otro componente básico del inicializador es el parámetro del diccionario `metaData`. El `metaData` incluye todo lo que hay en el `ABKContentCard` analizado en una serie de claves y valores. Una vez analizadas las tarjetas relevantes y convertidas en tus objetos personalizados, la aplicación está lista para empezar a trabajar con ellas como si se hubieran instanciado desde JSON o cualquier otra fuente.
Una vez que tengas una sólida comprensión de estas consideraciones sobre códigos, consulta nuestros [casos de uso](#sample-use-cases) para empezar a implementar tus objetos personalizados.
**Protocolo ContentCardable**
Un objeto `ContentCardData` que representa los datos de `ABKContentCard` junto con una enumeración `ContentCardClassType`. Un inicializador utilizado para instanciar objetos personalizados con metadatos `ABKContentCard`.
```swift
protocol ContentCardable {
var contentCardData: ContentCardData? { get }
init?(metaData: [ContentCardKey: Any], classType contentCardClassType: ContentCardClassType)
}
extension ContentCardable {
var isContentCard: Bool {
return contentCardData != nil
}
func logContentCardClicked() {
BrazeManager.shared.logContentCardClicked(idString: contentCardData?.contentCardId)
}
func logContentCardDismissed() {
BrazeManager.shared.logContentCardDismissed(idString: contentCardData?.contentCardId)
}
func logContentCardImpression() {
BrazeManager.shared.logContentCardImpression(idString: contentCardData?.contentCardId)
}
}
```
**Estructura de datos de Content Card**
`ContentCardData` representa los valores analizados de un `ABKContentCard`.
```swift
struct ContentCardData: Hashable {
let contentCardId: String
let contentCardClassType: ContentCardClassType
let createdAt: Double
let isDismissable: Bool
...
// other Content Card properties such as expiresAt, pinned, etc.
}
extension ContentCardData: Equatable {
static func ==(lhs: ContentCardData, rhs: ContentCardData) -> Bool {
return lhs.contentCardId == rhs.contentCardId
}
}
```
**Protocolo ContentCardable**
Un objeto `ContentCardData` que representa los datos `ABKContentCard` junto con una enumeración `ContentCardClassType`, un inicializador utilizado para instanciar objetos personalizados con metadatos `ABKContentCard`.
```objc
@protocol ContentCardable
@property (nonatomic, strong) ContentCardData *contentCardData;
- (instancetype __nullable)initWithMetaData:(NSDictionary *)metaData
classType:(enum ContentCardClassType)classType;
- (BOOL)isContentCard;
- (void)logContentCardImpression;
- (void)logContentCardClicked;
- (void)logContentCardDismissed;
@end
```
**Estructura de datos de Content Card**
`ContentCardData` representa los valores analizados de un `ABKContentCard`.
```objc
@interface ContentCardData : NSObject
+ (ContentCardClassType)contentCardClassTypeForString:(NSString *)rawValue;
- (instancetype)initWithIdString:(NSString *)idString
classType:(ContentCardClassType)classType
createdAt:(double)createdAt isDismissible:(BOOL)isDismissible;
@property (nonatomic, readonly) NSString *contentCardId;
@property (nonatomic) ContentCardClassType classType;
@property (nonatomic, readonly) double *createdAt;
@property (nonatomic, readonly) BOOL isDismissible;
...
// other Content Card properties such as expiresAt, pinned, etc.
@end
```
**Inicializador de objeto personalizado**
Los metadatos de un `ABKContentCard` se utilizan para rellenar las variables de tu objeto. Los pares clave-valor configurados en el panel de Braze se representan en el diccionario "extras".
```swift
extension CustomObject: ContentCardable {
init?(metaData: [ContentCardKey: Any], classType contentCardClassType: ContentCardClassType) {
guard let idString = metaData[.idString] as? String,
let createdAt = metaData[.created] as? Double,
let isDismissable = metaData[.dismissable] as? Bool,
let extras = metaData[.extras] as? [AnyHashable: Any],
else { return nil }
let contentCardData = ContentCardData(contentCardId: idString, contentCardClassType: contentCardClassType, createdAt: createdAt, isDismissable: isDismissable)
let customObjectProperty = extras["YOUR-CUSTOM-OBJECT-PROPERTY"] as? String
self.init(contentCardData: contentCardData, property: customObjectProperty)
}
}
```
**Identificación de tipos**
La enumeración `ContentCardClassType` representa el valor `class_type` en el panel de Braze. Este valor también se utiliza como identificador de filtro para mostrar Content Cards en distintos lugares.
```swift
enum ContentCardClassType: Hashable {
case yourValue
case yourOtherValue
...
case none
init(rawType: String?) {
switch rawType?.lowercased() {
case "your_value": // these values much match the value set in the Braze dashboard
self = .yourValue
case "your_other_value": // these values much match the value set in the Braze dashboard
self = .yourOtherValue
...
default:
self = .none
}
}
}
```
**Inicializador de objeto personalizado**
Los metadatos de un `ABKContentCard` se utilizan para rellenar las variables de tu objeto. Los pares clave-valor configurados en el panel de Braze se representan en el diccionario "extras".
```objc
- (id _Nullable)initWithMetaData:(nonnull NSDictionary *)metaData classType:(enum ContentCardClassType)classType {
self = [super init];
if (self) {
if ([metaData objectForKey:ContentCardKeyIdString] && [metaData objectForKey:ContentCardKeyCreated] && [metaData objectForKey:ContentCardKeyDismissible] && [metaData objectForKey:ContentCardKeyExtras]) {
NSDictionary *extras = metaData[ContentCardKeyExtras];
NSString *idString = metaData[ContentCardKeyIdString];
double createdAt = [metaData[ContentCardKeyCreated] doubleValue];
BOOL isDismissible = metaData[ContentCardKeyDismissible];
if ([extras objectForKey: @"YOUR-CUSTOM-PROPERTY")
_customObjectProperty = extras[@"YOUR-CUSTOM-OBJECT-PROPERTY"];
self.contentCardData = [[ContentCardData alloc] initWithIdString:idString classType:classType createdAt:createdAt isDismissible:isDismissible];
return self;
}
}
return nil;
}
```
**Identificación de tipos**
La enumeración `ContentCardClassType` representa el valor `class_type` en el panel de Braze. Este valor también se utiliza como identificador de filtro para mostrar Content Cards en distintos lugares.
```objc
typedef NS_ENUM(NSInteger, ContentCardClassType) {
ContentCardClassTypeNone = 0,
ContentCardClassTypeYourValue,
ContentCardClassTypeYourOtherValue,
...
};
+ (NSArray *)contentCardClassTypeArray {
return @[ @"", @"your_value", @"your_other_value" ];
}
+ (ContentCardClassType)contentCardClassTypeForString:(NSString*)rawValue {
if ([[self contentCardClassTypeArray] indexOfObject:rawValue] == NSNotFound) {
return ContentCardClassTypeNone;
} else {
NSInteger value = [[self contentCardClassTypeArray] indexOfObject:rawValue];
return (ContentCardClassType) value;
}
}
```
**Solicitud de Content Cards**
Mientras el observador siga retenido en memoria, se puede esperar la devolución de llamada de notificación del SDK de Braze.
```swift
func loadContentCards() {
BrazeManager.shared.addObserverForContentCards(observer: self, selector: #selector(contentCardsUpdated))
BrazeManager.shared.requestContentCardsRefresh()
}
```
**Manejo de la devolución de llamada del SDK de Content Cards**
Reenvía la devolución de llamada de notificación al archivo de ayuda para analizar los datos de carga útil de tu(s) objeto(s) personalizado(s).
```swift
@objc func contentCardsUpdated(_ notification: Notification) {
guard let contentCards = BrazeManager.shared.handleContentCardsUpdated(notification, for: [.yourValue]) as? [CustomObject],!contentCards.isEmpty else { return }
// do something with your array of custom objects
}
```
**Trabajar con Content Cards**
El `class_type` se pasa como filtro para devolver solo las Content Cards que tengan un `class_type` coincidente.
```swift
func handleContentCardsUpdated(_ notification: Notification, for classTypes: [ContentCardClassType]) -> [ContentCardable] {
guard let updateIsSuccessful = notification.userInfo?[ABKContentCardsProcessedIsSuccessfulKey] as? Bool, updateIsSuccessful, let cards = contentCards else { return [] }
return convertContentCards(cards, for: classTypes)
}
```
**Solicitud de Content Cards**
Mientras el observador siga retenido en memoria, se puede esperar la devolución de llamada de notificación del SDK de Braze.
```objc
- (void)loadContentCards {
[[BrazeManager shared] addObserverForContentCards:self selector:@selector(contentCardsUpdated:)];
[[BrazeManager shared] requestContentCardsRefresh];
}
```
**Manejo de la devolución de llamada del SDK de Content Cards**
Reenvía la devolución de llamada de notificación al archivo de ayuda para analizar los datos de carga útil de tu(s) objeto(s) personalizado(s).
```objc
- (void)contentCardsUpdated:(NSNotification *)notification {
NSArray *classTypes = @[@(ContentCardClassTypeYourValue)];
NSArray *contentCards = [[BrazeManager shared] handleContentCardsUpdated:notification forClassTypes:classTypes];
// do something with your array of custom objects
}
```
**Trabajar con Content Cards**
El `class_type` se pasa como filtro para devolver solo las Content Cards que tengan un `class_type` coincidente.
```objc
- (NSArray *)handleContentCardsUpdated:(NSNotification *)notification forClassType:(ContentCardClassType)classType {
BOOL updateIsSuccessful = [notification.userInfo[ABKContentCardsProcessedIsSuccessfulKey] boolValue];
if (updateIsSuccessful) {
return [self convertContentCards:self.contentCards forClassType:classType];
} else {
return @[];
}
}
```
**Trabajar con datos de carga útil**
Recorre la matriz de Content Cards y solo analiza las tarjetas que coincidan con `class_type`. La carga útil de una ABKContentCard se analiza en un `Dictionary`.
```swift
func convertContentCards(_ cards: [ABKContentCard], for classTypes: [ContentCardClassType]) -> [ContentCardable] {
var contentCardables: [ContentCardable] = []
for card in cards {
let classTypeString = card.extras?[ContentCardKey.classType.rawValue] as? String
let classType = ContentCardClassType(rawType: classTypeString)
guard classTypes.contains(classType) else { continue }
var metaData: [ContentCardKey: Any] = [:]
switch card {
case let banner as ABKBannerContentCard:
metaData[.image] = banner.image
case let captioned as ABKCaptionedImageContentCard:
metaData[.title] = captioned.title
metaData[.cardDescription] = captioned.cardDescription
metaData[.image] = captioned.image
case let classic as ABKClassicContentCard:
metaData[.title] = classic.title
metaData[.cardDescription] = classic.cardDescription
default:
break
}
metaData[.idString] = card.idString
metaData[.created] = card.created
metaData[.dismissible] = card.dismissible
metaData[.urlString] = card.urlString
metaData[.extras] = card.extras
...
// other Content Card properties such as expiresAt, pinned, etc.
if let contentCardable = contentCardable(with: metaData, for: classType) {
contentCardables.append(contentCardable)
}
}
return contentCardables
}
```
**Inicializar tus objetos personalizados a partir de los datos de carga útil de Content Card**
El `class_type` se utiliza para determinar cuál de tus objetos personalizados se inicializará a partir de los datos de carga útil.
```swift
func contentCardable(with metaData: [ContentCardKey: Any], for classType: ContentCardClassType) -> ContentCardable? {
switch classType {
case .yourValue:
return CustomObject(metaData: metaData, classType: classType)
case .yourOtherValue:
return OtherCustomObject(metaData: metaData, classType: classType)
...
default:
return nil
}
}
```
**Trabajar con datos de carga útil**
Recorre la matriz de Content Cards y solo analiza las tarjetas que coincidan con `class_type`. La carga útil de una ABKContentCard se analiza en un `Dictionary`.
```objc
- (NSArray *)convertContentCards:(NSArray *)cards forClassType:(ContentCardClassType)classType {
NSMutableArray *contentCardables = [[NSMutableArray alloc] init]; for (ABKContentCard *card in cards) {
NSString *classTypeString = [card.extras objectForKey:ContentCardKeyClassType];
ContentCardClassType cardClassType = [ContentCardData contentCardClassTypeForString: classTypeString];
if (cardClassType != classType) { continue; }
NSMutableDictionary *metaData = [[NSMutableDictionary alloc] init];
if ([card isKindOfClass:[ABKBannerContentCard class]]) {
ABKBannerContentCard *banner = (ABKBannerContentCard *)card;
metaData[ContentCardKeyImage] = banner.image;
} else if ([card isKindOfClass:[ABKCaptionedImageContentCard class]]) {
ABKCaptionedImageContentCard *captioned = (ABKCaptionedImageContentCard *)card;
metaData[ContentCardKeyTitle] = captioned.title;
metaData[ContentCardKeyCardDescription] = captioned.cardDescription;
metaData[ContentCardKeyImage] = captioned.image;
} else if ([card isKindOfClass:[ABKClassicContentCard class]]) {
ABKClassicContentCard *classic = (ABKClassicContentCard *)card;
metaData[ContentCardKeyCardDescription] = classic.title;
metaData[ContentCardKeyImage] = classic.image;
}
metaData[ContentCardKeyIdString] = card.idString;
metaData[ContentCardKeyCreated] = [NSNumber numberWithDouble:card.created];
metaData[ContentCardKeyDismissible] = [NSNumber numberWithBool:card.dismissible];
metaData[ContentCardKeyUrlString] = card.urlString;
metaData[ContentCardKeyExtras] = card.extras;
...
// other Content Card properties such as expiresAt, pinned, etc.
id contentCardable = [self contentCardableWithMetaData:metaData forClassType:classType];
if (contentCardable) {
[contentCardables addObject:contentCardable];
}
}
return contentCardables;
}
```
**Inicializar tus objetos personalizados a partir de los datos de carga útil de Content Card**
El `class_type` se utiliza para determinar cuál de tus objetos personalizados se inicializará a partir de los datos de carga útil.
```obj-c
- (id)contentCardableWithMetaData:(NSDictionary *)metaData forClassType:(ContentCardClassType)classType {
switch (classType) {
case ContentCardClassTypeYourValue:
return [[CustomObject alloc] initWithMetaData:metaData classType:classType];
case ContentCardClassTypeYourOtherValue:
return nil;
...
default:
return nil;
}
}
```
## Casos de uso {#use-cases}
A continuación te presentamos tres casos de uso. Cada caso de uso ofrece una explicación detallada, fragmentos de código relevantes y una visión de cómo pueden verse y utilizarse las variables de Content Card en el panel de Braze:
- [Content Cards como contenido complementario](#content-cards-as-supplemental-content)
- [Content Cards en un centro de mensajes](#content-cards-in-a-message-center)
- [Content Cards interactivas](#interactive-content-cards)
### Content Cards como contenido complementario {#content-cards-as-supplemental-content}
{: style="float:right;max-width:25%;margin-left:15px;border:0;"}
Puedes integrar fácilmente Content Cards en una fuente existente, permitiendo que los datos de varias fuentes se carguen simultáneamente. Esto crea una experiencia cohesiva y armoniosa con Content Cards de Braze y el contenido de la fuente existente.
El ejemplo de la derecha muestra un `UICollectionView` con una lista híbrida de elementos que se rellenan mediante datos locales y Content Cards impulsadas por Braze. Con esto, las Content Cards pueden ser indistinguibles de los contenidos existentes.
#### Configuración del dashboard {#dashboard-configuration}
Esta Content Card se entrega mediante una Campaign desencadenada por API con pares clave-valor desencadenados por API. Esto es ideal para campañas en las que los valores de la tarjeta dependen de factores externos para determinar qué contenido mostrar al usuario. Ten en cuenta que `class_type` debe conocerse en el momento de la configuración.
{: style="max-width:60%;"}
##### ¿Listo para registrar análisis? {#ready-to-log-analytics}
Visita la [sección siguiente](#logging-impressions-clicks-and-dismissals) para comprender mejor cómo debe ser el flujo de datos.
### Content Cards en un centro de mensajes {#content-cards-in-a-message-center}
Las Content Cards pueden utilizarse en un formato de centro de mensajes en el que cada mensaje es su propia tarjeta. Cada mensaje del centro de mensajes se rellena mediante una carga útil de Content Card, y cada tarjeta contiene pares clave-valor adicionales que potencian la UI/UX al hacer clic. En el siguiente ejemplo, un mensaje te dirige a una vista personalizada arbitraria, mientras que otro se abre en una vista web que muestra HTML personalizado.
{: style="border:0;"}{: style="max-width:80%;border:0"}
#### Configuración del dashboard
Para los siguientes tipos de mensaje, el par clave-valor `class_type` debe añadirse a la configuración de tu dashboard. Los valores asignados aquí son arbitrarios, pero deben poder distinguirse entre tipos de clases. Estos pares clave-valor son los identificadores clave en los que se fija la aplicación para decidir a dónde ir cuando el usuario hace clic en un mensaje de buzón de entrada abreviado.
Los pares clave-valor para este caso de uso incluyen:
- `message_header` configurado como `Full Page`
- `class_type` configurado como `message_full_page`
{: style="max-width:60%;"}
Los pares clave-valor para este caso de uso incluyen:
- `message_header` configurado como `HTML`
- `class_type` configurado como `message_webview`
- `message_title`
Este mensaje también busca un par clave-valor HTML, pero si trabajas con un dominio web, también es válido un par clave-valor URL.
{: style="max-width:60%;"}
#### Más explicaciones {#further-explanation}
La lógica del centro de mensajes se rige por el `contentCardClassType` que proporcionan los pares clave-valor de Braze. Con el método `addContentCardToView` puedes filtrar e identificar estos tipos de clases.
**Uso de `class_type` para el comportamiento al hacer clic**
Cuando se hace clic en un mensaje, `ContentCardClassType` gestiona cómo debe rellenarse la siguiente pantalla.
```swift
func addContentCardToView(with message: Message) {
switch message.contentCardData?.contentCardClassType {
case .message(.fullPage):
loadContentCardFullPageView(with: message as! FullPageMessage)
case .message(.webView):
loadContentCardWebView(with: message as! WebViewMessage)
default:
break
}
}
```
**Uso de `class_type` para el comportamiento al hacer clic**
Cuando se hace clic en un mensaje, `ContentCardClassType` gestiona cómo debe rellenarse la siguiente pantalla.
```objc
- (void)addContentCardToView:(Message *)message {
switch (message.contentCardData.classType) {
case ContentCardClassTypeMessageFullPage:
[self loadContentCardFullPageView:(FullPageMessage *)message];
break;
case ContentCardClassTypeMessageWebview:
[self loadContentCardWebView:(WebViewMessage *)message];
break;
default:
break;
}
}
```
##### ¿Listo para registrar análisis?
Visita la [sección siguiente](#logging-impressions-clicks-and-dismissals) para comprender mejor cómo debe ser el flujo de datos.
{: style="border:0;"}{: style="float:right;max-width:45%;border:0;margin-left:15px;"}
### Content Cards interactivas {#interactive-content-cards}
Las Content Cards pueden aprovecharse para crear experiencias dinámicas e interactivas para tus usuarios. En el ejemplo de la derecha, tenemos una ventana emergente de Content Card que aparece en el momento de la compra y que ofrece a los usuarios promociones de última hora.
Las tarjetas bien colocadas como esta son una forma estupenda de dar a los usuarios un "empujoncito" hacia acciones específicas.
#### Configuración del dashboard
La configuración del dashboard para Content Cards interactivas es sencilla. Los pares clave-valor para este caso de uso incluyen un `discount_percentage` configurado como el importe de descuento deseado y `class_type` configurado como `coupon_code`. Estos pares clave-valor son la forma en que se filtran las Content Cards específicas de cada tipo y se muestran en la pantalla de pago.
{: style="max-width:70%;"}
##### ¿Listo para registrar análisis?
Visita la [sección siguiente](#logging-impressions-clicks-and-dismissals) para comprender mejor cómo debe ser el flujo de datos.
## Personalización del modo oscuro {#dark-mode-customization}
Por defecto, las vistas de Content Card responderán automáticamente a los cambios del modo oscuro en el dispositivo con un conjunto de colores temáticos.
Este comportamiento puede anularse como se detalla en nuestra [guía de estilo personalizado](https://www.braze.com/docs/es/es/developer_guide/platform_integration_guides/ios/content_cards/customization/custom_styling#disabling-dark-mode).
## Registro de impresiones, clics y descartes {#logging-impressions-clicks-and-dismissals}
Tras ampliar tus objetos personalizados para que funcionen como Content Cards, el registro de métricas valiosas como impresiones, clics y descartes es rápido. Esto puede hacerse utilizando un protocolo `ContentCardable` que haga referencia y proporcione datos a un archivo de ayuda para que sea registrado por el SDK de Braze.
### Componentes de implementación
{#implementation-components}
**Registro de análisis**
Los métodos de registro pueden llamarse directamente desde objetos que cumplan el protocolo `ContentCardable`.
```swift
customObject.logContentCardImpression()
customObject.logContentCardClicked()
customObject.logContentCardDismissed()
```
**Recuperar el `ABKContentCard`**
El `idString` pasado desde tu objeto personalizado se utiliza para identificar la Content Card asociada y registrar análisis.
```swift
extension BrazeManager {
func logContentCardImpression(idString: String?) {
guard let contentCard = getContentCard(forString: idString) else { return }
contentCard.logContentCardImpression()
}
private func getContentCard(forString idString: String?) -> ABKContentCard? {
return contentCards?.first(where: { $0.idString == idString })
}
}
```
**Registro de análisis**
Los métodos de registro pueden llamarse directamente desde objetos que cumplan el protocolo `ContentCardable`.
```objc
[customObject logContentCardImpression];
[customObject logContentCardClicked];
[customObject logContentCardDismissed];
```
**Recuperar el `ABKContentCard`**
El `idString` pasado desde tu objeto personalizado se utiliza para identificar la Content Card asociada y registrar análisis.
```objc
- (void)logContentCardImpression:(NSString *)idString {
ABKContentCard *contentCard = [self getContentCard:idString];
[contentCard logContentCardImpression];
}
- (ABKContentCard *)getContentCard:(NSString *)idString {
NSPredicate *predicate = [NSPredicate predicateWithFormat:@"self.idString == %@", idString];
NSArray *filteredArray = [self.contentCards filteredArrayUsingPredicate:predicate];
return filteredArray.firstObject;
}
```
**Important:**
Para una variante de control de Content Card, aún debe instanciarse un objeto personalizado, y la lógica de la interfaz de usuario debe establecer la vista correspondiente del objeto como oculta. El objeto puede entonces registrar una impresión para informar a nuestros análisis de cuándo un usuario habría visto la tarjeta de control.
## Archivos de ayuda {#helper-files}
**Archivo de ayuda ContentCardKey**
```swift
enum ContentCardKey: String {
case idString
case created
case classType = "class_type"
case dismissible
case extras
...
}
```
```objc
static NSString *const ContentCardKeyIdString = @"idString";
static NSString *const ContentCardKeyCreated = @"created";
static NSString *const ContentCardKeyClassType = @"class_type";
static NSString *const ContentCardKeyDismissible = @"dismissible";
static NSString *const ContentCardKeyExtras = @"extras";
...
```
# Sesión de seguimiento para iOS
Source: /docs/es/developer_guide/platforms/legacy_sdks/ios/analytics/tracking_sessions/index.md
**Warning:**
[AppboyKit](https://github.com/Appboy/appboy-ios-sdk) (also known as the Objective-C SDK) is no longer supported and has been replaced by the [Swift SDK](https://www.braze.com/docs/es/es/developer_guide/sdk_integration/?sdktab=swift). It will no longer receive new features, bug fixes, security updates, or technical support—however, messaging and analytics will continue to function as normal. To learn more, see [Introducing the New Braze Swift SDK](https://www.braze.com/resources/articles/introducing-the-new-braze-swift-sdk).
# Seguimiento de sesión para iOS
El SDK de Braze informa de los datos de sesión utilizados por el panel de Braze para calcular la participación de los usuarios y otros análisis esenciales para comprender a tus usuarios. Nuestro SDK genera puntos de datos de "inicio de sesión" y "cierre de sesión" que tienen en cuenta la duración de la sesión y el recuento de sesiones visibles dentro del panel Braze, basándose en la siguiente semántica de sesión.
## Ciclo de vida de la sesión
Una sesión se inicia cuando llamas a `[[Appboy sharedInstance]` `startWithApiKey:inApplication:withLaunchOptions:withAppboyOptions]`, tras lo cual, por defecto, las sesiones comienzan cuando se dispara la notificación de `UIApplicationWillEnterForegroundNotification` (como cuando la aplicación entra en primer plano) y terminan cuando la aplicación abandona el primer plano (como cuando se dispara la notificación de `UIApplicationDidEnterBackgroundNotification` o cuando la aplicación muere).
**Note:**
Si necesitas forzar una nueva sesión, puedes hacerlo cambiando de usuario.
## Personalizar el tiempo de espera de la sesión
A partir de Braze iOS SDK v3.14.1, puedes configurar el tiempo de espera de la sesión utilizando el archivo Info.plist. Añade el diccionario `Braze` a tu archivo `Info.plist`. Dentro del diccionario `Braze`, añade la subentrada número `SessionTimeout` y establece el valor de tu tiempo de espera de sesión personalizado. Ten en cuenta que, antes de la versión 4.0.2 del SDK de iOS de Braze, debe usarse la clave de diccionario `Appboy` en lugar de `Braze`.
Alternativamente, puedes establecer la clave `ABKSessionTimeoutKey` al valor entero deseado en tu objeto `appboyOptions` pasado a [`startWithApiKey`](https://appboy.github.io/appboy-ios-sdk/docs/interface_appboy.html#afd911d60dfe7e5361afbfb364f5d20f9).
```objc
// Sets the session timeout to 60 seconds
[Appboy startWithApiKey:@"YOUR-API_KEY"
inApplication:application
withLaunchOptions:options
withAppboyOptions:@{ ABKSessionTimeoutKey : @(60) }];
```
```swift
// Sets the session timeout to 60 seconds
Appboy.start(withApiKey: "YOUR-API-KEY",
in:application,
withLaunchOptions:launchOptions,
withAppboyOptions:[ ABKSessionTimeoutKey : 60 ])
```
Si has establecido un tiempo de espera de la sesión, toda la semántica de la sesión se extiende a ese tiempo de espera personalizado.
**Note:**
El valor mínimo de `sessionTimeoutInSeconds` es 1 segundo. El valor predeterminado es 10 segundos.
## Probar el seguimiento de la sesión
Para detectar sesiones a través de tu usuario, busca a tu usuario en el panel y navega hasta **Uso de la aplicación** en el perfil de usuario. Puedes confirmar que el seguimiento de sesiones funciona comprobando que la métrica "Sesiones" aumenta cuando esperas que lo haga.

# Configurar ID de usuario para iOS
Source: /docs/es/developer_guide/platforms/legacy_sdks/ios/analytics/setting_user_ids/index.md
**Warning:**
[AppboyKit](https://github.com/Appboy/appboy-ios-sdk) (also known as the Objective-C SDK) is no longer supported and has been replaced by the [Swift SDK](https://www.braze.com/docs/es/es/developer_guide/sdk_integration/?sdktab=swift). It will no longer receive new features, bug fixes, security updates, or technical support—however, messaging and analytics will continue to function as normal. To learn more, see [Introducing the New Braze Swift SDK](https://www.braze.com/resources/articles/introducing-the-new-braze-swift-sdk).
# Establecer ID de usuario para iOS
User IDs should be set for each of your users. These should be unchanging and accessible when a user opens the app. Naming your user IDs correctly from the start is one of the most **crucial** steps when setting up user IDs. We strongly suggest using the Braze standard of UUIDs and GUIDs (detailed in the following section). We also strongly recommend providing this identifier as it will allow you to:
- Track your users across devices and platforms, improving the quality of your behavioral and demographic data.
- Import data about your users using our [user data API](https://www.braze.com/docs/es/es/developer_guide/rest_api/user_data/#user-data).
- Target specific users with our [messaging API](https://www.braze.com/docs/es/es/api/endpoints/messaging/) for both general and transactional messages.
**Note:**
If such an identifier is not available, Braze will assign a unique identifier to your users, but you will lack the capabilities listed for user IDs. You should avoid setting user IDs for users for whom you lack a unique identifier that is tied to them as an individual. Passing a device identifier offers no benefit versus the automatic anonymous user tracking Braze offers by default.
**Warning:**
If you want to include an identifiable value as your user ID, for additional security, we **strongly recommend** adding our [SDK authentication](https://www.braze.com/docs/es/es/developer_guide/authentication/) feature to prevent user impersonation.
## Convención de nomenclatura de ID de usuario sugerida
At Braze, we **strongly recommend** naming user IDs, also referred to as external IDs, in a [UUIDs and GUIDs](https://en.wikipedia.org/wiki/Universally_unique_identifier) format. UUIDs and GUIDs are universally unique identifiers that consist of a 128-bit number used to identify information in computer systems. This means that these UUIDs are long, random and well distributed. If you choose a different method in which to name your user IDs, they must also be long, random and well distributed. It is also important to note, that user IDs are **case sensitive**. For example, "Abcdef" is a different user from "abcdef".
If you find your user IDs include names, email addresses, timestamps, or incrementors, we suggest using a new naming method that is more secure so that your user IDs are not as easy to guess or impersonate. If you choose to include this in your user IDs, we **strongly recommend** adding our [SDK authentication](https://www.braze.com/docs/es/es/developer_guide/authentication/) feature to prevent user impersonation.
Providing this information to others may allow people outside your organization to glean information on how your user IDs are structured, opening up your organization to potentially malicious updates or removal of information. Choosing the correct naming convention from the start is one of the most important steps in setting up user IDs. However, a migration is possible using our [external ID migration endpoint](https://www.braze.com/docs/es/es/api/endpoints/user_data/external_id_migration/).
| User ID Naming |
| Recommended | Not Recommended |
| ------------ | ----------- |
| 123e4567-e89b-12d3-a456-836199333115 | JonDoe829525552 |
| 8c0b3728-7fa7-4c68-a32e-12de1d3ed2d5 | Anna@email.com |
| f0a9b506-3c5b-4d86-b16a-94fc4fc3f7b0 | CompanyName-1-2-19 |
| 2d9e96a1-8f15-4eaf-bf7b-eb8c34e25962 | jon-doe-1-2-19 |
{: .reset-td-br-1 .reset-td-br-2 aria-label="Table" }
## Asignar un ID de usuario
Debes realizar la siguiente llamada en cuanto se identifique el usuario (generalmente después de iniciar la sesión) para establecer el ID de usuario:
```objc
[[Appboy sharedInstance] changeUser:@"YOUR_USER_ID_STRING"];
```
```swift
Appboy.sharedInstance()?.changeUser("YOUR_USER_ID")
```
**Warning:**
**No llames a `changeUser()` cuando un usuario cierra la sesión. `changeUser()` solo se debe llamar cuando el usuario inicia sesión en la aplicación.** Si configuras [`changeUser()`](https://appboy.github.io/appboy-ios-sdk/docs/interface_appboy.html#ac8b369b40e15860b0ec18c0f4b46ac69%20%22changeuser%22) a un valor predeterminado estático asociará TODA la actividad del usuario a ese "usuario" predeterminado hasta que el usuario vuelva a conectarse.
Asegúrate de llamar a este método en el hilo principal de tu aplicación. Llamar al método de forma asíncrona puede provocar un comportamiento indefinido.
Además, te recomendamos que no cambies el ID de usuario cuando un usuario cierra la sesión, ya que esto hace que no puedas dirigirte al usuario que había iniciado sesión anteriormente con campañas de reactivación de la interacción. Si prevés varios usuarios en el mismo dispositivo, pero sólo quieres dirigirte a uno de ellos cuando tu aplicación esté desconectada, te recomendamos que hagas un seguimiento por separado del ID de usuario al que quieres dirigirte mientras está desconectado y que vuelvas a cambiar a ese ID de usuario como parte del proceso de cierre de sesión de tu aplicación.
## Prácticas recomendadas y notas sobre la integración del ID de usuario
### Automatic preservation of anonymous user history
| Identification Context | Preservation Behavior |
| ---------------------- | -------------------------- |
| User **has not** been previously identified | Anonymous history **is merged** with user profile upon identification. |
| User **has been** previously identified in-app or via API | Anonymous history **is not merged** with user profile upon identification. |
{: .reset-td-br-1 .reset-td-br-2 aria-label="Automatic preservation of anonymous user history" }
Refer to [Identified user profiles](https://www.braze.com/docs/es/es/user_guide/data_and_analytics/user_data_collection/user_profile_lifecycle/#identified-user-profiles) for more information on what occurs when you identify anonymous users.
### Additional notes and best practices
Note the following:
- If your app is used by multiple people, you can assign each user a unique identifier to track them.
- After a user ID has been set, you cannot revert that user to an anonymous profile.
- Do not change the user ID when a user logs out as this can separate the device from the user profile.
- As a result, you won't be able to target the previously logged out user with re-engagement messages. If you anticipate multiple users on the same device, but only want to target one of them when your app is in a logged-out state, we recommend separately keeping track of the user ID you want to target while logged out and switching back to that user ID as part of your app's logout process. By default, only the last user that was logged in will receive push notifications from your app.
- Switching from one identified user to another is a relatively costly operation.
- When you request the user switch, the current session for the previous user is automatically closed and a new session is started. Braze will automatically make a data refresh request for in-app messages and other Braze resources for the new user.
**Tip:**
If you opt to use a hash of a unique identifier as your user ID, be sure that you're normalizing the input to your hashing function. For example, if you're going to use a hash of an email address, confirm that you're stripping leading and trailing whitespace from the input, and taking localization into account.
## Asignación de alias de usuarios
A [user alias](https://www.braze.com/docs/es/es/user_guide/data_and_analytics/user_data_collection/user_profile_lifecycle/#user-aliases) serves as an alternative unique user identifier. You can use aliases to identify users along different dimensions than your core user ID:
* Set a consistent identifier for analytics that will follow a given user both before and after they have logged in to a mobile app or website.
* Add the identifiers used by a third-party vendor to your company users in order to more easily reconcile your data externally.
Each alias consists of two parts: a name for the identifier itself, and a label indicating the type of alias. Users can have multiple aliases with different labels, but only one name per label.
For more information on setting user aliases against a user profile, refer to [User aliases](https://www.braze.com/docs/es/es/user_guide/data_and_analytics/user_data_collection/user_profile_lifecycle/#user-aliases).
# Seguimiento de eventos personalizados para iOS
Source: /docs/es/developer_guide/platforms/legacy_sdks/ios/analytics/tracking_custom_events/index.md
**Warning:**
[AppboyKit](https://github.com/Appboy/appboy-ios-sdk) (also known as the Objective-C SDK) is no longer supported and has been replaced by the [Swift SDK](https://www.braze.com/docs/es/es/developer_guide/sdk_integration/?sdktab=swift). It will no longer receive new features, bug fixes, security updates, or technical support—however, messaging and analytics will continue to function as normal. To learn more, see [Introducing the New Braze Swift SDK](https://www.braze.com/resources/articles/introducing-the-new-braze-swift-sdk).
# Seguimiento de eventos personalizados para iOS {#track-custom-events-for-ios}
Puedes grabar eventos personalizados en Braze para conocer mejor los patrones de uso de tu aplicación y segmentar a tus usuarios por sus acciones en el dashboard.
Antes de la implementación, asegúrate de revisar ejemplos de las opciones de segmentación que ofrecen los eventos personalizados, los atributos personalizados y los eventos de compra en nuestras [mejores prácticas](https://www.braze.com/docs/es/es/developer_guide/platform_wide/analytics_overview#user-data-collection), así como nuestras notas sobre [las convenciones de denominación de eventos](https://www.braze.com/docs/es/es/user_guide/data/activation/events/event_naming_conventions).
## Añadir un evento personalizado {#adding-a-custom-event}
```objc
[[Appboy sharedInstance] logCustomEvent:@"YOUR_EVENT_NAME"];
```
```swift
Appboy.sharedInstance()?.logCustomEvent("YOUR_EVENT_NAME")
```
### Añadir propiedades {#adding-properties}
Puedes añadir metadatos sobre eventos personalizados pasando un `NSDictionary` rellenado con valores `NSNumber`, `NSString` o `NSDate`.
```objc
[[Appboy sharedInstance] logCustomEvent:@"YOUR-EVENT-NAME"
withProperties:@{
@"you": @"can",
@"pass": @(NO),
@"orNumbers": @42,
@"orDates": [NSDate date],
@"or": @[@"any", @"array", @"here"],
@"andEven": @{
@"deeply": @[@"nested", @"json"]
}
}];
```
```swift
Appboy.sharedInstance()?.logCustomEvent(
"YOUR-EVENT-NAME",
withProperties: [
"you": "can",
"pass": false,
"orNumbers": 42,
"orDates": Date(),
"or": ["any", "array", "here"],
"andEven": [
"deeply": ["nested", "json"]
]
]
)
```
Consulta la [documentación de nuestra clase](http://appboy.github.io/appboy-ios-sdk/docs/interface_appboy.html#a4f0051d73d85cb37f63c232248124c79) para más información.
### Claves reservadas {#event-reserved-keys}
Las siguientes claves están reservadas y no pueden utilizarse como propiedades del evento personalizado:
- `time`
- `event_name`
## Recursos adicionales {#additional-resources}
- Consulta la declaración del método en el [archivo](https://github.com/Appboy/appboy-ios-sdk/blob/master/AppboyKit/include/Appboy.h) `Appboy.h`.
- Consulta la documentación de [`logCustomEvent`](http://appboy.github.io/appboy-ios-sdk/docs/interface_appboy.html#ad80c39e8c96482a77562a5b1a1d387aa) para más información.
# Establecer atributos personalizados para iOS
Source: /docs/es/developer_guide/platforms/legacy_sdks/ios/analytics/setting_custom_attributes/index.md
**Warning:**
[AppboyKit](https://github.com/Appboy/appboy-ios-sdk) (also known as the Objective-C SDK) is no longer supported and has been replaced by the [Swift SDK](https://www.braze.com/docs/es/es/developer_guide/sdk_integration/?sdktab=swift). It will no longer receive new features, bug fixes, security updates, or technical support—however, messaging and analytics will continue to function as normal. To learn more, see [Introducing the New Braze Swift SDK](https://www.braze.com/resources/articles/introducing-the-new-braze-swift-sdk).
# Establecer atributos personalizados para iOS {#set-custom-attributes-for-ios}
Braze proporciona métodos para asignar atributos a los usuarios. Podrás filtrar y segmentar a tus usuarios según estos atributos en el dashboard.
Antes de la implementación, asegúrate de revisar los ejemplos de las opciones de segmentación que ofrecen los eventos personalizados, los atributos personalizados y los eventos de compra en nuestras [mejores prácticas](https://www.braze.com/docs/es/es/developer_guide/platform_wide/analytics_overview#user-data-collection), así como nuestras notas sobre [las convenciones de denominación de eventos](https://www.braze.com/docs/es/es/user_guide/data/activation/events/event_naming_conventions).
## Asignar atributos predeterminados al usuario {#assigning-default-user-attributes}
Para asignar atributos de usuario, tienes que establecer el campo apropiado en el objeto compartido `ABKUser`.
A continuación se muestra un ejemplo de configuración del atributo nombre:
```objc
[Appboy sharedInstance].user.firstName = @"first_name";
```
```swift
Appboy.sharedInstance()?.user.firstName = "first_name"
```
Los siguientes atributos deben establecerse en el objeto `ABKUser`:
- `firstName`
- `lastName`
- `email`
- `dateOfBirth`
- `country`
- `language`
- `homeCity`
- `phone`
- `userID`
- `gender`
## Asignar atributos personalizados al usuario {#assigning-custom-user-attributes}
Además de los atributos predeterminados de usuario, Braze también te permite definir atributos personalizados utilizando varios tipos de datos diferentes. Consulta nuestra [recopilación de datos de usuario](https://www.braze.com/docs/es/es/developer_guide/analytics) para obtener más información sobre las opciones de segmentación que te ofrece cada uno de estos atributos.
### Atributo personalizado con un valor de cadena {#custom-attribute-with-a-string-value}
```objc
[[Appboy sharedInstance].user setCustomAttributeWithKey:@"your_attribute_key" andStringValue:"your_attribute_value"];
```
```swift
Appboy.sharedInstance()?.user.setCustomAttributeWithKey("your_attribute_key", andStringValue: "your_attribute_value")
```
### Atributo personalizado con un valor entero {#custom-attribute-with-an-integer-value}
```objc
[[Appboy sharedInstance].user setCustomAttributeWithKey:@"your_attribute_key" andIntegerValue:yourIntegerValue];
```
```swift
Appboy.sharedInstance()?.user.setCustomAttributeWithKey("your_attribute_key", andIntegerValue: yourIntegerValue)
```
### Atributo personalizado con valor doble {#custom-attribute-with-a-double-value}
Braze trata de la misma manera los valores `float` y `double` dentro de nuestra base de datos.
```objc
[[Appboy sharedInstance].user setCustomAttributeWithKey:@"your_attribute_key" andDoubleValue:yourDoubleValue];
```
```swift
Appboy.sharedInstance()?.user.setCustomAttributeWithKey("your_attribute_key", andDoubleValue: yourDoubleValue)
```
### Atributo personalizado con valor booleano {#custom-attribute-with-a-boolean-value}
```objc
[[Appboy sharedInstance].user setCustomAttributeWithKey:@"your_attribute_key" andBOOLValue:yourBOOLValue];
```
```swift
Appboy.sharedInstance()?.user.setCustomAttributeWithKey("your_attribute_key", andBOOLValue: yourBoolValue)
```
### Atributo personalizado con un valor de fecha {#custom-attribute-with-a-date-value}
Las fechas pasadas a Braze con este método deben estar en el formato [ISO 8601](http://en.wikipedia.org/wiki/ISO_8601) (p. ej., `2013-07-16T19:20:30+01:00`) o en el formato `yyyy-MM-dd'T'HH:mm:ss:SSSZ` (`2016-12-14T13:32:31.601-0800`).
```objc
[[Appboy sharedInstance].user setCustomAttributeWithKey:@"your_attribute_key" andDateValue:yourDateValue];
```
```swift
Appboy.sharedInstance()?.user.setCustomAttributeWithKey("your_attribute_key", andDateValue:yourDateValue)
```
### Atributo personalizado con un valor de matriz {#custom-attribute-with-an-array-value}
La cantidad predeterminada y máxima de elementos en una matriz es de 500. Puedes actualizar la cantidad máxima de elementos de las matrices en el dashboard de Braze, en **Configuración de datos** > **Atributos personalizados**. Las matrices que superan la cantidad máxima de elementos se truncan para contener la cantidad máxima de elementos.
```objc
// Setting a custom attribute with an array value
[[Appboy sharedInstance].user setCustomAttributeArrayWithKey:@"array_name" array:@[@"value1", @"value2"]];
// Adding to a custom attribute with an array value
[[Appboy sharedInstance].user addToCustomAttributeArrayWithKey:@"array_name" value:@"value3"];
// Removing a value from an array type custom attribute
[[Appboy sharedInstance].user removeFromCustomAttributeArrayWithKey:@"array_name" value:@"value2"];
// Removing an entire array and key
[[Appboy sharedInstance].user setCustomAttributeArrayWithKey:@"array_name" array:nil];
```
```swift
// Setting a custom attribute with an array value
Appboy.sharedInstance()?.user.setCustomAttributeArrayWithKey("array_name", array: ["value1", "value2"])
// Adding to a custom attribute with an array value
Appboy.sharedInstance()?.user.addToCustomAttributeArrayWithKey("array_name", value: "value3")
// Removing a value from an array type custom attribute
Appboy.sharedInstance()?.user.removeFromCustomAttributeArrayWithKey("array_name", value: "value2")
```
### Desactivar un atributo personalizado {#unsetting-a-custom-attribute}
Los atributos personalizados también se pueden desactivar utilizando el siguiente método:
```objc
[[Appboy sharedInstance].user unsetCustomAttributeWithKey:@"your_attribute_key"];
```
```swift
Appboy.sharedInstance()?.user.unsetCustomAttributeWithKey("your_attribute_key")
```
### Incrementar/decrementar atributos personalizados {#incrementingdecrementing-custom-attributes}
Este código es un ejemplo de un atributo personalizado que se incrementa. Puedes incrementar el valor de un atributo personalizado en cualquier valor entero o largo positivo o negativo:
```objc
[[Appboy sharedInstance].user incrementCustomUserAttribute:@"your_attribute_key" by:incrementIntegerValue];
```
```swift
Appboy.sharedInstance()?.user.incrementCustomUserAttribute("your_attribute_key", by: incrementIntegerValue)
```
### Configurar un atributo personalizado a través de la REST API {#setting-a-custom-attribute-via-the-rest-api}
También puedes utilizar nuestra REST API para establecer atributos de usuario. Consulta la [documentación de la API de usuario](https://www.braze.com/docs/es/es/developer_guide/rest_api/user_data#user-data) para más detalles.
### Límites del valor del atributo personalizado {#custom-attribute-value-limits}
Los valores de atributos personalizados tienen una longitud máxima de 255 caracteres; los valores más largos se truncarán.
#### Información adicional {#additional-information}
- Puedes encontrar más detalles en el [archivo `ABKUser.h`](https://github.com/Appboy/appboy-ios-sdk/blob/master/AppboyKit/include/Appboy.h).
- Consulta la [documentación de `ABKUser`](http://appboy.github.io/appboy-ios-sdk/docs/interface_a_b_k_user.html) para obtener más información.
## Configuración de las suscripciones de los usuarios {#setting-up-user-subscriptions}
Para configurar una suscripción para tus usuarios (por correo electrónico o push), llama a las funciones `setEmailNotificationSubscriptionType` o `setPushNotificationSubscriptionType`, respectivamente. Estas dos funciones toman como argumento el tipo de enumeración `ABKNotificationSubscriptionType`. Este tipo tiene tres estados diferentes:
| Estado de la suscripción | Definición |
| ------------------- | ---------- |
| `ABKOptedin` | Suscrito y con adhesión voluntaria explícita |
| `ABKSubscribed` | Suscrito, pero sin adhesión voluntaria explícita |
| `ABKUnsubscribed` | No suscrito o con exclusión voluntaria explícita |
{: .reset-td-br-1 .reset-td-br-2 aria-label="Configuración de las suscripciones de los usuarios" }
Los usuarios que conceden permiso para que una aplicación les envíe notificaciones push tienen de forma predeterminada el estado `ABKOptedin`, ya que iOS requiere una adhesión voluntaria explícita.
Los usuarios se configurarán en `ABKSubscribed` automáticamente al recibir una dirección de correo electrónico válida; sin embargo, te sugerimos que establezcas un proceso de adhesión voluntaria explícito y configures este valor en `OptedIn` al recibir el consentimiento explícito de tu usuario. Consulta la sección [Gestión de las suscripciones de los usuarios](https://www.braze.com/docs/es/es/user_guide/channels/email/subscriptions) para obtener más detalles.
### Configuración de las suscripciones por correo electrónico {#setting-email-subscriptions}
```objc
[[Appboy sharedInstance].user setEmailNotificationSubscriptionType: ABKNotificationSubscriptionType]
```
```swift
Appboy.sharedInstance()?.user.setEmailNotificationSubscriptionType(ABKNotificationSubscriptionType)
```
### Configuración de suscripciones a notificaciones push {#setting-push-notification-subscriptions}
```objc
[[Appboy sharedInstance].user setPushNotificationSubscriptionType: ABKNotificationSubscriptionType]
```
```swift
Appboy.sharedInstance()?.user.setPushNotificationSubscriptionType(ABKNotificationSubscriptionType)
```
Consulta la sección [Gestión de las suscripciones de los usuarios](https://www.braze.com/docs/es/es/user_guide/channels/email/subscriptions) para obtener más detalles.
# Registrar compras para iOS
Source: /docs/es/developer_guide/platforms/legacy_sdks/ios/analytics/logging_purchases/index.md
**Warning:**
[AppboyKit](https://github.com/Appboy/appboy-ios-sdk) (also known as the Objective-C SDK) is no longer supported and has been replaced by the [Swift SDK](https://www.braze.com/docs/es/es/developer_guide/sdk_integration/?sdktab=swift). It will no longer receive new features, bug fixes, security updates, or technical support—however, messaging and analytics will continue to function as normal. To learn more, see [Introducing the New Braze Swift SDK](https://www.braze.com/resources/articles/introducing-the-new-braze-swift-sdk).
# Registrar compras para iOS {#log-purchases-for-ios}
Registra las compras dentro de la aplicación para que puedas hacer un seguimiento de tus ingresos a lo largo del tiempo y de las distintas fuentes de ingresos, así como segmentar a tus usuarios por su valor de duración del ciclo de vida.
Braze admite compras en varias divisas. Las compras que notifiques en una divisa distinta del USD se mostrarán en el dashboard en USD según la tasa de cambio en la fecha en que se notificaron.
Antes de la implementación, asegúrate de revisar ejemplos de las opciones de segmentación que ofrecen los eventos personalizados, los atributos personalizados y los eventos de compra en nuestras [buenas prácticas](https://www.braze.com/docs/es/es/developer_guide/platform_wide/analytics_overview#user-data-collection), así como nuestras notas sobre [las convenciones de denominación de eventos](https://www.braze.com/docs/es/es/user_guide/data/activation/events/event_naming_conventions).
## Seguimiento de compras e ingresos {#tracking-purchases-and-revenue}
Para utilizar esta característica, añade esta llamada al método después de una compra con éxito en tu aplicación:
```objc
[[Appboy sharedInstance] logPurchase:@"your product ID"
inCurrency:@"USD"
atPrice:[[[NSDecimalNumber alloc] initWithString:@"0.99"] autorelease]];
```
```swift
Appboy.sharedInstance()?.logPurchase("your product ID", inCurrency: "USD", atPrice: NSDecimalNumber(string: "0.99"))
```
- Los símbolos de moneda admitidos son: USD, CAD, EUR, GBP, JPY, AUD, CHF, NOK, MXN, NZD, CNY, RUB, TRY, INR, IDR, ILS, SAR, ZAR, AED, SEK, HKD, SPD, DKK y más.
- Cualquier otro símbolo de moneda proporcionado dará lugar a una advertencia registrada y el SDK no tomará ninguna otra medida.
- El ID del producto puede tener un máximo de 255 caracteres.
- Ten en cuenta que si el identificador del producto está vacío, la compra no se registrará en Braze.
### Añadir propiedades {#properties-purchases}
Puedes añadir metadatos sobre compras pasando una [matriz de propiedades de evento](https://www.braze.com/docs/es/es/user_guide/data_and_analytics/custom_data/custom_events#nested-objects) o pasando un `NSDictionary` rellenado con valores de `NSNumber`, `NSString` o `NSDate`.
Consulta [la documentación de la clase iOS](http://appboy.github.io/appboy-ios-sdk/docs/interface_appboy.html#aaca4b885a8f61ac9fad3936b091448cc) para más detalles.
### Añadir cantidad {#adding-quantity}
Puedes añadir una cantidad a tus compras si los clientes realizan la misma compra varias veces en un mismo proceso de pago. Puedes conseguirlo introduciendo una `NSUInteger` para la cantidad.
* La cantidad introducida debe estar comprendida entre [0, 100] para que el SDK registre una compra.
* Los métodos sin entrada de cantidad tendrán un valor de cantidad predeterminado de 1.
* Los métodos con una entrada de cantidad no tienen un valor predeterminado, y **deben** recibir una entrada de cantidad para que el SDK registre una compra.
Consulta [la documentación de la clase iOS](http://appboy.github.io/appboy-ios-sdk/docs/interface_appboy.html#ab50403068be47c0acba9943583e259fa) para más detalles.
```objc
[[Appboy sharedInstance] logPurchase:@"your product ID"
inCurrency:@"USD"
atPrice:[[[NSDecimalNumber alloc] initWithString:@"0.99"] autorelease]
withProperties:@{@"key1":"value1"}];
```
```swift
Appboy.sharedInstance()?.logPurchase("your product ID", inCurrency: "USD", atPrice: NSDecimalNumber(string: "0.99"), withProperties: ["key1":"value1"])
```
**Tip:**
Si introduces un valor de 10 USD y una cantidad de 3, eso se registrará en el perfil del usuario como tres compras de 10 dólares por un total de 30 dólares.
### Registrar las compras a nivel de pedido {#log-purchases-at-the-order-level}
Si quieres registrar las compras a nivel de pedido en lugar de a nivel de producto, puedes utilizar el nombre del pedido o la categoría del pedido como `product_id`. Consulta nuestra [especificación del objeto de compra](https://www.braze.com/docs/es/es/api/objects_filters/purchase_object#product-id-naming-conventions) para obtener más información.
### Claves reservadas {#reserved-keys}
Las siguientes claves están reservadas y no pueden utilizarse como propiedades de la compra:
- `time`
- `product_id`
- `quantity`
- `event_name`
- `price`
- `currency`
### REST API
También puedes utilizar nuestra REST API para registrar las compras. Consulta la [documentación de la API de usuario](https://www.braze.com/docs/es/es/developer_guide/rest_api/user_data#user-data) para más detalles.
# Seguimiento de ubicación para iOS
Source: /docs/es/developer_guide/platforms/legacy_sdks/ios/analytics/location_tracking/index.md
**Warning:**
[AppboyKit](https://github.com/Appboy/appboy-ios-sdk) (also known as the Objective-C SDK) is no longer supported and has been replaced by the [Swift SDK](https://www.braze.com/docs/es/es/developer_guide/sdk_integration/?sdktab=swift). It will no longer receive new features, bug fixes, security updates, or technical support—however, messaging and analytics will continue to function as normal. To learn more, see [Introducing the New Braze Swift SDK](https://www.braze.com/resources/articles/introducing-the-new-braze-swift-sdk).
# Seguimiento de ubicación para iOS
De manera predeterminada, Braze desactiva el seguimiento de ubicación. Habilitamos el seguimiento de ubicación después de que la aplicación anfitriona haya optado por el seguimiento de ubicación y haya obtenido el permiso del usuario. Siempre que los usuarios hayan optado por el seguimiento de ubicación, Braze registrará una única ubicación para cada usuario al inicio de la sesión.
**Important:**
Para que el seguimiento de ubicación funcione de forma fiable en iOS 14 para los usuarios que den permiso de ubicación aproximada, debes actualizar tu versión del SDK al menos a `3.26.1`.
## Habilitación del seguimiento de ubicación automático
A partir del SDK para iOS de Braze `v3.17.0`, el seguimiento de ubicación está desactivado de manera predeterminada. Puedes habilitar el seguimiento de ubicación automático mediante el archivo `Info.plist`. Añade el diccionario `Braze` a tu archivo `Info.plist`. Dentro del diccionario `Braze`, añade la subentrada booleana `EnableAutomaticLocationCollection` y establece el valor `YES`. Ten en cuenta que, antes de la versión 4.0.2 del SDK de iOS de Braze, debe usarse la clave de diccionario `Appboy` en lugar de `Braze`.
También puedes habilitar el seguimiento de ubicación automático al iniciar la aplicación mediante el método [`startWithApiKey:inApplication:withLaunchOptions:withAppboyOptions`](https://appboy.github.io/appboy-ios-sdk/docs/interface_appboy.html#aa9f1bd9e4a5c082133dd9cc344108b24). En el diccionario `appboyOptions`, establece `ABKEnableAutomaticLocationCollectionKey` en `YES`. Por ejemplo:
```objc
[Appboy startWithApiKey:@"YOUR-API_KEY"
inApplication:application
withLaunchOptions:options
withAppboyOptions:@{ ABKEnableAutomaticLocationCollectionKey : @(YES) }];
```
```swift
Appboy.start(withApiKey: "YOUR-API-KEY",
in:application,
withLaunchOptions:launchOptions,
withAppboyOptions:[ ABKEnableAutomaticLocationCollectionKey : true ])
```
### Pasar datos de ubicación a Braze
Se pueden utilizar los dos métodos siguientes para configurar manualmente la última ubicación conocida del usuario.
```objc
[[Appboy sharedInstance].user setLastKnownLocationWithLatitude:latitude
longitude:longitude
horizontalAccuracy:horizontalAccuracy];
```
```objc
[[Appboy sharedInstance].user setLastKnownLocationWithLatitude:latitude
longitude:longitude
horizontalAccuracy:horizontalAccuracy
altitude:altitude
verticalAccuracy:verticalAccuracy];
```
```swift
Appboy.sharedInstance()?.user.setLastKnownLocationWithLatitude(latitude: latitude, longitude: longitude, horizontalAccuracy: horizontalAccuracy)
```
```swift
Appboy.sharedInstance()?.user.setLastKnownLocationWithLatitude(latitude: latitude, longitude: longitude, horizontalAccuracy: horizontalAccuracy, altitude: altitude, verticalAccuracy: verticalAccuracy)
```
Consulta [`ABKUser.h`](https://github.com/Appboy/appboy-ios-sdk/blob/master/AppboyKit/include/ABKUser.h) para más información.
# Uninstall Tracking para iOS
Source: /docs/es/developer_guide/platforms/legacy_sdks/ios/analytics/uninstall_tracking/index.md
**Warning:**
[AppboyKit](https://github.com/Appboy/appboy-ios-sdk) (also known as the Objective-C SDK) is no longer supported and has been replaced by the [Swift SDK](https://www.braze.com/docs/es/es/developer_guide/sdk_integration/?sdktab=swift). It will no longer receive new features, bug fixes, security updates, or technical support—however, messaging and analytics will continue to function as normal. To learn more, see [Introducing the New Braze Swift SDK](https://www.braze.com/resources/articles/introducing-the-new-braze-swift-sdk).
# Uninstall Tracking para iOS {#uninstall-tracking-for-ios}
> Este artículo explica cómo configurar Uninstall Tracking para tu aplicación iOS, y cómo hacer pruebas para que tu aplicación no realice ninguna acción automática no deseada al recibir un push de Uninstall Tracking de Braze.
Uninstall Tracking utiliza notificaciones push en segundo plano con una flag de Braze en la carga útil. Para más información, consulta [Uninstall Tracking](https://www.braze.com/docs/es/es/user_guide/data_and_analytics/tracking/uninstall_tracking#uninstall-tracking) en nuestra guía del usuario.
## Paso 1: Habilitación del push en segundo plano {#step-1-enabling-background-push}
Asegúrate de haber habilitado la opción **Remote notifications** en la sección **Background Modes** de la pestaña **Capabilities** de tu proyecto de Xcode. Consulta nuestra documentación sobre [notificaciones push silenciosas](https://www.braze.com/docs/es/es/developer_guide/platforms/legacy_sdks/ios/push_notifications/silent_push_notifications) para obtener más detalles.
## Paso 2: Comprobación del push en segundo plano de Braze {#step-2-checking-for-braze-background-push}
Braze utiliza notificaciones push en segundo plano para recopilar análisis de Uninstall Tracking. Asegúrate de que tu aplicación [no realice ninguna acción no deseada](https://www.braze.com/docs/es/es/developer_guide/platforms/legacy_sdks/ios/push_notifications/customization/ignoring_internal_push) al recibir nuestras notificaciones de Uninstall Tracking.
## Paso 3: Prueba desde el dashboard {#step-3-test-from-the-dashboard}
A continuación, envíate un push de prueba desde el dashboard. Este push de prueba no actualizará tu perfil de usuario.
1. En la página **Campaigns**, crea una Campaign de notificación push y selecciona **iOS push** como plataforma.
2. En la página **Settings**, añade la clave `appboy_uninstall_tracking` con el valor correspondiente `true` y marca **Add Content-Available Flag**.
3. Utiliza la página **Preview** para enviarte un push de Uninstall Tracking de prueba.
4. Comprueba que tu aplicación no realice ninguna acción automática no deseada al recibir el push.
**Important:**
Estos pasos de prueba son un proxy para enviar un push de Uninstall Tracking desde Braze. Si tienes habilitado el recuento de señales, se enviará un número de señal junto con el push de prueba, pero los push de Uninstall Tracking de Braze no establecerán un número de señal en tu aplicación.
## Paso 4: Habilitar Uninstall Tracking {#step-4-enable-uninstall-tracking}
Sigue las instrucciones para [habilitar Uninstall Tracking](https://www.braze.com/docs/es/es/user_guide/data_and_analytics/tracking/uninstall_tracking#uninstall-tracking).
# Desactivar el seguimiento del SDK para iOS
Source: /docs/es/developer_guide/platforms/legacy_sdks/ios/analytics/disabling_tracking/index.md
**Warning:**
[AppboyKit](https://github.com/Appboy/appboy-ios-sdk) (also known as the Objective-C SDK) is no longer supported and has been replaced by the [Swift SDK](https://www.braze.com/docs/es/es/developer_guide/sdk_integration/?sdktab=swift). It will no longer receive new features, bug fixes, security updates, or technical support—however, messaging and analytics will continue to function as normal. To learn more, see [Introducing the New Braze Swift SDK](https://www.braze.com/resources/articles/introducing-the-new-braze-swift-sdk).
# Desactivar la recopilación de datos para iOS {#disable-data-collection-for-ios}
Para cumplir la normativa sobre privacidad de datos, la actividad de seguimiento de datos en el SDK de iOS puede detenerse por completo mediante el método [`disableSDK`](http://appboy.github.io/appboy-ios-sdk/docs/interface_appboy.html#a8d3b78a98420713d8590ed63c9172733). Este método hará que se cancelen todas las conexiones de red, y el SDK de Braze no pasará ningún dato a nuestros servidores. Si deseas reanudar la recopilación de datos más adelante, puedes utilizar el método [`requestEnableSDKOnNextAppRun`](http://appboy.github.io/appboy-ios-sdk/docs/interface_appboy.html#a781078a40a3db0de64ac82dcae3b595b) para reanudar la recopilación de datos.
Además, puedes utilizar el método [`wipeDataAndDisableForAppRun`](http://appboy.github.io/appboy-ios-sdk/docs/interface_appboy.html#ac8d580f60ec0608cd91240a8a3aa23a3) para borrar completamente todos los datos del lado del cliente almacenados en el dispositivo.
A menos que un usuario desinstale todas las aplicaciones de un proveedor en un dispositivo determinado, la siguiente ejecución del SDK y de la aplicación de Braze después de llamar a `wipeDataAndDisableForAppRun()` hará que nuestro servidor vuelva a identificar a ese usuario a través de su identificador de dispositivo (IDFV). Para eliminar por completo todos los datos de usuario, debes combinar una llamada a `wipeDataAndDisableForAppRun` con una solicitud de eliminación de datos en el servidor a través de la [REST API](https://www.braze.com/docs/es/es/developer_guide/rest_api/user_data#user-delete-endpoint) de Braze.
## SDK de iOS v5.7.0+ {#ios-sdk-v570}
Para los dispositivos que utilicen el SDK de iOS versión 5.7.0 o superior, al [desactivar la recopilación de IDFV](https://www.braze.com/docs/es/es/developer_guide/platform_integration_guides/legacy_sdks/ios/initial_sdk_setup/other_sdk_customizations#optional-idfv-collection---swift), la llamada a [`wipeData`](https://braze-inc.github.io/braze-swift-sdk/documentation/brazekit/braze/wipedata()) no hará que nuestro servidor vuelva a identificar a ese usuario a través del identificador de su dispositivo (IDFV).
# Vinculación en profundidad para iOS
Source: /docs/es/developer_guide/platforms/legacy_sdks/ios/advanced_use_cases/linking/index.md
**Warning:**
[AppboyKit](https://github.com/Appboy/appboy-ios-sdk) (also known as the Objective-C SDK) is no longer supported and has been replaced by the [Swift SDK](https://www.braze.com/docs/es/es/developer_guide/sdk_integration/?sdktab=swift). It will no longer receive new features, bug fixes, security updates, or technical support—however, messaging and analytics will continue to function as normal. To learn more, see [Introducing the New Braze Swift SDK](https://www.braze.com/resources/articles/introducing-the-new-braze-swift-sdk).
# Vinculación en profundidad para iOS {#deep-linking-for-ios}
Para obtener información introductoria sobre los vínculos profundos, consulta [el artículo de nuestra Guía del usuario](https://www.braze.com/docs/es/es/user_guide/messaging/design_and_edit/personalize/actions_and_media_urls#what-is-deep-linking). Si quieres implementar vínculos en profundidad por primera vez en tu aplicación Braze, los pasos siguientes te ayudarán a empezar.
## Paso 1: Registrar un esquema {#step-1-register-a-scheme}
Debes indicar un esquema personalizado en el archivo `Info.plist`. La estructura de navegación está definida por una matriz de diccionarios. Cada uno de esos diccionarios contiene una matriz de cadenas.
Utiliza Xcode para editar tu archivo `Info.plist`:
1. Añade una nueva clave, `URL types`. Xcode lo convertirá automáticamente en una matriz que contiene un diccionario llamado `Item 0`.
2. Dentro de `Item 0`, añade una clave `URL identifier`. Establece el valor a tu esquema personalizado.
3. Dentro de `Item 0`, añade una clave `URL Schemes`. Será automáticamente una matriz que contendrá una cadena `Item 0`.
4. Configura `URL Schemes` >> `Item 0` a tu esquema personalizado.
Alternativamente, si deseas editar tu archivo `Info.plist` directamente, puedes seguir esta especificación:
```html
CFBundleURLTypesCFBundleURLName{YOUR.SCHEME}CFBundleURLSchemes{YOUR.SCHEME}
```
## Paso 2: Permitir el esquema personalizado (iOS 9+) {#step-2-allowlist-the-custom-scheme-ios-9}
A partir de iOS 9, las aplicaciones deben tener una lista de esquemas personalizados que la aplicación puede abrir. Si intentas llamar a esquemas que están fuera de esta lista, el sistema registrará un error en los registros del dispositivo y el vínculo profundo no se abrirá. Un ejemplo de este error es el siguiente:
```
: -canOpenURL: failed for URL: "yourapp://deeplink" – error: "This app is not allowed to query for scheme yourapp"
```
Por ejemplo, si un mensaje dentro de la aplicación debe abrir la aplicación de Facebook al tocarlo, la aplicación tiene que tener el esquema personalizado de Facebook (`fb`) en la lista de permitidos. De lo contrario, el sistema rechazará el vínculo profundo. Los vínculos profundos que dirigen a una página o vista dentro de tu propia aplicación siguen requiriendo que el esquema personalizado de tu aplicación aparezca en el `Info.plist` de tu aplicación.
Debes añadir todos los esquemas a los que la aplicación necesita vincularse en profundidad en una lista de permitidos en el `Info.plist` de tu aplicación con la clave `LSApplicationQueriesSchemes`. Por ejemplo:
```html
LSApplicationQueriesSchemesmyappfacebooktwitter
```
Para más información, consulta [la documentación de Apple](https://developer.apple.com/library/content/documentation/General/Reference/InfoPlistKeyReference/Articles/LaunchServicesKeys.html#//apple_ref/doc/uid/TP40009250-SW14) sobre la clave `LSApplicationQueriesSchemes`.
## Paso 3: Implementar un controlador {#step-3-implement-a-handler}
Tras activar tu aplicación, iOS llamará al método [`application:openURL:options:`](https://developer.apple.com/reference/uikit/uiapplicationdelegate/1623112-application?language=objc). El argumento importante es el objeto [NSURL](https://developer.apple.com/library/ios/DOCUMENTATION/Cocoa/Reference/Foundation/Classes/NSURL_Class/Reference/Reference.html#//apple_ref/doc/c_ref/NSURL).
```objc
- (BOOL)application:(UIApplication *)app openURL:(NSURL *)url options:(NSDictionary *)options {
NSString *path = [url path];
NSString *query = [url query];
// Here you should insert code to take some action based upon the path and query.
return YES;
}
```
```swift
func application(_ app: UIApplication, open url: URL, options: [UIApplication.OpenURLOptionsKey : Any] = [:]) -> Bool {
let path = url.path
let query = url.query
// Here you should insert code to take some action based upon the path and query.
return true
}
```

# Enlaces universales {#universal-links}
Para utilizar los enlaces universales, asegúrate de haber añadido un dominio registrado a las capacidades de tu aplicación y de haber subido un archivo `apple-app-site-association`. A continuación, implementa el método `application:continueUserActivity:restorationHandler:` en tu `AppDelegate`. Por ejemplo:
```objc
- (BOOL)application:(UIApplication *)application
continueUserActivity:(NSUserActivity *)userActivity
restorationHandler:(void (^)(NSArray *restorableObjects))restorationHandler {
if ([userActivity.activityType isEqualToString:NSUserActivityTypeBrowsingWeb]) {
NSURL *url = userActivity.webpageURL;
// Handle url
}
return YES;
}
```
```swift
func application(_ application: UIApplication, continue userActivity: NSUserActivity, restorationHandler: @escaping ([UIUserActivityRestoring]?) -> Void) -> Bool {
if (userActivity.activityType == NSUserActivityTypeBrowsingWeb) {
let url = userActivity.webpageURL
// Handle url
}
return true
}
```
Consulta [Apple](https://developer.apple.com/library/content/documentation/General/Conceptual/AppSearch/UniversalLinks.html) para más información.
**Note:**
La integración predeterminada del enlace universal no es compatible con las notificaciones push ni con los mensajes dentro de la aplicación de Braze. Consulta la [personalización de la gestión de enlaces](#linking-handling-customization) para manejar enlaces universales dentro de tu aplicación. Como alternativa, recomendamos utilizar [vínculos profundos basados en esquemas](#step-1-registering-a-scheme) con notificaciones push y mensajes dentro de la aplicación.
## Seguridad en el transporte de aplicaciones (ATS) {#app-transport-security-ats}
iOS 9 introdujo un cambio importante que afecta a las URL web incrustadas en los mensajes dentro de la aplicación y en las notificaciones push.
### Requisitos ATS {#ats-requirements}
De [la documentación de Apple](https://developer.apple.com/library/prerelease/ios/releasenotes/General/WhatsNewIniOS/Articles/iOS9.html#//apple_ref/doc/uid/TP40016198-SW14): "App Transport Security es una característica que mejora la seguridad de las conexiones entre una aplicación y los servicios web. La característica consiste en requisitos de conexión predeterminados que se ajustan a las mejores prácticas para conexiones seguras. Las aplicaciones pueden anular este comportamiento predeterminado y desactivar la seguridad del transporte".
ATS se aplica de forma predeterminada en iOS 9+. Requiere que todas las conexiones utilicen HTTPS y estén cifradas mediante TLS 1.2 con confidencialidad directa. Consulta los [Requisitos para conectarse mediante ATS](https://developer.apple.com/library/ios/documentation/General/Reference/InfoPlistKeyReference/Articles/CocoaKeys.html#//apple_ref/doc/uid/TP40009251-SW35) para obtener más información. Todas las imágenes servidas por Braze a dispositivos finales son gestionadas por una red de entrega de contenidos ("CDN") que admite TLS 1.2 y es compatible con ATS.
A menos que se especifiquen como excepciones en el `Info.plist` de tu aplicación, las conexiones que no sigan estos requisitos fallarán con errores parecidos a estos:
```
CFNetwork SSLHandshake failed (-9801)
Error Domain=NSURLErrorDomain Code=-1200 "An SSL error has occurred, and a secure connection to the server cannot be made."
```
```
NSURLSession/NSURLConnection HTTP load failed (kCFStreamErrorDomainSSL, -9802)
```
El cumplimiento de ATS se aplica a los enlaces abiertos dentro de la aplicación móvil (nuestro tratamiento predeterminado de los enlaces en los que se hace clic) y no se aplica a los sitios abiertos externamente a través de un navegador web.
### Gestión de los requisitos ATS {#handling-ats-requirements}
Puedes manejar ATS de una de las tres formas siguientes:
#### Confirma que todos los enlaces cumplen con ATS (recomendado) {#confirm-all-links-are-ats-compliant-recommended}
Tu integración con Braze puede cumplir los requisitos de ATS garantizando que cualquier enlace existente al que dirijas a los usuarios (a través de mensajes dentro de la aplicación y Campaigns push) cumpla los requisitos de ATS. Aunque hay formas de eludir las restricciones de ATS, te recomendamos que compruebes que todas las URL enlazadas cumplen con ATS. Dado el creciente énfasis de Apple en la seguridad de las aplicaciones, no está garantizado que Apple admita los siguientes enfoques para permitir excepciones ATS.
Una herramienta SSL puede ayudarte a detectar problemas de seguridad del servidor web. Esta [prueba de servidor SSL](https://www.ssllabs.com/ssltest/index.html) de Qualys, Inc. proporciona una línea específica para el cumplimiento de Apple ATS 9 e iOS 9.
#### Desactiva parcialmente ATS {#partially-disable-ats}
Puedes permitir que un subconjunto de enlaces con determinados dominios o esquemas sean tratados como excepciones a las reglas de ATS. Tu integración con Braze satisfará los requisitos de ATS si cada enlace que utilices en un canal de mensajería de Braze es compatible con ATS o se gestiona mediante una excepción.
Para añadir un dominio como excepción de ATS, añade lo siguiente al archivo `Info.plist` de tu aplicación:
```html
NSAppTransportSecurityNSAllowsArbitraryLoadsNSExceptionDomainsexample.comNSExceptionAllowsInsecureHTTPLoadsNSIncludesSubdomains
```
Consulta el artículo de Apple sobre [las claves de seguridad para el transporte de aplicaciones](https://developer.apple.com/library/ios/documentation/General/Reference/InfoPlistKeyReference/Articles/CocoaKeys.html#//apple_ref/doc/uid/TP40009251-SW33) para obtener más información.
#### Desactiva ATS por completo {#disable-ats-entirely}
Puedes desactivar ATS por completo. Ten en cuenta que no es una práctica recomendada, tanto por la pérdida de protecciones de seguridad como por la futura compatibilidad con iOS. Para desactivar ATS, inserta lo siguiente en el archivo `Info.plist` de tu aplicación:
```html
NSAppTransportSecurityNSAllowsArbitraryLoads
```
Consulta [Enviar una aplicación con seguridad de transporte de aplicaciones](http://timekl.com/blog/2015/08/21/shipping-an-app-with-app-transport-security/?utm_campaign=iOS+Dev+Weekly&utm_medium=email&utm_source=iOS_Dev_Weekly_Issue_213) para obtener más información sobre cómo depurar fallos de ATS.
## Codificación de URL {#url-encoding}
A partir del SDK v2.21.0 de Braze para iOS, el SDK codifica porcentualmente los enlaces para crear `NSURL` válidos. Todos los caracteres de enlace que no estén permitidos en una URL correctamente formada, como los caracteres Unicode, se escaparán porcentualmente.
Para decodificar un enlace codificado, utiliza el método `NSString` [`stringByRemovingPercentEncoding`](https://developer.apple.com/library/ios/documentation/Cocoa/Reference/Foundation/Classes/NSString_Class/index.html#//apple_ref/occ/instm/NSString/stringByRemovingPercentEncoding). Ten en cuenta que también debes devolver `YES` en `ABKURLDelegate` y que es necesaria una llamada a la acción para desencadenar la gestión de la URL por parte de la aplicación. Por ejemplo:
```objc
- (BOOL)application:(UIApplication *)application openURL:(NSURL *)url options:(NSDictionary *)options {
NSString *urlString = url.absoluteString.stringByRemovingPercentEncoding;
// Handle urlString
return YES;
}
```
```swift
func application(_ app: UIApplication, open url: URL, options: [UIApplication.OpenURLOptionsKey : Any] = [:]) -> Bool {
let urlString = url.absoluteString.removingPercentEncoding
// Handle urlString
return true
}
```
## Personalización {#linking-customization}
### Personalización predeterminada de WebView {#default-webview-customization}
La clase personalizable `ABKModalWebViewController` muestra las URL web abiertas por el SDK, normalmente cuando se selecciona "Abrir URL web dentro de la aplicación" para un vínculo profundo web.
Puedes declarar una categoría para la clase `ABKModalWebViewController`, o modificarla directamente, para aplicar la personalización a la vista web. Consulta el [archivo .h](https://github.com/Appboy/appboy-ios-sdk/blob/master/AppboyKit/include/ABKModalWebViewController.h) y el [archivo .m](https://github.com/Appboy/appboy-ios-sdk/blob/master/AppboyKit/ABKModalWebViewController.m) de la clase para obtener más detalles.
### Personalización de la gestión de enlaces {#linking-handling-customization}
El protocolo `ABKURLDelegate` puede utilizarse para personalizar la gestión de las URL, como los vínculos profundos, las URL web y los enlaces universales. Para configurar el delegado durante la inicialización de Braze, pasa un objeto delegado a `ABKURLDelegateKey` en `appboyOptions` de [`startWithApiKey:inApplication:withAppboyOptions:`](https://appboy.github.io/appboy-ios-sdk/docs/interface_appboy.html#aa9f1bd9e4a5c082133dd9cc344108b24). A continuación, Braze llamará a la implementación de `handleAppboyURL:fromChannel:withExtras:` de tu delegado antes de gestionar cualquier URI.
#### Ejemplo de integración: ABKURLDelegate {#integration-example-abkurldelegate}
```objc
- (BOOL)handleAppboyURL:(NSURL *)url fromChannel:(ABKChannel)channel withExtras:(NSDictionary *)extras {
if ([[url.host lowercaseString] isEqualToString:@"MY-DOMAIN.com"]) {
// Custom handle link here
return YES;
}
// Let Braze handle links otherwise
return NO;
}
```
```swift
func handleAppboyURL(_ url: URL?, from channel: ABKChannel, withExtras extras: [AnyHashable : Any]?) -> Bool {
if (url.host == "MY-DOMAIN.com") {
// Custom handle link here
return true;
}
// Let Braze handle links otherwise
return false;
}
```
**Important:**
Cuando `handleAppboyURL:fromChannel:withExtras:` devuelve `YES`, Braze asume que tu aplicación está gestionando la URL y no la abrirá. Si estás gestionando enlaces universales, debes enrutar explícitamente la URL al controlador de enlaces universales de tu aplicación, por ejemplo llamando tú mismo a `application:continueUserActivity:restorationHandler:`. Devolver `YES` sin gestionar la URL hará que el mensaje dentro de la aplicación o la tarjeta de contenido se descarte sin ninguna acción visible.
Devuelve `NO` si quieres que Braze gestione la URL con su comportamiento predeterminado.
Para más información, consulta [`ABKURLDelegate.h`](https://github.com/Appboy/appboy-ios-sdk/blob/master/AppboyKit/include/ABKURLDelegate.h).
## Casos de uso frecuentes {#frequent-use-cases}
### Vinculación en profundidad con la configuración de la aplicación {#deep-linking-to-app-settings}
iOS puede llevar a los usuarios de tu aplicación a su página en la aplicación de configuración de iOS. Puedes aprovechar `UIApplicationOpenSettingsURLString` para crear un vínculo profundo a la configuración desde notificaciones push y mensajes dentro de la aplicación.
1. En primer lugar, asegúrate de que tu aplicación está configurada para [vínculos profundos basados en esquemas](#deep-links) o [enlaces universales](#universal-links).
2. Decide un URI para la vinculación en profundidad a la página de **configuración** (por ejemplo, `myapp://settings` o `https://www.braze.com/settings`).
3. Si utilizas vínculos profundos personalizados basados en esquemas, añade el siguiente código a tu método `application:openURL:options:`:
```objc
- (BOOL)application:(UIApplication *)app
openURL:(NSURL *)url
options:(NSDictionary *)options {
NSString *path = [url path];
if ([path isEqualToString:@"settings"]) {
NSURL *settingsURL = [NSURL URLWithString:UIApplicationOpenSettingsURLString];
[[UIApplication sharedApplication] openURL:settingsURL];
}
return YES;
}
```
```swift
func application(_ app: UIApplication, open url: URL, options: [UIApplicationOpenURLOptionsKey : Any] = [:]) -> Bool {
let path = url.path
if (path == "settings") {
UIApplication.shared.openURL(URL(string:UIApplicationOpenSettingsURLString)!)
}
return true
}
```
# Control fino del tráfico de red para iOS
Source: /docs/es/developer_guide/platforms/legacy_sdks/ios/advanced_use_cases/fine_network_traffic_control/index.md
**Warning:**
[AppboyKit](https://github.com/Appboy/appboy-ios-sdk) (also known as the Objective-C SDK) is no longer supported and has been replaced by the [Swift SDK](https://www.braze.com/docs/es/es/developer_guide/sdk_integration/?sdktab=swift). It will no longer receive new features, bug fixes, security updates, or technical support—however, messaging and analytics will continue to function as normal. To learn more, see [Introducing the New Braze Swift SDK](https://www.braze.com/resources/articles/introducing-the-new-braze-swift-sdk).
# Control fino del tráfico en la red
## Políticas de tramitación de solicitudes
Braze permite al usuario la opción de controlar el tráfico de red utilizando los siguientes protocolos:
### Procesamiento automático de solicitudes
***Valor de enumeración de `ABKRequestProcessingPolicy`: `ABKAutomaticRequestProcessing`***
- Este es el valor **predeterminado de la política de peticiones**.
- El SDK de Braze gestionará automáticamente toda la comunicación con el servidor, que incluye lo siguiente:
- Transmisión de datos de eventos y atributos personalizados a servidores Braze
- Actualización de tarjetas de contenido y geovallas
- Solicitar nuevos mensajes dentro de la aplicación
- Las solicitudes inmediatas al servidor se realizan cuando se necesitan datos orientados al usuario para las características de Braze, como los mensajes dentro de la aplicación.
- Para minimizar la carga del servidor, Braze realiza descargas periódicas de nuevos datos de usuario cada pocos segundos.
Los datos pueden vaciarse manualmente en los servidores de Braze en cualquier momento utilizando el siguiente método:
```objc
[[Appboy sharedInstance] flushDataAndProcessRequestQueue];
```
```swift
Appboy.sharedInstance()?.flushDataAndProcessRequestQueue()
```
### Tramitación manual de solicitudes
***Valor de enumeración de `ABKRequestProcessingPolicy`: `ABKManualRequestProcessing`***
- Este protocolo es igual que el procesamiento automático de solicitudes, excepto que:
- Los atributos personalizados y los datos de eventos personalizados no se envían automáticamente al servidor durante toda la sesión de usuario.
- Braze seguirá realizando solicitudes de red automáticas para características internas, como la solicitud de mensajes dentro de la aplicación, la plantilla Liquid en los mensajes dentro de la aplicación, las geovallas y el seguimiento de ubicación. Para más detalles, consulta la declaración `ABKRequestProcessingPolicy` en [`Appboy.h`](https://github.com/Appboy/appboy-ios-sdk/blob/master/AppboyKit/include/Appboy.h). Cuando se realizan estas solicitudes internas, los atributos personalizados almacenados localmente y los datos de eventos personalizados pueden enviarse al servidor Braze, dependiendo del tipo de solicitud.
Los datos pueden vaciarse manualmente en los servidores de Braze en cualquier momento utilizando el siguiente método:
```objc
[[Appboy sharedInstance] flushDataAndProcessRequestQueue];
```
```swift
Appboy.sharedInstance()?.flushDataAndProcessRequestQueue()
```
## Configuración de la política de procesamiento de solicitudes
### Establecer la política de solicitudes al inicio
Estas políticas pueden establecerse al iniciar la aplicación mediante el método [`startWithApiKey:inApplication:withLaunchOptions:withAppboyOptions`](https://appboy.github.io/appboy-ios-sdk/docs/interface_appboy.html#aa9f1bd9e4a5c082133dd9cc344108b24). En el diccionario `appboyOptions`, configura `ABKRequestProcessingPolicyOptionKey` como se muestra en el siguiente fragmento de código:
```objc
NSDictionary *appboyOptions = @{
// Other entries
ABKRequestProcessingPolicyOptionKey : @(ABKAutomaticRequestProcessing)
};
```
```swift
let appboyOptions: [AnyHashable: Any] = [
// Other entries
ABKRequestProcessingPolicyOptionKey: ABKRequestProcessingPolicy.automaticRequestProcessing.rawValue
]
```
### Establecer la política de peticiones en tiempo de ejecución
La política de procesamiento de solicitudes también puede establecerse durante el tiempo de ejecución a través de la propiedad `requestProcessingPolicy` en `Appboy`:
```objc
// Sets the request processing policy to automatic (the default value)
[Appboy sharedInstance].requestProcessingPolicy = ABKAutomaticRequestProcessing;
```
```swift
// Sets the request processing policy to automatic (the default value)
Appboy.sharedInstance()?.requestProcessingPolicy = ABKRequestProcessingPolicy.automaticRequestProcessing
```
## Desconexión manual de la comunicación con el servidor en vuelo
Si en algún momento hay que interrumpir una comunicación "en vuelo" con un servidor, debes llamar al método siguiente:
```objc
[[Appboy sharedInstance] shutdownServerCommunication];
```
```swift
Appboy.sharedInstance()?.shutdownServerCommunication();
```
Después de llamar a este método, debes restablecer el modo de procesamiento de solicitudes a automático. Por esta razón, sólo recomendamos llamarlo si el SO te obliga a detener tareas en segundo plano o algo similar.
# Localización para iOS
Source: /docs/es/developer_guide/platforms/legacy_sdks/ios/advanced_use_cases/localization/index.md
**Warning:**
[AppboyKit](https://github.com/Appboy/appboy-ios-sdk) (also known as the Objective-C SDK) is no longer supported and has been replaced by the [Swift SDK](https://www.braze.com/docs/es/es/developer_guide/sdk_integration/?sdktab=swift). It will no longer receive new features, bug fixes, security updates, or technical support—however, messaging and analytics will continue to function as normal. To learn more, see [Introducing the New Braze Swift SDK](https://www.braze.com/resources/articles/introducing-the-new-braze-swift-sdk).
# Localización {#localization}
La localización es compatible con el SDK de Braze para iOS. Además del inglés, Braze admite varios idiomas para los mensajes integrados del SDK. Estos corresponden a los mensajes predeterminados que se muestran en las aplicaciones integradas con Braze, como los lugares de la aplicación en los que hay problemas de conectividad (por ejemplo, "No se puede establecer conexión de red. Vuelve a intentarlo más tarde."). Si el idioma del teléfono está configurado en uno de los idiomas admitidos, cualquiera de las cadenas predeterminadas de Braze desencadenadas dentro de una aplicación integrada aparecerá automáticamente en ese idioma.
Si buscas una lista completa de los idiomas admitidos que puedes atribuir a tus usuarios en sus perfiles, consulta nuestra [lista de idiomas de usuario](https://www.braze.com/docs/es/es/user_guide/data/unification/user_data/language_codes).
## Idiomas admitidos {#languages-supported}
- Árabe
- Birmano
- Catalán
- Chino
- Checo
- Danés
- Holandés
- Inglés
- Esperanto
- Estonio
- Ewé
- Filipino
- Finlandés
- Francés
- Georgiano
- Alemán
- Griego
- Hebreo
- Hindi
- Húngaro
- Indonesio
- Irlandés
- Italiano
- Japonés
- Coreano
- Malayo
- Noruego
- Nynorsk
- Polaco
- Portugués
- Ruso
- Español
- Sueco
- Tailandés
- Ucraniano
- Vietnamita
Para más información, consulta nuestro artículo sobre [localización de Apple](https://developer.apple.com/library/ios/documentation/CoreFoundation/Reference/CFLocaleRef/), así como la [lista de idiomas estándar LOC](http://www.loc.gov/standards/iso639-2/php/English_list.php).
# Integración de balizas para iOS
Source: /docs/es/developer_guide/platforms/legacy_sdks/ios/advanced_use_cases/beacon_integration/index.md
**Warning:**
[AppboyKit](https://github.com/Appboy/appboy-ios-sdk) (also known as the Objective-C SDK) is no longer supported and has been replaced by the [Swift SDK](https://www.braze.com/docs/es/es/developer_guide/sdk_integration/?sdktab=swift). It will no longer receive new features, bug fixes, security updates, or technical support—however, messaging and analytics will continue to function as normal. To learn more, see [Introducing the New Braze Swift SDK](https://www.braze.com/resources/articles/introducing-the-new-braze-swift-sdk).
# Integración de balizas {#beacon-integration}
Aquí veremos cómo integrar tipos específicos de balizas con Braze para permitir la segmentación y la mensajería.
## Balizas Infillion {#infillion-beacons}
Una vez que hayas configurado tus balizas Infillion e integrado en tu aplicación, podrás registrar eventos personalizados, como el inicio o el final de una visita, o la detección de una baliza. También puedes registrar propiedades de estos eventos, como el nombre del lugar o el tiempo de permanencia.
Para registrar un evento personalizado cuando un usuario entra en un lugar, introduce este código en el método `didBeginVisit`:
```objc
[[Appboy sharedInstance] logCustomEvent:@"Entered %@", visit.place.name];
[[Appboy sharedInstance] flushDataAndProcessRequestQueue];
```
```swift
Appboy.sharedInstance()?.logCustomEvent("Entered %@", visit.place.name)
Appboy.sharedInstance()?.flushDataAndProcessRequestQueue()
```
`flushDataAndProcessRequestQueue` confirma que tu evento se registrará aunque la aplicación esté en segundo plano, y el mismo proceso puede aplicarse para abandonar una ubicación. Ten en cuenta que esto creará e incrementará un evento personalizado único para cada nuevo lugar en el que entre el usuario. Si prevés crear más de 50 lugares, te recomendamos que crees un evento personalizado genérico "Place Entered" e incluyas el nombre del lugar como propiedad del evento.
# Ubicaciones y geovallas para iOS
Source: /docs/es/developer_guide/platforms/legacy_sdks/ios/advanced_use_cases/locations_and_geofences/index.md
**Warning:**
[AppboyKit](https://github.com/Appboy/appboy-ios-sdk) (also known as the Objective-C SDK) is no longer supported and has been replaced by the [Swift SDK](https://www.braze.com/docs/es/es/developer_guide/sdk_integration/?sdktab=swift). It will no longer receive new features, bug fixes, security updates, or technical support—however, messaging and analytics will continue to function as normal. To learn more, see [Introducing the New Braze Swift SDK](https://www.braze.com/resources/articles/introducing-the-new-braze-swift-sdk).
# Ubicaciones y geovallas {#locations-and-geofences}
Para habilitar geovallas en iOS:
1. Tu integración debe admitir notificaciones push en segundo plano.
2. Las geovallas de Braze [deben habilitarse](https://www.braze.com/docs/es/es/developer_guide/platform_integration_guides/swift/analytics/location_tracking#enabling-automatic-location-tracking) a través del SDK, ya sea habilitando implícitamente la recopilación de ubicaciones o habilitando explícitamente la recopilación de geovallas. No están habilitadas de forma predeterminada.
**Important:**
A partir de iOS 14, las geovallas no funcionan de forma fiable para los usuarios que deciden dar permiso de ubicación aproximada.
## Paso 1: Habilitar el push en segundo plano {#step-1-enable-background-push}
Para aprovechar al máximo nuestra estrategia de sincronización de geovallas, debes tener habilitado el [push en segundo plano](https://www.braze.com/docs/es/es/developer_guide/platform_integration_guides/ios/push_notifications/silent_push_notifications#use-silent-remote-notifications-to-trigger-background-work), además de completar la integración push estándar.
## Paso 2: Habilitar geovallas {#step-2-enable-geofences}
De forma predeterminada, las geovallas se habilitan en función de si está habilitada la recopilación automática de ubicaciones. Puedes habilitar las geovallas utilizando el archivo `Info.plist`. Añade el diccionario `Braze` a tu archivo `Info.plist`. Dentro del diccionario `Braze`, añade la subentrada booleana `EnableGeofences` y establece el valor en `YES`. Ten en cuenta que, antes de la versión 4.0.2 del SDK de iOS de Braze, debe usarse la clave de diccionario `Appboy` en lugar de `Braze`.
También puedes habilitar las geovallas al iniciar la aplicación utilizando el método [`startWithApiKey:inApplication:withLaunchOptions:withAppboyOptions`](https://appboy.github.io/appboy-ios-sdk/docs/interface_appboy.html#aa9f1bd9e4a5c082133dd9cc344108b24). En el diccionario `appboyOptions`, establece `ABKEnableGeofencesKey` en `YES`. Por ejemplo:
```objc
[Appboy startWithApiKey:@"YOUR-API_KEY"
inApplication:application
withLaunchOptions:options
withAppboyOptions:@{ ABKEnableGeofencesKey : @(YES) }];
```
```swift
Appboy.start(withApiKey: "YOUR-API-KEY",
in:application,
withLaunchOptions:launchOptions,
withAppboyOptions:[ ABKEnableGeofencesKey : true ])
```
## Paso 3: Comprobar las notificaciones push en segundo plano de Braze {#step-3-check-for-braze-background-push}
Braze sincroniza las geovallas con los dispositivos mediante notificaciones push en segundo plano. Sigue el artículo de [personalización de iOS](https://www.braze.com/docs/es/es/developer_guide/platforms/legacy_sdks/ios/push_notifications/customization/ignoring_internal_push) para asegurarte de que tu aplicación no realiza ninguna acción no deseada al recibir notificaciones de sincronización de geovallas de Braze.
## Paso 4: Añadir NSLocationAlwaysUsageDescription a tu Info.plist {#step-4-add-nslocationalwaysusagedescription-to-your-infoplist}
Añade las claves `NSLocationAlwaysUsageDescription` y `NSLocationAlwaysAndWhenInUseUsageDescription` a tu `info.plist` con un valor `String` que contenga una descripción de por qué tu aplicación necesita hacer seguimiento de ubicación. Ambas claves son necesarias para iOS 11 o posterior.
Esta descripción se mostrará cuando el aviso de ubicación del sistema solicite autorización y debe explicar claramente a tus usuarios las ventajas del seguimiento de ubicación.
## Paso 5: Solicitar autorización al usuario {#step-5-request-authorization-from-the-user}
La característica de geovallas solo funciona cuando se concede la autorización de ubicación `Always`.
Para solicitar la autorización de ubicación `Always`, usa el siguiente código:
```objc
CLLocationManager *locationManager = [[CLLocationManager alloc] init];
[locationManager requestAlwaysAuthorization];
```
```swift
var locationManager = CLLocationManager()
locationManager.requestAlwaysAuthorization()
```
## Paso 6: Habilitar geovallas en el dashboard {#step-6-enable-geofences-on-the-dashboard}
iOS solo permite almacenar hasta 20 geovallas para una aplicación determinada. El uso de ubicaciones ocupará algunos de estos 20 espacios disponibles para geovallas. Para evitar interrupciones accidentales o no deseadas de otras funciones relacionadas con geovallas en tu aplicación, las geovallas de ubicación deben habilitarse para aplicaciones individuales en el dashboard.
Para que las ubicaciones funcionen correctamente, también debes confirmar que tu aplicación no está utilizando todos los espacios de geovalla disponibles.
### Habilitar las geovallas desde la página de ubicaciones: {#enable-geofences-from-the-locations-page}

### Habilitar las geovallas desde la página de configuración: {#enable-geofences-from-the-settings-page}

## Desactivar las solicitudes automáticas de geovallas {#disabling-automatic-geofence-requests}
A partir de la versión 3.21.3 del SDK de iOS, puedes desactivar la solicitud automática de geovallas. Puedes hacerlo utilizando el archivo `Info.plist`. Añade el diccionario `Braze` a tu archivo `Info.plist`. Dentro del diccionario `Braze`, añade la subentrada booleana `DisableAutomaticGeofenceRequests` y establece el valor en `YES`.
También puedes desactivar las solicitudes automáticas de geovallas al iniciar la aplicación mediante el método [`startWithApiKey:inApplication:withLaunchOptions:withAppboyOptions`](https://appboy.github.io/appboy-ios-sdk/docs/interface_appboy.html#aa9f1bd9e4a5c082133dd9cc344108b24). En el diccionario `appboyOptions`, establece `ABKDisableAutomaticGeofenceRequestsKey` en `YES`. Por ejemplo:
```objc
[Appboy startWithApiKey:@"YOUR-API_KEY"
inApplication:application
withLaunchOptions:options
withAppboyOptions:@{ ABKDisableAutomaticGeofenceRequestsKey : @(YES) }];
```
```swift
Appboy.start(withApiKey: "YOUR-API-KEY",
in:application,
withLaunchOptions:launchOptions,
withAppboyOptions:[ ABKDisableAutomaticGeofenceRequestsKey : true ])
```
Si decides utilizar esta opción, tendrás que solicitar manualmente las geovallas para que la característica funcione.
## Solicitar geovallas manualmente {#manually-requesting-geofences}
Cuando el SDK de Braze solicita geovallas para monitorizar desde el backend, informa de la ubicación actual del usuario y recibe geovallas que se determinan como óptimamente relevantes en función de la ubicación comunicada. Hay un límite de velocidad de una actualización de geovalla por sesión.
Para controlar la ubicación que informa el SDK con el fin de recibir las geovallas más relevantes, a partir de la versión 3.21.3 del SDK de iOS, puedes solicitar manualmente geovallas proporcionando la latitud y longitud de una ubicación. Se recomienda desactivar las solicitudes automáticas de geovallas cuando utilices este método. Para ello, utiliza el siguiente código:
```objc
[[Appboy sharedInstance] requestGeofencesWithLongitude:longitude
latitude:latitude];
```
```swift
Appboy.sharedInstance()?.requestGeofences(withLongitude: longitude, latitude: latitude)
```
# Google Tag Manager para iOS
Source: /docs/es/developer_guide/platforms/legacy_sdks/ios/advanced_use_cases/google_tag_manager/index.md
**Warning:**
[AppboyKit](https://github.com/Appboy/appboy-ios-sdk) (also known as the Objective-C SDK) is no longer supported and has been replaced by the [Swift SDK](https://www.braze.com/docs/es/es/developer_guide/sdk_integration/?sdktab=swift). It will no longer receive new features, bug fixes, security updates, or technical support—however, messaging and analytics will continue to function as normal. To learn more, see [Introducing the New Braze Swift SDK](https://www.braze.com/resources/articles/introducing-the-new-braze-swift-sdk).
# Google Tag Manager para iOS {#google-tag-manager-for-ios}
## Inicializar el SDK {#initializing-ios-google-tag-provider}
El SDK de Braze para iOS puede inicializarse y controlarse mediante etiquetas configuradas en [Google Tag Manager](https://tagmanager.google.com/).
Antes de utilizar Google Tag Manager, asegúrate de seguir primero nuestra [configuración inicial del SDK](https://www.braze.com/docs/es/es/developer_guide/platforms/legacy_sdks/ios/initial_sdk_setup/overview).
## Configurar tu Google Tag Manager {#configuring-ios-google-tag-manager}
En este ejemplo, haremos como si fuéramos una aplicación de streaming de música que quiere registrar diferentes eventos a medida que los usuarios escuchan canciones. Mediante Google Tag Manager para iOS, podemos controlar cuáles de nuestros proveedores externos reciben este evento y crear etiquetas específicas para Braze.
### Eventos personalizados {#custom-events}
Los eventos personalizados se registran con `actionType` configurado en `logEvent`. El proveedor de etiquetas personalizadas de Braze en nuestro ejemplo espera que el nombre del evento personalizado se configure mediante `eventName`.
Para empezar, crea un desencadenante que busque un "Nombre de evento" que sea igual a `played song`

A continuación, crea una nueva etiqueta ("Llamada a función") e introduce la ruta de clase de tu [proveedor de etiquetas personalizado](#adding-ios-google-tag-provider) que se describe más adelante en este artículo.
Esta etiqueta se desencadenará cuando registres el evento `played song` que acabamos de crear.
En los parámetros personalizados (pares clave-valor) de nuestra etiqueta de ejemplo, hemos establecido `eventName` en `played song`, que será el nombre del evento personalizado registrado en Braze.
**Important:**
Cuando envíes un evento personalizado, establece `actionType` en `logEvent` y fija un valor para `eventName` como se muestra en el siguiente ejemplo.
El proveedor de etiquetas personalizadas de nuestro ejemplo utilizará estas claves para determinar qué acción realizar y qué nombre de evento enviar a Braze cuando reciba datos de Google Tag Manager.

También puedes incluir argumentos adicionales de par clave-valor en la etiqueta, que se enviarán como propiedades del evento personalizado a Braze. `eventName` y `actionType` no se ignorarán para las propiedades del evento personalizado. En la siguiente etiqueta de ejemplo, pasaremos `genre`, que se definió utilizando una variable de etiqueta en Google Tag Manager, procedente del evento personalizado que registramos en nuestra aplicación.
La propiedad del evento `genre` se envía a Google Tag Manager como una variable "Firebase - Parámetro de evento", ya que Google Tag Manager para iOS utiliza Firebase como capa de datos.

Por último, cuando un usuario reproduzca una canción en nuestra aplicación, registraremos un evento a través de Firebase y Google Tag Manager utilizando el nombre del evento de análisis de Firebase que coincida con el nombre desencadenante de nuestra etiqueta, `played song`:
```obj-c
NSDictionary *parameters = @{@"genre" : @"pop",
@"number of times listened" : @42};
[FIRAnalytics logEventWithName:@"played song" parameters:parameters];
```
### Registro de atributos personalizados {#logging-custom-attributes}
Los atributos personalizados se establecen a través de un `actionType` configurado en `customAttribute`. El proveedor de etiquetas personalizadas de Braze espera que el par clave-valor del atributo personalizado se establezca a través de `customAttributeKey` y `customAttributeValue`:
```obj-c
NSDictionary *parameters = @{@"customAttributeKey" : @"favorite song",
@"customAttributeValue" : @"Private Eyes"};
[FIRAnalytics logEventWithName:@"customAttribute" parameters:parameters];
```
### Llamada a changeUser {#calling-changeuser}
Las llamadas a `changeUser()` se realizan a través de un `actionType` configurado en `changeUser`. El proveedor de etiquetas personalizadas de Braze espera que el ID de usuario de Braze se establezca mediante un par clave-valor `externalUserId` dentro de tu etiqueta:
```obj-c
NSDictionary *parameters = @{@"externalUserId" : userId};
[FIRAnalytics logEventWithName:@"changeUser" parameters:parameters];
```
## Proveedor de etiquetas personalizadas del SDK de Braze {#adding-ios-google-tag-provider}
Con las etiquetas y los desencadenantes configurados, también tendrás que implementar Google Tag Manager en tu aplicación para iOS, lo cual puedes encontrar en la [documentación](https://developers.google.com/tag-manager/ios/v5/) de Google.
Una vez que Google Tag Manager esté instalado en tu aplicación, añade un proveedor de etiquetas personalizado para llamar a los métodos del SDK de Braze en función de las etiquetas que hayas configurado en Google Tag Manager.
Asegúrate de anotar la "Ruta de clase" del archivo: es lo que introducirás cuando configures una etiqueta en la consola de [Google Tag Manager](https://tagmanager.google.com/).
Este ejemplo muestra una de las muchas formas de estructurar tu proveedor de etiquetas personalizado, en el que determinamos a qué método del SDK de Braze llamar en función del par clave-valor `actionType` enviado desde la etiqueta GTM.
Los `actionType` que hemos admitido en nuestro ejemplo son `logEvent`, `customAttribute` y `changeUser`, pero puede que prefieras cambiar la forma en que tu proveedor de etiquetas gestiona los datos de Google Tag Manager.
Añade el siguiente código a tu archivo `BrazeGTMTagManager.h`:
```obj-c
@import Firebase;
@import GoogleTagManager;
@interface BrazeGTMTagManager : NSObject
@end
```
Y añade el siguiente código a tu archivo `BrazeGTMTagManager.m`:
```obj-c
#import
#import "BrazeGTMTagManager.h"
#import "Appboy-iOS-SDK/AppboyKit.h"
static NSString *const ActionTypeKey = @"actionType";
// Custom Events
static NSString *const LogEventActionType = @"logEvent";
static NSString *const LogEventEventName = @"eventName";
// Custom Attributes
static NSString *const CustomAttributeActionType = @"customAttribute";
static NSString *const CustomAttributeKey = @"customAttributeKey";
static NSString *const CustomAttributeValueKey = @"customAttributeValue";
// Change User
static NSString *const ChangeUserActionType = @"changeUser";
static NSString *const ChangeUserExternalUserId = @"externalUserId";
@implementation BrazeGTMTagManager
- (NSObject *)executeWithParameters:(NSDictionary *)parameters {
NSMutableDictionary *mutableParameters = [parameters mutableCopy];
NSString *actionType = mutableParameters[ActionTypeKey];
if (!actionType) {
NSLog(@"There is no Braze action type key in this call. Doing nothing.", nil);
return nil;
}
[mutableParameters removeObjectForKey:ActionTypeKey];
if ([actionType isEqualToString:LogEventActionType]) {
[self logEvent:mutableParameters];
} else if ([actionType isEqualToString:CustomAttributeActionType]) {
[self logCustomAttribute:mutableParameters];
} else if ([actionType isEqualToString:ChangeUserActionType]) {
[self changeUser:mutableParameters];
} else {
NSLog(@"Invalid action type. Doing nothing.");
}
return nil;
}
- (void)logEvent:(NSMutableDictionary *)parameters {
NSString *eventName = parameters[LogEventEventName];
[parameters removeObjectForKey:LogEventEventName];
[[Appboy sharedInstance] logCustomEvent:eventName withProperties:parameters];
}
- (void)logCustomAttribute:(NSMutableDictionary *)parameters {
NSString *customAttributeKey = parameters[CustomAttributeKey];
id customAttributeValue = parameters[CustomAttributeValueKey];
if ([customAttributeValue isKindOfClass:[NSString class]]) {
[[Appboy sharedInstance].user setCustomAttributeWithKey:customAttributeKey
andStringValue:customAttributeValue];
} else if ([customAttributeValue isKindOfClass:[NSDate class]]) {
[[Appboy sharedInstance].user setCustomAttributeWithKey:customAttributeKey
andDateValue:customAttributeValue];
} else if ([customAttributeValue isKindOfClass:[NSNumber class]]) {
if (strcmp([customAttributeValue objCType], [@(YES) objCType]) == 0) {
[[Appboy sharedInstance].user setCustomAttributeWithKey:customAttributeKey
andBOOLValue:[(NSNumber *)customAttributeValue boolValue]];
} else if (strcmp([customAttributeValue objCType], @encode(short)) == 0 ||
strcmp([customAttributeValue objCType], @encode(int)) == 0 ||
strcmp([customAttributeValue objCType], @encode(long)) == 0) {
[[Appboy sharedInstance].user setCustomAttributeWithKey:customAttributeKey
andIntegerValue:[(NSNumber *)customAttributeValue integerValue]];
} else if (strcmp([customAttributeValue objCType], @encode(float)) == 0 ||
strcmp([customAttributeValue objCType], @encode(double)) == 0) {
[[Appboy sharedInstance].user setCustomAttributeWithKey:customAttributeKey
andDoubleValue:[(NSNumber *)customAttributeValue doubleValue]];
} else {
NSLog(@"Could not map NSNumber value to Appboy custom attribute:%@", customAttributeValue);
}
} else if ([customAttributeValue isKindOfClass:[NSArray class]]) {
[[Appboy sharedInstance].user setCustomAttributeArrayWithKey:customAttributeKey
array:customAttributeValue];
}
}
- (void)changeUser:(NSMutableDictionary *)parameters {
NSString *userId = parameters[ChangeUserExternalUserId];
[[Appboy sharedInstance] changeUser:userId];
}
@end
```
# Almacenamiento para iOS
Source: /docs/es/developer_guide/platforms/legacy_sdks/ios/storage/index.md
**Warning:**
[AppboyKit](https://github.com/Appboy/appboy-ios-sdk) (also known as the Objective-C SDK) is no longer supported and has been replaced by the [Swift SDK](https://www.braze.com/docs/es/es/developer_guide/sdk_integration/?sdktab=swift). It will no longer receive new features, bug fixes, security updates, or technical support—however, messaging and analytics will continue to function as normal. To learn more, see [Introducing the New Braze Swift SDK](https://www.braze.com/resources/articles/introducing-the-new-braze-swift-sdk).
# Almacenamiento {#storage}
En este artículo se describen las diferentes propiedades a nivel de dispositivo que se capturan al utilizar el SDK de Braze para iOS.
## Propiedades del dispositivo {#device-properties}
De forma predeterminada, Braze recopilará las siguientes [propiedades a nivel de dispositivo](https://github.com/Appboy/appboy-ios-sdk/blob/16e893f2677af7de905b927505d4101c6fb2091d/AppboyKit/headers/AppboyKitLibrary/Appboy.h#L181) para permitir la personalización de mensajes basada en el dispositivo, el idioma y la zona horaria:
* Resolución del dispositivo
* Operador del dispositivo
* Configuración regional del dispositivo
* Modelo del dispositivo
* Versión del sistema operativo del dispositivo
* IDFV (opcional a partir del [SDK para iOS v5.7.0+](https://github.com/braze-inc/braze-swift-sdk))
* Notificaciones push habilitadas
* Zona horaria del dispositivo
* Estado de la autorización push
* Seguimiento de anuncios habilitado
**Note:**
El SDK de Braze no recoge IDFA automáticamente. Las aplicaciones pueden pasar opcionalmente IDFA a Braze implementando nuestro protocolo `ABKIDFADelegate`. Las aplicaciones deben obtener la adhesión voluntaria explícita del usuario final al seguimiento a través del marco de transparencia de seguimiento de aplicaciones antes de pasar IDFA a Braze.
Los campos configurables del dispositivo se definen en la enumeración [`ABKDeviceOptions`](https://github.com/Appboy/appboy-ios-sdk/blob/4390e9eac8401bccdb81b053fa54eb87b1f6fcaa/Appboy-tvOS-SDK/AppboyTVOSKit.framework/Headers/Appboy.h#L179). Para desactivar o especificar el campo del dispositivo que te gustaría incluir en la lista de permitidos, asigna el `OR` a nivel de bits de los campos deseados a [`ABKDeviceAllowlistKey`](https://github.com/Appboy/appboy-ios-sdk/blob/fed071000722673754da288cace15c1ff8aca432/AppboyKit/include/Appboy.h#L148) en el `appboyOptions` de `startWithApiKey:inApplication:withAppboyOptions:`.
Por ejemplo, para especificar la zona horaria y la recopilación de configuraciones regionales que se deben permitir, establece:
```
appboyOptions[ABKDeviceAllowlistKey] = @(ABKDeviceOptionTimezone | ABKDeviceOptionLocale);
```
De forma predeterminada, todos los campos están habilitados. Ten en cuenta que, sin algunas propiedades, no todas las características funcionarán correctamente. Por ejemplo, la entrega según la zona horaria local no funcionará sin la zona horaria.
Para saber más sobre las propiedades del dispositivo recopiladas automáticamente, visita nuestra [recopilación de datos del SDK](https://www.braze.com/docs/es/es/user_guide/data/unification/user_data/sdk_data_collection).
# Ejemplos de aplicaciones para iOS
Source: /docs/es/developer_guide/platforms/legacy_sdks/ios/sample_apps/index.md
**Warning:**
[AppboyKit](https://github.com/Appboy/appboy-ios-sdk) (also known as the Objective-C SDK) is no longer supported and has been replaced by the [Swift SDK](https://www.braze.com/docs/es/es/developer_guide/sdk_integration/?sdktab=swift). It will no longer receive new features, bug fixes, security updates, or technical support—however, messaging and analytics will continue to function as normal. To learn more, see [Introducing the New Braze Swift SDK](https://www.braze.com/resources/articles/introducing-the-new-braze-swift-sdk).
# Ejemplos de aplicaciones {#sample-apps}
Para tu comodidad, los SDK de Braze incluyen aplicaciones de ejemplo en el repositorio. Cada una de estas aplicaciones es totalmente compilable, por lo que puedes probar las características de Braze a la vez que las implementas en tus propias aplicaciones. Probar el comportamiento dentro de tu propia aplicación en comparación con el comportamiento esperado y las rutas de código dentro de las aplicaciones de ejemplo es una forma excelente de depurar cualquier problema que puedas encontrarte.
## Compilar aplicaciones de prueba {#building-test-applications}
Hay varias aplicaciones de prueba disponibles en el [repositorio GitHub del SDK de iOS](https://github.com/appboy/appboy-ios-sdk). Sigue estas instrucciones para compilar y ejecutar nuestras aplicaciones de prueba.
1. Crea un nuevo [espacio de trabajo](https://www.braze.com/docs/es/es/developer_guide/platform_wide/app_group_configuration#creating-your-app-group-in-my-apps) y anota la clave de API del identificador de la aplicación.
2. Coloca tu clave de API en el campo correspondiente del archivo `AppDelegate.m`.
Las notificaciones push para la aplicación de prueba de iOS requieren una configuración adicional. Consulta nuestra [integración push en iOS](https://www.braze.com/docs/es/es/developer_guide/platforms/legacy_sdks/ios/push_notifications/integration) para más detalles.
# Registro de cambios para el SDK Swift de iOS
Source: /docs/es/developer_guide/platforms/legacy_sdks/ios/changelog/swift_changelog/index.md
**Warning:**
[AppboyKit](https://github.com/Appboy/appboy-ios-sdk) (also known as the Objective-C SDK) is no longer supported and has been replaced by the [Swift SDK](https://www.braze.com/docs/es/es/developer_guide/sdk_integration/?sdktab=swift). It will no longer receive new features, bug fixes, security updates, or technical support—however, messaging and analytics will continue to function as normal. To learn more, see [Introducing the New Braze Swift SDK](https://www.braze.com/resources/articles/introducing-the-new-braze-swift-sdk).
# Registro de cambios del SDK Swift para iOS
17.0.0
Breaking
Braze.init and changeUser(userId:) no longer block the calling thread.
The following properties now block the calling thread until the SDK has settled, ensuring they reflect the latest user state immediately after changeUser or Braze.init:
braze.user.id
braze.deviceId
braze.contentCards.cards
braze.contentCards.unviewedCards
braze.contentCards.lastUpdate
braze.featureFlags.featureFlags
braze.featureFlags.featureFlag(id:)
For UI and other latency-sensitive code paths, prefer the asynchronous getters (getCachedContentCards(_:), getUnviewedCards(_:), getLastUpdate(_:), getAllFeatureFlags(_:)).
braze.user.id now returns nil after calling wipeData().
Previously, braze.user.id continued to return the last user ID after wipeData().
This matches the Swift SDK’s behavior with that of the Android SDK.
changeUser now notifies Braze.ContentCards.subscribeToUpdates(_:) subscribers after a user switch, matching the existing Android SDK behavior.
Previously, subscribers were not notified until the next Content Cards sync.
Removes the deprecated push-to-start token update API on Braze.LiveActivities.
Removes the deprecated Braze.LiveActivities.PushToStartTokenUpdate enum and the pushToStartTokenUpdatesStream property.
Use subscribeToStateUpdates(_:) instead, which delivers the push-to-start token lifecycle events (UpdateEvent.ActivityType.pushToStartTokenRead, .pushToStartTokenFlushed, .pushToStartOptedOut, .pushToStartOptOutFlushed) as part of the complete Live Activities lifecycle in a single subscription.
Added
Adds non-blocking asynchronous accessors for user and device identifiers:
Braze.User.getId(_:) and Braze.User.getId() async — deliver on the main thread.
Braze.getDeviceId(_:) and Braze.getDeviceId() async — deliver on the main thread.
ObjC bridges: getIdWithCompletion: and getDeviceIdWithCompletion:.
Prefer these over the synchronous properties on the main thread or in @MainActor contexts.
Adds an sdkDisabled error on Braze.ContentCards.requestRefresh(_:), Braze.FeatureFlags.requestRefresh(_:), and Braze.Banners.requestBannersRefresh(_:). When the SDK is disabled, these now invoke their completion handler with .sdkDisabled instead of leaving it uncalled.
16.0.0
Breaking
Updates to Content Cards behavior and reliability
braze.contentCards.cards is now immediately updated after a card is marked as viewed, dismissed, or clicked via its context.
Previously, these mutations were only visible in braze.contentCards.cards after the next server sync.
Disabling Content Cards via Braze.Configuration now immediately clears braze.contentCards.cards and notifies subscribeToUpdates subscribers with an empty list.
Previously, braze.contentCards.cards retained its last value and subscribers were not notified.
Added
Adds Braze.FeatureFlags.getAllFeatureFlags(_:) — an asynchronous, callback-based getter that delivers cached feature flags on the main thread without blocking the calling thread.
15.2.0
Added
Adds optional subtotalValue, tax, and shipping fields to Braze.Ecommerce.OrderPlacedEvent, all Braze.Ecommerce.CartUpdated variants (Replace / Add / Remove), and Braze.Ecommerce.CheckoutStartedEvent.
Available in Objective-C on BRZEcommerceOrderPlacedEvent, BRZEcommerceCartUpdatedEvent, and BRZEcommerceCheckoutStartedEvent.
Fixed
Fixes a video player configuration error for embedded YouTube videos in HTML in-app messages.
15.1.0
Added
Adds dismiss() to Braze.Banner.Context and dismiss(using:) to Braze.Banner to dismiss a banner when using a custom UI.
Recommended to use Braze.Banner.Context.dismiss.
Both methods must be called from the main thread.
Calling either method fires the onDismiss callback on any registered BrazeBannerPlacement for that placement ID.
Available in Objective-C as -[BRZBannerContext dismiss] and -[BRZBanner dismissUsing:].
Adds example implementations for building a custom UI with banners.
Adds Braze.ContentCards.getCachedContentCards(_:), Braze.ContentCards.getUnviewedCards(_:), and Braze.ContentCards.getLastUpdate(_:) — asynchronous, callback-based getters that deliver on the main thread.
Fixed
Fixes a bug in the default Content Cards UI that would prevent image loading if multiple cards contained the same remote image URL. (#176)
If multiple cards contained the same image URL, only the first card to finish loading would display the image, whereas all others would indefinitely display the loading spinner.
15.0.1
Fixed
Improves the stability of the SDK’s internal state management, resolving a crash that would occur under low memory conditions.
getBanner now returns the cached banner immediately even when the SDK is rate limited.
15.0.0
Breaking
Banners: onDismiss now receives Braze/BannerDismissalEvent instead of Braze/Banner.
Raises the Xcode version to 26.0 (17A324).
Raises the minimum Mac Catalyst deployment target from iOS 13 (macOS 10.15 Catalina) to iOS 16 (macOS 13 Ventura).
Mac Catalyst users on macOS 12 Monterey or earlier are no longer supported.
Removes the ability to control whether the SDK prevents showing in-app messages to different users in certain edge cases.
Removes the option to configure through Braze.Configuration.preventInAppMessageDisplayForDifferentUser.
The SDK will now always behave as if this configuration option were set to true.
Updates the Braze.WebViewBridge.ScriptMessageHandler and Braze.WebViewBridge.SchemeHandler init to have non-optional channel parameter.
Added
Logs configuration validation messages when Braze.Configuration.devicePropertyAllowList omits pushEnabled or pushAuthStatus.
Both are required for push token registration and for push notifications to behave correctly.
Adds the following API: Braze.logEcommerceEvent(_:)
Adds Objective-C compatible APIs:
-[Braze logEcommerceProductViewed:]
-[Braze logEcommerceCartUpdated:]
-[Braze logEcommerceCheckoutStarted:]
-[Braze logEcommerceOrderPlaced:]
Fixed
Fixes a rare race condition where the app would become unresponsive when calling changeUser or wipeData while an HTML in-app message or banner was in the middle of displaying.
14.2.1
Fixed
Improves the reliability of resuming the SDK’s tracking of Live Activities when there are multiple active activity types.
This improves the tracking of Live Activities when relaunching the app after it has been terminated.
Fixes a compilation issue introduced in 14.2.0 on Mac Catalyst targets caused by ActivityKit imports.
14.2.0
Added
Adds methods to observe all key events and errors in the ActivityKit API, enabling observation of real-time state and error events from the SDK’s Live Activity lifecycle.
Adds Braze.LiveActivities.UpdateEvent, a new enum covering activity and token lifecycle events (e.g. started, active, dismissed, stale, ended, contentUpdated, pushTokenUpdated) as well as Braze SDK operation events (trackingStarted, trackingResumed, pushTokenFlushed).
Adds Braze.LiveActivities.ErrorEvent, a new enum covering observation failures, token registration failures (with isTransient for retry logic), activityNotFound, and invalidPushTokenTag.
Adds subscribeToStateUpdates(_:) and subscribeToErrors(_:) methods on Braze.LiveActivities to register callbacks for the above events. Both return a Braze.Cancellable to remove the subscription.
Deprecates the push-to-start token update API on Braze.LiveActivities in favor of the new subscribeToStateUpdates(_:) API.
Deprecates the Braze.LiveActivities.PushToStartTokenUpdate enum and the pushToStartTokenUpdatesStream property.
Use subscribeToStateUpdates(_:) instead, which delivers the push-to-start token lifecycle events (UpdateEvent.ActivityType.pushToStartTokenRead, .pushToStartTokenFlushed, .pushToStartOptedOut, .pushToStartOptOutFlushed) as part of the complete Live Activities lifecycle in a single subscription, covering the same information as the deprecated PushToStartTokenUpdate cases without the need to maintain a separate subscription.
Fixed
Improves reliability of Live Activity push token updates during app background and foreground transitions, including cold start scenarios where push-to-start activities may not have received token updates.
Content cards now filter out invalid cards so users can still view remaining valid cards.
Previously, if any of the cards were invalid in the content card sync, the entire sync would be dropped and no cards would be added.
This update brings parity with the behavior on Android and Web.
Improves the robustness of the SDK’s internal state management.
This release includes an internal refactor intended to make SDK behavior more consistent. No external API changes.
Adds error logging for Banners operations, providing actionable diagnostics for persistence failures and invalid banner states.
Fixed
Improves robustness around push notification and deep link handling during delayed SDK initialization.
Fixes an issue where Braze.FeatureFlags.subscribeToUpdates would not trigger the update closure upon all refresh completions.
All refresh completions, regardless of a success or error result, will now trigger the update closure. This change brings parity with the Android and Web SDKs.
Previously, the update closure would not always trigger upon the completion of a refresh request, depending on whether the cached data had previously been reported.
14.0.4
Fixed
Fixes an issue where the configuration of push notification automation would be dropped upon every other re-initialization of the Braze instance.
14.0.3
Fixed
Push Stories now filter out invalid pages so users can still navigate through remaining valid pages.
14.0.2
Fixed
Fixes the SwiftUI implementation of BannerView to update Banner contents in-place whenever a refresh has succeeded.
Re-exposes the public initializer of BrazeInAppMessageUI.HtmlView as a designated init instead of a convenience init, which was introduced in version 14.0.0
This allows subclasses of HtmlView to access the public initializer.
Improves robustness of internal SDK logic around dictionary access to prevent potential crashes.
14.0.1
Fixed
Resolves an issue where the handling of universal links defaulted to the UIApplicationDelegate implementation instead of the UISceneDelegate implementation when the app was not in foreground.
This would occur even if there was no UIApplicationDelegate implementation, resulting in dropped universal link handling under such scenarios.
Fixes a memory leak where base64-encoded tracking IDs in in-app messages would accumulate on background threads.
Resolves an issue where in-app messages were not dismissed when the user is changed, resulting in the user seeing incorrect content.
This change also adds changeUser dismissal reason for in-app messages.
14.0.0
Breaking
Removes News Feed.
This fully removes all UI elements, data models, and actions associated with News Feed.
Added
Remote configuration now automatically refetches after SDK upgrades, keeping server defaults in sync and improving reliability after version changes.
Fixed
Resolves an issue where long text in in-app message buttons would wrap to multiple lines.
These messages will now match the dashboard preview behavior of truncating long text.
Push Stories now fail gracefully when receiving null/empty deeplink values.
Previously, an invalid deeplink would cause the Push Story’s content to appear blank.
StoryPage safely trims and percent-encodes deeplink strings, dropping invalid values instead of throwing an error.
StoryView only scrolls when pages exist, preventing the “Next” action from crashing when the carousel is empty.
HTML in-app messages now reuse cached payloads to mitigate app hangs that occur in rare situations during presentation.
Templated in-app messages with delayed presentation will now request templated values only after completion of the delay.
This ensures that templated values are most up-to-date with the display of the message.
Previously, the request for templated values would occur at trigger time, prior to the delay.
13.3.0
Added
Improves reliability when sending the push token and push authorization status to the backend.
This change ensures that push authorization status changes will be flushed immediately as soon as they are read.
13.2.1
Fixed
Resolves an issue where an accumulation of Banners pending requests could cause the host application to hang at app startup.
This fix performs additional cleanup to any existing requests that were accumulated from previous versions, so you do not need to do any manual cleanup.
13.2.0
Added
Adds support for compilation with Xcode 26.0 and its corresponding operating system runtimes on all platforms supported by the Braze Swift SDK.
13.1.0
Added
Adds support for Banner properties via new public methods on Braze.Banner instances.
banner.stringProperty(key:) for accessing String properties.
banner.numberProperty(key:) for accessing Double properties.
banner.timestampProperty(key:) for accessing Int Unix millisecond timestamp properties.
banner.booleanProperty(key:) for accessing Bool properties.
banner.imageProperty(key:) for accessing image URL properties as Strings.
banner.jsonProperty(key:) for accessing JSON properties as [String:Any] dictionaries.
banner.jsonProperty<T: Decodable>(key:type:decoder:) for accessing JSON properties as values of any custom Decodable type.
The default client-side rate limiting values for Banners refresh has been increased. For more information on SDK rate limiting, please refer to the Braze Developer Guide
Fixed
Improves the behavior of VoiceOver for assets that are missing an imageAltText for Content Card and In-App Message campaigns created via the Traditional editor.
These assets will no longer be selectable or narrated by VoiceOver. Previously, the asset would be selectable and VoiceOver would read gibberish.
Drag-and-drop campaigns are not affected by this issue.
Campaigns created using the Traditional editor should always have the Alt text field populated for accessible users.
13.0.0
Breaking
Extends the functionality of BrazeSDKAuthDelegate.braze(_:sdkAuthenticationFailedWithError:) to be triggered for “Optional” authentication errors.
The delegate method BrazeSDKAuthDelegate.braze(_:sdkAuthenticationFailedWithError:) will now be triggered for both “Required” and “Optional” authentication errors.
If you want to only handle “Required” SDK authentication errors, add a check ensuring that BrazeSDKAuthError.optional is false inside your implementation of this delegate method.
Fixes the usage of Braze.Configuration.sdkAuthentication to take effect when enabled.
Previously, the value of this configuration was not consumed by the SDK and the token was always attached to requests if it was present.
Now, the SDK will only attach the SDK authentication token to outgoing network requests when this configuration is enabled.
The setters for all properties of Braze.FeatureFlag and all properties of Braze.Banner have been made private. The properties of these classes are now read-only.
Removes the banner.id property, which was deprecated in version 11.4.0.
Instead, use banner.trackingId to read a banner’s campaign tracking ID.
Added
Adds the boolean field optional to BrazeSDKAuthError to indicate if it is an optional authentication error.
12.1.0
Added
Adds optional imageAltText and language fields to UI classes and structs associated with Content Card and In-App Message campaigns for improved accessibility.
The imageAltText field contains the image accessibility alt text (if any) for the image or icon in a given campaign. The SDK’s default UI will use this field to inform how VoiceOver narrates the image portion of a campaign
The optional language field is a BCP 47 tag. If it is present, VoiceOver will use the corresponding language narrator when reading the campaign. Otherwise, the user system default settings will be used.
These are the classes and structs with imageAltText and language:
Braze.ContentCard.ClassicImage
Braze.ContentCard.ImageOnly
Braze.ContentCard.CaptionedImage
Braze.ContentCardRaw (BRZContentCardRaw in Objective-C)
Braze.InAppMessage.Slideup
Braze.InAppMessage.Modal
Braze.InAppMessage.ModalImage
Braze.InAppMessage.Full
Braze.InAppMessage.FullImage
Braze.InAppMessageRaw (BRZInAppMessageRaw in Objective-C)
Braze.ContentCard.Classic has the language field only
Full support will be added to the main repository closer to the public release of Xcode 26.
For any compatibility issues discovered while using the Xcode 26 Beta, submit a GitHub issue on the main repository.
12.0.3
Fixed
Fixes the Banner rendering incompatibility with iOS 18.5+ while maintaining the correct URL redirect behavior.
Banners can now successfully render on iOS 18.5+ without compromising click action functionality.
See the changelog entries for versions 12.0.1 and 12.0.2 for further details.
12.0.2
⚠️ Important: This version has a known issue preventing Banners from rendering on iOS 18.5+.
Fixed
Reverts Banners to the behavior found in versions 12.0.0 and prior.
Banners remain unusable on iOS 18.5+. A future release will address this issue.
12.0.1
⚠️ Important: This version has a known issue in Drag-and-Drop in-app messages and Banners, preventing certain URLs from redirecting properly. Update to a newer version if you are using this feature.
Fixed
Fixes an issue where setting configuration.forwardUniversalLinks = true would not properly forward universal links to the system APIs in some cases.
The SDK now verifies that the system APIs are implemented (either in your UIApplicationDelegate or SceneDelegate) before forwarding the universal link.
When multiple implementations are found, the SDK favors the SceneDelegate implementation over the UIApplicationDelegate implementation.
Fixes an issue when configuring Braze.Configuration.Push.Automation.authorizationOptions with the .provisional option.
Previously, the .provisional option was also applied for push primer in-app messages. This resulted in no push notification permission prompt being shown to the user.
With this change, push primer in-app messages will request push notification permissions using only the .alert, .badge, and .sound options, ensuring that the system prompt is presented to the user.
Fixes an incompatibility with iOS 18.5 where Banners would not render.
Previously, the Banner view would be added to the view hierarchy with a height of 0 but never successfully load the HTML content.
Banner views will no longer trigger superfluous about:blank URLs upon initial load.
12.0.0
Breaking
The distributed static XCFrameworks now include their resources directly instead of relying on external resources bundles.
When manually integrating the static XCFrameworks, you must select the Embed & Sign option for each XCFramework in the Frameworks, Libraries, and Embedded Content section of your target’s General settings.
No changes are required for Swift Package Manager or CocoaPods integrations.
Fixed
Fixes an App Store validation issue where Braze’s libraries privacy manifests would fail to be detected when integrating the SDK as static XCFrameworks.
Fixes BrazeKitCompatABKContentCard.expiresAt to return the correct expiration date.
Previously, ABKContentCard.expiresAt would always return 0.
Fixes an issue where the Braze.FeatureFlags.subscribeToUpdates(_:) update closure was being called immediately after calling changeUser(userId:) instead of waiting for the next feature flags sync result.
Fixes an issue where Braze.ContentCards.subscribeToUpdates(_:) would not call the update closure whenever a sync occurred without any changes in the Content Cards data.
Previously, the update closure would only be called when the sync resulted in a change.
Fixes the Braze.User.set(dateOfBirth:) method to report dates using the Gregorian calendar instead of the device’s current calendar setting.
Previously, the SDK would override input dates and formats if the device’s calendar settings were non-Gregorian.
With this change, you will still need to ensure that dates provided to set(dateOfBirth:) are generated with the Gregorian calendar, but the Braze SDK will no longer override their formats inadvertently.
Enhances the braze.wipeData() function to send a final update to all registered channel subscribers, notifying them of the data wipe.
This update ensures that any UI components utilizing the channel’s data are properly dismissed and cleaned up.
For instance, if an in-app message is currently displaying as braze.wipeData() is called, the message will be removed from display.
Fixes braze.user.id not resetting to nil after calling braze.wipeData().
Internally, the user identifier was properly reset, but the public braze.user.id property was not updated to reflect this change.
Added
Adds the BrazeInAppMessagePresenter.dismiss(reason:) optional protocol method.
This method enables the SDK to inform the in-app message presenter when an in-app message should be dismissed due to an internal SDK state change.
Currently, this method is triggered only by calling braze.wipeData().
BrazeInAppMessageUI implements this optional method and dismisses the in-app message when triggered.
Adds dSYM files to the dynamic and mergeable variants of the Braze SDK XCFrameworks.
This addresses an App Store submission validation warning when using Xcode 16.0 or later.
Fixed
The SDK Debugger tool will now capture logs even when Braze.configuration.logger.level is .disabled and no SDK logging occurs locally.
This aligns the Braze Swift SDK Debugger Tool behavior with that of the Debugger Tool on the Braze Android SDK.
Sets the default background of BannerUIView to be transparent.
Renames the VisibilityTracker.displayLinkTick method to VisibilityTracker.brazeDisplayLinkTick in BrazeUI to avoid potential naming conflicts with private system methods.
11.8.0
Added
Network requests made by the SDK to the Braze Live Activities /push_token_tag endpoint will now be retried in the case of a request failure.
Expands customizability options of custom endpoints passed when initializing a Braze instance.
You can now specify a base path to be used for SDK network requests (i.e. “example.com/mockServer”).
http schemes are now supported for use by custom endpoints (i.e. http://example.com). Previously, only https schemes were supported.
Fixed
Fixes an issue where in-app messages would not always be triggered when sending Braze requests to the tracking endpoint. This occurred when both of the following conditions are true:
The Braze.Configuration.Api.trackingPropertyAllowList did not include the .everything type.
All other Braze.Configuration.TrackingProperty types were manually listed in the trackingPropertyAllowList.
Improves the rendering behavior of Banner Cards embedded in a scroll view on hybrid development frameworks.
Fixes the Banner Card view to prevent drag gestures from exposing the background of the HTML content.
Fixes an issue on the Braze web view bridge where numeric values of 1 or 0 would be incorrectly reported as true or false, respectively.
11.7.0
Added
Adds the ability for a banner container to resize when the banner content changes height.
11.6.1
Fixed
Improves the reliability of collecting Live Activity push-to-start tokens on calling registerPushToStart:
Push-to-start tokens will now flush to the server immediately as soon as they are retrieved.
Push-to-start tokens will now be read immediately from the pushToStartToken property as soon as registerPushToStart is called, in addition to the existing behavior where an observable is set up to monitor new tokens.
Resolves issues with the SDK’s internal state for devices that were previously affected after restoring from another device’s iCloud or iTunes backup.
Previously, these devices would incorrectly inherit the device ID from the original device.
With this update, the SDK now generates a unique device ID for each restored device, ensuring proper identification and functionality.
This update follows up on the 11.6.0 fix, which prevented the issue from occurring on future backups.
11.6.0
Fixed
Fixes the behavior in the Braze-provided UI for Banner Cards where content would not automatically be cleared from the UI when changing to a user that was not eligible for that campaign.
Changes the behavior of Braze.Banners.subscribeToUpdates(_:) to match behavior of the corresponding API on the Braze Android SDK.
Upon calling Braze.Banners.subscribeToUpdates(_:), the update handler closure will only be called if a banners sync has succeeded during the current user session.
Previously, calling Braze.Banners.subscribeToUpdates(_:) would always result in the update handler being called one time immediately.
Upon successfully completing a banners sync, Braze.Banners.subscribeToUpdates(_:) will call its registered update handler even if the sync result is identical to the last successful sync.
Changes the behavior of Braze.Banners.bannersStream to match behavior of the corresponding API on the Braze Android SDK.
Braze.Banners.bannersStream will now only emit an update immediately upon access if a banners sync has succeeded during the current user session.
Previously, accessing Braze.Banners.bannersStream would always emit one update immediately.
Upon successfully completing a banners sync, Braze.Banners.bannersStream will emit an update even if the sync result is identical to the last successful sync.
JavaScript bridge methods expecting number arguments now also accept string representations of numbers.
This change aligns the behavior of the Swift SDK with the behavior of the Web SDK.
Added
Adds an optional method removeBannerContent to the BrazeBannerPlacement protocol.
Locally persisted Braze SDK data will no longer transfer during OS backups. This resolves an issue introduced in 6.2.0.
11.5.0
Fixed
Braze.banners.getBanner(for:_:) now successfully returns a cached Banner object for the requested placement ID as long as a Banner Cards sync has ever succeeded for the current user.
Previously, it would log a warning and pass nil to the completion handler if a Banner Cards sync had not been completed for the current user during the current session specifically.
This change aligns behavior with the Android SDK.
Fixes an issue where images with the "JPEG" image type would sometimes not display in Push Stories.
Fixes an issue where an in-app message in a Braze-provided UI can be displayed for an ineligible user under rare conditions.
This may occur if the in-app message was in the process of being displayed in the UI at the same time that the user was changed to a different user.
Added
Adds Braze.User.id to access the current user identifier synchronously.
Deprecates Braze.User.id() async and Braze.User.id(queue:completion:) in favor of Braze.User.id.
These methods will be removed fully in a future update.
Adds the optional parameter userIDMatchBehavior to the initializers of Braze.InAppMessageRaw.Context. This determines the behavior in the UI when the current identified user is different from the one that triggered the in-app message.
The default for Braze-provided UIs (.enforce) will enforce that the user ID matches the user ID that triggered the in-app message. If there is a mismatch, the in-app message will not be displayed.
For custom UIs, the default is .ignore and a mismatch will still display the in-app message.
11.4.0
Fixed
Fixes an issue where the SDK could hang during initialization if previous sessions generated a large number of geofence refreshes. This hang could sometimes lead to a crash by blocking the main thread for an extended period.
Fixes an issue where the triggering of in-app messages could be delayed in cases where requests for updated in-app message triggers are also delayed due to rate limiting.
Adds additional safeguards to ensure that ongoing network requests are dropped when changing users mid-flight.
Added
When Content Cards, Feature Flags, or Banner Cards go from enabled to disabled, the stored data is removed from cache.
Fixes the Objective-C Braze.delegate declaration to be weak like the Swift variant.
Added
Braze.prepareForDelayedInitialization now takes an optional parameter analyticsBehavior: PushEnqueueBehavior.
Braze uses this value to determine whether any Braze push payloads received before initialization should be processed once initialization is complete.
PushEnqueueBehavior.queue will enqueue received push payloads to be processed upon initialization. This option is selected by default.
PushEnqueueBehavior.drop will drop received push payloads, ignoring them.
Adds configuration properties to customize the lineSpacing, maxLineHeight, minLineHeight, and lineHeightMultiple for the header and message texts in full and modal in-app messages.
Updates BrazeContentCardUI.ViewController.Attributes.defaults to be a var to allow directly editing the property for convenience.
11.1.1
Fixed
Fixes an issue introduced in 11.0.0 where the push subscription status would be sent to the backend with an inaccurate value at startup, causing an unexpected subscription state. The SDK now sends up the accurate subscription status at each startup.
11.1.0
⚠️ Important: This version has a known issue related to push subscription status. Upgrade to version 11.1.1 instead.
Fixed
Fixes an issue introduced in 11.0.0 where the push token status would not always be reported in all circumstances.
Fixes a display bug where an in-app message would appear truncated after certain keyboard dismissal scenarios.
Fixes a reference cycle in Braze.NewsFeedCard.Context that could prevent the card from being deallocated.
Added
Adds a public initializer for Braze.Notifications.Payload.
11.0.1
Fixed
Fixes an issue introduced in 11.0.0 where the push subscription status would be sent to the backend with an inaccurate value at startup, causing an unexpected subscription state. The SDK now sends up the accurate subscription status at each startup.
11.0.0
⚠️ Important: This version has a known issue related to push subscription status. Upgrade to version 11.1.1 instead.
Relevant public Braze classes and data types now conform to the Sendable protocol and can be safely used across concurrency contexts.
Main thread-only APIs are now marked with the @MainActor attribute.
We recommend using Xcode 16.0 or later to take advantage of these features while minimizing the number of warnings generated by the compiler. Previous versions of Xcode may still be used, but some features may generate warnings.
When integrating push notification support manually, you may need to update the UNUserNotificationCenterDelegate conformance to use the @preconcurrency attribute to prevent warnings.
Applying the @preconcurrency attribute on protocol conformance is only available in Xcode 16.0 or later. Reference our sample integration code here.
As of Xcode 16.0, Apple has not yet audited the UNUserNotificationCenterDelegate protocol for Swift concurrency.
1
2
3
extensionAppDelegate:@preconcurrencyUNUserNotificationCenterDelegate{// Your existing implementation}
Updates the SDWebImage dependency in BrazeUICompat and sample apps to 5.19.7+ to support Swift 6 strict concurrency checking.
Fixed
Fixes the push authorization status reporting to display the proper push token status on the Dashboard when a user has not explicitly accepted or declined push permissions.
10.3.1
Fixed
Improves the reliability of sending updates to Live Activities that were launched via a push-to-start notification to an app in the terminated state.
10.3.0
Fixed
Fixes the in-app message orientation validation logic, which prevented certain device classes from displaying messages under certain orientation configurations.
Fixes the default behavior on full-screen in-app messages to display as modals only on tablet screen sizes.
Previously, full-screen messages would erroneously default to modal presentations on some larger phones.
Fixes a crash when dismissing a slideup in-app message before it has finished presenting.
Fixes an issue on iOS 18.0+ where the in-app message UI would persist on the screen when attempting to dismiss the message before it has finished presenting.
Updates custom attribute value, custom event, and purchase string validation to use a 255 character maximum instead of a 255 byte maximum.
Adds additional safeguards to Braze.Notifications.subscribeToUpdates to ensure the same Push notification can’t trigger the update closure multiple times.
10.2.0
Fixed
Updates the content card image background color to be clear.
Added
Adds support for an upcoming Braze SDK Debugging tool.
10.1.0
Fixed
Fixes an issue affecting the Objective-C variants of BrazeDelegate, BrazeContentCardUIViewControllerDelegate and BrazeInAppMessageUIDelegate.
When setting these delegates in Objective-C a second time, the delegate would end up being set to nil.
This issue has been resolved and the delegates can now be set multiple times without issue.
Added
Adds support for delayed SDK initialization, allowing you to create the Braze instance outside of application(_:didFinishLaunchingWithOptions:).
The SDK can now be initialized asynchronously, while conserving the ability to process incoming Braze push notifications.
The update closure will now be triggered by both “Push Opened” and “Push Received” events by default. Previously, it would only be triggered by “Push Opened” events.
To continue subscribing only to “Push Opened” events, pass in [.opened] for the parameter payloadTypes. Alternatively, implement your update closure to check that the type from the Braze.Notifications.Payload is .opened.
When receiving a push notification with content-available: true, the Braze.Notifications.Payload.type will now be .received instead of .opened.
Marks the following deprecated APIs as unavailable:
Removes the deprecated BrazeLocation class in favor of BrazeLocationProvider.
Fixed
Fixes a crash when handling a scheme-based deep link containing a registered applink domain (e.g. applinks:example.com with a deep link to app://example.com/path).
The following notifications will trigger this subscription:
Notifications received in the foreground
Notifications with the field content-available: true received in the foreground or background
The following notifications will not trigger this subscription:
Notifications received while terminated
Notifications received in the background without the field content-available: true
The new parameter payloadTypes will allow you to subscribe to “Push Opened” events, “Push Received” events, or both. If the parameter is omitted, it will subscribe to both by default.
If you are using manual push integration, you will need to first implement UNUserNotificationCenter.userNotificationCenter(_:willPresent:withCompletionHandler:), and make sure to call Braze.Notifications.handleForegroundNotification(notification:) within your implementation. Then, use subscribeToUpdates as noted above. See our guide on push notification integration for more info.
Fixes an issue where the Braze.FeatureFlag.subscribeToUpdates(_:) callback was not triggered at app launch when the cached feature flags matched the remote feature flags.
Fixes an issue in Objective-C projects where the return value of Braze.FeatureFlag.jsonProperty(key:) would incorrectly encode any entry value equal to null under certain conditions.
[String: Any] dictionaries returned by the Swift API will now drop null values.
NSDictionary objects returned by the Objective-C API will now encode null values as NSNull.
Customization of ViewAttributes via the attributes property is not available in the Objective-C version of PresentationContextRaw.
Adds Braze.FeatureFlag.jsonProperty(key:type:decoder:) to decode jsonobject type Feature Flag properties into custom Decodable types.
Deprecates the existing Feature Flag APIs, to be removed in a future version:
Braze.FeatureFlag.jsonStringProperty(key:) has been deprecated.
Braze.FeatureFlag.jsonObjectProperty(key:) has been deprecated in favor of Braze.FeatureFlag.jsonProperty(key:).
Fixed
Fixes an issue where the preferredOrientation on the presentation context of an in-app message would not be respected.
9.2.0
Added
Adds the openNewWindowLinksInBrowser configuration (default: false) to Braze.ModalContext.
Set this value in the braze(_:willPresentModalWithContext:) method of your BrazeDelegate to specify whether to launch the device browser to open web view hyperlinks that normally open a new tab or window.
Fixed
Fixes an issue with the automatic push integration feature that could cause the SDK not to send the device token to Braze.
Fixes an issue that prevented external links, which open in a new tab, from being activated in presented web views.
9.1.0
Added
Adds support for 3 new Feature Flag property types and various APIs for accessing them:
Braze.FeatureFlag.timestampProperty(key:) for accessing Int Unix millisecond timestamps.
Braze.FeatureFlag.imageProperty(key:) for accessing image URLs as Strings.
Braze.FeatureFlag.jsonObjectProperty(key:) for accessing JSONs as [String:Any] dictionaries.
Braze.FeatureFlag.jsonStringProperty(key:) for accessing JSONs as Strings.
Adds safeguards when reading the device model.
Fixed
Fixes the duplicate symbols compilation errors and runtime warnings that may occur under specific conditions when integrating BrazeKit and either BrazeNotificationService or BrazePushStory via CocoaPods.
9.0.0
Breaking
Removes the default privacy tracking domains from the BrazeKit privacy manifest.
If you are using the Braze data tracking features, you will need to manually add your tracking endpoint to your app-level privacy manifest.
Refer to the updated tutorial for integration guidance.
Removes the deprecated BrazeDelegate.braze(_:sdkAuthenticationFailedWithError) method in favor of BrazeSDKAuthDelegate.braze(_:sdkAuthenticationFailedWithError).
This method was originally deprecated in release 5.14.0.
Failing to switch to the new delegate method will not trigger a compiler error; instead, the BrazeDelegate.braze(_:sdkAuthenticationFailedWithError) method you define will simply not be called.
Fixed
Adds the missing NSPrivacyCollectedDataTypes key to the BrazePushStory privacy manifest.
8.4.0
Added
Expands Geofences behavior in the background while “When In Use” authorization is selected:
Adds the Braze.Location.Configuration.allowBackgroundGeofenceUpdates property to toggle whether geofences should be updated in the background.
When using this setting, verify that you have enabled the Location updates background mode.
Adds the Braze.Location.Configuration.distanceFilter property to configure the minimum distance sensitivity for triggering a location update.
Adds support for the message_extras Liquid tag for in-app messages.
8.3.0
Added
Adds early access for a third alternative repository which provides all Braze modules as mergeable XCFrameworks. For instructions on how to leverage it, refer to the repository README:
Adds a missing privacy manifest for BrazePushStory.
Fixes an invalid privacy manifest warning in BrazeLocation when submitting to the App Store as a dynamic XCFramework.
Fixes an issue where already enqueued in-app messages would not be removed from the stack after subsequent .reenqueue and .discard display actions.
Fixes an issue preventing retried requests from using an updated SDK authentication token until a new request was scheduled for processing.
Purchases, custom events, and nested custom user attributes can now include properties with values of any type conforming to BinaryInteger (Int64, UInt16, etc).
All values will be cast to Int before being logged.
This resolves an issue with a bugfix in 7.6.0.
8.2.1
Fixed
Fixes App Store validation issues when archiving with Xcode 15.3.
8.2.0
Added
Adds support for remotely starting Live Activities via push notifications.
Adds the following methods to the liveActivities module:
Adds public APIs to access BrazeKit, BrazeLocation and BrazeUI resources bundles:
Braze.Resources.bundle
BrazeLocationResources.bundle
BrazeUIResources.bundle
BrazeKit.overrideResourceBundle and BrazeUI.overrideResourceBundle have been deprecated in favor of BrazeKit.overrideResourcesBundle and BrazeUI.overrideResourcesBundle.
Re-enables visionOS sample apps requiring SDWebImage in Examples-CocoaPods.xcworkspace. SDWebImage for visionOS is now supported when using CocoaPods.
Updated SDWebImage dependency in BrazeUICompat to 5.19.0+.
Fixed
Fixes multiple issues on visionOS:
Sessions now properly start as expected.
The click behavior Open Web URL Inside App now properly opens the URL in a modal web view. Previously, the URL would always be opened using the default web browser.
[BrazeDelegate.braze(:willPresentModalWithContext:)](https://braze-inc.github.io/braze-swift-sdk/documentation/brazekit/brazedelegate/braze(:willpresentmodalwithcontext:)-1fj41) now has a default implementation.
Handling network requests and persisting data properly extend the lifetime of the application for processing.
Removes crash data from the BrazeKit privacy manifest. This data type is not collected by Braze.
8.0.0
⚠️ Warning
This release reports the SDK version as 7.7.0 instead of 8.0.0.
Breaking
Compiles the SDK using Xcode version 15.2 (15C500b).
This also raises the minimum deployment targets to iOS 12.0 and tvOS 12.0.
The BrazeLocation class is now marked as unavailable. It was previously deprecated in favor of BrazeLocationProvider in 5.8.1.
Added
Adds support for visionOS 1.0.
⚠️ Rich push notifications and Push Stories may not display as expected on visionOS 1.0. We are monitoring the latest versions for potential fixes.
⚠️ CocoaPods is not yet supported by SDWebImage for visionOS. visionOS sample apps requiring SDWebImage have been disabled in the Examples-CocoaPods.xcworkspace. Refer to the SwiftPM or manual integration Xcode project instead.
7.7.0
Added
Updates the prebuilt release assets to include the privacy manifest for manual integrations of SDWebImage.
Follow the manual integration guide to add the SDWebImage.bundle to your project for static XCFrameworks.
Enhances support for language localizations.
Introduces a localization for Azerbaijani strings.
Updates Ukrainian localization strings for accuracy.
Fixed
Fixes the default button placement for full in-app message views.
Fixes an issue where setting Braze.Configuration.Api.endpoint to a URL with invalid characters could cause a crash.
If the SDK is given an invalid endpoint, it will no longer attempt to make network requests and will instead log an error.
Fixes an issue preventing BrazeLocation from working correctly when using the dynamic XCFrameworks.
7.6.0
Added
Adds the Braze.InAppMessage.Data.isTestSend property, which indicates whether an in-app message was triggered as part of a test send.
Adds logic to separate Braze data into tracking and non-tracking requests.
Adds the following methods to set and edit the allow list for properties that will be used for tracking:
Braze.Configuration.Api.trackingPropertyAllowList: Set the initial allow list before initializing Braze.
Braze.updateTrackingAllowList(adding:removing:): Update the existing allow list during runtime.
For full usage details on these configurations, refer to our tutorial here.
Fixed
Adds safeguards to prevent a rare race condition occuring in the SDK network layer.
Prevents in-app message test sends from attempting re-display after being discarded by a custom in-app message UI delegate.
Fixes an issue in the default Braze in-app message UI where some messages were not being removed from the stack after display.
Fixes the compilation of BrazeKitCompat and BrazeUICompat in Objective-C++ projects.
Fixes an issue in BrazeUICompat where the header text in Full or Modal in-app messages would be duplicated in place of the body text under certain conditions.
Fixes the encoding of values of types Float, Int8, Int16, Int32, Int64, UInt, UInt8, UInt16, UInt32 and UInt64. Those types were previously not supported in custom events and purchase properties.
Fixes an issue preventing purchase events from being logged when the product identifier has a leading dollar sign.
Fixes an issue preventing custom attributes from being logged when the attribute key has a leading dollar sign.
7.5.0
Added
Adds privacy manifests for BrazeKit and BrazeLocation to describe Braze’s data collection policies. For more details, refer to Apple’s documentation on privacy manifests.
More fine-tuned configurations to manage your data collection practices will be made available in a future release.
Adds the optInWhenPushAuthorized configuration property to specify whether a user’s notification subscription state should automatically be set to optedIn when updating push permissions to authorized.
The WebKit Inspector developer tool is now enabled by default for all instances of BrazeInAppMessagesUI.HtmlView. It can be disabled by setting BrazeInAppMessagesUI.HtmlView.Attributes.allowInspector to false.
Fixed
Fixes an issue with the code signatures of XCFrameworks introduced in 7.1.0.
Fixes a crash on tvOS devices running versions below 16.0, caused by the absence of the UIApplication.openNotificationSettingsURLString symbol in those OS versions.
Fixes an issue where a content card would not display if the value under “Redirect to Web URL” was an empty string.
Fixes incorrect behavior in BrazeUI where tapping the body of a Full or Modal in-app message with buttons and an “Image Only” layout would dismiss that message and process the button’s click action.
Tapping the body will now be a no-op, bringing parity with other platforms.
7.4.0
Added
Adds two alternative repositories to support specialized integration options. For instructions on how to leverage them, refer to their respective READMEs:
In-App Message assets from URLs containing the query parameter cache=false will not be prefetched.
Additionally, when presented as a part of In-App Messages or Content Cards, those URLs will be fetched using the URLRequest.CachePolicy.reloadIgnoringLocalAndRemoteCacheData caching policy, which always requests a fresh version from the source and ignores any cached versions.
Fixed
Fixes XCFrameworks headers to use the #import syntax instead of @import for compatibility with Objective-C++ contexts.
Fixes the push token tag validation during Live Activity registration, accepting strings up to 256 bytes instead of 255 bytes.
Braze.ContentCards.unviewedCards no longer includes Control cards to bring parity with Android and Web.
Fixes an Objective-C metaclass crash that occurs when initializing a custom subclass of certain BrazeUI views.
7.3.0
Added
Adds support for Expo Notifications event listeners when using the automatic push integration.
Fixed
Fixes a rare concurrency issue that might result in duplicated events when logging large amount of events.
Fixes an issue where user.set(dateOfBirth:) was not setting the date of birth accurately due to variations in the device’s timezone.
7.2.0
Added
Exposes the BrazePushStory.NotificationViewController.didReceive methods for custom handling of push story notification events.
Fixed
Resolves an issue for in-app messages with buttons where tapping on the body would incorrectly execute the button’s click action.
Now, when you tap on the body of an in-app message with buttons, no event should occur.
Resolves a potential deadlock under rare circumstances in BrazeUI’s In-App messages presentation.
Refactors some text layout logic in BrazeUI into a new Braze.ModalTextView class.
Updates the behavior for Feature Flags methods.
FeatureFlags.featureFlag(id:) now returns nil for an ID that does not exist.
FeatureFlags.subscribeToUpdates(:) will trigger the callback when any refresh request completes with a success or failure.
The callback will also trigger immediately upon initial subscription if previously cached data exists from the current session.
Fixed
Fixes compiler warnings about Swift 6 when compiling BrazeUI while using Xcode 15.
Exposes public imports for ABKClassicImageContentCardCell.h and ABKControlTableViewCell.h for use in the BrazeUICompat layer.
Adds additional safeguards around invalid constraint values for BrazeInAppMessageUI.SlideupView.
Resolves a Content Cards feed UI issue displaying a placeholder image in Classic cards without an attached image.
Added
Adds the enableDarkTheme property to BrazeContentCardUI.ViewController.Attributes.
Set this field to false to prevent the Content Cards feed UI from adopting dark theme styling when the device is in dark mode.
This field is true by default.
6.6.2
Fixed
Fixes an issue preventing purchase events from being logged when the product identifier has a leading dollar sign ($).
Fixes an issue preventing custom attributes from being logged when the attribute key has a leading dollar sign ($).
6.6.1
Fixed
Fixes a crash in the geofences feature that could occur when the number of monitored regions exceeded the maximum count.
Fixes an issue introduced in 6.3.1 that would always update a user’s push subscription status to optedIn on app launch if push permissions were authorized on the device settings.
The SDK now will only send the subscription status at app launch if the device notification settings goes from denied to authorized.
Braze.ContentCard.logClick(using braze: Braze) will now log a click regardless of whether the ContentCard has a ClickAction.
This behavior differs from the default API Braze.ContentCard.Context.logClick(), which has the safeguard of requiring a ClickAction to log a click.
6.6.0
Fixed
Fixes an issue in HTML in-app messages where custom event and purchase properties would always convert values for 1 and 0 to become true and false, respectively.
These property values will now respect their original form in the HTML.
Prevents the default Braze UI from displaying in-app messages underneath the keyboard when Stage Manager is in use.
When enabled, the SDK will automatically implement the necessary system delegate methods for handling push notifications.
Compatibility with other push providers, whether first or third party, is maintained. The SDK will automatically handle only Braze push notifications, while original system delegate methods will be executed for all other push notifications.
Each automation step can be independently enabled or disabled. For example, configuration.push.automation.requestAuthorizationAtLaunch = false can be used to prevent the automatic request for push permissions at launch.
Adds the Braze.Configuration.forwardUniversalLinks configuration. When enabled, the SDK will redirect universal links from Braze campaigns to the appropriate system methods.
Fixes an issue preventing text fields from being selected in HTML IAMs for iOS 15.
Fixes an issue where the device model was inaccurately reported as iPad on macOS (Mac Catalyst and Designed for iPad configurations).
Fixes an issue where custom event and purchase properties would not accept an entry if its value was an empty string.
Fixes a crash that occurred in the default UI for Content Cards when encountering a zero-value aspect ratio.
Fixes an issue introduced in 6.0.0 where images in in-app messages would appear smaller than expected when using the compatibility UI (BrazeUICompat).
Added
Adds the unviewedCards convenience property to the Braze.ContentCards class to get the unviewed content cards for the current user.
6.3.1
Fixed
Fixes an issue where the previous user’s data would not be flushed after calling changeUser(userId:sdkAuthSignature:) when the SDK authentication feature is enabled.
A content card impression can now be logged once per session. Previously, the Braze-provided Content Cards UI would limit to a single impression per card at maximum, irrespective of sessions.
Fixes an issue that previously caused push notification URLs with percent-encoded characters to fail during decoding.
Fixes a behavior to automatically set a user’s push subscription state to optedIn after push permissions have explicitly been authorized via the Settings app.
Correctly hides shadows on in-app messages that are configured with a transparent background.
Fixes a rare crash occurring when deinitializing the Braze instance.
Added
Adds additional logging for network-related decoding errors.
6.3.0
Fixed
“Confirm” and “Cancel” notification categories now show the correct titles on the action buttons.
Added
Adds a new SDKMetadata option .reactnativenewarch for the React Native New Architecture.
Fixes a crash introduced in 6.0.0 when displaying an HTML in-app message using the BrazeUICompat module.
Removed a system call that is known to be slow on older versions of macOS. This resolves the SDK hanging during initialization on Mac Catalyst when running on affected macOS versions.
Added
Adds support for target attributes on anchor tags in HTML in-app messages (e.g. <a href="..." target="_blank"></a>).
Adding the target attribute to links will allow them to open in a new webview without dismissing the current in-app message.
This behavior can be disabled via the linkTargetSupport property of the BrazeInAppMessageUI.HtmlView.Attributes struct.
Fixes an issue that led to disproportionately large close buttons on in-app messages when the user has set a large font size in the device settings.
Fixes an issue that would lock the screen in a specific orientation after the dismissal of an in-app message customized to be presented in that orientation.
Renames User.setCustomAttributeArray(key: String, array: [String]?) to setCustomAttribute(…) to align it with other custom attribute setters, and adds “string” to the addTo and removeFrom attribute array methods to clarify which custom attributes they’re used for.
6.0.0
Breaking
The in-app message data models sent to BrazeInAppMessagePresenter.present(message:) now contain remote asset URLs. Previously, these data models would contain local asset URLs.
This change is only breaking in two situations:
When implementing a custom BrazeInAppMessagePresenter.
VoiceOver now correctly focuses on in-app message views when they are presented.
Fixes an issue causing in-app messages with re-eligibility disabled to display multiple times under certain conditions.
Fixes an issue where modal and full in-app message headers were truncated on devices running iOS versions lower than 16 when displaying non-ASCII characters.
The dynamic variant of BrazeUI.framework in the release artifact braze-swift-sdk-prebuilt.zip is now an actual dynamic framework. Previously, this specific framework was mistakenly distributed as a static framework.
Added
Adds the BrazeSDKAuthDelegate protocol as a separate protocol from BrazeDelegate, allowing for more flexible integrations.
Apps implementing BrazeDelegate.braze(_:sdkAuthenticationFailedWithError:) should migrate to use BrazeSDKAuthDelegate and remove the old implementation. The BrazeDelegate method will be removed in a future major release.
5.13.0
Fixed
Fixes an issue where the SDK would automatically track body clicks on non-legacy HTML in-app messages.
Added
Adds the synchronous deviceId property on the Braze instance.
deviceId(queue:completion:) is now deprecated.
deviceId() async is now deprecated.
Adds the automaticBodyClicks property to the HTML in-app message view attributes. This property can be used to enable automatic body clicks tracking on non-legacy HTML in-app messages.
This property is false by default.
This property is ignored for legacy HTML in-app messages.
Adds json() and decoding(json:) public methods to the Feature Flag model object for JSON encoding/decoding.
5.11.2
Fixed
Fixes a crash occurring when the SDK is configured with a flush interval of 0 and network connectivity is poor.
5.11.1
Fixed
Fixes an issue preventing the correct calculation of the delay when retrying failed requests. This led to a more aggressive retry schedule than intended.
Improves the performance of Live Activity tracking by de-duping push token tag requests.
Fixes an issue in logClick(using:) where it would incorrectly open the url field in addition to logging a click for metrics. It now only logs a click for metrics.
This applies to the associated APIs for content cards, in-app messages, and news feed cards.
It is still recommended to use the associated Context object to log interactions instead of these APIs.
Adds support for News Feed data models and analytics.
News Feed UI is not supported by the Swift SDK. See the migration guide for instructions on using the compatibility UI.
5.7.0
Fixed
Fixes an issue where modal image in-app messages would not respect the aspect ratio of the image when the height of the image is larger than its width.
Changed
Changes modal, modal image, full, and full image in-app message view attributes to use the ViewDimension type for their minWidth, maxWidth and maxHeight attributes.
The ViewDimension type enables providing different values for regular and large size-classes.
Added
Adds a configuration to use a randomly generated UUID instead of IDFV as the device ID: useUUIDAsDeviceId.
This configuration defaults to false. To opt in to this feature, set this value to true.
Enabling this value will only affect new devices. Existing devices will use the device identifier that was previously registered.
5.6.4
Fixed
Fixes an issue preventing the execution of BrazeDelegate methods when setting the delegate using Objective-C.
Fixes an issue where triggering an in-app message twice with the same event did not place the message on the in-app message stack under certain conditions.
Added
Adds the public id field to Braze.InAppMessage.Data.
Adds logImpression(using:) and logClick(buttonId:using:) to both in-app messages and content cards, and adds logDismissed(using:) to content cards.
It is recommended to continue using the associated Context to log impressions, clicks, and dismissals for the majority of use cases.
Adds Swift concurrency to support async/await versions of the following public methods. These methods can be used as alternatives to their corresponding counterparts that use completion handlers:
The applyAttributes() method for BrazeContentCardUI views now take the attributes explicitly as a parameter.
5.5.1
Fixed
Fixes an issue where content cards would not be properly removed when stopping a content card campaign on the dashboard and selecting the option Remove card after the next sync (e.g. session start).
5.5.0
Added
Adds support for host apps written in Objective-C.
Braze Objective-C types start either with BRZ or Braze, e.g.:
Renamed ClickAction.uri(_:useWebView:) to ClickAction.url(_:useWebView:).
5.4.0
Fixed
Fixes an issue where brazeBridge.logClick(button_id) would incorrectly accept invalid button_id values like "", [], or {}.
Added
Adds support for Braze Action Deeplink Click Actions.
5.3.2
Fixed
Fixes an issue preventing compilation when importing BrazeUI via SwiftPM in specific cases.
Lowers BrazeUI minimum deployment target to iOS 10.0.
5.3.1
Fixed
Fixes an HTML in-app message issue where clicking a link in an iFrame would launch a separate webview and close the message, instead of redirecting within the iFrame.
Fixes the rounding of In-App Message modal view top corners.
Fixes the display of modals and full screen in-app messages on iPads in landscape mode.
Added
Adds two Example schemes:
InAppMessage-Custom-UI:
Demonstrates how to implement your own custom In-App Message UI.
Available on iOS and tvOS.
ContentCards-Custom-UI:
Demonstrates how to implement your own custom Content Card UI.
# Registro de cambios para el SDK Objective-C de iOS
Source: /docs/es/developer_guide/platforms/legacy_sdks/ios/changelog/objc_changelog/index.md
**Warning:**
[AppboyKit](https://github.com/Appboy/appboy-ios-sdk) (also known as the Objective-C SDK) is no longer supported and has been replaced by the [Swift SDK](https://www.braze.com/docs/es/es/developer_guide/sdk_integration/?sdktab=swift). It will no longer receive new features, bug fixes, security updates, or technical support—however, messaging and analytics will continue to function as normal. To learn more, see [Introducing the New Braze Swift SDK](https://www.braze.com/resources/articles/introducing-the-new-braze-swift-sdk).
# Registro de cambios del SDK Objective-C de iOS
Improves resilience when triggering in-app messages with date property filters.
Added
Adds a new option ABKReenqueueInAppMessage to enum ABKInAppMessageDisplayChoice.
Return this option in beforeInAppMessageDisplayed: of an ABKInAppMessageControllerDelegate to ensure that an in-app message is not displayed and becomes eligible to trigger again.
This option will reset any trigger times and re-eligibility rules as if it was never triggered. It will not add the message to the in-app message stack.
4.5.4
Fixed
Improves reliability of custom event property type validation.
Fixes an issue where the status bar would not restore to its original state after a full in-app message was dismissed.
4.5.3
Fixed
Fixes a crash that occurs when receiving custom event properties of numeric types under certain conditions.
Fixes UI responsiveness warnings when requesting location authorization status.
4.5.2
Fixed
Improves reliability when validating trigger properties.
Improves the NSURLSessionConfiguration disk and memory cache capacities for file downloads. This change enables larger file downloads to be cached if needed.
4.5.1
Fixed
Improves eligibility checks around the minimum trigger timeout for in-app messages by now checking at trigger time in addition to display time.
Fixes an issue where purchases would not trigger certain templated in-app messages.
Added
Adds the delegate method noMatchingTriggerForEvent:name: to ABKInAppMessageControllerDelegate, which is called if no Braze in-app message was triggered for a given event.
4.5.0
Added
Adds support for Content Cards to evaluate Retry-After headers.
4.4.4
Fixed
Calling appboyBridge.closeMessage() or brazeBridge.closeMessage() from an HTML in-app message now correctly triggers ABKInAppMessageUIDelegate.onInAppMessageDismissed: when implemented.
Fixes an issue in 4.4.3 where the tvOS SDK incorrectly referenced an older SDK version.
4.4.3
Fixed
Fixes an issue introduced in 4.4.0 which prevented custom events or purchases with an empty dictionary of properties from being logged.
Improves handling of ABKInAppMessageWindow’s dismissal to promptly remove it from the view hierarchy.
Fixes the position of the pinned indicator for Captioned Image Content Cards when using the default UI.
Fixes an issue introduced in 4.3.2 and limited to users of Appboy-tvOS-SDK, which prevented custom events with properties or purchases with properties from being logged.
Added
Adds a padding property to ABKCaptionedImageContentCardCell to support modifying the default value.
4.4.2
Fixed
Fixes a bug for HTML in-app messages using the HTML Upload with Preview option to improve the reliability of in-app message display.
Fixes a bug preventing integration via Swift Package Manager in specific contexts.
Fixes an issue in the default Content Cards UI where the empty feed label was truncated if it was too large for the screen, for example due to accessibility or localization.
Fixes an issue where Slideup in-app messages would be automatically dismissed after multiple interaction with the app’s main window.
Changed
If changeUser:sdkAuthSignature: is called with the current user’s ID, but with a new and valid SDK Authentication signature, the new signature will be used.
Improves push tracking accuracy for apps making use of UISceneDelegate (UIKit) or Scene (SwiftUI).
4.4.1
Fixed
Fixes an issue in which input elements with type="date" in HTML in-app messages do not respond to some user interactions on iOS 14 and iOS 15.
Fixes ABKSdkMetadata availability when using the dynamic variant of the SDK.
Fixes an issue in which the default content cards UI’s empty feed label does not wrap properly when the device is using Larger Accessibility Sizes for its text size.
Changed
Changed ABKInAppMessageUIDelegate.inAppMessageViewControllerWithInAppMessage: to accept a nil return value.
Added
Adds support for the playsinline attribute on HTML <video> elements within webpages that are opened in the app by Braze.
Adds XCFramework support for the Core integration via Carthage. Please follow the Carthage migration guide when transitioning to the new artifact.
4.4.0
Breaking
Adds XCFramework support to Carthage. This allows projects integrated via Carthage to support Apple Silicon simulators and Mac Catalyst.
To continue using the original Full .framework file, include the Cartfile lines above but reference appboy_ios_sdk_full.json. Then, run carthage update.
For those using the Thin integration, use the same Cartfile above but exclude the line with SDWebImage.
The Core integration does not support XCFrameworks, and you can use the original .framework files as before.
Added
Adds a new attachment to the release called Appboy_iOS_SDK.xcframework.zip.
This artifact has the all-in-one XCFramework containing the full SDK code including all of the assets.
When importing this code manually, drag-and-drop the XCFramework into your project and select Embed & Sign. Then, add -ObjC under Build Settings > Other Linker Flags in your app’s target.
Adds localization support for the close button’s accessibility label in modal and full in-app messages.
Adds the ability to set the SDK’s log level at runtime by setting ABKLogLevelKey to an integer in appboyOptions. Descriptions of the available log levels can be found here.
Adds Appboy.addSdkMetadata: to allow self reporting of SDK Metadata fields via the ABKSdkMetadata enum.
4.3.4
This release requires Xcode 13.
Fixed
Fixes an issue in which the pinned indicator for a Banner Content Card would not display in the default Content Cards UI.
Fixes an issue which prevented custom events and purchases with properties larger than 50 KB to be properly discarded.
4.3.3
Fixed
Fixes a race-condition occasionally preventing HTML in-app messages with assets from being displayed from a test push.
Fixes an issue which prevented HTML in-app messages from opening sms:, mailto:, tel:, facetime: and facetime-audio: urls.
Previously, those urls would fail to open silently.
Fixes an issue where ABKContentCardsTableViewController was not displaying the “no update” label after the last card was deleted from the feed.
Added
Adds methods addToSubscriptionGroupWithGroupId: and removeFromSubscriptionGroupWithGroupId: to ABKUser to manage SMS/Email Subscription Groups.
Also adds appboyBridge.getUser().addToSubscriptionGroup(groupId) and appboyBridge.getUser().removeFromSubscriptionGroup(groupId) to the javascript interface for HTML in-app messages.
4.3.2
Fixed
Iframes embedded in an HTML in-app message are now displayed as part of the same in-app message. Previously, iframes would be loaded in a separate webview.
Added
Adds support for navigation bar transparency changes introduced in iOS 15. Apps using Braze default UIs for Content Cards, the News Feed, and the modal WebView should upgrade to this version as soon as possible ahead of iOS 15’s release.
4.3.1
Fixed
The sdkAuthenticationDelegate now works as expected when setting the property directly.
VoiceOver no longer reads content beneath the displayed in-app message.
Changed
The number of unviewed Content Cards in ABKContentCardsController’s unviewedContentCardCount now excludes control cards.
The default Content Cards UI now allows swipe-to-refresh gestures when empty.
Deprecates ABKInAppMessageController’s method displayNextInAppMessageWithDelegate: in favor of displayNextInAppMessage.
Added
Custom events and purchases now support nested properties.
In addition to integers, floats, booleans, dates, or strings, a JSON object can be provided containing dictionaries of arrays or nested dictionaries. All properties combined can be up to 50 KB in total length.
4.3.0
Breaking
Refined Content Cards UI public api changes introduced in 4.2.0.
Fixed
Fixes an issue introduced in 4.2.0 that caused Content Card type ABKClassicImageContentCardCell to crash on display when not using Storyboard.
4.2.0
⚠️ Known Issues
This release contains a known issue with the Content Cards default UI on iOS, where showing a “Classic” type card with an image causes a crash. If you are using the default Content Cards UI, do not upgrade to this version.
Breaking
Content Cards and News Feed are now more extensible!
Class level API methods have changed to instance methods to make subclassing easier, however getNavigationContentCardsViewController and getNavigationFeedViewController are left in as class methods for backwards compatibility.
Fixes an issue with Dynamic Type support introduced in 3.34.0 to be compatible with iOS 9.
Added
Adds support for new SDK Authentication feature.
Exposes window.brazeBridge in HTML in-app messages which replaces window.appboyBridge. appboyBridge is deprecated and will be removed in a future version of the SDK.
Changed
Makes in-app message window handling more resilient:
The in-app message window tries to display up to 10 times when another window competes for visibility. If the in-app message is not guaranteed visibility, it is dismissed and an error is logged.
Improves Appboy’s wipeDataAndDisableForAppRun and disableSDK to handle additional use cases.
Deprecates flushDataAndProcessRequestQueue in favor of requestImmediateDataFlush.
4.1.0
Breaking
ABKURLDelegate method handleAppboyURL:fromChannel:withExtras: is now invoked for all urls.
Previously, this delegate method was not invoked for urls opened in a WebView or the default browser when originating from the News Feed or Content Cards.
Removes ABKUIURLUtils method openURLWithSystem:fromChannel:. Use openURLWithSystem: as a replacement.
Fixed
Fixes a case where the ABKURLDelegate method handleAppboyURL:fromChannel:withExtras: was being called twice when opening a push notification with an url.
Changed
Deprecates ABKUnknownChannel.
4.0.2
Fixed
Fixes a double redirection bug in Push Stories when the app is in a terminated state and application:didReceiveRemoteNotification:fetchCompletionHandler: is not implemented.
Changed
Improves the Swift Package Manager bundle lookup to be more flexible.
Added
Adds support to use a dictionary named Braze instead of Appboy when adding customization in the Info.plist. After adding the Braze dictionary, please remove the previous Appboy dictionary.
4.0.1
Fixed
Sets CFBundleSupportedPlatforms in .plist files to the correct non-simulator value.
Removes the Dynamic Type support warnings.
4.0.0
Breaking
AppboyKit is now distributed as an XCFramework when integrating with Cocoapods. Cocoapods 1.10.0+ is required.
This removes the need for integrators to exclude the arm64 architecture when building for the simulator. Please undo any of the changes that may have been made when upgrading to 3.27.0 (Integrators will now be required to exclude …).
Fixed
Fixes the Swift Package Manager cleanup script to remove only the necessary files.
Added
Adds Mac Catalyst support for apps integrating with Cocoapods.
3.34.0
Breaking
Replaces ABKInAppMessageSlideupViewController’s slideConstraint by offset.
Added
Adds a new Github repo to optimize import speeds for applications integrating with Swift Package Manager.
To use this repo, follow these steps:
Remove the existing package in your application that points to the url: https://github.com/Appboy/Appboy-ios-sdk.
Add a new package using the new url: https://github.com/braze-inc/braze-ios-sdk.
Adds support for Right-to-Left languages in the News Feed.
Adds support for scaling fonts automatically with Dynamic Type for in-app messages and the News Feed.
Changed
Improves accessibility handling for modal and full in-app messages.
Improves Slideup in-app message animations.
3.33.1
Fixed
Fixes Swift Package Manager integration.
In Xcode, select File ▸ Swift Packages ▸ Update to Latest Package Versions to update.
Fixes Push Story integration via CocoaPods for applications that have use_frameworks! in their Podfile.
3.33.0
Breaking
Changed Push Story integration to use XCFrameworks for Cocoapods and manual integration. Applications currently integrating Push Stories via Cocoapods or manual integration must follow these steps when updating:
In your Notification Content Extension target:
Remove AppboyPushStory.framework from Frameworks and Libraries under the General tab.
In your application target:
Delete the Copy File build phase copying the AppboyPushStory.framework to the Frameworks destination.
Delete the Run Script build phase that starts with:
1
2
3
4
APP_PATH="${TARGET_BUILD_DIR}/${WRAPPER_NAME}"

find "$APP_PATH" -name 'AppboyPushStory.framework' -type d | while read -r FRAMEWORK
...
Fixes a double redirection bug in Push Stories when the app is in a terminated state and the UNUserNotificationCenter delegate is not the AppDelegate.
3.32.0
Added
Adds Mac Catalyst support for apps integrating with Swift Package Manager (SPM).
Please follow the instructions here to import the SDK with SPM. The SDK does not currently support Mac Catalyst when integrated through Cocoapods or Carthage.
Fixes the formatting of Full and Slideup in-app messages when displaying on iPhone 12 mini.
Changed
Improves Push Story click tracking handling.
3.31.1
Breaking
Removes the method getSDWebImageProxyClass from ABKUIUtils.
You can access the public class ABKSDWebImageProxy directly by importing ABKSDWebImageProxy.h.
Fixed
Fixes a bug in the Cocoapods integration that would lead to SDK localizations being embedded for languages not explicitly supported in the app.
Fixes a rare crash that would occur when no windows exist at UIWindowLevelNormal while an in-app message is being displayed and UIKit requests UI updates (orientation change, etc.).
Fixes a bug in modal in-app messages where some languages (such as Burmese) may have clipped text.
3.31.0
Breaking
For apps that have previously integrated through Swift Package Manager, please perform the following steps:
In the Xcode menu, click Product > Scheme > Edit Scheme...
Click the expand ▶️ next to Build and select Post-actions. Press + and select New Run Script Action.
In the dropdown next to Provide build settings from, select your app’s target.
If you are updating from 3.29.0 or 3.29.1, remove the Run Script Action previously specified in the 3.29.0 section of this changelog.
Added
Adds Push Stories support for apps integrating with Swift Package Manager.
In your app content extension’s target, under Build Settings > Other Linker Flags, add the -ObjC linker flag.
Changed
Updates the email validation on the SDK to be more lenient in favor of more accurate validation by the Braze backend. Valid emails with uncommon patterns or international characters that were previously rejected will now be accepted.
Deprecates ABKDeviceWhitelistKey in favor of ABKDeviceAllowlistKey.
Fixed
Fixes a bug in HTML in-app messages where some native WebKit UI elements could be unresponsive.
3.30.0
Breaking
Body click analytics will no longer automatically be collected for HTML in-app messages created using the HTML Upload with Preview option in the platform.
To continue to receive body click analytics, you must log body clicks explicitly from your message via Javascript using appboyBridge.logClick().
Fixed
Fixes a bug with Full in-app messages where the button positions did not match the preview on the Braze dashboard.
Fixes a bug where in-app messages would be displayed below the application window under specific conditions.
Apps that set up their window asynchronously at startup could accidentally hide the in-app message window if one was being displayed (e.g. as a result of clicking on a test in-app message notification).
Added
Adds support for custom endpoints with a scheme included (https, http, etc.). For example, http://localhost:3001 will no longer result in https://http://localhost:3001 as the resolved endpoint.
3.29.1
Added
Adds improved support for in-app message display on iPhone 12 models.
3.29.0
Added
Adds initial support for Swift Package Manager. There are 2 new packages that have been added: AppboyKit for the core SDK and AppboyUI for the full SDK (including UI elements), which correspond to the Appboy-iOS-SDK/Core and Appboy-iOS-SDK pods, respectively.
Note that tvOS support is not available via Swift Package Manager for this release. Push Stories is only available through a side-by-side integration with Cocoapods.
To add the package to your project follow these steps:
Select File > Swift Packages > Add Package Dependency.
In the search bar, enter https://github.com/Appboy/Appboy-ios-sdk.
Select one of AppboyKit or AppboyUI. Note that AppboyUI includes AppboyKit automatically.
In your app’s target, under Build Settings > Other Linker Flags, add the -ObjC linker flag.
In the Xcode menu, click Product > Scheme > Edit Scheme...
Click the expand ▶️ next to Build and select Post-actions. Press + and select New Run Script Action.
In the dropdown next to Provide build settings from, select your app’s target.
Removes userNotificationWasSentFromAppboy: and pushNotificationWasSentFromAppboy: on Appboy. Use isAppboyUserNotification: and isAppboyRemoteNotification: in ABKPushUtils instead.
Updates ABKURLDelegate’s method signature for handleAppboyURL:fromChannel:withExtras: to include nullability annotations required for proper Swift support.
Fixed
Fixes a race condition in Appboy method wipeDataAndDisableForAppRun where certain persisted fields would still be available immediately after calling the method. These fields now are removed synchronously.
Changed
Updated SDWebImage to use version 5.9.x.
3.27.0
Breaking
Adds support for iOS 14. Requires Xcode 12.
Removes the ABK_ENABLE_IDFA_COLLECTION preprocessor macro from the SDK.
Updates the ABKIDFADelegate protocol by renaming isAdvertisingTrackingEnabled to isAdvertisingTrackingEnabledOrATTAuthorized to reflect the addition of the AppTrackingTransparency framework in iOS 14.
If you use the Ad Tracking Enabled segment filter on the Braze dashboard or are implementing AppTrackingTransparency, you must update your integration to use AppTrackingTransparency to read the correct user status. Please see our sample app for implementation details.
If you do not use the Ad Tracking Enabled segment filter and are not implementing AppTrackingTransparency yet, your implementation of isAdvertisingTrackingEnabledOrATTAuthorized may temporarily continue to use isAdvertisingTrackingEnabled. However, the returned value will always be NO in iOS 14, regardless of actual IDFA availability.
Note that Apple announced that they will delay the enforcement of upcoming IDFA changes until early 2021. Please reference our iOS 14 upgrade guide for more details.
Updates the minimum required version of SDWebImage from 5.0 to 5.8.2.
Integrators will now be required to exclude the arm64 simulator slice in their entire project.
This is done automatically when integrating via Cocoapods.
For other cases:
If you are using xcconfig files to build your app, please set:
For iOS targets: EXCLUDED_ARCHS[sdk=iphonesimulator*] = arm64
For tvOS targets: EXCLUDED_ARCHS[sdk=appletvsimulator*] = arm64
If you are using the Xcode Build Settings panel, enable Build Active Architecture Only for the configuration you use to run your app on the simulator. (ONLY_ACTIVE_ARCH = YES)
3.26.1
Changed
Deprecates the compilation macro ABK_ENABLE_IDFA_COLLECTION in favor of the ABKIDFADelegate implementation.
ABK_ENABLE_IDFA_COLLECTION will not function properly in iOS 14. To continue collecting IDFA on iOS 14 devices, please upgrade to Xcode 12 and implement App Tracking Transparency and Braze’s ABKIDFADelegate (see the iOS 14 upgrade guide for more information).
Added
Adds improved support for iOS 14 Approximate Location tracking.
3.26.0
Breaking
Removed readonly property overrideApplicationStatusBarHiddenState in ABKInAppMessageViewController.h.
Fixed
Fixes an issue with in-app messages not respecting the application’s status bar style when View controller-based status bar appearance (UIViewControllerBasedStatusBarAppearance) is set to YES in the Info.plist.
Fixes an issue which can lead to text being cut off in Content Cards for specific iPhone models.
Fixes an issue preventing test Content Cards from displaying under specific conditions.
Changed
Added Binary Project Specification file for more efficient Carthage integration of the full SDK.
Update your Cartfile to use binary "https://raw.githubusercontent.com/Appboy/appboy-ios-sdk/master/appboy_ios_sdk_full.json"
Support for this integration method was added starting with version 3.24.0 of the SDK.
Added
Adds support for specifying PushStoryAppGroup in the Appboy dictionary in your app’s Info.plist. This Apple App Group will share the Braze Push Story information such as Campaign IDs between applications from a single Apple Developer account.
Adds appboyBridge.getUser().addAlias(alias, label) to the javascript interface for HTML in-app messages.
Adds the property overrideUserInterfaceStyle to ABKInAppMessage that allows forcing Light or Dark mode in the same way as Apple’s UIViewController.overrideUserInterfaceStyle.
Adds the ability to dismiss modal in-app messages when the user clicks outside of the in-app message.
This feature is disabled by default.
You can enable the feature by adding the Appboy dictionary to your Info.plist file. Inside the Appboy dictionary, add the DismissModalOnOutsideTap boolean subentry and set the value to YES.
You can also enable the feature at runtime by setting ABKEnableDismissModalOnOutsideTapKey to YES in appboyOptions.
3.25.0
Breaking
Removes the arm64e architecture when building with Cocoapods.
Removes the deprecated property appWindow from ABKInAppMessageWindowController.
3.24.2
Fixed
Fixes an issue with post-dismissal view hierarchy restoration for in-app messages under specific conditions.
Fixes an issue introduced in 3.24.0 breaking the SDK compatibility with Cocoapods.
3.24.0
Important This release is not compatible with Cocoapods. Do not upgrade to this version and upgrade to 3.24.1 and above instead.
Breaking
Renames ABKInAppMessageWindow’s catchClicksOutsideInAppMessage to handleAllTouchEvents.
Fixed
Fixes an issue where the unread indicator on a Content Card would persist even after being read.
Fixes an issue preventing long texts from displaying correctly in Full in-app messages.
Fixes an issue where appboyBridge would not work in an Ajax callback within HTML In-App Messages.
Changed
Changes the manual integration steps for versions 3.24.0 and newer. Please follow the updated integration steps here.
Added
Adds support for JavaScript functions window.alert(), window.confirm() and window.prompt() in HTML in-app messages.
Adds the ABKContentCardsTableViewControllerDelegate protocol to more intricately handle Content Card clicks using the methods contentCardTableViewController:shouldHandleCardClick: and contentCardTableViewController:didHandleCardClick:.
3.23.0
Fixed
Fixes an issue with regex based event property triggers not working as expected. Previously on iOS they had to match the entire string, now they will search for matches as expected.
Improves resiliency when handling multiple background requests.
Added
Adds support for upcoming HTML In-App Message templates.
Adds support for applications using scenes (UIWindowSceneDelegate). In-app messages are now properly displayed in that context.
3.22.0
Breaking
Removes the key ABKInAppMessageHideStatusBarKey from appboyOptions and the property forceHideStatusBar from ABKInAppMessageController. Full screen in-app messages are now always displayed with the status bar hidden.
Adds Dark Mode support to Content Cards. This feature is enabled by default and can be disabled by setting enableDarkTheme property to NO on ABKContentCardsTableViewController before the view controller is presented.
Fixed
Fixes an issue in HTML in-app messages where button clicks weren’t correctly being attributed for mailto: and tel: links.
Fixes an issue in HTML in-app messages where videos would be displayed underneath the in-app message when full screen playback was enabled. The in-app message UIWindow’s windowLevel is now set to UIWindowLevelNormal instead of being above UIWindowLevelStatusBar.
Fixes an issue in Content Cards where ABKURLDelegate was not being respected when opening links.
Added
Adds appboyBridge.logClick(id), appboyBridge.logClick() and appboyBridge.getUser().setCustomLocationAttribute(key, latitude, longitude) to the javascript interface for HTML in-app messages.
Adds Czech and Ukrainian language support for Braze UI elements.
Adds the ability to unset the current user’s email attribute by setting the email property of the current ABKUser instance to nil (e.g. [Appboy sharedInstance].user.email = nil;).
Adds Dark Mode support to Push Stories.
Adds the ability to set maximum width of Content Cards by using the maxContentCardWidth property of ABKContentCardsTableViewController.
3.21.3
Added
Adds an option to disable automatic geofence requests.
You can do this in the plist by adding the Appboy dictionary to your Info.plist file. Inside the Appboy dictionary, add the DisableAutomaticGeofenceRequests boolean subentry and set the value to YES.
You can also disable automatic geofence requests at runtime by setting ABKDisableAutomaticGeofenceRequestsKey to YES in appboyOptions.
Adds the method requestGeofencesWithLongitude:latitude: to Appboy.h. This method can be called whenever you explicitly want Braze to send a request for updated Geofences information. This call is rate limited to once per user session.
3.21.2
Fixed
Fixes an issue in HTML in-app messages where, during display, the viewport would shift down if the keyboard was opened but not shift back up when the keyboard was closed.
Fixes an issue introduced in 3.17.0 where the SDK would give precedence to the endpoint passed in Info.plist if given both an endpoint from the Info.plist and appboyOptions.
Added
Adds the ability to set a custom WKWebViewConfiguration for HTML in-app messages. You can set it using the method setCustomWKWebViewConfiguration in ABKInAppMessageUIDelegate.
Changed
Removes calls to deprecated APIs statusBarOrientation and statusBarFrame.
Un-deprecates the following push utility methods: isUninstallTrackingUserNotification:, isUninstallTrackingRemoteNotification:, isGeofencesSyncUserNotification:, isGeofencesSyncRemoteNotification:, and isPushStoryRemoteNotification: from ABKPushUtils. These APIs were originally deprecated in 3.16.0.
3.21.1
Fixed
Fixes an issue for Modal and Full in-app messages where the opacity value of the close X button was not being respected.
Changed
ABKContentCard.m will now log a click event when logContentCardClicked is called and no URL field is populated.
Added
Adds the ability to force the status bar to hide when a Full or HTML in-app message is being actively displayed. To opt in to this feature, set ABKInAppMessageHideStatusBarKey to YES in appboyOptions.
3.21.0
Breaking
Requires XCode 11.
Fixed
Fixes an issue in the animate-in behavior of HTML in-app messages that could cause a brief flicker before the message displayed on older devices and simulators.
Fixes an issue with Slideup in-app messages where they would cover part of the status bar when animating from the top on non-notched devices.
Fixes an issue introduced in 3.14.1 where boolean-typed event properties would be improperly cast to numbers.
Changed
Updates the logging format for debug, warn, and error ABKLogger messages to now print their log level.
Added
Adds support for the upcoming feature, in-app messages with Dark Mode support.
Dark Mode enabled messages must be created from the dashboard. Braze does not dynamically theme in-app messages for Dark Mode.
This feature is enabled by default for all new ABKInAppMessage instances. To prevent Braze from automatically applying a Dark Theme when the fields are available on Braze’s servers, set the enableDarkTheme flag on ABKInAppMessage to NO in the beforeInAppMessageDisplayed: method of your ABKInAppMessageControllerDelegate delegate implementation.
Adds the ability to reference the Braze iOS SDK API from Swift when using the Appboy-tvOS-SDK pod. Adding import AppboyTVOSKit to the top of your Swift file while using the Appboy-tvOS-SDK pod will give you equivalent behavior to adding import Appboy_iOS_SDK while using the Appboy-iOS-SDK pod.
Adds the populateContentCards: method and the cards property to ABKContentCardsTableViewController’s public interface. By setting the cards property from within populateContentCards:, you may manipulate ABKContentCard field data and/or control which ABKContentCard instances are displayed from the context of a custom ABKContentCardsTableViewController subclass.
3.20.4
Fixed
Fixed an issue with Content Cards where the header and description text fields would appear to be missing in Dark Mode.
Added
Adds a TEALIUM SDK flavor option.
3.20.3
Added
If Automatic Braze location collection is enabled, the SDK now submits a session start location request if location hasn’t already been sent up for the session after any affirmative location permission prompt. This also applies to the new “Allow Once” option in iOS 13.
3.20.2
Important If you are on Braze iOS SDK 3.19.0 or below, we recommend upgrading to this version immediately to ensure uninterrupted collection of new push tokens as users upgrade to iOS 13.
In application:didRegisterForRemoteNotificationsWithDeviceToken:, replace
If you are on Braze iOS SDK 3.19.0 or below and unable to upgrade, you must ensure your [Appboy registerPushToken] implementation does not rely on stringWithFormat or description for parsing the deviceToken passed in from application:didRegisterForRemoteNotificationsWithDeviceToken:. Please reach out to your Customer Success Manager for more information.
Important In Braze iOS SDK 3.19.0, we updated our HTML in-app message container from UIWebview to WKWebView, however, the initial releases have known issues displaying HTML in-app messages. If you are currently using 3.19.0, 3.20.0, or 3.20.1, you are strongly encouraged to upgrade if you make use of HTML in-app messages. Please see the following for more important information about the transition to WKWebView:
If you are utilizing customization for HTML in-app messages (such as customizing ABKInAppMessageHTMLFullViewController or ABKInAppMessageHTMLViewController), we strongly recommend testing to ensure your in-app messages continue to display correctly and interactions function as intended.
The following javascript methods are now no-ops: alert, confirm, prompt.
Deep links without schemes are no longer supported. Ensure that your in-app message deep links contain schemes.
Fixed
Fixes an issue introduced in 3.19.0 where HTML in-app messages would not register user clicks when the .xib failed to load.
Fixes an issue introduced in 3.19.0 where HTML in-app messages with select special characters and an assets zip would cause display irregularities.
Changed
Updates the WKWebView which displays HTML in-app messages with the following attributes:
suppressesIncrementalRendering is set to true
mediaTypesRequiringUserActionForPlayback is set to WKAudiovisualMediaTypeAll
Updates the background color of the WKWebView which displays HTML in-app messages from [[UIColor blackColor] colorWithAlphaComponent:.3] to [UIColor clearColor].
3.20.1
Important This release has known issues displaying HTML in-app messages. Do not upgrade to this version and upgrade to 3.20.2 and above instead. If you are using this version, you are strongly encouraged to upgrade to 3.20.2 or above if you make use of HTML in-app messages.
Fixed
Fixes an issue introduced in 3.19.0 which changed the background of HTML in-app messages to a non-transparent color.
Improves the robustness of push token collection code for iOS 13 introduced in 3.20.0.
3.20.0
Important This release has known issues displaying HTML in-app messages and a known issue with push token collection. Do not upgrade to this version and upgrade to 3.20.2 and above instead. If you are using this version, you are strongly encouraged to upgrade to 3.20.2 or above if you make use of HTML in-app messages.
Breaking
Introduced a signature change for push token collection methods:
Important This release has known issues displaying HTML in-app messages. Do not upgrade to this version and upgrade to 3.20.2 and above instead. If you are using this version, you are strongly encouraged to upgrade to 3.20.2 or above if you make use of HTML in-app messages.
Breaking
Replaces UIWebView with WKWebView for HTML in-app messages.
If you are utilizing customization for HTML in-app messages (such as customizing ABKInAppMessageHTMLFullViewController or ABKInAppMessageHTMLViewController), you must test to ensure your in-app messages continue to display correctly and interactions function as intended.
The following javascript methods are now no-ops: alert, confirm, prompt.
Deep links without schemes are no longer supported. Please ensure that your in-app message deep links contain schemes.
3.18.0
Breaking
Automatic Braze location collection is now disabled by default. If you choose to use our location collection, you must explicitly enable location collection.
You can do this in the plist by adding the Appboy dictionary to your Info.plist file. Inside the Appboy dictionary, add the EnableAutomaticLocationCollection boolean subentry and set the value to YES.
You can also enable location at runtime by setting ABKEnableAutomaticLocationCollectionKey to YES in appboyOptions.
Removes the Feedback feature from the SDK. The Feedback subspec and all Feedback methods on the SDK, including [[Appboy sharedInstance] submitFeedback] and [[Appboy sharedInstance] logFeedbackDisplayed], are removed.
Changed
Improves support for in-app messages on “notched” devices (for example, iPhone X, Pixel 3XL). Full-screen messages now expand to fill the entire screen of any phone, while covering the status bar.
Added
Adds the ability to enable Braze Geofences without enabling Braze location collection. You can set this in the plist by adding the Appboy dictionary to your Info.plist file. Inside the Appboy dictionary, add the EnableGeofences boolean subentry and set the value to YES to enable Braze Geofences. You can also enable geofences at runtime by setting ABKEnableGeofencesKey to YES in appboyOptions.
If this key is not set, it will default to the status of automatic location collection (see breaking change above).
Note that Braze Geofences will continue to work on existing integrations if location collection is enabled and this new configuration is not present. This new configuration is intended for integrations that want Braze Geofences, but not location collection enabled as well.
3.17.0
Breaking
Removes ABKAppboyEndpointDelegate.
You can now set the endpoint at runtime by setting the value of ABKEndpointKey in appboyOptions to your custom endpoint (ex. sdk.api.braze.eu) at initialization.
3.16.0
Important: If you are using ABKAppboyEndpointDelegate, you will need to replace dev.appboy.com with sdk.iad-01.braze.com in the getApiEndpoint method.
Breaking
Removes the methods: allowRequestWhenInUseLocationPermission and allowRequestAlwaysPermission from ABKLocationManager.
To request when in use location permission, use the following code:
The preprocessor macro ABK_DISABLE_LOCATION_SERVICES is no longer needed.
Important: Configuring geofences to request always location permissions remotely from the Braze dashboard is no longer supported. If you are using Geofences, you will need to ensure that your app requests always location permission from your users manually.
ABKAutomaticRequestProcessingExceptForDataFlush is deprecated. Users using ABKAutomaticRequestProcessingExceptForDataFlush should switch to ABKManualRequestProcessing, as the new behavior of ABKManualRequestProcessing is identical to the previous behavior of ABKAutomaticRequestProcessingExceptForDataFlush
Changed
Deprecates the push utility methods: isUninstallTrackingUserNotification:, isUninstallTrackingRemoteNotification:, isGeofencesSyncUserNotification:, isGeofencesSyncRemoteNotification:, and isPushStoryRemoteNotification: from ABKPushUtils. Please use the function isAppboyInternalRemoteNotification:.
Minor changes to the logic of ABKManualRequestProcessing. The original ABKManualRequestProcessing had specific exceptions and behaved more like ABKAutomaticRequestProcessingExceptForDataFlush in practice. As a result, the two policies have been merged into ABKManualRequestProcessing. Note that the new definition of ABKManualRequestProcessing is that periodic automatic data flushes are disabled. Other requests important to basic Braze functionality will still occur.
3.15.0
Important: If you are using ABKAppboyEndpointDelegate, you will need to replace dev.appboy.com with sdk.iad-01.braze.com in the getApiEndpoint method.
Breaking
Adds support for SDWebImage version 5.0.
Note that upgrading to SDWebImage 5.0 also removed the FLAnimatedImage transitive dependency from the SDK.
3.14.1
Important: If you are using ABKAppboyEndpointDelegate, you will need to replace dev.appboy.com with sdk.iad-01.braze.com in the getApiEndpoint method.
Changed
Changed in-app message trigger behavior to not perform trigger events until after any pending trigger sync requests to the server have finished.
Fixed
Fixed a serialization issue that could cause improper type conversions for certain decimal values.
Fixed a behavior introduced in 3.12.0 which caused in-app messages to not be considered triggered locally if ABKDiscardInAppMessage was returned by the host app in beforeInAppMessageDisplayed:.
Added
Added the ability to set the session timeout via the Info.plist.
Add the Appboy dictionary to your Info.plist file. Inside the Appboy Dictionary, add the SessionTimeout Number subentry and set the value to your session timeout.
Added the ability to disable location tracking via the Info.plist.
Add the Appboy dictionary to your Info.plist file. Inside the Appboy Dictionary, add the DisableAutomaticLocation Boolean subentry and set the value to YES.
Added dynamic cell resizing for Content Cards cells with templated images in our default Content Cards UI.
Added validation to the local filename’s canonical path during zip file extraction.
3.14.0
Important: If you are using ABKAppboyEndpointDelegate and plan to upgrade to 3.14.1, you will need to replace dev.appboy.com with sdk.iad-01.braze.com in the getApiEndpoint method.
Added
Improves the look and feel of In-App Messages to adhere to the latest UX and UI best practices. Changes affect font sizes, padding, and responsiveness across all message types. Now supports button border styling.
3.13.0
Breaking
Upgrades the delivery mechanism of Push Stories to allow delivery even after a user’s app has been force closed..
Required: Please change your integration to use ab_cat_push_story_v2 instead of ab_cat_push_story for the UNNotificationExtensionCategory in your content extension. See documentation for more details.
Changed
Improves in-app message triggering logic to fall back to lower priority messages when the Braze server aborts templating (e.g. from a Connected Content abort in the message body, or because the user is no longer in the correct Segment for the message).
Updates German translations to improve formatting.
3.12.0
Breaking
Drops support for iOS 8.
Adds support for the arm64e architecture when building with Cocoapods. Requires Xcode 10.1.
Fixed
Fixes bitcode support for the Push Story framework when using Xcode 10.
Cross-Promotion cards have also been removed as a card model and will thus no longer be returned.
3.11.0
Added
Adds the ability to set or remove custom location attributes for a specific user from within HTML IAMs.
Updates the SDK to report users who disable banner notifications but are still opted-in to push notifications as push enabled. Note this change does not affect provisionally authorized users on iOS 12, who were considered push enabled before this release regardless of their banner notification settings.
Adds Carthage Core support which allows for integration with the core Braze SDK without any UI components. To implement the core SDK, add binary "https://raw.githubusercontent.com/Appboy/appboy-ios-sdk/master/appboy_ios_sdk_core.json" to your Cartfile.
Changed
Deprecates the Feedback feature.
Fixed
Fixes an issue with the JS bridge when trying to set a custom attribute with the character ‘&’.
3.10.0
Added
Adds the ability to specify a whitelist for device fields that are collected by the Braze SDK.
Configurable device fields are defined in the ABKDeviceOptions enum.
To specify whitelisted device fields, assign the bitwise OR of desired fields to ABKDeviceWhitelistKey in the appboyOptions of startWithApiKey:inApplication:withAppboyOptions:.
For example, to specify timezone and locale collection to be whitelisted, set appboyOptions[ABKDeviceWhitelistKey] = @(ABKDeviceOptionTimezone | ABKDeviceOptionLocale);.
To turn off all fields, set appboyOptions[ABKDeviceWhitelistKey] = @(ABKDeviceOptionNone);.
By default, all fields are enabled.
Added the clicked property to ABKContentCard. Clicks made through [ABKContentCard logContentCardClicked] are now saved locally on the device.
Breaking
Removes ABKSignificantChangeCollectionEnabledOptionKey, ABKSignificantChangeCollectionDistanceFilterOptionKey, and ABKSignificantChangeCollectionTimeFilterOptionKey from the Appboy interface.
Removed
Removes the ability to optionally track locations in the background.
Fixed
Fixes an issue where Slideup and Full In-App Message content could be obscured by the notch on iPhone XR and iPhone XS Max.
3.9.0
Breaking
Adds support for iOS 12. Requires Xcode 10.
Fixed
Fixes minor issues with subclassing ABKInAppMessageModalViewController and News Feed request timeouts.
Thanks @datkinnguyen for your contribution.
3.8.4
Fixed
Fixes a regression introduced in version 3.8.3 that caused background tasks to extend beyond execution time.
3.8.3
Fixed
Fixes an issue where ABKContentCardsController unviewedContentCardCount would always return 0.
Changed
Updates the Content Cards UI with minor layout improvements.
3.8.2
Fixed
Fixes an issue with possible build failure when using Content Cards related to duplicate image names in Content Cards and News Feed pods. Please use this version if integrating Content Cards.
Changed
Updates the Content Cards UI with minor layout improvements.
3.8.1
Fixed
Important: Fixes an issue with Content Cards syncing. Note: As additional fixes were added in later versions, please use Braze iOS SDK version 3.8.2 or above if integrating Content Cards.
3.8.0
Added
In ABKUser class, addLocationCustomAttributeWithKey:latitude:longitude: and removeLocationCustomAttributeWithKey: methods are added to manage location custom attributes.
Introduces support for the upcoming Content Cards feature, which will eventually replace the existing News Feed feature and adds significant capability. This feature is currently in closed beta testing; if you’re interested in joining the beta, please reach out to your Customer Success Manager or Account Manager.
Changed
Status bar is not obscured when displaying a full screen in-app message.
3.7.1
Changed
Improves data handling immediately following a user change to bring behavioral parity with the Android and Web SDKs.
3.7.0
Breaking
In ABKInAppMessageUIControlling protocol, getCurrentDisplayChoiceForControlInAppMessage method is added to define whether the control in-app message impression should be logged now, later or discarded.
In ABKInAppMessageControllerDelegate protocol, beforeControlMessageImpressionLogged method is added to define whether the control in-app message impression should be logged now, later or discarded.
Added
CLLocationManager authorization requests can now be prevented from compiling by setting a Preprocessor flag ABK_DISABLE_LOCATION_SERVICES.
Fixed
Fixes an issue where in-app messages triggered on session start could potentially be templated with the old user’s attributes.
3.6.0
Breaking
In ABKSDWebImageProxy.h, renames removeImageForKey to removeSDWebImageForKey and clearCache to clearSDWebImageCache to avoid conflicts with internal Apple API. Important: We have received reports of sporadic App Store rejection stemming from Apple’s static checks mistaking our APIs for an invalid usage of the internal Apple API. We recommend new App Store submissions integrating the Braze iOS SDK ship with this version or above to decrease the likelihood of rejection.
Added
Exposes handleCardClick on ABKNewsFeedTableViewController.h to enable custom handling via subclassing.
Improves News Feed image handling on iPad.
3.5.1
Fixed
Fixes an issue with integrating the NewsFeed subspec in Swift projects via Cocoapods.
3.5.0
Breaking
Open sources the News Feed UI code and moves it into a new subspec named “NewsFeed”.
Manual integrators must now add the AppboyUI folder of this repository to their projects as a group, in addition to AppboyKit.
The “NewsFeed” subspec contains the Braze News Feed UI and the Core SDK. It does not include the Feedback or In-App Message UI.
The “UI” subspec contains all Braze UI and the Core SDK subpsec.
ABKFeedViewControllerDelegate was removed.
To integrate a navigation context News Feed, use the following code:
Removes NUI support for Feedback, In-App Messages, and the News Feed.
All customization can now be done by using categories or by extending our open sourced view controllers.
Removes deprecated ABKPushURIDelegate from the SDK. Use ABKURLDelegate instead.
3.4.0
Breaking
Adds preferredOrientation to ABKInAppMessageUIController and ABKInAppMessageWindowController.
Removes supportedOrientations from ABKInAppMessageUIController and ABKInAppMessageWindowController.
Renames supportedOrientationMasks to supportedOrientationMask in ABKInAppMessageUIController and ABKInAppMessageWindowController.
Fixed
Fixes an issue that caused GIFs to not animate on SDWebImage versions above or equal to 4.3.0
3.3.4
Added
Adds the ability to view verbose logs from the SDK for debugging.
To enable verbose logging, add a dictionary named Appboy to your Info.plist file. Inside the Appboy Dictionary, add the LogLevel String subentry and set the value to “0”.
3.3.3
Added
Adds wipeDataAndDisableForAppRun: on the Appboy interface to support wiping all customer data created by the Braze SDK.
Adds disableSDK: and requestEnableSDKOnNextAppRun: to the Appboy interface to disable and re-enable the Braze SDK.
Fixed
Fixes an issue where events setting custom attribute arrays to nil would persist on the SDK beyond their useful life.
3.3.2
Changed
Updates the SDK with internal, non-functional improvements.
3.3.1
Added
Adds Other, Unknown, Not Applicable, and Prefer not to Say options for user gender.
Adds umbrella header files AppboyFeedback.h and AppboyInAppMessage.h for the Feedback and InAppMessage subspecs.
Fixed
Fixes an issue where the method beforeInAppMessageDisplayed: in class ABKInAppMessageControllerDelegate is not called when the host app is using the Core subspec.
3.3.0
Breaking
Open sources the In-App Message UI code and moves it into a new subspec named “InAppMessage”.
Manual integrators must now add the AppboyUI folder of this repository to their projects as a group, in addition to AppboyKit.
The “InAppMessage” subspec contains the Braze In-App Message UI and the Core SDK. It does not include Feedback or the News Feed UI.
The “UI” subspec contains all Braze UI and the Core SDK subpsec.
The open-sourced In-App Message view controllers offer backward compatible NUI support, although we recommend using categories or subclassing the In-App Message view controllers for customization as the NUI library isn’t actively maintained any more. Support for NUI customization will be removed in a future release.
Most delegate customization methods are moved from ABKInAppMessageControllerDelegate to ABKInAppMessageUIDelegate.
Fixes an issue introduced in version 3.0.0 which caused detailed device model information to not be collected by the SDK.
Fixes an issue where Braze’s Carthage framework did not support simulators.
3.2.2
Fixed
Fixes an issue where Slideup and Full In-App Message content could be obscured by the notch on iPhone X.
3.2.1
Fixed
Fixes an issue where Push Story Framework did not support bitcode.
3.2.0
Added
Adds Push Stories, a new push type that uses UNNotificationContentExtension to display multiple images in a single notification.
This feature requires iOS 10 and above.
Fixed
Fixes an issue where tvOS SDK did not support bitcode.
3.1.1
Added
Adds a new property language to ABKUser to allow explicit control over the user’s language in the Braze dashboard. Note that this is separate and independent from the language settings on the user’s device.
Adds an Objective-C sample app for the Core subspec of the SDK. See Samples/Core/ObjCSample.
Fixed
Fixes a bug introduced in version 2.30 where crashes could occur if the SDK was directed to handle a custom scheme deep link inside a WebView.
Fixes a bug introduced in version 3.0 where new custom attributes were not being flushed if custom attributes had been previously flushed in the same foregrounded session.
Fixes a bug introduced in version 3.0 where previously flushed custom attributes were being re-sent.
Fixes an issue where slow image fetching blocked image-only modal in-app messages from displaying.
Adds the ability to set a custom API endpoint via the Info.plist.
Add the Appboy dictionary to your Info.plist file. Inside the Appboy Dictionary, add the Endpoint String subentry and set the value to your custom endpoint (e.g., sdk.api.braze.eu).
Fixed
Fixes an issue where changing the IDFA settings through a third party wrapper could cause a crash.
3.0.1
Fixed
Fixes an issue where calling incrementCustomUserAttribute: on ABKUser could cause a crash.
3.0.0
Breaking
Removes the deprecated foursquareAccessToken property from ABKUser. To associate a Foursquare access token with a user profile, use setCustomAttributeWithKey:andStringValue: instead.
Note: Braze iOS SDK version 3.0.0 will only support downgrading to iOS SDK version 2.31.0. Downgrading to versions prior to 2.31.0 may result in app crashes.
Added
Adds a major performance upgrade that reduces CPU usage, memory footprint, and network traffic.
2.31.0
Breaking
Open sources the Feedback view controllers and moves them into a new subspec “Feedback”.
The “Feedback” subspec has the Braze Feedback UI and the Core SDK. It will not include in-app messages or News Feed UI.
Removes the popover context for Feedback due to the deprecation of UIPopoverViewController in iOS.
Renames the ABKFeedbackViewControllerModalContext and ABKFeedbackViewControllerNavigationContext class to ABKModalFeedbackViewController and ABKNavigationFeedbackViewController.
The open-sourced Feedback view controllers offer backward compatible NUI support, although we recommend using categories or subclassing the Feedback view controllers for customization as NUI library isn’t actively maintained any more. See here for customization details.
Adds user aliasing capability. Aliases can be used in the API and dashboard to identify users in addition to their ID. See the addAlias:withLabel: method on ABKUser for more information.
Changed
Updates the AppboyKit.h to include all the public header files in the SDK.
2.30.0
Breaking
Open sources the ABKModalWebViewController class, which is used to display the web URLs from push or in-app message clicks.
Drops NUI customization support for the navigation bar and navigation bar button item on ABKModalWebViewController. To customize the UI, create an ABKModalWebViewController category and override the corresponding method(s) exposed.
Open sources the ABKNoConnectionLocalization class, which provides Braze’s default localized string for “No Connection” error.
You can customize the localization by adding Appboy.no-connection.message as the key in your Localizable.strings files.
Removes the Appboy.bundle from the Core subspec of the SDK.
If you use the Core subspec, the in-app messages will not display, and trying to display Braze’s News Feed and Feedback UI will lead to unpredictable behavior.
2.29.1
Added
Adds a new property buttonTextFont to ABKInAppMessageButton. It allows clients to set customized fonts on in-app message buttons before the in-app message is displayed.
Fixed
Makes class ABKInAppMessageWindowController.h public.
Fixes an issue where device information was not flushed for a new user when server requests were queued for two or more users.
Changed
Removes the warnings in ABKSDWebImageProxy.
2.29.0
Breaking
Drops support for iOS 7.
Removes the shouldOpenURIExternally field from ABKInAppMessage.
Requires XCode 8.3.
Changes the behavior of the onCardClicked:feedViewController: method in ABKFeedViewControllerDelegate to let Braze handle the card click action if the delegate method returns NO.
Previously, Braze would handle the card click action if onCardClicked:feedViewController: returned YES.
This change standardizes delegate behavior with ABKInAppMessageControllerDelegate and ABKURLDelegate.
Added
Adds the property openUrlInWebView to ABKInAppMessage, ABKInAppMessageButton and ABKCard. This property determines if the URL associated with the object will be opened in a UIWebView.
Adds a Javascript interface to HTML in-app messages with ability to log custom events, log purchases, set user attributes, navigate users, and close the message.
Adds an abDeepLink query field to HTML in-app messages, which defaults to false. To prevent the SDK from opening deep links in a UIWebView, specify abDeepLink=true in your link (e.g., https://www.braze.com?abDeepLink=true).
Adds the ABKURLDelegate protocol for customizing URL handling across channels. Set the ABKURLDelegate by passing a delegate object to the ABKURLDelegateKey in the appboyOptions of startWithApiKey:inApplication:withAppboyOptions:. See our Stopwatch sample application for a Universal Link implementation sample.
Adds the following utility methods to ABKPushUtils for detecting if a push notification was sent by Braze for internal feature purposes:
These methods can be used to ensure that your app does not take any undesired or unnecessary actions upon receiving Braze’s internal content-available notifications (e.g., pinging your server for content).
Changed
Deprecates ABKPushURIDelegate. If you were previously using ABKPushURIDelegate, use ABKURLDelegate instead.
Deprecates userNotificationWasSentFromAppboy: and pushNotificationWasSentFromAppboy: on Appboy. Use isAppboyUserNotification: and isAppboyRemoteNotification: on ABKPushUtils instead.
Deprecates shouldFetchTestTriggersFlagContainedInPayload: on ABKPushUtils.
2.28.0
Breaking:
Removes support for watchOS 1, including Braze WatchKit SDK and all public APIs for watchOS in Braze iOS SDK.
Added
Adds ABKSDWebImageProxy to access the SDWebImage framework. This will prevent the Core subspec of the SDK from calling any SDWebImage methods directly.
2.27.0
Breaking
Removes the following deprecated items: the bio field of ABKUser, the setIsSubscribedToEmails: method of ABKUser, and the getResourceEndpoint: method of the ABKAppboyEndpointDelegate protocol.
Added
Adds support for registering geofences and messaging on geofence events. Please reach out to success@braze.com for more information about this feature.
Adds Braze default push categories which can be fetched from ABKPushUtils.
To use the Braze default push categories, you need to manually add the Braze categories when you register for push. You can get the Braze categories from [ABKPushUtils getAppboyUNNotificationCategorySet] or [ABKPushUtils getAppboyUIUserNotificationCategorySet].
In this version, we add four sets of push action buttons: accept/decline, yes/no, confirm/cancel, more. These will be available as button sets on the dashboard when creating an iOS push campaign.
All Braze push action buttons support localization.
Adds support for web link and deep link handling of push action buttons.
Fixed
Fixes the issue where the combination of the Core subspec of the SDK and a non-supported version of SDWebImage framework can cause apps to crash.
HTML in-app messages now log body click analytics on all links that are not appboy://customEvent and do not include the abButtonId query field. Previously, no body click analytics were logged.
Removed
Removes deprecated method - (NSString *)getResourceEndpoint:(NSString *)appboyResourceEndpoint from ABKAppboyEndpointDelegate.
Removes deprecated property bio and deprecated method - (BOOL)setIsSubscribedToEmails:(BOOL)subscribed from ABKUser.
2.26.0
Breaking
Adds support for SDWebImage version 4.0.0 with GIF support. SDWebImage version 3.x will not be supported from this version on. Please make sure you are using the correct version of SDWebImage.framework. Note: SDWebImage 4.0.0 relies on FLAnimatedImage - users integrating in ways besides CocoaPods should ensure they link the FLAnimatedImage framework if they want GIF support.
Removes the url property from subclasses of ABKCard. This property has been renamed to urlString and moved onto the ABKCard superclass.
Added
Adds Cocoapods subspecs “Core” and “UI”.
The “UI” subspsec has the full feature set of the current SDK. This is the default subspec when no subspec is specified in the Podfile.
The “Core” subspec removes the SDWebImage framework dependency. This is for apps who do not use any Braze UI that leverages images (News Feed, in-app messages). If you use the “Core” subspec, in-app messages with images will not display, and the News Feed will render with plain white images.
Makes ABKThemableFeedNavigationBar.h and ABKNavigationBar.h public.
Adds ABKIDFADelegate protocol that can be used to create a delegate to pass Braze the IDFA in startWithApiKey: in the appboyOptions dictionary under the ABKIDFADelegateKey key. Alternative to existing ABKIdentifierForAdvertisingProvider compile flag solution.
Changed
Disables the -webkit-touch-callout property on HTML in-app messages. Long presses and 3D Touch on links will no longer display pop-ups with additional link information.
2.25.0
Added
Adds the ability to set the ABKInAppMessageControllerDelegate when the SDK starts by passing a delegate object to the ABKInAppMessageControllerDelegateKey in the appboyOptions of startWithApiKey:inApplication:withAppboyOptions:.
This is the recommended way to set the ABKInAppMessageControllerDelegate and circumvents a potential race condition where in-app messages can be shown before the delegate has been set.
Exposes the ABKFeedback object and adds a new method - (void)submitFeedback:(ABKFeedback *)feedback withCompletionHandler:(nullable void (^)(ABKFeedbackSentResult feedbackSentResult))completionHandler; in Appboy. The new method accepts a completion handler which receives an ABKFeedbackSentResult enum as feedback sending result.
The possible feedback sending results are: invalid feedback object(ABKInvalidFeedback), fail to send feedback(ABKNetworkIssue), and feedback sent successfully(ABKFeedbackSentSuccessfully).
Adds the utility method - (BOOL)userNotificationWasSentFromAppboy:(UNNotificationResponse *)response; to Appboy. This method is compatible with the UserNotifications framework and returns whether a push notification was sent from Braze’s server.
Those using - (BOOL)pushNotificationWasSentFromAppboy:(NSDictionary *)options; who have integrated the UserNotifications framework should use this method instead.
Fixed
Changes the ABKInAppMessageButton from a UIButton object to a pure data model class in NSObject.
This resolves the issue https://github.com/Appboy/appboy-ios-sdk/issues/97.
Changed
Adds more protection around triggered in-app message display.
2.24.5
Fixed
Fixes an issue where in-app messages triggered off of push clicks wouldn’t fire when the push click happened before the in-app message configuration was synced to the device.
Changed
Updates push registration to flush the token to the server immediately.
Improves the accessibility of in-app messages and news feed cards.
When in voiceOver mode, the SDK auto-focuses on in-app messages when they appear and resets focus on dismissal.
VoiceOver no longer reads Braze internal labels.
News feed cards are enhanced to be more accessible.
2.24.4
Added
Adds protection around in-app message UI code to avoid displaying in-app messages with corrupted images.
Fixed
Fixes the iOS version number in the deprecation warnings in Appboy.h.
2.24.3
Breaking
Update REQUIRED for apps using Braze SDK 2.24.0, 2.24.1 or 2.24.2 with UserNotifications.framework
Fixed
Fixes an issue where a user’s foreground push enabled status could erroneously be marked as disabled.
This issue can occur when opening the app from suspended mode. At that time, the foreground push enabled status was defaulted to disabled until the UserNotifications.framework returned the user’s push authorization status. If the user closed the app within a few seconds, the SDK would not flush the updated push status and the user would mistakenly be marked as “push disabled”.
This issue only affected apps using UserNotifications.framework to register for push notifications.
The updated code stores the push authorization status on disk to fix the issue.
Fixes an issue where triggered in-app messages with event property templating did not respect re-eligibility settings.
Changed
Updates the Podspecs for iOS and tvOS SDK.
Updates deprecation warnings to specify iOS version.
Updates the ABKFeedController with more generic nullability.
Disables all data detectors on HTML in-app messages. Phone numbers, web URLs, addresses and calendar events will no longer be automatically converted.
Disables scrolling bounces on HTML in-app messages.
2.24.2
Fixed
Fixes an issue where HTML in-app messages loaded JavaScript more than once.
Fixes the Appboy.inAppMessage.webview.done-button.title string in the French localization file, which was named incorrectly and wasn’t being found.
2.24.1
Added
Adds nullability annotation for the completionHandler in userNotificationCenter :didReceiveNotificationResponse:withCompletionHandler.
2.24.0
Breaking
Updates the SDK to require XCode 8.
iOS 10 changes behavior of application:didReceiveRemoteNotification:fetchCompletionHandler and subsequently breaks open tracking and deep link handling on most existing Braze iOS integrations. If you don’t currently implement application:didReceiveRemoteNotification: you need to modify your integration, and we recommend that all users update.
Added
Updates the iOS and tvOS SDKs to support iOS 10.
Adds a new method - (void)userNotificationCenter:(UNUserNotificationCenter *)center didReceiveNotificationResponse:(UNNotificationResponse *)response withCompletionHandler:(void (^)())completionHandler. This method supports the new delegate method for push notification handling in UserNotification framework.
Changed
Deprecates two push delegate methods:
- (void)registerApplication:(UIApplication *)application didReceiveRemoteNotification:(NSDictionary *)notification and
- (void)getActionWithIdentifier:(NSString *)identifier forRemoteNotification:(NSDictionary *)userInfo completionHandler:(nullable void (^)())completionHandler.
2.23.0
Added
Adds support for upgraded in-app messages including image-only messages, improved image sizing/cropping, text scrolling, text alignment, configurable orientation, and configurable frame color.
Adds support for in-app messages triggered on custom event properties, purchase properties, and in-app message clicks.
Adds support for templating event properties within in-app messages.
Removed
Removes the deprecated method logSocialShare from Appboy class.
2.22.1
Changed
Updates tvOS bitcode support, patching an error introduced by an Xcode bug.
2.22.0
Added
Adds tvOS support for logging analytics; adds sample applications for tvOS and TVML.
Adds Hebrew localization support.
2.21.0
Breaking
Drops support for iOS 6.
Added
Adds support for deep links with non-URL-encoded characters. The SDK will encode unencoded url strings to create valid deep link NSURLs.
Fixed
Fixes a bug where the background of a slideup in-app message remained transparent when configured with 100% opacity.
Changed
Updates the podspec SDWebImage dependency to fetch the latest version.
Replaces SDK usage of NSURLConnection with NSURLSession.
Updates the SDK to always call canOpenURL: before opening a deep link. After this change, the SDK will only direct deep links whose schemes are whitelisted.
Updates push registration to immediately, asynchronously send up the push token.
2.20.1
Fixed
Fixes an issue where in certain conditions NSUserDefault blocking would cause custom events logged in the main thread to result in UI freezing.
Changed
Implements an optimization in push handling to not prefetch the News Feed when a push arrives and the app is in the background.
2.20.0
Added
Adds Carthage support.
Fixed
Fixes a multithreading issue where logging custom events from different threads would sporadically cause errors.
Fixes the issue where a close button’s color on modal and full in-app messages didn’t respect the opacity value.
Fixes an issue where failure to download HTML in-app message assets mid-download resulted in display without assets.
Changed
Now the onInAppMessageHTMLButtonClicked:clickedURL:buttonID: delegate method will be called every time a URL is clicked. The method used to be only called when there was a button ID in the URL link.
Updates the feedback element to reject messages that contain only whitespace.
Updates remote push handling to call the completion handler passed in every time (a code path previously existed that would return without calling it).
Removed
Removes the delegate method onInAppMessageHTMLButtonClicked:buttonID: from ABKInAppMessageControllerDelegate protocol.
2.19.3
Added
Adds a new feature allowing manual control of deep link handling in push notications. To use this, add a ABKPushURIDelegate value for the ABKPushURIDelegate key in the appboyOptions dictionary of startWithApiKey:inApplication:inApplication:withAppboyOptions:. Also updates the ABKPushURIDelegate integration to be initialized through that integration point.
Adds guarding against a possible crash caused by a user’s offline state being corrupted and not including an active session when a network request
occurred.
Fixed
Fixes an issue where duplicate data could be recorded when a force quit or crash occurs after a network request completed successfully, but before any other activity (such as leaving the app, putting it to sleep, updating an attribute or firing some other event or purchase) occurred.
2.19.2
Added
Adds warning when messaging doesn’t succeed because SDWebImage is not integrated.
Fixed
Fixes a bug where users who went from being eligible for triggered messages to not being eligible for any triggered messages didn’t see their local triggers configuration get updated. This has already been fixed with a server-side update for affected versions; this update fixes the issue client-side.
Changed
Updates headers to be compatible with Swift 2.2.
2.19.1
Added
Adds sample code for a universal link in Stopwatch.
Fixed
Fixes the benign issue that caused the log message *** -[NSKeyedUnarchiver initForReadingWithData:]: data is NULL.
Fixes an issue where NULL campaign IDs in push messages (e.g. from a REST API push message without a specified campaign id) resulted in push-clicked triggers for triggered in-app messages not firing.
Fixes an issue where calling changeUser between identified users caused the read/unread state of the news feed cards of the old user to be set as the new user’s read/unread states.
Fixes an issue where a user attribute value that had been set to multiple different values created a state that would not let you set the original value again. The bug was introduced in version 2.17.1.
Changed
Analytics are now logged for in-app messages and in-app message buttons with ‘ABKInAppMessageNoneClickAction’ click actions. ABKInAppMessageNoneClickAction is set when an in-app message on the dashboard has a click action that only closes the in-app message; formerly this did not count as a click.
2.19.0
Added
Adds support for action-based, locally triggered in-app messages. In-app messages are now sent to the device at session start with associated trigger events. The SDK will display in-app messages in near real-time when the trigger event associated with a message occurs. Trigger events can be app opens, push opens, purchases, and custom events.
Changed
Deprecates the old system of requesting in-app message display, now collectively known as ‘original’ in-app messaging, where messages were limited to displaying at app start.
2.18.4
Fixed
Fixes a Cocoapods issue that emerged during the release of 2.8.13.
2.18.3
Changed
Makes an internal update to provide functionality for SDKs that embed this library.
2.18.2
Added
Adds warning logging if [Appboy sharedInstance] is called while in an uninitialized state.
Changed
Deprecates the delegate method getResourceEndpoint: in ABKAppboyEndpointDelegate. The SDK will no longer call this delegate method.
2.18.1
Fixed
Fixes the nullability annotation warnings in the public header files.
Changed
Updates HelloSwift sample app to adopt swift 2.0.
2.18
Added
Adds nullability annotations to all Braze public APIs.
Adds a new delegate method to support custom push URI handle. For more detail, please see ABKPushURIDelegate.h;
Changed
Updates to auto-dismiss the Braze web view when a user returns to the app after following a link out of the app from an Braze web view.
Removed
Removes the deprecated method requestSlideupRefresh from Braze class.
2.17.1
Fixed
Fixes a bug where in certain conditions the SDK would resend user attributes that had already synced with the server.
2.17
Added
Adds a new button clicked delegate method for HTML in-app message. The new delegate method also passes the URL of the clicked button.
Fixed
Fixes the crash caused by inserting a nil object into an NSDictionary when parsing an event object.
Changed
Makes the WebView background for HTML in-app messages transparent. Ensure HTML in-app messages you send to the device are created expecting a transparent background.
Applies the Braze endpoint delegate methods to in-app messages’ resource(zip and image) fetching.
Removed
Removes the Facebook button from Feedback page.
2.16.1
Added
Adds the ability to log a custom event from an HTML in-app message. To log a custom event from an HTML in-app message, navigate a user to a url of the form appboy://customEvent?name=customEventName&p1=v2, where the name URL parameter is the name of the event, and the remaining parameters are logged as String properties on the event.
Adds the support for customization of the background color of modal in-app messages.
Fixed
Fixes an issue where daylight savings changes were not reflected in the user profile timezone.
Changed
Enables users to input text into HTML in-app messages by allowing HTML in-app messages to be displayed with a keyboard on screen. For all other in-app messages, the in-app message will be dismissed when a keyboard is displayed.
2.16
Added
Adds HTML In-App Message types.
HTML In-App Messages consist of HTML and a url of a zipped archive of assets (e.g. images, css) to download locally which the HTML can reference. See InAppMessageUIViewController in our Stopwatch sample app for an example for the callbacks on the actions inside the WebView hosting the HTML In-App Message.
Changed
Deprecates the method - (void) logSocialShare:(ABKSocialNetwork)socialNetwork and enum ABKSocialNetwork in the Appboy class. If you use logSocialShare: to track user’s social account sharing, you can use logCustomEvent: instead.
Deprecates the property bio in the ABKUser class.
2.15.1
Fixed
Fixes the warning “full bitcode bundle could not be generated because XXX was built only with bitcode marker”.
2.15
Changed
Updates the SDK to support iOS 9. In iOS9, previous versions of the SDK: 1) did not have bitcode support, 2) had a minor UI issue in in-app messages where the slideup messages were not docked on the bottom of the screen if they had one line of text, 3) failed to localize for zh-HK and zh-TW.
2.14
Breaking
Migrates the SDK to ARC. If you are using our Apple Watch Extension and not using ARC, you must apply -fobjc-arc to the extension files.
Added
Adds configurable session timeout feature.
Adds feedbackViewControllerBeforeFeedbackSent method to the feedback delegate protocols, which can be used to modify the feedback message before it’s sent to Braze.
Adds a setAttributionData method to ABKUser that sets an ABKAttributionData object for the user. To be used with attribution provider SDKs when attribution events are fired.
2.13.2
Changed
Increases the number of supported currency codes from 22 to 171. All common currency codes are now supported. The full list of supported codes is available at Appboy.h.
2.13.1
Changed
Updates the isUninstallTrackingNotification method in ABKPushUtils to return the correct value.
2.13
Added
Adds an open-source Watch SDK to support data analytics on watchKit apps. You can use the Appboy-WatchKit SDK by downloading and adding the “Appboy-WatchKit” folder in your watchKit extension target. For more detail, please refer to ABWKUser.h and AppboyWatchKit.h.
Adds an opt-in location service that logs background location events; adds ABKLocationManager with methods for allowing Braze to request location permission on your behalf and logging the current location. More information on the background location capabilities will be made available when dashboard support is released.
Adds client side blocking of blacklisted attributes and events.
Adds ABKPushUtils with method + (BOOL) isUninstallTrackingNotification:(NSDictionary *)userInfo; that can be used to detect if a content-available push is from Braze uninstall tracking (and shouldn’t be acted upon).
Adds a new property expiresAt in class ABKCard. The property is the unix timestamp of the card’s expiration time. For more detail, please refer to ABKCard.h.
Changed
Stops collecting user’s Twitter data automatically. You can pass a user’s Twitter information to Braze by initialzing a ABKTwitterUser object with the twitter data, and setting it to [Appboy sharedInstance].user.twitterUser. For more information, please refer to ABKUser.h and ABKTwitterUser.h.
Stops logging foreground push as a push open as it is not delivered by the system.
Removed
Removes the feature of prompting a user to connect his/her social account. You can refer to the method promptUserToConnectTwitterAccountOnDeviceAndFetchAccountData in TwitterViewController.m to continue prompting the user to connect the Twitter account.
2.12.2
Fixed
Fixes the slideup in-app message display issue. When the host app sets the launch screen file, slideup in-app message from bottom sometimes didn’t dock at the bottom of the screen on iPhone 6 and iPhone 6 Plus.
2.12.1
Added
Adds font and font size customization to all in-app message’s header and message text through NUI. You can customize in-app message’s font by adding ABKInAppMessageSlideupMessageLabel, ABKInAppMessageeModalHeaderLabel,ABKInAppMessageModalMessageLabel, ABKInAppMessageFullHeaderLabel, ABKInAppMessageFullMessageLabel to your NUI nss style sheet.
Fixed
Fixes news feed issue where no news feed cards resulted in the loading spinner remaining on screen.
Changed
Cleans up the console logging in Class ABKIdentifierForAdvertisingProvider.
2.12.0
Fixed
Fixes the incorrect path runtime error for users who integrate our pod as a dynamic framework. For SDK versions before 2.12, when you integrate Braze with use_frameworks! in the Podfile, the library is integrated as a dynamic framework and the Appboy.bundle is stored in a different path.
Changed
Changes HelloSwift sample app to integrate Braze SDK as a dynamic framework.
Removed
Removes the subspecs from the podspec. This fixes the duplicate symbol error https://github.com/Appboy/appboy-ios-sdk/issues/24. If you are still using subspec like pod 'Appboy-iOS-SDK/AppboyKit' in your podfile, please make sure to change it to pod 'Appboy-iOS-SDK'.
2.11.3
Added
Adds the ability to send and retrieve extra key-value pairs via a News Feed card.
Adds the ability to define custom key-value properties on a custom event or purchase. Property keys are strings and values may be NSString, NSDate, or NSNumber objects.
Added the fix for an edge case when there are extra UIWindows at the time in-app message is going to display, the in-app message would have issue during dismissing.
2.11.2
Changed
Updates the serialize and deserialize methods for in-app message classes. This is for use by wrappers such as Braze’s Unity SDK for iOS.
2.11.1
Fixed
Fixes a UI issue in modal in-app messages displayed on iPads running iOS 6/7.
2.11
Added
Adds support for modal and full screen style in-app messages. Also adds support for including fontawesome icons and images with in-app messages, changing colors on in-app message UI elements, expanded customization options, and message resizing for tablets. Please visit our documentation for more information.
Changed
Updates the completionHandler signature in getActionWithIdentifier:forRemoteNotification:completionHandler: to match the comletionHandler passed by the system in method - (void) application:(UIApplication *)application handleActionWithIdentifier:(NSString *)identifier forRemoteNotification:(NSDictionary *)userInfo completionHandler:(void (^)())completionHandler.
2.10.2
Added
Adds the fix for an edge case when there are extra UIWindows at the time in-app message is going to display, the in-app message would have issue during dismissing.
2.10.1
Fixed
Fixes a bug which would cause the host app to crash when a deep link was launched from a push notification. In versions 2.10.0 and 2.9.4, if the host app used [[Appboy sharedInstance] registerApplication: didReceiveRemoteNotification:]; instead of [[Appboy sharedInstance] registerApplication: didReceiveRemoteNotification: fetchCompletionHandler:];, opening a push with a deep link would crash the host app in some circumstances.
2.10.0
Changed
Updates the minimum deployment targets of Braze iOS SDK to iOS 6.0. For apps supporting lower iOS versions, please continue to use 2.9.+ versions of the Braze SDK.
Stops collecting user’s Facebook data automatically. You can pass a user’s Facebook information to Braze by initializing a ABKFacebookUser object with the facebook data, and set it to [Appboy sharedInstance].user.facebookUser. For more information, please refer to ABKUser.h and ABKFacebookUser.h.
Removed
Removes Facebook SDK dependent builds. Now there is a single library - AppboyKit - and a single Pod without functional subspecs - Appboy-iOS-SDK (note we now have both the subspecs pointing at the same library). Please update your Podfile to pod 'Appboy-iOS-SDK if you are integrating Braze with Cocoapods.
Removes the feature of prompting a user to connect his/her Facebook account. You can refer to the method promptUserToConnectFacebookAccountOnDeviceAndFetchAccountData in FacebookViewController.m to continue prompting the user to connect the Facebook account.
2.9.6
Added
Adds the fix for an edge case when there are extra UIWindows at the time in-app message is going to display, the in-app message would have issue during dismissing.
2.9.5
Fixed
Fixes a bug which would cause the host app to crash when a deep link was launched from a push notification. In versions 2.9.4, if the host app used [[Appboy sharedInstance] registerApplication: didReceiveRemoteNotification:]; instead of [[Appboy sharedInstance] registerApplication: didReceiveRemoteNotification: fetchCompletionHandler:];, opening a push with a deep link would crash the host app in some circumstances.
2.9.4
Added
Adds a major performance upgrade that reduces CPU usage, memory footprint, and network traffic.
Adds 26 additional languages to localization support for Braze UI elements.
Adds support for deep linking from APNS push notification clicks.
Adds ability to customize the font of Feedback text using NUI with NUI class name ABKFeedbackTextView.
Fixed
Fixes the feedback page UI issues in iOS 8: when the device’s orientation is UIInterfaceOrientationPortraitUpsideDown, the contact info bar was off.
Fixes in-app messages to display correctly in landscape mode in iOS 8.
Changed
Updates the SDK to adopt the latest SDWebImage protocol methods.
Removed
Removes the “required” labels on the feedback page.
2.9.3
Added
Adds a new method - (void) registerApplication:(UIApplication *)application didReceiveRemoteNotification:(NSDictionary *)notification fetchCompletionHandler:(void (^)(UIBackgroundFetchResult))completionHandler to support push with background fetch. This method should be called in - (void) application:(UIApplication *)application didReceiveRemoteNotification:(NSDictionary *)userInfo fetchCompletionHandler:(void (^)(UIBackgroundFetchResult))completionHandler. For more details, please refer to Appboy.h.
Adds a HelloSwift sample app to demo how to use Braze in a swift app.
Adds a new NSString property “displayPrice” in ABKCrossPromotionCard to enable server side price localization.
Fixed
Fixes a bug of when sessions were being created when the app opened in the background.
Fixes a bug where requesting the news feed with a news feed open led to card impressions not updating until the next feed refresh.
2.9.2
Added
Adds the ability to turn off Braze’s automatic location collection by setting the ABKDisableAutomaticLocationCollectionKey boolean in AppboyOptions in startWithApiKey:inApplication:inApplication:withAppboyOptions:.
Adds the ability to send location tracking events to Braze manually using setLastKnownLocationWithLatitude:longitude:horizontalAccuracy: and setLastKnownLocationWithLatitude:longitude:horizontalAccuracy:altitude:verticalAccuracy: on the ABKUser. this is intended to be used with ABKDisableAutomaticLocationCollectionKey set to true in the AppboyOptions so that locations are only being recorded from a single source.
Fixed
Fixes a news feed bug: sometimes the spinner keeps spinning on the screen even after the news feed card image is displayed.
Changed
Updates sample app core location fetching code based on the changes in iOS 8.
2.9.1
Fixed
Fixes a news feed bug: When a user refreshed the news feed by swiping down, if the total number of cards in the feed was going to be reduced by the refresh, the app would crash.
2.9.0
Fixed
Fixes an App Store validation error introduced when the App Store started accepting submissions for iOS8. This was done by changing the packaging of the Braze framework to include a universal binary and a resource bundle (instead of combining them both together in a universal framework). Due to this change, Cocoapod integration is even more highly recommended than before to fully automate integration.
2.8.1
Added
Adds a new method - (void) getActionWithIdentifier:(NSString *)identifier forRemoteNotification:(NSDictionary *)userInfo to collect analytics data for push actions in iOS 8. It should be called in the UIApplication delegate method - (void) application:(UIApplication *)application handleActionWithIdentifier:(NSString *)identifier forRemoteNotification:(NSDictionary *)userInfo completionHandler:(void (^)())completionHandler. For more details, please refer to Appboy.h.
New Custom Attribute Data Type (Array): Braze now supports custom attributes which contain an array of string elements. In addition, we also provide methods for adding or removing an string element from an array type custom attribute. For more information, please refer to ABKUser.h.
Users can now pull down on the Braze Newsfeed to refresh the content on iOS version 6.0 or later.
Changed
Restricts product identifier string to 255 characters for method - (void) logPurchase:(NSString *)productIdentifier inCurrency:(NSString *)currencyCode atPrice:(NSDecimalNumber *)price and - (void) logPurchase:(NSString *)productIdentifier inCurrency:(NSString *)currencyCode atPrice:(NSDecimalNumber *)price withQuantity:(NSUInteger)quantity.
News feed card now can update the card height and display a full image based on the image ratio. Card image ratio used to be a fix number and images were aspect stretched to fit in the views.
The right and left margins in the news feed are now touchable areas for scrolling.
Card titles have been improved and will now truncate with “…” when they are more than 2 lines.
2.8
Breaking
Renames the class names of news feed cards to match the names on dashboard:
v2.8
v2.7
ABKBannerCard
ABKCardBanner
ABKCaptionedImageCard
ABKCardCaptionedMessage
ABKCrossPromotionCard
ABKCardCrossPromotionSmall
ABKClassicCard
ABKCardNews
ABKTextAnnouncementCard
ABKCardTextAnnouncement
Added
Adds email and push notification subscription types for a user. Subscription types are explicitly opted in, subscribed, and unsubscribed. The previous email boolean subscribe method has been deprecated.
Adds custom slideup orientation support. You can now ask the slideup to only support certain orientations. For more details on slideup custom orientation support, please refer to ABKSlideupController.h.
Adds quantity parameter as an option when logging purchase. The quanlity should be an unsigned interger greater than 0 and no larger than 100. For more information, please refer to Appboy.h.
Adds a class method in ABKCard to deserialize a given dictionary to a card. This is for use by wrappers such as Braze’s Unity SDK for iOS. Please refer to ABKCard.h for more information.
2.7
News Feed Update
Exposes raw card data in ABKFeedController
Developers can use the raw card data to creat custom user interfaces for the news feed. For more details on the card data, please refer to ABKFeedController.h.
Addes support for categories on cards and news feed view controllers.
Categories include Announcement, Advertising, Social, News and No Category. You can get cards of certain categories from ABKFeedController, or you can make ABKFeedViewController only display certain categories of cards.
Uses SDWebImage to handle images downloading and caching in the news feed, display a spinner while downloading images and show a default image when no image available.
Adds support for asynchronous image downloading in the news feed, asynchronous memory and disk image caching with automatic cache expiration handling.
Adds news feed view controller delegate to support custom handling of card clicks on news feed.
The app can customize click actions from the feed and display any card link in their own user interface.
Slideup Changes
Updates ABKSlideupControllerDelegate method onSlideupClicked to return a BOOL value to indicate if Braze should continue to execute the click action.
Stops logging slideup click when the slideup click action is ABKSlideupNoneClickAction.
Feedback Changes
Updates the ABKFeedbackViewControllerPopoverContext so now it should be used in all cases where the feedback page displayed in a popover, including the case that the feedback is push on a navigation controller in a popover.
Fixes the ABKFeedbackVIewControllerModalContext cancel button delegate issue.
Fixes the form sheet style ABKFeedbackViewControllerModalContext layout issue.
Other Changes
Adds API to request feed and slideup refresh.
Adds API to log news feed displayed and feedback displayed.
Allows updating analytics data even using customized news feed or feedback user interfaces.
Updates badge count policy to only update when app is foreground.
Adds clearTwitterDataWhenNoDataOfTwitterIdentifier to ABKUser, allowing developer to clear user data when a user disconnectes their twitter accounts.
Updates custom key and string value for custom attributes to automatically trim.
2.6.3
Changed
Updates the SDK to authenticate with the Twitter API using SSL.
2.6.2
Fixed
Fixes a news feed card click tracking issue.
Changed
Updates data flush time interval.
2.6.1
Fixed
Fixes a minor display problem that affected news items with no image or link for version 2.6.
2.6
Breaking
Braze iOS SDK now supports 64 bit as well. The minimum deployment targets that Braze iOS SDK supports is iOS 5.1.1.
The Braze iOS SDK will now allow function with 64-bit apps. This version of the SDK only supports iOS 5.1.1+. Legacy iOS apps should continue to use version 2.5 of the SDK.
You can install legacy versions of our SDK via CocoaPods by following changing the podfile to include something like the following example pod 'Appboy-iOS-SDK/AppboyKit', '~> 2.5'.
2.5.1
Fixed
Fixes a minor display problem that affected news items with no image or link for version 2.5.
2.5
Localization
Localization is now supported in version 2.5 of the Braze SDK. We have provided .string files for English, Simplified Chinese and Traditional Chinese. You can also optionally override our Braze’s default LocalizedAppboyUIString.strings right within your app’s Localizable.Strings file in much the same way you would do an override in CSS. To do so, copy the key and string pair into your Localizable.Strings file and edit the string as you so desire.
For your convenience our CocoaPod integrates the LocalizedAppboyUIString.strings files for the three aforementioned languages. If you do not wish to use one or more of these languages, you can feel free to delete these files from your project.
Slideup Upgrade
Braze version 2.5 provides a substantial upgrade to the slideup code and reorganization for better flexibility moving forward, but at the expense of a number of breaking changes. We’ve detailed the changes in this changelog and hope that you’ll love the added power, increased flexibility, and improved UI that the new Braze slideup provides. If you have any trouble with these changes, feel free to reach out to success@braze.com for help, but most migrations to the new code structure should be relatively painless.
New Slideup Controller
The property slideupController has been added to the Braze object. Please see ABKSlideupController.h for details.
The delegate property allows you to specify a delegate for the slideup.
This replaces slideupDelegate which has been removed.
The displayNextSlideupWithDelegate: method displays the next available slideup with the specified delegate.
This replaces provideSlideupToDelegate: which has been removed from Braze.
The slideupsRemainingOnStack method returns the number of slideups that are waiting locally to be displayed.
The addSlideup: method allows you to display a slideup object with custom content. This is useful in testing or if you want to use the Braze slideup’s UI/UX with another notification system that you are using.
Clicks and impressions of slideups added by this method will not be collected by Braze.
hideCurrentSlideup: method will remove any slideup currently on screen, with or without animation.
New Slideup Properties and Methods in ABKSlideup.h
The following properties and methods all belong to the ABKSlideup object. Please see ABKSlideup.h for more information.
New Properties
The extras property carries additional data within key value pairs that have been defined on the dashboard, just like a push notification. Braze does nothing with the extras property, any additional behavior is at your discretion.
The slideupAnchor property defines whether the slideup originates from the top or the bottom of the screen.
The slideupDismissType property controls whether the slideup will dismiss automatically after a period of time has lapsed, or if it will wait for interaction with the user before disappearing.
The slideup will be dismissed automatically after the number of seconds defined by the newly added duration property if the slideup’s slideupDismissType is ABKSlideupDismissAutomatically.
The slideupClickActionType property defines the action behavior after the slideup is clicked: displaying a news feed, redirect to a uri, or nothing but dismissing the slideup. This property is read only. If you want to change the slideup’s click behavior, you can call one of the following method: setSlideupClickActionToNewsFeed, setSlideupClickActionToUri: or setSlideupClickActionToNone.
The uri property defines the uri string that the slide up will open when the slideupClickActionType is ABKSlideupRedirectToURI. This is a read only property, you can call setSlideupClickActionToUri: to change it’s value.
New Methods
logSlideupImpression and logSlideupClicked have been added to allow you to report user interactions with the slideup in the case that you’ve fully customized the slideup experience and Braze is not handling the interactions.
setSlideupClickActionToNewsFeed, setSlideupClickActionToUri: and setSlideupClickActionToNone have been added to allow you to change the slideup’s click action behavior. setSlideupClickActionToUri: accepts a uri string as parameter and required the given uri string is valid.
Delegate Method Changes
All former Braze slideup delegate methods have been depreciated and removed. In their place Braze has added new slideup delegate methods within ABKSlideupControllerDelegate.h.
onSlideupReceived: is called when slideup objects are received from the Braze server.
beforeSlideupDisplayed:withKeyboardIsUp: is called before slideup objects are displayed, the return value determines whether the slideup will be displayed, queued or discarded.
slideupViewControllerWithSlideup: This delegate method allows you to specify custom view controllers in which your slideups will be displayed.
The custom view controller should be a subclass of ABKSlideupViewController.
Alternatively, it can also be an instance of ABKSlideupViewController.
The view of the returned view controller should be an instance of ABKSlideupView or its subclass.
For integration examples of a custom slideup view controller, see the CustomSlideupViewController class in Braze’s sample app Stopwatch.
onSlideupClicked: is called when a user clicks on a slideup. We recommend that you specify behavior on click via the dashboard, but you can additionally specify behavior on click by defining this delegate method.
onSlideupDismissed: is called whenever the slideup is dismissed regardless of whether the dismissal occurs automatically or via swipe. This method is not called if the user clicks on the slideup. If the user clicks or taps on the slideup, onSlideupClicked is called instead.
New Options on the Dashboard
Slideup behavior on click can now be set within the dashboard to open a modal news feed, open a URI within a modal, or do nothing.
The following properties can be set remotely from the Braze Dashboard:
extras
slideupAnchor
slideupDismissType
slideupClickActionType
uri
News Feed Changes
News feed items are now cached in offline storage, allowing the news feed to render even when no internet connectivity is available. Braze will still automatically try to pull down a new news feed when a session opens, even if an offline feed is available.
Each card now has a maximum height of no more than 2009 points to avoid any performance issues as recommended by iOS developer guidelines.
The entirety of captioned image cards are now clickable. Formerly, only the link itself was clickable.
When the news feed is brought to the foreground, it will now automatically check for new content if the cached version of the feed was received more than 60 seconds ago.
— The width of news feed cards as well as the minimum margin between any card and the left & right edges of the view controller can now be customized. These values can be set separately for both iPad and iPhone. This allows for a larger news feed to render on larger screen sizes. All card images will scale proportionally. Please see ABKFeedViewControllerContext.h and ABKFeedViewController.h for more information.
Other Changes
Various internal and news feed display optimizations.
2.4
IDFA Collection is now optional.
By default, IDFA collection is now disabled by the Braze SDK.
There will be no loss of continuity on user profiles or loss of functionality whatsoever as a result of this change.
If you’re using advertising elsewhere in the app or through our in-app news feed, we recommend continuing to collect the IDFA through Braze. You should be able to do so safely without fear of rejection from the iOS App Store.
The future availability of IDFAs will enable functionality like integrating with other third-party systems, including your own servers, and enabling re-targeting of existing users outside of Braze. If you continue to record them we will store IDFAs free of charge so you can take advantage of these options immediately when they are released without additional development work.
Necessary Project Changes
ABKIdentifierForAdvertisingProvider.m and ABKIdentifierForAdvertisingProvider.h must be added to your project regardless of whether or not you enable collection. This occurs automatically if you integrate/update via the CocoaPod.
Enabling Braze IDFA Collection
IDFA collection can be enabled via adding the following PreProcessor Macro to the Build Settings of your app:
ABK_ENABLE_IDFA_COLLECTION
2.3.1
The Braze SDK for iOS now has two versions, one for use with apps which incorporate the official Facebook SDK and one for those which do not. In November of 2013, the App Store Validation Process started generating warnings about the usage of isOpen and setActiveSession in the Braze SDK. These selectors were being sent to instances of classes in the Facebook SDK and are generally able to be used without generating warnings. However because of the way that the classes were initialized in Braze (a result of building a single Braze binary to fully support apps with and without the Facebook SDK), the App Store Validation Process started generating warnings the Facebook SDK methods share a name with private selectors elsewhere in iOS. Although none of our customers have been denied App Store approval yet, to protect against potential validation policy changes by Apple, Braze now provides two versions of its SDK, neither of which generate warnings. Going forward, the appboy-ios-sdk repository will provide both versions of the SDK in the folders ‘AppboySDK’ (as before) and ‘AppboySDKWithoutFacebookSupport’. The ‘AppboySDKWithoutFacebookSupport’ does not require the host app to include the Facebook SDK, but as a result does not include all of the Braze features for Facebook data fetching. More information is available here within the Braze documentation.
Fixed a bug that repeatedly updated the push token of some users unnecessarily.
The “Reporting an Issue?” box within the UI layout of the Feedback Page has been moved to the left side of the label away from the “Send” button. This change was made to reduce the number of misclicks of the “Send” button. The “Reporting an Issue?” label is now clickable as well.
Cross Promotion Cards for apps with long titles will now render appropriately in iOS5. Before the title would render abnormally large on these devices.
Fixed a bug where view recycling would cause incorrect card images to appear for newly rendered cards (until the image for that card finished downloading). Card images for newly rendered cards will now remain empty until the correct image is downloaded.
Internal changes to enable future support for a 64 bit library release.
Improvements to the Braze Sample App.
Internal code structure and performance improvements including the move of more offline caching to background tasks.
2.3
BREAKING CHANGE: The ABKSlideupControllerDelegate interface has been changed to work with ABKSlideup objects instead of simply the slideup message. This provides you with more control over the click actions and display of slideups and is also being made in anticipation of the augmentation of the ABKSlideup object with more data properties in future releases. To access the message previously sent to shouldDisplaySlideup, simply access the message property on the provided ABKSlideup argument.
displayNextAvailableSlideup has been deprecated and will be removed in the next minor release, it has been replaced by provideSlideupToDelegate, see Appboy.h documentation for more information.
provideSlideupToDelegate has been added to Braze to allow for more fine grained control over slideup display.
Fixes a bug where the slideupDelegate property getter on Braze would always return nil.
Changes the slideupDelegate property on Braze to be retained, instead of assigned.
2.2.1
Adds a startup option to appboyOptions to control the automatic capture of social network data. See the documentation on ABKSocialAccountAcquisitionPolicy in Appboy.h for more information.
Changes a table cell’s default background color to clear, from the white value that became default in iOS7.
Adds support for developer to send up image_url for user avatars, allowing for custom images to be included in user profiles on the dashboard.
2.2
Adds support for new banner and captioned image card types.
Adds support for submitting feedback programmatically through an Appboy.h method without using Braze feedback form. This allows you to create your own feedback form.
Fixes an issue where the the news feed’s web view would display “Connection Error” when a user came back into the app after a card had directed him or her to a protocol URL. Now when users come back from a redirected protocol URL, the feed is properly displayed.
Fixes an issue where the SDK might have incorrectly sent both read and write Facebook permissions at the same time, instead preferring to request only those read permissions that Braze is interested in and have already been requested by the incorporating app.
Fixes a corner case where card impressions could be miscounted when the feed view controller is the master view controller of a split view.
Makes cards truncate properly at two lines.
2.1.1
URGENT BUGFIX: This fixes an issue which exists in all previous versions of the v2 SDK which is causing crashes on the just release iPhone 5c and iPhone 5s. All users of v2 are recommended to upgrade the Braze SDK to 2.1.1 immediately and re-submit to the app store.
2.1.0
Adds support for iOS 7. You will need to use Xcode 5 to use this and future versions of the Braze iOS SDK.
Updates internal usage of NUI. If you’re using NUI, please ensure that you are at least using version 0.3.3 (the most up to date as of this writing is 0.3.4).
Removes support for iOS 4.3.
Optimizes news feed rendering for faster start up times and smoother scrolling of long feeds.
Removes the deprecated - (void) logPurchase:(NSString *)productId priceInCents:(NSUInteger)price method in favor of the new multi-currency tracking method. Conversion of old method calls is straightforward. [[Appboy sharedInstance] logPurchase:@"powerups" priceInCents:99]; should turn into [[Appboy sharedInstance] logPurchase:@"powerups" inCurrency:@"USD" atPrice:[[[NSDecimalNumber alloc] initWithFloat:.99f] autorelease]];
Any references to the delegate property of ABKFeedbackViewControllerModalContext should be updated to the new property name feedbackDelegate.
Following the removal of support for 4.3, removes SBJson parsing and uses built-in parsing added in iOS5 to improve performance and lower the SDK footprint.
2.0.4
Adds support for reporting purchases in multiple currencies. Also, changes the price reporting object type to NSDecimalNumber for consistency with StoreKit.
Adds additional space savings optimizations to image assets.
Minor fix to orientation change handling in the example app code.
2.0.3
Adds the ability to assign a Foursquare access token for each user. Doing so will cause the Braze backend to make Foursquare data available in user profiles on the dasbhard.
Adds more fine grained control options for Braze’s network activity. See Appboy.h for more information.
2.0.2
Fixes a bug where Braze might reopen a Facebook read session when a publish session already exists
2.0.1
UI Improvements
Fixed a bug when using the nav context feedback in a popover window that would cause the email bar to disappear
Updated news feed’s close button when opened from a slide up
Added a loading spinner on the feedback page when fetching email address from Facebook
Fixed the bug where the modal context feed page’s navigation bar would not adhere to NUI theming
Improved the look of the popover content feedback page
Enabled resizable webpages when clicking on to a web URL through a card
API updates
Updated custom user attribute setting methods to return a boolean value indicating if the setting is successful
Added methods for incrementing custom user attributes
Added support for device push tokens as NSData when registering the token to Braze
More detailed error messages logged in console
Removed the enable/disable Braze methods from Appboy.h
2.0
Initial release
# Configuración inicial del SDK para MacOS
Source: /docs/es/developer_guide/platforms/legacy_sdks/macOS/initial_sdk_setup/index.md
**Warning:**
[AppboyKit](https://github.com/Appboy/appboy-ios-sdk) (also known as the Objective-C SDK) is no longer supported and has been replaced by the [Swift SDK](https://www.braze.com/docs/es/es/developer_guide/sdk_integration/?sdktab=swift). It will no longer receive new features, bug fixes, security updates, or technical support—however, messaging and analytics will continue to function as normal. To learn more, see [Introducing the New Braze Swift SDK](https://www.braze.com/resources/articles/introducing-the-new-braze-swift-sdk).
# Configuración inicial del SDK {#initial-sdk-setup}
> En este artículo de referencia se explica cómo instalar el SDK de Braze para MacOS.
A partir de la versión [3.32.0](https://github.com/Appboy/appboy-ios-sdk/releases/tag/3.32.0), el SDK de Braze es compatible con macOS para aplicaciones que utilicen [Mac Catalyst](https://developer.apple.com/mac-catalyst/) al integrarse a través de Swift Package Manager. Actualmente, el SDK no es compatible con Mac Catalyst cuando se utilizan CocoaPods o Carthage.
**Note:**
Para crear tu aplicación con Mac Catalyst, consulta la documentación de Apple.
Una vez que tu aplicación sea compatible con Catalyst, sigue [estas instrucciones para utilizar Swift Package Manager](https://www.braze.com/docs/es/es/developer_guide/platform_integration_guides/swift/sdk_integration?tab=swift%20package%20manager/) para importar el SDK de Braze a tu aplicación.
## Características compatibles {#supported-features}
Braze es compatible con [notificaciones push](https://www.braze.com/docs/es/es/developer_guide/push_notifications?sdktab=swift), [Content Cards](https://www.braze.com/docs/es/es/developer_guide/platforms/swift/content_cards#content-cards-data-model), [mensajes dentro de la aplicación](https://www.braze.com/docs/es/es/developer_guide/analytics/tracking_location?sdktab=swift) y [recopilación automática de ubicaciones](https://www.braze.com/docs/es/es/developer_guide/analytics/tracking_location?sdktab=swift) cuando se ejecuta en Mac Catalyst.
Ten en cuenta que Push Stories, las notificaciones push enriquecidas y las geovallas no son compatibles con macOS.
[1]:https://github.com/Appboy/appboy-ios-sdk/releases/tag/3.32.0
[2]:https://developer.apple.com/mac-catalyst/
# Configuración inicial del SDK para tvOS
Source: /docs/es/developer_guide/platforms/legacy_sdks/tvos/initial_sdk_setup/index.md
**Warning:**
[AppboyKit](https://github.com/Appboy/appboy-ios-sdk) (also known as the Objective-C SDK) is no longer supported and has been replaced by the [Swift SDK](https://www.braze.com/docs/es/es/developer_guide/sdk_integration/?sdktab=swift). It will no longer receive new features, bug fixes, security updates, or technical support—however, messaging and analytics will continue to function as normal. To learn more, see [Introducing the New Braze Swift SDK](https://www.braze.com/resources/articles/introducing-the-new-braze-swift-sdk).
# Configuración inicial del SDK {#initial-sdk-setup}
> En este artículo de referencia se explica cómo instalar el SDK de Braze para tvOS. La instalación del SDK de Braze te proporcionará una funcionalidad básica de análisis.
**Note:**
Nuestro SDK para tvOS admite actualmente la funcionalidad de análisis. Para añadir una aplicación tvOS en tu dashboard, abre un [ticket de soporte](https://www.braze.com/docs/es/es/braze_support).
El SDK de Braze de tvOS debe instalarse o actualizarse mediante [CocoaPods](http://cocoapods.org/), un administrador de dependencias para proyectos Objective-C y Swift. CocoaPods proporciona una mayor simplicidad para la integración y la actualización.
## Integración del SDK de tvOS en CocoaPods {#tvos-sdk-cocoapods-integration}
### Paso 1: Instalar CocoaPods {#step-1-install-cocoapods}
La instalación del SDK a través de los [CocoaPods](http://cocoapods.org/) de tvOS automatiza la mayor parte del proceso de instalación por ti. Antes de comenzar este proceso, asegúrate de que utilizas la [versión de Ruby 2.0.0](https://www.ruby-lang.org/en/installation/) o superior.
Ejecuta el siguiente comando para empezar:
```bash
$ sudo gem install cocoapods
```
- Si se te pide que sobrescribas el ejecutable `rake`, consulta [Introducción](http://guides.cocoapods.org/using/getting-started.html) en CocoaPods.org para más detalles.
- Si tienes problemas con CocoaPods, consulta la [guía de solución de problemas de CocoaPods](http://guides.cocoapods.org/using/troubleshooting.html).
### Paso 2: Construir el archivo de bibliotecas {#step-2-constructing-the-podfile}
Ahora que has instalado la gema Ruby de CocoaPods, tendrás que crear un archivo en el directorio de tu proyecto de Xcode llamado `Podfile`.
Añade la siguiente línea a tu archivo de bibliotecas:
```
target 'YourAppTarget' do
pod 'Appboy-tvOS-SDK'
end
```
Te sugerimos que versiones Braze para que las actualizaciones de pods recojan automáticamente cualquier cosa menor que una actualización de versión menor. Esto se ve así: `pod 'Appboy-tvOS-SDK' ~> Major.Minor.Build`. Si quieres integrar automáticamente la última versión del SDK de Braze, incluso con cambios importantes, puedes utilizar `pod 'Appboy-tvOS-SDK'` en tu archivo de bibliotecas.
### Paso 3: Instalación del SDK de Braze {#step-3-installing-the-braze-sdk}
Para instalar los CocoaPods del SDK de Braze, ve al directorio de tu proyecto de aplicación Xcode en tu terminal y ejecuta el siguiente comando:
```
pod install
```
En este punto, deberías poder abrir el nuevo espacio de trabajo del proyecto Xcode creado por CocoaPods. Asegúrate de utilizar este espacio de trabajo de Xcode en lugar de tu proyecto de Xcode.

### Paso 4: Actualizar el delegado de tu aplicación {#step-4-updating-your-app-delegate}
Añade la siguiente línea de código a tu archivo `AppDelegate.m`:
```objc
#import
```
Dentro de tu archivo `AppDelegate.m`, añade el siguiente fragmento de código dentro de tu método `application:didFinishLaunchingWithOptions`:
```objc
[Appboy startWithApiKey:@"YOUR-API-KEY"
inApplication:application
withLaunchOptions:launchOptions];
```
Por último, actualiza `YOUR-API-KEY` con el valor correcto desde tu página **Administrar configuración**.
Si estás integrando el SDK de Braze con CocoaPods o Carthage, añade la siguiente línea de código a tu archivo `AppDelegate.swift`:
```swift
import AppboyTVOSKit
```
Para más información sobre el uso de código Objective-C en proyectos Swift, consulta los [documentos para desarrolladores de Apple](https://developer.apple.com/library/ios/documentation/swift/conceptual/buildingcocoaapps/MixandMatch.html).
En `AppDelegate.swift`, añade el siguiente fragmento de código a tu `application(application: UIApplication, didFinishLaunchingWithOptions launchOptions: [NSObject: AnyObject]?) -> Bool`:
```swift
Appboy.start(withApiKey: "YOUR-API-KEY", in:application, withLaunchOptions:launchOptions)
```
A continuación, actualiza `YOUR-API-KEY` con el valor correcto desde tu página **Administrar configuración**.
Nuestro singleton `sharedInstance` será nulo antes de llamar a `startWithApiKey:`, ya que es un requisito previo para utilizar cualquier funcionalidad de Braze.
**Warning:**
Asegúrate de inicializar Braze en el hilo principal de tu aplicación. Inicializar de forma asíncrona puede provocar fallos en la funcionalidad.
### Paso 5: Especifica tu punto de conexión personalizado o clúster de datos {#step-5-specify-your-custom-endpoint-or-data-cluster}
**Note:**
A partir de diciembre de 2019, ya no se proporcionan puntos de conexión personalizados; si tienes un punto de conexión personalizado preexistente, puedes seguir utilizándolo. Para más detalles, consulta nuestra lista de puntos de conexión disponibles.
Tu representante de Braze ya debería haberte informado del [punto de conexión correcto](https://www.braze.com/docs/es/es/user_guide/administrative/access_braze/sdk_endpoints/).
#### Configuración del punto de conexión en tiempo de compilación (recomendado) {#compile-time-endpoint-configuration-recommended}
Si se te proporciona un punto de conexión personalizado preexistente:
- A partir de la versión 3.0.2 del SDK iOS de Braze, puedes establecer un punto de conexión personalizado utilizando el archivo `Info.plist`. Añade el diccionario `Appboy` a tu archivo Info.plist. Dentro del diccionario `Appboy`, añade la subentrada de cadena `Endpoint` y establece el valor a la autoridad de URL de tu punto de conexión personalizado (por ejemplo, `sdk.iad-01.braze.com`, no `https://sdk.iad-01.braze.com`).
#### Configuración del punto de conexión en tiempo de ejecución {#runtime-endpoint-configuration}
Si se te proporciona un punto de conexión personalizado preexistente:
- A partir de la versión 3.17.0+ del SDK iOS de Braze, puedes anular la configuración de tu punto de conexión a través de `ABKEndpointKey` dentro del parámetro `appboyOptions` pasado a `startWithApiKey:inApplication:withLaunchOptions:withAppboyOptions:`. Establece el valor a la autoridad de URL de tu punto de conexión personalizado (por ejemplo, `sdk.iad-01.braze.com`, no `https://sdk.iad-01.braze.com`).
**Note:**
Se ha eliminado en la versión 3.17.0 del SDK iOS de Braze el soporte para la configuración de puntos de conexión en tiempo de ejecución mediante `ABKAppboyEndpointDelegate`. Si ya utilizas `ABKAppboyEndpointDelegate`, ten en cuenta que en las versiones v3.14.1 a v3.16.0 del SDK de Braze para iOS, cualquier referencia a `dev.appboy.com` en tu método `getApiEndpoint()` debe sustituirse por una referencia a `sdk.iad-01.braze.com`.
### Integración del SDK completa {#sdk-integration-complete}
Ahora Braze debería estar recopilando datos de tu aplicación, y tu integración básica debería estar completa. Ten en cuenta que al compilar tu aplicación tvOS y cualquier otra biblioteca de terceros, Bitcode debe estar habilitado.
### Actualizar el SDK de Braze mediante CocoaPods {#updating-the-braze-sdk-via-cocoapods}
Para actualizar un CocoaPod, simplemente ejecuta los siguientes comandos dentro del directorio de tu proyecto:
```
pod update
```
## Personalizar Braze al iniciarse {#customizing-braze-on-startup}
Si deseas personalizar Braze al iniciarse, puedes utilizar en su lugar el método de inicialización de Braze `startWithApiKey:inApplication:withLaunchOptions:withAppboyOptions` y pasar un `NSDictionary` opcional de claves de inicio de Braze.
En tu archivo `AppDelegate.m`, dentro de tu método `application:didFinishLaunchingWithOptions`, añade el siguiente método de Braze:
```objc
[Appboy startWithApiKey:@"YOUR-API-KEY"
inApplication:application
withLaunchOptions:launchOptions
withAppboyOptions:appboyOptions];
```
En `AppDelegate.swift`, dentro de tu método `application(application: UIApplication, didFinishLaunchingWithOptions launchOptions: [NSObject: AnyObject]?) -> Bool`, añade el siguiente método de Braze:
```swift
Appboy.start(withApiKey: "YOUR-API-KEY",
in:application,
withLaunchOptions:launchOptions,
withAppboyOptions:appboyOptions)
```
donde `appboyOptions` es un `Dictionary` de valores de configuración de inicio.
Este método sustituiría al método de inicialización `startWithApiKey:inApplication:withLaunchOptions:` y se llama con los siguientes parámetros:
- `YOUR-API-KEY`: La clave de API de tu aplicación se encuentra en **Administrar configuración** en el panel de Braze.
- `application`: La aplicación actual.
- `launchOptions`: Las opciones `NSDictionary` que obtienes de `application:didFinishLaunchingWithOptions:`.
- `appboyOptions`: Un `NSDictionary` opcional con valores de configuración de inicio para Braze.
Consulta [Appboy.h](https://github.com/Appboy/appboy-ios-sdk/blob/master/AppboyKit/include/Appboy.h) para ver una lista de las claves de inicio de Braze.
## Appboy.sharedInstance() y anulabilidad en Swift {#appboysharedinstance-and-swift-nullability}
A diferencia de la práctica habitual, el singleton `Appboy.sharedInstance()` es opcional. Esto se debe a que `sharedInstance` es `nil` antes de que se llame a `startWithApiKey:`, y hay algunas implementaciones no estándar pero no inválidas en las que se puede utilizar una inicialización retardada.
Si llamas a `startWithApiKey:` en tu delegado `didFinishLaunchingWithOptions:` antes de cualquier acceso al `sharedInstance` de Appboy (la implementación estándar), puedes utilizar el encadenamiento opcional, como `Appboy.sharedInstance()?.changeUser("testUser")`, para evitar comprobaciones engorrosas. Esto tendrá paridad con una implementación de Objective-C que haya asumido un `sharedInstance` no nulo.
## Opciones de integración manual {#manual-integration-options}
También puedes integrar nuestro SDK para tvOS manualmente: simplemente obtén el Framework de nuestro [repositorio público](https://github.com/appboy/appboy-ios-sdk) e inicializa Braze como se indica en las secciones anteriores.
## Identificación de usuarios e informes de análisis {#identifying-users-and-reporting-analytics}
Consulta nuestra [documentación de iOS](https://www.braze.com/docs/es/es/developer_guide/analytics/setting_user_ids?tab=swift) para obtener información sobre la configuración de ID de usuario, el registro de eventos personalizados y la configuración de atributos de usuario. También te recomendamos que te familiarices con nuestras [convenciones de nomenclatura de eventos](https://www.braze.com/docs/es/es/user_guide/data/activation/events/event_naming_conventions).
# Acerca de los banners
Source: /docs/es/developer_guide/banners/index.md
# Banners
> With Banners, you can create personalized messaging for your users, all while extending the reach of your other channels, such as email or push notifications. You can embed Banners directly in your app or website, which lets you engage with users through an experience that feels natural.
## Prerequisites
Banners availability depends on your Braze package. Contact your account manager or customer success manager to get started.
Before you start, make sure you have [Banner placements](https://www.braze.com/docs/es/es/developer_guide/banners/placements/) created in your app or website.

## Why use Banners?
Banners allow marketing and product teams to personalize app or website content dynamically, reflecting real-time user eligibility and behavior. They persistently display messages inline, providing non-intrusive, contextually relevant experiences that can be refreshed at the start of a session or mid-session when your app or website explicitly requests it.
After Banners are integrated into an app or website, marketers can design and launch Banners using a simple drag-and-drop editor, eliminating the need for ongoing developer assistance, reducing complexity, and improving efficiency.
| Use case | Explanation |
| --- | --- |
| Announcements | Keep announcements like upcoming events or policy changes at the forefront of your app experience. |
| Personalizing offers | Show personalized promotions and incentives based on each user’s browsing history, cart content, subscription tier, and loyalty status. |
| Targeting new user engagement | Guide new users through onboarding flows and account setup. |
| Sales and promotions | Highlight featured content, trending products, and ongoing brand campaigns persistently and directly on your homepage without disrupting the user experience. |
{: .reset-td-br-1 .reset-td-br-2 aria-label="Why use Banners?" }
## Features
Features for Banners include:
- **Easy content building:** Create and preview your Banner using a visual, drag-and-drop editor with support for images, text, buttons, email capture forms, custom code, and more.
- **Flexible placements:** Define multiple locations within your application or website where Banners can appear, enabling precise targeting to specific contexts or user experiences.
- **Dynamic personalization:** Banners recalculate personalization (Liquid logic) and segmentation every time the banner is refreshed. If a user updates their profile or a custom attribute changes, the next Banner refresh will reflect those changes.
- **Native prioritization:** Set the display priority for when multiple Banners target the same placement, ensuring the right message reaches users at the right time.
- **Custom Code editor block:** Use the Custom Code editor block to add custom HTML for advanced customization or seamless integration with your existing web styles.
## About Banners {#about-banners}
### Placement IDs {#placement-id}
Banner placements are specific locations in your app or website [you create with the Braze SDK](https://www.braze.com/docs/es/es/developer_guide/banners/placements/) that designate where Banners can appear.
Common locations include the top of your homepage, product detail pages, and checkout flows. After placements are created, Banners can be [assigned in your Banner campaign](https://www.braze.com/docs/es/es/user_guide/channels/banners/create_a_banner/).
There is no fixed limit on the number of placements you can create per workspace, and you can create as many placement IDs as your experience requires. Each placement must be unique within a workspace. A single placement ID can be referenced by up to 25 active messages at the same time.
**Important:**
Avoid modifying placement IDs after launching a Banner campaign.
### Banner priority {#priority}
When multiple Banner messages reference the same placement ID, Banners are displayed in order of priority: high, medium, or low. By default, Banners are set to medium, but you can [manually set the priority](https://www.braze.com/docs/es/es/user_guide/channels/banners/create_a_banner/#set-banner-priority-optional) when you create or edit your Banner campaign.
If multiple Banners are set to the same priority, the newest Banner that the user is eligible for is displayed first.
### Placement requests {#requests}
When you [create placements in your app or website](https://www.braze.com/docs/es/es/developer_guide/banners/placements/#requestBannersRefresh), your app sends a request to Braze to fetch Banner messages for each placement.
- You can request up to **10 placements per refresh request**.
- For each placement, Braze returns the **highest-priority Banner** the user is eligible to receive.
- If more than 10 placements are requested in a refresh, only the first 10 are returned; the rest are dropped.
For example, an app might request three placements in a refresh request: `homepage_promo`, `cart_abandonment`, and `seasonal_offer`. Each request returns the most relevant Banner for that placement.
#### Rate limiting for refresh requests
If you're on older SDK versions (before Swift 13.1.0, Android 38.0.0, Web 6.1.0, React Native 17.0.0, and Flutter 15.0.0), only one refresh request is permitted per user session.
If you're on newer minimum SDK versions (Swift 13.1.0+, Android 38.0.0+, Web 6.1.0+, React Native 17.0.0+, and Flutter 15.0.0+), refresh requests are controlled by a token bucket algorithm to prevent excessive polling:
- Each user session begins with five refresh tokens.
- Tokens refill at a rate of one token every 180 seconds (3 minutes).
Each explicit call to `requestBannersRefresh` consumes one token. The automatic refresh that occurs at the start of a new session or when `changeUser` is called does not consume a token, as this refresh is a publishing of the last cached Banner for that user. If you attempt a refresh when no tokens are available, the SDK doesn't make the request and logs an error until a token refills. This is important for mid-session and event-triggered updates. To implement dynamic updates (for example, after a user completes an action on the same page), call the refresh method after the custom event is logged, but note the necessary delay for Braze to ingest and process the event before the user qualifies for a different Banner campaign.
### Message delivery
Banner messages are delivered to your app or website as HTML content, typically rendered inside an iframe. This ensures that your Banners render consistently across devices, and helps you keep their styles and scripts separate from the rest of your code.
Iframes allow for dynamic and personalized content updates that don't require changes to your codebase. Each iframe retrieves and displays the HTML for each user session using campaign targeting and personalization logic.
### Dimensions and sizing
Here's what you need to know about Banner dimensions and sizing:
- While the composer allows you to preview Banners in different dimensions, that information isn't saved or sent to the SDK.
- The HTML takes up the full width of the container it's rendered in.
- We recommend making a fixed dimension element and testing those dimensions in composer.
## Limitations
Each workspace can support up to 200 active Banner campaigns. If this limit is reached, you'll need to [archive or deactivate](https://www.braze.com/docs/es/es/user_guide/messaging/governance/statuses/#changing-the-status) an existing campaign before creating a new one.
Additionally, Banner messages do not support the following features:
- API-triggered and action-based campaigns
- Connected Content
- Promotional codes
- `catalog_items` using the [`:rerender` tag](https://www.braze.com/docs/es/es/user_guide/data/activation/catalogs/using_catalogs/#using-liquid)
## Next steps
- [Create Banner placements in your app or website](https://www.braze.com/docs/es/es/developer_guide/banners/placements/)
- [Create a Banner campaign in Braze](https://www.braze.com/docs/es/es/user_guide/channels/banners/create_a_banner/)
- [Tutorial: Displaying a Banner by Placement ID](https://www.braze.com/docs/es/es/developer_guide/banners/tutorial_displaying_banners)
**Tip:**
Want to help prioritize what's next? Contact [banners-feedback@braze.com](mailto:banners-feedback@braze.com).
# Administrar ubicaciones de banners para el SDK de Braze
Source: /docs/es/developer_guide/banners/placements/index.md
# Administrar ubicaciones de banners {#manage-banner-placements}
> Aprende a crear y administrar ubicaciones de banners en el SDK de Braze, incluido el acceso a sus propiedades únicas y el registro de impresiones. Para obtener información más general, consulta [Acerca de los banners](https://www.braze.com/docs/es/es/developer_guide/banners).
## Acerca de las solicitudes de ubicación {#requests}
When you [create placements in your app or website](https://www.braze.com/docs/es/es/developer_guide/banners/placements/#requestBannersRefresh), your app sends a request to Braze to fetch Banner messages for each placement.
- You can request up to **10 placements per refresh request**.
- For each placement, Braze returns the **highest-priority Banner** the user is eligible to receive.
- If more than 10 placements are requested in a refresh, only the first 10 are returned; the rest are dropped.
For example, an app might request three placements in a refresh request: `homepage_promo`, `cart_abandonment`, and `seasonal_offer`. Each request returns the most relevant Banner for that placement.
#### Rate limiting for refresh requests
If you're on older SDK versions (before Swift 13.1.0, Android 38.0.0, Web 6.1.0, React Native 17.0.0, and Flutter 15.0.0), only one refresh request is permitted per user session.
If you're on newer minimum SDK versions (Swift 13.1.0+, Android 38.0.0+, Web 6.1.0+, React Native 17.0.0+, and Flutter 15.0.0+), refresh requests are controlled by a token bucket algorithm to prevent excessive polling:
- Each user session begins with five refresh tokens.
- Tokens refill at a rate of one token every 180 seconds (3 minutes).
Each explicit call to `requestBannersRefresh` consumes one token. The automatic refresh that occurs at the start of a new session or when `changeUser` is called does not consume a token, as this refresh is a publishing of the last cached Banner for that user. If you attempt a refresh when no tokens are available, the SDK doesn't make the request and logs an error until a token refills. This is important for mid-session and event-triggered updates. To implement dynamic updates (for example, after a user completes an action on the same page), call the refresh method after the custom event is logged, but note the necessary delay for Braze to ingest and process the event before the user qualifies for a different Banner campaign.
## Crear una ubicación {#create-a-placement}
### Requisitos previos {#prerequisites}
Estas son las versiones mínimas del SDK necesarias para crear ubicaciones de banners:
### Step 1: Create placements in Braze
If you haven't already, you'll need to create Banner placements in Braze that are used to define the locations in your app or site can display Banners. To create a placement, go to **Settings** > **Banners Placements**, then select **Create Placement**.

Give your placement a name and assign a **Placement ID**. Be sure you consult other teams before assigning an ID, as it'll be used throughout the card's lifecycle and shouldn't be changed later. For more information, see [Placement IDs].

### Paso 2: Actualiza las ubicaciones en tu aplicación {#requestBannersRefresh}
Para actualizar las ubicaciones, llama al método de actualización de tu SDK. Si `subscribeToBannersUpdates` está activo, el SDK vuelve a publicar automáticamente los ID de ubicación almacenados en caché al inicio de cada nueva sesión y cuando llamas a `changeUser`. Esta actualización automática no consume un token de límite de velocidad.
**Tip:**
Actualiza las ubicaciones lo antes posible para evitar retrasos en la descarga o visualización de los banners.
```javascript
import * as braze from "@braze/web-sdk";
braze.requestBannersRefresh(["global_banner", "navigation_square_banner"]);
```
```swift
AppDelegate.braze?.banners.requestRefresh(placementIds: ["global_banner", "navigation_square_banner"])
```
```java
ArrayList listOfBanners = new ArrayList<>();
listOfBanners.add("global_banner");
listOfBanners.add("navigation_square_banner");
Braze.getInstance(context).requestBannersRefresh(listOfBanners);
```
```kotlin
Braze.getInstance(context).requestBannersRefresh(listOf("global_banner", "navigation_square_banner"))
```
```javascript
Braze.requestBannersRefresh(["global_banner", "navigation_square_banner"]);
```
```csharp
This feature is not currently supported on Unity.
```
```javascript
This feature is not currently supported on Cordova.
```
```dart
braze.requestBannersRefresh(["global_banner", "navigation_square_banner"]);
```
```brightscript
This feature is not currently supported on Roku.
```
### Paso 3: Escucha las actualizaciones {#subscribeToBannersUpdates}
**Tip:**
Si insertas banners utilizando los métodos del SDK de esta guía, todos los eventos de análisis (como impresiones y clics) se gestionan automáticamente, y las impresiones solo se registran cuando el banner está visible.
Si utilizas JavaScript vanilla con el SDK Web de Braze, usa [`subscribeToBannersUpdates`](https://js.appboycdn.com/web-sdk/latest/doc/modules/braze.html#subscribetobannersupdates) para escuchar las actualizaciones de ubicación y, a continuación, llama a [`requestBannersRefresh`](https://js.appboycdn.com/web-sdk/latest/doc/modules/braze.html#requestbannersrefresh) para recuperarlas.
```javascript
import * as braze from "@braze/web-sdk";
braze.subscribeToBannersUpdates((banners) => {
console.log("Banners were updated");
});
// always refresh after your subscriber function has been registered
braze.requestBannersRefresh(["global_banner", "navigation_square_banner"]);
```
Si utilizas React con el SDK Web de Braze, configura [`subscribeToBannersUpdates`](https://js.appboycdn.com/web-sdk/latest/doc/modules/braze.html#subscribetobannersupdates) dentro de un hook `useEffect` y llama a [`requestBannersRefresh`](https://js.appboycdn.com/web-sdk/latest/doc/modules/braze.html#requestbannersrefresh) después de registrar tu listener.
```typescript
import * as braze from "@braze/web-sdk";
useEffect(() => {
const subscriptionId = braze.subscribeToBannersUpdates((banners) => {
console.log("Banners were updated");
});
// always refresh after your subscriber function has been registered
braze.requestBannersRefresh(["global_banner", "navigation_square_banner"]);
// cleanup listeners
return () => {
braze.removeSubscription(subscriptionId);
}
}, []);
```
**Note:**
Tu listener de actualización de banners refleja el estado en memoria de los banners del SDK. Una sola actualización puede incluir ubicaciones que ya estaban en caché (por ejemplo, de una actualización anterior, otra pantalla o trabajo automático del SDK), no solo los ID de ubicación de tu llamada `requestRefresh` más reciente. Si solo te interesan ciertas ubicaciones, comprueba el ID de ubicación de cada banner en tu listener y omite el resto. Cuando hayas registrado tu listener, llama a `requestRefresh` para las ubicaciones que quieras sincronizar desde Braze.
```swift
let placementIds = ["global_banner", "navigation_square_banner"]
let cancellable = brazeClient.braze()?.banners.subscribeToUpdates { banners in
banners.forEach { placementId, banner in
print("Received banner: \(banner) with placement ID: \(placementId)")
}
}
// Always refresh after your subscriber is registered
brazeClient.braze()?.banners.requestRefresh(placementIds: placementIds)
```
**Note:**
Tu listener de actualización de banners refleja el estado en memoria de los banners del SDK. Una sola actualización puede incluir ubicaciones que ya estaban en caché (por ejemplo, de una actualización anterior, otra pantalla o trabajo automático del SDK), no solo los ID de ubicación de tu llamada `requestBannersRefresh` más reciente. Si solo te interesan ciertas ubicaciones, comprueba el ID de ubicación de cada banner en tu listener y omite el resto. Cuando hayas registrado tu listener, llama a `requestBannersRefresh` para las ubicaciones que quieras sincronizar desde Braze.
```java
ArrayList placementIds = new ArrayList<>();
placementIds.add("global_banner");
placementIds.add("navigation_square_banner");
Braze.getInstance(context).subscribeToBannersUpdates(banners -> {
for (Banner banner : banners.getBanners()) {
Log.d(TAG, "Received banner: " + banner.getPlacementId());
}
});
// Always refresh after your subscriber is registered
Braze.getInstance(context).requestBannersRefresh(placementIds);
```
```kotlin
val placementIds = listOf("global_banner", "navigation_square_banner")
Braze.getInstance(context).subscribeToBannersUpdates { update ->
for (banner in update.banners) {
Log.d(TAG, "Received banner: " + banner.placementId)
}
}
// Always refresh after your subscriber is registered
Braze.getInstance(context).requestBannersRefresh(placementIds)
```
```javascript
const bannerCardsSubscription = Braze.addListener(
Braze.Events.BANNER_CARDS_UPDATED,
(data) => {
const banners = data.banners;
console.log(
`Received ${banners.length} Banner Cards with placement IDs:`,
banners.map((banner) => banner.placementId)
);
}
);
```
```csharp
This feature is not currently supported on Unity.
```
```javascript
This feature is not currently supported on Cordova.
```
```dart
StreamSubscription bannerStreamSubscription = braze.subscribeToBanners((List banners) {
for (final banner in banners) {
print("Received banner: " + banner.toString());
}
});
```
```brightscript
This feature is not currently supported on Roku.
```
### Paso 4: Inserta utilizando el ID de ubicación {#insertBanner}
**Tip:**
Para obtener un tutorial completo paso a paso, consulta [Mostrar un banner por ID de ubicación](https://www.braze.com/docs/es/es/developer_guide/banners/tutorial_displaying_banners).
Crea un elemento contenedor para el banner. Asegúrate de establecer su ancho y alto.
```html
```
Si utilizas JavaScript vanilla con el SDK Web de Braze, llama al método [`insertBanner`](https://js.appboycdn.com/web-sdk/latest/doc/modules/braze.html#insertbanner) para sustituir el HTML interno del elemento contenedor.
```javascript
import * as braze from "@braze/web-sdk";
braze.initialize("sdk-api-key", {
baseUrl: "sdk-base-url",
allowUserSuppliedJavascript: true, // banners require you to opt-in to user-supplied javascript
});
braze.subscribeToBannersUpdates((banners) => {
// get this placement's banner. If it's `null` the user did not qualify for one.
const globalBanner = braze.getBanner("global_banner");
if (!globalBanner) {
return;
}
// choose where in the DOM you want to insert the banner HTML
const container = document.getElementById("global-banner-container");
// Insert the banner which replaces the innerHTML of that container
braze.insertBanner(globalBanner, container);
// Special handling if the user is part of a Control Variant
if (globalBanner.isControl) {
// hide or collapse the container
container.style.display = "none";
}
});
braze.requestBannersRefresh(["global_banner", "navigation_square_banner"]);
```
Si utilizas React con el SDK Web de Braze, llama al método [`insertBanner`](https://js.appboycdn.com/web-sdk/latest/doc/modules/braze.html#insertbanner) con un `ref` para sustituir el HTML interno del elemento contenedor.
```tsx
import { useRef } from 'react';
import * as braze from "@braze/web-sdk";
export default function App() {
const bannerRef = useRef(null);
useEffect(() => {
const globalBanner = braze.getBanner("global_banner");
if (!globalBanner || globalBanner.isControl) {
// hide the container
} else {
// insert the banner to the container node
braze.insertBanner(globalBanner, bannerRef.current);
}
}, []);
return
}
```
**Tip:**
Para realizar el seguimiento de las impresiones, asegúrate de llamar a `insertBanner` para `isControl`. A continuación, puedes ocultar o contraer el contenedor.
```swift
// To get access to the Banner model object:
let globalBanner: Braze.Banner?
AppDelegate.braze?.banners.getBanner(for: "global_banner", { banner in
self.globalBanner = banner
})
// UIKit implementation:
// If you simply want the Banner view, initialize a `UIView` with the placement ID:
if let braze = AppDelegate.braze {
let bannerUIView = BrazeBannerUI.BannerUIView(
placementId: "global_banner",
braze: braze,
// iOS does not perform automatic resizing or visibility changes.
// Use the `processContentUpdates` parameter to adjust the size and visibility of your Banner according to your use case.
processContentUpdates: { result in
switch result {
case .success(let updates):
if let height = updates.height {
// Adjust the visibility and/or height.
}
case .failure(let error):
// Handle the error.
}
}
)
}
// SwiftUI implementation:
// Similarly, if you want a Banner view in SwiftUI, use the corresponding `BannerView` initializer:
if let braze = AppDelegate.braze {
let bannerView = BrazeBannerUI.BannerView(
placementId: "global_banner",
braze: braze,
// iOS does not perform automatic resizing or visibility changes.
// Use the `processContentUpdates` parameter to adjust the size and visibility of your Banner according to your use case.
processContentUpdates: { result in
switch result {
case .success(let updates):
if let height = updates.height {
// Adjust the visibility and/or height according to your parent controller.
}
case .failure(let error):
// Handle the error.
}
}
)
}
```
Para obtener el banner en código Java, utiliza:
```java
Banner globalBanner = Braze.getInstance(context).getBanner("global_banner");
```
Puedes crear banners en el diseño de tus vistas Android incluyendo este XML:
```xml
```
Si utilizas Android Views, usa este XML:
```xml
```
Para usar Jetpack Compose, añade el artefacto `com.braze:android-sdk-jetpack-compose` al módulo de tu aplicación. Usa la misma versión que tus otras dependencias del SDK Android de Braze. Este módulo es independiente de `android-sdk-ui` e incluye el composable [`Banner`](https://braze-inc.github.io/braze-android-sdk/kdoc/braze-android-sdk/com.braze.jetpackcompose.banners/-banner.html) bajo `com.braze.jetpackcompose.banners`.
**Note:**
Algunas bibliotecas de UI de Compose definen su propio composable `Banner`. Importa `com.braze.jetpackcompose.banners.Banner` explícitamente para asegurarte de llamar a la API de Braze.
```kotlin
import com.braze.jetpackcompose.banners.Banner
@Composable
fun myBannerSlot() {
Banner(placementId = "global_banner")
}
```
Opcionalmente, pasa `heightCallback` para recibir la altura renderizada en dp cuando cambie el tamaño del banner. Como referencia, consulta la [documentación KDoc de `Banner`](https://braze-inc.github.io/braze-android-sdk/kdoc/braze-android-sdk/com.braze.jetpackcompose.banners/-banner.html).
Si no añades el módulo de Jetpack Compose, envuelve [`BannerView`](https://braze-inc.github.io/braze-android-sdk/kdoc/braze-android-sdk/com.braze.ui.banners/-banner-view/index.html) en [`AndroidView`](https://developer.android.com/reference/kotlin/androidx/compose/ui/viewinterop/AndroidView):
```kotlin
import android.view.ViewGroup
import androidx.compose.runtime.Composable
import androidx.compose.ui.viewinterop.AndroidView
import com.braze.ui.banners.BannerView
@Composable
fun myBannerSlot() {
AndroidView(
factory = { context ->
BannerView(context, "global_banner").apply {
layoutParams = ViewGroup.LayoutParams(
ViewGroup.LayoutParams.MATCH_PARENT,
ViewGroup.LayoutParams.WRAP_CONTENT
)
}
},
update = { it.placementId = "global_banner" }
)
}
```
Para obtener el banner en Kotlin, utiliza:
```kotlin
val banner = Braze.getInstance(context).getBanner("global_banner")
```
Si utilizas [la nueva arquitectura de React Native](https://reactnative.dev/architecture/landing-page), debes registrar `BrazeBannerView` como componente Fabric en tu `AppDelegate.mm`.
```swift
#ifdef RCT_NEW_ARCH_ENABLED
/// Register the `BrazeBannerView` for use as a Fabric component.
- (NSDictionary> *)thirdPartyFabricComponents {
NSMutableDictionary * dictionary = [super thirdPartyFabricComponents].mutableCopy;
dictionary[@"BrazeBannerView"] = [BrazeBannerView class];
return dictionary;
}
#endif
```
Para una integración más sencilla, añade el siguiente fragmento de código JavaScript XML (JSX) a tu jerarquía de vistas, proporcionando únicamente el ID de ubicación.
```javascript
```
Para obtener el modelo de datos del banner en React Native, o para comprobar la presencia de esa ubicación en la caché de tu usuario, utiliza:
```javascript
const banner = await Braze.getBanner("global_banner");
```
```csharp
This feature is not currently supported on Unity.
```
```javascript
This feature is not currently supported on Cordova.
```
Para una integración más sencilla, añade el siguiente widget a tu jerarquía de vistas, proporcionando solo el ID de ubicación.
```dart
BrazeBannerView(
placementId: "global_banner",
),
To get the Banner's data model in Flutter, use:
```
Puedes utilizar el método `getBanner` para comprobar si esa ubicación está presente en la caché del usuario.
```dart
braze.getBanner("global_banner").then((banner) {
if (banner == null) {
// Handle null cases.
} else {
print(banner.toString());
}
});
```
```brightscript
This feature is not currently supported on Roku.
```
### Paso 5: Enviar un banner de prueba (opcional) {#handling-test-cards}
Antes de lanzar una campaña de banners, puedes [enviar un banner de prueba](https://www.braze.com/docs/es/es/user_guide/messaging/messaging_fundamentals/sending_test_messages?tab=banners) para verificar tu integración. Los banners de prueba se almacenan en una caché independiente en memoria y no se conservan tras reiniciar la aplicación. Aunque no se necesita ninguna configuración adicional, tu dispositivo de prueba debe ser capaz de recibir notificaciones push en primer plano para poder mostrar la prueba.
**Note:**
Los banners de prueba son como cualquier otro banner, salvo que se eliminan en la siguiente sesión de la aplicación.
## Registrar impresiones {#log-impressions}
Braze registra automáticamente las impresiones de los banners que están a la vista cuando utilizas métodos del SDK para insertar un banner—por lo que no es necesario realizar un seguimiento manual de las impresiones.
## Registrar clics {#logging-clicks}
El método utilizado para registrar los clics en los banners depende de cómo se muestre el banner y de la ubicación del controlador de clics.
### Contenido estándar del banner (automático) {#standard-banner-content-automatic}
Si utilizas métodos del SDK predeterminados y listos para usar para insertar banners, y tu banner utiliza componentes de editor estándar (imágenes, botones, texto), los clics se registran automáticamente. El SDK añade detectores de clics a estos elementos, sin necesidad de código adicional.
### Bloques de código personalizados {#custom-code-blocks}
Si tu banner utiliza el bloque de editor **Custom Code** en el panel de Braze, debes utilizar `brazeBridge.logClick()` para registrar los clics desde ese HTML personalizado. Esto se aplica incluso cuando se utilizan métodos del SDK para renderizar el banner, ya que el SDK no puede adjuntar automáticamente listeners a elementos dentro de tu código personalizado.
```html
```
Para obtener la referencia completa, consulta [Código personalizado y puente JavaScript para banners](https://www.braze.com/docs/es/es/user_guide/channels/banners/create_a_banner#custom-code). `brazeBridge` proporciona una capa de comunicación entre el HTML interno del banner y el SDK principal de Braze.
### Implementaciones de interfaz de usuario personalizadas (headless) {#custom-ui-implementations-headless}
Si estás creando una interfaz de usuario totalmente personalizada utilizando las [propiedades personalizadas](#custom-properties) del banner en lugar de renderizar el HTML del banner, debes registrar manualmente los clics y las impresiones desde el código de tu aplicación. Dado que el SDK no muestra el banner, no tiene forma de realizar un seguimiento automático de las interacciones con tus elementos de interfaz de usuario personalizados.
Para las firmas de los métodos y todos los detalles, consulta la [documentación de referencia del SDK de Braze](https://www.braze.com/docs/es/es/developer_guide/references).
#### Registrar impresiones {#logging-impressions}
Llama al método de impresión de banner de la plataforma cuando tu interfaz de usuario personalizada considere que el banner ha sido "visto". Construye una lógica robusta para determinar qué cuenta como una impresión y así evitar eventos duplicados; por ejemplo, registra solo cuando el banner entra en el viewport (o equivalente), y no registres de nuevo cuando el mismo banner vuelva a aparecer al hacer scroll o cuando tu componente se vuelva a renderizar sin un nuevo evento de visualización.
```javascript
import * as braze from "@braze/web-sdk";
// Log impression when your custom UI considers the banner viewed (for example, once when it enters viewport)
const banner = braze.getBanner("placement_id_homepage_top");
if (banner) {
braze.logBannerImpressions([banner]);
}
```
[Referencia del SDK Web](https://js.appboycdn.com/web-sdk/latest/doc/modules/braze.html#logbannerimpressions)
```kotlin
// Log impression when your custom UI considers the banner viewed (for example, once when it enters viewport)
Braze.getInstance(context).logBannerImpression("placement_id_homepage_top")
```
```java
// Log impression when your custom UI considers the banner viewed (for example, once when it enters viewport)
Braze.getInstance(context).logBannerImpression("placement_id_homepage_top");
```
[Referencia del SDK Android](https://braze-inc.github.io/braze-android-sdk/kdoc/braze-android-sdk/com.braze/-i-braze/log-banner-impression.html)
```swift
// Retrieve a banner and log an impression on it (for example, once when it enters viewport)
braze.banners.getBanner(for: "placement_id_homepage_top") { banner in
banner?.context.logImpression()
}
```
[Referencia del SDK Swift](https://braze-inc.github.io/braze-swift-sdk/documentation/brazekit/braze/banner/context-swift.class/logimpression())
```javascript
// Log impression when your custom UI considers the banner viewed (for example, once when it enters viewport)
Braze.logBannerImpression("placement_id_homepage_top");
```
Consulta el [repositorio del SDK React Native](https://github.com/braze-inc/braze-react-native-sdk) para las firmas de métodos más recientes.
```dart
// Log impression when your custom UI considers the banner viewed (for example, once when it enters viewport)
braze.logBannerImpression("placement_id_homepage_top");
```
[Referencia del SDK Flutter](https://pub.dev/documentation/braze_plugin/latest/braze_plugin/BrazePlugin/logBannerImpression.html)
#### Registrar clics
Llama al método de clic de banner de la plataforma cuando el usuario toque tu banner personalizado (o un botón específico). Pasa el `buttonId` opcional cuando el clic sea en un botón específico para que los análisis puedan atribuir el clic correctamente.
```javascript
import * as braze from "@braze/web-sdk";
// Log click
braze.logBannerClick("placement_id_homepage_top", buttonId); // buttonID is optional
```
[Referencia del SDK Web](https://js.appboycdn.com/web-sdk/latest/doc/modules/braze.html#logbannerclick)
```kotlin
// Log click
Braze.getInstance(context).logBannerClick("placement_id_homepage_top", buttonId) // buttonID parameter can be null
```
```java
// Log click
Braze.getInstance(context).logBannerClick("placement_id_homepage_top", buttonId); // buttonID parameter can be null
```
[Referencia del SDK Android](https://braze-inc.github.io/braze-android-sdk/kdoc/braze-android-sdk/com.braze/-i-braze/log-banner-click.html)
```swift
// Retrieve a banner and log a click on it
braze.banners.getBanner(for: "placement_id_homepage_top") { banner in
banner?.context.logClick(buttonId: buttonId) // buttonID is optional
}
```
[Referencia del SDK Swift](https://braze-inc.github.io/braze-swift-sdk/documentation/brazekit/braze/banner/context-swift.class/logclick(buttonid:))
```javascript
// Log click
Braze.logBannerClick("placement_id_homepage_top", buttonId); // buttonID is optional
```
Consulta el [repositorio del SDK React Native](https://github.com/braze-inc/braze-react-native-sdk) para las firmas de métodos más recientes.
```dart
// Log click
braze.logBannerClicked("placement_id_homepage_top", buttonId); // buttonID parameter can be null
```
[Referencia del SDK Flutter](https://pub.dev/documentation/braze_plugin/latest/braze_plugin/BrazePlugin/logBannerClicked.html)
## Registrar descartes {#log-dismissals}
Los descartes de banners eliminan programáticamente un banner de una ubicación cuando un usuario lo descarta activamente. Una vez descartado, el banner se suprime para ese usuario. La próxima vez que se actualice la lista de ubicaciones, se devolverá un nuevo banner si el usuario es elegible para uno.
### Requisitos previos
Estas son las versiones mínimas del SDK necesarias para registrar descartes de banners:
### Integraciones {#integrations}
#### Integraciones estándar de banners (editor de arrastrar y soltar) {#standard-banner-integrations-drag-and-drop-editor}
Si tu banner utiliza el editor de arrastrar y soltar e incluye un componente de botón de descarte, no se necesita código adicional. Cuando un usuario hace clic en el botón de descarte, el mensaje se oculta, se activa un descarte y luego se registra un evento de descarte para los análisis.
#### Bloques de código personalizados
Si tu banner utiliza el bloque de editor **Custom Code**, puedes activar un descarte directamente desde el HTML del banner utilizando `brazeBridge.closeMessage()`.
```html
```
#### Descartar un banner programáticamente {#dismiss-a-banner-programmatically}
Si utilizas el `BrazeBannerView` estándar con el botón de descarte creado en el editor de arrastrar y soltar, no se necesita código adicional; el descarte se gestiona automáticamente.
Para integraciones de interfaz de usuario personalizadas, puedes llamar al método de descarte directamente en tu instancia de Braze para descartar un banner programáticamente y registrar un evento de descarte. El método de descarte se puede llamar varias veces de forma segura: el SDK ignora las llamadas duplicadas para el mismo banner.
Estas son las versiones mínimas del SDK necesarias para descartar un banner programáticamente:
Pasa el objeto `Banner` a `braze.dismissBanner()`. Puedes obtener el objeto `Banner` de `braze.getAllBanners()` o de una devolución de llamada de `subscribeToBannersUpdates`.
```javascript
import * as braze from "@braze/web-sdk";
const banners = braze.getAllBanners();
const banner = banners["global_banner"];
if (banner) {
braze.dismissBanner(banner);
}
```
```typescript
import * as braze from "@braze/web-sdk";
const banners = braze.getAllBanners();
const banner = banners["global_banner"];
if (banner) {
braze.dismissBanner(banner);
}
```
```java
Braze.getInstance(context).dismissBanner("your-placement-id");
```
```kotlin
Braze.getInstance(context).dismissBanner("your-placement-id")
```
Usa `dismiss()` en el contexto del banner cuando esté disponible. Este método es idempotente y activa la devolución de llamada `onDismiss` automáticamente. Si el contexto no está disponible, llama a `dismiss(using:)` directamente en el banner. Ambos métodos deben llamarse desde el hilo principal.
```swift
// Preferred: dismiss via context.
banner.context?.dismiss()
// Fallback: if context is unavailable.
banner.dismiss(using: braze)
```
En Objective-C, estos están disponibles como `[banner.context dismiss]` y `[banner dismissUsing:braze]`.
```javascript
Braze.dismissBanner("your-placement-id");
```
```dart
braze.dismissBanner("your-placement-id");
```
### Registrar análisis personalizados al descartar un banner {#log-custom-analytics-on-banner-dismissal}
Para ejecutar lógica personalizada cuando se descarta un banner, como registrar análisis, usa la devolución de llamada de descarte de tu SDK. La devolución de llamada recibe un objeto de evento con el `placementId`, `stableKey` y `trackingId` del banner.
Usa [`Banner.subscribeToDismissedEvent()`](https://js.appboycdn.com/web-sdk/latest/doc/classes/braze.banner.html#subscribetodismissedevent) para ejecutar lógica personalizada cuando se descarta un banner específico. Suscríbete al evento antes de mostrar el banner.
**Note:**
`Banner.subscribeToDismissedEvent()` requiere el SDK Web 6.9.0 o posterior. En versiones anteriores, usa `braze.subscribeToBannersUpdates()` y detecta el descarte comprobando si el banner ya no está presente en el mapa de banners actualizado.
```javascript
import * as braze from "@braze/web-sdk";
braze.subscribeToBannersUpdates((banners) => {
const banner = banners["global_banner"];
if (banner) {
banner.subscribeToDismissedEvent(() => {
// Run any custom logic here, such as logging custom analytics
console.log("Banner was dismissed");
});
}
});
braze.requestBannersRefresh(["global_banner"]);
```
```typescript
import { useEffect } from "react";
import * as braze from "@braze/web-sdk";
useEffect(() => {
const subscriptionId = braze.subscribeToBannersUpdates((banners) => {
const banner = banners["global_banner"];
if (banner) {
banner.subscribeToDismissedEvent(() => {
// Run any custom logic here, such as logging custom analytics
console.log("Banner was dismissed");
});
}
});
braze.requestBannersRefresh(["global_banner"]);
return () => {
braze.removeSubscription(subscriptionId);
};
}, []);
```
Establece la propiedad opcional [`onDismissCallback`](https://braze-inc.github.io/braze-android-sdk/kdoc/braze-android-sdk/com.braze.ui.banners/-banner-view/on-dismiss-callback.html) en [`BannerView`](https://braze-inc.github.io/braze-android-sdk/kdoc/braze-android-sdk/com.braze.ui.banners/-banner-view/index.html).
```java
import android.util.Log;
import com.braze.ui.banners.BannerView;
import kotlin.Unit;
// After obtaining your BannerView instance (for example from XML via findViewById, or `new BannerView(context, "global_banner")`)
bannerView.setOnDismissCallback((snapshot) -> {
Log.d(TAG, "placementId: " + snapshot.getPlacementId()
+ ", stableKey: " + snapshot.getStableKey()
+ ", trackingId: " + snapshot.getTrackingId());
// Run any custom logic here, such as logging custom analytics
return Unit.INSTANCE;
});
```
```kotlin
import android.util.Log
import com.braze.ui.banners.BannerView
// After obtaining your BannerView instance (for example via findViewById or `BannerView(context, "global_banner")`)
bannerView.onDismissCallback = { snapshot ->
Log.d(TAG, "placementId: ${snapshot.placementId}, stableKey: ${snapshot.stableKey}, trackingId: ${snapshot.trackingId}")
// Run any custom logic here, such as logging custom analytics
}
```
```swift
// After initializing your banner view instance using UIKit or SwiftUI
bannerView.onDismiss = { event in
print("Banner dismissed — placementId: \(event.placementId ?? "unknown")")
print(" stableKey: \(event.stableKey ?? "unknown")")
print(" trackingId: \(event.trackingId ?? "unknown")")
// Run any custom logic here, such as logging custom analytics
}
```
Establece la propiedad `onDismiss` en `Braze.BrazeBannerView` para ejecutar lógica personalizada cuando se descarta un banner.
```javascript
import Braze from "@braze/react-native-sdk";
{
console.log("placementId:", event.placementId, "stableKey:", event.stableKey, "trackingId:", event.trackingId);
// Run any custom logic here, such as logging custom analytics
}}
/>
```
Establece el parámetro `onDismiss` en `BrazeBannerView` para ejecutar lógica personalizada cuando se descarta un banner.
```dart
BrazeBannerView(
placementId: 'global_banner',
onDismiss: (BrazeBannerDismissEvent event) {
print('placementId: ${event.placementId}, stableKey: ${event.stableKey}, trackingId: ${event.trackingId}');
// Run any custom logic here, such as logging custom analytics
},
)
```
### Límite de almacenamiento de descartes pendientes {#pending-dismissal-storage-cap}
Los eventos de descarte se almacenan localmente como entradas pendientes hasta que se puedan sincronizar con el servidor de Braze en la siguiente llamada a `requestBannersRefresh`.
**Warning:**
En casos excepcionales en los que se acumule un gran número de descartes sin una sincronización exitosa, los descartes pendientes más antiguos pueden eliminarse. Si esto ocurre, los banners descartados anteriormente pueden reaparecer hasta que se complete la siguiente sincronización exitosa. Para minimizar este riesgo, llama a `requestBannersRefresh` cada vez que tu aplicación recupere la conectividad de red.
## Dimensiones y tamaños {#dimensions-and-sizing}
Esto es lo que debes saber sobre las dimensiones y el tamaño de los banners:
- Aunque el creador te permite previsualizar los banners en diferentes dimensiones, esa información no se guarda ni se envía al SDK.
- El HTML ocupará todo el ancho del contenedor en el que se muestre.
- Recomendamos crear un elemento de dimensiones fijas y probar esas dimensiones en el creador.
## Propiedades personalizadas {#custom-properties}
Puedes utilizar propiedades personalizadas de tu campaña de banners para recuperar datos clave-valor a través del SDK y modificar el comportamiento o la apariencia de tu aplicación. Por ejemplo, podrías:
- Enviar metadatos para tus análisis o integraciones de terceros.
- Utilizar metadatos como un `timestamp` o un objeto JSON para desencadenar lógica condicional.
- Controlar el comportamiento de un banner basándote en metadatos incluidos como `ratio` o `format`.
### Requisitos previos
Debes [añadir propiedades personalizadas](https://www.braze.com/docs/es/es/user_guide/channels/banners/create_a_banner#custom-properties) a tu campaña de banners. Además, estas son las versiones mínimas del SDK necesarias para acceder a las propiedades personalizadas:
### Acceder a las propiedades personalizadas {#access-custom-properties}
Para acceder a las propiedades personalizadas de un banner, utiliza uno de los siguientes métodos según el tipo de propiedad definido en el panel. Si la clave no coincide con una propiedad de ese tipo o no existe, el método devuelve `null`.
```javascript
// Returns the Banner instance
const banner = braze.getBanner("placement_id_homepage_top");
// banner may be undefined or null
if (banner) {
// Returns the string property
const stringProperty = banner.getStringProperty("color");
// Returns the boolean property
const booleanProperty = banner.getBooleanProperty("expanded");
// Returns the number property
const numberProperty = banner.getNumberProperty("height");
// Returns the timestamp property (as a number)
const timestampProperty = banner.getTimestampProperty("account_start");
// Returns the image URL property as a string of the URL
const imageProperty = banner.getImageProperty("homepage_icon");
// Returns the JSON object property
const jsonObjectProperty = banner.getJsonProperty("footer_settings");
}
```
```swift
// Passes the specified banner to the completion handler
AppDelegate.braze?.banners.getBanner(for: "placement_id_homepage_top") { banner in
// Returns the string property
let stringProperty: String? = banner.stringProperty(key: "color")
// Returns the boolean property
let booleanProperty: Bool? = banner.boolProperty(key: "expanded")
// Returns the number property as a double
let numberProperty: Double? = banner.numberProperty(key: "height")
// Returns the Unix UTC millisecond timestamp property as an integer
let timestampProperty: Int? = banner.timestampProperty(key: "account_start")
// Returns the image property as a String of the image URL
let imageProperty: String? = banner.imageProperty(key: "homepage_icon")
// Returns the JSON object property as a [String: Any] dictionary
let jsonObjectProperty: [String: Any]? = banner.jsonObjectProperty(key: "footer_settings")
}
```
```java
// Returns the Banner instance
Banner banner = Braze.getInstance(context).getBanner("placement_id_homepage_top");
// banner may be undefined or null
if (banner != null) {
// Returns the string property
String stringProperty = banner.getStringProperty("color");
// Returns the boolean property
Boolean booleanProperty = banner.getBooleanProperty("expanded");
// Returns the number property
Number numberProperty = banner.getNumberProperty("height");
// Returns the timestamp property (as a Long)
Long timestampProperty = banner.getTimestampProperty("account_start");
// Returns the image URL property as a String of the URL
String imageProperty = banner.getImageProperty("homepage_icon");
// Returns the JSON object property as a JSONObject
JSONObject jsonObjectProperty = banner.getJSONProperty("footer_settings");
}
```
```kotlin
// Returns the Banner instance
val banner: Banner = Braze.getInstance(context).getBanner("placement_id_homepage_top") ?: return
// Returns the string property
val stringProperty: String? = banner.getStringProperty("color")
// Returns the boolean property
val booleanProperty: Boolean? = banner.getBooleanProperty("expanded")
// Returns the number property
val numberProperty: Number? = banner.getNumberProperty("height")
// Returns the timestamp property (as a Long)
val timestampProperty: Long? = banner.getTimestampProperty("account_start")
// Returns the image URL property as a String of the URL
val imageProperty: String? = banner.getImageProperty("homepage_icon")
// Returns the JSON object property as a JSONObject
val jsonObjectProperty: JSONObject? = banner.getJSONProperty("footer_settings")
```
```javascript
// Get the Banner instance
const banner = await Braze.getBanner('placement_id_homepage_top');
if (!banner) return;
// Get the string property
const stringProperty = banner.getStringProperty('color');
// Get the boolean property
const booleanProperty = banner.getBooleanProperty('expanded');
// Get the number property
const numberProperty = banner.getNumberProperty('height');
// Get the timestamp property (as a number)
const timestampProperty = banner.getTimestampProperty('account_start');
// Get the image URL property as a string
const imageProperty = banner.getImageProperty('homepage_icon');
// Get the JSON object property
const jsonObjectProperty = banner.getJSONProperty('footer_settings');
```
```dart
// Fetch the banner asynchronously
_braze.getBanner(placementId).then(('placement_id_homepage_top') {
// Get the string property
final String? stringProperty = banner?.getStringProperty('color');
// Get the boolean property
final bool? booleanProperty = banner?.getBooleanProperty('expanded');
// Get the number property
final num? numberProperty = banner?.getNumberProperty('height');
// Get the timestamp property
final int? timestampProperty = banner?.getTimestampProperty('account_start');
// Get the image URL property
final String? imageProperty = banner?.getImageProperty('homepage_icon');
// Get the JSON object property
final Map? jsonObjectProperty = banner?.getJSONProperty('footer_settings');
// Use these properties as needed in your UI or logic
});
```
# Banners de prueba
Source: /docs/es/developer_guide/banners/testing/index.md
# Banners de prueba {#test-banners}
> Aprende a probar tu mensaje de banner antes de lanzar tu campaña para asegurarte de que todos los medios, textos, personalizaciones y atributos personalizados se muestren correctamente. Para obtener información más general, consulta [Acerca de los banners](https://www.braze.com/docs/es/es/developer_guide/banners).
## Requisitos previos {#prerequisites}
Antes de poder probar los mensajes de banner en Braze, deberás crear una [Campaign de banner en Braze](https://www.braze.com/docs/es/es/user_guide/channels/banners/create_a_banner). Además, comprueba que la ubicación que deseas probar ya esté [colocada en tu aplicación o sitio web](https://www.braze.com/docs/es/es/developer_guide/banners/placements).
Para enviar una prueba a [grupos de prueba de contenido](https://www.braze.com/docs/es/es/user_guide/administrative/app_settings/developer_console/internal_groups_tab#content-test-groups) o a usuarios individuales, las notificaciones push deben estar habilitadas en tus dispositivos de prueba con tokens de notificaciones push válidos registrados para el usuario de prueba antes de enviarla.
## Prueba un banner {#test-a-banner}
**Preview** to you preview your Banner or send a test message.
{: style="max-width:50%;"}
Keep in mind, your preview may not be identical to the final render on a user's device due to differences across hardware.
To send a test message, add either a content test group or one or more individual users as **Test Recipients**, then select **Send Test**. You'll be able to view your test message on the device for up to 5 minutes. You can then select **Copy preview link** to generate and copy a shareable preview link that shows what the banner will look like for a random user. The link will last for seven days before it needs to be regenerated.

While reviewing your test Banner, verify the following:
- Is your Banner campaign assigned to a placement?
- Do the images and media show up and act as expected on your targeted device types and screen sizes?
- Do your links and buttons direct the user to where they should go?
- Does the Liquid function as expected? Have you accounted for a default attribute value in the event that the Liquid returns no information?
- Is your copy clear, concise, and correct?
For more information, see [Send test messages](https://www.braze.com/docs/es/es/user_guide/messaging/messaging_fundamentals/sending_test_messages/).
# Análisis de banners
Source: /docs/es/developer_guide/banners/analytics/index.md
# Análisis de banners
> Aprende a revisar los análisis de tus banners, que incluyen detalles de la campaña, rendimiento de los mensajes y rendimiento histórico. Para obtener información más general, consulta [Acerca de los banners](https://www.braze.com/docs/es/es/developer_guide/banners).
## Viewing analytics
Once you've launched your campaign, you can return to the details page for that campaign to view key metrics. Navigate to the **Campaigns** page and select your campaign to open the details page. For sent in Canvas, refer to [Canvas analytics](https://www.braze.com/docs/es/es/user_guide/engagement_tools/canvas/testing_canvases/measuring_and_testing_with_canvas_analytics/).
**Tip:**
Looking for definitions for the terms and metrics listed in your report? Refer to our
From the **Campaign Analytics** tab, you can view your reports in a series of panels. You may see more or less than those listed in the following sections, but each has its own useful purpose.
### Time range
By default, the time range for **Campaign Analytics** will display the last 90 days from the current time. This means that if the campaign was launched more than 90 days ago, the analytics will display as "0" for the given time range. To view all analytics for older campaigns, adjust the reporting time range.
### Campaign details
The **Campaign Details** panel shows a high-level overview of the entire performance for your
Review this panel to see overall metrics such as the number of messages sent to the number of recipients, the primary conversion rate, and the total revenue generated by this message. You can also review delivery, audience, and conversion settings from this page.
**Note:**
Analytics numbers in the dashboard and Snowflake may differ slightly. Braze measures numbers in the dashboard and records rows to Snowflake separately. Snowflake is the more precise data source, so if you see discrepancies between these sources, we recommend referring to Snowflake data.
#### Estimated Audience and Current Audience
Depending on how large your workspace is, the **Campaign Details** panel may label audience statistics **Estimated Audience** or **Current Audience**.
The following table summarizes what each label means.
| Footer label | When it is used |
| --- | --- |
| **Estimated Audience** | Braze does not run a full-database count by default. Audience size is estimated from a sample and extrapolated, similar to the **Reachable users** range in the segment builder. Margins of error are expected, especially for large workspaces or small segments as a share of the workspace. |
| **Current Audience** | Braze can compute the default statistic with a full scan of workspace profiles, so the displayed audience size is a current, unsampled count (still subject to channel reachability, subscription rules, and other targeting options). |
{: .reset-td-br-1 .reset-td-br-2 aria-label="Estimated Audience and Current Audience" }
For details on sampling behavior, **Calculate exact statistics**, and segmenting **Reachable users**, see [Measure segment size](https://www.braze.com/docs/es/es/user_guide/audience/segments/measuring_segment_size/).
#### Changes Since Last Viewed
The number of updates to the campaign from other members of your team is tracked by the *Changes Since Last Viewed* metric on the campaign overview page. Select **Changes Since Last Viewed** to view a changelog of updates to the campaign's name, schedule, tags, message, audience, approval status, or team access configuration. For each update, you can see who performed the update and when. You can use this changelog to audit changes to your campaign.
If you want to simplify your view, click **Add/Remove Columns** and clear any metrics as desired. By default, all metrics are displayed.
### Historical performance
The **Historical Performance** panel allows you to view the metrics from the **Message Performance** panel as a graph over time. Use the filters at the top of the panel to modify the stats and channels shown in the graph. The time range of this graph will always mirror the time range specified at the top of the page.
To get a day-by-day breakdown, click the hamburger menu and select **Download CSV** to receive a CSV export of the report.

### Conversion event details
The **Conversion Event Details** panel shows you the performance of your conversion events for your campaign. For more information, refer to [Conversion Events](https://www.braze.com/docs/es/es/user_guide/engagement_tools/campaigns/building_campaigns/conversion_events/#step-3-view-results).

### Conversion correlation
The **Conversion Correlation** panel gives you insight into what user attributes and behaviors help or hurt the outcomes you set for campaigns. For more information, refer to [Conversion correlation](https://www.braze.com/docs/es/es/user_guide/engagement_tools/testing/conversion_correlation/).

## Retention report
Retention reports show you the rates at which your users have performed a selected retention event over time periods in a specific campaign or Canvas. For more information, refer to [Retention reports](https://www.braze.com/docs/es/es/user_guide/analytics/reporting/retention_reports/).
## Funnel report
Funnel reporting offers a visual report that allows you to analyze the journeys your customers take after receiving a campaign or Canvas. If your campaign or Canvas uses a control group or multiple variants, you will be able to understand how the different variants have impacted the conversion funnel at a more granular level and optimize based on this data.
For more information, refer to [Funnel reports](https://www.braze.com/docs/es/es/user_guide/analytics/reporting/funnel_reports/).
# Migrar de Content Cards a banners
Source: /docs/es/developer_guide/banners/migrating_from_content_cards/index.md
# Migrar de Content Cards a banners {#migrate-from-content-cards-to-banners}
> Esta guía te ayuda en la migración de Content Cards a banners para casos de uso de mensajería tipo banner. Los banners son ideales para mensajes en línea, persistentes dentro de la aplicación y en la Web que aparecen en ubicaciones específicas de tu aplicación.
## ¿Por qué realizar la migración a banners? {#why-migrate-to-banners}
- Si tu equipo de ingeniería está creando o manteniendo Content Cards personalizadas, la migración a banners puede reducir esa inversión continua. Los banners permiten a los especialistas en marketing controlar directamente la interfaz de usuario, lo que libera a los desarrolladores para que puedan dedicarse a otras tareas.
- Si vas a lanzar nuevos mensajes en la página de inicio, flujos de incorporación o anuncios persistentes, empieza con banners en lugar de crear Content Cards. Podrás beneficiarte de la personalización en tiempo real, sin caducidad a los 30 días, sin límite de tamaño y con priorización nativa desde el primer día.
- Si estás lidiando con el límite de caducidad de 30 días, administrando una lógica de reelegibilidad compleja o frustrado por una personalización obsoleta, los banners resuelven estos problemas de forma nativa.
Los banners ofrecen varias ventajas con respecto a Content Cards para la mensajería tipo banner:
### Producción acelerada {#accelerated-production}
- **Reducción del soporte de ingeniería continuo necesario**: Los especialistas en marketing pueden crear mensajes personalizados utilizando un editor de arrastrar y soltar y HTML personalizado sin necesidad de ayuda de desarrolladores para la personalización.
- **Opciones de personalización flexibles**: Diseña directamente en el editor, utiliza HTML o aprovecha los modelos de datos existentes con propiedades personalizadas.
### Mejor experiencia de usuario {#better-ux}
- **Actualizaciones dinámicas de contenido**: Los banners actualizan la lógica de Liquid y la elegibilidad en cada actualización, lo que garantiza que los usuarios siempre vean el contenido más relevante.
- **Compatibilidad con la ubicación nativa**: Los mensajes aparecen en contextos específicos en lugar de en una fuente, lo que proporciona una mayor relevancia contextual.
- **Priorización nativa**: Control sobre el orden de visualización sin lógica personalizada, lo que facilita la administración de la jerarquía de mensajes.
### Persistencia {#persistence}
- **Sin límite de caducidad**: Las campañas con banners no tienen un límite de caducidad de 30 días como Content Cards, lo que permite una verdadera persistencia de los mensajes.
## Cuándo realizar la migración {#when-to-migrate}
Considera la migración a banners si utilizas Content Cards para:
- Héroes de la página de inicio, promociones en la página de productos, ofertas en el proceso de pago
- Anuncios de navegación persistentes o mensajes en la barra lateral
- Mensajes siempre activos con una duración superior a 30 días
- Mensajes en los que deseas personalización y elegibilidad en tiempo real
## Cuándo conservar Content Cards {#when-to-keep-content-cards}
Sigue utilizando Content Cards si necesitas:
- **Experiencias con la fuente:** Cualquier caso de uso que implique múltiples mensajes desplazables o un «buzón de entrada» basado en tarjetas.
- **Características específicas:** Mensajes que requieren contenido conectado o códigos promocionales, ya que los banners no los admiten de forma nativa.
- **Entrega desencadenada:** Casos de uso que requieren estrictamente una entrega desencadenada por API o basada en acciones. Aunque los banners no admiten la entrega desencadenada por API o basada en acciones, la evaluación de elegibilidad en tiempo real significa que los usuarios se clasifican o descartan instantáneamente en función de su pertenencia a un segmento cada vez que se actualiza la página.
## Guía de migración {#migration-guide}
### Requisitos previos {#prerequisites}
Antes de la migración, asegúrate de que tu SDK de Braze cumple los requisitos mínimos de versión:
Los descartes y la reelegibilidad requieren las siguientes versiones mínimas del SDK:
### Suscribirse a las actualizaciones {#subscribe-to-updates}
#### Enfoque de Content Cards {#content-cards-approach}
```javascript
import * as braze from "@braze/web-sdk";
braze.subscribeToContentCardsUpdates((cards) => {
// Handle array of cards
cards.forEach(card => {
console.log("Card:", card.id);
});
});
```
```kotlin
Braze.getInstance(context).subscribeToContentCardsUpdates { cards ->
// Handle array of cards
cards.forEach { card ->
Log.d(TAG, "Card: ${card.id}")
}
}
```
```swift
braze.contentCards.subscribeToUpdates { cards in
// Handle array of cards
for card in cards {
print("Card: \(card.id)")
}
}
```
```javascript
Braze.addListener(Braze.Events.CONTENT_CARDS_UPDATED, (update) => {
const cards = update.cards;
// Handle array of cards
cards.forEach(card => {
console.log("Card:", card.id);
});
});
```
```dart
StreamSubscription contentCardsStreamSubscription = braze.subscribeToContentCards((List contentCards) {
// Handle array of cards
for (final card in contentCards) {
print("Card: ${card.id}");
}
});
```
#### Enfoque de los banners {#banners-approach}
```javascript
import * as braze from "@braze/web-sdk";
braze.subscribeToBannersUpdates((banners) => {
// Get banner for specific placement
const banner = braze.getBanner("sample_placement_id");
if (banner) {
console.log("Banner received for placement:", banner.placementId);
}
});
```
```kotlin
Braze.getInstance(context).subscribeToBannersUpdates { update ->
// Get banner for specific placement
val banner = Braze.getInstance(context).getBanner("sample_placement_id")
if (banner != null) {
Log.d(TAG, "Banner received for placement: ${banner.placementId}")
}
}
```
```swift
braze.banners.subscribeToUpdates { banners in
// Get banner for specific placement
braze.banners.getBanner(for: "sample_placement_id") { banner in
guard let banner = banner else { return }
print("Banner received for placement: \(banner.placementId)")
}
}
```
```javascript
Braze.addListener(Braze.Events.BANNER_CARDS_UPDATED, (data) => {
const banners = data.banners;
// Get banner for specific placement
Braze.getBanner("sample_placement_id").then(banner => {
if (banner) {
console.log("Banner received for placement:", banner.placementId);
}
});
});
```
```dart
StreamSubscription bannerStreamSubscription = braze.subscribeToBanners((List banners) {
// Get banner for specific placement
braze.getBanner("sample_placement_id").then((banner) {
if (banner != null) {
print("Banner received for placement: ${banner.placementId}");
}
});
});
```
### Mostrar contenido {#display-content}
**Note:**
Content Cards se pueden renderizar manualmente con lógica de interfaz de usuario personalizada, mientras que los banners solo se pueden renderizar con los métodos del SDK listos para usar.
#### Enfoque de Content Cards
```javascript
// Show default feed UI
braze.showContentCards(document.getElementById("feed"));
// Or manually render cards
const cards = braze.getCachedContentCards();
cards.forEach(card => {
// Custom rendering logic
if (card instanceof braze.ClassicCard) {
// Render classic card
}
});
```
```kotlin
// Using default fragment
val fragment = ContentCardsFragment()
supportFragmentManager.beginTransaction()
.replace(R.id.content_cards_container, fragment)
.commit()
// Or manually render cards
val cards = Braze.getInstance(context).getCachedContentCards()
cards.forEach { card ->
when (card) {
is ClassicCard -> {
// Render classic card
}
}
}
```
```swift
// Using default view controller
let contentCardsController = BrazeContentCardUI.ViewController(braze: braze)
navigationController?.pushViewController(contentCardsController, animated: true)
// Or manually render cards
let cards = braze.contentCards.cards
for card in cards {
switch card {
case let card as Braze.ContentCard.Classic:
// Render classic card
default:
break
}
}
```
```javascript
// Launch default feed
Braze.launchContentCards();
// Or manually render cards
const cards = await Braze.getContentCards();
cards.forEach(card => {
if (card.type === 'CLASSIC') {
// Render classic card
}
});
```
```dart
// Launch default feed
braze.launchContentCards();
// Or manually render cards
final cards = await braze.getContentCards();
for (final card in cards) {
if (card.type == 'CLASSIC') {
// Render classic card
}
}
```
#### Enfoque de los banners
```javascript
braze.subscribeToBannersUpdates((banners) => {
const banner = braze.getBanner("sample_placement_id");
if (!banner) {
return;
}
const container = document.getElementById("global-banner-container");
braze.insertBanner(banner, container);
if (banner.isControl) {
container.style.display = "none";
}
});
braze.requestBannersRefresh(["sample_placement_id"]);
```
```kotlin
// Using BannerView in XML
//
// Or programmatically
val bannerView = BannerView(context).apply {
placementId = "sample_placement_id"
}
container.addView(bannerView)
Braze.getInstance(context).requestBannersRefresh(listOf("sample_placement_id"))
```
```swift
// Using BannerUIView
let bannerView = BrazeBannerUI.BannerUIView(
placementId: "sample_placement_id",
braze: braze,
processContentUpdates: { result in
switch result {
case .success(let updates):
if let height = updates.height {
// Update height constraint
}
case .failure:
break
}
}
)
view.addSubview(bannerView)
braze.banners.requestBannersRefresh(placementIds: ["sample_placement_id"])
```
```javascript
// Using BrazeBannerView component
// Or get banner data
const banner = await Braze.getBanner("sample_placement_id");
if (banner) {
// Render custom banner UI
}
Braze.requestBannersRefresh(["sample_placement_id"]);
```
```dart
// Using BrazeBannerView widget
BrazeBannerView(
placementId: "sample_placement_id",
)
// Or get banner data
final banner = await braze.getBanner("sample_placement_id");
if (banner != null) {
// Render custom banner UI
}
braze.requestBannersRefresh(["sample_placement_id"]);
```
### Registro de análisis (implementaciones personalizadas) {#log-analytics-custom-implementations}
**Note:**
Tanto Content Cards como los banners realizan un seguimiento automático de los análisis cuando se utilizan sus componentes de interfaz de usuario predeterminados. Los ejemplos siguientes son para implementaciones personalizadas en las que creas tu propia interfaz de usuario.
#### Enfoque de Content Cards
```javascript
// Manual impression logging required for custom implementations
cards.forEach(card => {
braze.logContentCardImpressions([card]);
});
// Manual click logging required for custom implementations
card.logClick();
```
```kotlin
// Manual impression logging required for custom implementations
cards.forEach { card ->
card.logImpression()
}
// Manual click logging required for custom implementations
card.logClick()
```
```swift
// Manual impression logging required for custom implementations
for card in cards {
card.context?.logImpression()
}
// Manual click logging required for custom implementations
card.context?.logClick()
```
```javascript
// Manual impression logging required for custom implementations
cards.forEach(card => {
Braze.logContentCardImpression(card.id);
});
// Manual click logging required for custom implementations
Braze.logContentCardClicked(card.id);
```
```dart
// Manual impression logging required for custom implementations
for (final card in cards) {
braze.logContentCardImpression(card);
}
// Manual click logging required for custom implementations
braze.logContentCardClicked(card);
```
#### Enfoque de los banners
**Important:**
El seguimiento de los análisis se realiza automáticamente cuando usas `insertBanner()`. No se debe utilizar el registro manual cuando se utiliza `insertBanner()`.
```javascript
// Analytics are automatically tracked when using insertBanner()
// Manual logging should not be used when using insertBanner()
// For custom implementations, use manual logging methods:
// Log impression
braze.logBannerImpressions([banner]);
// Log click (with optional buttonId)
braze.logBannerClick("sample_placement_id", buttonId);
```
**Important:**
Los análisis se rastrean automáticamente cuando usas BannerView. No se debe utilizar el registro manual cuando se utiliza BannerView.
```kotlin
// Analytics are automatically tracked when using BannerView
// Manual logging should not be used for default BannerView
// For custom implementations, use manual logging methods:
// Log impression
Braze.getInstance(context).logBannerImpression("sample_placement_id");
// Log click (with optional buttonId)
Braze.getInstance(context).logBannerClick("sample_placement_id", buttonId);
```
**Important:**
El seguimiento de los análisis se realiza automáticamente cuando usas BannerUIView. No se debe utilizar el registro manual para el BannerUIView predeterminado.
```swift
// Analytics are automatically tracked when using BannerUIView
// Manual logging should not be used for default BannerUIView
// For custom implementations, use manual logging methods:
// Get banner for specific placement
braze.banners.getBanner(for: "sample_placement_id") { banner in
guard let banner = banner else { return }
// Log impression
banner.context?.logImpression()
// Log click (with optional buttonId)
banner.context?.logClick(buttonId: buttonId)
}
// Control groups are automatically handled by BannerUIView
```
**Important:**
El seguimiento de los análisis se realiza automáticamente cuando usas BrazeBannerView. No es necesario registrar manualmente.
```javascript
// Analytics are automatically tracked when using BrazeBannerView
// No manual logging required
// Note: Manual logging methods for Banners are not yet supported in React Native
// Control groups are automatically handled by BrazeBannerView
```
**Important:**
El seguimiento de los análisis se realiza automáticamente cuando usas BrazeBannerView. No es necesario registrar manualmente.
```dart
// Analytics are automatically tracked when using BrazeBannerView
// No manual logging required
// Note: Manual logging methods for Banners are not yet supported in Flutter
// Control groups are automatically handled by BrazeBannerView
```
### Obtener propiedades {#getting-properties}
#### Enfoque de Content Cards
```javascript
cards.forEach(card => {
console.log("Card id:", card.id, "Extras:", card.extras);
});
```
```kotlin
cards.forEach { card ->
Log.d(TAG, "Card id: ${card.id} Extras: ${card.extras}")
}
```
```swift
for card in cards {
print("Card id: \(card.id) Extras: \(card.extras)")
}
```
```javascript
cards.forEach(card => {
console.log("Card id:", card.id, "Extras:", card.extras);
});
```
```dart
for (final card in cards) {
print("Card id: ${card.id} Extras: ${card.extras}");
}
```
#### Enfoque de los banners
```javascript
const banner = braze.getBanner("sample_placement_id");
if (!banner) {
return;
}
console.log("Banner placement:", banner.placementId, "Properties:", banner.properties);
```
```kotlin
val banner = Braze.getInstance(context).getBanner("sample_placement_id")
if (banner != null) {
Log.d(TAG, "Banner placement: ${banner.placementId} Properties: ${banner.properties}")
}
```
```swift
braze.banners.getBanner(for: "sample_placement_id") { banner in
guard let banner = banner else { return }
print("Banner placement: \(banner.placementId) Properties: \(banner.properties)")
}
```
```javascript
const banner = await Braze.getBanner("sample_placement_id");
if (banner) {
console.log("Banner placement:", banner.placementId, "Properties:", banner.properties);
}
```
```dart
final banner = await braze.getBanner("sample_placement_id");
if (banner != null) {
print("Banner placement: ${banner.placementId} Properties: ${banner.properties}");
}
```
### Manejo de grupos de control {#handling-control-groups}
#### Enfoque de Content Cards
```javascript
cards.forEach(card => {
if (card.isControl) {
// Logic for control cards ie. don't display but log analytics
} else {
// Logic for cards ie. render card
}
});
```
```kotlin
cards.forEach { card ->
if (card.isControl) {
// Logic for control cards ie. don't display but log analytics
} else {
// Logic for cards ie. render card
}
}
```
```swift
for card in cards {
if card.isControl {
// Logic for control cards ie. don't display but log analytics
} else {
// Logic for cards ie. render card
}
}
```
```javascript
cards.forEach(card => {
if (card.isControl) {
// Logic for control cards ie. don't display but log analytics
} else {
// Logic for cards ie. render card
}
});
```
```dart
for (final card in cards) {
if (card.isControl) {
// Logic for control cards ie. don't display but log analytics
} else {
// Logic for cards ie. render card
}
}
```
#### Enfoque de los banners
```javascript
braze.subscribeToBannersUpdates((banners) => {
const banner = braze.getBanner("sample_placement_id");
if (!banner) {
return;
}
const container = document.getElementById("global-banner-container");
// Always call insertBanner to track impression (including control)
braze.insertBanner(banner, container);
// Hide if control group
if (banner.isControl) {
container.style.display = "none";
}
});
```
```kotlin
// BannerView automatically handles control groups
// No additional code needed
val bannerView = BannerView(context).apply {
placementId = "sample_placement_id"
}
```
```swift
// BannerUIView automatically handles control groups
// No additional code needed
let bannerView = BrazeBannerUI.BannerUIView(
placementId: "sample_placement_id",
braze: braze
)
```
```javascript
// BrazeBannerView automatically handles control groups
// No additional code needed
```
```dart
// BrazeBannerView automatically handles control groups
// No additional code needed
BrazeBannerView(
placementId: "sample_placement_id",
)
```
## Limitaciones {#limitations}
Al realizar la migración de Content Cards a banners, ten en cuenta las siguientes limitaciones:
### Migración de mensajes desencadenados {#migrating-triggered-messages}
Los banners solo admiten campañas de entrega planificada. Para realizar la migración de un mensaje que anteriormente se desencadenaba mediante API o se basaba en acciones, conviértelo en una segmentación basada en segmentos:
- **Ejemplo:** En lugar de desencadenar una tarjeta «Completar perfil» con la API, crea un segmento para los usuarios que se hayan registrado en los últimos 7 días pero que no hayan completado su perfil.
- **Elegibilidad en tiempo real:** Los usuarios se clasifican o descalifican para el banner instantáneamente en cada actualización en función de su pertenencia al segmento.
### Diferencias entre características {#feature-differences}
| Característica | Content Cards | Banners |
|---------|--------------|---------|
| **Estructura del contenido** |
| Varias tarjetas en la fuente | ✅ Compatible | ✅ Puedes crear múltiples ubicaciones para lograr una implementación similar a un carrusel. Solo se devuelve un banner por ubicación. |
| Múltiples ubicaciones | N/A | ✅ Compatible con múltiples ubicaciones |
| Tipos de tarjetas (clásicas, con leyenda, solo imagen) | ✅ Múltiples tipos predefinidos | ✅ Banner único basado en HTML (más flexible) |
| **Gestión de contenidos** |
| Editor de arrastrar y soltar | ❌ Requiere desarrollador para personalización | ✅ Los especialistas en marketing pueden crear/actualizar sin necesidad de ingeniería |
| HTML/CSS personalizado | ❌ Limitado a la estructura de la tarjeta | ✅ Compatibilidad total con HTML/CSS |
| Pares clave-valor para personalización | ✅ Necesario para la personalización avanzada | ✅ Pares clave-valor fuertemente tipados denominados «propiedades» para una personalización avanzada |
| **Persistencia y caducidad** |
| Caducidad de la tarjeta | ✅ Compatible (límite de 30 días) | ✅ Compatible (sin límite de caducidad) |
| Verdadera persistencia | ❌ Máximo 30 días | ✅ Persistencia ilimitada |
| **Visualización y segmentación** |
| Interfaz de usuario de fuente | ✅ Fuente predeterminada disponible | ❌ Solo basado en la ubicación |
| Colocación específica según el contexto | ❌ Basado en fuente | ✅ Compatibilidad con la ubicación nativa |
| Priorización | ❌ Requiere lógica personalizada | ✅ Priorización nativa |
| **Interacción del usuario** |
| Descarte manual | ✅ Compatible | ✅ Compatible |
| Reelegibilidad tras el descarte | ❌ Requiere filtros personalizados o lógica de Campaign | ✅ Periodo de espera predeterminado |
| Tarjetas ancladas | ✅ Compatible | N/A |
| **Análisis** |
| Análisis automático (interfaz de usuario predeterminada) | ✅ Compatible | ✅ Compatible |
| Ordenación por prioridad | ❌ No compatible | ✅ Compatible |
| **Actualizaciones de contenido** |
| Actualización de plantillas Liquid | ❌ Una vez por tarjeta al enviar/lanzar | ✅ Se actualiza cada vez que se refresca |
| Actualización de los requisitos de elegibilidad | ❌ Una vez por tarjeta al enviar/lanzar | ✅ Se actualiza en cada sesión |
{: .reset-td-br-1 .reset-td-br-2 .reset-td-br-3 aria-label="Diferencias entre características" }
### Limitaciones del producto {#product-limitations}
- Hasta 25 mensajes activos por ubicación.
- Hasta 10 ID de ubicación por solicitud de actualización; las solicitudes que superen este límite se truncarán.
### Limitaciones del SDK {#sdk-limitations}
- Actualmente, los banners no son compatibles con las plataformas .NET MAUI (Xamarin), Cordova, Unity, Vega o TV.
- Asegúrate de que estás utilizando las versiones mínimas del SDK que se indican en los requisitos previos.
## Artículos relacionados {#related-articles}
- [Ubicaciones de banners](https://www.braze.com/docs/es/es/developer_guide/banners/placements)
- [Tutorial: Mostrar un banner por ID de ubicación](https://www.braze.com/docs/es/es/developer_guide/banners/tutorial_displaying_banners)
- [Análisis de banners](https://www.braze.com/docs/es/es/developer_guide/banners/analytics)
- [Preguntas frecuentes sobre banners](https://www.braze.com/docs/es/es/developer_guide/banners/faq)
# Tutorial: Mostrar un banner por ID de ubicación
Source: /docs/es/developer_guide/banners/tutorial_displaying_banners/index.md
# Tutorial: Mostrar un banner por ID de ubicación {#tutorial-displaying-a-banner-by-placement-id}
> Sigue el código de ejemplo de este tutorial para mostrar banners utilizando su ID de ubicación. Para obtener información más general, consulta [Banners](https://www.braze.com/docs/es/es/developer_guide/banners).
## Prerequisites
Before you can start this tutorial, verify that your Braze SDK meets the minimum version requirements:
## Displaying banners for the Web SDK
**Important:**
We're piloting this new tutorial format. [Tell us what you think](https://docs.google.com/forms/d/e/1FAIpQLSe_5uhWM7eXXk9F_gviO_pvA4rkYO3WA9B6tNJZ3TY91md5bw/viewform?usp=pp_url&entry.569173304=General+Feedback) — your feedback helps us improve future guides.
```js file=index.js
import * as braze from "@braze/web-sdk";
braze.initialize("YOUR-API-KEY", {
baseUrl: "YOUR-ENDPOINT",
enableLogging: true,
});
braze.subscribeToBannersUpdates((banners) => {
// Get this placement's banner. If it's `null`, the user did not qualify for any banners.
const globalBanner = braze.getBanner("global_banner");
if (!globalBanner) {
return;
}
const container = document.getElementById("global-banner-container");
braze.insertBanner(globalBanner, container);
if (globalBanner.isControl) {
// Hide or collapse the container
container.style.display = "none";
}
});
braze.requestBannersRefresh(["global_banner", "navigation_square_banner"]);
```
```html file=main.html
```
!!step
lines-index.js=5
### 1. Enable debugging (optional)
To make troubleshooting easier while developing, consider enabling debugging.
!!step
lines-index.js=8-23
### 2. Subscribe to Banner updates
Use `subscribeToBannersUpdates()` to register a handler that runs whenever a Banner is updated. Inside the handler, call `braze.getBanner("global_banner")` to get the latest placement.
!!step
lines-index.js=15-22
### 3. Insert the Banner and handle control groups
Use `braze.insertBanner(banner, container)` to insert a Banner when it's returned. To ensure keep your layout clean, hide or collapse Banners that are apart of a control group (for example, when `isControl` is `true`).
!!step
lines-index.js=25
### 4. Refresh your Banners
After initializing the SDK, call `requestBannersRefresh(["global_banner", ...])` to ensure that Banners are refreshed at the start of each session.
You can also call this function at any time to refresh Banner placements later.
!!step
lines-main.html=3
### 5. Add a container for your Banner
In your HTML, add a new `
` element and give it a short, Banner-related `id`, such as `global-banner-container`. Braze will use this `
` to insert your Banner into the page.
## Prerequisites
Before you can start this tutorial, verify that your Braze SDK meets the minimum version requirements:
## Displaying banners for the Android SDK
**Important:**
We're piloting this new tutorial format. [Tell us what you think](https://docs.google.com/forms/d/e/1FAIpQLSe_5uhWM7eXXk9F_gviO_pvA4rkYO3WA9B6tNJZ3TY91md5bw/viewform?usp=pp_url&entry.569173304=General+Feedback) — your feedback helps us improve future guides.
```kotlin file=MainApplication.kt
import android.app.Application
import android.util.Log
import com.braze.Braze
import com.braze.configuration.BrazeConfig
import com.braze.support.BrazeLogger
public class MainApplication : Application() {
override fun onCreate() {
super.onCreate()
// Turn on verbose Braze logging
BrazeLogger.logLevel = Log.VERBOSE
// Configure Braze with your SDK key and endpoint
val config = BrazeConfig.Builder()
.setApiKey("YOUR-API-KEY")
.setCustomEndpoint("YOUR-ENDPOINT")
.build()
Braze.configure(this, config)
// Subscribe to Banner updates
Braze.getInstance(this)
.subscribeToBannersUpdates { update ->
for (banner in update.banners) {
Log.d("brazeBanners", "Received banner for placement: ${banner.placementId}")
// Add any custom banner logic you'd like
}
}
}
}
```
```kotlin file=MainActivity.kt
import android.os.Bundle
import androidx.activity.ComponentActivity
class MainActivity : ComponentActivity() {
override fun onCreate(savedInstanceState: Bundle?) {
super.onCreate(savedInstanceState)
// Inflate the XML layout
setContentView(R.layout.banners)
// Refresh placements
Braze.getInstance(this)
.requestBannersRefresh(
listOf("top-1")
)
}
}
```
```xml file=banners.xml
```
!!step
lines-MainApplication.kt=12
### 1. Enable debugging (optional)
To make troubleshooting easier while developing, consider enabling debugging.
!!step
lines-MainApplication.kt=21-28
### 2. Subscribe to Banner updates
Use `subscribeToBannersUpdates()` to register a handler that runs whenever a Banner is updated.
!!step
lines-MainActivity.kt=10-14
### 3. Refresh your placements
After initializing the Braze SDK, call `requestBannersRefresh(["PLACEMENT_ID"])` to fetch the latest Banner content for that placement.
!!step
lines-banners.xml=15-19
### 4. Define `BannerView` in your `banners.xml`
In `banners.xml`, declare a `` element with `app:placementId="PLACEMENT_ID"`. Braze will use this element to insert your Banner into your UI.
## Prerequisites
Before you can start this tutorial, verify that your Braze SDK meets the minimum version requirements:
## Displaying banners for the Swift SDK
**Important:**
We're piloting this new tutorial format. [Tell us what you think](https://docs.google.com/forms/d/e/1FAIpQLSe_5uhWM7eXXk9F_gviO_pvA4rkYO3WA9B6tNJZ3TY91md5bw/viewform?usp=pp_url&entry.569173304=General+Feedback) — your feedback helps us improve future guides.
```swift file=AppDelegate.swift
import UIKit
import BrazeKit
import BrazeUI
class AppDelegate: UIResponder, UIApplicationDelegate {
static var braze: Braze? = nil
func application(
_ application: UIApplication,
didFinishLaunchingWithOptions launchOptions: [UIApplication.LaunchOptionsKey: Any]?
) -> Bool {
// Braze configuration with your SDK API key and endpoint
let configuration = Braze.Configuration(apiKey: "YOUR-API-TOKEN", endpoint: "YOUR-ENDPOINT")
configuration.logger.level = .debug
// Initialize Braze SDK instance
AppDelegate.braze = Braze(configuration: configuration)
// Request a banners refresh
AppDelegate.braze?.banners.requestBannersRefresh(placementIds: ["top-1"])
return true
}
}
```
```swift file=SampleApp.swift
import SwiftUI
@main
struct SampleApp: App {
// Bind the AppDelegate into the SwiftUI lifecycle
@UIApplicationDelegateAdaptor(AppDelegate.self) var delegate
var body: some Scene {
WindowGroup {
ContentView()
}
}
}
```
```swift file=BannerViewController.swift
import UIKit
import BrazeKit
import BrazeUI
final class BannerViewController: UIViewController {
static let bannerPlacementID = "top-1"
var bannerHeightConstraints: NSLayoutConstraint?
lazy var contentView: UILabel = {
let contentView = UILabel()
contentView.text = "Your Content Here"
contentView.textAlignment = .center
contentView.translatesAutoresizingMaskIntoConstraints = false
return contentView
}()
lazy var bannerView: BrazeBannerUI.BannerUIView = {
var bannerView = BrazeBannerUI.BannerUIView(
placementId: BannerViewController.bannerPlacementID,
braze: AppDelegate.braze!,
processContentUpdates: { [weak self] result in
// Update layout properties when banner content has finished loading.
DispatchQueue.main.async {
guard let self else { return }
switch result {
case .success(let updates):
if let height = updates.height {
self.bannerView.isHidden = false
self.bannerHeightConstraint?.constant = min(height, 80)
}
case .failure(let error):
return
}
}
}
)
bannerView.translatesAutoresizingMaskIntoConstraints = false
bannerView.isHidden = true
return bannerView
}()
override func viewDidLoad() {
super.viewDidLoad()
self.view.addSubview(contentView)
self.view.addSubview(bannerView)
bannerHeightConstraint = bannerView.heightAnchor.constraint(equalToConstant: 0)
NSLayoutConstraint.activate([
contentView.topAnchor.constraint(equalTo: self.view.safeAreaLayoutGuide.topAnchor),
contentView.leadingAnchor.constraint(equalTo: self.view.safeAreaLayoutGuide.leadingAnchor),
contentView.trailingAnchor.constraint(equalTo: self.view.safeAreaLayoutGuide.trailingAnchor),
bannerView.topAnchor.constraint(equalTo: self.contentView.bottomAnchor),
bannerView.leadingAnchor.constraint(equalTo: self.view.safeAreaLayoutGuide.leadingAnchor),
bannerView.trailingAnchor.constraint(equalTo: self.view.safeAreaLayoutGuide.trailingAnchor),
bannerView.bottomAnchor.constraint(equalTo: self.view.safeAreaLayoutGuide.bottomAnchor),
bannerHeightConstraint!,
])
}
}
```
!!step
lines-AppDelegate.swift=14
### 1. Enable debugging (optional)
To make troubleshooting easier while developing, consider enabling debugging.
!!step
lines-AppDelegate.swift=20
### 2. Refresh your placements
After initializing the Braze SDK, `call requestBannersRefresh(placementIds: ["PLACEMENT_ID"])` to refresh Banner content at the start of each session.
!!step
lines-BannerViewController.swift=19-37
### 3. Initialize the Banner and provide a callback
Create a `BrazeBannerUI.BannerUIView` instance with your Braze object and placement ID, and provide a `processContentUpdates` callback to unhide the Banner and update its height constraint based on the provided content height.
!!step
lines-BannerViewController.swift=38-40
### 4. Enable Auto Layout constraints
Hide the Banner view by default, then disable autoresizing mask translation to enable Auto Layout constraints.
!!step
lines-BannerViewController.swift=43-58
### 5. Anchor content and set height constraints
Anchor your main content to the top using Auto Layout, and place the Banner view after it. Pin the Banner’s leading, trailing, and bottom edges to the safe area, and set an initial height constraint of `0` that will be updated when content loads.
```swift file=AppDelegate.swift
import BrazeKit
import BrazeUI
class AppDelegate: UIResponder, UIApplicationDelegate {
static var braze: Braze? = nil
func application(
_ application: UIApplication,
didFinishLaunchingWithOptions launchOptions: [UIApplication.LaunchOptionsKey: Any]?
) -> Bool {
// Braze configuration with your SDK API key and endpoint
let configuration = Braze.Configuration(apiKey: "YOUR-API-TOKEN", endpoint: "YOUR-ENDPOINT")
configuration.logger.level = .debug
// Initialize Braze SDK instance
AppDelegate.braze = Braze(configuration: configuration)
// Request a banners refresh
AppDelegate.braze?.banners.requestBannersRefresh(placementIds: ["top-1"])
return true
}
}
```
```swift file=SampleApp.swift
import SwiftUI
@main
struct SampleApp: App {
// Bind the AppDelegate into the SwiftUI lifecycle
@UIApplicationDelegateAdaptor(AppDelegate.self) var delegate
var body: some Scene {
WindowGroup {
BannerSwiftUIView()
}
}
}
```
```swift file=BannerSwiftUIView.swift
import BrazeKit
import BrazeUI
import SwiftUI
@available(iOS 13.0, *)
struct BannerSwiftUIView: View {
static let bannerPlacementID = "top-1"
@State var hasBannerForPlacement: Bool = false
@State var contentHeight: CGFloat = 0
var body: some View {
VStack {
Text("Your Content Here")
.frame(maxWidth: .infinity, maxHeight: .infinity)
if let braze = AppDelegate.braze,
hasBannerForPlacement
{
BrazeBannerUI.BannerView(
placementId: BannerSwiftUIView.bannerPlacementID,
braze: braze,
processContentUpdates: { result in
switch result {
case .success(let updates):
if let height = updates.height {
self.contentHeight = height
}
case .failure:
return
}
}
)
.frame(height: min(contentHeight, 80))
}
}.onAppear {
AppDelegate.braze?.banners.getBanner(
for: BannerSwiftUIView.bannerPlacementID,
{ banner in
hasBannerForPlacement = banner != nil
}
)
}
}
}
```
!!step
lines-AppDelegate.swift=13
### 1. Enable debugging (optional)
To make troubleshooting easier while developing, consider enabling debugging.
!!step
lines-AppDelegate.swift=19
### 2. Refresh your placements
After initializing the Braze SDK, call `requestBannersRefresh(placementIds: ["PLACEMENT_ID"])` to refresh Banner content at the start of each session.
!!step
lines-BannerSwiftUIView.swift=1-46
### 3. Create a view component
Create a reusable SwiftUI view component that displays available Banners and contains your main app content if needed.
!!step
lines-BannerSwiftUIView.swift=36-43
### 4. Only display available Banners
Only attempt to show `BrazeBannerUI.BannerView` if the SDK is initialized and Banner content exists for that user. In `.onAppear`, call `getBanner(for:placementID)` to set the state of `hasBannerForPlacement`.
!!step
lines-BannerSwiftUIView.swift=17-32
### 5. Only show `BannerView` after it loads
To avoid blank space in your UI, only show `BrazeBannerUI.BannerView` if a Banner is present and the SDK is initialized.
!!step
lines-BannerSwiftUIView.swift=23-32
### 6. Dynamically update Banner height
Use the `processContentUpdates` callback to fetch the Banner’s content height as soon as it loads. Update your SwiftUI state (`contentHeight`) and apply a `.frame(height:)` constraint using the provided height.
!!step
lines-BannerSwiftUIView.swift=34
### 7. Limit the Banner height
To ensure your Banner never exceeds the maximum height, apply a `.frame(height: min(contentHeight, 80))` modifier. This will keep your UI visually balanced regardless of the Banner's content.
# Pancartas: Preguntas frecuentes
Source: /docs/es/developer_guide/banners/faq/index.md
# Frequently asked questions
> These are answers to frequently asked questions about Banners in Braze. For more general information, see [About Banners]().
## When do Banner updates appear for users?
Banners are refreshed with their latest data whenever you call the refresh method—there's no need to resend or update your Banner campaign.
## How many placements can I request in a session?
In a single refresh request, you can request a maximum of 10 placements. For each one you request, Braze will return the highest-priority Banner a user is eligible for. Additional requests will return an error.
For more information, see [Placement requests]().
## How many Banner campaigns can be active simultaneously?
Each workspace can support up to 200 active Banner campaigns. If this limit is reached, you'll need to [archive or deactivate](https://www.braze.com/docs/es/es/user_guide/engagement_tools/messaging_fundamentals/about_statuses/#changing-the-status) an existing campaign before creating a new one.
## For campaigns sharing a placement, which Banner is displayed first?
If a user qualifies for multiple Banner campaigns that share the same placement, the Banner with the highest priority will be displayed. For more information, see [Banner priority]().
## Can I use Banners in my existing Content Card feed?
Banners are different from Content Cards, meaning you can’t use Banners and Content Cards in the same feed. To replace existing Content Card feeds with Banners, you’ll need to [create placements in your app or website](https://www.braze.com/docs/es/es/developer_guide/banners/placements/).
## Can Banners include video?
The standard Banner composer supports images, text, and buttons. To include a video in a Banner, you could use a **Custom Code** block and render a video or embedded player in your app or website.
## Can I trigger a banner based on user actions?
While Banners do not support [action-based delivery](https://www.braze.com/docs/es/es/user_guide/engagement_tools/campaigns/building_campaigns/delivery_types/triggered_delivery), you can target users based on their past actions using segmentation and priority.
For example, to show a special Banner only to users who have completed a `purchase` event:
1. **Targeting:** In your campaign, target a segment of users who have performed the custom event `purchase` at least once.
2. **Priority:** If you have a general Banner for all users and this specific Banner for purchasers targeting the same placement, set the specific Banner's priority to **High** and the general Banner to **Medium** or **Low**.
When the user starts a new session or refreshes Banners after performing the action, Braze evaluates their eligibility. If they match the "Purchase" segment, the high-priority Banner will be displayed.
## Can users dismiss a Banner?
Yes. You can allow users to manually dismiss a Banner by turning on dismissal behavior in the Banner composer. See [Configure dismissal behavior](https://www.braze.com/docs/es/es/user_guide/channels/banners/create_a_banner/#dismiss-behavior) for details on turning on dismissal and customizing the dismiss button.
Users can manually dismiss Banners only if dismissal behavior is enabled. If dismissal isn't enabled, you can control Banner visibility by managing user segment eligibility. When a user no longer meets the targeting criteria for a Banner campaign, they won't see it again on their next session.
When a user dismisses a Banner, they're ineligible for that campaign by default. To let dismissed users see the Banner again, [configure re-eligibility](https://www.braze.com/docs/es/es/user_guide/channels/banners/create_a_banner/#re-eligibility) in the campaign's **Delivery Controls** step. Canvas Banner steps use Canvas re-entry settings to control re-eligibility instead.
For example, if you display a promotional Banner until a user makes a purchase, logging an event such as `purchase_completed` can remove that user from the targeted segment, effectively hiding the Banner in subsequent sessions.
## Can I export Banners campaign analytics using the Braze API?
Yes. You can use the [`/campaigns/data_series` endpoint](https://www.braze.com/docs/es/es/api/endpoints/export/campaigns/get_campaign_analytics/) to get data on how many Banner campaigns were viewed, clicked, or converted.
## When are users segmented?
Users are segmented at the beginning of the session. If a campaign's targeted segments depend on custom attributes, custom events, or other targeting attributes, they must be present on the user at the beginning of the session.
## How can I compose Banners to ensure the lowest latency?
The simpler the messaging in your Banner, the faster it will render. It’s best to test your Banner campaign against the expected latency for your use case. For example, be sure to test Liquid attributes like `catalog_items`.
## Are all Liquid tags supported?
No. However, most Liquid tags are supported for Banner messages, except for `catalog_items` that are re-rendered using the [`:rerender` tag](https://www.braze.com/docs/es/es/user_guide/data/activation/catalogs/using_catalogs/#using-liquid).
## Can I capture click events?
Yes. How click events are captured depends on how your Banner is rendered:
- **Standard editor components:** If your Banner uses standard editor components (images, buttons, text), clicks are tracked automatically when using the SDK's insertion methods.
- **Custom Code Blocks:** If you want to track clicks for elements within a Custom Code editor block, you must call `brazeBridge.logClick()` from within your custom HTML to track clicks. This applies even when using the SDK methods to insert and render the Banner. For the full reference, see [Custom code and JavaScript bridge for Banners](https://www.braze.com/docs/es/es/user_guide/message_building_by_channel/banners/custom_code/#javascript-bridge).
- **Custom UI (headless):** If you're building a fully custom UI using the Banner's custom properties instead of rendering the Banner HTML, call `logClick()` on the Banner object from your application code.
For more information, see [Logging clicks](https://www.braze.com/docs/es/es/developer_guide/banners/placements/#logging-clicks).
# Tarjetas de contenido en el SDK de Braze
Source: /docs/es/developer_guide/content_cards/index.md
# Tarjetas de contenido
> Obtén información sobre las tarjetas de contenido para el SDK de Braze, incluidos los diferentes modelos de datos y las propiedades específicas de las tarjetas disponibles para tu aplicación.
**Tip:**
Using Content Cards for banner-style messages? Try out [Banners](https://www.braze.com/docs/es/es/user_guide/message_building_by_channel/banners/)— perfect for inline, persistent in-app and web messages.
**Note:**
This guide uses code samples from the Braze Web SDK 4.0.0+. To upgrade to the latest Web SDK version, see [SDK Upgrade Guide](https://github.com/braze-inc/braze-web-sdk/blob/master/UPGRADE_GUIDE.md).
## Prerequisites
Before you can use Content Cards, you'll need to [integrate the Braze Web SDK](https://www.braze.com/docs/es/es/developer_guide/sdk_integration/?sdktab=web) into your app. However, no additional setup is required. To build your own UI instead, see [Content Card Customization Guide](https://www.braze.com/docs/es/es/developer_guide/content_cards/).
**Note:**
Some ad blockers and browser privacy extensions can block the Braze Web SDK script or related network requests, which can prevent Content Cards from loading. If you're using the CDN integration method, consider switching to the [NPM integration method](https://www.braze.com/docs/es/es/developer_guide/sdk_integration/?subtab=package%20manager&sdktab=web), which stores SDK libraries locally on your website and can avoid some ad-blocker-related issues.
## Standard feed UI
To use the included Content Cards UI, you'll need to specify where to show the feed on your website.
In this example, we have a `` in which we want to place the Content Cards feed. We'll use three buttons to hide, show, or toggle (hide or show based on its current state) the feed.
```html
```
When using the `toggleContentCards(parentNode, filterFunction)` and `showContentCards(parentNode, filterFunction)` methods, if no arguments are provided, all Content Cards will be shown in a fixed-position sidebar on the page. Otherwise, the feed will be placed in the specified `parentNode` option.
|Parameters | Description |
|---|---|
|`parentNode` | The HTML node to render the Content Cards into. If the parent node already has a Braze Content Cards view as a direct descendant, the existing Content Cards will be replaced. For example, you should pass in `document.querySelector(".my-container")`.|
|`filterFunction` | A filter or sort function for cards displayed in this view. Invoked with the array of `Card` objects, sorted by `{pinned, date}`. Expected to return an array of sorted `Card` objects to render for this user. If omitted, all cards will be displayed. |
{: .reset-td-br-1 .reset-td-br-2 aria-label="Standard feed UI" }
[See the SDK reference docs](https://js.appboycdn.com/web-sdk/latest/doc/modules/braze.html#togglecontentcards) for more information on Content Card toggling.
## Testing Content Cards on the web
You can test your Content Cards integration using your browser's developer tools.
1. Create a Content Card campaign and target your test user.
2. Log in to the website that has your Web SDK integration.
3. Open your browser console. For Chrome, right-click the page, select **Inspect**, then select the **Console** tab.
4. Run these commands in the console:
- `window.braze.getCachedContentCards()`
- `window.braze.toggleContentCards()`
## Card types and properties
The Content Cards data model is available in the Web SDK and offers the following Content Card types: [ImageOnly](https://js.appboycdn.com/web-sdk/latest/doc/classes/braze.imageonly.html), [CaptionedImage](https://js.appboycdn.com/web-sdk/latest/doc/classes/braze.captionedimage.html), and [ClassicCard](https://js.appboycdn.com/web-sdk/latest/doc/classes/braze.classiccard.html). Each type inherits common properties from a base model [Card](https://js.appboycdn.com/web-sdk/latest/doc/classes/braze.card.html) and has the following additional properties.
**Tip:**
To log Content Card data, see [Logging analytics](https://www.braze.com/docs/es/es/developer_guide/content_cards/logging_analytics/).
### Base card model
All Content Cards have these shared properties:
|Property|Description|
|---|---|
| `expiresAt` | The UNIX timestamp of the card's expiration time.|
| `extras`| (Optional) Key-value pair data formatted as a string object with a value string. |
| `id` | (Optional) The id of the card. This will be reported back to Braze with events for analytics purposes. |
| `pinned` | This property reflects if the card was set up as "pinned" in the dashboard.|
| `updated` | The UNIX timestamp of when this card was last modified. |
| `viewed` | This property reflects whether the user viewed the card or not.|
| `isControl` | This property is `true` when a card is a "control" group within an A/B test.|
{: .reset-td-br-1 .reset-td-br-2 aria-label="Base card model" }
### Image only
[ImageOnly](https://js.appboycdn.com/web-sdk/latest/doc/classes/braze.imageonly.html) cards are clickable full-sized images.
|Property|Description|
|---|---|
| `aspectRatio` | The aspect ratio of the card's image and serves as a hint before image loading completes. Note that the property may not be supplied in certain circumstances. |
| `categories` | This property is purely for organization in your custom implementation; these categories can be set in the dashboard composer. |
| `clicked` | This property indicates whether this card has ever been clicked on this device. |
| `created` | The UNIX timestamp of the card's creation time from Braze. |
| `dismissed` | This property indicates if this card has been dismissed. |
| `dismissible` | This property reflects if the user can dismiss the card, removing it from view. |
| `imageUrl` | The URL of the card's image.|
| `linkText` | The display text for the URL. |
| `url` | The URL that will be opened after the card is clicked on. |
{: .reset-td-br-1 .reset-td-br-2 aria-label="Image only" }
### Captioned image
[CaptionedImage](https://js.appboycdn.com/web-sdk/latest/doc/classes/braze.captionedimage.html) cards are clickable, full-sized images with accompanying descriptive text.
|Property|Description|
|---|---|
| `aspectRatio` | The aspect ratio of the card's image and serves as a hint before image loading completes. Note that the property may not be supplied in certain circumstances. |
| `categories` | This property is purely for organization in your custom implementation; these categories can be set in the dashboard composer. |
| `clicked` | This property indicates whether this card has ever been clicked on this device. |
| `created` | The UNIX timestamp of the card's creation time from Braze. |
| `dismissed` | This property indicates if this card has been dismissed. |
| `dismissible` | This property reflects if the user can dismiss the card, removing it from view. |
| `imageUrl` | The URL of the card's image.|
| `linkText` | The display text for the URL. |
| `title` | The title text for this card. |
| `url` | The URL that will be opened after the card is clicked on. |
{: .reset-td-br-1 .reset-td-br-2 aria-label="Captioned image" }
### Classic
The [ClassicCard](https://js.appboycdn.com/web-sdk/latest/doc/classes/braze.classiccard.html) model can contain an image with no text or a text with image.
|Property|Description|
|---|---|
| `aspectRatio` | The aspect ratio of the card's image and serves as a hint before image loading completes. Note that the property may not be supplied in certain circumstances. |
| `categories` | This property is purely for organization in your custom implementation; these categories can be set in the dashboard composer. |
| `clicked` | This property indicates whether this card has ever been clicked on this device. |
| `created` | The UNIX timestamp of the card's creation time from Braze. |
| `description` | The body text for this card. |
| `dismissed` | This property indicates if this card has been dismissed. |
| `dismissible` | This property reflects if the user can dismiss the card, removing it from view. |
| `imageUrl` | The URL of the card's image.|
| `linkText` | The display text for the URL. |
| `title` | The title text for this card. |
| `url` | The URL that will be opened after the card is clicked on. |
{: .reset-td-br-1 .reset-td-br-2 aria-label="Classic" }
## Control group
If you use the default Content Cards feed, impressions and clicks will be automatically tracked.
If you use a custom integration for Content Cards, you need need [log impressions](https://www.braze.com/docs/es/es/developer_guide/content_cards/logging_analytics/) when a Control Card would have been seen. As part of this effort, make sure to handle Control cards when logging impressions in an A/B test. These cards are blank, and while they aren’t seen by users, you should still log impressions in order to compare how they perform against non-Control cards.
To determine if a Content Card is in the Control group for an A/B test, check the `card.isControl` property (Web SDK v4.5.0+) or check if the card is a `ControlCard` instance (`card instanceof braze.ControlCard`).
## Card methods
### Default feed methods
Use these methods when displaying Content Cards using the Braze default feed UI:
|Method | Description |
|---|---|
|[`showContentCards`](https://js.appboycdn.com/web-sdk/latest/doc/modules/braze.html#showcontentcards)| Displays the default Content Cards feed. Renders cards into a provided `parentNode` HTML element, or as a fixed-position sidebar if no element is given. Accepts an optional `filterFunction` to sort or filter cards before display. |
|[`hideContentCards`](https://js.appboycdn.com/web-sdk/latest/doc/modules/braze.html#hidecontentcards)| Hides the default Content Cards feed if it is currently showing. |
|[`toggleContentCards`](https://js.appboycdn.com/web-sdk/latest/doc/modules/braze.html#togglecontentcards)| Shows the default Content Cards feed if it is hidden, or hides it if it is visible. If you need to display multiple Content Card feeds simultaneously, use `showContentCards` and `hideContentCards` instead. |
{: .reset-td-br-1 .reset-td-br-2 aria-label="Default feed methods" }
### Custom feed methods
Use these methods when building your own Content Card UI:
|Method | Description |
|---|---|
|[`subscribeToContentCardsUpdates`](https://js.appboycdn.com/web-sdk/latest/doc/modules/braze.html#subscribetocontentcardsupdates)| Registers a callback function that is invoked whenever Content Cards are updated for the current user, such as on session start. Use this as the primary way to receive card data for your custom feed. Must be called before `openSession()` to receive updates on the initial session. |
|[`getCachedContentCards`](https://js.appboycdn.com/web-sdk/latest/doc/modules/braze.html#getcachedcontentcards)| Returns all currently available cards from the most recent Content Cards refresh. Use this to immediately display cards on page load without waiting for a new server request, such as when the user returns to a page during an active session. |
|[`requestContentCardsRefresh`](https://js.appboycdn.com/web-sdk/latest/doc/modules/braze.html#requestcontentcardsrefresh)| Requests an immediate refresh of Content Cards from Braze servers. By default, cards refresh on session start and when the default feed is reopened. Use this to force a refresh at other times, such as after a specific user action. Be aware of [rate limits](https://www.braze.com/docs/es/es/developer_guide/content_cards/customizing_cards/feed/#rate-limit). |
|[`logContentCardImpressions`](https://js.appboycdn.com/web-sdk/latest/doc/modules/braze.html#logcontentcardimpressions)| Logs impression events for an array of cards. Call this when cards are rendered and visible to the user. Required for accurate campaign reporting when using a custom UI, as impressions are not tracked automatically outside the default feed. |
|[`logContentCardClick`](https://js.appboycdn.com/web-sdk/latest/doc/modules/braze.html#logcontentcardclick)| Logs a click event for a single card. Call this when a user interacts with a card in your custom UI. Required for accurate campaign reporting, as clicks are not tracked automatically outside the default feed. |
|[`handleBrazeAction`](https://js.appboycdn.com/web-sdk/latest/doc/modules/braze.html#handlebrazeaction)| Processes a card's URL and executes the configured on-click action, including Braze actions (`brazeActions://` URLs) and standard URL navigation. Call this in your card click handler to ensure on-click behaviors configured in the Braze dashboard are executed. |
|[`dismissCard`](https://js.appboycdn.com/web-sdk/latest/doc/classes/braze.card.html#dismisscard)| Programmatically dismisses a card, removing it from the user's feed. Use this to allow users to dismiss cards in your custom UI. |
{: .reset-td-br-1 .reset-td-br-2 aria-label="Custom feed methods" }
For more details, refer to the [SDK reference documentation](https://js.appboycdn.com/web-sdk/latest/doc/modules/braze.html).
## Best practices
### Call methods in the correct order
For custom feeds, Content Cards refresh only on session start if `subscribeToContentCardsUpdates()` is called before `openSession()`. Call your Braze methods in this order:
```javascript
import * as braze from "@braze/web-sdk";
// Step 1: Initialize the SDK
braze.initialize("YOUR-API-KEY", { baseUrl: "YOUR-SDK-ENDPOINT" });
// Step 2: Subscribe to card updates
braze.subscribeToContentCardsUpdates((updates) => {
const cards = updates.cards;
renderCards(cards);
});
// Step 3: Identify the user
braze.changeUser("USER_ID");
// Step 4: Start the session
braze.openSession();
```
### Use cached cards to persist content across page loads
Because `subscribeToContentCardsUpdates()` invokes only its callback when there are new updates (such as on session start), cards can disappear from your custom feed if a user refreshes the page mid-session. To prevent this, use `getCachedContentCards()` to immediately render cards from the local cache, alongside your subscription for new updates:
```javascript
import * as braze from "@braze/web-sdk";
function renderCards(cards) {
const container = document.getElementById("content-cards");
container.textContent = "";
const displayedCards = [];
cards.forEach(card => {
if (card instanceof braze.ClassicCard || card instanceof braze.CaptionedImage) {
const cardElement = document.createElement("div");
const h3 = document.createElement("h3");
h3.textContent = card.title || "";
cardElement.appendChild(h3);
const p = document.createElement("p");
p.textContent = card.description || "";
cardElement.appendChild(p);
if (card.imageUrl) {
const img = document.createElement("img");
img.src = card.imageUrl;
img.alt = card.title || "";
cardElement.appendChild(img);
}
if (card.url) {
cardElement.addEventListener("click", () => {
braze.logContentCardClick(card);
braze.handleBrazeAction(card.url);
});
}
container.appendChild(cardElement);
displayedCards.push(card);
}
});
if (displayedCards.length > 0) {
braze.logContentCardImpressions(displayedCards);
}
}
// Display cached cards immediately
const cached = braze.getCachedContentCards();
if (cached && cached.cards.length > 0) {
renderCards(cached.cards);
}
// Subscribe to future updates
braze.subscribeToContentCardsUpdates((updates) => {
renderCards(updates.cards);
});
```
### Log analytics for custom feeds
When using a custom UI, impressions, clicks, and dismissals are not tracked automatically. You must log each event manually:
- **Impressions:** Call `logContentCardImpressions([card1, card2, ...])` with an array of card objects when cards become visible to the user.
- **Clicks:** Call `logContentCardClick(card)` when a user interacts with a card.
- **On-click behavior:** Call `handleBrazeAction(card.url)` to execute the card's configured on-click action (such as navigating to a URL or logging a custom event).
**Warning:**
The argument passed to `logContentCardClick()` must be an original Braze `Card` object. If you transform or reconstruct the card data (for example, by serializing and deserializing), clicks are not logged and you see the error: "card must be a Card object."
## Using Google Tag Manager
Google Tag Manager works by injecting the [Braze CDN](https://www.braze.com/docs/es/es/developer_guide/platform_integration_guides/web/initial_sdk_setup#install-cdn) (a version of our Web SDK) directly into your website code, which means that all SDK methods are available just as if you had integrated the SDK without Google Tag Manager, except when implementing Content Cards.
### Setting up Content Cards
For a standard integration of the Content Card feed, you can use a **Custom HTML** tag in Google Tag Manager. Add the following to your Custom HTML tag, which will activate the standard Content Card feed:
```html
```

For more freedom over customizing the appearance of Content Cards and their feed, you can directly integrate Content Cards into your native website. There are two approaches you can take with this: using the standard feed UI or creating a custom feed UI.
When implementing the [standard feed UI](https://www.braze.com/docs/es/es/developer_guide/platform_integration_guides/web/content_cards/integration/#standard-feed-ui), Braze methods must have `window.` added to the start of the method. For example, `braze.showContentCards` should instead be `window.braze.showContentCards`.
For [custom feed](https://www.braze.com/docs/es/es/developer_guide/content_cards/creating_cards/) styling, the steps are the same as if you had integrated the SDK without GTM. For example, if you want to customize the width of the Content Card feed, you can paste the following into your CSS file:
```css
body .ab-feed {
width: 800px;
}
```
### Upgrading templates {#upgrading}
To upgrade to the latest version of the Braze Web SDK, take the following three steps in your Google Tag Manager dashboard:
1. **Update tag template** Go to the **Templates** page within your workspace. Here you should see an icon indicating an update is available.

Click that icon and after reviewing the change, click to **Accept Update**.

2. **Update version number** Once your tag template has been updated, edit the Braze Initialization Tag, and update the SDK version to the most recent `major.minor` version. For example, if the latest version is `4.1.2`, enter `4.1`. You can view a list of SDK versions in our [changelog](https://github.com/braze-inc/braze-web-sdk/blob/master/CHANGELOG.md).

3. **QA and publish** Verify the new SDK version is working using Google Tag Manager's [debugging tool](https://support.google.com/tagmanager/answer/6107056?hl=en) prior to publishing an update to your tag container.
### Troubleshooting {#troubleshooting}
#### Enable tag debugging {#debugging}
Each Braze tag template has an optional **GTM Tag Debugging** checkbox which can be used to log debug messages to your web page's JavaScript console.

#### Enter debug mode
Another way to help debug your Google Tag Manager integration is using Google's [Preview mode](https://support.google.com/tagmanager/answer/6107056) feature.
This will help identify what values are being sent from your web page's data layer to each triggered Braze tag and will also explain which tags were or were not triggered.

#### Verify tag sequencing for custom events {#tag-sequencing}
If custom events or other actions aren't logging in Braze, a common cause is a race condition where an action tag (such as **Custom Event** or **Purchase**) fires before the **Braze Initialization** tag has completed. To fix this, configure [tag sequencing](https://support.google.com/tagmanager/answer/6238868) in GTM:
1. Open the action tag that isn't logging correctly.
2. Under **Advanced Settings** > **Tag Sequencing**, select **A tag that fires before \[this tag\]**.
3. Choose your **Braze Initialization** tag as the setup tag.
This ensures the SDK is fully initialized before any action tags attempt to send data to Braze.
#### Enable verbose logging
To capture detailed logs for troubleshooting, you can enable verbose logging on your Google Tag Manager integration. These logs will appear in the **Console** tab of your browser's [developer tools](https://developer.mozilla.org/en-US/docs/Learn/Common_questions/What_are_browser_developer_tools).
In your Google Tag Manager integration, navigate to your Braze Initialization Tag and select **Enable Web SDK Logging**.

[changelog]: https://github.com/braze-inc/braze-web-sdk/blob/master/CHANGELOG.md
## Prerequisites
Before you can use Braze Content Cards, you'll need to integrate the [Braze Android SDK](https://www.braze.com/docs/es/es/developer_guide/sdk_integration/?sdktab=android) into your app. However, no additional setup is required.
## Google fragments
In Android, the Content Cards feed is implemented as a [fragment](https://developer.android.com/guide/components/fragments.html) available in the Braze Android UI project. The [`ContentCardsFragment`](https://braze-inc.github.io/braze-android-sdk/kdoc/braze-android-sdk/com.braze.ui.contentcards/-content-cards-fragment/index.html) class will automatically refresh and display the contents of the Content Cards and log usage analytics. The cards that can appear in a user's `ContentCards` are created on the Braze dashboard.
To learn how to add a fragment to an activity, see [Google's fragments documentation](https://developer.android.com/guide/fragments#Adding).
## Card types and properties
The Content Cards data model is available in the Android SDK and offers the following unique Content Card types. Each type shares a base model, which allows them to inherit common properties from the base model, in addition to having their own unique properties. For full reference documentation, see [`com.braze.models.cards`](https://braze-inc.github.io/braze-android-sdk/kdoc/braze-android-sdk/com.braze.models.cards/index.html).
### Base card model {#base-card-for-android}
The [base card](https://braze-inc.github.io/braze-android-sdk/kdoc/braze-android-sdk/com.braze.models.cards/-card/index.html) model provides foundational behavior for all cards.
|Property | Description |
|---|---|
|`getId()` | Returns the card's ID set by Braze.|
|`getViewed()` | Returns a boolean reflects if the card is read or unread by the user.|
|`getExtras()` | Returns a map of key-value extras for this card.|
|`getCreated()` | Returns the unix timestamp of the card's creation time from Braze.|
|`isPinned` | Returns a boolean that reflects whether the card is pinned.|
|`getOpenUriInWebView()` | Returns a boolean that reflects whether Uris for this card should be opened in the Braze WebView or not.|
|`getExpiredAt()` | Gets the expiration date of the card.|
|`isRemoved()` | Returns a boolean that reflects whether the end user has dismissed this card.|
|`isDismissibleByUser()` | Returns a boolean that reflects whether the card is dismissible by the user.|
|`isClicked()` | Returns a boolean that reflects the clicked state of this card.|
|`isDismissed` | Returns a boolean that reflects whether the card has been dismissed. Set to `true` to mark the card as dismissed. If a card is already marked as dismissed, it cannot be marked as dismissed again.|
|`isControl()` | Returns a boolean if this card is a control card and should not be rendered.|
{: .reset-td-br-1 .reset-td-br-2 aria-label="Base card model #base-card-for-android" }
### Image only {#banner-image-card-for-android}
[Image only cards](https://braze-inc.github.io/braze-android-sdk/kdoc/braze-android-sdk/com.braze.models.cards/-image-only-card/index.html) are clickable full-sized images.
|Property | Description |
|---|---|
|`getImageUrl()` | Returns the URL of the card's image.|
|`getUrl()` | Returns the URL that will be opened after the card is clicked. It can be a HTTP(s) URL or a protocol URL.|
|`getDomain()` | Returns link text for the property URL.|
{: .reset-td-br-1 .reset-td-br-2 aria-label="Image only #banner-image-card-for-android" }
### Captioned image {#captioned-image-card-for-android}
[Captioned image cards](https://braze-inc.github.io/braze-android-sdk/kdoc/braze-android-sdk/com.braze.models.cards/-captioned-image-card/index.html) are clickable, full-sized images with accompanying descriptive text.
|Property | Description |
|---|---|
|`getImageUrl()` | Returns the URL of the card's image.|
|`getTitle()` | Returns the title text for the card.|
|`getDescription()` | Returns the body text for the card.|
|`getUrl()` | Returns the URL that will be opened after the card is clicked. It can be a HTTP(s) URL or a protocol URL.|
|`getDomain()` | Returns the link text for the property URL. |
{: .reset-td-br-1 .reset-td-br-2 aria-label="Captioned image #captioned-image-card-for-android" }
### Classic {#text-Announcement-card-for-android}
A classic card without an image included will result in a [text announcement card](https://braze-inc.github.io/braze-android-sdk/kdoc/braze-android-sdk/com.braze.models.cards/-text-announcement-card/index.html). If an image is included, you will receive a [short news card](https://braze-inc.github.io/braze-android-sdk/kdoc/braze-android-sdk/com.braze.models.cards/-short-news-card/index.html).
|Property | Description |
|---|---|
|`getTitle()` | Returns the title text for the card. |
|`getDescription()` | Returns the body text for the card. |
|`getUrl()` | Returns the URL that will be opened after the card is clicked. It can be a HTTP(s) URL or a protocol URL. |
|`getDomain()` | Returns the link text for the property URL. |
|`getImageUrl()` | Returns the URL of the card's image, applies only to the classic Short News Card. |
|`isDismissed` | Returns a boolean that reflects whether the card has been dismissed. Set to `true` to mark the card as dismissed. If a card is already marked as dismissed, it cannot be marked as dismissed again. |
{: .reset-td-br-1 .reset-td-br-2 aria-label="Classic #text-Announcement-card-for-android" }
## Card methods
All [`Card`](https://braze-inc.github.io/braze-android-sdk/kdoc/braze-android-sdk/com.braze.models.cards/index.html) data model objects offer the following analytics methods for logging user events to Braze servers.
|Method | Description |
|---|---|
|`logImpression()` | Manually log an impression to Braze for a particular card. |
|`logClick()` | Manually log a click to Braze for a particular card. |
{: .reset-td-br-1 .reset-td-br-2 aria-label="Card methods" }
## Prerequisites
Before you can use Content Cards, you'll need to integrate the [Braze Swift SDK](https://www.braze.com/docs/es/es/developer_guide/sdk_integration/?sdktab=swift) into your app. However, no additional setup is required.
## View controller contexts
The default Content Cards UI can be integrated from the `BrazeUI` library of the Braze SDK. Create the Content Cards view controller using the `braze` instance. If you wish to intercept and react to the Content Card UI lifecycle, implement [`BrazeContentCardUIViewControllerDelegate`](https://braze-inc.github.io/braze-swift-sdk/documentation/brazeui/brazecontentcarduiviewcontrollerdelegate) as the delegate for your `BrazeContentCardUI.ViewController`.
**Note:**
For more information about iOS view controller options, refer to the [Apple developer documentation](https://developer.apple.com/documentation/uikit/view_controllers/showing_and_hiding_view_controllers).
The `BrazeUI` library of the Swift SDK provides two default view controller contexts: [navigation](#swift_navigation) or [modal](#swift_modal). This means you can integrate Content Cards in these contexts by adding a few lines of code to your app or site. Both views offer customization and styling options as described in the [customization guide](https://www.braze.com/docs/es/es/developer_guide/customization_guides/content_cards/customizing_styles/?tab=ios). You can also create a custom Content Card view controller instead of using the standard Braze one for even more customization options—refer to the [Content Cards UI tutorial](https://braze-inc.github.io/braze-swift-sdk/tutorials/braze/c2-contentcardsui/) for an example.
**Important:**
To handle control variant Content Cards in your custom UI, pass in your [`Braze.ContentCard.Control`](https://braze-inc.github.io/braze-swift-sdk/documentation/brazekit/braze/contentcard/control(_:)) object, then call the `logImpression` method as you would with any other Content Card type. The object will implicitly log a control impression to inform our analytics of when a user would have seen the control card.
### Navigation
A navigation controller is a view controller that manages one or more child view controllers in a navigation interface. Here is an example of pushing a `BrazeContentCardUI.ViewController` instance into a navigation controller:
```swift
func pushViewController() {
guard let braze = AppDelegate.braze else { return }
let contentCardsController = BrazeContentCardUI.ViewController(braze: braze)
// Implement and set `BrazeContentCardUIViewControllerDelegate` if you wish to intercept click actions.
contentCardsController.delegate = self
self.navigationController?.pushViewController(contentCardsController, animated: true)
}
```
```objc
- (void)pushViewController {
BRZContentCardUIViewController *contentCardsController = [[BRZContentCardUIViewController alloc] initWithBraze:self.braze];
// Implement and set `BrazeContentCardUIViewControllerDelegate` if you wish to intercept click actions.
[contentCardsController setDelegate:self];
[self.navigationController pushViewController:contentCardsController animated:YES];
}
```
### Modal
Use modal presentations to create temporary interruptions in your app’s workflow, such as prompting the user for important information. This model view has a navigation bar on top and a **Done** button on the side of the bar. Here is an example of pushing a `BrazeContentCard.ViewController` instance into a modal controller:
```swift
func presentModalViewController() {
guard let braze = AppDelegate.braze else { return }
let contentCardsModal = BrazeContentCardUI.ModalViewController(braze: braze)
// Implement and set `BrazeContentCardUIViewControllerDelegate` if you wish to intercept click actions.
contentCardsModal.viewController.delegate = self
self.navigationController?.present(contentCardsModal, animated: true, completion: nil)
}
```
```objc
- (void)presentModalViewController {
BRZContentCardUIModalViewController *contentCardsModal = [[BRZContentCardUIModalViewController alloc] initWithBraze:AppDelegate.braze];
// Implement and set `BrazeContentCardUIViewControllerDelegate` if you wish to intercept click actions.
[contentCardsModal.viewController setDelegate:self];
[self.navigationController presentViewController:contentCardsModal animated:YES completion:nil];
}
```
For example usage of `BrazeUI` view controllers, check out the corresponding Content Cards UI samples in our [Examples app](https://github.com/braze-inc/braze-swift-sdk/tree/main/Examples).
## Base card model
The Content Cards data model is available in the `BrazeKit` module of the Braze Swift SDK. This module contains the following Content Card types, which are an implementation of the `Braze.ContentCard` type. For a full list of Content Card properties and their usage, see [`ContentCard` class](https://braze-inc.github.io/braze-swift-sdk/documentation/brazekit/braze/contentcard).
- Image only
- Captioned image
- Classic
- Classic image
- Control
To access the Content Cards data model, call `contentCards.cards` on your `braze` instance. See [Logging analytics](https://www.braze.com/docs/es/es/developer_guide/content_cards/logging_analytics/) for more information on subscribing to card data.
**Note:**
Reading `contentCards.cards`, `contentCards.unviewedCards`, or `contentCards.lastUpdate` blocks the calling thread until the SDK has completed its post-initialization operations. For main-thread or latency-sensitive contexts, use the non-blocking alternatives [`getCachedContentCards(_:)`](https://braze-inc.github.io/braze-swift-sdk/documentation/brazekit/braze/contentcards-swift.class/getcachedcontentcards(_:)), [`getUnviewedCards(_:)`](https://braze-inc.github.io/braze-swift-sdk/documentation/brazekit/braze/contentcards-swift.class/getunviewedcards(_:)), or [`getLastUpdate(_:)`](https://braze-inc.github.io/braze-swift-sdk/documentation/brazekit/braze/contentcards-swift.class/getlastupdate(_:)) instead.
**Note:**
Keep in mind, `BrazeKit` offers an alternative [`ContentCardRaw`](https://braze-inc.github.io/braze-swift-sdk/documentation/brazekit/braze/contentcardraw) class for Objective-C compatibility.
## Card methods
Each card is initialized with a `Context` object, which contains various methods for managing your card's state. Call these methods when you want to modify the corresponding state property on a particular card object.
| Method | Description |
|--------------------------------------|------------------------------------------------------------------------------------------------------------------------------------------|
| `card.context?.logImpression()` | Log the content card impression event. |
| `card.context?.logClick()` | Log the content card click event. |
| `card.context?.processClickAction()` | Process a given [`ClickAction`](https://braze-inc.github.io/braze-swift-sdk/documentation/brazekit/braze/contentcard/clickaction) input. |
| `card.context?.logDismissed()` | Log the content card dismissed event. |
| `card.context?.logError()` | Log an error related to the content card. |
| `card.context?.loadImage()` | Load a given content card image from a URL. This method can be nil when the content card does not have an image. |
{: .reset-td-br-1 .reset-td-br-2 aria-label="Card methods" }
For more details, refer to the [`Context` class documentation](https://braze-inc.github.io/braze-swift-sdk/documentation/brazekit/braze/contentcardraw/context-swift.class)
## Prerequisites
Before you can use this feature, you'll need to [integrate the Cordova Braze SDK](https://www.braze.com/docs/es/es/developer_guide/sdk_integration/?sdktab=cordova).
## Card Feeds
The Braze SDK includes a default card feed. To show the default card feed, you can use the `launchContentCards()` method. This method handles all analytics tracking, dismissals, and rendering for a user's Content Cards.
## Content Cards
You can use these additional methods to build a custom Content Cards Feed within your app:
|Method | Description |
|---|---|
|`requestContentCardsRefresh()`|Sends a background request to request the latest Content Cards from the Braze SDK server.|
|`getContentCardsFromServer(successCallback, errorCallback)`|Retrieves Content Cards from the Braze SDK. This will request the latest Content Cards from the server and return the list of cards upon completion.|
|`getContentCardsFromCache(successCallback, errorCallback)`|Retrieves Content Cards from the Braze SDK. This will return the latest list of cards from the local cache, which was updated at the last refresh.|
|`logContentCardClicked(cardId)`|Logs a click for the given Content Card ID.|
|`logContentCardImpression(cardId)`|Logs an impression for the given Content Card ID.|
|`logContentCardDismissed(cardId)`|Logs a dismissal for the given Content Card ID.|
{: .reset-td-br-1 .reset-td-br-2 aria-label="Content Cards" }
## About Flutter Content Cards
The Braze SDK includes a default card feed to get you started with Content Cards. To show the card feed, you can use the `braze.launchContentCards()` method. The default card feed included with the Braze SDK will handle all analytics tracking, dismissals, and rendering for a user's Content Cards.
## Prerequisites
Before you can use this feature, you'll need to [integrate the Flutter Braze SDK](https://www.braze.com/docs/es/es/developer_guide/sdk_integration/?sdktab=flutter).
## Card methods
You can use these additional methods to build a custom Content Cards Feed within your app by using the following methods available on the [plugin public interface](https://github.com/braze-inc/braze-flutter-sdk/blob/master/lib/braze_plugin.dart):
| Method | Description |
| ---------------------------------------------- | ------------------------------------------------------------------------------------------------------ |
| `braze.requestContentCardsRefresh()` | Requests the latest Content Cards from the Braze SDK server. |
| `braze.logContentCardClicked(contentCard)` | Logs a click for the given Content Card object. |
| `braze.logContentCardImpression(contentCard)` | Logs an impression for the given Content Card object. |
| `braze.logContentCardDismissed(contentCard)` | Logs a dismissal for the given Content Card object. |
{: .reset-td-br-1 .reset-td-br-2 aria-label="Card methods" }
## Receiving Content Card data
To receive Content Card data in your Flutter app, the `BrazePlugin` supports sending Content Card data by using [Dart Streams](https://dart.dev/tutorials/language/streams).
The `BrazeContentCard` [object](https://pub.dev/documentation/braze_plugin/latest/braze_plugin/BrazeContentCard-class.html) supports a subset of fields available in the native model objects, including `description`, `title`, `image`, `url`, `extras`, and more.
### Listen for Content Card data in the Dart layer
To receive Content Card data in the Dart layer, use the following code to create a `StreamSubscription` and call `braze.subscribeToContentCards()`. Remember to `cancel()` the stream subscription when it is no longer needed.
```dart
// Create stream subscription
StreamSubscription contentCardsStreamSubscription;
contentCardsStreamSubscription = braze.subscribeToContentCards((List contentCards) {
// Handle Content Cards
}
// Cancel stream subscription
contentCardsStreamSubscription.cancel();
```
For an example, see [main.dart](https://github.com/braze-inc/braze-flutter-sdk/blob/master/example/lib/main.dart) in the Braze Flutter SDK sample application.
### Forward Content Card data from the native iOS layer
Content Card data is automatically forwarded from both the Android and iOS native layers. No additional setup is required.
If you're using Flutter SDK 17.1.0 or earlier, Content Card data forwarding from the iOS native layer requires manual setup. Your application likely contains a `contentCards.subscribeToUpdates` callback that calls `BrazePlugin.processContentCards(contentCards)`. To migrate to Flutter SDK 18.0.0, remove the `BrazePlugin.processContentCards(_:)` call—data forwarding is now handled automatically.
For an example, see [AppDelegate.swift](https://github.com/braze-inc/braze-flutter-sdk/blob/master/example/ios/Runner/AppDelegate.swift) in the Braze Flutter SDK sample application.
#### Replaying the callback for Content Cards
To store any Content Cards triggered before the callback is available and replay them after it is set, add the following entry to the `customConfigs` map when initializing the `BrazePlugin`:
```dart
BrazePlugin braze = new BrazePlugin(customConfigs: {replayCallbacksConfigKey: true});
```
## About React Native Content Cards
The Braze SDKs include a default card feed to get you started with Content Cards. To show the card feed, you can use the `Braze.launchContentCards()` method. The default card feed included with the Braze SDK will handle all analytics tracking, dismissals, and rendering for a user's Content Cards.
## Prerequisites
Before you can use this feature, you'll need to [integrate the React Native Braze SDK](https://www.braze.com/docs/es/es/developer_guide/sdk_integration/?sdktab=react%20native).
## Cards methods
To build your own UI, you can get a list of available cards, and listen for updates to cards:
```javascript
// Set initial cards
const [cards, setCards] = useState([]);
// Listen for updates as a result of card refreshes, such as:
// a new session, a manual refresh with `requestContentCardsRefresh()`, or after the timeout period
Braze.addListener(Braze.Events.CONTENT_CARDS_UPDATED, async (update) => {
setCards(update.cards);
});
// Manually trigger a refresh of cards
Braze.requestContentCardsRefresh();
```
**Important:**
If you choose to build your own UI to display cards, you must call `logContentCardImpression` in order to receive analytics for those cards. This includes `control` cards, which must be tracked even though they are not displayed to the user.
You can use these additional methods to build a custom Content Cards Feed within your app:
| Method | Description |
| ---------------------------------------- | ------------------------------------------------------------------------------------------------------ |
| `launchContentCards()` | Launches the Content Cards UI element. |
| `requestContentCardsRefresh()` | Requests the latest Content Cards from the Braze SDK server. The resulting list of cards is passed to each of the previously registered [content card event listeners](#reactnative_cards-methods). |
| `getContentCards()` | Retrieves Content Cards from the Braze SDK. This returns a promise that resolves with the latest list of cards from the server. |
| `getCachedContentCards()` | Returns the most recent Content Cards array from the cache. |
| `logContentCardClicked(cardId)` | Logs a click for the given Content Card ID. This method is used only for analytics. To execute the click action, call `processContentCardClickAction(cardId)` in addition. |
| `logContentCardImpression(cardId)` | Logs an impression for the given Content Card ID. |
| `logContentCardDismissed(cardId)` | Logs a dismissal for the given Content Card ID. |
| `processContentCardClickAction(cardId)` | Perform the action of a particular card. |
{: .reset-td-br-1 .reset-td-br-2 aria-label="Cards methods" }
## Card types and properties
The Content Cards data model is available in the React Native SDK and offers the following Content Cards card types: [Image Only](#image-only), [Captioned Image](#captioned-image), and [Classic](#classic). There's also a special [Control](#control) card type, which is returned to users that are in the control group for a given card. Each type inherits common properties from a base model in addition to its own unique properties.
**Tip:**
For a full reference of the Content Card data model, see the [Android](https://braze-inc.github.io/braze-android-sdk/kdoc/braze-android-sdk/com.braze.models.cards/index.html) and [iOS](https://braze-inc.github.io/braze-swift-sdk/documentation/brazekit/braze/contentcard) documentation.
### Base card model
The base card model provides foundational behavior for all cards.
|Property | Description |
|--------------|------------------------------------------------------------------------------------------------------------------------|
|`id` | The card's ID set by Braze. |
|`created` | The UNIX timestamp of the card's creation time from Braze. |
|`expiresAt` | The UNIX timestamp of the card's expiration time. When the value is less than 0, it means the card never expires. |
|`viewed` | Whether the card is read or unread by the user. This does not log analytics. |
|`clicked` | Whether the card has been clicked by the user. |
|`pinned` | Whether the card is pinned. |
|`dismissed` | Whether the user has dismissed this card. Marking a card as dismissed that has already been dismissed will be a no-op. |
|`dismissible` | Whether the card is dismissible by the user. |
|`url` | (Optional) The URL string associated with the card click action. |
|`openURLInWebView` | Whether URLs for this card should be opened in the Braze WebView or not. |
|`isControl` | Whether this card is a control card. Control cards should not be displayed to the user. |
|`extras` | The map of key-value extras for this card. |
{: .reset-td-br-1 .reset-td-br-2 aria-label="Base card model" }
For a full reference of the base card, see the [Android](https://braze-inc.github.io/braze-android-sdk/kdoc/braze-android-sdk/com.braze.models.cards/-card/index.html) and [iOS](https://braze-inc.github.io/braze-swift-sdk/documentation/brazekit/braze/contentcard/data-swift.struct) documentation.
### Image only
Image only cards are clickable, full-sized images.
|Property | Description |
|-------------------|-------------------------------------------------------------------------------------------------------------------|
|`type` | The Content Card type, `IMAGE_ONLY`. |
|`image` | The URL of the card's image. |
|`imageAspectRatio` | The aspect ratio of the card's image. It is meant to serve as a hint before image loading completes. Note that the property may not be supplied in certain circumstances. |
{: .reset-td-br-1 .reset-td-br-2 aria-label="Image only" }
For a full reference of the image only card, see the [Android](https://braze-inc.github.io/braze-android-sdk/kdoc/braze-android-sdk/com.braze.models.cards/-image-only-card/index.html) and [iOS](https://braze-inc.github.io/braze-swift-sdk/documentation/brazekit/braze/contentcard/imageonly-swift.struct) documentation.
### Captioned image
Captioned image cards are clickable, full-sized images with accompanying descriptive text.
|Property | Description |
|-------------------|-------------------------------------------------------------------------------------------------------------------|
|`type` | The Content Card type, `CAPTIONED`. |
|`image` | The URL of the card's image. |
|`imageAspectRatio` | The aspect ratio of the card's image. It is meant to serve as a hint before image loading completes. Note that the property may not be supplied in certain circumstances. |
|`title` | The title text for the card. |
|`cardDescription` | The description text for the card. |
|`domain` | (Optional) The link text for the property URL, for example, `"braze.com/resources/"`. It can be displayed on the card's UI to indicate the action/direction of clicking on the card. |
{: .reset-td-br-1 .reset-td-br-2 aria-label="Captioned image" }
For a full reference of the captioned image card, see the [Android](https://braze-inc.github.io/braze-android-sdk/kdoc/braze-android-sdk/com.braze.models.cards/-captioned-image-card/index.html) and [iOS](https://braze-inc.github.io/braze-swift-sdk/documentation/brazekit/braze/contentcard/captionedimage-swift.struct) documentation.
### Classic
Classic cards have a title, description, and an optional image before the text.
|Property | Description |
|-------------------|-------------------------------------------------------------------------------------------------------------------|
|`type` | The Content Card type, `CLASSIC`. |
|`image` | (Optional) The URL of the card's image. |
|`title` | The title text for the card. |
|`cardDescription` | The description text for the card. |
|`domain` | (Optional) The link text for the property URL, for example, `"braze.com/resources/"`. It can be displayed on the card's UI to indicate the action/direction of clicking on the card. |
{: .reset-td-br-1 .reset-td-br-2 aria-label="Classic" }
For a full reference of the classic (text announcement) Content Card, see the [Android](https://braze-inc.github.io/braze-android-sdk/kdoc/braze-android-sdk/com.braze.models.cards/-text-announcement-card/index.html) and [iOS](https://braze-inc.github.io/braze-swift-sdk/documentation/brazekit/braze/contentcard/classic-swift.struct) documentation. For the classic image (short news) card, see the [Android](https://braze-inc.github.io/braze-android-sdk/kdoc/braze-android-sdk/com.braze.models.cards/-short-news-card/index.html) and [iOS](https://braze-inc.github.io/braze-swift-sdk/documentation/brazekit/braze/contentcard/classicimage-swift.struct) documentation.
### Control
Control cards include all of the base properties, with a few important differences. Most importantly:
- The `isControl` property is guaranteed to be `true`.
- The `extras` property is guaranteed to be empty.
For a full reference of the control card, see the [Android](https://braze-inc.github.io/braze-android-sdk/kdoc/braze-android-sdk/com.braze.models.cards/-control-card/index.html) and [iOS](https://braze-inc.github.io/braze-swift-sdk/documentation/brazekit/braze/contentcard/control-swift.struct) documentation.
## Prerequisites
Before you can use Content Cards, you'll need to integrate the [Braze Swift SDK](https://www.braze.com/docs/es/es/developer_guide/sdk_integration/?sdktab=swift) into your app. Then you'll need to complete the steps for setting up your tvOS app.
**Important:**
Keep in mind, you'll need to implement your own custom UI since Content Cards are supported via headless UI using the Swift SDK—which does not include any default UI or views for tvOS.
## Setting up your tvOS app
### Step 1: Create a new iOS app
In Braze, select **Settings** > **App Settings**, then select **Add App**. Enter a name for your tvOS app, select **iOS**—_not tvOS_—then select **Add App**.
{: style="width:70%"}
**Warning:**
If you select the **tvOS** checkbox, you will not be able to customize Content Cards for tvOS.
### Step 2: Get your app's API key
In your app settings, select your new tvOS app then take note of your app's API key. You'll use this key to configure your app in Xcode.
{: style="width:70%"}
### Step 3: Integrate BrazeKit
Use your app's API key to integrate the [Braze Swift SDK](https://github.com/braze-inc/braze-swift-sdk) into your tvOS project in Xcode. You only need to integrate BrazeKit from the Braze Swift SDK.
### Step 4: Create your custom UI
Because Braze doesn't provide a default UI for content cards on tvOS, you'll need to customize it yourself. For a full walkthrough, see our step-by-step tutorial: [Customizing content cards for tvOS](https://braze-inc.github.io/braze-swift-sdk/documentation/braze/content-cards-customization/). For a sample project, see [Braze Swift SDK samples](https://github.com/braze-inc/braze-swift-sdk/tree/main/Examples#contentcards-custom-ui).
## Prerequisites
Before you can use this feature, you'll need to [integrate the Unity Braze SDK](https://www.braze.com/docs/es/es/developer_guide/sdk_integration/?sdktab=unity).
## Displaying Content Cards natively {#unity-content-cards-native-ui}
You can display the default UI for Content Cards using the following call:
```csharp
Appboy.AppboyBinding.DisplayContentCards();
```
## Receiving Content Card data in Unity
You may register Unity game objects to be notified of incoming Content Cards. We recommend setting game object listeners from the Braze configuration editor.
If you need to configure your game object listener at runtime, use `AppboyBinding.ConfigureListener()` and specify `BrazeUnityMessageType.CONTENT_CARDS_UPDATED`.
Note, you will additionally need to make a call to `AppboyBinding.RequestContentCardsRefresh()` to start receiving data in your game object listener on iOS.
## Parsing Content Cards
Incoming `string` messages received in your Content Cards game object callback can be parsed into our pre-supplied [`ContentCard`](https://github.com/braze-inc/braze-unity-sdk/blob/master/Assets/Plugins/Appboy/Models/Cards/ContentCard.cs) model object for convenience.
Parsing Content Cards requires JSON parsing, see the following example for details:
### Example Content Cards callback
```csharp
void ExampleCallback(string message) {
try {
JSONClass json = (JSONClass)JSON.Parse(message);
// Content Card data is contained in the `mContentCards` field of the top level object.
if (json["mContentCards"] != null) {
JSONArray jsonArray = (JSONArray)JSON.Parse(json["mContentCards"].ToString());
Debug.Log(String.Format("Parsed content cards array with {0} cards", jsonArray.Count));
// Iterate over the card array to parse individual cards.
for (int i = 0; i < jsonArray.Count; i++) {
JSONClass cardJson = jsonArray[i].AsObject;
try {
ContentCard card = new ContentCard(cardJson);
Debug.Log(String.Format("Created card object for card: {0}", card));
// Example of logging Content Card analytics on the ContentCard object
card.LogImpression();
card.LogClick();
} catch {
Debug.Log(String.Format("Unable to create and log analytics for card {0}", cardJson));
}
}
}
} catch {
throw new ArgumentException("Could not parse content card JSON message.");
}
}
```
## Refreshing Content Cards
To refresh Content Cards from Braze, call either of the following methods:
```csharp
// results in a network request to Braze
AppboyBinding.RequestContentCardsRefresh()
AppboyBinding.RequestContentCardsRefreshFromCache()
```
## Analytics
Clicks and impressions must be manually logged for Content Cards not displayed directly by Braze.
Use `LogClick()` and `LogImpression()` on [ContentCard](https://github.com/braze-inc/braze-unity-sdk/blob/master/Assets/Plugins/Appboy/Models/Cards/ContentCard.cs) to log clicks and impressions for specific cards.
## About .NET MAUI Content Cards
The Braze .NET MAUI (formerly Xamarin) SDK includes a default card feed to get you started with Content Cards. The default card feed included with the Braze SDK will handle all analytics tracking, dismissals, and rendering for a user’s Content Cards.
## Prerequisites
Before you can use this feature, you'll need to [integrate the .NET MAUI Braze SDK](https://www.braze.com/docs/es/es/developer_guide/sdk_integration/?sdktab=.net%20maui%20(xamarin)).
## Card types and properties
The Braze .NET MAUI SDK has three unique Content Cards card types that share a base model: [Banner](#xamarin_banner), [Captioned Image](#xamarin_captioned-image), and [Classic](#xamarin_classic). Each type inherits common properties from a base model and has the following additional properties.
### Base card model
|Property | Description |
|-------------------|------------------------------------------------------------------------------------------------------------------------|
|`idString` | The card's ID set by Braze. |
|`created` | The UNIX timestamp of the card's creation time from Braze. |
|`expiresAt` | The UNIX timestamp of the card's expiration time. When the value is less than 0, it means the card never expires. |
|`viewed` | Whether the card is read or unread by the user. This does not log analytics. |
|`clicked` | Whether the card has been clicked by the user. |
|`pinned` | Whether the card is pinned. |
|`dismissed` | Whether the user has dismissed this card. Marking a card as dismissed that has already been dismissed will be a no-op. |
|`dismissible` | Whether the card is dismissible by the user. |
|`urlString` | (Optional) The URL string associated with the card click action. |
|`openUrlInWebView` | Whether URLs for this card should be opened in the Braze WebView or not. |
|`isControlCard` | Whether this card is a control card. Control cards should not be displayed to the user. |
|`extras` | The map of key-value extras for this card. |
|`isTest` | Whether this card is a test card. |
{: .reset-td-br-1 .reset-td-br-2 aria-label="Base card model" }
For a full reference of the base card, see the [Android](https://braze-inc.github.io/braze-android-sdk/kdoc/braze-android-sdk/com.braze.models.cards/-card/index.html) and [iOS](https://braze-inc.github.io/braze-swift-sdk/documentation/brazekit/braze/contentcard/data-swift.struct) documentation.
### Banner
Banner cards are clickable, full-sized images.
|Property | Description |
|-------------------|-------------------------------------------------------------------------------------------------------------------|
|`image` | The URL of the card's image. |
|`imageAspectRatio` | The aspect ratio of the card's image. It is meant to serve as a hint before image loading completes. Note that the property may not be supplied in certain circumstances. |
{: .reset-td-br-1 .reset-td-br-2 aria-label="Banner" }
For a full reference of the banner card, see the [Android](https://braze-inc.github.io/braze-android-sdk/kdoc/braze-android-sdk/com.braze.models.cards/-image-only-card/index.html) and [iOS](https://braze-inc.github.io/braze-swift-sdk/documentation/brazekit/braze/contentcard/imageonly-swift.struct) documentation (now renamed to image only).
### Captioned image
Captioned image cards are clickable, full-sized images with accompanying descriptive text.
|Property | Description |
|-------------------|-------------------------------------------------------------------------------------------------------------------|
|`image` | The URL of the card's image. |
|`imageAspectRatio` | The aspect ratio of the card's image. It is meant to serve as a hint before image loading completes. Note that the property may not be supplied in certain circumstances. |
|`title` | The title text for the card. |
|`cardDescription` | The description text for the card. |
|`domain` | (Optional) The link text for the property URL, for example, `"braze.com/resources/"`. It can be displayed on the card's UI to indicate the action/direction of clicking on the card. |
{: .reset-td-br-1 .reset-td-br-2 aria-label="Captioned image" }
For a full reference of the captioned image card, see the [Android](https://braze-inc.github.io/braze-android-sdk/kdoc/braze-android-sdk/com.braze.models.cards/-captioned-image-card/index.html) and [iOS](https://braze-inc.github.io/braze-swift-sdk/documentation/brazekit/braze/contentcard/captionedimage-swift.struct) documentation.
### Classic
Classic cards have a title, description, and an optional image before the text.
|Property | Description |
|-------------------|-------------------------------------------------------------------------------------------------------------------|
|`image` | (Optional) The URL of the card's image. |
|`title` | The title text for the card. |
|`cardDescription` | The description text for the card. |
|`domain` | (Optional) The link text for the property URL, for example, `"braze.com/resources/"`. It can be displayed on the card's UI to indicate the action/direction of clicking on the card. |
{: .reset-td-br-1 .reset-td-br-2 aria-label="Classic" }
For a full reference of the classic (text announcement) Content Card, see the [Android](https://braze-inc.github.io/braze-android-sdk/kdoc/braze-android-sdk/com.braze.models.cards/-text-announcement-card/index.html) and [iOS](https://braze-inc.github.io/braze-swift-sdk/documentation/brazekit/braze/contentcard/classic-swift.struct) documentation. For a full reference of the classic image (short news) card, see the [Android](https://braze-inc.github.io/braze-android-sdk/kdoc/braze-android-sdk/com.braze.models.cards/-short-news-card/index.html) and [iOS](https://braze-inc.github.io/braze-swift-sdk/documentation/brazekit/braze/contentcard/classicimage-swift.struct) documentation.
## Card methods
You can use these additional methods to build a custom Content Cards Feed within your app:
| Method | Description |
| ---------------------------------------- | ------------------------------------------------------------------------------------------------------ |
| `requestContentCardsRefresh()` | Requests the latest Content Cards from the Braze SDK server. |
| `getContentCards()` | Retrieves Content Cards from the Braze SDK. This will return the latest list of cards from the server. |
| `logContentCardClicked(cardId)` | Logs a click for the given Content Card ID. This method is used only for analytics. |
| `logContentCardImpression(cardId)` | Logs an impression for the given Content Card ID. |
| `logContentCardDismissed(cardId)` | Logs a dismissal for the given Content Card ID. |
{: .reset-td-br-1 .reset-td-br-2 aria-label="Card methods" }
# Crear Content Cards
Source: /docs/es/developer_guide/content_cards/creating_cards/index.md
# Crear Content Cards {#create-content-cards}
> Este artículo describe el enfoque básico que utilizarás al implementar Content Cards personalizadas, así como tres casos de uso comunes. Asume que ya has leído los demás artículos de la guía de personalización de Content Cards para comprender qué se puede hacer de forma predeterminada y qué requiere código personalizado. Es especialmente útil comprender cómo [registrar los análisis](https://www.braze.com/docs/es/es/developer_guide/content_cards/logging_analytics) de tus Content Cards personalizadas.
**Tip:**
Using Content Cards for banner-style messages? Try out [Banners](https://www.braze.com/docs/es/es/user_guide/message_building_by_channel/banners/)— perfect for inline, persistent in-app and web messages.
## Crear una tarjeta {#creating-a-card}
### Paso 1: Crea una interfaz de usuario personalizada {#step-1-create-a-custom-ui}
En primer lugar, crea tu componente HTML personalizado que se utilizará para representar las tarjetas.
Primero, crea tu propio fragmento personalizado. El [`ContentCardsFragment`](https://braze-inc.github.io/braze-android-sdk/kdoc/braze-android-sdk/com.braze.ui.contentcards/-content-cards-fragment/index.html) predeterminado solo está diseñado para manejar nuestros tipos predeterminados de Content Cards, pero es un buen punto de partida.
Primero, crea tu propio componente de controlador de vista personalizado. El [`BrazeContentCardUI.ViewController`](https://braze-inc.github.io/braze-swift-sdk/documentation/brazeui/brazecontentcardui/viewcontroller) predeterminado solo está diseñado para manejar nuestros tipos predeterminados de Content Cards, pero es un buen punto de partida.
### Paso 2: Suscribirse a las actualizaciones de tarjetas {#step-2-subscribe-to-card-updates}
Registra una función de devolución de llamada para suscribirte a las actualizaciones de datos cuando se actualicen las tarjetas. Puedes analizar los objetos de Content Cards y extraer los datos de su carga útil, como `title`, `cardDescription` e `imageUrl`, y luego usar los datos del modelo resultante para rellenar tu interfaz de usuario personalizada.
Para obtener los modelos de datos de las Content Cards, suscríbete a las actualizaciones de Content Cards. Presta especial atención a las siguientes propiedades:
* **`id`:** Representa la cadena de ID de la Content Card. Es el identificador único utilizado para registrar análisis de Content Cards personalizadas.
* **`extras`:** Engloba todos los pares clave-valor del panel de Braze.
Todas las propiedades fuera de `id` y `extras` son opcionales de analizar para Content Cards personalizadas. Para más información sobre el modelo de datos, consulta el artículo de integración de cada plataforma: [Android](https://www.braze.com/docs/es/es/developer_guide/content_cards?sdktab=android), [iOS](https://www.braze.com/docs/es/es/developer_guide/content_cards?sdktab=swift), [Web](https://www.braze.com/docs/es/es/developer_guide/content_cards?sdktab=web).
```javascript
import * as braze from "@braze/web-sdk";
braze.subscribeToContentCardsUpdates((updates) => {
const cards = updates.cards;
// For example:
cards.forEach(card => {
if (card.isControl) {
// Do not display the control card, but remember to call `logContentCardImpressions([card])`
}
else if (card instanceof braze.ClassicCard || card instanceof braze.CaptionedImage) {
// Use `card.title`, `card.imageUrl`, etc.
}
else if (card instanceof braze.ImageOnly) {
// Use `card.imageUrl`, etc.
}
})
});
braze.openSession();
```
**Note:**
Las Content Cards solo se actualizan al inicio de la sesión si se llama a `subscribeToContentCardsUpdates()` antes de `openSession()`. También puedes [actualizar manualmente la fuente](https://www.braze.com/docs/es/es/developer_guide/content_cards/customizing_cards/feed) en cualquier momento.
#### Paso 2a: Crea una variable de suscriptor privada {#step-2a-create-a-private-subscriber-variable}
Para suscribirte a las actualizaciones de tarjetas, primero declara una variable privada en tu clase personalizada para almacenar tu suscriptor:
```java
// subscriber variable
private IEventSubscriber mContentCardsUpdatedSubscriber;
```
#### Paso 2b: Suscríbete a las actualizaciones {#step-2b-subscribe-to-updates}
Añade el siguiente código para suscribirte a las actualizaciones de Content Cards de Braze, normalmente dentro del `Activity.onCreate()` de tu actividad personalizada de Content Cards:
```java
// Remove the previous subscriber before rebuilding a new one with our new activity.
Braze.getInstance(context).removeSingleSubscription(mContentCardsUpdatedSubscriber, ContentCardsUpdatedEvent.class);
mContentCardsUpdatedSubscriber = new IEventSubscriber() {
@Override
public void trigger(ContentCardsUpdatedEvent event) {
// List of all Content Cards
List allCards = event.getAllCards();
// Your logic below
}
};
Braze.getInstance(context).subscribeToContentCardsUpdates(mContentCardsUpdatedSubscriber);
Braze.getInstance(context).requestContentCardsRefresh();
```
#### Paso 2c: Cancela la suscripción {#step-2c-unsubscribe}
Cancela la suscripción cuando tu actividad personalizada deje de estar visible. Añade el siguiente código al método de ciclo de vida `onDestroy()` de tu actividad:
```java
Braze.getInstance(context).removeSingleSubscription(mContentCardsUpdatedSubscriber, ContentCardsUpdatedEvent.class);
```
#### Paso 2a: Crea una variable de suscriptor privada
Para suscribirte a las actualizaciones de tarjetas, primero declara una variable privada en tu clase personalizada para almacenar tu suscriptor:
```kotlin
private var contentCardsUpdatedSubscriber: IEventSubscriber? = null
```
#### Paso 2b: Suscríbete a las actualizaciones
Añade el siguiente código para suscribirte a las actualizaciones de Content Cards de Braze, normalmente dentro del `Activity.onCreate()` de tu actividad personalizada de Content Cards:
```kotlin
// Remove the previous subscriber before rebuilding a new one with our new activity.
Braze.getInstance(context).subscribeToContentCardsUpdates(contentCardsUpdatedSubscriber)
Braze.getInstance(context).requestContentCardsRefresh()
// List of all Content Cards
val allCards = event.allCards
// Your logic below
}
Braze.getInstance(context).subscribeToContentCardsUpdates(mContentCardsUpdatedSubscriber)
Braze.getInstance(context).requestContentCardsRefresh(true)
```
#### Paso 2c: Cancela la suscripción
Cancela la suscripción cuando tu actividad personalizada deje de estar visible. Añade el siguiente código al método de ciclo de vida `onDestroy()` de tu actividad:
```kotlin
Braze.getInstance(context).removeSingleSubscription(contentCardsUpdatedSubscriber, ContentCardsUpdatedEvent::class.java)
```
Para acceder al modelo de datos de las Content Cards, llama a [`contentCards.cards`](https://braze-inc.github.io/braze-swift-sdk/documentation/brazekit/braze/contentcards-swift.class/cards) en tu instancia de `braze`.
```swift
let cards: [Braze.ContentCard] = AppDelegate.braze?.contentCards.cards
```
Además, puedes mantener una suscripción para observar los cambios en tus Content Cards. Puedes hacerlo de dos maneras:
1. Manteniendo un cancelable; o
2. Manteniendo un `AsyncStream`.
##### Cancelable {#cancellable}
```swift
// This subscription is maintained through a Braze cancellable, which will observe for changes until the subscription is cancelled.
// You must keep a strong reference to the cancellable to keep the subscription active.
// The subscription is canceled either when the cancellable is deinitialized or when you call its `.cancel()` method.
let cancellable = AppDelegate.braze?.contentCards.subscribeToUpdates { [weak self] contentCards in
// Implement your completion handler to respond to updates in `contentCards`.
}
```
##### AsyncStream
```swift
let stream: AsyncStream<[Braze.ContentCard]> = AppDelegate.braze?.contentCards.cardsStream
```
```objc
NSArray *contentCards = AppDelegate.braze.contentCards.cards;
```
Además, si quieres mantener una suscripción a tus Content Cards, puedes llamar a [`subscribeToUpdates`](https://braze-inc.github.io/braze-swift-sdk/documentation/brazekit/braze/contentcards-swift.class/subscribetoupdates(_:)):
```objc
// This subscription is maintained through Braze cancellable, which will continue to observe for changes until the subscription is cancelled.
BRZCancellable *cancellable = [self.braze.contentCards subscribeToUpdates:^(NSArray *contentCards) {
// Implement your completion handler to respond to updates in `contentCards`.
}];
```
### Paso 3: Implementar análisis {#step-3-implement-analytics}
Las impresiones, clics y descartes de las Content Cards no se registran automáticamente en tu vista personalizada. Debes [implementar cada método respectivo](https://www.braze.com/docs/es/es/developer_guide/content_cards/logging_analytics) para registrar correctamente todas las métricas en los análisis del panel de Braze.
### Paso 4: Prueba tu tarjeta (opcional) {#step-4-test-your-card-optional}
Para probar tu Content Card:
1. Establece un usuario activo en tu aplicación llamando al método [`changeUser()`](https://js.appboycdn.com/web-sdk/latest/doc/modules/braze.html#changeuser).
2. En Braze, ve a **Campaigns** y [crea una nueva campaña de Content Cards](https://www.braze.com/docs/es/es/user_guide/channels/content_cards/create_a_content_card).
3. En tu campaña, selecciona **Test** y, a continuación, introduce el `user-id` del usuario de prueba. Cuando estés listo, selecciona **Send Test**. En breve podrás lanzar una Content Card en tu dispositivo.

## Ubicaciones de Content Cards {#content-card-placements}
Las Content Cards pueden utilizarse de muchas formas distintas. Tres implementaciones comunes son utilizarlas como centro de mensajes, anuncio dinámico con imágenes o carrusel de imágenes. Para cada una de estas ubicaciones, asignarás [pares clave-valor](https://www.braze.com/docs/es/es/developer_guide/customization_guides/content_cards/customizing_behavior#key-value-pairs) (la propiedad `extras` del modelo de datos) a tus Content Cards y, en función de los valores, ajustarás dinámicamente el comportamiento, el aspecto o la funcionalidad de la tarjeta durante el tiempo de ejecución.
{: style="border:0px;"}
### Buzón de entrada de mensajes {#message-inbox}
Las Content Cards pueden utilizarse para simular un centro de mensajes. En este formato, cada mensaje es su propia tarjeta que contiene [pares clave-valor](https://www.braze.com/docs/es/es/developer_guide/customization_guides/content_cards/customizing_behavior#key-value-pairs) que alimentan los eventos al hacer clic. Estos pares clave-valor son los identificadores clave en los que se fija la aplicación para decidir adónde ir cuando el usuario hace clic en un mensaje del buzón de entrada. Los valores de los pares clave-valor son arbitrarios.
#### Ejemplo {#example}
Por ejemplo, es posible que quieras crear dos tarjetas de mensaje: una llamada a la acción para que los usuarios habiliten las recomendaciones de lectura y un código de cupón para tu nuevo segmento de suscriptores.
Claves como `body`, `title` y `buttonText` pueden tener simples valores de cadena que tus especialistas en marketing pueden establecer. Claves como `terms` pueden tener valores que proporcionen una pequeña colección de frases aprobadas por tu departamento jurídico. Las claves como `style` y `class_type` tienen valores de cadena que puedes configurar para determinar cómo se muestra tu tarjeta en tu aplicación o sitio web.
Pares clave-valor de la tarjeta de recomendación de lectura:
| Clave | Valor |
|------------|----------------------------------------------------------------------|
| `body` | Add your interests to your Politer Weekly profile for personal reading recommendations. |
| `style` | info |
| `class_type` | notification_center |
| `card_priority` | 1 |
{: .reset-td-br-1 .reset-td-br-2 aria-label="Ejemplo" }
Pares clave-valor para un nuevo cupón de suscriptor:
| Clave | Valor |
|------------|------------------------------------------------------------------|
| `title` | Subscribe for unlimited games |
| `body` | End of Summer Special - Enjoy 10% off Politer games |
| `buttonText` | Subscribe Now |
| `style` | promo |
| `class_type` | notification_center |
| `card_priority` | 2 |
| `terms` | new_subscribers_only |
{: .reset-td-br-1 .reset-td-br-2 aria-label="Ejemplo" }
**Información adicional para Android**
En el SDK de Android y FireOS, la lógica del centro de mensajes se rige por el valor `class_type` que proporcionan los pares clave-valor de Braze. Con el método [`createContentCardable`](https://www.braze.com/docs/es/es/developer_guide/content_cards) puedes filtrar e identificar estos tipos de clases.
**Uso de `class_type` para el comportamiento al hacer clic**
Cuando inflamos los datos de la Content Card en nuestras clases personalizadas, utilizamos la propiedad `ContentCardClass` de los datos para determinar qué subclase concreta debe utilizarse para almacenar los datos.
```kotlin
private fun createContentCardable(metadata: Map, type: ContentCardClass?): ContentCardable?{
return when(type){
ContentCardClass.AD -> Ad(metadata)
ContentCardClass.MESSAGE_WEB_VIEW -> WebViewMessage(metadata)
ContentCardClass.NOTIFICATION_CENTER -> FullPageMessage(metadata)
ContentCardClass.ITEM_GROUP -> Group(metadata)
ContentCardClass.ITEM_TILE -> Tile(metadata)
ContentCardClass.COUPON -> Coupon(metadata)
else -> null
}
}
```
Luego, al gestionar la interacción del usuario con la lista de mensajes, podemos utilizar el tipo de mensaje para determinar qué vista mostrar al usuario.
```kotlin
override fun onCreate(savedInstanceState: Bundle?) {
super.onCreate(savedInstanceState)
//...
listView.onItemClickListener = AdapterView.OnItemClickListener { parent, view, position, id ->
when (val card = dataProvider[position]){
is WebViewMessage -> {
val intent = Intent(this, WebViewActivity::class.java)
val bundle = Bundle()
bundle.putString(WebViewActivity.INTENT_PAYLOAD, card.contentString)
intent.putExtras(bundle)
startActivity(intent)
}
is FullPageMessage -> {
val intent = Intent(this, FullPageContentCard::class.java)
val bundle = Bundle()
bundle.putString(FullPageContentCard.CONTENT_CARD_IMAGE, card.icon)
bundle.putString(FullPageContentCard.CONTENT_CARD_TITLE, card.messageTitle)
bundle.putString(FullPageContentCard.CONTENT_CARD_DESCRIPTION, card.cardDescription)
intent.putExtras(bundle)
startActivity(intent)
}
}
}
}
```
**Uso de `class_type` para el comportamiento al hacer clic**
Cuando inflamos los datos de la Content Card en nuestras clases personalizadas, utilizamos la propiedad `ContentCardClass` de los datos para determinar qué subclase concreta debe utilizarse para almacenar los datos.
```java
private ContentCardable createContentCardable(Map metadata, ContentCardClass type){
switch(type){
case ContentCardClass.AD:{
return new Ad(metadata);
}
case ContentCardClass.MESSAGE_WEB_VIEW:{
return new WebViewMessage(metadata);
}
case ContentCardClass.NOTIFICATION_CENTER:{
return new FullPageMessage(metadata);
}
case ContentCardClass.ITEM_GROUP:{
return new Group(metadata);
}
case ContentCardClass.ITEM_TILE:{
return new Tile(metadata);
}
case ContentCardClass.COUPON:{
return new Coupon(metadata);
}
default:{
return null;
}
}
}
```
Luego, al gestionar la interacción del usuario con la lista de mensajes, podemos utilizar el tipo de mensaje para determinar qué vista mostrar al usuario.
```java
@Override
protected void onCreate(Bundle savedInstanceState) {
super.onCreate(savedInstanceState)
//...
listView.setOnItemClickListener(new AdapterView.OnItemClickListener() {
@Override
public void onItemClick(AdapterView parent, View view, int position, long id){
ContentCardable card = dataProvider.get(position);
if (card instanceof WebViewMessage){
Bundle intent = new Intent(this, WebViewActivity.class);
Bundle bundle = new Bundle();
bundle.putString(WebViewActivity.INTENT_PAYLOAD, card.getContentString());
intent.putExtras(bundle);
startActivity(intent);
}
else if (card instanceof FullPageMessage){
Intent intent = new Intent(this, FullPageContentCard.class);
Bundle bundle = Bundle();
bundle.putString(FullPageContentCard.CONTENT_CARD_IMAGE, card.getIcon());
bundle.putString(FullPageContentCard.CONTENT_CARD_TITLE, card.getMessageTitle());
bundle.putString(FullPageContentCard.CONTENT_CARD_DESCRIPTION, card.getCardDescription());
intent.putExtras(bundle)
startActivity(intent)
}
}
});
}
```
### Carrusel {#carousel}
Puedes configurar Content Cards en tu fuente de carrusel totalmente personalizada, permitiendo a los usuarios deslizar y ver tarjetas destacadas adicionales. Por defecto, las Content Cards se ordenan por fecha de creación (la más reciente primero), y tus usuarios verán todas las tarjetas para las que son elegibles.
Para implementar un carrusel de Content Cards:
1. Crea una lógica personalizada que observe los [cambios en tus Content Cards](https://www.braze.com/docs/es/es/developer_guide/customization_guides/content_cards/customizing_feed#refreshing-the-feed) y gestione la llegada de Content Cards.
2. Crea una lógica personalizada del lado del cliente para mostrar un número específico de tarjetas en el carrusel en cualquier momento. Por ejemplo, podrías seleccionar los cinco primeros objetos de Content Card de la matriz o introducir pares clave-valor para construir lógica condicional en torno a ellos.
**Tip:**
Si estás implementando un carrusel como fuente secundaria de Content Cards, asegúrate de [ordenar las tarjetas en la fuente correcta utilizando pares clave-valor](https://www.braze.com/docs/es/es/developer_guide/customization_guides/content_cards/customizing_feed#multiple-feeds).
### Solo imagen {#image-only}
Las Content Cards no tienen por qué parecer "tarjetas". Por ejemplo, las Content Cards pueden aparecer como una imagen dinámica que se muestra de forma permanente en tu página de inicio o en la parte superior de las páginas designadas.
Para lograrlo, tus especialistas en marketing crearán una campaña o un paso en Canvas con una Content Card de tipo **Solo imagen**. A continuación, establece los pares clave-valor adecuados para utilizar [las Content Cards como contenido complementario](https://www.braze.com/docs/es/es/developer_guide/customization_guides/content_cards/customizing_behavior#content-cards-as-supplemental-content).
# Personalizar tarjetas
Source: /docs/es/developer_guide/content_cards/customizing_cards/index.md
**Tip:**
Using Content Cards for banner-style messages? Try out [Banners](https://www.braze.com/docs/es/es/user_guide/message_building_by_channel/banners/)— perfect for inline, persistent in-app and web messages.
# Personalizar el estilo de Content Cards
Source: /docs/es/developer_guide/content_cards/customizing_cards/style/index.md
# Personalizar el estilo de Content Cards {#customize-the-style-of-content-cards}
> Las Content Cards de Braze tienen un aspecto predeterminado. Este artículo trata de las opciones de estilo de tus Content Cards para ayudarte a que coincidan con la identidad de tu marca. Para obtener la lista completa de tipos de tarjetas de contenido, consulta [Acerca de Content Cards](https://www.braze.com/docs/es/es/developer_guide/content_cards).
## Creación de un estilo personalizado {#creating-a-custom-style}
La interfaz de usuario predeterminada de Content Cards se importa de la capa de interfaz de usuario del SDK de Braze. A partir de ahí, puedes ajustar ciertas partes del estilo de la tarjeta, el orden en que se muestran las tarjetas y cómo se muestra la fuente a tus usuarios.

**Note:**
Las propiedades de Content Cards, como `title`, `cardDescription`, `imageUrl`, etc., se pueden editar directamente a través del [dashboard](https://www.braze.com/docs/es/es/user_guide/channels/content_cards/creative_details), que es el método preferido para cambiar estos detalles.
Los estilos predeterminados de Braze se definen en CSS dentro del SDK de Braze. Al sobrescribir los estilos seleccionados en tu aplicación, puedes personalizar nuestra fuente estándar con tus propias imágenes de fondo, familias de fuentes, estilos, tamaños, animaciones y mucho más. Por ejemplo, lo siguiente es un ejemplo de sobrescritura que hace que las Content Cards aparezcan con un ancho de 800 px:
``` css
body .ab-feed {
width: 800px;
}
```
Para obtener una lista completa de las propiedades que puedes modificar, consulta [las opciones de configuración del SDK de Braze](https://js.appboycdn.com/web-sdk/latest/doc/modules/braze.html)
Por defecto, las Content Cards del SDK de Android y FireOS se ajustan a las directrices de la interfaz de usuario estándar de Android para ofrecer una experiencia fluida. Puedes ver estos estilos predeterminados en el archivo [`res/values/styles.xml`](https://github.com/braze-inc/braze-android-sdk/blob/master/android-sdk-ui/src/main/res/values/styles.xml) de la distribución del SDK de Braze:
```xml
```
Para personalizar el estilo de tu Content Card, sobrescribe este estilo predeterminado. Para sobrescribir un estilo, cópialo en su totalidad en el archivo `styles.xml` de tu proyecto y haz las modificaciones. Debes copiar todo el estilo en tu archivo local `styles.xml` para que todos los atributos estén correctamente configurados.
```xml
```
```xml
```
Por defecto, las Content Cards del SDK de Android y FireOS se ajustan a las directrices de la interfaz de usuario estándar de Android para ofrecer una experiencia fluida.
Puedes aplicar el estilizado de dos formas. La primera es pasar un [`ContentCardListStyling`](https://braze-inc.github.io/braze-android-sdk/kdoc/braze-android-sdk/com.braze.jetpackcompose.contentcards.styling/-content-card-list-styling/index.html) y [`ContentCardStyling`](https://braze-inc.github.io/braze-android-sdk/kdoc/braze-android-sdk/com.braze.jetpackcompose.contentcards.styling/-content-card-styling/index.html) a [`ContentCardsList`](https://braze-inc.github.io/braze-android-sdk/kdoc/braze-android-sdk/com.braze.jetpackcompose.contentcards/-content-cards-list.html), como en el siguiente ejemplo:
```kotlin
ContentCardsList(
style = ContentCardListStyling(listBackgroundColor = Color.Red),
cardStyle = ContentCardStyling(
titleTextStyle = TextStyle(
fontFamily = fontFamily,
fontSize = 25.sp
),
shadowRadius = 10.dp,
shortNewsContentCardStyle = BrazeShortNewsContentCardStyling(
shadowRadius = 15.dp
)
)
)
```
La segunda es utilizar [`BrazeStyle`](https://braze-inc.github.io/braze-android-sdk/kdoc/braze-android-sdk/com.braze.jetpackcompose/-braze-style.html) para crear un estilo global para los componentes de Braze, como en el siguiente ejemplo:
```kotlin
BrazeStyle(
contentCardStyle = ContentCardStyling(
textAnnouncementContentCardStyle = BrazeTextAnnouncementContentCardStyling(
cardBackgroundColor = Color.Red,
descriptionTextStyle = TextStyle(
fontFamily = fontFamily,
fontSize = 25.sp,
)
),
titleTextColor = Color.Magenta
)
) {
// Your app here, including any ContentCardsList() in it
}
```
El controlador de vista de Content Cards te permite personalizar el aspecto y el comportamiento de todas las celdas mediante la estructura [`BrazeContentCardUI.ViewController.Attributes`](https://braze-inc.github.io/braze-swift-sdk/documentation/brazeui/brazecontentcardui/viewcontroller/attributes-swift.struct). Configurar Content Cards mediante `Attributes` es una opción sencilla que te permite lanzar tu interfaz de usuario de Content Cards con una configuración mínima.
**Important:**
La personalización a través de `Attributes` solo está disponible en Swift.
**Modificación de `Attributes.default`**
Personaliza el aspecto de todas las instancias del controlador de vista de interfaz de usuario de Content Cards de Braze modificando directamente la variable estática [`Attributes.defaults`](https://braze-inc.github.io/braze-swift-sdk/documentation/brazeui/brazecontentcardui/viewcontroller/attributes-swift.struct/defaults).
Por ejemplo, para cambiar el tamaño predeterminado de la imagen y el radio de las esquinas de todas las celdas:
```swift
BrazeContentCardUI.ViewController.Attributes.defaults.cellAttributes.cornerRadius = 20
BrazeContentCardUI.ViewController.Attributes.defaults.cellAttributes.classicImageSize = CGSize(width: 65, height: 65)
```
**Inicializar el controlador de vista con atributos**
Si deseas modificar solo una instancia específica del controlador de vista de interfaz de usuario de Content Cards de Braze, utiliza el inicializador [`init(braze:attributes:)`](https://braze-inc.github.io/braze-swift-sdk/documentation/brazeui/brazecontentcardui/viewcontroller/init(braze:attributes:)/) para pasar una estructura personalizada `Attributes` al controlador de vista.
Por ejemplo, puedes cambiar el tamaño de la imagen y el radio de la esquina para una instancia concreta del controlador de vista:
```swift
var attributes = BrazeContentCardUI.ViewController.Attributes.defaults
attributes.cellAttributes.cornerRadius = 20
attributes.cellAttributes.classicImageSize = CGSize(width: 65, height: 65)
let viewController = BrazeContentCardUI.ViewController(braze: AppDelegate.braze, attributes: attributes)
```
**Celdas personalizadas mediante subclases**
También puedes crear interfaces personalizadas registrando clases personalizadas para cada tipo de tarjeta que desees. Para utilizar tu subclase en lugar de la celda predeterminada, modifica la propiedad [`cells`](https://braze-inc.github.io/braze-swift-sdk/documentation/brazeui/brazecontentcardui/viewcontroller/attributes-swift.struct/cells) en la estructura `Attributes`. Por ejemplo:
```swift
var attributes = BrazeContentCardUI.ViewController.Attributes.defaults
// Register your own custom cell
attributes.cells[BrazeContentCardUI.ClassicImageCell.identifier] = CustomClassicImageCell.self
let viewController = BrazeContentCardUI.ViewController(braze: AppDelegate.braze, attributes: attributes)
```
**Modificar Content Cards mediante programación**
Puedes cambiar Content Cards mediante programación asignando el cierre [`transform`](https://braze-inc.github.io/braze-swift-sdk/documentation/brazeui/brazecontentcardui/viewcontroller/attributes-swift.struct/transform) en tu estructura `Attributes`. El ejemplo siguiente modifica `title` y `description` de las tarjetas compatibles:
```swift
var attributes = BrazeContentCardUI.ViewController.Attributes.defaults
attributes.transform = { cards in
cards.map { card in
var card = card
if let title = card.title {
card.title = "[modified] \(title)"
}
if let description = card.description {
card.description = "[modified] \(description)"
}
return card
}
}
let viewController = BrazeContentCardUI.ViewController(braze: AppDelegate.braze, attributes: attributes)
```
Consulta la [aplicación de ejemplo Examples](https://github.com/braze-inc/braze-swift-sdk/tree/main/Examples/Swift) para ver un ejemplo completo.
La personalización de Content Cards a través de `Attributes` no es compatible con Objective-C.
## Ejemplos de personalización {#customization-examples}
### Fuente personalizada {#custom-font}
Personalizar la fuente utilizada en tus Content Cards te permite mantener la identidad de tu marca y crear una experiencia visualmente atractiva para tus usuarios. Utiliza estas recetas para establecer la fuente de todas las Content Cards mediante programación.
Al igual que cualquier otro elemento web, puedes personalizar fácilmente el aspecto de las Content Cards mediante CSS. En tu archivo CSS o en los estilos en línea, utiliza la propiedad `font-family` y especifica el nombre de la fuente deseada o la pila de fuentes.
```css
/* CSS selector targeting the Content Card element */
.card-element {
font-family: "Helvetica Neue", Arial, sans-serif;
}
```
Para cambiar la fuente predeterminada mediante programación, establece un estilo para las tarjetas y utiliza el atributo `fontFamily` para indicar a Braze que utilice tu familia de fuentes personalizada.
Por ejemplo, para actualizar la fuente de todos los títulos de las tarjetas con imágenes subtituladas, sobrescribe el estilo `Braze.ContentCards.CaptionedImage.Title` y haz referencia a tu familia de fuentes personalizada. El valor del atributo debe apuntar a una familia de fuentes en tu directorio `res/font`.
Aquí tienes un ejemplo abreviado con una familia de fuentes personalizada, `my_custom_font_family`, a la que se hace referencia en la última línea:
```xml
```
Para más información sobre la personalización de fuentes en el SDK de Android, consulta la [guía de familias de fuentes](https://www.braze.com/docs/es/es/developer_guide/platform_integration_guides/android/advanced_use_cases/font_customization#font-customization).
Para cambiar la fuente predeterminada mediante programación, puedes establecer el [`titleTextStyle`](https://braze-inc.github.io/braze-android-sdk/kdoc/braze-android-sdk/com.braze.jetpackcompose.contentcards.styling/-content-card-styling/index.html#715371549%2FProperties%2F-1725759721) de `ContentCardStyling`.
También puedes configurar `titleTextStyle` para un tipo de tarjeta específico estableciéndolo en [`BrazeShortNewsContentCardStyling`](https://braze-inc.github.io/braze-android-sdk/kdoc/braze-android-sdk/com.braze.jetpackcompose.contentcards.styling/-braze-short-news-content-card-styling/index.html) y pasándolo al [`shortNewsContentCardStyle`](https://braze-inc.github.io/braze-android-sdk/kdoc/braze-android-sdk/com.braze.jetpackcompose.contentcards.styling/-content-card-styling/index.html#8580250%2FProperties%2F-1725759721) de `ContentCardStyling`.
```kotlin
val fontFamily = FontFamily(
Font(R.font.sailec_bold)
)
ContentCardStyling(
titleTextStyle = TextStyle(
fontFamily = fontFamily
)
)
```
Personaliza tus fuentes modificando los `Attributes` de la propiedad de instancia [`cellAttributes`](https://braze-inc.github.io/braze-swift-sdk/documentation/brazeui/brazecontentcardui/viewcontroller/attributes-swift.struct/cellattributes/). Por ejemplo:
```swift
var attributes = BrazeContentCardUI.ViewController.Attributes.defaults
attributes.cellAttributes.titleFont = .preferredFont(textStyle: .callout, weight: .bold)
attributes.cellAttributes.descriptionFont = .preferredFont(textStyle: .footnote, weight: .regular)
attributes.cellAttributes.domainFont = .preferredFont(textStyle: .footnote, weight: .medium)
let viewController = BrazeContentCardUI.ViewController.init(braze: braze, attributes: attributes)
```
La personalización de fuentes a través de `Attributes` no es compatible con Objective-C.
Consulta la [aplicación de ejemplo Examples](https://github.com/braze-inc/braze-swift-sdk/blob/main/Examples/ObjC/Sources/ContentCards-Custom-UI/CardsInfoViewController.m#L97) para ver un ejemplo de cómo crear tu propia interfaz de usuario con fuentes personalizadas.
### Iconos de anclaje personalizados {#custom-pinned-icons}
Al crear una Content Card, los especialistas en marketing tienen la opción de anclarla. Una tarjeta anclada se muestra en la parte superior de la fuente del usuario, y este no puede descartarla. A medida que personalizas los estilos de tus tarjetas, puedes cambiar el aspecto del icono de anclaje.
{:style="border:none"}
La estructura del icono de anclaje de Content Card es:
```css
```
Si deseas utilizar un icono FontAwesome diferente, puedes sustituir el nombre de clase del elemento `i` por el nombre de clase del icono deseado.
Si deseas cambiar el icono por completo, elimina el elemento `i` y añade el icono personalizado como elemento secundario de `ab-pinned-indicator`. Hay varias formas de cambiar el icono, pero un método sencillo es utilizar `replaceChildren()` en el elemento `ab-pinned-indicator`.
Por ejemplo:
```javascript
// Get the parent element
const pinnedIndicator = document.querySelector('.ab-pinned-indicator');
// Create a new custom icon element
const customIcon = document.createElement('span');
customIcon.classList.add('customIcon');
// Replace the existing icon with the custom icon
pinnedIndicator.replaceChildren(customIcon);
```
Para establecer un icono de anclaje personalizado, sobrescribe el estilo de `Braze.ContentCards.PinnedIcon`. Tu activo de imagen personalizado debe declararse en el elemento `android:src`. Por ejemplo:
```xml
```
Para cambiar el icono de anclaje predeterminado, puedes configurar el [`pinnedResourceId`](https://braze-inc.github.io/braze-android-sdk/kdoc/braze-android-sdk/com.braze.jetpackcompose.contentcards.styling/-content-card-styling/index.html#794044424%2FProperties%2F-1725759721) de `ContentCardStyling`. Por ejemplo:
```kotlin
ContentCardStyling(
pinnedResourceId = R.drawable.pushpin,
pinnedImageAlignment = Alignment.TopCenter
)
```
También puedes especificar un Composable en [`pinnedComposable`](https://braze-inc.github.io/braze-android-sdk/kdoc/braze-android-sdk/com.braze.jetpackcompose.contentcards.styling/-content-card-styling/index.html#1460938052%2FProperties%2F-1725759721) de `ContentCardStyling`. Si se especifica `pinnedComposable`, este sobrescribe el valor de `pinnedResourceId`.
```kotlin
ContentCardStyling(
pinnedComposable = {
Box(Modifier.fillMaxWidth()) {
Text(
modifier = Modifier
.align(Alignment.Center)
.width(50.dp),
text = "This message is not read. Please read it."
)
}
}
)
```
Personaliza el icono de anclaje modificando las propiedades `pinIndicatorColor` y `pinIndicatorImage` de la propiedad de instancia [`cellAttributes`](https://braze-inc.github.io/braze-swift-sdk/documentation/brazeui/brazecontentcardui/viewcontroller/attributes-swift.struct/cellattributes/). Por ejemplo:
```swift
var attributes = BrazeContentCardUI.ViewController.Attributes.defaults
attributes.cellAttributes.pinIndicatorColor = .red
attributes.cellAttributes.pinIndicatorImage = UIImage(named: "my-image")
let viewController = BrazeContentCardUI.ViewController.init(braze: braze, attributes: attributes)
```
También puedes utilizar subclases para crear tu propia versión personalizada de `BrazeContentCardUI.Cell`, que incluye el indicador de anclaje. Por ejemplo:
```swift
var attributes = BrazeContentCardUI.ViewController.Attributes.defaults
attributes.cells[BrazeContentCardUI.ClassicImageCell.identifier] = CustomClassicImageCell.self
let viewController = BrazeContentCardUI.ViewController(braze: AppDelegate.braze, attributes: attributes)
```
La personalización del indicador de anclaje mediante `Attributes` no es compatible con Objective-C.
### Cambiar el color del indicador de no leídos {#changing-the-unread-indicator-color}
Las Content Cards contienen una línea azul en la parte inferior de la tarjeta que indica si la tarjeta ha sido vista o no.

Para cambiar el color del indicador de no leídos de una tarjeta, añade CSS personalizado a tu página web. Por ejemplo, para establecer el color del indicador de no visto en verde:
```css
.ab-unread-indicator { background-color: green; }
```
Cambia el color de la barra indicadora de no leídos modificando el valor de `com_braze_content_cards_unread_bar_color` en tu archivo `colors.xml`:
```xml
#1676d0
```
Para cambiar el color de la barra indicadora de no leídos, modifica el valor de [`unreadIndicatorColor`](https://braze-inc.github.io/braze-android-sdk/kdoc/braze-android-sdk/com.braze.jetpackcompose.contentcards.styling/-content-card-styling/index.html#-1669590042%2FProperties%2F-1725759721) en `ContentCardStyling`:
```kotlin
ContentCardStyling(
unreadIndicatorColor = Color.Red
)
```
Cambia el color de la barra indicadora de no leídos asignando un valor al color de tinte de tu instancia `BrazeContentCardUI.ViewController`:
```swift
let viewController = BrazeContentCardUI.ViewController(braze: AppDelegate.braze)
viewController.view.tintColor = .systemGreen
```
Sin embargo, si deseas modificar solo el indicador de no visto, puedes acceder a la propiedad `unviewedIndicatorColor` de tu estructura `BrazeContentCardUI.ViewController.Attributes`. Si utilizas implementaciones `UITableViewCell` de Braze, accede a la propiedad antes de que se dibuje la celda.
Por ejemplo, para establecer el color del indicador de no visto en rojo:
```swift
var attributes = BrazeContentCardUI.ViewController.Attributes.defaults
attributes.cellAttributes.unviewedIndicatorColor = .red
let viewController = BrazeContentCardUI.ViewController(braze: AppDelegate.braze, attributes: attributes)
```
Consulta la [aplicación de ejemplo Examples](https://github.com/braze-inc/braze-swift-sdk/tree/main/Examples/Swift) para ver un ejemplo completo.
Cambia el color de la barra indicadora de no leídos asignando un valor al color de tinte de tu `BRZContentCardUIViewController`:
```objc
BRZContentCardUIViewController *viewController = [[BRZContentCardUIViewController alloc] initWithBraze:AppDelegate.braze];
[viewController.view setTintColor:[UIColor systemGreenColor]];
```
En Objective-C no es posible personalizar solo el indicador de no visto a través de `Attributes`.
### Modo oscuro {#dark-mode}
Para mostrar diferentes imágenes o estilos según el modo oscuro o claro del dispositivo, utiliza [pares clave-valor](https://www.braze.com/docs/es/es/user_guide/message_building_by_channel/content_cards/creative_details#key-value-pairs) en tu mensaje de Content Card. Por ejemplo, añade un par clave-valor como `dark_mode_image` con la URL de tu activo de imagen para modo oscuro. Luego, en tu aplicación, añade lógica personalizada para comprobar el modo de apariencia actual del dispositivo y mostrar la imagen adecuada.
```swift
if let darkImageUrl = card.extras["dark_mode_image"],
view.traitCollection.userInterfaceStyle == .dark {
// Use darkImageUrl for the image
}
```
```kotlin
val darkModeImage = card.extras["dark_mode_image"]
val isDarkMode = (resources.configuration.uiMode and Configuration.UI_MODE_NIGHT_MASK) == Configuration.UI_MODE_NIGHT_YES
if (isDarkMode && darkModeImage != null) {
// Use darkModeImage for the image
}
```
```javascript
const darkModeImage = card.extras?.dark_mode_image;
const isDarkMode = window.matchMedia("(prefers-color-scheme: dark)").matches;
if (isDarkMode && darkModeImage) {
// Use darkModeImage for the image
}
```
Este patrón funciona para cualquier contenido que dependa de la apariencia, incluyendo texto, colores o diseños. Carga tus activos de imagen para modo oscuro en la [biblioteca de medios](https://www.braze.com/docs/es/es/user_guide/messaging/design_and_edit/media_library/image_specifications) y luego haz referencia a ellos en un par clave-valor.
### Desactivar el indicador de no leídos {#disabling-unread-indicator}
Oculta la barra del indicador de no leídos añadiendo el siguiente estilo a tu `css`:
```css
.ab-unread-indicator { display: none; }
```
Oculta la barra del indicador de no leídos configurando [`setUnreadBarVisible`](https://braze-inc.github.io/braze-android-sdk/kdoc/braze-android-sdk/com.braze.ui.contentcards.view/-content-card-view-holder/set-unread-bar-visible.html?query=fun%20setUnreadBarVisible(isVisible:%20Boolean)) en `ContentCardViewHolder` como `false`.
Desactivar el indicador de no leídos no es compatible con Jetpack Compose.
Oculta la barra del indicador de no leídos estableciendo la propiedad `attributes.cellAttributes.unviewedIndicatorColor` de tu estructura `Attributes` en `.clear`.
En Objective-C no es posible personalizar solo el indicador de no visto a través de `Attributes`.
# Personalizar el comportamiento de las Content Cards
Source: /docs/es/developer_guide/content_cards/customizing_cards/behavior/index.md
# Personalizar el comportamiento de las Content Cards {#customize-the-behavior-of-content-cards}
> Esta guía de implementación trata sobre cómo cambiar el comportamiento de las Content Cards, cómo añadir extras como pares clave-valor a tu carga útil, y recetas para personalizaciones comunes. Para obtener la lista completa de tipos de tarjetas de contenido, consulta [Acerca de las Content Cards](https://www.braze.com/docs/es/es/developer_guide/content_cards).
## Pares clave-valor {#key-value-pairs}
Braze te permite enviar cargas útiles de datos adicionales mediante Content Cards a los dispositivos de los usuarios utilizando pares clave-valor. Pueden ayudarte a realizar un seguimiento de las métricas internas, actualizar el contenido de la aplicación y personalizar las propiedades. [Añade pares clave-valor utilizando el dashboard](https://www.braze.com/docs/es/es/user_guide/message_building_by_channel/content_cards/create#step-4-configure-additional-settings-optional).
**Note:**
No recomendamos enviar valores JSON anidados como pares clave-valor. En su lugar, aplana el JSON antes de enviarlo.
Los pares clave-valor se almacenan en objetos `card` como `extras`. Se pueden utilizar para enviar datos junto con una tarjeta para su posterior manipulación por la aplicación. Llama a `card.extras` para acceder a estos valores.
Los pares clave-valor se almacenan en objetos `card` como `extras`. Se pueden utilizar para enviar datos junto con una tarjeta para su posterior manipulación por la aplicación. Llama a `card.extras` para acceder a estos valores.
Los pares clave-valor se almacenan en objetos `card` como `extras`. Se pueden utilizar para enviar datos junto con una tarjeta para su posterior manipulación por la aplicación. Llama a `card.extras` para acceder a estos valores.
**Tip:**
Es importante que tus equipos de marketing y desarrolladores se coordinen sobre qué pares clave-valor se utilizarán (por ejemplo, `feed_type = brand_homepage`), ya que cualquier par clave-valor que los especialistas en marketing introduzcan en el dashboard de Braze debe coincidir exactamente con los pares clave-valor que los desarrolladores incorporen a la lógica de la aplicación.
## Content Cards como contenido complementario {#content-cards-as-supplemental-content}
{: style="float:right;max-width:25%;margin-left:15px;border:0;"}
Puedes integrar fácilmente las Content Cards en una fuente existente, permitiendo que los datos de varias fuentes se carguen simultáneamente. Esto crea una experiencia cohesiva y armoniosa con las Content Cards de Braze y el contenido de la fuente existente.
El ejemplo de la derecha muestra una fuente con una lista híbrida de elementos que se rellenan mediante datos locales y Content Cards impulsadas por Braze. Con esto, las Content Cards pueden ser indistinguibles del contenido existente.
### Pares clave-valor desencadenados por la API {#api-triggered-key-value-pairs}
Las [Campaigns desencadenadas por API](https://www.braze.com/docs/es/es/user_guide/messaging/campaigns/schedule_your_campaign/api_triggered_delivery) son una buena estrategia a emplear cuando los valores de una tarjeta dependen de factores externos para determinar qué contenido mostrar al usuario. Por ejemplo, para mostrar contenido complementario, establece pares clave-valor utilizando Liquid. Ten en cuenta que `class_type` debe conocerse en el momento de la configuración.
{: style="max-width:60%;"}
## Content Cards como contenido interactivo {#content-cards-as-interactive-content}
{: style="border:0;"}{: style="float:right;max-width:45%;border:0;margin-left:15px;"}
Las Content Cards pueden aprovecharse para crear experiencias dinámicas e interactivas para tus usuarios. En el ejemplo de la derecha, tenemos una ventana emergente de una Content Card que aparece en el momento de la compra y que ofrece a los usuarios promociones de última hora. Las tarjetas bien colocadas como esta son una forma estupenda de dar a los usuarios un "empujoncito" hacia acciones específicas.
Los pares clave-valor para este caso de uso incluyen un `discount_percentage` configurado como el importe de descuento deseado y `class_type` configurado como `coupon_code`. Estos pares clave-valor te permiten filtrar y mostrar Content Cards de tipos específicos en la pantalla de pago. Para más información sobre el uso de pares clave-valor para gestionar varias fuentes, consulta [Personalizar la fuente predeterminada de Content Cards](https://www.braze.com/docs/es/es/developer_guide/customization_guides/content_cards/customizing_feed#multiple-feeds).
{: style="max-width:80%;"}
## Señales de Content Cards {#content-card-badges}
{: style="max-width:35%;float:right;margin-left:15px;border:none;"}
Las señales son pequeños iconos ideales para llamar la atención del usuario. Utilizar señales para alertar al usuario sobre nuevo contenido de Content Cards puede atraer a los usuarios de vuelta a tu aplicación y aumentar las sesiones.
### Mostrar el número de Content Cards no leídas como una señal {#displaying-the-number-of-unread-content-cards-as-a-badge}
Puedes mostrar el número de Content Cards no leídas que tiene tu usuario como una señal en el icono de tu aplicación.
Puedes solicitar el número de tarjetas no leídas en cualquier momento llamando a:
```javascript
braze.getCachedContentCards().getUnviewedCardCount();
```
Puedes utilizar esta información para mostrar una señal que indique cuántas Content Cards hay sin leer. Consulta la documentación de referencia del SDK para obtener más información.
Puedes solicitar el número de tarjetas no leídas en cualquier momento llamando a:
```java
Braze.getInstance(context).getContentCardUnviewedCount();
```
```kotlin
Braze.getInstance(context).contentCardUnviewedCount
```
Puedes utilizar esta información para mostrar una señal que indique cuántas Content Cards hay sin leer. Consulta la documentación de referencia del SDK para obtener más información.
El siguiente ejemplo utiliza `braze.contentCards` para solicitar y mostrar el número de Content Cards no leídas. Una vez cerrada la aplicación y finalizada la sesión del usuario, este código solicita un recuento de tarjetas, filtrando el número de tarjetas en función de la propiedad `viewed`.
```swift
func applicationDidEnterBackground(_ application: UIApplication)
```
Dentro de este método, implementa el siguiente código, que actualiza activamente el recuento de señales mientras el usuario ve las tarjetas durante una sesión determinada:
```swift
let unreadCards = AppDelegate.braze?.contentCards.cards.filter { $0.viewed == false }
UIApplication.shared.applicationIconBadgeNumber = unreadCards?.count ?? 0
```
```objc
(void)applicationDidEnterBackground:(UIApplication *)application
```
Dentro de este método, implementa el siguiente código, que actualiza activamente el recuento de señales mientras el usuario ve las tarjetas durante una sesión determinada:
```objc
NSInteger unreadCardCount = 0;
for (BRZContentCardRaw *card in AppDelegate.braze.contentCards.cards) {
if (card.viewed == NO) {
unreadCardCount += 1;
}
}
[UIApplication sharedApplication].applicationIconBadgeNumber = unreadCardCount;
```
# Personalizar la fuente para Content Cards
Source: /docs/es/developer_guide/content_cards/customizing_cards/feed/index.md
# Personalizar la fuente para Content Cards {#customize-the-feed-for-content-cards}
> Una fuente de Content Cards es la secuencia de Content Cards en tus aplicaciones móviles o web. Este artículo cubre la configuración de cuándo se actualiza la fuente, el orden de las tarjetas, la gestión de múltiples fuentes y los mensajes de error de "fuente vacía". Para obtener la lista completa de tipos de tarjetas de contenido, consulta [Acerca de Content Cards](https://www.braze.com/docs/es/es/developer_guide/content_cards).
## About the session lifecycle
A session refers to the period of time the Braze SDK tracks user activity in your app after it's launched. You can also force a new session by [calling the `changeUser()` method](https://www.braze.com/docs/es/es/developer_guide/analytics/setting_user_ids/#setting-a-user-id).
By default, a session starts when you first call `braze.openSession()`. The session will remain active for up to `30` minutes of inactivity (unless you [change the default session timeout](https://www.braze.com/docs/es/es/developer_guide/analytics/tracking_sessions/?tab=web#change-session-timeout) or the user closes the app.
**Note:**
If you've set up the [activity lifecycle callback](https://www.braze.com/docs/es/es/developer_guide/platform_integration_guides/android/initial_sdk_setup/android_sdk_integration/#step-4-tracking-user-sessions-in-android) for Android, Braze will automatically call [`openSession()`](https://braze-inc.github.io/braze-android-sdk/kdoc/braze-android-sdk/com.braze/-i-braze/open-session.html) and [`closeSession()`](https://braze-inc.github.io/braze-android-sdk/kdoc/braze-android-sdk/com.braze/-i-braze/close-session.html) for each activity in your app.
By default, a session starts when `openSession()` is first called. If your app goes to the background and then returns to the foreground, the SDK will check if more than 10 seconds have passed since the session started (unless you [change the default session timeout](https://www.braze.com/docs/es/es/developer_guide/analytics/tracking_sessions/?tab=android#change-session-timeout)). If so, a new session will begin. Keep in mind that if the user closes your app while it's in the background, session data may not be sent to Braze until they reopen the app.
Calling `closeSession()` will not immediately end the session. Instead, it will end the session after 10 seconds if `openSession()` isn't called again by the user starting another activity.
By default, a session starts when you call `Braze.init(configuration:)`. This occurs when the `UIApplicationWillEnterForegroundNotification` notification is triggered, meaning the app has entered the foreground.
If your app goes to the background, `UIApplicationDidEnterBackgroundNotification` is triggered. The app does not remain in an active session while in the background. When your app returns to the foreground, the SDK compares the time elapsed since the session started against the session timeout (unless you [change the default session timeout](https://www.braze.com/docs/es/es/developer_guide/analytics/tracking_sessions/?tab=swift#change-session-timeout)). If the time since the session started exceeds the timeout period, a new session begins.
## Actualizar la fuente {#refreshing-the-feed}
### Actualización automática {#automatic-refresh}
De forma predeterminada, la fuente de Content Cards se actualizará automáticamente cuando:
- Se inicia una nueva sesión
- La fuente predeterminada de Content Cards se cierra y se vuelve a abrir después de que hayan pasado más de 60 segundos desde la última actualización.
**Tip:**
Para mostrar dinámicamente Content Cards actualizadas sin actualizarlas manualmente, selecciona **At first impression** durante la creación de la tarjeta. Estas tarjetas se actualizarán cuando estén disponibles.
### Actualización manual {#manual-refresh}
Para actualizar manualmente la fuente en un momento específico:
Solicita una actualización manual de Content Cards de Braze desde el SDK Web en cualquier momento llamando a [`requestContentCardsRefresh()`](https://js.appboycdn.com/web-sdk/latest/doc/modules/braze.html#requestcontentcardsrefresh).
También puedes llamar a [`getCachedContentCards`](https://js.appboycdn.com/web-sdk/latest/doc/modules/braze.html#getcachedcontentcards) para obtener todas las tarjetas actualmente disponibles desde la última actualización de Content Cards.
```javascript
import * as braze from "@braze/web-sdk";
function refresh() {
braze.requestContentCardsRefresh();
}
```
Para abrir los enlaces de Content Cards en una nueva pestaña del navegador en lugar de la misma pestaña, configura `openCardsInNewTab: true` en las opciones de inicialización de tu SDK Web. Para más información sobre las opciones de inicialización, consulta la [guía del repositorio del SDK Web](https://www.braze.com/docs/es/es/developer_guide/sdk_repository_guides/web).
Solicita una actualización manual de Content Cards de Braze desde el SDK de Android en cualquier momento llamando a [`requestContentCardsRefresh`](https://braze-inc.github.io/braze-android-sdk/kdoc/braze-android-sdk/com.braze/-i-braze/request-content-cards-refresh.html).
```java
Braze.getInstance(context).requestContentCardsRefresh();
```
```kotlin
Braze.getInstance(context).requestContentCardsRefresh()
```
Solicita una actualización manual de Content Cards de Braze desde el SDK Swift en cualquier momento llamando al método [`requestRefresh`](https://braze-inc.github.io/braze-swift-sdk/documentation/brazekit/braze/contentcards-swift.class/requestrefresh(_:)) en la clase [`Braze.ContentCards`](https://braze-inc.github.io/braze-swift-sdk/documentation/brazekit/braze/contentcards-swift.class):
En Swift, Content Cards pueden actualizarse con un controlador de finalización opcional o con un retorno asíncrono utilizando las API de concurrencia nativas de Swift.
#### Controlador de finalización {#completion-handler}
```swift
AppDelegate.braze?.contentCards.requestRefresh { result in
// Implement completion handler
}
```
#### Async/Await
```swift
let contentCards = await AppDelegate.braze?.contentCards.requestRefresh()
```
```objc
[AppDelegate.braze.contentCards requestRefreshWithCompletion:^(NSArray * contentCards, NSError * error) {
// Implement completion handler
}];
```
### Sincronización completa vs. sincronización parcial {#full-sync-vs-partial-sync}
El SDK de Braze utiliza dos tipos de sincronización al recuperar Content Cards del servidor:
- **Sincronización completa:** Descarga todas las Content Cards para las que un usuario es elegible. Las sincronizaciones completas ocurren automáticamente cada 7 días o cada vez que se llama a `changeUser()`.
- **Sincronización parcial:** Descarga solo las nuevas Content Cards desde la última solicitud. Si el usuario no es elegible para ninguna tarjeta nueva, la respuesta devuelve cero tarjetas. Las sincronizaciones parciales ocurren cada vez que se llama a `requestContentCardsRefresh()` (a menos que hayan pasado 7 días desde la última sincronización completa, en cuyo caso se desencadena una sincronización completa en su lugar).
Las sincronizaciones parciales reducen la carga del servidor y el consumo de batería del dispositivo. Las Content Cards que ya se han recibido se almacenan localmente en el SDK, por lo que los usuarios seguirán viendo sus tarjetas disponibles incluso cuando una sincronización parcial devuelva cero tarjetas nuevas.
### Límite de velocidad {#rate-limit}
Braze utiliza un algoritmo de contenedor de tokens para aplicar los siguientes límites de velocidad:
- Hasta 5 llamadas de actualización por dispositivo, compartidas entre usuarios y llamadas a `openSession()`
- Una vez alcanzado el límite, se puede realizar una nueva llamada cada 180 segundos (3 minutos)
- El sistema guardará hasta cinco llamadas para que las utilices en cualquier momento
- `subscribeToContentCards()` seguirá devolviendo tarjetas almacenadas en caché incluso cuando se haya alcanzado el límite de velocidad
**Important:**
El SDK de Braze también aplica límites de velocidad para garantizar el rendimiento y la fiabilidad. Ten esto en cuenta al ejecutar pruebas automatizadas o realizar controles de calidad manuales. Consulta [Límites de velocidad del SDK de Braze](https://www.braze.com/docs/es/es/developer_guide/sdk_integration/rate_limits) para obtener más información.
## Personalizar el orden de las tarjetas mostradas {#customizing-displayed-card-order}
Puedes cambiar el orden en que se muestran tus Content Cards. Esto te permite ajustar la experiencia del usuario dando prioridad a determinados tipos de contenido, como las promociones con tiempo limitado.
Personaliza el orden de visualización de Content Cards en tu fuente utilizando el parámetro [`filterFunction`](https://js.appboycdn.com/web-sdk/latest/doc/modules/braze.html#showcontentcards) de `showContentCards():`. Por ejemplo:
```javascript
braze.showContentCards(null, (cards) => {
return sortBrazeCards(cards); // Where sortBrazeCards is your sorting function that returns the sorted card array
});
```
El [`ContentCardsFragment`](https://braze-inc.github.io/braze-android-sdk/kdoc/braze-android-sdk/com.braze.ui.contentcards/-content-cards-fragment/index.html) se basa en un [`IContentCardsUpdateHandler`](https://braze-inc.github.io/braze-android-sdk/kdoc/braze-android-sdk/com.braze.ui.contentcards.handlers/-i-content-cards-update-handler/index.html) para gestionar cualquier ordenación o modificación de Content Cards antes de que se muestren en la fuente. Se puede configurar un controlador de actualizaciones personalizado a través de [`setContentCardUpdateHandler`](https://braze-inc.github.io/braze-android-sdk/kdoc/braze-android-sdk/com.braze.ui.contentcards/-content-cards-fragment/set-content-card-update-handler.html) en tu `ContentCardsFragment`.
El siguiente es el `IContentCardsUpdateHandler` predeterminado y puede utilizarse como punto de partida para la personalización:
**Mostrar ejemplo en Java**
```java
public class DefaultContentCardsUpdateHandler implements IContentCardsUpdateHandler {
// Interface that must be implemented and provided as a public CREATOR
// field that generates instances of your Parcelable class from a Parcel.
public static final Parcelable.Creator CREATOR = new Parcelable.Creator() {
public DefaultContentCardsUpdateHandler createFromParcel(Parcel in) {
return new DefaultContentCardsUpdateHandler();
}
public DefaultContentCardsUpdateHandler[] newArray(int size) {
return new DefaultContentCardsUpdateHandler[size];
}
};
@Override
public List handleCardUpdate(ContentCardsUpdatedEvent event) {
List sortedCards = event.getAllCards();
// Sort by pinned, then by the 'updated' timestamp descending
// Pinned before non-pinned
Collections.sort(sortedCards, new Comparator() {
@Override
public int compare(Card cardA, Card cardB) {
// A displays above B
if (cardA.getIsPinned() && !cardB.getIsPinned()) {
return -1;
}
// B displays above A
if (!cardA.getIsPinned() && cardB.getIsPinned()) {
return 1;
}
// At this point, both A & B are pinned or both A & B are non-pinned
// A displays above B since A is newer
if (cardA.getUpdated() > cardB.getUpdated()) {
return -1;
}
// B displays above A since A is newer
if (cardA.getUpdated() < cardB.getUpdated()) {
return 1;
}
// At this point, every sortable field matches so keep the natural ordering
return 0;
}
});
return sortedCards;
}
// Parcelable interface method
@Override
public int describeContents() {
return 0;
}
// Parcelable interface method
@Override
public void writeToParcel(Parcel dest, int flags) {
// No state is kept in this class so the parcel is left unmodified
}
}
```
**Mostrar ejemplo en Kotlin**
```kotlin
class DefaultContentCardsUpdateHandler : IContentCardsUpdateHandler {
override fun handleCardUpdate(event: ContentCardsUpdatedEvent): List {
val sortedCards = event.allCards
// Sort by pinned, then by the 'updated' timestamp descending
// Pinned before non-pinned
sortedCards.sortWith(Comparator sort@{ cardA: Card, cardB: Card ->
// A displays above B
if (cardA.isPinned && !cardB.isPinned) {
return@sort -1
}
// B displays above A
if (!cardA.isPinned && cardB.isPinned) {
return@sort 1
}
// At this point, both A & B are pinned or both A & B are non-pinned
// A displays above B since A is newer
if (cardA.updated > cardB.updated) {
return@sort -1
}
// B displays above A since A is newer
if (cardA.updated < cardB.updated) {
return@sort 1
}
0
})
return sortedCards
}
// Parcelable interface method
override fun describeContents(): Int {
return 0
}
// Parcelable interface method
override fun writeToParcel(dest: Parcel, flags: Int) {
// No state is kept in this class so the parcel is left unmodified
}
companion object {
// Interface that must be implemented and provided as a public CREATOR
// field that generates instances of your Parcelable class from a Parcel.
val CREATOR: Parcelable.Creator = object : Parcelable.Creator {
override fun createFromParcel(`in`: Parcel): DefaultContentCardsUpdateHandler? {
return DefaultContentCardsUpdateHandler()
}
override fun newArray(size: Int): Array {
return arrayOfNulls(size)
}
}
}
}
```
**Tip:**
El código fuente de `ContentCardsFragment` está disponible en [GitHub](https://github.com/braze-inc/braze-android-sdk/blob/master/android-sdk-ui/src/main/java/com/braze/ui/contentcards/ContentCardsFragment.kt).
Para filtrar y ordenar Content Cards en Jetpack Compose, configura el parámetro `cardUpdateHandler`. Por ejemplo:
```kotlin
ContentCardsList(
cardUpdateHandler = {
it.sortedWith { cardA, cardB ->
// A displays above B
if (cardA.isPinned && !cardB.isPinned) {
return@sortedWith -1
}
// B displays above A
if (!cardA.isPinned && cardB.isPinned) {
return@sortedWith 1
}
// At this point, both A & B are pinned or both A & B are non-pinned
// A displays above B since A is newer
if (cardA.updated > cardB.updated) {
return@sortedWith -1
}
// B displays above A since A is newer
if (cardA.updated < cardB.updated) {
return@sortedWith 1
}
0
}
}
)
```
Personaliza el orden de la fuente de tarjetas modificando directamente la variable estática [`Attributes.defaults`](https://braze-inc.github.io/braze-swift-sdk/documentation/brazeui/brazecontentcardui/viewcontroller/attributes-swift.struct/defaults).
```swift
var attributes = BrazeContentCardUI.ViewController.Attributes.defaults
attributes.transform = { cards in
cards.sorted {
if $0.pinned && !$1.pinned {
return true
} else if !$0.pinned && $1.pinned {
return false
} else {
return $0.createdAt > $1.createdAt
}
}
}
let viewController = BrazeContentCardUI.ViewController(braze: AppDelegate.braze, attributes: attributes)
```
La personalización a través de `BrazeContentCardUI.ViewController.Attributes` no está disponible en Objective-C.
## Personalizar el mensaje de "fuente vacía" {#customizing-empty-feed-message}
Cuando un usuario no cumple los requisitos para ninguna Content Card, el SDK muestra un mensaje de error de "fuente vacía" que indica: "No tenemos actualizaciones. Vuelve a comprobarlo más tarde." Puedes personalizar este mensaje de error de "fuente vacía" de forma similar a la siguiente:

El SDK Web no permite sustituir el texto de "fuente vacía" mediante programación. Puedes optar por sustituirlo cada vez que se muestre la fuente, pero no es recomendable porque la fuente puede tardar en actualizarse y el texto de fuente vacía no se mostrará inmediatamente.
Si el [`ContentCardsFragment`](https://braze-inc.github.io/braze-android-sdk/kdoc/braze-android-sdk/com.braze.ui.contentcards/-content-cards-fragment/index.html) determina que el usuario no cumple los requisitos para ninguna Content Card, muestra el mensaje de error de fuente vacía.
Un adaptador especial, el [`EmptyContentCardsAdapter`](https://github.com/braze-inc/braze-android-sdk/blob/master/android-sdk-ui/src/main/java/com/braze/ui/contentcards/adapters/EmptyContentCardsAdapter.kt), sustituye al [`ContentCardAdapter`](https://github.com/braze-inc/braze-android-sdk/blob/master/android-sdk-ui/src/main/java/com/braze/ui/contentcards/adapters/ContentCardAdapter.kt) estándar para mostrar este mensaje de error. Para configurar el mensaje personalizado, anula el recurso de cadena `com_braze_feed_empty`.
El estilo utilizado para mostrar este mensaje se puede encontrar a través de [`Braze.ContentCardsDisplay.Empty`](https://github.com/braze-inc/braze-android-sdk/blob/2e386dfa59a87bfc24ef7cb6ff5adf6b16f44d24/android-sdk-ui/src/main/res/values/styles.xml#L522-L530) y se reproduce en el siguiente fragmento de código:
```xml
```
Para obtener más información sobre la personalización de los elementos de estilo de Content Cards, consulta [Personalizar el estilo](https://www.braze.com/docs/es/es/developer_guide/content_cards/customizing_cards/style).
Para personalizar el mensaje de error de "fuente vacía" con Jetpack Compose, puedes pasar un `emptyString` a [`ContentCardsList`](https://braze-inc.github.io/braze-android-sdk/kdoc/braze-android-sdk/com.braze.jetpackcompose.contentcards/-content-cards-list.html). También puedes pasar [`emptyTextStyle`](https://braze-inc.github.io/braze-android-sdk/kdoc/braze-android-sdk/com.braze.jetpackcompose.contentcards.styling/-content-card-list-styling/index.html#1193499348%2FProperties%2F-1725759721) a `ContentCardListStyling` para personalizar aún más este mensaje.
```kotlin
ContentCardsList(
emptyString = "No messages today",
style = ContentCardListStyling(
emptyTextStyle = TextStyle(...)
)
)
```
Si tienes un Composable que te gustaría mostrar en su lugar, puedes pasar `emptyComposable` a [`ContentCardsList`](https://braze-inc.github.io/braze-android-sdk/kdoc/braze-android-sdk/com.braze.jetpackcompose.contentcards/-content-cards-list.html). Si se especifica `emptyComposable`, no se utilizará `emptyString`.
```kotlin
ContentCardsList(
emptyComposable = {
Image(
painter = painterResource(id = R.drawable.noMessages),
contentDescription = "No messages"
)
}
)
```
Personaliza el estado vacío del controlador de vista configurando los [`Attributes`](https://braze-inc.github.io/braze-swift-sdk/documentation/brazeui/brazecontentcardui/viewcontroller/attributes-swift.struct/defaults) relacionados.
```swift
var attributes = BrazeContentCardUI.ViewController.Attributes.defaults
attributes.emptyStateMessage = "This is a custom empty state message"
attributes.emptyStateMessageFont = .preferredFont(forTextStyle: .title1)
attributes.emptyStateMessageColor = .secondaryLabel
```
Cambia el texto que aparece automáticamente en las fuentes vacías de Content Cards redefiniendo las cadenas localizables de Content Cards en el archivo [`ContentCardsLocalizable.strings`](https://github.com/braze-inc/braze-swift-sdk/tree/main/Sources/BrazeUI/Resources/Localization/en.lproj) de tu aplicación.
**Note:**
Si quieres actualizar este mensaje en diferentes idiomas de localización, busca el idioma correspondiente en la [estructura de carpetas de recursos](https://github.com/braze-inc/braze-swift-sdk/tree/main/Sources/BrazeUI/Resources/Localization) con la cadena `ContentCardsLocalizable.strings`.
## Implementar múltiples fuentes {#implementing-multiple-feeds}
Content Cards pueden filtrarse en tu aplicación para que solo se muestren tarjetas específicas, lo que te permite tener varias fuentes de Content Cards para diferentes casos de uso. Por ejemplo, puedes mantener tanto una fuente transaccional como una fuente de marketing. Para ello, crea diferentes categorías de Content Cards estableciendo pares clave-valor en el panel de Braze. Después, crea fuentes en tu aplicación o sitio que traten estos tipos de Content Cards de forma diferente, filtrando algunos tipos y mostrando otros.
### Paso 1: Establecer pares clave-valor en las tarjetas {#step-1-set-key-value-pairs-on-cards}
Al crear una campaña de tarjeta de contenido, establece [datos de par clave-valor](https://www.braze.com/docs/es/es/developer_guide/content_cards/customizing_cards/behavior) en cada tarjeta. Utilizarás este par clave-valor para clasificar las tarjetas. Los pares clave-valor se almacenan en la propiedad `extras` del modelo de datos de la tarjeta.
En este ejemplo, estableceremos un par clave-valor con la clave `feed_type` que designará en qué fuente de Content Cards debe mostrarse la tarjeta. El valor será el que tengan tus fuentes personalizadas, como `home_screen` o `marketing`.
### Paso 2: Filtrar Content Cards {#step-2-filter-content-cards}
Una vez asignados los pares clave-valor, crea una fuente con una lógica que muestre las tarjetas que deseas y filtre las tarjetas de otros tipos. En este ejemplo, solo mostraremos las tarjetas cuyo par clave-valor coincida con `feed_type: "Transactional"`.
El siguiente ejemplo mostrará la fuente de Content Cards para las tarjetas de tipo `Transactional`:
```javascript
/**
* @param {String} feed_type - value of the "feed_type" KVP to filter
*/
function showCardsByFeedType(feed_type) {
braze.showContentCards(null, function(cards) {
return cards.filter((card) => card.extras["feed_type"] === feed_type);
});
}
```
A continuación, puedes configurar un alternador para tu fuente personalizada:
```javascript
// show the "Transactional" feed when this button is clicked
document.getElementById("show-transactional-feed").onclick = function() {
showCardsByFeedType("Transactional");
};
```
Para más información, consulta la [documentación del método del SDK](https://js.appboycdn.com/web-sdk/latest/doc/modules/braze.html#showcontentcards).
De forma predeterminada, la fuente de Content Cards se muestra en un [`ContentCardsFragment`](https://braze-inc.github.io/braze-android-sdk/kdoc/braze-android-sdk/com.braze.ui.contentcards/-content-cards-fragment/index.html) y [`IContentCardsUpdateHandler`](https://braze-inc.github.io/braze-android-sdk/kdoc/braze-android-sdk/com.braze.ui.contentcards.handlers/-i-content-cards-update-handler/index.html) devuelve una lista de tarjetas para mostrar después de recibir un [`ContentCardsUpdatedEvent`](https://braze-inc.github.io/braze-android-sdk/kdoc/braze-android-sdk/com.braze.events/-content-cards-updated-event/index.html) del SDK de Braze. Sin embargo, solo ordena las tarjetas y no gestiona ningún filtrado directamente.
#### Paso 2.1: Crear un controlador personalizado {#step-21-create-a-custom-handler}
Puedes filtrar Content Cards implementando un [`IContentCardsUpdateHandler`](https://braze-inc.github.io/braze-android-sdk/kdoc/braze-android-sdk/com.braze.ui.contentcards.handlers/-i-content-cards-update-handler/index.html) personalizado utilizando los pares clave-valor establecidos por [`Card.getExtras()`](https://braze-inc.github.io/braze-android-sdk/kdoc/braze-android-sdk/com.braze.models.cards/-card/extras.html) en el dashboard y, a continuación, modificándolo para eliminar de la lista cualquier tarjeta que no coincida con el valor de `feed_type` que estableciste anteriormente.
**Mostrar ejemplo en Java**
```java
private IContentCardsUpdateHandler getUpdateHandlerForFeedType(final String desiredFeedType) {
return new IContentCardsUpdateHandler() {
@Override
public List handleCardUpdate(ContentCardsUpdatedEvent event) {
// Use the default card update handler for a first
// pass at sorting the cards. This is not required
// but is done for convenience.
final List cards = new DefaultContentCardsUpdateHandler().handleCardUpdate(event);
final Iterator cardIterator = cards.iterator();
while (cardIterator.hasNext()) {
final Card card = cardIterator.next();
// Make sure the card has our custom KVP
// from the dashboard with the key "feed_type"
if (card.getExtras().containsKey("feed_type")) {
final String feedType = card.getExtras().get("feed_type");
if (!desiredFeedType.equals(feedType)) {
// The card has a feed type, but it doesn't match
// our desired feed type, remove it.
cardIterator.remove();
}
} else {
// The card doesn't have a feed
// type at all, remove it
cardIterator.remove();
}
}
// At this point, all of the cards in this list have
// a feed type that explicitly matches the value we put
// in the dashboard.
return cards;
}
};
}
```
**Mostrar ejemplo en Kotlin**
```kotlin
private fun getUpdateHandlerForFeedType(desiredFeedType: String): IContentCardsUpdateHandler {
return IContentCardsUpdateHandler { event ->
// Use the default card update handler for a first
// pass at sorting the cards. This is not required
// but is done for convenience.
val cards = DefaultContentCardsUpdateHandler().handleCardUpdate(event)
val cardIterator = cards.iterator()
while (cardIterator.hasNext()) {
val card = cardIterator.next()
// Make sure the card has our custom KVP
// from the dashboard with the key "feed_type"
if (card.extras.containsKey("feed_type")) {
val feedType = card.extras["feed_type"]
if (desiredFeedType != feedType) {
// The card has a feed type, but it doesn't match
// our desired feed type, remove it.
cardIterator.remove()
}
} else {
// The card doesn't have a feed
// type at all, remove it
cardIterator.remove()
}
}
// At this point, all of the cards in this list have
// a feed type that explicitly matches the value we put
// in the dashboard.
cards
}
}
```
#### Paso 2.2: Añádelo a un fragmento {#step-22-add-it-to-a-fragment}
Después de crear un [`IContentCardsUpdateHandler`](https://braze-inc.github.io/braze-android-sdk/kdoc/braze-android-sdk/com.braze.ui.contentcards.handlers/-i-content-cards-update-handler/index.html), crea un [`ContentCardsFragment`](https://braze-inc.github.io/braze-android-sdk/kdoc/braze-android-sdk/com.braze.ui.contentcards/-content-cards-fragment/index.html) que lo utilice. Esta fuente personalizada puede utilizarse como cualquier otro `ContentCardsFragment`. En las distintas partes de tu aplicación, muestra distintas fuentes de Content Cards en función de la clave proporcionada en el dashboard. Cada fuente `ContentCardsFragment` tendrá un conjunto único de tarjetas mostradas gracias al `IContentCardsUpdateHandler` personalizado en cada fragmento.
**Mostrar ejemplo en Java**
```java
// We want a Content Cards feed that only shows "Transactional" cards.
ContentCardsFragment customContentCardsFragment = new ContentCardsFragment();
customContentCardsFragment.setContentCardUpdateHandler(getUpdateHandlerForFeedType("Transactional"));
```
**Mostrar ejemplo en Kotlin**
```kotlin
// We want a Content Cards feed that only shows "Transactional" cards.
val customContentCardsFragment = ContentCardsFragment()
customContentCardsFragment.contentCardUpdateHandler = getUpdateHandlerForFeedType("Transactional")
```
Para filtrar qué Content Cards se muestran en esta fuente, utiliza `cardUpdateHandler`. Por ejemplo:
```kotlin
ContentCardsList(
cardUpdateHandler = {
it.filter { card ->
card.extras["feed_type"] == "Transactional"
}
}
)
```
The following example will show the Content Cards feed for `Transactional` type cards:
```swift
// Filter cards by the `Transactional` feed type based on your key-value pair.
let transactionalCards = cards.filter { $0.extras["feed_type"] as? String == "Transactional" }
```
Para ir un paso más allá, las tarjetas presentadas en el controlador de vista pueden filtrarse configurando la propiedad `transform` en tu estructura `Attributes` para mostrar solo las tarjetas filtradas según tus criterios.
```swift
var attributes = BrazeContentCardUI.ViewController.Attributes.defaults
attributes.transform = { cards in
cards.filter { $0.extras["feed_type"] as? String == "Transactional" }
}
// Pass your attributes containing the transformed cards to the Content Card UI.
let viewController = BrazeContentCardUI.ViewController(braze: AppDelegate.braze, attributes: attributes)
```
```objc
// Filter cards by the `Transactional` feed type based on your key-value pair.
NSMutableArray *transactionalCards = [[NSMutableArray alloc] init];
for (BRZContentCardRaw *card in AppDelegate.braze.contentCards.cards) {
if ([card.extras[@"feed_type"] isEqualToString:@"Transactional"]) {
[transactionalCards addObject:card];
}
}
```
# Registrar análisis
Source: /docs/es/developer_guide/content_cards/logging_analytics/index.md
# Registrar análisis {#log-analytics}
> When building a custom UI for Content Cards, you must manually log analytics like impressions, clicks, and dismissals, as this is only handled automatically for default card models. Logging these events is a standard part of a Content Card integration and is essential for accurate campaign reporting and billing. To do this, populate your custom UI with data from the Braze data models and then manually log the events. Once you understand how to log analytics, you can see common ways Braze customers [create custom Content Cards](https://www.braze.com/docs/es/es/developer_guide/content_cards/creating_cards/).
## Logging analytics
When implementing your custom Content Cards, you can parse the Content Card objects and extract their payload data such as `title`, `cardDescription`, and `imageUrl`. Then, you can use the resulting model data to populate your custom UI.
To obtain the Content Card data models, subscribe to Content Card updates. There are two properties to pay particular attention to:
* **`id`**: Represents the Content Card ID string. This is the unique identifier used to log analytics from custom Content Cards.
* **`extras`**: Encompasses all the key-value pairs from the Braze dashboard.
All properties outside of `id` and `extras` are optional to parse for custom Content Cards. For more information on the data model, see each platform's integration article: [Android](https://www.braze.com/docs/es/es/developer_guide/content_cards/?sdktab=android), [iOS](https://www.braze.com/docs/es/es/developer_guide/content_cards/?sdktab=swift), [Web](https://www.braze.com/docs/es/es/developer_guide/content_cards/?sdktab=web).
Register a callback function to subscribe for updates when cards are refreshed.
```javascript
import * as braze from "@braze/web-sdk";
braze.subscribeToContentCardsUpdates((updates) => {
const cards = updates.cards;
// For example:
cards.forEach(card => {
if (card.isControl) {
// Do not display the control card, but remember to call `logContentCardImpressions([card])`
}
else if (card instanceof braze.ClassicCard || card instanceof braze.CaptionedImage) {
// Use `card.title`, `card.imageUrl`, etc.
}
else if (card instanceof braze.ImageOnly) {
// Use `card.imageUrl`, etc.
}
})
});
braze.openSession();
```
**Note:**
Content Cards will only refresh on session start if a subscribe request is called before `openSession()`. You can always choose to [manually refresh the feed](https://www.braze.com/docs/es/es/developer_guide/content_cards/customizing_cards/feed/) as well.
### Step 1: Create a private subscriber variable
To subscribe to card updates, first declare a private variable in your custom class to hold your subscriber:
```java
// subscriber variable
private IEventSubscriber mContentCardsUpdatedSubscriber;
```
### Step 2: Subscribe to updates
Next, add the following code to subscribe to Content Card updates from Braze, typically inside of your custom Content Cards activity's `Activity.onCreate()`:
```java
// Remove the previous subscriber before rebuilding a new one with our new activity.
Braze.getInstance(context).removeSingleSubscription(mContentCardsUpdatedSubscriber, ContentCardsUpdatedEvent.class);
mContentCardsUpdatedSubscriber = new IEventSubscriber() {
@Override
public void trigger(ContentCardsUpdatedEvent event) {
// List of all Content Cards
List allCards = event.getAllCards();
// Your logic below
}
};
Braze.getInstance(context).subscribeToContentCardsUpdates(mContentCardsUpdatedSubscriber);
Braze.getInstance(context).requestContentCardsRefresh();
```
### Step 3: Unsubscribe
We also recommend unsubscribing when your custom activity moves out of view. Add the following code to your activity's `onDestroy()` lifecycle method:
```java
Braze.getInstance(context).removeSingleSubscription(mContentCardsUpdatedSubscriber, ContentCardsUpdatedEvent.class);
```
### Step 1: Create a private subscriber variable
To subscribe to card updates, first declare a private variable in your custom class to hold your subscriber:
```kotlin
private var contentCardsUpdatedSubscriber: IEventSubscriber? = null
```
### Step 2: Subscribe to updates
Next, add the following code to subscribe to Content Card updates from Braze, typically inside of your custom Content Cards activity's `Activity.onCreate()`:
```kotlin
// Remove the previous subscriber before rebuilding a new one with our new activity.
Braze.getInstance(context).removeSingleSubscription(contentCardsUpdatedSubscriber, ContentCardsUpdatedEvent::class.java)
contentCardsUpdatedSubscriber = IEventSubscriber { event ->
// List of all Content Cards
val allCards = event.allCards
// Your logic below
}
Braze.getInstance(context).subscribeToContentCardsUpdates(contentCardsUpdatedSubscriber)
Braze.getInstance(context).requestContentCardsRefresh(true)
```
### Step 3: Unsubscribe
We also recommend unsubscribing when your custom activity moves out of view. Add the following code to your activity's `onDestroy()` lifecycle method:
```kotlin
Braze.getInstance(context).removeSingleSubscription(contentCardsUpdatedSubscriber, ContentCardsUpdatedEvent::class.java)
```
To access the Content Cards data model, call [`contentCards.cards`](https://braze-inc.github.io/braze-swift-sdk/documentation/brazekit/braze/contentcards-swift.class/cards) on your `braze` instance.
```swift
let cards: [Braze.ContentCard] = AppDelegate.braze?.contentCards.cards
```
**Note:**
Reading `contentCards.cards`, `contentCards.unviewedCards`, or `contentCards.lastUpdate` blocks the calling thread until the SDK has completed its post-initialization operations. Use the non-blocking getters in [Non-blocking snapshot accessors](#non-blocking-snapshot-accessors) for main-thread or latency-sensitive contexts.
Additionally, you can also maintain a subscription to observe for changes in your Content Cards. You can do so in one of two ways:
1. Maintaining a cancellable; or
2. Maintaining an `AsyncStream`.
### Cancellable
```swift
// This subscription is maintained through a Braze cancellable, which will observe for changes until the subscription is cancelled.
// You must keep a strong reference to the cancellable to keep the subscription active.
// The subscription is canceled either when the cancellable is deinitialized or when you call its `.cancel()` method.
let cancellable = AppDelegate.braze?.contentCards.subscribeToUpdates { [weak self] contentCards in
// Implement your completion handler to respond to updates in `contentCards`.
}
```
### AsyncStream
```swift
let stream: AsyncStream<[Braze.ContentCard]> = AppDelegate.braze?.contentCards.cardsStream
```
### Non-blocking snapshot accessors {#non-blocking-snapshot-accessors}
Use these methods to read the current cached state without blocking the calling thread. Each completion handler is always delivered on the main thread.
```swift
// All cached cards.
AppDelegate.braze?.contentCards.getCachedContentCards { cards in
// Use `cards` here.
}
// Unviewed cards only (excludes control cards).
AppDelegate.braze?.contentCards.getUnviewedCards { cards in
// Use `cards` here.
}
// Date of the last server sync for the current user (nil until the first sync completes).
AppDelegate.braze?.contentCards.getLastUpdate { date in
// Use `date` here.
}
```
```objc
NSArray *contentCards = AppDelegate.braze.contentCards.cards;
```
Additionally, if you wish to maintain a subscription to your content cards, you can call [`subscribeToUpdates`](https://braze-inc.github.io/braze-swift-sdk/documentation/brazekit/braze/contentcards-swift.class/subscribetoupdates(_:)):
```objc
// This subscription is maintained through Braze cancellable, which will continue to observe for changes until the subscription is cancelled.
BRZCancellable *cancellable = [self.braze.contentCards subscribeToUpdates:^(NSArray *contentCards) {
// Implement your completion handler to respond to updates in `contentCards`.
}];
```
To read the current cached state without blocking the calling thread, use the following methods. Each completion handler is delivered on the main thread.
```objc
// All cached cards.
[AppDelegate.braze.contentCards getCachedContentCardsWithCompletion:^(NSArray *cards) {
// Use `cards` here.
}];
// Unviewed cards only (excludes control cards).
[AppDelegate.braze.contentCards getUnviewedCardsWithCompletion:^(NSArray *cards) {
// Use `cards` here.
}];
// Date of the last server sync for the current user (nil until the first sync completes).
[AppDelegate.braze.contentCards getLastUpdateWithCompletion:^(NSDate * _Nullable date) {
// Use `date` here.
}];
```
To get the Content Card data, use the `getContentCards` method:
```javascript
import Braze from "@braze/react-native-sdk";
const cards = await Braze.getContentCards();
```
To listen for updates, subscribe to Content Card update events:
```javascript
const subscription = Braze.addListener(Braze.Events.CONTENT_CARDS_UPDATED, (update) => {
const cards = update.cards;
cards.forEach(card => {
if (card.isControl) {
// Do not display the control card, but remember to log an impression
} else {
// Use card.title, card.cardDescription, card.image, etc.
}
});
});
```
To request a manual refresh of Content Cards from Braze servers:
```javascript
Braze.requestContentCardsRefresh();
```
To get cached Content Cards without a network request:
```javascript
const cachedCards = await Braze.getCachedContentCards();
```
## Logging events
Logging valuable metrics like impressions, clicks, and dismissals is quick and simple. Set a custom click listener to manually handle these analytics.
Log impression events when cards are viewed by users using [`logContentCardImpressions`](https://js.appboycdn.com/web-sdk/latest/doc/modules/braze.html#logcontentcardimpressions):
```javascript
import * as braze from "@braze/web-sdk";
braze.logContentCardImpressions([card1, card2, card3]);
```
Log card click events when users interact with a card using [`logContentCardClick`](https://js.appboycdn.com/web-sdk/latest/doc/modules/braze.html#logcontentcardclick):
```javascript
import * as braze from "@braze/web-sdk";
braze.logContentCardClick(card);
```
The [`BrazeManager`](https://github.com/braze-inc/braze-growth-shares-android-demo-app/blob/main/app/src/main/java/com/braze/advancedsamples/BrazeManager.kt) can reference Braze SDK dependencies such as the Content Card objects array list to get the [`Card`](https://braze-inc.github.io/braze-android-sdk/kdoc/braze-android-sdk/com.braze.models.cards/-card/index.html) to call the Braze logging methods. Use the `ContentCardable` base class to easily reference and provide data to the `BrazeManager`.
To log an impression or click on a card, call [`Card.logClick()`](https://braze-inc.github.io/braze-android-sdk/kdoc/braze-android-sdk/com.braze.models.cards/-card/log-click.html) or [`Card.logImpression()`](https://braze-inc.github.io/braze-android-sdk/kdoc/braze-android-sdk/com.braze.models.cards/-card/log-impression.html) respectively.
You can manually log or set a Content Card as "dismissed" to Braze for a particular card with [`isDismissed`](https://braze-inc.github.io/braze-android-sdk/kdoc/braze-android-sdk/com.braze.models.cards/-card/is-dismissed.html). If a card is already marked as dismissed, it cannot be marked as dismissed again.
To create a custom click listener, create a class that implements [`IContentCardsActionListener`](https://braze-inc.github.io/braze-android-sdk/kdoc/braze-android-sdk/com.braze.ui.contentcards.listeners/-i-content-cards-action-listener/index.html) and register it with [`BrazeContentCardsManager`](https://braze-inc.github.io/braze-android-sdk/kdoc/braze-android-sdk/com.braze.ui.contentcards.managers/-braze-content-cards-manager/index.html). Implement the [`onContentCardClicked()`](https://braze-inc.github.io/braze-android-sdk/kdoc/braze-android-sdk/com.braze.ui.contentcards.listeners/-i-content-cards-action-listener/on-content-card-clicked.html) method, which will be called when the user clicks a Content Card. Then, instruct Braze to use your Content Card click listener.
For example:
```java
BrazeContentCardsManager.getInstance().setContentCardsActionListener(new IContentCardsActionListener() {
@Override
public boolean onContentCardClicked(Context context, Card card, IAction cardAction) {
return false;
}
@Override
public void onContentCardDismissed(Context context, Card card) {
}
});
```
For example:
```kotlin
BrazeContentCardsManager.getInstance().contentCardsActionListener = object : IContentCardsActionListener {
override fun onContentCardClicked(context: Context, card: Card, cardAction: IAction): Boolean {
return false
}
override fun onContentCardDismissed(context: Context, card: Card) {
}
}
```
**Important:**
To handle control variant Content Cards in your custom UI, pass in your [`com.braze.models.cards.Card`](https://braze-inc.github.io/braze-android-sdk/kdoc/braze-android-sdk/com.braze.models.cards/-card/index.html) object, then call the `logImpression` method as you would with any other Content Card type. The object will implicitly log a control impression to inform our analytics of when a user would have seen the control card.
Implement the [`BrazeContentCardUIViewControllerDelegate`](https://braze-inc.github.io/braze-swift-sdk/documentation/brazeui/brazecontentcarduiviewcontrollerdelegate) protocol and set your delegate object as the `delegate` property of your `BrazeContentCardUI.ViewController`. This delegate will handle passing the data of your custom object back to Braze to be logged. For an example, see [Content Cards UI tutorial](https://braze-inc.github.io/braze-swift-sdk/tutorials/braze/c2-contentcardsui/).
```swift
// Set the delegate when creating the Content Cards controller
contentCardsController.delegate = delegate
// Method to implement in delegate
func contentCard(
_ controller: BrazeContentCardUI.ViewController,
shouldProcess clickAction: Braze.ContentCard.ClickAction,
card: Braze.ContentCard
) -> Bool {
// Intercept the content card click action here.
return true
}
```
```objc
// Set the delegate when creating the Content Cards controller
contentCardsController.delegate = delegate;
// Method to implement in delegate
- (BOOL)contentCardController:(BRZContentCardUIViewController *)controller
shouldProcess:(NSURL *)url
card:(BRZContentCardRaw *)card {
// Intercept the content card click action here.
return YES;
}
```
**Important:**
To handle control variant Content Cards in your custom UI, pass in your [`Braze.ContentCard.Control`](https://braze-inc.github.io/braze-swift-sdk/documentation/brazekit/braze/contentcard/control(_:)) object, then call the `logImpression` method as you would with any other Content Card type. The object will implicitly log a control impression to inform our analytics of when a user would have seen the control card.
Log impression events when cards are viewed by users:
```javascript
Braze.logContentCardImpression(card.id);
```
Log card click events when users interact with a card:
```javascript
Braze.logContentCardClicked(card.id);
```
Log dismissal events when a user dismisses a card:
```javascript
Braze.logContentCardDismissed(card.id);
```
## Handling on-click behavior
When a user clicks a Content Card in a custom feed, the on-click behavior (such as navigating to a URL, deep linking, or logging a custom event) is not handled automatically. Use [`handleBrazeAction`](https://js.appboycdn.com/web-sdk/latest/doc/modules/braze.html#handlebrazeaction) to process the card's URL and execute the configured on-click action, including Braze actions (`brazeActions://` URLs).
```javascript
import * as braze from "@braze/web-sdk";
// In your card click handler
function onCardClick(card) {
// Log the click
braze.logContentCardClick(card);
// Handle the on-click behavior
if (card.url) {
braze.handleBrazeAction(card.url);
}
}
```
| Parameter | Description |
|---|---|
| `url` | A valid URL, or a valid Braze action URL with the scheme `brazeActions://`. |
| `openLinkInNewTab` | (Optional) Whether the URL should open in a new tab. Defaults to `false`. |
{: .reset-td-br-1 .reset-td-br-2 aria-label="Handling on-click behavior" }
**Important:**
If you don't call `handleBrazeAction()`, on-click behaviors configured in the Braze dashboard (such as "Log Custom Event" or "Navigate to URL") won't execute for cards displayed in a custom feed.
On-click behavior is handled automatically by the default Content Cards UI. For custom implementations, use the [`IContentCardsActionListener`](https://braze-inc.github.io/braze-android-sdk/kdoc/braze-android-sdk/com.braze.ui.contentcards.listeners/-i-content-cards-action-listener/index.html) interface described in the [Logging analytics](#logging-analytics) section.
On-click behavior is handled automatically by the default Content Cards UI. For custom implementations, use the [`BrazeContentCardUIViewControllerDelegate`](https://braze-inc.github.io/braze-swift-sdk/documentation/brazeui/brazecontentcarduiviewcontrollerdelegate) protocol described in the [Logging analytics](#logging-analytics) section.
## Descartes únicos superiores a impresiones únicas {#unique-dismissals-higher-than-unique-impressions}
Si los *descartes únicos* superan a las *impresiones únicas*, tu integración personalizada de Content Cards registró descartes sin registrar impresiones para esas mismas tarjetas. La interfaz predeterminada de Content Cards de Braze registra ambos automáticamente, por lo que esta discrepancia solo aparece cuando utilizas una interfaz personalizada.
Registra una impresión cada vez que muestres una tarjeta, y registra un descarte cuando el usuario la descarte. Para los nombres de los métodos y ejemplos, consulta las secciones de plataforma a continuación.
## Análisis de Content Cards faltantes {#missing-content-cards-analytics}
Si las Content Cards aparecen correctamente en tu aplicación pero no recibes ningún análisis de forma consistente (impresiones, clics, etc.), es probable que se trate de un problema de integración de SDK.
- **Vistas personalizadas de Content Cards (Android, iOS, Web):** La interfaz predeterminada de Braze registra impresiones y clics automáticamente en todas las plataformas. Si estás utilizando una vista o implementación personalizada de Content Cards, debes llamar explícitamente a los métodos de registro apropiados dentro de tu aplicación. Consulta [Registrar análisis](https://www.braze.com/docs/es/es/developer_guide/content_cards/logging_analytics) para tu plataforma. Para implementaciones Web personalizadas específicamente, asegúrate de que el SDK Web de Braze esté cargado, revisa la consola del navegador en busca de errores y verifica que se estén recibiendo los datos de las tarjetas.
- **Inicialización del SDK e identificación de usuarios:** Asegúrate de que el SDK esté completamente inicializado antes de mostrar las tarjetas. Los eventos se descartan silenciosamente (no se ponen en cola) si el SDK no está inicializado, está en modo de inicialización diferida o tiene el RGPD desactivado. El SDK sí registra análisis para usuarios anónimos, pero las métricas del dashboard como "impresiones diarias únicas" requieren una identidad de usuario resuelta, así que llama a `changeUser` antes de que se muestren las tarjetas siempre que sea posible.
## ID de Content Card {#content-card-id}
Cada envío de una Campaign a un destinatario genera un nuevo ID de Content Card. Si el mismo usuario recibe la Campaign de nuevo en un envío posterior, Braze asigna un nuevo ID. Haz referencia al `id` de la tarjeta al registrar impresiones, clics y descartes en implementaciones personalizadas.
# Vinculación en profundidad en Content Cards
Source: /docs/es/developer_guide/content_cards/deep_linking/index.md
# Vinculación en profundidad en Content Cards {#deep-linking-in-content-cards}
> Aprende a crear vínculos profundos dentro de una Content Card utilizando el SDK de Braze. Para obtener más información sobre los vínculos profundos, consulta [¿Qué es la vinculación en profundidad?](https://www.braze.com/docs/es/es/user_guide/messaging/design_and_edit/personalize/actions_and_media_urls#what-is-deep-linking).
En este momento, los vínculos profundos de Content Cards no son compatibles con el SDK Web de Braze.
## Prerequisites
Before you can use this feature, you'll need to [integrate the Android Braze SDK](https://www.braze.com/docs/es/es/developer_guide/sdk_integration/?sdktab=android).
## Creating a universal delegate
The Android SDK provides the ability to set a single delegate object to custom handle all deep links opened by Braze across Content Cards, in-app messages, and push notifications.
Your delegate object should implement the [`IBrazeDeeplinkHandler`](https://braze-inc.github.io/braze-android-sdk/kdoc/braze-android-sdk/com.braze.ui/-braze-deeplink-handler/index.html) interface and be set using [`BrazeDeeplinkHandler.setBrazeDeeplinkHandler()`](https://braze-inc.github.io/braze-android-sdk/kdoc/braze-android-sdk/com.braze.ui/-braze-deeplink-handler/-companion/set-braze-deeplink-handler.html). In most cases, the delegate should be set in your app's `Application.onCreate()`.
The following is an example of overriding the default [`UriAction`](https://braze-inc.github.io/braze-android-sdk/kdoc/braze-android-sdk/com.braze.ui.actions/-uri-action/index.html) behavior with custom intent flags and custom behavior for YouTube URLs:
```java
public class CustomDeeplinkHandler implements IBrazeDeeplinkHandler {
private static final String TAG = BrazeLogger.getBrazeLogTag(CustomDeeplinkHandler.class);
@Override
public void gotoUri(Context context, UriAction uriAction) {
String uri = uriAction.getUri().toString();
// Open YouTube URLs in the YouTube app and not our app
if (!StringUtils.isNullOrBlank(uri) && uri.contains("youtube.com")) {
uriAction.setUseWebView(false);
}
CustomUriAction customUriAction = new CustomUriAction(uriAction);
customUriAction.execute(context);
}
public static class CustomUriAction extends UriAction {
public CustomUriAction(@NonNull UriAction uriAction) {
super(uriAction);
}
@Override
protected void openUriWithActionView(Context context, Uri uri, Bundle extras) {
Intent intent = getActionViewIntent(context, uri, extras);
intent.setFlags(Intent.FLAG_ACTIVITY_NEW_TASK | Intent.FLAG_ACTIVITY_CLEAR_TOP | Intent.FLAG_ACTIVITY_SINGLE_TOP);
if (intent.resolveActivity(context.getPackageManager()) != null) {
context.startActivity(intent);
} else {
BrazeLogger.w(TAG, "Could not find appropriate activity to open for deep link " + uri + ".");
}
}
}
}
```
```kotlin
class CustomDeeplinkHandler : IBrazeDeeplinkHandler {
override fun gotoUri(context: Context, uriAction: UriAction) {
val uri = uriAction.uri.toString()
// Open YouTube URLs in the YouTube app and not our app
if (!StringUtils.isNullOrBlank(uri) && uri.contains("youtube.com")) {
uriAction.useWebView = false
}
val customUriAction = CustomUriAction(uriAction)
customUriAction.execute(context)
}
class CustomUriAction(uriAction: UriAction) : UriAction(uriAction) {
override fun openUriWithActionView(context: Context, uri: Uri, extras: Bundle) {
val intent = getActionViewIntent(context, uri, extras)
intent.flags = Intent.FLAG_ACTIVITY_NEW_TASK or Intent.FLAG_ACTIVITY_CLEAR_TOP or Intent.FLAG_ACTIVITY_SINGLE_TOP
if (intent.resolveActivity(context.packageManager) != null) {
context.startActivity(intent)
} else {
BrazeLogger.w(TAG, "Could not find appropriate activity to open for deep link $uri.")
}
}
}
companion object {
private val TAG = BrazeLogger.getBrazeLogTag(CustomDeeplinkHandler::class.java)
}
}
```
## Deep linking to app settings
To allow deep links to directly open your app's settings, you'll need a custom `BrazeDeeplinkHandler`. In the following example, the presence of a custom key-value pair called `open_notification_page` will make the deep link open the app's settings page:
```java
BrazeDeeplinkHandler.setBrazeDeeplinkHandler(new IBrazeDeeplinkHandler() {
@Override
public void gotoUri(Context context, UriAction uriAction) {
final Bundle extras = uriAction.getExtras();
if (extras.containsKey("open_notification_page")) {
Intent intent = new Intent();
intent.setAction("android.settings.APP_NOTIFICATION_SETTINGS");
intent.setFlags(Intent.FLAG_ACTIVITY_NEW_TASK);
//for Android 5-7
intent.putExtra("app_package", context.getPackageName());
intent.putExtra("app_uid", context.getApplicationInfo().uid);
// for Android 8 and later
intent.putExtra("android.provider.extra.APP_PACKAGE", context.getPackageName());
context.startActivity(intent);
}
}
});
```
```kotlin
BrazeDeeplinkHandler.setBrazeDeeplinkHandler(object : IBrazeDeeplinkHandler {
override fun gotoUri(context: Context, uriAction: UriAction) {
val extras = uriAction.extras
if (extras.containsKey("open_notification_page")) {
val intent = Intent()
intent.action = "android.settings.APP_NOTIFICATION_SETTINGS"
intent.flags = Intent.FLAG_ACTIVITY_NEW_TASK
//for Android 5-7
intent.putExtra("app_package", context.packageName)
intent.putExtra("app_uid", context.applicationInfo.uid)
// for Android 8 and later
intent.putExtra("android.provider.extra.APP_PACKAGE", context.packageName)
context.startActivity(intent)
}
}
})
```
## Customizing WebView activity {#Custom_Webview_Activity}
When Braze opens website deeplinks inside the app, the deeplinks are handled by [`BrazeWebViewActivity`](https://braze-inc.github.io/braze-android-sdk/kdoc/braze-android-sdk/com.braze.ui/-braze-web-view-activity/index.html).
**Note:**
For custom HTML in-app messages, links configured with `target="_blank"` open in the device's default web browser and are not handled by `BrazeWebViewActivity`.
To change this:
1. Create a new Activity that handles the target URL from `Intent.getExtras()` with the key `com.braze.Constants.BRAZE_WEBVIEW_URL_EXTRA`. For an example, see [`BrazeWebViewActivity.kt`](https://github.com/braze-inc/braze-android-sdk/blob/master/android-sdk-ui/src/main/java/com/braze/ui/BrazeWebViewActivity.kt).
2. Add that activity to `AndroidManifest.xml` and set `exported` to `false`.
```xml
```
3. Set your custom Activity in a `BrazeConfig` [builder object](https://braze-inc.github.io/braze-android-sdk/kdoc/braze-android-sdk/com.braze.configuration/-braze-config/-builder/set-custom-web-view-activity-class.html). Build the builder and pass it to [`Braze.configure()`](https://braze-inc.github.io/braze-android-sdk/kdoc/braze-android-sdk/com.braze/-braze/-companion/configure.html) in your [`Application.onCreate()`](https://developer.android.com/reference/android/app/Application.html#onCreate()).
```java
BrazeConfig brazeConfig = new BrazeConfig.Builder()
.setCustomWebViewActivityClass(MyCustomWebViewActivity::class)
...
.build();
Braze.configure(this, brazeConfig);
```
```kotlin
val brazeConfig = BrazeConfig.Builder()
.setCustomWebViewActivityClass(MyCustomWebViewActivity::class.java)
...
.build()
Braze.configure(this, brazeConfig)
```
## Troubleshooting
If deep links from push notifications aren't working on Android, try the following steps:
1. **Test the deep link outside of Braze.** Open the deep link URL from another app, such as email or a browser. If it doesn't open your app, the deep link may not be configured correctly in your `AndroidManifest.xml`. For more information, see Android's [Create Deep Links](https://developer.android.com/training/app-links/deep-linking) documentation.
2. **Check that automatic deep link handling is enabled.** Verify that `com_braze_handle_push_deep_links_automatically` is set to `true` in `braze.xml`, or set this option through [runtime configuration](https://www.braze.com/docs/es/es/developer_guide/sdk_initalization/?sdktab=android). Without this setting, Braze doesn't automatically open your app and deep link destination when someone taps a push notification.
3. **Verify your deep link handler delegate.** If you set a custom `IBrazeDeeplinkHandler`, confirm that your `gotoUri` implementation handles the URI and doesn't drop it.
4. **Test across channels.** If the same deep link works in an in-app message but not from push, the issue is likely in your push deep link handling, not in the deep link itself.
## Using Jetpack Compose
To handle deeplinks when using Jetpack Compose with NavHost:
1. Ensure that the activity handling your deeplink is registered in the Android Manifest.
```xml
```
2. In NavHost, specify which deeplinks you want it to handle.
```kotlin
composableWithCompositionLocal(
route = "YOUR_ROUTE_HERE",
deepLinks = listOf(navDeepLink {
uriPattern = "myapp://articles/{${MainDestinations.ARTICLE_ID_KEY}}"
}),
arguments = listOf(
navArgument(MainDestinations.ARTICLE_ID_KEY) {
type = NavType.LongType
}
),
) { backStackEntry ->
val arguments = requireNotNull(backStackEntry.arguments)
val articleId = arguments.getLong(MainDestinations.ARTICLE_ID_KEY)
ArticleDetail(
articleId
)
}
```
3. Depending on your app architecture, you may need to handle the new intent that's sent to your current activity as well.
```kotlin
DisposableEffect(Unit) {
val listener = Consumer {
navHostController.handleDeepLink(it)
}
addOnNewIntentListener(listener)
onDispose { removeOnNewIntentListener(listener) }
}
```
## Prerequisites
Before you can use this feature, you'll need to [integrate the Swift Braze SDK](https://www.braze.com/docs/es/es/developer_guide/sdk_integration/?sdktab=swift).
**Tip:**
For help choosing between custom scheme deep links, universal links, and "Open Web URL Inside App," see [iOS deep linking guide](https://www.braze.com/docs/es/es/developer_guide/push_notifications/ios_deep_linking_guide). For troubleshooting, see [Deep linking troubleshooting](https://www.braze.com/docs/es/es/developer_guide/push_notifications/deep_linking_troubleshooting).
## Handling deep links
### Step 1: Register a scheme {#register-a-scheme}
To handle deep linking, a custom scheme must be stated in your `Info.plist` file. The navigation structure is defined by an array of dictionaries. Each of those dictionaries contains an array of strings.
Use Xcode to edit your `Info.plist` file:
1. Add a new key, `URL types`. Xcode will automatically make this an array containing a dictionary called `Item 0`.
2. Within `Item 0`, add a key `URL identifier`. Set the value to your custom scheme.
3. Within `Item 0`, add a key `URL Schemes`. This will automatically be an array containing a `Item 0` string.
4. Set `URL Schemes` >> `Item 0` to your custom scheme.
Alternatively, if you wish to edit your `Info.plist` file directly, you can follow this spec:
```html
CFBundleURLTypesCFBundleURLNameYOUR.SCHEMECFBundleURLSchemesYOUR.SCHEME
```
### Step 2: Add a scheme allowlist
You must declare the URL schemes you wish to pass to `canOpenURL(_:)` by adding the `LSApplicationQueriesSchemes` key to your app's Info.plist file. Attempting to call schemes outside this allowlist will cause the system to record an error in the device's logs, and the deep link will not open. An example of this error will look like this:
```
: -canOpenURL: failed for URL: "yourapp://deeplink" – error: "This app is not allowed to query for scheme yourapp"
```
For example, if an in-app message should open the Facebook app when tapped, the app has to have the Facebook custom scheme (`fb`) in your allowlist. Otherwise, the system will reject the deep link. Deep links that direct to a page or view inside your own app still require that your app's custom scheme be listed in your app's `Info.plist`.
Your example allowlist might look something like:
```html
LSApplicationQueriesSchemesmyappfbtwitter
```
For more information, refer to [Apple's documentation](https://developer.apple.com/library/content/documentation/General/Reference/InfoPlistKeyReference/Articles/LaunchServicesKeys.html#//apple_ref/doc/uid/TP40009250-SW14) on the `LSApplicationQueriesSchemes` key.
### Step 3: Implement a handler
After activating your app, iOS will call the method [`application:openURL:options:`](https://developer.apple.com/reference/uikit/uiapplicationdelegate/1623112-application?language=objc). The important argument is the [NSURL](https://developer.apple.com/library/ios/DOCUMENTATION/Cocoa/Reference/Foundation/Classes/NSURL_Class/Reference/Reference.html#//apple_ref/doc/c_ref/NSURL) object.
```swift
func application(_ app: UIApplication, open url: URL, options: [UIApplication.OpenURLOptionsKey : Any] = [:]) -> Bool {
let path = url.path
let query = url.query
// Insert your code here to take some action based upon the path and query.
return true
}
```
```objc
- (BOOL)application:(UIApplication *)app openURL:(NSURL *)url options:(NSDictionary *)options {
NSString *path = [url path];
NSString *query = [url query];
// Insert your code here to take some action based upon the path and query.
return YES;
}
```
## App Transport Security (ATS)
As defined by [Apple](https://developer.apple.com/library/prerelease/ios/releasenotes/General/WhatsNewIniOS/Articles/iOS9.html#//apple_ref/doc/uid/TP40016198-SW14), "App Transport Security is a feature that improves the security of connections between an app and web services. The feature consists of default connection requirements that conform to best practices for secure connections. Apps can override this default behavior and turn off transport security."
ATS is applied by default. It requires that all connections use HTTPS and are encrypted using TLS 1.2 with forward secrecy. Refer to [Requirements for Connecting Using ATS](https://developer.apple.com/library/ios/documentation/General/Reference/InfoPlistKeyReference/Articles/CocoaKeys.html#//apple_ref/doc/uid/TP40009251-SW35) for more information. All images served by Braze to end devices are handled by a content delivery network ("CDN") that supports TLS 1.2 and is compatible with ATS.
Unless they are specified as exceptions in your application's `Info.plist`, connections that do not follow these requirements will fail with errors that are similar to the following.
**Example Error 1:**
```bash
CFNetwork SSLHandshake failed (-9801)
Error Domain=NSURLErrorDomain Code=-1200 "An SSL error has occurred, and a secure connection to the server cannot be made."
```
**Example Error 2:**
```bash
NSURLSession/NSURLConnection HTTP load failed (kCFStreamErrorDomainSSL, -9802)
```
ATS compliance is enforced for links opened within the mobile app (our default handling of clicked links) and does not apply to sites opened externally via a web browser.
### Working with ATS
You can handle ATS in either of the following ways, but we recommend **complying with ATS requirements**.
Your Braze integration can satisfy ATS requirements by ensuring that any existing links you drive users to (for example, though in-app message and push campaigns) satisfy ATS requirements. While there are ways to bypass ATS restrictions, our recommendation is to ensure that all linked URLs are ATS-compliant. Given Apple's increasing emphasis on application security, the following approaches to allowing ATS exceptions are not guaranteed to be supported by Apple.
You can allow a subset of links with certain domains or schemes to be treated as exceptions to the ATS rules. Your Braze integration will satisfy ATS requirements if every link you use in a Braze messaging channel is either ATS compliant or handled by an exception.
To add a domain as an exception of the ATS, add following to your app's `Info.plist` file:
```html
NSAppTransportSecurityNSAllowsArbitraryLoadsNSExceptionDomainsexample.comNSExceptionAllowsInsecureHTTPLoadsNSIncludesSubdomains
```
Refer to Apple's article on [app transport security keys](https://developer.apple.com/library/ios/documentation/General/Reference/InfoPlistKeyReference/Articles/CocoaKeys.html#//apple_ref/doc/uid/TP40009251-SW33) for more information.
You can turn off ATS entirely. Note that this is not recommended practice, due to both lost security protections and future iOS compatibility. To disable ATS, insert the following in your app's `Info.plist` file:
```html
NSAppTransportSecurityNSAllowsArbitraryLoads
```
## Decoding URLs
The SDK percent-encodes links to create valid `URL`s. All link characters that are not allowed in a properly formed URL, such as Unicode characters, will be percent escaped.
To decode an encoded link, use the `String` property [`removingPercentEncoding`](https://developer.apple.com/documentation/swift/stringprotocol/removingpercentencoding). You must also return `true` in the `BrazeDelegate.braze(_:shouldOpenURL:)`. A call to action is required to trigger the handling of the URL by your app. For example:
```swift
func application(_ app: UIApplication, open url: URL, options: [UIApplication.OpenURLOptionsKey : Any] = [:]) -> Bool {
let urlString = url.absoluteString.removingPercentEncoding
// Handle urlString
return true
}
```
```objc
- (BOOL)application:(UIApplication *)application openURL:(NSURL *)url options:(NSDictionary *)options {
NSString *urlString = [url.absoluteString stringByRemovingPercentEncoding];
// Handle urlString
return YES;
}
```
## Deep linking to app settings
You can take advantage of `UIApplicationOpenSettingsURLString` to deep link users to your app's settings from Braze push notifications and in-app messages.
To take users from your app into the iOS settings:
1. First, make sure your application is set up for either [scheme-based deep links](#swift_register-a-scheme) or [universal links](#swift_universal-links).
2. Decide on a URI for deep linking to the **Settings** page (for example, `myapp://settings` or `https://www.braze.com/settings`).
3. If you are using custom scheme-based deep links, add the following code to your `application:openURL:options:` method:
```swift
func application(_ app: UIApplication, open url: URL, options: [UIApplicationOpenURLOptionsKey : Any] = [:]) -> Bool {
let path = url.path
if (path == "settings") {
UIApplication.shared.openURL(URL(string:UIApplication.openSettingsURLString)!)
}
return true
}
```
```objc
- (BOOL)application:(UIApplication *)app
openURL:(NSURL *)url
options:(NSDictionary *)options {
NSString *path = [url path];
if ([path isEqualToString:@"settings"]) {
NSURL *settingsURL = [NSURL URLWithString:UIApplicationOpenSettingsURLString];
[[UIApplication sharedApplication] openURL:settingsURL];
}
return YES;
}
```
## Customization options {#customization-options}
### Default WebView customization
The `Braze.WebViewController` class displays web URLs opened by the SDK, typically when "Open Web URL Inside App" is selected for a web deep link.
You can customize the `Braze.WebViewController` via the [`BrazeDelegate.braze(_:willPresentModalWithContext:)`](https://braze-inc.github.io/braze-swift-sdk/documentation/brazekit/brazedelegate/braze(_:willpresentmodalwithcontext:)-12sqy/) delegate method.
### Linking handling customization
The `BrazeDelegate` protocol can be used to customize the handling of URLs such as deep links, web URLs, and universal links. To set the delegate during Braze initialization, set a delegate object on the `Braze` instance. Braze will then call your delegate's implementation of `shouldOpenURL` before handling any URIs.
When a push notification or in-app message uses **Open web URL inside mobile app**, Braze passes `context.useWebView == true` on [`Braze.URLContext`](https://braze-inc.github.io/braze-swift-sdk/documentation/brazekit/braze/urlcontext). When the message opens the URL in the system browser instead, `useWebView` is `false`. Inspect `context.useWebView` in `braze(_:shouldOpenURL:)` to branch your custom handling—for example, to open an in-app `WebViewController` only when the campaign requested in-app display.
#### Universal links {#universal-links}
Braze supports universal links in push notifications, in-app messages, and Content Cards. To enable universal link support, [`configuration.forwardUniversalLinks`](https://braze-inc.github.io/braze-swift-sdk/documentation/brazekit/braze/configuration-swift.class/forwarduniversallinks) must be set to `true`.
When enabled, Braze will forward universal links to your app's `AppDelegate` via the [`application:continueUserActivity:restorationHandler:`](https://developer.apple.com/documentation/uikit/uiapplicationdelegate/1623072-application) method.
Your application also needs to be set up to handle universal links. Refer to [Apple's documentation](https://developer.apple.com/documentation/xcode/supporting-universal-links-in-your-app) to ensure your application is configured correctly for universal links.
**Warning:**
Universal link forwarding requires access to the application entitlements. When running the application in a simulator, these entitlements are not directly available and universal links are not forwarded to the system handlers.
To add support to simulator builds, you can add the application `.entitlements` file to the _Copy Bundle Resources_ build phase. See [`forwardUniversalLinks`](https://braze-inc.github.io/braze-swift-sdk/documentation/brazekit/braze/configuration-swift.class/forwarduniversallinks) documentation for more details.
**Note:**
The SDK does not query your domains' `apple-app-site-association` file. It performs the differentiation between universal links and regular URLs by looking at the domain name only. As a result, the SDK does not respect any exclusion rule defined in the `apple-app-site-association` per [Supporting associated domains](https://developer.apple.com/documentation/xcode/supporting-associated-domains).
## Examples
### BrazeDelegate
Here's an example using `BrazeDelegate`. For more information, see [Braze Swift SDK reference](https://braze-inc.github.io/braze-swift-sdk/documentation/brazekit/brazedelegate).
```swift
func braze(_ braze: Braze, shouldOpenURL context: Braze.URLContext) -> Bool {
if context.url.host == "MY-DOMAIN.com" {
// Custom handle link here
return false
}
// Let Braze handle links otherwise
return true
}
```
```objc
- (BOOL)braze:(Braze *)braze shouldOpenURL:(BRZURLContext *)context {
if ([[context.url.host lowercaseString] isEqualToString:@"MY-DOMAIN.com"]) {
// Custom handle link here
return NO;
}
// Let Braze handle links otherwise
return YES;
}
```
# Incrustar GIF en tarjetas de contenido
Source: /docs/es/developer_guide/content_cards/embedding_gifs/index.md
# Incrustar GIF en tarjetas de contenido
> Aprende a incrustar GIF en tarjetas de contenido utilizando el SDK de Braze.
**Note:**
Para los SDK de envoltura que no aparecen en la lista, utiliza el método nativo de Android o SWIFT correspondiente. Ten en cuenta que los SDK de Android y Swift Braze no admiten GIF animados de forma nativa, por lo que deberás implementar los GIF de las tarjetas de contenido utilizando herramientas de terceros.
La compatibilidad con GIF está incluida por defecto en la integración del SDK Web.
## About GIFs
Braze offers the ability to use a custom image library to display animated GIFs. Although the following example uses [Glide](https://bumptech.github.io/glide/), any image library that supports GIFs is compatible.
## Integrating a custom image library
### Step 1: Creating the image loader delegate
The Image Loader delegate must implement the following methods:
* [`getInAppMessageBitmapFromUrl()`](https://braze-inc.github.io/braze-android-sdk/kdoc/braze-android-sdk/com.braze.images/-i-braze-image-loader/get-in-app-message-bitmap-from-url.html)
* [`getPushBitmapFromUrl()`](https://braze-inc.github.io/braze-android-sdk/kdoc/braze-android-sdk/com.braze.images/-i-braze-image-loader/get-push-bitmap-from-url.html)
* [`renderUrlIntoCardView()`](https://braze-inc.github.io/braze-android-sdk/kdoc/braze-android-sdk/com.braze.images/-i-braze-image-loader/render-url-into-card-view.html)
* [`renderUrlIntoInAppMessageView()`](https://braze-inc.github.io/braze-android-sdk/kdoc/braze-android-sdk/com.braze.images/-i-braze-image-loader/render-url-into-in-app-message-view.html)
* [`setOffline()`](https://braze-inc.github.io/braze-android-sdk/kdoc/braze-android-sdk/com.braze.images/-i-braze-image-loader/set-offline.html)
The following integration example is taken from the [Glide integration sample app](https://github.com/braze-inc/braze-android-sdk/tree/master/samples/glide-image-integration) included with the Braze Android SDK.
```java
import com.braze.support.BrazeLogger;
import com.bumptech.glide.load.resource.gif.GifDrawable;
import android.graphics.drawable.Drawable;
public class GlideBrazeImageLoader implements IBrazeImageLoader {
private static final String TAG = GlideBrazeImageLoader.class.getName();
private RequestOptions mRequestOptions = new RequestOptions();
@Override
public void renderUrlIntoCardView(Context context, Card card, String imageUrl, ImageView imageView, BrazeViewBounds viewBounds) {
renderUrlIntoView(context, imageUrl, imageView);
}
@Override
public void renderUrlIntoInAppMessageView(Context context, IInAppMessage inAppMessage, String imageUrl, ImageView imageView, BrazeViewBounds viewBounds) {
renderUrlIntoView(context, imageUrl, imageView);
}
@Override
public Bitmap getPushBitmapFromUrl(Context context, Bundle extras, String imageUrl, BrazeViewBounds viewBounds) {
return getBitmapFromUrl(context, imageUrl, viewBounds);
}
@Override
public Bitmap getInAppMessageBitmapFromUrl(Context context, IInAppMessage inAppMessage, String imageUrl, BrazeViewBounds viewBounds) {
return getBitmapFromUrl(context, imageUrl, viewBounds);
}
private void renderUrlIntoView(Context context, String imageUrl, ImageView imageView) {
try {
final Drawable drawable = Glide.with(context)
.load(imageUrl)
.apply(mRequestOptions)
.submit()
.get();
imageView.post(() -> {
imageView.setImageDrawable(drawable);
if (drawable instanceof GifDrawable) {
((GifDrawable) drawable).start();
}
});
} catch (Exception e) {
BrazeLogger.e(TAG, "Failed to render URL into view: " + imageUrl, e);
}
}
private Bitmap getBitmapFromUrl(Context context, String imageUrl, BrazeViewBounds viewBounds) {
try {
return Glide.with(context)
.asBitmap()
.apply(mRequestOptions)
.load(imageUrl).submit().get();
} catch (Exception e) {
Log.e(TAG, "Failed to retrieve bitmap at url: " + imageUrl, e);
}
return null;
}
@Override
public void setOffline(boolean isOffline) {
// If the loader is offline, then we should only be retrieving from the cache
mRequestOptions = mRequestOptions.onlyRetrieveFromCache(isOffline);
}
}
```
```kotlin
import com.braze.support.BrazeLogger
import com.bumptech.glide.load.resource.gif.GifDrawable
class GlideBrazeImageLoader : IBrazeImageLoader {
companion object {
private val TAG = GlideBrazeImageLoader::class.qualifiedName
}
private var mRequestOptions = RequestOptions()
override fun renderUrlIntoCardView(context: Context, card: Card, imageUrl: String, imageView: ImageView, viewBounds: BrazeViewBounds) {
renderUrlIntoView(context, imageUrl, imageView)
}
override fun renderUrlIntoInAppMessageView(context: Context, inAppMessage: IInAppMessage, imageUrl: String, imageView: ImageView, viewBounds: BrazeViewBounds) {
renderUrlIntoView(context, imageUrl, imageView)
}
override fun getPushBitmapFromUrl(context: Context, extras: Bundle, imageUrl: String, viewBounds: BrazeViewBounds): Bitmap? {
return getBitmapFromUrl(context, imageUrl, viewBounds)
}
override fun getInAppMessageBitmapFromUrl(context: Context, inAppMessage: IInAppMessage, imageUrl: String, viewBounds: BrazeViewBounds): Bitmap? {
return getBitmapFromUrl(context, imageUrl, viewBounds)
}
private fun renderUrlIntoView(context: Context, imageUrl: String, imageView: ImageView) {
try {
val drawable = Glide.with(context)
.load(imageUrl)
.apply(mRequestOptions)
.submit()
.get()
imageView.post {
imageView.setImageDrawable(drawable)
if (drawable is GifDrawable) {
drawable.start()
}
}
} catch (e: Exception) {
BrazeLogger.e(TAG, "Failed to render URL into view: $imageUrl", e)
}
}
private fun getBitmapFromUrl(context: Context, imageUrl: String, viewBounds: BrazeViewBounds): Bitmap? {
try {
return Glide.with(context)
.asBitmap()
.apply(mRequestOptions)
.load(imageUrl).submit().get()
} catch (e: Exception) {
Log.e(TAG, "Failed to retrieve bitmap at url: $imageUrl", e)
}
return null
}
override fun setOffline(isOffline: Boolean) {
// If the loader is offline, then we should only be retrieving from the cache
mRequestOptions = mRequestOptions.onlyRetrieveFromCache(isOffline)
}
}
```
### Fixing image loading for Android SDK 36.0.0 and later
In Android SDK 36.0.0 and later, `displayInAppMessage()` is a `suspend` function. This means `renderUrlIntoInAppMessageView()` runs on a background thread instead of the main thread.
If your custom image loader calls `Glide.into(imageView)` in `renderUrlIntoInAppMessageView()`, your app can fail with "You must call this method on the main thread."
To avoid this:
1. Load the image on the background thread with `submit().get()`.
2. Post the UI update to the main thread with `imageView.post { ... }`.
3. If the loaded result is a GIF drawable, start the animation after setting it on the view.
This separates image loading from UI rendering, and keeps your custom image loader compatible with Android SDK 36.0.0 and later.
This guidance applies to Android custom image loaders. Web in-app messages support GIFs out of the box.
The following Kotlin sample uses placeholder values to show this pattern:
```kotlin
private const val TAG = "SampleGlideLoader"
private const val glideBrazeImageLoaderTag = "sample-loader"
private fun renderUrlIntoView(
context: Context,
imageUrl: String,
imageView: ImageView
) {
try {
val drawable: Drawable = Glide.with(context)
.load(imageUrl)
.apply(mRequestOptions)
.submit()
.get()
imageView.post {
imageView.setImageDrawable(drawable)
if (drawable is GifDrawable) {
drawable.start()
}
}
} catch (e: Exception) {
Log.e(TAG, "$glideBrazeImageLoaderTag renderUrlIntoView failed: url=$imageUrl", e)
}
}
```
### Step 2: Setting the image loader delegate
The Braze SDK will use any custom image loader set with [`IBrazeImageLoader`](https://braze-inc.github.io/braze-android-sdk/kdoc/braze-android-sdk/com.braze.images/-i-braze-image-loader/index.html). We recommend setting the custom image loader in a custom application subclass:
```java
public class GlideIntegrationApplication extends Application {
@Override
public void onCreate() {
super.onCreate();
Braze.getInstance(context).setImageLoader(new GlideBrazeImageLoader());
}
}
```
```kotlin
class GlideIntegrationApplication : Application() {
override fun onCreate() {
super.onCreate()
Braze.getInstance(context).imageLoader = GlideBrazeImageLoader()
}
}
```
## Custom Image Loading with Jetpack Compose
To override image loading with Jetpack Compose, you can pass in a value to [`imageComposable`](https://braze-inc.github.io/braze-android-sdk/kdoc/braze-android-sdk/com.braze.jetpackcompose.contentcards.styling/-content-card-styling/index.html#-808910455%2FProperties%2F-1725759721). This function will take a `Card` and render the image and the modifiers needed. Alternatively, you can use `customCardComposer` of `ContentCardsList` to render the entire card.
In the following example, Glide's Compose library is used for the cards listed in the `imageComposable` function:
```kotlin
ContentCardsList(
cardStyle = ContentCardStyling(
imageComposable = { card ->
when (card.cardType) {
CardType.CAPTIONED_IMAGE -> {
val captionedImageCard = card as CaptionedImageCard
GlideImage(
modifier = Modifier
.fillMaxWidth()
.wrapContentHeight()
.run {
if (captionedImageCard.aspectRatio > 0) {
aspectRatio(captionedImageCard.aspectRatio)
} else {
this
}
},
contentScale = ContentScale.Crop,
model = captionedImageCard.url,
loading = placeholder(R.drawable.pushpin),
contentDescription = ""
)
}
CardType.IMAGE -> {
val imageOnlyCard = card as ImageOnlyCard
GlideImage(
modifier = Modifier
.fillMaxWidth()
.run {
if (imageOnlyCard.aspectRatio > 0) {
aspectRatio(imageOnlyCard.aspectRatio)
} else {
this
}
},
contentScale = ContentScale.Crop,
model = imageOnlyCard.url,
loading = placeholder(R.drawable.pushpin),
contentDescription = ""
)
}
CardType.SHORT_NEWS -> {
val shortNews = card as ShortNewsCard
GlideImage(
modifier = Modifier
.width(100.dp)
.height(100.dp),
model = shortNews.url,
loading = placeholder(R.drawable.pushpin),
contentDescription = ""
)
}
else -> Unit
}
}
)
)
```
## Prerequisites
Before you can use this feature, you'll need to [integrate the Swift Braze SDK](https://www.braze.com/docs/es/es/developer_guide/sdk_integration/?sdktab=swift).
## Integrating a custom image library
### Step 1: Integrate SDWebImage
Integrate the [SDWebImage repository](https://github.com/SDWebImage/SDWebImage) into your Xcode project.
### Step 2: Create a new Swift file
In your Xcode project, create a new file named `SDWebImageGIFViewProvider.swift` and import the following:
```swift
import UIKit
import BrazeUI
import SDWebImage
```
### Step 3: Add `GIFViewProvider`
Next, add our sample SDWebImage [`GIFViewProvider`](https://braze-inc.github.io/braze-swift-sdk/documentation/brazeui/gifviewprovider/). Your file should be similar to the following:
```swift
import UIKit
import BrazeUI
import SDWebImage
extension GIFViewProvider {
/// A GIF view provider using [SDWebImage](https://github.com/SDWebImage/SDWebImage) as a
/// rendering library.
public static let sdWebImage = Self(
view: { SDAnimatedImageView(image: image(for: $0)) },
updateView: { ($0 as? SDAnimatedImageView)?.image = image(for: $1) }
)
private static func image(for url: URL?) -> UIImage? {
guard let url else { return nil }
return url.pathExtension == "gif"
? SDAnimatedImage(contentsOfFile: url.path)
: UIImage(contentsOfFile: url.path)
}
}
```
### Step 4: Modify your `AppDelegate.swift`
In your project's `AppDelegate.swift`, add GIF support to your `BrazeUI` components using `GIFViewProvider`. Your file should be similar to the following:
```swift
import UIKit
import BrazeKit
import BrazeUI
@main
class AppDelegate: UIResponder, UIApplicationDelegate {
static var braze: Braze? = nil
func application(
_ application: UIApplication,
didFinishLaunchingWithOptions launchOptions: [UIApplication.LaunchOptionsKey: Any]?
) -> Bool {
/* ... */
GIFViewProvider.shared = .sdWebImage
return true
}
}
```
# Tutorial: Crear un buzón de entrada con Content Cards
Source: /docs/es/developer_guide/content_cards/content_card_inbox/index.md
# Tutorial: Crear un buzón de entrada con Content Cards {#tutorial-making-an-inbox-with-content-cards}
> Sigue el código de ejemplo de este tutorial para crear un buzón de entrada con Content Cards de Braze.
## Prerequisites
Before you can use this feature, you'll need to [integrate the Android Braze SDK](https://www.braze.com/docs/es/es/developer_guide/sdk_integration/?sdktab=android).
## Crear un buzón de entrada con Content Cards para Android (Compose) {#making-an-inbox-with-content-cards-for-android-compose}
**Important:**
We're piloting this new tutorial format. [Tell us what you think](https://docs.google.com/forms/d/e/1FAIpQLSe_5uhWM7eXXk9F_gviO_pvA4rkYO3WA9B6tNJZ3TY91md5bw/viewform?usp=pp_url&entry.569173304=General+Feedback) — your feedback helps us improve future guides.
```kotlin file=MainApplication.kt
import android.app.Application
import com.braze.Braze
import com.braze.support.BrazeLogger
import com.braze.configuration.BrazeConfig
import android.util.Log
class ContentCardsApplication : Application() {
override fun onCreate() {
super.onCreate()
// Turn on verbose Braze logging
BrazeLogger.enableVerboseLogging()
// Configure Braze with your SDK key & endpoint
val config = BrazeConfig.Builder()
.setApiKey("YOUR_API_KEY")
.setCustomEndpoint("YOUR_API_ENDPOINT")
.build()
Braze.configure(this, config)
}
}
```
```kotlin file=ContentCardsInboxScreen.kt
import android.content.Intent
import android.net.Uri
import androidx.compose.foundation.clickable
import androidx.compose.foundation.layout.*
import androidx.compose.foundation.lazy.LazyColumn
import androidx.compose.foundation.lazy.items
import androidx.compose.material3.*
import androidx.compose.runtime.*
import androidx.compose.ui.Modifier
import androidx.compose.ui.platform.LocalContext
import androidx.compose.ui.text.font.FontWeight
import androidx.compose.ui.unit.dp
import androidx.compose.ui.unit.sp
import com.braze.Braze
import com.braze.events.ContentCardsUpdatedEvent
import com.braze.events.IEventSubscriber
import com.braze.models.cards.*
@Composable
fun ContentCardInboxScreen() {
val context = LocalContext.current
var cards by remember { mutableStateOf>(emptyList()) }
val loggedImpressions = remember { mutableSetOf() }
DisposableEffect(Unit) {
val subscriber = IEventSubscriber { event ->
cards = event.allCards.filter { !it.isControl }
}
Braze.getInstance(context).subscribeToContentCardsUpdates(subscriber)
Braze.getInstance(context).requestContentCardsRefresh(false)
onDispose {
Braze.getInstance(context)
.removeSingleSubscription(subscriber, ContentCardsUpdatedEvent::class.java)
}
}
Column(modifier = Modifier.fillMaxSize()) {
Text(
text = "Message Inbox",
fontSize = 20.sp,
fontWeight = FontWeight.Bold,
modifier = Modifier.padding(start = 16.dp, end = 16.dp, top = 12.dp, bottom = 8.dp)
)
LazyColumn(
modifier = Modifier
.fillMaxSize()
.padding(horizontal = 16.dp)
) {
items(cards, key = { it.id }) { card ->
ContentCardItem(
card = card,
onImpression = {
if (!loggedImpressions.contains(card.id)) {
card.logImpression()
loggedImpressions.add(card.id)
}
},
onClick = {
card.logClick()
card.url?.let {
context.startActivity(Intent(Intent.ACTION_VIEW, Uri.parse(it)))
}
}
)
}
}
}
}
@Composable
fun ContentCardItem(
card: Card,
onImpression: () -> Unit,
onClick: () -> Unit
) {
// Log impression when the card becomes visible
LaunchedEffect(card.id) {
onImpression()
}
val title = when (card) {
is CaptionedImageCard -> card.title
is ShortNewsCard -> card.title
is TextAnnouncementCard -> card.title
else -> null
}
val description = when (card) {
is CaptionedImageCard -> card.description
is ShortNewsCard -> card.description
is TextAnnouncementCard -> card.description
else -> null
}
Card(
modifier = Modifier
.fillMaxWidth()
.padding(vertical = 4.dp)
.clickable { onClick() }
) {
Column(modifier = Modifier.padding(16.dp)) {
title?.let {
Text(
text = it,
fontWeight = FontWeight.Bold,
fontSize = 16.sp
)
}
description?.let {
Spacer(modifier = Modifier.height(4.dp))
Text(
text = it,
fontSize = 14.sp
)
}
}
}
}
```
!!step
lines-MainApplication.kt=12
### 1. Habilitar depuración (opcional) {#1-enable-debugging-optional}
Para facilitar la solución de problemas durante el desarrollo, considera habilitar la depuración.
!!step
lines-ContentCardsInboxScreen.kt=47-69
#### 2. Crear una vista de interfaz de usuario {#2-build-a-ui-view}
Para Jetpack Compose, usa un [`LazyColumn`]() para mostrar Content Cards en una lista desplazable.
!!step
lines-ContentCardsInboxScreen.kt=25-37
#### 3. Suscribirse a las actualizaciones de Content Cards {#3-subscribe-to-content-card-updates}
Usa un [`DisposableEffect`]() para administrar el ciclo de vida de la suscripción, asegurándote de que se realice una limpieza adecuada cuando el composable salga de la composición.
!!step
lines-ContentCardsInboxScreen.kt=84-95
#### 4. Crear una interfaz de usuario personalizada para el buzón de entrada {#4-build-a-custom-inbox-ui}
El uso de los [atributos]() de Content Cards, como `title`, `description` y `url`, te permite crear Content Cards que se adapten a tus requisitos específicos de interfaz de usuario. En este caso, estamos creando un buzón de entrada con los composables `Card` y `Column` de Jetpack Compose.
!!step
lines-ContentCardsInboxScreen.kt=57,62
#### 5. Realizar el seguimiento de impresiones y clics {#5-track-impressions-and-clicks}
Puedes registrar impresiones y clics utilizando los métodos [`logImpressions`]() y [`logClick`]() disponibles para Content Cards.
Las impresiones solo deben registrarse una vez cuando el usuario ve una tarjeta. Usa `LaunchedEffect` para registrar las impresiones cuando una tarjeta se hace visible. Ten en cuenta que es posible que debas considerar el ciclo de vida de la vista de tu aplicación, así como el caso de uso, para garantizar que las impresiones se registren correctamente.
## Crear un buzón de entrada con Content Cards para Android (RecyclerView) {#making-an-inbox-with-content-cards-for-android-recyclerview}
```kotlin file=MainApplication.kt
import android.app.Application
import com.braze.Braze
import com.braze.support.BrazeLogger
import com.braze.configuration.BrazeConfig
import android.util.Log
class ContentCardsApplication : Application() {
override fun onCreate() {
super.onCreate()
// Turn on verbose Braze logging
BrazeLogger.enableVerboseLogging()
// Configure Braze with your SDK key & endpoint
val config = BrazeConfig.Builder()
.setApiKey("YOUR_API_KEY")
.setCustomEndpoint("YOUR_API_ENDPOINT")
.build()
Braze.configure(this, config)
}
}
```
```kotlin file=ContentCardInboxActivity.kt
import android.content.Intent
import android.net.Uri
import android.os.Bundle
import androidx.activity.ComponentActivity
import androidx.recyclerview.widget.LinearLayoutManager
import androidx.recyclerview.widget.RecyclerView
import android.view.*
import android.widget.TextView
import com.braze.Braze
import com.braze.events.ContentCardsUpdatedEvent
import com.braze.events.IEventSubscriber
import com.braze.models.cards.*
class ContentCardsActivity : ComponentActivity() {
private val cards = mutableListOf()
private var subscriber: IEventSubscriber? = null
private lateinit var recyclerView: RecyclerView
private val adapter = ContentCardAdapter()
override fun onCreate(savedInstanceState: Bundle?) {
super.onCreate(savedInstanceState)
setContentView(R.layout.content_card_inbox)
recyclerView = findViewById(R.id.contentCardsRecyclerView)
recyclerView.layoutManager = LinearLayoutManager(this)
recyclerView.adapter = adapter
// Prepare the subscriber (attach/detach in onStart/onStop)
subscriber = IEventSubscriber { event ->
runOnUiThread {
cards.clear()
cards.addAll(event.allCards.filter { !it.isControl })
adapter.notifyDataSetChanged()
}
}
}
override fun onStart() {
super.onStart()
subscriber?.let {
Braze.getInstance(this).subscribeToContentCardsUpdates(it)
}
// Fetch fresh cards
Braze.getInstance(this).requestContentCardsRefresh(false)
}
override fun onStop() {
// Avoid leaks by removing the subscription when not visible
Braze.getInstance(this)
.removeSingleSubscription(subscriber, ContentCardsUpdatedEvent::class.java)
super.onStop()
}
inner class ContentCardAdapter :
RecyclerView.Adapter() {
inner class CardViewHolder(v: View) : RecyclerView.ViewHolder(v) {
val title: TextView = v.findViewById(android.R.id.text1)
val description: TextView = v.findViewById(android.R.id.text2)
}
override fun onCreateViewHolder(parent: ViewGroup, viewType: Int): CardViewHolder {
val view = LayoutInflater.from(parent.context)
.inflate(android.R.layout.simple_list_item_2, parent, false)
return CardViewHolder(view)
}
override fun getItemCount() = cards.size
override fun onBindViewHolder(holder: CardViewHolder, position: Int) {
val card = cards[position]
val title = when (card) {
is CaptionedImageCard -> card.title
is ShortNewsCard -> card.title
is TextAnnouncementCard -> card.title
else -> null
}
val description = when (card) {
is CaptionedImageCard -> card.description
is ShortNewsCard -> card.description
is TextAnnouncementCard -> card.description
else -> null
}
holder.title.text = title.orEmpty()
holder.description.text = description.orEmpty()
// Naive impression guard: only log the first time we bind a not-yet-viewed card.
if (!card.viewed) card.logImpression()
holder.itemView.setOnClickListener {
card.logClick()
card.url?.let { startActivity(Intent(Intent.ACTION_VIEW, Uri.parse(it))) }
}
}
}
}
```
```xml file=content_card_inbox.xml
```
!!step
lines-MainApplication.kt=12
### 1. Habilitar depuración (opcional)
Para facilitar la solución de problemas durante el desarrollo, considera habilitar la depuración.
!!step
lines-content_card_inbox.xml=1-24
#### 2. Crear una vista de interfaz de usuario
En este tutorial, usamos [`RecyclerView`]() de Android para mostrar Content Cards, pero te recomendamos crear una interfaz de usuario con clases y componentes que se adapten a tu caso de uso. Braze proporciona la interfaz de usuario de forma predeterminada, pero este tutorial te guía para crear una vista personalizada con el fin de personalizar la apariencia y el comportamiento.
!!step
lines-ContentCardInboxActivity.kt=29-35,40-42,44
#### 3. Suscribirse a las actualizaciones de Content Cards
Usa [`subscribeToContentCardsUpdates`]() para permitir que tu interfaz de usuario responda cuando haya nuevas Content Cards disponibles. Aquí, los suscriptores se registran y eliminan dentro de los hooks del ciclo de vida de la actividad.
!!step
lines-ContentCardInboxActivity.kt=73-84
#### 4. Crear una interfaz de usuario personalizada para el buzón de entrada
El uso de los [atributos]() de Content Cards, como `title`, `description` y `url`, te permite crear Content Cards que se adapten a tus requisitos específicos de interfaz de usuario. En este caso, estamos creando un buzón de entrada con el `RecyclerView` nativo de Android.
!!step
lines-ContentCardInboxActivity.kt=90,93
#### 5. Realizar el seguimiento de impresiones y clics
Puedes registrar impresiones y clics utilizando los métodos [`logImpressions`]() y [`logClick`]() disponibles para Content Cards.
Las impresiones solo deben registrarse una vez cuando el usuario ve una tarjeta. Aquí usamos un mecanismo sencillo para evitar registros duplicados con un indicador por tarjeta. Ten en cuenta que es posible que debas considerar el ciclo de vida de la vista de tu aplicación, así como el caso de uso, para garantizar que las impresiones se registren correctamente.
## Prerequisites
Before you can use this feature, you'll need to [integrate the Swift Braze SDK](https://www.braze.com/docs/es/es/developer_guide/sdk_integration/?sdktab=swift). También necesitarás [habilitar los mensajes dentro de la aplicación para Swift](https://www.braze.com/docs/es/es/developer_guide/in_app_messages?sdktab=swift#swift_enabling-in-app-messages).
## Crear un buzón de entrada con Content Cards para Swift {#making-an-inbox-with-content-cards-for-swift}
**Important:**
We're piloting this new tutorial format. [Tell us what you think](https://docs.google.com/forms/d/e/1FAIpQLSe_5uhWM7eXXk9F_gviO_pvA4rkYO3WA9B6tNJZ3TY91md5bw/viewform?usp=pp_url&entry.569173304=General+Feedback) — your feedback helps us improve future guides.
```swift file=AppDelegate.swift
import SwiftUI
import BrazeKit
import BrazeUI
class AppDelegate: UIResponder, UIApplicationDelegate {
static var braze: Braze!
func application(
_ application: UIApplication,
didFinishLaunchingWithOptions launchOptions: [UIApplication.LaunchOptionsKey: Any]?
) -> Bool {
// Braze configuration with your SDK API key and endpoint
let configuration = Braze.Configuration(apiKey: "YOUR_API_ENDPOINT", endpoint: "YOUR_API_KEY")
configuration.logger.level = .debug
// Initialize Braze SDK instance
AppDelegate.braze = Braze(configuration: configuration)
return true
}
}
struct InboxViewControllerRepresentable: UIViewControllerRepresentable {
func makeUIViewController(context: Context) -> UINavigationController {
let vc = BrazeInboxViewController(style: .plain)
return UINavigationController(rootViewController: vc)
}
func updateUIViewController(_ uiViewController: UINavigationController, context: Context) {}
}
struct ContentView: View {
var body: some View {
NavigationView {
InboxViewControllerRepresentable()
.navigationTitle("Message Inbox")
}
}
}
```
```swift file=SampleApp.swift
import SwiftUI
@main
struct SampleApp: App {
@UIApplicationDelegateAdaptor(AppDelegate.self) var delegate
var body: some Scene {
WindowGroup {
ContentView()
}
}
}
```
```swift file=BrazeInboxView.swift
import SwiftUI
import UIKit
import BrazeKit
class BrazeInboxViewController: UITableViewController {
private var cards: [Braze.ContentCard] = []
private var subscription: Any?
private var loggedImpressions = Set()
override func viewDidLoad() {
super.viewDidLoad()
tableView.register(UITableViewCell.self, forCellReuseIdentifier: "CardCell")
tableView.rowHeight = 100
subscription = AppDelegate.braze.contentCards.subscribeToUpdates { [weak self] updatedCards in
self?.cards = updatedCards
self?.tableView.reloadData()
}
AppDelegate.braze.contentCards.requestRefresh()
}
override func numberOfSections(in tableView: UITableView) -> Int { 1 }
override func tableView(_ tableView: UITableView, numberOfRowsInSection section: Int) -> Int {
cards.count
}
override func tableView(_ tableView: UITableView, cellForRowAt indexPath: IndexPath) -> UITableViewCell {
let card = cards[indexPath.row]
let cell = tableView.dequeueReusableCell(withIdentifier: "CardCell", for: indexPath)
// Work with the content card's title and description
cell.textLabel?.numberOfLines = 2
cell.textLabel?.text = [card.title, card.description].compactMap { $0 }.joined(separator: "\n")
return cell
}
override func tableView(_ tableView: UITableView, didSelectRowAt indexPath: IndexPath) {
let card = cards[indexPath.row]
card.logClick(using: AppDelegate.braze)
if let url = card.clickAction?.url {
UIApplication.shared.open(url, options: [:], completionHandler: nil)
}
tableView.deselectRow(at: indexPath, animated: true)
}
override func tableView(_ tableView: UITableView,
willDisplay cell: UITableViewCell,
forRowAt indexPath: IndexPath) {
let card = cards[indexPath.row]
if !loggedImpressions.contains(card.id) {
card.logImpression(using: AppDelegate.braze)
}
}
}
```
!!step
lines-AppDelegate.swift=15
### 1. Habilitar depuración (opcional)
Para facilitar la solución de problemas durante el desarrollo, considera habilitar la depuración.
!!step
lines-BrazeInboxView.swift=5
#### 2. Crear una vista de interfaz de usuario
En este tutorial, usamos [`UITableViewController`](https://developer.apple.com/documentation/uikit/uitableviewcontroller) de Swift, pero te recomendamos crear una interfaz de usuario con clases y componentes que se adapten a tu caso de uso.
!!step
lines-BrazeInboxView.swift=15-20
#### 3. Suscribirse a las actualizaciones de Content Cards
Suscríbete al listener de Content Cards para recibir las últimas actualizaciones y, a continuación, llama a `requestRefresh()` para solicitar las Content Cards más recientes para ese usuario.
!!step
lines-BrazeInboxView.swift=34-35
#### 4. Crear una interfaz de usuario personalizada para el buzón de entrada
El uso de los [atributos](https://braze-inc.github.io/braze-swift-sdk/documentation/brazekit/braze/contentcard) de Content Cards, como `title`, `description` e `imageUrl`, te permite crear Content Cards que se adapten a tus requisitos específicos de interfaz de usuario. En este caso, estamos creando un buzón de entrada con las API nativas de tablas de Swift.
!!step
lines-BrazeInboxView.swift=8,43,49-56
#### 5. Realizar el seguimiento de impresiones y clics
Puedes registrar impresiones y clics utilizando los métodos [`logClick(using:)`]() y [`logImpression(using:)`]() disponibles para una tarjeta de contenido.
Además, puedes usar [`logDismissed(using:)`]() para los descartes.
Las impresiones solo deben registrarse una vez cuando el usuario las ve. Aquí se usa un mecanismo sencillo con un `Set` y `willDisplay` para lograrlo. Ten en cuenta que es posible que debas considerar el ciclo de vida de la interfaz de usuario de tu aplicación, así como el caso de uso, para garantizar que las impresiones se registren correctamente.
## Prerequisites
Before you can use this feature, you'll need to [integrate the Web Braze SDK](https://www.braze.com/docs/es/es/developer_guide/sdk_integration/?sdktab=web). Sin embargo, no es necesario realizar ninguna configuración adicional.
## Crear un buzón de entrada con Content Cards para Web {#making-an-inbox-with-content-cards-for-web}
**Important:**
We're piloting this new tutorial format. [Tell us what you think](https://docs.google.com/forms/d/e/1FAIpQLSe_5uhWM7eXXk9F_gviO_pvA4rkYO3WA9B6tNJZ3TY91md5bw/viewform?usp=pp_url&entry.569173304=General+Feedback) — your feedback helps us improve future guides.
```js file=main.js
import * as braze from "@braze/web-sdk";
// Uncomment this if you'd like to run braze web SDK methods in the console
// window.braze = braze;
// initialize the Braze SDK
braze.initialize("YOUR_API_KEY", {
baseUrl: "YOUR_API_ENDPOINT",
enableLogging: true,
});
braze.openSession();
// --- DOM refs ---
const listEl = document.getElementById("cards-list");
// --- State for impression de-duping & lookup ---
const loggedImpressions = new Set();
const idToCard = new Map();
let observer = null;
// Utility: clean observer between renders
function resetObserver() {
if (observer) observer.disconnect();
observer = new IntersectionObserver(onIntersect, { threshold: 0.6 });
}
// Intersection callback: logs impression once when ≥60% visible
function onIntersect(entries) {
entries.forEach((entry) => {
if (!entry.isIntersecting) return;
const id = entry.target.dataset.cardId;
if (!id || loggedImpressions.has(id)) return;
const card = idToCard.get(id);
if (!card) return;
// Log a single-card impression and stop observing this element
braze.logContentCardImpressions([card]);
loggedImpressions.add(id);
observer.unobserve(entry.target);
});
}
// Renders cards into the DOM, sets up click + visibility tracking
function renderCards(cards) {
// Rebuild lookup and observer each render
idToCard.clear();
resetObserver();
listEl.textContent = ""; // clear list
cards.forEach((card) => {
// Skip control-group cards in UI; (optional) you could log impressions for them elsewhere
if (card.isControl) return;
idToCard.set(card.id, card);
const item = document.createElement("article");
item.className = "card-item";
item.dataset.cardId = card.id;
const h3 = document.createElement("h3");
h3.textContent = card.title || "";
const p = document.createElement("p");
p.textContent = card.description || "";
let img = undefined;
if (card.imageUrl) {
img = document.createElement("img");
img.src = card.imageUrl;
item.append(img);
}
const children = [h3, p];
if (img) {
children.push(img);
}
item.append(...children);
// Click tracking + action
item.addEventListener("click", (e) => {
braze.logContentCardClick(card);
if (card.url) {
// any url-handling logic for your use case
}
});
listEl.appendChild(item);
observer.observe(item);
});
}
// Subscribe to updates *then* ask for a refresh
braze.subscribeToContentCardsUpdates((updates) => {
const cards = updates.cards || [];
renderCards(cards);
});
braze.requestContentCardsRefresh();
```
```html file=index.html
Message Inbox
```
!!step
lines-main.js=3-4,9
### 1. Habilitar depuración (opcional)
Para facilitar la solución de problemas durante el desarrollo, considera habilitar la depuración. Opcionalmente, también puedes ejecutar métodos del SDK Web de Braze en la consola.
!!step
lines-index.html=1-44
#### 2. Crear la interfaz de usuario {#2-build-the-ui}
Crea una interfaz de usuario para la página del buzón de entrada. Aquí estamos creando una página HTML básica, que incluye un `div` con el ID `cards-list`. Se usa como contenedor de destino para renderizar Content Cards.
!!step
lines-main.js=96-99,101
#### 3. Suscribirse a las actualizaciones de Content Cards
Suscríbete al listener de Content Cards para recibir las últimas actualizaciones y, a continuación, llama a [`requestContentCardsRefresh()`]() para solicitar las Content Cards más recientes para ese usuario. Como alternativa, llama al suscriptor antes de `openSession()` para una actualización automática al inicio de la sesión.
!!step
lines-main.js=64,67,70-74
#### 4. Crear los elementos del buzón de entrada {#4-build-the-inbox-elements}
El uso de los [atributos]() de Content Cards, como `title`, `description` y `url`, te permite mostrar Content Cards que se adapten a tus requisitos específicos de interfaz de usuario.
!!step
lines-main.js=22-25,28-43,84,91
#### 5. Realizar el seguimiento de impresiones y clics
Puedes registrar impresiones y clics utilizando los métodos [`logContentCardImpressions`]() y [`logContentCardClick`]() disponibles para Content Cards.
Además, puedes usar [`logCardDismissal`]() para los descartes.
Las impresiones solo deben registrarse una vez cuando el usuario las ve. Aquí, un `IntersectionObserver` junto con un `Set` indexado por `card.id` evita los registros duplicados. Ten en cuenta que es posible que debas considerar el ciclo de vida de la interfaz de usuario de tu aplicación, así como el caso de uso, para garantizar que las impresiones se registren correctamente.
# Mensajes dentro de la aplicación para el SDK de Braze
Source: /docs/es/developer_guide/in_app_messages/index.md
# Mensajes dentro de la aplicación
> Obtén información sobre los mensajes dentro de la aplicación y cómo configurarlos para el SDK de Braze.
## Prerequisites
Before you can use this feature, you'll need to [integrate the Web Braze SDK](https://www.braze.com/docs/es/es/developer_guide/sdk_integration/?sdktab=web). However, no additional setup is required.
## Message types
All in-app messages inherit their prototype from [`InAppMessage`](https://js.appboycdn.com/web-sdk/latest/doc/classes/braze.inappmessage.html), which defines basic behavior and traits for all in-app messages. The prototypical subclasses are [`SlideUpMessage`](https://js.appboycdn.com/web-sdk/latest/doc/classes/braze.slideupmessage.html), [`ModalMessage`](https://js.appboycdn.com/web-sdk/latest/doc/classes/braze.modalmessage.html), [`FullScreenMessage`](https://js.appboycdn.com/web-sdk/latest/doc/classes/braze.fullscreenmessage.html), and [`HtmlMessage`](https://js.appboycdn.com/web-sdk/latest/doc/classes/braze.htmlmessage.html).
Each in-app message type is customizable across content, images, icons, click actions, analytics, display, and delivery.
[`SlideUp`](https://js.appboycdn.com/web-sdk/latest/doc/classes/braze.slideupmessage.html) in-app messages are so-named because traditionally on mobile platforms, they "slide up" or "slide down" from the top or bottom of the screen. In the Braze Web SDK, these messages are displayed as more of a Growl or Toast style notification to align with the web's dominant paradigm. They cover a small portion of the screen and provide an effective and non-intrusive messaging capability.
{: style="border:0px;"}
[`Modal`](https://js.appboycdn.com/web-sdk/latest/doc/classes/braze.modalmessage.html) in-app messages appear in the center of the screen and are framed by a translucent panel. Useful for more critical messaging, they can be equipped with up to two click action and analytics-enabled buttons.
{: style="border:0px;"}
[`Full`](https://js.appboycdn.com/web-sdk/latest/doc/classes/braze.fullscreenmessage.html) in-app messages are useful for maximizing the content and impact of your user communication. On narrow browser windows (for example, the mobile web), `full` in-app messages take up the entire browser window. On larger browser windows, `full` in-app messages appear similarly to `modal` in-app messages. The upper half of a `full` in-app message contains an image, and the lower half allows up to eight lines of text as well as up to two click action, and analytics-enabled buttons
{: style="border:0px;"}
[`HTML`](https://js.appboycdn.com/web-sdk/latest/doc/classes/braze.htmlmessage.html) in-app messages are useful for creating fully customized user content. User-defined HTML is displayed in an iFrame and may contain rich content, such as images, fonts, videos, and interactive elements, allowing for full control over message appearance and functionality. These support a JavaScript `brazeBridge` interface to call methods on the Braze Web SDK from within your HTML, see our [best practices](https://www.braze.com/docs/es/es/user_guide/message_building_by_channel/in-app_messages/best_practices/) for more details.
**Important:**
To enable HTML in-app messages through the Web SDK, you **must** supply the `allowUserSuppliedJavascript` initialization option to Braze, for example, `braze.initialize('YOUR-API_KEY', {allowUserSuppliedJavascript: true})`. This is for security reasons. HTML in-app messages can execute JavaScript, so we require a site maintainer to enable them.
The following example shows a paginated HTML in-app message:

## Prerequisites
Before you can use this feature, you'll need to [integrate the Android Braze SDK](https://www.braze.com/docs/es/es/developer_guide/sdk_integration/?sdktab=android). You'll also need to enable in-app messages.
## Message types
Braze offers several default in-app message types, each customizable with messages, images, [Font Awesome](https://fontawesome.com/icons?d=gallery&p=2) icons, click actions, analytics, color schemes, and more.
Their basic behavior and traits are defined by the [`IInAppMessage`](https://braze-inc.github.io/braze-android-sdk/kdoc/braze-android-sdk/com.braze.models.inappmessage/-i-in-app-message/index.html) interface, in a subclass called [`InAppMessageBase`](https://braze-inc.github.io/braze-android-sdk/kdoc/braze-android-sdk/com.braze.models.inappmessage/-in-app-message-base/index.html). `IInAppMessage` also includes a subinterface, [`IInAppMessageImmersive`](https://braze-inc.github.io/braze-android-sdk/kdoc/braze-android-sdk/com.braze.models.inappmessage/-i-in-app-message-immersive/index.html), which lets you add close, click-action, and analytics [buttons](https://braze-inc.github.io/braze-android-sdk/kdoc/braze-android-sdk/com.braze.models.inappmessage/-message-button/index.html) to your app.
**Important:**
Keep in mind, in-app messages containing buttons will include the `clickAction` message in the final payload if the click action is added prior to adding the button text.
[`slideup`](https://braze-inc.github.io/braze-android-sdk/kdoc/braze-android-sdk/com.braze.models.inappmessage/-in-app-message-slideup/index.html) in-app messages are so-named because they "slide up" or "slide down" from the top or bottom of the screen. They cover a small portion of the screen and provide an effective and non-intrusive messaging capability.
The `slideup` in-app message object extends [`InAppMessageBase`](https://braze-inc.github.io/braze-android-sdk/kdoc/braze-android-sdk/com.braze.models.inappmessage/-in-app-message-base/index.html).
{: style="border:0px;"}
[`modal`](https://braze-inc.github.io/braze-android-sdk/kdoc/braze-android-sdk/com.braze.models.inappmessage/-in-app-message-modal/index.html) in-app messages appear in the center of the screen and are framed by a translucent panel. Useful for more critical messaging, they can be equipped with two click-action and analytics-enabled buttons.
This message type is a subclass of [`InAppMessageImmersiveBase`](https://braze-inc.github.io/braze-android-sdk/kdoc/braze-android-sdk/com.braze.models.inappmessage/-in-app-message-immersive-base/index.html), an abstract class that implements `IInAppMessageImmersive`, giving you the option to add custom functionality to your locally generated in-app messages.
{: style="border:0px;"}
[`full`](https://braze-inc.github.io/braze-android-sdk/kdoc/braze-android-sdk/com.braze.models.inappmessage/-in-app-message-full/index.html) in-app messages are useful for maximizing the content and impact of your user communication. The upper half of a `full` in-app message contains an image, and the lower half displays text and up to two click action and analytics-enabled buttons.
This message type extends [`InAppMessageImmersiveBase`](https://braze-inc.github.io/braze-android-sdk/kdoc/braze-android-sdk/com.braze.models.inappmessage/-in-app-message-immersive-base/index.html), giving you the option to add custom functionality to your locally generated in-app messages.

[`HTML`](https://braze-inc.github.io/braze-android-sdk/kdoc/braze-android-sdk/com.braze.models.inappmessage/-in-app-message-html/index.html) in-app messages are useful for creating fully customized user content. User-defined HTML in-app message content is displayed in a `WebView` and may optionally contain other rich content, such as images and fonts, allowing for full control over message appearance and functionality.
This message type implements [`IInAppMessageHtml`](https://braze-inc.github.io/braze-android-sdk/kdoc/braze-android-sdk/com.braze.models.inappmessage/-i-in-app-message-html/index.html), which is a subclass of [`IInAppMessage`](https://braze-inc.github.io/braze-android-sdk/kdoc/braze-android-sdk/com.braze.models.inappmessage/-i-in-app-message/index.html).
**Note:**
On Android, links configured with `target="_blank"` in custom HTML in-app messages open in the device's default web browser.
Android in-app messages support a JavaScript `brazeBridge` interface to call methods on the Braze Android SDK from within your HTML, see our JavaScript bridge page for more details.
{: style="border:0px;"}
**Important:**
We currently do not support the display of custom HTML in-app messages in an iFrame on the iOS and Android platforms.
**Tip:**
You can also define custom in-app message views for your app. For a full walkthrough, see [Setting custom factories](https://www.braze.com/docs/es/es/developer_guide/in_app_messages/customization#android_setting-custom-factories).
## Enabling in-app messages
### Step 1: Register `BrazeInAppMessageManager`
In-app message display is managed by the [`BrazeInAppMessageManager`](https://braze-inc.github.io/braze-android-sdk/kdoc/braze-android-sdk/com.braze.ui.inappmessage/-braze-in-app-message-manager/index.html) class. Every activity in your app must be registered with the `BrazeInAppMessageManager` to allow it to add in-app message views to the view hierarchy. There are two ways to accomplish this:
The [activity lifecycle callback integration](https://www.braze.com/docs/es/es/developer_guide/sdk_integration#android_step-4-enable-user-session-tracking) handles in-app message registration automatically; no extra integration is required. This is the recommended method for handling in-app message registration.
**Warning:**
If you're using activity lifecycle callback for automatic registration, do not complete this step.
In your [`Application.onCreate()`](https://developer.android.com/reference/android/app/Application.html#onCreate()), call [`ensureSubscribedToInAppMessageEvents()`](https://braze-inc.github.io/braze-android-sdk/kdoc/braze-android-sdk/com.braze.ui.inappmessage/-braze-in-app-message-manager/ensure-subscribed-to-in-app-message-events.html):
```java
BrazeInAppMessageManager.getInstance().ensureSubscribedToInAppMessageEvents(context);
```
```kotlin
BrazeInAppMessageManager.getInstance().ensureSubscribedToInAppMessageEvents(context)
```
In every activity where in-app messages can be shown, call [`registerInAppMessageManager()`](https://braze-inc.github.io/braze-android-sdk/kdoc/braze-android-sdk/com.braze.ui.inappmessage/-braze-in-app-message-manager/register-in-app-message-manager.html) in that activity's `onResume()`:
```java
@Override
public void onResume() {
super.onResume();
// Registers the BrazeInAppMessageManager for the current Activity. This Activity will now listen for
// in-app messages from Braze.
BrazeInAppMessageManager.getInstance().registerInAppMessageManager(activity);
}
```
```kotlin
public override fun onResume() {
super.onResume()
// Registers the BrazeInAppMessageManager for the current Activity. This Activity will now listen for
// in-app messages from Braze.
BrazeInAppMessageManager.getInstance().registerInAppMessageManager(this)
}
```
In every activity where [`registerInAppMessageManager()`](https://braze-inc.github.io/braze-android-sdk/kdoc/braze-android-sdk/com.braze.ui.inappmessage/-braze-in-app-message-manager/register-in-app-message-manager.html) was called, call [`unregisterInAppMessageManager()`](https://braze-inc.github.io/braze-android-sdk/kdoc/braze-android-sdk/com.braze.ui.inappmessage/-braze-in-app-message-manager/unregister-in-app-message-manager.html) in that activity's `onPause()`:
```java
@Override
public void onPause() {
super.onPause();
// Unregisters the BrazeInAppMessageManager for the current Activity.
BrazeInAppMessageManager.getInstance().unregisterInAppMessageManager(activity);
}
```
```kotlin
public override fun onPause() {
super.onPause()
// Unregisters the BrazeInAppMessageManager.
BrazeInAppMessageManager.getInstance().unregisterInAppMessageManager(this)
}
```
### Step 2: Update the manager's blocklist (optional)
In your integration, you may require that certain activities in your app should not show in-app messages. The [activity lifecycle callback integration](https://www.braze.com/docs/es/es/developer_guide/sdk_integration#android_step-4-enable-user-session-tracking) provides an easy way to accomplish this.
The following sample code adds two activities to the in-app message registration blocklist, `SplashActivity` and `SettingsActivity`:
```java
public class MyApplication extends Application {
@Override
public void onCreate() {
super.onCreate();
Set inAppMessageBlocklist = new HashSet<>();
inAppMessageBlocklist.add(SplashActivity.class);
inAppMessageBlocklist.add(SettingsActivity.class);
registerActivityLifecycleCallbacks(new BrazeActivityLifecycleCallbackListener(inAppMessageBlocklist));
}
}
```
```kotlin
class MyApplication : Application() {
override fun onCreate() {
super.onCreate()
val inAppMessageBlocklist = HashSet>()
inAppMessageBlocklist.add(SplashActivity::class.java)
inAppMessageBlocklist.add(SettingsActivity::class.java)
registerActivityLifecycleCallbacks(BrazeActivityLifecycleCallbackListener(inAppMessageBlocklist))
}
}
```
## Prerequisites
Before you can use this feature, you'll need to [integrate the Swift Braze SDK](https://www.braze.com/docs/es/es/developer_guide/sdk_integration/?sdktab=swift). You'll also need to enable in-app messages.
## Message types
Each in-app message type is highly customizable across content, images, icons, click actions, analytics, display, and delivery. They are enumerated types of `Braze.InAppMessage`, which defines basic behavior and traits for all in-app messages. For the full list of in-app message properties and usage, see the [`InAppMessage` class](https://braze-inc.github.io/braze-swift-sdk/documentation/brazekit/braze/inappmessage).
These are the available in-app message types in Braze and how they will look like for end-users.
[`Slideup`](https://braze-inc.github.io/braze-swift-sdk/documentation/brazekit/braze/inappmessage/slideup-swift.struct) in-app messages are given this name because they "slide up" or "slide down" from the top or bottom of the screen. They cover a small portion of the screen and provide an effective and non-intrusive messaging capability.
{: style="max-width:35%;border:none;"}
[`Modal`](https://braze-inc.github.io/braze-swift-sdk/documentation/brazekit/braze/inappmessage/modal-swift.struct) in-app messages appear in the center of the screen and are framed by a translucent panel. Useful for more critical messaging, they can be equipped with up to two analytics-enabled buttons.
{: style="max-width:35%;border:none;"}
[`Modal Image`](https://braze-inc.github.io/braze-swift-sdk/documentation/brazekit/braze/inappmessage/modalimage-swift.struct) in-app messages appear in the center of the screen and are framed by a translucent panel. These messages are similar to the `Modal` type except without header or message text. Useful for more critical messaging, they can be equipped with up to two analytics-enabled buttons.
{: style="max-width:35%;border:none;"}
[`Full`](https://braze-inc.github.io/braze-swift-sdk/documentation/brazekit/braze/inappmessage/full-swift.struct) in-app messages are useful for maximizing the content and impact of your user communication. The upper half of a `Full` in-app message contains an image, and the lower half displays text and up to two analytics-enabled buttons.
{: style="max-width:35%;border:none;"}
[`Full Image`](https://braze-inc.github.io/braze-swift-sdk/documentation/brazekit/braze/inappmessage/fullimage-swift.struct) in-app messages are similar to `Full` in-app messages except without header or message text. This message type is useful for maximizing the content and impact of your user communication. A `Full Image` in-app message contains an image spanning the entire screen, with the option to display up to two analytics-enabled buttons.
{: style="max-width:35%;border:none;"}
[`HTML`](https://braze-inc.github.io/braze-swift-sdk/documentation/brazekit/braze/inappmessage/html-swift.struct) in-app messages are useful for creating fully customized user content. User-defined HTML Full in-app message content is displayed in a `WKWebView`and may optionally contain other rich content, such as images and fonts, allowing for full control over message appearance and functionality.
iOS in-app messages support a JavaScript `brazeBridge` interface to call methods on the Braze Web SDK from within your HTML, see our [best practices](https://www.braze.com/docs/es/es/user_guide/message_building_by_channel/in-app_messages/best_practices/) for more details.
The following example shows a paginated HTML Full in-app message:

Note that we currently do not support the display of custom HTML in-app messages in an iFrame on the iOS and Android platforms.
[`Control`](https://braze-inc.github.io/braze-swift-sdk/documentation/brazekit/braze/inappmessage/control-swift.struct) in-app messages do not contain a UI component and are used primarily for analytics purposes. This type is used to verify receipt of an in-app message sent to a control group.
For further details about Intelligent Selection and control groups, refer to [Intelligent Selection](https://www.braze.com/docs/es/es/user_guide/brazeai/intelligence/intelligent_selection/).
## Enabling in-app messages
### Step 1: Create an implementation of `BrazeInAppMessagePresenter`
To let Braze display in-app messages, create an implementation of the `BrazeInAppMessagePresenter` protocol and assign it to the optional `inAppMessagePresenter` on your Braze instance. You can also use the default Braze UI presenter by instantiating a `BrazeInAppMessageUI` object.
Note that you will need to import the `BrazeUI` library to access the `BrazeInAppMessageUI` class.
```swift
AppDelegate.braze?.inAppMessagePresenter = BrazeInAppMessageUI()
```
```objc
AppDelegate.braze.inAppMessagePresenter = [[BrazeInAppMessageUI alloc] init];
```
### Step 2: Handle no matching triggers
Implement [`BrazeDelegate.(_:noMatchingTriggerForEvent)`](https://braze-inc.github.io/braze-swift-sdk/documentation/brazekit/brazedelegate/braze(_:nomatchingtriggerforevent:)-8rt7y/) within the relevant `BrazeDelegate` class. When Braze fails to find a matching trigger for a particular event, it will call this method automatically.
## Prerequisites
Before you can use this feature, you'll need to [integrate the Android Braze SDK](https://www.braze.com/docs/es/es/developer_guide/sdk_integration/?sdktab=android).
## About TV and OTT support
The Android Braze SDK natively supports displaying in-app messages on OTT devices like Android TV or Fire Stick. However, there's some key differences between native Android and OTT in-app messages. For OTT devices:
- In-app messages that require touch mode, such as slideup, are disabled on OTT.
- The currently selected or focused item, such as a button or close button, will be highlighted.
- Body clicks on the in-app message itself, such as not on a button, are not supported.
## Prerequisites
Before you can use this feature, you'll need to [integrate the Cordova Braze SDK](https://www.braze.com/docs/es/es/developer_guide/sdk_integration/?sdktab=cordova).
## Message types
Braze offers several default in-app message types, each customizable with messages, images, [Font Awesome](https://fontawesome.com/icons?d=gallery&p=2) icons, click actions, analytics, color schemes, and more.
Their basic behavior and traits are defined by the [`IInAppMessage`](https://braze-inc.github.io/braze-android-sdk/kdoc/braze-android-sdk/com.braze.models.inappmessage/-i-in-app-message/index.html) interface, in a subclass called [`InAppMessageBase`](https://braze-inc.github.io/braze-android-sdk/kdoc/braze-android-sdk/com.braze.models.inappmessage/-in-app-message-base/index.html). `IInAppMessage` also includes a subinterface, [`IInAppMessageImmersive`](https://braze-inc.github.io/braze-android-sdk/kdoc/braze-android-sdk/com.braze.models.inappmessage/-i-in-app-message-immersive/index.html), which lets you add close, click-action, and analytics [buttons](https://braze-inc.github.io/braze-android-sdk/kdoc/braze-android-sdk/com.braze.models.inappmessage/-message-button/index.html) to your app.
**Important:**
Keep in mind, in-app messages containing buttons will include the `clickAction` message in the final payload if the click action is added prior to adding the button text.
[`slideup`](https://braze-inc.github.io/braze-android-sdk/kdoc/braze-android-sdk/com.braze.models.inappmessage/-in-app-message-slideup/index.html) in-app messages are so-named because they "slide up" or "slide down" from the top or bottom of the screen. They cover a small portion of the screen and provide an effective and non-intrusive messaging capability.
The `slideup` in-app message object extends [`InAppMessageBase`](https://braze-inc.github.io/braze-android-sdk/kdoc/braze-android-sdk/com.braze.models.inappmessage/-in-app-message-base/index.html).
{: style="border:0px;"}
[`modal`](https://braze-inc.github.io/braze-android-sdk/kdoc/braze-android-sdk/com.braze.models.inappmessage/-in-app-message-modal/index.html) in-app messages appear in the center of the screen and are framed by a translucent panel. Useful for more critical messaging, they can be equipped with two click-action and analytics-enabled buttons.
This message type is a subclass of [`InAppMessageImmersiveBase`](https://braze-inc.github.io/braze-android-sdk/kdoc/braze-android-sdk/com.braze.models.inappmessage/-in-app-message-immersive-base/index.html), an abstract class that implements `IInAppMessageImmersive`, giving you the option to add custom functionality to your locally generated in-app messages.
{: style="border:0px;"}
[`full`](https://braze-inc.github.io/braze-android-sdk/kdoc/braze-android-sdk/com.braze.models.inappmessage/-in-app-message-full/index.html) in-app messages are useful for maximizing the content and impact of your user communication. The upper half of a `full` in-app message contains an image, and the lower half displays text and up to two click action and analytics-enabled buttons.
This message type extends [`InAppMessageImmersiveBase`](https://braze-inc.github.io/braze-android-sdk/kdoc/braze-android-sdk/com.braze.models.inappmessage/-in-app-message-immersive-base/index.html), giving you the option to add custom functionality to your locally generated in-app messages.

[`HTML`](https://braze-inc.github.io/braze-android-sdk/kdoc/braze-android-sdk/com.braze.models.inappmessage/-in-app-message-html/index.html) in-app messages are useful for creating fully customized user content. User-defined HTML in-app message content is displayed in a `WebView` and may optionally contain other rich content, such as images and fonts, allowing for full control over message appearance and functionality.
This message type implements [`IInAppMessageHtml`](https://braze-inc.github.io/braze-android-sdk/kdoc/braze-android-sdk/com.braze.models.inappmessage/-i-in-app-message-html/index.html), which is a subclass of [`IInAppMessage`](https://braze-inc.github.io/braze-android-sdk/kdoc/braze-android-sdk/com.braze.models.inappmessage/-i-in-app-message/index.html).
**Note:**
On Android, links configured with `target="_blank"` in custom HTML in-app messages open in the device's default web browser.
Android in-app messages support a JavaScript `brazeBridge` interface to call methods on the Braze Android SDK from within your HTML, see our JavaScript bridge page for more details.
{: style="border:0px;"}
**Important:**
We currently do not support the display of custom HTML in-app messages in an iFrame on the iOS and Android platforms.
**Tip:**
You can also define custom in-app message views for your app. For a full walkthrough, see [Setting custom factories](https://www.braze.com/docs/es/es/developer_guide/in_app_messages/customization#android_setting-custom-factories).
Each in-app message type is highly customizable across content, images, icons, click actions, analytics, display, and delivery. They are enumerated types of `Braze.InAppMessage`, which defines basic behavior and traits for all in-app messages. For the full list of in-app message properties and usage, see the [`InAppMessage` class](https://braze-inc.github.io/braze-swift-sdk/documentation/brazekit/braze/inappmessage).
These are the available in-app message types in Braze and how they will look like for end-users.
[`Slideup`](https://braze-inc.github.io/braze-swift-sdk/documentation/brazekit/braze/inappmessage/slideup-swift.struct) in-app messages are given this name because they "slide up" or "slide down" from the top or bottom of the screen. They cover a small portion of the screen and provide an effective and non-intrusive messaging capability.
{: style="max-width:35%;border:none;"}
[`Modal`](https://braze-inc.github.io/braze-swift-sdk/documentation/brazekit/braze/inappmessage/modal-swift.struct) in-app messages appear in the center of the screen and are framed by a translucent panel. Useful for more critical messaging, they can be equipped with up to two analytics-enabled buttons.
{: style="max-width:35%;border:none;"}
[`Modal Image`](https://braze-inc.github.io/braze-swift-sdk/documentation/brazekit/braze/inappmessage/modalimage-swift.struct) in-app messages appear in the center of the screen and are framed by a translucent panel. These messages are similar to the `Modal` type except without header or message text. Useful for more critical messaging, they can be equipped with up to two analytics-enabled buttons.
{: style="max-width:35%;border:none;"}
[`Full`](https://braze-inc.github.io/braze-swift-sdk/documentation/brazekit/braze/inappmessage/full-swift.struct) in-app messages are useful for maximizing the content and impact of your user communication. The upper half of a `Full` in-app message contains an image, and the lower half displays text and up to two analytics-enabled buttons.
{: style="max-width:35%;border:none;"}
[`Full Image`](https://braze-inc.github.io/braze-swift-sdk/documentation/brazekit/braze/inappmessage/fullimage-swift.struct) in-app messages are similar to `Full` in-app messages except without header or message text. This message type is useful for maximizing the content and impact of your user communication. A `Full Image` in-app message contains an image spanning the entire screen, with the option to display up to two analytics-enabled buttons.
{: style="max-width:35%;border:none;"}
[`HTML`](https://braze-inc.github.io/braze-swift-sdk/documentation/brazekit/braze/inappmessage/html-swift.struct) in-app messages are useful for creating fully customized user content. User-defined HTML Full in-app message content is displayed in a `WKWebView`and may optionally contain other rich content, such as images and fonts, allowing for full control over message appearance and functionality.
iOS in-app messages support a JavaScript `brazeBridge` interface to call methods on the Braze Web SDK from within your HTML, see our [best practices](https://www.braze.com/docs/es/es/user_guide/message_building_by_channel/in-app_messages/best_practices/) for more details.
The following example shows a paginated HTML Full in-app message:

Note that we currently do not support the display of custom HTML in-app messages in an iFrame on the iOS and Android platforms.
[`Control`](https://braze-inc.github.io/braze-swift-sdk/documentation/brazekit/braze/inappmessage/control-swift.struct) in-app messages do not contain a UI component and are used primarily for analytics purposes. This type is used to verify receipt of an in-app message sent to a control group.
For further details about Intelligent Selection and control groups, refer to [Intelligent Selection](https://www.braze.com/docs/es/es/user_guide/brazeai/intelligence/intelligent_selection/).
## Prerequisites
Before you can use this feature, you'll need to [integrate the Flutter Braze SDK](https://www.braze.com/docs/es/es/developer_guide/sdk_integration/?sdktab=flutter).
## Message types
Braze offers several default in-app message types, each customizable with messages, images, [Font Awesome](https://fontawesome.com/icons?d=gallery&p=2) icons, click actions, analytics, color schemes, and more.
Their basic behavior and traits are defined by the [`IInAppMessage`](https://braze-inc.github.io/braze-android-sdk/kdoc/braze-android-sdk/com.braze.models.inappmessage/-i-in-app-message/index.html) interface, in a subclass called [`InAppMessageBase`](https://braze-inc.github.io/braze-android-sdk/kdoc/braze-android-sdk/com.braze.models.inappmessage/-in-app-message-base/index.html). `IInAppMessage` also includes a subinterface, [`IInAppMessageImmersive`](https://braze-inc.github.io/braze-android-sdk/kdoc/braze-android-sdk/com.braze.models.inappmessage/-i-in-app-message-immersive/index.html), which lets you add close, click-action, and analytics [buttons](https://braze-inc.github.io/braze-android-sdk/kdoc/braze-android-sdk/com.braze.models.inappmessage/-message-button/index.html) to your app.
**Important:**
Keep in mind, in-app messages containing buttons will include the `clickAction` message in the final payload if the click action is added prior to adding the button text.
[`slideup`](https://braze-inc.github.io/braze-android-sdk/kdoc/braze-android-sdk/com.braze.models.inappmessage/-in-app-message-slideup/index.html) in-app messages are so-named because they "slide up" or "slide down" from the top or bottom of the screen. They cover a small portion of the screen and provide an effective and non-intrusive messaging capability.
The `slideup` in-app message object extends [`InAppMessageBase`](https://braze-inc.github.io/braze-android-sdk/kdoc/braze-android-sdk/com.braze.models.inappmessage/-in-app-message-base/index.html).
{: style="border:0px;"}
[`modal`](https://braze-inc.github.io/braze-android-sdk/kdoc/braze-android-sdk/com.braze.models.inappmessage/-in-app-message-modal/index.html) in-app messages appear in the center of the screen and are framed by a translucent panel. Useful for more critical messaging, they can be equipped with two click-action and analytics-enabled buttons.
This message type is a subclass of [`InAppMessageImmersiveBase`](https://braze-inc.github.io/braze-android-sdk/kdoc/braze-android-sdk/com.braze.models.inappmessage/-in-app-message-immersive-base/index.html), an abstract class that implements `IInAppMessageImmersive`, giving you the option to add custom functionality to your locally generated in-app messages.
{: style="border:0px;"}
[`full`](https://braze-inc.github.io/braze-android-sdk/kdoc/braze-android-sdk/com.braze.models.inappmessage/-in-app-message-full/index.html) in-app messages are useful for maximizing the content and impact of your user communication. The upper half of a `full` in-app message contains an image, and the lower half displays text and up to two click action and analytics-enabled buttons.
This message type extends [`InAppMessageImmersiveBase`](https://braze-inc.github.io/braze-android-sdk/kdoc/braze-android-sdk/com.braze.models.inappmessage/-in-app-message-immersive-base/index.html), giving you the option to add custom functionality to your locally generated in-app messages.

[`HTML`](https://braze-inc.github.io/braze-android-sdk/kdoc/braze-android-sdk/com.braze.models.inappmessage/-in-app-message-html/index.html) in-app messages are useful for creating fully customized user content. User-defined HTML in-app message content is displayed in a `WebView` and may optionally contain other rich content, such as images and fonts, allowing for full control over message appearance and functionality.
This message type implements [`IInAppMessageHtml`](https://braze-inc.github.io/braze-android-sdk/kdoc/braze-android-sdk/com.braze.models.inappmessage/-i-in-app-message-html/index.html), which is a subclass of [`IInAppMessage`](https://braze-inc.github.io/braze-android-sdk/kdoc/braze-android-sdk/com.braze.models.inappmessage/-i-in-app-message/index.html).
**Note:**
On Android, links configured with `target="_blank"` in custom HTML in-app messages open in the device's default web browser.
Android in-app messages support a JavaScript `brazeBridge` interface to call methods on the Braze Android SDK from within your HTML, see our JavaScript bridge page for more details.
{: style="border:0px;"}
**Important:**
We currently do not support the display of custom HTML in-app messages in an iFrame on the iOS and Android platforms.
**Tip:**
You can also define custom in-app message views for your app. For a full walkthrough, see [Setting custom factories](https://www.braze.com/docs/es/es/developer_guide/in_app_messages/customization#android_setting-custom-factories).
Each in-app message type is highly customizable across content, images, icons, click actions, analytics, display, and delivery. They are enumerated types of `Braze.InAppMessage`, which defines basic behavior and traits for all in-app messages. For the full list of in-app message properties and usage, see the [`InAppMessage` class](https://braze-inc.github.io/braze-swift-sdk/documentation/brazekit/braze/inappmessage).
These are the available in-app message types in Braze and how they will look like for end-users.
[`Slideup`](https://braze-inc.github.io/braze-swift-sdk/documentation/brazekit/braze/inappmessage/slideup-swift.struct) in-app messages are given this name because they "slide up" or "slide down" from the top or bottom of the screen. They cover a small portion of the screen and provide an effective and non-intrusive messaging capability.
{: style="max-width:35%;border:none;"}
[`Modal`](https://braze-inc.github.io/braze-swift-sdk/documentation/brazekit/braze/inappmessage/modal-swift.struct) in-app messages appear in the center of the screen and are framed by a translucent panel. Useful for more critical messaging, they can be equipped with up to two analytics-enabled buttons.
{: style="max-width:35%;border:none;"}
[`Modal Image`](https://braze-inc.github.io/braze-swift-sdk/documentation/brazekit/braze/inappmessage/modalimage-swift.struct) in-app messages appear in the center of the screen and are framed by a translucent panel. These messages are similar to the `Modal` type except without header or message text. Useful for more critical messaging, they can be equipped with up to two analytics-enabled buttons.
{: style="max-width:35%;border:none;"}
[`Full`](https://braze-inc.github.io/braze-swift-sdk/documentation/brazekit/braze/inappmessage/full-swift.struct) in-app messages are useful for maximizing the content and impact of your user communication. The upper half of a `Full` in-app message contains an image, and the lower half displays text and up to two analytics-enabled buttons.
{: style="max-width:35%;border:none;"}
[`Full Image`](https://braze-inc.github.io/braze-swift-sdk/documentation/brazekit/braze/inappmessage/fullimage-swift.struct) in-app messages are similar to `Full` in-app messages except without header or message text. This message type is useful for maximizing the content and impact of your user communication. A `Full Image` in-app message contains an image spanning the entire screen, with the option to display up to two analytics-enabled buttons.
{: style="max-width:35%;border:none;"}
[`HTML`](https://braze-inc.github.io/braze-swift-sdk/documentation/brazekit/braze/inappmessage/html-swift.struct) in-app messages are useful for creating fully customized user content. User-defined HTML Full in-app message content is displayed in a `WKWebView`and may optionally contain other rich content, such as images and fonts, allowing for full control over message appearance and functionality.
iOS in-app messages support a JavaScript `brazeBridge` interface to call methods on the Braze Web SDK from within your HTML, see our [best practices](https://www.braze.com/docs/es/es/user_guide/message_building_by_channel/in-app_messages/best_practices/) for more details.
The following example shows a paginated HTML Full in-app message:

Note that we currently do not support the display of custom HTML in-app messages in an iFrame on the iOS and Android platforms.
[`Control`](https://braze-inc.github.io/braze-swift-sdk/documentation/brazekit/braze/inappmessage/control-swift.struct) in-app messages do not contain a UI component and are used primarily for analytics purposes. This type is used to verify receipt of an in-app message sent to a control group.
For further details about Intelligent Selection and control groups, refer to [Intelligent Selection](https://www.braze.com/docs/es/es/user_guide/brazeai/intelligence/intelligent_selection/).
## Enabling in-app messages
The Braze Flutter SDK automatically sets up the default in-app message presenter on both Android and iOS. In-app messages are displayed and forwarded to the Dart layer without additional setup.
### Customizing the in-app message presenter on iOS
To override the default in-app message presenter on iOS, use the `postInitialization` closure in `BrazePlugin.configure(_:postInitialization:)`. Your custom presenter must call `BrazePlugin.processInAppMessage(message)` to forward in-app message data to the Dart layer.
```swift
import BrazeUI
BrazePlugin.configure(
{ configuration in
// Set non-API-key configurations here.
},
postInitialization: { braze in
let customPresenter = CustomInAppMessagePresenter()
braze.inAppMessagePresenter = customPresenter
}
)
```
In the custom presenter class, call `BrazePlugin.processInAppMessage(message)` and `super.present(message: message)` to forward data to Dart and display the default UI.
```swift
class CustomInAppMessagePresenter: BrazeInAppMessageUI {
override func present(message: Braze.InAppMessage) {
BrazePlugin.processInAppMessage(message)
super.present(message: message)
}
}
```
**Note:**
This step is for iOS only. The default implementation for in-app messages is already set up on Android.
To set up the default presenter for in-app messages on iOS, create an implementation of the `BrazeInAppMessagePresenter` protocol and assign it to the optional `inAppMessagePresenter` on your Braze instance. You can also use the default Braze UI presenter by instantiating a `BrazeInAppMessageUI` object.
You must import the `BrazeUI` library to access the `BrazeInAppMessageUI` class.
```swift
import BrazeUI
override func application(
_ application: UIApplication,
didFinishLaunchingWithOptions launchOptions: [UIApplication.LaunchOptionsKey : Any]? = nil
) -> Bool {
...
let braze = BrazePlugin.initBraze(configuration)
braze.inAppMessagePresenter = BrazeInAppMessageUI()
AppDelegate.braze = braze
return true
}
```
```objc
@import BrazeUI;
- (BOOL)application:(UIApplication *)application
didFinishLaunchingWithOptions:(NSDictionary *)launchOptions {
...
Braze *braze = [BrazePlugin initBraze:configuration];
braze.inAppMessagePresenter = [[BrazeInAppMessageUI alloc] init];
AppDelegate.braze = braze;
[self.window makeKeyAndVisible];
return YES;
}
```
For more information about accessing in-app message data, refer to [Logging in-app message data](https://www.braze.com/docs/es/es/developer_guide/in_app_messages/logging_message_data?sdktab=flutter).
## Prerequisites
Before you can use this feature, you'll need to [integrate the React Native Braze SDK](https://www.braze.com/docs/es/es/developer_guide/sdk_integration/?sdktab=react%20native).
## Message types
Braze offers several default in-app message types, each customizable with messages, images, [Font Awesome](https://fontawesome.com/icons?d=gallery&p=2) icons, click actions, analytics, color schemes, and more.
Their basic behavior and traits are defined by the [`IInAppMessage`](https://braze-inc.github.io/braze-android-sdk/kdoc/braze-android-sdk/com.braze.models.inappmessage/-i-in-app-message/index.html) interface, in a subclass called [`InAppMessageBase`](https://braze-inc.github.io/braze-android-sdk/kdoc/braze-android-sdk/com.braze.models.inappmessage/-in-app-message-base/index.html). `IInAppMessage` also includes a subinterface, [`IInAppMessageImmersive`](https://braze-inc.github.io/braze-android-sdk/kdoc/braze-android-sdk/com.braze.models.inappmessage/-i-in-app-message-immersive/index.html), which lets you add close, click-action, and analytics [buttons](https://braze-inc.github.io/braze-android-sdk/kdoc/braze-android-sdk/com.braze.models.inappmessage/-message-button/index.html) to your app.
**Important:**
Keep in mind, in-app messages containing buttons will include the `clickAction` message in the final payload if the click action is added prior to adding the button text.
[`slideup`](https://braze-inc.github.io/braze-android-sdk/kdoc/braze-android-sdk/com.braze.models.inappmessage/-in-app-message-slideup/index.html) in-app messages are so-named because they "slide up" or "slide down" from the top or bottom of the screen. They cover a small portion of the screen and provide an effective and non-intrusive messaging capability.
The `slideup` in-app message object extends [`InAppMessageBase`](https://braze-inc.github.io/braze-android-sdk/kdoc/braze-android-sdk/com.braze.models.inappmessage/-in-app-message-base/index.html).
{: style="border:0px;"}
[`modal`](https://braze-inc.github.io/braze-android-sdk/kdoc/braze-android-sdk/com.braze.models.inappmessage/-in-app-message-modal/index.html) in-app messages appear in the center of the screen and are framed by a translucent panel. Useful for more critical messaging, they can be equipped with two click-action and analytics-enabled buttons.
This message type is a subclass of [`InAppMessageImmersiveBase`](https://braze-inc.github.io/braze-android-sdk/kdoc/braze-android-sdk/com.braze.models.inappmessage/-in-app-message-immersive-base/index.html), an abstract class that implements `IInAppMessageImmersive`, giving you the option to add custom functionality to your locally generated in-app messages.
{: style="border:0px;"}
[`full`](https://braze-inc.github.io/braze-android-sdk/kdoc/braze-android-sdk/com.braze.models.inappmessage/-in-app-message-full/index.html) in-app messages are useful for maximizing the content and impact of your user communication. The upper half of a `full` in-app message contains an image, and the lower half displays text and up to two click action and analytics-enabled buttons.
This message type extends [`InAppMessageImmersiveBase`](https://braze-inc.github.io/braze-android-sdk/kdoc/braze-android-sdk/com.braze.models.inappmessage/-in-app-message-immersive-base/index.html), giving you the option to add custom functionality to your locally generated in-app messages.

[`HTML`](https://braze-inc.github.io/braze-android-sdk/kdoc/braze-android-sdk/com.braze.models.inappmessage/-in-app-message-html/index.html) in-app messages are useful for creating fully customized user content. User-defined HTML in-app message content is displayed in a `WebView` and may optionally contain other rich content, such as images and fonts, allowing for full control over message appearance and functionality.
This message type implements [`IInAppMessageHtml`](https://braze-inc.github.io/braze-android-sdk/kdoc/braze-android-sdk/com.braze.models.inappmessage/-i-in-app-message-html/index.html), which is a subclass of [`IInAppMessage`](https://braze-inc.github.io/braze-android-sdk/kdoc/braze-android-sdk/com.braze.models.inappmessage/-i-in-app-message/index.html).
**Note:**
On Android, links configured with `target="_blank"` in custom HTML in-app messages open in the device's default web browser.
Android in-app messages support a JavaScript `brazeBridge` interface to call methods on the Braze Android SDK from within your HTML, see our JavaScript bridge page for more details.
{: style="border:0px;"}
**Important:**
We currently do not support the display of custom HTML in-app messages in an iFrame on the iOS and Android platforms.
**Tip:**
You can also define custom in-app message views for your app. For a full walkthrough, see [Setting custom factories](https://www.braze.com/docs/es/es/developer_guide/in_app_messages/customization#android_setting-custom-factories).
Each in-app message type is highly customizable across content, images, icons, click actions, analytics, display, and delivery. They are enumerated types of `Braze.InAppMessage`, which defines basic behavior and traits for all in-app messages. For the full list of in-app message properties and usage, see the [`InAppMessage` class](https://braze-inc.github.io/braze-swift-sdk/documentation/brazekit/braze/inappmessage).
These are the available in-app message types in Braze and how they will look like for end-users.
[`Slideup`](https://braze-inc.github.io/braze-swift-sdk/documentation/brazekit/braze/inappmessage/slideup-swift.struct) in-app messages are given this name because they "slide up" or "slide down" from the top or bottom of the screen. They cover a small portion of the screen and provide an effective and non-intrusive messaging capability.
{: style="max-width:35%;border:none;"}
[`Modal`](https://braze-inc.github.io/braze-swift-sdk/documentation/brazekit/braze/inappmessage/modal-swift.struct) in-app messages appear in the center of the screen and are framed by a translucent panel. Useful for more critical messaging, they can be equipped with up to two analytics-enabled buttons.
{: style="max-width:35%;border:none;"}
[`Modal Image`](https://braze-inc.github.io/braze-swift-sdk/documentation/brazekit/braze/inappmessage/modalimage-swift.struct) in-app messages appear in the center of the screen and are framed by a translucent panel. These messages are similar to the `Modal` type except without header or message text. Useful for more critical messaging, they can be equipped with up to two analytics-enabled buttons.
{: style="max-width:35%;border:none;"}
[`Full`](https://braze-inc.github.io/braze-swift-sdk/documentation/brazekit/braze/inappmessage/full-swift.struct) in-app messages are useful for maximizing the content and impact of your user communication. The upper half of a `Full` in-app message contains an image, and the lower half displays text and up to two analytics-enabled buttons.
{: style="max-width:35%;border:none;"}
[`Full Image`](https://braze-inc.github.io/braze-swift-sdk/documentation/brazekit/braze/inappmessage/fullimage-swift.struct) in-app messages are similar to `Full` in-app messages except without header or message text. This message type is useful for maximizing the content and impact of your user communication. A `Full Image` in-app message contains an image spanning the entire screen, with the option to display up to two analytics-enabled buttons.
{: style="max-width:35%;border:none;"}
[`HTML`](https://braze-inc.github.io/braze-swift-sdk/documentation/brazekit/braze/inappmessage/html-swift.struct) in-app messages are useful for creating fully customized user content. User-defined HTML Full in-app message content is displayed in a `WKWebView`and may optionally contain other rich content, such as images and fonts, allowing for full control over message appearance and functionality.
iOS in-app messages support a JavaScript `brazeBridge` interface to call methods on the Braze Web SDK from within your HTML, see our [best practices](https://www.braze.com/docs/es/es/user_guide/message_building_by_channel/in-app_messages/best_practices/) for more details.
The following example shows a paginated HTML Full in-app message:

Note that we currently do not support the display of custom HTML in-app messages in an iFrame on the iOS and Android platforms.
[`Control`](https://braze-inc.github.io/braze-swift-sdk/documentation/brazekit/braze/inappmessage/control-swift.struct) in-app messages do not contain a UI component and are used primarily for analytics purposes. This type is used to verify receipt of an in-app message sent to a control group.
For further details about Intelligent Selection and control groups, refer to [Intelligent Selection](https://www.braze.com/docs/es/es/user_guide/brazeai/intelligence/intelligent_selection/).
## Data model
The in-app message model is available in the React Native SDK. Braze has four in-app message types that share the same data model: **slideup**, **modal**, **full** and **HTML full**.
### Messages
The in-app message model provides the base for all in-app messages.
|Property | Description |
|------------------|------------------------------------------------------------------------------------------------------------------------|
|`inAppMessageJsonString` | The message JSON representation. |
|`message` | The message text. |
|`header` | The message header. |
|`uri` | The URI associated with the button click action. |
|`imageUrl` | The message image URL. |
|`zippedAssetsUrl` | The zipped assets prepared to display HTML content. |
|`useWebView` | Indicates whether the button click action should redirect using a web view. |
|`duration` | The message display duration. |
|`clickAction` | The button click action type. The types are: `URI`, and `NONE`. |
|`dismissType` | The message close type. The two types are: `SWIPE` and `AUTO_DISMISS`. |
|`messageType` | The in-app message type supported by the SDK. The four types are: `SLIDEUP`, `MODAL`, `FULL` and `HTML_FULL`. |
|`extras` | The message extras dictionary. Default value: `[:]`. |
|`buttons` | The list of buttons on the in-app message. |
|`toString()` | The message as a String representation. |
{: .reset-td-br-1 .reset-td-br-2 aria-label="Messages" }
For a full reference of the in-app message model, see the [Android](https://braze-inc.github.io/braze-android-sdk/kdoc/braze-android-sdk/com.braze.models.inappmessage/index.html) and [iOS](https://braze-inc.github.io/braze-swift-sdk/documentation/brazekit/braze/inappmessage) documentation.
### Buttons
Buttons can be added to in-app messages to perform actions and log analytics. The button model provides the base for all in-app message buttons.
|Property | Description |
|------------------|-----------------------------------------------------------------------------------------------------------------------------|
|`text` | The text on the button. |
|`uri` | The URI associated with the button click action. |
|`useWebView` | Indicates whether the button click action should redirect using a web view. |
|`clickAction` | The type of click action processed when the user clicks on the button. The types are: `URI`, and `NONE`. |
|`id` | The button ID on the message. |
|`toString()` | The button as a String representation. |
{: .reset-td-br-1 .reset-td-br-2 aria-label="Buttons" }
For a full reference of button model, see the [Android](https://braze-inc.github.io/braze-android-sdk/kdoc/braze-android-sdk/com.braze.models.inappmessage/-message-button/index.html) and [iOS](https://braze-inc.github.io/braze-swift-sdk/documentation/brazekit/braze/inappmessage/button) documentation.
## Prerequisites
Before you can use this feature, you'll need to [integrate the Roku Braze SDK](https://www.braze.com/docs/es/es/developer_guide/sdk_integration/?sdktab=roku).
Additionally, in-app messages will only be sent to Roku devices running the minimum supported SDK version:
## Message types
Braze offers several default in-app message types, each customizable with messages, images, [Font Awesome](https://fontawesome.com/icons?d=gallery&p=2) icons, click actions, analytics, color schemes, and more.
Their basic behavior and traits are defined by the [`IInAppMessage`](https://braze-inc.github.io/braze-android-sdk/kdoc/braze-android-sdk/com.braze.models.inappmessage/-i-in-app-message/index.html) interface, in a subclass called [`InAppMessageBase`](https://braze-inc.github.io/braze-android-sdk/kdoc/braze-android-sdk/com.braze.models.inappmessage/-in-app-message-base/index.html). `IInAppMessage` also includes a subinterface, [`IInAppMessageImmersive`](https://braze-inc.github.io/braze-android-sdk/kdoc/braze-android-sdk/com.braze.models.inappmessage/-i-in-app-message-immersive/index.html), which lets you add close, click-action, and analytics [buttons](https://braze-inc.github.io/braze-android-sdk/kdoc/braze-android-sdk/com.braze.models.inappmessage/-message-button/index.html) to your app.
**Important:**
Keep in mind, in-app messages containing buttons will include the `clickAction` message in the final payload if the click action is added prior to adding the button text.
[`slideup`](https://braze-inc.github.io/braze-android-sdk/kdoc/braze-android-sdk/com.braze.models.inappmessage/-in-app-message-slideup/index.html) in-app messages are so-named because they "slide up" or "slide down" from the top or bottom of the screen. They cover a small portion of the screen and provide an effective and non-intrusive messaging capability.
The `slideup` in-app message object extends [`InAppMessageBase`](https://braze-inc.github.io/braze-android-sdk/kdoc/braze-android-sdk/com.braze.models.inappmessage/-in-app-message-base/index.html).
{: style="border:0px;"}
[`modal`](https://braze-inc.github.io/braze-android-sdk/kdoc/braze-android-sdk/com.braze.models.inappmessage/-in-app-message-modal/index.html) in-app messages appear in the center of the screen and are framed by a translucent panel. Useful for more critical messaging, they can be equipped with two click-action and analytics-enabled buttons.
This message type is a subclass of [`InAppMessageImmersiveBase`](https://braze-inc.github.io/braze-android-sdk/kdoc/braze-android-sdk/com.braze.models.inappmessage/-in-app-message-immersive-base/index.html), an abstract class that implements `IInAppMessageImmersive`, giving you the option to add custom functionality to your locally generated in-app messages.
{: style="border:0px;"}
[`full`](https://braze-inc.github.io/braze-android-sdk/kdoc/braze-android-sdk/com.braze.models.inappmessage/-in-app-message-full/index.html) in-app messages are useful for maximizing the content and impact of your user communication. The upper half of a `full` in-app message contains an image, and the lower half displays text and up to two click action and analytics-enabled buttons.
This message type extends [`InAppMessageImmersiveBase`](https://braze-inc.github.io/braze-android-sdk/kdoc/braze-android-sdk/com.braze.models.inappmessage/-in-app-message-immersive-base/index.html), giving you the option to add custom functionality to your locally generated in-app messages.

[`HTML`](https://braze-inc.github.io/braze-android-sdk/kdoc/braze-android-sdk/com.braze.models.inappmessage/-in-app-message-html/index.html) in-app messages are useful for creating fully customized user content. User-defined HTML in-app message content is displayed in a `WebView` and may optionally contain other rich content, such as images and fonts, allowing for full control over message appearance and functionality.
This message type implements [`IInAppMessageHtml`](https://braze-inc.github.io/braze-android-sdk/kdoc/braze-android-sdk/com.braze.models.inappmessage/-i-in-app-message-html/index.html), which is a subclass of [`IInAppMessage`](https://braze-inc.github.io/braze-android-sdk/kdoc/braze-android-sdk/com.braze.models.inappmessage/-i-in-app-message/index.html).
**Note:**
On Android, links configured with `target="_blank"` in custom HTML in-app messages open in the device's default web browser.
Android in-app messages support a JavaScript `brazeBridge` interface to call methods on the Braze Android SDK from within your HTML, see our JavaScript bridge page for more details.
{: style="border:0px;"}
**Important:**
We currently do not support the display of custom HTML in-app messages in an iFrame on the iOS and Android platforms.
**Tip:**
You can also define custom in-app message views for your app. For a full walkthrough, see [Setting custom factories](https://www.braze.com/docs/es/es/developer_guide/in_app_messages/customization#android_setting-custom-factories).
Each in-app message type is highly customizable across content, images, icons, click actions, analytics, display, and delivery. They are enumerated types of `Braze.InAppMessage`, which defines basic behavior and traits for all in-app messages. For the full list of in-app message properties and usage, see the [`InAppMessage` class](https://braze-inc.github.io/braze-swift-sdk/documentation/brazekit/braze/inappmessage).
These are the available in-app message types in Braze and how they will look like for end-users.
[`Slideup`](https://braze-inc.github.io/braze-swift-sdk/documentation/brazekit/braze/inappmessage/slideup-swift.struct) in-app messages are given this name because they "slide up" or "slide down" from the top or bottom of the screen. They cover a small portion of the screen and provide an effective and non-intrusive messaging capability.
{: style="max-width:35%;border:none;"}
[`Modal`](https://braze-inc.github.io/braze-swift-sdk/documentation/brazekit/braze/inappmessage/modal-swift.struct) in-app messages appear in the center of the screen and are framed by a translucent panel. Useful for more critical messaging, they can be equipped with up to two analytics-enabled buttons.
{: style="max-width:35%;border:none;"}
[`Modal Image`](https://braze-inc.github.io/braze-swift-sdk/documentation/brazekit/braze/inappmessage/modalimage-swift.struct) in-app messages appear in the center of the screen and are framed by a translucent panel. These messages are similar to the `Modal` type except without header or message text. Useful for more critical messaging, they can be equipped with up to two analytics-enabled buttons.
{: style="max-width:35%;border:none;"}
[`Full`](https://braze-inc.github.io/braze-swift-sdk/documentation/brazekit/braze/inappmessage/full-swift.struct) in-app messages are useful for maximizing the content and impact of your user communication. The upper half of a `Full` in-app message contains an image, and the lower half displays text and up to two analytics-enabled buttons.
{: style="max-width:35%;border:none;"}
[`Full Image`](https://braze-inc.github.io/braze-swift-sdk/documentation/brazekit/braze/inappmessage/fullimage-swift.struct) in-app messages are similar to `Full` in-app messages except without header or message text. This message type is useful for maximizing the content and impact of your user communication. A `Full Image` in-app message contains an image spanning the entire screen, with the option to display up to two analytics-enabled buttons.
{: style="max-width:35%;border:none;"}
[`HTML`](https://braze-inc.github.io/braze-swift-sdk/documentation/brazekit/braze/inappmessage/html-swift.struct) in-app messages are useful for creating fully customized user content. User-defined HTML Full in-app message content is displayed in a `WKWebView`and may optionally contain other rich content, such as images and fonts, allowing for full control over message appearance and functionality.
iOS in-app messages support a JavaScript `brazeBridge` interface to call methods on the Braze Web SDK from within your HTML, see our [best practices](https://www.braze.com/docs/es/es/user_guide/message_building_by_channel/in-app_messages/best_practices/) for more details.
The following example shows a paginated HTML Full in-app message:

Note that we currently do not support the display of custom HTML in-app messages in an iFrame on the iOS and Android platforms.
[`Control`](https://braze-inc.github.io/braze-swift-sdk/documentation/brazekit/braze/inappmessage/control-swift.struct) in-app messages do not contain a UI component and are used primarily for analytics purposes. This type is used to verify receipt of an in-app message sent to a control group.
For further details about Intelligent Selection and control groups, refer to [Intelligent Selection](https://www.braze.com/docs/es/es/user_guide/brazeai/intelligence/intelligent_selection/).
## Enabling in-app messages
### Step 1: Add an observer
To process in-app messages, you can add an observer on `BrazeTask.BrazeInAppMessage`:
```brightscript
m.BrazeTask.observeField("BrazeInAppMessage", "onInAppMessageReceived")
```
### Step 2: Access triggered messages
Then within your handler, you have access to the highest in-app message that your campaigns have triggered:
```brightscript
sub onInAppMessageReceived()
in_app_message = m.BrazeTask.BrazeInAppMessage
...
end sub
```
## Message fields
### Handling
The following lists the fields you will need to handle your in-app messages:
| Fields | Description |
| ------ | ----------- |
| `buttons` | List of buttons (could be an empty list). |
| `click_action` | `"URI"` or `"NONE"`. Use this field to indicate whether the in-app message should open to a URI link or close the message when clicked. When there are no buttons, this should happen when the user clicks "OK" when the in-app message is displayed. |
| `dismiss_type` | `"AUTO_DISMISS"` or `"SWIPE"`. Use this field to indicate whether your in-app message will auto dismiss or require a swipe to dismiss. |
| `display_delay` | How long (seconds) to wait until displaying the in-app message. |
| `duration` | How long (milliseconds) the message should be displayed when `dismiss_type` is set to `"AUTO_DISMISS"`. |
| `extras` | Key-value pairs. |
| `header` | The header text. |
| `id` | The ID used to log impressions or clicks. |
| `image_url` | In-app message image URL. |
| `message` | Message body text. |
| `uri` | Your URI users will be sent to based on your `click_action`. This field must be included when `click_action` is `"URI"`. |
{: .reset-td-br-1 .reset-td-br-2 aria-label="Handling" }
**Important:**
For in-app messages containing buttons, the message `click_action` will also be included in the final payload if the click action is added prior to adding the button text.
### Styling
There are also various styling fields that you could choose to use from the dashboard:
| Fields | Description |
| ------ | ----------- |
| `bg_color` | Background color. |
| `close_button_color` | Close button color. |
| `frame_color` | The color of the background screen overlay. |
| `header_text_color` | Header text color. |
| `message_text_color` | Message text color. |
| `text_align` | "START", "CENTER", or "END". Your selected text alignment. |
{: .reset-td-br-1 .reset-td-br-2 aria-label="Styling" }
Alternatively, you could implement the in-app message and style it within your Roku application using a standard palette:
### Buttons
| Fields | Description |
| ------ | ----------- |
| `click_action` | `"URI"` or `"NONE"`. Use this field to indicate whether the in-app message should open to a URI link or close the message when clicked. |
| `id` | The ID value of the button itself. |
| `text` | The text to display on the button. |
| `uri` | Your URI users will be sent to based on your `click_action`. This field must be included when `click_action` is `"URI"`. |
{: .reset-td-br-1 .reset-td-br-2 aria-label="Buttons" }
**Important:**
Keep in mind, you'll need to implement your own custom UI since in-app messaging is supported via headless UI using the Swift SDK—which does not include any default UI or views for tvOS.
## Prerequisites
Before you can use this feature, you'll need to [integrate the Swift Braze SDK](https://www.braze.com/docs/es/es/developer_guide/sdk_integration/?sdktab=swift).
## Enabling in-app messages
### Step 1: Create a new iOS app
In Braze, select **Settings** > **App Settings**, then select **Add App**. Enter a name for your tvOS app, select **iOS**—_not tvOS_—then select **Add App**.
{: style="width:70%"}
**Warning:**
If you select the **tvOS** checkbox, you will not be able to customize in-app messages for tvOS.
### Step 2: Get your app's API key
In your app settings, select your new tvOS app then take note of your app's API key. You'll use this key to configure your app in Xcode.
{: style="width:70%"}
### Step 3: Integrate BrazeKit
Use your app's API key to integrate the [Braze Swift SDK](https://github.com/braze-inc/braze-swift-sdk) into your tvOS project in Xcode. You only need to integrate BrazeKit from the Braze Swift SDK.
### Step 4: Create your custom UI
Because Braze doesn't provide a default UI for in-app messages on tvOS, you'll need to customize it yourself. For a full walkthrough, see our step-by-step tutorial: [Customizing in-app messages for tvOS](https://braze-inc.github.io/braze-swift-sdk/documentation/braze/in-app-message-customization). For a sample project, see [Braze Swift SDK samples](https://github.com/braze-inc/braze-swift-sdk/tree/main/Examples#inappmessages-custom-ui).
## Prerequisites
Before you can use this feature, you'll need to [integrate the Unity Braze SDK](https://www.braze.com/docs/es/es/developer_guide/sdk_integration/?sdktab=unity).
## Message types
Braze offers several default in-app message types, each customizable with messages, images, [Font Awesome](https://fontawesome.com/icons?d=gallery&p=2) icons, click actions, analytics, color schemes, and more.
Their basic behavior and traits are defined by the [`IInAppMessage`](https://braze-inc.github.io/braze-android-sdk/kdoc/braze-android-sdk/com.braze.models.inappmessage/-i-in-app-message/index.html) interface, in a subclass called [`InAppMessageBase`](https://braze-inc.github.io/braze-android-sdk/kdoc/braze-android-sdk/com.braze.models.inappmessage/-in-app-message-base/index.html). `IInAppMessage` also includes a subinterface, [`IInAppMessageImmersive`](https://braze-inc.github.io/braze-android-sdk/kdoc/braze-android-sdk/com.braze.models.inappmessage/-i-in-app-message-immersive/index.html), which lets you add close, click-action, and analytics [buttons](https://braze-inc.github.io/braze-android-sdk/kdoc/braze-android-sdk/com.braze.models.inappmessage/-message-button/index.html) to your app.
**Important:**
Keep in mind, in-app messages containing buttons will include the `clickAction` message in the final payload if the click action is added prior to adding the button text.
[`slideup`](https://braze-inc.github.io/braze-android-sdk/kdoc/braze-android-sdk/com.braze.models.inappmessage/-in-app-message-slideup/index.html) in-app messages are so-named because they "slide up" or "slide down" from the top or bottom of the screen. They cover a small portion of the screen and provide an effective and non-intrusive messaging capability.
The `slideup` in-app message object extends [`InAppMessageBase`](https://braze-inc.github.io/braze-android-sdk/kdoc/braze-android-sdk/com.braze.models.inappmessage/-in-app-message-base/index.html).
{: style="border:0px;"}
[`modal`](https://braze-inc.github.io/braze-android-sdk/kdoc/braze-android-sdk/com.braze.models.inappmessage/-in-app-message-modal/index.html) in-app messages appear in the center of the screen and are framed by a translucent panel. Useful for more critical messaging, they can be equipped with two click-action and analytics-enabled buttons.
This message type is a subclass of [`InAppMessageImmersiveBase`](https://braze-inc.github.io/braze-android-sdk/kdoc/braze-android-sdk/com.braze.models.inappmessage/-in-app-message-immersive-base/index.html), an abstract class that implements `IInAppMessageImmersive`, giving you the option to add custom functionality to your locally generated in-app messages.
{: style="border:0px;"}
[`full`](https://braze-inc.github.io/braze-android-sdk/kdoc/braze-android-sdk/com.braze.models.inappmessage/-in-app-message-full/index.html) in-app messages are useful for maximizing the content and impact of your user communication. The upper half of a `full` in-app message contains an image, and the lower half displays text and up to two click action and analytics-enabled buttons.
This message type extends [`InAppMessageImmersiveBase`](https://braze-inc.github.io/braze-android-sdk/kdoc/braze-android-sdk/com.braze.models.inappmessage/-in-app-message-immersive-base/index.html), giving you the option to add custom functionality to your locally generated in-app messages.

[`HTML`](https://braze-inc.github.io/braze-android-sdk/kdoc/braze-android-sdk/com.braze.models.inappmessage/-in-app-message-html/index.html) in-app messages are useful for creating fully customized user content. User-defined HTML in-app message content is displayed in a `WebView` and may optionally contain other rich content, such as images and fonts, allowing for full control over message appearance and functionality.
This message type implements [`IInAppMessageHtml`](https://braze-inc.github.io/braze-android-sdk/kdoc/braze-android-sdk/com.braze.models.inappmessage/-i-in-app-message-html/index.html), which is a subclass of [`IInAppMessage`](https://braze-inc.github.io/braze-android-sdk/kdoc/braze-android-sdk/com.braze.models.inappmessage/-i-in-app-message/index.html).
**Note:**
On Android, links configured with `target="_blank"` in custom HTML in-app messages open in the device's default web browser.
Android in-app messages support a JavaScript `brazeBridge` interface to call methods on the Braze Android SDK from within your HTML, see our JavaScript bridge page for more details.
{: style="border:0px;"}
**Important:**
We currently do not support the display of custom HTML in-app messages in an iFrame on the iOS and Android platforms.
**Tip:**
You can also define custom in-app message views for your app. For a full walkthrough, see [Setting custom factories](https://www.braze.com/docs/es/es/developer_guide/in_app_messages/customization#android_setting-custom-factories).
Each in-app message type is highly customizable across content, images, icons, click actions, analytics, display, and delivery. They are enumerated types of `Braze.InAppMessage`, which defines basic behavior and traits for all in-app messages. For the full list of in-app message properties and usage, see the [`InAppMessage` class](https://braze-inc.github.io/braze-swift-sdk/documentation/brazekit/braze/inappmessage).
These are the available in-app message types in Braze and how they will look like for end-users.
[`Slideup`](https://braze-inc.github.io/braze-swift-sdk/documentation/brazekit/braze/inappmessage/slideup-swift.struct) in-app messages are given this name because they "slide up" or "slide down" from the top or bottom of the screen. They cover a small portion of the screen and provide an effective and non-intrusive messaging capability.
{: style="max-width:35%;border:none;"}
[`Modal`](https://braze-inc.github.io/braze-swift-sdk/documentation/brazekit/braze/inappmessage/modal-swift.struct) in-app messages appear in the center of the screen and are framed by a translucent panel. Useful for more critical messaging, they can be equipped with up to two analytics-enabled buttons.
{: style="max-width:35%;border:none;"}
[`Modal Image`](https://braze-inc.github.io/braze-swift-sdk/documentation/brazekit/braze/inappmessage/modalimage-swift.struct) in-app messages appear in the center of the screen and are framed by a translucent panel. These messages are similar to the `Modal` type except without header or message text. Useful for more critical messaging, they can be equipped with up to two analytics-enabled buttons.
{: style="max-width:35%;border:none;"}
[`Full`](https://braze-inc.github.io/braze-swift-sdk/documentation/brazekit/braze/inappmessage/full-swift.struct) in-app messages are useful for maximizing the content and impact of your user communication. The upper half of a `Full` in-app message contains an image, and the lower half displays text and up to two analytics-enabled buttons.
{: style="max-width:35%;border:none;"}
[`Full Image`](https://braze-inc.github.io/braze-swift-sdk/documentation/brazekit/braze/inappmessage/fullimage-swift.struct) in-app messages are similar to `Full` in-app messages except without header or message text. This message type is useful for maximizing the content and impact of your user communication. A `Full Image` in-app message contains an image spanning the entire screen, with the option to display up to two analytics-enabled buttons.
{: style="max-width:35%;border:none;"}
[`HTML`](https://braze-inc.github.io/braze-swift-sdk/documentation/brazekit/braze/inappmessage/html-swift.struct) in-app messages are useful for creating fully customized user content. User-defined HTML Full in-app message content is displayed in a `WKWebView`and may optionally contain other rich content, such as images and fonts, allowing for full control over message appearance and functionality.
iOS in-app messages support a JavaScript `brazeBridge` interface to call methods on the Braze Web SDK from within your HTML, see our [best practices](https://www.braze.com/docs/es/es/user_guide/message_building_by_channel/in-app_messages/best_practices/) for more details.
The following example shows a paginated HTML Full in-app message:

Note that we currently do not support the display of custom HTML in-app messages in an iFrame on the iOS and Android platforms.
[`Control`](https://braze-inc.github.io/braze-swift-sdk/documentation/brazekit/braze/inappmessage/control-swift.struct) in-app messages do not contain a UI component and are used primarily for analytics purposes. This type is used to verify receipt of an in-app message sent to a control group.
For further details about Intelligent Selection and control groups, refer to [Intelligent Selection](https://www.braze.com/docs/es/es/user_guide/brazeai/intelligence/intelligent_selection/).
## Prerequisites
Before you can use this feature, you'll need to [integrate the .NET MAUI Braze SDK](https://www.braze.com/docs/es/es/developer_guide/sdk_integration/?sdktab=.net%20maui%20(xamarin)).
## Message types
Braze offers several default in-app message types, each customizable with messages, images, [Font Awesome](https://fontawesome.com/icons?d=gallery&p=2) icons, click actions, analytics, color schemes, and more.
Their basic behavior and traits are defined by the [`IInAppMessage`](https://braze-inc.github.io/braze-android-sdk/kdoc/braze-android-sdk/com.braze.models.inappmessage/-i-in-app-message/index.html) interface, in a subclass called [`InAppMessageBase`](https://braze-inc.github.io/braze-android-sdk/kdoc/braze-android-sdk/com.braze.models.inappmessage/-in-app-message-base/index.html). `IInAppMessage` also includes a subinterface, [`IInAppMessageImmersive`](https://braze-inc.github.io/braze-android-sdk/kdoc/braze-android-sdk/com.braze.models.inappmessage/-i-in-app-message-immersive/index.html), which lets you add close, click-action, and analytics [buttons](https://braze-inc.github.io/braze-android-sdk/kdoc/braze-android-sdk/com.braze.models.inappmessage/-message-button/index.html) to your app.
**Important:**
Keep in mind, in-app messages containing buttons will include the `clickAction` message in the final payload if the click action is added prior to adding the button text.
[`slideup`](https://braze-inc.github.io/braze-android-sdk/kdoc/braze-android-sdk/com.braze.models.inappmessage/-in-app-message-slideup/index.html) in-app messages are so-named because they "slide up" or "slide down" from the top or bottom of the screen. They cover a small portion of the screen and provide an effective and non-intrusive messaging capability.
The `slideup` in-app message object extends [`InAppMessageBase`](https://braze-inc.github.io/braze-android-sdk/kdoc/braze-android-sdk/com.braze.models.inappmessage/-in-app-message-base/index.html).
{: style="border:0px;"}
[`modal`](https://braze-inc.github.io/braze-android-sdk/kdoc/braze-android-sdk/com.braze.models.inappmessage/-in-app-message-modal/index.html) in-app messages appear in the center of the screen and are framed by a translucent panel. Useful for more critical messaging, they can be equipped with two click-action and analytics-enabled buttons.
This message type is a subclass of [`InAppMessageImmersiveBase`](https://braze-inc.github.io/braze-android-sdk/kdoc/braze-android-sdk/com.braze.models.inappmessage/-in-app-message-immersive-base/index.html), an abstract class that implements `IInAppMessageImmersive`, giving you the option to add custom functionality to your locally generated in-app messages.
{: style="border:0px;"}
[`full`](https://braze-inc.github.io/braze-android-sdk/kdoc/braze-android-sdk/com.braze.models.inappmessage/-in-app-message-full/index.html) in-app messages are useful for maximizing the content and impact of your user communication. The upper half of a `full` in-app message contains an image, and the lower half displays text and up to two click action and analytics-enabled buttons.
This message type extends [`InAppMessageImmersiveBase`](https://braze-inc.github.io/braze-android-sdk/kdoc/braze-android-sdk/com.braze.models.inappmessage/-in-app-message-immersive-base/index.html), giving you the option to add custom functionality to your locally generated in-app messages.

[`HTML`](https://braze-inc.github.io/braze-android-sdk/kdoc/braze-android-sdk/com.braze.models.inappmessage/-in-app-message-html/index.html) in-app messages are useful for creating fully customized user content. User-defined HTML in-app message content is displayed in a `WebView` and may optionally contain other rich content, such as images and fonts, allowing for full control over message appearance and functionality.
This message type implements [`IInAppMessageHtml`](https://braze-inc.github.io/braze-android-sdk/kdoc/braze-android-sdk/com.braze.models.inappmessage/-i-in-app-message-html/index.html), which is a subclass of [`IInAppMessage`](https://braze-inc.github.io/braze-android-sdk/kdoc/braze-android-sdk/com.braze.models.inappmessage/-i-in-app-message/index.html).
**Note:**
On Android, links configured with `target="_blank"` in custom HTML in-app messages open in the device's default web browser.
Android in-app messages support a JavaScript `brazeBridge` interface to call methods on the Braze Android SDK from within your HTML, see our JavaScript bridge page for more details.
{: style="border:0px;"}
**Important:**
We currently do not support the display of custom HTML in-app messages in an iFrame on the iOS and Android platforms.
**Tip:**
You can also define custom in-app message views for your app. For a full walkthrough, see [Setting custom factories](https://www.braze.com/docs/es/es/developer_guide/in_app_messages/customization#android_setting-custom-factories).
Each in-app message type is highly customizable across content, images, icons, click actions, analytics, display, and delivery. They are enumerated types of `Braze.InAppMessage`, which defines basic behavior and traits for all in-app messages. For the full list of in-app message properties and usage, see the [`InAppMessage` class](https://braze-inc.github.io/braze-swift-sdk/documentation/brazekit/braze/inappmessage).
These are the available in-app message types in Braze and how they will look like for end-users.
[`Slideup`](https://braze-inc.github.io/braze-swift-sdk/documentation/brazekit/braze/inappmessage/slideup-swift.struct) in-app messages are given this name because they "slide up" or "slide down" from the top or bottom of the screen. They cover a small portion of the screen and provide an effective and non-intrusive messaging capability.
{: style="max-width:35%;border:none;"}
[`Modal`](https://braze-inc.github.io/braze-swift-sdk/documentation/brazekit/braze/inappmessage/modal-swift.struct) in-app messages appear in the center of the screen and are framed by a translucent panel. Useful for more critical messaging, they can be equipped with up to two analytics-enabled buttons.
{: style="max-width:35%;border:none;"}
[`Modal Image`](https://braze-inc.github.io/braze-swift-sdk/documentation/brazekit/braze/inappmessage/modalimage-swift.struct) in-app messages appear in the center of the screen and are framed by a translucent panel. These messages are similar to the `Modal` type except without header or message text. Useful for more critical messaging, they can be equipped with up to two analytics-enabled buttons.
{: style="max-width:35%;border:none;"}
[`Full`](https://braze-inc.github.io/braze-swift-sdk/documentation/brazekit/braze/inappmessage/full-swift.struct) in-app messages are useful for maximizing the content and impact of your user communication. The upper half of a `Full` in-app message contains an image, and the lower half displays text and up to two analytics-enabled buttons.
{: style="max-width:35%;border:none;"}
[`Full Image`](https://braze-inc.github.io/braze-swift-sdk/documentation/brazekit/braze/inappmessage/fullimage-swift.struct) in-app messages are similar to `Full` in-app messages except without header or message text. This message type is useful for maximizing the content and impact of your user communication. A `Full Image` in-app message contains an image spanning the entire screen, with the option to display up to two analytics-enabled buttons.
{: style="max-width:35%;border:none;"}
[`HTML`](https://braze-inc.github.io/braze-swift-sdk/documentation/brazekit/braze/inappmessage/html-swift.struct) in-app messages are useful for creating fully customized user content. User-defined HTML Full in-app message content is displayed in a `WKWebView`and may optionally contain other rich content, such as images and fonts, allowing for full control over message appearance and functionality.
iOS in-app messages support a JavaScript `brazeBridge` interface to call methods on the Braze Web SDK from within your HTML, see our [best practices](https://www.braze.com/docs/es/es/user_guide/message_building_by_channel/in-app_messages/best_practices/) for more details.
The following example shows a paginated HTML Full in-app message:

Note that we currently do not support the display of custom HTML in-app messages in an iFrame on the iOS and Android platforms.
[`Control`](https://braze-inc.github.io/braze-swift-sdk/documentation/brazekit/braze/inappmessage/control-swift.struct) in-app messages do not contain a UI component and are used primarily for analytics purposes. This type is used to verify receipt of an in-app message sent to a control group.
For further details about Intelligent Selection and control groups, refer to [Intelligent Selection](https://www.braze.com/docs/es/es/user_guide/brazeai/intelligence/intelligent_selection/).
## Próximos pasos
¿Listo para profundizar más? Echa un vistazo a estos tutoriales paso a paso:
- Ajusta el momento de entrega de los mensajes [aplazando y restaurando los mensajes desencadenados](https://www.braze.com/docs/es/es/developer_guide/in_app_messages/tutorials/deferring_triggered_messages).
- Refina la orientación de los mensajes [estableciendo reglas de visualización condicionales](https://www.braze.com/docs/es/es/developer_guide/in_app_messages/tutorials/conditionally_displaying_messages).
- Adapta el aspecto de tu marca [personalizando el estilo de los mensajes con pares clave-valor](https://www.braze.com/docs/es/es/developer_guide/in_app_messages/tutorials/customizing_message_styling).
# Personalizar mensajes dentro de la aplicación para el SDK de Braze
Source: /docs/es/developer_guide/in_app_messages/customization/index.md
# Personalizar mensajes dentro de la aplicación
> Aprende a personalizar los mensajes dentro de la aplicación para el SDK de Braze. Para conocer técnicas de estilo avanzadas, consulta nuestro tutorial sobre cómo [personalizar el estilo de los mensajes mediante pares clave-valor](https://www.braze.com/docs/es/es/developer_guide/in_app_messages/tutorials/customizing_message_styling).
## Prerequisites
Before you can use this feature, you'll need to [integrate the Web Braze SDK](https://www.braze.com/docs/es/es/developer_guide/sdk_integration/?sdktab=web).
## Custom styles
Braze UI elements come with a default look and feel that create a neutral in-app message experience and aim for consistency with other Braze mobile platforms. The default Braze styles are defined in CSS within the Braze SDK.
### Setting a default style
By overriding selected styles in your application, you can customize our standard in-app message types with your own background images, font families, styles, sizes, animations, and more.
For instance, the following is an example override that will cause an in-app message's headers to appear italicized:
```css
body .ab-in-app-message .ab-message-header {
font-style: italic;
}
```
See the [JSDocs](https://js.appboycdn.com/web-sdk/latest/doc/classes/braze.inappmessage.html) for more information.
### Customizing the z-index
By default, in-app messages are displayed using `z-index: 9001`. This is configurable using the `inAppMessageZIndex ` [initialization option](https://js.appboycdn.com/web-sdk/latest/doc/modules/braze.html#initializationoptions) in the scenario that your website styles elements with higher values than that.
```javascript
braze.initialize("YOUR-API-KEY", {
baseUrl: "YOUR-API-ENDPOINT",
inAppMessageZIndex: 12000
});
```
**Important:**
This feature is only available for Web Braze SDK v3.3.0 and later.
## Customizing message dismissals
By default, when an in-app message is showing, pressing the escape button or a click on the grayed-out background of the page will dismiss the message. Configure the `requireExplicitInAppMessageDismissal` [initialization option](https://js.appboycdn.com/web-sdk/latest/doc/modules/braze.html#initializationoptions) to `true` to prevent this behavior and require an explicit button click to dismiss messages.
```javascript
import * as braze from "@braze/web-sdk";
braze.initialize("YOUR-API-KEY", {
baseUrl: "YOUR-API-ENDPOINT",
requireExplicitInAppMessageDismissal: true
});
```
## Customizing display timing
To override the default display timing, remove calls to `braze.automaticallyShowInAppMessages()` and handle messages in `braze.subscribeToInAppMessage()`. Register your callback before `braze.openSession()`, so you can intercept session-start messages and decide whether to display or defer each message.
By default, Braze displays in-app messages when they are triggered and eligible to display. If you need different behavior for your app experience, use a custom callback to defer or display messages based on your own logic.
The following example shows how to subscribe to triggered in-app messages, defer selected messages, and display deferred messages later:
```javascript
import * as braze from "@braze/web-sdk";
braze.initialize("YOUR-API-KEY", {
baseUrl: "YOUR-API-ENDPOINT"
});
braze.subscribeToInAppMessage(function (message) {
// Control-group messages should always be "shown" to log analytics.
if (message.isControl || message instanceof braze.ControlMessage) {
braze.showInAppMessage(message);
return;
}
const shouldDefer = true; // Replace with your own display logic
if (shouldDefer) {
braze.deferInAppMessage(message);
return;
}
braze.showInAppMessage(message);
});
braze.openSession();
// Later, when your app is ready to display a deferred message:
const deferredMessage = braze.getDeferredInAppMessage();
if (deferredMessage) {
braze.showInAppMessage(deferredMessage);
}
```
For related delivery customization guidance, see:
- [Web `deferInAppMessage` reference](https://js.appboycdn.com/web-sdk/latest/doc/modules/braze.html#deferinappmessage)
- [Web `subscribeToInAppMessage` reference](https://js.appboycdn.com/web-sdk/latest/doc/modules/braze.html#subscribetoinappmessage)
## Opening links in a new tab
To set your in-app message links to open in a new tab, set the `openInAppMessagesInNewTab` option to `true` to force all links from in-app message clicks open in a new tab or window.
```javascript
braze.initialize('api-key', { openInAppMessagesInNewTab: true} );
```
## Prerequisites
Before you can use this feature, you'll need to [integrate the Android Braze SDK](https://www.braze.com/docs/es/es/developer_guide/sdk_integration/?sdktab=android). You'll also need to [set up in-app messages](https://www.braze.com/docs/es/es/developer_guide/in_app_messages).
## Setting custom manager listeners
While the `BrazeInAppMessageManager` listener can automatically handle the display and lifecycle of in-app messages, you'll need to implement a custom manager listener if you'd like to fully customize your messages.
The Braze SDK has a default `DefaultHtmlInAppMessageActionListener` class that is used if no custom listener is defined and takes appropriate action automatically. If you require more control over how a user interacts with different buttons inside a custom HTML in-app message, implement a custom `IHtmlInAppMessageActionListener` class.
This listener applies to __both__ messages built with custom HTML and messages created using the Drag-and-Drop (DnD) editor. It does not apply to traditional IAMs. Traditional IAMs are Braze's built-in, SDK-rendered message types (for example, slideup, modal, and full) created in the original in-app message composer using predefined layouts. Unlike custom HTML and DnD IAMs, they do not run through the HTML action listener flow.
If you set a custom `IHtmlInAppMessageActionListener`, its logic will override the default click behavior for _all_ DnD messages. Please ensure your marketing team is aware of this, as it may affect their campaigns in unexpected ways.
### Step 1: Implement the custom manager listener
#### Step 1.1: Implement `IInAppMessageManagerListener`
Create a class that implements [`IInAppMessageManagerListener`](https://braze-inc.github.io/braze-android-sdk/kdoc/braze-android-sdk/com.braze.ui.inappmessage.listeners/-i-in-app-message-manager-listener/index.html).
The callbacks in your `IInAppMessageManagerListener` will also be called at various points in the in-app message lifecycle. For example, if you set a custom manager listener when an in-app message is received from Braze, the [`beforeInAppMessageDisplayed()`](https://braze-inc.github.io/braze-android-sdk/kdoc/braze-android-sdk/com.braze.ui.inappmessage.listeners/-i-in-app-message-manager-listener/before-in-app-message-displayed.html) method will be called. If your implementation of this method returns [`InAppMessageOperation.DISCARD`](https://braze-inc.github.io/braze-android-sdk/kdoc/braze-android-sdk/com.braze.ui.inappmessage/-in-app-message-operation/-d-i-s-c-a-r-d/index.html), that signals to Braze that the in-app message will be handled by the host app and should not be displayed by Braze. If [`InAppMessageOperation.DISPLAY_NOW`](https://braze-inc.github.io/braze-android-sdk/kdoc/braze-android-sdk/com.braze.ui.inappmessage/-in-app-message-operation/-d-i-s-p-l-a-y_-n-o-w/index.html) is returned, Braze will attempt to display the in-app message. This method should be used if you choose to display the in-app message in a customized manner.
`IInAppMessageManagerListener` also includes delegate methods for message clicks and buttons, which can be used in cases like intercepting a message when a button or message is clicked for further processing.
#### Step 1.2: Hook into IAM view lifecycle methods (optional)
The [`IInAppMessageManagerListener`](https://braze-inc.github.io/braze-android-sdk/kdoc/braze-android-sdk/com.braze.ui.inappmessage.listeners/-i-in-app-message-manager-listener/index.html) interface has in-app message view methods called at distinct points in the in-app message view lifecycle. These methods are called in the following order:
1. [`beforeInAppMessageViewOpened`](https://braze-inc.github.io/braze-android-sdk/kdoc/braze-android-sdk/com.braze.ui.inappmessage.listeners/-i-in-app-message-manager-listener/before-in-app-message-view-opened.html): Called just before the in-app message is added to the activity's view. The in-app message is not yet visible to the user at this time.
2. [`afterInAppMessageViewOpened`](https://braze-inc.github.io/braze-android-sdk/kdoc/braze-android-sdk/com.braze.ui.inappmessage.listeners/-i-in-app-message-manager-listener/after-in-app-message-view-opened.html): Called just after the in-app message is added to the activity's view. The in-app message is now visible to the user at this time.
3. [`beforeInAppMessageViewClosed`](https://braze-inc.github.io/braze-android-sdk/kdoc/braze-android-sdk/com.braze.ui.inappmessage.listeners/-i-in-app-message-manager-listener/before-in-app-message-view-closed.html): Called just before the in-app message is removed from the activity's view. The in-app message is still visible to the user at this time.
4. [`afterInAppMessageViewClosed`](https://braze-inc.github.io/braze-android-sdk/kdoc/braze-android-sdk/com.braze.ui.inappmessage.listeners/-i-in-app-message-manager-listener/after-in-app-message-view-closed.html): Called just after the in-app message is removed from the activity's view. The in-app message is no longer visible to the user at this time.
Note that the time between [`afterInAppMessageViewOpened`](https://braze-inc.github.io/braze-android-sdk/kdoc/braze-android-sdk/com.braze.ui.inappmessage.listeners/-i-in-app-message-manager-listener/after-in-app-message-view-opened.html) and [`beforeInAppMessageViewClosed`](https://braze-inc.github.io/braze-android-sdk/kdoc/braze-android-sdk/com.braze.ui.inappmessage.listeners/-i-in-app-message-manager-listener/before-in-app-message-view-closed.html) is when the in-app message view is on screen, visible to the user.
**Note:**
Implementation of these methods is not required. They're only provided to track and inform the in-app message view lifecycle. You can leave these method implementations empty.
Create a class that implements [`IHtmlInAppMessageActionListener`](https://braze-inc.github.io/braze-android-sdk/kdoc/braze-android-sdk/com.braze.ui.inappmessage.listeners/-i-html-in-app-message-action-listener/index.html).
The callbacks in your `IHtmlInAppMessageActionListener` will be called whenever the user initiates any of the following actions inside the HTML in-app message:
- Clicks on the close button
- Fires a custom event
- Clicks on a URL inside HTML in-app message
```java
public class CustomHtmlInAppMessageActionListener implements IHtmlInAppMessageActionListener {
private final Context mContext;
public CustomHtmlInAppMessageActionListener(Context context) {
mContext = context;
}
@Override
public void onCloseClicked(IInAppMessage inAppMessage, String url, Bundle queryBundle) {
Toast.makeText(mContext, "HTML In App Message closed", Toast.LENGTH_LONG).show();
BrazeInAppMessageManager.getInstance().hideCurrentlyDisplayingInAppMessage(false);
}
@Override
public boolean onCustomEventFired(IInAppMessage inAppMessage, String url, Bundle queryBundle) {
Toast.makeText(mContext, "Custom event fired. Ignoring.", Toast.LENGTH_LONG).show();
return true;
}
@Override
public boolean onOtherUrlAction(IInAppMessage inAppMessage, String url, Bundle queryBundle) {
Toast.makeText(mContext, "Custom url pressed: " + url + " . Ignoring", Toast.LENGTH_LONG).show();
BrazeInAppMessageManager.getInstance().hideCurrentlyDisplayingInAppMessage(false);
return true;
}
}
```
```kotlin
class CustomHtmlInAppMessageActionListener(private val mContext: Context) : IHtmlInAppMessageActionListener {
override fun onCloseClicked(inAppMessage: IInAppMessage, url: String, queryBundle: Bundle) {
Toast.makeText(mContext, "HTML In App Message closed", Toast.LENGTH_LONG).show()
BrazeInAppMessageManager.getInstance().hideCurrentlyDisplayingInAppMessage(false)
}
override fun onCustomEventFired(inAppMessage: IInAppMessage, url: String, queryBundle: Bundle): Boolean {
Toast.makeText(mContext, "Custom event fired. Ignoring.", Toast.LENGTH_LONG).show()
return true
}
override fun onOtherUrlAction(inAppMessage: IInAppMessage, url: String, queryBundle: Bundle): Boolean {
Toast.makeText(mContext, "Custom url pressed: $url . Ignoring", Toast.LENGTH_LONG).show()
BrazeInAppMessageManager.getInstance().hideCurrentlyDisplayingInAppMessage(false)
return true
}
}
```
### Step 2: Instruct Braze to use the custom manager listener
After you create `IInAppMessageManagerListener`, call `BrazeInAppMessageManager.getInstance().setCustomInAppMessageManagerListener()` to instruct `BrazeInAppMessageManager`
to use your custom `IInAppMessageManagerListener` instead of the default listener. Do this in your [`Application.onCreate()`](https://developer.android.com/reference/android/app/Application.html#onCreate()) before any other calls to Braze, so the custom listener is set before any in-app messages are displayed.
#### Altering in-app messages before display
When a new in-app message is received, and there is already an in-app message being displayed, the new message will be put onto the top of the stack and can be displayed at a later time.
However, if there is no in-app message being displayed, the following delegate method in `IInAppMessageManagerListener` will be called:
```java
@Override
public InAppMessageOperation beforeInAppMessageDisplayed(IInAppMessage inAppMessage) {
return InAppMessageOperation.DISPLAY_NOW;
}
```
```kotlin
override fun beforeInAppMessageDisplayed(inAppMessage: IInAppMessage): InAppMessageOperation {
return InAppMessageOperation.DISPLAY_NOW
}
```
The `InAppMessageOperation()` return value can control when the message should be displayed. The suggested usage of this method would be to delay messages in certain parts of the app by returning `DISPLAY_LATER` when in-app messages would be distracting to the user's app experience.
| `InAppMessageOperation` return value | Behavior |
| -------------------------- | -------- |
| `DISPLAY_NOW` | The message will be displayed |
| `DISPLAY_LATER` | The message will be returned to the stack and displayed at the next available opportunity |
| `DISCARD` | The message will be discarded |
| `null` | The message will be ignored. This method should **NOT** return `null` |
{: .reset-td-br-1 .reset-td-br-2 .reset-td-br-3 aria-label="Altering in-app messages before display" }
See [`InAppMessageOperation`](https://braze-inc.github.io/braze-android-sdk/kdoc/braze-android-sdk/com.braze.ui.inappmessage/-in-app-message-operation/index.html) for more details.
**Tip:**
If you choose to `DISCARD` the in-app message and replace it with your in-app message view, you will need to log in-app message clicks and impressions manually.
On Android, this is done by calling `logClick` and `logImpression` on in-app messages and `logButtonClick` on immersive in-app messages.
**Tip:**
Once an in-app message has been placed on the stack, you can request for it to be retrieved and displayed at any time by calling [`BrazeInAppMessageManager.getInstance().requestDisplayInAppMessage()`](https://braze-inc.github.io/braze-android-sdk/kdoc/braze-android-sdk/com.braze.ui.inappmessage/-braze-in-app-message-manager/request-display-in-app-message.html). This method requests Braze to display the next available in-app message from the stack.
After your `IHtmlInAppMessageActionListener` is created, call `BrazeInAppMessageManager.getInstance().setCustomHtmlInAppMessageActionListener()` to instruct `BrazeInAppMessageManager` to use your custom `IHtmlInAppMessageActionListener` instead of the default action listener.
We recommend setting your `IHtmlInAppMessageActionListener` in your [`Application.onCreate()`](https://developer.android.com/reference/android/app/Application.html#onCreate()) before any other calls to Braze. This will set the custom action listener before any in-app message is displayed:
```java
BrazeInAppMessageManager.getInstance().setCustomHtmlInAppMessageActionListener(new CustomHtmlInAppMessageActionListener(context));
```
```kotlin
BrazeInAppMessageManager.getInstance().setCustomHtmlInAppMessageActionListener(CustomHtmlInAppMessageActionListener(context))
```
## Setting custom factories
You can override a number of defaults through custom factory objects. These can be registered with the Braze SDK as needed to achieve the desired results. However, if you decide to override a factory, you'll likely need to explicitly defer to the default or reimplement the functionality provided by the Braze default. The following code snippet illustrates how to supply custom implementations of the `IInAppMessageViewFactory` and the `IInAppMessageViewWrapperFactory` interfaces.
**In-app message types**
```kotlin
class BrazeDemoApplication : Application(){
override fun onCreate() {
super.onCreate()
registerActivityLifecycleCallbacks(BrazeActivityLifecycleCallbackListener(true, true))
BrazeInAppMessageManager.getInstance().setCustomInAppMessageViewWrapperFactory(CustomInAppMessageViewWrapperFactory())
BrazeInAppMessageManager.getInstance().setCustomInAppMessageViewFactory(CustomInAppMessageViewFactory())
}
}
```
**In-app message types**
```java
public class BrazeDemoApplication extends Application {
@Override
public void onCreate{
super.onCreate();
registerActivityLifecycleCallbacks(new BrazeActivityLifecycleCallbackListener(true, true));
BrazeInAppMessageManager.getInstance().setCustomInAppMessageViewWrapperFactory(new CustomInAppMessageViewWrapperFactory());
BrazeInAppMessageManager.getInstance().setCustomInAppMessageViewFactory(new CustomInAppMessageViewFactory());
}
}
```
Braze in-app message types are versatile enough to cover most custom use cases. However, if you want to fully define the visual appearance of your in-app messages instead of using a default type, Braze makes this possible by setting a custom view factory.
The `BrazeInAppMessageManager` automatically handles placing the in-app message model into the existing activity view hierarchy by default using [`DefaultInAppMessageViewWrapper`](https://braze-inc.github.io/braze-android-sdk/kdoc/braze-android-sdk/com.braze.ui.inappmessage/-default-in-app-message-view-wrapper/index.html). If you need to customize how in-app messages are placed into the view hierarchy, you should use a custom [`IInAppMessageViewWrapperFactory`](https://braze-inc.github.io/braze-android-sdk/kdoc/braze-android-sdk/com.braze.ui.inappmessage/-i-in-app-message-view-wrapper-factory/index.html).
In-app messages have preset animation behavior. `Slideup` messages slide into the screen; `full` and `modal` messages fade in and out. If you want to define custom animation behaviors for your in-app messages, Braze makes this possible by setting up a custom animation factory.
### Step 1: Implement the factory
Create a class that implements [`IInAppMessageViewFactory`](https://braze-inc.github.io/braze-android-sdk/kdoc/braze-android-sdk/com.braze.ui.inappmessage/-i-in-app-message-view-factory/index.html):
```java
public class CustomInAppMessageViewFactory implements IInAppMessageViewFactory {
@Override
public View createInAppMessageView(Activity activity, IInAppMessage inAppMessage) {
// Uses a custom view for slideups, modals, and full in-app messages.
// HTML in-app messages and any other types will use the Braze default in-app message view factories
switch (inAppMessage.getMessageType()) {
case SLIDEUP:
case MODAL:
case FULL:
// Use a custom view of your choosing
return createMyCustomInAppMessageView();
default:
// Use the default in-app message factories
final IInAppMessageViewFactory defaultInAppMessageViewFactory = BrazeInAppMessageManager.getInstance().getDefaultInAppMessageViewFactory(inAppMessage);
return defaultInAppMessageViewFactory.createInAppMessageView(activity, inAppMessage);
}
}
}
```
```kotlin
class CustomInAppMessageViewFactory : IInAppMessageViewFactory {
override fun createInAppMessageView(activity: Activity, inAppMessage: IInAppMessage): View {
// Uses a custom view for slideups, modals, and full in-app messages.
// HTML in-app messages and any other types will use the Braze default in-app message view factories
when (inAppMessage.messageType) {
MessageType.SLIDEUP, MessageType.MODAL, MessageType.FULL ->
// Use a custom view of your choosing
return createMyCustomInAppMessageView()
else -> {
// Use the default in-app message factories
val defaultInAppMessageViewFactory = BrazeInAppMessageManager.getInstance().getDefaultInAppMessageViewFactory(inAppMessage)
return defaultInAppMessageViewFactory!!.createInAppMessageView(activity, inAppMessage)
}
}
}
}
```
Create a class that implements [`IInAppMessageViewWrapperFactory`](https://braze-inc.github.io/braze-android-sdk/kdoc/braze-android-sdk/com.braze.ui.inappmessage/-i-in-app-message-view-wrapper-factory/index.html) and returns an [`IInAppMessageViewWrapper`](https://braze-inc.github.io/braze-android-sdk/kdoc/braze-android-sdk/com.braze.ui.inappmessage/-i-in-app-message-view-wrapper/index.html).
This factory is called immediately after the in-app message view is created. The easiest way to implement a custom [`IInAppMessageViewWrapper`](https://braze-inc.github.io/braze-android-sdk/kdoc/braze-android-sdk/com.braze.ui.inappmessage/-i-in-app-message-view-wrapper/index.html) is just to extend the default [`DefaultInAppMessageViewWrapper`](https://braze-inc.github.io/braze-android-sdk/kdoc/braze-android-sdk/com.braze.ui.inappmessage/-default-in-app-message-view-wrapper/index.html):
```java
public class CustomInAppMessageViewWrapper extends DefaultInAppMessageViewWrapper {
public CustomInAppMessageViewWrapper(View inAppMessageView,
IInAppMessage inAppMessage,
IInAppMessageViewLifecycleListener inAppMessageViewLifecycleListener,
BrazeConfigurationProvider brazeConfigurationProvider,
Animation openingAnimation,
Animation closingAnimation, View clickableInAppMessageView) {
super(inAppMessageView,
inAppMessage,
inAppMessageViewLifecycleListener,
brazeConfigurationProvider,
openingAnimation,
closingAnimation,
clickableInAppMessageView);
}
@Override
public void open(@NonNull Activity activity) {
super.open(activity);
Toast.makeText(activity.getApplicationContext(), "Opened in-app message", Toast.LENGTH_SHORT).show();
}
@Override
public void close() {
super.close();
Toast.makeText(mInAppMessageView.getContext().getApplicationContext(), "Closed in-app message", Toast.LENGTH_SHORT).show();
}
}
```
```kotlin
class CustomInAppMessageViewWrapper(inAppMessageView: View,
inAppMessage: IInAppMessage,
inAppMessageViewLifecycleListener: IInAppMessageViewLifecycleListener,
brazeConfigurationProvider: BrazeConfigurationProvider,
openingAnimation: Animation,
closingAnimation: Animation, clickableInAppMessageView: View) :
DefaultInAppMessageViewWrapper(inAppMessageView,
inAppMessage,
inAppMessageViewLifecycleListener,
brazeConfigurationProvider,
openingAnimation,
closingAnimation,
clickableInAppMessageView) {
override fun open(activity: Activity) {
super.open(activity)
Toast.makeText(activity.applicationContext, "Opened in-app message", Toast.LENGTH_SHORT).show()
}
override fun close() {
super.close()
Toast.makeText(mInAppMessageView.context.applicationContext, "Closed in-app message", Toast.LENGTH_SHORT).show()
}
}
```
Create a class that implements [`IInAppMessageAnimationFactory`](https://braze-inc.github.io/braze-android-sdk/kdoc/braze-android-sdk/com.braze.ui.inappmessage/-i-in-app-message-animation-factory/index.html):
```java
public class CustomInAppMessageAnimationFactory implements IInAppMessageAnimationFactory {
@Override
public Animation getOpeningAnimation(IInAppMessage inAppMessage) {
Animation animation = new AlphaAnimation(0, 1);
animation.setInterpolator(new AccelerateInterpolator());
animation.setDuration(2000L);
return animation;
}
@Override
public Animation getClosingAnimation(IInAppMessage inAppMessage) {
Animation animation = new AlphaAnimation(1, 0);
animation.setInterpolator(new DecelerateInterpolator());
animation.setDuration(2000L);
return animation;
}
}
```
```kotlin
class CustomInAppMessageAnimationFactory : IInAppMessageAnimationFactory {
override fun getOpeningAnimation(inAppMessage: IInAppMessage): Animation {
val animation: Animation = AlphaAnimation(0, 1)
animation.interpolator = AccelerateInterpolator()
animation.duration = 2000L
return animation
}
override fun getClosingAnimation(inAppMessage: IInAppMessage): Animation {
val animation: Animation = AlphaAnimation(1, 0)
animation.interpolator = DecelerateInterpolator()
animation.duration = 2000L
return animation
}
}
```
### Step 2: Instruct Braze to use the factory
After your `IInAppMessageViewFactory` is created, call `BrazeInAppMessageManager.getInstance().setCustomInAppMessageViewFactory()` to instruct `BrazeInAppMessageManager`
to use your custom `IInAppMessageViewFactory` instead of the default view factory.
**Tip:**
We recommend setting your `IInAppMessageViewFactory` in your `Application.onCreate()` before any other calls to Braze. This will set the custom view factory before any in-app message is displayed.
#### How it works
The `slideup` in-app message view implements [`IInAppMessageView`](https://braze-inc.github.io/braze-android-sdk/kdoc/braze-android-sdk/com.braze.ui.inappmessage.views/-i-in-app-message-view/index.html). The `full` and `modal` type message views implement [`IInAppMessageImmersiveView`](https://braze-inc.github.io/braze-android-sdk/kdoc/braze-android-sdk/com.braze.ui.inappmessage.views/-i-in-app-message-immersive-view/index.html). Implementing one of these classes allows Braze to add click listeners to your custom view where appropriate. All Braze view classes extend Android's [`View`](http://developer.android.com/reference/android/view/View.html) class.
Implementing `IInAppMessageView` allows you to define a certain portion of your custom view as clickable. Implementing [`IInAppMessageImmersiveView`](https://braze-inc.github.io/braze-android-sdk/kdoc/braze-android-sdk/com.braze.ui.inappmessage.views/-i-in-app-message-immersive-view/index.html) allows you to define message button views and a close button view.
After your [`IInAppMessageViewWrapper`](https://braze-inc.github.io/braze-android-sdk/kdoc/braze-android-sdk/com.braze.ui.inappmessage/-i-in-app-message-view-wrapper/index.html) is created, call [`BrazeInAppMessageManager.getInstance().setCustomInAppMessageViewWrapperFactory()`](https://braze-inc.github.io/braze-android-sdk/kdoc/braze-android-sdk/com.braze.ui.inappmessage/-in-app-message-manager-base/set-custom-in-app-message-view-factory.html) to instruct `BrazeInAppMessageManager` to use your custom [`IInAppMessageViewWrapperFactory`](https://braze-inc.github.io/braze-android-sdk/kdoc/braze-android-sdk/com.braze.ui.inappmessage/-i-in-app-message-view-wrapper-factory/index.html) instead of the default view wrapper factory.
We recommend setting your [`IInAppMessageViewWrapperFactory`](https://braze-inc.github.io/braze-android-sdk/kdoc/braze-android-sdk/com.braze.ui.inappmessage/-i-in-app-message-view-wrapper-factory/index.html) in your [`Application.onCreate()`](https://developer.android.com/reference/android/app/Application.html#onCreate()) before any other calls to Braze. This will set the custom view wrapper factory before any in-app message is displayed:
```java
BrazeInAppMessageManager.getInstance().setCustomInAppMessageViewWrapperFactory(new CustomInAppMessageViewWrapper());
```
```kotlin
BrazeInAppMessageManager.getInstance().setCustomInAppMessageViewWrapperFactory(CustomInAppMessageViewWrapper())
```
Once your `IInAppMessageAnimationFactory` is created, call `BrazeInAppMessageManager.getInstance().setCustomInAppMessageAnimationFactory()` to instruct `BrazeInAppMessageManager`
to use your custom `IInAppMessageAnimationFactory` instead of the default animation factory.
We recommend setting your `IInAppMessageAnimationFactory` in your [`Application.onCreate()`](https://developer.android.com/reference/android/app/Application.html#onCreate()) before any other calls to Braze. This will set the custom animation factory before any in-app message is displayed.
## Custom styles
Braze UI elements come with a default look and feel that matches the Android standard UI guidelines and provides a seamless experience. This reference article covers custom in-app messaging styling for your Android or FireOS application.
### Setting a default style
You can see default styles in the Braze SDK's [`styles.xml`](https://github.com/braze-inc/braze-android-sdk/blob/master/android-sdk-ui/src/main/res/values/styles.xml) file:
```xml
```
If you would prefer, you can override these styles to create a look and feel that better suits your app.
To override a style, copy it in its entirety to the `styles.xml` file in your project and make modifications. The whole style must be copied over to your local `styles.xml` file for all attributes to be correctly set. Note that these custom styles are for changes to individual UI elements, not wholesale changes to layouts. Layout-level changes need to be handled with custom views.
**Note:**
You can customize some colors directly in your Braze campaign without modifying the XML. Keep in mind, colors set in the Braze dashboard will override colors you set anywhere else.
### Customizing the font
You can set a custom font by locating the typeface in the `res/font` directory. To use it, override the style for message text, headers, and button text and use the `fontFamily` attribute to instruct Braze to use your custom font family.
For example, to update the font on your in-app message button text, override the `Braze.InAppMessage.Button` style and reference your custom font family. The attribute value should point to a font family in your `res/font` directory.
Here is a truncated example with a custom font family, `my_custom_font_family`, referenced on the last line:
```xml
```
Aside from the `Braze.InAppMessage.Button` style for button text, the style for message text is `Braze.InAppMessage.Message` and the style for message headers is `Braze.InAppMessage.Header`. If you want to use your custom font family across all possible in-app message text, you can set your font family on the `Braze.InAppMessage` style, which is the parent style for all in-app messages.
**Important:**
As with other custom styles, the entire style must be copied over to your local `styles.xml` file for all attributes to be correctly set.
## Message dismissals
### Swiping to dismiss slideup messages
By default, slideup in-app messages can be dismissed with a swipe gesture. The direction of the swipe depends on the slideup position:
- **Left or right swipe:** Dismisses the slideup regardless of its position.
- **Slideup from the bottom:** Swiping from top to bottom dismisses the message. Swiping from bottom to top does not dismiss it.
- **Slideup from the top:** Swiping from bottom to top dismisses the message. Swiping from top to bottom does not dismiss it.
This swipe behavior is built into the default [`DefaultInAppMessageViewWrapper`](https://braze-inc.github.io/braze-android-sdk/kdoc/braze-android-sdk/com.braze.ui.inappmessage/-default-in-app-message-view-wrapper/index.html) and applies only to slideup in-app messages. Modal and full in-app messages don't support swipe-to-dismiss. To customize this behavior, you can implement a [custom view wrapper factory](#android_setting-custom-factories).
**Note:**
Tapping outside of a slideup message does not dismiss it by default. This behavior differs from modal messages, which can be configured for outside tap dismissal. For slideups, use the swipe gesture or the close button to dismiss the message.
### Disabling back button dismissals
By default, the hardware back button dismisses Braze in-app messages. This behavior can be disabled on a per-message basis via [`BrazeInAppMessageManager.setBackButtonDismissesInAppMessageView()`](https://braze-inc.github.io/braze-android-sdk/kdoc/braze-android-sdk/com.braze.ui.inappmessage/-in-app-message-manager-base/set-back-button-dismisses-in-app-message-view.html).
In the following example, `disable_back_button` is a custom key-value pair set on the in-app message that signifies whether the message should allow for the back button to dismiss the message:
```java
BrazeInAppMessageManager.getInstance().setCustomInAppMessageManagerListener(new DefaultInAppMessageManagerListener() {
@Override
public void beforeInAppMessageViewOpened(View inAppMessageView, IInAppMessage inAppMessage) {
super.beforeInAppMessageViewOpened(inAppMessageView, inAppMessage);
final Map extras = inAppMessage.getExtras();
if (extras != null && extras.containsKey("disable_back_button")) {
BrazeInAppMessageManager.getInstance().setBackButtonDismissesInAppMessageView(false);
}
}
@Override
public void afterInAppMessageViewClosed(IInAppMessage inAppMessage) {
super.afterInAppMessageViewClosed(inAppMessage);
BrazeInAppMessageManager.getInstance().setBackButtonDismissesInAppMessageView(true);
}
});
```
```kotlin
BrazeInAppMessageManager.getInstance().setCustomInAppMessageManagerListener(object : DefaultInAppMessageManagerListener() {
override fun beforeInAppMessageViewOpened(inAppMessageView: View, inAppMessage: IInAppMessage) {
super.beforeInAppMessageViewOpened(inAppMessageView, inAppMessage)
val extras = inAppMessage.extras
if (extras != null && extras.containsKey("disable_back_button")) {
BrazeInAppMessageManager.getInstance().setBackButtonDismissesInAppMessageView(false)
}
}
override fun afterInAppMessageViewClosed(inAppMessage: IInAppMessage) {
super.afterInAppMessageViewClosed(inAppMessage)
BrazeInAppMessageManager.getInstance().setBackButtonDismissesInAppMessageView(true)
}
})
```
**Note:**
Note that if this functionality is disabled, the host activity's hardware back button default behavior will be used instead. This may lead to the back button closing the application instead of the displayed in-app message.
### Enabling outside tap dismissals
By default, dismissing the modal using an outside tap is set to `false`. Setting this value to `true` will result in the modal in-app message being dismissed when the user taps outside of the in-app message. This behavior can be toggled on by calling:
```java
BrazeInAppMessageManager.getInstance().setClickOutsideModalViewDismissInAppMessageView(true)
```
## Customizing the orientation
To set a fixed orientation for an in-app message, first [set a custom in-app message manager listener](https://www.braze.com/docs/es/es/developer_guide/in_app_messages/customization/?sdktab=android#android_setting-custom-manager-listeners). Then, update the orientation on the `IInAppMessage` object in the `beforeInAppMessageDisplayed()` delegate method:
```java
public InAppMessageOperation beforeInAppMessageDisplayed(IInAppMessage inAppMessage) {
// Set the orientation to portrait
inAppMessage.setOrientation(Orientation.PORTRAIT);
return InAppMessageOperation.DISPLAY_NOW;
}
```
```kotlin
override fun beforeInAppMessageDisplayed(inAppMessage: IInAppMessage): InAppMessageOperation {
// Set the orientation to portrait
inAppMessage.orientation = Orientation.PORTRAIT
return InAppMessageOperation.DISPLAY_NOW
}
```
For tablet devices, in-app messages will appear in the user's preferred orientation style regardless of actual screen orientation.
## Disabling dark theme {#android-in-app-message-dark-theme-customization}
By default, `IInAppMessageManagerListener`'s `beforeInAppMessageDisplayed()` checks the system settings and conditionally enables dark theme styling on the message with the following code:
```java
@Override
public InAppMessageOperation beforeInAppMessageDisplayed(IInAppMessage inAppMessage) {
if (inAppMessage instanceof IInAppMessageThemeable && ViewUtils.isDeviceInNightMode(BrazeInAppMessageManager.getInstance().getApplicationContext())) {
((IInAppMessageThemeable) inAppMessage).enableDarkTheme();
}
return InAppMessageOperation.DISPLAY_NOW;
}
```
```kotlin
override fun beforeInAppMessageDisplayed(inAppMessage: IInAppMessage): InAppMessageOperation {
if (inAppMessage is IInAppMessageThemeable && ViewUtils.isDeviceInNightMode(BrazeInAppMessageManager.getInstance().applicationContext!!)) {
(inAppMessage as IInAppMessageThemeable).enableDarkTheme()
}
return InAppMessageOperation.DISPLAY_NOW
}
```
To change this, you can call [`enableDarkTheme`](https://braze-inc.github.io/braze-android-sdk/kdoc/braze-android-sdk/com.braze.models.inappmessage/-i-in-app-message-themeable/enable-dark-theme.html) at any step in the pre-display process to implement your own conditional logic.
## Customizing the Google Play review prompt
Due to the limitations and restrictions set by Google, custom Google Play review prompts are not currently supported by Braze. While some users have been able to integrate these prompts successfully, others have shown low success rates due to [Google Play quotas](https://developer.android.com/guide/playcore/in-app-review#quotas). Integrate at your own risk. Refer to documentation on [Google Play in-app review prompts](https://developer.android.com/guide/playcore/in-app-review).
## Prerequisites
Before you can use this feature, you'll need to [integrate the Swift Braze SDK](https://www.braze.com/docs/es/es/developer_guide/sdk_integration/?sdktab=swift).
## Setting up the UI delegate (required)
To customize the presentation of in-app messages and react to various lifecycle events, you'll need to set up [`BrazeInAppMessageUIDelegate`](https://braze-inc.github.io/braze-swift-sdk/documentation/brazeui/brazeinappmessageuidelegate). This is a delegate protocol used for receiving and processing triggered in-app message payloads, receiving display lifecycle events, and controlling display timing. To use `BrazeInAppMessageUIDelegate`, you must:
- Use the default [`BrazeInAppMessageUI`](https://braze-inc.github.io/braze-swift-sdk/documentation/brazeui/brazeinappmessageui) implementation as your `inAppMessagePresenter`.
- Include the `BrazeUI` library in your project.
### Step 1: Implement the `BrazeInAppMessageUIDelegate` protocol
First, implement the `BrazeInAppMessageUIDelegate` protocol and any corresponding methods you wish. In the following example, this protocol is implemented in the application's `AppDelegate` class.
```swift
extension AppDelegate: BrazeInAppMessageUIDelegate {
// Implement your protocol methods here.
}
```
```objc
@interface AppDelegate ()
@end
@implementation AppDelegate
// Implement your protocol methods here.
@end
```
### Step 2: Assign the `delegate` object
Assign the `delegate` object on the `BrazeInAppMessageUI` instance before assigning this in-app message UI as your `inAppMessagePresenter`.
```swift
let inAppMessageUI = BrazeInAppMessageUI()
inAppMessageUI.delegate = self
AppDelegate.braze?.inAppMessagePresenter = inAppMessageUI
```
```objc
BrazeInAppMessageUI *inAppMessageUI = [[BrazeInAppMessageUI alloc] init];
inAppMessageUI.delegate = self;
AppDelegate.braze.inAppMessagePresenter = inAppMessageUI;
```
**Important:**
Not all delegate methods are available in Objective-C due to the incompatibility of their parameters with the language runtime.
**Tip:**
For a step-by-step implementation of the in-app message UI delegate, refer to this [tutorial](https://braze-inc.github.io/braze-swift-sdk/tutorials/braze/c1-inappmessageui).
## On-click behavior
Each `Braze.InAppMessage` object contains a corresponding [`ClickAction`](https://braze-inc.github.io/braze-swift-sdk/documentation/brazekit/braze/inappmessage/clickaction), which defines the behavior upon clicking.
### Click action types
The `clickAction` property on your `Braze.InAppMessage` defaults to `.none` but can be set to one of the following values:
| `ClickAction` | On-Click Behavior |
| -------------------------- | -------- |
| `.url(URL, useWebView: Bool)` | Opens the given URL in an external browser. If `useWebView` is set to `true`, it will open in a web view. |
| `.none` | The message will be dismissed when clicked. |
{: .reset-td-br-1 .reset-td-br-2 aria-label="Click action types" }
**Important:**
For in-app messages containing buttons, the message `clickAction` will also be included in the final payload if the click action is added prior to adding the button text.
### Customizing on-click behavior
To customize this behavior, you may modify the `clickAction` property by referring to the following sample:
```swift
func inAppMessage(
_ ui: BrazeInAppMessageUI,
prepareWith context: inout BrazeInAppMessageUI.PresentationContext
) {
if let newUrl = URL(string: "{your-url}") {
context.message.clickAction = .url(newUrl, useWebView: true)
}
}
```
The `inAppMessage(_:prepareWith:)` method is not available in Objective-C.
### Handling the custom behavior
The following [`BrazeInAppMessageUIDelegate`](https://braze-inc.github.io/braze-swift-sdk/documentation/brazeui/brazeinappmessageuidelegate) delegate method is called when a user clicks an in-app message. This callback is triggered for user-initiated clicks on in-app message buttons and HTML in-app message buttons (links), and a button ID is provided as an optional parameter for these interactions. This callback is not invoked for programmatic clicks triggered through `brazeBridge.logClick()`.
```swift
func inAppMessage(
_ ui: BrazeInAppMessageUI,
shouldProcess clickAction: Braze.InAppMessage.ClickAction,
buttonId: String?,
message: Braze.InAppMessage,
view: InAppMessageView
) -> Bool
```
```objc
- (BOOL)inAppMessage:(BrazeInAppMessageUI *)ui
shouldProcess:(enum BRZInAppMessageRawClickAction)clickAction
url:(NSURL *)uri
buttonId:(NSString *)buttonId
message:(BRZInAppMessageRaw *)message
view:(UIView *)view;
```
This method returns a boolean value to indicate if Braze should continue to execute the click action.
```swift
func inAppMessage(
_ ui: BrazeInAppMessageUI, shouldProcess clickAction: Braze.InAppMessage.ClickAction,
buttonId: String?, message: Braze.InAppMessage, view: InAppMessageView
) -> Bool {
guard let buttonId,
let idInt = Int(buttonId)
else { return true }
var button: BrazeKit.Braze.InAppMessage.Button? = nil
switch message {
case .modal(let modal):
button = modal.buttons[idInt]
case .modalImage(let modalImage):
button = modalImage.buttons[idInt]
case .full(let full):
button = full.buttons[idInt]
case .fullImage(let fullImage):
button = fullImage.buttons[idInt]
default:
break
}
print(button?.id)
print(button?.text)
print(button?.clickAction)
return true
}
```
```objc
- (BOOL)inAppMessage:(BrazeInAppMessageUI *)ui
shouldProcess:(enum BRZInAppMessageRawClickAction)clickAction
url:(NSURL *)uri
buttonId:(NSString *)buttonId
message:(BRZInAppMessageRaw *)message
view:(UIView *)view {
NSInteger buttonInt = [buttonId integerValue];
if (message.type == BRZInAppMessageRawTypeFull || message.type == BRZInAppMessageRawTypeModal) {
BRZInAppMessageRawButton *button = message.buttons[buttonInt];
NSLog(@"%ld", (long)button.identifier);
NSLog(@"%@", button.text);
NSLog(@"%ld", (long)button.clickAction);
}
return YES;
}
```
## Swiping to dismiss slideup messages
By default, slideup in-app messages can be dismissed with a swipe gesture. The direction of the swipe depends on the slideup position:
- **Left or right swipe:** Dismisses the slideup regardless of its position.
- **Slideup from the bottom:** Swiping from top to bottom dismisses the message. Swiping from bottom to top does not dismiss it.
- **Slideup from the top:** Swiping from bottom to top dismisses the message. Swiping from top to bottom does not dismiss it.
This swipe behavior is built into the default `BrazeInAppMessageUI` [`SlideupView`](https://braze-inc.github.io/braze-swift-sdk/documentation/brazeui/brazeinappmessageui/slideupview) and applies only to slideup in-app messages. Modal and full in-app messages don't support swipe-to-dismiss. To further customize the slideup view, including swipe behavior, you can modify the [`SlideupView.Attributes`](https://braze-inc.github.io/braze-swift-sdk/documentation/brazeui/brazeinappmessageui/slideupview/attributes-swift.struct) or provide a custom view via subclassing.
**Note:**
Tapping outside of a slideup message does not dismiss it. For modal or full in-app messages, you can enable outside tap dismissals using the `dismissOnBackgroundTap` attribute described in the following section.
## Customizing modal dismissals
To enable outside tap dismissals, you can modify the `dismissOnBackgroundTap` property on the `Attributes` struct of the in-app message type you wish to customize.
For example, if you wish to enable this feature for modal image in-app messages, you can configure the following:
```swift
BrazeInAppMessageUI.ModalImageView.Attributes.defaults.dismissOnBackgroundTap = true
```
Customization via `Attributes` is not available in Objective-C.
The default value is `false`. This determines if the modal in-app message will be dismissed when the user taps outside of the in-app message.
| `DismissModalOnOutsideTap` | Description |
|----------|-------------|
| `true` | Modal in-app messages will be dismissed on outside tap. |
| `false` | Default, modal in-app messages will not be dismissed on outside tap. |
{: .reset-td-br-1 .reset-td-br-2 aria-label="Customizing modal dismissals" }
For more details on in-app message customization, refer to this [article](https://braze-inc.github.io/braze-swift-sdk/documentation/braze/in-app-message-customization).
## Customizing message orientation
You can customize the orientation of your in-app messages. You can set a new default orientation for all messages or set a custom orientation for a single message.
To choose a default orientation for all in-app messages, use the [`inAppMessage(_:prepareWith:)`](https://braze-inc.github.io/braze-swift-sdk/documentation/brazeui/brazeinappmessageuidelegate/inappmessage(_:preparewith:)-11fog) method to set the `preferredOrientation` property on the `PresentationContext`.
For example, to set portrait as the default orientation:
```swift
func inAppMessage(
_ ui: BrazeInAppMessageUI,
prepareWith context: inout BrazeInAppMessageUI.PresentationContext
) {
context.preferredOrientation = .portrait
}
```
```objc
- (void)inAppMessage:(BrazeInAppMessageUI *)ui
prepareWith:(BrazeInAppMessageUIPresentationContextRaw *)context {
context.preferredOrientation = BRZInAppMessageRawOrientationPortrait;
}
```
To set the orientation for a single message, modify the `orientation` property of `Braze.InAppMessage`:
```swift
// Set inAppMessage orientation to support any configuration
inAppMessage.orientation = .any
// Set inAppMessage orientation to only display in portrait
inAppMessage.orientation = .portrait
// Set inAppMessage orientation to only display in landscape
inAppMessage.orientation = .landscape
```
```objc
// Set inAppMessage orientation to support any configuration
inAppMessage.orientation = BRZInAppMessageRawOrientationAny;
// Set inAppMessage orientation to only display in portrait
inAppMessage.orientation = BRZInAppMessageRawOrientationPortrait;
// Set inAppMessage orientation to only display in landscape
inAppMessage.orientation = BRZInAppMessageRawOrientationLandscape;
```
After the in-app message is displayed, any device orientation changes while the message is still being displayed will cause the message to rotate with the device (provided it's supported by the message's `orientation` configuration).
The device orientation must also be supported by the in-app message's `orientation` property for the message to display. Additionally, the `preferredOrientation` setting will only be respected if it is included in your application's supported interface orientations under the **Deployment Info** section of your target's settings in Xcode.

**Note:**
The orientation is applied only for the presentation of the message. After the device changes orientation, the message view adopts one of the orientations it supports. On smaller devices (iPhones, iPod Touch), setting a landscape orientation for a modal or full in-app message may lead to truncated content.
## Customizing display timing
You can control if an available in-app message will display during certain points of your user experience. If there are situations where you would not want the in-app message to appear, such as during a fullscreen game or on a loading screen, you can delay or discard pending in-app message messages. To control the timing of in-app message, use the `inAppMessage(_:displayChoiceForMessage:)` [delegate method](https://braze-inc.github.io/braze-swift-sdk/documentation/brazeui/brazeinappmessageuidelegate/inappmessage(_:displaychoiceformessage:)-9w1nb) to set the `BrazeInAppMessageUI.DisplayChoice` property.
```swift
func inAppMessage(
_ ui: BrazeInAppMessageUI,
displayChoiceForMessage message: Braze.InAppMessage
) -> BrazeInAppMessageUI.DisplayChoice
```
```objc
- (enum BRZInAppMessageUIDisplayChoice)inAppMessage:(BrazeInAppMessageUI *)ui displayChoiceForMessage:(BRZInAppMessageRaw *)message
```
Configure `BrazeInAppMessageUI.DisplayChoice` to return one of the following values:
| Display Choice | Behavior |
| ----------------------------------- | --------------------------------------------------------------------------------------------------------------------------- |
| `.now` | The message will be displayed immediately. This is the default value. |
| `.reenqueue` | The message will be not be displayed and will be placed back on the top of the stack. |
| `.later` | The message will be not be displayed and will be placed back on the top of the stack. (Deprecated, please use `.reenqueue`) |
| `.discard` | The message will be discarded and will not be displayed. |
{: .reset-td-br-1 .reset-td-br-2 aria-label="Customizing display timing" }
**Tip:**
For a sample of `InAppMessageUI`, check out our [Swift Braze SDK repository](https://github.com/braze-inc/braze-swift-sdk/tree/main/Examples/Swift/Sources/InAppMessageUI) and [Objective-C](https://github.com/braze-inc/braze-swift-sdk/tree/main/Examples/ObjC/Sources/InAppMessageUI).
## Hiding the status bar
For `Full`, `FullImage` and `HTML` in-app messages, the SDK will hide the status bar by default. For other types of in-app messages, the status bar is left untouched. To configure this behavior, use the `inAppMessage(_:prepareWith:)` [delegate method](https://braze-inc.github.io/braze-swift-sdk/documentation/brazeui/brazeinappmessageuidelegate/inappmessage(_:preparewith:)-11fog) to set the `statusBarHideBehavior` property on the `PresentationContext`. This field takes one of the following values:
| Status Bar Hide Behavior | Description |
| ----------------------------------- | ------------------------------------------------------------------------------------- |
| `.auto` | The message view decides the status bar hidden state. |
| `.hidden` | Always hide the status bar. |
| `.visible` | Always display the status bar. |
{: .reset-td-br-1 .reset-td-br-2 aria-label="Hiding the status bar" }
## Disabling dark mode
To prevent in-app messages from adopting dark mode styling when the user device has dark mode enabled, implement the `inAppMessage(_:prepareWith:)` [delegate method](https://braze-inc.github.io/braze-swift-sdk/documentation/brazeui/brazeinappmessageuidelegate/inappmessage(_:preparewith:)-11fog) method. The `PresentationContext` passed to the method contains a reference to the `InAppMessage` object to be presented. Each `InAppMessage` has a `themes` property containing a `dark` and `light` mode theme. If you set the `themes.dark` property to `nil`, Braze will automatically present the in-app message using its light theme.
In-app message types with buttons have an additional `themes` object on their `buttons` property. To prevent buttons from adopting dark mode styling, you can use [`map(_:)`](https://developer.apple.com/documentation/swift/array/map(_:)-87c4d) to create a new array of buttons with a `light` theme and no `dark` theme.
```swift
func inAppMessage(
_ ui: BrazeInAppMessageUI,
prepareWith context: inout BrazeInAppMessageUI.PresentationContext
) {
switch context.message {
case .slideup:
guard var slideup = context.message.slideup else { return }
slideup.themes.dark = nil
context.message.slideup = slideup
case .modal:
guard var modal = context.message.modal else { return }
modal.themes.dark = nil
modal.buttons = modal.buttons.map {
var newButton = $0
newButton.themes = .init(themes: ["light": $0.themes.light])
return newButton
}
context.message.modal = modal
case .modalImage:
guard var modalImage = context.message.modalImage else { return }
modalImage.themes.dark = nil
modalImage.buttons = modalImage.buttons.map {
var newButton = $0
newButton.themes = .init(themes: ["light": $0.themes.light])
return newButton
}
context.message.modalImage = modalImage
case .full:
guard var full = context.message.full else { return }
full.themes.dark = nil
full.buttons = full.buttons.map {
var newButton = $0
newButton.themes = .init(themes: ["light": $0.themes.light])
return newButton
}
context.message.full = full
case .fullImage:
guard var fullImage = context.message.fullImage else { return }
fullImage.themes.dark = nil
fullImage.buttons = fullImage.buttons.map {
var newButton = $0
newButton.themes = .init(themes: ["light": $0.themes.light])
return newButton
}
context.message.fullImage = fullImage
default:
break
}
}
```
```objc
- (void)inAppMessage:(BrazeInAppMessageUI *)ui
prepareWith:(BrazeInAppMessageUIPresentationContextRaw *)context {
switch (context.message.type) {
case BRZInAppMessageRawTypeSlideup: {
NSMutableDictionary *updatedThemes = [context.message.themes mutableCopy];
[updatedThemes removeObjectForKey:@"dark"];
context.message.themes = updatedThemes;
break;
}
case BRZInAppMessageRawTypeModal:
case BRZInAppMessageRawTypeFull:
{
NSMutableDictionary *updatedThemes = [context.message.themes mutableCopy];
[updatedThemes removeObjectForKey:@"dark"];
context.message.themes = updatedThemes;
NSMutableArray *updatedButtons = [NSMutableArray arrayWithCapacity:context.message.buttons.count];
for (BRZInAppMessageRawButton *button in context.message.buttons) {
BRZInAppMessageRawButtonTheme *lightTheme = BRZInAppMessageRawButtonTheme.defaultLight;
BRZInAppMessageRawButton *newButton = [button mutableCopy];
newButton.textColor = lightTheme.textColor;
newButton.backgroundColor = lightTheme.backgroundColor;
newButton.borderColor = lightTheme.borderColor;
[updatedButtons addObject:newButton];
}
context.message.buttons = updatedButtons;
break;
}
default:
break;
}
}
```
## Customizing the app store review prompt
You can use in-app messages in a campaign to ask users for an App Store review.
**Note:**
Because this example prompt overrides default behavior of Braze, we cannot automatically track impressions if it is implemented. You must [log your own analytics](https://www.braze.com/docs/es/es/developer_guide/analytics/).
### Step 1: Set the in-app message delegate
First, set the [`BrazeInAppMessageUIDelegate`](https://www.braze.com/docs/es/es/developer_guide/in_app_messages/customization/#swift_setting-up-the-ui-delegate-required) in your app.
### Step 2: Disable the default App Store review message
Next, implement the `inAppMessage(_:displayChoiceForMessage:)` [delegate method](https://braze-inc.github.io/braze-swift-sdk/documentation/brazeui/brazeinappmessageuidelegate/inappmessage(_:displaychoiceformessage:)-9w1nb) to disable the default App Store review message.
```swift
func inAppMessage(_ ui: BrazeInAppMessageUI, displayChoiceForMessage message: Braze.InAppMessage) -> BrazeInAppMessageUI.DisplayChoice {
if message.extras["AppStore Review"] != nil,
let messageUrl = message.clickAction.url {
UIApplication.shared.open(messageUrl, options: [:], completionHandler: nil)
return .discard
} else {
return .now
}
}
```
```objc
- (enum BRZInAppMessageUIDisplayChoice)inAppMessage:(BrazeInAppMessageUI *)ui
displayChoiceForMessage:(BRZInAppMessageRaw *)message {
if (message.extras != nil && message.extras[@"AppStore Review"] != nil) {
[[UIApplication sharedApplication] openURL:message.url options:@{} completionHandler:nil];
return BRZInAppMessageUIDisplayChoiceDiscard;
} else {
return BRZInAppMessageUIDisplayChoiceNow;
}
}
```
### Step 3: Create a deep link
In your deep link handling code, add the following code to process the `{YOUR-APP-SCHEME}:app-store-review` deep link. Note that you will need to import `StoreKit` to use `SKStoreReviewController`:
```swift
func application(_ app: UIApplication, open url: URL, options: [UIApplicationOpenURLOptionsKey : Any] = [:]) -> Bool {
let urlString = url.absoluteString.removingPercentEncoding
if (urlString == "{YOUR-APP-SCHEME}:app-store-review") {
SKStoreReviewController.requestReview()
return true;
}
// Other deep link handling code…
}
```
```objc
- (BOOL)application:(UIApplication *)app openURL:(NSURL *)url options:(NSDictionary *)options {
NSString *urlString = url.absoluteString.stringByRemovingPercentEncoding;
if ([urlString isEqualToString:@"{YOUR-APP-SCHEME}:app-store-review"]) {
[SKStoreReviewController requestReview];
return YES;
}
// Other deep link handling code…
}
```
### Step 4: Set custom on-click behavior
Next, create an in-app messaging campaign with the following:
- The key-value pair `"AppStore Review" : "true"`
- The on-click behavior set to "Deep Link Into App", using the deep link `{YOUR-APP-SCHEME}:app-store-review`.
**Tip:**
Apple limits App Store review prompts to a maximum of three times per year for each user, so your campaign should be [rate-limited](https://www.braze.com/docs/es/es/user_guide/engagement_tools/campaigns/building_campaigns/rate-limiting/) to three times per year per user.
Users may turn off App Store review prompts. As a result, your custom review prompt should not promise that a native App Store review prompt will appear or directly ask for a review.
## Prerequisites
Before you can use this feature, you'll need to [integrate the React Native Braze SDK](https://www.braze.com/docs/es/es/developer_guide/sdk_integration/?sdktab=react%20native).
## Methods for logging
You can use these methods by passing your `BrazeInAppMessage` instance to log analytics and perform actions:
| Method | Description |
| --------------------------------------------------------- | ------------------------------------------------------------------------------------- |
| `logInAppMessageClicked(inAppMessage)` | Logs a click for the provided in-app message data. |
| `logInAppMessageImpression(inAppMessage)` | Logs an impression for the provided in-app message data. |
| `logInAppMessageButtonClicked(inAppMessage, buttonId)` | Logs a button click for the provided in-app message data and button ID. |
| `hideCurrentInAppMessage()` | Dismisses the currently displayed in-app message. |
| `performInAppMessageAction(inAppMessage)` | Performs the action for an in-app message. |
| `performInAppMessageButtonAction(inAppMessage, buttonId)` | Performs the action for an in-app message button. |
{: .reset-td-br-1 .reset-td-br-2 aria-label="Methods for logging" }
## Handling message data
In most cases, you can use the `Braze.addListener` method to register event listeners to handle data coming from in-app messages.
Additionally, you can access the in-app message data in the JavaScript layer by calling the `Braze.subscribeToInAppMessage` method to have the SDKs publish an `inAppMessageReceived` event when an in-app message is triggered. Pass a callback to this method to execute your own code when the in-app message is triggered and received by the listener.
To customize how message data is handled, refer to the following implementation examples:
To enhance the default behavior, or if you don't have access to customize the native iOS or Android code, we recommend that you disable the default UI while still receiving in-app message events from Braze. To disable the default UI, pass `false` to the `Braze.subscribeToInAppMessage` method and use the in-app message data to construct your own message in JavaScript. Note that you will need to manually log analytics on your messages if you choose to disable the default UI.
```javascript
import Braze from "@braze/react-native-sdk";
// Option 1: Listen for the event directly via `Braze.addListener`.
//
// You may use this method to accomplish the same thing if you don't
// wish to make any changes to the default Braze UI.
Braze.addListener(Braze.Events.IN_APP_MESSAGE_RECEIVED, (event) => {
console.log(event.inAppMessage);
});
// Option 2: Call `subscribeToInAppMessage`.
//
// Pass in `false` to disable the automatic display of in-app messages.
Braze.subscribeToInAppMessage(false, (event) => {
console.log(event.inAppMessage);
// Use `event.inAppMessage` to construct your own custom message UI.
});
```
To include more advanced logic to determine whether or not to show an in-app message using the built-in UI, implement in-app messages through the native layer.
**Warning:**
Since this is an advanced customization option, note that overriding the default Braze implementation will also nullify the logic to emit in-app message events to your JavaScript listeners. If you wish to still use `Braze.subscribeToInAppMessage` or `Braze.addListener` as described in [Accessing in-app message data](#accessing-in-app-message-data), you will need to handle publishing the events yourself.
Implement the `IInAppMessageManagerListener` as described in our Android article on [Custom Manager Listener](https://www.braze.com/docs/es/es/developer_guide/in_app_messages/customization/?sdktab=android#android_setting-custom-manager-listeners). In your `beforeInAppMessageDisplayed` implementation, you can access the `inAppMessage` data, send it to the JavaScript layer, and decide to show or not show the native message based on the return value.
For more on these values, see our [Android documentation](https://www.braze.com/docs/es/es/developer_guide/in_app_messages/).
```java
// In-app messaging
@Override
public InAppMessageOperation beforeInAppMessageDisplayed(IInAppMessage inAppMessage) {
WritableMap parameters = new WritableNativeMap();
parameters.putString("inAppMessage", inAppMessage.forJsonPut().toString());
getReactNativeHost()
.getReactInstanceManager()
.getCurrentReactContext()
.getJSModule(DeviceEventManagerModule.RCTDeviceEventEmitter.class)
.emit("inAppMessageReceived", parameters);
// Note: return InAppMessageOperation.DISCARD if you would like
// to prevent the Braze SDK from displaying the message natively.
return InAppMessageOperation.DISPLAY_NOW;
}
```
### Overriding the default UI delegate
By default, [`BrazeInAppMessageUI`](https://braze-inc.github.io/braze-swift-sdk/documentation/brazeui/brazeinappmessageui/) is created and assigned when you initialize the `braze` instance. `BrazeInAppMessageUI` is an implementation of the [`BrazeInAppMessagePresenter`](https://braze-inc.github.io/braze-swift-sdk/documentation/brazekit/brazeinappmessagepresenter) protocol and comes with a `delegate` property that can be used to customize the handling of in-app messages that have been received.
1. Implement the `BrazeInAppMessageUIDelegate` delegate as described in [our iOS article here](https://braze-inc.github.io/braze-swift-sdk/tutorials/braze/c1-inappmessageui).
2. In the `inAppMessage(_:displayChoiceForMessage:)` delegate method, you can access the `inAppMessage` data, send it to the JavaScript layer, and decide to show or not show the native message based on the return value.
For more details on these values, see our [iOS documentation](https://braze-inc.github.io/braze-swift-sdk/documentation/brazeui/brazeinappmessageuidelegate/).
```objc
- (enum BRZInAppMessageUIDisplayChoice)inAppMessage:(BrazeInAppMessageUI *)ui
displayChoiceForMessage:(BRZInAppMessageRaw *)message {
// Convert the message to a JavaScript representation.
NSData *inAppMessageData = [message json];
NSString *inAppMessageString = [[NSString alloc] initWithData:inAppMessageData encoding:NSUTF8StringEncoding];
NSDictionary *arguments = @{
@"inAppMessage" : inAppMessageString
};
// Send to JavaScript.
[self sendEventWithName:@"inAppMessageReceived" body:arguments];
// Note: Return `BRZInAppMessageUIDisplayChoiceDiscard` if you would like
// to prevent the Braze SDK from displaying the message natively.
return BRZInAppMessageUIDisplayChoiceNow;
}
```
To use this delegate, assign it to `brazeInAppMessagePresenter.delegate` after initializing the `braze` instance.
**Note:**
`BrazeUI` can only be imported in Objective-C or Swift. If you are using Objective-C++, you will need to handle this in a separate file.
```objc
@import BrazeUI;
- (BOOL)application:(UIApplication *)application didFinishLaunchingWithOptions:(NSDictionary *)launchOptions {
BRZConfiguration *configuration = [[BRZConfiguration alloc] initWithApiKey:apiKey endpoint:endpoint];
Braze *braze = [BrazeReactBridge initBraze:configuration];
((BrazeInAppMessageUI *)braze.inAppMessagePresenter).delegate = [[CustomDelegate alloc] init];
AppDelegate.braze = braze;
}
```
### Overriding the default native UI
If you wish to fully customize the presentation of your in-app messages at the native iOS layer, conform to the [`BrazeInAppMessagePresenter`](https://braze-inc.github.io/braze-swift-sdk/documentation/brazekit/brazeinappmessagepresenter) protocol and assign your custom presenter following this sample:
```objc
BRZConfiguration *configuration = [[BRZConfiguration alloc] initWithApiKey:apiKey endpoint:endpoint];
Braze *braze = [BrazeReactBridge initBraze:configuration];
braze.inAppMessagePresenter = [[MyCustomPresenter alloc] init];
AppDelegate.braze = braze;
```
## Customizing the display behavior
You can change the display behavior of in-app messages at runtime via the following:
```csharp
// Sets in-app messages to display immediately when triggered.
Appboy.AppboyBinding.SetInAppMessageDisplayAction(BrazeUnityInAppMessageDisplayActionType.IAM_DISPLAY_NOW);
// Sets in-app messages to display at a later time and be saved in a stack.
Appboy.AppboyBinding.SetInAppMessageDisplayAction(BrazeUnityInAppMessageDisplayActionType.IAM_DISPLAY_LATER);
// Sets in-app messages to be discarded after being triggered.
Appboy.AppboyBinding.SetInAppMessageDisplayAction(BrazeUnityInAppMessageDisplayActionType.IAM_DISCARD);
```
## Setting a custom listener
If you require more control over how a user interacts with in-app messages, use a `BrazeInAppMessageListener` and assign it to `Appboy.AppboyBinding.inAppMessageListener`. For any delegates you don't want to use, you can simply leave them as `null`.
```csharp
BrazeInAppMessageListener listener = new BrazeInAppMessageListener() {
BeforeInAppMessageDisplayed = BeforeInAppMessageDisplayed,
OnInAppMessageButtonClicked = OnInAppMessageButtonClicked,
OnInAppMessageClicked = OnInAppMessageClicked,
OnInAppMessageHTMLClicked = OnInAppMessageHTMLClicked,
OnInAppMessageDismissed = OnInAppMessageDismissed,
};
Appboy.AppboyBinding.inAppMessageListener = listener;
public void BeforeInAppMessageDisplayed(IInAppMessage inAppMessage) {
// Executed before an in-app message is displayed.
}
public void OnInAppMessageButtonClicked(IInAppMessage inAppMessage, InAppMessageButton inAppMessageButton) {
// Executed whenever an in-app message button is clicked.
}
public void OnInAppMessageClicked(IInAppMessage inAppMessage) {
// Executed whenever an in-app message is clicked.
}
public void OnInAppMessageHTMLClicked(IInAppMessage inAppMessage, Uri uri) {
// Executed whenever an HTML in-app message is clicked.
}
public void OnInAppMessageDismissed(IInAppMessage inAppMessage) {
// Executed whenever an in-app message is dismissed without a click.
}
```
# Desencadenar mensajes dentro de la aplicación a través del SDK de Braze
Source: /docs/es/developer_guide/in_app_messages/triggering_messages/index.md
# Desencadenar mensajes dentro de la aplicación {#trigger-in-app-messages}
> Aprende a desencadenar mensajes dentro de la aplicación a través del SDK de Braze.
## Desencadenantes y entrega de mensajes {#message-triggers-and-delivery}
Los mensajes dentro de la aplicación se desencadenan cuando el SDK registra uno de los siguientes tipos de eventos personalizados: `Session Start`, `Push Click`, `Any Purchase`, `Specific Purchase` y `Custom Event` (los dos últimos contienen filtros de propiedades robustos).
Al inicio de la sesión de un usuario, Braze entregará todos los mensajes dentro de la aplicación elegibles a su dispositivo, al tiempo que precargará los activos para minimizar la latencia de visualización. Si el evento desencadenante tiene más de un mensaje dentro de la aplicación elegible, solo se entregará el mensaje con la prioridad más alta. Para obtener más información, consulta [Ciclo de vida de la sesión](https://www.braze.com/docs/es/es/developer_guide/analytics/tracking_sessions#about-the-session-lifecycle).
**Note:**
Los mensajes dentro de la aplicación no se pueden desencadenar a través de la API ni mediante eventos de la API—solo mediante eventos personalizados registrados por el SDK. Para obtener más información sobre el registro, consulta [Registro de eventos personalizados](https://www.braze.com/docs/es/es/developer_guide/analytics/logging_events).
## Tipos de mensajes dentro de la aplicación {#types-of-in-app-messages}
Braze envía los siguientes tipos de mensajes dentro de la aplicación a los dispositivos de los usuarios al inicio de la sesión: `inapp` y `templated_iam`. Como usuario del dashboard, no ves los diferentes tipos, pero Braze los gestiona de forma diferente según la configuración y el contenido.
### `inapp` (estándar) {#inapp-standard}
Un mensaje dentro de la aplicación `inapp` (o "[estándar](https://www.braze.com/docs/es/es/user_guide/message_building_by_channel/in-app_messages#standard-message-types)") ya está plantillado con la información necesaria, como los atributos personalizados que Braze ya conoce. Generalmente, cuando el mensaje dentro de la aplicación se descarga en el dispositivo, el evento desencadenante hace que el SDK muestre el mensaje dentro de la aplicación `inapp` incluso cuando el dispositivo está sin conexión o en modo avión.
### `templated_iam` (plantillado) {#templated_iam-templated}
Un mensaje dentro de la aplicación `templated_iam` (o "plantillado") aún no está plantillado con la información necesaria. Braze debe realizar otra solicitud para obtener la información antes de que el mensaje pueda aparecer.
In-app messages are delivered as templated in-app messages when **Re-evaluate campaign eligibility before displaying** is selected or if any of the following Liquid tags exist in the message:
- `canvas_entry_properties`
- `connected_content`
- SMS variables such as `{sms.${*}}`
- `catalog_items`
- `catalog_selection_items`
- `event_properties`
This means that during session start, the device will receive the trigger of that in-app message instead of the entire message. When the user triggers the in-app message, the user's device will make a network request to fetch the actual message.
**Note:**
The message will not be delivered if the device doesn't have access to the internet. The message might not be delivered if the Liquid logic takes too long to resolve.
## Pares clave-valor {#key-value-pairs}
Cuando creas una Campaign en Braze, puedes establecer pares clave-valor como `extras`, que el objeto de mensajería dentro de la aplicación puede utilizar para enviar datos a tu aplicación.
```javascript
import * as braze from "@braze/web-sdk";
braze.subscribeToInAppMessage(function(inAppMessage) {
// control group messages should always be "shown"
// this will log an impression and not show a visible message
if (inAppMessage instanceof braze.ControlMessage) {
return braze.showInAppMessage(inAppMessage);
}
if (inAppMessage instanceof braze.InAppMessage) {
const extras = inAppMessage.extras;
if (extras) {
for (const key in extras) {
console.log("key: " + key + ", value: " + extras[key]);
}
}
}
braze.showInAppMessage(inAppMessage);
});
```
```java
Map getExtras()
```
```kotlin
extras: Map
```
**Tip:**
Para obtener más información, consulta el [KDoc](https://braze-inc.github.io/braze-android-sdk/kdoc/braze-android-sdk/com.braze.models.inappmessage/-i-in-app-message/index.html#1498425856%2FProperties%2F-1725759721).
El siguiente ejemplo utiliza lógica personalizada para configurar la presentación de un mensaje dentro de la aplicación basándose en sus pares clave-valor en `extras`. Para ver un ejemplo completo de personalización, consulta [nuestra aplicación de muestra](https://github.com/braze-inc/braze-swift-sdk/tree/main/Examples).
```swift
let customization = message.extras["custom-display"] as? String
if customization == "colorful-slideup" {
// Perform your custom logic.
}
```
```objc
if ([message.extras[@"custom-display"] isKindOfClass:[NSString class]]) {
NSString *customization = message.extras[@"custom-display"];
if ([customization isEqualToString:@"colorful-slideup"]) {
// Perform your custom logic.
}
}
```
## Desactivación de los desencadenantes automáticos {#disabling-automatic-triggers}
De forma predeterminada, los mensajes dentro de la aplicación se desencadenan automáticamente. Para desactivar esta función:
Elimina la llamada a `braze.automaticallyShowInAppMessages()` dentro de tu fragmento de código de carga y, a continuación, crea una lógica personalizada para gestionar la visualización o no de un mensaje dentro de la aplicación.
```javascript
braze.subscribeToInAppMessage(function(inAppMessage) {
// control group messages should always be "shown"
// this will log an impression and not show a visible message
if (inAppMessage.isControl) { // v4.5.0+, otherwise use `inAppMessage instanceof braze.ControlMessage`
return braze.showInAppMessage(inAppMessage);
}
// Display the in-app message. You could defer display here by pushing this message to code within your own application.
// If you don't want to use the display capabilities in Braze, you could alternatively pass the in-app message to your own display code here.
if ( should_show_the_message_according_to_your_custom_logic ) {
braze.showInAppMessage(inAppMessage);
} else {
// do nothing
}
});
```
**Important:**
Si llamas a `braze.showInAppMessage` sin quitar `braze.automaticallyShowInAppMessages()`, los mensajes pueden aparecer dos veces.
Para obtener un control más avanzado sobre la temporización de los mensajes, incluyendo el aplazamiento y la restauración de mensajes desencadenados, consulta nuestro [Tutorial: Aplazamiento y restauración de mensajes desencadenados](https://www.braze.com/docs/es/es/developer_guide/in_app_messages/tutorials/deferring_triggered_messages).
1. Implementa el [`IInAppMessageManagerListener`](https://www.braze.com/docs/es/es/developer_guide/in_app_messages/customization?sdktab=android&tab=global%20listener#android_step-1-implement-the-custom-manager-listener) para establecer un oyente personalizado.
2. Actualiza tu método [`beforeInAppMessageDisplayed()`](https://braze-inc.github.io/braze-android-sdk/kdoc/braze-android-sdk/com.braze.ui.inappmessage.listeners/-i-in-app-message-manager-listener/before-in-app-message-displayed.html) para que devuelva [`InAppMessageOperation.DISCARD`](https://braze-inc.github.io/braze-android-sdk/kdoc/braze-android-sdk/com.braze.ui.inappmessage/-in-app-message-operation/-d-i-s-c-a-r-d/index.html).
Para obtener un control más avanzado sobre la temporización de los mensajes, incluyendo la visualización posterior y la reincorporación a la cola, consulta nuestra página [Personalización de mensajes](https://www.braze.com/docs/es/es/developer_guide/in_app_messages/customization?tab=global%20listener&subtab=kotlin#android_step-2-instruct-braze-to-use-the-custom-manager-listener).
1. Implementa el delegado `BrazeInAppMessageUIDelegate` en tu aplicación. Para obtener una guía completa, consulta el [Tutorial: Interfaz de usuario de mensajes dentro de la aplicación](https://braze-inc.github.io/braze-swift-sdk/tutorials/braze/c1-inappmessageui).
2. Actualiza tu método delegado `inAppMessage(_:displayChoiceForMessage:)` para que devuelva `.discard`.
Para obtener un control más avanzado sobre la temporización de los mensajes, incluyendo el aplazamiento y la restauración de mensajes desencadenados, consulta nuestro [Tutorial: Aplazamiento y restauración de mensajes desencadenados](https://www.braze.com/docs/es/es/developer_guide/in_app_messages/tutorials/deferring_triggered_messages).
1. Verifica que estás utilizando el inicializador de integración automática, que está habilitado de forma predeterminada en las versiones `2.2.0` y posteriores.
2. Define la operación de mensajes dentro de la aplicación predeterminada en `DISCARD` añadiendo la siguiente línea a tu archivo `braze.xml`.
```xml
DISCARD
```
En Android, deselecciona **Automatically Display In-App Messages** en el editor de configuración de Braze. También puedes configurar `com_braze_inapp_show_inapp_messages_automatically` en `false` en el archivo `braze.xml` de tu proyecto Unity.
La operación inicial de visualización de mensajes dentro de la aplicación se puede configurar en Braze utilizando la opción "In App Message Manager Initial Display Operation".
Para iOS, configura los oyentes de objetos del juego en el editor de configuración de Braze y asegúrate de que **Braze Displays In-App Messages** no esté seleccionada.
La operación inicial de visualización de mensajes dentro de la aplicación se puede configurar en Braze utilizando la opción "In App Message Manager Initial Display Operation".
## Encadenar dos mensajes dentro de la aplicación en una sesión {#chaining-two-in-app-messages-in-one-session}
Puedes desencadenar un mensaje dentro de la aplicación al inicio de la sesión y luego desencadenar un segundo mensaje dentro de la aplicación después de que se pulse un botón en el primero. Para ello, registra un evento personalizado para el clic del botón que desencadenará el segundo mensaje. El desencadenante del segundo mensaje ya debe estar en el dispositivo (el usuario ya debe ser elegible para el segundo mensaje) y debe ocurrir en el lado del dispositivo (el SDK de Braze no detectará los cambios de atributos personalizados que ocurran en los servidores de Braze). El tiempo de espera predeterminado de 30 segundos entre desencadenantes de mensajes dentro de la aplicación debe modificarse para mostrar varios mensajes dentro de la aplicación en rápida sucesión. Para la configuración específica de cada plataforma, consulta [Anular el límite de velocidad predeterminado](#overriding-the-default-rate-limit).
## Anular el límite de velocidad predeterminado {#overriding-the-default-rate-limit}
De forma predeterminada, el SDK limita la velocidad de los mensajes dentro de la aplicación desencadenados a uno cada 30 segundos. Para anular esto, añade la siguiente propiedad a tu archivo de configuración antes de que se inicialice la instancia de Braze. Este valor se utilizará como nuevo límite de velocidad en segundos.
Para aplicaciones en producción, no establezcas este valor por debajo de 10 segundos, para que los usuarios no se vean abrumados con mensajes dentro de la aplicación consecutivos. Para pruebas y flujos de aplicaciones de muestra, 5 segundos es una configuración habitual.
Puedes establecer este intervalo en `0` para pruebas. Sin embargo, un intervalo de `0` segundos no fuerza a que varios mensajes dentro de la aplicación aparezcan al mismo tiempo. Si un mensaje dentro de la aplicación ya está visible, otro mensaje desencadenado no se mostrará hasta que el mensaje actual sea descartado.
```javascript
// Sets the minimum time interval between triggered in-app messages to 5 seconds instead of the default 30
braze.initialize('YOUR-API-KEY', { minimumIntervalBetweenTriggerActionsInSeconds: 5 })
```
```xml
5
```
```swift
let configuration = Braze.Configuration(
apiKey: "YOUR-APP-IDENTIFIER-API-KEY",
endpoint: "YOUR-BRAZE-ENDPOINT"
)
// Sets the minimum trigger time interval to 5 seconds
configuration.triggerMinimumTimeInterval = 5
let braze = Braze(configuration: configuration)
AppDelegate.braze = braze
```
```objc
BRZConfiguration *configuration =
[[BRZConfiguration alloc] initWithApiKey:@""
endpoint:@""];
// Sets the minimum trigger time interval to 5 seconds
configuration.triggerMinimumTimeInterval = 5;
Braze *braze = [BrazePlugin initBraze:configuration];
AppDelegate.braze = braze;
```
## Activación manual de mensajes {#manually-triggering-messages}
De forma predeterminada, los mensajes dentro de la aplicación se desencadenan automáticamente cuando el SDK registra un evento personalizado. Sin embargo, además de esto, puedes desencadenar mensajes manualmente utilizando los siguientes métodos.
### Uso de un evento del lado del servidor {#using-a-server-side-event}
En este momento, el SDK Web de Braze no admite la activación manual de mensajes mediante eventos del lado del servidor.
Para desencadenar un mensaje dentro de la aplicación mediante un evento enviado por el servidor, envía una notificación push silenciosa al dispositivo, lo que permite que una devolución de llamada push personalizada registre un evento basado en el SDK. Este evento desencadenará el mensaje dentro de la aplicación dirigido al usuario.
#### Paso 1: Crea una devolución de llamada push para recibir el push silencioso {#step-1-create-a-push-callback-to-receive-the-silent-push}
Registra tu devolución de llamada push personalizada para escuchar una notificación push silenciosa específica. Para obtener más información, consulta [Configuración de notificaciones push](https://www.braze.com/docs/es/es/developer_guide/push_notifications#android_setting-up-push-notifications).
Se registrarán dos eventos para que se entregue el mensaje dentro de la aplicación, uno por parte del servidor y otro desde dentro de tu devolución de llamada push personalizada. Para asegurarte de que no se duplica el mismo evento, el evento registrado desde dentro de tu devolución de llamada push debe seguir una convención de nomenclatura genérica, por ejemplo, "evento de desencadenamiento de mensaje dentro de la aplicación", y no el mismo nombre que el evento enviado por el servidor. Si no se hace así, la segmentación y los datos de usuario pueden verse afectados por el registro de eventos duplicados para una única acción de usuario.
```java
Braze.getInstance(context).subscribeToPushNotificationEvents(event -> {
final Bundle kvps = event.getNotificationPayload().getBrazeExtras();
if (kvps.containsKey("IS_SERVER_EVENT")) {
BrazeProperties eventProperties = new BrazeProperties();
// The campaign name is a string extra that clients can include in the push
String campaignName = kvps.getString("CAMPAIGN_NAME");
eventProperties.addProperty("campaign_name", campaignName);
Braze.getInstance(context).logCustomEvent("IAM Trigger", eventProperties);
}
});
```
```kotlin
Braze.getInstance(applicationContext).subscribeToPushNotificationEvents { event ->
val kvps = event.notificationPayload.brazeExtras
if (kvps.containsKey("IS_SERVER_EVENT")) {
val eventProperties = BrazeProperties()
// The campaign name is a string extra that clients can include in the push
val campaignName = kvps.getString("CAMPAIGN_NAME")
eventProperties.addProperty("campaign_name", campaignName)
Braze.getInstance(applicationContext).logCustomEvent("IAM Trigger", eventProperties)
}
}
```
#### Paso 2: Crea una campaña push {#step-2-create-a-push-campaign}
Crea una [campaña push silenciosa](https://www.braze.com/docs/es/es/developer_guide/push_notifications/silent?sdktab=android) desencadenada a través del evento enviado por el servidor.

La campaña push debe incluir extras de par clave-valor que indiquen que esta campaña push se envía para registrar un evento personalizado del SDK. Este evento se utilizará para desencadenar el mensaje dentro de la aplicación.
{: style="max-width:70%;" }
El código de ejemplo de devolución de llamada push anterior reconoce los pares clave-valor y registra el evento personalizado del SDK apropiado.
Si quieres incluir propiedades del evento para adjuntarlas a tu evento "desencadenador de mensajes dentro de la aplicación", puedes hacerlo pasándolas en los pares clave-valor de la carga útil push. En este ejemplo, se ha incluido el nombre de la campaña del mensaje dentro de la aplicación posterior. Tu devolución de llamada push personalizada puede entonces pasar el valor como parámetro de la propiedad del evento al registrar el evento personalizado.
#### Paso 3: Crea una campaña de mensajes dentro de la aplicación {#step-3-create-an-in-app-message-campaign}
Crea tu campaña de mensajes dentro de la aplicación visible para el usuario en el panel de Braze. Esta campaña debe tener una entrega basada en acciones y desencadenarse desde el evento personalizado registrado desde dentro de tu devolución de llamada push personalizada.
En el siguiente ejemplo, el mensaje específico dentro de la aplicación que se va a desencadenar se ha configurado enviando la propiedad del evento como parte del push silencioso inicial.

Si se registra un evento enviado por el servidor mientras la aplicación no está en primer plano, el evento se registrará, pero no se mostrará el mensaje dentro de la aplicación. Si quieres que el evento se retrase hasta que la aplicación esté en primer plano, debes incluir una comprobación en tu receptor push personalizado para descartar o retrasar el evento hasta que la aplicación haya entrado en primer plano.
#### Paso 1: Manejar el push silencioso y los pares clave-valor {#step-1-handle-silent-push-and-key-value-pairs}
Implementa la siguiente función y llámala dentro del método [`application(_:didReceiveRemoteNotification:fetchCompletionHandler:)`](https://developer.apple.com/documentation/uikit/uiapplicationdelegate/1623013-application/):
```swift
func handleExtras(userInfo: [AnyHashable : Any]) {
print("A push was received")
if userInfo != nil && (userInfo["IS_SERVER_EVENT"] as? String) != nil && (userInfo["CAMPAIGN_NAME"] as? String) != nil {
AppDelegate.braze?.logCustomEvent("IAM Trigger", properties: ["campaign_name": userInfo["CAMPAIGN_NAME"]])
}
}
```
```objc
- (void)handleExtrasFromPush:(NSDictionary *)userInfo {
NSLog(@"A push was received.");
if (userInfo !=nil && userInfo[@"IS_SERVER_EVENT"] !=nil && userInfo[@"CAMPAIGN_NAME"]!=nil) {
[AppDelegate.braze logCustomEvent:@"IAM Trigger" properties:@{@"campaign_name": userInfo[@"CAMPAIGN_NAME"]}];
}
};
```
Cuando se reciba el push silencioso, se registrará un evento "desencadenador de mensaje dentro de la aplicación" registrado en el SDK contra el perfil de usuario.
**Important:**
Debido a que se utiliza un mensaje push para registrar un evento personalizado registrado en el SDK, Braze necesitará almacenar un token de notificaciones push para cada usuario para habilitar esta solución. Para los usuarios de iOS, Braze solo almacenará un token a partir del momento en que un usuario haya recibido el aviso push del sistema operativo. Antes de esto, el usuario no será localizable mediante push, y la solución anterior no será posible.
#### Paso 2: Crea una campaña push silenciosa {#step-2-create-a-silent-push-campaign}
Crea una [campaña push silenciosa](https://www.braze.com/docs/es/es/developer_guide/push_notifications/silent?sdktab=swift) que se desencadene a través del evento enviado por el servidor.

La campaña push debe incluir extras de par clave-valor, que indiquen que esta campaña push se envía para registrar un evento personalizado del SDK. Este evento se utilizará para desencadenar el mensaje dentro de la aplicación.

El código del método `application(_:didReceiveRemoteNotification:fetchCompletionHandler:)` comprueba si hay una clave `IS_SERVER_EVENT` y registrará un evento personalizado del SDK si la hay.
Puedes modificar el nombre o las propiedades del evento enviando el valor deseado dentro de los extras del par clave-valor de la carga útil push. Al registrar el evento personalizado, estos extras se pueden utilizar como parámetro del nombre del evento o como propiedad del evento.
#### Paso 3: Crea una campaña de mensajes dentro de la aplicación
Crea tu campaña de mensajes dentro de la aplicación visible para el usuario en el panel de Braze. Esta campaña debe tener una entrega basada en acciones y desencadenarse desde el evento personalizado registrado en el método `application(_:didReceiveRemoteNotification:fetchCompletionHandler:)`.
En el siguiente ejemplo, el mensaje específico dentro de la aplicación que se va a desencadenar se ha configurado enviando la propiedad del evento como parte del push silencioso inicial.

**Note:**
Ten en cuenta que estos mensajes dentro de la aplicación solo se desencadenarán si se recibe el push silencioso mientras la aplicación está en primer plano.
### Mostrar un mensaje predefinido {#displaying-a-pre-defined-message}
Para mostrar manualmente un mensaje dentro de la aplicación predefinido, utiliza el siguiente método:
Para el SDK Web, utiliza `braze.showInAppMessage(inAppMessage)` para mostrar cualquier mensaje dentro de la aplicación. Para obtener más información y ver un ejemplo, consulta [Mostrar un mensaje en tiempo real](#displaying-a-message-in-real-time).
```java
BrazeInAppMessageManager.getInstance().addInAppMessage(inAppMessage);
```
```kotlin
BrazeInAppMessageManager.getInstance().addInAppMessage(inAppMessage)
```
```swift
if let inAppMessage = AppDelegate.braze?.inAppMessagePresenter?.nextAvailableMessage() {
AppDelegate.braze?.inAppMessagePresenter?.present(message: inAppMessage)
}
```
### Mostrar un mensaje en tiempo real {#displaying-a-message-in-real-time}
También puedes crear y mostrar mensajes dentro de la aplicación locales en tiempo real, utilizando las mismas opciones de personalización disponibles en el dashboard. Para hacerlo:
```javascript
// Displays a slideup type in-app message.
var message = new braze.SlideUpMessage("Welcome to Braze! This is an in-app message.");
message.slideFrom = braze.InAppMessage.SlideFrom.TOP;
braze.showInAppMessage(message);
```
```java
// Initializes a new slideup type in-app message and specifies its message.
InAppMessageSlideup inAppMessage = new InAppMessageSlideup();
inAppMessage.setMessage("Welcome to Braze! This is a slideup in-app message.");
```
```kotlin
// Initializes a new slideup type in-app message and specifies its message.
val inAppMessage = InAppMessageSlideup()
inAppMessage.message = "Welcome to Braze! This is a slideup in-app message."
```
**Important:**
No muestres mensajes dentro de la aplicación cuando el teclado en pantalla esté visible, ya que el renderizado no está definido en esta circunstancia.
Llama manualmente al método [`present(message:)`](https://braze-inc.github.io/braze-swift-sdk/documentation/brazekit/brazeinappmessagepresenter/present(message:)) en tu `inAppMessagePresenter`. Por ejemplo:
```swift
let customInAppMessage = Braze.InAppMessage.slideup(
.init(message: "YOUR_CUSTOM_SLIDEUP_MESSAGE", slideFrom: .bottom, themes: .defaults)
)
AppDelegate.braze?.inAppMessagePresenter?.present(message: customInAppMessage)
```
```objc
BRZInAppMessageRaw *customInAppMessage = [[BRZInAppMessageRaw alloc] init];
customInAppMessage.type = BRZInAppMessageRawTypeSlideup;
customInAppMessage.message = @"YOUR_CUSTOM_SLIDEUP_MESSAGE";
customInAppMessage.slideFrom = BRZInAppMessageRawSlideFromBottom;
customInAppMessage.themes = @{
@"light": BRZInAppMessageRawTheme.defaultLight,
@"dark": BRZInAppMessageRawTheme.defaultDark
};
[AppDelegate.braze.inAppMessagePresenter presentMessage:customInAppMessage];
```
**Note:**
Al crear tu propio mensaje dentro de la aplicación, te excluyes de cualquier seguimiento de análisis y tendrás que gestionar manualmente el registro de clics e impresiones utilizando tu `message.context`.
Para mostrar el siguiente mensaje de la pila, utiliza el método `DisplayNextInAppMessage()`. Los mensajes se guardarán en esta pila si se elige `DISPLAY_LATER` o `BrazeUnityInAppMessageDisplayActionType.IAM_DISPLAY_LATER` como acción de visualización de mensajes dentro de la aplicación.
```csharp
Appboy.AppboyBinding.DisplayNextInAppMessage();
```
## Causas de retrasos en los mensajes dentro de la aplicación {#causes-of-in-app-message-delays}
Si recibes una campaña de mensajes dentro de la aplicación unos segundos después del inicio de la sesión, el retraso puede haber sido causado por:
- Un retraso en el desencadenante de la campaña
- Personalizaciones
- El evento desencadenante se registró más tarde de lo esperado (como con un `templated_iam`)
## Mensajes de intención de salida para Web {#exit-intent-messages-for-web}
Los mensajes de intención de salida son mensajes no intrusivos dentro de la aplicación que se utilizan para comunicar información importante a los visitantes antes de que abandonen tu sitio web.
Para configurar desencadenantes para estos tipos de mensajes en el SDK Web, implementa una biblioteca de intención de salida en tu sitio web (como [la biblioteca de código abierto de ouibounce](https://github.com/carlsednaoui/ouibounce)) y, a continuación, utiliza el siguiente código para registrar `'exit intent'` como un evento personalizado en Braze. Ahora, tus futuras campañas de mensajes dentro de la aplicación pueden utilizar este tipo de mensaje como desencadenante de eventos personalizados.
```javascript
var _ouibounce = ouibounce(false, {
callback: function() { braze.logCustomEvent('exit intent'); }
});
```
# Mensajes HTML dentro de la aplicación
Source: /docs/es/developer_guide/in_app_messages/html_messages/index.md
# Mensajes HTML dentro de la aplicación {#html-in-app-messages}
> Aprende a añadir la interfaz JavaScript de Braze a tu aplicación, para que puedas utilizar la API de Braze para crear [mensajes HTML dentro de la aplicación](https://www.braze.com/docs/es/es/user_guide/channels/in_app_messages/message_types/custom_html) en tus WebViews personalizadas.
## Prerequisites
Before you can use this feature, you'll need to [integrate the Android Braze SDK](https://www.braze.com/docs/es/es/developer_guide/sdk_integration/?sdktab=android).
## About HTML messages
With the Braze JavaScript interface, you can leverage Braze inside the custom WebViews within your app. The [`InAppMessageJavascriptInterface`](https://braze-inc.github.io/braze-android-sdk/kdoc/braze-android-sdk/com.braze.ui.inappmessage.jsinterface/-in-app-message-javascript-interface/index.html) is responsible for:
1. Injecting the Braze JavaScript bridge into your WebView, as outlined in [User Guide: HTML in-app messages](https://www.braze.com/docs/es/es/user_guide/message_building_by_channel/in-app_messages/customize/#custom-html-messages).
2. Passing the bridge methods received from your WebView to the [Braze Android SDK](https://github.com/braze-inc/braze-android-sdk).
## Adding the interface to a WebView
Using Braze functionality from a WebView in your app can be done by adding the Braze JavaScript interface to your WebView. After the interface has been added, the same API available for [User Guide: HTML in-app messages](https://www.braze.com/docs/es/es/user_guide/message_building_by_channel/in-app_messages/customize/#custom-html-messages) will be available within your custom WebView.
```java
String javascriptString = BrazeFileUtils.getAssetFileStringContents(context.getAssets(), "braze-html-bridge.js");
myWebView.loadUrl("javascript:" + javascriptString);
final InAppMessageJavascriptInterface javascriptInterface = new InAppMessageJavascriptInterface(context, inAppMessage);
myWebView.addJavascriptInterface(javascriptInterface, "brazeInternalBridge");
```
```kotlin
val javascriptString = context.assets.getAssetFileStringContents("braze-html-bridge.js")
myWebView.loadUrl("javascript:" + javascriptString!!)
val javascriptInterface = InAppMessageJavascriptInterface(context, inAppMessage)
myWebView.addJavascriptInterface(javascriptInterface, "brazeInternalBridge")
```
## Embedding YouTube content
YouTube and other HTML5 content can play in HTML in-app messages. This requires hardware acceleration to be enabled in the activity where the in-app message is being displayed; see the [Android developer guide](https://developer.android.com/guide/topics/graphics/hardware-accel.html#controlling) for more details. Hardware acceleration is only available on Android API versions 11 and later.
The following is an example of an embedded YouTube video in an HTML snippet:
```html
```
## Using deep links
When using deep links or external links in Android HTML in-app messages, **do not** call `brazeBridge.closeMessage()` in your JavaScript. The SDK's internal logic automatically closes the in-app message when it redirects to a link. Calling `brazeBridge.closeMessage()` interferes with this process and may cause the message to become unresponsive when users return to your app.
The following is an example of a deep link in a code snippet:
```javascript
```
## Prerequisites
Before you can use this feature, you'll need to [integrate the Swift Braze SDK](https://www.braze.com/docs/es/es/developer_guide/sdk_integration/?sdktab=swift).
## About HTML messages
With the Braze JavaScript interface, you can leverage Braze inside the custom WebViews within your app. The interface's [`ScriptMessageHandler`](https://braze-inc.github.io/braze-swift-sdk/documentation/brazekit/braze/webviewbridge/scriptmessagehandler) is responsible for:
1. Injecting the Braze JavaScript bridge into your WebView, as outlined in [User Guide: HTML in-app messages](https://www.braze.com/docs/es/es/user_guide/message_building_by_channel/in-app_messages/customize/#custom-html-messages).
2. Passing the bridge methods received from your WebView to the [Braze Swift SDK](https://github.com/braze-inc/braze-swift-sdk).
## Adding the interface to a WebView
First, add the [`ScriptMessageHandler`](https://braze-inc.github.io/braze-swift-sdk/documentation/brazekit/braze/webviewbridge/scriptmessagehandler) from `WebViewBridge` to your app.
```swift
let scriptMessageHandler = Braze.WebViewBridge.ScriptMessageHandler(braze: braze)
```
Add the initialized `scriptMessageHandler` to a WkWebView's `userContentController`.
```swift
configuration.userContentController.add(
scriptMessageHandler,
name: Braze.WebViewBridge.ScriptMessageHandler.name
)
```
Then create the WebView using your configuration.
```swift
let webView = WKWebView(frame: .zero, configuration: configuration)
```
When you're finished, your code should be similar to the following:
```swift
// Create the script message handler using your initialized Braze instance.
let scriptMessageHandler = Braze.WebViewBridge.ScriptMessageHandler(braze: braze)
// Create a web view configuration and setup the script message handler.
let configuration = WKWebViewConfiguration()
configuration.userContentController.addUserScript(
Braze.WebViewBridge.ScriptMessageHandler.script
)
configuration.userContentController.add(
scriptMessageHandler,
name: Braze.WebViewBridge.ScriptMessageHandler.name
)
// Create the webview using the configuration
let webView = WKWebView(frame: .zero, configuration: configuration)
```
## Example: Logging a custom event
In the following example, `BrazeBridge` logs a custom event from existing web content to the Braze Swift SDK.
```javascript
Logging data via BrazeBridge Example
```
# Vinculación en profundidad en mensajes dentro de la aplicación para el SDK de Braze
Source: /docs/es/developer_guide/in_app_messages/deep_linking/index.md
# Vinculación en profundidad en mensajes dentro de la aplicación {#in-app-message-deep-linking}
> Aprende a crear vínculos profundos dentro de un mensaje dentro de la aplicación utilizando el SDK de Braze.
## Prerequisites
Before you can use this feature, you'll need to [integrate the Android Braze SDK](https://www.braze.com/docs/es/es/developer_guide/sdk_integration/?sdktab=android).
## Creating a universal delegate
The Android SDK provides the ability to set a single delegate object to custom handle all deep links opened by Braze across Content Cards, in-app messages, and push notifications.
Your delegate object should implement the [`IBrazeDeeplinkHandler`](https://braze-inc.github.io/braze-android-sdk/kdoc/braze-android-sdk/com.braze.ui/-braze-deeplink-handler/index.html) interface and be set using [`BrazeDeeplinkHandler.setBrazeDeeplinkHandler()`](https://braze-inc.github.io/braze-android-sdk/kdoc/braze-android-sdk/com.braze.ui/-braze-deeplink-handler/-companion/set-braze-deeplink-handler.html). In most cases, the delegate should be set in your app's `Application.onCreate()`.
The following is an example of overriding the default [`UriAction`](https://braze-inc.github.io/braze-android-sdk/kdoc/braze-android-sdk/com.braze.ui.actions/-uri-action/index.html) behavior with custom intent flags and custom behavior for YouTube URLs:
```java
public class CustomDeeplinkHandler implements IBrazeDeeplinkHandler {
private static final String TAG = BrazeLogger.getBrazeLogTag(CustomDeeplinkHandler.class);
@Override
public void gotoUri(Context context, UriAction uriAction) {
String uri = uriAction.getUri().toString();
// Open YouTube URLs in the YouTube app and not our app
if (!StringUtils.isNullOrBlank(uri) && uri.contains("youtube.com")) {
uriAction.setUseWebView(false);
}
CustomUriAction customUriAction = new CustomUriAction(uriAction);
customUriAction.execute(context);
}
public static class CustomUriAction extends UriAction {
public CustomUriAction(@NonNull UriAction uriAction) {
super(uriAction);
}
@Override
protected void openUriWithActionView(Context context, Uri uri, Bundle extras) {
Intent intent = getActionViewIntent(context, uri, extras);
intent.setFlags(Intent.FLAG_ACTIVITY_NEW_TASK | Intent.FLAG_ACTIVITY_CLEAR_TOP | Intent.FLAG_ACTIVITY_SINGLE_TOP);
if (intent.resolveActivity(context.getPackageManager()) != null) {
context.startActivity(intent);
} else {
BrazeLogger.w(TAG, "Could not find appropriate activity to open for deep link " + uri + ".");
}
}
}
}
```
```kotlin
class CustomDeeplinkHandler : IBrazeDeeplinkHandler {
override fun gotoUri(context: Context, uriAction: UriAction) {
val uri = uriAction.uri.toString()
// Open YouTube URLs in the YouTube app and not our app
if (!StringUtils.isNullOrBlank(uri) && uri.contains("youtube.com")) {
uriAction.useWebView = false
}
val customUriAction = CustomUriAction(uriAction)
customUriAction.execute(context)
}
class CustomUriAction(uriAction: UriAction) : UriAction(uriAction) {
override fun openUriWithActionView(context: Context, uri: Uri, extras: Bundle) {
val intent = getActionViewIntent(context, uri, extras)
intent.flags = Intent.FLAG_ACTIVITY_NEW_TASK or Intent.FLAG_ACTIVITY_CLEAR_TOP or Intent.FLAG_ACTIVITY_SINGLE_TOP
if (intent.resolveActivity(context.packageManager) != null) {
context.startActivity(intent)
} else {
BrazeLogger.w(TAG, "Could not find appropriate activity to open for deep link $uri.")
}
}
}
companion object {
private val TAG = BrazeLogger.getBrazeLogTag(CustomDeeplinkHandler::class.java)
}
}
```
## Deep linking to app settings
To allow deep links to directly open your app's settings, you'll need a custom `BrazeDeeplinkHandler`. In the following example, the presence of a custom key-value pair called `open_notification_page` will make the deep link open the app's settings page:
```java
BrazeDeeplinkHandler.setBrazeDeeplinkHandler(new IBrazeDeeplinkHandler() {
@Override
public void gotoUri(Context context, UriAction uriAction) {
final Bundle extras = uriAction.getExtras();
if (extras.containsKey("open_notification_page")) {
Intent intent = new Intent();
intent.setAction("android.settings.APP_NOTIFICATION_SETTINGS");
intent.setFlags(Intent.FLAG_ACTIVITY_NEW_TASK);
//for Android 5-7
intent.putExtra("app_package", context.getPackageName());
intent.putExtra("app_uid", context.getApplicationInfo().uid);
// for Android 8 and later
intent.putExtra("android.provider.extra.APP_PACKAGE", context.getPackageName());
context.startActivity(intent);
}
}
});
```
```kotlin
BrazeDeeplinkHandler.setBrazeDeeplinkHandler(object : IBrazeDeeplinkHandler {
override fun gotoUri(context: Context, uriAction: UriAction) {
val extras = uriAction.extras
if (extras.containsKey("open_notification_page")) {
val intent = Intent()
intent.action = "android.settings.APP_NOTIFICATION_SETTINGS"
intent.flags = Intent.FLAG_ACTIVITY_NEW_TASK
//for Android 5-7
intent.putExtra("app_package", context.packageName)
intent.putExtra("app_uid", context.applicationInfo.uid)
// for Android 8 and later
intent.putExtra("android.provider.extra.APP_PACKAGE", context.packageName)
context.startActivity(intent)
}
}
})
```
## Customizing WebView activity {#Custom_Webview_Activity}
When Braze opens website deeplinks inside the app, the deeplinks are handled by [`BrazeWebViewActivity`](https://braze-inc.github.io/braze-android-sdk/kdoc/braze-android-sdk/com.braze.ui/-braze-web-view-activity/index.html).
**Note:**
For custom HTML in-app messages, links configured with `target="_blank"` open in the device's default web browser and are not handled by `BrazeWebViewActivity`.
To change this:
1. Create a new Activity that handles the target URL from `Intent.getExtras()` with the key `com.braze.Constants.BRAZE_WEBVIEW_URL_EXTRA`. For an example, see [`BrazeWebViewActivity.kt`](https://github.com/braze-inc/braze-android-sdk/blob/master/android-sdk-ui/src/main/java/com/braze/ui/BrazeWebViewActivity.kt).
2. Add that activity to `AndroidManifest.xml` and set `exported` to `false`.
```xml
```
3. Set your custom Activity in a `BrazeConfig` [builder object](https://braze-inc.github.io/braze-android-sdk/kdoc/braze-android-sdk/com.braze.configuration/-braze-config/-builder/set-custom-web-view-activity-class.html). Build the builder and pass it to [`Braze.configure()`](https://braze-inc.github.io/braze-android-sdk/kdoc/braze-android-sdk/com.braze/-braze/-companion/configure.html) in your [`Application.onCreate()`](https://developer.android.com/reference/android/app/Application.html#onCreate()).
```java
BrazeConfig brazeConfig = new BrazeConfig.Builder()
.setCustomWebViewActivityClass(MyCustomWebViewActivity::class)
...
.build();
Braze.configure(this, brazeConfig);
```
```kotlin
val brazeConfig = BrazeConfig.Builder()
.setCustomWebViewActivityClass(MyCustomWebViewActivity::class.java)
...
.build()
Braze.configure(this, brazeConfig)
```
## Troubleshooting
If deep links from push notifications aren't working on Android, try the following steps:
1. **Test the deep link outside of Braze.** Open the deep link URL from another app, such as email or a browser. If it doesn't open your app, the deep link may not be configured correctly in your `AndroidManifest.xml`. For more information, see Android's [Create Deep Links](https://developer.android.com/training/app-links/deep-linking) documentation.
2. **Check that automatic deep link handling is enabled.** Verify that `com_braze_handle_push_deep_links_automatically` is set to `true` in `braze.xml`, or set this option through [runtime configuration](https://www.braze.com/docs/es/es/developer_guide/sdk_initalization/?sdktab=android). Without this setting, Braze doesn't automatically open your app and deep link destination when someone taps a push notification.
3. **Verify your deep link handler delegate.** If you set a custom `IBrazeDeeplinkHandler`, confirm that your `gotoUri` implementation handles the URI and doesn't drop it.
4. **Test across channels.** If the same deep link works in an in-app message but not from push, the issue is likely in your push deep link handling, not in the deep link itself.
## Using Jetpack Compose
To handle deeplinks when using Jetpack Compose with NavHost:
1. Ensure that the activity handling your deeplink is registered in the Android Manifest.
```xml
```
2. In NavHost, specify which deeplinks you want it to handle.
```kotlin
composableWithCompositionLocal(
route = "YOUR_ROUTE_HERE",
deepLinks = listOf(navDeepLink {
uriPattern = "myapp://articles/{${MainDestinations.ARTICLE_ID_KEY}}"
}),
arguments = listOf(
navArgument(MainDestinations.ARTICLE_ID_KEY) {
type = NavType.LongType
}
),
) { backStackEntry ->
val arguments = requireNotNull(backStackEntry.arguments)
val articleId = arguments.getLong(MainDestinations.ARTICLE_ID_KEY)
ArticleDetail(
articleId
)
}
```
3. Depending on your app architecture, you may need to handle the new intent that's sent to your current activity as well.
```kotlin
DisposableEffect(Unit) {
val listener = Consumer {
navHostController.handleDeepLink(it)
}
addOnNewIntentListener(listener)
onDispose { removeOnNewIntentListener(listener) }
}
```
## Prerequisites
Before you can use this feature, you'll need to [integrate the Swift Braze SDK](https://www.braze.com/docs/es/es/developer_guide/sdk_integration/?sdktab=swift).
**Tip:**
For help choosing between custom scheme deep links, universal links, and "Open Web URL Inside App," see [iOS deep linking guide](https://www.braze.com/docs/es/es/developer_guide/push_notifications/ios_deep_linking_guide). For troubleshooting, see [Deep linking troubleshooting](https://www.braze.com/docs/es/es/developer_guide/push_notifications/deep_linking_troubleshooting).
## Handling deep links
### Step 1: Register a scheme {#register-a-scheme}
To handle deep linking, a custom scheme must be stated in your `Info.plist` file. The navigation structure is defined by an array of dictionaries. Each of those dictionaries contains an array of strings.
Use Xcode to edit your `Info.plist` file:
1. Add a new key, `URL types`. Xcode will automatically make this an array containing a dictionary called `Item 0`.
2. Within `Item 0`, add a key `URL identifier`. Set the value to your custom scheme.
3. Within `Item 0`, add a key `URL Schemes`. This will automatically be an array containing a `Item 0` string.
4. Set `URL Schemes` >> `Item 0` to your custom scheme.
Alternatively, if you wish to edit your `Info.plist` file directly, you can follow this spec:
```html
CFBundleURLTypesCFBundleURLNameYOUR.SCHEMECFBundleURLSchemesYOUR.SCHEME
```
### Step 2: Add a scheme allowlist
You must declare the URL schemes you wish to pass to `canOpenURL(_:)` by adding the `LSApplicationQueriesSchemes` key to your app's Info.plist file. Attempting to call schemes outside this allowlist will cause the system to record an error in the device's logs, and the deep link will not open. An example of this error will look like this:
```
: -canOpenURL: failed for URL: "yourapp://deeplink" – error: "This app is not allowed to query for scheme yourapp"
```
For example, if an in-app message should open the Facebook app when tapped, the app has to have the Facebook custom scheme (`fb`) in your allowlist. Otherwise, the system will reject the deep link. Deep links that direct to a page or view inside your own app still require that your app's custom scheme be listed in your app's `Info.plist`.
Your example allowlist might look something like:
```html
LSApplicationQueriesSchemesmyappfbtwitter
```
For more information, refer to [Apple's documentation](https://developer.apple.com/library/content/documentation/General/Reference/InfoPlistKeyReference/Articles/LaunchServicesKeys.html#//apple_ref/doc/uid/TP40009250-SW14) on the `LSApplicationQueriesSchemes` key.
### Step 3: Implement a handler
After activating your app, iOS will call the method [`application:openURL:options:`](https://developer.apple.com/reference/uikit/uiapplicationdelegate/1623112-application?language=objc). The important argument is the [NSURL](https://developer.apple.com/library/ios/DOCUMENTATION/Cocoa/Reference/Foundation/Classes/NSURL_Class/Reference/Reference.html#//apple_ref/doc/c_ref/NSURL) object.
```swift
func application(_ app: UIApplication, open url: URL, options: [UIApplication.OpenURLOptionsKey : Any] = [:]) -> Bool {
let path = url.path
let query = url.query
// Insert your code here to take some action based upon the path and query.
return true
}
```
```objc
- (BOOL)application:(UIApplication *)app openURL:(NSURL *)url options:(NSDictionary *)options {
NSString *path = [url path];
NSString *query = [url query];
// Insert your code here to take some action based upon the path and query.
return YES;
}
```
## App Transport Security (ATS)
As defined by [Apple](https://developer.apple.com/library/prerelease/ios/releasenotes/General/WhatsNewIniOS/Articles/iOS9.html#//apple_ref/doc/uid/TP40016198-SW14), "App Transport Security is a feature that improves the security of connections between an app and web services. The feature consists of default connection requirements that conform to best practices for secure connections. Apps can override this default behavior and turn off transport security."
ATS is applied by default. It requires that all connections use HTTPS and are encrypted using TLS 1.2 with forward secrecy. Refer to [Requirements for Connecting Using ATS](https://developer.apple.com/library/ios/documentation/General/Reference/InfoPlistKeyReference/Articles/CocoaKeys.html#//apple_ref/doc/uid/TP40009251-SW35) for more information. All images served by Braze to end devices are handled by a content delivery network ("CDN") that supports TLS 1.2 and is compatible with ATS.
Unless they are specified as exceptions in your application's `Info.plist`, connections that do not follow these requirements will fail with errors that are similar to the following.
**Example Error 1:**
```bash
CFNetwork SSLHandshake failed (-9801)
Error Domain=NSURLErrorDomain Code=-1200 "An SSL error has occurred, and a secure connection to the server cannot be made."
```
**Example Error 2:**
```bash
NSURLSession/NSURLConnection HTTP load failed (kCFStreamErrorDomainSSL, -9802)
```
ATS compliance is enforced for links opened within the mobile app (our default handling of clicked links) and does not apply to sites opened externally via a web browser.
### Working with ATS
You can handle ATS in either of the following ways, but we recommend **complying with ATS requirements**.
Your Braze integration can satisfy ATS requirements by ensuring that any existing links you drive users to (for example, though in-app message and push campaigns) satisfy ATS requirements. While there are ways to bypass ATS restrictions, our recommendation is to ensure that all linked URLs are ATS-compliant. Given Apple's increasing emphasis on application security, the following approaches to allowing ATS exceptions are not guaranteed to be supported by Apple.
You can allow a subset of links with certain domains or schemes to be treated as exceptions to the ATS rules. Your Braze integration will satisfy ATS requirements if every link you use in a Braze messaging channel is either ATS compliant or handled by an exception.
To add a domain as an exception of the ATS, add following to your app's `Info.plist` file:
```html
NSAppTransportSecurityNSAllowsArbitraryLoadsNSExceptionDomainsexample.comNSExceptionAllowsInsecureHTTPLoadsNSIncludesSubdomains
```
Refer to Apple's article on [app transport security keys](https://developer.apple.com/library/ios/documentation/General/Reference/InfoPlistKeyReference/Articles/CocoaKeys.html#//apple_ref/doc/uid/TP40009251-SW33) for more information.
You can turn off ATS entirely. Note that this is not recommended practice, due to both lost security protections and future iOS compatibility. To disable ATS, insert the following in your app's `Info.plist` file:
```html
NSAppTransportSecurityNSAllowsArbitraryLoads
```
## Decoding URLs
The SDK percent-encodes links to create valid `URL`s. All link characters that are not allowed in a properly formed URL, such as Unicode characters, will be percent escaped.
To decode an encoded link, use the `String` property [`removingPercentEncoding`](https://developer.apple.com/documentation/swift/stringprotocol/removingpercentencoding). You must also return `true` in the `BrazeDelegate.braze(_:shouldOpenURL:)`. A call to action is required to trigger the handling of the URL by your app. For example:
```swift
func application(_ app: UIApplication, open url: URL, options: [UIApplication.OpenURLOptionsKey : Any] = [:]) -> Bool {
let urlString = url.absoluteString.removingPercentEncoding
// Handle urlString
return true
}
```
```objc
- (BOOL)application:(UIApplication *)application openURL:(NSURL *)url options:(NSDictionary *)options {
NSString *urlString = [url.absoluteString stringByRemovingPercentEncoding];
// Handle urlString
return YES;
}
```
## Deep linking to app settings
You can take advantage of `UIApplicationOpenSettingsURLString` to deep link users to your app's settings from Braze push notifications and in-app messages.
To take users from your app into the iOS settings:
1. First, make sure your application is set up for either [scheme-based deep links](#swift_register-a-scheme) or [universal links](#swift_universal-links).
2. Decide on a URI for deep linking to the **Settings** page (for example, `myapp://settings` or `https://www.braze.com/settings`).
3. If you are using custom scheme-based deep links, add the following code to your `application:openURL:options:` method:
```swift
func application(_ app: UIApplication, open url: URL, options: [UIApplicationOpenURLOptionsKey : Any] = [:]) -> Bool {
let path = url.path
if (path == "settings") {
UIApplication.shared.openURL(URL(string:UIApplication.openSettingsURLString)!)
}
return true
}
```
```objc
- (BOOL)application:(UIApplication *)app
openURL:(NSURL *)url
options:(NSDictionary *)options {
NSString *path = [url path];
if ([path isEqualToString:@"settings"]) {
NSURL *settingsURL = [NSURL URLWithString:UIApplicationOpenSettingsURLString];
[[UIApplication sharedApplication] openURL:settingsURL];
}
return YES;
}
```
## Customization options {#customization-options}
### Default WebView customization
The `Braze.WebViewController` class displays web URLs opened by the SDK, typically when "Open Web URL Inside App" is selected for a web deep link.
You can customize the `Braze.WebViewController` via the [`BrazeDelegate.braze(_:willPresentModalWithContext:)`](https://braze-inc.github.io/braze-swift-sdk/documentation/brazekit/brazedelegate/braze(_:willpresentmodalwithcontext:)-12sqy/) delegate method.
### Linking handling customization
The `BrazeDelegate` protocol can be used to customize the handling of URLs such as deep links, web URLs, and universal links. To set the delegate during Braze initialization, set a delegate object on the `Braze` instance. Braze will then call your delegate's implementation of `shouldOpenURL` before handling any URIs.
When a push notification or in-app message uses **Open web URL inside mobile app**, Braze passes `context.useWebView == true` on [`Braze.URLContext`](https://braze-inc.github.io/braze-swift-sdk/documentation/brazekit/braze/urlcontext). When the message opens the URL in the system browser instead, `useWebView` is `false`. Inspect `context.useWebView` in `braze(_:shouldOpenURL:)` to branch your custom handling—for example, to open an in-app `WebViewController` only when the campaign requested in-app display.
#### Universal links {#universal-links}
Braze supports universal links in push notifications, in-app messages, and Content Cards. To enable universal link support, [`configuration.forwardUniversalLinks`](https://braze-inc.github.io/braze-swift-sdk/documentation/brazekit/braze/configuration-swift.class/forwarduniversallinks) must be set to `true`.
When enabled, Braze will forward universal links to your app's `AppDelegate` via the [`application:continueUserActivity:restorationHandler:`](https://developer.apple.com/documentation/uikit/uiapplicationdelegate/1623072-application) method.
Your application also needs to be set up to handle universal links. Refer to [Apple's documentation](https://developer.apple.com/documentation/xcode/supporting-universal-links-in-your-app) to ensure your application is configured correctly for universal links.
**Warning:**
Universal link forwarding requires access to the application entitlements. When running the application in a simulator, these entitlements are not directly available and universal links are not forwarded to the system handlers.
To add support to simulator builds, you can add the application `.entitlements` file to the _Copy Bundle Resources_ build phase. See [`forwardUniversalLinks`](https://braze-inc.github.io/braze-swift-sdk/documentation/brazekit/braze/configuration-swift.class/forwarduniversallinks) documentation for more details.
**Note:**
The SDK does not query your domains' `apple-app-site-association` file. It performs the differentiation between universal links and regular URLs by looking at the domain name only. As a result, the SDK does not respect any exclusion rule defined in the `apple-app-site-association` per [Supporting associated domains](https://developer.apple.com/documentation/xcode/supporting-associated-domains).
## Examples
### BrazeDelegate
Here's an example using `BrazeDelegate`. For more information, see [Braze Swift SDK reference](https://braze-inc.github.io/braze-swift-sdk/documentation/brazekit/brazedelegate).
```swift
func braze(_ braze: Braze, shouldOpenURL context: Braze.URLContext) -> Bool {
if context.url.host == "MY-DOMAIN.com" {
// Custom handle link here
return false
}
// Let Braze handle links otherwise
return true
}
```
```objc
- (BOOL)braze:(Braze *)braze shouldOpenURL:(BRZURLContext *)context {
if ([[context.url.host lowercaseString] isEqualToString:@"MY-DOMAIN.com"]) {
// Custom handle link here
return NO;
}
// Let Braze handle links otherwise
return YES;
}
```
# Incrustar GIF en mensajes dentro de la aplicación para el SDK de Braze
Source: /docs/es/developer_guide/in_app_messages/gifs/index.md
# Incrustar GIF en mensajes dentro de la aplicación
> Aprende a incrustar GIF en mensajes dentro de la aplicación para el SDK de Braze.
## About GIFs
Braze offers the ability to use a custom image library to display animated GIFs. Although the following example uses [Glide](https://bumptech.github.io/glide/), any image library that supports GIFs is compatible.
## Integrating a custom image library
### Step 1: Creating the image loader delegate
The Image Loader delegate must implement the following methods:
* [`getInAppMessageBitmapFromUrl()`](https://braze-inc.github.io/braze-android-sdk/kdoc/braze-android-sdk/com.braze.images/-i-braze-image-loader/get-in-app-message-bitmap-from-url.html)
* [`getPushBitmapFromUrl()`](https://braze-inc.github.io/braze-android-sdk/kdoc/braze-android-sdk/com.braze.images/-i-braze-image-loader/get-push-bitmap-from-url.html)
* [`renderUrlIntoCardView()`](https://braze-inc.github.io/braze-android-sdk/kdoc/braze-android-sdk/com.braze.images/-i-braze-image-loader/render-url-into-card-view.html)
* [`renderUrlIntoInAppMessageView()`](https://braze-inc.github.io/braze-android-sdk/kdoc/braze-android-sdk/com.braze.images/-i-braze-image-loader/render-url-into-in-app-message-view.html)
* [`setOffline()`](https://braze-inc.github.io/braze-android-sdk/kdoc/braze-android-sdk/com.braze.images/-i-braze-image-loader/set-offline.html)
The following integration example is taken from the [Glide integration sample app](https://github.com/braze-inc/braze-android-sdk/tree/master/samples/glide-image-integration) included with the Braze Android SDK.
```java
import com.braze.support.BrazeLogger;
import com.bumptech.glide.load.resource.gif.GifDrawable;
import android.graphics.drawable.Drawable;
public class GlideBrazeImageLoader implements IBrazeImageLoader {
private static final String TAG = GlideBrazeImageLoader.class.getName();
private RequestOptions mRequestOptions = new RequestOptions();
@Override
public void renderUrlIntoCardView(Context context, Card card, String imageUrl, ImageView imageView, BrazeViewBounds viewBounds) {
renderUrlIntoView(context, imageUrl, imageView);
}
@Override
public void renderUrlIntoInAppMessageView(Context context, IInAppMessage inAppMessage, String imageUrl, ImageView imageView, BrazeViewBounds viewBounds) {
renderUrlIntoView(context, imageUrl, imageView);
}
@Override
public Bitmap getPushBitmapFromUrl(Context context, Bundle extras, String imageUrl, BrazeViewBounds viewBounds) {
return getBitmapFromUrl(context, imageUrl, viewBounds);
}
@Override
public Bitmap getInAppMessageBitmapFromUrl(Context context, IInAppMessage inAppMessage, String imageUrl, BrazeViewBounds viewBounds) {
return getBitmapFromUrl(context, imageUrl, viewBounds);
}
private void renderUrlIntoView(Context context, String imageUrl, ImageView imageView) {
try {
final Drawable drawable = Glide.with(context)
.load(imageUrl)
.apply(mRequestOptions)
.submit()
.get();
imageView.post(() -> {
imageView.setImageDrawable(drawable);
if (drawable instanceof GifDrawable) {
((GifDrawable) drawable).start();
}
});
} catch (Exception e) {
BrazeLogger.e(TAG, "Failed to render URL into view: " + imageUrl, e);
}
}
private Bitmap getBitmapFromUrl(Context context, String imageUrl, BrazeViewBounds viewBounds) {
try {
return Glide.with(context)
.asBitmap()
.apply(mRequestOptions)
.load(imageUrl).submit().get();
} catch (Exception e) {
Log.e(TAG, "Failed to retrieve bitmap at url: " + imageUrl, e);
}
return null;
}
@Override
public void setOffline(boolean isOffline) {
// If the loader is offline, then we should only be retrieving from the cache
mRequestOptions = mRequestOptions.onlyRetrieveFromCache(isOffline);
}
}
```
```kotlin
import com.braze.support.BrazeLogger
import com.bumptech.glide.load.resource.gif.GifDrawable
class GlideBrazeImageLoader : IBrazeImageLoader {
companion object {
private val TAG = GlideBrazeImageLoader::class.qualifiedName
}
private var mRequestOptions = RequestOptions()
override fun renderUrlIntoCardView(context: Context, card: Card, imageUrl: String, imageView: ImageView, viewBounds: BrazeViewBounds) {
renderUrlIntoView(context, imageUrl, imageView)
}
override fun renderUrlIntoInAppMessageView(context: Context, inAppMessage: IInAppMessage, imageUrl: String, imageView: ImageView, viewBounds: BrazeViewBounds) {
renderUrlIntoView(context, imageUrl, imageView)
}
override fun getPushBitmapFromUrl(context: Context, extras: Bundle, imageUrl: String, viewBounds: BrazeViewBounds): Bitmap? {
return getBitmapFromUrl(context, imageUrl, viewBounds)
}
override fun getInAppMessageBitmapFromUrl(context: Context, inAppMessage: IInAppMessage, imageUrl: String, viewBounds: BrazeViewBounds): Bitmap? {
return getBitmapFromUrl(context, imageUrl, viewBounds)
}
private fun renderUrlIntoView(context: Context, imageUrl: String, imageView: ImageView) {
try {
val drawable = Glide.with(context)
.load(imageUrl)
.apply(mRequestOptions)
.submit()
.get()
imageView.post {
imageView.setImageDrawable(drawable)
if (drawable is GifDrawable) {
drawable.start()
}
}
} catch (e: Exception) {
BrazeLogger.e(TAG, "Failed to render URL into view: $imageUrl", e)
}
}
private fun getBitmapFromUrl(context: Context, imageUrl: String, viewBounds: BrazeViewBounds): Bitmap? {
try {
return Glide.with(context)
.asBitmap()
.apply(mRequestOptions)
.load(imageUrl).submit().get()
} catch (e: Exception) {
Log.e(TAG, "Failed to retrieve bitmap at url: $imageUrl", e)
}
return null
}
override fun setOffline(isOffline: Boolean) {
// If the loader is offline, then we should only be retrieving from the cache
mRequestOptions = mRequestOptions.onlyRetrieveFromCache(isOffline)
}
}
```
### Fixing image loading for Android SDK 36.0.0 and later
In Android SDK 36.0.0 and later, `displayInAppMessage()` is a `suspend` function. This means `renderUrlIntoInAppMessageView()` runs on a background thread instead of the main thread.
If your custom image loader calls `Glide.into(imageView)` in `renderUrlIntoInAppMessageView()`, your app can fail with "You must call this method on the main thread."
To avoid this:
1. Load the image on the background thread with `submit().get()`.
2. Post the UI update to the main thread with `imageView.post { ... }`.
3. If the loaded result is a GIF drawable, start the animation after setting it on the view.
This separates image loading from UI rendering, and keeps your custom image loader compatible with Android SDK 36.0.0 and later.
This guidance applies to Android custom image loaders. Web in-app messages support GIFs out of the box.
The following Kotlin sample uses placeholder values to show this pattern:
```kotlin
private const val TAG = "SampleGlideLoader"
private const val glideBrazeImageLoaderTag = "sample-loader"
private fun renderUrlIntoView(
context: Context,
imageUrl: String,
imageView: ImageView
) {
try {
val drawable: Drawable = Glide.with(context)
.load(imageUrl)
.apply(mRequestOptions)
.submit()
.get()
imageView.post {
imageView.setImageDrawable(drawable)
if (drawable is GifDrawable) {
drawable.start()
}
}
} catch (e: Exception) {
Log.e(TAG, "$glideBrazeImageLoaderTag renderUrlIntoView failed: url=$imageUrl", e)
}
}
```
### Step 2: Setting the image loader delegate
The Braze SDK will use any custom image loader set with [`IBrazeImageLoader`](https://braze-inc.github.io/braze-android-sdk/kdoc/braze-android-sdk/com.braze.images/-i-braze-image-loader/index.html). We recommend setting the custom image loader in a custom application subclass:
```java
public class GlideIntegrationApplication extends Application {
@Override
public void onCreate() {
super.onCreate();
Braze.getInstance(context).setImageLoader(new GlideBrazeImageLoader());
}
}
```
```kotlin
class GlideIntegrationApplication : Application() {
override fun onCreate() {
super.onCreate()
Braze.getInstance(context).imageLoader = GlideBrazeImageLoader()
}
}
```
## Custom Image Loading with Jetpack Compose
To override image loading with Jetpack Compose, you can pass in a value to [`imageComposable`](https://braze-inc.github.io/braze-android-sdk/kdoc/braze-android-sdk/com.braze.jetpackcompose.contentcards.styling/-content-card-styling/index.html#-808910455%2FProperties%2F-1725759721). This function will take a `Card` and render the image and the modifiers needed. Alternatively, you can use `customCardComposer` of `ContentCardsList` to render the entire card.
In the following example, Glide's Compose library is used for the cards listed in the `imageComposable` function:
```kotlin
ContentCardsList(
cardStyle = ContentCardStyling(
imageComposable = { card ->
when (card.cardType) {
CardType.CAPTIONED_IMAGE -> {
val captionedImageCard = card as CaptionedImageCard
GlideImage(
modifier = Modifier
.fillMaxWidth()
.wrapContentHeight()
.run {
if (captionedImageCard.aspectRatio > 0) {
aspectRatio(captionedImageCard.aspectRatio)
} else {
this
}
},
contentScale = ContentScale.Crop,
model = captionedImageCard.url,
loading = placeholder(R.drawable.pushpin),
contentDescription = ""
)
}
CardType.IMAGE -> {
val imageOnlyCard = card as ImageOnlyCard
GlideImage(
modifier = Modifier
.fillMaxWidth()
.run {
if (imageOnlyCard.aspectRatio > 0) {
aspectRatio(imageOnlyCard.aspectRatio)
} else {
this
}
},
contentScale = ContentScale.Crop,
model = imageOnlyCard.url,
loading = placeholder(R.drawable.pushpin),
contentDescription = ""
)
}
CardType.SHORT_NEWS -> {
val shortNews = card as ShortNewsCard
GlideImage(
modifier = Modifier
.width(100.dp)
.height(100.dp),
model = shortNews.url,
loading = placeholder(R.drawable.pushpin),
contentDescription = ""
)
}
else -> Unit
}
}
)
)
```
## Prerequisites
Before you can use this feature, you'll need to [integrate the Swift Braze SDK](https://www.braze.com/docs/es/es/developer_guide/sdk_integration/?sdktab=swift).
## Integrating a custom image library
### Step 1: Integrate SDWebImage
Integrate the [SDWebImage repository](https://github.com/SDWebImage/SDWebImage) into your Xcode project.
### Step 2: Create a new Swift file
In your Xcode project, create a new file named `SDWebImageGIFViewProvider.swift` and import the following:
```swift
import UIKit
import BrazeUI
import SDWebImage
```
### Step 3: Add `GIFViewProvider`
Next, add our sample SDWebImage [`GIFViewProvider`](https://braze-inc.github.io/braze-swift-sdk/documentation/brazeui/gifviewprovider/). Your file should be similar to the following:
```swift
import UIKit
import BrazeUI
import SDWebImage
extension GIFViewProvider {
/// A GIF view provider using [SDWebImage](https://github.com/SDWebImage/SDWebImage) as a
/// rendering library.
public static let sdWebImage = Self(
view: { SDAnimatedImageView(image: image(for: $0)) },
updateView: { ($0 as? SDAnimatedImageView)?.image = image(for: $1) }
)
private static func image(for url: URL?) -> UIImage? {
guard let url else { return nil }
return url.pathExtension == "gif"
? SDAnimatedImage(contentsOfFile: url.path)
: UIImage(contentsOfFile: url.path)
}
}
```
### Step 4: Modify your `AppDelegate.swift`
In your project's `AppDelegate.swift`, add GIF support to your `BrazeUI` components using `GIFViewProvider`. Your file should be similar to the following:
```swift
import UIKit
import BrazeKit
import BrazeUI
@main
class AppDelegate: UIResponder, UIApplicationDelegate {
static var braze: Braze? = nil
func application(
_ application: UIApplication,
didFinishLaunchingWithOptions launchOptions: [UIApplication.LaunchOptionsKey: Any]?
) -> Bool {
/* ... */
GIFViewProvider.shared = .sdWebImage
return true
}
}
```
# Registra los datos de los mensajes dentro de la aplicación a través del SDK de Braze.
Source: /docs/es/developer_guide/in_app_messages/logging_message_data/index.md
# Iniciar sesión en los datos de mensajes dentro de la aplicación
> Aprende a registrar datos de mensajes dentro de la aplicación (IAM) a través del SDK de Braze.
## Prerequisites
Before you can use this feature, you'll need to [integrate the Web Braze SDK](https://www.braze.com/docs/es/es/developer_guide/sdk_integration/?sdktab=web).
## Logging message data
Logging in-app message [impressions](https://js.appboycdn.com/web-sdk/latest/doc/modules/braze.html#loginappmessageimpression) and [clicks](https://js.appboycdn.com/web-sdk/latest/doc/modules/braze.html#loginappmessagebuttonclick) is performed automatically when you use the `showInAppMessage` or `automaticallyShowInAppMessage` method.
If you do not use either method and opt to manually display the message using your own UI code, use the following methods to log analytics:
```javascript
// Registers that a user has viewed an in-app message with the Braze server.
braze.logInAppMessageImpression(inAppMessage);
// Registers that a user has clicked on the specified in-app message with the Braze server.
braze.logInAppMessageClick(inAppMessage);
// Registers that a user has clicked a specified in-app message button with the Braze server.
braze.logInAppMessageButtonClick(button, inAppMessage);
// Registers that a user has clicked on a link in an HTML in-app message with the Braze server.
braze.logInAppMessageHtmlClick(inAppMessage, buttonId?, url?)
```
## Prerequisites
Before you can use this feature, you'll need to [integrate the Flutter Braze SDK](https://www.braze.com/docs/es/es/developer_guide/sdk_integration/?sdktab=flutter).
## Logging message data
To log analytics using your `BrazeInAppMessage`, pass the instance into the desired analytics function:
- `logInAppMessageClicked`
- `logInAppMessageImpression`
- `logInAppMessageButtonClicked` (along with the button index)
For example:
```dart
// Log a click
braze.logInAppMessageClicked(inAppMessage);
// Log an impression
braze.logInAppMessageImpression(inAppMessage);
// Log button index `0` being clicked
braze.logInAppMessageButtonClicked(inAppMessage, 0);
```
## Accessing message data
To access in-app message data in your Flutter app, the `BrazePlugin` supports sending in-app message data using [Dart Streams](https://dart.dev/tutorials/language/streams).
The `BrazeInAppMessage` object supports a subset of fields available in the native model objects, including `uri`, `message`, `header`, `buttons`, `extras`, and more.
### Listen for in-app message data in the Dart layer
To receive in-app message data in the Dart layer, use the following code to create a `StreamSubscription` and call `braze.subscribeToInAppMessages()`. Remember to `cancel()` the stream subscription when it is no longer needed.
```dart
// Create stream subscription
StreamSubscription inAppMessageStreamSubscription;
inAppMessageStreamSubscription = braze.subscribeToInAppMessages((BrazeInAppMessage inAppMessage) {
// Handle in-app messages
}
// Cancel stream subscription
inAppMessageStreamSubscription.cancel();
```
For an example, see [main.dart](https://github.com/braze-inc/braze-flutter-sdk/blob/master/example/lib/main.dart) in the Braze Flutter SDK sample application.
### Forward in-app message data from the native layer
In-app message data is automatically forwarded from both the Android and iOS native layers. No additional setup is required.
If you're using Flutter SDK 17.1.0 or earlier, in-app message data forwarding from the iOS native layer requires manual setup. Your application likely contains one of the following. To migrate to Flutter SDK 18.0.0, remove the `BrazePlugin.processInAppMessage(_:)` call—data forwarding is now handled automatically.
Remove the `BrazePlugin.processInAppMessage(_:)` call from your [`willPresent` delegate implementation](https://braze-inc.github.io/braze-swift-sdk/documentation/brazeui/brazeinappmessageuidelegate/inappmessage(_:willpresent:view:)-4pzvv).
Remove the `BrazePlugin.processInAppMessage(message)` call from your custom presenter's [`present(message:)`](https://braze-inc.github.io/braze-swift-sdk/documentation/brazeui/brazeinappmessageui/present(message:)-f2ra) implementation:
```swift
class CustomInAppMessagePresenter: BrazeInAppMessageUI {
override func present(message: Braze.InAppMessage) {
// Pass in-app message data to the Dart layer.
BrazePlugin.processInAppMessage(message)
// If you want the default UI to display the in-app message.
super.present(message: message)
}
}
```
### Replaying the callback for in-app messages (optional)
To store any in-app messages triggered before the callback is available and replay them after it is set, add the following entry to the `customConfigs` map when initializing the `BrazePlugin`:
```dart
BrazePlugin braze = new BrazePlugin(customConfigs: {replayCallbacksConfigKey: true});
```
## Prerequisites
Before you can use this feature, you'll need to [integrate the React Native Braze SDK](https://www.braze.com/docs/es/es/developer_guide/sdk_integration/?sdktab=react%20native).
## Methods for logging
You can use these methods by passing your `BrazeInAppMessage` instance to log analytics and perform actions:
| Method | Description |
| --------------------------------------------------------- | ------------------------------------------------------------------------------------- |
| `logInAppMessageClicked(inAppMessage)` | Logs a click for the provided in-app message data. |
| `logInAppMessageImpression(inAppMessage)` | Logs an impression for the provided in-app message data. |
| `logInAppMessageButtonClicked(inAppMessage, buttonId)` | Logs a button click for the provided in-app message data and button ID. |
| `hideCurrentInAppMessage()` | Dismisses the currently displayed in-app message. |
| `performInAppMessageAction(inAppMessage)` | Performs the action for an in-app message. |
| `performInAppMessageButtonAction(inAppMessage, buttonId)` | Performs the action for an in-app message button. |
{: .reset-td-br-1 .reset-td-br-2 aria-label="Methods for logging" }
## Handling message data
In most cases, you can use the `Braze.addListener` method to register event listeners to handle data coming from in-app messages.
Additionally, you can access the in-app message data in the JavaScript layer by calling the `Braze.subscribeToInAppMessage` method to have the SDKs publish an `inAppMessageReceived` event when an in-app message is triggered. Pass a callback to this method to execute your own code when the in-app message is triggered and received by the listener.
To customize how message data is handled, refer to the following implementation examples:
To enhance the default behavior, or if you don't have access to customize the native iOS or Android code, we recommend that you disable the default UI while still receiving in-app message events from Braze. To disable the default UI, pass `false` to the `Braze.subscribeToInAppMessage` method and use the in-app message data to construct your own message in JavaScript. Note that you will need to manually log analytics on your messages if you choose to disable the default UI.
```javascript
import Braze from "@braze/react-native-sdk";
// Option 1: Listen for the event directly via `Braze.addListener`.
//
// You may use this method to accomplish the same thing if you don't
// wish to make any changes to the default Braze UI.
Braze.addListener(Braze.Events.IN_APP_MESSAGE_RECEIVED, (event) => {
console.log(event.inAppMessage);
});
// Option 2: Call `subscribeToInAppMessage`.
//
// Pass in `false` to disable the automatic display of in-app messages.
Braze.subscribeToInAppMessage(false, (event) => {
console.log(event.inAppMessage);
// Use `event.inAppMessage` to construct your own custom message UI.
});
```
To include more advanced logic to determine whether or not to show an in-app message using the built-in UI, implement in-app messages through the native layer.
**Warning:**
Since this is an advanced customization option, note that overriding the default Braze implementation will also nullify the logic to emit in-app message events to your JavaScript listeners. If you wish to still use `Braze.subscribeToInAppMessage` or `Braze.addListener` as described in [Accessing in-app message data](#accessing-in-app-message-data), you will need to handle publishing the events yourself.
Implement the `IInAppMessageManagerListener` as described in our Android article on [Custom Manager Listener](https://www.braze.com/docs/es/es/developer_guide/in_app_messages/customization/?sdktab=android#android_setting-custom-manager-listeners). In your `beforeInAppMessageDisplayed` implementation, you can access the `inAppMessage` data, send it to the JavaScript layer, and decide to show or not show the native message based on the return value.
For more on these values, see our [Android documentation](https://www.braze.com/docs/es/es/developer_guide/in_app_messages/).
```java
// In-app messaging
@Override
public InAppMessageOperation beforeInAppMessageDisplayed(IInAppMessage inAppMessage) {
WritableMap parameters = new WritableNativeMap();
parameters.putString("inAppMessage", inAppMessage.forJsonPut().toString());
getReactNativeHost()
.getReactInstanceManager()
.getCurrentReactContext()
.getJSModule(DeviceEventManagerModule.RCTDeviceEventEmitter.class)
.emit("inAppMessageReceived", parameters);
// Note: return InAppMessageOperation.DISCARD if you would like
// to prevent the Braze SDK from displaying the message natively.
return InAppMessageOperation.DISPLAY_NOW;
}
```
### Overriding the default UI delegate
By default, [`BrazeInAppMessageUI`](https://braze-inc.github.io/braze-swift-sdk/documentation/brazeui/brazeinappmessageui/) is created and assigned when you initialize the `braze` instance. `BrazeInAppMessageUI` is an implementation of the [`BrazeInAppMessagePresenter`](https://braze-inc.github.io/braze-swift-sdk/documentation/brazekit/brazeinappmessagepresenter) protocol and comes with a `delegate` property that can be used to customize the handling of in-app messages that have been received.
1. Implement the `BrazeInAppMessageUIDelegate` delegate as described in [our iOS article here](https://braze-inc.github.io/braze-swift-sdk/tutorials/braze/c1-inappmessageui).
2. In the `inAppMessage(_:displayChoiceForMessage:)` delegate method, you can access the `inAppMessage` data, send it to the JavaScript layer, and decide to show or not show the native message based on the return value.
For more details on these values, see our [iOS documentation](https://braze-inc.github.io/braze-swift-sdk/documentation/brazeui/brazeinappmessageuidelegate/).
```objc
- (enum BRZInAppMessageUIDisplayChoice)inAppMessage:(BrazeInAppMessageUI *)ui
displayChoiceForMessage:(BRZInAppMessageRaw *)message {
// Convert the message to a JavaScript representation.
NSData *inAppMessageData = [message json];
NSString *inAppMessageString = [[NSString alloc] initWithData:inAppMessageData encoding:NSUTF8StringEncoding];
NSDictionary *arguments = @{
@"inAppMessage" : inAppMessageString
};
// Send to JavaScript.
[self sendEventWithName:@"inAppMessageReceived" body:arguments];
// Note: Return `BRZInAppMessageUIDisplayChoiceDiscard` if you would like
// to prevent the Braze SDK from displaying the message natively.
return BRZInAppMessageUIDisplayChoiceNow;
}
```
To use this delegate, assign it to `brazeInAppMessagePresenter.delegate` after initializing the `braze` instance.
**Note:**
`BrazeUI` can only be imported in Objective-C or Swift. If you are using Objective-C++, you will need to handle this in a separate file.
```objc
@import BrazeUI;
- (BOOL)application:(UIApplication *)application didFinishLaunchingWithOptions:(NSDictionary *)launchOptions {
BRZConfiguration *configuration = [[BRZConfiguration alloc] initWithApiKey:apiKey endpoint:endpoint];
Braze *braze = [BrazeReactBridge initBraze:configuration];
((BrazeInAppMessageUI *)braze.inAppMessagePresenter).delegate = [[CustomDelegate alloc] init];
AppDelegate.braze = braze;
}
```
### Overriding the default native UI
If you wish to fully customize the presentation of your in-app messages at the native iOS layer, conform to the [`BrazeInAppMessagePresenter`](https://braze-inc.github.io/braze-swift-sdk/documentation/brazekit/brazeinappmessagepresenter) protocol and assign your custom presenter following this sample:
```objc
BRZConfiguration *configuration = [[BRZConfiguration alloc] initWithApiKey:apiKey endpoint:endpoint];
Braze *braze = [BrazeReactBridge initBraze:configuration];
braze.inAppMessagePresenter = [[MyCustomPresenter alloc] init];
AppDelegate.braze = braze;
```
## Prerequisites
Before you can use this feature, you'll need to [integrate the Android Braze SDK](https://www.braze.com/docs/es/es/developer_guide/sdk_integration/?sdktab=android).
## Logging message data
You will need to make sure certain functions are called to handle the analytics for your campaign.
### Displayed messages
When a message is displayed or seen, log an impression:
```brightscript
LogInAppMessageImpression(in_app_message.id, brazetask)
```
### Clicked messages
Once a user clicks on the message, log a click and then process `in_app_message.click_action`:
```brightscript
LogInAppMessageClick(in_app_message.id, brazetask)
```
### Clicked buttons
If the user clicks on a button, log the button click and then process `inappmessage.buttons[selected].click_action`:
```brightscript
LogInAppMessageButtonClick(inappmessage.id, inappmessage.buttons[selected].id, brazetask)
```
### After processing a message
After processing an in-app message, you should clear the field:
```brightscript
m.BrazeTask.BrazeInAppMessage = invalid
```
## Subscribing to in-app messages
You may register Unity game objects to be notified of incoming in-app messages. We recommend setting game object listeners from the Braze configuration editor. In the configuration editor, listeners must be set separately for Android and iOS.
If you need to configure your game object listener at runtime, use `AppboyBinding.ConfigureListener()` and specify `BrazeUnityMessageType.IN_APP_MESSAGE`.
## Parsing messages
Incoming `string` messages received in your in-app message game object callback can be parsed into our pre-supplied model objects for convenience.
Use `InAppMessageFactory.BuildInAppMessage()` to parse your in-app message. The resulting object will either be an instance of [`IInAppMessage.cs`](https://github.com/braze-inc/braze-unity-sdk/blob/18cb8ee89f1841c576eb954793edb6e06f9130b4/Assets/Plugins/Appboy/Models/InAppMessage/IInAppMessage.cs) or [`IInAppMessageImmersive.cs`](https://github.com/braze-inc/braze-unity-sdk/blob/18cb8ee89f1841c576eb954793edb6e06f9130b4/Assets/Plugins/Appboy/Models/InAppMessage/IInAppMessageImmersive.cs) depending on its type.
```csharp
// Automatically logs a button click, if present.
void InAppMessageReceivedCallback(string message) {
IInAppMessage inApp = InAppMessageFactory.BuildInAppMessage(message);
if (inApp is IInAppMessageImmersive) {
IInAppMessageImmersive inAppImmersive = inApp as IInAppMessageImmersive;
if (inAppImmersive.Buttons != null && inAppImmersive.Buttons.Count > 0) {
inAppImmersive.LogButtonClicked(inAppImmersive.Buttons[0].ButtonID);
}
}
}
```
## Logging message data
Clicks and impressions must be manually logged for in-app messages not displayed directly by Braze.
Use `LogClicked()` and `LogImpression()` on [`IInAppMessage`](https://github.com/braze-inc/braze-unity-sdk/blob/18cb8ee89f1841c576eb954793edb6e06f9130b4/Assets/Plugins/Appboy/Models/InAppMessage/IInAppMessage.cs) to log clicks and impressions on your message.
Use `LogButtonClicked(int buttonID)` on [`IInAppMessageImmersive`](https://github.com/braze-inc/braze-unity-sdk/blob/18cb8ee89f1841c576eb954793edb6e06f9130b4/Assets/Plugins/Appboy/Models/InAppMessage/IInAppMessageImmersive.cs) to log button clicks. Note that buttons are represented as lists of[`InAppMessageButton`](https://github.com/braze-inc/braze-unity-sdk/blob/18cb8ee89f1841c576eb954793edb6e06f9130b4/Assets/Plugins/Appboy/Models/InAppMessage/InAppMessageButton.cs) instances, each of which contains a `ButtonID`.
# Envía un mensaje de prueba para el SDK de Braze.
Source: /docs/es/developer_guide/in_app_messages/sending_test_messages/index.md
# Sending test messages
> Before sending out a messaging campaign to your users, you may want to test it to make sure it looks right and operates in the intended manner. You can use the dashboard to create and send test messages with push notifications, in-app messages (IAM), or email.
## Sending a test message
### Step 1: Create a designated test segment
After you set up a test segment, you can use it to test any of your Braze messaging channels. When set up correctly, this only needs to be done a single time.
To set up a test segment, go to **Segments** and create a new segment. Select **Add Filter**, then choose a one of the test filters.

With test filters, you can ensure that only users with a specific email address or [external user ID](https://www.braze.com/docs/es/es/developer_guide/platform_integration_guides/swift/analytics/setting_user_ids/#setting-user-ids) are sent the test message.

Both email address and external user ID filters offer the following options:
| Operator | Description |
|------------------|--------------------------------------------------------------------------------------------------------------------------------|
| `equals` | This will look for an exact match of the email or user ID that you provide. Use this if you only want to send the test campaigns to devices associated with a single email or user ID. |
| `does not equal` | Use this if you want to exclude a particular email or user ID from test campaigns. |
| `matches` | This will find users that have email addresses or user IDs that match part of the search term you provide. You could use this to find only the users that have an `@yourcompany.com` address, allowing you to send messages to everyone on your team. |
{: .reset-td-br-1 .reset-td-br-2 aria-label="Step 1: Create a designated test segment a class="margin-fix" name="test-segment"/a" }
You can select multiple specific emails using the "`matches`" option and separating the email addresses with a | character. For example: "`matches`" "`email1@braze.com` | `email2@braze.com`". You can also combine multiple operators together. For example, the test segment could include an email address filter that "`matches`" "`@braze.com`" and another filter that "`does not equal`" "`sales@braze.com`".
After adding the testing filters to your test segment, you can verify it's working by selecting **Preview** or by selecting **Settings** > **CSV Export All User Data** to export that segment's user data to a CSV file.

**Note:**
Exporting the segment's User Data to a CSV file is the most accurate verification method, as the preview will only show a sample of your users and may not include all users.
### Step 2: Send the message
You can send a message using the Braze dashboard or the command line.
To send test push notifications or in-app messages, you need to target your previously created test segment. Begin by creating your campaign and following the usual steps. When you reach the **Target Audiences** step, select your test segment from the dropdown menu.

Confirm your campaign and launch it to test your push notification and in-app messages.
**Note:**
Be sure to select **Allow users to become re-eligible to receive campaign** under the **Schedule** portion of the campaign composer if you intend to use a single campaign to send a test message to yourself more than once.
If you're only testing email messages, you do not necessarily have to set up a test segment. In the first step of the campaign composer where you compose your campaign's email message, click **Send Test** and enter the email address to which you wish to send a test email.

**Tip:**
You can also enable or disable [TEST (or SEED)](https://www.braze.com/docs/es/es/user_guide/administrative/app_settings/email_settings/#append-email-subject-lines) being appended on your test messages.
Alternatively, you can send a single notification using cURL and the [Braze Messaging API](https://www.braze.com/docs/es/es/api/endpoints/messaging/). Note that these examples make a request using the `US-01` instance. To find out yours, refer to [API endpoints](https://www.braze.com/docs/es/es/api/basics/#endpoints).
```bash
curl -X POST -H "Content-Type: application/json" -H "Authorization: Bearer {BRAZE_API_KEY}" -d '{
"external_user_ids":["EXTERNAL_USER_ID"],
"messages": {
"android_push": {
"title":"Test push title",
"alert":"Test push",
"extra":{
"CUSTOM_KEY":"CUSTOM_VALUE"
}
}
}
}' https://rest.iad-01.braze.com/messages/send
```
```bash
curl -X POST -H "Content-Type: application/json" -H "Authorization: Bearer {BRAZE_API_KEY}" -d '{
"external_user_ids":["EXTERNAL_USER_ID"],
"messages": {
"apple_push": {
"alert": "Test push",
"extra": {
"CUSTOM_KEY" :"CUSTOM_VALUE"
}
}
}
}' https://rest.iad-01.braze.com/messages/send
```
```bash
curl -X POST -H "Content-Type: application/json" -H "Authorization: Bearer {BRAZE_API_KEY}" -d '{
"external_user_ids":["EXTERNAL_USER_ID"],
"messages": {
"kindle_push": {
"title":"Test push title",
"alert":"Test push",
"extra":{
"CUSTOM_KEY":"CUSTOM_VALUE"
}
}
}
}' https://rest.iad-01.braze.com/messages/send
```
Replace the following:
| Placeholder | Description |
|---------------------|-----------------------------------------------------------|
| `BRAZE_API_KEY` | Your Braze API key used for authentication. In Braze, go to **Settings** > **API Keys** to locate your key. |
| `EXTERNAL_USER_ID` | The external user ID used to send your message to a specific user. In Braze, go to **Audience** > **Search users**, then search for a user. |
| `CUSTOM_KEY` | (Optional) A custom key for additional data. |
| `CUSTOM_VALUE` | (Optional) A custom value assigned to your custom key. |
{: .reset-td-br-1 .reset-td-br-2 aria-label="Step 2: Send the message" }
## Test limitations
There are a few situations where test messages don't have complete feature parity with launching a campaign or Canvas to a real set of users. In these instances, to validate this behavior, you should launch the campaign or Canvas to a limited set of test users.
- Viewing the Braze [preference center](https://www.braze.com/docs/es/es/user_guide/message_building_by_channel/email/managing_user_subscriptions/#subscription-groups) from **Test Messages** will cause the submit button to be grayed out.
- The list-unsubscribe header is not included in emails sent by the test message functionality.
- For in-app messages and Content Cards, the target user must have a push token for the target device.
# Tutoriales
Source: /docs/es/developer_guide/in_app_messages/tutorials/index.md
# Tutorial: Mostrar mensajes dentro de la aplicación de forma condicional
Source: /docs/es/developer_guide/in_app_messages/tutorials/conditionally_displaying_messages/index.md
# Tutorial: Mostrar mensajes dentro de la aplicación de forma condicional {#tutorial-conditionally-displaying-in-app-messages}
> Sigue el código de ejemplo de este tutorial para mostrar mensajes dentro de la aplicación de forma condicional utilizando el SDK de Braze.
## Prerequisites
Before you can use this feature, you'll need to [integrate the Web Braze SDK](https://www.braze.com/docs/es/es/developer_guide/sdk_integration/?sdktab=web). Sin embargo, no es necesario realizar ninguna configuración adicional.
## Visualización condicional de mensajes dentro de la aplicación para Web {#conditionally-displaying-in-app-messages-for-web}
**Important:**
We're piloting this new tutorial format. [Tell us what you think](https://docs.google.com/forms/d/e/1FAIpQLSe_5uhWM7eXXk9F_gviO_pvA4rkYO3WA9B6tNJZ3TY91md5bw/viewform?usp=pp_url&entry.569173304=General+Feedback) — your feedback helps us improve future guides.
```js file=index.js
import * as braze from "@braze/web-sdk";
// Remove any calls to `braze.automaticallyShowInAppMessages()`
braze.initialize("YOUR-API-KEY", {
baseUrl: "YOUR-ENDPOINT",
enableLogging: true,
});
braze.subscribeToInAppMessage(function (message) {
if (
location.pathname === "/checkout" ||
document.getElementById("#checkout")
) {
// do not show the message
} else {
braze.showInAppMessage(message);
}
});
```
!!step
lines-index.js=2
### 1. Eliminar llamadas a `automaticallyShowInAppMessages()` {#1-remove-calls-to-automaticallyshowinappmessages}
Elimina cualquier llamada a [`automaticallyShowInAppMessages()`](https://js.appboycdn.com/web-sdk/latest/doc/modules/braze.html#automaticallyshowinappmessages), ya que anularán cualquier lógica personalizada que implementes más adelante.
!!step
lines-index.js=6
#### 2. Habilitar depuración (opcional) {#2-enable-debugging-optional}
Para facilitar la solución de problemas durante el desarrollo, considera habilitar la depuración.
!!step
lines-index.js=9-18
#### 3. Suscribirse a las actualizaciones de mensajes dentro de la aplicación {#3-subscribe-to-in-app-message-updates}
Registra una devolución de llamada con [`subscribeToInAppMessage(callback)`](https://js.appboycdn.com/web-sdk/latest/doc/modules/braze.html#subscribetoinappmessage) para recibir un `message` cada vez que se desencadene un mensaje dentro de la aplicación.
!!step
lines-index.js=10-13
#### 4. Crear lógica condicional {#4-create-conditional-logic}
Crea una lógica personalizada para controlar cuándo se muestran los mensajes. En este ejemplo, la lógica comprueba si la URL contiene `"checkout"` o si existe un elemento `#checkout` en la página.
!!step
lines-index.js=16
#### 5. Mostrar mensajes con `showInAppMessage` {#5-display-messages-with-showinappmessage}
Para mostrar el mensaje, llama a [`showInAppMessage(message)`](https://js.appboycdn.com/web-sdk/latest/doc/modules/braze.html#showinappmessage). Si se omite, el mensaje se descartará.
## Prerequisites
Before you can use this feature, you'll need to [integrate the Android Braze SDK](https://www.braze.com/docs/es/es/developer_guide/sdk_integration/?sdktab=android). También tendrás que [habilitar los mensajes dentro de la aplicación para Android](https://www.braze.com/docs/es/es/developer_guide/in_app_messages?sdktab=android#android_enabling-in-app-messages).
## Visualización condicional de mensajes dentro de la aplicación para Android {#conditionally-displaying-in-app-messages-for-android}
**Important:**
We're piloting this new tutorial format. [Tell us what you think](https://docs.google.com/forms/d/e/1FAIpQLSe_5uhWM7eXXk9F_gviO_pvA4rkYO3WA9B6tNJZ3TY91md5bw/viewform?usp=pp_url&entry.569173304=General+Feedback) — your feedback helps us improve future guides.
```kotlin file=MainApplication.kt
import android.app.Application
import com.braze.Braze
import com.braze.support.BrazeLogger
import com.braze.configuration.BrazeConfig
import com.braze.ui.inappmessage.BrazeInAppMessageManager
import com.braze.BrazeActivityLifecycleCallbackListener
import com.braze.ui.inappmessage.listeners.IInAppMessageManagerListener
import com.braze.models.inappmessage.IInAppMessage
import com.braze.ui.inappmessage.InAppMessageOperation
import android.util.Log
class MyApplication : Application() {
override fun onCreate() {
super.onCreate()
// Enable verbose Braze SDK logs
BrazeLogger.logLevel = Log.VERBOSE
// Initialize Braze
val brazeConfig = BrazeConfig.Builder()
.setApiKey("YOUR-API-KEY")
.setCustomEndpoint("YOUR-ENDPOINT")
.build()
Braze.configure(this, brazeConfig)
registerActivityLifecycleCallbacks(
BrazeActivityLifecycleCallbackListener()
)
// Set up in-app message listener
BrazeInAppMessageManager.getInstance().setCustomInAppMessageManagerListener(object : IInAppMessageManagerListener {
override fun beforeInAppMessageDisplayed(inAppMessage: IInAppMessage): InAppMessageOperation {
// Check if we should show the message
val shouldShow = inAppMessage.extras["should_display_message"] == "true"
return if (shouldShow) {
// Show the message using Braze's UI
InAppMessageOperation.DISPLAY_NOW
} else {
// Discard the message (or we could also create our own UI using KVP values)
InAppMessageOperation.DISCARD
}
}
})
}
}
```
!!step
lines-MainApplication.kt=17
### 1. Habilitar depuración (opcional) {#1-enable-debugging-optional}
Para facilitar la solución de problemas durante el desarrollo, considera habilitar la depuración.
!!step
lines-MainApplication.kt=26-28
#### 2. Registrar las devoluciones de llamada del ciclo de vida de la actividad {#2-register-activity-lifecycle-callbacks}
Registra el listener predeterminado de Braze para gestionar el ciclo de vida de los mensajes dentro de la aplicación.
!!step
lines-MainApplication.kt=30-44
#### 3. Configurar un listener de mensajes dentro de la aplicación {#3-set-up-an-in-app-message-listener}
Utiliza `BrazeInAppMessageManager` para configurar un listener personalizado que intercepte los mensajes antes de que se muestren.
!!step
lines-MainApplication.kt=34-42
#### 4. Crear lógica condicional
Utiliza lógica personalizada para controlar el momento en que se muestran los mensajes. En este ejemplo, la lógica personalizada comprueba si el extra `should_display_message` está establecido en `"true"`.
!!step
lines-MainApplication.kt=38,41
#### 5. Devolver o descartar el mensaje {#5-return-or-discard-the-message}
Devuelve un `InAppMessageOperation` con `DISPLAY_NOW` para mostrar el mensaje, o con `DISCARD` para suprimirlo.
## Prerequisites
Before you can use this feature, you'll need to [integrate the Swift Braze SDK](https://www.braze.com/docs/es/es/developer_guide/sdk_integration/?sdktab=swift). También tendrás que [habilitar los mensajes dentro de la aplicación para Swift](https://www.braze.com/docs/es/es/developer_guide/in_app_messages?sdktab=swift#swift_enabling-in-app-messages).
## Visualización condicional de mensajes dentro de la aplicación para Swift {#conditionally-displaying-in-app-messages-for-swift}
**Important:**
We're piloting this new tutorial format. [Tell us what you think](https://docs.google.com/forms/d/e/1FAIpQLSe_5uhWM7eXXk9F_gviO_pvA4rkYO3WA9B6tNJZ3TY91md5bw/viewform?usp=pp_url&entry.569173304=General+Feedback) — your feedback helps us improve future guides.
```swift file=AppDelegate.swift
import SwiftUI
import BrazeKit
import BrazeUI
class AppDelegate: NSObject, UIApplicationDelegate, BrazeInAppMessageUIDelegate {
static var braze: Braze?
func application(_ application: UIApplication,
didFinishLaunchingWithOptions launchOptions: [UIApplication.LaunchOptionsKey: Any]? = nil) -> Bool {
// 1. Braze configuration with your SDK API key and endpoint
let configuration = Braze.Configuration(apiKey: "YOUR_API_ENDPOINT", endpoint: "YOUR_API_KEY")
configuration.logger.level = .debug
// 2. Initialize Braze SDK instance
let brazeInstance = Braze(configuration: configuration)
AppDelegate.braze = brazeInstance
// 3. Set up Braze In-App Message UI and delegate
let inAppMessageUI = BrazeInAppMessageUI()
inAppMessageUI.delegate = self
brazeInstance.inAppMessagePresenter = inAppMessageUI
return true
}
func inAppMessage(_ ui: BrazeInAppMessageUI,
displayChoiceForMessage message: Braze.InAppMessage) -> BrazeInAppMessageUI.DisplayChoice {
if let showFlag = message.extras["should_display_message"] as? String, showFlag == "true" {
return .now
} else {
return .discard
}
}
}
```
```swift file=SampleApp.swift
import SwiftUI
@main
struct SampleApp: App {
@UIApplicationDelegateAdaptor(AppDelegate.self) var appDelegate
var body: some Scene {
WindowGroup {
YourView()
}
}
}
```
!!step
lines-AppDelegate.swift=5
### 1. Implementar el `BrazeInAppMessageUIDelegate` {#1-implement-the-brazeinappmessageuidelegate}
En tu clase AppDelegate, implementa [`BrazeInAppMessageUIDelegate`](https://braze-inc.github.io/braze-swift-sdk/documentation/brazeui/brazeinappmessageui/delegate) para poder sobrescribir su método `inAppMessage` más adelante.
!!step
lines-AppDelegate.swift=12
#### 2. Habilitar depuración (opcional)
Para facilitar la solución de problemas durante el desarrollo, considera habilitar la depuración.
!!step
lines-AppDelegate.swift=19-21
#### 3. Configurar la interfaz de usuario de Braze y el delegado {#3-set-up-your-braze-ui-and-delegate}
`BrazeInAppMessageUI()` muestra mensajes dentro de la aplicación de forma predeterminada. Al asignar `self` como delegado, puedes interceptar y gestionar los mensajes antes de que se muestren.
!!step
lines-AppDelegate.swift=26-33
#### 4. Sobrescribir `DisplayChoice` con lógica condicional {#4-override-displaychoice-with-conditional-logic}
Sobrescribe [`inAppMessage(_:displayChoiceForMessage:)`](https://braze-inc.github.io/braze-swift-sdk/documentation/brazeui/brazeinappmessageuidelegate/inappmessage(_:displaychoiceformessage:)-9w1nb) para decidir si se debe mostrar un mensaje. Devuelve `.now` para mostrar el mensaje o `.discard` para suprimirlo.
# Tutorial: Personalización del estilo mediante pares clave-valor
Source: /docs/es/developer_guide/in_app_messages/tutorials/customizing_message_styling/index.md
# Tutorial: Personalización del estilo de los mensajes mediante pares clave-valor {#tutorial-customizing-message-styling-using-key-value-pairs}
> Sigue el código de ejemplo de este tutorial para personalizar el estilo de los mensajes dentro de la aplicación utilizando pares clave-valor en el SDK de Braze.
## Prerequisites
Before you can use this feature, you'll need to [integrate the Web Braze SDK](https://www.braze.com/docs/es/es/developer_guide/sdk_integration/?sdktab=web). Sin embargo, no es necesario realizar ninguna configuración adicional.
## Personalización del estilo de los mensajes mediante pares clave-valor para Web {#customizing-message-styling-using-key-value-pairs-for-web}
**Important:**
We're piloting this new tutorial format. [Tell us what you think](https://docs.google.com/forms/d/e/1FAIpQLSe_5uhWM7eXXk9F_gviO_pvA4rkYO3WA9B6tNJZ3TY91md5bw/viewform?usp=pp_url&entry.569173304=General+Feedback) — your feedback helps us improve future guides.
```js file=index.js
import * as braze from "@braze/web-sdk";
// Remove any calls to `braze.automaticallyShowInAppMessages()`
braze.initialize("YOUR-API-KEY", {
baseUrl: "YOUR-ENDPOINT",
enableLogging: true,
});
braze.subscribeToInAppMessage(function (message) {
const extras = message.extras;
const customTemplateType = extras["custom-template"] || "";
const customColor = extras["custom-color"] || "";
const customMessageId = extras["message-id"] || "";
if (customTemplateType) {
// add your own custom code to render this message
} else {
// otherwise, use Braze built-in UI
braze.showInAppMessage(message);
}
});
```
!!step
lines-index.js=2
### 1. Eliminar llamadas a `automaticallyShowInAppMessages()` {#1-remove-calls-to-automaticallyshowinappmessages}
Elimina cualquier llamada a [`automaticallyShowInAppMessages()`](https://js.appboycdn.com/web-sdk/latest/doc/modules/braze.html#automaticallyshowinappmessages), ya que anularán cualquier lógica personalizada que implementes más adelante.
!!step
lines-index.js=6
#### 2. Habilitar depuración (opcional) {#2-enable-debugging-optional}
Para facilitar la solución de problemas durante el desarrollo, considera habilitar la depuración.
!!step
lines-index.js=9-21
#### 3. Suscríbete al controlador de devolución de llamada de mensajes dentro de la aplicación {#3-subscribe-to-the-in-app-message-callback-handler}
Registra una devolución de llamada con [`subscribeToInAppMessage(callback)`](https://js.appboycdn.com/web-sdk/latest/doc/modules/braze.html#subscribetoinappmessage) para recibir un mensaje cada vez que se desencadene un mensaje dentro de la aplicación.
!!step
lines-index.js=10-13
#### 4. Acceder a la propiedad `message.extras` {#4-access-the-messageextras-property}
Utiliza `message.extras` para acceder a los tipos de personalización, los atributos de estilo o cualquier otro valor definido en el dashboard. Todos los valores se devuelven como cadenas.
!!step
lines-index.js=19
#### 5. Llamada condicional a `showInAppMessage` {#5-conditionally-call-showinappmessage}
Para mostrar el mensaje, llama a [`showInAppMessage(message)`](https://js.appboycdn.com/web-sdk/latest/doc/modules/braze.html#showinappmessage). De lo contrario, utiliza las propiedades personalizadas según sea necesario.
## Prerequisites
Before you can use this feature, you'll need to [integrate the Android Braze SDK](https://www.braze.com/docs/es/es/developer_guide/sdk_integration/?sdktab=android). También tendrás que [habilitar los mensajes dentro de la aplicación para Android](https://www.braze.com/docs/es/es/developer_guide/in_app_messages?sdktab=android#android_enabling-in-app-messages).
## Personalización del estilo de los mensajes mediante pares clave-valor para Android {#customizing-message-styling-using-key-value-pairs-for-android}
**Important:**
We're piloting this new tutorial format. [Tell us what you think](https://docs.google.com/forms/d/e/1FAIpQLSe_5uhWM7eXXk9F_gviO_pvA4rkYO3WA9B6tNJZ3TY91md5bw/viewform?usp=pp_url&entry.569173304=General+Feedback) — your feedback helps us improve future guides.
```kotlin file=MainApplication.kt
package com.example.brazedevlab
import android.app.Application
import com.braze.Braze
import com.braze.support.BrazeLogger
import com.braze.configuration.BrazeConfig
import com.braze.ui.inappmessage.BrazeInAppMessageManager
import com.braze.BrazeActivityLifecycleCallbackListener
import com.braze.ui.inappmessage.listeners.IInAppMessageManagerListener
import com.braze.models.inappmessage.IInAppMessage
import com.braze.ui.inappmessage.InAppMessageOperation
import android.util.Log
class MyApplication : Application() {
override fun onCreate() {
super.onCreate()
// Enable verbose Braze SDK logs
BrazeLogger.logLevel = Log.VERBOSE
// Initialize Braze
val brazeConfig = BrazeConfig.Builder()
.setApiKey("YOUR-API-KEY")
.setCustomEndpoint("YOUR-ENDPOINT")
.build()
Braze.configure(this, brazeConfig)
registerActivityLifecycleCallbacks(
BrazeActivityLifecycleCallbackListener()
)
// Set up custom in-app message view factory
BrazeInAppMessageManager.getInstance()
.setCustomInAppMessageViewFactory(CustomInAppMessageViewFactory())
}
}
```
```kotlin file=CustomInAppMessageViewFactory.kt
import android.app.Activity
import android.graphics.Color
import android.view.View
import com.braze.models.inappmessage.IInAppMessage
import com.braze.ui.inappmessage.BrazeInAppMessageManager
import com.braze.ui.inappmessage.IInAppMessageViewFactory
class CustomInAppMessageViewFactory : IInAppMessageViewFactory {
override fun createInAppMessageView(
activity: Activity,
inAppMessage: IInAppMessage
): View {
// 1) Obtain Braze’s default view factory for this message type
val defaultFactory =
BrazeInAppMessageManager.getInstance()
.getDefaultInAppMessageViewFactory(inAppMessage)
?: throw IllegalStateException(
"Braze default IAM view factory is missing"
)
// 2) Inflate the default view
val iamView = defaultFactory
.createInAppMessageView(activity, inAppMessage)
?: throw IllegalStateException(
"Braze default IAM view is null"
)
// 3) Get your KVP extras
val extras = inAppMessage.extras ?: emptyMap()
val customization = extras["customization"]
val overrideColor = extras["custom-color"]
// 4) Style your root view
if (customization == "slideup-attributes" && overrideColor != null) {
try {
iamView.setBackgroundColor(Color.parseColor(overrideColor))
} catch (_: IllegalArgumentException) {
// ignore bad styling
}
}
return iamView
}
}
```
!!step
lines-MainApplication.kt=19
### 1. Habilitar depuración (opcional) {#1-enable-debugging-optional}
Para facilitar la solución de problemas durante el desarrollo, considera habilitar la depuración.
!!step
lines-MainApplication.kt=28-30
#### 2. Registrar las devoluciones de llamada del ciclo de vida de la actividad {#2-register-activity-lifecycle-callbacks}
Registra el listener predeterminado de Braze para gestionar el ciclo de vida de los mensajes dentro de la aplicación.
!!step
lines-CustomInAppMessageViewFactory.kt=8
#### 3. Crear tu clase de fábrica de vistas personalizada {#3-create-your-custom-view-factory-class}
Asegúrate de que tu clase cumpla con [`IInAppMessageViewFactory`](https://braze-inc.github.io/braze-android-sdk/kdoc/braze-android-sdk/com.braze.ui.inappmessage/-i-in-app-message-view-factory/index.html) para que pueda construir y devolver vistas de mensajes personalizadas.
!!step
lines-CustomInAppMessageViewFactory.kt=15-20
#### 4. Delegar a la fábrica predeterminada de Braze {#4-delegate-to-brazes-default-factory}
Delega en la fábrica predeterminada para conservar el estilo integrado de Braze antes de aplicar tus propios cambios condicionales.
!!step
lines-CustomInAppMessageViewFactory.kt=30-32,35-41
#### 5. Acceder a los pares clave-valor desde `inAppMessage.extras` {#5-access-key-value-pairs-from-inappmessageextras}
Utiliza `inAppMessage.extras` para acceder a los tipos de personalización, los atributos de estilo o cualquier otro valor definido en el dashboard. Aplica las modificaciones de estilo antes de devolver la vista.
!!step
lines-MainApplication.kt=33-34
#### 6. Implementar un `IInAppMessageViewFactory` personalizado {#6-implement-a-custom-iinappmessageviewfactory}
Implementa [`IInAppMessageViewFactory`](https://braze-inc.github.io/braze-android-sdk/kdoc/braze-android-sdk/com.braze.ui.inappmessage/-i-in-app-message-view-factory/index.html) en tu clase personalizada para construir y renderizar vistas de mensajes dentro de la aplicación.
## Prerequisites
Before you can use this feature, you'll need to [integrate the Swift Braze SDK](https://www.braze.com/docs/es/es/developer_guide/sdk_integration/?sdktab=swift). También tendrás que [habilitar los mensajes dentro de la aplicación para Swift](https://www.braze.com/docs/es/es/developer_guide/in_app_messages?sdktab=swift#swift_enabling-in-app-messages).
## Personalización del estilo de los mensajes mediante pares clave-valor para Swift {#customizing-message-styling-using-key-value-pairs-for-swift}
**Important:**
We're piloting this new tutorial format. [Tell us what you think](https://docs.google.com/forms/d/e/1FAIpQLSe_5uhWM7eXXk9F_gviO_pvA4rkYO3WA9B6tNJZ3TY91md5bw/viewform?usp=pp_url&entry.569173304=General+Feedback) — your feedback helps us improve future guides.
```swift file=AppDelegate.swift
import UIKit
import BrazeKit
import BrazeUI
class AppDelegate: UIResponder, UIApplicationDelegate, BrazeInAppMessageUIDelegate {
var window: UIWindow?
static var braze: Braze?
func application(
_ application: UIApplication,
didFinishLaunchingWithOptions launchOptions: [UIApplication.LaunchOptionsKey: Any]?
) -> Bool {
let configuration = Braze.Configuration(
apiKey: "YOUR-API-KEY",
endpoint: "YOUR-ENDPOINT"
)
configuration.logger.level = .debug
let braze = Braze(configuration: configuration)
AppDelegate.braze = braze
// Set up Braze In-App Message UI and delegate
let inAppMessageUI = BrazeInAppMessageUI()
inAppMessageUI.delegate = self
brazeInstance.inAppMessagePresenter = inAppMessageUI
return true
}
func inAppMessage(
_ ui: BrazeInAppMessageUI,
prepareWith context: inout BrazeInAppMessageUI.PresentationContext
) {
let customization = context.message.extras["customization"] as? String
if customization == "slideup-attributes" {
// Create a new attributes object and make customizations.
var attributes = context.attributes?.slideup
attributes?.font = UIFont(name: "Chalkduster", size: 17)!
attributes?.imageSize = CGSize(width: 65, height: 65)
attributes?.cornerRadius = 20
attributes?.imageCornerRadius = 10
if #available(iOS 13.0, *) {
attributes?.cornerCurve = .continuous
attributes?.imageCornerCurve = .continuous
}
context.attributes?.slideup = attributes
}
}
}
```
```swift file=SampleApp.swift
import SwiftUI
@main
struct SampleApp: App {
@UIApplicationDelegateAdaptor(AppDelegate.self) var appDelegate
var body: some Scene {
WindowGroup {
YourView()
}
}
}
```
!!step
lines-AppDelegate.swift=5
### 1. Implementar `BrazeInAppMessageUIDelegate` {#1-implement-brazeinappmessageuidelegate}
En tu clase `AppDelegate`, implementa [`BrazeInAppMessageUIDelegate`](https://braze-inc.github.io/braze-swift-sdk/documentation/brazeui/brazeinappmessageui/delegate) para que puedas sobrescribir su método `inAppMessage` más adelante.
!!step
lines-AppDelegate.swift=17
#### 2. Habilitar depuración (opcional)
Para facilitar la solución de problemas durante el desarrollo, considera habilitar la depuración.
!!step
lines-AppDelegate.swift=30-50
#### 3. Preparar los mensajes antes de que se muestren {#3-prepare-messages-before-theyre-displayed}
Braze llama a `inAppMessage(_:prepareWith:)` durante la preparación del mensaje. Úsalo para personalizar el estilo o aplicar lógica basada en pares clave-valor.
!!step
lines-AppDelegate.swift=34
#### 4. Acceder a los pares clave-valor desde `message.extras` {#4-access-key-value-pairs-from-messageextras}
Utiliza `message.extras` para acceder a los tipos de personalización, los atributos de estilo o cualquier otro valor definido en el dashboard.
!!step
lines-AppDelegate.swift=38-46
#### 5. Actualizar los atributos de estilo del mensaje {#5-update-the-messages-styling-attributes}
Utiliza [`inAppMessage(_:prepareWith:)`](https://braze-inc.github.io/braze-swift-sdk/documentation/brazeui/brazeinappmessageuidelegate/inappmessage(_:preparewith:)-11fog) para acceder al `PresentationContext` y poder modificar directamente los atributos de estilo. Cada tipo de mensaje dentro de la aplicación expone atributos diferentes.
# Tutorial: Aplazamiento y restauración de mensajes desencadenados
Source: /docs/es/developer_guide/in_app_messages/tutorials/deferring_triggered_messages/index.md
# Tutorial: Aplazamiento y restauración de mensajes desencadenados {#tutorial-deferring-and-restoring-triggered-messages}
> Sigue el código de ejemplo de este tutorial para aplazar y restaurar mensajes desencadenados dentro de la aplicación utilizando el SDK de Braze.
## Prerequisites
Before you can use this feature, you'll need to [integrate the Web Braze SDK](https://www.braze.com/docs/es/es/developer_guide/sdk_integration/?sdktab=web). Sin embargo, no es necesario realizar ninguna configuración adicional.
## Aplazamiento y restauración de mensajes desencadenados para Web {#deferring-and-restoring-triggered-messages-for-web}
**Important:**
We're piloting this new tutorial format. [Tell us what you think](https://docs.google.com/forms/d/e/1FAIpQLSe_5uhWM7eXXk9F_gviO_pvA4rkYO3WA9B6tNJZ3TY91md5bw/viewform?usp=pp_url&entry.569173304=General+Feedback) — your feedback helps us improve future guides.
```js file=index.js
import * as braze from "@braze/web-sdk";
// Remove any calls to `braze.automaticallyShowInAppMessages()`
braze.initialize("YOUR-API-KEY", {
baseUrl: "YOUR-ENDPOINT",
enableLogging: true,
});
braze.subscribeToInAppMessage(function (message) {
const shouldDefer = true; // customize for your own logic
if (shouldDefer) {
braze.deferInAppMessage(message);
} else {
braze.showInAppMessage(message);
}
});
// elsewhere in your app
document.getElementById("button").onclick = function () {
const deferredMessage = braze.getDeferredInAppMessage();
if (deferredMessage) {
braze.showInAppMessage(deferredMessage);
}
};
```
!!step
lines-index.js=2
### 1. Eliminar llamadas a `automaticallyShowInAppMessages()` {#1-remove-calls-to-automaticallyshowinappmessages}
Elimina cualquier llamada a [`automaticallyShowInAppMessages()`](https://js.appboycdn.com/web-sdk/latest/doc/modules/braze.html#automaticallyshowinappmessages) , ya que anularán cualquier lógica personalizada que implementes más adelante.
!!step
lines-index.js=6
#### 2. Habilitar depuración (opcional) {#2-enable-debugging-optional}
Para facilitar la solución de problemas durante el desarrollo, considera habilitar la depuración.
!!step
lines-index.js=9-16
#### 3. Suscríbete al controlador de devolución de llamada de mensajes dentro de la aplicación {#3-subscribe-to-the-in-app-message-callback-handler}
Registra una devolución de llamada con [`subscribeToInAppMessage(callback)`](https://js.appboycdn.com/web-sdk/latest/doc/modules/braze.html#subscribetoinappmessage) para recibir un mensaje cada vez que se desencadene un mensaje dentro de la aplicación.
!!step
lines-index.js=11-12
#### 4. Aplazar la instancia `message` {#4-defer-the-message-instance}
Para aplazar el mensaje, llama a [`deferInAppMessage(message)`](https://js.appboycdn.com/web-sdk/latest/doc/modules/braze.html#deferinappmessage). Braze serializará y guardará este mensaje para que puedas mostrarlo en una futura carga de la página.
!!step
lines-index.js=18-24
#### 5. Recuperar un mensaje aplazado anteriormente {#5-retrieve-a-previously-deferred-message}
Para recuperar cualquier mensaje aplazado anteriormente, llama a [`getDeferredInAppMessage()`](https://js.appboycdn.com/web-sdk/latest/doc/modules/braze.html#getdeferredinappmessage).
!!step
lines-index.js=21-23
#### 6. Mostrar el mensaje aplazado {#6-display-the-deferred-message}
Después de recuperar un mensaje aplazado, muéstralo pasándolo a [`showInAppMessage(message)`](https://js.appboycdn.com/web-sdk/latest/doc/modules/braze.html#showinappmessage).
!!step
lines-index.js=13-15
#### 7. Mostrar un mensaje inmediatamente {#7-display-a-message-immediately}
Para mostrar un mensaje en lugar de aplazarlo, llama a [`showInAppMessage(message)`](https://js.appboycdn.com/web-sdk/latest/doc/modules/braze.html#showinappmessage) directamente en tu devolución de llamada `subscribeToInAppMessage`.
## Prerequisites
Before you can use this feature, you'll need to [integrate the Android Braze SDK](https://www.braze.com/docs/es/es/developer_guide/sdk_integration/?sdktab=android). También tendrás que [habilitar los mensajes dentro de la aplicación para Android](https://www.braze.com/docs/es/es/developer_guide/in_app_messages?sdktab=android#android_enabling-in-app-messages).
## Aplazamiento y restauración de mensajes desencadenados para Android {#deferring-and-restoring-triggered-messages-for-android}
**Important:**
We're piloting this new tutorial format. [Tell us what you think](https://docs.google.com/forms/d/e/1FAIpQLSe_5uhWM7eXXk9F_gviO_pvA4rkYO3WA9B6tNJZ3TY91md5bw/viewform?usp=pp_url&entry.569173304=General+Feedback) — your feedback helps us improve future guides.
```kotlin file=MainApplication.kt
import android.app.Application
import com.braze.Braze
import com.braze.support.BrazeLogger
import com.braze.configuration.BrazeConfig
import com.braze.ui.inappmessage.BrazeInAppMessageManager
import com.braze.BrazeActivityLifecycleCallbackListener
import com.braze.ui.inappmessage.listeners.IInAppMessageManagerListener
import com.braze.models.inappmessage.IInAppMessage
import com.braze.ui.inappmessage.InAppMessageOperation
import android.util.Log
class MyApplication : Application() {
companion object {
private var instance: MyApplication? = null
fun getInstance(): MyApplication = instance!!
}
private var showMessage = false
override fun onCreate() {
super.onCreate()
instance = this
// Enable verbose Braze SDK logs
BrazeLogger.logLevel = Log.VERBOSE
// Initialize Braze
val brazeConfig = BrazeConfig.Builder()
.setApiKey("YOUR-API-KEY")
.setCustomEndpoint("YOUR-ENDPOINT")
.build()
Braze.configure(this, brazeConfig)
registerActivityLifecycleCallbacks(
BrazeActivityLifecycleCallbackListener()
)
// Set up in-app message listener
BrazeInAppMessageManager.getInstance().setCustomInAppMessageManagerListener(object : IInAppMessageManagerListener {
override fun beforeInAppMessageDisplayed(inAppMessage: IInAppMessage): InAppMessageOperation {
return if (showMessage) {
// Show the message using Braze's UI
InAppMessageOperation.DISPLAY_NOW
} else {
// Re-enqueue the message for later
InAppMessageOperation.DISPLAY_LATER
}
}
})
}
fun showDeferredMessage(show: Boolean) {
showMessage = show
BrazeInAppMessageManager.getInstance().requestDisplayInAppMessage()
}
}
```
```kotlin file=MainActivity.kt
import android.os.Bundle
import androidx.activity.ComponentActivity
import androidx.activity.compose.setContent
import androidx.compose.foundation.layout.*
import androidx.compose.material.Button
import androidx.compose.material.Text
import androidx.compose.runtime.Composable
import androidx.compose.ui.Modifier
import androidx.compose.ui.unit.dp
class MainActivity : ComponentActivity() {
override fun onCreate(savedInstanceState: Bundle?) {
super.onCreate(savedInstanceState)
setContent {
ContentView()
}
}
}
@Composable
fun ContentView() {
Column(
modifier = Modifier.padding(16.dp),
verticalArrangement = Arrangement.spacedBy(20.dp)
) {
// ... your UI
Button(onClick = {
MyApplication.getInstance().showDeferredMessage(true)
}) {
Text("Show Deferred IAM")
}
}
}
```
!!step
lines-MainApplication.kt=13-16
### 1. Crear una instancia singleton de `Application` {#1-create-a-singleton-application-instance}
Utiliza un objeto companion para exponer tu clase `Application` como un singleton, de modo que se pueda acceder a ella más adelante en tu código.
!!step
lines-MainApplication.kt=25
#### 2. Habilitar depuración (opcional)
Para facilitar la solución de problemas durante el desarrollo, considera habilitar la depuración.
!!step
lines-MainApplication.kt=34-36
#### 3. Registrar las devoluciones de llamada del ciclo de vida de la actividad {#3-register-activity-lifecycle-callbacks}
Registra el listener predeterminado de Braze para gestionar el ciclo de vida de los mensajes dentro de la aplicación.
!!step
lines-MainApplication.kt=39-49
#### 4. Configurar un listener de mensajes dentro de la aplicación {#4-set-up-an-in-app-message-listener}
Utiliza `BrazeInAppMessageManager` para configurar un listener personalizado que intercepte los mensajes antes de que se muestren.
!!step
lines-MainApplication.kt=43,46
#### 5. Crear lógica condicional {#5-create-conditional-logic}
Utiliza la bandera `showMessage` para controlar el momento—devuelve `DISPLAY_NOW` para mostrar el mensaje ahora o `DISPLAY_LATER` para aplazarlo.
!!step
lines-MainApplication.kt=52-55
#### 6. Crear un método para mostrar mensajes aplazados {#6-create-a-method-for-displaying-deferred-messages}
Utiliza `showDeferredMessage` para desencadenar el siguiente mensaje dentro de la aplicación. Cuando `showMessage` es `true`, el listener devolverá `DISPLAY_NOW`.
!!step
lines-MainActivity.kt=29
#### 7. Desencadenar el método desde tu interfaz de usuario {#7-trigger-the-method-from-your-ui}
Para mostrar el mensaje previamente aplazado, llama a `showDeferredMessage(true)` desde tu interfaz de usuario, por ejemplo, un botón o un toque.
## Prerequisites
Before you can use this feature, you'll need to [integrate the Swift Braze SDK](https://www.braze.com/docs/es/es/developer_guide/sdk_integration/?sdktab=swift). También tendrás que [habilitar los mensajes dentro de la aplicación para Swift](https://www.braze.com/docs/es/es/developer_guide/in_app_messages?sdktab=swift#swift_enabling-in-app-messages).
## Aplazamiento y restauración de mensajes desencadenados para Swift {#deferring-and-restoring-triggered-messages-for-swift}
**Important:**
We're piloting this new tutorial format. [Tell us what you think](https://docs.google.com/forms/d/e/1FAIpQLSe_5uhWM7eXXk9F_gviO_pvA4rkYO3WA9B6tNJZ3TY91md5bw/viewform?usp=pp_url&entry.569173304=General+Feedback) — your feedback helps us improve future guides.
```swift file=AppDelegate.swift
import SwiftUI
import BrazeKit
import BrazeUI
class AppDelegate: UIResponder, UIApplicationDelegate, BrazeInAppMessageUIDelegate {
static private(set) var shared: AppDelegate!
private var braze: Braze!
public var showMessage: Bool = false
func application(
_ application: UIApplication,
didFinishLaunchingWithOptions launchOptions: [UIApplication.LaunchOptionsKey: Any]?
) -> Bool {
AppDelegate.shared = self
// 1. Braze configuration with your SDK API key and endpoint
let configuration = Braze.Configuration(apiKey: "a1fc095b-ae3d-40f4-bb33-3fb5176562c0", endpoint: "sondheim.braze.com")
configuration.logger.level = .debug
// 2. Initialize Braze SDK instance
braze = Braze(configuration: configuration)
// 3. Set up Braze In-App Message UI and delegate
let ui = BrazeInAppMessageUI()
ui.delegate = self
braze.inAppMessagePresenter = ui
return true
}
func inAppMessage(
_ ui: BrazeInAppMessageUI,
displayChoiceForMessage message: Braze.InAppMessage
) -> BrazeInAppMessageUI.DisplayChoice {
if !showMessage {
return .reenqueue
}
return .now
}
func showDeferredMessage(showMessage: Bool) {
self.showMessage = showMessage
(braze.inAppMessagePresenter as? BrazeInAppMessageUI)?.presentNext()
}
}
```
```swift file=SampleApp.swift
import SwiftUI
@main
struct IAMDeferApp: App {
@UIApplicationDelegateAdaptor(AppDelegate.self) var delegate
var body: some Scene {
WindowGroup {
ContentView()
}
}
}
```
```swift file=ContentView.swift
import SwiftUI
struct ContentView: View {
var body: some View {
VStack(spacing: 20) {
// ...your UI
Button("Show Deferred IAM") {
AppDelegate.shared.showDeferredMessage(showMessage: true)
}
}
.padding()
}
}
```
!!step
lines-AppDelegate.swift=5
### 1. Implementar el `BrazeInAppMessageUIDelegate` {#1-implement-the-brazeinappmessageuidelegate}
En tu clase `AppDelegate`, implementa el [`BrazeInAppMessageUIDelegate`](https://braze-inc.github.io/braze-swift-sdk/documentation/brazeui/brazeinappmessageuidelegate) para que puedas sobrescribir su método `inAppMessage` más adelante.
!!step
lines-AppDelegate.swift=19
#### 2. Habilitar depuración (opcional)
Para facilitar la solución de problemas durante el desarrollo, considera habilitar la depuración.
!!step
lines-AppDelegate.swift=25-27
#### 3. Configurar tu interfaz de usuario de Braze y el delegado {#3-set-up-your-braze-ui-and-delegate}
`BrazeInAppMessageUI()` muestra mensajes dentro de la aplicación de forma predeterminada. Al asignar `self` como su delegado, puedes interceptar y gestionar los mensajes antes de que se muestren. Asegúrate de guardar la instancia, ya que la necesitarás más adelante para restaurar los mensajes aplazados.
!!step
lines-AppDelegate.swift=32-41
#### 4. Sobrescribir `DisplayChoice` con lógica condicional {#4-override-displaychoice-with-conditional-logic}
Sobrescribe [`inAppMessage(_:displayChoiceForMessage:)`](https://braze-inc.github.io/braze-swift-sdk/documentation/brazeui/brazeinappmessageuidelegate/inappmessage(_:displaychoiceformessage:)-9w1nb) para determinar cuándo se debe mostrar un mensaje. Devuelve `.now` para mostrarlo inmediatamente o `.reenqueue` para aplazarlo.
!!step
lines-AppDelegate.swift=43-46
#### 5. Crear un método para mostrar mensajes aplazados {#5-create-a-method-to-show-deferred-messages}
Crea un método que llame a `showDeferredMessage(true)` para mostrar el siguiente mensaje aplazado de la pila. Cuando se llama, `showMessage` se establece en `true`, lo que hace que el delegado devuelva `.now`.
!!step
lines-ContentView.swift=1-14
#### 6. Desencadenar el método desde tu interfaz de usuario {#5-trigger-the-method-from-your-ui}
Para mostrar el mensaje previamente aplazado, llama a `showDeferredMessage(true)` desde tu interfaz de usuario, por ejemplo, un botón o un toque.
# Solución de problemas de mensajes dentro de la aplicación para el SDK de Braze
Source: /docs/es/developer_guide/in_app_messages/troubleshooting/index.md
# Solución de problemas de mensajes dentro de la aplicación {#troubleshoot-in-app-messages}
> Usa esta página para diagnosticar por qué los mensajes dentro de la aplicación no se entregan o no se muestran en un dispositivo. Para la configuración del dashboard (prioridad, desencadenantes, Segments y reelegibilidad), consulta las [preguntas frecuentes sobre mensajes dentro de la aplicación](https://www.braze.com/docs/es/es/user_guide/channels/in_app_messages/faq).
Antes de depurar, añádete como [usuario de prueba](https://www.braze.com/docs/es/es/user_guide/administer/global/user_management/internal_groups#adding-test-users) y revisa [Envío de mensajes de prueba](https://www.braze.com/docs/es/es/developer_guide/in_app_messages/sending_test_messages).
## Empieza aquí: identifica tu síntoma {#start-here-match-your-symptom}
| Síntoma | Ir a |
| --- | --- |
| El mensaje dentro de la aplicación no se mostró para un usuario | [Un usuario](#in-app-message-not-shown-for-one-user) |
| El mensaje dentro de la aplicación no se mostró en una plataforma (Android, iOS o Web) | [Una plataforma](#in-app-message-not-shown-on-one-platform) |
| El mensaje dentro de la aplicación de un paso de **Canvas** no se mostró | [Mensajes dentro de la aplicación en Canvas](#canvas-in-app-messages) |
| El mensaje dentro de la aplicación se mostró tarde o con retraso | [Temporización y visualización retrasada](#timing-and-delayed-display) |
| Las impresiones o los clics parecen incorrectos | [Impresiones y análisis](#impressions-and-analytics) |
| `triggers` faltantes o vacíos en los registros de eventos de usuario | [Solución de problemas de entrega](#delivery-troubleshooting) |
| Los desencadenantes se devolvieron pero nada se muestra en el dispositivo | [Solución de problemas de visualización específica por plataforma](#platform-specific-display-troubleshooting) |
| Los activos del mensaje dentro de la aplicación no se cargan (iOS, `NSURLError` -1008) | [Carga de activos (pestaña Swift)](https://www.braze.com/docs/es/es/developer_guide/in_app_messages/troubleshooting?sdktab=swift#asset-loading) |
{: .reset-td-br-1 .reset-td-br-2 aria-label="Síntoma de mensaje dentro de la aplicación" }
## Ruta de investigación estándar {#standard-investigation-path}
Usa este flujo de trabajo para cada incidente. Comienza en el paso 1.
1. Confirma que se registra un **inicio de sesión** para el dispositivo de prueba. Los mensajes dentro de la aplicación se solicitan al inicio de sesión.
2. Abre los [registros de eventos de usuario](https://www.braze.com/docs/es/es/user_guide/administer/global/workspace_settings/logs_and_alerts/event_user_log) y busca la solicitud del SDK para ese inicio de sesión. En **Response Data**:
- En el JSON sin procesar, confirma que `respond_with` incluye `"triggers": true`.
- La fila **Requested Responses** debe incluir **`triggers`**.
- Las filas **Trigger In-App Message** enumeran cada mensaje dentro de la aplicación devuelto para esa solicitud.
- Si no hay una clave `triggers` ni filas **Trigger In-App Message**, ve a [Solución de problemas de mensajes no solicitados](#troubleshoot-messages-not-being-requested).
- Si `triggers` está presente pero vacío (`[]`), ve a [Solución de problemas de mensajes no devueltos](#troubleshoot-messages-not-being-returned).
- Si hay filas **Trigger In-App Message** pero nada se muestra, ve a [Solución de problemas de visualización específica por plataforma](#platform-specific-display-troubleshooting).
- Cada carga útil de desencadenante incluye un `type`: `inapp` (estándar) o `templated_iam` (requiere una solicitud de plantilla antes de mostrarse). Consulta [Tipos de mensajes dentro de la aplicación](https://www.braze.com/docs/es/es/developer_guide/in_app_messages/triggering_messages#types-of-in-app-messages).
3. Para la elegibilidad del lado del dashboard (Segment, reelegibilidad, límites de frecuencia, prioridad, grupos de control), consulta [Solución de problemas de entrega](#delivery-troubleshooting) y las [preguntas frecuentes sobre mensajes dentro de la aplicación](https://www.braze.com/docs/es/es/user_guide/channels/in_app_messages/faq).
4. Para problemas de visualización del lado del dispositivo (delegados, límites de velocidad, orientación, tiempo de espera de sesión), selecciona la pestaña de tu SDK en [Solución de problemas de visualización específica por plataforma](#platform-specific-display-troubleshooting).
## Mensajes dentro de la aplicación en Canvas {#canvas-in-app-messages}
**Síntoma:** Un usuario entró en un paso de mensaje dentro de la aplicación en Canvas pero no vio el mensaje cuando se esperaba.
Tres comportamientos generan la mayoría de los tickets de Canvas y mensajes dentro de la aplicación:
1. **Visualización en la siguiente sesión:** Los mensajes dentro de la aplicación en Canvas son elegibles en el *siguiente* inicio de sesión después de que se procese el paso, no inmediatamente a mitad de sesión. Consulta [¿Cuándo se envían los mensajes dentro de la aplicación en Canvas?](https://www.braze.com/docs/es/es/user_guide/messaging/canvas/faqs#when-are-in-app-messages-in-canvas-sent) en las preguntas frecuentes de Canvas.
2. **Validaciones de entrega en la entrada del paso:** Si **Validar audiencia al enviar el mensaje** está habilitado en el paso de mensaje, la pertenencia al Segment y los límites de frecuencia se evalúan cuando el usuario **entra en el paso**, no en el momento de la visualización. Consulta [Validaciones de entrega](https://www.braze.com/docs/es/es/user_guide/messaging/canvas/canvas_components/message_step#delivery-validations).
3. **Retraso y tiempo de espera de sesión:** Si un usuario entra en un paso de retraso más largo que el tiempo de espera de sesión de tu SDK, puede iniciar una nueva sesión antes del paso de mensaje dentro de la aplicación. Es posible que el mensaje no se obtenga en el inicio de sesión cuando esperas que se muestre.
Para ventanas de disponibilidad, expiración y cero _Envíos_ en los análisis de Canvas, consulta [Mensajes dentro de la aplicación y entrega](https://www.braze.com/docs/es/es/user_guide/messaging/canvas/faqs#messages-and-delivery) en las preguntas frecuentes de Canvas.
**Important:**
Los mensajes dentro de la aplicación en Canvas solo pueden ser desencadenados por eventos enviados a través del SDK, no por la REST API.
## El mensaje dentro de la aplicación no se mostró para un usuario {#in-app-message-not-shown-for-one-user}
**Síntoma:** Un usuario no recibió un mensaje dentro de la aplicación esperado; otros usuarios pueden no estar afectados.
Comprueba lo siguiente:
- ¿Estaba el usuario en el Segment al **inicio de sesión**, cuando el SDK solicita nuevos mensajes dentro de la aplicación?
- ¿Era el usuario elegible o reelegible según las reglas de segmentación de la Campaign o Canvas? Consulta [Reelegibilidad para Campaigns y Canvas](https://www.braze.com/docs/es/es/user_guide/messaging/messaging_fundamentals/re_eligibility).
- ¿Se aplicó un [límite de frecuencia](https://www.braze.com/docs/es/es/user_guide/messaging/messaging_fundamentals/frequency_capping)?
- ¿Estaba el usuario en un grupo de control de la Campaign? Comprueba si la Campaign está configurada para pruebas A/B.
- ¿Se mostró en su lugar un mensaje dentro de la aplicación de mayor prioridad? Consulta [¿Pueden mostrarse varios mensajes dentro de la aplicación en la misma sesión?](https://www.braze.com/docs/es/es/user_guide/channels/in_app_messages/faq#can-multiple-in-app-messages-display-in-the-same-session) en las preguntas frecuentes de mensajes dentro de la aplicación.
- ¿Estaba el dispositivo en la orientación especificada por la Campaign?
- ¿Fue suprimido el mensaje por el intervalo mínimo predeterminado de 30 segundos entre desencadenantes? Consulta [Anular el límite de velocidad predeterminado](https://www.braze.com/docs/es/es/developer_guide/in_app_messages/triggering_messages#overriding-the-default-rate-limit).
Luego sigue la [ruta de investigación estándar](#standard-investigation-path).
## El mensaje dentro de la aplicación no se mostró en una plataforma {#in-app-message-not-shown-on-one-platform}
**Síntoma:** Los mensajes dentro de la aplicación no se muestran en Android, iOS o Web, pero pueden funcionar en otras plataformas.
| Causa probable | Qué comprobar |
| --- | --- |
| Objetivo de **Send To** incorrecto | Confirma que la Campaign o el paso de Canvas apunta a **Mobile Apps** o **Web Browsers** según corresponda. Una Campaign solo para Web no se enviará a dispositivos Android. |
| Una UI personalizada o un controlador suprime la visualización | Revisa los delegados (móvil) o [`braze.subscribeToInAppMessage`](https://js.appboycdn.com/web-sdk/latest/doc/modules/braze.html#subscribetoinappmessage) (Web). Consulta [Personalización](https://www.braze.com/docs/es/es/developer_guide/in_app_messages/customization) y la pestaña de tu SDK a continuación. |
| La integración nunca funcionó en esta plataforma | Confirma que esta plataforma y versión de la aplicación han mostrado mensajes dentro de la aplicación anteriormente. |
| El desencadenante no se activó en el dispositivo | El desencadenante debe ocurrir localmente a través del SDK. Una llamada a la REST API no puede desencadenar un mensaje dentro de la aplicación en el SDK. Consulta [Desencadenar mensajes](https://www.braze.com/docs/es/es/developer_guide/in_app_messages/triggering_messages). |
| `triggers` vacíos en los registros de eventos de usuario | Segment, reelegibilidad, límite de frecuencia o grupo de control. Consulta [Solución de problemas de mensajes no devueltos](#troubleshoot-messages-not-being-returned). |
{: .reset-td-br-1 .reset-td-br-2 aria-label="Causa del síntoma por plataforma" }
## El mensaje dentro de la aplicación no se mostró para todos los usuarios {#in-app-message-not-shown-for-all-users}
**Síntoma:** Ningún usuario o menos usuarios de los esperados recibieron el mensaje dentro de la aplicación.
Comprueba lo siguiente:
- ¿Está la acción desencadenante configurada correctamente en el dashboard y en la integración de la aplicación?
- ¿Interceptó un mensaje dentro de la aplicación de mayor prioridad la Campaign? Consulta las [preguntas frecuentes sobre mensajes dentro de la aplicación](https://www.braze.com/docs/es/es/user_guide/channels/in_app_messages/faq#can-multiple-in-app-messages-display-in-the-same-session).
- ¿Estás usando una versión reciente del SDK? Algunos tipos de mensajes dentro de la aplicación tienen requisitos mínimos de SDK.
- ¿Están las sesiones integradas correctamente? Confirma que los análisis de sesión funcionan para esta aplicación.
- ¿Está una biblioteca de UI personalizada interfiriendo con la visualización? Consulta [Personalización](https://www.braze.com/docs/es/es/developer_guide/in_app_messages/customization).
Luego sigue la [ruta de investigación estándar](#standard-investigation-path).
## Temporización y visualización retrasada {#timing-and-delayed-display}
**Síntoma:** El mensaje dentro de la aplicación apareció más tarde de lo esperado o no hasta una nueva sesión.
Causas comunes:
- **Precarga en el inicio de sesión de la Campaign:** Los mensajes dentro de la aplicación se almacenan en caché al inicio de sesión y se muestran cuando se activa el desencadenante. Un desencadenante que ocurre antes del siguiente inicio de sesión no se mostrará hasta esa sesión. Consulta [Desencadenar mensajes](https://www.braze.com/docs/es/es/developer_guide/in_app_messages/triggering_messages).
- **Comportamiento de siguiente sesión en Canvas:** Consulta [Mensajes dentro de la aplicación en Canvas](#canvas-in-app-messages).
- **Retraso planificado en el dashboard:** Confirma si hay un retraso configurado en la Campaign o el paso.
- **Condición de carrera en la sincronización de desencadenantes:** Si los usuarios registran un evento inmediatamente después del inicio de sesión, es posible que los desencadenantes aún no se hayan sincronizado. Considera desencadenar a partir del inicio de sesión y segmentar por el evento deseado para que la entrega ocurra en la siguiente sesión después del evento.
- **Mensajes dentro de la aplicación secuenciales:** Si estás aplazando o restaurando mensajes en un recorrido, consulta [Aplazar mensajes dentro de la aplicación desencadenados](https://www.braze.com/docs/es/es/developer_guide/in_app_messages/tutorials/deferring_triggered_messages).
- **Activos grandes o CDN lento:** Optimiza las imágenes y el video para mensajes dentro de la aplicación HTML. En dispositivos móviles, las imágenes pueden descargarse antes de mostrarse en redes lentas; selecciona la pestaña de tu SDK a continuación para notas específicas de la plataforma.
**Note:**
Si tu mensaje dentro de la aplicación se desencadena por el inicio de sesión y has configurado un tiempo de espera de sesión extendido, cerrar y volver a abrir la aplicación dentro de esa ventana no actualizará la sesión. Por ejemplo, con un tiempo de espera de 300 segundos, un mensaje dentro de la aplicación desencadenado por inicio de sesión no se mostrará hasta que la sesión se actualice realmente. Ajusta el tiempo de espera de sesión o el tipo de desencadenante si esto afecta tu prueba.
## Solución de problemas de entrega {#delivery-troubleshooting}
La mayoría de los problemas con mensajes dentro de la aplicación son de **entrega** (el dispositivo no recibió los desencadenantes) o de **visualización** (los desencadenantes llegaron pero no se mostraron). Confirma primero la [entrega](#troubleshooting-in-app-message-delivery) y luego comprueba la [visualización](#platform-specific-display-troubleshooting).
### Solución de problemas de entrega {#troubleshooting-in-app-message-delivery}
El SDK solicita mensajes dentro de la aplicación a los servidores de Braze al inicio de sesión. Confirma que el SDK está solicitando desencadenantes y que Braze los está devolviendo.
#### Comprueba si los mensajes se solicitan y se devuelven {#check-if-messages-are-requested-and-returned}
1. Añádete como [usuario de prueba](https://www.braze.com/docs/es/es/user_guide/administer/global/user_management/internal_groups#adding-test-users).
2. Configura una Campaign de mensaje dentro de la aplicación dirigida a tu usuario.
3. Inicia una nueva sesión en tu aplicación.
4. En los [registros de eventos de usuario](https://www.braze.com/docs/es/es/user_guide/administer/global/workspace_settings/logs_and_alerts/event_user_log), busca la solicitud del SDK para el evento de inicio de sesión. En **Response Data**:
- En el JSON sin procesar, confirma que `respond_with` incluye `"triggers": true`.
- La fila **Requested Responses** enumera las claves de nivel superior en la respuesta. Para mensajes dentro de la aplicación, espera **`triggers`**.
- Las filas **Trigger In-App Message** enumeran cada mensaje dentro de la aplicación devuelto para esa solicitud.
Luego clasifica:
- Si no hay una clave `triggers` ni filas **Trigger In-App Message**, consulta [Solución de problemas de mensajes no solicitados](#troubleshoot-messages-not-being-requested).
- Si `triggers` está presente pero vacío (`[]`), consulta [Solución de problemas de mensajes no devueltos](#troubleshoot-messages-not-being-returned).
- Si hay filas **Trigger In-App Message** pero nada se muestra en el dispositivo, consulta [Solución de problemas de visualización específica por plataforma](#platform-specific-display-troubleshooting).
- Cada carga útil de desencadenante incluye un `type`: `inapp` (estándar) o `templated_iam` (requiere una solicitud de plantilla antes de mostrarse). Consulta [Tipos de mensajes dentro de la aplicación](https://www.braze.com/docs/es/es/developer_guide/in_app_messages/triggering_messages#types-of-in-app-messages).
5. Confirma que los mensajes dentro de la aplicación correctos aparecen en los datos de respuesta.

##### Solución de problemas de mensajes no solicitados {#troubleshoot-messages-not-being-requested}
Si los mensajes dentro de la aplicación no se están solicitando, es posible que tu aplicación no esté rastreando las sesiones correctamente; los mensajes dentro de la aplicación se actualizan al inicio de sesión. Confirma que la aplicación está iniciando una sesión según la semántica de tiempo de espera de sesión:

##### Solución de problemas de mensajes no devueltos {#troubleshoot-messages-not-being-returned}
Si los mensajes dentro de la aplicación no se están devolviendo, es probable que haya un problema de segmentación o elegibilidad:
1. Tu Segment no contiene a tu usuario.
- Comprueba la pestaña [**Interacción**](https://www.braze.com/docs/es/es/user_guide/audience/manage_audience/user_profiles#engagement-tab) del usuario para el Segment esperado.
2. Tu usuario ya recibió el mensaje y no era reelegible.
- Comprueba la [configuración de reelegibilidad](https://www.braze.com/docs/es/es/user_guide/messaging/messaging_fundamentals/re_eligibility) y las [preguntas frecuentes sobre mensajes dentro de la aplicación](https://www.braze.com/docs/es/es/user_guide/channels/in_app_messages/faq#campaigns).
3. Tu usuario alcanzó el límite de frecuencia.
- Comprueba la [configuración de límites de frecuencia](https://www.braze.com/docs/es/es/user_guide/messaging/messaging_fundamentals/frequency_capping).
4. Tu usuario cayó en un grupo de control.
- Crea un Segment con un filtro **Received campaign variant** establecido en **Control**, o excluye los grupos de control durante las pruebas de integración.
5. Un mensaje dentro de la aplicación de mayor prioridad tuvo precedencia. Consulta las [preguntas frecuentes sobre mensajes dentro de la aplicación](https://www.braze.com/docs/es/es/user_guide/channels/in_app_messages/faq#can-multiple-in-app-messages-display-in-the-same-session).
Para Campaigns archivadas, configuración de desencadenantes y horas tranquilas, consulta las [preguntas frecuentes sobre mensajes dentro de la aplicación](https://www.braze.com/docs/es/es/user_guide/channels/in_app_messages/faq).
## Impresiones y análisis {#impressions-and-analytics}
**Síntoma:** Los recuentos de impresiones o clics no coinciden con las expectativas.
- **_Impresiones_ mayores que _Impresiones únicas_:** Es esperado cuando los usuarios tienen varios dispositivos o cuando un retraso planificado hace que el mismo usuario califique más de una vez. Consulta [Reelegibilidad para Campaigns y Canvas](https://www.braze.com/docs/es/es/user_guide/messaging/messaging_fundamentals/re_eligibility).
- **Impresiones menores de lo esperado:** Es posible que los usuarios no hayan visto el mensaje (las impresiones se registran al mostrarse), que varios mensajes de alta prioridad se intercepten entre sí, o que se apliquen condiciones de carrera en la sincronización de desencadenantes. Para mensajes dentro de la aplicación en Canvas, consulta [Mensajes dentro de la aplicación en Canvas](#canvas-in-app-messages). Para definiciones completas de métricas, consulta [Informes de mensajes dentro de la aplicación](https://www.braze.com/docs/es/es/user_guide/channels/in_app_messages/reporting) y las [preguntas frecuentes sobre mensajes dentro de la aplicación](https://www.braze.com/docs/es/es/user_guide/channels/in_app_messages/faq).
- **Impresiones menores que antes:** Revisa los registros de cambios del Segment y la Campaign. Confirma que no reutilizaste el mismo evento desencadenante en una Campaign de mayor prioridad.

Si usas un delegado o un controlador personalizado para mostrar mensajes dentro de la aplicación manualmente, debes registrar las impresiones y los clics tú mismo. Consulta la pestaña de tu SDK en [Solución de problemas de visualización específica por plataforma](#platform-specific-display-troubleshooting) para detalles de Swift y Android, o [Registrar datos de mensajes dentro de la aplicación](https://www.braze.com/docs/es/es/developer_guide/in_app_messages/logging_message_data) para Web.
## Solución de problemas de visualización específica por plataforma {#platform-specific-display-troubleshooting}
Si aparecen filas **Trigger In-App Message** en los registros de eventos de usuario pero nada se muestra en el dispositivo, selecciona la pestaña de tu SDK para comprobaciones de visualización (delegados, límites de velocidad, orientación y controladores personalizados).
### Troubleshooting display {#troubleshooting-in-app-message-display}
If your app is requesting and receiving in-app messages but they aren't showing, device-side logic may be preventing display:
1. Is the trigger event firing as expected? To test, configure the message to trigger on a different action (such as session start) and verify whether it displays.
3. Failed image downloads prevent in-app messages with images from displaying. Check device logs for download failures. Try removing the image temporarily to see if the message displays.
### Troubleshooting display {#troubleshooting-in-app-message-display}
If your app is requesting and receiving in-app messages but they aren't showing, device-side logic may be preventing display:
1. Is the trigger event firing as expected? To test, configure the message to trigger on a different action (such as session start) and verify whether it displays.
3. Failed image downloads prevent in-app messages with images from displaying. Check device logs for download failures. Try removing the image temporarily to see if the message displays.
### Troubleshooting display {#troubleshooting-in-app-message-display}
If your app is requesting and receiving in-app messages but they aren't showing, device-side logic may be preventing display:
1. Is the trigger event firing as expected? To test, configure the message to trigger on a different action (such as session start) and verify whether it displays.
3. Failed image downloads prevent in-app messages with images from displaying. Check device logs for download failures. Try removing the image temporarily to see if the message displays.
### Troubleshooting asset loading (`NSURLError` code `-1008`) {#asset-loading}
When integrating Braze alongside third-party network logging libraries, developers can commonly run into an `NSURLError` with the domain code `-1008`. This error indicates that assets like images and fonts could not be retrieved or failed to cache. To work around such cases, you must register Braze CDN URLs to the list of domains that should be ignored by these libraries.
#### Domains
The full list of CDN domains is as follows:
* `"appboy-images.com"`
* `"braze-images.com"`
* `"cdn.braze.eu"`
* `"cdn.braze.com"`
#### Examples
The following libraries are known to conflict with Braze asset caching, along with example code to work around the issue. If your project uses a library that causes an unavailable resource error and is not listed here, consult the documentation of that library for similar usage APIs.
##### Netfox
```swift
NFX.sharedInstance().ignoreURLs(["https://cdn.braze.com"])
```
```objc
[NFX.sharedInstance ignoreURLs:@[@"https://cdn.braze.com"]];
```
##### NetGuard
```swift
NetGuard.blackListHosts.append(contentsOf: ["cdn.braze.com"])
```
```objc
NSMutableArray *blackListHosts = [NetGuard.blackListHosts mutableCopy];
[blackListHosts addObject:@"cdn.braze.com"];
NetGuard.blackListHosts = blackListHosts;
```
##### XNLogger
```swift
let brazeAssetsHostFilter = XNHostFilter(host: "https://cdn.braze.com")
XNLogger.shared.addFilters([brazeAssetsHostFilter])
```
```objc
XNHostFilter *brazeAssetsHostFilter = [[XNHostFilter alloc] initWithHost: @"https://cdn.braze.com"];
[XNLogger.shared addFilters:@[brazeAssetsHostFilter]];
```
# Notificaciones push para el SDK de Braze
Source: /docs/es/developer_guide/push_notifications/index.md
# Notificaciones push {#push-notifications}
> Las [notificaciones push](https://www.braze.com/docs/es/es/user_guide/channels/push) te permiten enviar notificaciones desde tu aplicación cuando se producen eventos importantes. Puedes enviar una notificación push cuando tengas nuevos mensajes instantáneos que entregar, alertas de noticias de última hora que enviar o el último episodio del programa de TV favorito de tu usuario listo para que lo descargue para verlo sin conexión. También son más eficientes que la obtención en segundo plano, ya que la aplicación solo se inicia cuando es necesario.
**Note:**
Si **Redirect to web URL** con **Open web URL inside app** no está seleccionado, pero el enlace aún se abre dentro de la aplicación, es posible que la aplicación esté gestionando la URL (por ejemplo, con enlaces universales en iOS o App Links en Android). Para abrir el enlace en el navegador, confirma que tu aplicación delega la URL al navegador del sistema cuando el usuario toca la notificación, o ajusta la gestión de URL de tu aplicación para que la acción de clic coincida con la configuración del dashboard de Braze. Consulta la documentación push de tu plataforma para saber cómo se configuran las acciones de clic y la gestión de URL.
**Note:**
This guide uses code samples from the Braze Web SDK 4.0.0+. To upgrade to the latest Web SDK version, see [SDK Upgrade Guide](https://github.com/braze-inc/braze-web-sdk/blob/master/UPGRADE_GUIDE.md).
## Prerequisites
Before you can use this feature, you'll need to [integrate the Web Braze SDK](https://www.braze.com/docs/es/es/developer_guide/sdk_integration/?sdktab=web).
## Push protocols
Web push notifications are implemented using the [W3C push standard](http://www.w3.org/TR/push-api/), which most major browsers support. For more information on specific push protocol standards and browser support, you can review resources from [Apple](https://developer.apple.com/notifications/safari-push-notifications/) [Mozilla](https://developer.mozilla.org/en-us/docs/web/api/push_api#browser_compatibility) and [Microsoft](https://developer.microsoft.com/en-us/microsoft-edge/status/pushapi/).
## Setting up push notifications
### Step 1: Configure your service worker
In your project's `service-worker.js` file, add the following snippet and set the [`manageServiceWorkerExternally`](https://js.appboycdn.com/web-sdk/latest/doc/modules/braze.html#initialize) initialization option to `true` when initializing the Web SDK.
**Important:**
Your web server must return a `Content-Type: application/javascript` when serving your service worker file. Additionally, if your service worker file is not `service-worker.js` named, you'll need to use the `serviceWorkerLocation` [initialization option](https://js.appboycdn.com/web-sdk/latest/doc/modules/braze.html#initializationoptions).
### Step 2: Register the browser
To immediately request push permissions from a user so their browser can receive push notifications, call `braze.requestPushPermission()`. To test if push is supported in their browser first, call `braze.isPushSupported()`.
You can also [send a soft push prompt](https://www.braze.com/docs/es/es/developer_guide/push_notifications/soft_push_prompts/?sdktab=web) to the user before requesting push permission to show your own push-related UI.
**Important:**
On macOS, both **Google Chrome** and **Google Chrome Helper (Alerts)** must be enabled by the end-user in **System Settings > Notifications** before push notifications can be displayed—even if permissions are granted.
### Step 3: Disable `skipWaiting` (optional)
The Braze service worker file will automatically call `skipWaiting` upon install. If you'd like to disable this functionality, add the following code to your service worker file, after importing Braze:
## Unsubscribing a user
To unsubscribe a user, call `braze.unregisterPush()`.
**Important:**
Recent versions of Safari and Firefox require that you call this method from a short-lived event handler (such as from a button-click handler or soft push prompt). This is consistent with [Chrome's user experience best practices](https://docs.google.com/document/d/1WNPIS_2F0eyDm5SS2E6LZ_75tk6XtBSnR1xNjWJ_DPE) for push registration.
## Alternate domains
To integrate web push, your domain must be [secure](https://w3c.github.io/webappsec-secure-contexts/), which generally means `https`, `localhost`, and other exceptions as defined in the [W3C push standard](https://www.w3.org/TR/service-workers/#security-considerations). You'll also need to be able to register a Service Worker at the root of your domain, or at least be able to control the HTTP headers for that file. This article covers how to integrate Braze Web Push on an alternate domain.
### Use cases
If you can't meet all of the criteria outlined in the [W3C push standard](https://www.w3.org/TR/service-workers/#security-considerations), you can use this method to add a push prompt dialog to your website instead. This can be helpful if you want to let your users opt-in from an `http` website or a browser extension popup that's preventing your push prompt from displaying.
### Considerations
Keep in mind, like many workarounds on the web, browsers continually evolve, and this method may not be viable in the future. Before continuing, ensure that:
- You own a separate secure domain (`https://`) and permissions to register a Service Worker on that domain.
- Users are logged in to your website which ensures push tokens are match to the correct profile.
**Important:**
You cannot use this method to implement push notifications for Shopify. Shopify will automatically remove the headers need to deliver push this way.
### Setting up an alternate push domain
To make the following example clear, we'll use use `http://insecure.com` and `https://secure.com` as our two domains with the goal of getting visitors to register for push on `http://insecure.com`. This example could also be applied to a `chrome-extension://` scheme for a browser extension's popup page.
#### Step 1: Initiate prompting flow
On `insecure.com`, open a new window to your secure domain using a URL parameter to pass the currently logged-in user's Braze external ID.
**http://insecure.com**
```html
```
#### Step 2: Register for push
At this point, `secure.com` will open a popup window in which you can initialize the Braze Web SDK for the same user ID and request the user's permission for Web push.
**https://secure.com/push-registration.html**
#### Step 3: Communicate between domains (optional)
Now that users can opt-in from this workflow originating on `insecure.com`, you may want to modify your site based on if the user is already opted-in or not. There's no point in asking the user to register for push if they already are.
You can use iFrames and the [`postMessage`](https://developer.mozilla.org/en-US/docs/Web/API/Window/postMessage) API to communicate between your two domains.
**insecure.com**
On our `insecure.com` domain, we will ask the secure domain (where push is _actually_ registered) for information on the current user's push registration:
```html
```
**secure.com/push-status.html**
## Frequently Asked Questions (FAQ)
### Service workers
#### What if I can't register a service worker in the root directory?
By default, a service worker can only be used within the same directory it is registered in. For example, if your service worker file exists in `/assets/service-worker.js`, it would only be possible to register it within `example.com/assets/*` or a subdirectory of the `assets` folder, but not on your homepage (`example.com/`). For this reason, it is recommended to host and register the service worker in the root directory (such as `https://example.com/service-worker.js`).
If you cannot register a service worker in your root domain, an alternative approach is to use the [`Service-Worker-Allowed`](https://w3c.github.io/ServiceWorker/#service-worker-script-response) HTTP header when serving your service worker file. By configuring your server to return `Service-Worker-Allowed: /` in the response for the service worker, this will instruct the browser to broaden the scope and allow it to be used from within a different directory.
#### Can I create a service worker using a Tag Manager?
No, service workers must be hosted on your website's server and can't be loaded via Tag Manager.
### Site security
#### Is HTTPS required?
Yes. Web standards require that the domain requesting push notification permission be secure.
#### When is a site considered "secure"?
A site is considered secure if it matches one of the following secure-origin patterns. Braze Web push notifications are built on this open standard, so man-in-the-middle attacks are prevented.
- `(https, , *)`
- `(wss, *, *)`
- `(, localhost, )`
- `(, .localhost, *)`
- `(, 127/8, )`
- `(, ::1/128, *)`
- `(file, *, —)`
- `(chrome-extension, *, —)`
#### What if a secure site is not available?
While industry best practice is to make your whole site secure, customers who cannot secure their site domain can work around the requirement by using a secure modal. Read more in our guide to using [Alternate push domain](https://www.braze.com/docs/es/es/developer_guide/platform_integration_guides/web/push_notifications/alternate_push_domain) or view a [working demo](http://appboyj.com/modal-test.html).
## Prerequisites
Before you can use this feature, you'll need to [integrate the Android Braze SDK](https://www.braze.com/docs/es/es/developer_guide/sdk_integration/?sdktab=android).
## Built-in features
The following features are built into the Braze Android SDK. To use any other push notification features, you will need to [set up push notifications](#android_setting-up-push-notifications) for your app.
|Feature|Description|
|-------|-----------|
|Push Stories|Android Push Stories are built into the Braze Android SDK by default. To learn more, see [Push Stories](https://www.braze.com/docs/es/es/user_guide/message_building_by_channel/push/advanced_push_options/push_stories/).|
|Push Primers|Push primer campaigns encourage your users to enable push notifications on their device for your app. This can be done without SDK customization using our [no code push primer](https://www.braze.com/docs/es/es/user_guide/message_building_by_channel/push/best_practices/push_primer_messages/).|
{: .reset-td-br-1 .reset-td-br-2 aria-label="Built-in features" }
## About the push notification lifecycle {#push-notification-lifecycle}
The following flowchart shows how Braze handles the push notification lifecycle, such as permission prompts, token generation, and message delivery.
```mermaid
---
config:
theme: neutral
---
flowchart TD
%% Permission flow
subgraph Permission[Push Permissions]
B{Android version of the device?}
B -->|Android 13+| C["requestPushPermissionPrompt() called"]
B -->|Android 12 and earlier| D[No permissions required]
%% Connect Android 12 path to Braze state
D --> H3[Braze: user subscription state]
H3 --> J3[Defaults to 'subscribed' when user profile created]
C --> E{Did the user grant push permission?}
E -->|Yes| F[POST_NOTIFICATIONS permission granted]
E -->|No| G[POST_NOTIFICATIONS permission denied]
%% Braze subscription state updates
F --> H1[Braze: user subscription state]
G --> H2[Braze: user subscription state]
H1 --> I1{Automatically opt in after permission granted?}
I1 -->|true| J1[Set to 'opted-in']
I1 -->|false| J2[Remains 'subscribed']
H2 --> K1[Remains 'subscribed' or 'unsubscribed']
%% Subscription state legend
subgraph BrazeStates[Braze subscription states]
L1['Subscribed' - default state when user profile created]
L2['Opted-in' - user explicitly wants push notifications]
L3['Unsubscribed' - user explicitly opted out of push]
end
%% Note about user-level states
note1[Note: These states are user-level and apply across all devices for the user]
%% Connect states to legend
J1 -.-> L2
J2 -.-> L1
J3 -.-> L1
K1 -.-> L3
note1 -.-> BrazeStates
end
%% Styling
classDef permissionClass fill:#e3f2fd,stroke:#1565c0,stroke-width:2px
classDef tokenClass fill:#e8f5e9,stroke:#2e7d32,stroke-width:2px
classDef sdkClass fill:#fff3e0,stroke:#e65100,stroke-width:2px
classDef configClass fill:#f3e5f5,stroke:#7b1fa2,stroke-width:2px
classDef displayClass fill:#ffebee,stroke:#c62828,stroke-width:2px
classDef deliveryClass fill:#fce4ec,stroke:#c2185b,stroke-width:2px
classDef brazeClass fill:#e8f5e9,stroke:#2e7d32,stroke-width:3px
class A,B,C,E,F,G permissionClass
class H,I tokenClass
class J,K sdkClass
class N,O,P configClass
class R,S,S1,T,U,V displayClass
class W,X,X1,X2,Y,Z deliveryClass
class H1,H2,H3,I1,J1,J2,J3,K1,L1,L2,L3,note1 brazeClass
```
```mermaid
---
config:
theme: neutral
---
flowchart TD
%% Token generation flow
subgraph Token[Token Generation]
H["Braze SDK initialized"] --> Q{Is FCM auto-registration enabled?}
Q -->|Yes| L{Is required configuration present?}
Q -->|No| M[No FCM token generated]
L -->|Yes| I[Generate FCM token]
L -->|No| M
I --> K[Register token with Braze]
%% Configuration requirements
subgraph Config[Required configuration]
N['google-services.json' file is present]
O['com.google.firebase:firebase-messaging' in gradle]
P['com.google.gms.google-services' plugin in gradle]
end
%% Connect config to check
N -.-> L
O -.-> L
P -.-> L
end
%% Styling
classDef permissionClass fill:#e3f2fd,stroke:#1565c0,stroke-width:2px
classDef tokenClass fill:#e8f5e9,stroke:#2e7d32,stroke-width:2px
classDef sdkClass fill:#fff3e0,stroke:#e65100,stroke-width:2px
classDef configClass fill:#f3e5f5,stroke:#7b1fa2,stroke-width:2px
classDef displayClass fill:#ffebee,stroke:#c62828,stroke-width:2px
classDef deliveryClass fill:#fce4ec,stroke:#c2185b,stroke-width:2px
classDef brazeClass fill:#e8f5e9,stroke:#2e7d32,stroke-width:3px
class A,B,C,E,F,G permissionClass
class H,I tokenClass
class J,K sdkClass
class N,O,P configClass
class R,S,S1,T,U,V displayClass
class W,X,X1,X2,Y,Z deliveryClass
class H1,H2,H3,I1,J1,J2,J3,K1,L1,L2,L3,note1 brazeClass
```
```mermaid
---
config:
theme: neutral
fontSize: 10
---
flowchart TD
subgraph Display[Push Display]
%% Push delivery flow
W[Push sent to FCM servers] --> X{Did FCM receive push?}
X -->|App is terminated| Y[FCM cannot deliver push to the app]
X -->|Delivery conditions met| X1[App receives push from FCM]
X1 --> X2[Braze SDK receives push]
X2 --> R[Push type?]
%% Push Display Flow
R -->|Standard push| S{Is push permission required?}
R -->|Silent push| T[Braze SDK processes silent push]
S -->|Yes| S1{Did the user grant push permission?}
S -->|No| V[Notification is shown to the user]
S1 -->|Yes| V
S1 -->|No| U[Notification is not shown to the user]
end
%% Styling
classDef permissionClass fill:#e3f2fd,stroke:#1565c0,stroke-width:2px
classDef tokenClass fill:#e8f5e9,stroke:#2e7d32,stroke-width:2px
classDef sdkClass fill:#fff3e0,stroke:#e65100,stroke-width:2px
classDef configClass fill:#f3e5f5,stroke:#7b1fa2,stroke-width:2px
classDef displayClass fill:#ffebee,stroke:#c62828,stroke-width:2px
classDef deliveryClass fill:#fce4ec,stroke:#c2185b,stroke-width:2px
classDef brazeClass fill:#e8f5e9,stroke:#2e7d32,stroke-width:3px
class A,B,C,E,F,G permissionClass
class H,I tokenClass
class J,K sdkClass
class N,O,P configClass
class R,S,S1,T,U,V displayClass
class W,X,X1,X2,Y,Z deliveryClass
class H1,H2,H3,I1,J1,J2,J3,K1,L1,L2,L3,note1 brazeClass
```
## Setting up push notifications
**Tip:**
To check out a sample app using FCM with the Braze Android SDK, see [Braze: Firebase Push Sample App](https://github.com/braze-inc/braze-android-sdk/tree/master/samples/firebase-push).
### Rate limits
Firebase Cloud Messaging (FCM) API has a default rate limit of 600,000 requests per minute. If you reach this limit, Braze will automatically try again in a few minutes. To request an increase, contact [Firebase Support](https://firebase.google.com/support).
### Step 1: Add Firebase to your project
First, add Firebase to your Android project. For step-by-step instructions, see Google's [Firebase setup guide](https://firebase.google.com/docs/android/setup).
### Step 2: Add Cloud Messaging to your dependencies
Next, add the Cloud Messaging library to your project dependencies. In your Android project, open `build.gradle`, then add the following line to your `dependencies` block.
```gradle
implementation "google.firebase:firebase-messaging:+"
```
Your dependencies should look similar to the following:
```gradle
dependencies {
implementation project(':android-sdk-ui')
implementation "com.google.firebase:firebase-messaging:+"
}
```
### Step 3: Enable the Firebase Cloud Messaging API
In Google Cloud, select the project your Android app is using, then enable the [Firebase Cloud Messaging API](https://console.cloud.google.com/apis/library/fcm.googleapis.com).
{: style="max-width:80%;"}
### Step 4: Create a service account {#service-account}
Next, create a new service account, so Braze can make authorized API calls when registering FCM tokens. In Google Cloud, go to **Service Accounts**, then choose your project. On the **Service Accounts** page, select **Create Service Account**.

Enter a service account name, ID, and description, then select **Create and continue**.
In the **Role** field, find and select **Firebase Cloud Messaging API Admin** from the list of roles. For more restrictive access, create a [custom role](https://cloud.google.com/iam/docs/creating-custom-roles) with the `cloudmessaging.messages.create` permission, then choose it from the list instead. When you're finished, select **Done**.
**Warning:**
Be sure to select **Firebase Cloud Messaging _API_ Admin**, not **Firebase Cloud Messaging Admin**.

### Step 5: Generate JSON credentials {#json}
Next, generate JSON credentials for your FCM service account. On Google Cloud IAM & Admin, go to **Service Accounts**, then choose your project. Locate the FCM service account [you created earlier](#android_service-account), then select **Actions** > **Manage Keys**.

Select **Add Key** > **Create new key**.

Choose **JSON**, then select **Create**. If you created your service account using a different Google Cloud project ID than your FCM project ID, you'll need to manually update the value assigned to the `project_id` in your JSON file.
Be sure to remember where you downloaded the key—you'll need it in the next step.
{: style="max-width:65%;"}
**Warning:**
Private keys could pose a security risk if compromised. Store your JSON credentials in a secure location for now—you'll delete your key after you upload it to Braze.
### Step 6: Upload your JSON credentials to Braze
Next, upload your JSON credentials to your Braze dashboard. In Braze, select **Settings** > **App Settings**.

Under your Android app's **Push Notification Settings**, choose **Firebase**, then select **Upload JSON File** and upload the credentials [you generated earlier](#android_json). When you're finished, select **Save**.

**Warning:**
Private keys could pose a security risk if compromised. Now that your key is uploaded to Braze, delete the file [you generated previously](#android_json).
### Step 7: Set up automatic token registration
When one of your users opt-in for push notifications, your app needs to generate an FCM token on their device before you can send them push notifications. With the Braze SDK, you can enable automatic FCM token registration for each user's device in your project's Braze configuration files.
First, go to Firebase Console, open your project, then select **Settings** > **Project settings**.

Select **Cloud Messaging**, then under **Firebase Cloud Messaging API (V1)**, copy the number in the **Sender ID** field.

Next, open your Android Studio project and use your Firebase Sender ID to enable automatic FCM token registration within your `braze.xml` or `BrazeConfig`.
To configure automatic FCM token registration, add the following lines to your `braze.xml` file:
```xml
trueFIREBASE_SENDER_ID
```
Replace `FIREBASE_SENDER_ID` with the value you copied from your Firebase project settings. Your `braze.xml` should look similar to the following:
```xml
12345ABC-6789-DEFG-0123-HIJK456789LMtrue603679405392
```
To configure automatic FCM token registration, add the following lines to your `BrazeConfig`:
```java
.setIsFirebaseCloudMessagingRegistrationEnabled(true)
.setFirebaseCloudMessagingSenderIdKey("FIREBASE_SENDER_ID")
```
```kotlin
.setIsFirebaseCloudMessagingRegistrationEnabled(true)
.setFirebaseCloudMessagingSenderIdKey("FIREBASE_SENDER_ID")
```
Replace `FIREBASE_SENDER_ID` with the value you copied from your Firebase project settings. Your `BrazeConfig` should look similar to the following:
```java
BrazeConfig brazeConfig = new BrazeConfig.Builder()
.setApiKey("12345ABC-6789-DEFG-0123-HIJK456789LM")
.setCustomEndpoint("sdk.iad-01.braze.com")
.setSessionTimeout(60)
.setHandlePushDeepLinksAutomatically(true)
.setGreatNetworkDataFlushInterval(10)
.setIsFirebaseCloudMessagingRegistrationEnabled(true)
.setFirebaseCloudMessagingSenderIdKey("603679405392")
.build();
Braze.configure(this, brazeConfig);
```
```kotlin
val brazeConfig = BrazeConfig.Builder()
.setApiKey("12345ABC-6789-DEFG-0123-HIJK456789LM")
.setCustomEndpoint("sdk.iad-01.braze.com")
.setSessionTimeout(60)
.setHandlePushDeepLinksAutomatically(true)
.setGreatNetworkDataFlushInterval(10)
.setIsFirebaseCloudMessagingRegistrationEnabled(true)
.setFirebaseCloudMessagingSenderIdKey("603679405392")
.build()
Braze.configure(this, brazeConfig)
```
**Tip:**
If you'd like to manually register FCM tokens instead, set the [`registeredPushToken`](https://braze-inc.github.io/braze-android-sdk/kdoc/braze-android-sdk/com.braze/-i-braze/registered-push-token.html) property on the Braze instance inside your app's [`onCreate()`](https://developer.android.com/reference/android/app/Application.html#onCreate()) method.
```kotlin
// Kotlin
Braze.getInstance(context).registeredPushToken = "FCM_TOKEN"
```
```java
// Java
Braze.getInstance(context).setRegisteredPushToken("FCM_TOKEN");
```
### Step 8: Remove automatic requests in your application class
To prevent Braze from triggering unnecessary network requests every time you send silent push notifications, remove any automatic network requests configured in your `Application` class's `onCreate()` method. For more information see, [Android Developer Reference: Application](https://developer.android.com/reference/android/app/Application).
## Displaying notifications
### Step 1: Register Braze Firebase Messaging Service
You can either create a new, existing, or non-Braze Firebase Messaging Service. Choose whichever best meets your specific needs.
Braze includes a service to handle push receipt and open intents. Our `BrazeFirebaseMessagingService` class will need to be registered in your `AndroidManifest.xml`:
```xml
```
Our notification code also uses `BrazeFirebaseMessagingService` to handle open and click action tracking. This service must be registered in the `AndroidManifest.xml` to function correctly. Also, remember that Braze prefixes notifications from our system with a unique key so that we only render notifications sent from our systems. You may register additional services separately to render notifications sent from other FCM services. See [`AndroidManifest.xml`](https://github.com/braze-inc/braze-android-sdk/blob/master/samples/firebase-push/src/main/AndroidManifest.xml) in the Firebase push sample app.
**Important:**
Before Braze SDK 3.1.1, `AppboyFcmReceiver` was used to handle FCM push. The `AppboyFcmReceiver` class should be removed from your manifest and replaced with the preceding integration.
If you already have a Firebase Messaging Service registered, you can pass [`RemoteMessage`](https://firebase.google.com/docs/reference/android/com/google/firebase/messaging/RemoteMessage) objects to Braze via [`BrazeFirebaseMessagingService.handleBrazeRemoteMessage()`](https://braze-inc.github.io/braze-android-sdk/kdoc/braze-android-sdk/com.braze.push/-braze-firebase-messaging-service/-companion/handle-braze-remote-message.html). This method will only display a notification if the [`RemoteMessage`](https://firebase.google.com/docs/reference/android/com/google/firebase/messaging/RemoteMessage) object originated from Braze and will safely ignore if not.
```java
public class MyFirebaseMessagingService extends FirebaseMessagingService {
@Override
public void onMessageReceived(RemoteMessage remoteMessage) {
super.onMessageReceived(remoteMessage);
if (BrazeFirebaseMessagingService.handleBrazeRemoteMessage(this, remoteMessage)) {
// This Remote Message originated from Braze and a push notification was displayed.
// No further action is needed.
} else {
// This Remote Message did not originate from Braze.
// No action was taken and you can safely pass this Remote Message to other handlers.
}
}
}
```
```kotlin
class MyFirebaseMessagingService : FirebaseMessagingService() {
override fun onMessageReceived(remoteMessage: RemoteMessage?) {
super.onMessageReceived(remoteMessage)
if (BrazeFirebaseMessagingService.handleBrazeRemoteMessage(this, remoteMessage)) {
// This Remote Message originated from Braze and a push notification was displayed.
// No further action is needed.
} else {
// This Remote Message did not originate from Braze.
// No action was taken and you can safely pass this Remote Message to other handlers.
}
}
}
```
If you have another Firebase Messaging Service you would also like to use, you can also specify a fallback Firebase Messaging Service to call if your application receives a push that isn't from Braze.
In your `braze.xml`, specify:
```xml
truecom.company.OurFirebaseMessagingService
```
or set via [runtime configuration:](https://www.braze.com/docs/es/es/developer_guide/sdk_initalization/?sdktab=android)
```java
BrazeConfig brazeConfig = new BrazeConfig.Builder()
.setFallbackFirebaseMessagingServiceEnabled(true)
.setFallbackFirebaseMessagingServiceClasspath("com.company.OurFirebaseMessagingService")
.build();
Braze.configure(this, brazeConfig);
```
```kotlin
val brazeConfig = BrazeConfig.Builder()
.setFallbackFirebaseMessagingServiceEnabled(true)
.setFallbackFirebaseMessagingServiceClasspath("com.company.OurFirebaseMessagingService")
.build()
Braze.configure(this, brazeConfig)
```
### Step 2: Conform small icons to design guidelines
For general information about Android notification icons, visit the [Notifications overview](https://developer.android.com/guide/topics/ui/notifiers/notifications).
Starting in Android N, you should update or remove small notification icon assets that involve color. The Android system (not the Braze SDK) ignores all non-alpha and transparency channels in action icons and the notification small icon. In other words, Android will convert all parts of your notification small icon to monochrome except for transparent regions.
To create a notification small icon asset that displays properly:
- Remove all colors from the image except for white.
- All other non-white regions of the asset should be transparent.
**Note:**
A common symptom of an improper asset is the small notification icon rendering as a solid monochrome square. This is due to the Android system not being able to find any transparent regions in the notification small icon asset.
The following large and small icons pictured are examples of properly designed icons:

### Step 3: Configure notification icons {#configure-icons}
#### Specifying icons in braze.xml
Braze allows you to configure your notification icons by specifying drawable resources in your `braze.xml`:
```xml
REPLACE_WITH_YOUR_ICONREPLACE_WITH_YOUR_ICON
```
Setting a small notification icon is required. **If you do not set one, Braze will default to using the application icon as the small notification icon, which may look suboptimal.**
Setting a large notification icon is optional but recommended.
#### Specifying icon accent color
The notification icon accent color can be overridden in your `braze.xml`. If the color is not specified, the default color is the same gray Lollipop uses for system notifications.
```xml
0xFFf33e3e
```
You may also optionally use a color reference:
```xml
@color/my_color_here
```
### Step 4: Add deep links
#### Enabling automatic deep link opening
To enable Braze to automatically open your app and any deep links when a push notification is clicked, set `com_braze_handle_push_deep_links_automatically` to `true`, in your `braze.xml`:
```xml
true
```
This flag can also be set via [runtime configuration](https://www.braze.com/docs/es/es/developer_guide/sdk_initalization/?sdktab=android):
```java
BrazeConfig brazeConfig = new BrazeConfig.Builder()
.setHandlePushDeepLinksAutomatically(true)
.build();
Braze.configure(this, brazeConfig);
```
```kotlin
val brazeConfig = BrazeConfig.Builder()
.setHandlePushDeepLinksAutomatically(true)
.build()
Braze.configure(this, brazeConfig)
```
If you want to custom handle deep links, you will need to create a push callback that listens for push received and opened intents from Braze. For more information, see [Using a callback for push events](https://www.braze.com/docs/es/es/developer_guide/push_notifications/customization#android_using-a-callback-for-push-events).
## Handling foreground notifications
By default, when a push notification arrives while your app is in the foreground on Android, the system displays it automatically. To have Braze process the push notification payload (for analytics tracking, deep link handling, and custom processing), route the incoming push data to Braze inside your `FirebaseMessagingService.onMessageReceived` method.
### How it works
When you call `BrazeFirebaseMessagingService.handleBrazeRemoteMessage`, Braze determines if the payload is a Braze push notification and, if so, creates and displays the notification with the `NotificationManagerCompat` method. Unlike iOS, Android displays notifications regardless of whether the app is in the foreground or background.
```java
package com.example.push;
import com.braze.push.BrazeFirebaseMessagingService;
import com.google.firebase.messaging.FirebaseMessagingService;
import com.google.firebase.messaging.RemoteMessage;
public class MyFirebaseMessagingService extends FirebaseMessagingService {
@Override
public void onMessageReceived(RemoteMessage remoteMessage) {
super.onMessageReceived(remoteMessage);
// Let Braze process the payload and display the notification
if (BrazeFirebaseMessagingService.handleBrazeRemoteMessage(this, remoteMessage)) {
// Braze successfully handled the push notification
} else {
// Handle non-Braze messages
}
}
}
```
```kotlin
package com.example.push
import com.braze.push.BrazeFirebaseMessagingService
import com.google.firebase.messaging.FirebaseMessagingService
import com.google.firebase.messaging.RemoteMessage
class MyFirebaseMessagingService : FirebaseMessagingService() {
override fun onMessageReceived(remoteMessage: RemoteMessage) {
super.onMessageReceived(remoteMessage)
// Let Braze process the payload and display the notification
if (BrazeFirebaseMessagingService.handleBrazeRemoteMessage(this, remoteMessage)) {
// Braze successfully handled the push notification
} else {
// Handle non-Braze messages
}
}
}
```
For more information, see the [Firebase integration sample](https://github.com/braze-inc/braze-android-sdk/blob/master/samples/firebase-push/src/main/java/com/braze/firebasepush/FirebaseMessagingService.kt) in the Braze Android SDK repository.
### Customizing foreground behavior
If you want custom foreground behavior, such as suppressing the system notification or showing an in-app UI instead, you can:
- Use `subscribeToPushNotificationEvents` to react to push events and handle deep links with the `BrazeNotificationUtils.routeUserWithNotificationOpenedIntent` method. For more information, see the [Firebase push sample](https://github.com/braze-inc/braze-android-sdk/blob/master/samples/firebase-push/src/main/java/com/braze/firebasepush/FirebaseApplication.kt).
- Build and post your own notification using a custom `IBrazeNotificationFactory`, or suppress the notification by not calling `notificationManager.notify` in your handling path.
For more information on customizing notifications, see [Custom notification factory](https://www.braze.com/docs/es/es/developer_guide/push_notifications/customization/?sdktab=android#custom-notification-factory).
#### Creating custom deep links
Follow the instructions found within the [Android developer documentation](http://developer.android.com/training/app-indexing/deep-linking.html) on deep linking if you have not already added deep links to your app. To learn more about what deep links are, see our [FAQ article](https://www.braze.com/docs/es/es/user_guide/messaging/design_and_edit/personalize/actions_and_media_urls/#what-is-deep-linking).
#### Adding deep links
The Braze dashboard supports setting deep links or web URLs in push notifications campaigns and Canvases that will be opened when the notification is clicked.

#### Customizing back stack behavior
The Android SDK, by default, will place your host app's main launcher activity in the back stack when following push deep links. Braze allows you to set a custom activity to open in the back stack in place of your main launcher activity or to disable the back stack altogether.
For example, to set an activity called `YourMainActivity` as the back stack activity using [runtime configuration](https://www.braze.com/docs/es/es/developer_guide/sdk_initalization/?sdktab=android):
```java
BrazeConfig brazeConfig = new BrazeConfig.Builder()
.setPushDeepLinkBackStackActivityEnabled(true)
.setPushDeepLinkBackStackActivityClass(YourMainActivity.class)
.build();
Braze.configure(this, brazeConfig);
```
```kotlin
val brazeConfig = BrazeConfig.Builder()
.setPushDeepLinkBackStackActivityEnabled(true)
.setPushDeepLinkBackStackActivityClass(YourMainActivity.class)
.build()
Braze.configure(this, brazeConfig)
```
See the equivalent configuration for your `braze.xml`. Note that the class name must be the same as returned by `Class.forName()`.
```xml
trueyour.package.name.YourMainActivity
```
### Step 5: Define notification channels
The Braze Android SDK supports [Android notification channels](https://developer.android.com/preview/features/notification-channels.html). If a Braze notification does not contain the ID for a notification channel or that a Braze notification contains an invalid channel ID, Braze will display the notification with the default notification channel defined in the SDK. Company users use [Android Notification Channels](https://www.braze.com/docs/es/es/user_guide/message_building_by_channel/push/android/notification_channels/) within the platform to group notifications.
To set the user facing name of the default Braze notification channel, use [`BrazeConfig.setDefaultNotificationChannelName()`](https://braze-inc.github.io/braze-android-sdk/kdoc/braze-android-sdk/com.braze.configuration/-braze-config/-builder/set-default-notification-channel-name.html).
To set the user facing description of the default Braze notification channel, use [`BrazeConfig.setDefaultNotificationChannelDescription()`](https://braze-inc.github.io/braze-android-sdk/kdoc/braze-android-sdk/com.braze.configuration/-braze-config/-builder/set-default-notification-channel-description.html).
Update any API campaigns with the [Android push object](https://www.braze.com/docs/es/es/api/objects_filters/messaging/android_object/) parameter to include the `notification_channel` field. If this field is not specified, Braze will send the notification payload with the [dashboard fallback](https://www.braze.com/docs/es/es/user_guide/message_building_by_channel/push/android/notification_channels/#dashboard-fallback-channel) channel ID.
Other than the default notification channel, Braze will not create any channels. All other channels must be programmatically defined by the host app and then entered into the Braze dashboard.
The default channel name and description can also be configured in `braze.xml`.
```xml
Your channel nameYour channel description
```
### Step 6: Test notification display and analytics
#### Testing display
At this point, you should be able to see notifications sent from Braze. To test this, go to the **Campaigns** page on your Braze dashboard and create a **Push Notification** campaign. Choose **Android Push** and design your message. Then click the eye icon in the composer to get the test sender. Enter the user ID or email address of your current user and click **Send Test**. You should see the push show up on your device.

For issues related to push display, see our [troubleshooting guide](https://www.braze.com/docs/es/es/developer_guide/push_notifications/troubleshooting/?sdktab=android).
#### Testing analytics
At this point, you should also have analytics logging for push notification opens. Clicking on the notification when it arrives should result in the **Direct Opens** on your campaign results page to increase by 1. Check out our [push reporting](https://www.braze.com/docs/es/es/user_guide/message_building_by_channel/push/push_reporting/) article for a break down on push analytics.
For issues related to push analytics, see our [troubleshooting guide](https://www.braze.com/docs/es/es/developer_guide/push_notifications/troubleshooting/?sdktab=android).
#### Testing from command line
If you'd like to test in-app and push notifications via the command-line interface, you can send a single notification through the terminal via cURL and the [messaging API](https://www.braze.com/docs/es/es/api/endpoints/messaging/). You will need to replace the following fields with the correct values for your test case:
- `YOUR_API_KEY` (Go to **Settings** > **API Keys**.)
- `YOUR_EXTERNAL_USER_ID` (Search for a profile on the **Search Users** page.)
- `YOUR_KEY1` (optional)
- `YOUR_VALUE1` (optional)
```bash
curl -X POST -H "Content-Type: application/json" -H "Authorization: Bearer {YOUR_API_KEY}" -d '{
"external_user_ids":["YOUR_EXTERNAL_USER_ID"],
"messages": {
"android_push": {
"title":"Test push title",
"alert":"Test push",
"extra": {
"YOUR_KEY1":"YOUR_VALUE1"
}
}
}
}' https://rest.iad-01.braze.com/messages/send
```
This example uses the `US-01` instance. If you are not on this instance, replace the `US-01` endpoint with [your endpoint](https://www.braze.com/docs/es/es/api/basics/#endpoints).
## Conversation push notifications
{: style="float:right;max-width:35%;margin-left:15px;border: 0;"}
The [people and conversations initiative](https://developer.android.com/guide/topics/ui/conversations) is a multi-year Android initiative that aims to elevate people and conversations in the system surfaces of the phone. This priority is based on the fact that communication and interaction with other people is still the most valued and important functional area for the majority of Android users across all demographics.
### Usage requirements
- This notification type requires the Braze Android SDK v15.0.0+ and Android 11+ devices.
- Unsupported devices or SDKs will fallback to a standard push notification.
This feature is only available over the Braze REST API. See the [Android push object](https://www.braze.com/docs/es/es/api/objects_filters/messaging/android_object#android-conversation-push-object) for more information.
## FCM quota exceeded errors
When your limit for Firebase Cloud Messaging (FCM) is exceeded, Google returns "quota exceeded" errors. The default limit for FCM is 600,000 requests per minute. Braze retries sending according to Google's recommended best practices. However, a large volume of these errors can prolong sending time by several minutes. To mitigate potential impact, Braze will send you an alert that the rate limit is being exceeded and steps you can take to prevent the errors.
To check your current limit, go to your **Google Cloud Console** > **APIs & Services** > **Firebase Cloud Messaging API** > **Quotas & System Limits**, or visit the [FCM API Quotas page](https://console.cloud.google.com/apis/api/fcm.googleapis.com/quotas).
### Best practices
We recommend these best practices to keep these error volumes low.
#### Request a rate limit increase from FCM
To request a rate limit increase from FCM, you can contact [Firebase Support](https://firebase.google.com/support) directly or do the following:
1. Go to the [FCM API Quotas page](https://console.cloud.google.com/apis/api/fcm.googleapis.com/quotas).
2. Locate the **Send requests per minute** quota.
3. Select **Edit Quota**.
4. Enter a new value and submit your request.
#### Apply a workspace rate limit
You can apply a workspace rate limit for Android push notifications. This can help regulate the delivery rate of your outgoing messages. For more details, see [Workspace messaging rate limits](https://www.braze.com/docs/es/es/user_guide/administrative/app_settings/messaging_rate_limits).
## Rate limits
Push notifications are rate-limited, so don't be afraid of sending as many as your application needs. iOS and the Apple Push Notification service (APNs) servers will control how often they are delivered, and you won't get into trouble for sending too many. If your push notifications are throttled, they might be delayed until the next time the device sends a keep-alive packet or receives another notification.
## Setting up push notifications
### Step 1: Upload your APNs token
Before you can send an iOS push notification using Braze, you need to upload your `.p8` push notification file, as described in [Apple's developer documentation](https://developer.apple.com/documentation/usernotifications/establishing-a-token-based-connection-to-apns):
1. In your Apple developer account, go to [**Certificates, Identifiers & Profiles**](https://developer.apple.com/account/ios/certificate).
2. Under **Keys**, select **All** and click the add button (+) at the top of the page.
3. Under **Key Description**, enter a unique name for the signing key.
4. Under **Key Services**, select the **Apple Push Notification service (APNs)** checkbox, then click **Continue**. Click **Confirm**.
5. Note the key ID. Click **Download** to generate and download the key. Make sure to save the downloaded file in a secure place, as you cannot download this more than once.
6. In Braze, go to **Settings** > **App Settings** and upload the `.p8` file under **Apple Push Certificate**. You can upload either your development or production push certificate. To test push notifications after your app is live in the App Store, its recommended to set up a separate workspace for the development version of your app.
7. When prompted, enter your app's [bundle ID](https://developer.apple.com/documentation/foundation/nsbundle/1418023-bundleidentifier), [key ID](https://developer.apple.com/help/account/manage-keys/get-a-key-identifier/), and [team ID](https://developer.apple.com/help/account/manage-your-team/locate-your-team-id). You'll also need to specify whether to send notifications to your app's development or production environment, which is defined by its provisioning profile.
8. When you're finished, select **Save**.
### Step 2: Enable push capabilities
In Xcode, go to the **Signing & Capabilities** section of the main app target and add the push notifications capability.

### Step 3: Set up push handling
You can use the Swift SDK to automate the processing of remote notifications received from Braze. This is the simplest way to handle push notifications and is the recommended handling method.
#### Step 3.1: Enable automation in the push property
To enable the automatic push integration, set the `automation` property of the `push` configuration to `true`:
```swift
let configuration = Braze.Configuration(apiKey: "{YOUR-BRAZE-API-KEY}", endpoint: "{YOUR-BRAZE-API-ENDPOINT}")
configuration.push.automation = true
```
```objc
BRZConfiguration *configuration = [[BRZConfiguration alloc] initWithApiKey:@"{YOUR-BRAZE-API-KEY}" endpoint:@"{YOUR-BRAZE-API-ENDPOINT}"];
configuration.push.automation = [[BRZConfigurationPushAutomation alloc] initEnablingAllAutomations:YES];
```
This instructs the SDK to:
- Register your application for push notification on the system.
- Request the push notification authorization/permission at initialization.
- Dynamically provide implementations for the push notification related system delegate methods.
**Note:**
The automation steps performed by the SDK are compatible with pre-existing push notification handling integrations in your codebase. The SDK only automates the processing of remote notification received from Braze. Any system handler implemented to process your own or another third party SDK remote notifications will continue to work when `automation` is enabled.
**Warning:**
The SDK must be initialized on the main thread to enable push notification automation. SDK initialization must happen before the application has finished launching or in your AppDelegate [`application(_:didFinishLaunchingWithOptions:)`](https://developer.apple.com/documentation/uikit/uiapplicationdelegate/1622921-application) implementation.
If your application requires additional setup before initializing the SDK, please refer to the [Delayed Initialization](https://www.braze.com/docs/es/es/developer_guide/sdk_initalization/?sdktab=swift) documentation page.
#### Step 3.2: Override individual configurations (optional)
For more granular control, each automation step can be enabled or disabled individually:
```swift
// Enable all automations and disable the automatic notification authorization request at launch.
configuration.push.automation = true
configuration.push.automation.requestAuthorizationAtLaunch = false
```
```objc
// Enable all automations and disable the automatic notification authorization request at launch.
configuration.push.automation = [[BRZConfigurationPushAutomation alloc] initEnablingAllAutomations:YES];
configuration.push.automation.requestAuthorizationAtLaunch = NO;
```
See [`Braze.Configuration.Push.Automation`](https://braze-inc.github.io/braze-swift-sdk/documentation/brazekit/braze/configuration-swift.class/push-swift.class/automation-swift.class) for all available options and [`automation`](https://braze-inc.github.io/braze-swift-sdk/documentation/brazekit/braze/configuration-swift.class/push-swift.class/automation-swift.property) for more information on the automation behavior.
**Note:**
If you rely on push notifications for additional behavior specific to your app, you may still be able to use automatic push integration instead of manual push notification integration. The [`subscribeToUpdates(_:)`](https://braze-inc.github.io/braze-swift-sdk/documentation/brazekit/braze/notifications-swift.class/subscribetoupdates(_:)) method provides a way to be notified of remote notifications processed by Braze.
#### Step 3.1: Register for push notifications with APNs
Include the appropriate code sample within your app's [`application:didFinishLaunchingWithOptions:` delegate method](https://developer.apple.com/documentation/uikit/uiapplicationdelegate/1622921-application) so that your users' devices can register with APNs. Ensure that you call all push integration code in your application's main thread.
Braze also provides default push categories for push action button support, which must be manually added to your push registration code. Refer to [push action buttons](https://www.braze.com/docs/es/es/developer_guide/push_notifications/customization/?sdktab=swift#swift_customizing-push-categories) for additional integration steps.
Add the following code to the `application:didFinishLaunchingWithOptions:` method of your app delegate.
**Note:**
The following code sample includes integration for provisional push authentication (lines 5 and 6). If you are not planning on using provisional authorization in your app, you can remove the lines of code that add `UNAuthorizationOptionProvisional` to the `requestAuthorization` options. Visit [iOS notification options](https://www.braze.com/docs/es/es/user_guide/message_building_by_channel/push/ios/notification_options/) to learn more about push provisional authentication.
```swift
application.registerForRemoteNotifications()
let center = UNUserNotificationCenter.current()
center.setNotificationCategories(Braze.Notifications.categories)
center.delegate = self
var options: UNAuthorizationOptions = [.alert, .sound, .badge]
if #available(iOS 12.0, *) {
options = UNAuthorizationOptions(rawValue: options.rawValue | UNAuthorizationOptions.provisional.rawValue)
}
center.requestAuthorization(options: options) { granted, error in
print("Notification authorization, granted: \(granted), error: \(String(describing: error))")
}
```
```objc
[application registerForRemoteNotifications];
UNUserNotificationCenter *center = UNUserNotificationCenter.currentNotificationCenter;
[center setNotificationCategories:BRZNotifications.categories];
center.delegate = self;
UNAuthorizationOptions options = UNAuthorizationOptionAlert | UNAuthorizationOptionSound | UNAuthorizationOptionBadge;
if (@available(iOS 12.0, *)) {
options = options | UNAuthorizationOptionProvisional;
}
[center requestAuthorizationWithOptions:options
completionHandler:^(BOOL granted, NSError *_Nullable error) {
NSLog(@"Notification authorization, granted: %d, "
@"error: %@)",
granted, error);
}];
```
**Warning:**
You must assign your delegate object using `center.delegate = self` synchronously before your app finishes launching, preferably in `application:didFinishLaunchingWithOptions:`. Not doing so may cause your app to miss incoming push notifications. Visit Apple's [`UNUserNotificationCenterDelegate`](https://developer.apple.com/documentation/usernotifications/unusernotificationcenterdelegate) documentation to learn more.
If your app calls `wipeData()` and later re-enables the Braze SDK in the same app run, you must call `registerForRemoteNotifications()` again to re-populate the device token used by the SDK.
#### Step 3.2: Register push tokens with Braze
Once APNs registration is complete, pass the resulting `deviceToken` to Braze to enable for push notifications for the user.
Add the following code to your app's `application(_:didRegisterForRemoteNotificationsWithDeviceToken:)` method:
```swift
AppDelegate.braze?.notifications.register(deviceToken: deviceToken)
```
Add the following code to your app's `application:didRegisterForRemoteNotificationsWithDeviceToken:` method:
```objc
[AppDelegate.braze.notifications registerDeviceToken:deviceToken];
```
**Important:**
The `application:didRegisterForRemoteNotificationsWithDeviceToken:` delegate method is called every time after `application.registerForRemoteNotifications()` is called.
If you are migrating to Braze from another push service and your user's device has already registered with APNs, this method will collect tokens from existing registrations the next time the method is called, and users will not have to re-opt-in to push.
#### Step 3.3: Enable push handling
Next, pass the received push notifications along to Braze. This step is necessary for logging push analytics and link handling. Ensure that you call all push integration code in your application's main thread.
##### Default push handling
To enable the Braze default push handling, add the following code to your app's `application(_:didReceiveRemoteNotification:fetchCompletionHandler:)` method:
```swift
if let braze = AppDelegate.braze, braze.notifications.handleBackgroundNotification(
userInfo: userInfo,
fetchCompletionHandler: completionHandler
) {
return
}
completionHandler(.noData)
```
Next, add the following to your app's `userNotificationCenter(_:didReceive:withCompletionHandler:)` method:
```swift
if let braze = AppDelegate.braze, braze.notifications.handleUserNotification(
response: response,
withCompletionHandler: completionHandler
) {
return
}
completionHandler()
```
To enable the Braze default push handling, add the following code to your application's `application:didReceiveRemoteNotification:fetchCompletionHandler:` method:
```objc
BOOL processedByBraze = AppDelegate.braze != nil && [AppDelegate.braze.notifications handleBackgroundNotificationWithUserInfo:userInfo
fetchCompletionHandler:completionHandler];
if (processedByBraze) {
return;
}
completionHandler(UIBackgroundFetchResultNoData);
```
Next, add the following code to your app's `(void)userNotificationCenter:didReceiveNotificationResponse:withCompletionHandler:` method:
```objc
BOOL processedByBraze = AppDelegate.braze != nil && [AppDelegate.braze.notifications handleUserNotificationWithResponse:response
withCompletionHandler:completionHandler];
if (processedByBraze) {
return;
}
completionHandler();
```
##### Foreground push handling
To enable foreground push notifications and let Braze recognize them when they're received, implement `UNUserNotificationCenter.userNotificationCenter(_:willPresent:withCompletionHandler:)`. If a user taps your foreground notification, the `userNotificationCenter(_:didReceive:withCompletionHandler:)` push delegate will be called and Braze will log the push click event.
```swift
func userNotificationCenter(
_ center: UNUserNotificationCenter,
willPresent notification: UNNotification,
withCompletionHandler completionHandler: @escaping (UNNotificationPresentationOptions
) -> Void) {
if let braze = AppDelegate.braze {
// Forward notification payload to Braze for processing.
braze.notifications.handleForegroundNotification(notification: notification)
}
// Configure application's foreground notification display options.
if #available(iOS 14.0, *) {
completionHandler([.list, .banner])
} else {
completionHandler([.alert])
}
}
```
To enable foreground push notifications and let Braze recognize them when they're received, implement `userNotificationCenter:willPresentNotification:withCompletionHandler:`. If a user taps your foreground notification, the `userNotificationCenter:didReceiveNotificationResponse:withCompletionHandler:` push delegate will be called and Braze will log the push click event.
```objc
- (void)userNotificationCenter:(UNUserNotificationCenter *)center
willPresentNotification:(UNNotification *)notification
withCompletionHandler:(void (^)(UNNotificationPresentationOptions options))completionHandler {
if (AppDelegate.braze != nil) {
// Forward notification payload to Braze for processing.
[AppDelegate.braze.notifications handleForegroundNotificationWithNotification:notification];
}
// Configure application's foreground notification display options.
if (@available(iOS 14.0, *)) {
completionHandler(UNNotificationPresentationOptionList | UNNotificationPresentationOptionBanner);
} else {
completionHandler(UNNotificationPresentationOptionAlert);
}
}
```
## Testing notifications {#push-testing}
If you'd like to test in-app and push notifications via the command line, you can send a single notification through the terminal via CURL and the [messaging API](https://www.braze.com/docs/es/es/api/endpoints/messaging/send_messages/post_send_messages/). You will need to replace the following fields with the correct values for your test case:
- `YOUR_API_KEY` - available at **Settings** > **API Keys**.
- `YOUR_EXTERNAL_USER_ID` - available on the **Search Users** page. See [assigning user IDs](https://www.braze.com/docs/es/es/developer_guide/platform_integration_guides/swift/analytics/setting_user_ids/#assigning-a-user-id) for more information.
- `YOUR_KEY1` (optional)
- `YOUR_VALUE1` (optional)
In the following example, the `US-01` instance is being used. If you're not on this instance, refer to our [API documentation](https://www.braze.com/docs/es/es/api/basics/) to see which endpoint to make requests to.
```bash
curl -X POST -H "Content-Type: application/json" -H "Authorization: Bearer {YOUR_API_KEY}" -d '{
"external_user_ids":["YOUR_EXTERNAL_USER_ID"],
"messages": {
"apple_push": {
"alert":"Test push",
"extra": {
"YOUR_KEY1":"YOUR_VALUE1"
}
}
}
}' https://rest.iad-01.braze.com/messages/send
```
## Subscribing to push notifications updates
To access the push notification payloads processed by Braze, use the [`Braze.Notifications.subscribeToUpdates(payloadTypes:_:)`](https://braze-inc.github.io/braze-swift-sdk/documentation/brazekit/braze/notifications-swift.class/subscribetoupdates(payloadtypes:_:)/) method.
You can use the `payloadTypes` parameter to specify whether you'd like to subscribe to notifications involving push open events, push received events, or both.
```swift
// This subscription is maintained through a Braze cancellable, which will observe for changes until the subscription is cancelled.
// You must keep a strong reference to the cancellable to keep the subscription active.
// The subscription is canceled either when the cancellable is deinitialized or when you call its `.cancel()` method.
let cancellable = AppDelegate.braze?.notifications.subscribeToUpdates(payloadTypes: [.open, .received]) { payload in
print("Braze processed notification with title '\(payload.title)' and body '\(payload.body)'")
}
```
**Important:**
Keep in mind, push received events will only trigger for foreground notifications and `content-available` background notifications. It will not trigger for notifications received while terminated or for background notifications without the `content-available` field.
```objc
NSInteger filtersValue = BRZNotificationsPayloadTypeFilter.opened.rawValue | BRZNotificationsPayloadTypeFilter.received.rawValue;
BRZNotificationsPayloadTypeFilter *filters = [[BRZNotificationsPayloadTypeFilter alloc] initWithRawValue: filtersValue];
BRZCancellable *cancellable = [notifications subscribeToUpdatesWithPayloadTypes:filters update:^(BRZNotificationsPayload * _Nonnull payload) {
NSLog(@"Braze processed notification with title '%@' and body '%@'", payload.title, payload.body);
}];
```
**Important:**
Keep in mind, push received events will only trigger for foreground notifications and `content-available` background notifications. It will not trigger for notifications received while terminated or for background notifications without the `content-available` field.
**Note:**
When using the automatic push integration, `subscribeToUpdates(_:)` is the only way to be notified of remote notifications processed by Braze. The `UIAppDelegate` and `UNUserNotificationCenterDelegate` system methods are not called when the notification is automatically processed by Braze.
**Tip:**
Create your push notification subscription in `application(_:didFinishLaunchingWithOptions:)` to ensure your subscription is triggered after an end-user taps a notification while your app is in a terminated state.
## Handling foreground notifications
By default, when a push notification arrives while your app is in the foreground, iOS does not display it automatically. To display push notifications in the foreground and track them with Braze analytics, call the `handleForegroundNotification(notification:)` method inside your `UNUserNotificationCenterDelegate.userNotificationCenter(_:willPresent:withCompletionHandler:)` implementation.
### How it works
When you call `handleForegroundNotification(notification:)`, Braze processes the notification payload to log analytics and handle any deep links or button actions. The actual display behavior is controlled by the `UNNotificationPresentationOptions` you pass to the completion handler.
```swift
import BrazeKit
import UserNotifications
extension AppDelegate: UNUserNotificationCenterDelegate {
func userNotificationCenter(
_ center: UNUserNotificationCenter,
willPresent notification: UNNotification,
withCompletionHandler completionHandler: @escaping (UNNotificationPresentationOptions) -> Void
) {
// Let Braze process the notification payload
if let braze = AppDelegate.braze {
braze.notifications.handleForegroundNotification(notification: notification)
}
// Control how the notification appears in the foreground
if #available(iOS 14.0, *) {
completionHandler([.banner, .list, .sound])
} else {
completionHandler([.alert, .sound])
}
}
}
```
For a complete example, see the [push notifications manual integration sample](https://github.com/braze-inc/braze-swift-sdk/blob/e31907eaa0dbd151dc2e6826de66cc494242ba60/Examples/Swift/Sources/PushNotifications-Manual/AppDelegate.swift#L1-L120) in the Braze Swift SDK repository.
## Push primers {#push-primers}
Push primer campaigns encourage your users to enable push notifications on their device for your app. This can be done without SDK customization using our [no code push primer](https://www.braze.com/docs/es/es/user_guide/message_building_by_channel/push/best_practices/push_primer_messages/).
## Dynamic APNs gateway management
Dynamic Apple Push Notification Service (APNs) gateway management enhances the reliability and efficiency of iOS push notifications by automatically detecting the correct APNs environment. Previously, you would manually select APNs environments (development or production) for your push notifications, which sometimes led to incorrect gateway configurations, delivery failures, and `BadDeviceToken` errors.
With dynamic APNs gateway management, you'll have:
- **Improved reliability:** Notifications are always delivered to the correct APNs environment, reducing failed deliveries.
- **Simplified configuration:** You no longer need to manually manage APNs gateway settings.
- **Error resilience:** Invalid or missing gateway values are gracefully handled, providing uninterrupted service.
### Prerequisites
Braze supports Dynamic APNs gateway management for push notifications on iOS with the following SDK version requirement:
### How it works
When an iOS app integrates with the Braze Swift SDK, it sends device-related data, including [`aps-environment`](https://developer.apple.com/documentation/bundleresources/entitlements/aps-environment) to the Braze SDK API, if available. The `apns_gateway` value indicates whether the app is using the development (`dev`) or production (`prod`) APNs environment.
Braze also stores the reported gateway value for each device. If a new, valid gateway value is received, Braze updates the stored value automatically.
When Braze sends a push notification:
- If a valid gateway value (dev or prod) is stored for the device, Braze uses it to determine the correct APNs environment.
- If no gateway value is stored, Braze defaults to the APNs environment configured in the **App Settings** page.
### Frequently asked questions
#### Why was this feature introduced?
With dynamic APNs gateway management, the correct environment is selected automatically. Previously, you had to manually configure the APNs gateway, which could lead to `BadDeviceToken` errors, token invalidation, and potential APNs rate-limiting issues.
#### How does this impact push delivery performance?
This feature improves delivery rates by always routing push tokens to the correct APNs environment, avoiding failures caused by misconfigured gateways.
#### Can I disable this feature?
Dynamic APNs Gateway Management is turned on by default and provides reliability improvements. If you have specific use cases that require manual gateway selection, contact [Braze Support](https://www.braze.com/docs/es/es/user_guide/administrative/access_braze/support/).
## About push notifications for Android TV
{: style="float:right;max-width:25%;margin-left:15px; border: 0"}
While not a native feature, Android TV push integration is made possible by leveraging the Braze Android SDK and Firebase Cloud Messaging to register a push token for Android TV. It is, however, necessary to build a UI to display the notification payload after it is received.
## Prerequisites
To use this feature, you'll need to complete the following:
- [Integrate the Braze Android SDK](https://www.braze.com/docs/es/es/developer_guide/sdk_integration/?sdktab=android)
- [Set up push notifications for the Braze Android SDK](https://www.braze.com/docs/es/es/developer_guide/platform_integration_guides/android/push_notifications/?tab=android)
## Setting up push notifications
To set up push notifications for Android TV:
1. Create a custom view in your app to display your notifications.
2. Create a [custom notification factory](https://www.braze.com/docs/es/es/developer_guide/push_notifications/customization#customization-display). This will override the default SDK behavior and allow you to manually display the notifications. By returning `null`, this will prevent the SDK from processing and will require custom code to display the notification. After these steps have been completed, you can start sending push to Android TV!
3. (Optional) To track click analytics effectively, set up click analytics tracking. This can be achieved by creating a [push callback](https://www.braze.com/docs/es/es/developer_guide/push_notifications/customization#push-callback) to listen for Braze push opened and received intents.
**Note:**
These notifications **will not persist** and will only be visible to the user when the device displays them. This is due to Android TV's notification center not supporting historical notifications.
## Testing Android TV push notifications
To test if your push implementation is successful, send a notification from the Braze dashboard as you would normally for an Android device.
- **If the application is closed**: The push message will display a toast notification on the screen.
- **If the application is open**: You have the opportunity to display the message in your own hosted UI. We recommend following the UI styling of our Android Mobile SDK in-app messages.
## Best practices
For marketers using Braze, launching a campaign to Android TV will be identical to launching a push to Android mobile apps. To target these devices exclusively, we recommend selecting the Android TV App in segmentation.
The delivered and clicked response returned by FCM will follow the same convention as a mobile Android device; therefore, any errors will be visible in the message activity log.
## Prerequisites
Before you can use this feature, you'll need to [integrate the Cordova Braze SDK](https://www.braze.com/docs/es/es/developer_guide/sdk_integration/?sdktab=cordova). After you integrate the SDK, basic push notification functionality is enabled by default. To use [rich push notifications](https://www.braze.com/docs/es/es/developer_guide/push_notifications/rich/?sdktab=cordova) and [push stories](https://www.braze.com/docs/es/es/developer_guide/push_notifications/push_stories/?sdktab=cordova), you'll need to set them up individually. To use iOS push messages, you also need to upload a valid push certificate.
**Warning:**
Anytime you add, remove, or update your Cordova plugins, Cordova will overwrite the Podfile in your iOS app's Xcode project. This means you’ll need to set these features up again anytime you modify your Cordova plugins.
## Enabling push deep linking
By default, the Braze Cordova SDK doesn't automatically handle deep links from push notifications. To enable push deep linking, follow the configuration steps in [Deep linking](https://www.braze.com/docs/es/es/developer_guide/cordova/deep_linking/).
For more details about these and other push configuration options, see [Optional configurations](https://www.braze.com/docs/es/es/developer_guide/sdk_integration?sdktab=cordova#optional).
## Disabling basic push notifications (iOS only)
After you integrate the Braze Cordova SDK for iOS, basic push notification functionality is enabled by default. To disable this functionality in your iOS app, add the following to your `config.xml` file. For more information, see [Optional configurations](https://www.braze.com/docs/es/es/developer_guide/sdk_integration?sdktab=cordova#optional).
```xml
```
## Prerequisites
Before you can use this feature, you'll need to [integrate the Flutter Braze SDK](https://www.braze.com/docs/es/es/developer_guide/sdk_integration/?sdktab=flutter).
## Setting up push notifications
### Step 1: Complete the initial setup
#### Step 1.1: Register for push
Register for push using Google’s Firebase Cloud Messaging (FCM) API. For a full walkthrough, refer to the following steps from the [Native Android push integration guide](https://www.braze.com/docs/es/es/developer_guide/platform_integration_guides/android/push_notifications/?tab=android/):
1. [Add Firebase to your project](https://www.braze.com/docs/es/es/developer_guide/platform_integration_guides/android/push_notifications/android/integration/standard_integration/#step-1-add-firebase-to-your-project).
2. [Add Cloud Messaging to your dependencies](https://www.braze.com/docs/es/es/developer_guide/platform_integration_guides/android/push_notifications/android/integration/standard_integration/#step-2-add-cloud-messaging-to-your-dependencies).
3. [Create a service account](https://www.braze.com/docs/es/es/developer_guide/platform_integration_guides/android/push_notifications/android/integration/standard_integration/#step-3-create-a-service-account).
4. [Generate JSON credentials](https://www.braze.com/docs/es/es/developer_guide/platform_integration_guides/android/push_notifications/android/integration/standard_integration/#step-4-generate-json-credentials).
5. [Upload your JSON credentials to Braze](https://www.braze.com/docs/es/es/developer_guide/platform_integration_guides/android/push_notifications/android/integration/standard_integration/#step-5-upload-your-json-credentials-to-braze).
#### Step 1.2: Get your Google Sender ID
First, go to Firebase Console, open your project, then select **Settings** > **Project settings**.

Select **Cloud Messaging**, then under **Firebase Cloud Messaging API (V1)**, copy the **Sender ID** to your clipboard.

#### Step 1.3: Update your `braze.xml`
Add the following to your `braze.xml` file. Replace `FIREBASE_SENDER_ID` with the sender ID you copied previously.
```xml
trueFIREBASE_SENDER_ID
```
#### Step 1.1: Upload APNs certificates
Generate an Apple Push Notification service (APNs) certificate and uploaded it to the Braze dashboard. For a full walkthrough, see [Uploading your APNs certificate](https://www.braze.com/docs/es/es/developer_guide/platform_integration_guides/swift/push_notifications/integration/#step-1-upload-your-apns-certificate).
#### Step 1.2: Add push notification support to your app
Follow the [native iOS integration guide](https://www.braze.com/docs/es/es/developer_guide/platform_integration_guides/swift/push_notifications/integration/?tab=objective-c#automatic-push-integration).
### Step 2: Listen for push notification events (optional)
To listen for push notification events that Braze has detected and handled, call `subscribeToPushNotificationEvents()` and pass in an argument to execute.
**Note:**
Braze push notification events are available on both Android and iOS. Due to platform differences, iOS will only detect Braze push events when a user has interacted with a notification.
```dart
// Create stream subscription
StreamSubscription pushEventsStreamSubscription;
pushEventsStreamSubscription = braze.subscribeToPushNotificationEvents((BrazePushEvent pushEvent) {
print("Push Notification event of type ${pushEvent.payloadType} seen. Title ${pushEvent.title}\n and deeplink ${pushEvent.url}");
// Handle push notification events
});
// Cancel stream subscription
pushEventsStreamSubscription.cancel();
```
#### Push notification event fields
**Note:**
Because of platform limitations on iOS, the Braze SDK can only process push payloads while the app is in the foreground. Listeners will only trigger for the `push_opened` event type on iOS after a user has interacted with a push.
For a full list of push notification fields, refer to the following table:
| Field Name | Type | Description |
| ------------------ | --------- | ----------- |
| `payloadType` | String | Specifies the notification payload type. The two values that are sent from the Braze Flutter SDK are `push_opened` and `push_received`. Only `push_opened` events are supported on iOS. |
| `url` | String | Specifies the URL that was opened by the notification. |
| `useWebview` | Boolean | If `true`, URL will open in-app in a modal webview. If `false`, the URL will open in the device browser. |
| `title` | String | Represents the title of the notification. |
| `body` | String | Represents the body or content text of the notification. |
| `summaryText` | String | Represents the summary text of the notification. This is mapped from `subtitle` on iOS. |
| `badgeCount` | Number | Represents the badge count of the notification. |
| `timestamp` | Number | Represents the time at which the payload was received by the application. |
| `isSilent` | Boolean | If `true`, the payload is received silently. For details on sending Android silent push notifications, refer to [Silent push notifications on Android](https://www.braze.com/docs/es/es/developer_guide/push_notifications/silent/?sdktab=android). For details on sending iOS silent push notifications, refer to [Silent push notifications on iOS](https://www.braze.com/docs/es/es/developer_guide/push_notifications/silent/?sdktab=swift). |
| `isBrazeInternal`| Boolean | This will be `true` if a notification payload was sent for an internal SDK feature, such as Feature Flag sync or uninstall tracking. The payload is received silently for the user. |
| `imageUrl` | String | Specifies the URL associated with the notification image. |
| `brazeProperties` | Object | Represents Braze properties associated with the campaign (key-value pairs). |
| `ios` | Object | Represents iOS-specific fields. |
| `android` | Object | Represents Android-specific fields. |
{: .reset-td-br-1 .reset-td-br-2 aria-label="Push notification event fields" }
### Step 3: Test displaying push notifications
To test your integration after configuring push notifications in the native layer:
1. Set an active user in the Flutter application. To do so, initialize your plugin by calling `braze.changeUser('your-user-id')`.
2. Head to **Campaigns** and create a new push notification campaign. Choose the platforms that you'd like to test.
3. Compose your test notification and head over to the **Test** tab. Add the same `user-id` as the test user and click **Send Test**.
4. You should receive the notification on your device shortly. You may need to check in the Notification Center or update Settings if it doesn't display.
**Tip:**
Starting with Xcode 14, you can test remote push notifications on an iOS simulator.
## Prerequisites
Before you can use this feature, you'll need to [integrate the Android Braze SDK](https://www.braze.com/docs/es/es/developer_guide/sdk_integration/?sdktab=android).
## Setting up push notifications
Newer phones manufactured by [Huawei](https://huaweimobileservices.com/) come equipped with Huawei Mobile Services (HMS) - a service used to deliver push instead of Google's Firebase Cloud Messaging (FCM).
### Step 1: Register for a Huawei developer account
Before getting started, you'll need to register and set up a [Huawei Developer account](https://developer.huawei.com/consumer/en/console). In your Huawei account, go to **My Projects > Project Settings > App Information**, and take note of the `App ID` and `App secret`.

### Step 2: Create a new Huawei app in the Braze dashboard
In the Braze dashboard, go to **App Settings**, listed under the **Settings** navigation.
Click **+ Add App**, provide a name (such as My Huawei App), select `Android` as the platform.
{: style="max-width:60%;"}
Once your new Braze app has been created, locate the push notification settings and select `Huawei` as the push provider. Next, provide your `Huawei Client Secret` and `Huawei App ID`.

### Step 3: Integrate the Huawei messaging SDK into your app
Huawei has provided an [Android integration codelab](https://developer.huawei.com/consumer/en/codelab/HMSPushKit/index.html) detailing integrating the Huawei Messaging Service into your application. Follow those steps to get started.
After completing the codelab, you will need to create a custom [Huawei Message Service](https://developer.huawei.com/consumer/en/doc/development/HMS-References/push-HmsMessageService-cls) to obtain push tokens and forward messages to the Braze SDK.
```java
public class CustomPushService extends HmsMessageService {
@Override
public void onNewToken(String token) {
super.onNewToken(token);
Braze.getInstance(this.getApplicationContext()).setRegisteredPushToken(token);
}
@Override
public void onMessageReceived(RemoteMessage remoteMessage) {
super.onMessageReceived(remoteMessage);
if (BrazeHuaweiPushHandler.handleHmsRemoteMessageData(this.getApplicationContext(), remoteMessage.getDataOfMap())) {
// Braze has handled the Huawei push notification
}
}
}
```
```kotlin
class CustomPushService: HmsMessageService() {
override fun onNewToken(token: String?) {
super.onNewToken(token)
Braze.getInstance(applicationContext).setRegisteredPushToken(token!!)
}
override fun onMessageReceived(hmsRemoteMessage: RemoteMessage?) {
super.onMessageReceived(hmsRemoteMessage)
if (BrazeHuaweiPushHandler.handleHmsRemoteMessageData(applicationContext, hmsRemoteMessage?.dataOfMap)) {
// Braze has handled the Huawei push notification
}
}
}
```
After adding your custom push service, add the following to your `AndroidManifest.xml`:
```xml
```
### Step 4: Handle foreground notifications
By default, when a push notification arrives while your app is in the foreground, Huawei displays it automatically. To have Braze process the push notification payload (for analytics tracking, deep link handling, and custom processing), route the incoming push data to Braze inside your `HmsMessageService.onMessageReceived` method.
When you call `BrazeHuaweiPushHandler.handleHmsRemoteMessageData`, Braze determines if the payload is a Braze push notification and, if so, creates and displays the notification. For more information, see [Handling foreground notifications](https://www.braze.com/docs/es/es/developer_guide/push_notifications/?sdktab=android#handling-foreground-notifications) in the Android push notifications documentation.
For a complete example, see the [Huawei handler reference](https://braze-inc.github.io/braze-android-sdk/kdoc/braze-android-sdk/com.braze.push/-braze-huawei-push-handler/index.html) in the Braze Android SDK documentation.
### Step 5: Test your push notifications (optional)
At this point, you've created a new Huawei Android app in the Braze dashboard, configured it with your Huawei developer credentials, and have integrated the Braze and Huawei SDKs into your app.
Next, we can test out the integration by testing a new push campaign in Braze.
#### Step 5.1: Create a new push notification campaign
In the **Campaigns** page, create a new campaign, and choose **Push Notification** as your message type.
After you name your campaign, choose **Android Push** as the push platform.

Next, compose your push campaign with a title and message.
#### Step 5.2: Send a test push
In the **Test** tab, enter your user ID, which you've set in your app using the [`changeUser(USER_ID_STRING)` method](https://www.braze.com/docs/es/es/developer_guide/platform_integration_guides/android/analytics/setting_user_ids/#assigning-a-user-id), and click **Send Test** to send a test push.

At this point, you should receive a test push notification on your Huawei (HMS) device from Braze.
#### Step 5.3: Set up Huawei segmentation (optional)
Since your Huawei app in the Braze dashboard is built upon the Android push platform, you have the flexibility to send push to all Android users (Firebase Cloud Messaging and Huawei Mobile Services), or you can choose to segment your campaign audience to specific apps.
To send push to only Huawei apps, [create a new Segment](https://www.braze.com/docs/es/es/user_guide/engagement_tools/segments/creating_a_segment/#step-3-choose-your-app-or-platform) and select your Huawei App within the **Apps** section.

Of course, if you want to send the same push to all Android push providers, you can choose not to specify the app which will send to all Android apps configured within the current workspace.
## Prerequisites
Before you can use this feature, you'll need to [integrate the React Native Braze SDK](https://www.braze.com/docs/es/es/developer_guide/sdk_integration/?sdktab=react%20native).
## Setting up push notifications {#setting-up-push-notifications}
### Step 1: Complete the initial setup
#### Prerequisites
Before you can use Expo for push notifications, you'll need to [set up the Braze Expo plugin](https://www.braze.com/docs/es/es/developer_guide/platform_integration_guides/react_native/sdk_integration/?tab=expo).
#### Step 1.1: Update your `app.json` file
Next update your `app.json` file for Android and iOS:
- **Android:** Add the `enableFirebaseCloudMessaging` option.
- **iOS:** Add the `enableBrazeIosPush` option.
#### Step 1.2: Add your Google Sender ID
First, go to Firebase Console, open your project, then select **Settings** > **Project settings**.

Select **Cloud Messaging**, then under **Firebase Cloud Messaging API (V1)**, copy the **Sender ID** to your clipboard.

Next, open your project's `app.json` file and set your `firebaseCloudMessagingSenderId` property to the Sender ID in your clipboard. For example:
```
"firebaseCloudMessagingSenderId": "693679403398"
```
#### Step 1.3: Add the path to your Google Services JSON
In your project's `app.json` file, add the path to your `google-services.json` file. This file is required when setting `enableFirebaseCloudMessaging: true` in your configuration.
```json
{
"expo": {
"android": {
"googleServicesFile": "PATH_TO_GOOGLE_SERVICES"
},
"plugins": [
[
"@braze/expo-plugin",
{
"androidApiKey": "YOUR-ANDROID-API-KEY",
"iosApiKey": "YOUR-IOS-API-KEY",
"enableBrazeIosPush": true,
"enableFirebaseCloudMessaging": true,
"firebaseCloudMessagingSenderId": "YOUR-FCM-SENDER-ID",
"androidHandlePushDeepLinksAutomatically": true
}
],
]
}
}
```
Note that you will need to use these settings instead of the native setup instructions if you are depending on additional push notification libraries like [Expo Notifications](https://docs.expo.dev/versions/latest/sdk/notifications/).
If you are not using the Braze Expo plugin, or would like to configure these settings natively instead, register for push by referring to the [Native Android push integration guide](https://www.braze.com/docs/es/es/developer_guide/platform_integration_guides/android/push_notifications/?tab=android/).
If you are not using the Braze Expo plugin, or would like to configure these settings natively instead, register for push by referring to the following steps from the [Native iOS push integration guide](https://www.braze.com/docs/es/es/developer_guide/push_notifications/?sdktab=swift):
#### Step 1.1: Request for push permissions
If you don't plan on requesting push permissions when the app is launched, omit the `requestAuthorizationWithOptions:completionHandler:` call in your AppDelegate. Then, skip to [Step 2](#reactnative_step-2-request-push-notifications-permission). Otherwise, follow the [native iOS integration guide](https://www.braze.com/docs/es/es/developer_guide/platform_integration_guides/swift/push_notifications/integration/?tab=objective-c#automatic-push-integration).
#### Step 1.2 (Optional): Migrate your push key
If you were previously using `expo-notifications` to manage your push key, run `expo fetch:ios:certs` from your application's root folder. This will download your push key (a .p8 file), which can then be uploaded to the Braze dashboard.
### Step 2: Request push notifications permission
Use the `Braze.requestPushPermission()` method (available on v1.38.0 and up) to request permission for push notifications from the user on iOS and Android 13+. For Android 12 and earlier, this method is a no-op.
This method takes in a required parameter that specifies which permissions the SDK should request from the user on iOS. These options have no effect on Android.
```javascript
const permissionOptions = {
alert: true,
sound: true,
badge: true,
provisional: false
};
Braze.requestPushPermission(permissionOptions);
```
#### Step 2.1: Listen for push notifications (optional)
You can additionally subscribe to events where Braze has detected and handled an incoming push notification. Use the listener key `Braze.Events.PUSH_NOTIFICATION_EVENT`.
**Important:**
iOS push received events will only trigger for foreground notifications and `content-available` background notifications. It will not trigger for notifications received while terminated or for background notifications without the `content-available` field.
```javascript
Braze.addListener(Braze.Events.PUSH_NOTIFICATION_EVENT, data => {
console.log(`Push Notification event of type ${data.payload_type} seen. Title ${data.title}\n and deeplink ${data.url}`);
console.log(JSON.stringify(data, undefined, 2));
});
```
##### Push notification event fields
For a full list of push notification fields, refer to the following table:
| Field Name | Type | Description |
| ------------------ | --------- | ----------- |
| `payload_type` | String | Specifies the notification payload type. The two values that are sent from the Braze React Native SDK are `push_opened` and `push_received`. |
| `url` | String | Specifies the URL that was opened by the notification. |
| `use_webview` | Boolean | If `true`, URL will open in-app in a modal webview. If `false`, the URL will open in the device browser. |
| `title` | String | Represents the title of the notification. |
| `body` | String | Represents the body or content text of the notification. |
| `summary_text` | String | Represents the summary text of the notification. This is mapped from `subtitle` on iOS. |
| `badge_count` | Number | Represents the badge count of the notification. |
| `timestamp` | Number | Represents the time at which the payload was received by the application. |
| `is_silent` | Boolean | If `true`, the payload is received silently. For details on sending Android silent push notifications, refer to [Silent push notifications on Android](https://www.braze.com/docs/es/es/developer_guide/push_notifications/silent/?sdktab=android). For details on sending iOS silent push notifications, refer to [Silent push notifications on iOS](https://www.braze.com/docs/es/es/developer_guide/push_notifications/silent/?sdktab=swift). |
| `is_braze_internal`| Boolean | This will be `true` if a notification payload was sent for an internal SDK feature, such as Feature Flag sync or uninstall tracking. The payload is received silently for the user. |
| `image_url` | String | Specifies the URL associated with the notification image. |
| `braze_properties` | Object | Represents Braze properties associated with the campaign (key-value pairs). |
| `ios` | Object | Represents iOS-specific fields. |
| `android` | Object | Represents Android-specific fields. |
{: .reset-td-br-1 .reset-td-br-2 aria-label="Push notification event fields" }
### Step 3: Enable deep linking (optional)
To enable Braze to handle deep links inside React components when a push notification is clicked, first implement the steps described in [React Native Linking](https://reactnative.dev/docs/linking) library, or with your solution of choice. Then, follow the additional steps.
To learn more about what deep links are, see our [FAQ article](https://www.braze.com/docs/es/es/user_guide/messaging/design_and_edit/personalize/actions_and_media_urls/#what-is-deep-linking).
**Important:**
If you're migrating an existing React Native push integration, re-test deep linking after you upgrade the Braze SDK, React Native, Expo, or related libraries. Confirm that:
- [React Native Linking](https://reactnative.dev/docs/linking) is still configured and handling your deep link URLs.
- Your iOS initial push payload handling (see [Step 3.1: Store the push notification payload on app launch](#step-3-1)) is implemented and still called on app launch.
- Any native delegate or listener methods you use to handle push click events are still registered and invoked as expected.
If you're using the [Braze Expo plugin](https://www.braze.com/docs/es/es/developer_guide/platforms/react_native/sdk_integration/?tab=expo#step-2-choose-a-setup-option), you can handle push notification deep links automatically by setting `androidHandlePushDeepLinksAutomatically` to `true` in your `app.json`.
To handle deep links manually instead, refer to the native Android documentation: [Adding deep links](https://www.braze.com/docs/es/es/developer_guide/push_notifications/deep_linking).
#### Step 3.1: Store the push notification payload on app launch
**Note:**
This is supported as of React Native SDK 19.1.0.
Add `populateInitialPushPayloadFromIntent` to your main activity's `onCreate()` method. This must be called before React Native initializes to capture the initial Intent data. For example:
```kotlin
override fun onCreate(savedInstanceState: Bundle?) {
BrazeReactUtils.populateInitialPushPayloadFromIntent(intent)
super.onCreate(savedInstanceState)
}
```
#### Step 3.2: Handle deep links from a closed state
In addition to the base scenarios handled by [React Native Linking](https://reactnative.dev/docs/linking), implement the `Braze.getInitialPushPayload` method and retrieve the `url` value to account for deep links from push notifications that open your app when it isn't running. For example:
```javascript
// Handles deep links when an app is launched from a hard close via push click.
Braze.getInitialPushPayload(pushPayload => {
if (pushPayload) {
console.log('Braze.getInitialPushPayload is ' + pushPayload);
showToast('Initial URL is ' + pushPayload.url);
handleOpenUrl({ pushPayload.url });
}
});
```
**Note:**
This method requires the native setup in Step 3.1 for your platform. If you're using the Braze Expo plugin, this may be handled automatically.
**Important:**
To handle deep links from push notifications on iOS, you must also configure link handling in your native iOS layer.
This includes registering a custom URL scheme and implementing a URL handler in your `AppDelegate`. For full setup instructions, see [Handling deep links](https://www.braze.com/docs/es/es/developer_guide/platforms/swift/in_app_messages/deep_linking/?tab=objective-c) in the native iOS documentation.
#### Step 3.1: Store the push notification payload on app launch {#step-3-1}
**Note:**
Skip step 3.1 if you're using the Braze Expo plugin, as this functionality is handled automatically.
For iOS, add `populateInitialPayloadFromLaunchOptions` to your AppDelegate's `didFinishLaunchingWithOptions` method. For example:
```objc
- (BOOL)application:(UIApplication *)application didFinishLaunchingWithOptions:(NSDictionary *)launchOptions
{
// ... Perform regular React Native setup
BRZConfiguration *configuration = [[BRZConfiguration alloc] initWithApiKey:apiKey endpoint:endpoint];
configuration.triggerMinimumTimeInterval = 1;
configuration.logger.level = BRZLoggerLevelInfo;
Braze *braze = [BrazeReactBridge initBraze:configuration];
AppDelegate.braze = braze;
[self registerForPushNotifications];
[[BrazeReactUtils sharedInstance] populateInitialPayloadFromLaunchOptions:launchOptions];
return [super application:application didFinishLaunchingWithOptions:launchOptions];
}
```
```swift
func application(
_ application: UIApplication,
didFinishLaunchingWithOptions launchOptions: [UIApplication.LaunchOptionsKey: Any]? = nil
) -> Bool {
// ... Perform regular React Native setup
let configuration = Braze.Configuration(apiKey: apiKey, endpoint: endpoint)
configuration.triggerMinimumTimeInterval = 1
configuration.logger.level = .info
let braze = BrazeReactBridge.initBraze(configuration)
AppDelegate.braze = braze
registerForPushNotifications()
BrazeReactUtils.shared().populateInitialPayload(fromLaunchOptions: launchOptions)
return super.application(application, didFinishLaunchingWithOptions: launchOptions)
}
```
#### Step 3.2: Handle deep links from a closed state
In addition to the base scenarios handled by [React Native Linking](https://reactnative.dev/docs/linking), implement the `Braze.getInitialPushPayload` method and retrieve the `url` value to account for deep links from push notifications that open your app when it isn't running. For example:
```javascript
// Handles deep links when an app is launched from a hard close via push click.
Braze.getInitialPushPayload(pushPayload => {
if (pushPayload) {
console.log('Braze.getInitialPushPayload is ' + pushPayload);
showToast('Initial URL is ' + pushPayload.url);
handleOpenUrl({ pushPayload.url });
}
});
```
**Note:**
This method requires the native setup in Step 3.1 for your platform. If you're using the Braze Expo plugin, this may be handled automatically.
#### Step 3.3: Enable Universal Links (optional)
To enable [universal linking](https://www.braze.com/docs/es/es/developer_guide/push_notifications/deep_linking/?sdktab=swift#universal-links) support, implement a Braze delegate that determines whether to open a given URL, then register it with your Braze instance.
Create a `BrazeReactDelegate.swift` file in your `iOS` directory and add the following. Replace `YOUR_DOMAIN_HOST` with your actual domain.
```swift
import Foundation
import BrazeKit
import UIKit
class BrazeReactDelegate: NSObject, BrazeDelegate {
/// This delegate method determines whether to open a given URL.
/// Reference the context to get additional details about the URL payload.
func braze(_ braze: Braze, shouldOpenURL context: Braze.URLContext) -> Bool {
if let host = context.url.host,
host.caseInsensitiveCompare("YOUR_DOMAIN_HOST") == .orderedSame {
// Sample custom handling of universal links
let application = UIApplication.shared
let userActivity = NSUserActivity(activityType: NSUserActivityTypeBrowsingWeb)
userActivity.webpageURL = context.url
// Routes to the `continueUserActivity` method, which should be handled in your AppDelegate.
application.delegate?.application?(
application,
continue: userActivity,
restorationHandler: { _ in }
)
return false
}
// Let Braze handle links otherwise
return true
}
}
```
Then, create and register your `BrazeReactDelegate` in `didFinishLaunchingWithOptions` of your project's `AppDelegate.swift` file.
```swift
import BrazeKit
class AppDelegate: UIResponder, UIApplicationDelegate {
static var braze: Braze?
// Keep a strong reference to the BrazeDelegate so it is not deallocated.
private var brazeDelegate: BrazeReactDelegate?
func application(
_ application: UIApplication,
didFinishLaunchingWithOptions launchOptions: [UIApplication.LaunchOptionsKey: Any]? = nil
) -> Bool {
// Other setup code (e.g., Braze initialization)
brazeDelegate = BrazeReactDelegate()
AppDelegate.braze?.delegate = brazeDelegate
return true
}
}
```
Create a `BrazeReactDelegate.h` file in your `iOS` directory and then add the following code snippet.
```objc
#import
#import
@interface BrazeReactDelegate: NSObject
@end
```
Next, create a `BrazeReactDelegate.m` file and then add the following code snippet. Replace `YOUR_DOMAIN_HOST` with your actual domain.
```objc
#import "BrazeReactDelegate.h"
#import
@implementation BrazeReactDelegate
/// This delegate method determines whether to open a given URL.
///
/// Reference the `BRZURLContext` object to get additional details about the URL payload.
- (BOOL)braze:(Braze *)braze shouldOpenURL:(BRZURLContext *)context {
if ([[context.url.host lowercaseString] isEqualToString:@"YOUR_DOMAIN_HOST"]) {
// Sample custom handling of universal links
UIApplication *application = UIApplication.sharedApplication;
NSUserActivity* userActivity = [[NSUserActivity alloc] initWithActivityType:NSUserActivityTypeBrowsingWeb];
userActivity.webpageURL = context.url;
// Routes to the `continueUserActivity` method, which should be handled in your `AppDelegate`.
[application.delegate application:application
continueUserActivity:userActivity restorationHandler:^(NSArray> * _Nullable restorableObjects) {}];
return NO;
}
// Let Braze handle links otherwise
return YES;
}
@end
```
Then, create and register your `BrazeReactDelegate` in `didFinishLaunchingWithOptions` of your project's `AppDelegate.m` file.
```objc
#import "BrazeReactUtils.h"
#import "BrazeReactDelegate.h"
@interface AppDelegate ()
// Keep a strong reference to the BrazeDelegate to ensure it is not deallocated.
@property (nonatomic, strong) BrazeReactDelegate *brazeDelegate;
@end
- (BOOL)application:(UIApplication *)application didFinishLaunchingWithOptions:(NSDictionary *)launchOptions
{
// Other setup code
self.brazeDelegate = [[BrazeReactDelegate alloc] init];
braze.delegate = self.brazeDelegate;
}
```
For an example integration, reference our sample app [in this AppDelegate example](https://github.com/braze-inc/braze-react-native-sdk/blob/master/BrazeProject/ios/BrazeProject/AppDelegate.mm).
### Step 4: Handle foreground notifications
Foreground notification handling works differently depending on your platform and setup. Choose the approach that matches your integration:
For iOS, foreground notification handling is the same as the native Swift integration. Call `handleForegroundNotification(notification:)` inside your `UNUserNotificationCenterDelegate.userNotificationCenter(_:willPresent:withCompletionHandler:)` implementation.
For complete details and code examples, see [Handling foreground notifications](https://www.braze.com/docs/es/es/developer_guide/push_notifications/?sdktab=swift#handling-foreground-notifications) in the Swift push notifications documentation.
For Android, foreground notification handling is the same as the native Android integration. Call `BrazeFirebaseMessagingService.handleBrazeRemoteMessage` inside your `FirebaseMessagingService.onMessageReceived` method.
For complete details and code examples, see [Handling foreground notifications](https://www.braze.com/docs/es/es/developer_guide/push_notifications/?sdktab=android#handling-foreground-notifications) in the Android push notifications documentation.
In Expo-managed workflow, you don't call native notification handlers directly. Instead, use the Expo Notifications API to control foreground presentation, while the Braze Expo Plugin handles native processing automatically.
```javascript
import * as Notifications from 'expo-notifications';
import Braze from '@braze/react-native-sdk';
// Control foreground presentation in Expo
Notifications.setNotificationHandler({
handleNotification: async () => ({
shouldShowAlert: true, // Show alert while in foreground
shouldPlaySound: false,
shouldSetBadge: false,
}),
});
// React to Braze push events
const subscription = Braze.addListener('pushNotificationEvent', (event) => {
console.log('Braze push event', {
type: event.payload_type, // "push_received" | "push_opened"
title: event.title,
url: event.url,
is_silent: event.is_silent,
});
// Handle deep links, custom behavior, etc.
});
// Handle initial payload when app launches via push
Braze.getInitialPushPayload((payload) => {
if (payload) {
console.log('Initial push payload', payload);
}
});
```
**Note:**
In Expo-managed workflow, the Braze Expo Plugin handles native push processing automatically. You control foreground UI via the Expo Notifications presentation options shown earlier.
For bare workflow integrations, follow the native iOS and Android approaches instead.
### Step 5: Send a test push notification
At this point, you should be able to send notifications to the devices. Adhere to the following steps to test your push integration.
**Note:**
Starting in macOS 13, on certain devices, you can test iOS push notifications on an iOS 16+ simulator running on Xcode 14 or higher. For further details, refer to the [Xcode 14 Release Notes](https://developer.apple.com/documentation/xcode-release-notes/xcode-14-release-notes).
1. Set an active user in the React Native application by calling `Braze.changeUserId('your-user-id')` method.
2. Head to **Campaigns** and create a new push notification campaign. Choose the platforms that you'd like to test.
3. Compose your test notification and head over to the **Test** tab. Add the same `user-id` as the test user and click **Send Test**. You should receive the notification on your device shortly.

## Using the Expo plugin
After you [set up push notifications for Expo](#reactnative_setting-up-push-notifications), you can use it to handle the following push notifications behaviors—without needing to write any code in the native Android or iOS layers.
### Forwarding Android push to additional FMS
If you want to use an additional Firebase Messaging Service (FMS), you can specify a fallback FMS to call if your application receives a push that isn't from Braze. For example:
```json
{
"expo": {
"plugins": [
[
"@braze/expo-plugin",
{
...
"androidFirebaseMessagingFallbackServiceEnabled": true,
"androidFirebaseMessagingFallbackServiceClasspath": "com.company.OurFirebaseMessagingService"
}
]
]
}
}
```
### Using app extensions with Expo Application Services {#app-extensions}
If you are using Expo Application Services (EAS) and have enabled `enableBrazeIosRichPush` or `enableBrazeIosPushStories`, you will need to declare the corresponding bundle identifiers for each app extension in your project. There are multiple ways you can approach this step, depending on how your project is configured to manage code signing with EAS.
One approach is to use the `appExtensions` configuration in your `app.json` file by following Expo's [app extensions documentation](https://docs.expo.dev/build-reference/app-extensions/). Alternatively, you can set up the `multitarget` setting in your `credentials.json` file by following Expo's [local credentials documentation](https://docs.expo.dev/app-signing/local-credentials/#multi-target-project).
### Troubleshooting
These are common troubleshooting steps for push notification integrations with the Braze React Native SDK and Expo plugin.
#### Push notifications stopped working {#troubleshooting-stopped-working}
If push notifications through the Expo plugin have stopped working:
1. Check that the Braze SDK is still tracking sessions.
2. Check that the SDK wasn't disabled by an explicit or implicit call to `wipeData`.
3. Review any recent upgrades to Expo or it's related libraries, as there may be conflicts with your Braze configuration.
4. Review recently added project dependencies and check if they are manually overriding your existing push notification delegate methods.
**Tip:**
For iOS integrations, you can also reference our [push notification setup tutorial](https://braze-inc.github.io/braze-swift-sdk/tutorials/braze/b1-standard-push-notifications) to help you identify potential conflicts with your project dependencies.
#### Device token won't register with Braze {#troubleshooting-token-registration}
If your device token won't register with Braze, first review [Push notifications stopped working](#troubleshooting-stopped-working).
If your issue persists, there may be a separate dependency interfering with your Braze push notification configuration. You can try removing it or manually call `Braze.registerPushToken` instead.
#### Deep links from push notifications don't open {#troubleshooting-deep-links}
If deep links from push notifications stop opening after a migration, check the following:
1. Verify your [React Native Linking](https://reactnative.dev/docs/linking) setup is still valid in your upgraded app.
2. For iOS native integrations, confirm you implemented `populateInitialPayloadFromLaunchOptions` and `Braze.getInitialPushPayload` so that, when the app is launched from a terminated state, it can retrieve the initial push payload and pass its `url` into your deep link handler.
3. If you're using the Braze Expo plugin, verify `androidHandlePushDeepLinksAutomatically` is set correctly for your implementation.
4. Review recently added dependencies for overrides to notification handling or app delegate behavior.
If you've completed these checks and the issue persists, [open a support ticket](https://www.braze.com/docs/es/es/user_guide/administrative/access_braze/support/) and include SDK logs plus reproduction steps.
## Prerequisites
Before you can use this feature, you'll need to [integrate the Web Braze SDK](https://www.braze.com/docs/es/es/developer_guide/sdk_integration/?sdktab=web). You'll also need to [set up push notifications](https://www.braze.com/docs/es/es/developer_guide/push_notifications/?sdktab=web) for the Web SDK. Note that you can only send push notifications to iOS and iPadOS users that are using [Safari v16.4](https://developer.apple.com/documentation/safari-release-notes/safari-16_4-release-notes) or later.
## Setting up Safari push for mobile
### Step 1: Create a manifest file {#manifest}
A [Web Application Manifest](https://developer.mozilla.org/en-US/docs/Web/Manifest) is a JSON file that controls how your website is presented when installed to a user's home screen.
For example, you can set the background theme color and icon that the [App Switcher](https://support.apple.com/en-us/HT202070) uses, whether it renders as full screen to resemble a native app, or whether the app should open in landscape or portrait mode.
Create a new `manifest.json` file in your website's root directory, with the following mandatory fields.
```json
{
"name": "your app name",
"short_name": "your app name",
"display": "fullscreen",
"icons": [{
"src": "favicon.ico",
"sizes": "128x128",
}]
}
```
The full list of supported fields can be found [here](https://developer.mozilla.org/en-US/docs/Web/Manifest).
### Step 2: Link the manifest file {#manifest-link}
Add the following `` tag to your website's `` element pointing to where your manifest file is hosted.
```html
```
### Step 3: Add a service worker {#service-worker}
Your website must have a service worker file that imports the Braze service-worker library, as described in our [web push integration guide](https://www.braze.com/docs/es/es/developer_guide/platform_integration_guides/web/push_notifications/integration/#step-1-configure-your-sites-service-worker).
### Step 4: Add to home screen {#add-to-homescreen}
Popular browsers (such as Safari, Chrome, FireFox, and Edge) all support web push notifications in their later versions. To request push permission on iOS or iPadOS, your website must be added to the user's home screen by selecting **Share To** > **Add to Home Screen**. [Add to Homescreen](https://support.apple.com/guide/iphone/bookmark-favorite-webpages-iph42ab2f3a7/ios#iph4f9a47bbc) lets users bookmark your website, adding your icon to their valuable home screen real estate.
{: style="max-width:40%"}
### Step 5: Show the native push prompt {#push-prompt}
After the app has been added to your home screen you can now request push permission when the user takes an action (such as clicking a button). This can be done using the [`requestPushPermission`](https://js.appboycdn.com/web-sdk/latest/doc/modules/braze.html#requestpushpermission) method, or with a [no-code push primer in-app message](https://www.braze.com/docs/es/es/user_guide/message_building_by_channel/push/best_practices/push_primer_messages/).
**Note:**
After you accept or decline the prompt, you need to delete and reinstall the website to your home screen to be able to show the prompt again.
{: style="max-width:40%"}
For example:
```typescript
import { requestPushPermission } from "@braze/web-sdk";
button.onclick = function(){
requestPushPermission(() => {
console.log(`User accepted push prompt`);
}, (temporary) => {
console.log(`User ${temporary ? "temporarily dismissed" : "permanently denied"} push prompt`);
});
};
```
## Next steps
Next, send yourself a [test message](https://www.braze.com/docs/es/es/developer_guide/in_app_messages/sending_test_messages/) to validate the integration. After your integration is complete, you can use our [no-code push primer messages](https://www.braze.com/docs/es/es/user_guide/message_building_by_channel/push/best_practices/push_primer_messages/) to optimize your push opt-in rates.
## Prerequisites
Before you can use this feature, you'll need to [integrate the Unity Braze SDK](https://www.braze.com/docs/es/es/developer_guide/sdk_integration/?sdktab=unity).
## Setting up push notification
### Step 1: Set up the platform
#### Step 1.1: Enable Firebase
To get started, follow the [Firebase Unity setup documentation](https://firebase.google.com/docs/unity/setup).
**Note:**
Integrating the Firebase Unity SDK may cause your `AndroidManifest.xml` to be overridden. If that occurs, make sure to revert it to the original.
#### Step 1.2: Set your Firebase credentials
You need to input your Firebase Server Key and Sender ID into the Braze dashboard. To do this, log in to the [Firebase Developers Console](https://console.firebase.google.com/) and select your Firebase project. Next, select **Cloud Messaging** under **Settings** and copy the Server Key and Sender ID: 
In Braze, select your Android app on the **App Settings** page under **Manage Settings**. Next, enter your Firebase Server Key in the **Firebase Cloud Messaging Server Key** field and Firebase Sender ID in the **Firebase Cloud Messaging Sender** ID field.

#### Step 1.1: Verify integration method
Braze provides a native Unity solution for automating iOS push integrations. If you you'd like to set up and manage your integration manually instead, see [Swift: Push Notifications](https://www.braze.com/docs/es/es/developer_guide/push_notifications/?sdktab=swift).
Otherwise, continue to the next step.
**Note:**
Our automatic push notification solution takes advantage of iOS 12's Provisional Authorization feature and is not available to use with the native push prompt pop-up.
#### Step 1.1: Enable ADM
1. Create an account with the [Amazon Apps & Games Developer Portal](https://developer.amazon.com/public) if you have not already done so.
2. Obtain [OAuth credentials (Client ID and Client Secret) and an ADM API key](https://developer.amazon.com/public/apis/engage/device-messaging/tech-docs/02-obtaining-adm-credentials).
3. Enable **Automatic ADM Registration Enabled** in the Unity Braze Configuration window.
- Alternatively, you may add the following line to your `res/values/braze.xml` file to enable ADM registration:
```xml
true
```
### Step 2: Configure push notifications
#### Step 2.1: Configure push settings {#unity_step-21-configure-push-settings}
The Braze SDK can automatically handle push registration with the Firebase Cloud Messaging Servers to have devices receive push notifications. In Unity, enable **Automate Unity Android Integration**, then configure the following **Push Notification** settings.
| Setting | Description |
|----------------------------------------|----------------------------------------------------------------------------------------------------------------------------------------------------------|
| Automatic Firebase Cloud Messaging Registration Enabled | Instructs the Braze SDK to automatically retrieve and send an FCM push token for a device. |
| Firebase Cloud Messaging Sender ID | The Sender ID from your Firebase console. |
| Handle Push Deeplinks Automatically | Whether the SDK should handle opening deep links or opening the app when push notifications are clicked. |
| Small Notification Icon Drawable | Android drawable resource reference for the small icon shown when a push arrives. Enter the full reference including the `@drawable/` prefix (for example, `@drawable/hourglass_icon`). The automated integration writes this value into `braze.xml` as entered. If you leave this empty, the notification uses the application icon as the small icon. |
| Large Notification Icon Drawable | Optional large icon for notifications. Use the same `@drawable/` format as the small icon (for example, `@drawable/my_large_icon`). |
{: .reset-td-br-1 .reset-td-br-2 aria-label="Step 2.1: Configure push settings" }
**Note:**
**Small Notification Icon Drawable** and **Large Notification Icon Drawable** appear under **Push Configuration** in **Braze > Braze Configuration**. Both values are written into `braze.xml` as you enter them. Include the `@drawable/` prefix yourself—the Braze Unity integration does not add it for you (for example, `@drawable/hourglass_icon`).
#### Step 2.1: Upload your APNs token
Before you can send an iOS push notification using Braze, you need to upload your `.p8` push notification file, as described in [Apple's developer documentation](https://developer.apple.com/documentation/usernotifications/establishing-a-token-based-connection-to-apns):
1. In your Apple developer account, go to [**Certificates, Identifiers & Profiles**](https://developer.apple.com/account/ios/certificate).
2. Under **Keys**, select **All** and click the add button (+) at the top of the page.
3. Under **Key Description**, enter a unique name for the signing key.
4. Under **Key Services**, select the **Apple Push Notification service (APNs)** checkbox, then click **Continue**. Click **Confirm**.
5. Note the key ID. Click **Download** to generate and download the key. Make sure to save the downloaded file in a secure place, as you cannot download this more than once.
6. In Braze, go to **Settings** > **App Settings** and upload the `.p8` file under **Apple Push Certificate**. You can upload either your development or production push certificate. To test push notifications after your app is live in the App Store, its recommended to set up a separate workspace for the development version of your app.
7. When prompted, enter your app's [bundle ID](https://developer.apple.com/documentation/foundation/nsbundle/1418023-bundleidentifier), [key ID](https://developer.apple.com/help/account/manage-keys/get-a-key-identifier/), and [team ID](https://developer.apple.com/help/account/manage-your-team/locate-your-team-id). You'll also need to specify whether to send notifications to your app's development or production environment, which is defined by its provisioning profile.
8. When you're finished, select **Save**.
#### Step 2.2: Enable automatic push
Open the Braze Configuration Settings in the Unity Editor by navigating to **Braze > Braze Configuration**.
Check **Integrate Push With Braze** to automatically register users for push notifications, pass push tokens to Braze, track analytics for push opens, and take advantage of our default push notification handling.
#### Step 2.3: Enable background push (optional)
Check **Enable Background Push** if you want to enable `background mode` for push notifications. This allows the system to wake your application from the `suspended` state when a push notification arrives, enabling your application to download content in response to push notifications. Checking this option is required for our uninstall tracking functionality.

#### Step 2.4: Disable automatic registration (optional)
Users who have not yet opted-in to push notifications will automatically be authorized for push upon opening your application. To disable this feature and manually register users for push, check **Disable Automatic Push Registration**.
- If **Disable Provisional Authorization** is not checked on iOS 12 or later, the user will be provisionally (silently) authorized to receive quiet push. If checked, the user will be shown the native push prompt.
- If you need to configure exactly when the prompt is shown at runtime, disable automatic registration from the Braze configuration editor and use `AppboyBinding.PromptUserForPushPermissions()` instead.

#### Step 2.1: Update `AndroidManifest.xml`
If your app does not have an `AndroidManifest.xml`, you can use the following as a template. Otherwise, if you already have an `AndroidManifest.xml`, ensure that any of the following missing sections are added to your existing `AndroidManifest.xml`.
```xml
```
#### Step 2.2: Store your ADM API key
First, [generate an ADM API Key for your app](https://developer.amazon.com/public/apis/engage/device-messaging/tech-docs/02-obtaining-adm-credentials), then save the key to a file named `api_key.txt` and add it in your project's [`Assets/`](https://docs.unity3d.com/Manual/AndroidAARPlugins.html) directory.
**Important:**
Amazon will not recognize your key if `api_key.txt` contains any white space characters, such as a trailing line break.
Next, in your `mainTemplate.gradle` file, add the following:
```gradle
task copyAmazon(type: Copy) {
def unityProjectPath = $/file:///**DIR_UNITYPROJECT**/$.replace("\\", "/")
from unityProjectPath + '/Assets/api_key.txt'
into new File(projectDir, 'src/main/assets')
}
preBuild.dependsOn(copyAmazon)
```
#### Step 2.3: Add ADM Jar
The required ADM Jar file may be placed anywhere in your project according to the [Unity JAR documentation](https://docs.unity3d.com/Manual/AndroidJARPlugins.html).
#### Step 2.4: Add Client Secret and Client ID to your Braze dashboard
Lastly, you must add the Client Secret and Client ID you obtained in [Step 1](#unity_step-1-enable-adm) to the Braze dashboard's **Manage Settings** page.

### Step 3: Set push listeners
#### Step 3.1: Enable push received listener
The push received listener is fired when a user receives a push notification. To send the push payload to Unity, set the name of your game object and push the received listener callback method under the **Set Push Received Listener**.
#### Step 3.2: Enable push opened listener
The push opened listener is fired when a user launches the app by clicking on a push notification. To send the push payload to Unity, set the name of your game object and push opened listener callback method under the **Set Push Opened Listener**.
#### Step 3.3: Enable push deleted listener
The push deleted listener is fired when a user swipes away or dismisses a push notification. To send the push payload to Unity, set the name of your game object and push deleted listener callback method under the **Set Push Deleted Listener**.
#### Push listener example
The following example implements the `BrazeCallback` game object using a callback method name of `PushNotificationReceivedCallback`, `PushNotificationOpenedCallback`, and `PushNotificationDeletedCallback` respectively.

```csharp
public class MainMenu : MonoBehaviour {
void PushNotificationReceivedCallback(string message) {
#if UNITY_ANDROID
Debug.Log("PushNotificationReceivedCallback message: " + message);
PushNotification pushNotification = new PushNotification(message);
Debug.Log("Push Notification received: " + pushNotification);
#elif UNITY_IOS
ApplePushNotification pushNotification = new ApplePushNotification(message);
Debug.Log("Push received Notification event: " + pushNotification);
#endif
}
void PushNotificationOpenedCallback(string message) {
#if UNITY_ANDROID
Debug.Log("PushNotificationOpenedCallback message: " + message);
PushNotification pushNotification = new PushNotification(message);
Debug.Log("Push Notification opened: " + pushNotification);
#elif UNITY_IOS
ApplePushNotification pushNotification = new ApplePushNotification(message);
Debug.Log("Push opened Notification event: " + pushNotification);
#endif
}
void PushNotificationDeletedCallback(string message) {
#if UNITY_ANDROID
Debug.Log("PushNotificationDeletedCallback message: " + message);
PushNotification pushNotification = new PushNotification(message);
Debug.Log("Push Notification dismissed: " + pushNotification);
#endif
}
}
```
#### Step 3.1: Enable push received listener
The push received listener is fired when a user receives a push notification while actively using the application (such as when the app is foregrounded). Set the push received listener in the Braze configuration editor. If you need to configure your game object listener at runtime, use `AppboyBinding.ConfigureListener()` and specify `BrazeUnityMessageType.PUSH_RECEIVED`.

#### Step 3.2: Enable push opened listener
The push opened listener is fired when a user launches the app by clicking on a push notification. To send the push payload to Unity, set the name of your game object and push opened listener callback method under the **Set Push Opened Listener** option:

If you need to configure your game object listener at runtime, use `AppboyBinding.ConfigureListener()` and specify `BrazeUnityMessageType.PUSH_OPENED`.
#### Push listener example
The following example implements the `AppboyCallback` game object using a callback method name of `PushNotificationReceivedCallback` and `PushNotificationOpenedCallback`, respectively.

```csharp
public class MainMenu : MonoBehaviour {
void PushNotificationReceivedCallback(string message) {
#if UNITY_ANDROID
Debug.Log("PushNotificationReceivedCallback message: " + message);
PushNotification pushNotification = new PushNotification(message);
Debug.Log("Push Notification received: " + pushNotification);
#elif UNITY_IOS
ApplePushNotification pushNotification = new ApplePushNotification(message);
Debug.Log("Push received Notification event: " + pushNotification);
#endif
}
void PushNotificationOpenedCallback(string message) {
#if UNITY_ANDROID
Debug.Log("PushNotificationOpenedCallback message: " + message);
PushNotification pushNotification = new PushNotification(message);
Debug.Log("Push Notification opened: " + pushNotification);
#elif UNITY_IOS
ApplePushNotification pushNotification = new ApplePushNotification(message);
Debug.Log("Push opened Notification event: " + pushNotification);
#endif
}
}
```
By updating your `AndroidManifest.xml` in the [previous step](#unity_step-21-update-androidmanifestxml), push listeners were automatically set up when you added the following lines. So, no further setup is required.
```xml
```
**Note:**
To learn more about ADM push listeners, see [Amazon: Integrate Amazon Device Messaging](https://developer.amazon.com/docs/video-skills-fire-tv-apps/integrate-adm.html).
## Optional configurations
### Deep linking to in-app resources
Although Braze can handle standard deep links (such as website URLs, Android URIs, etc.) by default, creating custom deep links requires an additional Manifest setup.
For setup guidance, visit [Deep Linking to In-App Resources](https://developer.android.com/training/app-links/deep-linking).
#### Adding Braze push notification icons
**Important:**
Do not add notification icon images under `Assets/Plugins/Android/res`. Unity [deprecated providing Android resources in that path](https://support.unity.com/hc/en-us/articles/115005875443-Providing-Android-resources-in-Assets-Plugins-Android-res-is-deprecated), which can surface build warnings or validation errors. Package your icon drawables in an [Android Archive (AAR) plug-in](https://docs.unity3d.com/Manual/AndroidAARPlugins.html) or Android library project instead so they merge into the built app's resources like any other drawable.
To add push icons to your project, create an AAR plug-in or Android library that contains the icon image files under `res/drawable*` (or density-specific folders), then reference each icon in **Braze > Braze Configuration** using the full `@drawable/` resource name (see [Step 2.1: Configure push settings](#unity_step-21-configure-push-settings)). For Unity's packaging and import steps, see [Android Library Projects and Android Archive plug-ins](https://docs.unity3d.com/Manual/AndroidAARPlugins.html).
For small icon artwork rules (alpha-only, no color), see [Android push notifications](https://www.braze.com/docs/es/es/developer_guide/push_notifications/?sdktab=android), Step 2: Conform small icons to design guidelines.
#### Push token callback
To receive a copy of Braze device tokens from the OS, set a delegate using `AppboyBinding.SetPushTokenReceivedFromSystemDelegate()`.
There are no optional configurations for ADM at this time.
## Prerequisites
Before you can use this feature, you'll need to [integrate the .NET MAUI Braze SDK](https://www.braze.com/docs/es/es/developer_guide/sdk_integration/?sdktab=.net%20maui%20(xamarin)).
## Setting up push notifications
**Tip:**
To see how namespaces change between Java and C#, check out our [Xample sample app on GitHub](https://github.com/braze-inc/braze-xamarin-sdk/tree/master/appboy-component/samples/android-net-maui/BrazeAndroidMauiSampleApp/BrazeAndroidMauiSampleApp).
To integrate push notifications for .NET MAUI (formerly Xamarin), you'll need to complete the steps for native Android push notifications. The following steps are only a summary. For a full walkthrough, see the [native push notification guide](https://www.braze.com/docs/es/es/developer_guide/platform_integration_guides/android/push_notifications/?tab=android/).
### Step 1: Update your project
1. Add Firebase to your Android project.
2. Add the Cloud Messaging library to your Android project's `build.gradle`:
```gradle
implementation "google.firebase:firebase-messaging:+"
```
### Step 2: Create your JSON credentials
1. In Google Cloud, enable the [Firebase Cloud Messaging API](https://console.cloud.google.com/apis/library/fcm.googleapis.com).
2. Select **Service Accounts** > your project > **Create Service Account**, then enter a service account name, ID, and description. When you're finished, select **Create and continue**.
3. In the **Role** field, find and select **Firebase Cloud Messaging API Admin** from the list of roles.
4. In **Service Accounts**, choose your project, then select **Actions** > **Manage Keys** > **Add Key** > **Create new key**. Choose **JSON**, then select **Create**.
### Step 3: Upload your JSON credentials
1. In Braze, select **Settings** > **App Settings**. Under your Android app's **Push Notification Settings**, choose **Firebase**, then select **Upload JSON File** and upload the credentials you generated earlier. When you're finished, select **Save**.
2. Enable automatic FCM token registration, by going to Firebase Console. Open your project, then select **Settings** > **Project settings**. Select **Cloud Messaging**, then under **Firebase Cloud Messaging API (V1)**, copy the number in the **Sender ID** field.
3. In your Android Studio project and the following to your `braze.xml`.
```xml
trueFIREBASE_SENDER_ID
```
**Important:**
To prevent Braze from triggering unnecessary network requests every time you send silent push notifications, remove any automatic network requests configured in your `Application` class's `onCreate()` method. For more information see, [Android Developer Reference: Application](https://developer.android.com/reference/android/app/Application).
### Step 1: Complete the initial setup
See the [Swift integration instructions](https://www.braze.com/docs/es/es/developer_guide/push_notifications/?sdktab=swift) for information about setting up your application with push and storing your credentials on our server. Refer to the [iOS MAUI](https://github.com/braze-inc/braze-xamarin-sdk/tree/master/appboy-component/samples/ios-net-maui/BrazeiOSMauiSampleApp) sample application for more details.
### Step 2: Request push notifications permission
Our .NET MAUI SDK now supports automatic push set up. Set up push automation and permissions by adding the following code to your Braze instance configuration:
```csharp
configuration.Push.Automation = new BRZConfigurationPushAutomation(true);
configuration.Push.Automation.RequestAuthorizationAtLaunch = false;
```
Refer to the [iOS MAUI](https://github.com/braze-inc/braze-xamarin-sdk/tree/master/appboy-component/samples/ios-net-maui/BrazeiOSMauiSampleApp) sample application for more details. For more details, see the Xamarin documentation for [Enhanced User Notifications in Xamarin.iOS](https://learn.microsoft.com/en-us/previous-versions/xamarin/ios/platform/user-notifications/enhanced-user-notifications?tabs=macos).
# Personalizar las notificaciones push para el SDK de Braze
Source: /docs/es/developer_guide/push_notifications/customization/index.md
# Personalizar las notificaciones push
> Aprende a personalizar las notificaciones push para el SDK de Braze.
## Prerequisites
Before you can use this feature, you'll need to [integrate the Android Braze SDK](https://www.braze.com/docs/es/es/developer_guide/sdk_integration/?sdktab=android). You'll also need to [set up push notifications](https://www.braze.com/docs/es/es/developer_guide/push_notifications/?sdktab=android).
## Using a callback for push events {#push-callback}
Braze provides a [`subscribeToPushNotificationEvents()`](https://braze-inc.github.io/braze-android-sdk/kdoc/braze-android-sdk/com.braze/-i-braze/subscribe-to-push-notification-events.html) callback for when push notifications are received, opened, or dismissed. It is recommended to place this callback in your `Application.onCreate()` in order to not miss any events occurring while your application is not running.
**Note:**
If previously using a Custom Broadcast Receiver for this functionality in your application, you can safely remove it in favor of this integration option.
```java
Braze.getInstance(context).subscribeToPushNotificationEvents(event -> {
final BrazeNotificationPayload parsedData = event.getNotificationPayload();
//
// The type of notification itself
//
final boolean isPushOpenEvent = event.getEventType() == BrazePushEventType.NOTIFICATION_OPENED;
final boolean isPushReceivedEvent = event.getEventType() == BrazePushEventType.NOTIFICATION_RECEIVED;
// Sent when a user has dismissed a notification
final boolean isPushDeletedEvent = event.getEventType() == BrazePushEventType.NOTIFICATION_DELETED;
//
// Notification data
//
final String pushTitle = parsedData.getTitleText();
final Long pushArrivalTimeMs = parsedData.getNotificationReceivedTimestampMillis();
final String deeplink = parsedData.getDeeplink();
//
// Custom KVP data
//
final String myCustomKvp1 = parsedData.getBrazeExtras().getString("my first kvp");
final String myCustomKvp2 = parsedData.getBrazeExtras().getString("my second kvp");
});
```
```kotlin
Braze.getInstance(context).subscribeToPushNotificationEvents { event ->
val parsedData = event.notificationPayload
//
// The type of notification itself
//
val isPushOpenEvent = event.eventType == BrazePushEventType.NOTIFICATION_OPENED
val isPushReceivedEvent = event.eventType == BrazePushEventType.NOTIFICATION_RECEIVED
// Sent when a user has dismissed a notification
val isPushDeletedEvent = event.eventType == BrazePushEventType.NOTIFICATION_DELETED
//
// Notification data
//
val pushTitle = parsedData.titleText
val pushArrivalTimeMs = parsedData.notificationReceivedTimestampMillis
val deeplink = parsedData.deeplink
//
// Custom KVP data
//
val myCustomKvp1 = parsedData.brazeExtras.getString("my first kvp")
val myCustomKvp2 = parsedData.brazeExtras.getString("my second kvp")
}
```
**Tip:**
With notification action buttons, `BRAZE_PUSH_INTENT_NOTIFICATION_OPENED` intents fire when buttons with `opens app` or `deep link` actions are clicked. Deep link and extras handling remains the same. Buttons with `close` actions don't fire `BRAZE_PUSH_INTENT_NOTIFICATION_OPENED` intents and dismiss the notification automatically.
**Important:**
Create your push notification listener in `Application.onCreate` to ensure your listener is triggered after an end-user taps a notification while your app is in a terminated state.
## Customizing notification display {#customization-display}
### Step 1: Create your custom notification factory
In some scenarios, you may wish to customize push notifications in ways that would be cumbersome or unavailable server side. To give you complete control of notification display, we've added the ability to define your own [`IBrazeNotificationFactory`](https://braze-inc.github.io/braze-android-sdk/kdoc/braze-android-sdk/com.braze/-i-braze-notification-factory/index.html) to create notification objects for display by Braze.
If a custom `IBrazeNotificationFactory` is set, Braze will call your factory's `createNotification()` method upon push receipt before the notification is displayed to the user. Braze will pass in a `Bundle` containing Braze push data and another `Bundle` containing custom key-value pairs sent either via the dashboard or the messaging APIs:
Braze will pass in a [`BrazeNotificationPayload`](https://braze-inc.github.io/braze-android-sdk/kdoc/braze-android-sdk/com.braze.models.push/-braze-notification-payload/index.html) containing data from the Braze push notification.
```java
// Factory method implemented in your custom IBrazeNotificationFactory
@Override
public Notification createNotification(BrazeNotificationPayload brazeNotificationPayload) {
// Example of getting notification title
String title = brazeNotificationPayload.getTitleText();
// Example of retrieving a custom KVP ("my_key" -> "my_value")
String customKvp = brazeNotificationPayload.getBrazeExtras().getString("my_key");
}
```
```kotlin
// Factory method implemented in your custom IBrazeNotificationFactory
override fun createNotification(brazeNotificationPayload: BrazeNotificationPayload): Notification {
// Example of getting notification title
val title = brazeNotificationPayload.getTitleText()
// Example of retrieving a custom KVP ("my_key" -> "my_value")
val customKvp = brazeNotificationPayload.getBrazeExtras().getString("my_key")
}
```
You can return `null` from your custom `createNotification()` method to not show the notification at all, use `BrazeNotificationFactory.getInstance().createNotification()` to obtain our default `notification` object for that data and modify it before display, or generate a completely separate `notification` object for display.
**Note:**
For documentation on Braze push data keys, refer to the [Android SDK](https://braze-inc.github.io/braze-android-sdk/kdoc/braze-android-sdk/com.braze/-constants/index.html).
### Step 2: Set your custom notification factory
To instruct Braze to use your custom notification factory, use the `setCustomBrazeNotificationFactory` method to set your [`IBrazeNotificationFactory`](https://braze-inc.github.io/braze-android-sdk/kdoc/braze-android-sdk/com.braze/-i-braze-notification-factory/index.html):
```java
setCustomBrazeNotificationFactory(IBrazeNotificationFactory brazeNotificationFactory);
```
```kotlin
setCustomBrazeNotificationFactory(brazeNotificationFactory: IBrazeNotificationFactory)
```
The recommended place to set your custom `IBrazeNotificationFactory` is in the `Application.onCreate()` application lifecycle method (not activity). This will allow the notification factory to be set correctly whenever your app process is active.
**Important:**
Creating your own notification from scratch is an advanced use case and should be done only with thorough testing and a deep understanding of the Braze push functionality. For example, you must make sure your notification logs push opens correctly.
To unset your custom [`IBrazeNotificationFactory`](https://braze-inc.github.io/braze-android-sdk/kdoc/braze-android-sdk/com.braze/-i-braze-notification-factory/index.html) and return to default Braze handling for push, pass in `null` to our custom notification factory setter:
```java
setCustomBrazeNotificationFactory(null);
```
```kotlin
setCustomBrazeNotificationFactory(null)
```
## Rendering multicolor text
In Braze SDK version 3.1.1, HTML can be sent to a device to render multicolor text in push notifications.
{: style="max-width:40%;"}
This example is rendered with the following HTML:
```html
MultiColorPush
testmessage
```
Keep in mind that, Android limits which HTML elements and tags are valid in your push notifications. For example, `marquee` is not allowed.
**Important:**
Multicolor text rendering is device-specific and may not display based on Android device or version.
To render multicolor text in a push notification, you can update your `braze.xml` or `BrazeConfig`:
Add the following in your `braze.xml`:
```xml
true
```
Add the following in your [`BrazeConfig`](https://www.braze.com/docs/es/es/developer_guide/platform_integration_guides/android/advanced_use_cases/runtime_configuration/#runtime-configuration):
```java
BrazeConfig brazeConfig = new BrazeConfig.Builder()
.setPushHtmlRenderingEnabled(true)
.build();
Braze.configure(this, brazeConfig);
```
```kotlin
val brazeConfig = BrazeConfig.Builder()
.setPushHtmlRenderingEnabled(true)
.build()
Braze.configure(this, brazeConfig)
```
### Supported HTML tags
Currently, Google doesn't list their supported HTML tags for Android directly in their documentation—this information can only be found in their [Git repository's `Html.java` file](https://android.googlesource.com/platform/frameworks/base/+/master/core/java/android/text/Html.java). Keep this in mind when referencing the following table, as this information was pulled from this file, and their supported HTML tags could be subject to change.
Category
HTML Tag
Description
Basic Text Styling
<b>, <strong>
Bold text
<i>, <em>
Italic text
<u>
Underline text
<s>, <strike>, <del>
Strikethrough text
<sup>
Superscript text
<sub>
Subscript text
<tt>
Monospace text
Size/Font
<big>, <small>
Relative text size changes
<font color="...">
Sets foreground color
<span> (with inline CSS)
Inline styles (e.g., color, background)
Paragraph & Block
<p>, <div>
Block-level sections
<br>
Line break
<blockquote>
Quoted block
<ul> + <li>
Unordered list with bullets
Headings
<h1> - <h6>
Headings (various sizes)
Links & Images
<a href="...">
Clickable link
<img src="...">
Inline image
Other Inline
<em>, <strong>, <dfn>, <cite>
Synonyms for italic or bold
{: .reset-td-br-1 .reset-td-br-2 .reset-td-br-3 aria-label="Supported HTML tags" }
## Rendering inline images
### How it works
You can showcase a larger image within your Android push notification using inline image push. With this design, users won't have to manually expand the push to enlarge the image. Unlike regular Android push notifications, inline image push images are in a 3:2 aspect ratio.
{: style="max-width:50%;"}
### Compatibility
While you can send inline images to any device, devices and SDKs that don't meet the minimum versions will display a standard image instead. For inline images to display properly, both the Android Braze SDK v10.0.0+ and a device running Android M+ are required. The SDK must also be enabled for the image to render.
**Note:**
Devices running Android 12 will render differently due to changes in custom push notification styles.
### Sending an inline image push
When creating an Android push message, this feature is available in the **Notification Type** dropdown.

## Settings
There are many advanced settings available for Android push notifications sent through the Braze dashboard. This article will describe these features and how to use them successfully.

### Notification ID {#notification-id}
A **Notification ID** is a unique identifier for a message category of your choosing that informs the messaging service to only respect the most recent message from that ID. Setting a notification ID allows you to send just the most recent and relevant message, rather than a stack of outdated, irrelevant ones.
### Firebase Messaging Delivery priority {#fcm-priority}
The [Firebase Messaging Delivery Priority](https://firebase.google.com/docs/cloud-messaging/android/message-priority#setting-priority-for-messages) field lets you control whether a push is sent with "normal" or "high" priority to Firebase Cloud Messaging.
### Time to live (TTL) {#ttl}
The **Time to Live** (TTL) field allows you to set a custom length of time to store messages with the push messaging service. The default values for time to live are four weeks for FCM and 31 days for ADM.
### Summary text {#summary-text}
The summary text allows you to set additional text in the expanded notification view. It also serves as a caption for notifications with images.
{: style="max-width:65%;"}
The summary text will display under the body of the message in the expanded view.
{: style="max-width:65%;"}
For push notifications that include images, the message text will be shown in the collapsed view, while the summary text will be displayed as the image caption when the notification is expanded.
### Custom URIs {#custom-uri}
The **Custom URI** feature allows you to specify a Web URL or an Android resource to navigate to when the notification is clicked. If no custom URI is specified, clicking on the notification brings users into your app. You can use the custom URI to deep link inside your app and direct users to resources that exist outside of your app. This can be specified via the [Messaging API](https://www.braze.com/docs/es/es/api/endpoints/messaging/) or our dashboard under **Advanced Settings** in the push composer as pictured:

### Notification display priority {#notification-priority}
**Important:**
The Notification Display Priority setting is no longer used on devices running Android O or newer. For newer devices, set the priority through [notification channel configuration](https://developer.android.com/training/notify-user/channels#importance).
The priority level of a push notification affects how your notification is displayed in the notification tray relative to other notifications. It can also affect the speed and manner of delivery, as normal and lower priority messages may be sent with slightly higher latency or batched to preserve battery life, whereas high priority messages are always sent immediately.
In Android O, notification priority became a property of notification channels. You will need to work with your developer to define the priority for a channel during its configuration and then use the dashboard to select the proper channel when sending your notification sounds. For devices running versions of Android before O, specifying a priority level for Android notifications is possible via the Braze dashboard and messaging API.
To message your full user base with a specific priority, we recommend that you indirectly specify the priority through [notification channel configuration](https://developer.android.com/training/notify-user/channels#importance) (to target O+ devices) *and* send the individual priority from the dashboard (to target <O devices).
The priority levels that you can set on Android or Fire OS push notifications are:
| Priority | Description/Intended Use | `priority` value (for API messages) |
|----------|--------------------------|-------------------------------------|
| Max | Urgent or time-critical messages | `2` |
| High | Important communication, such as a new message from a friend | `1` |
| Default | Most notifications - use if your message doesn't explicitly fall under any of the other priority types | `0` |
| Low | Information that you want users to know about but does not require immediate action | `-1` |
| Min | Contextual or background information. | `-2` |
{: .reset-td-br-1 .reset-td-br-2 .reset-td-br-3 aria-label="Notification display priority #notification-priority" }
For more information, refer to Google's [Android notification](http://developer.android.com/design/patterns/notifications.html) documentation.
### Sounds {#sounds}
In Android O, notification sounds became a property of notification channels. You will need to work with your developer to define the sound for a channel during its configuration and then use the dashboard to select the proper channel when sending your notifications.
For devices running versions of Android before O, Braze allows you to set the sound of an individual push message through the dashboard composer. You can do so by specifying a local sound resource on the device (for example, `android.resource://com.mycompany.myapp/raw/mysound`). Specifying "default" in this field will play the default notification sound on the device. This can be specified via the [Messaging API](https://www.braze.com/docs/es/es/api/endpoints/messaging/) or the dashboard under **Advanced Settings** in the push composer.

Enter the full sound resource URI (for example, `android.resource://com.mycompany.myapp/raw/mysound`) into the dashboard prompt.
To message your full user base with a specific sound, we recommend that you indirectly specify the sound through [notification channel configuration](https://developer.android.com/training/notify-user/channels) (to target O+ devices) *and* send the individual sound from the dashboard (to target <O devices).
## Prerequisites
Before you can use this feature, you'll need to [integrate the Swift Braze SDK](https://www.braze.com/docs/es/es/developer_guide/sdk_integration/?sdktab=swift). You'll also need to [set up push notifications](https://www.braze.com/docs/es/es/developer_guide/push_notifications/?sdktab=swift).
## Customizing action buttons {#push-action-buttons-integration}
The Braze Swift SDK provides URL handling support for push action buttons. There are four sets of default push action buttons for Braze default push categories: `Accept/Decline`, `Yes/No`, `Confirm/Cancel`, and `More`.
{: style="max-width:60%"}
### Manually registering action buttons
**Important:**
Manually registering push action buttons are not recommended.
If you [set up push notifications](https://www.braze.com/docs/es/es/developer_guide/push_notifications/?sdktab=swift) using the `configuration.push.automation` configuration option, Braze automatically registers the action buttons for the default push categories and handles the push action button click analytics and URL routing.
However, you can choose to manually register push action buttons instead.
#### Step 1: Adding Braze default push categories {#registering}
Use the following code to register for the default push categories when you [register for push](https://www.braze.com/docs/es/es/developer_guide/platform_integration_guides/swift/push_notifications/integration/#step-4-register-push-tokens-with-braze):
a
```swift
UNUserNotificationCenter.current().setNotificationCategories(Braze.Notifications.categories)
```
```objc
[[UNUserNotificationCenter currentNotificationCenter] setNotificationCategories:BRZNotifications.categories];
```
**Note:**
Clicking on push action buttons with background activation mode will only dismiss the notification and not open the app. The next time the user opens the app, the button click analytics for these actions will be flushed to the server.
#### Step 2: Enable interactive push handling {#enable-push-handling}
To enable our push action button handling, including click analytics and URL routing, add the following code to your app's `didReceive(_:completionHandler:)` delegate method:
```swift
AppDelegate.braze?.notifications.handleUserNotification(response: response, withCompletionHandler: completionHandler)
```
```objc
[AppDelegate.braze.notifications handleUserNotificationWithResponse:response
withCompletionHandler:completionHandler];
```
If you use the `UNNotification` framework and have implemented the Braze [notification methods](https://www.braze.com/docs/es/es/developer_guide/platform_integration_guides/swift/push_notifications/integration/#step-5-enable-push-handling), you should already have this method integrated.
## Customizing push categories {#customizing-push-categories}
In addition to providing a set of default push categories, Braze supports custom notification categories and actions. After you register categories in your application, you can use the Braze dashboard to send these custom notification categories to your users.
Here's an example that leverages the `LIKE_CATEGORY` displayed on the device:

### Step 1: Register a category
To register a category in your app, use a similar approach to the following:
```swift
Braze.Notifications.categories.insert(
.init(identifier: "LIKE_CATEGORY",
actions: [
.init(identifier: "LIKE_IDENTIFIER", title: "Like", options: [.foreground]),
.init(identifier: "UNLIKE_IDENTIFIER", title: "Unlike", options: [.foreground])
],
intentIdentifiers: []
)
)
UNUserNotificationCenter.current().setNotificationCategories(Braze.Notifications.categories)
```
```objc
NSMutableSet *categories = [BRZNotifications.categories mutableCopy];
UNNotificationAction *likeAction = [UNNotificationAction actionWithIdentifier:@"LIKE_IDENTIFIER"
title:@"Like"
options:UNNotificationActionOptionForeground];
UNNotificationAction *unlikeAction = [UNNotificationAction actionWithIdentifier:@"UNLIKE_IDENTIFIER"
title:@"Unlike"
options:UNNotificationActionOptionForeground];
UNNotificationCategory *likeCategory = [UNNotificationCategory categoryWithIdentifier:@"LIKE_CATEGORY"
actions:@[likeAction, unlikeAction]
intentIdentifiers:@[]
options:UNNotificationCategoryOptionNone];
[categories addObject:likeCategory];
[UNUserNotificationCenter.currentNotificationCenter setNotificationCategories:categories];
```
**Note:**
When you create a `UNNotificationAction`, you can specify a list of action options. For example, `.foreground` lets your users open your app after tapping the action button. This is necessary for navigational on-click behaviors, such as "Open App" and "Deep Link into Application". If you want an action button that simply dismisses the notification without opening the app, leave `.foreground` out of the action's `options` array. For more information, see [`UNNotificationActionOptions`](https://developer.apple.com/documentation/usernotifications/unnotificationactionoptions).
### Step 2: Select your categories
After you register a category, use the Braze dashboard to send notifications of that type to users.
**Tip:**
You only need to define action buttons on the Braze dashboard for behaviors that can't be created locally in your Swift code, such as deep linking into your app or redirecting to a web URL. These actions need to be configured on the dashboard so they can define what URL or deep link to open. For action buttons that simply dismiss the notification without opening the app, you don't need to configure them on the dashboard—dismissal behavior is handled automatically by iOS. Just register your custom category and its actions in your app code, then enter the matching category name on the dashboard.
1. In the Braze dashboard, select **Messaging** > **Push Notifications**, then choose your iOS [push campaign](https://www.braze.com/docs/es/es/user_guide/message_building_by_channel/push/creating_a_push_message).
2. Under **Compose push notification**, turn on **Action Buttons**.
3. In the **iOS Notification Category** dropdown, select **Enter pre-registered custom iOS Category**.
4. Finally, enter one of the categories you created earlier. The following example, uses the custom category: `LIKE_CATEGORY`.

### Example: Custom push category {#example-custom-push-category}
Suppose you want to create a push notification with two action buttons: **Manage**, which deep links into your app, and **Keep**, which simply dismisses the notification.
In the following example, the `MANAGE_IDENTIFIER` action includes the `.foreground` option, which opens the app when tapped—this is necessary because it will deep link into a specific part of the app. The `KEEP_IDENTIFIER` action uses an empty options array, meaning it will dismiss the notification without opening the app.
```swift
Braze.Notifications.categories.insert(
.init(identifier: "YOUR_CATEGORY",
actions: [
.init(identifier: "KEEP_IDENTIFIER", title: "Keep", options: []),
.init(identifier: "MANAGE_IDENTIFIER", title: "Manage", options: [.foreground])
],
intentIdentifiers: []
)
)
UNUserNotificationCenter.current().setNotificationCategories(Braze.Notifications.categories)
```
Because `MANAGE_IDENTIFIER` deep links into the app, you would set up that action button on the Braze dashboard with the associated deep link URL. However, you don't need to define a button on the dashboard for `KEEP_IDENTIFIER` because it only dismisses the notification. On the dashboard, you only need to enter the category name (for example, `YOUR_CATEGORY`) to match what you registered in your app code.
## Customizing badges
Badges are small icons that are ideal for getting a user's attention. You can specify a badge count in the [**Settings**](https://www.braze.com/docs/es/es/developer_guide/push_notifications/customization/?sdktab=swift#swift_settings) tab when you compose a push notification using the Braze dashboard. You may also update your badge count manually through your application's [`applicationIconBadgeNumber`](https://developer.apple.com/library/ios/documentation/UIKit/Reference/UIApplication_Class/index.html#//apple_ref/occ/instp/UIApplication/applicationIconBadgeNumber) property or the [remote notification payload](https://developer.apple.com/library/content/documentation/NetworkingInternet/Conceptual/RemoteNotificationsPG/CreatingtheNotificationPayload.html#//apple_ref/doc/uid/TP40008194-CH10-SW1).
Braze will automatically clear the badge count when a Braze notification is received while the app is in the foreground. Manually setting the badge number to 0 will also clear notifications in the notification center.
If you do not have a plan for clearing badges as part of normal app operation or by sending pushes that clear the badge, you should clear the badge when the app becomes active by adding the following code to your app's `applicationDidBecomeActive:` delegate method:
```swift
// For iOS 16.0+
let center = UNUserNotificationCenter.current()
do {
try await center.setBadgeCount(0)
} catch {
// Handle errors
}
// Prior to iOS 16. Deprecated in iOS 17+.
UIApplication.shared.applicationIconBadgeNumber = 0
```
```objc
// For iOS 16.0+
UNUserNotificationCenter *center = [UNUserNotificationCenter currentNotificationCenter];
[center setBadgeCount:0 withCompletionHandler:^(NSError * _Nullable error) {
if (error != nil) {
// Handle errors
}
}];
// Prior to iOS 16. Deprecated in iOS 17+.
[UIApplication sharedApplication].applicationIconBadgeNumber = 0;
```
## Customizing sounds
### Step 1: Host the sound in your app
Custom push notification sounds must be hosted locally within the main bundle of your app. The following audio data formats are accepted:
- Linear PCM
- MA4
- µLaw
- aLaw
You can package the audio data in an AIFF, WAV, or CAF file. In Xcode, add the sound file to your project as a non-localized resource of the application bundle.
**Note:**
Custom sounds must be under 30 seconds when played. If a custom sound is over that limit, the default system sound is played instead.
#### Converting sound files
You can use the afconvert tool to convert sounds. For example, to convert the 16-bit linear PCM system sound Submarine.aiff to IMA4 audio in a CAF file, use the following command in the terminal:
```bash
afconvert /System/Library/Sounds/Submarine.aiff ~/Desktop/sub.caf -d ima4 -f caff -v
```
**Tip:**
You can inspect a sound to determine its data format by opening it in QuickTime Player and choosing **Show Movie Inspector** from the **Movie** menu.
### Step 2: Provide a protocol URL for the sound
You must specify a protocol URL that directs to the location of the sound file in your app. There are two methods for doing this:
* Use the `sound` parameter of the [Apple push object](https://www.braze.com/docs/es/es/api/objects_filters/messaging/apple_object#apple-push-object) to pass the URL to Braze.
* Specify the URL in the dashboard. In the [push composer](https://www.braze.com/docs/es/es/user_guide/message_building_by_channel/push/creating_a_push_message/#step-3-select-notification-type-ios-and-android), select **Settings** and enter the protocol URL in the **Sound** field.

If the specified sound file doesn't exist or the keyword "default" is entered, Braze will use the default device alert sound. Aside from our dashboard, sound can also be configured via our [messaging API][12].
See the Apple Developer Documentation regarding [preparing custom alert sounds](https://developer.apple.com/library/content/documentation/NetworkingInternet/Conceptual/RemoteNotificationsPG/SupportingNotificationsinYourApp.html) for additional information.
## Settings
When creating a push campaign through the dashboard, click the **Settings** tab on the **Compose** step to view the advanced settings available.

### Key-value pairs
Braze allows you to send custom-defined string key-value pairs, known as `extras`, along with a push notification to your application. Extras can be defined via the dashboard or API and will be available as key-value pairs within the `notification` dictionary passed to your push delegate implementations.
### Alert options
Select the **Alert Options** checkbox to see a dropdown of key-values available to adjust how the notification appears on devices.
### Adding content-available flag
Check the **Add Content-Available Flag** checkbox to instruct devices to download new content in the background. Most commonly, this can be checked if you are interested in sending [silent notifications](https://www.braze.com/docs/es/es/developer_guide/push_notifications/silent/?sdktab=swift).
### Adding mutable-content flag
Check the **Add Mutable-Content Flag** checkbox to enable advanced receiver customization. This flag will automatically be sent when composing a [rich notification](https://www.braze.com/docs/es/es/developer_guide/push_notifications/rich/?sdktab=swift), regardless of the value of this checkbox.
### Collapse ID
Specify a collapse ID to coalesce similar notifications. If you send multiple notifications with the same collapse ID, the device will only show the most recently received notification. Refer to Apple's documentation on [coalesced notifications](https://developer.apple.com/library/content/documentation/NetworkingInternet/Conceptual/RemoteNotificationsPG/APNSOverview.html#//apple_ref/doc/uid/TP40008194-CH8-SW1).
### Expiry
Checking the **Expiry** checkbox will allow setting an expiration time for your message. Should a user's device lose connectivity, Braze will continue to try and send the message until the specified time. If this is not set, the platform will default to an expiration of 30 days. Note that push notifications that expire before delivery are not considered failed and will not be recorded as a bounce.
## Prerequisites
Before you can use this feature, you'll need to [integrate the Android Braze SDK](https://www.braze.com/docs/es/es/developer_guide/sdk_integration/?sdktab=android). You'll also need to [set up push notifications](https://www.braze.com/docs/es/es/developer_guide/push_notifications/?sdktab=android).
## Settings
There are many advanced settings available for FireOS push notifications sent through the Braze dashboard. This article will describe these features and how to use them successfully.

### Time to live (TTL) {#ttl}
The **Time to Live** (TTL) field allows you to set a custom length of time to store messages with the push messaging service. The default values for time to live are four weeks for FCM and 31 days for ADM.
### Summary text {#summary-text}
The summary text allows you to set additional text in the expanded notification view. It also serves as a caption for notifications with images.
{: style="max-width:65%;"}
The summary text will display under the body of the message in the expanded view.
{: style="max-width:65%;"}
For push notifications that include images, the message text will be shown in the collapsed view, while the summary text will be displayed as the image caption when the notification is expanded.
### Custom URIs {#custom-uri}
The **Custom URI** feature allows you to specify a Web URL or an Android resource to navigate to when the notification is clicked. If no custom URI is specified, clicking on the notification brings users into your app. You can use the custom URI to deep link inside your app and direct users to resources that exist outside of your app. This can be specified via the [Messaging API](https://www.braze.com/docs/es/es/api/endpoints/messaging) or our dashboard under **Advanced Settings** in the push composer as pictured:

### Notification display priority
**Important:**
The Notification Display Priority setting is no longer used on devices running Android O or newer. For newer devices, set the priority through [notification channel configuration](https://developer.android.com/training/notify-user/channels#importance).
The priority level of a push notification affects how your notification is displayed in the notification tray relative to other notifications. It can also affect the speed and manner of delivery, as normal and lower priority messages may be sent with slightly higher latency or batched to preserve battery life whereas high priority messages are always sent immediately.
In Android O, notification priority became a property of notification channels. You will need to work with your developer to define the priority for a channel during its configuration and then use the dashboard to select the proper channel when sending your notification sounds. For devices running versions of Android before O, specifying a priority level for FireOS notifications is possible via the Braze dashboard and messaging API.
To message your full user base with a specific priority, we recommend that you indirectly specify the priority through [notification channel configuration](https://developer.android.com/training/notify-user/channels#importance) (to target O+ devices) *and* send the individual priority from the dashboard (to target <O devices).
The priority levels that you can set on Fire OS push notifications are:
| Priority | Description/Intended Use | `priority` value (for API messages) |
|----------|--------------------------|-------------------------------------|
| Max | Urgent or time-critical messages | `2` |
| High | Important communication, such as a new message from a friend | `1` |
| Default | Most notifications - use if your message doesn't explicitly fall under any of the other priority types | `0` |
| Low | Information that you want users to know about but does not require immediate action | `-1` |
| Min | Contextual or background information. | `-2` |
{: .reset-td-br-1 .reset-td-br-2 .reset-td-br-3 aria-label="Notification display priority" }
For more information, refer to Google's [Android notification](http://developer.android.com/design/patterns/notifications.html) documentation.
### Sounds {#sounds}
In Android O, notification sounds became a property of notification channels. You will need to work with your developer to define the sound for a channel during its configuration and then use the dashboard to select the proper channel when sending your notifications.
For devices running versions of Android before O, Braze allows you to set the sound of an individual push message through the dashboard composer. You can do so by specifying a local sound resource on the device (for example, `android.resource://com.mycompany.myapp/raw/mysound`). Specifying "default" in this field will play the default notification sound on the device. This can be specified via the [Messaging API](https://www.braze.com/docs/es/es/api/endpoints/messaging) or the dashboard under **Settings** in the push composer.

Enter the full sound resource URI (for example, `android.resource://com.mycompany.myapp/raw/mysound`) into the dashboard prompt.
To message your full user base with a specific sound, we recommend that you indirectly specify the sound through [notification channel configuration](https://developer.android.com/training/notify-user/channels) (to target O+ devices) *and* send the individual sound from the dashboard (to target <O devices).
## Prerequisites
Before you can use this feature, you'll need to [integrate the React Native Braze SDK](https://www.braze.com/docs/es/es/developer_guide/sdk_integration/?sdktab=react%20native). You must also [set up push notifications](https://www.braze.com/docs/es/es/developer_guide/push_notifications/?sdktab=react%20native).
## Push customization in React Native
The Braze React Native SDK does not expose push notification customization (action buttons, categories, custom notification factories) through its JavaScript API. These features require native configuration in your iOS and Android projects.
The following table shows which features require native configuration:
| Feature | iOS | Android |
| --- | --- | --- |
| Action buttons | Configure in native Swift/Objective-C | Configure in native Java/Kotlin |
| Push categories | Configure in native Swift/Objective-C | Configure in native Java/Kotlin |
| Custom notification factory | N/A | Configure in native Java/Kotlin |
| Badge customization | Configure in native Swift/Objective-C | N/A |
| Custom sounds | Configure in native Swift/Objective-C | Configure in native Java/Kotlin |
{: .reset-td-br-1 .reset-td-br-2 .reset-td-br-3 aria-label="Push customization in React Native" }
### iOS customization
To add push action buttons, categories, badges, or custom sounds on iOS, implement the native configuration in your `AppDelegate` (Swift or Objective-C). See [Customize push notifications – Swift](https://www.braze.com/docs/es/es/developer_guide/push_notifications/customization/?sdktab=swift) for step-by-step instructions.
### Android customization
To add push action buttons, categories, or a custom notification factory on Android, implement the native configuration in your Android project. See [Customize push notifications – Android](https://www.braze.com/docs/es/es/developer_guide/push_notifications/customization/?sdktab=android) for step-by-step instructions.
# Vinculación en profundidad en notificaciones push para el SDK de Braze
Source: /docs/es/developer_guide/push_notifications/deep_linking/index.md
# Vinculación en profundidad en notificaciones push
> Aprende a configurar notificaciones push silenciosas para el SDK de Braze.
## Prerequisites
Before you can use this feature, you'll need to [integrate the Android Braze SDK](https://www.braze.com/docs/es/es/developer_guide/sdk_integration/?sdktab=android).
## Creating a universal delegate
The Android SDK provides the ability to set a single delegate object to custom handle all deep links opened by Braze across Content Cards, in-app messages, and push notifications.
Your delegate object should implement the [`IBrazeDeeplinkHandler`](https://braze-inc.github.io/braze-android-sdk/kdoc/braze-android-sdk/com.braze.ui/-braze-deeplink-handler/index.html) interface and be set using [`BrazeDeeplinkHandler.setBrazeDeeplinkHandler()`](https://braze-inc.github.io/braze-android-sdk/kdoc/braze-android-sdk/com.braze.ui/-braze-deeplink-handler/-companion/set-braze-deeplink-handler.html). In most cases, the delegate should be set in your app's `Application.onCreate()`.
The following is an example of overriding the default [`UriAction`](https://braze-inc.github.io/braze-android-sdk/kdoc/braze-android-sdk/com.braze.ui.actions/-uri-action/index.html) behavior with custom intent flags and custom behavior for YouTube URLs:
```java
public class CustomDeeplinkHandler implements IBrazeDeeplinkHandler {
private static final String TAG = BrazeLogger.getBrazeLogTag(CustomDeeplinkHandler.class);
@Override
public void gotoUri(Context context, UriAction uriAction) {
String uri = uriAction.getUri().toString();
// Open YouTube URLs in the YouTube app and not our app
if (!StringUtils.isNullOrBlank(uri) && uri.contains("youtube.com")) {
uriAction.setUseWebView(false);
}
CustomUriAction customUriAction = new CustomUriAction(uriAction);
customUriAction.execute(context);
}
public static class CustomUriAction extends UriAction {
public CustomUriAction(@NonNull UriAction uriAction) {
super(uriAction);
}
@Override
protected void openUriWithActionView(Context context, Uri uri, Bundle extras) {
Intent intent = getActionViewIntent(context, uri, extras);
intent.setFlags(Intent.FLAG_ACTIVITY_NEW_TASK | Intent.FLAG_ACTIVITY_CLEAR_TOP | Intent.FLAG_ACTIVITY_SINGLE_TOP);
if (intent.resolveActivity(context.getPackageManager()) != null) {
context.startActivity(intent);
} else {
BrazeLogger.w(TAG, "Could not find appropriate activity to open for deep link " + uri + ".");
}
}
}
}
```
```kotlin
class CustomDeeplinkHandler : IBrazeDeeplinkHandler {
override fun gotoUri(context: Context, uriAction: UriAction) {
val uri = uriAction.uri.toString()
// Open YouTube URLs in the YouTube app and not our app
if (!StringUtils.isNullOrBlank(uri) && uri.contains("youtube.com")) {
uriAction.useWebView = false
}
val customUriAction = CustomUriAction(uriAction)
customUriAction.execute(context)
}
class CustomUriAction(uriAction: UriAction) : UriAction(uriAction) {
override fun openUriWithActionView(context: Context, uri: Uri, extras: Bundle) {
val intent = getActionViewIntent(context, uri, extras)
intent.flags = Intent.FLAG_ACTIVITY_NEW_TASK or Intent.FLAG_ACTIVITY_CLEAR_TOP or Intent.FLAG_ACTIVITY_SINGLE_TOP
if (intent.resolveActivity(context.packageManager) != null) {
context.startActivity(intent)
} else {
BrazeLogger.w(TAG, "Could not find appropriate activity to open for deep link $uri.")
}
}
}
companion object {
private val TAG = BrazeLogger.getBrazeLogTag(CustomDeeplinkHandler::class.java)
}
}
```
## Deep linking to app settings
To allow deep links to directly open your app's settings, you'll need a custom `BrazeDeeplinkHandler`. In the following example, the presence of a custom key-value pair called `open_notification_page` will make the deep link open the app's settings page:
```java
BrazeDeeplinkHandler.setBrazeDeeplinkHandler(new IBrazeDeeplinkHandler() {
@Override
public void gotoUri(Context context, UriAction uriAction) {
final Bundle extras = uriAction.getExtras();
if (extras.containsKey("open_notification_page")) {
Intent intent = new Intent();
intent.setAction("android.settings.APP_NOTIFICATION_SETTINGS");
intent.setFlags(Intent.FLAG_ACTIVITY_NEW_TASK);
//for Android 5-7
intent.putExtra("app_package", context.getPackageName());
intent.putExtra("app_uid", context.getApplicationInfo().uid);
// for Android 8 and later
intent.putExtra("android.provider.extra.APP_PACKAGE", context.getPackageName());
context.startActivity(intent);
}
}
});
```
```kotlin
BrazeDeeplinkHandler.setBrazeDeeplinkHandler(object : IBrazeDeeplinkHandler {
override fun gotoUri(context: Context, uriAction: UriAction) {
val extras = uriAction.extras
if (extras.containsKey("open_notification_page")) {
val intent = Intent()
intent.action = "android.settings.APP_NOTIFICATION_SETTINGS"
intent.flags = Intent.FLAG_ACTIVITY_NEW_TASK
//for Android 5-7
intent.putExtra("app_package", context.packageName)
intent.putExtra("app_uid", context.applicationInfo.uid)
// for Android 8 and later
intent.putExtra("android.provider.extra.APP_PACKAGE", context.packageName)
context.startActivity(intent)
}
}
})
```
## Customizing WebView activity {#Custom_Webview_Activity}
When Braze opens website deeplinks inside the app, the deeplinks are handled by [`BrazeWebViewActivity`](https://braze-inc.github.io/braze-android-sdk/kdoc/braze-android-sdk/com.braze.ui/-braze-web-view-activity/index.html).
**Note:**
For custom HTML in-app messages, links configured with `target="_blank"` open in the device's default web browser and are not handled by `BrazeWebViewActivity`.
To change this:
1. Create a new Activity that handles the target URL from `Intent.getExtras()` with the key `com.braze.Constants.BRAZE_WEBVIEW_URL_EXTRA`. For an example, see [`BrazeWebViewActivity.kt`](https://github.com/braze-inc/braze-android-sdk/blob/master/android-sdk-ui/src/main/java/com/braze/ui/BrazeWebViewActivity.kt).
2. Add that activity to `AndroidManifest.xml` and set `exported` to `false`.
```xml
```
3. Set your custom Activity in a `BrazeConfig` [builder object](https://braze-inc.github.io/braze-android-sdk/kdoc/braze-android-sdk/com.braze.configuration/-braze-config/-builder/set-custom-web-view-activity-class.html). Build the builder and pass it to [`Braze.configure()`](https://braze-inc.github.io/braze-android-sdk/kdoc/braze-android-sdk/com.braze/-braze/-companion/configure.html) in your [`Application.onCreate()`](https://developer.android.com/reference/android/app/Application.html#onCreate()).
```java
BrazeConfig brazeConfig = new BrazeConfig.Builder()
.setCustomWebViewActivityClass(MyCustomWebViewActivity::class)
...
.build();
Braze.configure(this, brazeConfig);
```
```kotlin
val brazeConfig = BrazeConfig.Builder()
.setCustomWebViewActivityClass(MyCustomWebViewActivity::class.java)
...
.build()
Braze.configure(this, brazeConfig)
```
## Troubleshooting
If deep links from push notifications aren't working on Android, try the following steps:
1. **Test the deep link outside of Braze.** Open the deep link URL from another app, such as email or a browser. If it doesn't open your app, the deep link may not be configured correctly in your `AndroidManifest.xml`. For more information, see Android's [Create Deep Links](https://developer.android.com/training/app-links/deep-linking) documentation.
2. **Check that automatic deep link handling is enabled.** Verify that `com_braze_handle_push_deep_links_automatically` is set to `true` in `braze.xml`, or set this option through [runtime configuration](https://www.braze.com/docs/es/es/developer_guide/sdk_initalization/?sdktab=android). Without this setting, Braze doesn't automatically open your app and deep link destination when someone taps a push notification.
3. **Verify your deep link handler delegate.** If you set a custom `IBrazeDeeplinkHandler`, confirm that your `gotoUri` implementation handles the URI and doesn't drop it.
4. **Test across channels.** If the same deep link works in an in-app message but not from push, the issue is likely in your push deep link handling, not in the deep link itself.
## Using Jetpack Compose
To handle deeplinks when using Jetpack Compose with NavHost:
1. Ensure that the activity handling your deeplink is registered in the Android Manifest.
```xml
```
2. In NavHost, specify which deeplinks you want it to handle.
```kotlin
composableWithCompositionLocal(
route = "YOUR_ROUTE_HERE",
deepLinks = listOf(navDeepLink {
uriPattern = "myapp://articles/{${MainDestinations.ARTICLE_ID_KEY}}"
}),
arguments = listOf(
navArgument(MainDestinations.ARTICLE_ID_KEY) {
type = NavType.LongType
}
),
) { backStackEntry ->
val arguments = requireNotNull(backStackEntry.arguments)
val articleId = arguments.getLong(MainDestinations.ARTICLE_ID_KEY)
ArticleDetail(
articleId
)
}
```
3. Depending on your app architecture, you may need to handle the new intent that's sent to your current activity as well.
```kotlin
DisposableEffect(Unit) {
val listener = Consumer {
navHostController.handleDeepLink(it)
}
addOnNewIntentListener(listener)
onDispose { removeOnNewIntentListener(listener) }
}
```
## Prerequisites
Before you can use this feature, you'll need to [integrate the Swift Braze SDK](https://www.braze.com/docs/es/es/developer_guide/sdk_integration/?sdktab=swift).
**Tip:**
For help choosing between custom scheme deep links, universal links, and "Open Web URL Inside App," see [iOS deep linking guide](https://www.braze.com/docs/es/es/developer_guide/push_notifications/ios_deep_linking_guide). For troubleshooting, see [Deep linking troubleshooting](https://www.braze.com/docs/es/es/developer_guide/push_notifications/deep_linking_troubleshooting).
## Handling deep links
### Step 1: Register a scheme {#register-a-scheme}
To handle deep linking, a custom scheme must be stated in your `Info.plist` file. The navigation structure is defined by an array of dictionaries. Each of those dictionaries contains an array of strings.
Use Xcode to edit your `Info.plist` file:
1. Add a new key, `URL types`. Xcode will automatically make this an array containing a dictionary called `Item 0`.
2. Within `Item 0`, add a key `URL identifier`. Set the value to your custom scheme.
3. Within `Item 0`, add a key `URL Schemes`. This will automatically be an array containing a `Item 0` string.
4. Set `URL Schemes` >> `Item 0` to your custom scheme.
Alternatively, if you wish to edit your `Info.plist` file directly, you can follow this spec:
```html
CFBundleURLTypesCFBundleURLNameYOUR.SCHEMECFBundleURLSchemesYOUR.SCHEME
```
### Step 2: Add a scheme allowlist
You must declare the URL schemes you wish to pass to `canOpenURL(_:)` by adding the `LSApplicationQueriesSchemes` key to your app's Info.plist file. Attempting to call schemes outside this allowlist will cause the system to record an error in the device's logs, and the deep link will not open. An example of this error will look like this:
```
: -canOpenURL: failed for URL: "yourapp://deeplink" – error: "This app is not allowed to query for scheme yourapp"
```
For example, if an in-app message should open the Facebook app when tapped, the app has to have the Facebook custom scheme (`fb`) in your allowlist. Otherwise, the system will reject the deep link. Deep links that direct to a page or view inside your own app still require that your app's custom scheme be listed in your app's `Info.plist`.
Your example allowlist might look something like:
```html
LSApplicationQueriesSchemesmyappfbtwitter
```
For more information, refer to [Apple's documentation](https://developer.apple.com/library/content/documentation/General/Reference/InfoPlistKeyReference/Articles/LaunchServicesKeys.html#//apple_ref/doc/uid/TP40009250-SW14) on the `LSApplicationQueriesSchemes` key.
### Step 3: Implement a handler
After activating your app, iOS will call the method [`application:openURL:options:`](https://developer.apple.com/reference/uikit/uiapplicationdelegate/1623112-application?language=objc). The important argument is the [NSURL](https://developer.apple.com/library/ios/DOCUMENTATION/Cocoa/Reference/Foundation/Classes/NSURL_Class/Reference/Reference.html#//apple_ref/doc/c_ref/NSURL) object.
```swift
func application(_ app: UIApplication, open url: URL, options: [UIApplication.OpenURLOptionsKey : Any] = [:]) -> Bool {
let path = url.path
let query = url.query
// Insert your code here to take some action based upon the path and query.
return true
}
```
```objc
- (BOOL)application:(UIApplication *)app openURL:(NSURL *)url options:(NSDictionary *)options {
NSString *path = [url path];
NSString *query = [url query];
// Insert your code here to take some action based upon the path and query.
return YES;
}
```
## App Transport Security (ATS)
As defined by [Apple](https://developer.apple.com/library/prerelease/ios/releasenotes/General/WhatsNewIniOS/Articles/iOS9.html#//apple_ref/doc/uid/TP40016198-SW14), "App Transport Security is a feature that improves the security of connections between an app and web services. The feature consists of default connection requirements that conform to best practices for secure connections. Apps can override this default behavior and turn off transport security."
ATS is applied by default. It requires that all connections use HTTPS and are encrypted using TLS 1.2 with forward secrecy. Refer to [Requirements for Connecting Using ATS](https://developer.apple.com/library/ios/documentation/General/Reference/InfoPlistKeyReference/Articles/CocoaKeys.html#//apple_ref/doc/uid/TP40009251-SW35) for more information. All images served by Braze to end devices are handled by a content delivery network ("CDN") that supports TLS 1.2 and is compatible with ATS.
Unless they are specified as exceptions in your application's `Info.plist`, connections that do not follow these requirements will fail with errors that are similar to the following.
**Example Error 1:**
```bash
CFNetwork SSLHandshake failed (-9801)
Error Domain=NSURLErrorDomain Code=-1200 "An SSL error has occurred, and a secure connection to the server cannot be made."
```
**Example Error 2:**
```bash
NSURLSession/NSURLConnection HTTP load failed (kCFStreamErrorDomainSSL, -9802)
```
ATS compliance is enforced for links opened within the mobile app (our default handling of clicked links) and does not apply to sites opened externally via a web browser.
### Working with ATS
You can handle ATS in either of the following ways, but we recommend **complying with ATS requirements**.
Your Braze integration can satisfy ATS requirements by ensuring that any existing links you drive users to (for example, though in-app message and push campaigns) satisfy ATS requirements. While there are ways to bypass ATS restrictions, our recommendation is to ensure that all linked URLs are ATS-compliant. Given Apple's increasing emphasis on application security, the following approaches to allowing ATS exceptions are not guaranteed to be supported by Apple.
You can allow a subset of links with certain domains or schemes to be treated as exceptions to the ATS rules. Your Braze integration will satisfy ATS requirements if every link you use in a Braze messaging channel is either ATS compliant or handled by an exception.
To add a domain as an exception of the ATS, add following to your app's `Info.plist` file:
```html
NSAppTransportSecurityNSAllowsArbitraryLoadsNSExceptionDomainsexample.comNSExceptionAllowsInsecureHTTPLoadsNSIncludesSubdomains
```
Refer to Apple's article on [app transport security keys](https://developer.apple.com/library/ios/documentation/General/Reference/InfoPlistKeyReference/Articles/CocoaKeys.html#//apple_ref/doc/uid/TP40009251-SW33) for more information.
You can turn off ATS entirely. Note that this is not recommended practice, due to both lost security protections and future iOS compatibility. To disable ATS, insert the following in your app's `Info.plist` file:
```html
NSAppTransportSecurityNSAllowsArbitraryLoads
```
## Decoding URLs
The SDK percent-encodes links to create valid `URL`s. All link characters that are not allowed in a properly formed URL, such as Unicode characters, will be percent escaped.
To decode an encoded link, use the `String` property [`removingPercentEncoding`](https://developer.apple.com/documentation/swift/stringprotocol/removingpercentencoding). You must also return `true` in the `BrazeDelegate.braze(_:shouldOpenURL:)`. A call to action is required to trigger the handling of the URL by your app. For example:
```swift
func application(_ app: UIApplication, open url: URL, options: [UIApplication.OpenURLOptionsKey : Any] = [:]) -> Bool {
let urlString = url.absoluteString.removingPercentEncoding
// Handle urlString
return true
}
```
```objc
- (BOOL)application:(UIApplication *)application openURL:(NSURL *)url options:(NSDictionary *)options {
NSString *urlString = [url.absoluteString stringByRemovingPercentEncoding];
// Handle urlString
return YES;
}
```
## Deep linking to app settings
You can take advantage of `UIApplicationOpenSettingsURLString` to deep link users to your app's settings from Braze push notifications and in-app messages.
To take users from your app into the iOS settings:
1. First, make sure your application is set up for either [scheme-based deep links](#swift_register-a-scheme) or [universal links](#swift_universal-links).
2. Decide on a URI for deep linking to the **Settings** page (for example, `myapp://settings` or `https://www.braze.com/settings`).
3. If you are using custom scheme-based deep links, add the following code to your `application:openURL:options:` method:
```swift
func application(_ app: UIApplication, open url: URL, options: [UIApplicationOpenURLOptionsKey : Any] = [:]) -> Bool {
let path = url.path
if (path == "settings") {
UIApplication.shared.openURL(URL(string:UIApplication.openSettingsURLString)!)
}
return true
}
```
```objc
- (BOOL)application:(UIApplication *)app
openURL:(NSURL *)url
options:(NSDictionary *)options {
NSString *path = [url path];
if ([path isEqualToString:@"settings"]) {
NSURL *settingsURL = [NSURL URLWithString:UIApplicationOpenSettingsURLString];
[[UIApplication sharedApplication] openURL:settingsURL];
}
return YES;
}
```
## Customization options {#customization-options}
### Default WebView customization
The `Braze.WebViewController` class displays web URLs opened by the SDK, typically when "Open Web URL Inside App" is selected for a web deep link.
You can customize the `Braze.WebViewController` via the [`BrazeDelegate.braze(_:willPresentModalWithContext:)`](https://braze-inc.github.io/braze-swift-sdk/documentation/brazekit/brazedelegate/braze(_:willpresentmodalwithcontext:)-12sqy/) delegate method.
### Linking handling customization
The `BrazeDelegate` protocol can be used to customize the handling of URLs such as deep links, web URLs, and universal links. To set the delegate during Braze initialization, set a delegate object on the `Braze` instance. Braze will then call your delegate's implementation of `shouldOpenURL` before handling any URIs.
When a push notification or in-app message uses **Open web URL inside mobile app**, Braze passes `context.useWebView == true` on [`Braze.URLContext`](https://braze-inc.github.io/braze-swift-sdk/documentation/brazekit/braze/urlcontext). When the message opens the URL in the system browser instead, `useWebView` is `false`. Inspect `context.useWebView` in `braze(_:shouldOpenURL:)` to branch your custom handling—for example, to open an in-app `WebViewController` only when the campaign requested in-app display.
#### Universal links {#universal-links}
Braze supports universal links in push notifications, in-app messages, and Content Cards. To enable universal link support, [`configuration.forwardUniversalLinks`](https://braze-inc.github.io/braze-swift-sdk/documentation/brazekit/braze/configuration-swift.class/forwarduniversallinks) must be set to `true`.
When enabled, Braze will forward universal links to your app's `AppDelegate` via the [`application:continueUserActivity:restorationHandler:`](https://developer.apple.com/documentation/uikit/uiapplicationdelegate/1623072-application) method.
Your application also needs to be set up to handle universal links. Refer to [Apple's documentation](https://developer.apple.com/documentation/xcode/supporting-universal-links-in-your-app) to ensure your application is configured correctly for universal links.
**Warning:**
Universal link forwarding requires access to the application entitlements. When running the application in a simulator, these entitlements are not directly available and universal links are not forwarded to the system handlers.
To add support to simulator builds, you can add the application `.entitlements` file to the _Copy Bundle Resources_ build phase. See [`forwardUniversalLinks`](https://braze-inc.github.io/braze-swift-sdk/documentation/brazekit/braze/configuration-swift.class/forwarduniversallinks) documentation for more details.
**Note:**
The SDK does not query your domains' `apple-app-site-association` file. It performs the differentiation between universal links and regular URLs by looking at the domain name only. As a result, the SDK does not respect any exclusion rule defined in the `apple-app-site-association` per [Supporting associated domains](https://developer.apple.com/documentation/xcode/supporting-associated-domains).
## Examples
### BrazeDelegate
Here's an example using `BrazeDelegate`. For more information, see [Braze Swift SDK reference](https://braze-inc.github.io/braze-swift-sdk/documentation/brazekit/brazedelegate).
```swift
func braze(_ braze: Braze, shouldOpenURL context: Braze.URLContext) -> Bool {
if context.url.host == "MY-DOMAIN.com" {
// Custom handle link here
return false
}
// Let Braze handle links otherwise
return true
}
```
```objc
- (BOOL)braze:(Braze *)braze shouldOpenURL:(BRZURLContext *)context {
if ([[context.url.host lowercaseString] isEqualToString:@"MY-DOMAIN.com"]) {
// Custom handle link here
return NO;
}
// Let Braze handle links otherwise
return YES;
}
```
## Prerequisites
Before you can implement deep linking into your Flutter iOS app, configure your URL schemes in your `Info.plist` file. For details, refer to [Deep linking for iOS](https://www.braze.com/docs/es/es/developer_guide/push_notifications/deep_linking/?sdktab=swift#url-schemes).
For Flutter Android, no additional native setup is required if you're handling deep links on the Dart layer. The minimal implementation shown in this article is sufficient for most Flutter apps.
If you need advanced native-layer link handling (such as custom `IBrazeDeeplinkHandler` implementations), refer to [Deep linking for Android](https://www.braze.com/docs/es/es/developer_guide/push_notifications/deep_linking/?sdktab=android).
## Implementing deep linking
### Step 1: Set up Flutter's built-in handling
1. In your Xcode project, open your `Info.plist` file.
2. Add a new key-value pair.
3. Set the key to `FlutterDeepLinkingEnabled`.
4. Set the type to `Boolean`.
5. Set the value to `YES`.

1. In your Android Studio project, open your `AndroidManifest.xml` file.
2. Locate `.MainActivity` in your `activity` tags.
3. Within the `activity` tag, add the following `meta-data` tag:
```xml
```
### Step 2: Forward data to the Dart layer (optional)
You can use native, first-party, or third-party link handling for complex use cases, such as sending a user to a specific location in your app, or calling a specific function.
#### Example: Deep linking to an alert dialog
**Note:**
While the following example does not rely on additional packages, you can use a similar approach to implement native, first-party, or third-party packages, such as [`go_router`](https://pub.dev/packages/go_router). Additional Dart code may be required.
First, a method channel is used in the native layer to forward the deep link's URL string data to the Dart layer.
```swift
extension AppDelegate {
// Delegate method for handling custom scheme links.
override func application(_ app: UIApplication, open url: URL, options: [UIApplication.OpenURLOptionsKey : Any] = [:]) -> Bool {
forwardURL(url)
return true
}
// Delegate method for handling universal links.
override func application(_ application: UIApplication, continue userActivity: NSUserActivity, restorationHandler: @escaping ([UIUserActivityRestoring]?) -> Void) -> Bool {
guard userActivity.activityType == NSUserActivityTypeBrowsingWeb,
let url = userActivity.webpageURL else {
return false
}
forwardURL(url)
return true
}
private func forwardURL(_ url: URL) {
guard let controller: FlutterViewController = window?.rootViewController as? FlutterViewController else { return }
let deepLinkChannel = FlutterMethodChannel(name: "deepLinkChannel", binaryMessenger: controller.binaryMessenger)
deepLinkChannel.invokeMethod("receiveDeepLink", arguments: url.absoluteString)
}
}
```
```kotlin
class MainActivity : FlutterActivity() {
override fun onCreate(savedInstanceState: Bundle?) {
super.onCreate(savedInstanceState)
handleDeepLink(intent)
}
override fun onNewIntent(intent: Intent) {
super.onNewIntent(intent)
handleDeepLink(intent)
}
private fun handleDeepLink(intent: Intent) {
val binaryMessenger = flutterEngine?.dartExecutor?.binaryMessenger
if (intent?.action == Intent.ACTION_VIEW && binaryMessenger != null) {
MethodChannel(binaryMessenger, "deepLinkChannel")
.invokeMethod("receivedDeepLink", intent?.data.toString())
}
}
}
```
Next, a callback function is used in the Dart layer to display an alert dialogue using the URL string data sent previously.
```dart
MethodChannel('deepLinkChannel').setMethodCallHandler((call) async {
deepLinkAlert(call.arguments, context);
});
void deepLinkAlert(String link, BuildContext context) {
showDialog(
context: context,
builder: (BuildContext context) {
return AlertDialog(
title: Text("Deep Link Alert"),
content: Text("Opened with deep link: $link"),
actions: [
TextButton(
child: Text("Close"),
onPressed: () {
Navigator.of(context).pop();
},
),
],
);
},
);
}
```
## Prerequisites
Before you can use this feature, you'll need to [integrate the Cordova Braze SDK](https://www.braze.com/docs/es/es/developer_guide/sdk_integration/?sdktab=cordova).
## Enabling push deep linking
By default, the Braze Cordova SDK doesn't automatically handle push deep linking from notifications. To enable push deep linking, add the following preferences to the `platform` element in your project's `config.xml` file.
```xml
```
```xml
```
To customize back stack behavior when deep links are followed, you can also add these optional preferences:
```xml
```
For a full list of available push configuration options, see [Optional configurations](https://www.braze.com/docs/es/es/developer_guide/sdk_integration?sdktab=cordova#optional).
# Guía de vinculación en profundidad para iOS
Source: /docs/es/developer_guide/push_notifications/ios_deep_linking_guide/index.md
# Guía de vinculación en profundidad para iOS {#ios-deep-linking-guide}
> Esta guía te ayuda a elegir la estrategia de vinculación en profundidad adecuada para tu aplicación iOS, en función del canal de mensajería que utilices y de si utilizas un proveedor de vínculos externo como Branch.
Para obtener más información sobre la implementación, consulta [Vinculación en profundidad](https://www.braze.com/docs/es/es/developer_guide/push_notifications/deep_linking?sdktab=swift). Para solucionar problemas, consulta [Solución de problemas de vinculación en profundidad](https://www.braze.com/docs/es/es/developer_guide/push_notifications/deep_linking_troubleshooting).
## Elegir un tipo de enlace {#choosing-a-link-type}
Hay tres formas de gestionar los enlaces de los mensajes de Braze en tu aplicación para iOS. Cada una funciona de manera diferente y es adecuada para distintos canales y casos de uso.
| Tipo de enlace | Ejemplo | Ideal para | ¿Se abre sin tener la aplicación instalada? |
|---|---|---|---|
| **Esquema personalizado** | `myapp://products/123` | Notificaciones push, mensajes dentro de la aplicación, Content Cards | No, el enlace no funciona |
| **Enlace universal** | `https://myapp.com/products/123` | Correo electrónico, SMS, canales con seguimiento de clics | Sí, vuelve a la web |
| **Abrir URL web dentro de la aplicación** | Cualquier URL `https://` | Mostrar contenido web en una WebView modal | N/A — se muestra en WebView |
{: .reset-td-br-1 .reset-td-br-2 .reset-td-br-3 .reset-td-br-4 aria-label="Elegir un tipo de enlace" }
### Vínculos profundos con esquema personalizado {#custom-scheme-deep-links}
Los vínculos profundos con esquema personalizado (por ejemplo, `myapp://products/123`) abren tu aplicación directamente en una pantalla específica. Son la opción más sencilla para canales en los que los enlaces no son modificados por terceros.
**Utiliza vínculos profundos con esquema personalizado cuando:**
- Envías notificaciones push, mensajes dentro de la aplicación o Content Cards.
- No necesitas que el enlace funcione si la aplicación no está instalada.
- No necesitas seguimiento de clics (envoltura de enlaces del ESP de correo electrónico).
**No utilices vínculos profundos con esquema personalizado cuando:**
- Envías correos electrónicos: los ESP envuelven los enlaces para el seguimiento de clics, lo que rompe los esquemas personalizados.
- Necesitas que el enlace vuelva a una página web si la aplicación no está instalada.
### Enlaces universales {#universal-links}
Los enlaces universales (por ejemplo, `https://myapp.com/products/123`) son direcciones URL HTTPS estándar que iOS puede redirigir a tu aplicación en lugar de abrirlas en un navegador. Requieren una configuración del lado del servidor (un archivo AASA) y una configuración del lado de la aplicación (derecho de dominios asociados).
**Utiliza enlaces universales cuando:**
- Envías correos electrónicos. Tu ESP envuelve los enlaces para el seguimiento de clics, por lo que los enlaces deben ser HTTPS.
- Envías SMS u otros canales en los que los enlaces se envuelven o acortan.
- Necesitas que el enlace vuelva a una página web cuando la aplicación no está instalada.
- Utilizas un proveedor de vínculos externo como Branch o AppsFlyer.
**No utilices enlaces universales cuando:**
- Solo necesitas vínculos profundos desde notificaciones push, mensajes dentro de la aplicación o Content Cards. Los esquemas personalizados son más sencillos.
### "Abrir URL web dentro de la aplicación" {#open-web-url-inside-app}
Esta opción abre una página web dentro de una WebView modal en tu aplicación. El SDK de Braze se encarga de todo mediante `Braze.WebViewController`, por lo que no es necesario escribir ningún código para gestionar las URL.
**Utiliza "Abrir URL web dentro de la aplicación" cuando:**
- Quieres mostrar una página web (como una promoción o un artículo) sin salir de tu aplicación.
- La URL es una página web HTTPS estándar, no un vínculo profundo a una pantalla específica de la aplicación.
**No utilices "Abrir URL web dentro de la aplicación" cuando:**
- Necesitas navegar hasta una vista específica en tu aplicación. En su lugar, utiliza un esquema personalizado o un enlace universal.
- La página web requiere autenticación o tiene encabezados de política de seguridad de contenido que bloquean la incrustación.
## Lo que necesitas para cada tipo de enlace {#what-you-need-for-each-link-type}
### Vínculos profundos con esquema personalizado
| Requisito | Detalles |
|---|---|
| Archivo AASA | No es necesario |
| `Info.plist` | Registra tu esquema en `CFBundleURLTypes` y añádelo a `LSApplicationQueriesSchemes` |
| Método delegado de la aplicación | Implementa `application(_:open:options:)` para analizar la URL y navegar |
| Configuración del SDK de Braze | Ninguna: el SDK abre direcciones URL de esquemas personalizados de forma predeterminada |
{: .reset-td-br-1 .reset-td-br-2 aria-label="Vínculos profundos con esquema personalizado" }
### Enlaces universales
| Requisito | Detalles |
|---|---|
| Archivo AASA | Obligatorio: alójalo en `https://yourdomain.com/.well-known/apple-app-site-association` |
| Dominios asociados | Añade `applinks:yourdomain.com` en Xcode, en **Signing & Capabilities** |
| Método delegado de la aplicación | Implementa `application(_:continue:restorationHandler:)` para gestionar `NSUserActivity` |
| Configuración del SDK de Braze | Establece `configuration.forwardUniversalLinks = true` |
| BrazeDelegate (opcional) | Implementa `braze(_:shouldOpenURL:)` para enrutamiento personalizado (por ejemplo, Branch) |
{: .reset-td-br-1 .reset-td-br-2 aria-label="Enlaces universales" }
**Important:**
Si envías correos electrónicos a través de Braze, tu ESP (SendGrid, SparkPost o Amazon SES) envuelve los enlaces en un dominio de seguimiento de clics. Debes alojar el archivo AASA también en tu dominio de seguimiento de clics, no solo en tu dominio principal. Para obtener información sobre la configuración completa, consulta [Enlaces universales y enlaces de aplicaciones](https://www.braze.com/docs/es/es/user_guide/channels/email/customize/universal_links_and_app_links).
### "Abrir URL web dentro de la aplicación"
| Requisito | Detalles |
|---|---|
| Archivo AASA | No es necesario |
| Método delegado de la aplicación | No es necesario: el SDK se encarga de esto automáticamente |
| Configuración del SDK de Braze | Ninguna: selecciona **Open Web URL Inside App** en el compositor de la campaña |
{: .reset-td-br-1 .reset-td-br-2 aria-label="Abrir URL web dentro de la aplicación" }
## Cuándo necesitas un archivo AASA {#when-aasa}
Solo se requiere un archivo Apple App Site Association (AASA) cuando utilizas **enlaces universales**. Le indica a iOS qué URL puede gestionar tu aplicación.
Necesitas un archivo AASA cuando:
- Envías vínculos profundos en campañas de correo electrónico (porque los ESP envuelven los vínculos en URL de seguimiento de clics HTTPS).
- Envías vínculos profundos en campañas de SMS (porque los vínculos pueden acortarse a direcciones URL HTTPS).
- Utilizas Branch, AppsFlyer u otro proveedor de vínculos (porque utilizan sus propios dominios HTTPS).
- Utilizas enlaces universales desde notificaciones push, mensajes dentro de la aplicación o Content Cards (menos habitual, pero posible con `forwardUniversalLinks = true`).
No necesitas un archivo AASA cuando:
- Solo utilizas vínculos profundos con esquema personalizado (por ejemplo, `myapp://`) desde notificaciones push, mensajes dentro de la aplicación o Content Cards.
- Utilizas la opción **Abrir URL web dentro de la aplicación**.
Para obtener instrucciones sobre la configuración de AASA, consulta [Enlaces universales y enlaces de aplicaciones](https://www.braze.com/docs/es/es/user_guide/message_building_by_channel/email/universal_links#setting-up-universal-links-and-app-links).
## Cuándo necesitas código de aplicación para gestionar enlaces {#when-app-code}
El método delegado que implementes dependerá del tipo de enlace que estés utilizando:
| Método delegado | Gestiona | Cuándo implementar |
|---|---|---|
| `application(_:open:options:)` | Vínculos profundos con esquema personalizado (`myapp://`) | Utilizas vínculos profundos con esquema personalizado desde cualquier canal |
| `application(_:continue:restorationHandler:)` | Enlaces universales (`https://`) | Utilizas enlaces universales desde correo electrónico, SMS o con `forwardUniversalLinks = true` |
| `BrazeDelegate.braze(_:shouldOpenURL:)` | Todas las URL abiertas por el SDK | Necesitas una lógica de enrutamiento personalizada (por ejemplo, Branch, gestión condicional, análisis) |
{: .reset-td-br-1 .reset-td-br-2 .reset-td-br-3 aria-label="Cuándo necesitas código de aplicación para gestionar enlaces" }
**Tip:**
Si utilizas un proveedor de vínculos externo como Branch, implementa `BrazeDelegate.braze(_:shouldOpenURL:)` para interceptar las URL y reenviarlas al SDK del proveedor. Consulta [Branch para la vinculación en profundidad](https://www.braze.com/docs/es/es/partners/message_orchestration/deeplinking/branch_for_deeplinking) para ver un ejemplo completo.
## Usar Branch con Braze {#branch}
Si utilizas [Branch](https://www.braze.com/docs/es/es/partners/message_orchestration/deeplinking/branch_for_deeplinking) como proveedor de vínculos, tu configuración requiere algunos pasos adicionales más allá de la configuración estándar de enlaces universales:
1. **SDK de Branch**: Integra el SDK de Branch siguiendo [la documentación de Branch](https://help.branch.io/developers-hub/docs/native-sdks-overview).
2. **Dominios asociados**: Añade tu dominio de Branch (por ejemplo, `applinks:yourapp.app.link`) en Xcode, en **Signing & Capabilities**.
3. **BrazeDelegate**: Implementa `braze(_:shouldOpenURL:)` para redirigir los enlaces de Branch al SDK de Branch en lugar de dejar que Braze los gestione directamente.
4. **Reenviar enlaces universales**: Establece `configuration.forwardUniversalLinks = true` en tu configuración del SDK de Braze.
Para obtener detalles sobre la implementación y orientación sobre la depuración, consulta [Branch para la vinculación en profundidad](https://www.braze.com/docs/es/es/partners/message_orchestration/deeplinking/branch_for_deeplinking).
# Solución de problemas de vinculación en profundidad
Source: /docs/es/developer_guide/push_notifications/deep_linking_troubleshooting/index.md
# Solución de problemas de vinculación en profundidad {#deep-linking-troubleshooting}
> Esta página cubre problemas comunes de vinculación en profundidad en iOS y cómo diagnosticarlos. Para obtener ayuda sobre cómo elegir el tipo de enlace adecuado, consulta la [guía de vinculación en profundidad de iOS](https://www.braze.com/docs/es/es/developer_guide/push_notifications/ios_deep_linking_guide). Para más detalles de implementación, consulta [Vinculación en profundidad](https://www.braze.com/docs/es/es/developer_guide/push_notifications/deep_linking?sdktab=swift).
## El vínculo profundo de esquema personalizado no abre la vista correcta {#custom-scheme-deep-link-doesnt-open-the-correct-view}
Si un vínculo profundo de esquema personalizado (por ejemplo, `myapp://products/123`) abre tu aplicación pero no navega a la pantalla deseada:
1. **Verifica que el esquema esté registrado.** En Xcode, comprueba que tu esquema aparece en la lista bajo `CFBundleURLTypes` en `Info.plist`.
2. **Comprueba tu controlador.** Establece un punto de interrupción en `application(_:open:options:)` para confirmar que se está llamando e inspecciona el parámetro `url`.
3. **Prueba el enlace de forma independiente.** Ejecuta el siguiente comando desde Terminal para probar el vínculo profundo fuera de Braze:
```bash
xcrun simctl openurl booted "myapp://products/123"
```
Si el enlace no funciona aquí, el problema está en el manejo de URL de tu aplicación, no en Braze.
4. **Comprueba el formato de la URL.** Verifica que la URL en tu campaña coincida con lo que espera tu controlador. Los errores comunes incluyen componentes de ruta faltantes o uso incorrecto de mayúsculas y minúsculas.
## El enlace universal se abre en Safari en lugar de en la aplicación {#universal-link-opens-in-safari-instead-of-the-app}
Si un enlace universal (por ejemplo, `https://myapp.com/products/123`) se abre en Safari en lugar de en tu aplicación:
### Verifica el derecho de dominios asociados {#verify-the-associated-domains-entitlement}
En Xcode, ve al objetivo de tu aplicación > **Signing & Capabilities** y comprueba que `applinks:yourdomain.com` aparece en la lista bajo **Associated Domains**.
### Valida el archivo AASA {#validate-the-aasa-file}
Tu archivo Apple App Site Association (AASA) debe estar alojado en una de estas ubicaciones:
- `https://yourdomain.com/.well-known/apple-app-site-association`
- `https://yourdomain.com/apple-app-site-association`
Verifica lo siguiente:
- El archivo se sirve a través de HTTPS con un certificado válido.
- El `Content-Type` es `application/json`.
- El tamaño del archivo es inferior a 128 KB.
- El `appID` coincide con tu Team ID y Bundle ID (por ejemplo, `ABCDE12345.com.example.myapp`).
- La matriz `paths` o `components` incluye los patrones de URL que esperas.
Puedes validar tu AASA utilizando la [herramienta de validación de búsqueda de Apple](https://search.developer.apple.com/appsearch-validation-tool/) o ejecutando:
```bash
swcutil dl -d yourdomain.com
```
### Comprueba el `AppDelegate` {#check-the-appdelegate}
Verifica que `application(_:continue:restorationHandler:)` esté implementado en tu `AppDelegate` y gestione correctamente el `NSUserActivity`:
```swift
func application(_ application: UIApplication,
continue userActivity: NSUserActivity,
restorationHandler: @escaping ([UIUserActivityRestoring]?) -> Void) -> Bool {
guard userActivity.activityType == NSUserActivityTypeBrowsingWeb,
let url = userActivity.webpageURL else {
return false
}
// Handle the URL
return true
}
```
### Verifica la configuración del SDK de Braze {#verify-braze-sdk-configuration}
Si utilizas enlaces universales desde notificaciones push, mensajes dentro de la aplicación o Content Cards entregados por Braze, confirma que `forwardUniversalLinks` está habilitado:
```swift
let configuration = Braze.Configuration(apiKey: "", endpoint: "")
configuration.forwardUniversalLinks = true
```
**Note:**
El reenvío de enlaces universales requiere acceso a los derechos de la aplicación. Cuando se ejecuta en un simulador, estos derechos no están disponibles directamente. Para probar en un simulador, añade el archivo `.entitlements` a la fase de compilación **Copy Bundle Resources**.
### Comprueba el problema de la pulsación prolongada {#check-for-the-long-press-issue}
Si mantienes pulsado un enlace universal y seleccionas **Open**, iOS puede "romper" la asociación del enlace universal para ese dominio. Este es un comportamiento conocido de iOS. Para restablecerlo, mantén pulsado el enlace de nuevo y selecciona **Open in [App Name]**.
## El vínculo profundo del correo electrónico no abre la aplicación {#deep-link-from-email-doesnt-open-the-app}
Los enlaces de correo electrónico pasan por el sistema de seguimiento de clics de tu ESP, que envuelve los enlaces en un dominio de seguimiento (por ejemplo, `https://click.yourdomain.com/...`). Para que los enlaces universales funcionen desde el correo electrónico, debes configurar el archivo AASA en tu dominio de seguimiento de clics, no solo en tu dominio principal.
### Verifica el AASA del dominio de seguimiento de clics {#verify-click-tracking-domain-aasa}
1. Identifica tu dominio de seguimiento de clics en la configuración de tu ESP (SendGrid, SparkPost o Amazon SES).
2. Aloja el archivo AASA en `https://your-click-tracking-domain/.well-known/apple-app-site-association`.
3. Asegúrate de que el archivo AASA del dominio de seguimiento de clics incluya el mismo `appID` y patrones de ruta válidos.
Para obtener instrucciones de configuración específicas para cada ESP, consulta [Enlaces universales y App Links](https://www.braze.com/docs/es/es/user_guide/channels/email/customize/universal_links_and_app_links).
### Comprueba la cadena de redireccionamiento {#check-the-redirect-chain}
Algunos ESP realizan un redireccionamiento desde la URL de seguimiento de clics a tu URL final. Los enlaces universales solo funcionan si iOS reconoce el dominio *inicial* (el dominio de seguimiento de clics) como asociado a tu aplicación. Si el redireccionamiento omite la comprobación AASA, el enlace se abre en Safari.
Para probar:
1. Envíate un correo electrónico de prueba.
2. Mantén pulsado el enlace e inspecciona la URL: esta es la URL de seguimiento de clics.
3. Verifica que este dominio tenga un archivo AASA válido.
## El vínculo profundo funciona desde push pero no desde mensajes dentro de la aplicación (o viceversa) {#deep-link-works-from-push-but-not-from-in-app-messages-or-vice-versa}
### Comprueba el BrazeDelegate {#check-the-brazedelegate}
Si implementas `BrazeDelegate.braze(_:shouldOpenURL:)`, verifica que gestiona los enlaces de forma coherente en todos los canales. El parámetro `context` incluye el canal de origen. Busca lógica condicional que pueda filtrar accidentalmente enlaces de canales específicos.
### Habilita el registro detallado {#enable-verbose-logging}
[Habilita el registro detallado](https://www.braze.com/docs/es/es/developer_guide/sdk_integration/verbose_logging) y reproduce el problema. Busca la entrada de registro `Opening`:
```
Opening '':
- channel:
- useWebView:
- isUniversalLink:
```
Compara la salida del registro del canal que funciona con la del canal que no funciona. Las diferencias en `useWebView` o `isUniversalLink` indican cómo el SDK interpreta el enlace de manera diferente.
### Comprueba si hay delegados de visualización personalizados {#check-for-custom-display-delegates}
Si utilizas un delegado de visualización de mensajes dentro de la aplicación personalizado o un controlador de clics de Content Cards, verifica que transmite correctamente los eventos de enlace al SDK de Braze para su gestión.
## "Abrir URL web dentro de la aplicación" muestra una página en blanco o dañada {#open-web-url-inside-app-shows-a-blank-or-broken-page}
Si al seleccionar **Open Web URL Inside App** aparece una WebView en blanco o dañada:
1. **Verifica que la URL utiliza HTTPS.** La WebView del SDK requiere URL compatibles con ATS. Los enlaces HTTP fallan silenciosamente.
2. **Comprueba los encabezados de Content Security Policy.** Si la página web de destino establece `X-Frame-Options: DENY` o una `Content-Security-Policy` restrictiva, bloquea la representación en una WebView.
3. **Comprueba si hay redireccionamientos a esquemas personalizados.** Si la página web redirige a un esquema personalizado (por ejemplo, `myapp://`), la WebView no puede gestionarlo.
4. **Prueba la URL en Safari.** Si la página no se carga en Safari en el dispositivo, tampoco se cargará en la WebView.
## Solución de problemas de Branch con Braze {#branch}
Si utilizas [Branch](https://www.braze.com/docs/es/es/partners/message_orchestration/deeplinking/branch_for_deeplinking) como tu proveedor de enlaces:
### Verifica que el BrazeDelegate enrute a Branch {#verify-the-brazedelegate-routes-to-branch}
Tu `BrazeDelegate` debe interceptar los enlaces de Branch y pasarlos al SDK de Branch. Verifica lo siguiente:
```swift
func braze(_ braze: Braze, shouldOpenURL context: Braze.URLContext) -> Bool {
if let host = context.url.host, host.contains("app.link") {
// Route to Branch SDK
Branch.getInstance.handleDeepLink(context.url)
return false
}
// Let Braze handle other links
return true
}
```
Si `shouldOpenURL` devuelve `true` para enlaces de Branch, Braze los gestiona directamente en lugar de enrutarlos a Branch.
### Comprueba el dominio de enlace de Branch {#check-branch-link-domain}
Verifica que el dominio de Branch en tu `BrazeDelegate` coincida con tu dominio de enlace de Branch real. Branch utiliza varios formatos de dominio:
- `yourapp.app.link` (predeterminado)
- `yourapp-alternate.app.link` (alternativo)
- Dominios personalizados (si están configurados en el dashboard de Branch)
### Habilita el registro de ambos SDK {#enable-both-sdks-logging}
Para diagnosticar dónde se rompe el enlace en la cadena:
1. Habilita el [registro detallado de Braze](https://www.braze.com/docs/es/es/developer_guide/sdk_integration/verbose_logging): busca entradas `Opening '':` para verificar que el SDK recibió el enlace.
2. Habilita el [modo de prueba de Branch](https://help.branch.io/developers-hub/docs/ios-basic-integration#test-deep-linking): comprueba el dashboard de Branch para ver los eventos de clics en los enlaces.
1. Habilita el [registro detallado de Braze](https://www.braze.com/docs/es/es/developer_guide/sdk_integration/verbose_logging). Busca entradas `Opening '':` para verificar que el SDK recibió el enlace.
2. Habilita el [modo de prueba de Branch](https://help.branch.io/developers-hub/docs/ios-basic-integration#test-deep-linking). Comprueba el dashboard de Branch para ver los eventos de clics en los enlaces.
3. Si Braze registra el enlace, pero Branch no detecta un clic, es probable que el problema esté en la lógica de enrutamiento del `BrazeDelegate`.
### Comprueba la configuración del dashboard de Branch {#check-branch-dashboard-configuration}
En el dashboard de Branch, verifica:
- El **Bundle ID** y el **Team ID** de tu aplicación coinciden con tu proyecto Xcode.
- Tus **Associated Domains** incluyen el dominio de enlace de Branch.
- Tu archivo AASA de Branch es válido (Branch lo aloja automáticamente en dominios `app.link`).
### Prueba los enlaces de Branch de forma independiente {#test-branch-links-independently}
Prueba el enlace de Branch fuera de Braze para aislar el problema:
1. Abre el enlace de Branch en Safari en tu dispositivo. Si no se abre la aplicación, el problema está en tu configuración de Branch o AASA, no en Braze.
2. Pega el enlace de Branch en la aplicación Notas y pulsa sobre él. Los enlaces universales funcionan de forma más fiable desde Notas que desde la barra de direcciones de Safari.
## Consejos generales de depuración {#general-debugging-tips}
### Usa el registro detallado {#use-verbose-logging}
[Habilita el registro detallado](https://www.braze.com/docs/es/es/developer_guide/sdk_integration/verbose_logging) para ver exactamente cómo el SDK procesa los enlaces. Entradas clave que debes buscar:
| Entrada de registro | Qué significa |
|---|---|
| `Opening '': - channel: notification` | El SDK está procesando un enlace desde una notificación push |
| `Opening '': - channel: inAppMessage` | El SDK está procesando un enlace desde un mensaje dentro de la aplicación |
| `Opening '': - channel: contentCard` | El SDK está procesando un enlace desde una Content Card |
| `useWebView: true` | El SDK abre la URL en la WebView integrada en la aplicación |
| `isUniversalLink: true` | El SDK identificó la URL como un enlace universal |
{: .reset-td-br-1 .reset-td-br-2 aria-label="Usa el registro detallado" }
Para más detalles sobre cómo leer estos registros, consulta [Lectura de registros detallados](https://www.braze.com/docs/es/es/developer_guide/sdk_integration/verbose_logging).
### Prueba los enlaces de forma aislada {#test-links-in-isolation}
Antes de probar a través de Braze, verifica que tu vínculo profundo o enlace universal funciona por sí solo:
- **Esquema personalizado**: Ejecuta `xcrun simctl openurl booted "myapp://path"` en Terminal.
- **Enlace universal**: Pega la URL en la aplicación Notas en un dispositivo físico y pulsa sobre ella. No pruebes desde la barra de direcciones de Safari, ya que iOS trata las URL escritas de forma diferente a los enlaces pulsados.
- **Enlace de Branch**: Abre el enlace de Branch desde la aplicación Notas en un dispositivo.
### Prueba en un dispositivo físico {#test-on-a-physical-device}
Los enlaces universales tienen compatibilidad limitada en el simulador de iOS. Prueba siempre en un dispositivo físico para obtener resultados precisos. Si necesitas probar en un simulador, añade el archivo `.entitlements` a la fase de compilación **Copy Bundle Resources**.
# Configura notificaciones push silenciosas para el SDK de Braze.
Source: /docs/es/developer_guide/push_notifications/silent/index.md
# Notificaciones push silenciosas
> Aprende a configurar notificaciones push silenciosas para el SDK de Braze.
## Prerequisites
Before you can use this feature, you'll need to [integrate the Android Braze SDK](https://www.braze.com/docs/es/es/developer_guide/sdk_integration/?sdktab=android). You'll also need to [set up push notifications](https://www.braze.com/docs/es/es/developer_guide/push_notifications/?sdktab=android).
## Setting up silent push notifications
Silent notifications are available through the Braze [Messaging API](https://www.braze.com/docs/es/es/api/endpoints/messaging/). To take advantage of them, you need to set the `send_to_sync` flag to `true` within the [Android push object](https://www.braze.com/docs/es/es/api/objects_filters/messaging/android_object/) and ensure there are no `title` or `alert` fields set as it will cause errors when used alongside `send_to_sync`—however, you can include data `extras` within the object.
## Prerequisites
Before you can use this feature, you'll need to [integrate the Swift Braze SDK](https://www.braze.com/docs/es/es/developer_guide/sdk_integration/?sdktab=swift). You'll also need to [set up push notifications](https://www.braze.com/docs/es/es/developer_guide/push_notifications/?sdktab=swift).
## iOS limitations
The iOS operating system may gate notifications for some features. Note that if you are experiencing difficulties with these features, the iOS's silent notifications gate might be the cause. For more details, refer to Apple's [instance method](https://developer.apple.com/documentation/uikit/uiapplicationdelegate/1623013-application) and [unreceived notifications](https://developer.apple.com/library/content/technotes/tn2265/_index.html#//apple_ref/doc/uid/DTS40010376-CH1-TNTAG23) documentation.
## Setting up silent push notifications
To use silent push notifications to trigger background work, you must configure your app to receive notifications even when it is in the background. To do this, add the Background Modes capability using the **Signing & Capabilities** pane to the main app target in Xcode. Select the **Remote notifications** checkbox.

Even with the remote notifications background mode enabled, the system will not launch your app into the background if the user has force-quit the application. The user must explicitly launch the application or reboot the device before the app can be automatically launched into the background by the system.
For more information, refer to [pushing background updates](https://developer.apple.com/documentation/usernotifications/setting_up_a_remote_notification_server/pushing_background_updates_to_your_app) and the `application:didReceiveRemoteNotification:fetchCompletionHandler:` [documentation](https://developer.apple.com/library/ios/documentation/UIKit/Reference/UIApplicationDelegate_Protocol/index.html#//apple_ref/occ/intfm/UIApplicationDelegate/application:didReceiveRemoteNotification:fetchCompletionHandler:).
## Sending silent push notifications
To send a silent push notification, set the `content-available` flag to `1` in a push notification payload.
**Note:**
What Apple calls a remote notification is just a normal push notification with the `content-available` flag set.
The `content-available` flag can be set in the Braze dashboard as well as within our [Apple push object](https://www.braze.com/docs/es/es/api/objects_filters/messaging/apple_object/) in the [messaging API](https://www.braze.com/docs/es/es/api/endpoints/messaging/).
**Warning:**
Attaching both a title and body with `content-available=1` is not recommended because it can lead to undefined behavior. To ensure that a notification is truly silent, exclude both the title and body when setting the `content-available` flag to `1.` For further details, refer to the official [Apple documentation on background updates](https://developer.apple.com/documentation/usernotifications/setting_up_a_remote_notification_server/pushing_background_updates_to_your_app).

When sending a silent push notification, you might also want to include some data in the notification payload, so your application can reference the event. This could save you a few networking requests and increase the responsiveness of your app.
## Ignoring internal push notifications
Braze uses silent push notifications to internally handle certain advanced features, such as uninstall tracking. If your app takes automatic actions on application launches or background pushes, consider gating that activity so it's not triggered by any internal push notifications.
For example, if you have logic that calls your servers for new content upon every background push or application launch, you may want to prevent triggering Braze’s internal pushes to avoid unnecessary network traffic. Because Braze sends certain kinds of internal pushes to all users at approximately the same time, significant server load may occur if on-launch network calls from internal pushes are not gated.
### Step 1: Check your app for automatic actions
Check your application for automatic actions in the following places and update your code to ignore Braze’s internal pushes:
1. **Push Receivers.** Background push notifications will call `application:didReceiveRemoteNotification:fetchCompletionHandler:` on the `UIApplicationDelegate`.
2. **Application Delegate.** Background pushes can launch [suspended](https://developer.apple.com/documentation/uikit/app_and_environment/managing_your_app_s_life_cycle) apps into the background, triggering the `application:willFinishLaunchingWithOptions:` and `application:didFinishLaunchingWithOptions:` methods on your `UIApplicationDelegate`. Check the `launchOptions` of these methods to determine if the application has been launched from a background push.
### Step 2: Use the internal push utility method
You can use the static utility method in `Braze.Notifications` to check if your app has received or was launched by a Braze internal push. [`Braze.Notifications.isInternalNotification(_:)`](https://braze-inc.github.io/braze-swift-sdk/documentation/brazekit/braze/notifications-swift.class/isinternalnotification(_:)) returns `true` for all Braze internal push notifications, which include uninstall tracking and [Feature flags](https://www.braze.com/docs/es/es/user_guide/messaging/feature_flags/) sync notifications.
For example:
```swift
func application(_ application: UIApplication,
didReceiveRemoteNotification userInfo: [AnyHashable : Any],
fetchCompletionHandler completionHandler: @escaping (UIBackgroundFetchResult) -> Void) {
if (!Braze.Notifications.isInternalNotification(userInfo)) {
// Gated logic here (for example pinging server for content)
}
}
```
```objc
- (void)application:(UIApplication *)application didReceiveRemoteNotification:(NSDictionary *)userInfo fetchCompletionHandler:(void (^)(UIBackgroundFetchResult result))completionHandler {
if (![BRZNotifications isInternalNotification:userInfo]) {
// Gated logic here (for example pinging server for content)
}
}
```
## Prerequisites
Before you can use this feature, you'll need to [integrate the Android Braze SDK](https://www.braze.com/docs/es/es/developer_guide/sdk_integration/?sdktab=android). You'll also need to [set up push notifications](https://www.braze.com/docs/es/es/developer_guide/push_notifications/?sdktab=android).
## Setting up silent push notifications
Silent notifications are available through the Braze [Messaging API](https://www.braze.com/docs/es/es/api/endpoints/messaging/). To take advantage of them, you need to set the `send_to_sync` flag to `true` within the [Android push object](https://www.braze.com/docs/es/es/api/objects_filters/messaging/android_object/) and ensure there are no `title` or `alert` fields set as it will cause errors when used alongside `send_to_sync`—however, you can include data `extras` within the object.
# Configura notificaciones push enriquecidas para el SDK de Braze.
Source: /docs/es/developer_guide/push_notifications/rich/index.md
# Notificaciones push enriquecidas
> Aprende a configurar notificaciones push enriquecidas para el SDK de Braze.
## Prerequisites
Before you can use this feature, you'll need to [integrate the Swift Braze SDK](https://www.braze.com/docs/es/es/developer_guide/sdk_integration/?sdktab=swift). You'll also need to [set up push notifications](https://www.braze.com/docs/es/es/developer_guide/push_notifications/?sdktab=swift).
## Setting up rich push notifications
### Step 1: Creating a service extension
To create a [notification service extension](https://developer.apple.com/reference/usernotifications/unnotificationserviceextension), navigate to **File > New > Target** in Xcode and select **Notification Service Extension**.
{: style="max-width:90%"}
Ensure that **Embed In Application** is set to embed the extension in your application.
### Step 2: Setting up the notification service extension
A notification service extension is its own binary that is bundled with your app. It must be set up in the [Apple Developer Portal](https://developer.apple.com) with its own app ID and provisioning profile.
The notification service extension's bundle ID must be distinct from your main app target's bundle ID. For example, if your app's bundle ID is `com.company.appname`, you can use `com.company.appname.AppNameServiceExtension` for your service extension.
### Step 3: Adding an App Group
In Xcode, add the App Groups capability from the **Signing & Capabilities** pane to your main app target as well as the Notification Service Extension target. Then, click the **+** button. Use your app's bundle ID to create the app group. For example, if your app's bundle ID is `com.company.appname`, you can name your app group `group.com.company.appname.xyz`.
**Important:**
App Groups in this context refer to Apple's [App Groups Entitlement](https://developer.apple.com/documentation/bundleresources/entitlements/com_apple_security_application-groups) and not your Braze workspace (previously app group) ID.
You need a shared App Group so your main app and the Notification Service Extension can access shared data. If you do not add your app to an app group, your app may fail to populate certain fields from the push payload and will not work fully as expected.
### Step 4: Integrating rich push notifications
For a step-by-step guide on integrating rich push notifications with `BrazeNotificationService`, refer to our [tutorial](https://braze-inc.github.io/braze-swift-sdk/tutorials/braze/b2-rich-push-notifications).
To see a sample, refer to the usage in [`NotificationService`](https://github.com/braze-inc/braze-swift-sdk/blob/main/Examples/Swift/Sources/PushNotificationsServiceExtension/NotificationService.swift) of our Examples app.
#### Adding the rich push framework to your app
After following the [Swift Package Manager integration guide](https://www.braze.com/docs/es/es/developer_guide/platform_integration_guides/swift/sdk_integration/?tab=swift%20package%20manager/), add `BrazeNotificationService` to your `Notification Service Extension` by doing the following:
1. In Xcode, under frameworks and libraries, select the add icon to add a framework.

2. Select the "BrazeNotificationService" framework.

Add the following to your Podfile:
```ruby
target 'YourAppTarget' do
pod 'BrazeKit'
pod 'BrazeUI'
pod 'BrazeLocation'
end
target 'YourNotificationServiceExtensionTarget' do
pod 'BrazeNotificationService'
end
# Only include the below if you want to also integrate Push Stories
target 'YourNotificationContentExtensionTarget' do
pod 'BrazePushStory'
end
```
**Note:**
For instructions to implement Push Stories, see the [documentation](https://www.braze.com/docs/es/es/developer_guide/platform_integration_guides/swift/push_notifications/push_story/?tab=swift%20package%20manager).
After updating the Podfile, navigate to the directory of your Xcode app project within your terminal and run `pod install`.
To add `BrazeNotificationService.xcframework` to your `Notification Service Extension`, see [Manual integration](https://www.braze.com/docs/es/es/developer_guide/platform_integration_guides/swift/sdk_integration?tab=manual/).

#### Using your own UNNotificationServiceExtension
If you need to use your own UNNotificationServiceExtension, you can instead call [`brazeHandle`](https://braze-inc.github.io/braze-swift-sdk/documentation/brazenotificationservice/brazehandle(request:contenthandler:)) in your `didReceive` method.
```swift
import BrazeNotificationService
import UserNotifications
class NotificationService: UNNotificationServiceExtension {
override func didReceive(
_ request: UNNotificationRequest,
withContentHandler contentHandler: @escaping (UNNotificationContent) -> Void
) {
if brazeHandle(request: request, contentHandler: contentHandler) {
return
}
// Custom handling here
contentHandler(request.content)
}
}
```
### Step 5: Configuring the App Group in Braze
Before initializing Braze, assign the name of your app group to your Braze configuration's [`push.appGroup`](https://braze-inc.github.io/braze-swift-sdk/documentation/brazekit/braze/configuration-swift.class/push-swift.class/appgroup) property.
```swift
let configuration = Braze.Configuration(apiKey: "",
endpoint: "")
configuration.push.appGroup = "REPLACE_WITH_APPGROUP"
let braze = Braze(configuration: configuration)
```
### Step 6: Creating a rich notification in your dashboard
Your marketing team can also create rich notifications from the dashboard. Create a push notification through the push composer and attach an image or GIF, or provide a URL that hosts an image, GIF, or video. Note that assets are downloaded on the receipt of push notifications, so you should plan for large, synchronous spikes in requests if you are hosting your content.
## Prerequisites
Before you can use this feature, you'll need to [integrate the Cordova Braze SDK](https://www.braze.com/docs/es/es/developer_guide/sdk_integration/?sdktab=cordova). You'll also need to [set up push notifications](https://www.braze.com/docs/es/es/developer_guide/push_notifications/?sdktab=cordova).
## Setting up rich push notifications
### Step 1: Create a notification service extension
In your Xcode project, create a notification service extension. For a full walkthrough, see [iOS Rich Push Notifications Tutorial](https://braze-inc.github.io/braze-swift-sdk/tutorials/braze/b2-rich-push-notifications).
### Step 2: Add a new target
Open your Podfile and add `BrazeNotificationService` to the notification service extension target [you just created](#cordova_step-1-create-a-notification-service-extension). If `BrazeNotificationService` is already added to a target, remove it before continuing. To avoid duplicate symbol errors, use static linking.
```ruby
target 'NOTIFICATION_SERVICE_EXTENSION' do
use_frameworks! :linkage => :static
pod 'BrazeNotificationService'
end
```
Replace `NOTIFICATION_SERVICE_EXTENSION` with the name of your notification service extension. Your Podfile should be similar to the following:
```ruby
target 'MyAppRichNotificationService' do
use_frameworks! :linkage => :static
pod 'BrazeNotificationService'
end
```
### Step 3: Reinstall your CocoaPods dependencies
In the terminal, go to your project's iOS directory and reinstall your CocoaPod dependencies.
```bash
cd PATH_TO_PROJECT/platform/ios
pod install
```
## Prerequisites
Before you can use this feature, you'll need to [integrate the React Native Braze SDK](https://www.braze.com/docs/es/es/developer_guide/sdk_integration/?sdktab=react%20native). You'll also need to [set up push notifications](https://www.braze.com/docs/es/es/developer_guide/push_notifications/?sdktab=react%20native).
## Using Expo to enable rich push notifications
For the React Native SDK, **rich push notifications are available for Android by default**.
To enable rich push notifications on iOS using Expo, configure the `enableBrazeIosRichPush` property to `true` in your `expo.plugins` object in `app.json`:
```json
{
"expo": {
"plugins": [
[
"@braze/expo-plugin",
{
...
"enableBrazeIosRichPush": true
}
]
]
}
}
```
Lastly, add the bundle identifier for this app extension to your project's credentials configuration: `.BrazeExpoRichPush`. For further details on this process, refer to [Using app extensions with Expo Application Services](https://www.braze.com/docs/es/es/developer_guide/push_notifications/?sdktab=react%20native#reactnative_app-extensions).
# Configurar historias push para el SDK de Braze
Source: /docs/es/developer_guide/push_notifications/push_stories/index.md
# Historias push
> Aprende a configurar historias push para el SDK de Braze.
## Prerequisites
Before you can use this feature, you'll need to [integrate the Swift Braze SDK](https://www.braze.com/docs/es/es/developer_guide/sdk_integration/?sdktab=swift). You'll also need to [set up push notifications](https://www.braze.com/docs/es/es/developer_guide/push_notifications/?sdktab=swift), which includes implementing the `UNNotification` framework.
The following minimum SDK version is required to receive Push Stories:
## Setting up Push Stories
### Step 1: Adding the Notification Content Extension target {#notification-content-extension}
In your app project, go to menu **File > New > Target** and add a new `Notification Content Extension` target and activate it.

Xcode should generate a new target for you and create files automatically for you including:
- `NotificationViewController.swift`
- `MainInterface.storyboard`
### Step 2: Enable capabilities {#enable-capabilities}
In Xcode, add the Background Modes capability using the **Signing & Capabilities** pane to the main app target. Select both the **Background fetch** and **Remote notifications** checkboxes.

#### Adding an App Group
Additionally, from the **Signing & Capabilities** pane in Xcode, add the App Groups capability to your main app target as well as the Notification Content Extension targets. Then, click the **+** button. Use your app's bundle ID to create the app group. For example, if your app's bundle ID is `com.company.appname`, you can name your app group `group.com.company.appname.xyz`.
**Important:**
App Groups in this context refer to Apple's [App Groups Entitlement](https://developer.apple.com/documentation/bundleresources/entitlements/com_apple_security_application-groups) and not your Braze workspace (previously app group) ID.
If you do not add your app to an App Group, your app may fail to populate certain fields from the push payload and will not work fully as expected.
### Step 3: Adding the Push Story framework to your app {#enable-capabilities}
After following the [Swift Package Manager integration guide](https://www.braze.com/docs/es/es/developer_guide/platform_integration_guides/swift/sdk_integration/?tab=swift%20package%20manager/), add `BrazePushStory` to your `Notification Content Extension`:


Add the following line to your Podfile:
```ruby
target 'YourAppTarget' do
pod 'BrazeKit'
pod 'BrazeUI'
pod 'BrazeLocation'
end
target 'YourNotificationContentExtensionTarget' do
pod 'BrazePushStory'
end
# Only include the below if you want to also integrate Rich Push
target 'YourNotificationServiceExtensionTarget' do
pod 'BrazeNotificationService'
end
```
**Note:**
For instructions to implement Rich Push, see [Rich notifications](https://www.braze.com/docs/es/es/developer_guide/platform_integration_guides/swift/push_notifications/customization/rich_notifications/?tab=swift%20package%20manager).
After updating the Podfile, navigate to the directory of your Xcode app project within your terminal and run `pod install`.
Download the latest `BrazePushStory.zip` from the [GitHub release page](https://github.com/braze-inc/braze-swift-sdk/releases), extract it, and add the `BrazePushStory.xcframework` to your project's `Notification Content Extension`.

**Important:**
Make sure that **Do Not Embed** is selected for **BrazePushStory.xcframework** under the **Embed** column.
### Step 4: Updating your notification view controller {#enable-capabilities}
In `NotificationViewController.swift`, add the following line to import the header files:
```swift
import BrazePushStory
```
Next, replace the default implementation by inheriting [`BrazePushStory.NotificationViewController`](https://braze-inc.github.io/braze-swift-sdk/documentation/brazepushstory/notificationviewcontroller/):
```swift
class NotificationViewController: BrazePushStory.NotificationViewController {}
```
#### Custom handling push story events
If you want to implement your own custom logic to handle push story notification events, inherit `BrazePushStory.NotificationViewController` as shown in the previous example and override the [`didReceive`](https://braze-inc.github.io/braze-swift-sdk/documentation/brazepushstory/notificationviewcontroller/didreceive(_:)) methods in the following example.
```swift
import BrazePushStory
import UserNotifications
import UserNotificationsUI
class NotificationViewController: BrazePushStory.NotificationViewController {
override func didReceive(_ notification: UNNotification) {
super.didReceive(notification)
// Custom handling logic
}
override func didReceive(_ response: UNNotificationResponse, completionHandler completion: @escaping (UNNotificationContentExtensionResponseOption) -> Void) {
super.didReceive(response, completionHandler: completion)
// Custom handling logic
}
}
```
### Step 5: Setting the Notification Content Extension plist {#notification-content-extension}
Open the `Info.plist` file of the `Notification Content Extension`, then add and change the following keys under `NSExtension \ NSExtensionAttributes`:
| Key | Type | Value |
|--------------------------------------------------|---------|------------------------|
| `UNNotificationExtensionCategory` | String | `ab_cat_push_story_v2` |
| `UNNotificationExtensionDefaultContentHidden` | Boolean | `YES` |
| `UNNotificationExtensionInitialContentSizeRatio` | Number | `0.6` |
| `UNNotificationExtensionUserInteractionEnabled` | Boolean | `YES` |
{: .reset-td-br-1 .reset-td-br-2 .reset-td-br-3 aria-label="Step 5: Setting the Notification Content Extension plist #notification-content-extension" }
Additionally, add the following top-level `Braze` dictionary to the same `Info.plist` file, replacing `REPLACE_WITH_APPGROUP` with the App Group you created in [Step 2](#enable-capabilities):
| Key | Type | Value |
|------------------|--------|--------------------------|
| `Braze.AppGroup` | String | `REPLACE_WITH_APPGROUP` |
{: .reset-td-br-1 .reset-td-br-2 .reset-td-br-3 aria-label="Step 5: Setting the Notification Content Extension plist #notification-content-extension" }
Your `Info.plist` file should match the following image:

### Step 6: Updating the Braze integration in your main app {#update-braze}
Before initializing Braze, assign the name of your app group to your Braze configuration's [`push.appGroup`](https://braze-inc.github.io/braze-swift-sdk/documentation/brazekit/braze/configuration-swift.class/push-swift.class/appgroup) property.
```swift
let configuration = Braze.Configuration(apiKey: "",
endpoint: "")
configuration.push.appGroup = "REPLACE_WITH_APPGROUP"
let braze = Braze(configuration: configuration)
```
## Prerequisites
Before you can use this feature, you'll need to [integrate the Cordova Braze SDK](https://www.braze.com/docs/es/es/developer_guide/sdk_integration/?sdktab=cordova). You'll also need to [set up push notifications](https://www.braze.com/docs/es/es/developer_guide/push_notifications/?sdktab=cordova).
## Setting up push stories
### Step 1: Create a notification content extension
In your Xcode project, create a notification content extension. For a full walkthrough, see [iOS Push Stories Tutorial](https://braze-inc.github.io/braze-swift-sdk/tutorials/braze/b3-push-stories/).
### Step 2: Configure your push app group
In your project's `config.xml` file, configure the push app group [you just created](#cordova_step-1-create-a-notification-content-extension).
```xml
```
Replace `PUSH_APP_GROUP` with the name of your push app group. Your `config.xml` should be similar to the following:
```xml
```
### Step 3: Add a new target
Open your Podfile and add `BrazePushStory` to the notification content extension target [you created previously](#cordova_step-1-create-a-notification-content-extension). To avoid duplicate symbol errors, use static linking.
```ruby
target 'NOTIFICATION_CONTENT_EXTENSION' do
use_frameworks! :linkage => :static
pod 'BrazePushStory'
end
```
Replace `NOTIFICATION_CONTENT_EXTENSION` with the name of your notification content extension. Your Podfile should be similar to the following:
```ruby
target 'MyAppNotificationContentExtension' do
use_frameworks! :linkage => :static
pod 'BrazePushStory'
end
```
### Step 4: Reinstall your CocoaPods dependencies
In the terminal, go to your iOS directory and reinstall your CocoaPod dependencies.
```bash
cd PATH_TO_PROJECT/platform/ios
pod install
```
## Prerequisites
Before you can use this feature, you'll need to [integrate the React Native Braze SDK](https://www.braze.com/docs/es/es/developer_guide/sdk_integration/?sdktab=react%20native). You'll also need to [set up push notifications](https://www.braze.com/docs/es/es/developer_guide/push_notifications/?sdktab=react%20native).
## Enabling push stories
For the React Native SDK, **push stories are available for Android by default**.
To enable Push Stories on iOS using Expo, ensure you have an app group defined for your application. For more information, see [Adding an App Group](https://www.braze.com/docs/es/es/developer_guide/platform_integration_guides/swift/push_notifications/push_story/#adding-an-app-group).
Next, configure the `enableBrazeIosPushStories` property to `true` and assign your app group ID to `iosPushStoryAppGroup` in your `expo.plugins` object in `app.json`:
```json
{
"expo": {
"plugins": [
[
"@braze/expo-plugin",
{
...
"enableBrazeIosPushStories": true,
"iosPushStoryAppGroup": "group.com.company.myApp.PushStories"
}
]
]
}
}
```
Lastly, add the bundle identifier for this app extension to your project's credentials configuration: `.BrazeExpoPushStories`. For further details on this process, refer to [Using app extensions with Expo Application Services](https://www.braze.com/docs/es/es/developer_guide/push_notifications/?sdktab=react%20native#reactnative_app-extensions).
**Warning:**
If you are using Push Stories with Expo Application Services, be sure to use the `EXPO_NO_CAPABILITY_SYNC=1` flag when running `eas build`. There is a known issue in the command line which removes the App Groups capability from your extension's provisioning profile.
# Configurar avisos de push suave para el SDK de Braze
Source: /docs/es/developer_guide/push_notifications/soft_push_prompts/index.md
# Mensajes de pulsación suave para la Web
> Aprende a configurar avisos de push suave para el SDK de Braze.
## Prerequisites
Before you can use this feature, you'll need to [integrate the Web Braze SDK](https://www.braze.com/docs/es/es/developer_guide/sdk_integration/?sdktab=web). You'll also need to [set up push notifications](https://www.braze.com/docs/es/es/developer_guide/push_notifications/?sdktab=web).
If you're integrating Braze through mParticle's embedded kit on the web, see [Step 3 in mParticle's Braze Web event integration](https://docs.mparticle.com/integrations/braze/event/#web) for instructions to implement soft push prompts.
## About soft push prompts
It's often a good idea for sites to implement a "soft" push prompt where you "prime" the user and make your case for sending them push notifications before requesting push permission. This is useful because the browser throttles how often you may prompt the user directly, and if the user denies permission you can never ask them again.
Alternatively, if you would like to include special custom handling, instead of calling `requestPushPermission()` directly as described in the standard [Web push integration](https://www.braze.com/docs/es/es/developer_guide/platform_integration_guides/web/push_notifications/integration/#step-2-browser-registration), use our [triggered in-app messages](https://www.braze.com/docs/es/es/developer_guide/in_app_messages/triggering_messages/?tab=web).
**Tip:**
This can be done without SDK customization using our new [no code push primer](https://www.braze.com/docs/es/es/user_guide/message_building_by_channel/push/best_practices/push_primer_messages/).
## Setting up soft push prompts
**Note:**
This guide uses code samples from the Braze Web SDK 4.0.0+. To upgrade to the latest Web SDK version, see [SDK Upgrade Guide](https://github.com/braze-inc/braze-web-sdk/blob/master/UPGRADE_GUIDE.md).
### Step 1: Create a push primer campaign
First, you must create a "Prime for Push" in-app messaging campaign in the Braze dashboard:
1. Create a **Modal** in-app message with the text and styling you want.
2. Next, set the on-click behavior to **Close Message**. This behavior will be customized later.
3. Add a key-value pair to the message where the key is `msg-id`, and the value is `push-primer`.
4. Assign a custom event trigger action (such as "prime-for-push") to the message. You can create the custom event manually from the dashboard if needed.
### Step 2: Remove calls
In your Braze SDK integration, find and remove any calls to `automaticallyShowInAppMessages()` from within your loading snippet.
### Step 3: Update integration
Finally, replace the removed call with the following snippet. Call `subscribeToInAppMessage()` before calling `openSession()`. This ensures your in-app message listener is registered in time to receive the push primer message.
```javascript
import * as braze from "@braze/web-sdk";
// Be sure to remove any calls to braze.automaticallyShowInAppMessages()
braze.subscribeToInAppMessage(function(inAppMessage) {
// check if message is not a control variant
if (inAppMessage instanceof braze.inAppMessage) {
// access the key-value pairs, defined as `extras`
const keyValuePairs = inAppMessage.extras || {};
// check the value of our key `msg-id` defined in the Braze dashboard
if (keyValuePairs["msg-id"] === "push-primer") {
// We don't want to display the soft push prompt to users on browsers
// that don't support push, or if the user has already granted/blocked permission
if (
braze.isPushSupported() === false ||
braze.isPushPermissionGranted() ||
braze.isPushBlocked()
) {
// do not call `showInAppMessage`
return;
}
// user is eligible to receive the native prompt
// register a click handler on one of the two buttons
if (inAppMessage.buttons[0]) {
// Prompt the user when the first button is clicked
inAppMessage.buttons[0].subscribeToClickedEvent(function() {
braze.requestPushPermission(
function() {
// success!
},
function() {
// user declined
}
);
});
}
}
}
// show the in-app message now
braze.showInAppMessage(inAppMessage);
});
```
When you wish to display the soft push prompt to the user, call `braze.logCustomEvent` - with whatever event name triggers this in-app message.
# Análisis push y registro de eventos personalizados
Source: /docs/es/developer_guide/push_notifications/logging_message_data/index.md
# Análisis push y registro de eventos personalizados {#push-analytics-and-custom-event-logging}
> Esta página cubre los siguientes flujos de trabajo: análisis nativos de push (aperturas, Influenced Opens e informes de Campaign) y registro de datos personalizados (eventos personalizados y atributos) a partir de cargas útiles push. Usa esta guía para identificar qué flujo de trabajo se aplica a tu caso de uso y sigue los pasos para tu plataforma.
## Requisitos previos {#prerequisites}
Antes de empezar, completa la integración inicial de notificaciones push para tu plataforma:
- [Notificaciones push en Android](https://www.braze.com/docs/es/es/developer_guide/push_notifications?sdktab=android)
- [Notificaciones push en Swift](https://www.braze.com/docs/es/es/developer_guide/push_notifications?sdktab=swift)
- [Notificaciones push web](https://www.braze.com/docs/es/es/developer_guide/push_notifications?sdktab=web)
## Análisis nativos de push vs. registro de eventos personalizados {#native-push-analytics-vs-custom-event-logging}
Los siguientes flujos de trabajo tienen diferentes superficies de informes.
| Categoría de análisis | Descripción | Dónde aparece |
| --- | --- | --- |
| Análisis nativos de push | Métricas push como aperturas e Influenced Opens, vinculadas a Campaigns push de Braze | Análisis de Campaigns push, eventos de interacción de mensajes en Currents, Generador de informes |
| Eventos personalizados y atributos | Análisis que defines y registras a través de métodos del SDK o del punto de conexión `/users/track` | Perfiles de usuario, segmentación, Campaigns y Canvas basados en acciones, análisis de eventos personalizados |
{: .reset-td-br-1 .reset-td-br-2 .reset-td-br-3 aria-label="Análisis nativos de push vs. registro de eventos personalizados" }
**Important:**
Registrar un evento personalizado (como `push_notification_opened`) no es lo mismo que el seguimiento nativo de aperturas push de Braze. Los eventos personalizados no rellenan las métricas nativas de apertura de Campaigns push ni la atribución push.
## Qué registra Braze automáticamente {#what-braze-logs-automatically}
Cuando la integración de tu SDK está configurada, Braze registra automáticamente los datos principales de interacción del canal, incluyendo aperturas push e Influenced Opens. No se requiere código adicional para los análisis push estándar. Para una lista completa de los datos recopilados automáticamente, consulta [Recopilación de datos del SDK](https://www.braze.com/docs/es/es/user_guide/data/unification/user_data/sdk_data_collection).
Para más detalles, consulta lo siguiente:
- [Recopilación de datos del SDK](https://www.braze.com/docs/es/es/user_guide/data/unification/user_data/sdk_data_collection) para una lista completa de datos recopilados automáticamente y opcionales.
- [Influenced Opens](https://www.braze.com/docs/es/es/user_guide/analytics/tracking/influenced_opens) para saber cómo Braze calcula las Influenced Opens.
- [Eventos de interacción de mensajes](https://www.braze.com/docs/es/es/user_guide/data/distribution/braze_currents/event_glossary/message_engagement_events) para los esquemas de eventos posteriores en Currents.
## Preservar los análisis nativos de push con manejo personalizado de push {#preserving-native-push-analytics-with-custom-push-handling}
Podrías usar un controlador push personalizado cuando necesites integrar múltiples proveedores push, procesar datos adicionales de la carga útil o implementar lógica personalizada de visualización de notificaciones. Si usas un controlador push personalizado, debes seguir pasando las cargas útiles push a los métodos del SDK de Braze. Esto permite que Braze extraiga los datos de seguimiento integrados y registre los análisis nativos de push (aperturas, Influenced Opens y métricas de entrega).
Si tienes un `FirebaseMessagingService` personalizado, llama a `BrazeFirebaseMessagingService.handleBrazeRemoteMessage(...)` dentro de tu método `onMessageReceived`. Ten en cuenta que tu subclase de `FirebaseMessagingService` debe finalizar la ejecución en 9 segundos desde la invocación para evitar ser [marcada o terminada](https://firebase.google.com/docs/cloud-messaging/android/receive) por el sistema Android.
```java
public class MyFirebaseMessagingService extends FirebaseMessagingService {
@Override
public void onMessageReceived(RemoteMessage remoteMessage) {
super.onMessageReceived(remoteMessage);
if (BrazeFirebaseMessagingService.handleBrazeRemoteMessage(this, remoteMessage)) {
// Braze processed a Braze push payload.
} else {
// Non-Braze payload: pass to your other handlers.
}
}
}
```
Para un ejemplo completo de implementación, consulta la [aplicación de ejemplo de push Firebase del SDK de Braze para Android](https://github.com/braze-inc/braze-android-sdk/tree/master/samples/firebase-push).
En una integración push manual, reenvía las devoluciones de llamada de notificaciones en segundo plano y de notificaciones de usuario a Braze.
**Notificaciones en segundo plano:**
```swift
if let braze = AppDelegate.braze, braze.notifications.handleBackgroundNotification(
userInfo: userInfo,
fetchCompletionHandler: completionHandler
) {
return
}
completionHandler(.noData)
```
**Respuestas de notificaciones de usuario:**
```swift
if let braze = AppDelegate.braze, braze.notifications.handleUserNotification(
response: response,
withCompletionHandler: completionHandler
) {
return
}
completionHandler()
```
**Notificaciones en primer plano:**
```swift
func userNotificationCenter(
_ center: UNUserNotificationCenter,
willPresent notification: UNNotification,
withCompletionHandler completionHandler: @escaping (UNNotificationPresentationOptions) -> Void
) {
if let braze = AppDelegate.braze {
braze.notifications.handleForegroundNotification(notification: notification)
}
if #available(iOS 14.0, *) {
completionHandler([.banner, .list, .sound])
} else {
completionHandler([.alert, .sound])
}
}
```
Para un ejemplo completo de implementación, consulta el [ejemplo de push manual del SDK Swift de Braze (`AppDelegate.swift`)](https://github.com/braze-inc/braze-swift-sdk/blob/main/Examples/Swift/Sources/PushNotifications-Manual/AppDelegate.swift).
Para notificaciones push web, configura tu prestador de servicios y la inicialización del SDK como se describe en [Notificaciones push web](https://www.braze.com/docs/es/es/developer_guide/push_notifications?sdktab=web).
Para más ejemplos de código, consulta el [repositorio del SDK Web de Braze](https://github.com/braze-inc/braze-web-sdk).
## Registrar datos personalizados a partir de cargas útiles push {#logging-custom-data-from-push-payloads}
Usa esta sección cuando necesites registrar datos adicionales a partir de pares clave-valor de la carga útil push, como eventos personalizados o atributos vinculados a tu lógica de negocio.
Para más información sobre eventos personalizados, consulta [Eventos personalizados](https://www.braze.com/docs/es/es/user_guide/data/activation/events/custom_events). Para registrar eventos personalizados a través de métodos del SDK, consulta [Registrar eventos personalizados](https://www.braze.com/docs/es/es/developer_guide/analytics/logging_events).
### Opción A: Registrar con el punto de conexión `/users/track` {#option-a-log-with-the-userstrack-endpoint}
Puedes registrar análisis en tiempo real llamando al punto de conexión [`/users/track`](https://www.braze.com/docs/es/es/api/endpoints/user_data/post_user_track).
Para identificar el perfil de usuario, incluye `braze_id` en los pares clave-valor de tu carga útil push.
**Note:**
Pasar `braze_id` solo identifica el perfil. Aún necesitas lógica de implementación que lea los valores de la carga útil y envíe la solicitud `/users/track` con los eventos o atributos que deseas registrar.
### Opción B: Registrar con métodos del SDK después del lanzamiento de la aplicación {#option-b-log-with-sdk-methods-after-app-launch}
También puedes guardar los datos de la carga útil localmente y registrar eventos personalizados y atributos a través de métodos del SDK después de que la aplicación se inicialice. Este enfoque es común en flujos de extensiones de contenido de notificaciones donde los datos de análisis se persisten primero y se envían en el siguiente lanzamiento de la aplicación.
**Important:**
Los análisis no se envían a Braze hasta que la aplicación se lance. Dependiendo de tu configuración de descarte, puede haber un retraso entre el momento en que el usuario descarta la notificación y cuando la aplicación se abre y envía los análisis.
## Registrar desde una extensión de contenido de notificación (Swift) {#logging-from-a-notification-content-extension-swift}
Los siguientes pasos cubren cómo guardar y enviar eventos personalizados, atributos personalizados y atributos de usuario desde una extensión de contenido de notificación en Swift.
### Paso 1: Configurar grupos de aplicaciones en Xcode {#step-1-configure-app-groups-in-xcode}
En Xcode, añade la capacidad `App Groups` a tu target principal de la aplicación. Activa **App Groups**, luego haz clic en **+** para añadir un nuevo grupo. Usa el bundle ID de tu aplicación para crear el identificador del grupo (por ejemplo, `group.com.company.appname.xyz`). Activa **App Groups** tanto para el target principal de tu aplicación como para el target de la extensión de contenido.

### Paso 2: Elegir qué registrar {#step-2-choose-what-to-log}
Antes de implementar los fragmentos de código, elige qué categoría de análisis deseas registrar:
- **Eventos personalizados:** Acciones que realizan los usuarios (por ejemplo, completar un flujo o tocar un elemento específico de la interfaz). Usa eventos personalizados para desencadenantes basados en acciones, segmentación y análisis de eventos. Para más información, consulta [Eventos personalizados](https://www.braze.com/docs/es/es/user_guide/data/activation/events/custom_events) y [Registrar eventos personalizados](https://www.braze.com/docs/es/es/developer_guide/analytics/logging_events).
- **Atributos personalizados:** Campos de perfil que defines (por ejemplo, `plan_tier` o `preferred_language`) y actualizas con el tiempo. Para más información, consulta [Atributos personalizados](https://www.braze.com/docs/es/es/user_guide/data/activation/custom_data/data_types) y [Configurar atributos de usuario](https://www.braze.com/docs/es/es/developer_guide/analytics/setting_user_attributes).
- **Atributos de usuario:** Campos estándar del perfil (por ejemplo, correo electrónico, nombre y número de teléfono). En el código de ejemplo, estos se representan mediante un modelo tipado `UserAttribute` y luego se mapean a campos de usuario de Braze.
Los archivos auxiliares en esta sección (`RemoteStorage`, `UserAttribute` y `EventName Dictionary`) son archivos de utilidad locales usados por esta implementación de ejemplo. No son clases integradas del SDK. Almacenan datos derivados de la carga útil en `UserDefaults`, definen un modelo tipado para actualizaciones pendientes de usuario y estandarizan la construcción de la carga útil de eventos. Para más información sobre el comportamiento de almacenamiento local de datos, consulta [Almacenamiento](https://www.braze.com/docs/es/es/developer_guide/storage?tab=swift).
**Note:**
Los ejemplos de archivos auxiliares en esta sección son específicos de iOS (Swift y Objective-C). Para enfoques de Android y Web para registrar eventos personalizados y atributos, consulta [Registrar eventos personalizados](https://www.braze.com/docs/es/es/developer_guide/analytics/logging_events) ([Android](https://www.braze.com/docs/es/es/developer_guide/analytics/logging_events?tab=android), [Web](https://www.braze.com/docs/es/es/developer_guide/analytics/logging_events?tab=web)) y [Configurar atributos de usuario](https://www.braze.com/docs/es/es/developer_guide/analytics/setting_user_attributes) ([Android](https://www.braze.com/docs/es/es/developer_guide/analytics/setting_user_attributes?tab=android), [Web](https://www.braze.com/docs/es/es/developer_guide/analytics/setting_user_attributes?tab=web)).
#### Guardar eventos personalizados {#saving-custom-events}
Crea la carga útil de análisis construyendo un diccionario, rellenando los metadatos y guardándolo con el archivo auxiliar.
1. Inicializa un diccionario con los metadatos del evento.
2. Inicializa `userDefaults` para recuperar y almacenar datos de eventos.
3. Si se encuentra un array existente, añade y guarda.
4. Si no existe un array, guarda uno nuevo.
```swift
func saveCustomEvent(with properties: [String: Any]? = nil) {
// 1
let customEventDictionary = Dictionary(eventName: "YOUR-EVENT-NAME", properties: properties)
// 2
let remoteStorage = RemoteStorage(storageType: .suite)
// 3
if var pendingEvents = remoteStorage.retrieve(forKey: .pendingCustomEvents) as? [[String: Any]] {
pendingEvents.append(contentsOf: [customEventDictionary])
remoteStorage.store(pendingEvents, forKey: .pendingCustomEvents)
} else {
// 4
remoteStorage.store([customEventDictionary], forKey: .pendingCustomEvents)
}
}
```
```objc
- (void)saveCustomEvent:(NSDictionary *)properties {
// 1
NSDictionary *customEventDictionary = [[NSDictionary alloc] initWithEventName:@"YOUR-EVENT-NAME" properties:properties];
// 2
RemoteStorage *remoteStorage = [[RemoteStorage alloc] initWithStorageType:StorageTypeSuite];
NSMutableArray *pendingEvents = [[remoteStorage retrieveForKey:RemoteStorageKeyPendingCustomEvents] mutableCopy];
// 3
if (pendingEvents) {
[pendingEvents addObject:customEventDictionary];
[remoteStorage store:pendingEvents forKey:RemoteStorageKeyPendingCustomEvents];
} else {
// 4
[remoteStorage store:@[ customEventDictionary ] forKey:RemoteStorageKeyPendingCustomEvents];
}
}
```
#### Enviar eventos personalizados a Braze {#sending-custom-events-to-braze}
Registra los análisis guardados justo después de la inicialización del SDK.
1. Recorre los eventos pendientes.
2. Recorre los pares clave-valor de cada evento.
3. Busca la clave `event_name`.
4. Añade los pares clave-valor restantes al diccionario `properties`.
5. Registra cada evento personalizado.
6. Elimina los eventos pendientes del almacenamiento.
```swift
func logPendingCustomEventsIfNecessary() {
let remoteStorage = RemoteStorage(storageType: .suite)
guard let pendingEvents = remoteStorage.retrieve(forKey: .pendingCustomEvents) as? [[String: Any]] else { return }
// 1
for event in pendingEvents {
var eventName: String?
var properties: [AnyHashable: Any] = [:]
// 2
for (key, value) in event {
if key == "event_name" {
// 3
if let eventNameValue = value as? String {
eventName = eventNameValue
} else {
print("Invalid type for event_name key")
}
} else {
// 4
properties[key] = value
}
}
// 5
if let eventName = eventName {
AppDelegate.braze?.logCustomEvent(name: eventName, properties: properties)
}
}
// 6
remoteStorage.removeObject(forKey: .pendingCustomEvents)
}
```
```objc
- (void)logPendingEventsIfNecessary {
RemoteStorage *remoteStorage = [[RemoteStorage alloc] initWithStorageType:StorageTypeSuite];
NSArray *pendingEvents = [remoteStorage retrieveForKey:RemoteStorageKeyPendingCustomEvents];
// 1
for (NSDictionary *event in pendingEvents) {
NSString *eventName = nil;
NSMutableDictionary *properties = [NSMutableDictionary dictionary];
// 2
for (NSString* key in event) {
if ([key isEqualToString:@"event_name"]) {
// 3
if ([[event objectForKey:key] isKindOfClass:[NSString class]]) {
eventName = [event objectForKey:key];
} else {
NSLog(@"Invalid type for event_name key");
}
} else {
// 4
properties[key] = event[key];
}
}
// 5
if (eventName != nil) {
[AppDelegate.braze logCustomEvent:eventName properties:properties];
}
}
// 6
[remoteStorage removeObjectForKey:RemoteStorageKeyPendingCustomEvents];
}
```
#### Guardar atributos personalizados {#saving-custom-attributes}
Crea el diccionario de análisis desde cero y luego persístelo.
1. Inicializa un diccionario con los metadatos del atributo.
2. Inicializa `userDefaults` para recuperar y almacenar datos de atributos.
3. Si se encuentra un array existente, añade y guarda.
4. Si no existe un array, guarda uno nuevo.
```swift
func saveCustomAttribute() {
// 1
let customAttributeDictionary: [String: Any] = ["YOUR-CUSTOM-ATTRIBUTE-KEY": "YOUR-CUSTOM-ATTRIBUTE-VALUE"]
// 2
let remoteStorage = RemoteStorage(storageType: .suite)
// 3
if var pendingAttributes = remoteStorage.retrieve(forKey: .pendingCustomAttributes) as? [[String: Any]] {
pendingAttributes.append(contentsOf: [customAttributeDictionary])
remoteStorage.store(pendingAttributes, forKey: .pendingCustomAttributes)
} else {
// 4
remoteStorage.store([customAttributeDictionary], forKey: .pendingCustomAttributes)
}
}
```
```objc
- (void)saveCustomAttribute {
// 1
NSDictionary *customAttributeDictionary = @{ @"YOUR-CUSTOM-ATTRIBUTE-KEY": @"YOUR-CUSTOM-ATTRIBUTE-VALUE" };
// 2
RemoteStorage *remoteStorage = [[RemoteStorage alloc] initWithStorageType:StorageTypeSuite];
NSMutableArray *pendingAttributes = [[remoteStorage retrieveForKey:RemoteStorageKeyPendingCustomAttributes] mutableCopy];
// 3
if (pendingAttributes) {
[pendingAttributes addObject:customAttributeDictionary];
[remoteStorage store:pendingAttributes forKey:RemoteStorageKeyPendingCustomAttributes];
} else {
// 4
[remoteStorage store:@[ customAttributeDictionary ] forKey:RemoteStorageKeyPendingCustomAttributes];
}
}
```
#### Enviar atributos personalizados a Braze {#sending-custom-attributes-to-braze}
Registra los análisis guardados justo después de la inicialización del SDK.
1. Recorre los atributos pendientes.
2. Recorre cada par clave-valor.
3. Registra cada clave y valor de atributo personalizado.
4. Elimina los atributos pendientes del almacenamiento.
```swift
func logPendingCustomAttributesIfNecessary() {
let remoteStorage = RemoteStorage(storageType: .suite)
guard let pendingAttributes = remoteStorage.retrieve(forKey: .pendingCustomAttributes) as? [[String: Any]] else { return }
// 1
pendingAttributes.forEach { setCustomAttributesWith(keysAndValues: $0) }
// 4
remoteStorage.removeObject(forKey: .pendingCustomAttributes)
}
func setCustomAttributesWith(keysAndValues: [String: Any]) {
// 2
for (key, value) in keysAndValues {
// 3
if let value = value as? [String] {
setCustomAttributeArrayWithKey(key, andValue: value)
} else {
setCustomAttributeWithKey(key, andValue: value)
}
}
}
```
```objc
- (void)logPendingCustomAttributesIfNecessary {
RemoteStorage *remoteStorage = [[RemoteStorage alloc] initWithStorageType:StorageTypeSuite];
NSArray *pendingAttributes = [remoteStorage retrieveForKey:RemoteStorageKeyPendingCustomAttributes];
// 1
for (NSDictionary *attribute in pendingAttributes) {
[self setCustomAttributeWith:attribute];
}
// 4
[remoteStorage removeObjectForKey:RemoteStorageKeyPendingCustomAttributes];
}
- (void)setCustomAttributeWith:(NSDictionary *)keysAndValues {
// 2
for (NSString *key in keysAndValues) {
// 3
[self setCustomAttributeWith:key andValue:[keysAndValues objectForKey:key]];
}
}
```
#### Guardar atributos de usuario {#saving-user-attributes}
Al guardar atributos de usuario, crea un objeto personalizado para capturar qué campo de usuario se está actualizando (`email`, `first_name`, `phone_number`, etc.). El objeto debe ser compatible con el almacenamiento y la recuperación a través de `UserDefaults`. Consulta el archivo auxiliar `UserAttribute` en la pestaña **Archivos auxiliares** para ver un ejemplo.
1. Inicializa un objeto `UserAttribute` codificado con el tipo correspondiente.
2. Inicializa `userDefaults` para recuperar y almacenar los datos.
3. Si se encuentra un array existente, añade y guarda.
4. Si no existe un array, guarda uno nuevo.
```swift
func saveUserAttribute() {
// 1
guard let data = try? PropertyListEncoder().encode(UserAttribute.email("USER-ATTRIBUTE-VALUE")) else { return }
// 2
let remoteStorage = RemoteStorage(storageType: .suite)
// 3
if var pendingAttributes = remoteStorage.retrieve(forKey: .pendingUserAttributes) as? [Data] {
pendingAttributes.append(contentsOf: [data])
remoteStorage.store(pendingAttributes, forKey: .pendingUserAttributes)
} else {
// 4
remoteStorage.store([data], forKey: .pendingUserAttributes)
}
}
```
```objc
- (void)saveUserAttribute {
// 1
UserAttribute *userAttribute = [[UserAttribute alloc] initWithUserField:@"USER-ATTRIBUTE-VALUE" attributeType:UserAttributeTypeEmail];
NSError *error;
NSData *data = [NSKeyedArchiver archivedDataWithRootObject:userAttribute requiringSecureCoding:YES error:&error];
if (error != nil) {
// log error
}
// 2
RemoteStorage *remoteStorage = [[RemoteStorage alloc] initWithStorageType:StorageTypeSuite];
NSMutableArray *pendingAttributes = [[remoteStorage retrieveForKey:RemoteStorageKeyPendingUserAttributes] mutableCopy];
// 3
if (pendingAttributes) {
[pendingAttributes addObject:data];
[remoteStorage store:pendingAttributes forKey:RemoteStorageKeyPendingUserAttributes];
} else {
// 4
[remoteStorage store:@[data] forKey:RemoteStorageKeyPendingUserAttributes];
}
}
```
#### Enviar atributos de usuario a Braze {#sending-user-attributes-to-braze}
Registra los análisis guardados justo después de la inicialización del SDK.
1. Recorre los datos de `pendingAttributes`.
2. Decodifica cada `UserAttribute`.
3. Establece los campos de usuario según el tipo de atributo.
4. Elimina los atributos de usuario pendientes del almacenamiento.
```swift
func logPendingUserAttributesIfNecessary() {
let remoteStorage = RemoteStorage(storageType: .suite)
guard let pendingAttributes = remoteStorage.retrieve(forKey: .pendingUserAttributes) as? [Data] else { return }
// 1
for attributeData in pendingAttributes {
// 2
guard let userAttribute = try? PropertyListDecoder().decode(UserAttribute.self, from: attributeData) else { continue }
// 3
switch userAttribute {
case .email(let email):
AppDelegate.braze?.user.set(email: email)
}
}
// 4
remoteStorage.removeObject(forKey: .pendingUserAttributes)
}
```
```objc
- (void)logPendingUserAttributesIfNecessary {
RemoteStorage *remoteStorage = [[RemoteStorage alloc] initWithStorageType:StorageTypeSuite];
NSArray *pendingAttributes = [remoteStorage retrieveForKey:RemoteStorageKeyPendingUserAttributes];
// 1
for (NSData *attributeData in pendingAttributes) {
NSError *error;
// 2
UserAttribute *userAttribute = [NSKeyedUnarchiver unarchivedObjectOfClass:[UserAttribute class] fromData:attributeData error:&error];
if (error != nil) {
// log error
}
// 3
if (userAttribute) {
switch (userAttribute.attributeType) {
case UserAttributeTypeEmail:
[self user].email = userAttribute.userField;
break;
}
}
}
// 4
[remoteStorage removeObjectForKey:RemoteStorageKeyPendingUserAttributes];
}
```
#### Archivo auxiliar RemoteStorage {#remotestorage-helper-file}
```swift
enum RemoteStorageKey: String, CaseIterable {
// MARK: - Notification Content Extension Analytics
case pendingCustomEvents = "pending_custom_events"
case pendingCustomAttributes = "pending_custom_attributes"
case pendingUserAttributes = "pending_user_attributes"
}
enum RemoteStorageType {
case standard
case suite
}
class RemoteStorage: NSObject {
private var storageType: RemoteStorageType = .standard
private lazy var defaults: UserDefaults = {
switch storageType {
case .standard:
return .standard
case .suite:
// Use the App Group identifier you created in Step 1.
return UserDefaults(suiteName: "group.com.company.appname.xyz")!
}
}()
init(storageType: RemoteStorageType = .standard) {
self.storageType = storageType
}
func store(_ value: Any, forKey key: RemoteStorageKey) {
defaults.set(value, forKey: key.rawValue)
}
func retrieve(forKey key: RemoteStorageKey) -> Any? {
return defaults.object(forKey: key.rawValue)
}
func removeObject(forKey key: RemoteStorageKey) {
defaults.removeObject(forKey: key.rawValue)
}
func resetStorageKeys() {
for key in RemoteStorageKey.allCases {
defaults.removeObject(forKey: key.rawValue)
}
}
}
```
```objc
@interface RemoteStorage ()
@property (nonatomic) StorageType storageType;
@property (nonatomic, strong) NSUserDefaults *defaults;
@end
@implementation RemoteStorage
- (id)initWithStorageType:(StorageType)storageType {
if (self = [super init]) {
self.storageType = storageType;
}
return self;
}
- (void)store:(id)value forKey:(RemoteStorageKey)key {
[[self defaults] setValue:value forKey:[self rawValueForKey:key]];
}
- (id)retrieveForKey:(RemoteStorageKey)key {
return [[self defaults] objectForKey:[self rawValueForKey:key]];
}
- (void)removeObjectForKey:(RemoteStorageKey)key {
[[self defaults] removeObjectForKey:[self rawValueForKey:key]];
}
- (void)resetStorageKeys {
[[self defaults] removeObjectForKey:[self rawValueForKey:RemoteStorageKeyPendingCustomEvents]];
[[self defaults] removeObjectForKey:[self rawValueForKey:RemoteStorageKeyPendingCustomAttributes]];
[[self defaults] removeObjectForKey:[self rawValueForKey:RemoteStorageKeyPendingUserAttributes]];
}
- (NSUserDefaults *)defaults {
if (!_defaults) {
switch (self.storageType) {
case StorageTypeStandard:
_defaults = [NSUserDefaults standardUserDefaults];
break;
case StorageTypeSuite:
_defaults = [[NSUserDefaults alloc] initWithSuiteName:@"group.com.company.appname.xyz"];
break;
}
}
return _defaults;
}
- (NSString*)rawValueForKey:(RemoteStorageKey)remoteStorageKey {
switch(remoteStorageKey) {
case RemoteStorageKeyPendingCustomEvents:
return @"pending_custom_events";
case RemoteStorageKeyPendingCustomAttributes:
return @"pending_custom_attributes";
case RemoteStorageKeyPendingUserAttributes:
return @"pending_user_attributes";
default:
[NSException raise:NSGenericException format:@"Unexpected FormatType."];
}
}
```
#### Archivo auxiliar UserAttribute {#userattribute-helper-file}
```swift
enum UserAttribute: Hashable {
case email(String?)
}
// MARK: - Codable
extension UserAttribute: Codable {
private enum CodingKeys: String, CodingKey {
case email
}
func encode(to encoder: Encoder) throws {
var values = encoder.container(keyedBy: CodingKeys.self)
switch self {
case .email(let email):
try values.encodeIfPresent(email, forKey: .email)
}
}
init(from decoder: Decoder) throws {
let values = try decoder.container(keyedBy: CodingKeys.self)
let email = try values.decodeIfPresent(String.self, forKey: .email)
self = .email(email)
}
}
```
```objc
@implementation UserAttribute
- (id)initWithUserField:(NSString *)userField attributeType:(UserAttributeType)attributeType {
if (self = [super init]) {
self.userField = userField;
self.attributeType = attributeType;
}
return self;
}
- (void)encodeWithCoder:(NSCoder *)encoder {
[encoder encodeObject:self.userField forKey:@"userField"];
[encoder encodeInteger:self.attributeType forKey:@"attributeType"];
}
- (id)initWithCoder:(NSCoder *)decoder {
if (self = [super init]) {
self.userField = [decoder decodeObjectForKey:@"userField"];
NSInteger attributeRawValue = [decoder decodeIntegerForKey:@"attributeType"];
self.attributeType = (UserAttributeType) attributeRawValue;
}
return self;
}
@end
```
#### Archivo auxiliar de diccionario EventName {#eventname-dictionary-helper-file}
```swift
extension Dictionary where Key == String, Value == Any {
init(eventName: String, properties: [String: Any]? = nil) {
self.init()
self[PushNotificationKey.eventName.rawValue] = eventName
if let properties = properties {
for (key, value) in properties {
self[key] = value
}
}
}
}
```
```objc
@implementation NSMutableDictionary (Helper)
+ (instancetype)dictionaryWithEventName:(NSString *)eventName
properties:(NSDictionary *)properties {
NSMutableDictionary *dict = [NSMutableDictionary dictionary];
dict[@"event_name"] = eventName;
if (properties) {
for (id key in properties) {
dict[key] = properties[key];
}
}
return dict;
}
@end
```
## Analizar resultados {#analyzing-results}
Usa la superficie de informes que corresponda a la categoría de análisis:
| Categoría de análisis | Dónde verlo en Braze |
| --- | --- |
| Análisis nativos de push | Para ver las métricas de apertura push a nivel de campaña, navega a la página **Campaign Analytics** de tu Campaign push. Para las definiciones de métricas, consulta [Influenced Opens](https://www.braze.com/docs/es/es/user_guide/analytics/tracking/influenced_opens). Para crear vistas de análisis personalizadas, navega a **Analytics** > **Report Builder (New)**. Para los pasos de navegación, consulta [Generador de informes](https://www.braze.com/docs/es/es/user_guide/analytics/reports/report_builder). Para los esquemas de eventos a nivel de almacén de datos, consulta [Eventos de interacción de mensajes](https://www.braze.com/docs/es/es/user_guide/data/distribution/braze_currents/event_glossary/message_engagement_events). |
| Eventos personalizados y atributos | Para ver tendencias de eventos personalizados, navega a **Analytics** > **Informe de eventos personalizados**. Para más detalles, consulta [Eventos personalizados](https://www.braze.com/docs/es/es/user_guide/data/activation/events/custom_events). Para inspeccionar valores a nivel de usuario, navega a la página **Buscar usuarios** y abre un perfil. Para los pasos, consulta [Perfiles de usuario](https://www.braze.com/docs/es/es/user_guide/audience/manage_audience/user_profiles). Para filtrar audiencias por estos valores, navega a **Audience** > **Segments**. Para los pasos de navegación, consulta [Crear un Segment](https://www.braze.com/docs/es/es/user_guide/audience/segments/creating_a_segment) y las opciones de filtro en [Filtros de segmentación](https://www.braze.com/docs/es/es/user_guide/audience/segments/segmentation_filters). |
{: .reset-td-br-1 .reset-td-br-2 aria-label="Analizar resultados" }
Para la creación de informes personalizados, consulta [Generador de informes](https://www.braze.com/docs/es/es/user_guide/analytics/reports/report_builder).
## Referencias relacionadas {#related-references}
- [Notificaciones push](https://www.braze.com/docs/es/es/developer_guide/push_notifications)
- [Registrar eventos personalizados](https://www.braze.com/docs/es/es/developer_guide/analytics/logging_events)
- [Eventos personalizados](https://www.braze.com/docs/es/es/user_guide/data/activation/events/custom_events)
- [Punto de conexión de seguimiento de usuarios (`/users/track`)](https://www.braze.com/docs/es/es/api/endpoints/user_data/post_user_track)
- [Repositorio del SDK de Braze para Android](https://github.com/braze-inc/braze-android-sdk)
- [Repositorio del SDK Swift de Braze](https://github.com/braze-inc/braze-swift-sdk)
- [Repositorio del SDK Web de Braze](https://github.com/braze-inc/braze-web-sdk)
# Enviar mensajes de prueba
Source: /docs/es/developer_guide/push_notifications/sending_test_messages/index.md
# Sending test messages
> Before sending out a messaging campaign to your users, you may want to test it to make sure it looks right and operates in the intended manner. You can use the dashboard to create and send test messages with push notifications, in-app messages (IAM), or email.
## Sending a test message
### Step 1: Create a designated test segment
After you set up a test segment, you can use it to test any of your Braze messaging channels. When set up correctly, this only needs to be done a single time.
To set up a test segment, go to **Segments** and create a new segment. Select **Add Filter**, then choose a one of the test filters.

With test filters, you can ensure that only users with a specific email address or [external user ID](https://www.braze.com/docs/es/es/developer_guide/platform_integration_guides/swift/analytics/setting_user_ids/#setting-user-ids) are sent the test message.

Both email address and external user ID filters offer the following options:
| Operator | Description |
|------------------|--------------------------------------------------------------------------------------------------------------------------------|
| `equals` | This will look for an exact match of the email or user ID that you provide. Use this if you only want to send the test campaigns to devices associated with a single email or user ID. |
| `does not equal` | Use this if you want to exclude a particular email or user ID from test campaigns. |
| `matches` | This will find users that have email addresses or user IDs that match part of the search term you provide. You could use this to find only the users that have an `@yourcompany.com` address, allowing you to send messages to everyone on your team. |
{: .reset-td-br-1 .reset-td-br-2 aria-label="Step 1: Create a designated test segment a class="margin-fix" name="test-segment"/a" }
You can select multiple specific emails using the "`matches`" option and separating the email addresses with a | character. For example: "`matches`" "`email1@braze.com` | `email2@braze.com`". You can also combine multiple operators together. For example, the test segment could include an email address filter that "`matches`" "`@braze.com`" and another filter that "`does not equal`" "`sales@braze.com`".
After adding the testing filters to your test segment, you can verify it's working by selecting **Preview** or by selecting **Settings** > **CSV Export All User Data** to export that segment's user data to a CSV file.

**Note:**
Exporting the segment's User Data to a CSV file is the most accurate verification method, as the preview will only show a sample of your users and may not include all users.
### Step 2: Send the message
You can send a message using the Braze dashboard or the command line.
To send test push notifications or in-app messages, you need to target your previously created test segment. Begin by creating your campaign and following the usual steps. When you reach the **Target Audiences** step, select your test segment from the dropdown menu.

Confirm your campaign and launch it to test your push notification and in-app messages.
**Note:**
Be sure to select **Allow users to become re-eligible to receive campaign** under the **Schedule** portion of the campaign composer if you intend to use a single campaign to send a test message to yourself more than once.
If you're only testing email messages, you do not necessarily have to set up a test segment. In the first step of the campaign composer where you compose your campaign's email message, click **Send Test** and enter the email address to which you wish to send a test email.

**Tip:**
You can also enable or disable [TEST (or SEED)](https://www.braze.com/docs/es/es/user_guide/administrative/app_settings/email_settings/#append-email-subject-lines) being appended on your test messages.
Alternatively, you can send a single notification using cURL and the [Braze Messaging API](https://www.braze.com/docs/es/es/api/endpoints/messaging/). Note that these examples make a request using the `US-01` instance. To find out yours, refer to [API endpoints](https://www.braze.com/docs/es/es/api/basics/#endpoints).
```bash
curl -X POST -H "Content-Type: application/json" -H "Authorization: Bearer {BRAZE_API_KEY}" -d '{
"external_user_ids":["EXTERNAL_USER_ID"],
"messages": {
"android_push": {
"title":"Test push title",
"alert":"Test push",
"extra":{
"CUSTOM_KEY":"CUSTOM_VALUE"
}
}
}
}' https://rest.iad-01.braze.com/messages/send
```
```bash
curl -X POST -H "Content-Type: application/json" -H "Authorization: Bearer {BRAZE_API_KEY}" -d '{
"external_user_ids":["EXTERNAL_USER_ID"],
"messages": {
"apple_push": {
"alert": "Test push",
"extra": {
"CUSTOM_KEY" :"CUSTOM_VALUE"
}
}
}
}' https://rest.iad-01.braze.com/messages/send
```
```bash
curl -X POST -H "Content-Type: application/json" -H "Authorization: Bearer {BRAZE_API_KEY}" -d '{
"external_user_ids":["EXTERNAL_USER_ID"],
"messages": {
"kindle_push": {
"title":"Test push title",
"alert":"Test push",
"extra":{
"CUSTOM_KEY":"CUSTOM_VALUE"
}
}
}
}' https://rest.iad-01.braze.com/messages/send
```
Replace the following:
| Placeholder | Description |
|---------------------|-----------------------------------------------------------|
| `BRAZE_API_KEY` | Your Braze API key used for authentication. In Braze, go to **Settings** > **API Keys** to locate your key. |
| `EXTERNAL_USER_ID` | The external user ID used to send your message to a specific user. In Braze, go to **Audience** > **Search users**, then search for a user. |
| `CUSTOM_KEY` | (Optional) A custom key for additional data. |
| `CUSTOM_VALUE` | (Optional) A custom value assigned to your custom key. |
{: .reset-td-br-1 .reset-td-br-2 aria-label="Step 2: Send the message" }
## Test limitations
There are a few situations where test messages don't have complete feature parity with launching a campaign or Canvas to a real set of users. In these instances, to validate this behavior, you should launch the campaign or Canvas to a limited set of test users.
- Viewing the Braze [preference center](https://www.braze.com/docs/es/es/user_guide/message_building_by_channel/email/managing_user_subscriptions/#subscription-groups) from **Test Messages** will cause the submit button to be grayed out.
- The list-unsubscribe header is not included in emails sent by the test message functionality.
- For in-app messages and Content Cards, the target user must have a push token for the target device.
# Acerca de los estados de la suscripción push
Source: /docs/es/developer_guide/push_notifications/subscription_states/index.md
# Acerca de los estados de la suscripción push
## Push subscription states {#push-sub-states}
A "Push Subscription State" in Braze identifies a **user's** global preference for their desire to receive push notifications. Because the subscription state is user-based, it is not specific to any individual app. Subscription states become helpful flags when deciding which users to target for push notifications.
**Note:**
A user's push subscription state applies to their entire user profile, which includes all of the user's devices.
The following subscription state options exist: `Subscribed`, `Opted-In`, and `Unsubscribed`.
By default, for your user to receive your messages through push, their push subscription state must be either `Subscribed` or `Opted-In`, and they must have foreground push enabled. You can override this setting if needed when composing a message.
|Opt-in State|Description|
|---|---|
|`Subscribed`| Default push subscription state when a user profile is created in Braze. |
|`Opted-In`| A user has explicitly expressed a preference to receive push notifications. Braze automatically moves a user's opt-in state to `Opted-In` if the user accepts an OS-level push prompt.
This does not apply to Android 12 or earlier users.|
|`Unsubscribed`| A user explicitly unsubscribed from push through your application or other methods your brand provides. By default, Braze push campaigns target only users that are `Subscribed` or `Opted-in` for push.|
{: .reset-td-br-1 .reset-td-br-2 aria-label="Push subscription states #push-sub-states" }
**Important:**
Braze does not automatically change a user's push subscription state to `Unsubscribed`. Remember that if a user's push subscription state is `Unsubscribed`, then the user's `Foreground Push Enabled` filter in segmentation is `false`.
### Push registration and reachable users
Push subscription state reflects a user's preference, but whether they count as **reachable** for push in the dashboard also depends on [push registration](https://www.braze.com/docs/es/es/user_guide/channels/push/push_setup/push_token_lifecycle/)—that is, a valid foreground push token on their profile. For how Braze calculates channel-level counts, see [Measure segment size](https://www.braze.com/docs/es/es/user_guide/audience/segments/measuring_segment_size/).
- **Push campaigns and Canvases:** Users who aren't push registered aren't included in **Reachable users** for Android Push or iOS Push in audience statistics, even when their push subscription state is `Subscribed` or `Opted-In`.
- **Other channels:** The same users can still count as reachable for other channels they qualify for (for example, email or in-app messages).
- **Segments:** Segment membership follows your filters. Users without push registration remain in the segment unless a filter excludes them (for example, **Foreground Push Enabled**). Total segment membership can be higher than the sum of users shown in push-specific **Reachable users** rows.
A user profile can show push subscription state `Subscribed` while no push token is assigned. Those users still don't count toward **Reachable users** for Android Push or iOS Push until Braze records a valid token.
For filter definitions, see [Segmentation filters](https://www.braze.com/docs/es/es/user_guide/audience/segments/segmentation_filters/).
### Updating push subscription states {#update-push-subscription-state}
Review the following ways to update a user's push subscription state:
#### Automatic opt-in (default)
By default, Braze sets a user's push subscription state to `Opted-In` when they first authorize push notifications for your app. Braze also does this when a user re-enables push permissions in their system settings after previously disabling them.
To disable this default behavior, add the following property to your Android Studio project's `braze.xml` file:
```xml
false
```
On iOS, a new install typically shows push subscription state **`Subscribed`** until the user allows notifications. After the user selects **Allow** on the OS prompt, Braze sets the state to **`Opted-In`** when automatic opt-in is enabled. If the user selects **Don't Allow** and later turns push on in iOS Settings, the state updates after the user logs a session—not at the moment they change Settings.
Starting with [Braze Swift SDK version 7.5.0](https://github.com/braze-inc/braze-swift-sdk/releases/tag/7.5.0), you can disable or further customize this behavior by adding the `optInWhenPushAuthorized` configuration to your Xcode project's `AppDelegate.swift` file:
```swift
configuration.optInWhenPushAuthorized = false // disables the default behavior
let braze = Braze(configuration: configuration)
AppDelegate.braze = braze
```
#### SDK integration
You can update a user's subscription state with the Braze SDK using the `setPushNotificationSubscriptionType` method on [Web](https://js.appboycdn.com/web-sdk/latest/doc/classes/braze.user.html#setpushnotificationsubscriptiontype), [Android](https://braze-inc.github.io/braze-android-sdk/kdoc/braze-android-sdk/com.braze/-braze-user/set-push-notification-subscription-type.html), or [iOS](https://braze-inc.github.io/braze-swift-sdk/documentation/brazekit/braze/user-swift.class/set(pushnotificationsubscriptionstate:)). For example, you can use this method to create a settings page in your app where users can manually enable or disable push notifications.
#### REST API
You can update a user's subscription state with the Braze REST API using the [`/users/track` endpoint](https://www.braze.com/docs/es/es/api/endpoints/user_data/post_user_track/) to update their [`push_subscribe`](https://www.braze.com/docs/es/es/api/objects_filters/user_attributes_object) attribute.
### Differences between push enablement and push subscription status
Push enablement refers to whether a user has granted OS- or browser-level permission to receive notifications on a specific device. Push subscription state is a Braze-level setting that represents a user's global preference for receiving push across their profile.
When automatic opt-in is enabled (the default), Braze updates a user's push subscription state to `Opted-In` when they authorize push notifications for your app or re-enable permissions in their system settings (for example, on iOS, Android 13+, and supported web browsers). Otherwise, the user's push subscription state remains `Subscribed` until you explicitly change it using an SDK method or REST API call.
Braze does not automatically change a user's push subscription state to `Unsubscribed` when they opt out of notifications at the OS, browser, or app level. To update a user's push subscription state, you must update it in Braze. For example, if a user disables push from an in-app preference center, update the push subscription state to `Unsubscribed` in Braze. Braze does not update user profiles based on your preference center. To align subscription states with a user's in-app preferences, call the appropriate methods using the [SDK](https://www.braze.com/docs/es/es/user_guide/channels/push/push_setup/push_subscription_states/#sdk-integration) (iOS or Android) or [REST API](https://www.braze.com/docs/es/es/user_guide/channels/push/push_setup/push_subscription_states/#rest-api).
### Imported push tokens (iOS)
When you [import iOS push tokens](https://www.braze.com/docs/es/es/api/endpoints/user_data/post_user_track/#push-token-import) with `push_token_import`, the user's push subscription state is typically **`Subscribed`** until they log a session in your Braze-integrated app. After the first session, Braze may update the state to **`Opted-In`** if [automatic opt-in](#automatic-opt-in-default) applies (for example, when the user authorizes push on iOS and `optInWhenPushAuthorized` is enabled).
Review **Contact Settings** on the user's profile after import and again after the user's first in-app session to confirm the expected state.
### Checking push subscription state
{: style="float:right;max-width:35%;margin-left:15px;"}
You can check a user's push subscription state with Braze in any of the following ways:
* **User profile:** You can access individual user profiles through the Braze dashboard on the **[User Search](https://www.braze.com/docs/es/es/user_guide/engagement_tools/segments/user_profiles/)** page. After finding a user's profile (via email address, phone number, or external user ID), you can select the **Engagement** tab to view and manually adjust a user's subscription state.
* **REST API export:** You can export individual user profiles in JSON format using the export [Users by segment](https://www.braze.com/docs/es/es/api/endpoints/export/user_data/post_users_segment/) or [Users by identifier](https://www.braze.com/docs/es/es/api/endpoints/export/user_data/post_users_identifier/) endpoints. Braze returns a push tokens object that contains push enablement information per device.
# Solución de problemas con las notificaciones push para el SDK de Braze
Source: /docs/es/developer_guide/push_notifications/troubleshooting/index.md
# Solución de problemas con las notificaciones push {#troubleshoot-push-notifications}
> Aprende a solucionar problemas relacionados con las notificaciones push para el SDK de Braze.
## Troubleshooting
If you're experiencing issues after setting up push notifications, consider the following:
- Web push notifications require that your site be HTTPS.
- Not all browsers can receive push messages. Ensure that `braze.isPushSupported()` returns `true` in the browser.
- Some browsers, such as Firefox, do not display images in push notifications. For details on browser support, refer to the [MDN documentation for Notification images](https://developer.mozilla.org/en-US/docs/Web/API/Notification/image).
- If a user has denied a site push access, they won't be prompted for permission again unless they remove the denied status from their browser preferences.
## Understanding the Braze push workflow
The Firebase Cloud Messaging (FCM) service is Google's infrastructure for push notifications sent to Android applications. Here is the simplified structure of how push notifications are enabled for your users' devices and how Braze can send push notifications to them:
```mermaid
---
config:
theme: mc
---
sequenceDiagram
participant Device as User Device
participant App as Android App
participant BrazeSDK as Braze SDK
participant BrazeAPI as Braze Server
participant Firebase as Google Firebase
Note over Device, Firebase: Register Option 1 Register Automatically using `com_braze_firebase_cloud_messaging_registration_enabled` in braze.xml
App ->> Braze: App initializes Braze with the first Braze call This could be automatic session handling
BrazeSDK ->> App: Get push token from Firebase Manager
BrazeSDK ->> BrazeAPI: Send push token to Braze Server
Note right of BrazeAPI: Braze will remove push token from any other user who may have previously been logged in on the same device.
Note over Device, Firebase: Register Option 2 Manual registration.
App ->> BrazeSDK: App sets `Braze.registeredPushToken`
BrazeSDK ->> BrazeAPI: Send push token to Braze Server
Note right of BrazeAPI: Braze will remove push token from any other user who may have previously been logged in on the same device.
Note over Device, Firebase: Push permission
BrazeAPI ->> BrazeSDK: In-App Message containing push prompt
BrazeSDK -> App: In-App Message is displayed
App -> BrazeSDK: User requests permissions
BrazeSDK -> App: Displays the Push Authorization prompt
BrazeSDK -> BrazeAPI: If authorized and `com_braze_optin_when_push_authorized`, Opt-In value is sent.
Note over Device, Firebase: Push Notification Is Sent
BrazeAPI ->> Firebase: Sends push message
Firebase ->> Device: Push message sent
Device ->> App: Android will send the push to the App. This could be blocked to Do Not Disturb, Power Saving Mode, etc.
App ->> BrazeSDK: Message is sent to BrazeFirebaseMessagingService
BrazeSDK ->> Device: SDK will check if the push is from Braze. If so, push data is transformed into a Push Notification and displayed.
```
### Step 1: Configuring your Google Cloud API key
In developing your app, you'll need to provide the Braze Android SDK with your Firebase sender ID. Additionally, you'll need to provide an API Key for server applications to the Braze dashboard. Braze will use this API key to send messages to your devices. You will also need to check that FCM service is enabled in Google Developer's console.
**Note:**
A common mistake during this step is using the app identifier API key instead of the REST API key.
### Step 2: Devices register for FCM and provide Braze with push tokens
In typical integrations, the Braze Android SDK will handle registering devices for FCM capability. This will usually happen immediately upon opening the app for the first time. After registration, Braze will be provided with an FCM Registration ID, which is used to send messages to that device specifically. We will store the Registration ID for that user, and that user will become "push registered" if they previously did not have a push token for any of your apps.
### Step 3: Launching a Braze push campaign
When a push campaign is launched, Braze will make requests to FCM to deliver your message. Braze will use the API key copied in the dashboard to authenticate and verify that we can send push notifications to the push tokens provided.
### Step 4: Removing invalid tokens
If FCM informs us that any of the push tokens we were attempting to send a message to are invalid, we remove those tokens from the user profiles they were associated with. If users have no other push tokens, they will no longer show up as "Push Registered" under the **Segments** page.
For more details about FCM, visit [Cloud messaging](https://firebase.google.com/docs/cloud-messaging/).
## Utilizing the push error logs
Braze provides push notification errors within the message activity log. This error log provides a variety of warnings which can be very helpful for identifying why your campaigns aren't working as expected. Clicking on an error message will redirect you to relevant documentation to help you troubleshoot a particular incident.

## Troubleshooting scenarios
### Push isn't sending
Your push messages might not be sending because of the following situations:
- Your credentials exist in the wrong Google Cloud Platform project ID (wrong sender ID).
- Your credentials have the wrong permission scope.
- You uploaded wrong credentials to the wrong Braze workspace (wrong sender ID).
For other issues that may prevent you from sending a push message, refer to [User Guide: Troubleshooting Push Notifications](https://www.braze.com/docs/es/es/user_guide/message_building_by_channel/push/troubleshooting/).
### No "push registered" users showing in the Braze dashboard (prior to sending messages)
Confirm that your app is correctly configured to allow push notifications. Common failure points to check include:
#### Incorrect sender ID
Check that the correct FCM sender ID is included in the `braze.xml` file. An incorrect sender ID will lead to `MismatchSenderID` errors reported in the dashboard's message activity log.
#### Braze registration not occurring
Since FCM registration is handled outside of Braze, failure to register can only occur in two places:
1. During registration with FCM
2. When passing the FCM-generated push token to Braze
We recommend setting a breakpoint or logging to confirm that the FCM-generated push token is being sent to Braze. If a token is not generated correctly or at all, we recommend consulting the [FCM documentation](https://firebase.google.com/docs/cloud-messaging/android/client).
#### Google Play Services not present
For FCM push to work, Google Play Services must be present on the device. If Google Play Services isn't on a device, push registration will not occur.
**Note:** Google Play Services is not installed on Android emulators without Google APIs installed.
#### Device not connected to the internet
Check that your device has good internet connectivity and isn't sending network traffic through a proxy.
### Tapping push notification doesn't open the app
Check if `com_braze_handle_push_deep_links_automatically` is set to `true` or `false`. To enable Braze to automatically open the app and any deep links when a push notification is tapped, set `com_braze_handle_push_deep_links_automatically` to `true` in your `braze.xml` file.
If `com_braze_handle_push_deep_links_automatically` is set to its default of `false`, you need to use a Braze Push Callback to listen for and handle the push received and opened intents.
### Push notifications bounced
If a push notification isn't delivered, make sure it didn't bounce by looking in the [developer console](https://www.braze.com/docs/es/es/developer_guide/platforms/android/push_notifications/troubleshooting/#utilizing-the-push-error-logs). The following are descriptions of common errors that may be logged in the developer console:
#### Error: MismatchSenderID
`MismatchSenderID` indicates an authentication failure. Confirm your Firebase sender ID and FCM API key are correct.
#### Error: InvalidRegistration
`InvalidRegistration` can be caused by a malformed push token.
1. Make sure to pass a valid push token to Braze from [Firebase Cloud Messaging](https://firebase.google.com/docs/cloud-messaging/android/client#retrieve-the-current-registration-token).
#### Error: NotRegistered
1. `NotRegistered` typically occurs when an app has been deleted from a device. Braze uses `NotRegistered` internally to signal that an app has been uninstalled from a device.
2. `NotRegistered` may also occur when multiple registrations occur and a second registration invalidates the first token.
### Push notifications sent but not displayed on users' devices
There are a few reasons why this could be occurring:
#### Application was force quit
If you force-quit your application through your system settings, your push notifications will not be sent. Launching the app again will re-enable your device to receive push notifications.
#### BrazeFirebaseMessagingService not registered
The BrazeFirebaseMessagingService must be properly registered in `AndroidManifest.xml` for push notifications to appear:
```xml
```
#### Firewall is blocking push
If you are testing push over Wi-Fi, your firewall may be blocking ports necessary for FCM to receive messages. Confirm that ports `5228`, `5229`, and `5230` are open. Additionally, since FCM doesn't specify its IPs, you must also allow your firewall to accept outgoing connections to all IP addresses contained in the IP blocks listed in Google's ASN of `15169`.
#### Custom notification factory returning null
If you have implemented a [custom notification factory](https://www.braze.com/docs/es/es/developer_guide/platform_integration_guides/android/push_notifications/android/integration/standard_integration/#custom-displaying-notifications), ensure that it is not returning `null`. This will cause notifications not to be displayed.
### "Push registered" users no longer enabled after sending messages
There are a few reasons why this could be happening:
#### Application was uninstalled
Users have uninstalled the application. This will invalidate their FCM push token.
#### Invalid Firebase Cloud Messaging server key
The Firebase Cloud Messaging server key provided in the Braze dashboard is invalid. The sender ID provided should match the one referenced in your app's `braze.xml` file. The server key and sender ID are found here in your Firebase Console:

### Push clicks not logged
Braze logs push clicks automatically, so this scenario should be comparatively rare.
If push clicks are not being logged, it is possible that push click data has not been flushed to our servers yet. Braze throttles the frequency of its flushes based on the strength of the network connection. With a good network connection, push click-data should arrive at the server within a minute in most circumstances.
### Deep links not working
#### Verify deep link configuration
Deep links can be [tested with ADB](https://developer.android.com/training/app-indexing/deep-linking.html#testing-filters). We recommend testing your deep link with the following command:
`adb shell am start -W -a android.intent.action.VIEW -d "THE_DEEP_LINK" THE_PACKAGE_NAME`
If the deep link fails to work, the deep link may be misconfigured. A misconfigured deep link will not work when sent through Braze push.
#### Verify custom handling logic
If the deep link [works correctly with ADB](https://developer.android.com/training/app-indexing/deep-linking.html#testing-filters) but fails to work from Braze push, check whether any [custom push open handling](https://www.braze.com/docs/es/es/developer_guide/platform_integration_guides/android/push_notifications/android/integration/standard_integration/#android-push-listener-callback) has been implemented. If so, verify that the custom handling code properly handles the incoming deep link.
#### Disable back stack behavior
If the deep link [works correctly with ADB](https://developer.android.com/training/app-indexing/deep-linking.html#testing-filters) but fails to work from Braze push, try disabling [back stack](https://developer.android.com/guide/components/activities/tasks-and-back-stack). To do so, update your **braze.xml** file to include:
```xml
false
```
## Understanding the Braze/APNs workflow
The Apple Push Notification service (APNs) is the infrastructure for sending push notifications to applications running on Apple's platforms. Here is the simplified structure of how push notifications are enabled for your users' devices and how Braze can send push notifications to them:
1. You configure the push certificate and provisioning profile
2. Devices register for APNs and provide Braze with push tokens
3. You launch a Braze push campaign
4. Braze removes invalid tokens
### Step 1: Configuring the push certificate and provisioning profile
In developing your app, you'll need to create an SSL certificate to enable push notifications. This certificate will be included in the provisioning profile your app is built with and will also need to be uploaded to the Braze dashboard. The certificate allows Braze to tell APNs that we are allowed to send push notifications on your behalf.
There are two types of [provisioning profiles](https://developer.apple.com/library/content/documentation/IDEs/Conceptual/AppDistributionGuide/MaintainingProfiles/MaintainingProfiles.html) and certificates: development and distribution. We recommend just using distribution profiles and certificates to avoid any confusion. If you choose to use different profiles and certificates for development and distribution, ensure that the certificate uploaded to the dashboard matches the provisioning profile you are currently using.
**Warning:**
Do not change the push certificate environment (development versus production). Changing the push certificate to the wrong environment can lead to your users having their push token accidentally removed, making them unreachable by push.
### Step 2: Devices register for APNs and provide Braze with push tokens
When users open your app, they will be prompted to accept push notifications. If they accept this prompt, APNs will generate a push token for that particular device. The Swift SDK will immediately and asynchronously send up the push token for apps using the default [automatic flush policy](https://www.braze.com/docs/es/es/developer_guide/platform_integration_guides/swift/advanced_use_cases/fine_network_traffic_control/#automatic-request-processing). After we have a push token associated with a user, they will show as "Push Registered" in the dashboard on their user profile under the **Engagement** tab and will be eligible to receive push notifications from Braze campaigns.
**Note:**
Starting in macOS 13, on certain devices, you can test push notifications on an iOS 16 Simulator running on Xcode 14. For further details, refer to the [Xcode 14 Release Notes](https://developer.apple.com/documentation/xcode-release-notes/xcode-14-release-notes).
#### Considerations for push token generation
- If users install your app on another device, another token will be created and captured in the same way.
- If users reinstall your app, a new token will be generated and passed to Braze. However, the original token may still be logged as valid by APNs and Braze.
- If users uninstall your app, Braze doesn't get immediately notified of this and the token will still appear as valid until it is retired by APNs.
- At some point, APNs will retire old tokens. Braze doesn't have control or visibility of this.
### Step 3: Launching a Braze push campaign
When a push campaign is launched, Braze will make requests to APNs to deliver your message. Specifically, the requests are passed to APNs for each current valid push token unless **Send to a user's most recent device** is selected. After Braze receives a successful response from APNs, we will log a successful delivery on the user profile, though the user may not have received the actual message for reasons including:
- Their device is powered off.
- Their device isn't connected to the internet (Wi-Fi or cellular).
- They recently uninstalled the app.
Braze will use the SSL push certificate uploaded in the dashboard to authenticate and verify that we are allowed to send push notifications to the push tokens provided. If a device is online, the notification should be received shortly after the campaign has been sent. Note that Braze sets the default APNs [expiration date](https://developer.apple.com/documentation/usernotifications/setting_up_a_remote_notification_server/sending_notification_requests_to_apns#2947607) for notifications to 30 days.
### Step 4: Removing invalid tokens
If [APNs](https://developer.apple.com/library/content/documentation/NetworkingInternet/Conceptual/RemoteNotificationsPG/APNSOverview.html#//apple_ref/doc/uid/TP40008194-CH8-SW1) informs us that any of the push tokens we were attempting to send a message to are invalid, we remove those tokens from the user profiles they were associated with.
**Note:**
It's normal for APNs to initially return a success status even if a token becomes unregistered, as APNs doesn't immediately report token invalidation events. APNs intentionally delays returning a `410` status for invalid tokens on a randomized schedule, designed to protect user privacy and prevent tracking of app uninstalls. You can safely continue sending notifications to an unregistered token until APNs returns a `410` status.
## Using the push error logs
The [Message Activity Log](https://www.braze.com/docs/es/es/user_guide/administrative/app_settings/message_activity_log_tab/) gives you the opportunity to see any messages (especially error messages) associated with your campaigns and sends, including push notification errors. This error log provides a variety of warnings which can be very helpful for identifying why your campaigns aren't working as expected. Clicking on an error message will redirect you to relevant documentation to help you troubleshoot a particular incident.

Common errors you might see here include user-specific notifications, such as ["Received Unregistered Sending to Push Token"](#swift_received-unregistered-sending).
In addition, Braze also provides a push changelog on the user profile under the **Engagement** tab. This changelog provides insight into push registration behavior such as token invalidation, push registration errors, tokens being moved to new users, etc.
{: style="max-width:50%;" }
### Message Activity Log errors
#### Received unregistered sending to push token {#received-unregistered-sending}
- Make sure that the push token being sent to Braze from the method `AppDelegate.braze?.notifications.register(deviceToken:)` is valid. You can look in the **Message Activity Log** to see the push token. It should look something like `6e407a9be8d07f0cdeb9e724733a89445f57a89ec890d63867c482a483506fa6`, a long string containing a mix of letters and numbers. If your push token looks different, check your [code](https://www.braze.com/docs/es/es/developer_guide/platform_integration_guides/swift/push_notifications/integration/#step-4-register-push-tokens-with-braze) for sending Braze the push tokens.
- Ensure that your push provisioning profile matches the environment you're testing. Universal certificates may be configured in the Braze dashboard to send to either the development or production APNs environment. Using a development certificate for a production app or a production certificate for a development app will not work.
- Check that the push token you have uploaded to Braze matches the provisioning profile you used to build the app you sent the push token from.
#### Device token not for topic
APNs returns `DeviceTokenNotForTopic` (HTTP status 400) when the push token doesn't match the topic (bundle ID) configured for your credentials. Braze may surface this in **Message Activity Log** or push delivery logs as `DeviceTokenNotForTopic`.
To resolve the mismatch:
1. Confirm the app's **bundle ID** matches the **App Bundle ID** in Braze (**Settings** > **App Settings** > **Push Notification Settings**).
2. Verify the provisioning profile used to build the app includes push capability for that bundle ID.
3. Confirm the push credential uploaded to Braze matches the app's environment (development versus production).
4. For `.p8` keys, verify **Team ID** and **Key ID** in Braze match your Apple Developer account.
5. Re-upload a valid `.p8` key or `.p12` certificate if credentials were rotated or revoked.
Prefer `.p8` authentication keys when possible. For credential types and dashboard status indicators, see [Migrate to a .p8 authentication key](https://www.braze.com/docs/es/es/user_guide/channels/push/troubleshooting/#migrate-to-a-p8-authentication-key).
#### BadDeviceToken sending to push token
The `BadDeviceToken` is an APNs error code and does not originate from Braze. There could be a number of reasons for this response being returned, including the following:
- The app received a push token that was invalid for the credentials uploaded to the dashboard.
- Push was disabled for this workspace.
- The user has opted out of push.
- The app was uninstalled.
- Apple refreshed the push token, which invalidated the old token.
- The app was built for a production environment, but the push credentials uploaded to Braze are set for a development environment (or the other way around).
## Push registration issues
### No push registration prompt
If the application does not prompt you to register for push notifications, there is likely an issue with your push registration integration. Ensure you have followed our [documentation](https://www.braze.com/docs/es/es/developer_guide/push_notifications/?sdktab=swift) and correctly integrated our push registration. You can also set breakpoints in your code to ensure the push registration code is running.
### No "push registered" users showing in the dashboard (prior to sending messages)
Ensure that your app is correctly configured to allow push notifications. Common failure points to check include:
- Check that your app is prompting you to allow push notifications. Typically, this prompt will appear upon your first open of the app, but it can be programmed to appear elsewhere. If it does not appear where it should be, the problem is likely with the basic configuration of your app's push capabilities.
- Verify the steps for [push integration](https://www.braze.com/docs/es/es/developer_guide/push_notifications/?sdktab=swift) were successfully completed.
- Check that the provisioning profile your app was built with includes permissions for push. Make sure that you're pulling down all of the available provisioning profiles from your Apple developer account. To confirm this, perform the following steps:
1. In Xcode, navigate to **Preferences > Accounts** (or use the keyboard shortcut Command+,).
2. Select the Apple ID you use for your developer account and click **View Details**.
3. On the next page, click ** Refresh** and confirm that you're pulling all available provisioning profiles.
- Check you have [properly enabled push capability](https://www.braze.com/docs/es/es/developer_guide/platform_integration_guides/swift/push_notifications/integration/#step-2-enable-push-capabilities) in your app.
- Check your push provisioning profile matches the environment you're testing in. Universal certificates may be configured in the Braze dashboard to send to either the development or production APNs environment. Using a development certificate for a production app or a production certificate for a development app will not work.
- Check that you are calling our `registerPushToken` method by setting a breakpoint in your code.
- Make sure you're testing using a device (push will not work on a simulator) and have good network connectivity.
## Push notifications sent but not displayed on users’ devices
### "Push registered" users no longer enabled after sending messages
This likely indicates that the user had an invalid push token. This can happen for several reasons:
#### Dashboard and app certificate mismatch
If the push certificate you uploaded in the dashboard is not the same one in the provisioning profile that your app was built with, APNs will reject the token. Verify that you have uploaded the correct certificate and completed another session in the app before attempting another test notification.
#### Application was uninstalled
If a user has uninstalled your application, their push token will be invalid and removed upon the next send.
#### Regenerating your provisioning profile
As a last resort, starting over fresh and creating a whole new provisioning profile can clear up configuration errors that come from working with multiple environments, profiles, and apps at the same time. There are many "moving parts" in setting up push notifications, so sometimes, it is best to retry from the beginning. This will also help isolate the problem if you need to continue troubleshooting.
### Messages not delivered to "push registered" users
#### App is foregrounded
On iOS versions that do not integrate push via the `UserNotifications` framework, if the app is in the foreground when the push message is received, it will not be displayed. You should background the app on your test devices before sending test messages.
#### Test notification scheduled incorrectly
Check the schedule you set for your test message. If it is set to local time zone delivery or [Intelligent Timing](https://www.braze.com/docs/es/es/user_guide/brazeai/intelligence/intelligent_timing/), you may have just not received the message yet (or had the app in the foreground when it was received).
### User not "push registered" for the app being tested
Check the user profile of the user you are trying to send a test message to. Under the **Engagement** tab, there should be a list of "pushable apps." Verify the app you are trying to send test messages to is in this list. Users will show up as "Push Registered" if they have a push token for any app in your workspace, so this could be something of a false positive.
The following would indicate a problem with push registration or that the user's token had been returned to Braze as invalid by APNs after being pushed:
{: style="max-width:50%"}
## Push clicks not logged {#push-clicks-not-logged}
- Make sure you have followed the [push integration steps](https://www.braze.com/docs/es/es/developer_guide/platform_integration_guides/swift/push_notifications/integration/#step-5-enable-push-handling).
- Braze does not handle push notifications received silently in the foreground (default foreground push behavior prior to the `UserNotifications` framework). This means that links will not be opened, and push clicks will not be logged. If your application has not yet integrated the `UserNotifications` framework, Braze will not handle push notifications when the application state is `UIApplicationStateActive`. Ensure that your app does not delay calls to [push handling methods](https://www.braze.com/docs/es/es/developer_guide/platform_integration_guides/swift/push_notifications/integration/#step-5-enable-push-handling); otherwise, the Swift SDK may treat push notifications as silent foreground push events and not handle them.
## Deep links not working
For comprehensive troubleshooting across all channels—including universal links, custom schemes, email, and third-party providers like Branch—see [Deep linking troubleshooting](https://www.braze.com/docs/es/es/developer_guide/push_notifications/deep_linking_troubleshooting).
### Web links from push clicks not opening
Links in push notifications need to be ATS compliant to be opened in web views. Ensure that your web links use HTTPS. For more information, refer to [ATS compliance](https://www.braze.com/docs/es/es/developer_guide/platform_integration_guides/swift/advanced_use_cases/linking/#app-transport-security-ats).
### Deep links from push clicks not opening
Most of the code that handles deep links also handles push opens. First, ensure that push opens are being logged. If not, fix that issue (as the fix often fixes link handling).
If opens are being logged, check whether it is an issue with the deep link in general or with the deep linking push click handling. To do this, test to see if a deep link from an in-app message click works.
## Understanding the Braze push workflow
The Firebase Cloud Messaging (FCM) service is Google's infrastructure for push notifications sent to Android applications. Here is the simplified structure of how push notifications are enabled for your users' devices and how Braze can send push notifications to them:
```mermaid
---
config:
theme: mc
---
sequenceDiagram
participant Device as User Device
participant App as Android App
participant BrazeSDK as Braze SDK
participant BrazeAPI as Braze Server
participant Firebase as Google Firebase
Note over Device, Firebase: Register Option 1 Register Automatically using `com_braze_firebase_cloud_messaging_registration_enabled` in braze.xml
App ->> Braze: App initializes Braze with the first Braze call This could be automatic session handling
BrazeSDK ->> App: Get push token from Firebase Manager
BrazeSDK ->> BrazeAPI: Send push token to Braze Server
Note right of BrazeAPI: Braze will remove push token from any other user who may have previously been logged in on the same device.
Note over Device, Firebase: Register Option 2 Manual registration.
App ->> BrazeSDK: App sets `Braze.registeredPushToken`
BrazeSDK ->> BrazeAPI: Send push token to Braze Server
Note right of BrazeAPI: Braze will remove push token from any other user who may have previously been logged in on the same device.
Note over Device, Firebase: Push permission
BrazeAPI ->> BrazeSDK: In-App Message containing push prompt
BrazeSDK -> App: In-App Message is displayed
App -> BrazeSDK: User requests permissions
BrazeSDK -> App: Displays the Push Authorization prompt
BrazeSDK -> BrazeAPI: If authorized and `com_braze_optin_when_push_authorized`, Opt-In value is sent.
Note over Device, Firebase: Push Notification Is Sent
BrazeAPI ->> Firebase: Sends push message
Firebase ->> Device: Push message sent
Device ->> App: Android will send the push to the App. This could be blocked to Do Not Disturb, Power Saving Mode, etc.
App ->> BrazeSDK: Message is sent to BrazeFirebaseMessagingService
BrazeSDK ->> Device: SDK will check if the push is from Braze. If so, push data is transformed into a Push Notification and displayed.
```
### Step 1: Configuring your Google Cloud API key
In developing your app, you'll need to provide the Braze Android SDK with your Firebase sender ID. Additionally, you'll need to provide an API Key for server applications to the Braze dashboard. Braze will use this API key to send messages to your devices. You will also need to check that FCM service is enabled in Google Developer's console.
**Note:**
A common mistake during this step is using the app identifier API key instead of the REST API key.
### Step 2: Devices register for FCM and provide Braze with push tokens
In typical integrations, the Braze Android SDK will handle registering devices for FCM capability. This will usually happen immediately upon opening the app for the first time. After registration, Braze will be provided with an FCM Registration ID, which is used to send messages to that device specifically. We will store the Registration ID for that user, and that user will become "push registered" if they previously did not have a push token for any of your apps.
### Step 3: Launching a Braze push campaign
When a push campaign is launched, Braze will make requests to FCM to deliver your message. Braze will use the API key copied in the dashboard to authenticate and verify that we can send push notifications to the push tokens provided.
### Step 4: Removing invalid tokens
If FCM informs us that any of the push tokens we were attempting to send a message to are invalid, we remove those tokens from the user profiles they were associated with. If users have no other push tokens, they will no longer show up as "Push Registered" under the **Segments** page.
For more details about FCM, visit [Cloud messaging](https://firebase.google.com/docs/cloud-messaging/).
## Utilizing the push error logs
Braze provides push notification errors within the message activity log. This error log provides a variety of warnings which can be very helpful for identifying why your campaigns aren't working as expected. Clicking on an error message will redirect you to relevant documentation to help you troubleshoot a particular incident.

## Troubleshooting scenarios
### Push isn't sending
Your push messages might not be sending because of the following situations:
- Your credentials exist in the wrong Google Cloud Platform project ID (wrong sender ID).
- Your credentials have the wrong permission scope.
- You uploaded wrong credentials to the wrong Braze workspace (wrong sender ID).
For other issues that may prevent you from sending a push message, refer to [User Guide: Troubleshooting Push Notifications](https://www.braze.com/docs/es/es/user_guide/message_building_by_channel/push/troubleshooting/).
### No "push registered" users showing in the Braze dashboard (prior to sending messages)
Confirm that your app is correctly configured to allow push notifications. Common failure points to check include:
#### Incorrect sender ID
Check that the correct FCM sender ID is included in the `braze.xml` file. An incorrect sender ID will lead to `MismatchSenderID` errors reported in the dashboard's message activity log.
#### Braze registration not occurring
Since FCM registration is handled outside of Braze, failure to register can only occur in two places:
1. During registration with FCM
2. When passing the FCM-generated push token to Braze
We recommend setting a breakpoint or logging to confirm that the FCM-generated push token is being sent to Braze. If a token is not generated correctly or at all, we recommend consulting the [FCM documentation](https://firebase.google.com/docs/cloud-messaging/android/client).
#### Google Play Services not present
For FCM push to work, Google Play Services must be present on the device. If Google Play Services isn't on a device, push registration will not occur.
**Note:** Google Play Services is not installed on Android emulators without Google APIs installed.
#### Device not connected to the internet
Check that your device has good internet connectivity and isn't sending network traffic through a proxy.
### Tapping push notification doesn't open the app
Check if `com_braze_handle_push_deep_links_automatically` is set to `true` or `false`. To enable Braze to automatically open the app and any deep links when a push notification is tapped, set `com_braze_handle_push_deep_links_automatically` to `true` in your `braze.xml` file.
If `com_braze_handle_push_deep_links_automatically` is set to its default of `false`, you need to use a Braze Push Callback to listen for and handle the push received and opened intents.
### Push notifications bounced
If a push notification isn't delivered, make sure it didn't bounce by looking in the [developer console](https://www.braze.com/docs/es/es/developer_guide/platforms/android/push_notifications/troubleshooting/#utilizing-the-push-error-logs). The following are descriptions of common errors that may be logged in the developer console:
#### Error: MismatchSenderID
`MismatchSenderID` indicates an authentication failure. Confirm your Firebase sender ID and FCM API key are correct.
#### Error: InvalidRegistration
`InvalidRegistration` can be caused by a malformed push token.
1. Make sure to pass a valid push token to Braze from [Firebase Cloud Messaging](https://firebase.google.com/docs/cloud-messaging/android/client#retrieve-the-current-registration-token).
#### Error: NotRegistered
1. `NotRegistered` typically occurs when an app has been deleted from a device. Braze uses `NotRegistered` internally to signal that an app has been uninstalled from a device.
2. `NotRegistered` may also occur when multiple registrations occur and a second registration invalidates the first token.
### Push notifications sent but not displayed on users' devices
There are a few reasons why this could be occurring:
#### Application was force quit
If you force-quit your application through your system settings, your push notifications will not be sent. Launching the app again will re-enable your device to receive push notifications.
#### BrazeFirebaseMessagingService not registered
The BrazeFirebaseMessagingService must be properly registered in `AndroidManifest.xml` for push notifications to appear:
```xml
```
#### Firewall is blocking push
If you are testing push over Wi-Fi, your firewall may be blocking ports necessary for FCM to receive messages. Confirm that ports `5228`, `5229`, and `5230` are open. Additionally, since FCM doesn't specify its IPs, you must also allow your firewall to accept outgoing connections to all IP addresses contained in the IP blocks listed in Google's ASN of `15169`.
#### Custom notification factory returning null
If you have implemented a [custom notification factory](https://www.braze.com/docs/es/es/developer_guide/platform_integration_guides/android/push_notifications/android/integration/standard_integration/#custom-displaying-notifications), ensure that it is not returning `null`. This will cause notifications not to be displayed.
### "Push registered" users no longer enabled after sending messages
There are a few reasons why this could be happening:
#### Application was uninstalled
Users have uninstalled the application. This will invalidate their FCM push token.
#### Invalid Firebase Cloud Messaging server key
The Firebase Cloud Messaging server key provided in the Braze dashboard is invalid. The sender ID provided should match the one referenced in your app's `braze.xml` file. The server key and sender ID are found here in your Firebase Console:

### Push clicks not logged
Braze logs push clicks automatically, so this scenario should be comparatively rare.
If push clicks are not being logged, it is possible that push click data has not been flushed to our servers yet. Braze throttles the frequency of its flushes based on the strength of the network connection. With a good network connection, push click-data should arrive at the server within a minute in most circumstances.
### Deep links not working
#### Verify deep link configuration
Deep links can be [tested with ADB](https://developer.android.com/training/app-indexing/deep-linking.html#testing-filters). We recommend testing your deep link with the following command:
`adb shell am start -W -a android.intent.action.VIEW -d "THE_DEEP_LINK" THE_PACKAGE_NAME`
If the deep link fails to work, the deep link may be misconfigured. A misconfigured deep link will not work when sent through Braze push.
#### Verify custom handling logic
If the deep link [works correctly with ADB](https://developer.android.com/training/app-indexing/deep-linking.html#testing-filters) but fails to work from Braze push, check whether any [custom push open handling](https://www.braze.com/docs/es/es/developer_guide/platform_integration_guides/android/push_notifications/android/integration/standard_integration/#android-push-listener-callback) has been implemented. If so, verify that the custom handling code properly handles the incoming deep link.
#### Disable back stack behavior
If the deep link [works correctly with ADB](https://developer.android.com/training/app-indexing/deep-linking.html#testing-filters) but fails to work from Braze push, try disabling [back stack](https://developer.android.com/guide/components/activities/tasks-and-back-stack). To do so, update your **braze.xml** file to include:
```xml
false
```
## Troubleshooting
### Push doesn't appear after app is closed from task switcher
If you observe that push notifications no longer appear after the app is closed from the task switcher, your app is likely in Debug mode. .NET MAUI adds scaffolding in Debug mode that prevents apps from receiving push after their process is killed. If you run your app in Release Mode, you should see push even after the app is closed from the task switcher.
### Custom notification factory not being set correctly
Custom notification factories (and all delegates) must extend [`Java.Lang.Object`](https://developer.xamarin.com/api/type/Android.Runtime.IJavaObject/) to work properly across the C# and Java divide. See [Xamarin](https://developer.xamarin.com/guides/android/advanced_topics/java_integration_overview/working_with_jni/#Implementing_Interfaces) on implementing Java interfaces for more information.
## Saltos de línea en las notificaciones push {#push-linebreaks}
Al redactar notificaciones push con etiquetas de Liquid, los saltos de línea adyacentes a las etiquetas de Liquid se eliminan automáticamente antes de que se envíe el mensaje. En el [compositor de notificaciones push](https://www.braze.com/docs/es/es/user_guide/message_building_by_channel/push/creating_a_push_message), estos saltos de línea se vuelven a añadir para que tu mensaje siga siendo legible mientras lo editas. Si notas saltos de línea alrededor de las etiquetas de Liquid al guardar tu mensaje, se trata de un comportamiento esperado.
# Ejemplos avanzados de notificaciones push para el SDK de Braze
Source: /docs/es/developer_guide/push_notifications/examples/index.md
# Actividades en vivo para el SDK de Braze
Source: /docs/es/developer_guide/live_notifications/index.md
Actividades en vivo
> Aprende a enviar notificaciones persistentes y dinámicas directamente a las pantallas de bloqueo de tus usuarios, para que puedan recibir actualizaciones en tiempo real sin necesidad de abrir tu aplicación. Para Swift, esto es compatible de forma nativa.
Aprende a enviar notificaciones persistentes y dinámicas directamente a las pantallas de bloqueo de tus usuarios, para que puedan recibir actualizaciones en tiempo real sin siquiera abrir tu aplicación.
Featured:
- Implementación de actividades en vivo para Swift
# Actividades en vivo para el SDK Swift de Braze
Source: /docs/es/developer_guide/live_notifications/live_activities/index.md
# Actividades en vivo para Swift {#live-activities-for-swift}
> Aprende a implementar las actividades en vivo para el SDK Swift de Braze. Las actividades en vivo son notificaciones persistentes e interactivas que se muestran directamente en la pantalla de bloqueo, lo que permite a los usuarios obtener actualizaciones dinámicas en tiempo real—sin necesidad de desbloquear el dispositivo.
## Cómo funciona {#how-it-works}
{: style="max-width:40%;float:right;margin-left:15px;"}
Las actividades en vivo presentan una combinación de información estática e información dinámica que tú actualizas. Por ejemplo, puedes crear una actividad en vivo que ofrezca un seguimiento del estado de una entrega. Esta actividad en vivo tendría el nombre de tu empresa como información estática, así como un "Tiempo de entrega" dinámico que se actualizaría a medida que el conductor de la entrega se acercara a su destino.
Como desarrollador, puedes utilizar Braze para gestionar los ciclos de vida de tus actividades en vivo, hacer llamadas a la REST API de Braze para realizar actualizaciones de actividades en vivo y hacer que todos los dispositivos suscritos reciban la actualización lo antes posible. Y, como gestionas las actividades en vivo a través de Braze, puedes utilizarlas en tándem con tus otros canales de mensajería—notificaciones push, mensajes dentro de la aplicación, Content Cards—para impulsar la adopción.
## Diagrama de secuencia {#sequence-diagram}
**Mostrar diagrama**
```mermaid
---
config:
theme: mc
---
sequenceDiagram
participant Server as Client Server
participant Device as User Device
participant App as iOS App / Braze SDK
participant BrazeAPI as Braze API
participant APNS as Apple Push Notification Service
Note over Server, APNS: Launch Option 1 Locally Start Activities
App ->> App: Register a Live Activity using `launchActivity(pushTokenTag:activity:)`
App ->> App: Get push token from iOS
App ->> BrazeAPI: Activity ID & Push token automatically sent to Braze
Note over Server, APNS: Launch Option 2 Remotely Start Activities
Device ->> App: Call `registerPushToStart` to collect push tokens early
App ->> BrazeAPI: Push-to-start tokens sent to Braze
Server ->> BrazeAPI: POST /messages/live_activity/start
Note right of BrazeAPI: Payload includes: - push_token - activity_id - external_id - event_name - content_state (optional)
BrazeAPI ->> APNS: Live activity start request
APNS ->> Device: APNS sends activity to device
App ->> App: Get push token from iOS
App ->> BrazeAPI: Activity ID & Push token automatically sent to Braze
Note over Server, APNS: Resuming activities upon app launch
App ->> App: Call `resumeActivities(ofType:)` on each app launch
Note over Server, APNS: Updating a Live Activity
loop update a live activity
Server ->> BrazeAPI: POST /messages/live_activity/update
Note right of BrazeAPI: Payload includes changes to ContentState (dynamic variables)
BrazeAPI ->> APNS: Update sent to APNS
APNS ->> Device: APNS sends update to device
end
Note over Server, APNS: Ending a Live Activity
Server ->> BrazeAPI: POST /messages/live_activity/update
Note right of BrazeAPI: Activity can be ended via: - User manually dismisses - Times out after 12 hours - Setting `end_activity: true` on `/messages/live_activity/update`
APNS ->> Device: Live activity is dismissed
```
## Implementación de una actividad en vivo {#implementing-a-live-activity}
### Prerequisites
Before you can use this feature, you'll need to [integrate the Swift Braze SDK](https://www.braze.com/docs/es/es/developer_guide/sdk_integration/?sdktab=swift). También deberás completar lo siguiente:
- Asegúrate de que tu proyecto esté dirigido a iOS 16.1 o posterior.
- Añade el derecho `Push Notification` en **Signing & Capabilities** en tu proyecto Xcode.
- Asegúrate de que se usen claves `.p8` para enviar notificaciones. Los archivos antiguos como `.p12` o `.pem` no son compatibles.
- A partir de la versión 8.2.0 del SDK Swift de Braze, puedes [registrar remotamente una actividad en vivo](#swift_step-2-start-the-activity). Para utilizar esta característica, se necesita iOS 17.2 o posterior.
**Note:**
Aunque las actividades en vivo y las notificaciones push son similares, sus permisos de sistema son distintos. Por defecto, todas las características de las actividades en vivo están habilitadas, pero los usuarios pueden deshabilitar esta característica por aplicación.
### Paso 1: Crear una actividad {#create-an-activity}
En primer lugar, asegúrate de que has seguido [Mostrar datos en vivo con Live Activities](https://developer.apple.com/documentation/activitykit/displaying-live-data-with-live-activities) en la documentación de Apple para configurar las actividades en vivo en tu aplicación iOS. Como parte de esta tarea, asegúrate de incluir `NSSupportsLiveActivities` configurado como `YES` en tu `Info.plist`.
Dado que la naturaleza exacta de tu actividad en vivo será específica de tu caso empresarial, tendrás que configurar e inicializar los objetos de [Activity](https://developer.apple.com/documentation/activitykit/activityattributes). Es importante que definas lo siguiente:
* `ActivityAttributes`: Este protocolo define el contenido estático (invariable) y dinámico (cambiante) que aparecerá en tu actividad en vivo.
* `ActivityAttributes.ContentState`: Este tipo define los datos dinámicos que se actualizarán en el transcurso de la actividad.
También utilizarás SwiftUI para crear la presentación de la interfaz de usuario de la pantalla de bloqueo y la Dynamic Island en los dispositivos compatibles.
Asegúrate de que conoces los [requisitos previos y las limitaciones](https://developer.apple.com/documentation/activitykit/displaying-live-data-with-live-activities#Understand-constraints) de Apple para las actividades en vivo, ya que estas limitaciones son independientes de Braze.
**Note:**
Si esperas enviar push frecuentes a la misma actividad en vivo, puedes evitar que el límite de presupuesto de Apple te restrinja configurando `NSSupportsLiveActivitiesFrequentUpdates` en `YES` en tu archivo `Info.plist`. Para más detalles, consulta la sección [`Determine the update frequency`](https://developer.apple.com/documentation/activitykit/updating-and-ending-your-live-activity-with-activitykit-push-notifications#Determine-the-update-frequency) de la documentación de ActivityKit.
#### Ejemplo {#example}
Imaginemos que queremos crear una actividad en vivo para ofrecer a nuestros usuarios actualizaciones sobre el espectáculo Superb Owl, en el que dos rescates de animales salvajes que compiten entre sí reciben puntos por los búhos que tienen en residencia. Para este ejemplo, hemos creado una estructura llamada `SportsActivityAttributes`, pero puedes utilizar tu propia implementación de `ActivityAttributes`.
```swift
#if canImport(ActivityKit)
import ActivityKit
#endif
@available(iOS 16.1, *)
struct SportsActivityAttributes: ActivityAttributes {
public struct ContentState: Codable, Hashable {
var teamOneScore: Int
var teamTwoScore: Int
}
var gameName: String
var gameNumber: String
}
```
### Paso 2: Iniciar la actividad {#start-the-activity}
Primero, elige cómo quieres registrar tu actividad:
- **Remoto:** Utiliza el método [`registerPushToStart`]() al principio del ciclo de vida del usuario y antes de que sea necesario el token push-to-start, y luego inicia una actividad utilizando el punto de conexión [`/messages/live_activity/start`](https://www.braze.com/docs/es/es/api/endpoints/messaging/live_activity/start).
- **Local:** Crea una instancia de tu actividad en vivo y utiliza el método [`launchActivity`]() para crear tokens de notificaciones push para que los administre Braze.
**Important:**
Para registrar remotamente una actividad en vivo, se necesita iOS 17.2 o posterior.
#### Paso 2.1: Añade BrazeKit a tu extensión de widget {#step-21-add-brazekit-to-your-widget-extension}
En tu proyecto de Xcode, selecciona el nombre de tu aplicación y luego **General**. En **Frameworks and Libraries**, confirma que `BrazeKit` está en la lista.

#### Paso 2.2: Añadir el protocolo BrazeLiveActivityAttributes {#brazeActivityAttributes}
En tu implementación de `ActivityAttributes`, añade la conformidad con el protocolo `BrazeLiveActivityAttributes` y, a continuación, añade la propiedad `brazeActivityId` al modelo de atributos.
**Important:**
iOS mapea la propiedad `brazeActivityId` con el campo correspondiente en la carga útil push-to-start de la actividad en vivo, por lo que no se debe cambiar el nombre ni asignarle ningún otro valor.
```swift
import BrazeKit
#if canImport(ActivityKit)
import ActivityKit
#endif
@available(iOS 16.1, *)
// 1. Add the `BrazeLiveActivityAttributes` conformance to your `ActivityAttributes` struct.
struct SportsActivityAttributes: ActivityAttributes, BrazeLiveActivityAttributes {
public struct ContentState: Codable, Hashable {
var teamOneScore: Int
var teamTwoScore: Int
}
var gameName: String
var gameNumber: String
// 2. Add the `String?` property to represent the activity ID.
var brazeActivityId: String?
}
```
#### Paso 2.3: Registro para push-to-start {#step-23-register-for-push-to-start}
A continuación, registra el tipo de actividad en vivo, para que Braze pueda hacer un seguimiento de todos los tokens push-to-start y de las instancias de actividad en vivo asociadas a este tipo.
**Warning:**
El sistema operativo iOS solo genera tokens push-to-start durante la primera instalación de una aplicación después de reiniciar un dispositivo. Para asegurarte de que tus tokens se registran de forma fiable, llama a `registerPushToStart` en tu método `didFinishLaunchingWithOptions`.
##### Ejemplo
En el siguiente ejemplo, la clase `LiveActivityManager` maneja objetos de actividad en vivo. A continuación, el método `registerPushToStart` registra `SportsActivityAttributes`:
```swift
import BrazeKit
#if canImport(ActivityKit)
import ActivityKit
#endif
class LiveActivityManager {
@available(iOS 17.2, *)
func registerActivityType() {
// This method returns a Swift background task.
// You may keep a reference to this task if you need to cancel it wherever appropriate, or ignore the return value if you wish.
let pushToStartObserver: Task = Self.braze?.liveActivities.registerPushToStart(
forType: Activity.self,
name: SportsActivityAttributes.name
)
}
}
```
#### Paso 2.4: Enviar una notificación push-to-start {#step-24-send-a-push-to-start-notification}
Envía una notificación push-to-start remota utilizando el punto de conexión [`/messages/live_activity/start`](https://www.braze.com/docs/es/es/api/endpoints/messaging/live_activity/start).
Puedes utilizar [el framework ActivityKit de Apple](https://developer.apple.com/documentation/activitykit) para obtener un token de notificaciones push, que el SDK de Braze puede administrar por ti. Esto te permite actualizar actividades en vivo a través de la API de Braze, ya que Braze enviará el token de notificaciones push al servicio de notificaciones push de Apple (APNs) en el backend.
1. Crea una instancia de tu implementación de actividad en vivo utilizando las API de ActivityKit de Apple.
2. Configura el parámetro `pushType` como `.token`.
3. Introduce los `ActivitiesAttributes` y `ContentState` de las actividades en vivo que hayas definido.
4. Registra tu actividad en tu instancia de Braze pasándola a [`launchActivity(pushTokenTag:activity:)`](https://braze-inc.github.io/braze-swift-sdk/documentation/brazekit/braze/liveactivities-swift.class). El parámetro `pushTokenTag` es una cadena personalizada que tú defines. Debe ser única para cada actividad en vivo que crees.
Una vez que hayas registrado la actividad en vivo, el SDK de Braze extraerá y observará los cambios en los tokens de notificaciones push.
#### Ejemplo
Para nuestro ejemplo, crearemos una clase llamada `LiveActivityManager` como interfaz para nuestros objetos de actividad en vivo. A continuación, configuraremos `pushTokenTag` como `"sports-game-2024-03-15"`.
```swift
import BrazeKit
#if canImport(ActivityKit)
import ActivityKit
#endif
class LiveActivityManager {
@available(iOS 16.2, *)
func createActivity() {
let activityAttributes = SportsActivityAttributes(gameName: "Superb Owl", gameNumber: "Game 1")
let contentState = SportsActivityAttributes.ContentState(teamOneScore: "0", teamTwoScore: "0")
let activityContent = ActivityContent(state: contentState, staleDate: nil)
if let activity = try? Activity.request(attributes: activityAttributes,
content: activityContent,
// Setting your pushType as .token allows the Activity to generate push tokens for the server to watch.
pushType: .token) {
// Register your Live Activity with Braze using the pushTokenTag.
// This method returns a Swift background task.
// You may keep a reference to this task if you need to cancel it wherever appropriate, or ignore the return value if you wish.
let liveActivityObserver: Task = AppDelegate.braze?.liveActivities.launchActivity(pushTokenTag: "sports-game-2024-03-15",
activity: activity)
}
}
}
```
Tu widget de actividad en vivo mostraría este contenido inicial a tus usuarios.
{: style="max-width:40%;"}
### Paso 3: Reanudar el seguimiento de la actividad {#resume-activity-tracking}
Para garantizar que Braze realiza un seguimiento de tu actividad en vivo al iniciar la aplicación:
1. Abre tu archivo `AppDelegate`.
2. Importa el módulo `ActivityKit` si está disponible.
3. Llama a [`resumeActivities(ofType:)`](https://braze-inc.github.io/braze-swift-sdk/documentation/brazekit/braze/liveactivities-swift.class/resumeactivities(oftype:)) en `application(_:didFinishLaunchingWithOptions:)` para todos los tipos de `ActivityAttributes` que hayas registrado en tu aplicación.
Esto permite a Braze reanudar las tareas de seguimiento de las actualizaciones de tokens de notificaciones push de todas las actividades en vivo activas. Ten en cuenta que si un usuario ha descartado explícitamente la actividad en vivo en su dispositivo, se considera eliminada, y Braze dejará de seguirla.
#### Ejemplo
```swift
import UIKit
import BrazeKit
#if canImport(ActivityKit)
import ActivityKit
#endif
@main
class AppDelegate: UIResponder, UIApplicationDelegate {
static var braze: Braze? = nil
func application(
_ application: UIApplication,
didFinishLaunchingWithOptions launchOptions: [UIApplication.LaunchOptionsKey: Any]?
) -> Bool {
if #available(iOS 16.1, *) {
Self.braze?.liveActivities.resumeActivities(
ofType: Activity.self
)
}
return true
}
}
```
### Paso 4: Actualizar la actividad {#update-the-activity}
{: style="max-width:40%;float:right;margin-left:15px;"}
El punto de conexión [`/messages/live_activity/update`](https://www.braze.com/docs/es/es/api/endpoints/messaging/live_activity/update) te permite actualizar una actividad en vivo mediante notificaciones push enviadas a través de la REST API de Braze. Utiliza este punto de conexión para actualizar el `ContentState` de tu actividad en vivo.
A medida que actualices tu `ContentState`, tu widget de actividad en vivo mostrará la nueva información. Así es como podría verse el espectáculo Superb Owl al final del primer tiempo.
Consulta nuestro artículo sobre el [punto de conexión `/messages/live_activity/update`](https://www.braze.com/docs/es/es/api/endpoints/messaging/live_activity/update) para conocer todos los detalles.
### Paso 5: Finalizar la actividad {#end-the-activity}
Cuando una actividad en vivo está activa, se muestra tanto en la pantalla de bloqueo del usuario como en la Dynamic Island. Para finalizarla a través de Braze, utiliza el punto de conexión [`/messages/live_activity/update`](https://www.braze.com/docs/es/es/api/endpoints/messaging/live_activity/update) con `end_activity` configurado como `true`.
Para mejorar la fiabilidad al finalizar una actividad en vivo, sigue estos pasos opcionales:
1. Opcionalmente, incluye `dismissal_date` en esa misma solicitud de `update` para sugerir cuándo iOS debe eliminar la interfaz de la actividad en vivo.
2. Verifica los resultados de entrega en el [Registro de actividad de mensajes](https://www.braze.com/docs/es/es/user_guide/administrative/app_settings/message_activity_log_tab).
#### Programar el descarte automático {#arranging-automatic-dismissal}
Para programar el descarte automático, planifica una solicitud de seguimiento al punto de conexión de actualización después de iniciar la actividad en vivo.
1. Envía una solicitud `/messages/live_activity/start` con un `activity_id` que puedas rastrear.
2. Almacena ese `activity_id` y tu hora de finalización objetivo en tu programador del backend.
3. En la hora de finalización objetivo, envía una solicitud `/messages/live_activity/update` con `end_activity` configurado como `true`.
4. Configura la fecha de descarte en la misma solicitud de actualización. Para más detalles, consulta el punto de conexión [`/messages/live_activity/update`](https://www.braze.com/docs/es/es/api/endpoints/messaging/live_activity/update).
Ten en cuenta que el momento del descarte lo controla iOS. Incluso después de enviar una solicitud de finalización válida, la eliminación de la pantalla de bloqueo o la Dynamic Island puede retrasarse o comportarse de forma diferente según las condiciones del sistema operativo.
Una actividad en vivo también puede finalizar fuera de Braze:
* **Descarte del usuario**: Un usuario puede descartar manualmente una actividad en vivo.
* **Tiempo de espera agotado**: Tras un tiempo predeterminado de ocho horas, iOS eliminará la actividad en vivo de la Dynamic Island del usuario. Tras un tiempo predeterminado de 12 horas, iOS eliminará la actividad en vivo de la pantalla de bloqueo del usuario.
Consulta nuestro artículo sobre el [punto de conexión `/messages/live_activity/update`](https://www.braze.com/docs/es/es/api/endpoints/messaging/live_activity/update) para conocer todos los detalles.
## Seguimiento de actividades en vivo {#tracking-live-activities}
Los eventos de actividad en vivo están disponibles en Currents, Uso compartido de datos de Snowflake y el Generador de consultas. Los siguientes eventos pueden ayudarte a comprender y supervisar el ciclo de vida de tus actividades en vivo, realizar un seguimiento de la disponibilidad de tokens y diagnosticar problemas o verificar el estado de entrega de forma independiente.
- [Cambio de token push-to-start de actividad en vivo](https://www.braze.com/docs/es/es/user_guide/data/braze_currents/event_glossary/customer_behavior_events#live-activity-push-to-start-token-change-events): Captura cuándo se añade o actualiza un token push-to-start (PTS) en Braze, lo que te permite realizar el seguimiento de los registros y la disponibilidad de tokens por usuario.
- [Cambio en el token de actualización de actividad en vivo](https://www.braze.com/docs/es/es/user_guide/data/braze_currents/event_glossary/customer_behavior_events#live-activity-update-token-change-events): Realiza un seguimiento de la adición, actualización o eliminación de tokens de actualización de actividad en vivo (LAU).
- [Envío de actividad en vivo](https://www.braze.com/docs/es/es/user_guide/data/braze_currents/event_glossary/message_engagement_events#live-activity-send-events): Registra cada vez que Braze inicia, actualiza o finaliza una actividad en vivo.
- [Resultado de la actividad en vivo](https://www.braze.com/docs/es/es/user_guide/data/braze_currents/event_glossary/message_engagement_events#live-activity-outcome-events): Indica el estado final de entrega al servicio de notificaciones push de Apple (APNs) para cada actividad en vivo enviada desde Braze.
## Verificar envíos de actividades en vivo {#verify-live-activity-sends}
Si necesitas confirmar si un espacio de trabajo está enviando actividades en vivo de iOS, puedes utilizar los siguientes métodos:
### Registro de actividad de mensajes {#message-activity-log}
Ve a **Configuración** > **Registro de actividad de mensajes** y filtra por errores de actividad en vivo para ver cualquier resultado de entrega relacionado con actividades en vivo durante el periodo de tiempo esperado. Para más información, consulta [Registro de actividad de mensajes](https://www.braze.com/docs/es/es/user_guide/administer/global/workspace_settings/logs_and_alerts/message_activity_log).
### Generador de consultas, Currents o Uso compartido de datos de Snowflake {#query-builder-currents-or-snowflake-data-sharing}
Comprueba los siguientes eventos de actividad en vivo para verificar el ciclo de vida y la entrega de la actividad en vivo:
- **Envío de actividad en vivo:** Se registra cada vez que Braze inicia, actualiza o finaliza una actividad en vivo.
- **Resultado de la actividad en vivo:** Estado final de entrega a APNs para cada actividad en vivo enviada.
Opcionalmente, también puedes comprobar las señales de disponibilidad de tokens:
- **Cambio de token push-to-start de actividad en vivo**
- **Cambio en el token de actualización de actividad en vivo**
### Dashboard de uso de la API {#api-usage-dashboard}
Ve a **Configuración** > **API e identificadores** > **Dashboard**, selecciona **Filtros** y filtra por **Punto de conexión** para ver las respuestas de la API. Por ejemplo, selecciona `/messages/live_activity/update` (o `/messages/live_activity/start`) y consulta el volumen de solicitudes de los últimos 30 días. Las respuestas de la API indican que la API se está utilizando y que las notificaciones de actividades en vivo de iOS se están usando en este espacio de trabajo. Para más información, consulta [Dashboard de uso de la API](https://www.braze.com/docs/es/es/user_guide/analytics/dashboards/api_usage).
## Observar eventos de actividad en vivo (opcional) {#observe-live-activity-events}
**Important:**
No te suscribas directamente a estos flujos de ActivityKit con Apple, ya que entrará en conflicto con las suscripciones de Braze e impedirá que las actividades en vivo funcionen correctamente:
1. [`pushTokenUpdates`](https://developer.apple.com/documentation/activitykit/activity/pushtokenupdates-swift.property)
2. [`activityStateUpdates`](https://developer.apple.com/documentation/activitykit/activity/activitystateupdates-swift.property)
3. [`contentUpdates`](https://developer.apple.com/documentation/activitykit/activity/contentupdates-swift.property)
4. [`pushToStartTokenUpdates`](https://developer.apple.com/documentation/activitykit/activity/pushtostarttokenupdates)
5. [`activityUpdates`](https://developer.apple.com/documentation/activitykit/activity/activityupdates-swift.type.property)
En su lugar, utiliza las suscripciones que se mencionan a continuación.
El SDK de Braze proporciona dos métodos de suscripción en `braze.liveActivities` para observar el ciclo de vida completo de las actividades en vivo. Para un tutorial paso a paso completo, consulta el [tutorial de actividades en vivo](https://braze-inc.github.io/braze-swift-sdk/tutorials/brazekit/b4-live-activities).
- [`subscribeToStateUpdates(_:)`](#subscribe-to-state-updates): Entrega eventos del ciclo de vida tanto para el registro de tokens push-to-start como para las instancias de actividad en ejecución.
- [`subscribeToErrors(_:)`](#subscribe-to-errors): Entrega errores del SDK y del lado del servidor encontrados durante el seguimiento de actividades en vivo.
**Note:**
Ambos métodos devuelven un [`Braze.Cancellable`](https://braze-inc.github.io/braze-swift-sdk/documentation/brazekit/braze/cancellable-swift.typealias). La suscripción permanece activa mientras el valor devuelto se mantenga a través de una referencia fuerte (por ejemplo, almacénalo en una propiedad con el mismo ciclo de vida que tu instancia de `Braze`).
### Configurar suscripciones {#set-up-subscriptions}
Configura las suscripciones una vez en `application(_:didFinishLaunchingWithOptions:)` y mantenlas durante toda la vida de tu aplicación:
```swift
class AppDelegate: UIResponder, UIApplicationDelegate {
static var braze: Braze?
var stateSubscription: Braze.Cancellable?
var errorSubscription: Braze.Cancellable?
func application(
_ application: UIApplication,
didFinishLaunchingWithOptions launchOptions: [UIApplication.LaunchOptionsKey: Any]?
) -> Bool {
let braze = Braze(configuration: config)
Self.braze = braze
if #available(iOS 16.1, *) {
stateSubscription = Self.braze?.liveActivities.subscribeToStateUpdates { event in
self.handleStateUpdate(event)
}
errorSubscription = Self.braze?.liveActivities.subscribeToErrors { error in
self.handleLiveActivityError(error)
}
}
return true
}
}
```
**Note:**
Las devoluciones de llamada solo se activan para eventos futuros de actividad en vivo; no reproducen el estado actual en el momento de la suscripción. Para consultar la instantánea del estado actual, utiliza `Activity.activities`.
### subscribeToStateUpdates {#subscribe-to-state-updates}
`subscribeToStateUpdates(_:)` entrega valores `UpdateEvent` que cubren el ciclo de vida completo de las actividades en vivo. Los eventos se dividen en dos ámbitos:
- `.activityType(ActivityType)`: Eventos a nivel de tipo para el registro de tokens push-to-start (iOS 17.2+). Aún no existe ninguna instancia de actividad.
- `.activityInstance(ActivityInstance)`: Eventos a nivel de instancia para una actividad en ejecución específica.
Se admiten múltiples suscriptores: cada suscripción activa recibe cada emisión de forma independiente.
#### Eventos a nivel de tipo {#type-scoped-events}
| Evento | Cuándo se activa |
| ----- | ------------- |
| `.pushToStartTokenRead(activityType:)` | Se leyó un token push-to-start del sistema operativo. Braze ahora puede iniciar remotamente una nueva actividad de este tipo. |
| `.pushToStartTokenFlushed(activityType:)` | El token se envió al servidor de Braze. Braze puede enviar notificaciones push-to-start para este tipo. |
| `.pushToStartOptedOut(activityType:)` | El usuario fue excluido de push-to-start para este tipo de actividad a través de `optOutPushToStart(type:)`. |
| `.pushToStartOptOutFlushed(activityType:)` | La exclusión se envió al servidor de Braze. |
{: .reset-td-br-1 .reset-td-br-2 aria-label="Eventos a nivel de tipo" }
#### Eventos a nivel de instancia {#instance-scoped-events}
| Evento | Cuándo se activa |
| ----- | ------------- |
| `.started(activityId:activityType:pushTokenTag:launchSource:)` | El SDK comenzó a rastrear esta actividad a través de `launchActivity(pushTokenTag:activity:)`. El valor de `launchSource` es `.local` para actividades iniciadas por la aplicación o `.pushToStart` para actividades iniciadas remotamente. |
| `.resumed(activityId:activityType:pushTokenTag:)` | El SDK reanudó el seguimiento de esta actividad a través de `resumeActivities(ofType:)`. |
| `.pushTokenFlushed(activityId:activityType:pushTokenTag:)` | El token push de la actividad fue aceptado por el servidor de Braze; la actividad ahora puede recibir actualizaciones remotas. |
| `.active(activityId:activityType:)` | La actividad está actualmente activa y visible para el usuario. |
| `.stale(activityId:activityType:staleDate:)` | El contenido de la actividad se ha vuelto obsoleto. Solo se emite en iOS 16.2 y posterior. |
| `.dismissed(activityId:activityType:)` | El usuario descartó manualmente la actividad. |
| `.ended(activityId:activityType:)` | La actividad ha finalizado. |
| `.contentUpdated(activityId:activityType:)` | El estado del contenido de la actividad se actualizó (iOS 16.2+). Utiliza lógica personalizada para buscar la `Activity` por ID desde `Activity.activities` y acceder al estado tipado a través de `activity.content.state`. |
| `.pushTokenUpdated(activityId:activityType:)` | ActivityKit rotó el token push de la actividad. |
{: .reset-td-br-1 .reset-td-br-2 aria-label="Eventos a nivel de instancia" }
##### Ejemplo
```swift
func handleStateUpdate(_ event: Braze.LiveActivities.UpdateEvent) {
switch event {
// Type-scoped: push-to-start token lifecycle (iOS 17.2+)
case .activityType(.pushToStartTokenRead(let activityType)):
print("[\(activityType)] Push-to-start token read by SDK")
// ...
// Instance-scoped: SDK tracking
case .activityInstance(.started(let id, let type, let tag, let source)):
print("[\(type)] Activity \(id) started via \(source), tag: \(tag)")
// ...
// Instance-scoped: ActivityKit lifecycle
case .activityInstance(.active(let id, let type)):
print("[\(type)] Activity \(id) is active")
// ...
case .activityInstance(.ended(let id, let type)):
print("[\(type)] Activity \(id) ended")
// Instance-scoped: content updates (iOS 16.2+)
case .activityInstance(.contentUpdated(let id, let type)):
// For more advanced use cases of `contentUpdated`, see the section below
print("[\(type)] Content updated for activity \(id)")
case .activityInstance(.pushTokenUpdated(let id, let type)):
print("[\(type)] Activity \(id) push token rotated")
}
}
```
### subscribeToErrors {#subscribe-to-errors}
`subscribeToErrors(_:)` entrega valores `ErrorEvent` utilizando los mismos dos ámbitos que `UpdateEvent`:
- `.activityType(ActivityType)`: Errores a nivel de tipo para fallos en el registro push-to-start.
- `.activityInstance(ActivityInstance)`: Errores a nivel de instancia para una actividad en ejecución.
Utiliza la bandera `isTransient` para determinar si es apropiado reintentar. El SDK reintenta automáticamente los fallos transitorios.
#### Errores a nivel de tipo {#type-scoped-errors}
| Error | Cuándo se activa |
| ----- | ------------- |
| `.pushToStartRegistrationFailed(activityType:isTransient:reason:)` | El token push-to-start no pudo llegar al servidor de Braze. |
{: .reset-td-br-1 .reset-td-br-2 aria-label="Errores a nivel de tipo" }
#### Errores a nivel de instancia {#instance-scoped-errors}
| Error | Cuándo se activa |
| ----- | ------------- |
| `.registrationFailed(activityId:activityType:pushTokenTag:isTransient:reason:)` | El token push de la actividad no se pudo registrar en Braze. |
| `.activityNotFound(activityId:activityType:)` | `resumeActivities(ofType:)` encontró un mapeado almacenado para una actividad que ya no está en ejecución; probablemente finalizó mientras la aplicación estaba cerrada. |
| `.invalidPushTokenTag(activityId:activityType:tag:)` | `launchActivity(pushTokenTag:activity:)` fue llamado con una etiqueta no válida. Las etiquetas deben ser no vacías y de menos de 256 bytes. |
{: .reset-td-br-1 .reset-td-br-2 aria-label="Errores a nivel de instancia" }
##### Ejemplo
```swift
func handleLiveActivityError(_ error: Braze.LiveActivities.ErrorEvent) {
switch error {
// Type-scoped errors
case .activityType(.pushToStartRegistrationFailed(let type, let isTransient, let reason)):
if isTransient {
print("[\(type)] Push-to-start registration failed (transient, will retry): \(reason)")
} else {
print("[\(type)] Push-to-start registration failed (permanent): \(reason)")
}
// Instance-scoped errors
case .activityInstance(.registrationFailed(let id, let type, _, let isTransient, let reason)):
if isTransient {
print("[\(type)] Activity \(id) registration failed (transient, retrying): \(reason)")
} else {
print("[\(type)] Activity \(id) registration failed (permanent): \(reason)")
}
case .activityInstance(.activityNotFound(let id, let type)):
print("[\(type)] Stored activity \(id) not found on resume")
case .activityInstance(.invalidPushTokenTag(let id, let type, let tag)):
print("[\(type)] Activity \(id) has invalid push token tag '\(tag)'")
}
}
```
### Manejar actualizaciones del estado del contenido (opcional) {#handle-content-state}
Si deseas utilizar el estado del contenido de la instancia real de la actividad en vivo, sigue esta sección.
Cuando se activa un evento `.contentUpdated`, utiliza lógica personalizada para buscar la `Activity` en ejecución por su ID desde `Activity.activities` y luego accede al `ContentState` tipado a través de `activity.content.state`.
#### Tipo de atributos único {#single-attributes-type}
```swift
case .activityInstance(.contentUpdated(let id, let type)):
#if canImport(ActivityKit)
// Add custom logic look up the Activity