# Braze Developer Guide Full Text
Consolidated full markdown text for all pages in the Developer Guide collection.
# Guia do desenvolvedor da Braze
Source: /docs/pt-br/developer_guide/home/index.md
Guia do desenvolvedor da Braze
É aqui que os desenvolvedores podem encontrar tudo o que precisam saber sobre o SDK da Braze. Cada SDK está hospedado em seu próprio repositório público do GitHub, que inclui apps de amostra totalmente compiláveis que você pode usar para testar os recursos da Braze ou implementar junto com seus próprios aplicativos. Para saber mais, consulte Referências, repositórios e apps de amostra . Quer se conectar, aprender e se inspirar com outros desenvolvedores que utilizam a Braze? Junte-se à comunidade de desenvolvedores da Braze !
Essa landing page é onde os desenvolvedores podem encontrar todas as integrações disponíveis com a Braze.
Featured:
- Web
- Android
- Swift
# Como começar
Source: /docs/pt-br/developer_guide/getting_started/index.md
Você pode acompanhar este guia ou consultar o [Braze Learning](https://learning.braze.com) para obter cursos guiados, como nossas jornadas de aprendizado para [profissionais de marketing](https://learning.braze.com/path/marketer) e [desenvolvedores](https://learning.braze.com/path/developer).
# Visão geral do SDK para desenvolvedores
Source: /docs/pt-br/developer_guide/getting_started/sdk_overview/index.md
# [](https://learning.braze.com/path/developer/sdk-integration-basics){: style="float:right;width:120px;border:0;" class="noimgborder"}Visão geral do SDK para desenvolvedores {#braze-learning-course-image_buster-assetsimgbl_icon3png-httpslearningbrazecompathdevelopersdk-integration-basics-stylefloatrightwidth120pxborder0-classnoimgbordersdk-overview-for-developers}
> Antes de começar a integrar os SDKs da Braze, você pode se perguntar o que exatamente está desenvolvendo e integrando. Talvez você esteja curioso para saber como pode personalizar o SDK para atender ainda mais às suas necessidades. O objetivo deste artigo é tirar as suas dúvidas sobre o SDK.
Você é um profissional de marketing e está procurando um resumo básico do SDK? Em vez disso, dê uma olhada em nossa [visão geral para profissionais de marketing](https://www.braze.com/docs/pt-br/pt-br/user_guide/get_started/sdk_overview/).
Em resumo, o SDK da Braze:
* Coleta e sincroniza dados de usuários em um perfil de usuário consolidado
* Coleta automaticamente dados da sessão, informações do dispositivo e tokens por push
* Captura dados de engajamento de marketing e dados personalizados específicos da sua empresa
* Potencializa as notificações por push, as mensagens no app e os canais de envio de mensagens do cartão de conteúdo
Assista ao vídeo a seguir para uma breve introdução aos conceitos básicos de integração do SDK da Braze e suas funcionalidades principais.
## Desempenho do app {#app-performance}
A Braze não deve ter nenhum impacto negativo sobre o desempenho do seu app.
Os SDKs da Braze têm um impacto muito pequeno no tamanho do app. Alteramos automaticamente a taxa de envio dos dados do usuário dependendo da qualidade da rede, além de permitir o controle manual da rede. Agrupamos automaticamente as solicitações de API do SDK para garantir que os dados sejam registrados rapidamente, mantendo a máxima eficiência da rede. Por fim, a quantidade de dados enviados do cliente para a Braze em cada chamada de API é extremamente pequena.
## Compatibilidade do SDK {#sdk-compatibility}
O SDK da Braze foi projetado para ser discreto e não interferir em outros SDKs presentes em seu app. Se você estiver enfrentando algum problema que acha que pode ser devido à incompatibilidade com outro SDK, entre em contato com o suporte da Braze.
## Análise de dados padrão e tratamento de sessões {#default-analytics-and-session-handling}
Certos dados de usuários são coletados automaticamente pelo nosso SDK — por exemplo, primeiro uso do app, último uso do app, contagem total de sessões, sistema operacional do dispositivo, etc. Se você seguir nossos guias de integração para implementar nossos SDKs, poderá aproveitar esta [coleta de dados padrão](https://www.braze.com/docs/pt-br/pt-br/user_guide/data/unification/user_data/sdk_data_collection/). Verificar esta lista pode ajudá-lo a evitar armazenar as mesmas informações sobre os usuários mais de uma vez. Com exceção do início e do fim da sessão, todos os outros dados rastreados automaticamente não contam para o uso dos seus pontos de dados.
**Note:**
Todos os nossos recursos são configuráveis, mas é uma boa ideia implementar completamente o modelo padrão de coleta de dados.
Se necessário para o seu caso de uso, você pode [limitar a coleta de determinados dados](#blocking-data-collection) após a conclusão da integração.
## Upload e download de dados {#data-upload-and-download}
O SDK da Braze armazena dados em cache (sessões, eventos personalizados etc.) e faz upload deles periodicamente. Somente após os dados terem sido enviados, os valores serão atualizados no dashboard. O intervalo de upload leva em consideração o estado do dispositivo e é determinado pela qualidade da conexão de rede:
| Qualidade da conexão de rede | Intervalo de descarga de dados |
|---|---|
| Excelente | 10 segundos |
| Boa | 30 segundos |
| Ruim | 60 segundos |
{: .reset-td-br-1 .reset-td-br-2 aria-label="Upload e download de dados" }
Se não houver conexão de rede, os dados serão armazenados em cache localmente no dispositivo até que a conexão de rede seja restabelecida. Quando a conexão for restabelecida, os dados serão enviados para a Braze.
A Braze envia dados para o SDK no início de uma sessão com base nos segmentos em que o usuário se enquadra no momento da sessão. As novas mensagens no app não serão atualizadas durante a sessão. No entanto, os dados de usuários durante a sessão serão processados continuamente à medida que forem enviados pelo cliente. Por exemplo, um usuário desistente (usou o app pela última vez há mais de 7 dias) ainda receberá conteúdo direcionado a usuários desistentes em sua primeira sessão de volta ao app.
## Bloqueio da coleta de dados {#blocking-data-collection}
É possível (embora não recomendado) bloquear a coleta automática de determinados dados da sua integração SDK ou permitir processos que façam isso.
O bloqueio da coleta de dados não é recomendado porque a remoção de dados analíticos reduz a capacidade de personalização e direcionamento da sua plataforma. Por exemplo:
- Se você optar por não integrar completamente a funcionalidade de localização em um dos SDKs, não poderá personalizar suas mensagens com base em idioma ou localização.
- Se optar por não fazer a integração por fuso horário, talvez não consiga enviar mensagens dentro do fuso horário de um usuário.
- Se você optar por não integrar informações visuais de um dispositivo específico, o conteúdo da mensagem poderá não ser otimizado para esse dispositivo.
É altamente recomendável integrar completamente os SDKs para aproveitar ao máximo os recursos de nosso produto.
Você pode simplesmente não integrar determinadas partes do SDK ou usar [`disableSDK`](https://js.appboycdn.com/web-sdk/latest/doc/modules/braze.html#disablesdk) para um usuário. Esse método sincronizará os dados registrados antes de `disableSDK()` ter sido chamado e fará com que todas as chamadas subsequentes ao Braze Web SDK para essa página e para futuros carregamentos de página sejam ignoradas. Para retomar a coleta de dados posteriormente, use o método [`enableSDK()`](https://js.appboycdn.com/web-sdk/latest/doc/modules/braze.html#enablesdk). Para saber mais, consulte o artigo [Desativação do rastreamento Web](https://www.braze.com/docs/pt-br/pt-br/developer_guide/analytics/managing_data_collection/?sdktab=web).
Você pode usar [`setDeviceObjectAllowlist`](https://braze-inc.github.io/braze-android-sdk/kdoc/braze-android-sdk/com.braze.configuration/-braze-config/-builder/set-device-object-allowlist.html?query=fun%20setDeviceObjectAllowlist(deviceObjectAllowlist:%20EnumSet%3CDeviceKey%3E):%20BrazeConfig.Builder) para configurar o SDK para enviar apenas um subconjunto de chaves ou valores de objetos do dispositivo de acordo com uma lista de permissões definida. Isso deve ser ativado via [`setDeviceObjectAllowlistEnabled`](https://braze-inc.github.io/braze-android-sdk/kdoc/braze-android-sdk/com.braze.configuration/-braze-config/-builder/set-device-object-allowlist-enabled.html?query=fun%20setDeviceObjectAllowlistEnabled(enabled:%20Boolean):%20BrazeConfig.Builder).
**Important:**
Uma lista de permissões vazia fará com que **nenhum** dado do dispositivo seja enviado à Braze.
Você pode atribuir um conjunto de campos elegíveis a [`configuration.devicePropertyAllowList`](https://braze-inc.github.io/braze-swift-sdk/documentation/brazekit/braze/configuration-swift.class/devicepropertyallowlist) em seu `Braze.Configuration` para especificar uma lista de permissões para os campos do dispositivo que são coletados pelo SDK. A lista completa de campos está definida em [`Braze.Configuration.DeviceProperty`](https://braze-inc.github.io/braze-swift-sdk/documentation/brazekit/braze/configuration-swift.class/deviceproperty). Para desativar a coleta de todos os campos do dispositivo, defina o valor dessa propriedade como um conjunto vazio (`[]`).
**Important:**
Por padrão, todos os campos são coletados pelo Braze Swift SDK. A remoção de algumas propriedades do dispositivo pode desativar os recursos do SDK.
Para saber mais, consulte [Armazenamento](https://www.braze.com/docs/pt-br/pt-br/developer_guide/storage/?tab=swift) na documentação do Swift SDK.
## Qual é a versão do SDK que estou usando? {#what-version-of-the-sdk-am-i-on}
Use o dashboard para ver a versão do SDK de um determinado app em **Configurações > Configurações do app**. A **versão do SDK ativa** exibe a versão mais recente do SDK da Braze usada pelo seu app ativo mais recente para pelo menos 5% dos seus usuários.
{: style="max-width:80%"}
**Tip:**
Se você tiver um app iOS, confirme se está usando o [Swift SDK](https://www.braze.com/docs/pt-br/pt-br/developer_guide/sdk_integration/?sdktab=swift) em vez do antigo [Objective-C iOS SDK](https://www.braze.com/docs/pt-br/pt-br/developer_guide/platforms/legacy_sdks/ios/initial_sdk_setup/overview/) se a **versão do SDK ativa** for igual ou superior a 5.0.0, que foi a primeira versão lançada do Swift SDK.
# Visão geral da plataforma
Source: /docs/pt-br/developer_guide/getting_started/platform_overview/index.md
# [](https://learning.braze.com/path/developer){: style="float:right;width:120px;border:0;" class="noimgborder"}Primeiros passos: Visão geral da plataforma {#braze-learning-course-image_buster-assetsimgbl_icon3png-httpslearningbrazecompathdeveloper-stylefloatrightwidth120pxborder0-classnoimgbordergetting-started-platform-overview}
> Este artigo aborda as partes básicas e os recursos da plataforma Braze. Os links deste artigo se conectam a tópicos essenciais da Braze.
**Tip:**
Confira nosso curso gratuito [Developer Learning Path](https://learning.braze.com/path/developer) junto com estes artigos.
## O que é a Braze? {#what-is-braze}
A Braze é uma plataforma de engajamento com clientes. Ela consome dados de usuários, exibe ações e comportamentos dos usuários e permite que você aja sobre eles. A plataforma tem três componentes principais: o SDK, o dashboard e a REST API.
Se você for um profissional de marketing e estiver procurando uma visão geral mais ampla da Braze, consulte a [seção Primeiros passos para profissionais de marketing](https://www.braze.com/docs/pt-br/pt-br/user_guide/get_started/).
{: style="max-width:55%;float:right;margin-left:15px;"}
### SDK
Os [SDKs da Braze](#integrating-braze) podem ser integrados aos seus aplicativos móveis e da web para fornecer ferramentas poderosas de marketing, gerenciamento de usuários e análise de dados.
Em resumo, quando está totalmente integrado, o SDK:
* Coleta e sincroniza dados de usuários em um perfil de usuário consolidado
* Coleta automaticamente dados da sessão, informações do dispositivo e tokens por push
* Captura dados de engajamento de marketing e dados personalizados específicos da sua empresa
* É arquitetado para segurança e testado quanto à penetração por terceiros
* É otimizado para dispositivos com pouca bateria ou rede lenta
* Oferece suporte a assinaturas JWT no lado do servidor para aumentar a segurança
* Tem acesso somente para gravação aos seus sistemas (não pode recuperar dados de usuários)
* Potencializa as notificações por push, as mensagens no app e os canais de envio de mensagens do Content Cards
### Interface de usuário do dashboard {#dashboard-user-interface}
O dashboard é a interface do usuário que controla todos os dados e interações no coração da plataforma Braze. Os profissionais de marketing usarão o dashboard para fazer seu trabalho e criar conteúdo. Os desenvolvedores usam o dashboard para gerenciar as configurações de integração de apps, como chaves de API e credenciais de notificação por push.
Se estiver apenas começando, o administrador da sua equipe deve adicionar você (e todos os outros membros da equipe que precisam de acesso à Braze) como [usuários no seu dashboard](https://www.braze.com/docs/pt-br/pt-br/user_guide/administer/personal/).
### REST API
A API da Braze permite que você mova dados para dentro e para fora da Braze em escala. Use a API para trazer atualizações do seu back-end, data warehouses e outras fontes primárias e de terceiros. Além disso, use a API para adicionar eventos personalizados para fins de segmentação diretamente de aplicativos baseados na web. Você pode disparar e enviar mensagens por meio da API, permitindo que os recursos técnicos incluam metadados JSON complexos como parte das suas campanhas.
A API também fornece um serviço da web em que é possível registrar as ações realizadas pelos usuários diretamente via HTTP, em vez de usar os SDKs móveis e da web. Combinado com webhooks, isso significa que você pode rastrear ações e disparar atividades para usuários dentro e fora da experiência no app. O [guia da API](https://www.braze.com/docs/pt-br/pt-br/api/home/) lista os endpoints da API da Braze disponíveis e seus usos.
Para saber mais sobre as partes e peças da Braze, confira: [Primeiros passos: Visão geral da arquitetura](https://www.braze.com/docs/pt-br/pt-br/developer_guide/getting_started/architecture_overview/).
## Análise de dados e ação {#data-analysis-and-action}
Os dados armazenados na Braze são retidos e podem ser usados para segmentação, personalização e direcionamento enquanto você for um cliente da Braze. Isso permite que você aja com base nos dados de perfil de usuários (por exemplo, atividade de sessão ou compras) até que você decida descontinuar essas informações. Por exemplo, um serviço de streaming poderia rastrear o conteúdo visto por cada assinante desde o primeiro dia no serviço (mesmo que isso tenha ocorrido há muitos anos) e usar esses dados para enviar mensagens relevantes.
{: style="max-width:80%"}
### Análise de dados do app {#app-analytics}
O dashboard da Braze exibe gráficos atualizados em tempo real com base em métricas de análise de dados e eventos personalizados que você instrumenta. Medidas e otimizações consistentes usando testes A/B, relatórios personalizados, análise de dados e inteligência automatizada ajudam a apoiar o engajamento e a diferenciação do cliente.
### Segmentação de usuários {#user-segmentation}
A segmentação permite criar grupos de usuários com base em filtros poderosos de seu comportamento no app, dados demográficos e similares. A Braze também permite que você defina qualquer ação do usuário no app como um "evento personalizado" se a ação desejada não for capturada por padrão. O mesmo se aplica às características do usuário por meio de "atributos personalizados". Depois que um segmento de usuários for criado no dashboard, seus usuários entrarão e sairão do segmento à medida que atenderem (ou não atenderem) aos critérios definidos. Por exemplo, você pode criar um segmento que inclua todos os usuários que gastaram dinheiro no app e que usaram o aplicativo pela última vez há mais de duas semanas.
Para saber mais sobre nossos modelos de dados, confira: [Primeiros passos: Visão geral da análise de dados](https://www.braze.com/docs/pt-br/pt-br/developer_guide/getting_started/architecture_overview/).
## Mensagens em vários canais {#multichannel-messaging}
Depois de definir um segmento, as ferramentas de envio de mensagens da Braze permitem o engajamento com seus usuários de forma dinâmica e personalizada. A Braze foi projetada com um modelo de dados independente de canal e centrado no usuário. O envio de mensagens é feito dentro do seu aplicativo ou site (como o envio de mensagens no app ou por meio de elementos gráficos como carrosséis e banners do Content Cards) ou fora da experiência no app (como o envio de notificações por push ou e-mails). Por exemplo, seus profissionais de marketing podem enviar uma notificação por push e um e-mail para o segmento de exemplo definido na seção anterior.
{: style="border:none" }
| Canal | Descrição |
| ---------------------------------------------------------------------------------------------------- | ------------------------------------------------------------------------------------------------------------------------------------------------------ |
| [Content Cards](https://www.braze.com/docs/pt-br/pt-br/user_guide/channels/content_cards/)* | Envie notificações no app altamente direcionadas e dinâmicas sem interromper o cliente. |
| [E-mail](https://www.braze.com/docs/pt-br/pt-br/user_guide/channels/email/) | Envie mensagens em HTML avançado criando seu e-mail usando o editor de rich-text, nosso editor de arrastar e soltar ou fazendo upload de um dos seus modelos HTML existentes. |
| [In-App Messages](https://www.braze.com/docs/pt-br/pt-br/in-app_messages/) | Envie notificações discretas no app usando a interface de usuário nativa personalizada da Braze. |
| [Push](https://www.braze.com/docs/pt-br/pt-br/user_guide/channels/push/) | Dispare automaticamente notificações por push de campanhas de mensagens ou itens de notícias usando o serviço de Notificações por Push da Apple (APNs) para iOS ou o Firebase Cloud Messaging (FCM) para Android. |
| [SMS, MMS e RCS](https://www.braze.com/docs/pt-br/pt-br/user_guide/channels/sms_mms_and_rcs/)* | Use SMS, MMS ou RCS para enviar notificações transacionais, compartilhar promoções, enviar lembretes e mais. |
| [Push para a web](https://www.braze.com/docs/pt-br/pt-br/user_guide/channels/push/platform_specific_resources/web/) | Envie notificações ao navegador da web, mesmo que os usuários não estejam ativos no site no momento. |
| [Webhooks](https://www.braze.com/docs/pt-br/pt-br/about_webhooks/) | Use webhooks para disparar ações que não sejam do aplicativo, fornecendo dados em tempo real a outros sistemas e aplicativos. |
| [WhatsApp](https://www.braze.com/docs/pt-br/pt-br/user_guide/channels/whatsapp/whatsapp_setup/)* | Conecte-se diretamente com seus usuários e clientes aproveitando a popular plataforma de envio de mensagens ponto a ponto: WhatsApp. |
{: .reset-td-br-1 .reset-td-br-2 aria-label="Mensagens em vários canais" }
*Disponível como um recurso complementar.*
### Componentes personalizáveis {#customizable-components}
Todos os componentes da Braze são criados para serem acessíveis, adaptáveis e personalizáveis. Você pode começar a usar a Braze usando os componentes padrão do BrazeUI e personalizando-os para atender às necessidades da sua marca e ao seu caso de uso.
Para ir além das opções padrão, você pode escrever um código personalizado para atualizar a aparência de um canal de envio de mensagens para que ele corresponda melhor à sua marca. Isso inclui a alteração do tipo de fonte, do tamanho da fonte e das cores de um componente. Os profissionais de marketing mantêm o controle do público, do conteúdo, do comportamento ao clicar e da expiração diretamente no dashboard da Braze.
Também é possível criar componentes totalmente personalizados para controlar a aparência das mensagens, como elas se comportam e como interagem com outros canais de envio de mensagens (por exemplo, disparando um Content Card com base em uma notificação por push). A Braze fornece métodos do SDK para permitir o registro de métricas como impressões, cliques e dispensas no dashboard da Braze. Cada canal de envio de mensagens tem um artigo de análise de dados para ajudar a facilitar isso.
## Integração da Braze {#integrating-braze}
A Braze é projetada para integração rápida. O tempo médio para valor é de seis semanas em nossa base de clientes. Para mais informações sobre o processo de integração, veja [Primeiros passos: Visão geral da integração](https://www.braze.com/docs/pt-br/pt-br/developer_guide/getting_started/integration_overview/).
## Recursos para adicionar aos favoritos {#resources-to-bookmark}
Como um recurso técnico, você estará envolvido em muitos dos detalhes básicos da Braze. Aqui estão alguns bons recursos que podem ser marcados como favoritos fora da nossa documentação. Enquanto estiver navegando, mantenha nosso glossário [Termos para conhecer](https://www.braze.com/docs/pt-br/pt-br/user_guide/get_started/terms_to_know/) à mão caso tenha dúvidas sobre termos da Braze.
| Recurso | O que você aprenderá |
|---|---|
| [Depurando o SDK](https://www.braze.com/docs/pt-br/pt-br/developer_guide/sdk_integration/debugging/) | Ao solucionar problemas da sua integração, a ferramenta de debug do SDK será uma ferramenta útil. Certifique-se de tê-la à mão! |
| [GitHub público da Braze](https://github.com/braze-inc/) | Você encontrará informações detalhadas sobre integração e exemplos de código em nosso repositório do GitHub. |
| [Repositório GitHub do Android SDK](https://github.com/braze-inc/braze-android-sdk/) | O repositório GitHub do Android SDK. |
| [Referência do Android SDK](https://appboy.github.io/appboy-android-sdk/kdoc/index.html) | Documentação de classe para o Android SDK. |
| [Repositório GitHub do SDK do iOS (Swift)](https://github.com/braze-inc/braze-swift-sdk) | O repositório GitHub do Swift SDK. |
| [Referência do SDK do iOS (Swift)](https://braze-inc.github.io/braze-swift-sdk/) | Documentação de classe para o SDK do iOS. |
| [Repositório GitHub do Web SDK](https://github.com/braze-inc/braze-web-sdk) | O repositório GitHub do Web SDK. |
| [Referência do Web SDK](https://js.appboycdn.com/web-sdk/5.0/doc/modules/braze.html) | Documentação de classe para o Web SDK. |
| [Changelogs do SDK](https://www.braze.com/docs/pt-br/pt-br/developer_guide/changelogs/) | A Braze tem lançamentos mensais previsíveis, além de lançamentos para quaisquer problemas críticos e atualizações importantes do sistema operacional. |
| [Coleção Postman da API da Braze](https://documenter.getpostman.com/view/4689407/SVYrsdsG?version=latest) | Baixe nossa coleção Postman aqui. |
| [Monitor de status do sistema Braze](https://braze.statuspage.io/) | Nossa página de status é atualizada sempre que há incidentes ou interrupções. Acesse esta página para se inscrever para receber alertas. |
{: .reset-td-br-1 .reset-td-br-2 aria-label="Recursos para adicionar aos favoritos" }
# Visão geral da integração
Source: /docs/pt-br/developer_guide/getting_started/integration_overview/index.md
# [](https://learning.braze.com/sdk-integration-basics){: style="float:right;width:120px;border:0;" class="noimgborder"}Introdução: Visão geral da integração {#braze-learning-course-image_buster-assetsimgbl_icon3png-httpslearningbrazecomsdk-integration-basics-stylefloatrightwidth120pxborder0-classnoimgbordergetting-started-integration-overview}
> Este artigo fornece uma visão geral básica do processo de integração.
{: style="max-width:50%;float:right;margin-left:15px;border:none;"}
Como recurso técnico, você capacitará sua equipe integrando a Braze ao seu stack de tecnologia. A integração é dividida, em linhas gerais, em quatro etapas:
* [Descoberta e planejamento](#discovery): Trabalhe com sua equipe para alinhar o escopo, planejar uma estrutura para dados e campanhas e criar uma estrutura de espaço de trabalho apropriada.
* [Integração](#integration): Execute seu plano integrando o SDK e a API, ativando canais de envio de mensagens e configurando a importação e exportação de dados.
* [Controle de qualidade](#qa): Confirme se o loop de dados e envio de mensagens entre a plataforma Braze e seu app ou site está funcionando conforme o esperado.
* [Manutenção](#maintenance): Depois de passar a Braze para a sua equipe de marketing, você continuará a garantir que tudo funcione sem problemas.
**Tip:**
Reconhecemos que cada organização tem suas necessidades distintas, e a Braze foi criada para atender a uma gama diversificada de opções de personalização que podem ser adaptadas às suas necessidades específicas. Os tempos de integração variam de acordo com seu caso de uso.
## Descoberta e planejamento {#discovery}
Durante essa fase, você trabalhará com a sua equipe para definir o escopo das tarefas de integração e garantir que todas as partes interessadas estejam alinhadas a um objetivo comum.
Sua equipe realizará o planejamento de ponta a ponta dos seus casos de uso para garantir que tudo possa ser criado conforme o esperado, com os dados corretos disponíveis para isso. Essa fase inclui o líder do projeto, o líder de CRM, a engenharia de front e back-end, os proprietários de produtos e os profissionais de marketing.
A fase de descoberta e planejamento leva, em média, cerca de seis semanas. Os líderes de engenharia podem esperar passar de 2 a 4 horas por semana durante essa fase. Os desenvolvedores que trabalham com o produto podem esperar passar de 10 a 20 horas por semana na Braze durante a fase de descoberta e planejamento.
**Tip:**
Durante o período de integração da sua empresa, a Braze realizará sessões de visão geral técnica. Recomendamos enfaticamente que os engenheiros participem dessas sessões. As sessões de visão geral técnica oferecem a oportunidade de conversar sobre a escalabilidade da arquitetura da plataforma e ver exemplos práticos de como empresas do seu porte foram bem-sucedidas em casos de uso semelhantes.
{: style="max-width:40%;float:right;margin-left:15px;"}
### Planejamento de campanhas {#campaign-planning}
Sua equipe de CRM planejará os casos de uso de envio de mensagens que serão lançados em um futuro próximo. Isso inclui:
* [Canal](https://www.braze.com/docs/pt-br/pt-br/user_guide/channels/) (por exemplo, notificações por push ou mensagens no app)
* [Método de entrega](https://www.braze.com/docs/pt-br/pt-br/user_guide/messaging/campaigns/schedule_your_campaign/) (por exemplo, entrega programada ou entrega baseada em ação)
* [Público-alvo](https://www.braze.com/docs/pt-br/pt-br/user_guide/audience/segments/)
* [Métricas de sucesso](https://www.braze.com/docs/pt-br/pt-br/user_guide/messaging/messaging_fundamentals/conversion_events/)
Por exemplo, uma Campaign para novos clientes pode ser: um e-mail enviado diariamente às 10h para um segmento de clientes que registraram sua primeira sessão ontem. O evento de conversão (a métrica de sucesso) é o registro de uma sessão.
**Important:**
A integração não pode começar até que a etapa de planejamento de campanhas esteja concluída. Essa etapa determinará quais partes da Braze precisam ser configuradas durante a fase de integração.
### Criação de requisitos de dados {#creating-data-requirements}
Em seguida, sua equipe de CRM deve definir quais dados são necessários para lançar as campanhas planejadas, criando requisitos de dados.
Muitos tipos comuns de atributos de usuário, como nome, e-mail, data de nascimento, país e similares, são automaticamente rastreados após a integração do SDK da Braze. Outros tipos de dados precisarão ser definidos como dados personalizados.
Como desenvolvedor, você trabalhará com sua equipe para definir quais dados adicionais e personalizados fazem sentido rastrear. Seus dados personalizados afetarão a forma como sua base de usuários será classificada e segmentada. Você configurará uma taxonomia de eventos em todo o seu growth stack, estruturando seus dados para que sejam compatíveis com seus sistemas à medida que entram e saem da Braze.
**Tip:**
Mantenha a nomenclatura dos dados consistente em todas as ferramentas. Por exemplo, seu data warehouse pode registrar "comprar oferta por tempo limitado" de uma maneira específica. Você precisará decidir se é necessário um evento personalizado na Braze para corresponder a esse formato.
Saiba mais sobre [dados coletados automaticamente e dados personalizados](https://www.braze.com/docs/pt-br/pt-br/developer_guide/analytics/).
### Planejamento de personalizações {#customizations-planning}
Converse com seus profissionais de marketing sobre as personalizações desejadas. Por exemplo, você deseja implementar os Content Cards padrão da Braze? Deseja ajustar ligeiramente a aparência e o comportamento para que correspondam às diretrizes da sua marca? Deseja desenvolver uma interface de usuário totalmente nova para um componente e fazer com que a Braze rastreie sua análise de dados? Diferentes níveis de personalização exigem diferentes níveis de escopo.
### Como obter acesso ao dashboard {#getting-dashboard-access}
O dashboard da Braze é nossa interface de usuário na web. Os profissionais de marketing usarão o dashboard para fazer seu trabalho e criar conteúdo. Os desenvolvedores usam o dashboard para gerenciar as configurações de integração de apps, como chaves de API e credenciais de notificação por push.
O administrador da sua equipe deve adicionar você (e todos os outros membros da equipe que precisam de acesso à Braze) como usuários no seu dashboard.
### Espaços de trabalho e chaves de API {#workspaces-and-api-keys}
O administrador da sua equipe também criará diferentes [espaços de trabalho](https://www.braze.com/docs/pt-br/pt-br/user_guide/administer/global/create_and_manage_workspaces/). Os espaços de trabalho agrupam seus dados — usuários, segmentos, chaves de API — em um único local. Como prática recomendada, sugerimos colocar apenas versões diferentes do mesmo app ou de apps muito semelhantes em um único espaço de trabalho.
É importante ressaltar que os espaços de trabalho fornecem chaves de API para várias plataformas (como iOS e Android). Você usará as chaves de API correlacionadas para associar os dados do SDK a um espaço de trabalho específico. Navegue até seus espaços de trabalho para acessar a chave de API de cada um de seus apps. Confira se cada chave de API tem as permissões corretas para executar o trabalho que você definiu como escopo. Consulte o [artigo sobre provisionamento da API](https://www.braze.com/docs/pt-br/pt-br/api/basics/#rest-api-key) para saber mais.
**Important:**
É importante que você configure ambientes diferentes para desenvolvimento e produção. A configuração de um ambiente de teste evitará que você gaste dinheiro real durante a integração e o controle de qualidade. Para criar um ambiente de teste, configure um espaço de trabalho de teste e certifique-se de usar a respectiva chave de API para não preencher o espaço de trabalho de produção com dados de teste.
## Integração {#integration}
{: style="max-width:45%;float:right;margin-left:15px;"}
A Braze oferece suporte a apps iOS, apps Android, apps web e muito mais. Você também pode optar por usar um wrapper SDK multiplataforma, como o React Native ou o Unity. Normalmente, vemos os clientes se integrarem em um período de 1 a 6 semanas. Muitos clientes integraram a Braze com apenas um engenheiro, dependendo da amplitude de suas habilidades técnicas e da disponibilidade. Depende inteiramente do seu escopo específico de integração e de quanto tempo sua equipe dedica ao projeto Braze.
Você precisará de desenvolvedores que estejam familiarizados com:
* Trabalhar na camada nativa do seu app ou site
* Criação de processos para acessar nossa REST API
* Teste de integração
* Autenticação de token da web JSON
* Habilidades gerais de gerenciamento de dados
* Configuração de registros DNS
### Integração com parceiros de CDP {#cdp-integration-partners}
Muitos clientes usam a integração da Braze como uma oportunidade de também se integrar a uma plataforma de dados do cliente (CDP) como parceiro de integração. A Braze oferece rastreamento e análise de dados, enquanto uma CDP pode oferecer roteamento e orquestração de dados adicionais. A Braze oferece integração perfeita com muitas CDPs, como a [mParticle](https://www.braze.com/docs/pt-br/pt-br/partners/data_and_analytics/customer_data_platform/mparticle/mparticle/) e o [Segment](https://www.braze.com/docs/pt-br/pt-br/partners/data_and_analytics/customer_data_platform/segment/segment/).
Se estiver realizando a integração lado a lado com uma CDP, você mapeará as chamadas do SDK da sua CDP para o SDK da Braze. Essencialmente, você irá:
* Mapear chamadas de identificação para `changeUser` ([Android](https://braze-inc.github.io/braze-android-sdk/kdoc/braze-android-sdk/com.braze/-i-braze/change-user.html), [iOS](https://braze-inc.github.io/braze-swift-sdk/documentation/brazekit/braze/changeuser(userid:sdkauthsignature:fileid:line:)/), [web](https://js.appboycdn.com/web-sdk/latest/doc/modules/braze.html#changeuser)) e definir atributos.
* Mapear chamadas de flush de dados para `requestImmediateDataFlush` ([Android](https://braze-inc.github.io/braze-android-sdk/kdoc/braze-android-sdk/com.braze/-i-braze/request-immediate-data-flush.html?query=abstract%20fun%20requestImmediateDataFlush()), [iOS](https://braze-inc.github.io/braze-swift-sdk/documentation/brazekit/braze/requestimmediatedataflush()), [web](https://js.appboycdn.com/web-sdk/latest/doc/modules/braze.html#requestimmediatedataflush)).
* Registrar eventos personalizados ou compras.
Exemplos de integrações entre o SDK da Braze e a CDP de sua escolha podem estar disponíveis, dependendo da plataforma que você escolheu. Para saber mais, consulte nossa [lista de parceiros de tecnologia CDP](https://www.braze.com/docs/pt-br/pt-br/partners/data_and_analytics/).
### Integração do SDK da Braze {#braze-sdk-integration}
O SDK da Braze fornece duas funcionalidades essenciais: coleta e sincroniza os dados de usuários em um perfil de usuário consolidado e alimenta os canais de envio de mensagens, como notificações por push, mensagens no app e Content Cards.
**Tip:**
Quando estiver totalmente integrado ao seu app ou site, o SDK da Braze oferece um nível de sofisticação de marketing totalmente realizado. Se você adiar a integração do SDK da Braze, algumas das funcionalidades descritas na documentação não estarão disponíveis.
**Note:**
Para adicionar uma camada adicional de segurança, você pode ativar a [autenticação do SDK](https://www.braze.com/docs/pt-br/pt-br/developer_guide/sdk_integration/authentication/) para evitar solicitações não autorizadas ao SDK. Este recurso está disponível em todas as principais plataformas, incluindo Web, iOS, Android, React Native, Flutter, Unity, Cordova, .NET MAUI (Xamarin) e Expo.
Durante a implementação do SDK, você irá:
* Escrever o código de integração do SDK para cada plataforma à qual deseja oferecer suporte.
* Ativar os canais de envio de mensagens para cada plataforma, garantindo que o SDK da Braze rastreie os dados das interações com seus clientes por e-mail, SMS, notificações por push e outros canais.
* Criar quaisquer personalizações de componentes de UI planejadas (por exemplo, Content Cards personalizados). Para conteúdo totalmente personalizado, será necessário registrar a análise de dados, pois a coleta automática de dados do SDK não estará ciente dos seus novos componentes. Você pode padronizar essa implementação com base nos nossos componentes padrão.
### Usando a API da Braze {#using-the-braze-api}
Você usará nossa REST API para diferentes tarefas em diferentes momentos ao longo do seu tempo de uso da Braze. A API da Braze é útil para:
1. Importação de dados históricos; e
2. Atualizações contínuas que não são disparadas na Braze. Por exemplo, o perfil de um usuário faz upgrade para VIP sem que ele faça login em um app, portanto, a API precisa comunicar essas informações à Braze.
Comece com a [API da Braze](https://www.braze.com/docs/pt-br/pt-br/api/basics/).
**Important:**
Ao usar a API, certifique-se de agrupar suas solicitações em lote e enviar apenas valores delta. A Braze reescreve todos os atributos que são enviados. Não atualize nenhum atributo personalizado se seu valor não tiver sido alterado.
### Configuração da análise de dados do produto {#setting-up-product-analytics}
A Braze tem tudo a ver com dados. Os dados na Braze são armazenados no perfil do usuário.
Os pontos de dados são uma estrutura por meio da qual você garante que está capturando os dados certos para seus profissionais de marketing, e não apenas "qualquer" dado que possa ser aspirado. Familiarize-se com os [pontos de dados](https://www.braze.com/docs/pt-br/pt-br/user_guide/data/infrastructure/data_points/).
### Migração de dados de usuários antigos {#migrating-legacy-user-data}
Você pode usar o [`/users/track endpoint`](https://www.braze.com/docs/pt-br/pt-br/api/endpoints/user_data/post_user_track/) da Braze para migrar dados históricos que foram registrados fora da Braze. Exemplos de dados comumente importados incluem tokens por push e compras anteriores. Esse endpoint pode ser usado para importações pontuais ou atualizações regulares em lote.
Também é possível importar usuários e atualizar os valores dos atributos de clientes por meio de um único [upload de CSV](https://www.braze.com/docs/pt-br/pt-br/user_guide/data_and_analytics/user_data_collection/user_import/#importing-a-csv) para o dashboard. Fazer upload de CSVs pode ser útil para profissionais de marketing, enquanto nossa REST API permite maior flexibilidade.
### Configuração do rastreamento de sessão {#setting-up-session-tracking}
O SDK da Braze gera pontos de dados de "sessão aberta" e "sessão fechada". O SDK da Braze também libera os dados em intervalos regulares. Consulte esses links para obter os valores padrão de rastreamento de sessão, todos os quais podem ser personalizados ([Android](https://www.braze.com/docs/pt-br/pt-br/developer_guide/analytics/tracking_sessions/?tab=android), [iOS](https://www.braze.com/docs/pt-br/pt-br/developer_guide/analytics/tracking_sessions/?tab=swift), [web](https://www.braze.com/docs/pt-br/pt-br/developer_guide/analytics/tracking_sessions/?tab=web)).
### Rastreamento de eventos personalizados, atributos e eventos de compra {#tracking-custom-events-attributes-and-purchase-events}
Coordene-se com sua equipe para configurar o esquema de dados planejado, incluindo eventos personalizados, atributos de usuários e eventos de compra. Seu [esquema de dados personalizado](https://www.braze.com/docs/pt-br/pt-br/user_guide/data/activation/events/custom_events/) será inserido usando o dashboard e deve corresponder exatamente ao que foi implementado durante a integração do SDK.
**Tip:**
Os IDs de usuário, chamados de `external_id`s na Braze, devem ser definidos para todos os usuários conhecidos. Eles devem ser imutáveis e acessíveis quando um usuário abre o app, permitindo o rastreamento dos seus usuários entre dispositivos e plataformas. Consulte o artigo [Ciclo de vida do usuário](https://www.braze.com/docs/pt-br/pt-br/user_guide/data/unification/user_data/user_profile_lifecycle/) para obter as práticas recomendadas.
### Outras ferramentas {#other-tools}
Com base no seu caso de uso, pode haver outras ferramentas que você precise configurar. Por exemplo, talvez seja necessário configurar uma ferramenta como [geofences](https://www.braze.com/docs/pt-br/pt-br/user_guide/engagement_tools/locations_and_geofences#about-locations-and-geofences/) para realizar suas histórias de usuários. Descobrimos que os clientes que têm a capacidade de configurar essas ferramentas adicionais depois de concluir as etapas essenciais de integração são mais bem-sucedidos.
## Controle de qualidade {#qa}
Ao executar a integração, você realizará o controle de qualidade para garantir que tudo o que está sendo configurado esteja funcionando conforme o esperado. Esse controle de qualidade se divide em duas categorias gerais: ingestão de dados e canais de envio de mensagens.
**Important:**
Confira se os seus ambientes de produção e teste estão configurados antes de iniciar o controle de qualidade.
| **Ingestão de dados de controle de qualidade** | **Envio de mensagens de controle de qualidade** |
|---------------------------|---------------------------------------------------------------|
| Você realizará o controle de qualidade na forma como os dados são ingeridos, armazenados e exportados. | Você garantirá que as mensagens estão sendo enviadas corretamente aos usuários e que tudo está excelente. |
| Execute testes para confirmar que os dados estão armazenados corretamente. | Crie segmentos de usuários. |
| Confirme se os dados da sessão estão corretamente atribuídos ao espaço de trabalho pretendido na Braze. | Lance Campaigns e Canvas com sucesso. |
| Confirme se o início e o fim da sessão estão sendo registrados. | Confirme se as Campaigns corretas estão sendo exibidas para os segmentos de usuários corretos. |
| Confirme se as informações de atributos do usuário estão corretamente registradas nos perfis de usuário. | Confirme se os tokens por push estão sendo registrados corretamente. |
| Teste se os dados personalizados estão sendo registrados corretamente nos perfis de usuários. | Confirme se os tokens por push foram removidos corretamente. |
| Crie perfis de usuário anônimos. | Teste se as campanhas push estão sendo enviadas corretamente para os dispositivos e se o engajamento está registrado. |
| Confirme se os perfis de usuário anônimos se tornam perfis de usuário conhecidos quando o método `changeUser()` é chamado. | Teste se as mensagens no app são entregues e se as métricas são registradas. |
| | Teste se os Content Cards são entregues e se as métricas são registradas. |
| | Facilite o Conteúdo conectado (por exemplo, AccuWeather). |
| | Confirme se todas as integrações de canais de envio de mensagens estão funcionando corretamente. |
{: .reset-td-br-1 .reset-td-br-2 aria-label="Quality assurance #qa" }
**Note:**
Ao realizar o controle de qualidade na sua integração de SDK, use o [Depurador do SDK](https://www.braze.com/docs/pt-br/pt-br/developer_guide/sdk_integration/debugging/) para solucionar problemas sem ativar o registro detalhado para seu app.
### Passando a Braze para os profissionais de marketing {#passing-braze-off-to-marketers}
Depois de integrar a plataforma ou o site, envolva a equipe de marketing para passar a propriedade da plataforma para eles. Esse processo é diferente em cada empresa, mas pode incluir o seguinte:
* Criação de uma [lógica Liquid](https://www.braze.com/docs/pt-br/pt-br/user_guide/personalization_and_dynamic_content/liquid/#about-liquid) complexa
* Ajuda para facilitar o [aquecimento de IP de e-mail](https://www.braze.com/docs/pt-br/pt-br/user_guide/channels/email/email_setup/ip_warming/)
* Garantia de que outras partes interessadas entendam o tipo de dados que estão sendo rastreados
### Desenvolver para o futuro {#develop-for-the-future}
Você já herdou uma base de código e não tinha a menor ideia do que o desenvolvedor inicial estava pensando? Pior ainda, você já escreveu um código, entendeu-o completamente e depois ficou completamente perplexo quando voltou a ele um ano depois?
Durante a integração da Braze, as decisões coletivas tomadas em relação a dados, perfis de usuários, quais integrações estavam e não estavam no escopo, como as personalizações deveriam funcionar e muito mais, parecerão frescas em sua mente e, portanto, óbvias. Quando sua equipe quiser expandir a Braze ou quando outros recursos técnicos forem atribuídos ao seu projeto Braze, essas informações serão obscuras.
Crie um recurso para consolidar as informações que você aprendeu durante as sessões de visão geral técnica. Esse recurso ajudará a reduzir o tempo de integração de novos desenvolvedores que se juntam à sua equipe (ou servirá como um lembrete para você mesmo quando precisar expandir sua implementação atual da Braze).
## Manutenção {#maintenance}
Após a transferência para seus profissionais de marketing, você continuará a servir como um recurso para manutenção. Você prestará atenção às atualizações do iOS e do Android que possam afetar o SDK da Braze e garantirá que seus fornecedores terceirizados estejam atualizados.
Você fará o rastreamento das atualizações da plataforma Braze por meio do [GitHub](https://github.com/braze-inc/) da Braze. Ocasionalmente, seu administrador também receberá e-mails sobre atualizações urgentes e correções de bugs diretamente da Braze.
## Limites de taxa do SDK {#sdk-rate-limits}
### Usuários ativos mensais CY 24-25, MAU universal, MAU web e MAU móvel {#monthly-active-users-cy-24-25-universal-mau-web-mau-and-mobile-mau}
Para clientes que adquiriram Usuários Ativos Mensais CY 24-25, MAU Universal, MAU Web e MAU Móvel, a Braze aplica limites de taxa do lado do servidor nas solicitações de API usadas por nossos SDKs para atualizar sessões, atributos de usuário, eventos e outros dados de perfil de usuário. Isso é para garantir a estabilidade da plataforma e manter um serviço rápido e confiável.
* Os limites de taxa por hora são definidos de acordo com o tráfego esperado do SDK na sua conta, que pode corresponder ao número de usuários ativos mensais (MAU) que você adquiriu, setor, sazonalidade ou outros fatores. Quando o limite de taxa por hora é atingido, a Braze limitará as solicitações até a próxima hora.
* Todas as solicitações com limite de taxa são automaticamente reprocessadas pelo SDK.
* As solicitações do SDK estão correlacionadas com a quantidade de dados personalizados coletados na sua implementação. Se você está consistentemente perto ou no seu limite de taxa por hora, considere:
* Revisar sua integração de SDK para reduzir a coleta excessiva de dados.
* Bloquear dados personalizados que não são essenciais para seus casos de uso de marketing.
* Os limites de taxa de burst são limites de curta duração que se aplicam quando um alto volume de solicitações chega em um período muito curto (ou seja, em segundos). Você não precisa tomar medidas quando os limites de burst ocorrem, e o SDK tentará novamente em breve.
* Os limites de taxa constantes controlam o volume de solicitações sustentadas ao longo de uma janela móvel maior que a janela de burst (por exemplo, vários minutos) e ajudam a suavizar o tráfego contínuo entre os limites de burst e seu limite de taxa por hora.
### Encontrando seus limites de taxa {#finding-your-rate-limits}
Para encontrar os limites atuais com base na taxa de transferência esperada do SDK, acesse **Configurações** > **APIs e identificadores** > **Limites de API e SDK**.
Para uso histórico, acesse **Configurações** > **APIs e identificadores** > **Dashboard de API e SDK**.
### Solicitando limites de taxa mais altos {#requesting-higher-rate-limits}
Se você precisar de um limite de taxa mais alto na Braze, entre em contato com o suporte da Braze ou seu gerente de sucesso do cliente e inclua os seguintes detalhes:
* Se você precisa de um aumento temporário ou permanente.
* Por que você precisa do aumento.
* Quais endpoints e ambientes são afetados.
* Seu volume de tráfego aproximado e cronograma, incluindo data de início, duração e horários de pico.
* Se você pode agrupar chamadas ou distribuir o tráfego ao longo do tempo.
Após enviar sua solicitação, a Braze a revisa e atualiza você com o resultado.
### Mudanças e suporte {#changes-and-support}
A Braze pode modificar os limites de taxa para proteger a estabilidade do sistema ou permitir um aumento na taxa de transferência de dados na sua conta. Entre em contato com o suporte da Braze ou com seu gerente de sucesso do cliente para perguntas ou preocupações sobre limites de taxa e como eles impactam seu negócio.
# Visão geral da arquitetura
Source: /docs/pt-br/developer_guide/getting_started/architecture_overview/index.md
# Como começar: Visão geral da arquitetura {#getting-started-architectural-overview}
> Este artigo discute as diferentes partes e peças do stack de tecnologia da Braze, com links para artigos relevantes.
Em última análise, a Braze trata de dados. A plataforma da Braze, com o SDK, a REST API e as integrações com parceiros, permite que você agregue e atue em cima de seus dados.
{: style="display:block;margin:auto;" }
* [Ingestão de dados](#ingestion): A Braze extrai dados de uma variedade de fontes.
* [Classificação](#classification): Sua equipe de marketing segmenta dinamicamente sua base de usuários usando essas métricas.
* [Orquestração](#orchestration): A Braze coordena de forma inteligente as mensagens para diferentes segmentos de público no momento ideal.
* [Ação](#action): Sua equipe de marketing age com base nos dados, criando conteúdo por meio de uma variedade de canais de envio de mensagens, como SMS e e-mail.
* [Personalização](#personalization): Os dados são transformados em tempo real com informações personalizadas sobre seu público.
* [Exportação](#exporting-data): Em seguida, a Braze rastreia o engajamento de seus usuários com essas mensagens e as alimenta novamente na plataforma, criando um loop. Você obtém insights sobre esses dados por meio de relatórios e análises em tempo real.
Tudo isso funciona em conjunto para criar interações bem-sucedidas entre sua base de usuários e sua marca, de modo que você possa atingir suas metas. A Braze faz tudo isso no contexto de algo que chamamos de nosso stack verticalmente integrado. Vamos nos aprofundar em cada camada, uma de cada vez.
## Ingestão de dados {#ingestion}
A Braze foi desenvolvida com base em uma arquitetura de fluxo de dados que utiliza Snowflake, Kafka, MongoDB e Redis. Dados de muitas fontes podem ser carregados na Braze por meio do SDK e da API. A plataforma pode lidar com qualquer dado em tempo real, independentemente de como esteja aninhado ou estruturado. Os dados na Braze são armazenados no perfil do usuário.
**Tip:**
A Braze pode rastrear os dados de um usuário durante toda a jornada dele com você, desde o momento em que ele é anônimo até o momento em que faz login no seu app e é conhecido. As IDs de usuário, chamadas `external_id`s na Braze, devem ser definidas para cada um de seus usuários. Elas devem ser imutáveis e acessíveis quando um usuário abre o app, permitindo o rastreamento de seus usuários entre dispositivos e plataformas. Consulte o artigo [Ciclo de vida do perfil de usuário](https://www.braze.com/docs/pt-br/pt-br/user_guide/data/unification/user_data/user_profile_lifecycle/) para obter as práticas recomendadas.
{: style="display:block;margin:auto;" }
**Note:**
Esse banco de dados de perfil de usuário centrado na pessoa permite velocidade interativa e em tempo real. A Braze pré-computa os valores quando os dados chegam e armazena os resultados em nosso formato de documento leve para recuperação rápida. E como a plataforma foi projetada dessa forma desde o início, ela é ideal para a maioria dos casos de uso de envio de mensagens, especialmente quando combinada com outros conceitos de dados, como Conteúdo conectado, catálogos de produtos e atributos aninhados.
### Detalhamento das fontes de dados {#data-source-breakdown}
A Braze utiliza diferentes sistemas de armazenamento de dados para várias funcionalidades. Entender quais funcionalidades usam quais fontes de dados é importante para a gestão de dados e resolução de problemas.
#### Funcionalidades baseadas em MongoDB {#mongodb-powered-features}
- Eventos personalizados (rastreados pelo SDK e pela API)
- Atributos personalizados
- Perfis de usuário
- Eventos de compra
- A maioria das funcionalidades de segmentação e direcionamento
#### Funcionalidades baseadas em Snowflake {#snowflake-powered-features}
- [Extensões de segmento SQL](https://www.braze.com/docs/pt-br/pt-br/user_guide/audience/segments/segment_extension/sql_segments/)
- [Conjunto de previsões](https://www.braze.com/docs/pt-br/pt-br/user_guide/brazeai/)
- [Jornadas personalizadas](https://www.braze.com/docs/pt-br/pt-br/user_guide/messaging/canvas/canvas_components/experiment_step/personalized_paths/) e [Variante personalizada](https://www.braze.com/docs/pt-br/pt-br/user_guide/engagement_tools/testing/multivariant_testing/optimizations/#personalized-variant)
- [Recomendações de itens personalizados por IA](https://www.braze.com/docs/pt-br/pt-br/user_guide/brazeai/item_recommendations/creating_recommendations/ai/)
- [Taxa de abertura real estimada](https://www.braze.com/docs/pt-br/pt-br/user_guide/message_building_by_channel/email/reporting_and_analytics/email_reporting/#estimated-real-open-rate) (não utiliza eventos personalizados)
**Important:**
**Considerações sobre remoção de dados:** Eventos personalizados são armazenados no MongoDB e são separados dos dados do Snowflake. Se você precisar remover dados de eventos personalizados errôneos, deve tratá-los no MongoDB. Funcionalidades baseadas em Snowflake (como extensões de segmento SQL e outras funcionalidades baseadas em Snowflake) utilizam dados do Snowflake, que são tratados separadamente. Remover dados de um sistema não remove automaticamente do outro.
### Fontes de dados de backend por meio da API da Braze {#backend-data-sources-through-the-braze-api}
A Braze pode extrair dados de bancos de dados de usuários, transações off-line e data warehouses por meio de nossa [REST API](https://www.braze.com/docs/pt-br/pt-br/api/endpoints/user_data/).
### Fontes de dados de frontend por meio do SDK da Braze {#frontend-data-sources-through-braze-sdk}
A Braze captura automaticamente dados primários de fontes de dados de frontend, como dispositivos de usuários, por meio do [SDK da Braze](https://www.braze.com/docs/pt-br/pt-br/user_guide/get_started/sdk_overview/). O SDK lida com novos usuários (anônimos) e gerencia os dados de seu perfil de usuário durante todo o seu ciclo de vida.
### Integrações com parceiros {#partner-integrations}
A Braze tem mais de 150 parceiros de tecnologia, que chamamos de "Alloys". Você pode complementar seus feeds de dados por meio de uma rede significativamente robusta de [tecnologias interoperáveis e APIs de dados.](https://www.braze.com/docs/pt-br/pt-br/partners/home/)
### Conexão direta com o data warehouse por meio da Ingestão de Dados na Nuvem da Braze {#direct-warehouse-connection-through-braze-cloud-data-ingestion}
É possível enviar dados de clientes do seu data warehouse para a plataforma por meio da [Ingestão de Dados na Nuvem da Braze](https://www.braze.com/docs/pt-br/pt-br/user_guide/data/unification/cloud_ingestion/) em apenas alguns minutos, permitindo a sincronização de atributos, eventos e compras relevantes do usuário. A integração da Ingestão de Dados na Nuvem oferece suporte a estruturas de dados complexas, incluindo JSON aninhado e arrays de objetos.
A Ingestão de Dados na Nuvem pode sincronizar dados do Snowflake, Amazon Redshift, Databricks e Google BigQuery.
## Classificação {#classification}
A camada de classificação permite que sua equipe classifique e crie públicos dinamicamente, chamados [segmentos](https://www.braze.com/docs/pt-br/pt-br/user_guide/audience/segments/), com base nos dados que passam pela Braze.
**Note:**
As camadas de classificação, orquestração e personalização são onde sua equipe de marketing fará a maior parte do trabalho. Eles interagem com essas camadas com mais frequência por meio do dashboard da Braze, nossa interface web. Os desenvolvedores têm uma função na configuração e na personalização dessas camadas.
Muitos tipos comuns de atributos do usuário, como nome, e-mail, data de nascimento, país e outros, são automaticamente rastreados pelo SDK por padrão. Como desenvolvedor, você trabalhará com a sua equipe para definir quais dados adicionais e personalizados fazem sentido rastrear para o seu caso de uso. Seus dados personalizados afetarão a forma como sua base de usuários será classificada e segmentada. Você definirá esse modelo de dados durante o processo de implementação.
Saiba mais sobre [dados coletados automaticamente e dados personalizados](https://www.braze.com/docs/pt-br/pt-br/developer_guide/analytics/).
## Orquestração {#orchestration}
A camada de orquestração permite que sua equipe de marketing projete jornadas de usuário com base nos dados de usuários e no engajamento anterior. Esse trabalho é feito principalmente por meio de nossa interface de dashboard, mas você também tem a opção de lançar [Campaigns por meio da API](https://www.braze.com/docs/pt-br/pt-br/api/api_campaigns/#api-campaigns). Por exemplo, você pode fazer com que seu backend informe à Braze quando enviar as mensagens e Campaigns que seus profissionais de marketing projetaram no dashboard e dispará-las de acordo com sua lógica de backend. Um exemplo de mensagem disparada pela API pode ser a redefinição de senha ou a confirmação de envio.
**Note:**
As Campaigns disparadas por API são ideais para casos de uso transacionais mais avançados. Elas permitem que os profissionais de marketing gerenciem o texto da Campaign, os testes multivariantes e as regras de reelegibilidade no dashboard da Braze, enquanto disparam a entrega desse conteúdo a partir de seus servidores e sistemas. A solicitação da API para disparar a mensagem também pode incluir dados adicionais a serem modelados na mensagem em tempo real.
### Feature Flags
A Braze permite ativar ou desativar remotamente a funcionalidade para uma seleção de usuários por meio de [Feature Flags](https://www.braze.com/docs/pt-br/pt-br/developer_guide/feature_flags/). Isso permite que os profissionais de marketing direcionem o segmento correto da sua base de usuários com envios de mensagens para recursos que ainda não foram implementados para todo o público. Mas, mais do que isso, Feature Flags podem ser usadas para ativar e desativar um recurso na produção sem implementação de código adicional ou atualizações da loja de aplicativos. Isso permite que você implemente novos recursos com segurança e confiança.
## Personalização {#personalization}
A camada de personalização representa a capacidade de fornecer conteúdo dinâmico em suas mensagens. Ao usar o Liquid, uma linguagem de personalização amplamente utilizada, sua equipe pode extrair dinamicamente os dados existentes para exibir a mensagem personalizada para cada destinatário. Além disso, você pode inserir qualquer informação acessível em seu servidor web ou por meio da API diretamente nas mensagens que está enviando, como notificações por push ou e-mails, usando [Conteúdo conectado](https://www.braze.com/docs/pt-br/pt-br/user_guide/messaging/design_and_edit/personalize/connected_content/). O Conteúdo conectado se baseia no Liquid e usa uma sintaxe familiar.
E como esse conteúdo dinâmico é programável, os profissionais de marketing podem incluir valores computados, respostas de outras chamadas ou itens do catálogo de produtos. Depois de configurar esses sistemas durante a implementação, sua equipe de marketing pode fazer isso com pouco ou nenhum suporte das equipes técnicas.
## Ação {#action}
A camada de ação permite o envio real de mensagens aos seus usuários. O objetivo da camada de ação é enviar a mensagem certa para o usuário certo no momento certo, com base nos dados disponíveis em todas as camadas discutidas anteriormente. O envio de mensagens é feito dentro do seu app ou site (como o envio de mensagens no app ou por meio de elementos gráficos como carrosséis e banners de Content Cards) ou fora da experiência no app (como o envio de notificações por push ou e-mails).
### Canais de envio de mensagens {#messaging-channels}
A Braze foi projetada para lidar com um cenário tecnológico em evolução com seu modelo de dados independente de canal e centrado no usuário. O dashboard gerencia a entrega de mensagens e os disparos transacionais. Por exemplo, seus profissionais de marketing podem disparar uma mensagem SMS oferecendo um cupom para uma de suas lojas recém-inauguradas quando um usuário entrar no geofence definido próximo a esse local, ou enviar um e-mail a um usuário para informá-lo de que seu programa favorito tem uma nova temporada.
O [SDK da Braze](https://www.braze.com/docs/pt-br/pt-br/user_guide/get_started/sdk_overview/) possibilita canais adicionais de envio de mensagens: push, mensagens no app e Content Cards. Você integra o SDK ao seu app ou site para permitir que sua equipe de marketing use o dashboard da Braze para coordenar suas Campaigns em todos os canais de envio de mensagens compatíveis.

## Exportação de dados {#exporting-data}
É fundamental que todas as interações do usuário final com a Braze sejam rastreadas para que você possa medir seu engajamento e alcance. E depois que a Braze tiver agregado seus dados de todas essas fontes, eles poderão ser exportados de volta para seu stack de tecnologia usando uma variedade de ferramentas, fechando o ciclo.
### Currents
O [Currents](https://www.braze.com/docs/pt-br/pt-br/user_guide/data/distribution/braze_currents/) é um complemento opcional da Braze que fornece uma exportação de streaming granular que alimenta continuamente outros destinos do seu stack. O Currents é um feed de dados brutos por usuário e por evento que exporta dados a cada cinco minutos ou a cada 15.000 eventos, o que ocorrer primeiro. Exemplos de alguns destinos downstream do Currents seriam Segment, S3, Redshift e Mixpanel, entre outros.
### Compartilhamento de dados Snowflake {#snowflake-data-sharing}
A funcionalidade de [compartilhamento seguro de dados](https://www.braze.com/docs/pt-br/pt-br/partners/data_and_analytics/data_warehouses/snowflake/) do Snowflake permite que a Braze lhe dê acesso seguro aos dados em nosso portal Snowflake sem se preocupar com o atrito do fluxo de trabalho, os pontos de falha e os custos desnecessários que vêm com os relacionamentos típicos com os provedores de dados. Todo o compartilhamento é realizado por meio da camada de serviços e do armazenamento de metadados exclusivos do Snowflake: nenhum dado é realmente copiado ou transferido entre as contas. Esse é um conceito importante porque os dados compartilhados não ocupam nenhum espaço de armazenamento em uma conta de consumidor e, portanto, não contribuem para suas cobranças mensais de armazenamento de dados. Os únicos encargos para os consumidores são os recursos de computação (ou seja, data warehouses virtuais) usados para consultar os dados compartilhados.
### APIs de exportação da Braze {#braze-export-apis}
A API da Braze fornece [endpoints](https://www.braze.com/docs/pt-br/pt-br/api/endpoints/export/) que permitem exportar análises agregadas de forma programática, bem como exportar dados de usuários individuais. Esses dados podem ser exportados para públicos e segmentos de qualquer tamanho.
### CSVs
Por fim, há uma opção para baixar seus dados em nível agregado diretamente do dashboard como um [CSV](https://www.braze.com/docs/pt-br/pt-br/user_guide/data/distribution/export_braze_data/). A opção CSV permite que os membros da sua equipe exportem facilmente os dados da Braze.
**Tip:**
Embora a exportação CSV tenha um limite básico de 500.000 linhas, as APIs não têm um limite nesse sentido.
## Juntando tudo {#putting-it-all-together}
Um dos seus usuários, vamos chamá-lo de Mel, acabou de receber o anúncio do seu produto. Nos bastidores, todas as camadas da plataforma da Braze trabalharam juntas para garantir que esse processo ocorresse sem problemas.
As informações de Mel foram transferidas para a Braze a partir da sua plataforma legada de engajamento com clientes por meio de uma importação de CSV. Toda vez que Mel interagia com seu app após a integração, mais dados eram adicionados ao perfil de cliente dela.
Seu anúncio de produto foi enviado a todos os clientes que gostaram de um item semelhante em seu app. Você definiu esses dados como um evento personalizado. O SDK fez o rastreamento desse evento e segmentou sua base de usuários de acordo com isso. A Braze orquestrou a melhor hora do dia para enviar esse anúncio e personalizou o anúncio chamando Mel pelo seu nome preferido.
Quando Mel abre o anúncio, ela adiciona seu novo produto à lista de desejos dela. A Braze rastreia o fato de ela ter clicado no e-mail automaticamente. O SDK rastreia o fato de ela ter colocado seu novo produto na lista de desejos. Cada vez que eles se engajam com a sua marca, você e seus usuários aprendem mais um sobre o outro.

# Construindo com um LLM
Source: /docs/pt-br/developer_guide/getting_started/build_with_llm/index.md
# Construindo com um LLM {#building-with-an-llm}
> Use assistentes de codificação com IA para acelerar seu fluxo de trabalho de integração com a Braze. Conecte seu IDE ao servidor MCP da documentação da Braze por meio do Context7 e obtenha orientações precisas e atualizadas sobre SDK diretamente no seu ambiente de desenvolvimento.
Assistentes de codificação com IA podem ajudar você a escrever código de integração, solucionar problemas e explorar recursos do SDK da Braze—mas apenas se tiverem o contexto correto. O servidor MCP da documentação da Braze fornece ao seu assistente de IA acesso direto à documentação da Braze, para que ele possa gerar trechos de código precisos e responder a perguntas técnicas com base nas referências mais recentes do SDK.
## Conectando-se ao MCP da documentação da Braze {#connecting-to-the-braze-docs-mcp}
O [Context7](https://context7.com/braze-inc/braze-docs) serve como a ponte entre seu assistente de IA e a biblioteca de documentação da Braze. Ao adicionar o Context7 à configuração MCP do seu IDE, seu assistente de IA pode consultar todo o conjunto de documentação da Braze e recuperar referências relevantes de SDK, exemplos de código e guias de integração sob demanda.
### Configurando o Context7 {#setting-up-context7}
Para conectar seu assistente de IA ao MCP da documentação da Braze por meio do Context7, adicione a seguinte configuração ao arquivo `mcp.json` do seu IDE.
No [Cursor](https://cursor.com/), acesse **Settings** > **Tools and Integrations** > **MCP Tools** > **Add Custom MCP** e adicione o seguinte trecho:
```json
{
"mcpServers": {
"context7": {
"command": "npx",
"args": ["-y", "@upstash/context7-mcp@latest"]
}
}
}
```
Salve a configuração e reinicie o Cursor. Seu assistente de IA agora pode acessar a documentação da Braze por meio do Context7 quando você incluir `use context7` nos seus prompts.
No Claude Desktop, acesse **Settings** > **Developer** > **Edit Config** e adicione o seguinte ao seu arquivo `claude_desktop_config.json`:
```json
{
"mcpServers": {
"context7": {
"command": "npx",
"args": ["-y", "@upstash/context7-mcp@latest"]
}
}
}
```
Salve a configuração e reinicie o Claude Desktop.
Adicione o seguinte ao seu arquivo `settings.json` ou `.vscode/mcp.json` do VS Code:
```json
{
"mcpServers": {
"context7": {
"command": "npx",
"args": ["-y", "@upstash/context7-mcp@latest"]
}
}
}
```
Salve a configuração e reinicie o VS Code.
**Note:**
O Context7 é diferente do [servidor MCP da Braze](https://www.braze.com/docs/pt-br/pt-br/developer_guide/mcp_server/). O Context7 fornece ao seu assistente de IA acesso à **documentação da Braze**, enquanto o servidor MCP da Braze fornece acesso somente leitura aos **dados do seu espaço de trabalho na Braze** (como Campaigns, Segments e análise de dados). Você pode usar ambos juntos para uma experiência de desenvolvimento assistida por IA mais completa.
## Escrevendo prompts para o desenvolvimento com o SDK da Braze {#writing-prompts-for-braze-sdk-development}
Depois de configurar o Context7, inclua `use context7` nos seus prompts para sinalizar ao seu assistente de IA que ele deve buscar a documentação da Braze como contexto. Os exemplos a seguir mostram como escrever prompts eficazes para tarefas comuns do SDK.
### SDK do React Native {#react-native-sdk}
Esses prompts demonstram tarefas comuns de integração para o [SDK React Native da Braze](https://www.braze.com/docs/pt-br/pt-br/developer_guide/sdk_integration/?sdktab=react%20native).
#### Inicializando o SDK {#initializing-the-sdk}
```text
Using the Braze React Native SDK, show me how to initialize the SDK
in my App.tsx with an API key and custom endpoint. Include the
configuration for automatic session tracking. Use context7.
```
#### Registrando eventos personalizados com propriedades {#logging-custom-events-with-properties}
```text
I need to track user activity in my React Native app using the Braze
React Native SDK. Show me how to log a custom event called
"ProductViewed" with properties for product_id, category, and price.
Use context7.
```
#### Configurando notificações por push {#setting-up-push-notifications}
```text
Using the Braze React Native SDK, walk me through requesting push
notification permissions on both iOS and Android 13+. Include the
code for registering the push token with Braze. Use context7.
```
#### Lidando com mensagens no app {#handling-in-app-messages}
```text
Show me how to subscribe to in-app messages using the Braze React
Native SDK, including how to log impressions and button clicks
programmatically. Use context7.
```
### SDK da Web {#web-sdk}
Esses prompts demonstram tarefas comuns de integração para o [SDK Web da Braze](https://www.braze.com/docs/pt-br/pt-br/developer_guide/sdk_integration/?sdktab=web).
#### Inicializando o SDK
```text
Using the Braze Web SDK, show me how to initialize the SDK with
braze.initialize(), including the API key, base URL, and options
for enabling logging and automatic in-app message display.
Use context7.
```
#### Rastreamento de eventos personalizados e compras {#tracking-custom-events-and-purchases}
```text
Using the Braze Web SDK, create a JavaScript module that logs a
custom event called "VideoPlayed" with properties for video_id,
duration_seconds, and completion_percentage. Also show how to log
a purchase with product ID, price, currency code, and quantity.
Use context7.
```
#### Registrando-se para push na web {#registering-for-web-push}
```text
Using the Braze Web SDK, provide the HTML and JavaScript needed to
register a user for web push notifications after they click a
"Subscribe to updates" button. Include the service worker setup.
Use context7.
```
#### Gerenciando atributos de usuário {#managing-user-attributes}
```text
Using the Braze Web SDK, show me how to set standard user attributes
(first name, email, country) and custom user attributes (favorite_genre,
subscription_tier) for the current user. Use context7.
```
## Documentação em texto simples {#plain-text-documentation}
Você pode acessar a documentação do Guia do Desenvolvedor da Braze como arquivos de texto simples otimizados para ferramentas de IA e LLMs. Esses arquivos fornecem a documentação da Braze em um formato que assistentes de IA podem analisar e entender sem a sobrecarga da renderização em HTML.
| Arquivo | Descrição |
|------|-------------|
| [llms.txt](https://www.braze.com/docs/pt-br/pt-br/developer_guide/llms.txt) | Um índice das páginas de documentação do desenvolvedor da Braze com títulos e descrições. Use como ponto de partida para descobrir a documentação disponível. |
| [llms-full.txt](https://www.braze.com/docs/pt-br/pt-br/developer_guide/llms-full.txt) | A documentação completa do desenvolvedor da Braze em um único arquivo de texto simples, formatado para consumo por LLMs. |
{: .reset-td-br-1 .reset-td-br-2 aria-label="Documentação em texto simples" }
Esses arquivos seguem o [padrão llms.txt](https://llmstxt.org/), uma convenção emergente para tornar a documentação acessível a ferramentas de IA. Você pode referenciar esses arquivos diretamente nos seus prompts ou colar o conteúdo deles em um LLM para contexto.
# Visão geral da personalização
Source: /docs/pt-br/developer_guide/getting_started/customization_overview/index.md
# Visão geral da personalização {#customization-overview}
> Quase tudo na Braze é totalmente personalizável! Os artigos deste Guia de Personalização mostram como refinar sua experiência na Braze por meio de uma combinação de configuração e personalização. Durante esse processo, as equipes de marketing e engenharia devem trabalhar em conjunto para coordenar exatamente como personalizar os canais de envio de mensagens da Braze.
**Note:**
O Braze SDK é um kit de ferramentas avançado, mas, em um nível mais alto, ele oferece duas funcionalidades importantes: ajuda a coletar e sincronizar dados de usuários entre plataformas em um perfil de usuário consolidado e também lida com canais de envio de mensagens, como mensagens no app, notificações por push e Content Cards. Os artigos do Guia de Personalização pressupõem que você já tenha passado pelo [processo de implementação do SDK](https://www.braze.com/docs/pt-br/pt-br/developer_guide/home/).
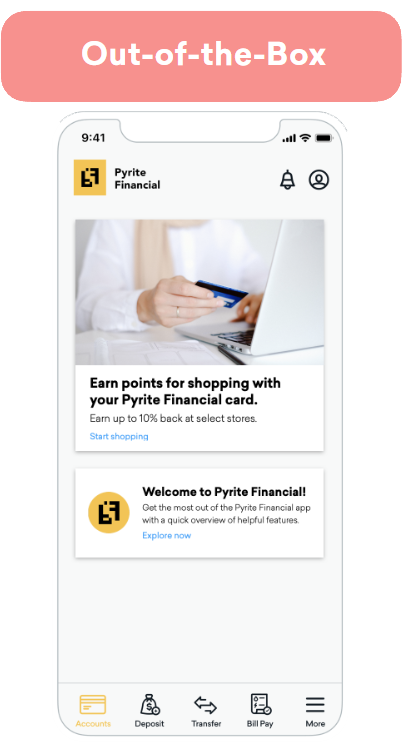
Todos os componentes da Braze são desenvolvidos para serem acessíveis, adaptáveis e personalizáveis. Por isso, recomendamos começar com os componentes padrão do `BrazeUI` e personalizá-los para atender às necessidades da sua marca e ao caso de uso. Na Braze, dividimos a personalização em três abordagens diferentes com base no esforço associado e no nível de flexibilidade fornecido. Essas abordagens são chamadas de "engatinhar", "caminhar" ou "correr".
- **Engatinhar:** Aproveite as opções básicas de estilo para uma implementação rápida e de baixo esforço.
- **Caminhar:** Adicione um estilo personalizado aos modelos padrão para corresponder melhor à experiência da sua marca.
- **Correr:** Personalize cada parte do seu envio de mensagens, do estilo ao comportamento e às conexões entre canais.
{: style="max-width:35%;float:right;margin-left:15px;border:none;"}
A abordagem Crawl coloca o poder da personalização diretamente nas mãos dos profissionais de marketing. Embora seja necessário algum trabalho leve de desenvolvimento inicial para integrar os canais de envio de mensagens da Braze ao seu app ou site, essa abordagem permite que você comece a trabalhar mais cedo.
Os profissionais de marketing determinam o conteúdo, o público e o momento das mensagens pelo dashboard. No entanto, as opções de estilo são limitadas. Essa abordagem é mais adequada para equipes com recursos de desenvolvimento limitados ou que desejam compartilhar rapidamente conteúdo simples.
Visão geral da personalização
Personalização
Descrição
Esforço
Baixo
Trabalho do desenvolvedor
0–1 hora
Estilo do cartão
Use os modelos padrão da Braze.
Comportamento
Escolha entre as opções de comportamento padrão.
Rastreamento de análise de dados
A análise de dados é capturada na Braze.
Pares de chave-valor
Opcional, permite personalização adicional de UI/UX.
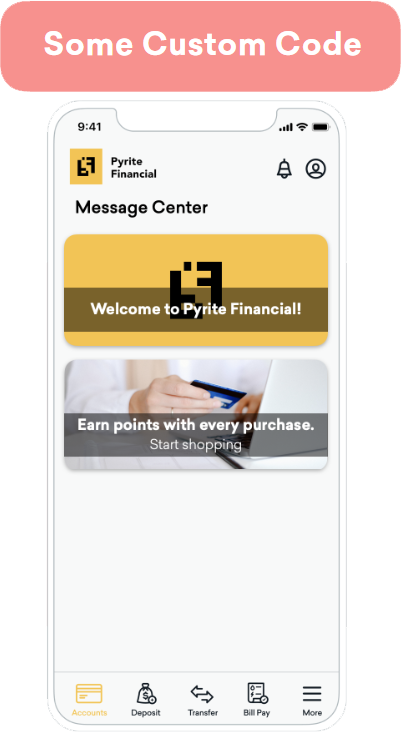
{: style="max-width:35%;float:right;margin-left:15px;border:none;"}
Uma abordagem híbrida para a implementação, a abordagem Walk envolve as equipes de marketing e de desenvolvimento para combinar com a marca do seu app ou site.
Durante o processo de implementação, os desenvolvedores escrevem código personalizado para atualizar a aparência de um canal de envio de mensagens para que ele corresponda melhor à sua marca. Isso inclui a alteração do tipo e do tamanho da fonte, dos cantos arredondados e das cores. Essa abordagem ainda usa as opções padrão, mas com estilo de modelo programático.
Os profissionais de marketing ainda mantêm o controle do público, do conteúdo, do comportamento ao clicar e da expiração diretamente no dashboard da Braze.
Visão geral da personalização
Personalização
Descrição
Esforço
Baixo
Trabalho do desenvolvedor
0–4 horas
Interface
Use modelos da Braze ou use seus próprios modelos criados pelo desenvolvedor.
Comportamento
Escolha entre as opções de comportamento padrão.
Rastreamento de análise de dados
A análise de dados padrão é capturada na Braze.
Pares de chave-valor
Opcional, permite personalização adicional de UI/UX.
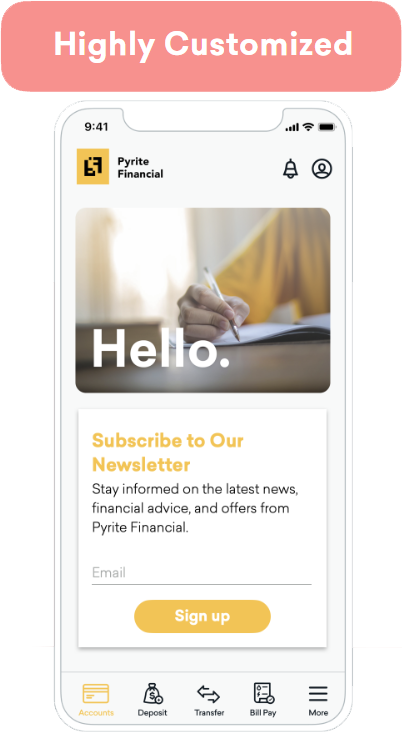
{: style="max-width:35%;float:right;margin-left:15px;border:none;"}
Com a abordagem Run, os desenvolvedores assumem o controle total da experiência do usuário. O código personalizado determina a aparência das mensagens, como elas se comportam e como interagem com outros canais de envio de mensagens (por exemplo, disparando um Content Card com base em uma notificação por push).
Quando você cria conteúdo personalizado completamente novo, como novos tipos de Content Cards ou mensagens no app com interface personalizada, o Braze SDK não [rastreia automaticamente a análise de dados](https://www.braze.com/docs/pt-br/pt-br/developer_guide/analytics/). Você deve lidar com a análise de dados de forma programática para que os profissionais de marketing continuem a ter acesso a métricas como impressões, cliques e dispensas no dashboard da Braze. Chame os métodos de análise de dados do Braze SDK para que ele retorne esses dados para a Braze. Cada canal de envio de mensagens tem um artigo de análise de dados para ajudar a facilitar isso.
Visão geral da personalização
Personalização
Descrição
Esforço
Depende do caso de uso.
Trabalho do desenvolvedor
Baixo esforço: 1–4 horas Esforço médio: 4–8 horas Alto esforço: mais de 8 horas
Interface
Personalizada
Comportamento
Personalizado
Rastreamento de análise de dados
Personalizado
Pares de chave-valor
Obrigatório
**Tip:**
Quando os desenvolvedores e implementadores criam conteúdo personalizado para a Braze, há uma oportunidade de colaboração multifuncional com os profissionais de marketing. Por exemplo, se você desenvolver uma nova interface ou uma nova funcionalidade para um componente específico, prepare sua equipe para o sucesso documentando o novo comportamento e como ele se integra ao seu back-end.
# Tutoriais do SDK Braze
Source: /docs/pt-br/developer_guide/tutorials/index.md
# Integre o SDK da Braze
Source: /docs/pt-br/developer_guide/sdk_integration/index.md
# {: style="float:right;width:120px;border:0;" class="noimgborder"}Integre o SDK da Braze {#braze-logo-image_buster-assetsbraze_primary_icon_blacksvg-stylefloatrightwidth120pxborder0-classnoimgborderintegrate-the-braze-sdk}
> Aprenda como integrar o SDK da Braze. Cada SDK é hospedado em seu próprio repositório público no GitHub, que inclui apps de exemplo totalmente compiláveis que você pode usar para testar os recursos da Braze ou implementar junto com suas próprias aplicações. Para saber mais, veja [Referências, repositórios e apps de exemplo](https://www.braze.com/docs/pt-br/pt-br/developer_guide/references/). Para mais informações gerais sobre o SDK, veja [Introdução: Visão geral da integração](https://www.braze.com/docs/pt-br/pt-br/developer_guide/getting_started/integration_overview/).
Para conteúdo espelhado do README do SDK na documentação, veja [Guias de repositório](https://www.braze.com/docs/pt-br/pt-br/developer_guide/sdk_repository_guides/).
**Tip:**
Após integrar o SDK, você pode ativar a [Autenticação do SDK](https://www.braze.com/docs/pt-br/pt-br/developer_guide/sdk_integration/authentication/) para adicionar uma camada adicional de segurança, impedindo solicitações não autorizadas ao SDK. A autenticação do SDK está disponível para Web, Android, Swift, React Native, Flutter, Unity, Cordova, .NET MAUI (Xamarin) e Expo.
## About the Web Braze SDK
The Web Braze SDK lets you collect analytics and display rich in-app messages, push, and Content Card messages to your web users. For more information, see [Braze JavaScript reference documentation](https://js.appboycdn.com/web-sdk/latest/doc/modules/braze.html).
**Note:**
This guide uses code samples from the Braze Web SDK 4.0.0+. To upgrade to the latest Web SDK version, see [SDK Upgrade Guide](https://github.com/braze-inc/braze-web-sdk/blob/master/UPGRADE_GUIDE.md).
## Integrate the Web SDK
You can integrate the Web Braze SDK using the following methods. For additional options, see [other integration methods](#web_other-integration-methods).
- **Code-based integration:** Integrate the Web Braze SDK directly in your codebase using your preferred package manager or the Braze CDN. This gives you full control over how the SDK is loaded and configured.
- **Google Tag Manager:** A no-code solution that lets you integrate the Web Braze SDK without modifying your site's code. For more information, see [Google Tag Manager with the Braze SDK](https://www.braze.com/docs/pt-br/pt-br/developer_guide/sdk_integration/google_tag_manager/).
**Important:**
We recommend using the [NPM integration method](https://www.braze.com/docs/pt-br/pt-br/developer_guide/sdk_integration/?subtab=package%20manager&sdktab=web). Benefits include storing SDK libraries locally on your website, providing immunity from ad-blocker extensions, and contributing to faster load times as part of bundler support.
### Step 1: Install the Braze library
You can install the Braze library using one of the following methods. However, if your website uses a `Content-Security-Policy`, review the [Content Security Policy](https://www.braze.com/docs/pt-br/pt-br/developer_guide/platforms/web/content_security_policy/) before continuing.
**Important:**
While most ad blockers do not block the Braze Web SDK, some more-restrictive ad blockers are known to cause issues.
If your site uses NPM or Yarn package managers, you can add the [Braze NPM package](https://www.npmjs.com/package/@braze/web-sdk) as a dependency.
Typescript definitions are now included as of v3.0.0. For notes on upgrading from 2.x to 3.x, see our [changelog](https://github.com/braze-inc/braze-web-sdk/blob/master/UPGRADE_GUIDE.md).
```bash
npm install --save @braze/web-sdk
# or, using yarn:
# yarn add @braze/web-sdk
```
Once installed, you can `import` or `require` the library in the typical fashion:
```typescript
import * as braze from "@braze/web-sdk";
// or, using `require`
const braze = require("@braze/web-sdk");
```
Add the Braze Web SDK directly to your HTML by referencing our CDN-hosted script, which loads the library asynchronously.
**Important:**
The default **Prevent Cross-Site Tracking** setting in Safari can prevent in-app message types like Banners and Content Cards from displaying when you use the CDN integration method. To avoid this issue, use the NPM integration method so that Safari does not classify these messages as cross-site traffic and your web users can see them in all supported browsers.
### Step 2: Initialize the SDK
After the Braze Web SDK is added to your website, initialize the library with the API key and [SDK endpoint URL](https://www.braze.com/docs/pt-br/pt-br/user_guide/administrative/access_braze/sdk_endpoints) found in **Settings** > **App Settings** within your Braze dashboard. For a complete list of options for `braze.initialize()`, along with our other JavaScript methods, see [Braze JavaScript documentation](https://js.appboycdn.com/web-sdk/latest/doc/modules/braze.html#initialize).
**Note:**
**Custom domains for Web SDK requests are not supported**: The Web SDK `baseUrl` must be a Braze SDK endpoint (for example, `sdk.iad-05.braze.com`). Braze does not support routing Web SDK traffic through a customer-owned domain via CNAME records. If you need Web SDK requests to originate from your own domain, contact Braze support.
```javascript
// initialize the SDK
braze.initialize('YOUR-API-KEY-HERE', {
baseUrl: "YOUR-SDK-ENDPOINT-HERE",
enableLogging: false, // set to `true` for debugging
allowUserSuppliedJavascript: false, // set to `true` to support custom HTML messages
});
// Enable automatic display of in-app messages
// Required if you want in-app messages to display automatically when triggered
braze.automaticallyShowInAppMessages();
// if you use Content Cards
braze.subscribeToContentCardsUpdates(function(cards){
// cards have been updated
});
// optionally set the current user's external ID before starting a new session
// you can also call `changeUser` later in the session after the user logs in
if (isLoggedIn){
braze.changeUser(userIdentifier);
}
// `openSession` should be called last - after `changeUser` and `automaticallyShowInAppMessages`
braze.openSession();
```
**Important:**
**In-App Message Display**: To display in-app messages automatically when they're triggered, you must call `braze.automaticallyShowInAppMessages()`. Without this call, in-app messages don't display automatically. If you want to manage message display manually, remove this call and use `braze.subscribeToInAppMessage()` instead. For more information, see [In-app message delivery](https://www.braze.com/docs/pt-br/pt-br/developer_guide/in_app_messages/delivery/).
#### Troubleshooting missing sessions for anonymous users
If you're seeing "Session missing" behavior, or you're not able to track the session for users who stay anonymous on web, make sure your integration calls `braze.openSession()` during initialization.
- **Scenario:** Anonymous users can return a Braze ID, but session data is blank or missing.
- **Cause:** The implementation doesn't call `braze.openSession()`.
- **Resolution:** Always call `braze.openSession()` after initialization (and after `braze.changeUser()` if you set an external ID).
For more information, see [Step 2: Initialize the SDK](https://www.braze.com/docs/pt-br/pt-br/developer_guide/sdk_integration/?sdktab=web&tab=code-based%20integration#step-2-initialize-the-sdk).
**Important:**
Anonymous users on mobile or web devices may be counted towards your [MAU](https://www.braze.com/docs/pt-br/pt-br/user_guide/data_and_analytics/reporting/understanding_your_app_usage_data/#monthly-active-users). As a result, you may want to conditionally load or initialize the SDK to exclude these users from your MAU count.
### Prerequisites
Before you can use this integration method, you'll need to [create an account and container for Google Tag Manager](https://support.google.com/tagmanager/answer/14842164).
### Step 1: Open the tag template gallery
In [Google Tag Manager](https://tagmanager.google.com/), choose your workspace, then select **Templates**. In the **Tag Template** pane, select **Search Gallery**.
{: style="max-width:95%;"}
### Step 2: Add the initialization tag template
In the template gallery, search for `braze-inc`, then select **Braze Initialization Tag**.
{: style="max-width:80%;"}
Select **Add to workspace** > **Add**.
{: style="max-width:70%;"}
### Step 3: Configure the tag
From the **Templates** section, select your newly added template.
{: style="max-width:95%;"}
Select the pencil icon to open the **Tag Configuration** dropdown.

Enter the minimum required information:
| Field | Description |
| ------------- | ----------- |
| **API Key** | Your [Braze API Key](https://www.braze.com/docs/pt-br/pt-br/api/basics/#about-rest-api-keys), found in the Braze dashboard under **Settings** > **App Settings**. |
| **API Endpoint** | Your REST endpoint URL. Your endpoint will depend on the Braze URL for [your instance](https://www.braze.com/docs/pt-br/pt-br/api/basics/#endpoints). |
| **SDK Version** | The most recent `MAJOR.MINOR` version of the Web Braze SDK listed in the [changelog](https://www.braze.com/docs/pt-br/pt-br/developer_guide/changelogs/?sdktab=web). For example, if the latest version is `4.1.2`, enter `4.1`. For more information, see [About SDK version management](https://www.braze.com/docs/pt-br/pt-br/developer_guide/sdk_integration/version_management/). |
{: .reset-td-br-1 .reset-td-br-2 aria-label="Step 3: Configure the tag" }
For additional initialization settings, select **Braze Initialization Options** and choose any options you need.
{: style="max-width:65%;"}
### Step 4: Choose initialization options
The Braze Initialization Tag exposes the following options. Most of these map directly to the [Web SDK `InitializationOptions`](https://js.appboycdn.com/web-sdk/latest/doc/modules/braze.html#initializationoptions), and some correspond to Web SDK methods that the tag will call during initialization. Select the options that match your integration needs:
| GTM option | Web SDK configuration or method | Description |
| --- | --- | --- |
| **Allow HTML In-App Messages** | `allowUserSuppliedJavascript` | Enables HTML in-app messages, Banners, and user-supplied JavaScript click actions. Required for [HTML in-app messages](https://www.braze.com/docs/pt-br/pt-br/user_guide/channels/in_app_messages/message_types/custom_html/) and [Banners](https://www.braze.com/docs/pt-br/pt-br/developer_guide/banners/placements/?sdktab=web) that use custom HTML. Only enable this when you trust the HTML and JavaScript content, as it allows user-supplied JavaScript execution. |
| **App Version Number** | `appVersion`, `appVersionNumber` | App version for segmentation (for example, `1.2.3.4`). |
| **Automatically Open New Session** | `braze.openSession()` | Opens a new session after the SDK is initialized by calling this method for you. |
| **Automatically show new in app messages** | `braze.automaticallyShowInAppMessages()` | Automatically displays new in-app messages when they arrive from the server by calling this method after initialization. |
| **Disable Automatic Push Token Maintenance** | `disablePushTokenMaintenance` | Stops the SDK from syncing push tokens with the Braze backend on new sessions. |
| **Disable Automatic Service Worker Registration** | `manageServiceWorkerExternally` | Use if you register and control the service worker yourself. |
| **Disable Cookies** | `noCookies` | Uses localStorage instead of cookies for user/session data. Prevents cross-subdomain recognition. |
| **Disable Font Awesome** | `doNotLoadFontAwesome` | Prevents the SDK from loading Font Awesome from the CDN. Use if your site has its own Font Awesome. |
| **Enable SDK Authentication** | `enableSdkAuthentication` | Enables [SDK Authentication](https://www.braze.com/docs/pt-br/pt-br/developer_guide/sdk_integration/authentication/). |
| **Enable Web SDK Logging** | `enableLogging` | Enables console logging for debugging. Remove before production. |
| **Minimum Interval Between Triggered Messages** | `minimumIntervalBetweenTriggerActionsInSeconds` | Minimum seconds between trigger actions (default: 30). |
| **Open Cards in New Tab** | `openCardsInNewTab` | Opens Content Card links in a new tab when using the default Feed UI. |
| **Service Worker Location** | `serviceWorkerLocation` | Custom path for the service worker file (default: `/service-worker.js`). |
| **Session Timeout (seconds)** | `sessionTimeoutInSeconds` | Session timeout in seconds (default: 1800). |
{: .reset-td-br-1 .reset-td-br-2 .reset-td-br-3 aria-label="Step 4: Choose initialization options" }
**Note:**
To enable [Custom HTML in-app messages](https://www.braze.com/docs/pt-br/pt-br/user_guide/channels/in_app_messages/message_types/custom_html/) when using the Google Tag Manager Braze Initialization Tag, select **Allow HTML In-App Messages** in **Braze Initialization Options**. This checkbox maps to the `allowUserSuppliedJavascript` initialization option in `braze.initialize()` and sets it to `true`. The Google Tag Manager Braze Initialization Tag uses this label instead of the option name.
For options not exposed in the GTM template (such as `contentSecurityNonce`, `localization`, or `devicePropertyAllowlist`), use [runtime initialization](https://www.braze.com/docs/pt-br/pt-br/developer_guide/sdk_integration/?sdktab=web) instead.
### Step 5: Set to Trigger on *all pages*
The initialization tag should be run on all pages of your site. This allows you to use Braze SDK methods and record web push analytics.
### Step 6: Verify your integration
You can verify your integration using either of the following options:
- **Option 1:** Using Google Tag Manager's [debugging tool](https://support.google.com/tagmanager/answer/6107056?hl=en), you can check if the Braze Initialization Tag is triggering correctly on your configured pages or events.
- **Option 2:** Check for any network requests made to Braze from your web page. Additionally, the global `window.braze` library should now be defined.
## Filtering bot traffic {#bot-filtering}
MAU can include a percentage of bot users, which inflates your monthly active user count. While the Braze Web SDK includes built-in detection for some common web crawlers (such as search engine bots and social media preview bots), it is especially important to stay proactive with robust solutions to detect bots, as SDK updates alone cannot consistently detect every new bot.
### Limitations of SDK-side bot detection
The Web SDK includes basic user-agent-based bot detection that filters out known crawlers. However, this approach has limitations:
- **New bots emerge constantly**: AI companies and other actors regularly create new bots that may disguise themselves to avoid detection.
- **User-agent spoofing**: Sophisticated bots can mimic legitimate browser user-agents.
- **Custom bots**: Non-technical users can now easily create bots using large language models (LLMs), making bot behavior unpredictable.
### Implementing bot filtering
**Important:**
The solutions outlined below are general suggestions. Tailor bot filtering logic to your unique environment and traffic patterns.
The most robust solution is to implement your own bot filtering logic before initializing the Braze SDK. Common approaches include:
#### Require user interaction
Consider delaying SDK initialization until a user performs a meaningful interaction, such as accepting a cookie consent banner, scrolling, or clicking. This approach is often easier to implement and can be highly effective at filtering bot traffic.
**Important:**
Delaying SDK initialization until user interaction might cause Banners and Content Cards to also not display until that interaction occurs.
#### Custom bot detection
Implement custom detection based on your specific bot traffic patterns, such as:
- Analyzing user-agent strings for patterns you've identified in your traffic
- Checking for headless browser indicators
- Using third-party bot detection services
- Monitoring behavioral signals specific to your site
**Example of conditional initialization:**
```javascript
// Only initialize Braze if your custom bot detection determines this is not a bot
if (!isLikelyBot()) {
braze.initialize('YOUR-API-KEY-HERE', {
baseUrl: "YOUR-SDK-ENDPOINT-HERE"
});
braze.automaticallyShowInAppMessages();
braze.openSession();
}
```
### Best practices
- Regularly analyze your MAU data and web traffic patterns to identify new bot behavior.
- Test thoroughly to ensure your bot filtering doesn't prevent legitimate users from being tracked.
- Update your filtering logic based on the bot traffic patterns you observe in your environment.
## Optional configurations
### Logging
To quickly enable logging, you can add `?brazeLogging=true` as a parameter to your website URL. Alternatively, you can enable [basic](#web_basic-logging) or [custom](#web_custom-logging) logging. For a centralized overview across all platforms, see [Verbose logging](https://www.braze.com/docs/pt-br/pt-br/developer_guide/sdk_integration/verbose_logging).
#### Basic logging
Use `enableLogging` to log basic debugging messages to the JavaScript console before the SDK is initialized.
```javascript
enableLogging: true
```
Your method should be similar to the following:
```javascript
braze.initialize('API-KEY', {
baseUrl: 'API-ENDPOINT',
enableLogging: true
});
braze.openSession();
```
Use `braze.toggleLogging()` to log basic debugging messages to the JavaScript console after the SDK is initialized. Your method should be similar to the following:
```javascript
braze.initialize('API-KEY', {
baseUrl: 'API-ENDPOINT',
});
braze.openSession();
...
braze.toggleLogging();
```
**Important:**
Basic logs are visible to all users, so consider disabling, or switch to [`setLogger`](#web_custom-logging), before releasing your code to production.
#### Custom logging
Use `setLogger` to log custom debugging messages to the JavaScript console. Unlike basic logs, these logs are not visible to users.
```javascript
setLogger(loggerFunction: (message: STRING) => void): void
```
Replace `STRING` with your message as a single string parameter. Your method should be similar to the following:
```javascript
braze.initialize('API-KEY');
braze.setLogger(function(message) {
console.log("Braze Custom Logger: " + message);
});
braze.openSession();
```
## Upgrading the SDK
**Note:**
This guide uses code samples from the Braze Web SDK 4.0.0+. To upgrade to the latest Web SDK version, see [SDK Upgrade Guide](https://github.com/braze-inc/braze-web-sdk/blob/master/UPGRADE_GUIDE.md).
When you reference the Braze Web SDK from our content delivery network, for example, `https://js.appboycdn.com/web-sdk/a.a/braze.min.js` (as recommended by our default integration instructions), your users receive minor updates (bug fixes and backward compatible features, versions `a.a.a` through `a.a.z` in the above examples) automatically when they refresh your site.
However, when we release major changes, we require you to upgrade the Braze Web SDK manually to ensure that breaking changes do not impact your integration. Additionally, if you download our SDK and host it yourself, you don't receive any version updates automatically and should upgrade manually to receive the latest features and bug fixes.
You can keep up-to-date with our latest release [following our release feed](https://github.com/braze-inc/braze-web-sdk/tags.atom) with the RSS Reader or service of your choice, and see [our changelog](https://github.com/braze-inc/braze-web-sdk/blob/master/CHANGELOG.md) for a full accounting of our Web SDK release history. To upgrade the Braze Web SDK:
- Update the Braze library version by changing the version number of `https://js.appboycdn.com/web-sdk/[OLD VERSION NUMBER]/braze.min.js`, or in your package manager's dependencies.
- If you have web push integrated, update the service worker file on your site - by default, this is located at `/service-worker.js` at your site's root directory, but the location may be customized in some integrations. You must access the root directory to host a service worker file.
You must update these two files in coordination with each other for proper functionality.
## Other integration methods
### Accelerated Mobile Pages (AMP)
**See more**
#### Step 1: Include AMP web push script
Add the following async script tag to your head:
```js
```
#### Step 2: Add subscription widgets
Add a widget to the body of your HTML that allows users to subscribe and unsubscribe from push.
```js
```
#### Step 3: Add `helper-iframe` and `permission-dialog`
The AMP Web Push component creates a popup to handle push subscriptions, so you must add the following helper files to your project to enable this feature:
- [`helper-iframe.html`](https://cdn.ampproject.org/v0/amp-web-push-helper-frame.html)
- [`permission-dialog.html`](https://cdn.ampproject.org/v0/amp-web-push-permission-dialog.html)
#### Step 4: Create a service worker file
Create a `service-worker.js` file in the root directory of your website and add the following snippet:
#### Step 5: Configure the AMP web push HTML element
Add the following `amp-web-push` HTML element to your HTML body. Keep in mind, you need to append your [`apiKey` and `baseUrl`](https://documenter.getpostman.com/view/4689407/SVYrsdsG) as query parameters to `service-worker-URL`.
```js
```
### Asynchronous Module Definition (AMD)
#### Disable support
If your site uses RequireJS or another AMD module-loader, but you prefer to load the Braze Web SDK through one of the other options in this list, you can load a version of the library that does not include AMD support. This version of the library can be loaded from the following CDN location:
#### Module loader
If you use RequireJS or other AMD module-loaders we recommend self-hosting a copy of our library and referencing it as you would with other resources:
```javascript
require(['path/to/braze.min.js'], function(braze) {
braze.initialize('YOUR-API-KEY-HERE', { baseUrl: 'YOUR-SDK-ENDPOINT' });
// Required if you want in-app messages to display automatically
braze.automaticallyShowInAppMessages();
braze.openSession();
});
```
### Electron {#electron}
Electron does not officially support web push notifications (see: this [GitHub issue](https://github.com/electron/electron/issues/6697)). There are other [open source workarounds](https://github.com/MatthieuLemoine/electron-push-receiver) you may try that have not been tested by Braze.
### Jest framework {#jest}
When using Jest, you may see an error similar to `SyntaxError: Unexpected token 'export'`. To fix this, adjust your configuration in `package.json` to ignore the Braze SDK:
```
"jest": {
"transformIgnorePatterns": [
"/node_modules/(?!@braze)"
]
}
```
### SSR frameworks {#ssr}
The Web SDK runs in a browser environment. In SSR frameworks, initialize Braze in a client-only component so your server never executes SDK code.
#### Framework-agnostic dynamic import
If your framework isn't listed in this section, you can dynamically import Braze from a client-only lifecycle hook.
```javascript
// MyComponent/braze-exports.js
// Export the parts of the SDK that you need.
export { initialize, openSession } from "@braze/web-sdk";
// MyComponent/MyComponent.js
useEffect(() => {
import("./braze-exports.js").then(({ initialize, openSession }) => {
initialize("YOUR-API-KEY-HERE", {
baseUrl: "YOUR-SDK-ENDPOINT",
enableLogging: true,
});
openSession();
});
}, []);
```
If you're using webpack, you can dynamically import only specific SDK exports.
```javascript
// MyComponent.js
useEffect(() => {
import(
/* webpackExports: ["initialize", "openSession"] */
"@braze/web-sdk"
).then(({ initialize, openSession }) => {
initialize("YOUR-API-KEY-HERE", {
baseUrl: "YOUR-SDK-ENDPOINT",
enableLogging: true,
});
openSession();
});
}, []);
```
#### Shared hook for Next.js and Remix
Create a reusable `useBraze` hook and call it near your app root.
```tsx
// hooks/useBraze.ts
import { useEffect, useRef } from "react";
export function useBraze() {
const didInit = useRef(false);
useEffect(() => {
if (didInit.current) {
return;
}
didInit.current = true;
import("@braze/web-sdk")
.then((braze) => {
const initialized = braze.initialize("YOUR-API-KEY-HERE", {
// Use your Braze Web SDK endpoint, such as sdk.iad-01.braze.com.
baseUrl: "YOUR-SDK-ENDPOINT",
enableLogging: false,
});
if (!initialized) {
return;
}
// Optional: Identify signed-in users before opening a session.
// braze.changeUser("external-id");
// Optional: Automatically display in-app messages.
// braze.automaticallyShowInAppMessages();
braze.openSession();
})
.catch((error) => {
console.error("Unable to load Braze SDK:", error);
});
}, []);
}
```
#### Next.js (App Router)
Call `useBraze` in a client component that wraps your app.
```tsx
// app/components/AppRoot.tsx
"use client";
import type { ReactNode } from "react";
import { useBraze } from "../hooks/useBraze";
export function AppRoot({ children }: { children: ReactNode }) {
useBraze();
return <>{children};
}
```
```tsx
// app/layout.tsx
import type { ReactNode } from "react";
import { AppRoot } from "./components/AppRoot";
export default function RootLayout({
children,
}: {
children: ReactNode;
}) {
return (
{children}
);
}
```
#### Next.js (Pages Router)
Call `useBraze` at the top of your custom app component.
```tsx
// pages/_app.tsx
import type { AppProps } from "next/app";
import { useBraze } from "../hooks/useBraze";
export default function App({ Component, pageProps }: AppProps) {
useBraze();
return (
);
}
```
#### Remix
Call `useBraze` at the top of your root route component.
For local Remix validation examples, run `PORT=4013 npm run dev`.
```tsx
// app/root.tsx
import { Outlet } from "@remix-run/react";
import { useBraze } from "./hooks/useBraze";
export default function App() {
useBraze();
return ;
}
```
#### Logging events and updating users
After `useBraze` initializes the SDK at your app root, other client components can call Braze methods. A common pattern is to call them inside user actions, such as `onClick` or `onSubmit`. In the example, the SDK methods are loaded inside the click handler instead of at the top of the file. This keeps the Web SDK out of server code and loads only what that action needs. The `webpackExports` comment tells webpack which methods to include, so your bundle stays smaller.
```tsx
// app/components/BuyButton.tsx
"use client";
export function BuyButton() {
const handleClick = async () => {
const { logCustomEvent, logPurchase, getUser } = await import(
/* webpackExports: ["logCustomEvent", "logPurchase", "getUser"] */
"@braze/web-sdk"
);
getUser()?.setCustomUserAttribute("last_purchase_date", "2026-05-04");
logCustomEvent("clicked_buy", { source: "product_page" });
logPurchase("sku_123", 19.99, "USD");
};
return ;
}
```
This example shows a `BuyButton` component that logs activity when someone clicks **Buy**. First, it imports only `logCustomEvent`, `logPurchase`, and `getUser` at click time. Then it updates a user attribute, logs a custom event, and logs a purchase. This pattern helps you keep initialization centralized in `useBraze`, while still tracking meaningful actions from any client component.
If you're using Remix with Vite and package-root imports fail at runtime, use the existing Vite workaround. For more information, see [Vite](https://www.braze.com/docs/pt-br/pt-br/developer_guide/sdk_integration/?sdktab=web#web_vite).
For a full list of available methods, see the [Braze JavaScript reference documentation](https://js.appboycdn.com/web-sdk/latest/doc/modules/braze.html).
### Tealium iQ
Tealium iQ offers a basic turnkey Braze integration. To configure the integration, search for Braze in the Tealium Tag Management interface, and provide the Web SDK API key from your dashboard.
For more details or in-depth Tealium configuration support, check out our [integration documentation](https://www.braze.com/docs/pt-br/pt-br/partners/data_and_infrastructure_agility/customer_data_platform/tealium/#about-tealium) or contact your Tealium account manager.
### Vite {#vite}
If you use Vite and see a warning around circular dependencies or `Uncaught TypeError: Class extends value undefined is not a constructor or null`, you may need to exclude the Braze SDK from its [dependency discovery](https://vitejs.dev/guide/dep-pre-bundling.html#customizing-the-behavior):
```
optimizeDeps: {
exclude: ['@braze/web-sdk']
},
```
### Other tag managers
Braze may also be compatible with other tag management solutions by following our integration instructions within a custom HTML tag. Contact a Braze representative if you need help evaluating these solutions.
## Integrating the Android SDK
### Step 1: Update your Gradle build configuration
In your project's repository configuration (for example, `settings.gradle`, `settings.gradle.kts`, or top-level `build.gradle`), add [`mavenCentral()`](https://docs.gradle.org/current/kotlin-dsl/gradle/org.gradle.api.artifacts.dsl/-repository-handler/maven-central.html) to your list of repositories. This syntax is the same for both Groovy and Kotlin DSL.
```groovy
repositories {
mavenCentral()
}
```
Next, add Braze to your dependencies. In the following examples, replace `SDK_VERSION` with the current version of your Android Braze SDK. For the full list of versions, see [Changelogs](https://www.braze.com/docs/pt-br/pt-br/developer_guide/changelogs/?sdktab=android).
**Note:**
- For Kotlin DSL (`build.gradle.kts`), use the `implementation("...")` syntax.
- For Groovy (`build.gradle`), use the `implementation '...'` syntax.
- For [version catalogs](https://developer.android.com/build/migrate-to-catalogs), add entries to your `gradle/libs.versions.toml` file and reference them using the generated accessors.
If you don't plan on using Braze UI components, add the following to your dependencies.
```groovy
dependencies {
implementation 'com.braze:android-sdk-base:SDK_VERSION' // (Required) Adds dependencies for the base Braze SDK.
implementation 'com.braze:android-sdk-location:SDK_VERSION' // (Optional) Adds dependencies for Braze location services.
}
```
```kotlin
dependencies {
implementation("com.braze:android-sdk-base:SDK_VERSION") // (Required) Adds dependencies for the base Braze SDK.
implementation("com.braze:android-sdk-location:SDK_VERSION") // (Optional) Adds dependencies for Braze location services.
}
```
In your `gradle/libs.versions.toml` file:
```toml
[versions]
braze = "SDK_VERSION"
[libraries]
braze-android-sdk-base = { group = "com.braze", name = "android-sdk-base", version.ref = "braze" }
braze-android-sdk-location = { group = "com.braze", name = "android-sdk-location", version.ref = "braze" }
```
Then, in your `build.gradle` or `build.gradle.kts` file, add the following dependencies. This syntax is the same for both Groovy and Kotlin DSL.
```groovy
dependencies {
implementation(libs.braze.android.sdk.base) // (Required) Adds dependencies for the base Braze SDK.
implementation(libs.braze.android.sdk.location) // (Optional) Adds dependencies for Braze location services.
}
```
If you plan on using Braze UI components, add the following to your dependencies.
```groovy
dependencies {
implementation 'com.braze:android-sdk-ui:SDK_VERSION' // (Required) Adds dependencies for the Braze SDK and Braze UI components.
implementation 'com.braze:android-sdk-location:SDK_VERSION' // (Optional) Adds dependencies for Braze location services.
}
```
```kotlin
dependencies {
implementation("com.braze:android-sdk-ui:SDK_VERSION") // (Required) Adds dependencies for the Braze SDK and Braze UI components.
implementation("com.braze:android-sdk-location:SDK_VERSION") // (Optional) Adds dependencies for Braze location services.
}
```
In your `gradle/libs.versions.toml` file:
```toml
[versions]
braze = "SDK_VERSION"
[libraries]
braze-android-sdk-ui = { group = "com.braze", name = "android-sdk-ui", version.ref = "braze" }
braze-android-sdk-location = { group = "com.braze", name = "android-sdk-location", version.ref = "braze" }
```
Then, in your `build.gradle` or `build.gradle.kts` file, add the following dependencies. This syntax is the same for both Groovy and Kotlin DSL.
```groovy
dependencies {
implementation(libs.braze.android.sdk.ui) // (Required) Adds dependencies for the Braze SDK and Braze UI components.
implementation(libs.braze.android.sdk.location) // (Optional) Adds dependencies for Braze location services.
}
```
### Step 2: Configure your `braze.xml`
**Note:**
As of December 2019, custom endpoints are no longer given out, if you have a pre-existing custom endpoint, you may continue to use it. For more details, refer to our list of available endpoints.
Create a `braze.xml` file in your project's `res/values` folder. If you are on a specific data cluster or have a pre-existing custom endpoint, you need to specify the endpoint in your `braze.xml` file as well.
The contents of that file should resemble the following code snippet. Make sure to substitute `YOUR_APP_IDENTIFIER_API_KEY` with the identifier found in the **Manage Settings** page of the Braze dashboard. Log in at [dashboard.braze.com](https://dashboard.braze.com) to find your [cluster address](https://www.braze.com/docs/pt-br/pt-br/user_guide/administrative/access_braze/sdk_endpoints).
```xml
YOUR_APP_IDENTIFIER_API_KEYYOUR_CUSTOM_ENDPOINT_OR_CLUSTER
```
### Step 3: Add permissions to `AndroidManifest.xml`
Next, add the following permissions to your `AndroidManifest.xml`:
```xml
```
**Note:**
With the release of Android M, Android switched from an install-time to a runtime permissions model. However, both of these permissions are normal permissions and are granted automatically if listed in the app manifest. For more information, visit Android's [permission documentation](https://developer.android.com/training/permissions/index.html).
### Step 4: Enable delayed initialization (optional)
To use delayed initialization, the minimum Braze SDK version is required:
**Note:**
While delayed initialization is enabled, all network connections are canceled, preventing the SDK from sending data to the Braze servers.
#### Step 4.1: Update your `braze.xml`
Delayed initialization is disabled by default. To enable, use one of the following options:
In your project's `braze.xml` file, set `com_braze_enable_delayed_initialization` to `true`.
```xml
true
```
To enable delayed initialization at runtime, use the following method.
```java
Braze.enableDelayedInitialization(context);
```
```kotlin
Braze.enableDelayedInitialization(context)
```
**Note:**
When delayed initialization is enabled and a push notification contains a deep link action, the deep link does not resolve.
#### Step 4.2: Configure push analytics (optional)
When delayed initialization is enabled, push analytics are queued by default. However, you can choose to [explicitly queue](#explicitly-queue-push-analytics) or [drop](#drop-push-analytics) push analytics instead.
##### Explicitly queue {#explicitly-queue-push-analytics}
To explicitly queue push analytics, choose one of the following options:
In your `braze.xml` file, set `com_braze_delayed_initialization_analytics_behavior` to `QUEUE`:
```xml
QUEUE
```
Add `QUEUE` to your [`Braze.enableDelayedInitialization()`](https://braze-inc.github.io/braze-android-sdk/kdoc/braze-android-sdk/com.braze/-braze/-companion/enable-delayed-initialization.html) method:
```java
Braze.enableDelayedInitialization(context, DelayedInitializationAnalyticsBehavior.QUEUE);
```
```kotlin
Braze.enableDelayedInitialization(context, DelayedInitializationAnalyticsBehavior.QUEUE)
```
##### Drop {#drop-push-analytics}
To drop push analytics, choose one of the following options:
In your `braze.xml` file, set `com_braze_delayed_initialization_analytics_behavior` to `DROP`:
```xml
DROP
```
Add `DROP` to the [`Braze.enableDelayedInitialization()`](https://braze-inc.github.io/braze-android-sdk/kdoc/braze-android-sdk/com.braze/-braze/-companion/enable-delayed-initialization.html) method:
```java
Braze.enableDelayedInitialization(context, DelayedInitializationAnalyticsBehavior.DROP);
```
```kotlin
Braze.enableDelayedInitialization(context, DelayedInitializationAnalyticsBehavior.DROP)
```
#### Step 4.3: Manually initialize the SDK
After your chosen delay period, use the [`Braze.disableDelayedInitialization()`](https://braze-inc.github.io/braze-android-sdk/kdoc/braze-android-sdk/com.braze/-braze/-companion/disable-delayed-initialization.html) method to manually initialize the SDK.
```java
Braze.disableDelayedInitialization(context);
```
```kotlin
Braze.disableDelayedInitialization(context)
```
### Step 5: Enable user session tracking
When you enable user session tracking, calls to `openSession()`, `closeSession()`,[`ensureSubscribedToInAppMessageEvents()`](https://braze-inc.github.io/braze-android-sdk/kdoc/braze-android-sdk/com.braze.ui.inappmessage/-braze-in-app-message-manager/ensure-subscribed-to-in-app-message-events.html), and `InAppMessageManager` registration can be handled automatically.
To register activity lifecycle callbacks, add the following code to the `onCreate()` method of your `Application` class.
```java
public class MyApplication extends Application {
@Override
public void onCreate() {
super.onCreate();
registerActivityLifecycleCallbacks(new BrazeActivityLifecycleCallbackListener());
}
}
```
```kotlin
class MyApplication : Application() {
override fun onCreate() {
super.onCreate()
registerActivityLifecycleCallbacks(BrazeActivityLifecycleCallbackListener())
}
}
```
For the list of available parameters, see [`BrazeActivityLifecycleCallbackListener`](https://braze-inc.github.io/braze-android-sdk/kdoc/braze-android-sdk/com.braze/-braze-activity-lifecycle-callback-listener/index.html).
## Testing session tracking
**Tip:**
You can also use the [SDK Debugger](https://www.braze.com/docs/pt-br/pt-br/developer_guide/debugging) to diagnose SDK issues.
If you experience issues while testing, enable [verbose logging](#android_enabling-logs), then use logcat to detect missing `openSession` and `closeSession` calls in your activities.
1. In Braze, go to **Overview**, select your app, then in the **Display Data For** dropdown choose **Today**.

2. Open your app, then refresh the Braze dashboard. Verify that your metrics have increased by 1.
3. Navigate through your app and verify that only one session has been logged to Braze.
4. Send the app to the background for at least 10 seconds, then bring it to the foreground. Verify that a new session was logged.
## Optional configurations
### Runtime configuration
To set your Braze options in code rather than your `braze.xml` file, use [runtime configuration](https://braze-inc.github.io/braze-android-sdk/kdoc/braze-android-sdk/com.braze/-braze/-companion/configure.html). If a value exists in both places, the runtime value will be used instead. After all required settings are supplied at runtime, you can delete your `braze.xml` file.
In the following example, a [builder object](https://braze-inc.github.io/braze-android-sdk/kdoc/braze-android-sdk/com.braze.configuration/-braze-config/-builder/index.html) is created and then passed to [`Braze.configure()`](https://braze-inc.github.io/braze-android-sdk/kdoc/braze-android-sdk/com.braze/-braze/-companion/configure.html). Note that only some of the available runtime options are shown—refer to our [KDoc](https://braze-inc.github.io/braze-android-sdk/kdoc/braze-android-sdk/com.braze.configuration/-braze-config/-builder/index.html) for the full list.
```java
BrazeConfig brazeConfig = new BrazeConfig.Builder()
.setApiKey("api-key-here")
.setCustomEndpoint("YOUR_CUSTOM_ENDPOINT_OR_CLUSTER")
.setSessionTimeout(60)
.setHandlePushDeepLinksAutomatically(true)
.setGreatNetworkDataFlushInterval(10)
.build();
Braze.configure(this, brazeConfig);
```
```kotlin
val brazeConfig = BrazeConfig.Builder()
.setApiKey("api-key-here")
.setCustomEndpoint("YOUR_CUSTOM_ENDPOINT_OR_CLUSTER")
.setSessionTimeout(60)
.setHandlePushDeepLinksAutomatically(true)
.setGreatNetworkDataFlushInterval(10)
.build()
Braze.configure(this, brazeConfig)
```
**Tip:**
Looking for another example? Check out our [Hello Braze sample app](https://github.com/braze-inc/braze-android-sdk/blob/master/samples/hello-braze/src/main/java/com/braze/helloworld/CustomApplication.java).
### Google Advertising ID
The [Google Advertising ID (GAID)](https://support.google.com/googleplay/android-developer/answer/6048248/advertising-id?hl=en) is an optional user-specific, anonymous, unique, and resettable ID for advertising, provided by Google Play services. GAID gives users the power to reset their identifier, opt-out of interest-based ads within Google Play apps, and provides developers with a simple, standard system to continue to monetize their apps.
The Google Advertising ID is not automatically collected by the Braze SDK and must be set manually via the [`Braze.setGoogleAdvertisingId()`](https://braze-inc.github.io/braze-android-sdk/kdoc/braze-android-sdk/com.braze/-i-braze/set-google-advertising-id.html) method.
```java
new Thread(new Runnable() {
@Override
public void run() {
try {
AdvertisingIdClient.Info idInfo = AdvertisingIdClient.getAdvertisingIdInfo(getApplicationContext());
Braze.getInstance(getApplicationContext()).setGoogleAdvertisingId(idInfo.getId(), idInfo.isLimitAdTrackingEnabled());
} catch (Exception e) {
e.printStackTrace();
}
}
}).start();
```
```kotlin
suspend fun fetchAndSetAdvertisingId(
context: Context,
scope: CoroutineScope = GlobalScope
) {
scope.launch(Dispatchers.IO) {
try {
val idInfo = AdvertisingIdClient.getAdvertisingIdInfo(context)
Braze.getInstance(context).setGoogleAdvertisingId(
idInfo.id,
idInfo.isLimitAdTrackingEnabled
)
} catch (e: Exception) {
e.printStackTrace()
}
}
}
```
**Important:**
Google requires the Advertising ID to be collected on a non-UI thread.
### Location tracking
To enable Braze location collection, set `com_braze_enable_location_collection` to `true` in your `braze.xml` file:
```xml
true
```
**Important:**
Starting with Braze Android SDK version 3.6.0, Braze location collection is disabled by default.
### Logging
By default, the Braze Android SDK log level is set to `INFO`. You can [suppress these logs](#android_suppressing-logs) or [set a different log level](#android_enabling-logs), such as `VERBOSE`, `DEBUG`, or `WARN`.
#### Enabling logs
To help troubleshoot issues in your app, or reduce turnaround times with Braze Support, you can enable verbose logs for the SDK. When you send verbose logs to Braze Support, ensure they begin as soon as you launch your application and end far after your issue occurs. For a centralized overview, see [Verbose logging](https://www.braze.com/docs/pt-br/pt-br/developer_guide/sdk_integration/verbose_logging). To learn how to interpret log output, see [Reading verbose logs](https://www.braze.com/docs/pt-br/pt-br/developer_guide/sdk_integration/reading_verbose_logs).
Keep in mind, verbose logs are only intended for your development environment, so you'll want to disable them before releasing your app.
**Important:**
Enable verbose logs before any other calls in `Application.onCreate()` to ensure your logs are as complete as possible.
To enable logs directly in your app, add the following to your application's `onCreate()` method before any other methods.
```java
BrazeLogger.setLogLevel(Log.MIN_LOG_LEVEL);
```
```kotlin
BrazeLogger.logLevel = Log.MIN_LOG_LEVEL
```
Replace `MIN_LOG_LEVEL` with the **Constant** of the log level you'd like to set as your minimum log level. Any logs at a level `>=` to your set `MIN_LOG_LEVEL` will be forwarded to Android's default [`Log`](https://developer.android.com/reference/android/util/Log) method. Any logs `<` your set `MIN_LOG_LEVEL` will be discarded.
| Constant | Value | Description |
|-------------|----------------|---------------------------------------------------------------------------|
| `VERBOSE` | 2 | Logs the most detailed messages for debugging and development. |
| `DEBUG` | 3 | Logs descriptive messages for debugging and development. |
| `INFO` | 4 | Logs informational messages for general highlights. |
| `WARN` | 5 | Logs warning messages for identifying potentially harmful situations. |
| `ERROR` | 6 | Logs error messages for indicating application failure or serious issues. |
| `ASSERT` | 7 | Logs assertion messages when conditions are false during development. |
{: .reset-td-br-1 .reset-td-br-2 .reset-td-br-3 aria-label="Enabling logs" }
For example, the following code will forward log levels `2`, `3`, `4`, `5`, `6`, and `7` to the `Log` method.
```java
BrazeLogger.setLogLevel(Log.VERBOSE);
```
```kotlin
BrazeLogger.logLevel = Log.VERBOSE
```
To enable logs in the `braze.xml`, add the following to your file:
```xml
MIN_LOG_LEVEL
```
Replace `MIN_LOG_LEVEL` with the **Value** of the log level you'd like to set as your minimum log level. Any logs at a level `>=` to your set `MIN_LOG_LEVEL` will be forwarded to Android's default [`Log`](https://developer.android.com/reference/android/util/Log) method. Any logs `<` your set `MIN_LOG_LEVEL` will be discarded.
| Constant | Value | Description |
|-------------|----------------|---------------------------------------------------------------------------|
| `VERBOSE` | 2 | Logs the most detailed messages for debugging and development. |
| `DEBUG` | 3 | Logs descriptive messages for debugging and development. |
| `INFO` | 4 | Logs informational messages for general highlights. |
| `WARN` | 5 | Logs warning messages for identifying potentially harmful situations. |
| `ERROR` | 6 | Logs error messages for indicating application failure or serious issues. |
| `ASSERT` | 7 | Logs assertion messages when conditions are false during development. |
{: .reset-td-br-1 .reset-td-br-2 .reset-td-br-3 aria-label="Enabling logs" }
For example, the following code will forward log levels `2`, `3`, `4`, `5`, `6`, and `7` to the `Log` method.
```xml
2
```
#### Verifying verbose logs
To verify that your logs are set to `VERBOSE`, check if `V/Braze` occurs somewhere in your logs. If it does, then verbose logs have been successfully enabled. For example:
```
2077-11-19 16:22:49.591 ? V/Braze v9.0.01 .bo.app.d3: Request started
```
#### Suppressing logs
To suppress all logs for the Braze Android SDK, set the log level to `BrazeLogger.SUPPRESS` in your application's `onCreate()` method _before_ any other methods.
```java
BrazeLogger.setLogLevel(BrazeLogger.SUPPRESS);
```
```kotlin
BrazeLogger.setLogLevel(BrazeLogger.SUPPRESS)
```
### Multiple API keys
The most common use case for multiple API keys is separating API keys for debug and release build variants.
To easily switch between multiple API keys in your builds, we recommend creating a separate `braze.xml` file for each relevant [build variant](https://developer.android.com/studio/build/build-variants.html). A build variant is a combination of build type and product flavor. By default, new Android projects are configured with [`debug` and `release` build types](https://developer.android.com/reference/tools/gradle-api/8.3/null/com/android/build/api/dsl/BuildType) and no product flavors.
For each relevant build variant, create a new `braze.xml` in the `src//res/values/` directory. When the build variant is compiled, it will use the new API key.
```xml
REPLACE_WITH_YOUR_BUILD_VARIANT_API_KEY
```
**Tip:**
To learn how to set up the API key in your code, see [Runtime configuration](https://www.braze.com/docs/pt-br/pt-br/developer_guide/sdk_initalization/?sdktab=android).
### Exclusive in-app message TalkBack
In adherence to the [Android accessibility guidelines](https://developer.android.com/guide/topics/ui/accessibility), the Braze Android SDK offers Android Talkback by default. To ensure that only the contents of in-app messages are read out loud—without including other screen elements like the app title bar or navigation—you can enable exclusive mode for TalkBack.
To enable exclusive mode for in-app messages:
```xml
true
```
```kotlin
val brazeConfigBuilder = BrazeConfig.Builder()
brazeConfigBuilder.setIsInAppMessageAccessibilityExclusiveModeEnabled(true)
Braze.configure(this, brazeConfigBuilder.build())
```
```java
BrazeConfig.Builder brazeConfigBuilder = new BrazeConfig.Builder()
brazeConfigBuilder.setIsInAppMessageAccessibilityExclusiveModeEnabled(true);
Braze.configure(this, brazeConfigBuilder.build());
```
### R8 and ProGuard
[Code shrinking](https://developer.android.com/build/shrink-code) configuration is automatically included with your Braze integration.
Client apps that obfuscate Braze code must store release mapping files for Braze to interpret stack traces. If you want to continue to keep all Braze code, add the following to your ProGuard file:
```
-keep class bo.app.** { *; }
-keep class com.braze.** { *; }
```
## Integrating the Swift SDK
You can integrate and customize the Braze Swift SDK using the Swift Package Manager (SPM), CocoaPods, or manual integration methods. For more information about the various SDK symbols, see [Braze Swift reference documentation](https://braze-inc.github.io/braze-swift-sdk/documentation/brazekit/).
### Prerequisites
Before you start, verify your environment is supported by the [latest Braze Swift SDK version](https://github.com/braze-inc/braze-swift-sdk#version-information).
### Step 1: Install the Braze Swift SDK
We recommend using the [Swift Package Manager (SwiftPM)](https://swift.org/package-manager/) or [CocoaPods](http://cocoapods.org/) to install the Braze Swift SDK. Alternatively, you can install the SDK manually.
#### Step 1.1: Import SDK version
Open your project and navigate to your project's settings. Select the **Swift Packages** tab and click on the add button below the packages list.

**Note:**
Starting in version 7.4.0, the Braze Swift SDK has additional distribution channels as [static XCFrameworks](https://github.com/braze-inc/braze-swift-sdk-prebuilt-static) and [dynamic XCFrameworks](https://github.com/braze-inc/braze-swift-sdk-prebuilt-dynamic). If you'd like to use either of these formats instead, follow the installation instructions from its respective repository.
Enter the URL of our iOS Swift SDK repository `https://github.com/braze-inc/braze-swift-sdk` in the text field. Under the **Dependency Rule** section, select the SDK version. Finally, click **Add Package**.

#### Step 1.2: Select your packages
The Braze Swift SDK separates features into standalone libraries to provide developers with more control over which features to import into their projects.
| Package | Details |
| --------------- | --------------------------------------------------------------------------------------------------------------------------------------------------------------- |
| `BrazeKit` | Main SDK library providing support for analytics and push notifications. |
| `BrazeLocation` | Location library providing support for location analytics and geofence monitoring. |
| `BrazeUI` | Braze-provided user interface library for in-app messages, Content Cards, and Banners. Import this library if you intend to use the default UI components. |
{: .reset-td-br-1 .reset-td-br-2 aria-label="Step 1.2: Select your packages" }
{: .ws-td-nw-1}
##### About Extension libraries
**Warning:**
[BrazeNotificationService](https://braze-inc.github.io/braze-swift-sdk/tutorials/braze/b2-rich-push-notifications) and [BrazePushStory](https://braze-inc.github.io/braze-swift-sdk/tutorials/braze/b3-push-stories) are extension modules that provide additional functionality and should not be added directly to your main application target. Instead follow the linked guides to integrate them separately into their respective target extensions.
| Package | Details |
| -------------------------- | ------------------------------------------------------------------------------------- |
| `BrazeNotificationService` | Notification service extension library providing support for rich push notifications. |
| `BrazePushStory` | Notification content extension library providing support for Push Stories. |
{: .reset-td-br-1 .reset-td-br-2 aria-label="About Extension libraries" }
{: .ws-td-nw-1}
Select the package that best suits your needs and click **Add Package**. Make sure you select `BrazeKit` at a minimum.

#### Step 1.1: Install CocoaPods
For a full walkthrough, see CocoaPods' [Getting Started Guide](https://guides.cocoapods.org/using/getting-started.html). Otherwise, you can run the following command to get started quickly:
```bash
$ sudo gem install cocoapods
```
If you get stuck, checkout CocoaPods' [Troubleshooting Guide](http://guides.cocoapods.org/using/troubleshooting.html).
#### Step 1.2: Constructing the Podfile
Next, create a file in your Xcode project directory named `Podfile`.
**Note:**
Starting in version 7.4.0, the Braze Swift SDK has additional distribution channels as [static XCFrameworks](https://github.com/braze-inc/braze-swift-sdk-prebuilt-static) and [dynamic XCFrameworks](https://github.com/braze-inc/braze-swift-sdk-prebuilt-dynamic). If you'd like to use either of these formats instead, follow the installation instructions from its respective repository.
Add the following line to your Podfile:
```
target 'YourAppTarget' do
pod 'BrazeKit'
end
```
`BrazeKit` contains the main SDK library, providing support for analytics and push notifications.
We suggest you version Braze so pod updates automatically grab anything smaller than a minor version update. This looks like `pod 'BrazeKit' ~> Major.Minor.Build`. If you want to automatically integrate the latest Braze SDK version, even with major changes, you can use `pod 'BrazeKit'` in your Podfile.
##### About additional libraries
The Braze Swift SDK separates features into standalone libraries to provide developers with more control over which features to import into their projects. In addition to `BrazeKit`, you may add the following libraries to your Podfile:
| Library | Details |
| --------------------- | --------------------------------------------------------------------------------------------------------------------------------------------------------------- |
| `pod 'BrazeLocation'` | Location library providing support for location analytics and geofence monitoring. |
| `pod 'BrazeUI'` | Braze-provided user interface library for in-app messages, Content Cards, and Banners. Import this library if you intend to use the default UI components. |
{: .reset-td-br-1 .reset-td-br-2 aria-label="About additional libraries" }
{: .ws-td-nw-1}
###### Extension libraries
[BrazeNotificationService](https://braze-inc.github.io/braze-swift-sdk/tutorials/braze/b2-rich-push-notifications) and [BrazePushStory](https://braze-inc.github.io/braze-swift-sdk/tutorials/braze/b3-push-stories) are extension modules that provide additional functionality and should not be added directly to your main application target. Instead, you will need to create separate extension targets for each of these modules and import the Braze modules into their corresponding targets.
| Library | Details |
| -------------------------------- | ------------------------------------------------------------------------------------- |
| `pod 'BrazeNotificationService'` | Notification service extension library providing support for rich push notifications. |
| `pod 'BrazePushStory'` | Notification content extension library providing support for Push Stories. |
{: .reset-td-br-1 .reset-td-br-2 aria-label="Extension libraries" }
{: .ws-td-nw-1}
#### Step 1.3: Install the SDK
To install the Braze SDK CocoaPod, navigate to the directory of your Xcode app project within your terminal and run the following command:
```
pod install
```
At this point, you should be able to open the new Xcode project workspace created by CocoaPods. Make sure to use this Xcode workspace instead of your Xcode project.

#### Updating the SDK using CocoaPods
To update a CocoaPod, simply run the following command within your project directory:
```
pod update
```
#### Step 1.1: Download the Braze SDK
Go to the [Braze SDK release page on GitHub](https://github.com/braze-inc/braze-swift-sdk/releases), then download `braze-swift-sdk-prebuilt.zip`.

#### Step 1.2: Choose your frameworks
The Braze Swift SDK contains a variety of standalone XCFrameworks, which gives you the freedom to integrate the features you want—without needing to integrate them all. Reference the following table to choose your XCFrameworks:
| Package | Required? | Description |
| -------------------------- | --------- | ------------------------------------------------------------------------------------------------------------------------------------------------------------------------------------------------------------------------------------------------------------------------------------------------------------------------------------ |
| `BrazeKit` | Yes | Main SDK library that provides support for analytics and push notifications. |
| `BrazeLocation` | No | Location library that provides support for location analytics and geofence monitoring. |
| `BrazeUI` | No | Braze-provided user interface library for in-app messages, Content Cards, and Banners. Import this library if you intend to use the default UI components. |
| `BrazeNotificationService` | No | Notification service extension library that provides support for rich push notifications. Do not add this library directly to your main application target, instead [add the `BrazeNotificationService` library separately](https://braze-inc.github.io/braze-swift-sdk/tutorials/braze/b2-rich-push-notifications). |
| `BrazePushStory` | No | Notification content extension library that provides support for Push Stories. Do not add this library directly to your main application target, instead [add the `BrazePushStory` library separately](https://braze-inc.github.io/braze-swift-sdk/tutorials/braze/b3-push-stories). |
| `BrazeKitCompat` | No | Compatibility library containing all the `Appboy` and `ABK*` classes and methods that were available in the `Appboy-iOS-SDK` version 4.X.X. For usage details, refer to the minimal migration scenario in the [migration guide](https://braze-inc.github.io/braze-swift-sdk/documentation/braze/appboy-migration-guide/). |
| `BrazeUICompat` | No | Compatibility library containing all the `ABK*` classes and methods that were available in the `AppboyUI` library from `Appboy-iOS-SDK` version 4.X.X. For usage details, refer to the minimal migration scenario in the [migration guide](https://braze-inc.github.io/braze-swift-sdk/documentation/braze/appboy-migration-guide/). |
| `SDWebImage` | No | Dependency used only by `BrazeUICompat` in the minimal migration scenario. |
{: .reset-td-br-1 .reset-td-br-2 .reset-td-br-3 aria-label="Step 1.2: Choose your frameworks" }
{: .ws-td-nw-1 .reset-td-br-1 .reset-td-br-2 aria-label="Step 1.2: Choose your frameworks" }
#### Step 1.3: Prepare your files
Decide whether you want to use **Static** or **Dynamic** XCFrameworks, then prepare your files:
1. Create a temporary directory for your XCFrameworks.
2. In `braze-swift-sdk-prebuilt`, open the `dynamic` directory and move `BrazeKit.xcframework` into your directory. Your directory should be similar to the following:
```bash
temp_dir
└── BrazeKit.xcframework
```
3. Move each of your [chosen XCFrameworks](#swift_step-2-choose-your-frameworks) into your temporary directory. Your directory should be similar to the following:
```bash
temp_dir
├── BrazeKit.xcframework
├── BrazeKitCompat.xcframework
├── BrazeLocation.xcframework
└── SDWebImage.xcframework
```
#### Step 1.4: Integrate your frameworks
Next, integrate the **Dynamic** or **Static** XCFrameworks you [prepared previously](#swift_step-3-prepare-your-files):
In your Xcode project, select your build target, then **General**. Under **Frameworks, Libraries, and Embedded Content**, drag and drop the [files you prepared previously](#swift_step-3-prepare-your-files).

**Note:**
Starting with the Swift SDK 12.0.0, you should always select **Embed & Sign** for the Braze XCFrameworks for both the static and dynamic variants. This ensures that the frameworks resources are properly embedded in your app bundle.
**Tip:**
To enable GIF support, add `SDWebImage.xcframework`, located in either `braze-swift-sdk-prebuilt/static` or `braze-swift-sdk-prebuilt/dynamic`.
#### Common errors for Objective-C projects
If your Xcode project only contains Objective-C files, you may get "missing symbol" errors when you try to build your project. To fix these errors, open your project and add an empty Swift file to your file tree. This will force your build toolchain to embed [Swift Runtime](https://support.apple.com/kb/dl1998) and link to the appropriate frameworks during build time.
```bash
FILE_NAME.swift
```
Replace `FILE_NAME` with any non-spaced string. Your file should look similar to the following:
```bash
empty_swift_file.swift
```
### Step 2: Set up delayed initialization (optional)
You can choose to delay when the Braze Swift SDK is initialized, which is useful if your app needs to load a configuration or wait for user consent before starting the SDK. Delayed initialization makes sure Braze push notifications and push tokens received before SDK initialization are enqueued and processed once the SDK is initialized.
To use delayed initialization, the minimum Braze SDK version is required:
#### Step 2.1: Prepare for delayed initialization
Call `Braze.prepareForDelayedInitialization()` as early as possible in your app's lifecycle, ideally in or before `application(_:didFinishLaunchingWithOptions:)`. This makes sure that push notifications received before the SDK is initialized are properly captured and processed later.
**Note:**
This only applies to push notifications from Braze. Other push notifications are handled normally by system delegates.
```swift
func application(_ application: UIApplication, didFinishLaunchingWithOptions launchOptions: [UIApplication.LaunchOptionsKey: Any]?) -> Bool {
// Prepare the SDK for delayed initialization
Braze.prepareForDelayedInitialization()
// ... Additional non-Braze setup code
return true
}
```
```swift
@main
struct MyApp: App {
@UIApplicationDelegateAdaptor var appDelegate: AppDelegate
var body: some Scene {
WindowGroup {
ContentView()
}
}
}
class AppDelegate: NSObject, UIApplicationDelegate {
func application(_ application: UIApplication, didFinishLaunchingWithOptions launchOptions: [UIApplication.LaunchOptionsKey : Any]? = nil) -> Bool {
// Prepare the SDK for delayed initialization
Braze.prepareForDelayedInitialization()
// ... Additional non-Braze setup code
return true
}
}
```
```objc
- (BOOL)application:(UIApplication *)application didFinishLaunchingWithOptions:(NSDictionary *)launchOptions {
// Prepare the SDK for delayed initialization
[Braze prepareForDelayedInitialization];
// ... Additional non-Braze setup code
return YES;
}
```
When using delayed initialization, push notification automation is implicitly enabled. You can [customize the push automation](#swift_step-23-customize-push-automation-optional) configuration by passing a `pushAutomation` parameter.
#### Step 2.2: Configure push analytics behavior (optional)
When delayed initialization is enabled, push analytics are queued by default. However, you can choose to explicitly queue or drop push analytics instead.
##### Explicitly queue
To explicitly queue push analytics (default behavior), pass `.queue` to the `analyticsBehavior` parameter. Push analytics events that are queued prior to initialization will be processed and flushed to the server upon initialization.
```swift
Braze.prepareForDelayedInitialization(analyticsBehavior: .queue)
```
```objc
[Braze prepareForDelayedInitializationWithAnalyticsBehavior:BRZPushEnqueueBehaviorQueue];
```
##### Drop
To drop push analytics received before SDK initialization, pass `.drop` to the `analyticsBehavior` parameter. With this option, any push analytics event that occurs while the SDK is not initialized will be ignored.
```swift
Braze.prepareForDelayedInitialization(analyticsBehavior: .drop)
```
```objc
[Braze prepareForDelayedInitializationWithAnalyticsBehavior:BRZPushEnqueueBehaviorDrop];
```
#### Step 2.3: Customize push automation (optional)
You can customize the push automation configuration by passing a `pushAutomation` parameter. By default, all automation features are enabled except `requestAuthorizationAtLaunch`.
```swift
// Enable all push automation
featuresBraze.prepareForDelayedInitialization(pushAutomation: true)
// Or customize specific automation options
let automation = Braze.Configuration.Push.Automation()
automation.automaticSetup = true
automation.requestAuthorizationAtLaunch = false
Braze.prepareForDelayedInitialization(pushAutomation: automation)
```
```objc
// Enable all push automation features
[Braze prepareForDelayedInitializationWithPushAutomation:[[BRZConfigurationPushAutomation alloc] initWithAutomationEnabled:YES]];
// Or customize specific automation options
BRZConfigurationPushAutomation *automation = [[BRZConfigurationPushAutomation alloc] init];
automation.automaticSetup = YES;
automation.requestAuthorizationAtLaunch = NO;
[Braze prepareForDelayedInitializationWithPushAutomation:automation analyticsBehavior:BRZPushEnqueueBehaviorQueue];
```
#### Step 2.4: Initialize the SDK
After your chosen delay period (for example, after fetching configuration from a server or after user consent), initialize the SDK as normal:
```swift
func initializeBraze() {
let configuration = Braze.Configuration(apiKey: "YOUR-API-KEY", endpoint: "YOUR-ENDPOINT")
// Enable push automation to match the delayed initialization configuration
configuration.push.automation = true
let braze = Braze(configuration: configuration)
// Store the Braze instance for later use
AppDelegate.braze = braze
}
```
```objc
- (void)initializeBraze {
BRZConfiguration *configuration = [[BRZConfiguration alloc] initWithApiKey:@"YOUR-API-KEY" endpoint:@"YOUR-ENDPOINT"];
// Enable push automation to match the delayed initialization configuration
configuration.push.automation = [[BRZConfigurationPushAutomation alloc] initWithAutomationEnabled:YES];
Braze *braze = [[Braze alloc] initWithConfiguration:configuration];
// Store the Braze instance for later use
AppDelegate.braze = braze;
}
```
**Note:**
When the SDK is initialized, all queued push notifications, push tokens, and deep links are automatically processed.
### Step 3: Update your app delegate
**Important:**
The following assumes you've already added an `AppDelegate` to your project (which are not generated by default) and you are not using the delayed initialization feature. If you don't plan on using an `AppDelegate`, be sure to initialize the Braze SDK as early as possible, like during the app's launch. If you are using the delayed initialization feature, refer to [Step 2.4](#swift_step-24-initialize-the-sdk) for initializing the SDK and ignore this step.
Add the following line of code to your `AppDelegate.swift` file to import the features included in the Braze Swift SDK:
```swift
import BrazeKit
```
Next, add a static property to your `AppDelegate` class to keep a strong reference to the Braze instance throughout your application's lifetime:
```swift
class AppDelegate: UIResponder, UIApplicationDelegate {
static var braze: Braze? = nil
}
```
The SDK requires your application to retain a strong reference to the Braze instance throughout its usage. To prevent any unexpected side effects, ensure that you have fully captured that reference before accessing or modifying any properties or methods on the Braze instance.
Finally, in `AppDelegate.swift`, add the following snippet to your `application:didFinishLaunchingWithOptions:` method:
```swift
let configuration = Braze.Configuration(
apiKey: "YOUR-APP-IDENTIFIER-API-KEY",
endpoint: "YOUR-BRAZE-ENDPOINT"
)
let braze = Braze(configuration: configuration)
AppDelegate.braze = braze
```
Update `YOUR-APP-IDENTIFIER-API-KEY` and `YOUR-BRAZE-ENDPOINT` with the correct value from your **App Settings** page. Check out our [API identifier types](https://www.braze.com/docs/pt-br/pt-br/api/identifier_types/?tab=app%20ids) for more information on where to find your app identifier API key.
Add the following line of code to your `AppDelegate.m` file:
```objc
@import BrazeKit;
```
Next, add a static variable to your `AppDelegate.m` file to keep a reference to the Braze instance throughout your application's lifetime:
```objc
static Braze *_braze;
@implementation AppDelegate
+ (Braze *)braze {
return _braze;
}
+ (void)setBraze:(Braze *)braze {
_braze = braze;
}
@end
```
The SDK requires your application to retain a strong reference to the Braze instance throughout its usage. To prevent any unexpected side effects, ensure that you have fully captured that reference before accessing or modifying any properties or methods on the Braze instance.
Finally, within your `AppDelegate.m` file, add the following snippet within your `application:didFinishLaunchingWithOptions:` method:
```objc
BRZConfiguration *configuration = [[BRZConfiguration alloc] initWithApiKey:"YOUR-APP-IDENTIFIER-API-KEY"
endpoint:"YOUR-BRAZE-ENDPOINT"];
Braze *braze = [[Braze alloc] initWithConfiguration:configuration];
AppDelegate.braze = braze;
```
Update `YOUR-APP-IDENTIFIER-API-KEY` and `YOUR-BRAZE-ENDPOINT` with the correct value from your **Manage Settings** page. Check out our [API documentation](https://www.braze.com/docs/pt-br/pt-br/api/api_key/#the-app-identifier-api-key) for more information on where to find your app identifier API key.
## Optional configurations
### Logging
For a centralized overview across all platforms, see [Verbose logging](https://www.braze.com/docs/pt-br/pt-br/developer_guide/sdk_integration/verbose_logging). To learn how to interpret log output, see [Reading verbose logs](https://www.braze.com/docs/pt-br/pt-br/developer_guide/sdk_integration/reading_verbose_logs).
#### Log levels
The default log level for the Braze Swift SDK is `.error`—it's also the minimum supported level when logs are enabled. These are the full list of log levels:
| Swift | Objective-C | Description |
| ----------- | ------------------------ | ------------------------------------------------------------ |
| `.debug` | `BRZLoggerLevelDebug` | Log debugging information + `.info` + `.error`. |
| `.info` | `BRZLoggerLevelInfo` | Log general SDK information (user changes, etc.) + `.error`. |
| `.error` | `BRZLoggerLevelError` | Log errors. |
| `.disabled` | `BRZLoggerLevelDisabled` | No logging occurs. |
{: .reset-td-br-1 .reset-td-br-2 .reset-td-br-3 aria-label="Log levels" }
{: .reset-td-br-1 .reset-td-br-2 .reset-td-br-3 aria-label="Log levels" }
#### Setting the log level
You can assign the log level at runtime in your `Braze.Configuration` object. For complete usage details, see [`Braze.Configuration.Logger`](https://braze-inc.github.io/braze-swift-sdk/documentation/brazekit/braze/configuration-swift.class/logger-swift.class).
```swift
let configuration = Braze.Configuration(
apiKey: "",
endpoint: ""
)
// Enable logging of general SDK information (such as user changes, etc.)
configuration.logger.level = .info
let braze = Braze(configuration: configuration)
```
```objc
BRZConfiguration *configuration = [[BRZConfiguration alloc] initWithApiKey:self.APIKey
endpoint:self.apiEndpoint];
// Enable logging of general SDK information (such as user changes, etc.)
[configuration.logger setLevel:BRZLoggerLevelInfo];
Braze *braze = [[Braze alloc] initWithConfiguration:configuration];
```
## Integrating the Cordova SDK
### Prerequisites
Before you start, verify your environment is supported by the [latest Braze Cordova SDK version](https://github.com/braze-inc/braze-cordova-sdk?tab=readme-ov-file#minimum-version-requirements).
### Step 1: Add the SDK to your project
**Warning:**
Only add the Braze Cordova SDK using the methods below. Do not attempt to install using other methods as it could lead to a security breach.
If you're on Cordova 6 or later, you can add the SDK directly from GitHub. Alternatively, you can download a ZIP of the [GitHub repository](https://github.com/braze-inc/braze-cordova-sdk) and add the SDK manually.
If you don't plan on using location collection and geofences, use the `master` branch from GitHub.
```bash
cordova plugin add https://github.com/braze-inc/braze-cordova-sdk#master
```
If you plan on using location collection and geofences, use the `geofence-branch` from GitHub.
```bash
cordova plugin add https://github.com/braze-inc/braze-cordova-sdk#geofence-branch
```
**Tip:**
You can switch between `master` and `geofence-branch` at anytime by repeating this step.
### Step 2: Configure your project
Next, adding the following preferences to the `platform` element in your project's `config.xml` file.
```xml
```
```xml
```
Replace the following:
| Value | Description |
| --------------------- | -------------------------------------------------------------------------------------------------------------------------------- |
| `BRAZE_API_KEY` | Your [Braze REST API key](https://www.braze.com/docs/pt-br/pt-br/user_guide/administrative/app_settings/api_settings_tab/#rest-api-keys). |
| `CUSTOM_API_ENDPOINT` | A custom API endpoint. This endpoint is used to route your Braze instance data to the correct App Group in your Braze dashboard. |
{: .reset-td-br-1 .reset-td-br-2 aria-label="Step 2: Configure your project" }
The `platform` element in your `config.xml` file should be similar to the following:
```xml
```
```xml
```
## Platform-specific syntax
The following section covers the platform-specific syntax when using Cordova with iOS or Android.
### Integers
Integer preferences are read as string representations, like in the following example:
```xml
```
Due to how the Cordova 8.0.0+ framework handles preferences, integer-only preferences (such as sender IDs) must be set to strings prepended with `str_`, like in the following example:
```xml
```
### Booleans
Boolean preferences are read by the SDK using `YES` and `NO` keywords as a string representation, like in the following example:
```xml
```
Boolean preferences are read by the SDK using `true` and `false` keywords as a string representation, like in the following example:
```xml
```
## Optional configurations {#optional}
You can add any of the following preferences to the `platform` element in your project's `config.xml` file:
| Method | Description |
| ------------------------------------------------- | ----------------------------------------------------------------------------------------------------------------------------------------------------------------------------------------------------------------------------------------------------- |
| `ios_api_key` | Sets the API key for your application. |
| `ios_api_endpoint` | Sets the [SDK endpoint](https://www.braze.com/docs/pt-br/pt-br/api/basics/#endpoints) for your application. |
| `ios_disable_automatic_push_registration` | Sets whether automatic push registration should be disabled. |
| `ios_disable_automatic_push_handling` | Sets whether automatic push handling should be disabled. |
| `ios_enable_idfa_automatic_collection` | Sets whether the Braze SDK should automatically collect the IDFA information. For more information, see [the Braze IDFA method documentation](https://braze-inc.github.io/braze-swift-sdk/documentation/brazekit/braze/set(identifierforadvertiser:)/). |
| `enable_location_collection` | Sets whether the automatic location collection is enabled (if the user permits). The `geofence-branch` |
| `geofences_enabled` | Sets whether geofences are enabled. |
| `ios_session_timeout` | Sets the Braze session timeout for your application in seconds. Defaults to 10 seconds. |
| `sdk_authentication_enabled` | Sets whether to enable the [SDK Authentication](https://www.braze.com/docs/pt-br/pt-br/developer_guide/platform_wide/sdk_authentication#sdk-authentication) feature. |
| `display_foreground_push_notifications` | Sets whether push notifications should be displayed while the application is in the foreground. |
| `ios_disable_un_authorization_option_provisional` | Sets whether `UNAuthorizationOptionProvisional` should be disabled. |
| `trigger_action_minimum_time_interval_seconds` | Sets the minimum time interval in seconds between triggers. Defaults to 30 seconds. |
| `ios_push_app_group` | Sets the app group ID for iOS push extensions. |
| `ios_forward_universal_links` | Sets whether the SDK automatically recognizes and forwards universal links to the system methods. Required for deep links from push notifications to work on iOS. Defaults to disabled. |
| `ios_log_level` | Sets the minimum logging level for `Braze.Configuration.Logger`. |
| `ios_use_uuid_as_device_id` | Sets if a randomly generated UUID should be used as the device ID. |
| `ios_flush_interval_seconds` | Sets the interval in seconds between automatic data flushes. Defaults to 10 seconds. |
| `ios_use_automatic_request_policy` | Sets whether the request policy for `Braze.Configuration.Api` should be automatic or manual. |
| `should_opt_in_when_push_authorized` | Sets if a user’s notification subscription state should automatically be set to `optedIn` when push permissions are authorized. |
{: .reset-td-br-1 .reset-td-br-2 aria-label="Optional configurations #optional" }
**Tip:**
For more detailed information, see [GitHub: Braze iOS Cordova plugin](https://github.com/braze-inc/braze-cordova-sdk/blob/master/src/ios/BrazePlugin.m).
| Method | Description |
| ----------------------------------------------------------------- | --------------------------------------------------------------------------------------------------------------------------------------------------------------------------------------------- |
| `android_api_key` | Sets the API key for your application. |
| `android_api_endpoint` | Sets the [SDK endpoint](https://www.braze.com/docs/pt-br/pt-br/api/basics/#endpoints) for your application. |
| `android_small_notification_icon` | Sets the notification small icon. |
| `android_large_notification_icon` | Sets the notification large icon. |
| `android_notification_accent_color` | Sets the notification accent color using a hexadecimal representation. |
| `android_default_session_timeout` | Sets the Braze session timeout for your application in seconds. Defaults to 10 seconds. |
| `android_handle_push_deep_links_automatically` | Sets whether the Braze SDK automatically handles push deep links. Required for deep links from push notifications to work on Android. Defaults to disabled. |
| `android_log_level` | Sets the log level for your application. The default log level is 4 and will minimally log info. To enable verbose logging for debugging, use log level 2. |
| `firebase_cloud_messaging_registration_enabled` | Sets whether to use Firebase Cloud Messaging for push notifications. |
| `android_fcm_sender_id` | Sets the Firebase Cloud Messaging sender ID. |
| `enable_location_collection` | Sets whether the automatic location collection is enabled (if the user permits). |
| `geofences_enabled` | Sets whether geofences are enabled. |
| `android_disable_auto_session_tracking` | Disable the Android Cordova plugin from automatically tracking sessions. For more information, see [Disabling automatic session tracking](#cordova_disable-automatic-session-tracking) |
| `sdk_authentication_enabled` | Sets whether to enable the [SDK Authentication](https://www.braze.com/docs/pt-br/pt-br/developer_guide/platform_wide/sdk_authentication#sdk-authentication) feature. |
| `trigger_action_minimum_time_interval_seconds` | Sets the minimum time interval in seconds between triggers. Defaults to 30 seconds. |
| `is_session_start_based_timeout_enabled` | Sets whether the session timeout behavior to be based either on session start or session end events. |
| `default_notification_channel_name` | Sets the user-facing name as seen via `NotificationChannel.getName` for the Braze default `NotificationChannel`. |
| `default_notification_channel_description` | Sets the user-facing description as seen via `NotificationChannel.getDescription` for the Braze default `NotificationChannel`. |
| `does_push_story_dismiss_on_click` | Sets whether a Push Story is automatically dismissed when clicked. |
| `is_fallback_firebase_messaging_service_enabled` | Sets whether the use of a fallback Firebase Cloud Messaging Service is enabled. |
| `fallback_firebase_messaging_service_classpath` | Sets the classpath for the fallback Firebase Cloud Messaging Service. |
| `is_content_cards_unread_visual_indicator_enabled` | Sets whether the Content Cards unread visual indication bar is enabled. |
| `is_firebase_messaging_service_on_new_token_registration_enabled` | Sets whether the Braze SDK will automatically register tokens in `com.google.firebase.messaging.FirebaseMessagingService.onNewToken`. |
| `is_push_deep_link_back_stack_activity_enabled` | Sets whether Braze will add an activity to the back stack when automatically following deep links for push. |
| `push_deep_link_back_stack_activity_class_name` | Sets the activity that Braze will add to the back stack when automatically following deep links for push. |
| `should_opt_in_when_push_authorized` | Sets if Braze should automatically opt-in the user when push is authorized. |
{: .reset-td-br-1 .reset-td-br-2 aria-label="Optional configurations #optional" }
**Tip:**
For more detailed information, see [GitHub: Braze Android Cordova plugin](https://github.com/braze-inc/braze-cordova-sdk/blob/master/src/android/BrazePlugin.kt).
The following is an example `config.xml` file with additional configurations:
```xml
```
```xml
```
## Disabling automatic session tracking (Android only) {#disable-automatic-session-tracking}
By default, the Android Cordova plugin automatically tracks sessions. To disable automatic session tracking, add the following preference to the `platform` element in your project's `config.xml` file:
```xml
```
To start tracking sessions again, call `BrazePlugin.startSessionTracking()`. Keep in mind, only sessions started after the next `Activity.onStart()` will be tracked.
## About the Flutter Braze SDK
After you integrate the Braze Flutter SDK on Android and iOS, you'll be able to use the Braze API within your [Flutter apps](https://flutter.dev/) written in Dart. This plugin provides basic analytics functionality and lets you integrate in-app messages and Content Cards for both iOS and Android with a single codebase.
## Integrating the Flutter SDK
### Prerequisites
Before you integrate the Braze Flutter SDK, you'll need to complete the following:
| Prerequisite | Description |
| --- | --- |
| Braze API app identifier | To locate your app's identifier, go to **Settings** > **APIs and Identifiers** > **App Identifiers**. For more information see, [API Identifier Types](https://www.braze.com/docs/pt-br/pt-br/api/identifier_types/#app-identifier).|
| Braze SDK endpoint | Your SDK endpoint URL (for example, `sdk..braze.com`). Your endpoint will depend on the [Braze URL for your instance](https://www.braze.com/docs/pt-br/pt-br/developer_guide/rest_api/basics/#endpoints).|
| Flutter SDK | Install the official [Flutter SDK](https://docs.flutter.dev/get-started/install) and ensure it meets the Braze Flutter SDK's [minimum supported version](https://github.com/braze-inc/braze-flutter-sdk#requirements). |
{: .reset-td-br-1 .reset-td-br-2 aria-label="Prerequisites" }
### Step 1: Integrate the Braze library
Add the Braze Flutter SDK package from the command line. This will add the appropriate line to your `pubspec.yaml`.
```bash
flutter pub add braze_plugin
```
### Step 2: Complete native SDK setup
#### 2.1 Set up Android
##### Provide credentials at compile time
Create a `braze.xml` file in your project's `android/res/values` folder. The API key and endpoint are provided at runtime from Dart, so they are not required in this file. To enable delayed initialization, add `com_braze_enable_delayed_initialization` to the file:
```xml
true
```
##### Provide credentials at runtime
Alternatively, you can enable delayed initialization programmatically in your `MainActivity.kt`:
```kotlin
import com.braze.Braze
class MainActivity : FlutterActivity() {
override fun onCreate(savedInstanceState: Bundle?) {
super.onCreate(savedInstanceState)
Braze.enableDelayedInitialization(context = this)
}
}
```
Add the required permissions to your `AndroidManifest.xml` file:
```xml
```
#### 2.2 Set up iOS
Within your existing `application(_:didFinishLaunchingWithOptions:)` method, add a call to `BrazePlugin.configure(_:postInitialization:)` to store your configuration. The Braze instance is created later when `initialize()` is called from Dart. The API key and endpoint are not set here.
Add the following code to your `AppDelegate.swift`:
```swift
import BrazeKit
import braze_plugin
// ...
override func application(
_ application: UIApplication,
didFinishLaunchingWithOptions launchOptions: [UIApplication.LaunchOptionsKey : Any]? = nil
) -> Bool {
// ... your existing didFinishLaunchingWithOptions setup ...
BrazePlugin.configure(
{ configuration in
configuration.logger.level = .info
// Set other non-API-key configurations here, such as:
// configuration.push.automation = true
// configuration.sessionTimeout = 60
},
postInitialization: { braze in
// Optional: Customize the Braze instance after creation.
// For example, set a custom in-app message presenter:
// let customPresenter = CustomInAppMessagePresenter()
// braze.inAppMessagePresenter = customPresenter
}
)
return true
}
```
Add the following code to your `AppDelegate.m`:
```objc
@import BrazeKit;
@import braze_plugin;
// ...
- (BOOL)application:(UIApplication *)application
didFinishLaunchingWithOptions:(NSDictionary *)launchOptions {
[BrazePlugin configure:^(BRZConfiguration *configuration) {
configuration.logger.level = BRZLoggerLevelInfo;
// Set other non-API-key configurations here, such as:
// configuration.push.automation = ...
// configuration.sessionTimeout = 60;
} postInitialization:^(Braze *braze) {
// Optional: customize the Braze instance after creation.
}];
return YES;
}
```
**Important:**
`BrazePlugin.configure()` only stores your configuration. No Braze instance exists until `initialize()` is called from Dart, so do not call any Braze SDK methods in the AppDelegate after `configure()`.
#### 2.1 Set up Android
To connect to Braze servers, create a `braze.xml` file in your project's `android/res/values` folder. Paste the following code and replace the API identifier key and endpoint with your values:
```xml
YOUR_APP_IDENTIFIER_API_KEYYOUR_CUSTOM_ENDPOINT_OR_CLUSTER
```
Add the required permissions to your `AndroidManifest.xml` file:
```xml
```
#### 2.2 Set up iOS
Add the Braze SDK imports at the top of the `AppDelegate.swift` file:
```swift
import BrazeKit
import braze_plugin
```
In the same file, create the Braze configuration object in the `application(_:didFinishLaunchingWithOptions:)` method and replace the API key and endpoint with your app's values. Then, create the Braze instance using the configuration, and create a static property on the `AppDelegate` for easy access:
```swift
static var braze: Braze? = nil
override func application(
_ application: UIApplication,
didFinishLaunchingWithOptions launchOptions: [UIApplication.LaunchOptionsKey : Any]? = nil
) -> Bool {
// Setup Braze
let configuration = Braze.Configuration(
apiKey: "",
endpoint: ""
)
// - Enable logging or customize configuration here
configuration.logger.level = .info
let braze = BrazePlugin.initBraze(configuration)
AppDelegate.braze = braze
return true
}
```
Import the Braze SDK at the top of the `AppDelegate.m` file:
```objc
@import BrazeKit;
@import braze_plugin;
```
In the same file, create the Braze configuration object in the `application:didFinishLaunchingWithOptions:` method and replace the API key and endpoint with your app's values. Then, create the Braze instance using the configuration, and create a static property on the `AppDelegate` for easy access:
```objc
- (BOOL)application:(UIApplication *)application
didFinishLaunchingWithOptions:(NSDictionary *)launchOptions {
// Setup Braze
BRZConfiguration *configuration =
[[BRZConfiguration alloc] initWithApiKey:@""
endpoint:@""];
// - Enable logging or customize configuration here
configuration.logger.level = BRZLoggerLevelInfo;
Braze *braze = [BrazePlugin initBraze:configuration];
AppDelegate.braze = braze;
[self.window makeKeyAndVisible];
return YES;
}
#pragma mark - AppDelegate.braze
static Braze *_braze = nil;
+ (Braze *)braze {
return _braze;
}
+ (void)setBraze:(Braze *)braze {
_braze = braze;
}
```
### Step 3: Set up the plugin
Import the plugin and create a single instance of `BrazePlugin`:
```dart
import 'package:braze_plugin/braze_plugin.dart';
final BrazePlugin braze = BrazePlugin();
```
Then call `initialize()` with your app identifier API key and SDK endpoint to create the Braze instance. See the options below for where to call this method in your app.
#### Standard initialization
To initialize the SDK when your app starts, call `initialize()` in `initState()`:
```dart
@override
void initState() {
super.initState();
braze.initialize("", "");
}
```
#### Delayed initialization
To defer SDK initialization until a later point in the session — for example, after the user grants consent or completes login — call `initialize()` when you're ready:
```dart
// ...
void onUserConsent() {
braze.initialize("", "");
}
```
**Warning:**
Push notifications and deep links received before `initialize()` is called are not processed on iOS. On Android, deep links from push notifications do not resolve while the SDK is waiting to be initialized. If your app relies on push or deep links at launch, use [standard initialization](#standard-initialization) instead.
#### Platform-specific API keys
Since your Android and iOS apps use different API keys, use platform detection:
```dart
import 'dart:io' show Platform;
if (Platform.isAndroid) {
braze.initialize("", "");
} else if (Platform.isIOS) {
braze.initialize("", "");
}
```
#### Re-initialization
You can call `initialize()` multiple times to re-initialize the SDK with a different API key and endpoint mid-session. Each call tears down the previous Braze instance and creates a new one.
**Important:**
To avoid undefined behaviors, only allocate and use a single instance of the `BrazePlugin` in your Dart code. All SDK method calls made before `initialize()` are ignored on iOS, so call `initialize()` before using any other Braze methods.
To import the plugin into your Dart code, use the following:
```dart
import 'package:braze_plugin/braze_plugin.dart';
```
Then, initialize an instance of the Braze plugin by calling `new BrazePlugin()` like in [our sample app](https://github.com/braze-inc/braze-flutter-sdk/blob/master/example/lib/main.dart).
**Important:**
To avoid undefined behaviors, only allocate and use a single instance of the `BrazePlugin` in your Dart code.
## Testing the integration
You can verify that the SDK is integrated by checking session statistics in the dashboard. If you run your application on either platform, you should see a new session in the dashboard (in the **Overview** section).
Open a session for a particular user by calling the following code in your app.
```dart
BrazePlugin braze = BrazePlugin();
braze.initialize("", "");
braze.changeUser("{some-user-id}");
```
```dart
BrazePlugin braze = BrazePlugin();
braze.changeUser("{some-user-id}");
```
Search for the user with `{some-user-id}` in the dashboard under **Audience** > **Search Users**. There, you can verify that session and device data have been logged.
## About the React Native Braze SDK
Integrating the React Native Braze SDK provides basic analytics functionality and lets you integrate in-app messages and Content Cards for both iOS and Android with one codebase.
## New Architecture compatibility
The following minimum SDK version is compatible with all apps using [React Native's New Architecture](https://reactnative.dev/docs/the-new-architecture/landing-page):
Starting with SDK version 6.0.0, Braze uses a React Native Turbo Module, which is compatible with both the New Architecture and legacy bridge architecture. This means no additional setup is required.
**Warning:**
If your iOS app conforms to `RCTAppDelegate` and follows our previous `AppDelegate` setup, review the samples in [Complete native setup](#reactnative_step-2-complete-native-setup) to prevent crashes when subscribing to events in the Turbo Module.
## React and React Native version requirements
Braze doesn't publish separate minimum React versions beyond what the React Native SDK supports. To integrate the SDK, use React Native version 0.71 or later. For the full list of supported React Native versions, see the [React Native SDK GitHub repository](https://github.com/braze-inc/braze-react-native-sdk?tab=readme-ov-file#version-support).
When you upgrade React, React Native, or the Braze SDK, review the SDK [CHANGELOG](https://github.com/braze-inc/braze-react-native-sdk/blob/master/CHANGELOG.md) for breaking changes before you deploy.
## Integrating the React Native SDK
### Prerequisites
For supported React Native versions and upgrade guidance, see [React and React Native version requirements](#react-and-react-native-version-requirements).
### Step 1: Integrate the Braze library
```bash
npm install @braze/react-native-sdk
```
```bash
yarn add @braze/react-native-sdk
```
### Step 2: Complete native setup
If your app uses Expo, see [Using the Expo plugin](#reactnative-using-the-expo-plugin). If your app uses pure React Native, see [Using React Native CLI](#reactnative-using-react-native-cli).
Choose one setup method in each version tab: Expo plugin or React Native CLI.
#### Method 1: Using the Expo plugin {#reactnative-using-the-expo-plugin}
##### 2.1 Install the Braze Expo plugin
Ensure that your version of the Braze Expo plugin is at least 4.1.0. For the full list of supported versions, see the [Braze Expo plugin repository](https://github.com/braze-inc/braze-expo-plugin?tab=readme-ov-file#version-support).
The following code snippet shows the command to install the Braze Expo plugin:
```bash
npx expo install @braze/expo-plugin
```
##### 2.2 Add the plugin to your app.json
In your `app.json`, add the Braze Expo plugin. The API key and endpoint are no longer set here. Provide them at runtime through `Braze.initialize()` from JavaScript. Add the following optional configuration parameters based on your implementation needs:
| Method | Type | Description |
| --------------------------------------------- | ------- | -------------------------------------------------------------------------------------------------------------------------------------------------------- |
| `enableBrazeIosPush` | boolean | iOS only. Whether to use Braze to handle push notifications on iOS. |
| `enableFirebaseCloudMessaging` | boolean | Android only. Whether to use Firebase Cloud Messaging for push notifications. |
| `firebaseCloudMessagingSenderId` | string | Android only. Your Firebase Cloud Messaging sender ID. |
| `sessionTimeout` | integer | The Braze session timeout for your application in seconds. |
| `enableSdkAuthentication` | boolean | Whether to enable the [SDK Authentication](https://www.braze.com/docs/pt-br/pt-br/developer_guide/platform_wide/sdk_authentication#sdk-authentication) feature. |
| `logLevel` | integer | The log level for your application. The default log level is 8 and minimally logs info. To enable verbose logging for debugging, use log level 0. |
| `minimumTriggerIntervalInSeconds` | integer | The minimum time interval in seconds between triggers. Defaults to 30 seconds. |
| `enableAutomaticLocationCollection` | boolean | Whether automatic location collection is enabled (if the user permits). |
| `enableGeofence` | boolean | Whether geofences are enabled. |
| `enableAutomaticGeofenceRequests` | boolean | Whether geofence requests should be made automatically. |
| `dismissModalOnOutsideTap` | boolean | iOS only. Whether a modal in-app message is dismissed when the user clicks outside of the in-app message. |
| `androidHandlePushDeepLinksAutomatically` | boolean | Android only. Whether the Braze SDK should automatically handle push deep links. |
| `androidPushNotificationHtmlRenderingEnabled` | boolean | Android only. Sets whether the text content in a push notification should be interpreted and rendered as HTML using `android.text.Html.fromHtml`. |
| `androidNotificationAccentColor` | string | Android only. Sets the Android notification accent color. |
| `androidNotificationLargeIcon` | string | Android only. Sets the Android notification large icon. |
| `androidNotificationSmallIcon` | string | Android only. Sets the Android notification small icon. |
| `iosRequestPushPermissionsAutomatically` | boolean | iOS only. Whether the user should automatically be prompted for push permissions on app launch. |
| `enableBrazeIosRichPush` | boolean | iOS only. Whether to enable rich push features for iOS. |
| `enableBrazeIosPushStories` | boolean | iOS only. Whether to enable Braze Push Stories for iOS. |
| `iosPushStoryAppGroup` | string | iOS only. The app group used for iOS Push Stories. |
| `iosUseUUIDAsDeviceId` | boolean | iOS only. Whether the device ID uses a randomly generated UUID. |
| `iosForwardUniversalLinks` | boolean | iOS only. Specifies if the SDK should automatically recognize and forward universal links to the system methods (default: `false`). |
{: .reset-td-br-1 .reset-td-br-2 .reset-td-br-3 aria-label="2.2 Add the plugin to your app.json" }
The following code snippet shows an example `app.json` configuration:
```json
{
"expo": {
"plugins": [
[
"@braze/expo-plugin",
{
"sessionTimeout": 60,
"enableGeofence": false,
"enableBrazeIosPush": false,
"enableFirebaseCloudMessaging": false,
"firebaseCloudMessagingSenderId": "YOUR-FCM-SENDER-ID",
"androidHandlePushDeepLinksAutomatically": true,
"enableSdkAuthentication": false,
"logLevel": 0,
"minimumTriggerIntervalInSeconds": 0,
"enableAutomaticLocationCollection": false,
"enableAutomaticGeofenceRequests": false,
"dismissModalOnOutsideTap": true,
"androidPushNotificationHtmlRenderingEnabled": true,
"androidNotificationAccentColor": "#ff3344",
"androidNotificationLargeIcon": "@drawable/custom_app_large_icon",
"androidNotificationSmallIcon": "@drawable/custom_app_small_icon",
"iosRequestPushPermissionsAutomatically": false,
"enableBrazeIosPushStories": true,
"iosPushStoryAppGroup": "group.com.example.myapp.PushStories",
"iosForwardUniversalLinks": false
}
]
]
}
}
```
###### Configuring Android push notification icons {#android-push-icons}
When using `androidNotificationLargeIcon` and `androidNotificationSmallIcon`, follow these best practices for proper icon display:
**Icon placement and format**
To use custom push notification icons with the Braze Expo plugin:
1. Create your icon files following the Icon requirements listed below.
2. Place them in your project's Android native directories at `android/app/src/main/res/drawable-/`.
For example, use `android/app/src/main/res/drawable-mdpi/` and `android/app/src/main/res/drawable-hdpi/`.
3. Alternatively, if you're managing assets in your React Native directory, you can use Expo's [app.json icon configuration](https://docs.expo.dev/versions/latest/config/app/#icon) or create an [Expo config plugin](https://docs.expo.dev/config-plugins/introduction/) to copy the icons to the Android drawable folders during prebuild.
The Braze Expo plugin references these icons using Android's drawable resource system.
**Icon requirements**
- **Small icon:** Must be a white silhouette on a transparent background (this is an Android platform requirement)
- **Large icon:** Can be a full-color image.
- **Format:** PNG format is recommended.
- **Naming:** Use lowercase letters, numbers, and underscores only (for example, `my_large_icon.png`)
**Configuration in app.json**
The following code snippet shows how to reference Android notification icons in `app.json` using the `@drawable/` prefix:
```json
{
"expo": {
"plugins": [
[
"@braze/expo-plugin",
{
"androidNotificationLargeIcon": "@drawable/large_icon",
"androidNotificationSmallIcon": "@drawable/small_icon"
}
]
]
}
}
```
**Important:**
Do not use relative file paths (such as `src/assets/images/icon.png`) or include the file extension when referencing icons. The Expo plugin requires the `@drawable/` prefix to properly locate the icons in the Android native folders after the prebuild process.
**How it works**
The Braze Expo plugin references your icon files from the Android `drawable` directories. When you run `npx expo prebuild`, Expo generates the native Android project structure. Your icons must be present in the Android `drawable` folders (either placed manually or copied through a config plugin) before the build process. The plugin then configures the Braze SDK to use these drawable resources by their names (without path or extension), which is why the `@drawable/` prefix is required in your configuration.
For more information on Android notification icons, see [Android's notification icon guidelines](https://developer.android.com/develop/ui/views/notifications#icon).
##### 2.3 Build and run your application
Prebuilding your application generates the native files necessary for the Braze Expo plugin to work.
The following code snippet shows the command to prebuild your application:
```bash
npx expo prebuild
```
Run your application as specified in the [Expo docs](https://docs.expo.dev/workflow/customizing/). If you make changes to the configuration options, prebuild and run the application again.
#### Method 2: Using React Native CLI {#reactnative-using-react-native-cli}
##### Set up Android
**2.1 Add the Kotlin Gradle plugin**
The following code snippet shows how to add the Kotlin Gradle plugin in your top-level project `build.gradle` under `buildscript` > `dependencies`:
```groovy
buildscript {
dependencies {
...
// Choose your Kotlin version
classpath("org.jetbrains.kotlin:kotlin-gradle-plugin:1.8.10")
}
}
```
This adds Kotlin to your project.
**2.2 Configure the Braze SDK**
Create a `braze.xml` file in your project's `res/values` folder. The API key and endpoint are provided at runtime from JavaScript, so they are not required in this file. The following code snippet shows how to enable delayed initialization with `com_braze_enable_delayed_initialization`:
```xml
true
```
**Note:**
You can still add other native configuration values to `braze.xml` (such as push, session timeout, and logging settings). These are applied automatically when `Braze.initialize()` is called from JavaScript.
The following code snippet shows the required permissions for your `AndroidManifest.xml` file:
```xml
```
**Tip:**
On Braze Android SDK version 12.2.0 or later, you can automatically pull in the android-sdk-location library by setting `importBrazeLocationLibrary=true` in your `gradle.properties` file.
**2.3 Implement user session tracking**
The calls to `openSession()` and `closeSession()` are handled automatically.
The following code snippet shows what to add to the `onCreate()` method of your `MainApplication` class:
```java
import com.braze.BrazeActivityLifecycleCallbackListener;
@Override
public void onCreate() {
super.onCreate();
...
registerActivityLifecycleCallbacks(new BrazeActivityLifecycleCallbackListener());
}
```
```kotlin
import com.braze.BrazeActivityLifecycleCallbackListener
override fun onCreate() {
super.onCreate()
...
registerActivityLifecycleCallbacks(BrazeActivityLifecycleCallbackListener())
}
```
**2.4 Handle intent updates**
If your MainActivity has `android:launchMode` set to `singleTask`, the following code snippet shows what to add to your `MainActivity` class:
```java
@Override
public void onNewIntent(Intent intent) {
super.onNewIntent(intent);
setIntent(intent);
}
```
```kotlin
override fun onNewIntent(intent: Intent) {
super.onNewIntent(intent)
setIntent(intent)
}
```
##### Set up iOS
**2.5 (Optional) Configure Podfile for dynamic XCFrameworks**
To import certain Braze libraries, such as BrazeUI, into an Objective-C++ file, you must use the `#import` syntax. Starting in version `7.4.0` of the Braze Swift SDK, binaries have an [optional distribution channel as dynamic XCFrameworks](https://github.com/braze-inc/braze-swift-sdk-prebuilt-dynamic), which are compatible with this syntax.
If you'd like to use this distribution channel, manually override the CocoaPods source locations in your Podfile. Reference the sample below and replace `{your-version}` with the relevant version you wish to import:
```ruby
pod 'BrazeKit', :podspec => 'https://raw.githubusercontent.com/braze-inc/braze-swift-sdk-prebuilt-dynamic/{your-version}/BrazeKit.podspec'
pod 'BrazeUI', :podspec => 'https://raw.githubusercontent.com/braze-inc/braze-swift-sdk-prebuilt-dynamic/{your-version}/BrazeUI.podspec'
pod 'BrazeLocation', :podspec => 'https://raw.githubusercontent.com/braze-inc/braze-swift-sdk-prebuilt-dynamic/{your-version}/BrazeLocation.podspec'
```
**2.6 Install pods**
Since React Native automatically links the libraries to the native platform, you can install the SDK with the help of CocoaPods.
The following code snippet shows how to install pods from the root folder of the project:
```bash
# To install using the React Native New Architecture
cd ios && pod install
# To install using the React Native legacy architecture
cd ios && RCT_NEW_ARCH_ENABLED=0 pod install
```
**2.7 Configure the Braze SDK**
Use `BrazeReactInitializer.configure` in your `AppDelegate` to register native configuration. The closures you provide are stored and applied later when `Braze.initialize(apiKey, endpoint)` is called from JavaScript.
The following code snippet shows how to import the Braze SDK at the top of the `AppDelegate.swift` file:
```swift
import BrazeKit
import braze_react_native_sdk
```
In the `application(_:didFinishLaunchingWithOptions:)` method, register your native configuration using `BrazeReactInitializer.configure`. Do not set the API key or endpoint here. They are provided from JavaScript through `Braze.initialize()`.
- **`configure` closure**: Receives a `Braze.Configuration` and lets you set native configuration properties (logging, push, sessions, and more).
- **`postInitialization` closure** _(optional)_: Receives the live `Braze` instance after creation, for setup that requires the instance (for example, storing a reference or setting delegates).
The following code snippet shows an example `AppDelegate.swift` implementation that uses `BrazeReactInitializer.configure`:
```swift
@main
class AppDelegate: UIResponder, UIApplicationDelegate {
static var braze: Braze? = nil
func application(
_ application: UIApplication,
didFinishLaunchingWithOptions launchOptions: [UIApplication.LaunchOptionsKey: Any]? = nil
) -> Bool {
BrazeReactInitializer.configure { configuration in
configuration.logger.level = .info
configuration.push.automation = true
} postInitialization: { braze in
AppDelegate.braze = braze
}
// ... React Native setup
return true
}
}
```
The following code snippet shows how to import the Braze SDK at the top of the `AppDelegate.m` file:
```objc
@import BrazeKit;
@import braze_react_native_sdk;
```
In the `application:didFinishLaunchingWithOptions:` method, register your native configuration using `BrazeReactInitializer`. Do not set the API key or endpoint here. They are provided from JavaScript through `Braze.initialize()`.
The following code snippet shows an example `AppDelegate.m` implementation that uses `BrazeReactInitializer`:
```objc
- (BOOL)application:(UIApplication *)application
didFinishLaunchingWithOptions:(NSDictionary *)launchOptions {
[BrazeReactInitializer configure:^(BRZConfiguration *configuration) {
configuration.logger.level = BRZLoggerLevelInfo;
configuration.push.automation = [[BRZConfigurationPushAutomation alloc] initWithAutomationEnabled:YES];
} postInitialization:^(Braze *braze) {
// Store the Braze instance for later use.
}];
/* Other configuration */
return YES;
}
```
**Important:**
`BrazeReactInitializer.configure()` only stores your configuration. No Braze instance exists until `Braze.initialize()` is called from JavaScript, so do not call any Braze SDK methods in the AppDelegate after `configure()`.
When you call `Braze.initialize()` again, the same `configure` and `postInitialization` blocks are applied to the new Braze instance.
#### Method 1: Using the Expo plugin
##### Step 2.1: Install the Braze Expo plugin
Ensure that your version of the Braze React Native SDK is at least 1.37.0. For the full list of supported versions, see the [Braze React Native repository](https://github.com/braze-inc/braze-react-native-sdk?tab=readme-ov-file#version-support).
The following code snippet shows the command to install the Braze Expo plugin:
```bash
npx expo install @braze/expo-plugin
```
##### Step 2.2: Add the plugin to your app.json
In your `app.json`, add the Braze Expo plugin. You can provide the following configuration options:
| Method | Type | Description |
| --------------------------------------------- | ------- | -------------------------------------------------------------------------------------------------------------------------------------------------------- |
| `androidApiKey` | string | Required. The [API key](https://www.braze.com/docs/pt-br/pt-br/api/identifier_types/) for your Android application, located in your Braze dashboard under **Manage Settings**. |
| `iosApiKey` | string | Required. The [API key](https://www.braze.com/docs/pt-br/pt-br/api/identifier_types/) for your iOS application, located in your Braze dashboard under **Manage Settings**. |
| `baseUrl` | string | Required. The [SDK endpoint](https://www.braze.com/docs/pt-br/pt-br/api/basics/#endpoints) for your application, located in your Braze dashboard under **Manage Settings**. |
| `enableBrazeIosPush` | boolean | iOS only. Whether to use Braze to handle push notifications on iOS. Introduced in React Native SDK v1.38.0 and Expo Plugin v0.4.0. |
| `enableFirebaseCloudMessaging` | boolean | Android only. Whether to use Firebase Cloud Messaging for push notifications. Introduced in React Native SDK v1.38.0 and Expo Plugin v0.4.0. |
| `firebaseCloudMessagingSenderId` | string | Android only. Your Firebase Cloud Messaging sender ID. Introduced in React Native SDK v1.38.0 and Expo Plugin v0.4.0. |
| `sessionTimeout` | integer | The Braze session timeout for your application in seconds. |
| `enableSdkAuthentication` | boolean | Whether to enable the [SDK Authentication](https://www.braze.com/docs/pt-br/pt-br/developer_guide/platform_wide/sdk_authentication#sdk-authentication) feature. |
| `logLevel` | integer | The log level for your application. The default log level is 8 and minimally logs info. To enable verbose logging for debugging, use log level 0. |
| `minimumTriggerIntervalInSeconds` | integer | The minimum time interval in seconds between triggers. Defaults to 30 seconds. |
| `enableAutomaticLocationCollection` | boolean | Whether automatic location collection is enabled (if the user permits). |
| `enableGeofence` | boolean | Whether geofences are enabled. |
| `enableAutomaticGeofenceRequests` | boolean | Whether geofence requests should be made automatically. |
| `dismissModalOnOutsideTap` | boolean | iOS only. Whether a modal in-app message is dismissed when the user clicks outside of the in-app message. |
| `androidHandlePushDeepLinksAutomatically` | boolean | Android only. Whether the Braze SDK should automatically handle push deep links. |
| `androidPushNotificationHtmlRenderingEnabled` | boolean | Android only. Sets whether the text content in a push notification should be interpreted and rendered as HTML using `android.text.Html.fromHtml`. |
| `androidNotificationAccentColor` | string | Android only. Sets the Android notification accent color. |
| `androidNotificationLargeIcon` | string | Android only. Sets the Android notification large icon. |
| `androidNotificationSmallIcon` | string | Android only. Sets the Android notification small icon. |
| `iosRequestPushPermissionsAutomatically` | boolean | iOS only. Whether the user should automatically be prompted for push permissions on app launch. |
| `enableBrazeIosRichPush` | boolean | iOS only. Whether to enable rich push features for iOS. |
| `enableBrazeIosPushStories` | boolean | iOS only. Whether to enable Braze Push Stories for iOS. |
| `iosPushStoryAppGroup` | string | iOS only. The app group used for iOS Push Stories. |
| `iosUseUUIDAsDeviceId` | boolean | iOS only. Whether the device ID will use a randomly generated UUID. |
| `iosForwardUniversalLinks` | boolean | iOS only. Specifies if the SDK should automatically recognize and forward universal links to the system methods (default: `false`). When enabled, the SDK will automatically forward universal links to the system methods defined in [Supporting universal links in your app](https://braze-inc.github.io/braze-swift-sdk/documentation/brazekit/braze/configuration-swift.class/forwarduniversallinks/). Introduced in React Native SDK v11.1.0 and Expo Plugin v3.2.0. |
{: .reset-td-br-1 .reset-td-br-2 .reset-td-br-3 aria-label="Step 2.2: Add the plugin to your app.json" }
The following code snippet shows an example `app.json` configuration:
```json
{
"expo": {
"plugins": [
[
"@braze/expo-plugin",
{
"androidApiKey": "YOUR-ANDROID-API-KEY",
"iosApiKey": "YOUR-IOS-API-KEY",
"baseUrl": "YOUR-SDK-ENDPOINT",
"sessionTimeout": 60,
"enableGeofence": false,
"enableBrazeIosPush": false,
"enableFirebaseCloudMessaging": false,
"firebaseCloudMessagingSenderId": "YOUR-FCM-SENDER-ID",
"androidHandlePushDeepLinksAutomatically": true,
"enableSdkAuthentication": false,
"logLevel": 0,
"minimumTriggerIntervalInSeconds": 0,
"enableAutomaticLocationCollection": false,
"enableAutomaticGeofenceRequests": false,
"dismissModalOnOutsideTap": true,
"androidPushNotificationHtmlRenderingEnabled": true,
"androidNotificationAccentColor": "#ff3344",
"androidNotificationLargeIcon": "@drawable/custom_app_large_icon",
"androidNotificationSmallIcon": "@drawable/custom_app_small_icon",
"iosRequestPushPermissionsAutomatically": false,
"enableBrazeIosPushStories": true,
"iosPushStoryAppGroup": "group.com.example.myapp.PushStories",
"iosForwardUniversalLinks": false
}
],
]
}
}
```
###### Configuring Android push notification icons
When using `androidNotificationLargeIcon` and `androidNotificationSmallIcon`, follow these best practices for proper icon display:
**Icon placement and format**
To use custom push notification icons with the Braze Expo plugin:
1. Create your icon files following the Icon requirements listed below.
2. Place them in your project's Android native directories at `android/app/src/main/res/drawable-/` (for example, `android/app/src/main/res/drawable-mdpi/`, `drawable-hdpi/`, or similar.)
3. Alternatively, if you're managing assets in your React Native directory, you can use Expo's [app.json icon configuration](https://docs.expo.dev/versions/latest/config/app/#icon) or create an [Expo config plugin](https://docs.expo.dev/config-plugins/introduction/) to copy the icons to the Android drawable folders during prebuild.
The Braze Expo plugin references these icons using Android's drawable resource system.
**Icon requirements**
- **Small icon:** Must be a white silhouette on a transparent background (this is an Android platform requirement)
- **Large icon:** Can be a full-color image.
- **Format:** PNG format is recommended.
- **Naming:** Use lowercase letters, numbers, and underscores only (for example, `my_large_icon.png`)
**Configuration in app.json**
The following code snippet shows how to reference Android notification icons in `app.json` using the `@drawable/` prefix:
```json
{
"expo": {
"plugins": [
[
"@braze/expo-plugin",
{
"androidNotificationLargeIcon": "@drawable/large_icon",
"androidNotificationSmallIcon": "@drawable/small_icon"
}
]
]
}
}
```
**Important:**
Do not use relative file paths (such as `src/assets/images/icon.png`) or include the file extension when referencing icons. The Expo plugin requires the `@drawable/` prefix to properly locate the icons in the Android native folders after the prebuild process.
**How it works**
The Braze Expo plugin references your icon files from the Android `drawable` directories. When you run `npx expo prebuild`, Expo generates the native Android project structure. Your icons must be present in the Android `drawable` folders (either placed manually or copied through a config plugin) before the build process. The plugin then configures the Braze SDK to use these drawable resources by their names (without path or extension), which is why the `@drawable/` prefix is required in your configuration.
For more information on Android notification icons, see [Android's notification icon guidelines](https://developer.android.com/develop/ui/views/notifications#icon).
##### Step 2.3: Build and run your application
Prebuilding your application generates the native files necessary for the Braze Expo plugin to work.
The following code snippet shows the command to prebuild your application:
```bash
npx expo prebuild
```
Run your application as specified in the [Expo docs](https://docs.expo.dev/workflow/customizing/). Keep in mind, if you make any changes to the configuration options, you'll be required to prebuild and run the application again.
#### Method 2: Using React Native CLI
##### Set up Android
**Step 2.1: Add the Kotlin Gradle plugin**
The following code snippet shows how to add the Kotlin Gradle plugin in your top-level project `build.gradle` under `buildscript` > `dependencies`:
```groovy
buildscript {
dependencies {
...
// Choose your Kotlin version
classpath("org.jetbrains.kotlin:kotlin-gradle-plugin:1.8.10")
}
}
```
This adds Kotlin to your project.
**Step 2.2: Configure the Braze SDK**
To connect to Braze servers, create a `braze.xml` file in your project's `res/values` folder. The following code snippet shows an example `braze.xml` configuration. Replace the API [key](https://www.braze.com/docs/pt-br/pt-br/api/identifier_types/) and [endpoint](https://www.braze.com/docs/pt-br/pt-br/api/basics/#endpoints) with your values:
```xml
YOU_APP_IDENTIFIER_API_KEYYOUR_CUSTOM_ENDPOINT_OR_CLUSTER
```
The following code snippet shows the required permissions for your `AndroidManifest.xml` file:
```xml
```
**Tip:**
On Braze Android SDK version 12.2.0 or later, you can automatically pull in the android-sdk-location library by setting `importBrazeLocationLibrary=true` in your `gradle.properties` file.
**Step 2.3: Implement user session tracking**
The calls to `openSession()` and `closeSession()` are handled automatically.
The following code snippet shows what to add to the `onCreate()` method of your `MainApplication` class:
```java
import com.braze.BrazeActivityLifecycleCallbackListener;
@Override
public void onCreate() {
super.onCreate();
...
registerActivityLifecycleCallbacks(new BrazeActivityLifecycleCallbackListener());
}
```
```kotlin
import com.braze.BrazeActivityLifecycleCallbackListener
override fun onCreate() {
super.onCreate()
...
registerActivityLifecycleCallbacks(BrazeActivityLifecycleCallbackListener())
}
```
**Step 2.4: Handle intent updates**
If your MainActivity has `android:launchMode` set to `singleTask`, the following code snippet shows what to add to your `MainActivity` class:
```java
@Override
public void onNewIntent(Intent intent) {
super.onNewIntent(intent);
setIntent(intent);
}
```
```kotlin
override fun onNewIntent(intent: Intent) {
super.onNewIntent(intent)
setIntent(intent)
}
```
##### Set up iOS
**Step 2.5: (Optional) Configure Podfile for dynamic XCFrameworks**
To import certain Braze libraries, such as BrazeUI, into an Objective-C++ file, you must use the `#import` syntax. Starting in version `7.4.0` of the Braze Swift SDK, binaries have an [optional distribution channel as dynamic XCFrameworks](https://github.com/braze-inc/braze-swift-sdk-prebuilt-dynamic), which are compatible with this syntax.
If you'd like to use this distribution channel, manually override the CocoaPods source locations in your Podfile. The following code snippet shows a sample override. Replace `{your-version}` with the relevant version you wish to import:
```ruby
pod 'BrazeKit', :podspec => 'https://raw.githubusercontent.com/braze-inc/braze-swift-sdk-prebuilt-dynamic/{your-version}/BrazeKit.podspec'
pod 'BrazeUI', :podspec => 'https://raw.githubusercontent.com/braze-inc/braze-swift-sdk-prebuilt-dynamic/{your-version}/BrazeUI.podspec'
pod 'BrazeLocation', :podspec => 'https://raw.githubusercontent.com/braze-inc/braze-swift-sdk-prebuilt-dynamic/{your-version}/BrazeLocation.podspec'
```
**Step 2.6: Install pods**
Since React Native automatically links the libraries to the native platform, you can install the SDK with the help of CocoaPods.
The following code snippet shows how to install pods from the root folder of the project:
```bash
# To install using the React Native New Architecture
cd ios && pod install
# To install using the React Native legacy architecture
cd ios && RCT_NEW_ARCH_ENABLED=0 pod install
```
**Step 2.7: Configure the Braze SDK**
The following code snippet shows how to import the Braze SDK at the top of the `AppDelegate.swift` file:
```swift
import BrazeKit
import braze_react_native_sdk
```
In the `application(_:didFinishLaunchingWithOptions:)` method, replace the API [key](https://www.braze.com/docs/pt-br/pt-br/api/identifier_types/) and [endpoint](https://www.braze.com/docs/pt-br/pt-br/api/basics/#endpoints) with your app's values. Then, create the Braze instance using the configuration, and create a static property on the `AppDelegate` for easy access.
**Note:**
Our example assumes an implementation of [RCTAppDelegate](https://github.com/facebook/react-native/blob/e64756ae5bb5c0607a4d97a134620fafcb132b3b/packages/react-native/Libraries/AppDelegate/RCTAppDelegate.h), which provides a number of abstractions in the React Native setup. If you are using a different setup for your app, be sure to adjust your implementation as needed.
The following code snippet shows an example `AppDelegate.swift` setup:
```swift
func application(
_ application: UIApplication,
didFinishLaunchingWithOptions launchOptions: [UIApplication.LaunchOptionsKey : Any]? = nil
) -> Bool {
// Setup Braze
let configuration = Braze.Configuration(
apiKey: "{BRAZE_API_KEY}",
endpoint: "{BRAZE_ENDPOINT}")
// Enable logging and customize the configuration here.
configuration.logger.level = .info
let braze = BrazeReactBridge.perform(
#selector(BrazeReactBridge.initBraze(_:)),
with: configuration
).takeUnretainedValue() as! Braze
AppDelegate.braze = braze
/* Other configuration */
return true
}
// MARK: - AppDelegate.braze
static var braze: Braze? = nil
```
The following code snippet shows how to import the Braze SDK at the top of the `AppDelegate.m` file:
```objc
#import
#import "BrazeReactBridge.h"
```
In the `application:didFinishLaunchingWithOptions:` method, replace the API [key](https://www.braze.com/docs/pt-br/pt-br/api/identifier_types/) and [endpoint](https://www.braze.com/docs/pt-br/pt-br/api/basics/#endpoints) with your app's values. Then, create the Braze instance using the configuration, and create a static property on the `AppDelegate` for easy access.
**Note:**
Our example assumes an implementation of [RCTAppDelegate](https://github.com/facebook/react-native/blob/e64756ae5bb5c0607a4d97a134620fafcb132b3b/packages/react-native/Libraries/AppDelegate/RCTAppDelegate.h), which provides a number of abstractions in the React Native setup. If you are using a different setup for your app, be sure to adjust your implementation as needed.
The following code snippet shows an example `AppDelegate.m` setup:
```objc
- (BOOL)application:(UIApplication *)application
didFinishLaunchingWithOptions:(NSDictionary *)launchOptions {
// Setup Braze
BRZConfiguration *configuration = [[BRZConfiguration alloc] initWithApiKey:@"{BRAZE_API_KEY}"
endpoint:@"{BRAZE_ENDPOINT}"];
// Enable logging and customize the configuration here.
configuration.logger.level = BRZLoggerLevelInfo;
Braze *braze = [BrazeReactBridge initBraze:configuration];
AppDelegate.braze = braze;
/* Other configuration */
return YES;
}
#pragma mark - AppDelegate.braze
static Braze *_braze = nil;
+ (Braze *)braze {
return _braze;
}
+ (void)setBraze:(Braze *)braze {
_braze = braze;
}
```
### Step 3: Initialize the SDK
The following code snippet shows how to import the library in your React Native code:
```javascript
import Braze from "@braze/react-native-sdk";
```
Then call `Braze.initialize()` with your app identifier API key and SDK endpoint to create the Braze instance. See the options below for where to call this method in your app.
#### Standard initialization
The following code snippet shows how to initialize the SDK when your app starts by calling `Braze.initialize()` in a `useEffect`:
```javascript
import React, { useEffect } from "react";
import Braze from "@braze/react-native-sdk";
const App = () => {
useEffect(() => {
Braze.initialize("YOUR-API-KEY", "YOUR-SDK-ENDPOINT");
}, []);
return (
// Your app components
);
};
```
#### Delayed initialization
The following code snippet shows how to defer SDK initialization until later in the session. For example, after the user grants consent or completes login:
```javascript
function onUserConsent() {
Braze.initialize("YOUR-API-KEY", "YOUR-SDK-ENDPOINT");
}
```
**Warning:**
On iOS, push notifications received before `Braze.initialize()` are queued and processed after initialization. On Android, deep links from push notifications do not resolve while the SDK is waiting to be initialized. If your app relies on immediate deep link handling at launch, use [standard initialization](#standard-initialization) instead.
#### Platform-specific API keys
The following code snippet shows how to use platform detection when your Android and iOS apps use different API keys:
```javascript
import { Platform } from "react-native";
import Braze from "@braze/react-native-sdk";
const apiKey = Platform.select({
android: "YOUR-ANDROID-API-KEY",
ios: "YOUR-IOS-API-KEY",
}) ?? "";
Braze.initialize(apiKey, "YOUR-SDK-ENDPOINT");
```
#### Re-initialization
You can call `Braze.initialize()` multiple times to re-initialize the SDK with a different API key and endpoint mid-session. Each call tears down the previous Braze instance and creates a new one.
**Important:**
All SDK method calls made before `Braze.initialize()` are ignored on iOS, so call `Braze.initialize()` before using any other Braze methods.
For React Native SDK 19.1.0 and earlier, native initialization happens in Step 2. Import the library in your React Native code to call Braze methods. For more details, check out our [sample project](https://github.com/braze-inc/braze-react-native-sdk/tree/master/BrazeProject).
```javascript
import Braze from "@braze/react-native-sdk";
```
### Step 4: Test the integration (optional)
You can verify that the SDK is integrated by checking session statistics in the dashboard. If you run your application on either platform, you should see a new session in the dashboard (in the **Overview** section).
The following code snippet shows how to open a session for a particular user in your app:
```javascript
import Braze from "@braze/react-native-sdk";
Braze.initialize("YOUR-API-KEY", "YOUR-SDK-ENDPOINT");
Braze.changeUser("{some-user-id}");
```
Search for the user with `{some-user-id}` in the dashboard under **Audience** > **Search Users**. There, you can verify that session and device data have been logged.
To test your SDK integration, the following code snippet shows how to start a new session on either platform for a user.
```javascript
Braze.changeUser("userId");
```
The following code snippet shows an example of assigning the user ID at app startup:
```javascript
import React, { useEffect } from "react";
import Braze from "@braze/react-native-sdk";
const App = () => {
useEffect(() => {
Braze.changeUser("some-user-id");
}, []);
return (
...
)
```
In the Braze dashboard, go to [User Search](https://www.braze.com/docs/pt-br/pt-br/user_guide/engagement_tools/segments/using_user_search#using-user-search) and look for the user with the ID matching `some-user-id`. Here, you can verify that session and device data were logged.
## Next steps
After integrating the Braze SDK, you can start implementing common messaging features:
- [Push Notifications](https://www.braze.com/docs/pt-br/pt-br/developer_guide/push_notifications/): Set up and send push notifications to your users.
- [In-App Messages](https://www.braze.com/docs/pt-br/pt-br/developer_guide/in_app_messages/): Display contextual messages within your app.
- [Banners](https://www.braze.com/docs/pt-br/pt-br/developer_guide/banners/): Show persistent banners in your app interface.
## Integrating the Roku SDK
### Step 1: Add files
Braze SDK files can be found in the `sdk_files` directory in the [Braze Roku SDK repository](https://github.com/braze-inc/braze-roku-sdk).
1. Add `BrazeSDK.brs` to your app in the `source` directory.
2. Add `BrazeTask.brs` and `BrazeTask.xml` to your app in the `components` directory.
### Step 2: Add references
Add a reference to `BrazeSDK.brs` in your main scene using the following `script` element:
```
```
### Step 3: Configure
Within `main.brs`, set the Braze configuration on the global node:
```brightscript
globalNode = screen.getGlobalNode()
config = {}
config_fields = BrazeConstants().BRAZE_CONFIG_FIELDS
config[config_fields.API_KEY] = {YOUR_API_KEY}
' example endpoint: "https://sdk.iad-01.braze.com/"
config[config_fields.ENDPOINT] = {YOUR_ENDPOINT}
config[config_fields.HEARTBEAT_FREQ_IN_SECONDS] = 5
globalNode.addFields({brazeConfig: config})
```
You can find your [SDK endpoint](https://www.braze.com/docs/pt-br/pt-br/user_guide/administrative/access_braze/sdk_endpoints/) and API key within the Braze dashboard.
### Step 4: Initialize Braze
Initialize the Braze instance:
```brightscript
m.BrazeTask = createObject("roSGNode", "BrazeTask")
m.Braze = getBrazeInstance(m.BrazeTask)
```
## Optional configurations
### Logging
To debug your Braze integration, you can view the Roku debug console for Braze logs. Refer to [Debugging code](https://developer.roku.com/docs/developer-program/debugging/debugging-channels.md) from Roku Developers to learn more.
## About the Unity Braze SDK
For a full list of types, functions, variables, and more, see [Unity Declaration File](https://github.com/braze-inc/braze-unity-sdk/blob/master/Assets/Plugins/Appboy/BrazePlatform.cs). Additionally, if you've already integrated Unity manually for iOS, you can [switch to an automated integration](#unity_automated-integration) instead.
## Integrating the Unity SDK
### Prerequisites
Before you start, verify your environment is supported by the [latest Braze Unity SDK version](https://github.com/braze-inc/braze-unity-sdk/releases).
### Step 1: Choose your Braze Unity package
The Braze [`.unitypackage`](https://docs.unity3d.com/Manual/AssetPackages.html) bundles native bindings for the Android and iOS platforms, along with a C# interface.
There are several Braze Unity packages available for download on the [Braze Unity releases page](https://github.com/Appboy/appboy-unity-sdk/releases):
- `Appboy.unitypackage`
- This package bundles the Braze Android and iOS SDKs and the [SDWebImage](https://github.com/SDWebImage/SDWebImage) dependency for the iOS SDK, which is required for the proper functionality of Braze in-app messaging, and Content Cards features on iOS. The SDWebImage framework is used for downloading and displaying images, including GIFs. If you intend on utilizing full Braze functionality, download and import this package.
- `Appboy-nodeps.unitypackage`
- This package is similar to `Appboy.unitypackage` except for the [SDWebImage](https://github.com/SDWebImage/SDWebImage) framework is not present. This package is useful if you do not want the SDWebImage framework present in your iOS app.
**Note:**
As of Unity 2.6.0, the bundled Braze Android SDK artifact requires [AndroidX](https://developer.android.com/jetpack/androidx) dependencies. If you were previously using a `jetified` unitypackage, you can safely transition to the corresponding `unitypackage`.
If Android builds fail with "This project uses AndroidX dependencies, but the 'android.useAndroidX' property is not enabled", enable [Custom Gradle Properties Template](https://docs.unity3d.com/Manual/class-PlayerSettingsAndroid.html#Publishing) in your Unity Publishing Settings. Then open `Assets/Plugins/Android/gradleTemplate.properties` and set `android.useAndroidX=true`. For a working template, see the [Braze Unity sample app](https://github.com/braze-inc/braze-unity-sdk/tree/master/unity-samples) and its [`gradleTemplate.properties`](https://github.com/braze-inc/braze-unity-sdk/blob/master/unity-samples/Assets/Plugins/Android/gradleTemplate.properties) file.
The Braze [`.unitypackage`](https://docs.unity3d.com/Manual/AssetPackages.html) bundles native bindings for the Android and iOS platforms, along with a C# interface.
The Braze Unity package is available for download on the [Braze Unity releases page](https://github.com/Appboy/appboy-unity-sdk/releases) with two integration options:
1. `Appboy.unitypackage` only
- This package bundles the Braze Android and iOS SDKs without any additional dependencies. With this integration method, there will not be proper functionality of Braze in-app messaging, and Content Cards features on iOS. If you intend on utilizing full Braze functionality without custom code, use the option below instead.
- To use this integration option, ensure that the box next to `Import SDWebImage dependency` is *unchecked* in the Unity UI under "Braze Configuration".
2. `Appboy.unitypackage` with `SDWebImage`
- This integration option bundles the Braze Android and iOS SDKs and the [SDWebImage](https://github.com/SDWebImage/SDWebImage) dependency for the iOS SDK, which is required for the proper functionality of Braze in-app messaging, and Content Cards features on iOS. The `SDWebImage` framework is used for downloading and displaying images, including GIFs. If you intend on utilizing full Braze functionality, download and import this package.
- To automatically import `SDWebImage`, be sure to *check* the box next to `Import SDWebImage dependency` in the Unity UI under "Braze Configuration".
**Note:**
To see if you require the [SDWebImage](https://github.com/SDWebImage/SDWebImage) dependency for your iOS project, visit the [iOS in-app message documentation](https://www.braze.com/docs/pt-br/pt-br/developer_guide/platform_integration_guides/swift/in-app_messaging/overview/).
### Step 2: Import the package
In the Unity Editor, import the package into your Unity project by navigating to **Assets > Import Package > Custom Package**. Next, click **Import**.
Alternatively, follow the [Unity asset package import](https://docs.unity3d.com/Manual/AssetPackages.html) instructions for a more detailed guide on importing custom Unity packages.
**Note:**
If you only wish to import the iOS or Android plugin, deselect the `Plugins/Android` or `Plugins/iOS` subdirectory when importing the Braze `.unitypackage`.
### Step 3: Configure the SDK
#### Step 3.1: Configure `AndroidManifest.xml`
Configure [`AndroidManifest.xml`](https://docs.unity3d.com/Manual/android-manifest.html) so the Braze SDK can function. If your app does not have an `AndroidManifest.xml`, you can use the following as a template. Otherwise, if you already have an `AndroidManifest.xml`, ensure that any of the following missing sections are added to your existing `AndroidManifest.xml`.
1. Go to the `Assets/Plugins/Android/` directory and open your `AndroidManifest.xml` file. This is the [default location in the Unity editor](https://docs.unity3d.com/Manual/android-manifest.html).
2. In your `AndroidManifest.xml`, add the required permissions and activities from in the following template.
3. When you're finished, your `AndroidManifest.xml` should only contain a single Activity with `"android.intent.category.LAUNCHER"` present.
```xml
```
**Important:**
All Activity classes registered in your `AndroidManifest.xml` file should be fully integrated with the Braze Android SDK, otherwise your analytics won't be collected. If you add your own Activity class, be sure you [extend the Braze Unity player](#unity_extend-unity-player) so you can prevent this.
#### Step 3.2: Update `AndroidManifest.xml` with your package name
To find your package name, click **File > Build Settings > Player Settings > Android Tab**.

In your `AndroidManifest.xml`, all instances of `REPLACE_WITH_YOUR_PACKAGE_NAME` should be replaced with your `Package Name` from the previous step.
#### Step 3.3: Add gradle dependencies
To add gradle dependencies to your Unity project, first enable ["Custom Main Gradle Template"](https://docs.unity3d.com/Manual/class-PlayerSettingsAndroid.html#Publishing) in your Publishing Settings. This will create a template gradle file that your project will use. A gradle file handles setting dependencies and other build-time project settings. For more information, check out the Braze Unity sample app's [mainTemplate.gradle](https://github.com/braze-inc/braze-unity-sdk/blob/master/unity-samples/Assets/Plugins/Android/mainTemplate.gradle).
The following dependencies are required:
```groovy
implementation 'com.google.firebase:firebase-messaging:22.0.0'
implementation "androidx.swiperefreshlayout:swiperefreshlayout:1.1.0"
implementation "androidx.recyclerview:recyclerview:1.2.1"
implementation "org.jetbrains.kotlin:kotlin-stdlib:1.6.0"
implementation "org.jetbrains.kotlinx:kotlinx-coroutines-android:1.6.1"
implementation 'androidx.core:core:1.6.0'
```
You may also set these dependencies using the [External Dependency Manager](https://github.com/googlesamples/unity-jar-resolver).
#### Step 3.4: Automate the Unity Android integration
Braze provides a native Unity solution for automating the Unity Android integration.
1. In the Unity Editor, open the Braze Configuration Settings by navigating to **Braze > Braze Configuration**.
2. Check the **Automate Unity Android Integration** box.
3. In the **Braze API Key** field, input your application's API key found in **Manage Settings** from the Braze dashboard.
**Note:**
This automatic integration should not be used with a manually created `braze.xml` file since the configuration values may conflict during project building. If you require a manual `braze.xml`, disable the automatic integration.
#### Step 3.1: Set your API key
Braze provides a native Unity solution for automating the Unity iOS integration. This solution modifies the built Xcode project using Unity's [`PostProcessBuildAttribute`](http://docs.unity3d.com/ScriptReference/Callbacks.PostProcessBuildAttribute.html) and subclasses the `UnityAppController` using the `IMPL_APP_CONTROLLER_SUBCLASS` macro.
1. In the Unity Editor, open the Braze Configuration Settings by navigating to **Braze > Braze Configuration**.
2. Check the **Automate Unity iOS Integration** box.
3. In the **Braze API Key** field, input your application's API key found in **Manage Settings**.

If your application is already using another `UnityAppController` subclass, you will need to merge your subclass implementation with `AppboyAppDelegate.mm`.
## Customizing the Unity package
### Step 1: Clone the repository
In your terminal, clone the [Braze Unity SDK GitHub repository](https://github.com/braze-inc/braze-unity-sdk), then navigate to that folder:
```bash
git clone git@github.com:braze-inc/braze-unity-sdk.git
cd ~/PATH/TO/DIRECTORY/braze-unity-sdk
```
```powershell
git clone git@github.com:braze-inc/braze-unity-sdk.git
cd C:\PATH\TO\DIRECTORY\braze-unity-sdk
```
### Step 2: Export package from repository
First, launch Unity and keep it running in the background. Then, in the repository root, run the following command to export the package to `braze-unity-sdk/unity-package/`.
```bash
/Applications/Unity/Unity.app/Contents/MacOS/Unity -batchmode -nographics -projectPath "$(pwd)" -executeMethod Appboy.Editor.Build.ExportAllPackages -quit
```
```powershell
"%UNITY_PATH%" -batchmode -nographics -projectPath "%PROJECT_ROOT%" -executeMethod Appboy.Editor.Build.ExportAllPackages -quit
```
**Tip:**
If you experience any issues after running these commands, refer to [Unity: Command Line Arguments](https://docs.unity3d.com/2017.2/Documentation/Manual/CommandLineArguments.html).
### Step 3: Import package into Unity
1. In Unity, import the desired package into your Unity project by navigating to **Assets** > **Import Package** > **Custom Package**.
2. If there's any files you don't want want to import, deselect them now.
3. Customize the exported Unity package located in `Assets/Editor/Build.cs`.
## Switch to an automated integration (Swift only) {#automated-integration}
To take advantage of the automated iOS integration offered in the Braze Unity SDK, follow these steps on transitioning from a manual to an automated integration.
1. Remove all Braze-related code from your Xcode project's `UnityAppController` subclass.
2. Remove Braze iOS libraries from your Unity or Xcode project (such as `Appboy_iOS_SDK.framework` and `SDWebImage.framework`).
3. Import the Braze Unity package into your project again. For a full walkthrough, see [Step 2: Import the package](#unity_step-2-import-the-package).
4. Set your API key again. For a full walkthrough, see [Step 3.1: Set your API key](#unity_step-31-set-your-api-key).
## Optional configurations
### Verbose logging
To enable verbose logging in the Unity Editor, do the following:
1. Open the Braze Configuration Settings by navigating to **Braze** > **Braze Configuration**.
2. Click the **Show Braze Android Settings** dropdown.
3. In the **SDK Log Level** field, input the value "0".
### Prime 31 compatibility
To use the Braze Unity plugin with Prime31 plugins, edit your project's `AndroidManifest.xml` to use the Prime31 compatible Activity classes. Change all references of
`com.braze.unity.BrazeUnityPlayerActivity` to `com.braze.unity.prime31compatible.BrazeUnityPlayerActivity`
### Amazon Device Messaging (ADM)
Braze supports integrating [ADM push](https://developer.amazon.com/public/apis/engage/device-messaging) into Unity apps. If you want to integrate ADM push, create a file called `api_key.txt` containing your ADM API key and place it in the `Plugins/Android/assets/` folder. For more information on integrating ADM with Braze, visit our [ADM push integration instructions](https://www.braze.com/docs/pt-br/pt-br/developer_guide/push_notifications/?sdktab=unity).
### Extending the Braze Unity player (Android only) {#extend-unity-player}
The example `AndroidManifest.xml` file provided has one Activity class registered, [`BrazeUnityPlayerActivity`](https://github.com/braze-inc/braze-android-sdk/blob/e804cb3a10ae68364b354b52abf1bef8a0d1a9dc/android-sdk-unity/src/main/java/com/braze/unity/BrazeUnityPlayerActivity.kt). This class is integrated with the Braze SDK and extends `UnityPlayerActivity` with session handling, in-app message registration, push notification analytics logging, and more. See [Unity](https://docs.unity3d.com/Manual/AndroidUnityPlayerActivity.html) for more information on extending the `UnityPlayerActivity` class.
If you are creating your own custom `UnityPlayerActivity` in a library or plugin project, you will need to extend our `BrazeUnityPlayerActivity` to integrate your custom functionality with Braze. Before beginning work on extending `BrazeUnityPlayerActivity`, follow our instructions for integrating Braze into your Unity project.
1. Add the Braze Android SDK as a dependency to your library or plugin project as described in the [Braze Android SDK integration instructions](https://www.braze.com/docs/pt-br/pt-br/developer_guide/sdk_integration/?sdktab=android).
2. Integrate our Unity `.aar`, which contains our Unity-specific functionality, to your Android library project you are building for Unity. The `appboy-unity.aar` is available from our [public repo](https://github.com/braze-inc/braze-unity-sdk/tree/master/Assets/Plugins/Android). After our Unity library is successfully integrated, modify your `UnityPlayerActivity` to extend `BrazeUnityPlayerActivity`.
3. Export your library or plugin project and drop it into `//Assets/Plugins/Android` as normal. Do not include any Braze source code in your library or plugin as they will already be present in `//Assets/Plugins/Android`.
4. Edit your `//Assets/Plugins/Android/AndroidManifest.xml` to specify your `BrazeUnityPlayerActivity` subclass as the main activity.
You should now be able to package an `.apk` from the Unity IDE that is fully integrated with Braze and contains your custom `UnityPlayerActivity` functionality.
## Troubleshooting
### Error: "File could not be read"
Errors resembling the following may be safely ignored. Apple software uses a proprietary PNG extension called CgBI, which Unity does not recognize. These errors will not affect your iOS build or the proper display of the associated images in the Braze bundle.
```
Could not create texture from Assets/Plugins/iOS/AppboyKit/Appboy.bundle/...png: File could not be read
```
## Integrating the .NET MAUI SDK
Integrating the Braze .NET MAUI (formerly Xamarin) SDK will provide you with basic analytics functionality as well as working in-app messages with which you can engage your users.
### Prerequisites
Before you can integrate the .NET MAUI Braze SDK, be sure you meet the following requirements:
- Starting in `version 3.0.0`, this SDK requires using .NET 6+ and removes support for projects using the Xamarin framework.
- Starting in `version 4.0.0`, this SDK dropped support for Xamarin & Xamarin.Forms and added support for .NET MAUI. See [Microsoft's policy](https://dotnet.microsoft.com/en-us/platform/support/policy/xamarin) around the end of support for Xamarin.
### Step 1: Get the .NET MAUI binding
A .NET MAUI binding is a way to use native libraries in .NET MAUI apps. The implementation of a binding consists of building a C# interface to the library, and then using that interface in your application. See the [.NET MAUI documentation](http://developer.xamarin.com/guides/android/advanced_topics/java_integration_overview/binding_a_java_library_%28.jar%29/). There are two ways to include the Braze SDK binding: using NuGet or compiling from source.
The simplest integration method involves getting the Braze SDK from the [NuGet.org](https://www.nuget.org/) central repository. In the Visual Studio sidebar, right click `Packages` folder and click `Add Packages...`. Search for 'Braze' and install the [`BrazePlatform.BrazeAndroidBinding`](https://www.nuget.org/packages/BrazePlatform.BrazeAndroidBinding/) package into your project.
To use Braze location services and geofences, also install the [`BrazePlatform.BrazeAndroidLocationBinding`](https://www.nuget.org/packages/BrazePlatform.BrazeAndroidLocationBinding/) package.
The second integration method is to include the [binding source](https://github.com/braze-inc/braze-xamarin-sdk). Under [`appboy-component/src/androidnet6`](https://github.com/braze-inc/braze-xamarin-sdk/tree/master/appboy-component/src/androidnet6/BrazeAndroidNet6Binding) you will find our binding source code; adding a project reference to the ```BrazeAndroidBinding.csproj``` in your .NET MAUI application will cause the binding to be built with your project and provide you access to the Braze Android SDK.
To use Braze location services and geofences, also add a project reference to the ```BrazeAndroidLocationBinding.csproj``` found under [`appboy-component/src/androidnet6/BrazeAndroidLocationBinding`](https://github.com/braze-inc/braze-xamarin-sdk/tree/master/appboy-component/src/androidnet6/BrazeAndroidLocationBinding).
**Important:**
The iOS bindings for .NET MAUI SDK version 4.0.0 and later use the [Braze Swift SDK](https://github.com/braze-inc/braze-swift-sdk/), while previous versions use the [legacy AppboyKit SDK](https://github.com/Appboy/Appboy-ios-sdk).
A .NET MAUI binding is a way to use native libraries in .NET MAUI apps. The implementation of a binding consists of building a C# interface to the library and then using that interface in your application. There are two ways to include the Braze SDK binding: using NuGet or compiling from source.
The simplest integration method involves getting the Braze SDK from the [NuGet.org](https://www.nuget.org/) central repository. In the Visual Studio sidebar, right-click `Packages` folder and click `Add Packages...`. Search for 'Braze' and install the latest .NET MAUI iOS NuGet packages: [Braze.iOS.BrazeKit](https://www.nuget.org/packages/Braze.iOS.BrazeKit), [Braze.iOS.BrazeUI](https://www.nuget.org/packages/Braze.iOS.BrazeUI), and [Braze.iOS.BrazeLocation](https://www.nuget.org/packages/Braze.iOS.BrazeLocation) into your project.
We also provide the compatibility libraries packages: [Braze.iOS.BrazeKitCompat](https://www.nuget.org/packages/Braze.iOS.BrazeKitCompat) and [Braze.iOS.BrazeUICompat](https://www.nuget.org/packages/Braze.iOS.BrazeUICompat), to help make your migration to .NET MAUI easier.
The second integration method is to include the [binding source](https://github.com/braze-inc/braze-xamarin-sdk). Under [`appboy-component/src/iosnet6`](https://github.com/braze-inc/braze-xamarin-sdk/tree/master/appboy-component/src/iosnet6/BrazeiOSNet6Binding) you will find our binding source code; adding a project reference to the ```BrazeiOSBinding.csproj``` in your .NET MAUI application will cause the binding to be built with your project and provide you access to the Braze iOS SDK. Make sure `BrazeiOSBinding.csproj` is showing in your project's "Reference" folder.
### Step 2: Configure your Braze instance
#### Step 2.1: Configure the Braze SDK in Braze.xml
Now that the libraries have been integrated, you have to create an `Braze.xml` file in your project's `Resources/values` folder. The contents of that file should resemble the following code snippet:
**Note:**
Be sure to substitute `YOUR_API_KEY` with the API key located at **Settings** > **API Keys** in the Braze dashboard.
```xml
YOUR_API_KEYYOUR_CUSTOM_ENDPOINT_OR_CLUSTERXAMARINNUGET
```
If you are including the binding source manually, remove `NUGET` from your code.
**Tip:**
To see an example `Braze.xml`, check out our [Android MAUI sample app](https://github.com/braze-inc/braze-xamarin-sdk/blob/master/appboy-component/samples/android-net-maui/BrazeAndroidMauiSampleApp/BrazeAndroidMauiSampleApp/Resources/values/Braze.xml).
#### Step 2.2: Add required permissions to Android manifest
Now that you've added your API key, you need to add the following permissions to your `AndroidManifest.xml` file:
```xml
```
For an example of your `AndroidManifest.xml`, see the [Android MAUI](https://github.com/braze-inc/braze-xamarin-sdk/blob/master/appboy-component/samples/android-net-maui/BrazeAndroidMauiSampleApp/BrazeAndroidMauiSampleApp/AndroidManifest.xml) sample application.
#### Step 2.3: Track user sessions and registering for in-app messages
To enable user session tracking and register your app for in-app messages, add the following call to the `OnCreate()` lifecycle method of the `Application` class in your app:
```kotlin
RegisterActivityLifecycleCallbacks(new BrazeActivityLifecycleCallbackListener());
```
When setting up your Braze instance, add the following snippet to configure your instance:
**Note:**
Be sure to substitute `YOUR_API_KEY` with the API key located at **Settings** > **API Keys** in the Braze dashboard.
```csharp
var configuration = new BRZConfiguration("YOUR_API_KEY", "YOUR_ENDPOINT");
configuration.Api.AddSDKMetadata(new[] { BRZSDKMetadata.Xamarin });
braze = new Braze(configuration);
```
See the `App.xaml.cs` file in the [iOS MAUI](https://github.com/braze-inc/braze-xamarin-sdk/blob/master/appboy-component/samples/ios-net-maui/BrazeiOSMauiSampleApp/BrazeiOSMauiSampleApp/App.xaml.cs) sample application.
### Step 3: Test the integration
Now you can launch your application and see sessions being logged to the Braze dashboard (along with device information and other analytics). For a more in-depth discussion of best practices for the basic SDK integration, consult the [Android integration instructions](https://www.braze.com/docs/pt-br/pt-br/developer_guide/sdk_integration/?sdktab=android).
Now you can launch your application and see sessions being logged to the Braze dashboard. For a more in-depth discussion of best practices for the basic SDK integration, consult the [iOS integration instructions](https://www.braze.com/docs/pt-br/pt-br/developer_guide/sdk_integration/?sdktab=swift).
**Important:**
Our current public .NET MAUI binding for the iOS SDK does not connect to the iOS Facebook SDK (linking social data) and does not include sending the IDFA to Braze.
# ChatGPT app integration
## Setup
### Step 1: Get the Braze integration file
Copy the `braze.js` file from our [ChatGPT apps integration repository](https://github.com/braze-inc/chatgpt-apps-braze-integration/blob/main/src/braze/braze.ts) to your project. This file contains all the necessary Braze SDK configuration and helper functions.
### Step 2: Install dependencies
Install our Web SDK for Braze's most up-to-date set of features:
**For client-side integration:**
```bash
npm install @braze/web-sdk
```
## Implementation
There are two ways to integrate Braze with your ChatGPT app depending on your use case:
### Client-side integration (custom widgets)
**Tip:**
**Recommended Approach:** This method enables rich messaging experiences and real-time user interaction tracking within your ChatGPT app widgets.
For displaying Braze messaging and tracking user interactions within your custom ChatGPT app widgets, use the Web SDK integration. A full messaging example can be found in our sample repository [here](https://github.com/braze-inc/chatgpt-apps-braze-integration/tree/main/src/inbox).
#### Configure widget metadata
Add the following metadata to your MCP server file to allow Braze domains, ensuring to update the CDN domain based on [your region](https://www.braze.com/docs/pt-br/pt-br/developer_guide/platforms/web/content_security_policy):
```javascript
"openai/widgetCSP": {
connect_domains: ["https://YOUR-SDK-ENDPOINT"],
resource_domains: [
"https://appboy-images.com",
"https://braze-images.com",
"https://cdn.braze.eu",
"https://use.fontawesome.com"
],
}
```
Replace `YOUR-SDK-ENDPOINT` with your actual Braze SDK endpoint.
#### Set up the useBraze hook
```javascript
import { useBraze } from "./utils/braze";
function YourWidget() {
const braze = useBraze({
apiKey: "your-braze-api-key",
baseUrl: "your-braze-endpoint.braze.com",
});
useEffect(() => {
if (!braze.isInitialized) {
return;
}
// Set user identity
braze.changeUser("user-id-123");
// Log widget interactions
braze.logCustomEvent("viewed_pizzaz_list");
}, [braze.isInitialized]);
return (
// Your widget JSX
);
}
```
#### Display Braze Content Cards
```javascript
const [cards, setCards] = useState([]);
useEffect(() => {
// Get cached content cards
setCards(braze.getCachedContentCards()?.cards ?? []);
// Subscribe to content card updates
braze.subscribeToContentCardsUpdates((contentCards) => {
setCards(contentCards.cards);
});
// Open session
braze.openSession();
return () => {
braze.removeAllSubscriptions();
}
}, []);
```
#### Track widget events
```javascript
// Track user interactions within your widget
const handleButtonClick = () => {
braze.logCustomEvent("widget_button_clicked", {
button_type: "save_list",
widget_name: "pizza_list"
});
};
const handleItemInteraction = (itemId) => {
braze.logCustomEvent("item_interacted", {
item_id: itemId,
interaction_type: "view_details"
});
};
```
### Server-side integration (MCP server)
If you also need a server-side integration for messaging functionality on your MCP server, contact `mcp-product@braze.com`. For tracking events and purchases from your MCP server, use our [REST API](https://www.braze.com/docs/pt-br/pt-br/api/home).
## About the Braze Vega SDK
The Braze Vega SDK lets you collect analytics and display rich in-app messages to your users. Most methods in the Braze Vega SDK are asynchronous and return promises that should be awaited or resolved.
## Integrating the Braze Vega SDK
### Step 1: Install the Braze library
Install the Braze Vega SDK using your preferred package manager.
If your project uses NPM, you can add the Braze Vega SDK as a dependency.
```bash
npm install @braze/vega-sdk --save
```
After installation, you can import the methods you need:
```javascript
import { initialize, changeUser, openSession } from "@braze/vega-sdk";
```
If your project uses Yarn, you can add the Braze Vega SDK as a dependency.
```bash
yarn add @braze/vega-sdk
```
After installation, you can import the methods you need:
```javascript
import { initialize, changeUser, openSession } from "@braze/vega-sdk";
```
### Step 2: Initialize the SDK
After the Braze Vega SDK is added to your project, initialize the library with the API key and [SDK endpoint URL](https://www.braze.com/docs/pt-br/pt-br/user_guide/administrative/access_braze/sdk_endpoints) found in **Settings** > **App Settings** within your Braze dashboard.
**Important:**
You must await or resolve the `changeUser` promise before calling other Braze methods, or events and attributes may be set on the incorrect user.
```javascript
import { useEffect } from "react-native";
import {
initialize,
changeUser,
logCustomEvent,
openSession,
setCustomUserAttribute,
setUserCountry
} from "@braze/vega-sdk";
const App = () => {
useEffect(() => {
const initBraze = async () => {
// Initialize the SDK
await initialize("YOUR-API-KEY", "YOUR-SDK-ENDPOINT", {
sessionTimeoutInSeconds: 60,
appVersionNumber: "1.2.3.4",
enableLogging: true, // set to `true` for debugging
});
// Change user
await changeUser("user-id-123");
// Start a session
await openSession();
// Log custom events and set user attributes
logCustomEvent("visited-page", { pageName: "home" });
setCustomUserAttribute("my-attribute", "my-attribute-value");
setUserCountry("USA");
};
initBraze();
}, []);
return (
// Your app components
);
};
```
**Important:**
Anonymous users may be counted towards your [MAU](https://www.braze.com/docs/pt-br/pt-br/user_guide/data_and_analytics/reporting/understanding_your_app_usage_data/#monthly-active-users). As a result, you may want to conditionally load or initialize the SDK to exclude these users from your MAU count.
## Optional configurations
### Logging
You can enable SDK logging to help with debugging and troubleshooting. There are multiple ways to enable logging.
#### Enable logging during initialization
Pass `enableLogging: true` to `initialize()` to log debugging messages to the console:
```javascript
initialize("YOUR-API-KEY", "YOUR-SDK-ENDPOINT", {
enableLogging: true
});
```
**Important:**
Basic logs are visible to all users, so consider disabling logging before releasing your code to production.
#### Enable logging after initialization
Use `toggleLogging()` to enable or disable SDK logging after initialization:
```javascript
import { toggleLogging } from "@braze/vega-sdk";
// Enable logging
toggleLogging();
```
#### Custom logging
Use `setLogger()` to provide a custom logger function for more control over how SDK logs are handled:
```javascript
import { setLogger } from "@braze/vega-sdk";
setLogger((message) => {
console.log("Braze Custom Logger: " + message);
// Add your custom logging logic here
});
```
### Configuration options
You can pass additional configuration options to `initialize()` to customize the SDK behavior:
```javascript
await initialize("YOUR-API-KEY", "YOUR-SDK-ENDPOINT", {
sessionTimeoutInSeconds: 60, // Configure session timeout (default is 1800 seconds)
appVersionNumber: "1.2.3.4", // Set your app version
enableLogging: true, // Enable SDK logging
});
```
## Upgrading the SDK
When you reference the Braze Vega SDK from NPM or Yarn, you can upgrade to the latest version by updating your package dependency:
```bash
npm update @braze/vega-sdk
# or, using yarn:
yarn upgrade @braze/vega-sdk
```
## Testing your integration
To verify your SDK integration is working correctly:
1. Initialize the SDK with `enableLogging: true` to see debug messages in the console
2. Ensure you `await changeUser()` before calling other SDK methods
3. Call `await openSession()` to start a session
4. Check your Braze dashboard under **Overview** to verify that session data is being recorded
5. Test logging a custom event and verify it appears in your dashboard
**Note:**
Ao realizar QA na sua integração de SDK, use o [Depurador do SDK](https://www.braze.com/docs/pt-br/pt-br/developer_guide/sdk_integration/debugging/) para solucionar problemas sem ativar o registro detalhado no seu app.
# Google Tag Manager com o SDK da Braze
Source: /docs/pt-br/developer_guide/sdk_integration/google_tag_manager/index.md
# Google Tag Manager com o SDK da Braze {#google-tag-manager-with-the-braze-sdk}
> Aprenda como usar o [Google Tag Manager (GTM)](https://developers.google.com/tag-platform/tag-manager) com o SDK da Braze, para que você possa controlar remotamente o rastreamento de eventos da Braze e as atualizações de atributos de usuário sem precisar de alterações de código ou novas versões do app.
## About Google Tag Manager for Web {#google-tag-manager}
Google Tag Manager (GTM) lets you remotely add, remove, and edit tags on your website without requiring a production code release or engineering resources. Braze offers the following templates for the Web SDK:
|Tag Type|Use Case|
|--------|--------|
| Initialization tag | This tag lets you [integrate the Web Braze SDK](https://www.braze.com/docs/pt-br/pt-br/developer_guide/sdk_integration/?tab=google%20tag%20manager&sdktab=web) without needing to modify your site’s code.|
| Action tag | This tag lets you [create Content Cards](https://www.braze.com/docs/pt-br/pt-br/developer_guide/content_cards/?sdktab=web#web_using-google-tag-manager), [set user attributes](https://www.braze.com/docs/pt-br/pt-br/developer_guide/analytics/setting_user_attributes/?tab=google%20tag%20manager&sdktab=web), and [manage data collection](https://www.braze.com/docs/pt-br/pt-br/developer_guide/analytics/managing_data_collection/?tab=google%20tag%20manager&sdktab=web).|
{: .reset-td-br-1 .reset-td-br-2 aria-label="About Google Tag Manager for Web #google-tag-manager" }
## Tag sequencing for Braze action tags
Custom events and other Braze action tags can fail when they fire before the **Braze Initialization** tag finishes loading the Web SDK. In Google Tag Manager, open the action tag, go to **Advanced Settings** > **Tag Sequencing**, select **A tag that fires before [this tag] is fired**, and choose your Braze Initialization tag.
For more detail, see [Verify tag sequencing for custom events](https://www.braze.com/docs/pt-br/pt-br/developer_guide/content_cards/?sdktab=web#tag-sequencing).
## Log purchases with GTM
In Braze action tags and Custom HTML tags, call `braze.logPurchase()` to record revenue. The legacy `appboy.logPurchase()` namespace is not supported in current Web SDK integrations.
## Logging custom events with GTM
You can log custom events using a **Custom HTML** tag in GTM. This approach uses the GTM [data layer](https://developers.google.com/tag-platform/tag-manager/datalayer) to pass event data from your site to a GTM tag that calls the Braze Web SDK.
### Step 1: Push the event to the data layer
In your site's code, push an event to the data layer wherever you want to trigger the custom event. For example, to log a custom event when a button is clicked:
```html
```
### Step 2: Create a trigger in GTM
1. In your GTM container, go to **Triggers** and create a new trigger.
2. Set the **Trigger Type** to **Custom Event**.
3. Set the **Event Name** to the same value you pushed to the data layer (for example, `my_custom_event`).
4. Choose when the trigger should fire (for example, **All Custom Events**).
### Step 3: Create a Custom HTML tag
1. In GTM, go to **Tags** and create a new tag.
2. Set the **Tag Type** to **Custom HTML**.
3. In the HTML field, add the following:
```html
```
4. Under **Triggering**, select the trigger you created in step 2.
5. Save and publish your container.
To include event properties, pass them as the second argument:
```html
```
## Google's EU User Consent Policy
**Important:**
Google is updating their [EU User Consent Policy](https://www.google.com/about/company/user-consent-policy/) in response to changes to the [Digital Markets Act (DMA)](https://ads-developers.googleblog.com/2023/10/updates-to-customer-match-conversion.html), which is in effect as of March 6, 2024. This new change requires advertisers to disclose certain information to their EEA and UK end users, as well as obtain necessary consents from them. Review the following documentation to learn more.
As part of Google's EU User Consent Policy, the following boolean custom attributes need to be logged to user profiles:
- `$google_ad_user_data`
- `$google_ad_personalization`
If setting these via the GTM integration, custom attributes require creating a custom HTML tag. The following is an example of how to log these values as boolean data types (not as strings):
```js
```
For more information, refer to [Audience Sync to Google](https://www.braze.com/docs/pt-br/pt-br/partners/canvas_audience_sync/google_audience_sync/).
## Prerequisites
Before you can use this feature, you'll need to [integrate the Android Braze SDK](https://www.braze.com/docs/pt-br/pt-br/developer_guide/sdk_integration/?sdktab=android).
## Using Google Tag Manager for Android
In the following example, a music streaming app wants to log different events as users listen to songs. Using Google Tag Manager for Android, they can control which of the Braze third-party vendors receive this event, and create tags specific to Braze.
### Step 1: Create a trigger for custom events
Custom events are logged with `actionType` set to `logEvent`. The Braze custom tag provider in this example is expecting the custom event name to be set using `eventName`.
To get started, create a trigger that looks for an "Event Name" that equals `played song`

Next, create a new tag (also known as a "Function Call") and enter the class path of your [custom tag provider](#adding-android-google-tag-provider) described later in this article. This tag will be triggered when you log the `played song` event.
In the tag's custom parameters (also known as the key-value pairs), set `eventName` to `played song`. This will be the custom event name logged to Braze.

**Important:**
When sending a custom event, be sure to set `actionType` to `logEvent`, and set a value for `eventName` so Braze receives the correct event name and action to take.
You can also include additional key-value pair arguments to the tag, which will be sent as custom event properties to Braze. `eventName` and `actionType` will not be ignored for custom event properties. In the following example tag, `genre` is passed and defined using a tag variable in Google Tag Manager, which is sourced from the custom event logged in the app.
Because Google Tag Manager for Android uses Firebase as the data layer, the `genre` event property is sent to Google Tag Manager as a "Firebase - Event Parameter" variable.

When a user plays a song in the app, an event will be logged through Firebase and Google Tag Manager using the Firebase analytics event name that matches the tag's trigger name, `played song`:
```java
Bundle params = new Bundle();
params.putString("genre", "pop");
params.putInt("number of times listened", 42);
mFirebaseAnalytics.logEvent("played song", params);
```
```kotlin
val params = Bundle()
params.putString("genre", "pop")
params.putInt("number of times listened", 42);
mFirebaseAnalytics.logEvent("played song", params)
```
### Step 2: Log custom attributes
Custom attributes are set via an `actionType` set to `customAttribute`. The Braze custom tag provider is expecting the custom attribute key-value to be set via `customAttributeKey` and `customAttributeValue`:
```java
Bundle params = new Bundle();
params.putString("customAttributeKey", "favorite song");
params.putString("customAttributeValue", "Private Eyes");
mFirebaseAnalytics.logEvent("customAttribute", params);
```
```kotlin
val params = Bundle()
params.putString("customAttributeKey", "favorite song")
params.putString("customAttributeValue", "Private Eyes")
mFirebaseAnalytics.logEvent("customAttribute", params)
```
### Step 3: Call `changeUser()`
Calls to `changeUser()` are made via an `actionType` set to `changeUser`. The Braze custom tag provider is expecting the Braze user ID to be set via an `externalUserId` key-value pair within your tag:
```java
Bundle params = new Bundle();
params.putString("externalUserId", userId);
mFirebaseAnalytics.logEvent("changeUser", params);
```
```kotlin
val params = Bundle()
params.putString("externalUserId", userId)
mFirebaseAnalytics.logEvent("changeUser", params)
```
### Step 4: Add a custom tag provider {#adding-android-google-tag-provider}
With the tags and triggers set up, you will also need to implement Google Tag Manager in your Android app which can be found in Google's [documentation](https://developers.google.com/tag-manager/android/v5/).
After the Google Tag Manager is installed in your app, add a custom tag provider to call Braze SDK methods based on the tags you've configured within Google Tag Manager.
Be sure to note the "Class Path" to the file - this is what you'll enter when setting up a Tag in the [Google Tag Manager](https://tagmanager.google.com/) console.
This example highlights one of many ways you can structure your custom tag provider. Specifically, it shows how to determine which Braze SDK method to call based on the `actionType` key-value pair sent from the GTM Tag.
The `actionType` shown in this example are `logEvent`, `customAttribute`, and `changeUser`, but you may prefer to change how your tag provider handles data from Google Tag Manager.
```java
public class BrazeGtmTagProvider implements CustomTagProvider {
private static final String TAG = BrazeLogger.getBrazeLogTag(BrazeGtmTagProvider.class);
private static final String ACTION_TYPE_KEY = "actionType";
// Custom Events
private static final String LOG_EVENT_ACTION_TYPE = "logEvent";
private static final String EVENT_NAME_VARIABLE = "eventName";
// Custom Attributes
private static final String CUSTOM_ATTRIBUTE_ACTION_TYPE = "customAttribute";
private static final String CUSTOM_ATTRIBUTE_KEY = "customAttributeKey";
private static final String CUSTOM_ATTRIBUTE_VALUE_KEY = "customAttributeValue";
// Change User
private static final String CHANGE_USER_ACTION_TYPE = "changeUser";
private static final String CHANGE_USER_ID_VARIABLE = "externalUserId";
private static Context sApplicationContext;
/**
* Must be set before calling any of the following methods
* so that the proper application context is available when needed.
*
* Recommended to be called in your {@link Application#onCreate()}.
*/
public static void setApplicationContext(Context applicationContext) {
if (applicationContext != null) {
sApplicationContext = applicationContext.getApplicationContext();
}
}
@Override
public void execute(Map map) {
BrazeLogger.i(TAG, "Got google tag manager parameters map: " + map);
if (sApplicationContext == null) {
BrazeLogger.w(TAG, "No application context provided to this tag provider.");
return;
}
if (!map.containsKey(ACTION_TYPE_KEY)) {
BrazeLogger.w(TAG, "Map does not contain the Braze action type key: " + ACTION_TYPE_KEY);
return;
}
String actionType = String.valueOf(map.remove(ACTION_TYPE_KEY));
switch (actionType) {
case LOG_EVENT_ACTION_TYPE:
logEvent(map);
break;
case CUSTOM_ATTRIBUTE_ACTION_TYPE:
setCustomAttribute(map);
break;
case CHANGE_USER_ACTION_TYPE:
changeUser(map);
break;
default:
BrazeLogger.w(TAG, "Got unknown action type: " + actionType);
break;
}
}
private void logEvent(Map tagParameterMap) {
String eventName = String.valueOf(tagParameterMap.remove(EVENT_NAME_VARIABLE));
Braze.getInstance(sApplicationContext).logCustomEvent(eventName, parseMapIntoProperties(tagParameterMap));
}
private BrazeProperties parseMapIntoProperties(Map map) {
BrazeProperties brazeProperties = new BrazeProperties();
for (Map.Entry entry : map.entrySet()) {
final Object value = entry.getValue();
final String key = entry.getKey();
if (value instanceof Boolean) {
brazeProperties.addProperty(key, (Boolean) value);
} else if (value instanceof Integer) {
brazeProperties.addProperty(key, (Integer) value);
} else if (value instanceof Date) {
brazeProperties.addProperty(key, (Date) value);
} else if (value instanceof Long) {
brazeProperties.addProperty(key, (Long) value);
} else if (value instanceof String) {
brazeProperties.addProperty(key, (String) value);
} else if (value instanceof Double) {
brazeProperties.addProperty(key, (Double) value);
} else {
BrazeLogger.w(TAG, "Failed to parse value into an BrazeProperties "
+ "accepted type. Key: '" + key + "' Value: '" + value + "'");
}
}
return brazeProperties;
}
private void setCustomAttribute(Map tagParameterMap) {
String key = String.valueOf(tagParameterMap.get(CUSTOM_ATTRIBUTE_KEY));
Object value = tagParameterMap.get(CUSTOM_ATTRIBUTE_VALUE_KEY);
Braze.getInstance(sApplicationContext).getCurrentUser(new IValueCallback() {
@Override
public void onSuccess(BrazeUser brazeUser) {
if (value instanceof Boolean) {
brazeUser.setCustomUserAttribute(key, (Boolean) value);
} else if (value instanceof Integer) {
brazeUser.setCustomUserAttribute(key, (Integer) value);
} else if (value instanceof Long) {
brazeUser.setCustomUserAttribute(key, (Long) value);
} else if (value instanceof String) {
brazeUser.setCustomUserAttribute(key, (String) value);
} else if (value instanceof Double) {
brazeUser.setCustomUserAttribute(key, (Double) value);
} else if (value instanceof Float) {
brazeUser.setCustomUserAttribute(key, (Float) value);
} else {
BrazeLogger.w(TAG, "Failed to parse value into a custom "
+ "attribute accepted type. Key: '" + key + "' Value: '" + value + "'");
}
}
});
}
private void changeUser(Map tagParameterMap) {
String userId = String.valueOf(tagParameterMap.get(CHANGE_USER_ID_VARIABLE));
Braze.getInstance(sApplicationContext).changeUser(userId);
}
}
```
```kotlin
class BrazeGtmTagProvider : CustomTagProvider {
override fun execute(map: MutableMap) {
BrazeLogger.i(TAG, "Got google tag manager parameters map: $map")
if (sApplicationContext == null) {
BrazeLogger.w(TAG, "No application context provided to this tag provider.")
return
}
if (!map.containsKey(ACTION_TYPE_KEY)) {
BrazeLogger.w(TAG, "Map does not contain the Braze action type key: $ACTION_TYPE_KEY")
return
}
val actionType = map.remove(ACTION_TYPE_KEY).toString()
when (actionType) {
LOG_EVENT_ACTION_TYPE -> logEvent(map)
CUSTOM_ATTRIBUTE_ACTION_TYPE -> setCustomAttribute(map)
CHANGE_USER_ACTION_TYPE -> changeUser(map)
else -> BrazeLogger.w(TAG, "Got unknown action type: $actionType")
}
}
private fun logEvent(tagParameterMap: MutableMap) {
val eventName = tagParameterMap.remove(EVENT_NAME_VARIABLE).toString()
Braze.getInstance(sApplicationContext).logCustomEvent(eventName, parseMapIntoProperties(tagParameterMap))
}
private fun parseMapIntoProperties(map: Map): BrazeProperties {
val brazeProperties = BrazeProperties()
map.forEach { param ->
val key = param.key
val value = param.value
when (value) {
is Boolean -> brazeProperties.addProperty(key, value)
is Int -> brazeProperties.addProperty(key, value)
is Date -> brazeProperties.addProperty(key, value)
is Long -> brazeProperties.addProperty(key, value)
is String -> brazeProperties.addProperty(key, value)
is Double -> brazeProperties.addProperty(key, value)
else -> BrazeLogger.w(TAG, "Failed to parse value into an BrazeProperties "
+ "accepted type. Key: '" + key + "' Value: '" + value + "'")
}
}
return brazeProperties
}
private fun setCustomAttribute(tagParameterMap: Map) {
val key = tagParameterMap[CUSTOM_ATTRIBUTE_KEY].toString()
val value = tagParameterMap[CUSTOM_ATTRIBUTE_VALUE_KEY]
Braze.getInstance(sApplicationContext).getCurrentUser { brazeUser ->
when (value) {
is Boolean -> brazeUser.setCustomUserAttribute(key, value)
is Int -> brazeUser.setCustomUserAttribute(key, value)
is Long -> brazeUser.setCustomUserAttribute(key, value)
is String -> brazeUser.setCustomUserAttribute(key, value)
is Double -> brazeUser.setCustomUserAttribute(key, value)
is Float -> brazeUser.setCustomUserAttribute(key, value)
else -> BrazeLogger.w(
TAG, "Failed to parse value into a custom "
+ "attribute accepted type. Key: '" + key + "' Value: '" + value + "'"
)
}
}
}
private fun changeUser(tagParameterMap: Map) {
val userId = tagParameterMap[CHANGE_USER_ID_VARIABLE].toString()
Braze.getInstance(sApplicationContext).changeUser(userId)
}
companion object {
private val TAG = BrazeLogger.getBrazeLogTag(BrazeGtmTagProvider::class.java)
private val ACTION_TYPE_KEY = "actionType"
// Custom Events
private val LOG_EVENT_ACTION_TYPE = "logEvent"
private val EVENT_NAME_VARIABLE = "eventName"
// Custom Attributes
private val CUSTOM_ATTRIBUTE_ACTION_TYPE = "customAttribute"
private val CUSTOM_ATTRIBUTE_KEY = "customAttributeKey"
private val CUSTOM_ATTRIBUTE_VALUE_KEY = "customAttributeValue"
// Change User
private val CHANGE_USER_ACTION_TYPE = "changeUser"
private val CHANGE_USER_ID_VARIABLE = "externalUserId"
private var sApplicationContext: Context? = null
/**
* Must be set before calling any of the following methods so
* that the proper application context is available when needed.
*
* Recommended to be called in your [Application.onCreate].
*/
fun setApplicationContext(applicationContext: Context?) {
if (applicationContext != null) {
sApplicationContext = applicationContext.applicationContext
}
}
}
}
```
In your `Application.onCreate()` be sure to add the following initialization for the previous snippet:
```java
BrazeGtmTagProvider.setApplicationContext(this.getApplicationContext());
```
```kotlin
BrazeGtmTagProvider.setApplicationContext(this.applicationContext)
```
## Prerequisites
Before you can use this feature, you'll need to [integrate the Swift Braze SDK](https://www.braze.com/docs/pt-br/pt-br/developer_guide/sdk_integration/?sdktab=swift).
## Using Google Tag Manager for Swift
In the following example, a music streaming app wants to log different events as users listen to songs. Using Google Tag Manager for iOS, they can control which of the Braze third-party vendors receive this event and create tags specific to Braze.
### Step 1: Create a trigger for custom events
Custom events are logged with `actionType` set to `logEvent`. In this example, the Braze custom tag provider is expecting the custom event name to be set using `eventName`.
First, create a trigger that looks for an `eventName` that equals `played song`.

Next, create a new Tag (also known as a "Function Call") and enter the class path of your [custom tag provider](#adding-ios-google-tag-provider) described later in this article. This tag will be triggered when you log the `played song` event. Because `eventName` is set to `played song` it will be used as custom event name that's logged to Braze.
**Important:**
When sending a custom event, set `actionType` to `logEvent`, and set a value for `eventName` so Braze receives the correct event name and action to take.

You can also include additional key-value pair arguments to the tag, which will be sent as custom event properties to Braze. `eventName` and `actionType` will not be ignored for custom event properties. In the following example tag, pass in `genre`, which was defined using a tag variable in Google Tag Manager and sourced from the custom event logged in the app.
The `genre` event property is sent to Google Tag Manager as a "Firebase - Event Parameter" variable since Google Tag Manager for iOS uses Firebase as the data layer.

When a user plays a song in the app, log an event through Firebase and Google Tag Manager using the Firebase analytics event name that matches the tag's trigger name, `played song`:
```swift
let parameters: [String: Any] = ["genre": "pop",
"number of times listened": 42]
Analytics.logEvent("played song", parameters: parameters)
```
```obj-c
NSDictionary *parameters = @{@"genre" : @"pop",
@"number of times listened" : @42};
[FIRAnalytics logEventWithName:@"played song" parameters:parameters];
```
### Step 2: Log custom attributes
Custom attributes are set via an `actionType` set to `customAttribute`. The Braze custom tag provider is expecting the custom attribute key-value to be set via `customAttributeKey` and `customAttributeValue`:
```swift
let parameters: [String: Any] = ["customAttributeKey": "favoriteSong",
"customAttributeValue": "Private Eyes"]
FIRAnalytics.logEvent(withName:"customAttribute", parameters: parameters)
```
```obj-c
NSDictionary *parameters = @{@"customAttributeKey" : @"favoriteSong",
@"customAttributeValue" : @"Private Eyes"};
[FIRAnalytics logEventWithName:@"customAttribute" parameters:parameters];
```
### Step 3: Call `changeUser()`
Calls to `changeUser()` are made via an `actionType` set to `changeUser`. The Braze custom tag provider is expecting the Braze user ID to be set via an `externalUserId` key-value pair within your tag:
```swift
let parameters: [String: Any] = ["externalUserId": "favorite userId"]
Analytics.logEvent(withName:"changeUser", parameters: parameters)
```
```obj-c
NSDictionary *parameters = @{@"externalUserId" : userId};
[FIRAnalytics logEventWithName:@"changeUser" parameters:parameters];
```
### Step 4: Add a custom tag provider {#adding-ios-google-tag-provider}
With the tags and triggers set up, you will also need to implement Google Tag Manager in your iOS app which can be found in Google's [documentation](https://developers.google.com/tag-manager/ios/v5/).
After Google Tag Manager is installed in your app, add a custom tag provider to call Braze SDK methods based on the tags you've configured within Google Tag Manager.
Be sure to note the "Class Path" to the file - this is what you'll enter when setting up a tag in the [Google Tag Manager](https://tagmanager.google.com/) console.
This example highlights one of many ways you can structure your custom tag provider. Specifically, it shows how to determine which Braze SDK method to call based on the `actionType` key-value pair sent from the GTM Tag. This example assumes you've assigned the Braze instance as a variable in the AppDelegate.
The `actionType` supported in this example are `logEvent`, `customAttribute`, and `changeUser`, but you may prefer to change how your tag provider handles data from Google Tag Manager.
Add the following code to your `BrazeGTMTagManager.swift` file.
```swift
import FirebaseAnalytics
import GoogleTagManager
import BrazeKit
let ActionTypeKey: String = "actionType"
// Custom Events
let LogEventAction: String = "logEvent"
let LogEventName: String = "eventName"
// Custom Attributes
let CustomAttributeAction: String = "customAttribute"
let CustomAttributeKey: String = "customAttributeKey"
let CustomAttributeValueKey: String = "customAttributeValue"
// Change User
let ChangeUserAction: String = "changeUser"
let ChangeUserExternalUserId: String = "externalUserId"
@objc(BrazeGTMTagManager)
final class BrazeGTMTagManager : NSObject, TAGCustomFunction {
@objc func execute(withParameters parameters: [AnyHashable : Any]!) -> NSObject! {
var parameters: [String : Any] = parameters as! [String : Any]
guard let actionType: String = parameters[ActionTypeKey] as? String else {
print("There is no Braze action type key in this call. Doing nothing.")
return nil
}
parameters.removeValue(forKey: ActionTypeKey)
if actionType == LogEventAction {
logEvent(parameters: parameters)
} else if actionType == CustomAttributeAction {
logCustomAttribute(parameters: parameters)
} else if actionType == ChangeUserAction {
changeUser(parameters: parameters)
}
return nil
}
func logEvent(parameters: [String : Any]) {
var parameters: [String : Any] = parameters
guard let eventName: String = parameters[LogEventName] as? String else { return }
parameters.removeValue(forKey: LogEventName)
AppDelegate.braze?.logCustomEvent(name: eventName, properties: parameters)
}
func logCustomAttribute(parameters: [String: Any]) {
guard let customAttributeKey = parameters[CustomAttributeKey] as? String else { return }
let customAttributeValue = parameters[CustomAttributeValueKey]
if let customAttributeValue = customAttributeValue as? String {
AppDelegate.braze?.user.setCustomAttribute(key: customAttributeKey, value: customAttributeValue)
} else if let customAttributeValue = customAttributeValue as? Date {
AppDelegate.braze?.user.setCustomAttribute(key: customAttributeKey, value: customAttributeValue)
} else if let customAttributeValue = customAttributeValue as? Double {
AppDelegate.braze?.user.setCustomAttribute(key: customAttributeKey, value: customAttributeValue)
} else if let customAttributeValue = customAttributeValue as? Bool {
AppDelegate.braze?.user.setCustomAttribute(key: customAttributeKey, value: customAttributeValue)
} else if let customAttributeValue = customAttributeValue as? Int {
AppDelegate.braze?.user.setCustomAttribute(key: customAttributeKey, value: customAttributeValue)
} else if let customAttibuteValue = customAttributeValue as? [String] {
AppDelegate.braze?.user.setCustomAttributeArray(key: customAttributeKey, array: customAttibuteValue)
}
}
func changeUser(parameters: [String: Any]) {
guard let userId = parameters[ChangeUserExternalUserId] as? String else { return }
AppDelegate.braze?.changeUser(userId: userId)
}
}
```
Add the following code to your `BrazeGTMTagManager.h` file:
```obj-c
@import Firebase;
@import GoogleTagManager;
@interface BrazeGTMTagManager : NSObject
@end
```
And add the following code to your `BrazeGTMTagManager.m` file:
```obj-c
#import
#import "BrazeGTMTagManager.h"
#import "BrazeKit"
#import "AppDelegate.h"
static NSString *const ActionTypeKey = @"actionType";
// Custom Events
static NSString *const LogEventAction = @"logEvent";
static NSString *const LogEventEventName = @"eventName";
// Custom Attributes
static NSString *const CustomAttributeAction = @"customAttribute";
static NSString *const CustomAttributeKey = @"customAttributeKey";
static NSString *const CustomAttributeValueKey = @"customAttributeValue";
// Change User
static NSString *const ChangeUserAction = @"changeUser";
static NSString *const ChangeUserExternalUserId = @"externalUserId";
@implementation BrazeGTMTagManager
- (NSObject *)executeWithParameters:(NSDictionary *)parameters {
NSMutableDictionary *mutableParameters = [parameters mutableCopy];
NSString *actionType = mutableParameters[ActionTypeKey];
if (!actionType) {
NSLog(@"There is no Braze action type key in this call. Doing nothing.", nil);
return nil;
}
[mutableParameters removeObjectForKey:ActionTypeKey];
if ([actionType isEqualToString:LogEventAction]) {
[self logEvent:mutableParameters];
} else if ([actionType isEqualToString:CustomAttributeAction]) {
[self logCustomAttribute:mutableParameters];
} else if ([actionType isEqualToString:ChangeUserAction]) {
[self changeUser:mutableParameters];
} else {
NSLog(@"Invalid action type. Doing nothing.");
}
return nil;
}
- (void)logEvent:(NSMutableDictionary *)parameters {
NSString *eventName = parameters[LogEventEventName];
[parameters removeObjectForKey:LogEventEventName];
[AppDelegate.braze logCustomEvent:eventName
properties:parameters];
}
- (void)logCustomAttribute:(NSMutableDictionary *)parameters {
NSString *customAttributeKey = parameters[CustomAttributeKey];
id customAttributeValue = parameters[CustomAttributeValueKey];
if ([customAttributeValue isKindOfClass:[NSString class]]) {
[AppDelegate.braze logCustomEvent:customAttributeKey
properties:parameters];
} else if ([customAttributeValue isKindOfClass:[NSDate class]]) {
[AppDelegate.braze.user setCustomAttributeWithKey:customAttributeKey
dateValue:customAttributeValue];
} else if ([customAttributeValue isKindOfClass:[NSNumber class]]) {
if (strcmp([customAttributeValue objCType], [@(YES) objCType]) == 0) {
[AppDelegate.braze.user setCustomAttributeWithKey:customAttributeKey
boolValue:[(NSNumber *)customAttributeValue boolValue]];
} else if (strcmp([customAttributeValue objCType], @encode(short)) == 0 ||
strcmp([customAttributeValue objCType], @encode(int)) == 0 ||
strcmp([customAttributeValue objCType], @encode(long)) == 0) {
[AppDelegate.braze.user setCustomAttributeWithKey:customAttributeKey
intValue:[(NSNumber *)customAttributeValue integerValue]];
} else if (strcmp([customAttributeValue objCType], @encode(float)) == 0 ||
strcmp([customAttributeValue objCType], @encode(double)) == 0) {
[AppDelegate.braze.user setCustomAttributeWithKey:customAttributeKey
doubleValue:[(NSNumber *)customAttributeValue doubleValue]];
} else {
NSLog(@"Could not map NSNumber value to Braze custom attribute:%@", customAttributeValue);
}
} else if ([customAttributeValue isKindOfClass:[NSArray class]]) {
[AppDelegate.braze.user setCustomAttributeArrayWithKey:customAttributeKey
array:customAttributeValue];
}
}
- (void)changeUser:(NSMutableDictionary *)parameters {
NSString *userId = parameters[ChangeUserExternalUserId];
[AppDelegate.braze changeUser:userId];
}
@end
```
## Solução de problemas {#troubleshooting}
Se a Braze não inicializar ou os eventos não aparecerem como esperado, confirme se o contêiner do GTM está publicado, se os disparadores e a ordem de acionamento das tags estão alinhados com o [ciclo de vida e a estratégia de inicialização](https://www.braze.com/docs/pt-br/pt-br/developer_guide/sdk_integration/) do seu SDK, e se os dispositivos de teste não estão bloqueando os endpoints da Braze.
Para falhas de inicialização, verifique se a tag da Braze ou o provedor de tag personalizado está recebendo o `actionType` e os parâmetros esperados (consulte as guias Android, Swift e Web nesta página). Para obter um registro detalhado ao validar eventos disparados pelo GTM, ative o registro de depuração do SDK da sua plataforma conforme descrito nos guias de integração vinculados nessas guias.
# Configure a autenticação do SDK da Braze
Source: /docs/pt-br/developer_guide/sdk_integration/authentication/index.md
# Configurar autenticação do SDK {#set-up-sdk-authentication}
> A autenticação do SDK permite fornecer prova criptográfica (gerada no lado do servidor) para solicitações do SDK feitas em nome de usuários registrados.
## Como funciona {#how-it-works}
Depois de ativar esse recurso em seu app, você pode configurar o dashboard da Braze para rejeitar quaisquer solicitações com um JSON Web Token (JWT) inválido ou ausente, o que inclui:
- Envio de eventos personalizados, atributos, compras e dados de sessão
- Criação de novos usuários em seu espaço de trabalho da Braze
- Atualização de atributos padrão do perfil de usuário
- Receber ou disparar mensagens
Agora você pode impedir que usuários conectados não autenticados usem a chave de API do SDK do seu app para realizar ações maliciosas, como simular a identidade de outros usuários.
## Configurando a autenticação {#setting-up-authentication}
### Etapa 1: Configure seu servidor {#server-side-integration}
#### Etapa 1.1: Gerar um par de chaves pública/privada {#generate-keys}
Gere um par de chaves pública/privada RSA256. A chave pública será eventualmente adicionada ao dashboard da Braze, enquanto a chave privada deverá ser armazenada com segurança em seu servidor.
Recomendamos usar uma chave RSA com 2048 bits para uso com o algoritmo RS256 JWT.
**Warning:**
Lembre-se de manter suas chaves privadas _em sigilo_. Nunca exponha ou codifique sua chave privada em seu app ou site. Qualquer pessoa que conheça sua chave privada pode simular a identidade ou criar usuários em nome do seu aplicativo.
#### Etapa 1.2: Crie um JSON Web Token para o usuário atual {#create-jwt}
Depois de obter a chave privada, o aplicativo no lado do servidor deve usá-la para retornar um JWT ao seu app ou site para o usuário atualmente registrado.
Normalmente, essa lógica pode ser acessada em qualquer lugar em que o aplicativo normalmente solicite o perfil do usuário atual, como um endpoint de login ou em qualquer lugar em que o aplicativo atualize o perfil do usuário atual.
Ao gerar o JWT, os seguintes campos são esperados:
**Cabeçalho JWT**
| Campo | Obrigatória | Descrição |
| ----- | -------- | ----------------------------------- |
| `alg` | Sim | O algoritmo suportado é `RS256`. |
| `typ` | Sim | O tipo deve ser igual a `JWT`. |
{: .reset-td-br-1 .reset-td-br-2 .reset-td-br-3 aria-label="Etapa 1.2: Crie um JSON Web Token para o usuário atual" }
{: .reset-td-br-1 .reset-td-br-2 .reset-td-br-3 aria-label="Etapa 1.2: Crie um JSON Web Token para o usuário atual #create-jwt" }
**Carga útil do JWT**
| Campo | Obrigatória | Descrição |
| ----- | -------- | -------------------------------------------------------------------------------------- |
| `sub` | Sim | O "assunto" deve ser igual ao ID do usuário que você fornece ao SDK da Braze ao chamar `changeUser` |
| `exp` | Sim | A "expiração" de quando você deseja que esse token expire, como um timestamp Unix em segundos (por exemplo, `1893456000` para 1º de janeiro de 2030). |
{: .reset-td-br-1 .reset-td-br-2 .reset-td-br-3 aria-label="Etapa 1.2: Crie um JSON Web Token para o usuário atual" }
{: .reset-td-br-1 .reset-td-br-2 .reset-td-br-3 aria-label="Etapa 1.2: Crie um JSON Web Token para o usuário atual #create-jwt" }
**Tip:**
Para saber mais sobre os JSON Web Tokens ou para navegar pelas muitas bibliotecas de código aberto que simplificam esse processo de assinatura, consulte [https://jwt.io](https://jwt.io).
### Etapa 2: Configurar o SDK {#sdk-integration}
Este recurso está disponível nas seguintes [versões do SDK](https://www.braze.com/docs/pt-br/pt-br/user_guide/engagement_tools/campaigns/ideas_and_strategies/new_features/#filtering-by-most-recent-app-versions):
**Note:**
Para integrações de iOS, esta página detalha as etapas para o Braze Swift SDK. Para obter exemplos de uso no AppboyKit iOS SDK legado, consulte [este arquivo](https://github.com/Appboy/appboy-ios-sdk/blob/master/Example/Stopwatch/Sources/AppDelegate.m) e [este arquivo](https://github.com/Appboy/appboy-ios-sdk/blob/master/Example/Stopwatch/Sources/Utils/SdkAuthDelegate.m).
#### Etapa 2.1: Ative a autenticação no SDK da Braze. {#step-21-enable-authentication-in-the-braze-sdk}
Quando esse recurso for ativado, o SDK da Braze anexará o último JWT conhecido do usuário atual às solicitações de rede feitas aos servidores da Braze.
**Note:**
Não se preocupe, a inicialização apenas com essa opção não afetará a coleta de dados de forma alguma, até que você comece a [aplicar a autenticação](#braze-dashboard) no dashboard da Braze.
Ao chamar `initialize`, defina a propriedade opcional `enableSdkAuthentication` como `true`.
```javascript
import * as braze from "@braze/web-sdk";
braze.initialize("YOUR-API-KEY-HERE", {
baseUrl: "YOUR-SDK-ENDPOINT-HERE",
enableSdkAuthentication: true,
});
```
A autenticação do SDK deve ser ativada durante a inicialização do SDK nativo. Adicione a seguinte configuração ao seu código nativo iOS e Android:
**iOS (AppDelegate.swift)**
```swift
import BrazeKit
import braze_react_native_sdk
let configuration = Braze.Configuration(
apiKey: "{YOUR-BRAZE-API-KEY}",
endpoint: "{YOUR-BRAZE-ENDPOINT}"
)
configuration.api.sdkAuthentication = true
let braze = BrazeReactBridge.perform(
#selector(BrazeReactBridge.initBraze(_:)),
with: configuration
).takeUnretainedValue() as! Braze
```
**Android (braze.xml)**
```xml
true
```
Após ativar a autenticação do SDK na camada nativa, você pode usar os métodos JavaScript do React Native mostrados nas etapas a seguir.
Ao configurar a instância da Braze, chame `setIsSdkAuthenticationEnabled` com `true`.
```java
BrazeConfig.Builder brazeConfigBuilder = new BrazeConfig.Builder()
.setIsSdkAuthenticationEnabled(true);
Braze.configure(this, brazeConfigBuilder.build());
```
Como alternativa, você pode adicionar `true` ao seu braze.xml.
Ao configurar a instância da Braze, chame `setIsSdkAuthenticationEnabled` com `true`.
```kotlin
BrazeConfig.Builder brazeConfigBuilder = BrazeConfig.Builder()
.setIsSdkAuthenticationEnabled(true)
Braze.configure(this, brazeConfigBuilder.build())
```
Como alternativa, você pode adicionar `true` ao seu braze.xml.
Para ativar a autenticação do SDK, defina a propriedade `configuration.api.sdkAuthentication` do seu objeto `BRZConfiguration` como `YES` antes de inicializar a instância da Braze:
```objc
BRZConfiguration *configuration =
[[BRZConfiguration alloc] initWithApiKey:@"{BRAZE_API_KEY}"
endpoint:@"{BRAZE_ENDPOINT}"];
configuration.api.sdkAuthentication = YES;
Braze *braze = [[Braze alloc] initWithConfiguration:configuration];
AppDelegate.braze = braze;
```
Para ativar a autenticação do SDK, defina a propriedade `configuration.api.sdkAuthentication` do seu objeto `Braze.Configuration` como `true` ao inicializar o SDK:
```swift
let configuration = Braze.Configuration(apiKey: "{YOUR-BRAZE-API-KEY}",
endpoint: "{YOUR-BRAZE-ENDPOINT}")
configuration.api.sdkAuthentication = true
let braze = Braze(configuration: configuration)
AppDelegate.braze = braze
```
Atualmente, a autenticação do SDK deve ser ativada como parte da inicialização do SDK no código nativo do iOS e do Android. Para ativar a autenticação do SDK no Flutter SDK, siga as integrações para iOS e Android nas outras guias. Depois que a autenticação do SDK for ativada, o restante do recurso poderá ser integrado ao Dart.
A autenticação do SDK deve ser ativada como parte da inicialização do SDK no código nativo do iOS e Android. Quando ativada na camada nativa, você pode usar os métodos do Flutter SDK para passar a assinatura JWT.
**iOS**
Para ativar a autenticação do SDK, defina a propriedade `configuration.api.sdkAuthentication` como `true` em seu código iOS nativo:
```swift
let configuration = Braze.Configuration(apiKey: "{YOUR-BRAZE-API-KEY}", endpoint: "{YOUR-BRAZE-ENDPOINT}")
configuration.api.sdkAuthentication = true
let braze = Braze(configuration: configuration)
```
**Android (braze.xml)**
```xml
true
```
Após ativar a autenticação do SDK na camada nativa, você pode usar os métodos do Flutter SDK mostrados nas etapas a seguir.
A autenticação do SDK deve ser ativada durante a inicialização do SDK nativo. Adicione a seguinte configuração ao seu código nativo iOS e Android:
**iOS**
Defina a propriedade `SDKAuthenticationEnabled` como `true` no seu arquivo de configuração:
```xml
SDKAuthenticationEnabled
```
**Android (braze.xml)**
```xml
true
```
Depois de ativar a autenticação do SDK na camada nativa, você pode usar os métodos Unity C# mostrados nas etapas a seguir.
A autenticação do SDK deve ser ativada durante a inicialização do SDK nativo. Adicione a seguinte configuração ao seu código nativo iOS e Android:
**iOS**
Para ativar a autenticação do SDK, defina a propriedade `enableSDKAuthentication` como `true` em seu `config.xml`:
```xml
```
**Android (braze.xml)**
```xml
true
```
Depois de ativar a autenticação do SDK na camada nativa, você pode usar os métodos JavaScript do Cordova mostrados nas etapas a seguir.
A autenticação do SDK deve ser ativada durante a inicialização do SDK nativo. Configure a autenticação do SDK separadamente para iOS e Android:
**iOS**
Para ativar a autenticação do SDK, defina a propriedade `configuration.Api.SdkAuthentication` como `true` ao inicializar o SDK:
```csharp
var configuration = new BRZConfiguration("YOUR-API-KEY", "YOUR-ENDPOINT");
configuration.Api.SdkAuthentication = true;
var braze = new Braze(configuration);
```
**Android (braze.xml)**
```xml
true
```
Após ativar a autenticação do SDK, você pode usar os métodos .NET MAUI mostrados nas etapas a seguir.
Ao usar o plug-in Braze Expo, defina a propriedade `enableSdkAuthentication` como `true` na configuração do seu app. Isso configura automaticamente a autenticação do SDK nas camadas nativas do iOS e Android, sem a necessidade de alterações manuais no código nativo.
**app.json ou app.config.js**
```json
{
"expo": {
"plugins": [
[
"@braze/expo-plugin",
{
"enableSdkAuthentication": true
}
]
]
}
}
```
Depois de ativar a autenticação do SDK na configuração do seu app, você pode usar os métodos JavaScript do React Native mostrados na guia React Native para as etapas a seguir.
**Note:**
Para um exemplo completo de implementação, consulte o [app de exemplo do plug-in Braze Expo](https://github.com/braze-inc/braze-expo-plugin/blob/main/example/components/Braze.tsx) no GitHub.
#### Etapa 2.2: Definir o JWT do usuário atual {#step-22-set-the-current-users-jwt}
Sempre que seu app chamar o método `changeUser` da Braze, forneça também o JWT que foi [gerado no lado do servidor](#braze-dashboard).
Também é possível configurar o token para ser atualizado no meio da sessão para o usuário atual.
**Note:**
Lembre-se de que o `changeUser` só deve ser chamado quando o ID do usuário for _realmente alterado_. Você não deve usar este método como forma de atualizar o token de autenticação (JWT) se o ID do usuário não tiver sido alterado.
Forneça o JWT ao chamar [`changeUser`](https://js.appboycdn.com/web-sdk/latest/doc/modules/braze.html#changeuser):
```javascript
import * as braze from "@braze/web-sdk";
braze.changeUser("NEW-USER-ID", "JWT-FROM-SERVER");
```
Ou quando você tiver atualizado o token do usuário no meio da sessão:
```javascript
import * as braze from "@braze/web-sdk";
braze.setSdkAuthenticationSignature("NEW-JWT-FROM-SERVER");
```
Forneça o JWT ao chamar [`changeUser`](https://braze-inc.github.io/braze-react-native-sdk/classes/Braze.Braze-1.html#changeUser):
```typescript
import Braze from '@braze/react-native-sdk';
Braze.changeUser("NEW-USER-ID", "JWT-FROM-SERVER");
```
Ou quando você tiver atualizado o token do usuário no meio da sessão:
```typescript
import Braze from '@braze/react-native-sdk';
Braze.setSdkAuthenticationSignature("NEW-JWT-FROM-SERVER");
```
Forneça o JWT ao chamar [`changeUser`](https://braze-inc.github.io/braze-android-sdk/kdoc/braze-android-sdk/com.braze/-i-braze/change-user.html):
```java
Braze.getInstance(this).changeUser("NEW-USER-ID", "JWT-FROM-SERVER");
```
Ou quando você tiver atualizado o token do usuário no meio da sessão:
```java
Braze.getInstance(this).setSdkAuthenticationSignature("NEW-JWT-FROM-SERVER");
```
Forneça o JWT ao chamar [`changeUser`](https://braze-inc.github.io/braze-android-sdk/kdoc/braze-android-sdk/com.braze/-i-braze/change-user.html):
```kotlin
Braze.getInstance(this).changeUser("NEW-USER-ID", "JWT-FROM-SERVER")
```
Ou quando você tiver atualizado o token do usuário no meio da sessão:
```kotlin
Braze.getInstance(this).setSdkAuthenticationSignature("NEW-JWT-FROM-SERVER")
```
Forneça o JWT ao chamar [`changeUser`](https://braze-inc.github.io/braze-swift-sdk/documentation/brazekit/braze/changeuser(userid:sdkauthsignature:fileid:line:)):
```objc
[AppDelegate.braze changeUser:@"userId" sdkAuthSignature:@"JWT-FROM-SERVER"];
```
Ou quando você tiver atualizado o token do usuário no meio da sessão:
```objc
[AppDelegate.braze setSDKAuthenticationSignature:@"NEW-JWT-FROM-SERVER"];
```
Forneça o JWT ao chamar [`changeUser`](https://braze-inc.github.io/braze-swift-sdk/documentation/brazekit/braze/changeuser(userid:sdkauthsignature:fileid:line:)):
```swift
AppDelegate.braze?.changeUser(userId: "userId", sdkAuthSignature: "JWT-FROM-SERVER")
```
Ou quando você tiver atualizado o token do usuário no meio da sessão:
```swift
AppDelegate.braze?.set(sdkAuthenticationSignature: "NEW-JWT-FROM-SERVER")
```
Forneça o JWT ao chamar [`changeUser`](https://js.appboycdn.com/web-sdk/latest/doc/modules/braze.html#changeuser):
```dart
braze.changeUser("userId", sdkAuthSignature: "JWT-FROM-SERVER")
```
Ou quando você tiver atualizado o token do usuário no meio da sessão:
```dart
braze.setSdkAuthenticationSignature("NEW-JWT-FROM-SERVER")
```
Forneça o JWT ao chamar `changeUser`:
```dart
import 'package:braze_plugin/braze_plugin.dart';
BrazePlugin braze = BrazePlugin();
braze.changeUser("NEW-USER-ID", sdkAuthSignature: "JWT-FROM-SERVER");
```
Ou quando você tiver atualizado o token do usuário no meio da sessão:
```dart
import 'package:braze_plugin/braze_plugin.dart';
BrazePlugin braze = BrazePlugin();
braze.setSdkAuthenticationSignature("NEW-JWT-FROM-SERVER");
```
Forneça o JWT ao chamar `ChangeUser`:
```csharp
BrazeBinding.ChangeUser("NEW-USER-ID", "JWT-FROM-SERVER");
```
Ou quando você tiver atualizado o token do usuário no meio da sessão:
```csharp
BrazeBinding.SetSdkAuthenticationSignature("NEW-JWT-FROM-SERVER");
```
Forneça o JWT ao chamar `changeUser`:
```javascript
BrazePlugin.changeUser("NEW-USER-ID", "JWT-FROM-SERVER");
```
Ou quando você tiver atualizado o token do usuário no meio da sessão:
```javascript
BrazePlugin.setSdkAuthenticationSignature("NEW-JWT-FROM-SERVER");
```
Forneça o JWT ao chamar `ChangeUser`:
**iOS**
```csharp
Braze.SharedInstance?.ChangeUser("NEW-USER-ID", "JWT-FROM-SERVER");
```
Ou quando você tiver atualizado o token do usuário no meio da sessão:
```csharp
Braze.SharedInstance?.SetSDKAuthenticationSignature("NEW-JWT-FROM-SERVER");
```
**Android**
```csharp
Braze.GetInstance(this).ChangeUser("NEW-USER-ID", "JWT-FROM-SERVER");
```
Ou quando você tiver atualizado o token do usuário no meio da sessão:
```csharp
Braze.GetInstance(this).SetSdkAuthenticationSignature("NEW-JWT-FROM-SERVER");
```
Ao usar o plug-in Braze Expo, utilize os mesmos métodos do SDK React Native. Forneça o JWT ao chamar `changeUser`:
```typescript
import Braze from '@braze/react-native-sdk';
Braze.changeUser("NEW-USER-ID", "JWT-FROM-SERVER");
```
Ou quando você tiver atualizado o token do usuário no meio da sessão:
```typescript
import Braze from '@braze/react-native-sdk';
Braze.setSdkAuthenticationSignature("NEW-JWT-FROM-SERVER");
```
#### Etapa 2.3: Registre uma função de retorno de chamada para tokens inválidos {#sdk-callback}
Quando esse recurso for definido como [Obrigatório](#enforcement-options), os cenários a seguir farão com que as solicitações do SDK sejam rejeitadas pela Braze:
- O JWT expirou no momento em que foi recebido pela API da Braze
- O JWT estava vazio ou ausente
- Falha na verificação do JWT para as chaves públicas cujo upload foi feito para o dashboard da Braze
Você pode usar `subscribeToSdkAuthenticationFailures` para se inscrever e ser notificado quando as solicitações do SDK falharem por um desses motivos. Uma função de retorno de chamada contém um objeto com o [`errorCode`](#error-codes) relevante, o `reason` do erro, o `userId` da solicitação (o usuário não pode ser anônimo) e o token de autenticação (JWT) que causou o erro.
As solicitações com falha serão repetidas periodicamente até que seu app forneça um novo JWT válido. Se o usuário ainda estiver registrado, você poderá usar esse retorno de chamada como uma oportunidade para solicitar um novo JWT do seu servidor e fornecer ao SDK da Braze esse novo token válido.
Quando você receber um erro de autenticação, verifique se o `userId` no erro corresponde ao usuário atualmente conectado, em seguida, obtenha uma nova assinatura do seu servidor e forneça-a ao SDK da Braze. Você também pode registrar esses erros em seu serviço de monitoramento ou relatório de erros.
**Tip:**
Esses métodos de retorno de chamada são um ótimo lugar para adicionar seu próprio serviço de monitoramento ou registro de erros para saber com que frequência as solicitações da Braze estão sendo rejeitadas.
```javascript
import * as braze from "@braze/web-sdk";
braze.subscribeToSdkAuthenticationFailures((error) => {
console.error("SDK authentication failed:", error);
console.log("Error code:", error.errorCode);
console.log("User ID:", error.userId);
// Note: Do not log error.signature as it contains sensitive authentication credentials
// Verify the error.userId matches the currently logged-in user
// Fetch a new token from your server and set it
fetchNewSignature(error.userId).then((newSignature) => {
braze.setSdkAuthenticationSignature(newSignature);
});
});
```
```typescript
import Braze from '@braze/react-native-sdk';
const sdkAuthErrorSubscription = Braze.addListener(
Braze.Events.SDK_AUTHENTICATION_ERROR,
(error) => {
console.log(`SDK Authentication for ${error.userId} failed with error code ${error.errorCode}.`);
const updated_jwt = getNewTokenSomehow(error);
Braze.setSdkAuthenticationSignature(updated_jwt);
}
);
// Don't forget to remove the listener when done
// sdkAuthErrorSubscription.remove();
```
```java
Braze.getInstance(this).subscribeToSdkAuthenticationFailures(error -> {
String newToken = getNewTokenSomehow(error);
Braze.getInstance(getContext()).setSdkAuthenticationSignature(newToken);
});
```
```kotlin
Braze.getInstance(this).subscribeToSdkAuthenticationFailures({ error: BrazeSdkAuthenticationErrorEvent ->
val newToken: String = getNewTokenSomehow(error)
Braze.getInstance(getContext()).setSdkAuthenticationSignature(newToken)
})
```
```objc
Braze *braze = [[Braze alloc] initWithConfiguration:configuration];
braze.sdkAuthDelegate = delegate;
AppDelegate.braze = braze;
// Method to implement in delegate
- (void)braze:(Braze *)braze sdkAuthenticationFailedWithError:(BRZSDKAuthenticationError *)error {
NSLog(@"Invalid SDK Authentication Token.");
NSString *newSignature = getNewTokenSomehow(error);
[AppDelegate.braze setSDKAuthenticationSignature:newSignature];
}
```
```swift
let braze = Braze(configuration: configuration)
braze.sdkAuthDelegate = delegate
AppDelegate.braze = braze
// Method to implement in delegate
func braze(_ braze: Braze, sdkAuthenticationFailedWithError error: Braze.SDKAuthenticationError) {
print("Invalid SDK Authentication Token.")
let newSignature = getNewTokenSomehow(error)
AppDelegate.braze?.set(sdkAuthenticationSignature: newSignature)
}
```
```dart
braze.setBrazeSdkAuthenticationErrorCallback((BrazeSdkAuthenticationError error) async {
print("Invalid SDK Authentication Token.");
final newSignature = getNewTokenSomehow(error);
braze.setSdkAuthenticationSignature(newSignature);
});
```
```dart
import 'package:braze_plugin/braze_plugin.dart';
BrazePlugin braze = BrazePlugin();
braze.setBrazeSdkAuthenticationErrorCallback((BrazeSdkAuthenticationError error) async {
print("SDK Authentication for ${error.userId} failed with error code ${error.errorCode}.");
String newSignature = getNewTokenSomehow(error);
braze.setSdkAuthenticationSignature(newSignature);
});
```
**iOS**
Defina o delegado de autenticação do SDK na sua implementação nativa do iOS:
```csharp
public class SdkAuthDelegate : BRZSdkAuthDelegate
{
public void Braze(Braze braze, BRZSDKAuthenticationError error)
{
Debug.Log("Invalid SDK Authentication Token.");
string newSignature = GetNewTokenSomehow(error);
BrazeBinding.SetSdkAuthenticationSignature(newSignature);
}
}
```
**Android**
```csharp
Braze.GetInstance(this).SubscribeToSdkAuthenticationFailures((error) => {
string newToken = GetNewTokenSomehow(error);
Braze.GetInstance(this).SetSdkAuthenticationSignature(newToken);
});
```
```javascript
BrazePlugin.subscribeToSdkAuthenticationFailures((error) => {
console.log(`SDK Authentication for ${error.user_id} failed with error code ${error.error_code}.`);
const newSignature = getNewTokenSomehow(error);
BrazePlugin.setSdkAuthenticationSignature(newSignature);
});
```
**iOS**
Defina o delegado de autenticação do SDK em sua instância `Braze`:
```csharp
public class SdkAuthDelegate : BRZSdkAuthDelegate
{
public override void Braze(Braze braze, BRZSDKAuthenticationError error)
{
Console.WriteLine("Invalid SDK Authentication Token.");
string newSignature = GetNewTokenSomehow(error);
Braze.SharedInstance?.SetSDKAuthenticationSignature(newSignature);
}
}
// Set the delegate during initialization
var configuration = new BRZConfiguration("YOUR-API-KEY", "YOUR-ENDPOINT");
configuration.Api.SdkAuthentication = true;
var braze = new Braze(configuration);
braze.SdkAuthDelegate = new SdkAuthDelegate();
```
**Android**
```csharp
Braze.GetInstance(this).SubscribeToSdkAuthenticationFailures((error) => {
string newToken = GetNewTokenSomehow(error);
Braze.GetInstance(this).SetSdkAuthenticationSignature(newToken);
});
```
Ao usar o plug-in Braze Expo, use os mesmos métodos do SDK React Native:
```typescript
import Braze from '@braze/react-native-sdk';
const sdkAuthErrorSubscription = Braze.addListener(
Braze.Events.SDK_AUTHENTICATION_ERROR,
(error) => {
console.log(`SDK Authentication for ${error.userId} failed with error code ${error.errorCode}.`);
const updated_jwt = getNewTokenSomehow(error);
Braze.setSdkAuthenticationSignature(updated_jwt);
}
);
// Don't forget to remove the listener when done
// sdkAuthErrorSubscription.remove();
```
### Etapa 3: Ative a autenticação no dashboard {#braze-dashboard}
Em seguida, você pode ativar a autenticação no dashboard da Braze para os apps que você configurou anteriormente.
Lembre-se de que as solicitações do SDK continuarão a fluir normalmente sem autenticação, a menos que a configuração de autenticação do SDK do app esteja definida como **Obrigatória** no dashboard da Braze.
Se algo der errado com sua integração (por exemplo, seu app está passando tokens incorretamente para o SDK ou seu servidor está gerando tokens inválidos), desative esse recurso no dashboard da Braze e os dados voltarão a fluir normalmente sem verificação.
#### Opções de aplicação {#enforcement-options}
Na página **Gerenciar configurações** do dashboard, cada app tem três estados de autenticação do SDK que controlam como a Braze verifica as solicitações.
| Configuração | Descrição |
| ------ | ---------- |
| **Desativado** | A Braze não verificará o JWT fornecido para um usuário. (Configuração padrão) |
| **Opcional** | A Braze verificará as solicitações de usuários registrados, mas não rejeitará solicitações inválidas. |
| **Obrigatória** | A Braze verificará as solicitações de usuários registrados e rejeitará JWTs inválidos. |
{: .reset-td-br-1 .reset-td-br-2 aria-label="Opções de aplicação #enforcement-options" }

A configuração **Opcional** é uma maneira útil de monitorar o impacto potencial que esse recurso terá no tráfego do SDK do seu app.
Um JWT inválido será relatado nos estados **Opcional** e **Obrigatório**, porém apenas o estado **Obrigatório** rejeitará as solicitações do SDK, fazendo com que os apps tentem novamente e solicitem um novo JWT.
## Gerenciamento de chaves públicas {#key-management}
### Adição de uma chave pública {#adding-a-public-key}
Você pode adicionar até três chaves públicas para cada app: uma primária, uma secundária e uma terciária. Você também pode adicionar a mesma chave a mais de um app, se necessário. Para adicionar uma chave pública:
1. Acesse o dashboard da Braze e selecione **Configurações** > **Configurações do app**.
2. Escolha um app da sua lista de apps disponíveis.
3. Em **Autenticação do SDK**, selecione **Adicionar chave pública**.
4. Insira uma descrição opcional, cole sua chave pública e selecione **Adicionar chave pública**.
### Atribuir uma nova chave primária {#assign-a-new-primary-key}
Para atribuir uma chave secundária ou terciária como sua nova chave primária:
1. Acesse o dashboard da Braze e selecione **Configurações** > **Configurações do app**.
2. Escolha um app da sua lista de apps disponíveis.
3. Em **Autenticação do SDK**, escolha uma chave e selecione **Gerenciar** > **Tornar chave primária**.
### Exclusão de uma chave {#deleting-a-key}
Para excluir uma chave primária, primeiro [atribua uma nova primária](#assign-a-new-primary-key) e, em seguida, exclua sua chave. Para excluir uma chave não primária:
1. Acesse o dashboard da Braze e selecione **Configurações** > **Configurações do app**.
2. Escolha um app da sua lista de apps disponíveis.
3. Em **Autenticação do SDK**, escolha uma chave não primária e selecione **Gerenciar** > **Excluir chave pública**.
## Análise de dados {#analytics}
Cada app mostrará um detalhamento dos erros de autenticação do SDK coletados enquanto esse recurso estiver no estado **Opcional** e **Obrigatório**.
Os dados estão disponíveis em tempo real, e você pode passar o mouse sobre os pontos do gráfico para ver um detalhamento dos erros de uma determinada data.
{: style="max-width:80%"}
## Códigos de erro {#error-codes}
| Código de erro | Motivo do erro | Descrição | Etapas para resolver |
| -------- | ------------ | --------- | --------- |
| 10 | `EXPIRATION_REQUIRED` | A expiração é um campo obrigatório para o uso da Braze. | Adicione um campo `exp` ou de expiração à sua lógica de criação de JWT. |
| 20 | `DECODING_ERROR` | Chave pública não correspondente ou um erro geral não detectado. | Copie seu JWT em uma ferramenta de teste de JWT para diagnosticar por que seu JWT está em um formato inválido. |
| 21 | `SUBJECT_MISMATCH` | Os assuntos esperado e real não são os mesmos. | O campo `sub` deve ser o mesmo ID do usuário passado para o método `changeUser` do SDK. |
| 22 | `EXPIRED` | O token fornecido expirou. | Prolongue a validade ou atualize periodicamente os tokens antes que eles expirem. |
| 23 | `INVALID_PAYLOAD` | A carga útil do token é inválida. | Copie seu JWT em uma ferramenta de teste de JWT para diagnosticar por que seu JWT está em um formato inválido. |
| 24 | `INCORRECT_ALGORITHM` | O algoritmo do token não é compatível. | Altere seu JWT para usar criptografia `RS256`. Outros tipos não são compatíveis. |
| 25 | `PUBLIC_KEY_ERROR` | A chave pública não pôde ser convertida no formato adequado. | Copie seu JWT em uma ferramenta de teste de JWT para diagnosticar por que seu JWT está em um formato inválido. |
| 26 | `MISSING_TOKEN` | Nenhum token foi fornecido na solicitação. | Certifique-se de que está passando um token ao chamar `changeUser(id, token)` e que seu token não está em branco. |
| 27 | `NO_MATCHING_PUBLIC_KEYS` | Nenhuma chave pública corresponde ao token fornecido. | A chave privada usada no JWT não corresponde a nenhuma chave pública configurada para o seu app. Confirme se você adicionou as chaves públicas ao app correto em seu espaço de trabalho que corresponde a esta chave de API. |
| 28 | `PAYLOAD_USER_ID_MISMATCH` | Nem todos os IDs de usuário na carga útil da solicitação correspondem conforme necessário. | Isso é inesperado e pode resultar em uma carga útil malformada. Abra um ticket de suporte para obter assistência. |
{: .reset-td-br-1 .reset-td-br-2 .reset-td-br-3 .reset-td-br-4 aria-label="Códigos de erro #error-codes" }
## Perguntas frequentes (FAQ) {#faq}
#### Esse recurso precisa ser ativado em todos os meus apps ao mesmo tempo? {#faq-app-by-app}
Não, esse recurso pode ser ativado para apps específicos e não precisa ser usado em todos os seus apps de uma só vez.
#### O que acontece com os usuários que ainda estão em versões mais antigas do meu app? {#faq-sdk-backward-compatibility}
Quando você começar a aplicar esse recurso, as solicitações feitas por versões mais antigas do app serão rejeitadas pela Braze e tentadas novamente pelo SDK. Depois que os usuários fizerem upgrade do app para uma versão compatível, essas solicitações enfileiradas começarão a ser aceitas novamente.
Se possível, incentive os usuários a fazer upgrade como faria para qualquer outra atualização obrigatória. Como alternativa, você pode manter o recurso como [Opcional](#enforcement-options) até perceber que uma porcentagem aceitável de usuários fez upgrade.
#### Que validade devo usar ao gerar um JWT? {#faq-expiration}
Recomendamos usar o valor mais alto entre: duração média da sessão, expiração do cookie/token da sessão ou a frequência com que o aplicativo atualizaria o perfil do usuário atual.
#### O que acontece se um JWT expirar no meio da sessão de um usuário? {#faq-jwt-expiration}
Caso o token de um usuário expire no meio da sessão, o SDK possui uma [função de retorno de chamada](#sdk-callback) que será invocada para informar ao seu app que um novo JWT é necessário para continuar enviando dados para a Braze.
#### O que acontecerá se minha integração no lado do servidor falhar e eu não puder mais criar um JWT? {#faq-server-downtime}
Se o seu servidor não conseguir fornecer um JWT ou se você notar algum problema de integração, você sempre pode desativar o recurso no dashboard da Braze.
Uma vez desativado, todas as solicitações pendentes do SDK que falharam serão eventualmente repetidas pelo SDK e aceitas pela Braze.
#### Por que esse recurso usa chaves pública/privada em vez de segredos compartilhados? {#faq-shared-secrets}
Ao usar segredos compartilhados, qualquer pessoa com acesso a esse segredo compartilhado, como a página do dashboard da Braze, poderá gerar tokens e se passar por seus usuários finais.
Em vez disso, usamos chaves pública/privada para que nem mesmo os colaboradores da Braze (muito menos os usuários da sua empresa) tenham acesso às suas chaves privadas.
#### Como as solicitações rejeitadas serão tentadas novamente? {#faq-retry-logic}
Quando uma solicitação é rejeitada devido a um erro de autenticação, o SDK invocará seu retorno de chamada usado para atualizar o JWT do usuário.
As solicitações serão repetidas periodicamente usando uma abordagem de backoff exponencial. Após 50 tentativas consecutivas sem sucesso, as novas tentativas serão pausadas até o início da próxima sessão. Cada SDK também tem um método para solicitar manualmente uma descarga de dados.
#### É possível usar a autenticação do SDK para usuários anônimos? {#faq-anonymous-users}
Não. A autenticação do SDK funciona com seu site confirmando a identidade de alguém, então ela se aplica apenas a usuários identificados. Como usuário anônimo, não há identidade a ser confirmada.
A aplicação começa após a chamada de `changeUser`. Antes de um usuário ser identificado (por exemplo, enquanto navega anonimamente antes de se cadastrar), o SDK ainda pode enviar dados para a Braze sem um JWT. Após a chamada de `changeUser`, as solicitações para esse perfil identificado exigem um JWT válido.
Isso significa que uma jornada típica de usuário pode ser assim:
1. Um usuário visita seu site ou abre seu app anonimamente. A Braze coleta essa atividade sem um JWT.
2. O usuário se cadastra ou faz login, e seu app chama `changeUser` com um `external_id`.
3. A Braze continua coletando atividade para esse usuário, e a autenticação do SDK é aplicada para solicitações desse perfil identificado.
#### A autenticação do SDK funciona com aliases de usuário? {#faq-aliases}
Não. A autenticação do SDK requer um `external_id`. Não é possível configurá-la quando apenas um `braze_id` ou `alias_id` está disponível, então perfis somente com alias não podem usar a autenticação do SDK.
#### Ativar a autenticação do SDK bloqueia a coleta de atividade não autenticada? {#faq-unauthenticated-collection}
Não. A autenticação do SDK não bloqueia a coleta legítima de atividade anônima. Ela se aplica apenas após um perfil ser identificado com `changeUser`.
# Depuração do SDK da Braze
Source: /docs/pt-br/developer_guide/sdk_integration/debugging/index.md
# Depuração do SDK da Braze {#debugging-the-braze-sdk}
> Saiba como usar o depurador integrado do SDK da Braze para solucionar problemas em seus canais com SDK, sem precisar ativar o registro detalhado em seu app.
**Tip:**
Para uma investigação mais aprofundada, você também pode [ativar o registro detalhado](https://www.braze.com/docs/pt-br/pt-br/developer_guide/sdk_integration/verbose_logging/) para capturar a saída detalhada do SDK e [aprender a ler logs detalhados](https://www.braze.com/docs/pt-br/pt-br/developer_guide/sdk_integration/reading_verbose_logs/) para canais específicos.
## Pré-requisitos {#prerequisites}
Para usar o Depurador do SDK da Braze, você precisará das permissões "Ver IPI" e "Ver Perfis de Usuários (IPI Ocultada)". Para baixar os registros da sua sessão de depuração, você também precisará da permissão "Exportar dados de usuários". Além disso, seu SDK da Braze precisa atender ou apontar para as seguintes versões mínimas:
Para coletar registros do depurador quando `Braze.configuration.logger.level` estiver como `.disabled`, use o Swift SDK 11.9.0 ou posterior. Para saber mais, consulte os [changelogs do Swift](https://www.braze.com/docs/pt-br/pt-br/developer_guide/changelogs/#swift_fixed-12).
## Depuração do SDK da Braze
**Tip:**
Para ativar a depuração do Braze Web SDK, você pode [usar um parâmetro de URL](https://www.braze.com/docs/pt-br/pt-br/developer_guide/platform_integration_guides/web/initial_sdk_setup/#logging).
### Etapa 1: Feche seu app {#step-1-close-your-app}
Antes de iniciar a sessão de depuração, feche o app que está apresentando problemas no momento. Você pode reabrir o app no início da sua sessão.
### Etapa 2: Crie uma sessão de depuração {#step-2-create-a-debugging-session}
Na Braze, acesse **Configurações** e, em **Configurações e teste**, selecione **Depurador do SDK**.

Selecione **Criar sessão de depuração**.

### Etapa 3: Selecione um usuário {#step-3-select-a-user}
Pesquise um usuário usando seu endereço de e-mail, `external_id`, alias de usuário ou token por push. Quando estiver pronto para iniciar a sessão, selecione **Selecionar usuário**.
{: style="max-width:85%;"}
### Etapa 4: Reabra o app {#step-4-relaunch-the-app}
Primeiro, abra o app e confirme se o dispositivo está emparelhado. Se o emparelhamento for bem-sucedido, reinicie o app—isso garantirá que os registros de inicialização do app sejam totalmente capturados.
### Etapa 5: Reproduza o erro {#step-5-complete-the-reproduction-steps}
Depois de reiniciar o app, siga as etapas para reproduzir o erro.
**Tip:**
Quando estiver reproduzindo o erro, certifique-se de seguir as etapas de reprodução o mais fielmente possível, para que possa criar [registros de qualidade](#step-6-export-your-session-logs-optional).
### Etapa 6: Encerre sua sessão {#step-6-end-your-session}
Quando terminar as etapas de reprodução, selecione **Encerrar sessão** > **Fechar**.
{: style="max-width:85%;"}
**Note:**
Pode levar alguns minutos para gerar os registros, dependendo da duração da sessão e da conectividade da rede.
### Etapa 7: Compartilhe ou exporte sua sessão (opcional) {#step-7-share-or-export-your-session-optional}
Após a sessão, é possível exportar os registros da sessão como um arquivo CSV. Além disso, outras pessoas podem usar seu **ID da sessão** para procurar sua sessão de depuração, então não é necessário enviar seus registros diretamente.

# Registro detalhado
Source: /docs/pt-br/developer_guide/sdk_integration/verbose_logging/index.md
# Registro detalhado
> O registro detalhado fornece informações detalhadas e de baixo nível do SDK da Braze, permitindo que você veja como o SDK é inicializado, se comunica com os servidores e processa canais de mensagens como push, mensagens no app e Cartões de Conteúdo.
Quando algo não está funcionando como esperado—como uma notificação por push não chegando, uma mensagem no app não sendo exibida ou dados de usuários não sincronizando—os logs detalhados ajudam você a identificar a causa raiz. Em vez de adivinhar, você pode ver exatamente o que o SDK está fazendo em cada etapa.
**Tip:**
Se você quiser depurar sem ativar o registro detalhado manualmente, pode usar o [Depurador de SDK](https://www.braze.com/docs/pt-br/pt-br/developer_guide/sdk_integration/debugging) para criar sessões de depuração diretamente no dashboard da Braze.
## Quando usar o registro detalhado
Ative o registro detalhado quando precisar:
- **Verificar a inicialização do SDK**: Confirme se o SDK inicia corretamente com a chave de API e o endpoint corretos.
- **Resolver problemas de entrega de mensagens**: Verifique se os tokens de push estão registrados, se as mensagens no app são acionadas ou se os Cartões de Conteúdo estão sincronizados.
- **Depurar links profundos**: Verifique se o SDK recebe e abre links profundos de push, mensagens no app ou Cartões de Conteúdo.
- **Validar rastreamento de sessões**: Confirme se as sessões começam e terminam como esperado.
- **Diagnosticar problemas de conectividade**: Inspecione as requisições e respostas de rede entre o SDK e os servidores da Braze.
## Ativando o registro detalhado
**Important:**
Os logs detalhados são destinados apenas para ambientes de desenvolvimento e teste. Desative o registro detalhado antes de liberar seu app para produção para evitar que informações sensíveis sejam expostas.
Ative o registro detalhado antes de qualquer outra chamada de SDK no seu `Application.onCreate()` método para capturar a saída mais completa.
**Em código:**
```java
BrazeLogger.setLogLevel(Log.VERBOSE);
```
```kotlin
BrazeLogger.logLevel = Log.VERBOSE
```
**Em `braze.xml`:**
```xml
2
```
Para verificar se o registro detalhado está ativado, procure por `V/Braze` na saída do Logcat. Por exemplo:
```
2077-11-19 16:22:49.591 ? V/Braze v9.0.01 .bo.app.d3: Request started
```
Para detalhes completos, veja [registro do SDK Android](https://www.braze.com/docs/pt-br/pt-br/developer_guide/sdk_integration#android_enabling-logs).
Defina o nível de registro como `.debug` no seu objeto `Braze.Configuration` durante a inicialização.
```swift
let configuration = Braze.Configuration(
apiKey: "",
endpoint: ""
)
configuration.logger.level = .debug
let braze = Braze(configuration: configuration)
```
```objc
BRZConfiguration *configuration = [[BRZConfiguration alloc] initWithApiKey:@""
endpoint:@""];
[configuration.logger setLevel:BRZLoggerLevelDebug];
Braze *braze = [[Braze alloc] initWithConfiguration:configuration];
```
O nível `.debug` é o mais detalhado e é recomendado para solução de problemas. Para detalhes completos, veja [registro do SDK Swift](https://www.braze.com/docs/pt-br/pt-br/developer_guide/sdk_integration#swift_log-levels).
Adicione `?brazeLogging=true` como um parâmetro de URL, ou ative o registro durante a inicialização do SDK:
```javascript
braze.initialize('YOUR-API-KEY', {
baseUrl: 'YOUR-SDK-ENDPOINT',
enableLogging: true
});
```
Você também pode alternar o registro após a inicialização:
```javascript
braze.toggleLogging();
```
Os registros aparecem na aba **Console** das ferramentas de desenvolvedor do seu navegador. Para detalhes completos, veja [registro do SDK Web](https://www.braze.com/docs/pt-br/pt-br/developer_guide/sdk_integration#web_logging).
1. Abra Configurações da Braze navegando até **Braze** > **Configuração da Braze**.
2. Selecione o dropdown **Mostrar Configurações do Braze Android**.
3. No campo **Nível de Registro do SDK**, insira `0`.
Defina o nível de registro durante a configuração do SDK:
```javascript
const configuration = new Braze.BrazeConfiguration('YOUR-API-KEY', 'YOUR-SDK-ENDPOINT');
configuration.logLevel = Braze.LogLevel.Verbose;
```
## Coletando registros
Depois de ativar o registro detalhado, reproduza o problema que você está solucionando, e então colete os registros do console ou da ferramenta de depuração da sua plataforma.
Use **Logcat** no Android Studio para capturar registros:
1. Conecte seu dispositivo ou inicie um emulador.
2. No Android Studio, abra **Logcat** no painel inferior.
3. Filtre por `V/Braze` ou `D/Braze` para isolar a saída do Braze SDK.
4. Reproduza o problema.
5. Copie os registros relevantes e salve-os em um arquivo de texto.
Use o app **Console** no macOS para capturar registros:
1. Instale o app no seu dispositivo com o registro detalhado ativado.
2. Conecte seu dispositivo ao seu Mac.
3. Abra o app **Console** e selecione seu dispositivo na barra lateral **Devices**.
4. Filtre os registros por `Braze` ou `BrazeKit` na barra de pesquisa.
5. Reproduza o problema.
6. Copie os registros relevantes e salve-os em um arquivo de texto.
Use as ferramentas de desenvolvedor do seu navegador:
1. Abra as ferramentas de desenvolvedor do seu navegador (geralmente **F12** ou **Cmd+Option+I**).
2. Acesse a guia **Console**.
3. Reproduza o problema.
4. Copie a saída do console e salve-a em um arquivo de texto.
**Tip:**
Ao coletar registros para o suporte da Braze, comece a registrar antes de iniciar seu app e continue até bem depois que o problema ocorrer. Isso ajuda a capturar toda a sequência de eventos.
## Lendo registros detalhados
Registros detalhados seguem uma estrutura consistente que ajuda você a rastrear o que o SDK está fazendo. Para aprender a interpretar a saída de registros para canais específicos, incluindo quais entradas-chave procurar e padrões comuns de solução de problemas, veja [Reading verbose logs](https://www.braze.com/docs/pt-br/pt-br/developer_guide/sdk_integration/reading_verbose_logs).
## Compartilhando registros com o suporte da Braze
Quando você contatar o suporte da Braze com um problema de SDK, inclua o seguinte:
1. **Arquivo de log detalhado**: Uma captura completa do log desde o lançamento do app até a ocorrência do problema.
2. **Passos para reproduzir**: Uma descrição clara das ações que disparam o problema.
3. **Comportamento esperado vs. real**: O que você esperava que acontecesse e o que aconteceu de fato.
4. **Versão do SDK**: A versão do SDK do Braze que você está usando.
5. **Plataforma e versão do SO**: Por exemplo, iOS 18.0, Android 14 ou Chrome 120.
# Lendo logs verbosos
Source: /docs/pt-br/developer_guide/sdk_integration/reading_verbose_logs/index.md
# Lendo logs verbosos {#reading-verbose-logs}
> Esta página explica como interpretar a saída de logs verbosos do SDK da Braze. Para cada canal de envio de mensagens, você encontrará as entradas de log principais, o que elas significam e problemas comuns a serem observados.
Antes de começar, certifique-se de que você [ativou o registro verboso](https://www.braze.com/docs/pt-br/pt-br/developer_guide/sdk_integration/verbose_logging/) e sabe como coletar logs na sua plataforma.
## Sessões {#sessions}
As sessões são a base da análise de dados e da entrega de mensagens da Braze. Muitos recursos de envio de mensagens — incluindo mensagens no app e Content Cards — dependem de uma sessão válida ser iniciada antes que possam funcionar. Se as sessões não estiverem sendo registradas corretamente, investigue isso primeiro. Para saber mais sobre como ativar o rastreamento de sessões, veja [Etapa 5: Ativar o rastreamento de sessões do usuário](https://www.braze.com/docs/pt-br/pt-br/developer_guide/sdk_integration/?sdktab=android#android_step-5-enable-user-session-tracking).
### Entradas de log principais {#key-log-entries}
**Início da sessão:**
```
Started user session (id: )
```
**Fim da sessão:**
```
Ended user session (id: , duration: s)
Logged event:
- userId:
- sessionId:
- data: sessionEnd(duration: )
```
**Início da sessão:**
Procure as seguintes entradas:
```
New session created with ID:
Session start event for new session received
Completed the openSession call
Opened session with activity:
```
Filtre as solicitações de rede para o seu endpoint da Braze configurado (por exemplo, sdk.iad-01.braze.com) para ver o evento de início da sessão (`ss`).
**Fim da sessão:**
```
Closed session with activity:
Closed session with session ID:
Requesting data flush on internal session close flush timer.
```
### O que verificar {#what-to-check}
- Verifique se um log de início de sessão aparece quando o app é iniciado.
- Se você não vir um início de sessão, verifique se o SDK está devidamente inicializado e se `openSession` (Android) está sendo chamado.
- No Android, confirme se uma solicitação de rede está sendo feita para o endpoint da Braze. Se você não vir isso, verifique sua chave de API e a configuração do endpoint.
## Notificações por push {#push-notifications}
Os logs de notificação por push ajudam a verificar se os tokens dos dispositivos estão registrados, se as notificações são entregues e se os eventos de clique são rastreados.
### Registro de token {#token-registration}
Quando uma sessão começa, o SDK registra o token por push do dispositivo na Braze.
```
Updated push notification authorization:
- authorization: authorized
Received remote notifications device token:
```
Filtre as solicitações para o seu endpoint da Braze configurado (por exemplo, sdk.iad-01.braze.com) e procure por `push_token` nos atributos do corpo da solicitação:
```
"attributes": [
{
"push_token": "",
"user_id": ""
}
]
```
Também confirme que as informações do dispositivo incluem:
```
"device": {
"ios_push_auth": "authorized",
"remote_notification_enabled": 1
}
```
Procure o log de registro do FCM:
```
Registering for Firebase Cloud Messaging token using sender id:
```
Verifique o seguinte:
- `com_braze_firebase_cloud_messaging_registration_enabled` é `true`.
- O ID do remetente do FCM corresponde ao seu projeto Firebase.
Um erro comum é `SENDER_ID_MISMATCH`, que significa que o ID do remetente configurado não corresponde ao seu projeto Firebase.
### O que verificar
- Se `push_token` estiver faltando no corpo da solicitação, o token não foi capturado. Verifique a configuração do push no seu app.
- Se `ios_push_auth` mostrar `denied` ou `provisional`, o usuário não concedeu permissão total para push.
- No Android, se você vir `SENDER_ID_MISMATCH`, atualize seu ID do remetente FCM para corresponder ao seu projeto Firebase.
### Entrega e clique do push {#push-delivery-and-click}
Quando uma notificação por push é tocada, o SDK registra o processamento e os eventos de clique.
```
Processing push notification:
- date:
- silent: false
- userInfo: {
"ab": { ... },
"ab_uri": "",
"aps": {
"alert": {
"body": "",
"title": ""
}
}
}
```
Seguido pelo evento de clique:
```
Logged event:
- userId:
- sessionId:
- data: pushClick(campaignId: ...)
```
Se o push contiver um deep link, você também verá:
```
Opening '':
- channel: notification
- useWebView: false
- isUniversalLink: false
```
```
BrazeFirebaseMessagingService: Got Remote Message from FCM
```
Seguido pela carga útil do push e logs de exibição. Para deep links, procure as entradas Deep Link Delegate ou `UriAction`.
### O que verificar
- Verifique se a carga útil do push contém os `title`, `body` esperados e quaisquer deep links (`ab_uri`).
- Confirme que um evento `pushClick` é registrado após o toque.
- Se o evento de clique estiver ausente, verifique se seu delegado de app ou manipulador de notificações está encaminhando corretamente os eventos de push para o SDK da Braze.
## Mensagens no app {#in-app-messages}
Os logs de mensagens no app mostram todo o ciclo de vida: entrega do servidor, acionamento com base em eventos, exibição, registro de impressão e rastreamento de cliques.
### Entrega da mensagem {#message-delivery}
Quando um usuário inicia uma sessão e é elegível para uma mensagem no app, o SDK recebe a carga útil da mensagem do servidor.
Filtre as respostas do seu endpoint da Braze configurado (por exemplo, sdk.iad-01.braze.com) contendo os dados da mensagem no app.
O corpo da resposta contém a carga útil da mensagem, incluindo:
```
"templated_message": {
"data": {
"message": "...",
"type": "HTML",
"message_close": "SWIPE",
"trigger_id": ""
},
"type": "inapp"
}
```
Procure o log do evento de gatilho correspondente:
```
Triggering action:
```
Isso confirma que a mensagem no app foi correspondida a um evento de gatilho.
### Exibição da mensagem e impressão {#message-display-and-impression}
```
In-app message ready for display:
- triggerId: (campaignId: , ...)
- extras: { ... }
```
Seguido pelo log de impressão:
```
Logged event:
- userId:
- sessionId:
- data: inAppMessageImpression(triggerIds: [...])
```
```
handleExistingInAppMessagesInStackWithDelegate:: Displaying in-app message
```
### Eventos de clique e botão {#click-and-button-events}
Quando um usuário toca em um botão ou fecha a mensagem:
```
Logged event:
- userId:
- sessionId:
- data: inAppMessageButtonClick(triggerIds: [...], buttonId: "")
```
Se não houver mais mensagens acionadas correspondentes, você também verá:
```
No matching trigger for event.
```
Esse é o comportamento esperado quando não há mensagens no app adicionais configuradas para o evento.
Filtre as solicitações para seu endpoint da Braze configurado (por exemplo, sdk.iad-01.braze.com) e procure eventos com o nome `sbc` (clique no botão) ou `si` (impressão) no corpo da solicitação.
### O que verificar
- Se a mensagem no app não for exibida, verifique se o início da sessão foi registrado primeiro.
- Filtre as respostas do seu endpoint da Braze configurado para confirmar que a carga útil da mensagem foi entregue.
- Se as impressões não estão sendo registradas, verifique se você não implementou um delegado `inAppMessageDisplay` personalizado que suprime o registro.
- Se "No matching trigger for event" aparecer, isso é normal e indica que nenhuma mensagem no app adicional está configurada para esse evento.
## Content Cards
Os logs de Content Cards ajudam você a verificar se os cartões estão sincronizados com o dispositivo, exibidos para o usuário e que as interações (impressões, cliques, dispensas) estão sendo rastreadas.
### Sincronização do cartão {#card-sync}
Os Content Cards são sincronizados no início da sessão e quando uma atualização manual é solicitada. Se nenhuma sessão for registrada, nenhum Content Card será exibido.
Filtre as respostas do seu endpoint da Braze configurado (por exemplo, sdk.iad-01.braze.com) contendo os dados do cartão.
O corpo da resposta contém os dados do cartão, incluindo:
```
"cards": [
{
"id": "",
"tt": "",
"ds": "",
"tp": "short_news",
"v": 0,
"cl": 0,
"p": 1
}
]
```
Campos principais:
- `v` (visualizado): `0` = não visualizado, `1` = visualizado
- `cl` (clicado): `0` = não clicado, `1` = clicado
- `p` (fixado): `0` = não fixado, `1` = fixado
- `tp` (tipo): `short_news`, `captioned_image`, `classic`, etc.
```
Requesting content cards sync.
```
Seguido por uma solicitação POST para o seu endpoint da Braze configurado (por exemplo, sdk.iad-01.braze.com) contendo informações do usuário e do dispositivo.
### Impressões, cliques e dispensas {#impressions-clicks-and-dismissals}
**Impressão:**
```
Logged event:
- userId:
- sessionId:
- data: contentCardImpression(cardIds: [...])
```
**Clique:**
```
Logged event:
- userId:
- sessionId:
- data: contentCardClick(cardIds: [...])
```
Se o cartão tiver uma URL, você também verá:
```
Opening '':
- channel: contentCard
- useWebView: true
```
**Dispensa:**
```
Logged event:
- userId:
- sessionId:
- data: contentCardDismissed(cardIds: [...])
```
Filtre as solicitações para o seu endpoint da Braze configurado (por exemplo, sdk.iad-01.braze.com) e procure nomes de eventos no corpo da solicitação:
- `cci` — impressão de Content Card
- `ccc` — clique em Content Card
- `ccd` — Content Card dispensado
### O que verificar
- **Nenhum cartão exibido**: Verifique se o início da sessão está registrado. Content Cards requerem uma sessão ativa para sincronizar.
- **Cartões ausentes para novos usuários**: Novos usuários em sua primeira sessão podem não ver Content Cards até a próxima sessão. Esse é um comportamento esperado.
- **Cartão excede o limite de tamanho**: Content Cards acima de 2 KB não são exibidos e a mensagem é abortada.
- **Cartão persiste após parar a Campaign**: Verifique se a sincronização foi concluída após a Campaign ser parada. Os Content Cards são removidos do dispositivo após uma sincronização bem-sucedida. Ao parar uma Campaign, certifique-se de que a opção de remover cartões ativos dos feeds dos usuários esteja selecionada.
## Deep links {#deep-links}
Os logs de deep link aparecem em notificações por push, mensagens no app e Content Cards. A estrutura do log é consistente, independentemente do canal de origem.
Quando o SDK processa um deep link:
```
Opening '':
- channel:
- useWebView: false
- isUniversalLink: false
- extras: { ... }
```
Onde `` é um dos seguintes: `notification`, `inAppMessage` ou `contentCard`.
Para deep links, procure as entradas **Deep Link Delegate** ou **UriAction** no Logcat. Para testar a resolução de deep link de forma independente, execute o seguinte comando:
```bash
adb shell am start -W -a android.intent.action.VIEW -d "" ""
```
Isso confirma se o deep link resolve corretamente fora do SDK da Braze.
### O que verificar
- Verifique se a URL do deep link corresponde ao que você configurou na Campaign.
- Se o deep link funcionar de um canal (por exemplo, push) mas não de outro (por exemplo, Content Cards), verifique se a sua implementação de tratamento de deep link suporta todos os canais.
- No iOS, links universais requerem tratamento adicional. Se os links universais não estiverem funcionando a partir dos canais da Braze, verifique se seu app implementa o protocolo `BrazeDelegate` para tratamento de URL.
- No Android, verifique se o tratamento automático de deep link está desativado se você usar um manipulador personalizado. Caso contrário, o manipulador padrão pode entrar em conflito com sua implementação.
## Identificação do usuário {#user-identification}
Quando um usuário é identificado com um `external_id`, o SDK registra um evento de mudança de usuário.
```
changeUser called with:
```
Coisas importantes a saber:
- Chame `changeUser` assim que o usuário fizer login — quanto mais cedo, melhor.
- Se um usuário sair, não há como chamar `changeUser` para revertê-lo a um usuário anônimo.
- Se você não quiser usuários anônimos, chame `changeUser` durante o início da sessão ou a inicialização do app.
Filtre as solicitações para seu endpoint da Braze configurado (por exemplo, sdk.iad-01.braze.com) e procure a identificação do usuário no corpo da solicitação:
```
"user_id": ""
```
## Solicitações de rede {#network-requests}
Os logs verbosos incluem todos os detalhes de solicitação e resposta HTTP para a comunicação do SDK com os servidores da Braze. Eles são úteis para diagnosticar problemas de conectividade.
### Estrutura da solicitação {#request-structure}
Filtre as solicitações para seu endpoint da Braze configurado (por exemplo, sdk.iad-01.braze.com). A estrutura da solicitação inclui:
```
[http] request POST:
- Headers:
- Content-Type: application/json
- X-Braze-Api-Key:
- X-Braze-Req-Attempt: 1
- X-Braze-Req-Tokens-Remaining:
- Body: { ... }
```
```
Making request(id = ) to
```
### O que verificar
- **Chave de API**: Verifique se `X-Braze-Api-Key` corresponde à chave de API do seu espaço de trabalho.
- **Endpoint**: Confirme se a URL da solicitação corresponde ao endpoint de SDK configurado.
- **Tentativas de reenvio**: `X-Braze-Req-Attempt` maior que 1 indica que o SDK está tentando novamente uma solicitação que falhou, o que pode sinalizar problemas de conectividade.
- **Limite de taxa**: `X-Braze-Req-Tokens-Remaining` mostra os tokens de solicitação restantes. Uma contagem baixa pode indicar que o SDK está se aproximando dos limites de taxa.
- **Solicitações ausentes**: No Android, se você não vir uma solicitação para o endpoint da Braze após o início da sessão, verifique sua chave de API e a configuração do endpoint.
## Abreviações comuns de eventos {#common-event-abbreviations}
Nas cargas úteis de logs verbosos, a Braze usa nomes de eventos abreviados. Aqui está uma referência:
| Abreviação | Evento |
|---|---|
| `ss` | Início da sessão |
| `se` | Fim da sessão |
| `si` | Impressão de mensagem no app |
| `sbc` | Clique no botão da mensagem no app |
| `cci` | Impressão de Content Card |
| `ccc` | Clique em Content Card |
| `ccd` | Content Card dispensado |
| `lr` | Local registrado |
{: .reset-td-br-1 .reset-td-br-2 aria-label="Abreviações comuns de eventos" }
## Solução de problemas {#troubleshooting}
### Quando um usuário pode ter 0 sessões registradas no perfil? {#when-might-a-user-have-0-sessions-recorded-against-their-profile}
Um perfil de usuário pode mostrar 0 sessões quando você importa o usuário pela REST API ([`/users/track`](https://www.braze.com/docs/pt-br/pt-br/api/endpoints/user_data/post_user_track/)) ou importação por CSV sem os campos **First session** ou **Last session**. As sessões são registradas quando os usuários interagem com o seu app por meio do SDK. Para saber mais, veja [Perfil de usuário com 0 sessões](https://www.braze.com/docs/pt-br/pt-br/developer_guide/analytics/tracking_sessions/#user-profile-has-0-sessions).
### Discrepâncias de dados ao usar o SDK e a REST API juntos {#user-data-discrepancies-when-using-the-sdk-and-rest-api-together}
Quando você usa o SDK e a REST API ao mesmo tempo, condições de corrida podem causar discrepâncias nos dados. Depois de chamar `changeUser()`, permita que o SDK envie os dados pendentes antes de fazer chamadas críticas à REST API, evite agrupar atualizações sensíveis ao tempo e considere adicionar um pequeno atraso entre as solicitações do SDK e da API. Para o comportamento de `changeUser()`, veja [Como o changeUser() funciona](https://www.braze.com/docs/pt-br/pt-br/developer_guide/analytics/setting_user_ids/#how-changeuser-works).
### Dados não chegam à Braze {#data-not-reaching-braze}
Se os dados não estão chegando à Braze, confirme se o seu firewall permite tráfego de saída para os endpoints de API da Braze e provedores de CDN. Execute um teste MTR e use o [Fastly Debug](https://www.fastly-debug.com/) enquanto o problema ocorre. Para saber mais sobre allowlisting e solução de problemas de conectividade, veja [Problemas de conectividade de rede da API](https://www.braze.com/docs/pt-br/pt-br/api/network_connectivity_issues/).
# Limites de taxa do SDK da Braze
Source: /docs/pt-br/developer_guide/sdk_integration/rate_limits/index.md
# Limites de taxa do SDK da Braze {#braze-sdk-rate-limits}
> Saiba mais sobre a limitação de taxa inteligente e do lado do cliente do SDK da Braze que otimiza a vida útil da bateria, reduz o uso de largura de banda e garante a entrega confiável de dados.
## Entendendo os limites de taxa do SDK {#understanding-sdk-rate-limits}
A limitação de taxa do SDK da Braze utiliza os seguintes recursos para otimizar a performance, minimizar o consumo de bateria, reduzir o uso de dados e garantir a entrega confiável de dados:
### Processamento assíncrono {#asynchronous-processing}
O SDK da Braze usa um algoritmo de token bucket para limitação de taxa. Essa abordagem permite picos de atividade enquanto mantém o controle de taxa a longo prazo. Em vez de processar solicitações em uma fila rígida, o token bucket opera de forma assíncrona:
- **Geração de tokens**: Os tokens são reabastecidos a uma taxa constante no bucket.
- **Tratamento de solicitações**: Qualquer chamada do SDK que chega quando um token está disponível prossegue imediatamente, independentemente de quando outras chamadas chegaram.
- **Sem ordenação rígida**: As solicitações não esperam na fila; várias chamadas podem competir pelo próximo token disponível.
- **Tratamento de picos**: Picos curtos de atividade são permitidos se houver tokens suficientes disponíveis no momento das solicitações.
- **Controle de taxa**: A taxa de transferência a longo prazo é limitada pela taxa constante de reabastecimento de tokens.
Esse fluxo assíncrono ajuda o SDK a responder rapidamente à capacidade de rede disponível enquanto mantém níveis de tráfego geral previsíveis.
### Limitação de taxa adaptativa {#adaptive-rate-limiting}
O SDK da Braze pode ajustar os limites de taxa em tempo real para proteger a infraestrutura de rede e manter uma performance ideal. Essa abordagem:
- **Previne sobrecarga**: Ajusta limites para evitar congestionamento na rede.
- **Otimiza a performance**: Mantém a operação suave do SDK sob condições variadas.
- **Responde às condições**: Adapta-se com base nos padrões atuais de rede e uso.
**Note:**
Como os limites se adaptam em tempo real, tamanhos exatos de buckets e valores estáticos não são fornecidos. Eles podem mudar dependendo das condições da rede e do uso.
### Otimizações de rede {#networking-optimizations}
O SDK da Braze inclui vários comportamentos integrados para melhorar a eficiência, reduzir o uso da bateria e lidar com condições de rede variadas:
- **Agrupamento automático**: Coloca eventos em fila e os envia em lotes eficientes.
- **Comportamento ciente da rede**: Ajusta as taxas de envio com base na qualidade da conectividade.
- **Otimização da bateria**: Minimiza ativações do rádio e chamadas de rede.
- **Degradação suave**: Mantém a funcionalidade durante condições de rede ruins.
- **Consciência de segundo plano/primeiro plano**: Otimiza o comportamento à medida que o ciclo de vida do app muda.
## Melhores práticas {#best-practices}
Siga estas melhores práticas para ajudar a evitar problemas de limite de taxa:
| Faça isso | Não faça isso |
| --- | --- |
| Rastreie ações e marcos significativos do usuário | Rastreie cada interação menor ou evento de UI |
| Atualize o conteúdo apenas quando necessário | Atualize o conteúdo em cada ação do usuário (como eventos de rolagem) |
| Deixe o SDK lidar com o agrupamento automaticamente | Force a transmissão imediata de dados (a menos que absolutamente necessário) |
| Concentre-se em eventos que agregam valor à análise de dados | Chame métodos do SDK em rápida sucessão sem considerar a frequência |
{: .reset-td-br-1 .reset-td-br-2 aria-label="Melhores práticas" }
## Obtendo ajuda {#getting-help}
Se você está enfrentando problemas de limite de taxa do SDK, revise os seguintes métodos de rede:
- `requestImmediateDataFlush()`
- `requestContentCardsRefresh()`
- `refreshFeatureFlags()`
- `logCustomEvent()`
- `logPurchase()`
Ao entrar em contato com o [suporte da Braze](https://www.braze.com/docs/pt-br/pt-br/user_guide/administer/personal/braze_support/), inclua os seguintes detalhes para cada um dos métodos de rede do SDK que você usa:
```plaintext
Method name:
Frequency:
[Describe how often this is called, e.g., at every app launch, once per session]
Trigger/context:
[Describe what causes it to be called, e.g., button click, scroll event]
Code snippet:
[Paste the exact code where this method is called, one snippet for each time it is called]
Patterns in user flow that may cause bursts or excessive calls:
[Describe here]
```
# Integre a Braze com os aplicativos ChatGPT
Source: /docs/pt-br/developer_guide/sdk_integration/chatgpt_apps/index.md
# Integre a Braze com os aplicativos ChatGPT {#integrate-braze-with-chatgpt-apps}
> Este guia aborda como integrar a Braze com os aplicativos ChatGPT para ativar a análise de dados e o registro de eventos em aplicativos com tecnologia de IA.
{: style="float:right;max-width:30%;border:none;" }
## Visão geral {#overview}
Os aplicativos ChatGPT oferecem uma plataforma poderosa para a criação de aplicativos conversacionais de IA. Ao integrar a Braze ao seu aplicativo ChatGPT, você pode continuar a manter o controle dos dados primários na era da IA, incluindo como:
- Acompanhar o engajamento e o comportamento dos usuários em seu app ChatGPT (por exemplo, identificando quais perguntas ou recursos de bate-papo seus clientes utilizam)
- Segmentar e redirecionar Campaigns da Braze com base em padrões de interação de IA (como o envio de e-mails para usuários que utilizaram o chat mais de três vezes por semana)
### Principais benefícios {#key-benefits}
- **Seja dono da jornada do seu cliente:** Enquanto os usuários interagem com sua marca por meio do ChatGPT, você mantém visibilidade sobre o comportamento, as preferências e os padrões de engajamento deles. Esses dados fluem diretamente para os perfis de usuário da Braze, não apenas para a análise de dados da plataforma de IA.
- **Redirecionamento entre plataformas:** Acompanhe as interações dos usuários em seu aplicativo ChatGPT e redirecione-os em seus canais proprietários (e-mail, SMS, notificações por push, mensagens no app) com campanhas personalizadas com base em seus padrões de uso de IA.
- **Retorne conteúdo promocional 1:1 para conversas no ChatGPT:** Entregue [mensagens no app](https://www.braze.com/docs/pt-br/pt-br/user_guide/channels/in_app_messages/) da Braze, [Content Cards](https://www.braze.com/docs/pt-br/pt-br/user_guide/channels/content_cards/) e muito mais diretamente na sua experiência ChatGPT usando os componentes personalizados da interface de usuário conversacional que sua equipe criou para o seu app.
- **Atribuição de receita:** Acompanhe as compras e conversões originadas das interações com o app ChatGPT.
## Pré-requisitos {#prerequisites}
Antes de integrar a Braze ao seu aplicativo ChatGPT, você deve ter o seguinte:
- Um novo app web e uma chave de API em seu espaço de trabalho da Braze
- Um [app ChatGPT](https://openai.com/index/introducing-apps-in-chatgpt/) criado na plataforma OpenAI ([app de exemplo da OpenAI](https://github.com/openai/openai-apps-sdk-examples))
# ChatGPT app integration
## Setup
### Step 1: Get the Braze integration file
Copy the `braze.js` file from our [ChatGPT apps integration repository](https://github.com/braze-inc/chatgpt-apps-braze-integration/blob/main/src/braze/braze.ts) to your project. This file contains all the necessary Braze SDK configuration and helper functions.
### Step 2: Install dependencies
Install our Web SDK for Braze's most up-to-date set of features:
**For client-side integration:**
```bash
npm install @braze/web-sdk
```
## Implementation
There are two ways to integrate Braze with your ChatGPT app depending on your use case:
### Client-side integration (custom widgets)
**Tip:**
**Recommended Approach:** This method enables rich messaging experiences and real-time user interaction tracking within your ChatGPT app widgets.
For displaying Braze messaging and tracking user interactions within your custom ChatGPT app widgets, use the Web SDK integration. A full messaging example can be found in our sample repository [here](https://github.com/braze-inc/chatgpt-apps-braze-integration/tree/main/src/inbox).
#### Configure widget metadata
Add the following metadata to your MCP server file to allow Braze domains, ensuring to update the CDN domain based on [your region](https://www.braze.com/docs/pt-br/pt-br/developer_guide/platforms/web/content_security_policy):
```javascript
"openai/widgetCSP": {
connect_domains: ["https://YOUR-SDK-ENDPOINT"],
resource_domains: [
"https://appboy-images.com",
"https://braze-images.com",
"https://cdn.braze.eu",
"https://use.fontawesome.com"
],
}
```
Replace `YOUR-SDK-ENDPOINT` with your actual Braze SDK endpoint.
#### Set up the useBraze hook
```javascript
import { useBraze } from "./utils/braze";
function YourWidget() {
const braze = useBraze({
apiKey: "your-braze-api-key",
baseUrl: "your-braze-endpoint.braze.com",
});
useEffect(() => {
if (!braze.isInitialized) {
return;
}
// Set user identity
braze.changeUser("user-id-123");
// Log widget interactions
braze.logCustomEvent("viewed_pizzaz_list");
}, [braze.isInitialized]);
return (
// Your widget JSX
);
}
```
#### Display Braze Content Cards
```javascript
const [cards, setCards] = useState([]);
useEffect(() => {
// Get cached content cards
setCards(braze.getCachedContentCards()?.cards ?? []);
// Subscribe to content card updates
braze.subscribeToContentCardsUpdates((contentCards) => {
setCards(contentCards.cards);
});
// Open session
braze.openSession();
return () => {
braze.removeAllSubscriptions();
}
}, []);
```
#### Track widget events
```javascript
// Track user interactions within your widget
const handleButtonClick = () => {
braze.logCustomEvent("widget_button_clicked", {
button_type: "save_list",
widget_name: "pizza_list"
});
};
const handleItemInteraction = (itemId) => {
braze.logCustomEvent("item_interacted", {
item_id: itemId,
interaction_type: "view_details"
});
};
```
### Server-side integration (MCP server)
If you also need a server-side integration for messaging functionality on your MCP server, contact `mcp-product@braze.com`. For tracking events and purchases from your MCP server, use our [REST API](https://www.braze.com/docs/pt-br/pt-br/api/home).
# Sobre o gerenciamento de versões para o SDK da Braze
Source: /docs/pt-br/developer_guide/sdk_integration/version_management/index.md
# Sobre o gerenciamento de versões {#about-version-management}
> Saiba sobre o gerenciamento de versões para o SDK da Braze, para que seu app possa ficar atualizado com os últimos recursos e melhorias de qualidade. Como versões mais antigas do SDK podem não receber o último patch, correções de bugs ou suporte, recomendamos sempre mantê-lo atualizado como parte do seu ciclo de desenvolvimento contínuo.
## Recomendações de versionamento {#versioning-recommendations}
Todos os SDKs da Braze seguem a [Especificação de Versionamento Semântico (SemVer)](https://semver.org/), então, dado um número de versão `MAJOR.MINOR.PATCH`, recomendamos o seguinte:
| Versão | Sobre esta versão | Recomendação |
|-------|------------------|--------------|
| `PATCH` | As atualizações são sempre não disruptivas e incluem correções de bugs importantes. Elas sempre serão seguras. | Você deve sempre tentar atualizar para a versão de patch mais recente da sua versão principal e secundária atual imediatamente. |
| `MINOR` | As atualizações são sempre não disruptivas e incluem novas funcionalidades. Elas nunca exigirão mudanças no código da sua aplicação. | Embora você não precise fazer isso imediatamente, deve atualizar para a versão secundária mais recente da sua versão principal atual o mais rápido possível. |
| `MAJOR` | As atualizações são mudanças disruptivas e podem exigir mudanças no código da sua aplicação. | Como isso pode exigir mudanças no código, atualize para a versão principal mais recente em um período que funcione melhor para sua equipe. |
{: .reset-td-br-1 .reset-td-br-2 .reset-td-br-3 aria-label="Recomendações de versionamento" }
**Note:**
Às vezes, novas atualizações do Android ou do sistema operacional da Apple exigem mudanças no SDK da Braze. Para garantir que seu app seja compatível com telefones mais novos, é importante que você mantenha seu SDK atualizado.
## Recebendo notificações de novos lançamentos {#getting-notified-of-new-releases}
Para receber notificações automáticas quando uma nova versão do SDK for lançada, você pode acompanhar o repositório no GitHub de qualquer SDK da Braze:
1. Acesse o repositório do SDK no GitHub (por exemplo, [braze-android-sdk](https://github.com/braze-inc/braze-android-sdk), [braze-swift-sdk](https://github.com/braze-inc/braze-swift-sdk) ou [braze-web-sdk](https://github.com/braze-inc/braze-web-sdk)).
2. Clique em **Watch** no canto superior direito.
3. Clique em **Custom**, selecione **Releases** e clique em **Apply**.
Você receberá uma notificação do GitHub (e um e-mail, dependendo das suas [configurações de notificação](https://github.com/settings/notifications)) cada vez que um novo lançamento for publicado. Para a lista completa de repositórios de SDK, consulte [Referências, repositórios e apps de exemplo](https://www.braze.com/docs/pt-br/pt-br/developer_guide/references/).
## Sobre problemas conhecidos {#about-known-issues}
Para garantir que nossas mudanças não quebrem suas pipelines de build, **nunca alteraremos ou removeremos uma versão depois que ela for publicada em um sistema de distribuição**—mesmo que essa versão específica tenha problemas conhecidos.
Nesses casos, documentaremos o problema no [changelog do SDK da Braze](https://www.braze.com/docs/pt-br/pt-br/developer_guide/changelogs/) e lançaremos um novo patch para as versões principais ou secundárias impactadas o mais rápido possível.
# Guia de atualização do Android 13
Source: /docs/pt-br/developer_guide/platforms/android/android_13/index.md
# Upgrading to Android 13
> This guide describes relevant changes introduced in Android 13 (2022) and the required upgrade steps for your Braze Android SDK integration.
Refer to the [Android 13 developer documentation](https://developer.android.com/about/versions/13) for a full migration guide.
## Android 13 Braze SDK
To prepare for Android 13, please upgrade your Braze SDK to the [latest version (v21.0.0+)](https://github.com/braze-inc/braze-android-sdk/blob/master/CHANGELOG.md#2300). Doing so will give you access to our new ["no-code" push primer feature](https://www.braze.com/docs/pt-br/pt-br/user_guide/message_building_by_channel/push/best_practices/push_primer_messages/).
## Changes in Android 13
### Push permission {#push-permission}
Android 13 introduces a [major change](https://developer.android.com/about/versions/13/changes/notification-permission) in how users manage apps that send push notifications. In Android 13, apps are required to obtain permission before push notifications can be shown.
{: style="float:right;max-width:430px;width:50%;margin-left:15px;border:0"}
This new permission follows a similar pattern to iOS and Web push, where you only have one attempt to obtain permission. If a user chooses `Don't Allow` or dismisses the prompt, your app cannot ask for permission again.
Note that apps are granted an [exemption](https://developer.android.com/about/versions/13/changes/notification-permission#eligibility) for users who previously had push notifications enabled prior to updating to Android 13. These users [will remain eligible](https://developer.android.com/about/versions/13/changes/notification-permission#existing-apps) to receive push when they update to Android 13 without having to request permission.
#### Permission prompt timing {#push-permission-timing}
**Targeting Android 13**
Apps targeting Android 13 can control when to request permission and show the native push prompt.
If your user upgrades from Android 12 to 13, your app was previously installed, and you were already sending push, the system automatically pre-grants the new notification permission to all eligible apps. In other words, these apps can continue to send notifications to users, and users don't see a runtime permission prompt.
For more details on this see Android's Developer Documentation for [effects on updates to existing apps](https://developer.android.com/about/versions/13/changes/notification-permission#existing-apps).
**Targeting Android 12 or earlier**
If your app does not yet target Android 13, then a new user on Android 13 installs your app, they will automatically see a push permission prompt when your app creates its first notification channel (via `notificationManager.createNotificationChannel`). Users who already have your app installed and then upgrade to Android 13 are never shown a prompt and are automatically granted push permission.
**Note:**
Braze SDK v23.0.0 automatically creates a default notification channel if one does not already exist when a push notification is received. If you don't target Android 13, this will cause the push permission prompt to be shown, which is required to show the notification.
## Preparing for Android 13 {#next-steps}
It is strongly recommended that your app targets Android 13 in order to control when users are prompted for push permission.
This will allow you to optimize your [push opt-in rates](https://www.braze.com/resources/articles/android-13-developer-preview-push-opt-ins-arrive-for-android-apps) by prompting users at more appropriate times and will lead to a better user experience in how and when your app asks for push permission.
To start using our new ["no-code" push primer feature](https://www.braze.com/docs/pt-br/pt-br/user_guide/message_building_by_channel/push/best_practices/push_primer_messages/), upgrade your Android SDK to the [latest version (v23.0.0+)](https://github.com/braze-inc/braze-android-sdk/blob/master/CHANGELOG.md#2300).
# Fazendo upgrade para o iOS 18
Source: /docs/pt-br/developer_guide/platforms/swift/ios_18/index.md
# Fazendo upgrade para o iOS 18 {#upgrading-to-ios-18}
> Quer saber como a Braze está se preparando para o próximo lançamento do iOS? Este artigo resume nossos insights sobre o lançamento do iOS 18 para ajudar você a criar uma experiência perfeita para você e seus usuários.
A [WWDC](https://developer.apple.com/wwdc24/) da Apple foi realizada de 9 a 11 de junho de 2024. Saiba mais sobre os anúncios em nossa [publicação no blog](https://www.braze.com/resources/articles/wwdc-announcements-bring-apple-intelligence-rcs-and-more-to-ios-18) ou continue lendo para saber como aproveitar o iOS 18 com a Braze.
## Alterações no iOS 18 {#changes-in-ios-18}
### Live Activities no Apple Watch {#live-activities-on-apple-watch}
O [Live Activities](https://www.braze.com/docs/pt-br/pt-br/developer_guide/push_notifications/live_notifications/?sdktab=swift) será compatível com o watchOS 11. Não é necessária nenhuma configuração adicional. No entanto, a Apple oferece a opção de personalizar a interface do relógio.
### Apple Vision Pro
O Vision Pro já está disponível na China, Japão, Cingapura, Austrália, Canadá, França, Alemanha e Reino Unido. Confira nosso blog para ver como a [Braze oferece suporte ao visionOS](https://www.braze.com/resources/articles/building-braze-a-new-era-of-customer-engagement-braze-announces-visionos-support).
### Notificações do iPhone no macOS {#iphone-notifications-on-macos}
O novo recurso de [espelhamento do iPhone](https://www.apple.com/newsroom/2024/06/macos-sequoia-takes-productivity-and-intelligence-on-mac-to-new-heights/) da Apple permite que os usuários recebam notificações do iPhone em seus dispositivos macOS. Lembre-se de que alguns tipos de mídia, como imagens de push story e GIFs, não são compatíveis, pois não podem ser renderizados como uma notificação no macOS.
### Apple Intelligence
O [Apple Intelligence](https://developer.apple.com/documentation/Updates/Apple-Intelligence) já está disponível para dispositivos com iOS 18.1 e posterior.
Como usuário da Braze, o novo recurso mais importante que você deve conhecer são os [resumos de notificação](https://support.apple.com/en-us/108781), que usam o processamento no dispositivo para agrupar e gerar automaticamente resumos de texto para notificações por push relacionadas enviadas de um único app. Os usuários finais podem tocar para expandir um resumo e visualizar cada notificação por push como foi enviada originalmente.
Devido à forma como esses resumos são gerados, você não terá controle sobre o comportamento específico deles ou sobre o texto gerado. No entanto, isso não afetará nenhum recurso de análise de dados ou relatórios, como o rastreamento de cliques em push.

# Compatibilidade com o visionOS
Source: /docs/pt-br/developer_guide/platforms/swift/visionos/index.md
# Compatibilidade com o visionOS
> A partir do [Braze Swift SDK 8.0.0](https://github.com/braze-inc/braze-swift-sdk/blob/main/CHANGELOG.md#800), é possível usar a Braze com o [visionOS](https://developer.apple.com/visionos/), a plataforma de computação espacial da Apple para o Apple Vision Pro. Para ver um exemplo de app do visionOS utilizando a Braze, consulte [Apps de amostra](https://www.braze.com/docs/pt-br/pt-br/developer_guide/references/?tab=swift).
## Recursos totalmente compatíveis
A maioria dos recursos disponíveis no iOS também está disponível no visionOS, tais como:
- Análise de dados (sessões, eventos personalizados, compras, etc.)
- Envio de mensagens no app (modelos de dados e UI)
- Cartões de Conteúdo (modelos de dados e UI)
- Notificações por push (visíveis ao usuário com botões de ação e notificações silenciosas)
- Feature Flags
- Análise de dados do local
## Recursos parcialmente suportados
Alguns recursos são compatíveis apenas parcialmente com o visionOS, mas é provável que a Apple resolva esses problemas no futuro:
- Notificações por push avançadas
- Há suporte para imagens.
- GIFs e vídeos exibem a miniatura de pré-visualização, mas não podem ser reproduzidos.
- A reprodução de áudio não é suportada.
- Stories por push
- Há suporte para rolagem e seleção da página do Story por push.
- Não há suporte para a navegação entre as páginas do Story por push usando **Next**.
## Recursos incompatíveis
- Não há suporte para o monitoramento de geofences. A Apple não disponibilizou as APIs principais de localização para monitoramento de região no visionOS.
- Não há suporte para atividades ao vivo. No momento, o ActivityKit está disponível apenas para iOS e iPadOS.
# Guia de atualização do SDK do iOS 14
Source: /docs/pt-br/developer_guide/platforms/swift/_archived_updates/ios_14/index.md
# Guia de atualização do SDK do iOS 14 {#ios-14-sdk-upgrade-guide}
> Este guia descreve as alterações relacionadas à Braze introduzidas no iOS 14 e as etapas de upgrade necessárias para sua integração de SDK da Braze para iOS. Para obter uma lista completa das novas atualizações do iOS 14, consulte a página da Apple sobre [o iOS 14](https://www.apple.com/ios/ios-14/).
**Tip:**
A partir do iOS 14.5, a coleta de **IDFA** e [determinados compartilhamentos de dados](https://developer.apple.com/app-store/user-privacy-and-data-use/#permission-to-track) exigirão o novo prompt de permissão da estrutura [AppTrackingTransparency](https://developer.apple.com/documentation/apptrackingtransparency) ([saiba mais](#idfa)).
#### Resumo das mudanças significativas no iOS 14 {#summary-of-ios-14-breaking-changes}
- Os apps com direcionamento para o iOS 14 / Xcode 12 devem usar nossa [versão oficial do iOS 14](https://github.com/Appboy/appboy-ios-sdk/releases/tag/3.27.0).
- [O iOS não oferece mais suporte a](https://developer.apple.com/documentation/corelocation/cllocationmanager/3600215-accuracyauthorization) geofences para usuários que escolhem a nova permissão de _local aproximado_.
- O uso dos recursos de direcionamento "Último local conhecido" exigirá uma atualização para o Braze iOS SDK v3.26.1+ para compatibilidade com a permissão de _local aproximado_. Note que, se estiver usando o Xcode 12, será necessário fazer upgrade para, pelo menos, a versão 3.27.0.
- A partir do iOS 14.5, a coleta de IDFA e [determinados compartilhamentos de dados](https://developer.apple.com/app-store/user-privacy-and-data-use/#permission-to-track) exigem o novo prompt de permissão da estrutura [AppTrackingTransparency](https://developer.apple.com/documentation/apptrackingtransparency).
- Se usar o campo "Rastreamento de anúncios ativado" para direcionamento de Campaigns ou análise de dados, será necessário fazer upgrade para o Xcode 12 e usar a nova estrutura AppTrackingTransparency para informar o status de aceitação dos usuários.
## Resumo do upgrade {#upgrade-summary}
| Se o seu app usa: | Recomendação para fazer upgrade | Descrição |
|------|--------|---|
| Xcode 12 | **Faça upgrade para o iOS SDK v3.27 ou posterior** | Os clientes que usam o Xcode 12 devem usar a versão 3.27.0+ para compatibilidade. Se você tiver algum problema ou dúvida relacionada à nossa compatibilidade com o iOS 14, abra um novo [tópico no GitHub](https://github.com/Appboy/appboy-ios-sdk/issues). |
| Local mais recente | **Faça upgrade para o iOS SDK v3.26.1 ou posterior** | Se você usa o recurso de direcionamento para o local mais recente e ainda está usando o Xcode 11, deve fazer upgrade para, pelo menos, o iOS SDK v3.26.1, que oferece suporte ao novo recurso de _localização aproximada_. Os SDKs mais antigos não conseguirão coletar o local de forma confiável quando um usuário fizer upgrade para o iOS 14 _e_ escolher a opção "Localização aproximada".
Mesmo que seu app não seja direcionado ao iOS 14, seus usuários podem fazer upgrade para o iOS 14 e começar a usar a nova opção de precisão de local. Os apps que não fizerem upgrade para o iOS SDK v3.26.1+ não poderão coletar de forma confiável atributos de local quando os usuários fornecerem sua _localização aproximada_ em dispositivos iOS 14. |
| ID de rastreamento de anúncios IDFA | **Pode ser necessário fazer upgrade para o Xcode 12 e o iOS SDK v3.27** | Em algum momento de 2021, a Apple começará a exigir uma solicitação de permissão para a coleta do IDFA. Nesse momento, os apps deverão fazer upgrade para o Xcode 12 e usar a nova estrutura `AppTrackingTransparency` para continuar coletando o IDFA. Se você passar o IDFA para o SDK da Braze, também deverá fazer upgrade para a versão 3.27.0+ no mesmo momento.
Os apps que não usarem as novas APIs do iOS 14 não poderão coletar o IDFA e, em vez disso, coletarão um ID em branco (`00000000-0000-0000-0000-000000000000`) depois que a Apple começar a aplicar essa alteração em 2021. Para saber se isso se aplica ou não ao seu app, consulte [os detalhes do IDFA](#idfa). |
{: .reset-td-br-1 .reset-td-br-2 .reset-td-br-3 aria-label="Upgrade summary" }
## Mudanças de comportamento no iOS 14 {#ios-14-behavior-changes}
### Permissão de local aproximado {#approximate-location-permission}
{: style="float:right;max-width:45%;margin-left:15px;"}
#### Visão geral {#overview}
Ao solicitar permissão de localização, os usuários agora terão a opção de fornecer seu _local preciso_ (comportamento anterior) ou o novo _local aproximado_. O local aproximado retornará um raio maior no qual o usuário está localizado, em vez de suas coordenadas exatas.
#### Geofences {#geofences}
[O iOS não oferece mais suporte a](https://developer.apple.com/documentation/corelocation/cllocationmanager/3600215-accuracyauthorization) geofences para usuários que escolhem a nova permissão de _local aproximado_. Embora não sejam necessárias atualizações para a integração do SDK da Braze, talvez seja necessário ajustar sua [estratégia de marketing baseada em local](https://www.braze.com/blog/geofencing-geo-targeting-beaconing-when-to-use/) para Campaigns que dependem de geofences.
#### Direcionamento para a localização {#location-tracking}
Para continuar a coletar a _última localização conhecida_ dos usuários quando _a localização aproximada_ for informada, seu app precisará fazer upgrade para, no mínimo, a versão 3.26.1 do SDK da Braze para iOS. Lembre-se de que o local será menos preciso e, com base em nossos testes, tem sido de mais de 12.000 metros (mais de 7 milhas). Ao usar as opções de direcionamento do _último local conhecido_ no dashboard da Braze, certifique-se de aumentar o raio do local para levar em conta os novos _locais aproximados_ (recomendamos um raio de pelo menos 1 milha/1,6 km).
Os apps que não fizerem upgrade do SDK da Braze para iOS para pelo menos a versão 3.26.1 não poderão mais usar o monitoramento de localização quando _a localização aproximada_ for informada em dispositivos iOS 14.
Os usuários que já concederam acesso ao local continuarão a fornecer _a localização precisa_ após fazer o upgrade.
Note que, se estiver usando o Xcode 12, será necessário fazer upgrade para, pelo menos, a versão 3.27.0.
Para saber mais sobre a localização aproximada, assista ao vídeo da Apple [What's New In Location](https://developer.apple.com/videos/play/wwdc2020/10660/) WWDC.
### IDFA e transparência no rastreamento de aplicativos {#idfa}
#### Visão geral
O IDFA (Identifier for Advertisers) é um identificador fornecido pela Apple para uso com parceiros de publicidade e atribuição para rastreamento entre dispositivos e está vinculado ao ID Apple de um indivíduo.
A partir do iOS 14.5, um novo prompt de permissão (lançado pela nova estrutura `AppTrackingTransparency`) deve ser exibido para coletar o consentimento explícito do usuário para o IDFA. Essa solicitação de permissão para "rastrear você em apps e sites de outras empresas" será solicitada de forma semelhante à solicitação de localização dos usuários.
Se um usuário não aceitar o prompt ou se você não fizer upgrade para a estrutura `AppTrackingTransparency` do Xcode 12, um valor IDFA em branco (`00000000-0000-0000-0000-000000000000`) será retornado e seu app não poderá solicitar o usuário novamente.
**Important:**
Essas atualizações do IDFA entrarão em vigor depois que os usuários finais fizerem upgrade de seus dispositivos para o iOS 14.5. Confira se o seu app está usando o novo `AppTransparencyFramework` com o Xcode 12 se você planeja coletar o IDFA.
#### Mudanças na coleta de IDFA da Braze {#changes-to-braze-idfa-collection}
{: style="float:right;max-width:25%;margin-left:15px;border:0"}
1. A Braze continuará a permitir que os apps forneçam o valor IDFA de um usuário _ao_ SDK da Braze.
2. A macro de compilação `ABK_ENABLE_IDFA_COLLECTION`, que compilaria condicionalmente na coleta automática opcional de IDFA, não funcionará mais no iOS 14 e foi removida na versão 3.27.0.
3. Se usar o campo "Rastreamento de anúncios ativado" para direcionamento de Campaigns ou análise de dados, será necessário fazer upgrade para o Xcode 12 e usar a nova estrutura AppTrackingTransparency para informar o status de aceitação dos usuários. O motivo dessa alteração é que, no iOS 14, o antigo campo [`advertisingTrackingEnabled`](https://developer.apple.com/documentation/adsupport/asidentifiermanager/1614148-advertisingtrackingenabled) sempre retornará No.
4. Se o seu app tiver usado IDFA ou IDFV como ID externo da Braze, recomendamos fortemente que você migre desses identificadores em favor de um UUID. Para saber mais sobre a migração de IDs externos, consulte nossos [endpoints da API de migração de IDs externos](https://www.braze.com/docs/pt-br/pt-br/api/endpoints/user_data/external_id_migration/).
Leia mais sobre as [atualizações de privacidade](https://developer.apple.com/app-store/user-privacy-and-data-use/) da Apple e a nova [estrutura de transparência de rastreamento de aplicativos](https://developer.apple.com/documentation/apptrackingtransparency).
### Autorização push {#push-provisional-auth}
**Important:**
Nenhuma alteração na autorização provisória por push foi incluída no iOS 14. Em uma versão beta anterior do iOS 14, a Apple introduziu uma alteração que, desde então, foi revertida para o comportamento anterior.
## Novos recursos do iOS 14 {#ios-14-new-features}
### Visão geral da privacidade do app e da coleta de dados {#app-privacy}
Desde 8 de dezembro de 2020, todos os envios para a App Store exigem etapas adicionais para aderir aos [novos padrões de privacidade de aplicativos da Apple](https://developer.apple.com/app-store/app-privacy-details/).
#### Questionário do portal do desenvolvedor da Apple {#apple-developer-portal-questionnaire}
No _Portal do desenvolvedor da Apple_:
* Será solicitado que você preencha um questionário para descrever como seu app ou parceiros de terceiros coletam dados.
* Espera-se que o questionário esteja sempre atualizado com seu lançamento mais recente na App Store.
* O questionário pode ser atualizado mesmo sem o envio de um novo app.
* Será necessário colar um link para o URL da Política de Privacidade do seu app.
Ao preencher seu questionário, consulte sua equipe jurídica e considere como o uso da Braze para os seguintes campos pode afetar seus requisitos de divulgação.
#### Coleta de dados padrão da Braze {#braze-default-data-collection}
**Identificadores** - Um identificador de dispositivo anônimo é sempre coletado pelo SDK da Braze. Atualmente, está definido como o IDFV (identificador do fornecedor) do dispositivo.
**Dados de uso** - Isso pode incluir dados de sessão da Braze, bem como qualquer coleta de evento ou atributo que você use para medir a interação com o produto.
#### Coleta de dados opcional {#optional-data-collection}
Dados que você pode estar coletando opcionalmente por meio do uso da Braze:
**Localização** - Tanto a localização aproximada quanto o local preciso podem ser coletados opcionalmente pelo SDK da Braze. Esses recursos são desativados por padrão.
**Informações de contato** - Pode incluir eventos e atributos relacionados à identidade do usuário.
**Compras** - Isso pode incluir eventos e compras registrados em nome do usuário.
**Important:**
Note que esta não é uma lista exaustiva. Se você coletar manualmente outras informações sobre seus usuários na Braze que se aplicam a outras categorias no Questionário de privacidade do app, também precisará divulgá-las.
Para saber mais sobre esse recurso, consulte [Privacidade e uso de dados da Apple](https://developer.apple.com/app-store/user-privacy-and-data-use/).
# Guia de atualização do SDK do iOS 15
Source: /docs/pt-br/developer_guide/platforms/swift/_archived_updates/ios_15/index.md
# Guia de atualização do SDK do iOS 15 {#ios-15-sdk-upgrade-guide}
> Este guia descreve as alterações introduzidas no iOS 15 (WWDC21) e as etapas de atualização necessárias para a integração de SDK da Braze para iOS. Para obter uma lista completa das novas atualizações do iOS 15, consulte as notas de versão do [iOS 15](https://developer.apple.com/documentation/ios-ipados-release-notes/ios-ipados-15-release-notes) da Apple.
## Alterações de transparência nas navegações da interface do usuário {#transparency-changes-to-ui-navigations}
Como parte de nossos testes anuais de versões beta do iOS, identificamos uma alteração feita pela Apple que faz com que determinadas barras de navegação da interface do usuário apareçam transparentes em vez de opacas. Isso será visível no iOS 15 ao usar a interface padrão da Braze para Content Cards, ou quando deep links da web forem abertos dentro do seu app em vez de em um app de navegador separado.
Para evitar essa mudança visual no iOS 15, recomendamos enfaticamente que você faça upgrade para o [SDK da Braze para iOS v4.3.2](https://github.com/Appboy/appboy-ios-sdk/releases/tag/4.3.2) o mais rápido possível, antes que os usuários comecem a atualizar seus telefones para o novo sistema operacional iOS 15.
## Novas configurações de notificação {#notification-settings}
O iOS 15 introduziu novos recursos de notificação para ajudar os usuários a manter o foco e evitar interrupções frequentes ao longo do dia. Estamos entusiasmados em oferecer suporte a esses novos recursos. Esses recursos não requerem atualizações adicionais do SDK e serão aplicados apenas aos usuários de dispositivos iOS 15.
### Modos de foco {#focus-mode}
Os usuários do iOS 15 agora podem criar "Modos de Foco" — perfis personalizados usados para determinar quais notificações eles querem que ultrapassem o foco e sejam exibidas com destaque.
{: style="float:right;max-width:25%;margin-left:15px;border:0"}
### Níveis de interrupção {#interruption-levels}
No iOS 15, as notificações por push podem ser enviadas com um dos quatro níveis de interrupção:
* **Passive** (novo) - Sem som, sem vibração, sem despertar da tela, sem ultrapassar as configurações de foco.
* **Active** (padrão) - Permite som, vibração, despertar da tela, sem ultrapassar as configurações de foco.
* **Time-Sensitive** (novo) - Permite som, vibração, despertar da tela, pode ultrapassar os controles do sistema, se permitido.
* **Critical** - Permite som, vibração, despertar da tela, pode ultrapassar os controles do sistema e ignorar o interruptor de campainha.
Consulte [Opções de notificação do iOS](https://www.braze.com/docs/pt-br/pt-br/user_guide/message_building_by_channel/push/ios/notification_options/#interruption-level) para saber mais sobre como definir essa opção no iOS Push.
### Resumo de notificações {#notification-summary}
{: style="float:right;max-width:25%;margin-left:15px;border:0"}
No iOS 15, os usuários podem (opcionalmente) escolher determinados horários ao longo do dia para receber um resumo das notificações. As notificações que não exigem atenção imediata (como as enviadas como "Passive" ou enquanto o usuário estiver no Modo de Foco) serão agrupadas para evitar interrupções constantes ao longo do dia.
Para cada notificação enviada, em breve você poderá especificar uma "pontuação de relevância" para controlar qual notificação deve aparecer na parte superior do resumo.
Consulte [Opções de notificação do iOS](https://www.braze.com/docs/pt-br/pt-br/user_guide/message_building_by_channel/push/ios/notification_options/#relevance-score) para saber mais sobre como definir a "pontuação de relevância" de uma notificação.
## Botões de localização {#location-buttons}
O iOS 15 apresenta uma maneira nova e conveniente para os usuários concederem temporariamente acesso ao local em um app.
O novo botão de local se baseia na permissão existente "Permitir uma vez" sem solicitar repetidamente aos usuários que clicam várias vezes na mesma sessão.
Para saber mais, assista ao vídeo [Meet the Location Button](https://developer.apple.com/videos/play/wwdc2021/10102/) da Apple na Worldwide Developer Conference (WWDC) deste ano.
**Tip:**
Esse recurso oferece uma chance extra de solicitar permissão aos usuários! Os usuários que recusaram anteriormente as permissões de local antes do iOS 15 receberão um aviso ao clicar no botão de local como uma oportunidade de redefinir a permissão do estado recusado uma última vez.
### Uso de botões de local com a Braze {#using-location-buttons-with-braze}
Não é necessária nenhuma integração adicional ao usar botões de local com a Braze. Seu app deve continuar passando o local do usuário (depois que ele tiver concedido permissão) como de costume.
De acordo com a Apple, para os usuários que já compartilharam o acesso ao local em segundo plano, a opção "While Using App" continuará a conceder esse nível de permissão depois que eles fizerem upgrade para o iOS 15.
## E-mail da Apple {#mail}
Este ano, a Apple anunciou muitas atualizações para o rastreamento e a privacidade de e-mails. Para saber mais, confira nossa [postagem no blog](https://www.braze.com/resources/articles/9-ways-email-marketers-can-respond-to-apples-mail-privacy-protection-feature).
## Local do endereço IP do Safari {#safari-ip-address-location}
No iOS 15, os usuários poderão configurar o Safari para tornar anônimo ou generalizar o local determinado a partir de seus endereços IP. Tenha isso em mente ao usar o direcionamento ou a segmentação com base no local.
# Guia de upgrade do iOS 16
Source: /docs/pt-br/developer_guide/platforms/swift/_archived_updates/ios_16/index.md
# Guia de upgrade do SDK para iOS 16 {#ios-16-sdk-upgrade-guide}
> Este guia descreve mudanças relevantes introduzidas pelo iOS 16 (2022) e o impacto na sua integração de SDK da Braze para iOS. Consulte as [notas de versão do iOS 16](https://developer.apple.com/documentation/ios-ipados-release-notes/ios-ipados-16-release-notes) para um guia completo de migração.
## Mudanças no iOS 16 {#changes-in-ios-16}
### Push para a web do Safari {#safari-web-push}
A Apple anunciou duas mudanças em sua funcionalidade de push para a web.
#### Push para a web no desktop (MacOS) {#macos-push}
Antes, a Apple aceitava notificações por push no MacOS (desktop) usando suas próprias APIs de push do Safari.
A partir do macOS Ventura (lançado em 24 de outubro de 2022), [o Safari passou a ser compatível com APIs de push para a web](https://webkit.org/blog/12824/news-from-wwdc-webkit-features-in-safari-16-beta/#web-push-for-macos) além do push do Safari. Esse é um padrão de API existente entre navegadores, usado em outros navegadores populares.
Se você já envia push para a web pelo Safari através da Braze, nenhuma mudança é necessária.
#### Push para a web em dispositivos móveis (iOS e iPadOS) {#ios-push}
Antes, o Safari no iPhone e iPad não aceitava o recebimento de notificações por push.
Em 2023, a Apple adicionará suporte para push para a web em dispositivos iPhone e iPad através do Safari.
A Braze será compatível com esse novo push para a web do iOS e iPadOS sem exigir alterações ou upgrades adicionais.
## Como se preparar para o iOS 16 {#next-steps}
Embora você não precise fazer upgrade do SDK da Braze para iOS 16, há duas outras atualizações interessantes:
1. A Braze lançou um [novo Swift SDK](https://github.com/braze-inc/braze-swift-sdk). Ele traz melhor desempenho, novos recursos e muitos aprimoramentos.
2. Nosso Swift SDK da Braze oferece suporte a um novo [recurso de primer de push "sem código"](https://www.braze.com/docs/pt-br/pt-br/user_guide/channels/push/best_practices/push_primer_messages/)!
# Guia de atualização do iOS 17
Source: /docs/pt-br/developer_guide/platforms/swift/_archived_updates/ios_17/index.md
# Guia de atualização do iOS 17
> Quer saber como a Braze está se preparando para o próximo lançamento do iOS? Este artigo resume nossos insights sobre o lançamento do iOS 17 para ajudá-lo a criar uma experiência perfeita para você e seus usuários.
## Compatibilidade com iOS 17 e Xcode 15
O Braze Swift SDK e o Objective C SDK são compatíveis com versões anteriores do Xcode 14 e do Xcode 15 e com dispositivos iOS 17.
## Alterações no iOS 17
### Rastreamento de links e remoção de parâmetros UTM
Uma das mudanças importantes no iOS 17 é o bloqueio de parâmetros UTM no Safari. Os parâmetros UTM são pedaços de código adicionados aos URLs, que são frequentemente usados em campanhas de marketing para medir a eficácia de e-mails, SMS e outros canais de envio de mensagens.
Essa alteração não afeta o rastreamento de cliques por e-mail do Braze e os envios de encurtamento de links por SMS.
### Transparência no rastreamento de aplicativos
A Apple anunciou seu compromisso de expandir o escopo do [Ad Tracking Transparency (ATT)](https://support.apple.com/en-us/HT212025), que ativa a capacidade dos usuários de controlar se um aplicativo pode acessar sua atividade em apps e sites pertencentes a outras empresas. A versão 17 do iOS contém dois recursos importantes da ATT: manifestos de privacidade e fazer login no código.
#### Manifestos de privacidade
A Apple agora exige um arquivo de manifesto de privacidade que descreva o motivo pelo qual seu app e os SDKs de terceiros coletam dados, juntamente com seus métodos de coleta de dados. A partir do iOS 17.2, a Apple bloqueará todos os endpoints de rastreamento declarados em seu app até que o usuário final aceite o prompt da ATT.
O Braze lançou nosso próprio manifesto de privacidade, juntamente com novas APIs flexíveis que redirecionam automaticamente os dados de rastreamento declarados para pontos de extremidade dedicados em `-tracking`. Para saber mais, consulte o [manifesto de privacidade da Braze](https://www.braze.com/docs/pt-br/pt-br/developer_guide/analytics/managing_data_collection/?sdktab=swift#swift_privacy-manifest).
#### Assinatura de código
A assinatura de código permite que os desenvolvedores que usam um SDK de terceiros em seu aplicativo validem que o mesmo desenvolvedor fez o login em versões anteriores no Xcode.
### SDK do Braze e privacidade
A Apple também anunciou que divulgará uma lista de SDKs de terceiros que são considerados "afetando a privacidade" no final de 2023. Espera-se que esses SDKs tenham um impacto especialmente alto na privacidade do usuário pela Apple.
Ao contrário dos SDKs de rastreamento tradicionais, projetados para monitorar usuários em vários sites e aplicativos, o SDK da Braze se concentra no envio de mensagens de dados primários e nas experiências de usuários.
Embora não esperemos que o SDK da Braze seja incluído nessa lista, pretendemos monitorar essa situação de perto e lançar as atualizações necessárias.
# Integração de extensões de navegador para a Web
Source: /docs/pt-br/developer_guide/platforms/web/browser_extensions/index.md
# Extensão do navegador {#browser-extension}
> Este artigo descreve como usar o Braze Web SDK em suas extensões de navegador (Google Chrome, Firefox).
Integre o Braze Web SDK em sua extensão de navegador para coletar análises de dados e exibir mensagens personalizadas para os usuários. Isso inclui **as extensões do Google Chrome** e **os complementos do Firefox**.
## O que é suportado {#whats-supported}
Em geral, como as extensões são HTML e JavaScript, você pode usar a Braze para o seguinte:
* **Analytics**: Capture eventos personalizados, atributos e até mesmo identifique usuários recorrentes com a sua extensão. Use essas características de perfil para potencializar o envio de mensagens entre canais.
* **Mensagens no app**: Dispare mensagens no app quando os usuários realizarem uma ação em sua extensão, usando nosso envio de mensagens HTML nativo ou personalizado.
* **Content Cards**: Adicione um feed de cartões nativos à sua extensão para integração ou conteúdo promocional.
* **Push para a web**: Envie notificações oportunas mesmo quando sua página da web não estiver aberta no momento.
## O que não é suportado {#whats-not-supported}
* Os service workers não são suportados pelo Braze Web SDK, no entanto, isso está no planejamento para consideração futura.
## Tipos de extensão {#extension-types}
A Braze pode ser incluída nas seguintes áreas de sua extensão:
| Área | Informações | O que é suportado |
|--------|-------|------|
| Página pop-up | A página [Popup](https://developer.mozilla.org/en-US/docs/Mozilla/Add-ons/WebExtensions/user_interface/Popups) é uma caixa de diálogo que pode ser mostrada aos usuários quando eles clicam no ícone da sua extensão na barra de ferramentas do navegador. | Análise de dados, mensagens no app e Content Cards |
| Scripts em segundo plano | [Scripts em segundo plano](https://developer.chrome.com/extensions/background_pages) (somente Manifest v2) permitem que sua extensão inspecione e interaja com a navegação do usuário ou modifique páginas da web (por exemplo, como os bloqueadores de anúncios detectam e alteram o conteúdo das páginas). | Análise de dados, mensagens no app e Content Cards.
Os scripts em segundo plano não são visíveis para os usuários, portanto, para o envio de mensagens, seria necessário comunicar-se com as guias do navegador ou com a página pop-up ao exibir mensagens. |
| Páginas de opções | A [página Options](https://developer.mozilla.org/en-US/docs/Mozilla/Add-ons/WebExtensions/user_interface/Options_pages) permite que os usuários alternem as configurações na extensão. É uma página HTML autônoma que abre uma nova guia. | Análise de dados, mensagens no app e Content Cards |
{: .reset-td-br-1 .reset-td-br-2, .reset-td-br-3 aria-label="Extension types" }
## Permissões {#permissions}
Não são necessárias permissões adicionais no seu `manifest.json` ao integrar o SDK da Braze (`braze.min.js`) como um arquivo local empacotado com sua extensão.
No entanto, se você usar o [Google Tag Manager](https://www.braze.com/docs/pt-br/pt-br/developer_guide/platform_integration_guides/web/google_tag_manager/), ou fizer referência ao SDK da Braze a partir de uma URL externa, ou tiver definido uma política de segurança de conteúdo rigorosa para sua extensão, será necessário ajustar a configuração [`content_security_policy`](https://developer.chrome.com/extensions/contentSecurityPolicy) no `manifest.json` para permitir fontes de script remotas.
## Primeiros passos {#getting-started}
**Tip:**
Antes de começar, leia o [guia de configuração inicial do Web SDK](https://www.braze.com/docs/pt-br/pt-br/developer_guide/sdk_integration/?sdktab=web) para saber mais sobre a integração de JavaScript em geral.
Pode ser interessante marcar a [referência do JavaScript SDK](https://js.appboycdn.com/web-sdk/latest/doc/modules/braze.html) para obter detalhes completos sobre todos os diferentes métodos e opções de configuração do SDK.
Para integrar o Braze Web SDK, você primeiro precisará baixar uma cópia da biblioteca JavaScript mais recente. Isso pode ser feito usando NPM ou baixando diretamente do [Braze CDN](https://js.appboycdn.com/web-sdk/latest/braze.min.js).
Como alternativa, se você preferir usar o [Google Tag Manager](https://www.braze.com/docs/pt-br/pt-br/developer_guide/platform_integration_guides/web/google_tag_manager/) ou usar uma cópia hospedada externamente do Braze SDK, lembre-se de que o carregamento de recursos externos exigirá que você ajuste a configuração [`content_security_policy`](https://developer.chrome.com/extensions/contentSecurityPolicy) no seu `manifest.json`.
Depois de baixar, copie o arquivo `braze.min.js` em algum lugar do diretório da sua extensão.
### Popups de extensão {#popup}
Para adicionar a Braze a um popup de extensão, faça referência ao arquivo JavaScript local no seu `popup.html`, como faria em um site normal. Se estiver usando o Google Tag Manager, você pode adicionar a Braze usando nossos [modelos do Google Tag Manager](https://www.braze.com/docs/pt-br/pt-br/developer_guide/platform_integration_guides/web/google_tag_manager/).
```html
popup.html
```
### Script em segundo plano (somente Manifest v2) {#background-script}
Para usar a Braze no script em segundo plano da sua extensão, adicione a biblioteca Braze ao `manifest.json` no array `background.scripts`. Isso tornará a variável global `braze` disponível no contexto do seu script em segundo plano.
```json
{
"manifest_version": 2,
"background": {
"scripts": [
"relative/path/to/braze.min.js",
"background.js"
]
}
}
```
### Página de opções {#options-page}
Se você usar uma página de opções (por meio das propriedades do manifesto `options` ou `options_ui`), poderá incluir a Braze da mesma forma que faria nas [instruções do `popup.html`](#popup).
## Inicialização {#initialization}
Depois que o SDK for incluído, você poderá inicializar a biblioteca como de costume.
Como não há suporte para cookies em extensões de navegador, você pode desativar os cookies inicializando com `noCookies: true`.
```javascript
braze.initialize("YOUR-API-KEY-HERE", {
baseUrl: "YOUR-API-ENDPOINT",
enableLogging: true,
noCookies: true
});
```
Para saber mais sobre as opções de inicialização suportadas, visite a [referência do Web SDK](https://js.appboycdn.com/web-sdk/latest/doc/modules/braze.html#initialize).
## Push {#push}
As caixas de diálogo popup de extensão não permitem solicitações de push (elas não têm a barra de URL na navegação). Portanto, para registrar e solicitar permissão de push na caixa de diálogo popup de uma extensão, será necessário usar uma solução alternativa de domínio, conforme descrito em [Domínio push alternativo](https://www.braze.com/docs/pt-br/pt-br/developer_guide/platform_integration_guides/web/push_notifications/alternate_push_domain).
# Cabeçalhos de política de segurança de conteúdo para a Web
Source: /docs/pt-br/developer_guide/platforms/web/content_security_policy/index.md
# Cabeçalhos de política de segurança de conteúdo {#content-security-policy-headers}
> A Content-Security-Policy oferece segurança adicional ao restringir como e onde o conteúdo pode ser carregado em seu site. Este artigo de referência aborda quais cabeçalhos de política de segurança de conteúdo são necessários com o Web SDK.
**Important:**
Este artigo é destinado a desenvolvedores que trabalham em sites que aplicam regras de CSP e se integram à Braze. Não se trata de um conselho sobre como você deve abordar a segurança.
**Note:**
This guide uses code samples from the Braze Web SDK 4.0.0+. To upgrade to the latest Web SDK version, see [SDK Upgrade Guide](https://github.com/braze-inc/braze-web-sdk/blob/master/UPGRADE_GUIDE.md).
## Atributos de nonce {#nonce}
Se você usar um valor `nonce` nas diretivas `script-src` ou `style-src`, passe esse valor para a opção de inicialização `contentSecurityNonce` para propagá-lo para scripts e estilos recém-criados gerados pelo SDK:
```javascript
import * as braze from "@braze/web-sdk";
braze.initialize(apiKey, {
baseUrl: baseUrl,
contentSecurityNonce: "YOUR-NONCE-HERE", // assumes a "nonce-YOUR-NONCE-HERE" CSP value
});
```
## Diretivas {#directives}
### `connect-src` {#connect-src}
**Warning:**
Sua URL deve corresponder ao [endpoint de SDK da API](https://www.braze.com/docs/pt-br/pt-br/user_guide/administer/personal/sdk_endpoints/) da sua opção de inicialização `baseUrl` escolhida.
| URL | Informações |
|---|-----------|
| `connect-src https://sdk.iad-01.braze.com` | Permite que o SDK se comunique com as APIs da Braze. Altere essa URL para corresponder ao [endpoint de SDK da API](https://www.braze.com/docs/pt-br/pt-br/user_guide/administer/personal/sdk_endpoints/) da sua opção de inicialização `baseUrl` escolhida. |
{: .reset-td-br-1 .reset-td-br-2 aria-label="connect-src #connect-src" }
### `script-src` {#script-src}
| URL | Informações |
|---|-----------|
| `script-src https://js.appboycdn.com` | Obrigatória ao usar a integração hospedada por CDN. |
| `script-src 'unsafe-eval'` | Obrigatória ao usar o snippet de integração que contém referência a `appboyQueue`. Para evitar o uso dessa diretiva, [integre o SDK usando o NPM](https://www.braze.com/docs/pt-br/pt-br/developer_guide/platform_integration_guides/web/initial_sdk_setup/?tab=package%20manager). |
| `script-src 'nonce-...'` ou `script-src 'unsafe-inline'` | Obrigatória para determinadas mensagens no app, como HTML personalizado. |
{: .reset-td-br-1 .reset-td-br-2 aria-label="script-src #script-src" }
### `img-src` {#img-src}
| URL | Informações |
|---|-----------|
| `img-src: appboy-images.com braze-images.com cdn.braze.eu` | Obrigatória ao usar imagens hospedadas pelo CDN da Braze. Os nomes de host podem variar de acordo com o cluster do dashboard.
**Importante:** Se você estiver usando fontes personalizadas, também será necessário incluir `font-src`. |
{: .reset-td-br-1 .reset-td-br-2 aria-label="img-src #img-src" }
## Font Awesome {#font-awesome}
Para desativar a inclusão automática do Font Awesome, use a opção de inicialização `doNotLoadFontAwesome`:
```javascript
import * as braze from "@braze/web-sdk";
braze.initialize(apiKey, {
baseUrl: baseUrl,
doNotLoadFontAwesome: true,
});
```
Se você optar por usar o Font Awesome, as seguintes diretivas de CSP serão obrigatórias:
- `font-src https://use.fontawesome.com`
- `style-src https://use.fontawesome.com`
- `style-src 'nonce-...'` ou `style-src 'unsafe-inline'`
# Acessibilidade
Source: /docs/pt-br/developer_guide/platforms/web/accessibility/index.md
# Acessibilidade {#accessibility}
> Este artigo fornece uma visão geral de como a Braze suporta acessibilidade na sua integração.
O SDK Web da Braze suporta os padrões fornecidos pelas [Diretrizes de Acessibilidade para Conteúdo da Web (WCAG 2.1)](https://www.w3.org/TR/WCAG21/). Mantemos uma [pontuação de 100/100 no Lighthouse](https://developer.chrome.com/docs/lighthouse/accessibility/scoring) para Content Cards e mensagens no app em todas as nossas novas versões para manter nosso padrão de acessibilidade.
## Pré-requisitos {#prerequisites}
A versão mínima do SDK que atende à WCAG 2.1 é próxima da v3.4.0. No entanto, recomendamos a atualização para pelo menos a v6.0.0 para correções importantes de tags de imagem.
### Correções notáveis de acessibilidade {#notable-accessibility-fixes}
| Versão | Tipo | Principais mudanças |
|---------|------|-------------|
| **6.0.0** | **Major** | Imagens como tags ``, campos `imageAltText` ou `language`, melhorias gerais de acessibilidade da interface |
| **3.5.0** | Minor | Melhorias de acessibilidade de texto rolável |
| **3.4.0** | Fix | Correção do papel `article` para Content Cards |
| **3.2.0** | Minor | Alvos de toque mínimos de 45x45px para botões |
| **3.1.2** | Minor | Texto alternativo padrão para imagens |
| **2.4.1** | **Major** | HTML semântico (`h1` ou `button`), atributos ARIA, navegação por teclado, gerenciamento de foco |
| **2.0.5** | Minor | Gerenciamento de foco, navegação por teclado, rótulos |
{: .reset-td-br-1, .reset-td-br-2 aria-label="Notable accessibility fixes" }
## Recursos de acessibilidade suportados {#supported-accessibility-features}
Suportamos esses recursos para Content Cards e mensagens no app:
- Funções e rótulos ARIA
- Suporte à navegação por teclado
- Gerenciamento de foco
- Anúncios para leitores de tela
- Suporte a texto alternativo para imagens
## Diretrizes de acessibilidade para integrações de SDK {#accessibility-guidelines-for-sdk-integrations}
Consulte [Crie mensagens acessíveis na Braze](https://www.braze.com/docs/pt-br/pt-br/user_guide/messaging/messaging_fundamentals/accessibility/) para diretrizes gerais de acessibilidade. Este guia fornece dicas e boas práticas para máxima acessibilidade ao integrar o SDK Web da Braze em sua aplicação web.
### Content Cards
#### Definindo uma altura máxima {#setting-a-maximum-height}
Para evitar que os Content Cards ocupem muito espaço vertical e melhorar a acessibilidade, você pode definir uma altura máxima no contêiner do feed, como neste exemplo:
```css
/* Limit the height of the Content Cards feed */
.ab-feed {
max-height: 600px; /* Adjust to your needs */
overflow-y: auto;
}
/* For inline feeds (non-sidebar), you may want to limit individual cards */
.ab-card {
max-height: 400px; /* Optional: limit individual card height */
overflow: hidden;
}
```
#### Considerações sobre a viewport {#viewport-considerations}
Para Content Cards exibidos em linha, considere as restrições da viewport, como neste exemplo.
```css
/* Limit feed height on mobile to prevent covering too much screen */
@media (max-width: 768px) {
body > .ab-feed {
max-height: 80vh; /* Leave space for other content */
}
}
```
### Mensagens no app {#in-app-messages}
**Warning:**
Não coloque informações importantes em mensagens no app do tipo slide up, pois elas não são acessíveis para leitores de tela.
### Considerações para dispositivos móveis {#mobile-considerations}
#### Design responsivo {#responsive-design}
O SDK inclui pontos de interrupção responsivos. Confirme que suas personalizações funcionam em diferentes tamanhos de tela, como neste exemplo:
```css
/* Mobile-specific accessibility considerations */
@media (max-width: 768px) {
/* Ensure readable font sizes */
.ab-feed {
font-size: 14px; /* Minimum 14px for mobile readability */
}
/* Ensure sufficient touch targets */
.ab-card {
padding: 16px; /* Adequate padding for touch */
}
}
```
### Testando acessibilidade {#testing-accessibility}
#### Lista de verificação de teste manual {#manual-test-checklist}
Teste manualmente a acessibilidade completando estas tarefas:
- Navegue pelos Content Cards e mensagens no app apenas com o teclado (Tab, Enter, Espaço)
- Teste com leitor de tela (NVDA, JAWS, VoiceOver)
- Verifique se todas as imagens têm texto alternativo
- Verifique as proporções de contraste de cores (use ferramentas como o WebAIM Contrast Checker)
- Teste em dispositivos móveis com toque
- Verifique se os indicadores de foco estão visíveis
- Teste a captura de foco de mensagens modais
- Verifique se todos os elementos interativos são acessíveis pelo teclado
### Problemas comuns de acessibilidade {#common-accessibility-issues}
Para evitar problemas comuns de acessibilidade, faça o seguinte:
1. **Mantenha os estilos de foco:** Os indicadores de foco do SDK são essenciais para usuários de teclado.
2. **Use `display: none` apenas em elementos não interativos:** Use `visibility: hidden` ou `opacity: 0` para ocultar elementos interativos.
3. **Não substitua atributos ARIA:** O SDK define funções e rótulos ARIA apropriados.
4. **Use atributos `tabindex`:** Eles controlam a ordem de navegação pelo teclado.
5. **Forneça rolagem se você definir `overflow: hidden`:** Confirme que o conteúdo rolável permanece acessível.
6. **Não interfira nos manipuladores de teclado integrados:** Confirme que a navegação existente pelo teclado funciona.
# Suporte para smart TV para o SDK Web Braze
Source: /docs/pt-br/developer_guide/platforms/web/smart_tvs/index.md
# Suporte para smart TV
> O SDK da Braze para Web permite que você colete análises de dados e exiba mensagens Rich no app e mensagens de cartão de conteúdo para usuários de smart TV, incluindo [TVs Samsung Tizen](https://developer.samsung.com/smarttv/develop/specifications/tv-model-groups.html) e [TVs LG (webOS)](https://webostv.developer.lge.com/discover). Este artigo aborda como usar o SDK da Braze para Web para integrar com Smart TVs.
**Tip:**
Para uma referência técnica completa, confira nossa [Documentação JavaScript](https://js.appboycdn.com/web-sdk/latest/doc/modules/braze.html) ou nossos [aplicativos de exemplo](https://github.com/Appboy/smart-tv-sample-apps) para ver o Web SDK rodando em uma TV.
## Prerequisites
Before you can use this feature, you'll need to [integrate the Web Braze SDK](https://www.braze.com/docs/pt-br/pt-br/developer_guide/sdk_integration/?sdktab=web).
## Configurando o SDK Web Braze
Existem duas mudanças necessárias ao integrar com Smart TVs:
1. Ao baixar ou importar o Web SDK, use o pacote "core" (disponível em `https://js.appboycdn.com/web-sdk/x.y/braze.core.min.js`, onde `x.y` é a versão desejada). Recomendamos usar a versão CDN do nosso SDK Web, já que a versão NPM é escrita em módulos ES nativos, enquanto a versão CDN é transpilada para ES5. Se você preferir usar a [versão NPM](https://www.npmjs.com/package/@braze/web-sdk), use um empacotador como o webpack que removerá o código não utilizado e que o código seja transpilado para ES5.
2. Ao inicializar o SDK da Web, você precisa definir as opções de inicialização `disablePushTokenMaintenance` e `manageServiceWorkerExternally` para `true`.
## Análise de dados
Todos os mesmos métodos do SDK da Web para análise de dados podem ser usados em Smart TVs. Para um guia completo sobre rastreamento de eventos personalizados, atributos personalizados e mais, veja [análise de dados](https://www.braze.com/docs/pt-br/pt-br/developer_guide/analytics/tracking_sessions/?tab=web).
## Mensagens no app e Cartões de Conteúdo
O SDK da Braze para Web aceita tanto [mensagens no app](https://www.braze.com/docs/pt-br/pt-br/developer_guide/in_app_messages/?sdktab=web) quanto [cartões de conteúdo](https://www.braze.com/docs/pt-br/pt-br/developer_guide/content_cards/?sdktab=web) em Smart TVs. Nota que você deve usar o ["Core" Web SDK](https://www.npmjs.com/package/@braze/web-sdk) pois a renderização de mensagens no app e Cartões de Conteúdo não é suportada usando nossa exibição padrão de UI e deve ser personalizada pelo seu app para se encaixar na experiência do seu App de TV.
Para saber mais sobre como seu app de smart TV pode receber e exibir mensagens no aplicativo, veja [Disparando mensagens](https://www.braze.com/docs/pt-br/pt-br/developer_guide/in_app_messages/triggering_messages/?tab=web).
# Integrações de TV e OTT para a Braze
Source: /docs/pt-br/developer_guide/platforms/tv_and_ott/index.md
# Integrações de TV e OTT {#tv-and-ott-integrations}
> À medida que a tecnologia evolui para novas plataformas e dispositivos, o seu envio de mensagens também pode evoluir com a Braze! A Braze oferece diferentes canais de engajamento para vários sistemas operacionais de TV e métodos de entrega de conteúdo Over-the-Top (OTT).
## Plataformas e recursos {#platforms-and-features}
A seguir estão listados os recursos e os canais de envio de mensagens suportados atualmente.
Plataformas e recursos
Tipo de dispositivo
Dados e análise de dados
Mensagens no app
Content Cards
Notificações por push
Canvas
Feature Flags
Banners
Amazon Fire TV
Kindle Fire
Android TV
LG TV (webOS)
N/D
Samsung Tizen TV
N/D
Roku
N/D
Apple TV OS
Apple Vision Pro
- = Suportado
- = Suporte parcial
- = Não suportado pela Braze
- N/D = Não suportado pela plataforma OTT
## Guias de integração {#integration-guides}
### Amazon Fire TV {#fire-tv}
Use o SDK Braze Fire OS para integrar com dispositivos Amazon Fire TV.
Os recursos incluem:
- Coleta de dados e análise de dados para engajamento entre canais
- Notificações por push (conhecidas como ["Heads Up Notifications"](https://developer.amazon.com/docs/fire-tv/notifications.html#headsup))
- A prioridade deve ser definida como "HIGH" para que elas apareçam. Todas as notificações aparecem no menu de configurações do Fire TV.
- Content Cards
- Feature Flags
- Mensagens no app
- Para exibir mensagens HTML em ambientes sem toque, como TVs, defina `com.braze.configuration.BrazeConfig.Builder.setIsTouchModeRequiredForHtmlInAppMessages` como `false` (disponível a partir do [Android SDK v23.1.0](https://github.com/braze-inc/braze-android-sdk/blob/master/CHANGELOG.md#2310))
- Banners
- Use [posicionamentos de Banner](https://www.braze.com/docs/pt-br/pt-br/developer_guide/banners/placements/) para incorporar mensagens diretamente no seu app Fire TV.
Para saber mais, visite o [guia de integração do Fire OS](https://www.braze.com/docs/pt-br/pt-br/developer_guide/sdk_integration/?sdktab=android).
### Kindle Fire {#kindle-fire}
Use o SDK Braze Fire OS para integrar com dispositivos Amazon Kindle Fire.
Os recursos incluem:
- Coleta de dados e análise de dados para engajamento entre canais
- Notificações por push
- Content Cards
- Feature Flags
- Mensagens no app
- Banners
- Use [posicionamentos de Banner](https://www.braze.com/docs/pt-br/pt-br/developer_guide/banners/placements/) para incorporar mensagens diretamente no seu Kindle Fire.
Para saber mais, visite o [guia de integração do Fire OS](https://www.braze.com/docs/pt-br/pt-br/developer_guide/sdk_integration/?sdktab=android).
### Android TV {#android-tv}
Use o SDK Braze Android para integrar com dispositivos Android TV.
Os recursos incluem:
- Coleta de dados e análise de dados para engajamento entre canais
- Content Cards
- Feature Flags
- Mensagens no app
- Para exibir mensagens HTML em ambientes sem toque, como TVs, defina `com.braze.configuration.BrazeConfig.Builder.setIsTouchModeRequiredForHtmlInAppMessages` como `false` (disponível a partir do [Android SDK v23.1.0](https://github.com/braze-inc/braze-android-sdk/blob/master/CHANGELOG.md#2310))
- * Notificações por push (integração manual necessária)
- Notificações por push não são suportadas nativamente no Android TV. Para saber o motivo, consulte as [Diretrizes de design](https://designguidelines.withgoogle.com/android-tv/patterns/notifications.html) do Google. No entanto, você pode **fazer uma integração manual da interface de notificação por push para conseguir isso**. Consulte nossa [documentação](https://www.braze.com/docs/pt-br/pt-br/developer_guide/push_notifications/?sdktab=android%20tv) sobre como configurar isso.
- Banners
- Use [posicionamentos de Banner](https://www.braze.com/docs/pt-br/pt-br/developer_guide/banners/placements/) para incorporar mensagens diretamente no seu app Android TV.
Para saber mais, visite o [guia de integração do SDK Android](https://www.braze.com/docs/pt-br/pt-br/developer_guide/sdk_integration/?sdktab=android).
**Note:**
Crie um novo app Android no dashboard para a sua integração Android OTT.
### LG webOS {#lg-webos}
Use o SDK Braze Web para integrar com [TVs LG webOS](https://webostv.developer.lge.com/discover).
Os recursos incluem:
- Coleta de dados e análise de dados para engajamento entre canais
- Content Cards (via [Headless UI](#custom-ui))
- Feature Flags
- Mensagens no app (via [Headless UI](#custom-ui))
- Banners
- Use [posicionamentos de Banner](https://www.braze.com/docs/pt-br/pt-br/developer_guide/banners/placements/) para incorporar mensagens diretamente no seu app webOS.
Para saber mais, visite o [guia de integração da Web Smart TV](https://www.braze.com/docs/pt-br/pt-br/developer_guide/platforms/web/smart_tvs/).
### Samsung Tizen {#tizen}
Use o SDK Braze Web para integrar com as [TVs Samsung Tizen](https://developer.samsung.com/smarttv/develop/specifications/tv-model-groups.html).
Os recursos incluem:
- Coleta de dados e análise de dados para engajamento entre canais
- Content Cards (via [Headless UI](#custom-ui))
- Feature Flags
- Mensagens no app (via [Headless UI](#custom-ui))
- Banners
- Use [posicionamentos de Banner](https://www.braze.com/docs/pt-br/pt-br/developer_guide/banners/placements/) para incorporar mensagens diretamente no seu app Tizen.
Para saber mais, visite o [guia de integração da Web Smart TV](https://www.braze.com/docs/pt-br/pt-br/developer_guide/platforms/web/smart_tvs/).
### Roku {#roku}
Use o SDK Braze Roku para integrar com [TVs Roku](https://developer.roku.com/docs/developer-program/getting-started/roku-dev-prog.md).
Os recursos incluem:
- Coleta de dados e análise de dados para engajamento entre canais
- Mensagens no app (via [Headless UI](#custom-ui))
- A plataforma Roku não é compatível com webviews, portanto mensagens HTML no app não são suportadas.
- Feature Flags
Para saber mais, acesse o [guia de integração do Roku](https://www.braze.com/docs/pt-br/pt-br/developer_guide/in_app_messages/?sdktab=roku).
### Apple TV OS {#tvos}
Use o SDK Braze Swift para integrar com o tvOS. Lembre-se de que o SDK Swift não inclui nenhuma interface ou visualização padrão para tvOS, então você precisará implementar a sua própria.
Os recursos incluem:
- Coleta de dados e análise de dados para engajamento entre canais
- Content Cards (via [Headless UI](#custom-ui))
- Feature Flags
- Mensagens no app (via [Headless UI](#custom-ui))
- A plataforma tvOS não é compatível com webviews, portanto mensagens HTML no app não são suportadas.
- Veja nosso [app de exemplo](https://github.com/braze-inc/braze-swift-sdk/tree/main/Examples#inappmessages-custom-ui) para saber mais sobre como usar uma Headless UI para envio de mensagens personalizadas no tvOS.
- Notificações por push silenciosas e atualização de badging
- Banners
- Use [posicionamentos de Banner](https://www.braze.com/docs/pt-br/pt-br/developer_guide/banners/placements/) para incorporar mensagens diretamente no seu app tvOS.
Para saber mais, acesse o [guia de integração do SDK Swift para iOS](https://github.com/braze-inc/braze-swift-sdk).
**Note:**
Para evitar exibir mensagens no app para dispositivos móveis aos seus usuários de TV, configure o [direcionamento de app](#app-targeting) ou use pares de chave-valor para filtrar mensagens. Por exemplo, exiba mensagens do tvOS apenas se elas contiverem um par de chave-valor especial `tv = true`.
### Apple Vision Pro {#vision-pro}
Use o SDK Braze Swift para integrar com o visionOS. A maioria dos recursos disponíveis no iOS também está disponível no visionOS, incluindo:
- Análise de dados (sessões, eventos personalizados, compras, etc.)
- Mensagens no app (modelos de dados e UI)
- Content Cards (modelos de dados e UI)
- Notificações por push (visíveis ao usuário com botões de ação e notificações silenciosas)
- Feature Flags
- Análise de dados de localização
- Banners
- Use [posicionamentos de Banner](https://www.braze.com/docs/pt-br/pt-br/developer_guide/banners/placements/) para incorporar mensagens diretamente no seu app visionOS.
Para saber mais, acesse o [guia de integração do SDK Swift para iOS](https://github.com/braze-inc/braze-swift-sdk).
**Important:**
Alguns recursos do iOS são parcialmente compatíveis ou incompatíveis. Para a lista completa, consulte o [suporte ao visionOS](https://www.braze.com/docs/pt-br/pt-br/developer_guide/platform_integration_guides/swift/visionos/).
## Direcionamento de apps {#app-targeting}
Para direcionar apps OTT para envio de mensagens, recomendamos criar um segmento específico para o seu app OTT.

## Headless UI {#custom-ui}
**Important:**
Plataformas que suportam mensagens no app ou Content Cards por meio de Headless UI **não** incluem nenhuma interface ou visualização padrão. Crie sua própria interface personalizada (como para mensagens no app) e use os modelos de dados fornecidos pelo SDK para preencher essas interfaces.
Com a Headless UI, a Braze fornecerá um modelo de dados, como JSON, que seu app pode ler e usar dentro de uma interface controlada pelo seu app. Esses dados conterão os campos configurados no dashboard (título, corpo, texto do botão, cores, etc.) que seu app pode ler e exibir de acordo. Para saber mais sobre o tratamento personalizado de mensagens, consulte:
**Android SDK**
- [Personalização de mensagens no app](https://www.braze.com/docs/pt-br/pt-br/developer_guide/in_app_messages/customization/?sdktab=android#android_setting-custom-manager-listeners)
- [Personalização de Content Cards](https://www.braze.com/docs/pt-br/pt-br/developer_guide/content_cards/customizing_cards/style/)
**Swift SDK**
- [Personalização de mensagens no app](https://braze-inc.github.io/braze-swift-sdk/documentation/brazekit/brazeinappmessagepresenter/)
- [App de exemplo de Headless UI](https://github.com/braze-inc/braze-swift-sdk/tree/main/Examples#inappmessages-custom-ui)
- [Personalização de Content Cards](https://braze-inc.github.io/braze-swift-sdk/documentation/brazekit/braze/contentcards-swift.class/)
**SDK Web**
- [Personalização de mensagens no app](https://www.braze.com/docs/pt-br/pt-br/developer_guide/in_app_messages/triggering_messages/?tab=web)
- [Personalização de Content Cards](https://www.braze.com/docs/pt-br/pt-br/developer_guide/content_cards/customizing_cards/style/)
# Visão geral da integração para iOS
Source: /docs/pt-br/developer_guide/platforms/legacy_sdks/ios/initial_sdk_setup/overview/index.md
**Warning:**
[AppboyKit](https://github.com/Appboy/appboy-ios-sdk) (also known as the Objective-C SDK) is no longer supported and has been replaced by the [Swift SDK](https://www.braze.com/docs/pt-br/pt-br/developer_guide/sdk_integration/?sdktab=swift). It will no longer receive new features, bug fixes, security updates, or technical support—however, messaging and analytics will continue to function as normal. To learn more, see [Introducing the New Braze Swift SDK](https://www.braze.com/resources/articles/introducing-the-new-braze-swift-sdk).
Instalar o SDK iOS da Braze fornecerá a você funcionalidades básicas de análise de dados (manipulação de sessões) e mensagens básicas no app. Você deve personalizar ainda mais sua integração para canais e recursos adicionais.
O SDK da Braze para iOS pode ser instalado ou atualizado usando CocoaPods, Carthage, Swift Package Manager ou uma integração manual.
Além disso, o SDK da Braze para iOS oferece suporte integral para aplicativos RubyMotion.
**Important:**
O SDK do iOS adicionará 1 MB a 2 MB ao arquivo IPA do app, além de um arquivo app, e 30 MB para o framework.
Depois de fazer a integração usando uma das opções listadas, seguir os passos para [completar a integração](https://www.braze.com/docs/pt-br/pt-br/developer_guide/platforms/legacy_sdks/ios/initial_sdk_setup/completing_integration/) e habilitar outras personalizações do SDK (opcional), prossiga para integrar, habilitar e personalizar canais e recursos adicionais para atender às necessidades de suas futuras campanhas.
# Integração do Carthage para iOS
Source: /docs/pt-br/developer_guide/platforms/legacy_sdks/ios/initial_sdk_setup/installation_methods/carthage_integration/index.md
**Warning:**
[AppboyKit](https://github.com/Appboy/appboy-ios-sdk) (also known as the Objective-C SDK) is no longer supported and has been replaced by the [Swift SDK](https://www.braze.com/docs/pt-br/pt-br/developer_guide/sdk_integration/?sdktab=swift). It will no longer receive new features, bug fixes, security updates, or technical support—however, messaging and analytics will continue to function as normal. To learn more, see [Introducing the New Braze Swift SDK](https://www.braze.com/resources/articles/introducing-the-new-braze-swift-sdk).
# Integração de Cartago
## Importar o SDK
A partir da versão `4.4.0`, o SDK da Braze é compatível com o XCFrameworks durante a integração via Carthage. Para importar o SDK completo, inclua estas linhas em seu `Cartfile`:
```
binary "https://raw.githubusercontent.com/Appboy/appboy-ios-sdk/master/appboy_ios_sdk.json"
github "SDWebImage/SDWebImage"
```
Consulte o [guia de início rápido do Carthage](https://github.com/Carthage/Carthage#quick-start) para saber mais sobre a importação do SDK.
Ao migrar de uma versão anterior para `4.4.0`, siga o [guia de migração do Carthage para o XCFrameworks](https://github.com/Carthage/Carthage#migrating-a-project-from-framework-bundles-to-xcframeworks).
**Note:**
Para saber mais sobre a sintaxe do `Cartfile` ou sobre recursos como a fixação de versão, consulte a [documentação do Carthage](https://github.com/Carthage/Carthage/blob/master/Documentation/Artifacts.md#cartfile).
Para uso específico da plataforma do Carthage, consulte o [guia do usuário](https://github.com/Carthage/Carthage#if-youre-building-for-ios-tvos-or-watchos).
### Versões anteriores
Para as versões `3.24.0` a `4.3.4`, inclua o seguinte em seu `Cartfile`:
```
binary "https://raw.githubusercontent.com/Appboy/appboy-ios-sdk/master/appboy_ios_sdk_full.json"
```
Para importar versões anteriores a `3.24.0`, inclua o seguinte em seu `Cartfile`:
```
github "Appboy/Appboy-iOS-SDK" ""
```
Substitua `` pela [versão apropriada](https://github.com/Appboy/appboy-ios-sdk/releases) do Braze iOS SDK no formato "x.y.z".
## Próximas etapas
Siga as instruções para [concluir a integração](https://www.braze.com/docs/pt-br/pt-br/developer_guide/platforms/legacy_sdks/ios/initial_sdk_setup/completing_integration/).
## Integração somente do núcleo
Para usar o SDK principal sem nenhum componente ou dependência de interface, instale a versão principal do framework da Braze para Carthage incluindo a seguinte linha em seu `Cartfile`:
```
binary "https://raw.githubusercontent.com/Appboy/appboy-ios-sdk/master/appboy_ios_sdk_core.json"
```
# Integração do CocoaPods para iOS
Source: /docs/pt-br/developer_guide/platforms/legacy_sdks/ios/initial_sdk_setup/installation_methods/cocoapods/index.md
**Warning:**
[AppboyKit](https://github.com/Appboy/appboy-ios-sdk) (also known as the Objective-C SDK) is no longer supported and has been replaced by the [Swift SDK](https://www.braze.com/docs/pt-br/pt-br/developer_guide/sdk_integration/?sdktab=swift). It will no longer receive new features, bug fixes, security updates, or technical support—however, messaging and analytics will continue to function as normal. To learn more, see [Introducing the New Braze Swift SDK](https://www.braze.com/resources/articles/introducing-the-new-braze-swift-sdk).
# Integração com o CocoaPods {#cocoapods-integration}
## Etapa 1: Instalar o CocoaPods {#step-1-install-cocoapods}
A instalação do SDK do iOS por meio do [CocoaPods](http://cocoapods.org/) automatiza a maior parte do processo de instalação para você. Antes de iniciar esse processo, use a [versão 2.0.0 ou superior do Ruby](https://www.ruby-lang.org/en/installation/). Não se preocupe, não é necessário ter conhecimento da sintaxe do Ruby para instalar esse SDK.
Execute o seguinte comando para começar:
```bash
$ sudo gem install cocoapods
```
Se você tiver problemas com o CocoaPods, consulte o [guia de solução de problemas](http://guides.cocoapods.org/using/troubleshooting.html) do CocoaPods.
**Note:**
Se for solicitado a substituir o executável `rake`, consulte as instruções de [introdução](http://guides.cocoapods.org/using/getting-started.html) em CocoaPods.org para obter mais detalhes.
## Etapa 2: Construindo o Podfile {#step-2-constructing-the-podfile}
Agora que você instalou o CocoaPods Ruby Gem, precisará criar um arquivo no diretório do projeto Xcode chamado `Podfile`.
Adicione a seguinte linha ao seu Podfile:
```
target 'YourAppTarget' do
pod 'Appboy-iOS-SDK'
end
```
Sugerimos que você versione a Braze para que as atualizações do pod capturem automaticamente qualquer coisa menor que uma atualização de versão secundária. Fica assim: `pod 'Appboy-iOS-SDK' ~> Major.Minor.Build`. Se quiser integrar automaticamente a versão mais recente do SDK da Braze, mesmo com grandes alterações, você poderá usar `pod 'Appboy-iOS-SDK'` em seu Podfile.
#### Subspecs {#subspecs}
Recomendamos que os integradores importem nosso SDK completo. No entanto, se tiver certeza de que integrará apenas um recurso específico da Braze, você poderá importar apenas a subspec de interface do usuário desejada em vez do SDK completo.
| Subspec | Informações |
| ------- | ------- |
| `pod 'Appboy-iOS-SDK/InAppMessage'` | A subspec `InAppMessage` contém a interface do usuário de mensagens no app da Braze e o Core SDK. |
| `pod 'Appboy-iOS-SDK/ContentCards'` | A subspec `ContentCards` contém a interface do usuário de Content Cards da Braze e o Core SDK. |
| `pod 'Appboy-iOS-SDK/NewsFeed'` | A subspec `NewsFeed` contém o Braze Core SDK. |
| `pod 'Appboy-iOS-SDK/Core'` | A subspec `Core` contém suporte para análise de dados, como eventos personalizados e atributos. |
{: .ws-td-nw-1 aria-label="Subspecs" }
## Etapa 3: Instalação do SDK da Braze {#step-3-installing-the-braze-sdk}
Para instalar o SDK da Braze via CocoaPods, navegue até o diretório do seu projeto de app do Xcode em seu terminal e execute o seguinte comando:
```
pod install
```
Nesse ponto, você deve conseguir abrir o novo espaço de trabalho do projeto Xcode criado pelo CocoaPods. Use esse espaço de trabalho do Xcode em vez do seu projeto do Xcode.

## Próximas etapas {#next-steps}
Siga as instruções para [concluir a integração](https://www.braze.com/docs/pt-br/pt-br/developer_guide/platforms/legacy_sdks/ios/initial_sdk_setup/completing_integration/).
## Atualizando o SDK da Braze via CocoaPods {#updating-the-braze-sdk-via-cocoapods}
Para atualizar um CocoaPod, basta executar o seguinte comando no diretório do projeto:
```
pod update
```
# Integração do Swift Package Manager para iOS
Source: /docs/pt-br/developer_guide/platforms/legacy_sdks/ios/initial_sdk_setup/installation_methods/swift_package_manager/index.md
**Warning:**
[AppboyKit](https://github.com/Appboy/appboy-ios-sdk) (also known as the Objective-C SDK) is no longer supported and has been replaced by the [Swift SDK](https://www.braze.com/docs/pt-br/pt-br/developer_guide/sdk_integration/?sdktab=swift). It will no longer receive new features, bug fixes, security updates, or technical support—however, messaging and analytics will continue to function as normal. To learn more, see [Introducing the New Braze Swift SDK](https://www.braze.com/resources/articles/introducing-the-new-braze-swift-sdk).
# integração do Swift Package Manager
Instalar o iOS SDK via [Swift Package Manager](https://swift.org/package-manager/) (SPM) automatiza a maior parte do processo de instalação para você. Antes de começar este processo, certifique-se de usar o Xcode 12 ou superior.
**Note:**
tvOS não está disponível atualmente via Swift Package Manager.
## Etapa 1: Adicionando a dependência ao seu projeto
### Importar versão do SDK
Abra seu projeto e navegue até as configurações do seu projeto. Selecione a guia **SWIFT Packages** e clique no botão adicionar abaixo da lista de pacotes.

Ao importar a versão `3.33.1` do SDK ou posterior, insira a URL do nosso repositório de SDK para iOS (`https://github.com/braze-inc/braze-ios-sdk`) no campo de texto e clique em **Avançar**.
Para versões `3.29.0` até `3.32.0`, use o URL `https://github.com/Appboy/Appboy-ios-sdk`.

Na próxima tela, selecione a versão do SDK e clique em **Avançar**. As versões `3.29.0` e posteriores são compatíveis com o Swift Package Manager.

### Selecionar pacotes
Selecione o pacote que melhor atende às suas necessidades e clique em **Concluir**. Certifique-se de selecionar `AppboyKit` ou `AppboyUI`. Incluir ambos os pacotes pode levar a um comportamento indesejado:
- `AppboyUI`
- Mais adequado se você planeja usar os componentes de UI fornecidos pela Braze.
- Inclui `AppboyKit` automaticamente.
- `AppboyKit`
- Mais adequado se você não precisar usar nenhum dos componentes de interface do usuário fornecidos pela Braze (por exemplo, Cartões de Conteúdo, mensagens no app, etc.).
- `AppboyPushStory`
- Inclua este pacote se você integrou Push Stories no seu app. Isso é suportado a partir da versão `3.31.0`.
- No menu suspenso em `Add to Target`, selecione seu alvo `ContentExtension` em vez do alvo do seu app principal.

## Etapa 2: Configurando seu projeto
Em seguida, navegue até as **configurações de build** do seu projeto e adicione a flag `-ObjC` à configuração **Outras Flags do Linker**. Esta bandeira deve ser adicionada e quaisquer [erros](https://developer.apple.com/library/archive/qa/qa1490/_index.html) resolvidos para integrar ainda mais o SDK.

**Note:**
Se você não adicionar a flag `-ObjC`, partes da API podem ficar ausentes e o comportamento será indefinido. Você pode encontrar erros inesperados, como "seletor não reconhecido enviado para a classe", falhas no aplicativo e outros problemas.
## Etapa 3: Editando o esquema do alvo
**Important:**
Se você estiver usando o Xcode 12.5 ou mais recente, pule esta etapa.
Se você estiver usando o Xcode 12.4 ou anterior, edite o esquema do alvo incluindo o pacote Appboy (**Produto > Esquema > Editar Esquema** item do menu):
1. Expanda o menu **Build** e selecione **Post-actions**. Pressione o botão de mais (+) e selecione **Nova Ação de Execução de Script**.
2. No menu suspenso **Provide build settings from**, selecione o alvo do seu app.
3. Copie este script no campo aberto:
```sh
# iOS
bash "$BUILT_PRODUCTS_DIR/Appboy_iOS_SDK_AppboyKit.bundle/Appboy.bundle/appboy-spm-cleanup.sh"
# macOS (if applicable)
bash "$BUILT_PRODUCTS_DIR/Appboy_iOS_SDK_AppboyKit.bundle/Contents/Resources/Appboy.bundle/appboy-spm-cleanup.sh"
```

## Próximos passos
Siga as instruções para [concluir a integração](https://www.braze.com/docs/pt-br/pt-br/developer_guide/platforms/legacy_sdks/ios/initial_sdk_setup/completing_integration/).
# Opções de Integração Manual para iOS
Source: /docs/pt-br/developer_guide/platforms/legacy_sdks/ios/initial_sdk_setup/installation_methods/manual_integration_options/index.md
**Warning:**
[AppboyKit](https://github.com/Appboy/appboy-ios-sdk) (also known as the Objective-C SDK) is no longer supported and has been replaced by the [Swift SDK](https://www.braze.com/docs/pt-br/pt-br/developer_guide/sdk_integration/?sdktab=swift). It will no longer receive new features, bug fixes, security updates, or technical support—however, messaging and analytics will continue to function as normal. To learn more, see [Introducing the New Braze Swift SDK](https://www.braze.com/resources/articles/introducing-the-new-braze-swift-sdk).
# Integração manual
**Tip:**
Recomendamos fortemente que você implemente o SDK por meio de um gerenciador de pacotes, como [Swift Package Manager](../swift_package_manager/), [CocoaPods](../cocoapods/) ou [Carthage](../carthage_integration/). Isso vai te poupar muito tempo e automatizar grande parte do processo. No entanto, se não conseguir fazer isso, conclua a integração manualmente seguindo as instruções.
## Etapa 1: Download do SDK da Braze
### Opção 1: XCFramework Dinâmico
1. Baixe `Appboy_iOS_SDK.xcframework.zip` da [página de versão](https://github.com/appboy/appboy-ios-sdk/releases) e extraia o arquivo.
2. No Xcode, arraste e solte este `.xcframework` no seu projeto.
3. Na guia **General (Geral** ) do projeto, selecione **Embed & Sign** for `Appboy_iOS_SDK.xcframework`.
### Opção 2: XCFramework estática para integração estática
1. Baixe `Appboy_iOS_SDK.zip` da [página de versão](https://github.com/appboy/appboy-ios-sdk/releases).
2. No Xcode, no navegador do projeto, selecione o projeto ou grupo de destino para Braze
3. Navegue até **File > Add Files > Project_Name**.
4. Adicione as pastas `AppboyKit` e `AppboyUI` ao seu projeto como um grupo.
- Certifique-se de que a opção **Copiar itens para a pasta do grupo de destino** esteja selecionada se você estiver integrando pela primeira vez. Expandir **Opções** no seletor de arquivos para selecionar **Copiar itens, se necessário** e **Criar grupos**.
- Exclua os diretórios `AppboyKit/include` e `AppboyUI/include`.
5. (Opcional) Se um dos seguintes se aplicar a você:
- Você só quer os principais recursos de análise de dados do SDK e não usa nenhum recurso de interface do usuário (por exemplo, mensagens no app ou Cartões de Conteúdo).
- Você tem uma interface de usuário personalizada para os recursos da interface de usuário do Braze e lida com o download de imagens por conta própria.
Você pode usar a versão principal do SDK removendo o arquivo `ABKSDWebImageProxy.m` e `Appboy.bundle`. Isso removerá a dependência do framework `SDWebImage` e todos os recursos relacionados à interface do usuário (por exemplo, arquivos Nib, imagens, arquivos de localização) do SDK.
**Warning:**
Se você tentar usar a versão principal do SDK sem os recursos de UI da Braze, as mensagens no app não serão exibidas. Tentar exibir o UI de cartões de conteúdo da Braze com a versão principal levará a um comportamento imprevisível.
## Etapa 2: Adicionando bibliotecas iOS necessárias
1. Clique no alvo para o seu projeto (usando a navegação à esquerda) e selecione a **Fases de Build** guia.
2. Clique no botão em **Link Binary With Libraries**.
3. No menu, selecione `SystemConfiguration.framework`.
4. Marque esta biblioteca como obrigatória usando o menu suspenso ao lado de `SystemConfiguration.framework`.
5. Repita para adicionar cada um dos seguintes frameworks necessários ao seu projeto, marcando cada um como "obrigatório".
- `QuartzCore.framework`
- `libz.tbd`
- `CoreImage.framework`
- `CoreText.framework`
- `WebKit.framework`
6. Adicione os seguintes frameworks e marque-os como opcionais:
- `CoreTelephony.framework`
7. Selecione a guia **Configurações de Build**. Na seção **Linking**, localize a configuração **Other Linker Flags** e adicione a flag `-ObjC`.
8. O `SDWebImage` framework é necessário para que os cartões de conteúdo e o envio de mensagens no app funcionem corretamente. `SDWebImage` é usado para download e exibição de imagens, incluindo GIFs. Se você pretende usar Cartões de Conteúdo ou mensagens no app, siga as etapas de integração do SDWebImage.
### integração SDWebImage
Para instalar `SDWebImage`, siga as [instruções](https://github.com/SDWebImage/SDWebImage/wiki/Installation-Guide#build-sdwebimage-as-xcframework) e depois arraste e solte o `XCFramework` resultante em seu projeto.
### Monitoramento de localização opcional
1. Adicione o `CoreLocation.framework` para ativar o monitoramento de localização.
2. Você deve autorizar local para seus usuários usando `CLLocationManager` no seu app.
## Etapa 3: Cabeçalho de ponte Objective-C
**Note:**
Se o seu projeto usa apenas Objective-C, pule esta etapa.
Se o seu projeto usa Swift, você precisará de um arquivo de cabeçalho de ponte.
Se você não tiver um arquivo de cabeçalho de ponte, crie um e nomeie-o `your-product-module-name-Bridging-Header.h` escolhendo **Arquivo > Novo > Arquivo > (iOS ou OS X) > Fonte > Arquivo de Cabeçalho**. Em seguida, adicione a seguinte linha de código ao topo do seu arquivo de cabeçalho de ponte:
```
#import "AppboyKit.h"
```
Nas **Configurações de Build** do seu projeto, adicione a jornada relativa do seu arquivo de cabeçalho à configuração de compilação `Objective-C Bridging Header` em `Swift Compiler - Code Generation`.
## Próximas etapas
Siga as instruções para [concluir a integração](https://www.braze.com/docs/pt-br/pt-br/developer_guide/platforms/legacy_sdks/ios/initial_sdk_setup/completing_integration/).
# Complete a integração do SDK iOS
Source: /docs/pt-br/developer_guide/platforms/legacy_sdks/ios/initial_sdk_setup/completing_integration/index.md
**Warning:**
[AppboyKit](https://github.com/Appboy/appboy-ios-sdk) (also known as the Objective-C SDK) is no longer supported and has been replaced by the [Swift SDK](https://www.braze.com/docs/pt-br/pt-br/developer_guide/sdk_integration/?sdktab=swift). It will no longer receive new features, bug fixes, security updates, or technical support—however, messaging and analytics will continue to function as normal. To learn more, see [Introducing the New Braze Swift SDK](https://www.braze.com/resources/articles/introducing-the-new-braze-swift-sdk).
# Complete a integração {#complete-the-integration}
Antes de seguir estas etapas, certifique-se de que você já integrou o SDK usando [Carthage](https://www.braze.com/docs/pt-br/pt-br/developer_guide/platforms/legacy_sdks/ios/initial_sdk_setup/installation_methods/carthage_integration/), [CocoaPods](https://www.braze.com/docs/pt-br/pt-br/developer_guide/platforms/legacy_sdks/ios/initial_sdk_setup/installation_methods/cocoapods/), [Swift Package Manager](https://www.braze.com/docs/pt-br/pt-br/developer_guide/platforms/legacy_sdks/ios/initial_sdk_setup/installation_methods/swift_package_manager/) ou uma integração [manual](https://www.braze.com/docs/pt-br/pt-br/developer_guide/platforms/legacy_sdks/ios/initial_sdk_setup/installation_methods/manual_integration_options/).
## Etapa 1: Atualize seu delegado do app {#step-1-update-your-app-delegate}
Se estiver fazendo a integração do SDK da Braze com CocoaPods, Carthage ou com uma [integração manual dinâmica](https://www.braze.com/docs/pt-br/pt-br/developer_guide/platforms/legacy_sdks/ios/initial_sdk_setup/installation_methods/manual_integration_options/), adicione a seguinte linha de código ao seu arquivo `AppDelegate.m`:
```objc
#import "Appboy-iOS-SDK/AppboyKit.h"
```
Se estiver fazendo a integração com o Swift Package Manager ou com uma [integração manual estática](https://www.braze.com/docs/pt-br/pt-br/developer_guide/platforms/legacy_sdks/ios/initial_sdk_setup/installation_methods/manual_integration_options/), use esta linha:
```objc
#import "AppboyKit.h"
```
Em seguida, no arquivo `AppDelegate.m`, adicione o seguinte snippet no método `application:didFinishLaunchingWithOptions:`:
```objc
[Appboy startWithApiKey:@"YOUR-APP-IDENTIFIER-API-KEY"
inApplication:application
withLaunchOptions:launchOptions];
```
Atualize `YOUR-APP-IDENTIFIER-API-KEY` com o valor correto da sua página **Gerenciar configurações**. Consulte nossa [documentação da API](https://www.braze.com/docs/pt-br/pt-br/api/api_key/#the-app-identifier-api-key) para saber mais sobre onde encontrar a chave de API do identificador do app.
Se estiver fazendo a integração do SDK da Braze com CocoaPods, Carthage ou com uma [integração manual dinâmica](https://www.braze.com/docs/pt-br/pt-br/developer_guide/platforms/legacy_sdks/ios/initial_sdk_setup/installation_methods/manual_integration_options/), adicione a seguinte linha de código ao seu arquivo `AppDelegate.swift`:
```swift
import Appboy_iOS_SDK
```
Se estiver fazendo a integração com o Swift Package Manager ou com uma [integração manual estática](https://www.braze.com/docs/pt-br/pt-br/developer_guide/platforms/legacy_sdks/ios/initial_sdk_setup/installation_methods/manual_integration_options/), use esta linha:
```swift
import AppboyKit
```
Consulte os [documentos para desenvolvedores da Apple](https://developer.apple.com/library/ios/documentation/swift/conceptual/buildingcocoaapps/MixandMatch.html) para saber mais sobre o uso de código Objective-C em projetos Swift.
Em seguida, em `AppDelegate.swift`, adicione o seguinte snippet ao método `application(application: UIApplication, didFinishLaunchingWithOptions launchOptions: [NSObject: AnyObject]?) -> Bool`:
```swift
Appboy.start(withApiKey: "YOUR-APP-IDENTIFIER-API-KEY", in:application, withLaunchOptions:launchOptions)
```
Atualize `YOUR-APP-IDENTIFIER-API-KEY` com o valor correto da sua página **Gerenciar configurações**. Consulte nossa [documentação da API](https://www.braze.com/docs/pt-br/pt-br/api/api_key/#the-app-identifier-api-key) para saber mais sobre onde encontrar a chave de API do identificador do app.
**Note:**
O singleton `sharedInstance` será nulo antes de `startWithApiKey:` ser chamado, pois esse é um pré-requisito para usar qualquer funcionalidade da Braze.
**Warning:**
Certifique-se de inicializar a Braze na thread principal do seu aplicativo. A inicialização de forma assíncrona pode levar a uma funcionalidade interrompida.
## Etapa 2: Especifique seu cluster de dados {#step-2-specify-your-data-cluster}
**Note:**
A partir de dezembro de 2019, os endpoints personalizados não são mais fornecidos. Se você tiver um endpoint personalizado pré-existente, poderá continuar usando-o. Para saber mais, consulte nossa lista de endpoints disponíveis.
### Configuração do endpoint em tempo de compilação (recomendado) {#compile-time-endpoint-configuration-recommended}
Se for fornecido um endpoint personalizado pré-existente:
- A partir do SDK da Braze para iOS v3.0.2, você pode definir um endpoint personalizado usando o arquivo `Info.plist`. Adicione o dicionário `Braze` ao seu arquivo `Info.plist`. Dentro do dicionário `Braze`, adicione a subentrada string `Endpoint` e defina o valor como a autoridade do URL do seu endpoint personalizado (por exemplo, `sdk.iad-01.braze.com`, não `https://sdk.iad-01.braze.com`). Antes do Braze iOS SDK v4.0.2, deve-se utilizar a chave do dicionário `Appboy` no lugar de `Braze`.
Seu representante da Braze já deve ter informado sobre o [endpoint correto](https://www.braze.com/docs/pt-br/pt-br/user_guide/administer/personal/sdk_endpoints/).
### Configuração do endpoint em tempo de execução {#runtime-endpoint-configuration}
Se for fornecido um endpoint personalizado pré-existente:
- A partir do Braze iOS SDK v3.17.0+, você pode substituir a definição do seu endpoint pela chave `ABKEndpointKey` dentro do parâmetro `appboyOptions` passado para `startWithApiKey:inApplication:withLaunchOptions:withAppboyOptions:`. Defina o valor como a autoridade do URL do seu endpoint personalizado (por exemplo, `sdk.iad-01.braze.com`, não `https://sdk.iad-01.braze.com`).
## Integração do SDK concluída {#sdk-integration-complete}
Agora, a Braze deve estar coletando dados do seu aplicativo, e sua integração básica deve estar concluída. Consulte os artigos a seguir para ativar o [rastreamento de eventos personalizados](https://www.braze.com/docs/pt-br/pt-br/developer_guide/analytics/logging_events/?tab=swift), o [envio de mensagens push](https://www.braze.com/docs/pt-br/pt-br/developer_guide/platforms/legacy_sdks/ios/push_notifications/integration/) e o conjunto completo de recursos da Braze.
## Personalização da Braze na inicialização {#customizing-braze-on-startup}
Se desejar personalizar a Braze na inicialização, você pode usar o método de inicialização da Braze `startWithApiKey:inApplication:withLaunchOptions:withAppboyOptions:` e passar um `NSDictionary` opcional de chaves de inicialização da Braze.
No seu arquivo `AppDelegate.m`, no método `application:didFinishLaunchingWithOptions:`, adicione o seguinte método da Braze:
```objc
[Appboy startWithApiKey:@"YOUR-APP-IDENTIFIER-API-KEY"
inApplication:application
withLaunchOptions:launchOptions
withAppboyOptions:appboyOptions];
```
Note que esse método substituiria o método de inicialização `startWithApiKey:inApplication:withLaunchOptions:`.
Em `AppDelegate.swift`, no método `application(application: UIApplication, didFinishLaunchingWithOptions launchOptions: [NSObject: AnyObject]?) -> Bool`, adicione o seguinte método da Braze, em que `appboyOptions` é um `Dictionary` de valores de configuração de inicialização:
```swift
Appboy.start(withApiKey: "YOUR-APP-IDENTIFIER-API-KEY",
in:application,
withLaunchOptions:launchOptions,
withAppboyOptions:appboyOptions)
```
Note que esse método substituiria o método de inicialização `startWithApiKey:inApplication:withLaunchOptions:`.
Esse método é chamado com os seguintes parâmetros:
- `YOUR-APP-IDENTIFIER-API-KEY` – Sua chave de API do [identificador do app](https://www.braze.com/docs/pt-br/pt-br/api/api_key/#the-app-identifier-api-key) no dashboard da Braze.
- `application` – O app atual.
- `launchOptions` – As opções `NSDictionary` que você obtém em `application:didFinishLaunchingWithOptions:`.
- `appboyOptions` – Um `NSDictionary` opcional com valores de configuração de inicialização para a Braze.
Consulte [Appboy.h](https://github.com/braze-inc/braze-ios-sdk/blob/master/AppboyKit/include/Appboy.h) para ver a lista de chaves de inicialização da Braze.
## Appboy.sharedInstance() e a anulabilidade do Swift {#appboysharedinstance-and-swift-nullability}
Diferentemente da prática comum, o singleton `Appboy.sharedInstance()` é opcional. Isso ocorre porque `sharedInstance` é `nil` antes da chamada de `startWithApiKey:`, e há algumas implementações não padronizadas, mas ainda válidas, nas quais uma inicialização postergada pode ser utilizada.
Se você chamar `startWithApiKey:` no seu delegado `didFinishLaunchingWithOptions:` antes de qualquer acesso ao `sharedInstance` do Appboy (a implementação padrão), poderá usar o encadeamento opcional, como `Appboy.sharedInstance()?.changeUser("testUser")`, para evitar verificações complicadas. Isso terá paridade com uma implementação em Objective-C que assume um `sharedInstance` não nulo.
## Recursos adicionais {#additional-resources}
A [documentação completa da classe do iOS](http://appboy.github.io/appboy-ios-sdk/docs/annotated.html) está disponível para fornecer orientações adicionais sobre quaisquer métodos do SDK.
# Outras personalizações do SDK para iOS
Source: /docs/pt-br/developer_guide/platforms/legacy_sdks/ios/initial_sdk_setup/other_sdk_customizations/index.md
**Warning:**
[AppboyKit](https://github.com/Appboy/appboy-ios-sdk) (also known as the Objective-C SDK) is no longer supported and has been replaced by the [Swift SDK](https://www.braze.com/docs/pt-br/pt-br/developer_guide/sdk_integration/?sdktab=swift). It will no longer receive new features, bug fixes, security updates, or technical support—however, messaging and analytics will continue to function as normal. To learn more, see [Introducing the New Braze Swift SDK](https://www.braze.com/resources/articles/introducing-the-new-braze-swift-sdk).
# Outras personalizações do SDK {#other-sdk-customizations}
## Nível de registro da Braze {#braze-log-level}
O nível de registro padrão para o Braze iOS SDK é mínimo, ou `8` no gráfico a seguir. Esse nível suprime a maioria dos registros para que nenhuma informação sensível seja registrada em um aplicativo lançado em produção.
Consulte a seguinte lista de níveis de registro disponíveis:
### Níveis de registro {#log-levels}
| Nível | Descrição |
|----------|-------------|
| 0 | Verbose. Todas as informações de registro serão registradas no console do iOS. |
| 1 | Depuração. As informações de depuração e de nível superior serão registradas no console do iOS. |
| 2 | Aviso. As informações de aviso e de nível superior serão registradas no console do iOS. |
| 4 | Erro. As informações de erro e de nível superior serão registradas no console do iOS. |
| 8 | Mínimo. O mínimo de informações será registrado no console do iOS. A configuração padrão do SDK. |
{: .reset-td-br-1 .reset-td-br-2 aria-label="Log levels" }
### Registro detalhado {#verbose-logging}
É possível configurar o nível de registro para qualquer valor disponível. No entanto, definir o nível de registro como verbose, ou `0`, pode ser muito útil para depurar problemas com a sua integração. Esse nível é destinado apenas a ambientes de desenvolvimento e não deve ser definido em um aplicativo lançado. O registro detalhado não enviará nenhuma informação extra ou nova do usuário para a Braze.
### Definição do nível de registro {#setting-log-level}
O nível de registro pode ser atribuído em tempo de compilação ou em tempo de execução:
Adicione um dicionário chamado `Braze` ao seu arquivo `Info.plist`. No dicionário `Braze`, adicione a subentrada string `LogLevel` e defina o valor como `0`.
**Note:**
Antes do Braze iOS SDK v4.0.2, a chave do dicionário `Appboy` deve ser usada no lugar de `Braze`.
Exemplo do conteúdo de `Info.plist`:
```
BrazeLogLevel0
```
Adicione o `ABKLogLevelKey` dentro do parâmetro `appboyOptions` passado para `startWithApiKey:inApplication:withLaunchOptions:withAppboyOptions:`. Defina seu valor como o número inteiro `0`.
```objc
NSMutableDictionary *appboyOptions = [NSMutableDictionary dictionary];
appboyOptions[ABKLogLevelKey] = @(0);
[Appboy startWithApiKey:@"YOUR-API-KEY"
inApplication:application
withLaunchOptions:launchOptions
withAppboyOptions:appboyOptions];
```
```swift
let appboyOptions: [AnyHashable: Any] = [
ABKLogLevelKey : 0
]
Appboy.start(withApiKey: "YOUR-API-KEY", in:application, withLaunchOptions:launchOptions, withAppboyOptions:appboyOptions)
```
**Note:**
O nível de registro só pode ser definido em tempo de execução com o Braze iOS SDK v4.4.0 ou mais recente. Se estiver usando uma versão anterior do SDK, defina o nível de registro no momento da compilação.
## Coleta opcional de IDFV - Swift {#optional-idfv-collection-swift}
Nas versões anteriores do Braze iOS Swift SDK, o campo IDFV (Identifier for Vendor) era coletado automaticamente como o ID do dispositivo do usuário.
A partir do Swift SDK v5.7.0, o campo IDFV pode ser desativado opcionalmente e, em vez disso, a Braze definirá um UUID aleatório como o ID do dispositivo. Para saber mais, consulte [Coleta de IDFV](https://www.braze.com/docs/pt-br/pt-br/developer_guide/analytics/managing_data_collection/?sdktab=swift).
## Coleta opcional de IDFA {#optional-idfa-collection}
A coleta de IDFA é opcional no SDK da Braze e fica desativada por padrão. A coleta de IDFA só é necessária na Braze se você pretender usar nossas [integrações de atribuição da instalação](https://www.braze.com/docs/pt-br/pt-br/partners/message_orchestration/attribution/adjust/). Se você optar por armazenar seu IDFA, nós o armazenaremos gratuitamente, para que você possa aproveitar essas opções imediatamente após o lançamento, sem trabalho de desenvolvimento adicional.
Por isso, recomendamos que você continue coletando o IDFA se atender a qualquer um dos critérios a seguir:
- Você está atribuindo a instalação do app a um anúncio veiculado anteriormente
- Você está atribuindo uma ação no aplicativo a um anúncio veiculado anteriormente
### iOS 14.5 AppTrackingTransparency
A Apple exige que os usuários façam opt-in por meio de uma solicitação de permissão para coletar o IDFA.
Para coletar o IDFA, além de implementar nosso protocolo `ABKIDFADelegate`, seu aplicativo precisará solicitar autorização do usuário usando o `ATTrackingManager` da Apple no framework de transparência de rastreamento do app. Consulte o [artigo sobre privacidade do usuário](https://developer.apple.com/app-store/user-privacy-and-data-use/) da Apple para saber mais.
A solicitação de autorização de transparência de rastreamento do app requer uma entrada `Info.plist` para explicar o uso do identificador:
```
NSUserTrackingUsageDescriptionTo retarget ads and build a global profile to better serve you things you would like.
```
### Implementação da coleta de IDFA {#implementing-idfa-collection}
Siga estas etapas para implementar a coleta de IDFA:
##### Etapa 1: Implementar o ABKIDFADelegate {#step-1-implement-abkidfadelegate}
Crie uma classe que esteja em conformidade com o protocolo [`ABKIDFADelegate`](https://github.com/Appboy/appboy-ios-sdk/blob/master/AppboyKit/include/ABKIDFADelegate.h):
```objc
#import "IDFADelegate.h"
#import
#import
@implementation IDFADelegate
- (NSString *)advertisingIdentifierString {
return [[[ASIdentifierManager sharedManager] advertisingIdentifier] UUIDString];
}
- (BOOL)isAdvertisingTrackingEnabledOrATTAuthorized {
if (@available(iOS 14, *)) {
return [ATTrackingManager trackingAuthorizationStatus] == ATTrackingManagerAuthorizationStatusAuthorized;
}
return [[ASIdentifierManager sharedManager] isAdvertisingTrackingEnabled];
}
@end
```
```swift
import Appboy_iOS_SDK
import AdSupport
import AppTrackingTransparency
class IDFADelegate: NSObject, ABKIDFADelegate {
func advertisingIdentifierString() -> String {
return ASIdentifierManager.shared().advertisingIdentifier.uuidString
}
func isAdvertisingTrackingEnabledOrATTAuthorized() -> Bool {
if #available(iOS 14, *) {
return ATTrackingManager.trackingAuthorizationStatus == ATTrackingManager.AuthorizationStatus.authorized
}
return ASIdentifierManager.shared().isAdvertisingTrackingEnabled
}
}
```
##### Etapa 2: Definir o delegado durante a inicialização da Braze {#step-2-set-the-delegate-during-braze-initialization}
No dicionário `appboyOptions` passado para `startWithApiKey:inApplication:withAppboyOptions:`, defina a chave `ABKIDFADelegateKey` como uma instância da sua classe em conformidade com `ABKIDFADelegate`.
## Tamanho aproximado do SDK do iOS {#ios-sdk-size}
O tamanho aproximado do arquivo do framework do iOS SDK é de 30 MB, e o tamanho aproximado do .ipa (adição ao arquivo do app) está entre 1 MB e 2 MB.
A Braze mede o tamanho do nosso iOS SDK observando o efeito do SDK no tamanho do `.ipa`, de acordo com as [recomendações da Apple sobre tamanho de apps](https://developer.apple.com/library/content/qa/qa1795/_index.html). Se estiver calculando a adição de tamanho do iOS SDK ao seu aplicativo, recomendamos seguir [Obter um relatório de tamanho do app](https://developer.apple.com/library/content/qa/qa1795/_index.html) para comparar a diferença de tamanho no seu `.ipa` antes e depois da integração do Braze iOS SDK. Ao comparar os tamanhos do relatório de afinamento de apps, também recomendamos analisar os tamanhos de apps para arquivos `.ipa` afinados, pois os arquivos `.ipa` universais serão maiores do que os binários baixados da App Store e instalados nos dispositivos dos usuários.
**Note:**
Se estiver integrando via CocoaPods com `use_frameworks!`, defina `Enable Bitcode = NO` nas configurações de build do alvo para obter um dimensionamento preciso.
# Guia de integração do SDK do Braze para iOS (opcional)
Source: /docs/pt-br/developer_guide/platforms/legacy_sdks/ios/initial_sdk_setup/ios_sdk_integration/index.md
**Warning:**
[AppboyKit](https://github.com/Appboy/appboy-ios-sdk) (also known as the Objective-C SDK) is no longer supported and has been replaced by the [Swift SDK](https://www.braze.com/docs/pt-br/pt-br/developer_guide/sdk_integration/?sdktab=swift). It will no longer receive new features, bug fixes, security updates, or technical support—however, messaging and analytics will continue to function as normal. To learn more, see [Introducing the New Braze Swift SDK](https://www.braze.com/resources/articles/introducing-the-new-braze-swift-sdk).
# Guia de integração do SDK do Braze para iOS
> Este guia opcional de integração do iOS leva você a uma jornada passo a passo sobre as práticas recomendadas de configuração ao integrar pela primeira vez o SDK do iOS e seus componentes principais em seu aplicativo. Este guia o ajudará a criar um arquivo auxiliar `BrazeManager.swift` que desacoplará todas as dependências do SDK da Braze para iOS do restante do seu código de produção, resultando em um `import AppboyUI` em todo o seu aplicativo. Essa abordagem limita os problemas decorrentes do excesso de importações de SDK, facilitando o rastreamento, a depuração e a alteração do código.
**Important:**
Este guia pressupõe que você já tenha [adicionado o SDK](https://www.braze.com/docs/pt-br/pt-br/developer_guide/platforms/legacy_sdks/ios/initial_sdk_setup/overview/) ao seu projeto Xcode.
## Visão geral da integração
As etapas a seguir o ajudam a criar um arquivo auxiliar `BrazeManager` para o qual seu código de produção faz chamadas. Esse arquivo auxiliar tratará de todas as dependências relacionadas ao Braze, adicionando várias extensões para os seguintes tópicos de integração listados. Cada tópico incluirá etapas de guias horizontais e trechos de código em Swift e Objective C. Observe que as etapas do cartão de conteúdo e da mensagem no app não são necessárias para a integração se você não planeja usar esses canais em seu aplicativo.
- [Criar BrazeManager.swift](#create-brazemanagerswift)
- [Inicializar o SDK](#initialize-the-sdk)
- [Notificações por push](#push-notifications)
- [Acessar variáveis e métodos do usuário](#access-user-variables-and-methods)
- [Análise de dados](#log-analytics)
- [Mensagens no app (opcional)](#in-app-messages)
- [Cartões de conteúdo (opcional)](#content-cards)
- [Próximas etapas](#next-steps)
### Criar BrazeManager.swift
##### Criar BrazeManager.swift
Para construir seu arquivo `BrazeManager.swift`, crie um novo arquivo Swift chamado _BrazeManager_ para adicionar ao seu projeto no local desejado. Em seguida, substitua `import Foundation` por `import AppboyUI` para SPM (`import Appboy_iOS_SDK` para CocoaPods) e crie uma classe `BrazeManager` que será usada para hospedar todos os métodos e variáveis relacionados à Braze. `Appboy_iOS_SDK`
**Note:**
- `BrazeManager` é uma classe `NSObject` e não um struct, portanto, pode estar em conformidade com os delegates ABK, como o `ABKInAppMessageUIDelegate`.
- O `BrazeManager` é uma classe singleton por padrão, de modo que apenas uma instância dessa classe será usada. Isso é feito para fornecer um ponto de acesso unificado ao objeto.
1. Adicione uma variável estática chamada _shared_ que inicializa a classe `BrazeManager`. É garantido que isso seja iniciado de forma preguiçosa apenas uma vez.
2. Em seguida, adicione uma variável constante privada chamada _apiKey_ e defina-a como a chave de API de seu espaço de trabalho no dashboard da Braze.
3. Adicione uma variável computada privada chamada _appboyOptions_, que armazenará valores de configuração para o SDK. Ele ficará vazio por enquanto.
```swift
class BrazeManager: NSObject {
// 1
static let shared = BrazeManager()
// 2
private let apikey = "YOUR-API-KEY"
// 3
private var appboyOptions: [String:Any] {
return [:]
}
}
```
```objc
@implementation BrazeManager
// 1
+ (instancetype)shared {
static BrazeManager *shared = nil;
static dispatch_once_t onceToken;
dispatch_once(&onceToken, ^{
shared = [[BrazeManager alloc] init];
// Do any other initialisation stuff here
});
return shared;
}
// 2
- (NSString *)apiKey {
return @"YOUR-API-KEY";
}
// 3
- (NSDictionary *)appboyOptions {
return [NSDictionary dictionary];
}
```
### Inicializar o SDK
##### Inicializar o SDK a partir de BrazeManager.swift
Em seguida, você deve inicializar o SDK. Este guia pressupõe que você já tenha [adicionado o SDK](https://www.braze.com/docs/pt-br/pt-br/developer_guide/platforms/legacy_sdks/ios/initial_sdk_setup/overview/) ao seu projeto Xcode. Você também deve ter seu [endpoint de SDK do espaço de trabalho](https://www.braze.com/docs/pt-br/pt-br/developer_guide/platform_integration_guides/ios/initial_sdk_setup/completing_integration/#step-2-specify-your-data-cluster) e [`LogLevel`](https://www.braze.com/docs/pt-br/pt-br/developer_guide/platform_integration_guides/ios/initial_sdk_setup/other_sdk_customizations/#braze-log-level) definidos em seu arquivo `Info.plist` ou em `appboyOptions`.
Adicione o método `didFinishLaunchingWithOptions` do arquivo `AppDelegate.swift` sem um tipo de retorno em seu arquivo `BrazeManager.swift`. Ao criar um método semelhante no arquivo `BrazeManager.swift`, não haverá uma declaração `import AppboyUI` em seu arquivo `AppDelegate.swift`.
Em seguida, inicialize o SDK usando suas variáveis recém-declaradas `apiKey` e `appboyOptions`.
**Important:**
A inicialização deve ser feita na thread principal.
```swift
func application(_ application: UIApplication, didFinishLaunchingWithOptions launchOptions: [UIApplication.LaunchOptionsKey: Any]?) {
Appboy.start(withApiKey: apikey, in: application, withLaunchOptions: launchOptions, withAppboyOptions: appboyOptions)
}
```
```objc
- (void)application:(UIApplication *)application didFinishLaunchingWithOptions:(NSDictionary *)launchOptions {
[Appboy startWithApiKey:[self apiKey] inApplication:application withLaunchOptions:launchOptions withAppboyOptions:[self appboyOptions]];
}
```
##### Lidar com a inicialização do Appboy no AppDelegate.swift
Em seguida, volte ao arquivo `AppDelegate.swift` e adicione o seguinte trecho de código no método `didFinishLaunchingWithOptions` do AppDelegate para tratar da inicialização do Appboy no arquivo auxiliar `BrazeManager.swift`. Lembre-se de que não há necessidade de adicionar uma declaração `import AppboyUI` no site `AppDelegate.swift`.
```swift
func application(
_ application: UIApplication,
didFinishLaunchingWithOptions launchOptions: [UIApplication.LaunchOptionsKey: Any]?
) -> Bool {
// Override point for customization after application launch
BrazeManager.shared.application(application, didFinishLaunchingWithOptions: launchOptions)
return true
}
```
```objc
- (BOOL)application:(UIApplication *)application didFinishLaunchingWithOptions:(NSDictionary *)launchOptions {
// Override point for customization after application launch
[[BrazeManager shared] application:application didFinishLaunchingWithOptions:launchOptions];
return YES;
}
```
**Checkpoint:**
Prossiga para compilar seu código e executar seu aplicativo.
Nesse ponto, o SDK deve estar funcionando. No seu dashboard, observe se as sessões estão sendo registradas antes de avançar mais.
### Notificações por push
##### Adicionar certificado push
Navegue até seu espaço de trabalho existente no dashboard do Braze. Em **Push Notification Settings (Configurações de notificações por push** ), faça upload do arquivo de certificado push no dashboard do Braze e salve-o.
{: style="max-width:60%;"}
**Important:**
Não perca o ponto de controle dedicado no final dessa etapa!
##### Registre-se para receber notificações por push
Em seguida, registre-se para receber notificações por push. Este guia pressupõe que você tenha configurado [suas credenciais push corretamente](https://www.braze.com/docs/pt-br/pt-br/developer_guide/platforms/legacy_sdks/ios/push_notifications/integration/) no portal do desenvolvedor da Apple e no projeto Xcode.
O código para registrar notificações por push será adicionado ao método `didFinishLaunching...` no arquivo `BrazeManager.swift`. Seu código de inicialização deve ser parecido com o seguinte:
1. Configure o conteúdo para solicitar autorização para interagir com o usuário. Essas opções estão listadas como exemplo.
2. Solicite autorização para enviar notificações por push aos seus usuários. A resposta do usuário para permitir ou negar notificações por push é rastreada na variável `granted`.
3. Encaminhe os resultados da autorização por push para o Braze depois que o usuário interagir com o prompt de notificação.
4. Inicie o processo de registro com APNs; isso deve ser feito no thread principal. Se o registro for bem-sucedido, o app chamará o método `didRegisterForRemoteNotificationsWithDeviceToken` do seu objeto `AppDelegate`.
```swift
func application(_ application: UIApplication, didFinishLaunchingWithOptions launchOptions:[UIApplication.LaunchOptionsKey:Any]?) {
Appboy.start(withAPIKey: apikey, in: application, withLaunchOptions: launchOptions, withAppboyOptions: appboyOptions)
// 1
let options: UNAuthorizationOptions = [.alert, .sound, .badge]
// 2
UNUserNotificationCenter.current().requestAuthorization(option: options) { (granted, error) in
// 3
Appboy.sharedInstance()?.pushAuthorization(fromUserNotificationCenter: granted)
}
// 4
UIApplications.shared.registerForRemoteNotificiations()
}
```
```objc
- (void)application:(UIApplication *)application didFinishLaunchingWithOptions:(NSDictionary *)launchOptions {
[Appboy startWithApiKey:[self apiKey] inApplication:application withLaunchOptions:launchOptions withAppboyOptions:[self appboyOptions]];
// 1
UNAuthorizationOptions options = (UNAuthorizationOptionSound | UNAuthorizationOptionAlert | UNAuthorizationOptionBadge);
// 2
[[UNUserNotificationCenter currentNotificationCenter] requestAuthorizationWithOptions:options completionHandler:^(BOOL granted, NSError * _Nullable error) {
// 3
[[Appboy sharedInstance] pushAuthorizationFromUserNotificationCenter:granted];
}];
// 4
[[UIApplication sharedApplication] registerForRemoteNotifications];
}
```
**Checkpoint:**
Prossiga para compilar seu código e executar seu aplicativo.
- No seu app, confirme se está sendo solicitado a receber notificações por push antes de prosseguir.
- Se não for solicitado, tente excluir e reinstalar o app para garantir que o aviso de notificação por push não tenha sido exibido anteriormente.
Observe se está sendo solicitado a receber notificações por push antes de avançar mais.
##### Encaminhar métodos de notificação por push
Em seguida, encaminhe os métodos de notificações por push do sistema de `AppDelegate.swift` para `BrazeManager.swift` para serem tratados pelo SDK da Braze para iOS.
###### Etapa 1: Criar extensão para o código de notificação por push
Crie uma extensão para o seu código de notificação por push no arquivo `BrazeManager.swift` para que ele seja lido de forma mais organizada quanto à finalidade que está sendo atendida no arquivo auxiliar, da seguinte forma:
1. Seguindo o padrão de não incluir uma instrução `import AppboyUI` em seu arquivo `AppDelegate`, trataremos dos métodos de notificações por push no arquivo `BrazeManager.swift`. Os tokens de dispositivo do usuário precisarão ser passados para o Braze a partir do método `didRegisterForRemote...`. Esse método é necessário para implementar notificações por push silenciosas. Em seguida, adicione o mesmo método do site `AppDelegate` em sua classe `BrazeManager`.
2. Adicione a seguinte linha dentro do método para registrar o token do dispositivo no Braze. Isso é necessário para que a Braze associe o token ao dispositivo atual.
```swift
// MARK - Push Notifications
extension BrazeManager {
// 1
func application(
_ application: UIApplication,
didRegisterForRemoteNotificationsWithDeviceToken deviceToken: Data
) {
// 2
Appboy.sharedInstance().?registerDeviceToken(deviceToken)
}
}
```
```objc
// MARK - Push Notifications
// 1
- (void)application:(UIApplication *)application didRegisterForRemoteNotificationsWithDeviceToken:(NSData *)deviceToken {
// 2
[[Appboy sharedInstance] registerDeviceToken:deviceToken];
}
```
###### Etapa 2: Suporte a notificações remotas
Na aba **Assinatura & Capacidades**, adicione suporte a **Modos em segundo plano** e selecione **Notificações remotas** para começar a oferecer suporte a notificações push remotas originadas do Braze.

###### Etapa 3: Manuseio de notificações remotas
O SDK da Braze pode lidar com notificações por push remotas originadas da Braze. Encaminhe as notificações remotas para a Braze; o SDK ignorará automaticamente as notificações por push que não forem originadas na Braze. Adicione o seguinte método ao seu arquivo `BrazeManager.swift` na extensão de notificação por push.
```swift
func application(
_ application: UIApplication,
didReceiveRemoteNotification userInfo: [AnyHashable : Any],
fetchCompletionHandler completionHandler: @escaping (UIBackgroundFetchResult) -> Void
) {
Appboy.sharedInstance()?.register(
application,
didReceiveRemoteNotification: userInfo,
fetchCompletionHandler: completionHandler
)
}
```
```objc
- (void)application:(UIApplication *)application didReceiveRemoteNotification:(NSDictionary *)userInfo fetchCompletionHandler:(void (^)(UIBackgroundFetchResult))completionHandler {
[[Appboy sharedInstance] registerApplication:application didReceiveRemoteNotification:userInfo fetchCompletionHandler:completionHandler];
}
```
###### Etapa 4: Encaminhar respostas de notificação
O SDK da Braze pode lidar com a resposta de notificações por push originadas na Braze. Encaminhe a resposta das notificações para a Braze; o SDK ignorará automaticamente as respostas das notificações por push que não forem originadas na Braze. Adicione o seguinte método ao seu arquivo `BrazeManager.swift`:
```swift
func userNotificationCenter(
_ center: UNUserNotificationCenter,
didReceive response: UNNotificationResponse,
withCompletionHandler completionHandler: @escaping () -> Void
) {
Appboy.sharedInstance()?.userNotificationCenter(
center,
didReceive: response,
withCompletionHandler: completionHandler
)
}
```
```objc
- (void)userNotificationCenter:(UNUserNotificationCenter *)center
didReceiveNotificationResponse:(UNNotificationResponse *)response
withCompletionHandler:(void (^)(void))completionHandler {
[[Appboy sharedInstance] userNotificationCenter:center
didReceiveNotificationResponse:response
withCompletionHandler:completionHandler];
}
```
**Checkpoint:**
Prossiga para compilar seu código e executar seu aplicativo.
Tente enviar a si mesmo uma notificação por push a partir do dashboard do Braze e observe se as análises de dados estão sendo registradas a partir das notificações por push antes de avançar mais.
### Acessar variáveis e métodos do usuário
##### Criar variáveis e métodos de usuário
Em seguida, você desejará ter acesso fácil às variáveis e aos métodos do site `ABKUser`. Crie uma extensão para o seu código de usuário no arquivo `BrazeManager.swift` para que ele seja lido de forma mais organizada quanto à finalidade do arquivo auxiliar, da seguinte forma:
1. Um objeto `ABKUser` representa um usuário conhecido ou anônimo no seu aplicativo iOS. Adicione uma variável computada para recuperar o `ABKUser`; essa variável será reutilizada para recuperar variáveis sobre o usuário.
2. Consulte a variável do usuário para acessar facilmente o site `userId`. Entre as outras variáveis, o objeto `ABKUser` é responsável por (`firstName`, `lastName`, `phone`, `homeCity`, etc.)
3. Defina o usuário chamando `changeUser()` com um `userId` correspondente.
```swift
// MARK: - User
extension BrazeManager {
// 1
var user: ABKUser? {
return Appboy.sharedInstance()?.user
}
// 2
var userId: String? {
return user?.userID
}
// 3
func changeUser(_ userId: String) {
Appboy.sharedInstance()?.changeUser(userId)
}
}
```
```objc
// MARK: - User
// 1
- (ABKUser *)user {
return [[Appboy sharedInstance] user];
}
// 2
- (NSString *)userId {
return [self user].userID;
}
// 3
- (void)changeUser:(NSString *)userId {
[[Appboy sharedInstance] changeUser:userId];
}
```
**Checkpoint:**
Prossiga para compilar seu código e executar seu aplicativo.
Tente identificar os usuários de um login/inscrição bem-sucedido. Certifique-se de ter um sólido entendimento do que é e do que não é um identificador de usuário apropriado.
No seu dashboard, observe se o identificador do usuário está registrado antes de prosseguir.
### Análise de dados
##### Criar método de evento personalizado de registro
Com base no seguinte método do SDK da Braze `logCustomEvent`, crie um método correspondente.
**Braze `logCustomEvent` método de referência**
Isso foi projetado porque somente o arquivo `BrazeManager.swift` pode acessar diretamente os métodos do SDK da Braze para iOS. Portanto, ao criar um método correspondente, o resultado é o mesmo e é feito sem a necessidade de nenhuma dependência direta do SDK da Braze para iOS em seu código de produção.
```
open func logCustomEvent(_ eventName: String, withProperties properties: [AnyHashable : Any]?)
```
**Método de correspondência**
Registre eventos personalizados do objeto `Appboy` no Braze. `Properties` é um parâmetro opcional com um valor padrão de nil. Não é necessário que os eventos personalizados tenham propriedades, mas é necessário que tenham um nome.
```swift
func logCustomEvent(_ eventName: String, withProperties properties: [AnyHashable: Any]? = nil) {
Appboy.sharedInstance()?.logCustomEvent(eventName, withProperties: properties)
}
```
```objc
- (void)logCustomEvent:(NSString *)eventName withProperties:(nullable NSDictionary *)properties {
[[Appboy sharedInstance] logCustomEvent:eventName withProperties:properties];
}
```
##### Criar método de atributos personalizados de registro
O SDK pode registrar vários tipos como atributos personalizados. Não há necessidade de criar métodos auxiliares para cada tipo de valor que pode ser definido. Em vez disso, exponha apenas um método que possa filtrar até o valor apropriado.
```
- (BOOL)setCustomAttributeWithKey:(NSString *)key andBOOLValue:(BOOL)value;
- (BOOL)setCustomAttributeWithKey:(NSString *)key andIntegerValue:(NSIntenger)value;
- (BOOL)setCustomAttributeWithKey:(NSString *)key andDoubleValue:(double)value;
- (BOOL)setCustomAttributeWithKey:(NSString *)key andStringValue:(NSString *)value;
- (BOOL)setCustomAttributeWithKey:(NSString *)key andDateValue:(NSDate *)value;
```
Os atributos personalizados são registrados a partir do objeto `ABKUser`.
Crie **um método** que possa abranger todos os tipos disponíveis que podem ser definidos para uma atribuição. Adicione esse método em seu arquivo `BrazeManager.swift` na extensão de análise de dados. Isso pode ser feito filtrando os tipos de atributos personalizados válidos e chamando o método associado ao tipo correspondente.
- O parâmetro `value` é um tipo genérico que está em conformidade com o protocolo `Equatable`. Isso é feito explicitamente, portanto, se o tipo não for o que o SDK da Braze para iOS espera, haverá um erro de tempo de compilação.
- Os parâmetros `key` e `value` são parâmetros opcionais que serão desembrulhados condicionalmente no método. Essa é apenas uma maneira de garantir que valores não nulos sejam passados para o SDK da Braze para iOS.
```swift
func setCustomAttributeWithKey(_ key: String?, andValue value: T?) {
guard let key = key, let value = value else { return }
switch value.self {
case let value as Date:
user?.setCustomAttributeWithKey(key, andDateValue: value)
case let value as Bool:
user?.setCustomAttributeWithKey(key, andBOOLValue: value)
case let value as String:
user?.setCustomAttributeWithKey(key, andStringValue: value)
case let value as Double:
user?.setCustomAttributeWithKey(key, andDoubleValue: value)
case let value as Int:
user?.setCustomAttributeWithKey(key, andIntegerValue: value)
default:
return
}
}
```
```objc
- (void)setCustomAttributeWith:(NSString *)key andValue:(id)value {
if ([value isKindOfClass:[NSDate class]]) {
[[self user] setCustomAttributeWithKey:key andDateValue:value];
} else if ([value isKindOfClass:[NSString class]]) {
[[self user] setCustomAttributeWithKey:key andStringValue:value];
} else if ([value isKindOfClass:[NSNumber class]]) {
if (strcmp([value objCType], @encode(double)) == 0) {
[[self user] setCustomAttributeWithKey:key andDoubleValue:[value doubleValue]];
} else if (strcmp([value objCType], @encode(int)) == 0) {
[[self user] setCustomAttributeWithKey:key andIntegerValue:[value integerValue]];
} else if ([value boolValue]) {
[[self user] setCustomAttributeWithKey:key andBOOLValue:[value boolValue]];
}
}
}
```
##### Criar método de compra de registro
Em seguida, com base no seguinte método do SDK da Braze `logPurchase`, crie um método correspondente.
**Braze `logPurchase` método de referência**
Isso foi projetado porque somente o arquivo `BrazeManager.swift` pode acessar diretamente os métodos do SDK da Braze para iOS. Portanto, ao criar um método correspondente, o resultado é o mesmo e é feito sem a necessidade de nenhuma dependência direta do SDK da Braze para iOS em seu código de produção.
```
open func logPurchase(_ productIdentifier: String, inCurrency currency: String, atPrice price: NSDecimalNumber, withoutQuantity quantity: UInt)
```
**Método de correspondência**
Registre as compras do objeto `Appboy` para a Braze. O SDK tem vários métodos para registrar compras, e este é apenas um exemplo. Esse método também lida com a criação dos objetos `NSDecimal` e `UInt`. A maneira como você deseja lidar com essa parte depende de você, este é apenas um exemplo.
```swift
func logPurchase(_ productIdentifier: String, inCurrency currency: String, atPrice price:
String, withQuantity quantity: Int) {
Appboy.sharedInstance()?.logPurchase(productIdentifier, inCurrency: currency, atPrice: NSDecimalNumber(string: price), withQuantity: UInt(quantity))
}
```
```objc
- (void)logPurchase:(NSString *)productIdentifier inCurrency:(nonnull NSString *)currencyCode atPrice:(nonnull NSDecimalNumber *)price withQuantity:(NSUInteger)quantity {
[[Appboy sharedInstance] logPurchase:productIdentifier inCurrency:currencyCode atPrice:price withQuantity:quantity];
}
```
**Checkpoint:**
Prossiga para compilar seu código e executar seu aplicativo.
Tente registrar eventos personalizados.
No seu dashboard, observe se os eventos personalizados estão registrados antes de prosseguir.
### Mensagem no app
**Important:**
A seção de mensagens no app a seguir não é necessária para a integração se você não planeja usar esse canal no seu aplicativo.
##### Em conformidade com o ABKInAppMessageUIDelegate
Em seguida, ative o código de seu arquivo `BrazeManager.swift` para que esteja em conformidade com o `ABKInAppMessageUIDelegate` e manipule diretamente os métodos associados.
O código de conformidade com o delegate será adicionado aos métodos `didFinishLaunching...` no arquivo `BrazeManager.swift`. Seu código de inicialização deve ter a seguinte aparência:
```swift
func application(_ application: UIApplication, didFinishLaunchingWithOptions launchOptions: [UIApplication.LaunchOptionsKey: Any]?) {
Appboy.start(withApiKey: apiKey, in: application, withLaunchOptions: launchOptions, withAppboyOptions: appboyOptions)
let options: UNAuthorizationOptions = [.alert, .sound, .badge]
UNUserNotificationCenter.current().requestAuthorization(options: options) { (granted, error) in
Appboy.sharedInstance()?.pushAuthorization(fromUserNotificationCenter: granted)
}
UIApplication.shared.registerForRemoteNotifications()
Appboy.sharedInstance()?.inAppMessageController.inAppMessageUIController?.setInAppMessageUIDelegate?(self)
}
```
```objc
- (void)application:(UIApplication *)application didFinishLaunchingWithOptions:(NSDictionary *)launchOptions {
[Appboy startWithApiKey:[self apiKey] inApplication:application withLaunchOptions:launchOptions withAppboyOptions:[self appboyOptions]];
UNAuthorizationOptions options = (UNAuthorizationOptionSound | UNAuthorizationOptionAlert | UNAuthorizationOptionBadge);
[[UNUserNotificationCenter currentNotificationCenter] requestAuthorizationWithOptions:options completionHandler:^(BOOL granted, NSError * _Nullable error) {
[[Appboy sharedInstance] pushAuthorizationFromUserNotificationCenter:granted];
}];
[[UIApplication sharedApplication] registerForRemoteNotifications];
[[Appboy sharedInstance].inAppMessageController.inAppMessageUIController setInAppMessageUIDelegate:self];
}
```
##### Adicionar métodos delegados
Em seguida, crie uma extensão que esteja em conformidade com o site `ABKInAppMessageUIDelegate`.
Adicione o seguinte snippet à seção de análise de dados. Note que o objeto `BrazeManager.swift` está definido como o delegate; é nesse objeto que o arquivo `BrazeManager.swift` manipula todos os métodos `ABKInAppMessageUIDelegate`.
**Important:**
O site `ABKInAppMessageUIDelegate` não vem com nenhum método obrigatório, mas o seguinte é um exemplo de um.
```swift
// MARK: - ABKInAppMessage UI Delegate
extension AppboyManager: ABKInAppMessageUIDelegate{
func inAppMessageViewControllerWith(_ inAppMessage: ABKInAppMessage) -> ABKInAppMessageViewController {
switch inAppMessage {
case is ABKInAppMessageSlideup:
return ABKInAppMessageSlideupViewController(inAppMessage: inAppMessage)
case is ABKInAppMessageModal:
return ABKInAppMessageModalViewController(inAppMessage: inAppMessage)
case is ABKInAppMessageFull:
return ABKInAppMessageFullViewController(inAppMessage: inAppMessage)
case is ABKInAppMessageHTML:
return ABKInAppMessageHTMLViewController(inAppMessage: inAppMessage)
default:
return ABKInAppMessageViewController(inAppMessage: inAppMessage)
}
```
```objc
// MARK: - ABKInAppMessage UI Delegate
- (ABKInAppMessageViewController *)inAppMessageViewControllerWithInAppMessage:(ABKInAppMessage *)inAppMessage {
if ([inAppMessage isKindOfClass:[ABKInAppMessageSlideup class]]) {
return [[ABKInAppMessageSlideupViewController alloc] initWithInAppMessage:inAppMessage];
} else if ([inAppMessage isKindOfClass:[ABKInAppMessageModal class]]) {
return [[ABKInAppMessageModalViewController alloc] initWithInAppMessage:inAppMessage];
} else if ([inAppMessage isKindOfClass:[ABKInAppMessageFull class]]) {
return [[ABKInAppMessageFullViewController alloc] initWithInAppMessage:inAppMessage];
} else if ([inAppMessage isKindOfClass:[ABKInAppMessageHTML class]]) {
return [[ABKInAppMessageHTMLViewController alloc] initWithInAppMessage:inAppMessage];
}
return nil;
}
```
**Checkpoint:**
Prossiga para compilar seu código e executar seu aplicativo.
Tente enviar uma mensagem no app para você mesmo.
No arquivo `BrazeManager.swift`, defina um ponto de interrupção na entrada do método de exemplo `ABKInAppMessageUIDelegate`. Envie a si mesmo uma mensagem no app e confirme se o ponto de interrupção foi atingido antes de avançar mais.
### Cartões de conteúdo
**Important:**
A seção do cartão de conteúdo a seguir não é necessária para a integração se você não planeja usar esse canal no seu aplicativo.
##### Criar variáveis e métodos do cartão de conteúdo
Ative seu código de produção para exibir o controlador de visualização dos cartões de conteúdo sem a necessidade de instruções `import AppboyUI` desnecessárias.
Crie uma extensão para o código dos seus cartões de conteúdo no arquivo `BrazeManager.swift`, para que ele seja lido de forma mais organizada quanto à finalidade do arquivo auxiliar, da seguinte forma:
1. Exibir o site `ABKContentCardsTableViewController`. Um `navigationController` opcional é o único parâmetro necessário para apresentar ou fazer um push do controlador de visualizações.
2. Inicializar um objeto `ABKContentCardsTableViewController` e, opcionalmente, alterar o título. Você também deve adicionar o controlador de visualizações inicializado à pilha de navegação.
```swift
// MARK: - Content Cards
extension BrazeManager {
// 1
func displayContentCards(navigationController: UINavigationController?) {
// 2
let contentCardsVc = ABKContentCardsTableViewController()
contentCardsVc.title = "Content Cards"
navigationController?.pushViewController(contentCardsVc, animated: true)
}
}
```
```objc
// MARK: - Content Cards
// 1
- (void)displayContentCards:(UINavigationController *)navigationController {
// 2
ABKContentCardsTableViewController *contentCardsVc = [[ABKContentCardsTableViewController alloc] init];
contentCardsVc.title = @"Content Cards";
[navigationController pushViewController:contentCardsVc animated:YES];
}
```
**Checkpoint:**
Prossiga para compilar seu código e executar seu aplicativo.
Tente exibir o endereço `ABKContentCardsTableViewController` em seu aplicativo antes de prosseguir.
## Próximas etapas
Parabéns! Você concluiu este guia de práticas recomendadas de integração! Um exemplo de arquivo auxiliar `BrazeManager` pode ser encontrado no [GitHub](https://github.com/braze-inc/braze-growth-shares-ios-demo-app/blob/master/Braze-Demo/BrazeManager.swift).
Agora que você desacoplou todas as dependências do SDK da Braze para iOS do restante de seu código de produção, confira alguns de nossos guias de implementação avançada opcionais:
- [Guia de implementação de notificações por push avançadas](https://www.braze.com/docs/pt-br/pt-br/developer_guide/platforms/legacy_sdks/ios/push_notifications/implementation_guide/)
- [Guia de implementação de mensagens no app avançadas](https://www.braze.com/docs/pt-br/pt-br/developer_guide/platforms/legacy_sdks/ios/in-app_messaging/implementation_guide/)
- [Guia de implementação do cartão de conteúdo avançado](https://www.braze.com/docs/pt-br/pt-br/developer_guide/platforms/legacy_sdks/ios/content_cards/implementation_guide/)
# Integração push para iOS
Source: /docs/pt-br/developer_guide/platforms/legacy_sdks/ios/push_notifications/integration/index.md
**Warning:**
[AppboyKit](https://github.com/Appboy/appboy-ios-sdk) (also known as the Objective-C SDK) is no longer supported and has been replaced by the [Swift SDK](https://www.braze.com/docs/pt-br/pt-br/developer_guide/sdk_integration/?sdktab=swift). It will no longer receive new features, bug fixes, security updates, or technical support—however, messaging and analytics will continue to function as normal. To learn more, see [Introducing the New Braze Swift SDK](https://www.braze.com/resources/articles/introducing-the-new-braze-swift-sdk).
# Integração push {#push-integration}
## Etapa 1: Fazer upload do seu token APNs {#step-1-upload-your-apns-token}
Before you can send an iOS push notification using Braze, you need to upload your `.p8` push notification file, as described in [Apple's developer documentation](https://developer.apple.com/documentation/usernotifications/establishing-a-token-based-connection-to-apns):
1. In your Apple developer account, go to [**Certificates, Identifiers & Profiles**](https://developer.apple.com/account/ios/certificate).
2. Under **Keys**, select **All** and click the add button (+) in the upper-right corner.
3. Under **Key Description**, enter a unique name for the signing key.
4. Under **Key Services**, select the **Apple Push Notification service (APNs)** checkbox, then click **Continue**. Click **Confirm**.
5. Note the key ID. Click **Download** to generate and download the key. Make sure to save the downloaded file in a secure place, as you cannot download this more than once.
6. In Braze, go to **Settings** > **App Settings** and upload the `.p8` file under **Apple Push Certificate**. You can upload either your development or production push certificate. To test push notifications after your app is live in the App Store, its recommended to set up a separate workspace for the development version of your app.
7. When prompted, enter your app's [bundle ID](https://developer.apple.com/documentation/foundation/nsbundle/1418023-bundleidentifier), [key ID](https://developer.apple.com/help/account/manage-keys/get-a-key-identifier/), and [team ID](https://developer.apple.com/help/account/manage-your-team/locate-your-team-id). You'll also need to specify whether to send notifications to your app's development or production environment, which is defined by its provisioning profile.
8. When you're finished, select **Save**.
## Etapa 2: Ativar os recursos de push {#step-2-enable-push-capabilities}
Nas configurações do projeto, certifique-se de que, na guia **Capabilities**, o recurso de **Push Notifications** esteja ativado.

Se tiver certificados push de desenvolvimento e produção separados, desmarque a caixa **Automatically manage signing** na guia **General**. Isso permitirá que você escolha diferentes perfis de provisionamento para cada configuração de compilação, pois o recurso de assinatura automática de código do Xcode só faz a assinatura de desenvolvimento.

## Etapa 3: Registre-se para receber notificações por push {#step-3-register-for-push-notifications}
O exemplo de código apropriado deve ser incluído no método delegado `application:didFinishLaunchingWithOptions:` do seu app para que o dispositivo dos seus usuários se registre com APNs. Chame todo o código de integração push na thread principal do app.
A Braze também fornece categorias de push padrão para suporte ao botão de ação por push, que devem ser adicionadas manualmente ao seu código de registro de push. Consulte os [botões de ação por push](https://www.braze.com/docs/pt-br/pt-br/developer_guide/platforms/legacy_sdks/ios/push_notifications/customization/action_buttons/) para obter etapas adicionais de integração.
**Warning:**
Se você implementou um prompt de push personalizado, conforme descrito em nossas [práticas recomendadas de push](https://www.braze.com/docs/pt-br/pt-br/developer_guide/platforms/legacy_sdks/ios/push_notifications/troubleshooting/), certifique-se de chamar o seguinte código **toda vez que o aplicativo for executado** após a concessão de permissões de push ao seu aplicativo. **Os apps precisam se registrar novamente no APNs, pois [os tokens de dispositivos podem mudar arbitrariamente](https://developer.apple.com/library/ios/documentation/iPhone/Conceptual/iPhoneOSProgrammingGuide/BackgroundExecution/BackgroundExecution.html).**
### Usando o framework UserNotification (iOS 10+) {#using-usernotification-framework-ios-10}
Se estiver usando o framework `UserNotifications` (recomendado) lançado no iOS 10, adicione o seguinte código ao método `application:didFinishLaunchingWithOptions:` do delegado do seu app.
**Important:**
O seguinte exemplo de código inclui integração para autenticação push provisória (linhas 5 e 6). Se você não planeja usar autorização provisória no seu app, pode remover as linhas de código que adicionam `UNAuthorizationOptionProvisional` às opções de `requestAuthorization`. Visite [opções de notificação do iOS](https://www.braze.com/docs/pt-br/pt-br/user_guide/channels/push/platform_specific_resources/ios/notification_options/) para saber mais sobre a autenticação provisória push.
```objc
if (floor(NSFoundationVersionNumber) > NSFoundationVersionNumber_iOS_9_x_Max) {
UNUserNotificationCenter *center = [UNUserNotificationCenter currentNotificationCenter];
center.delegate = self;
UNAuthorizationOptions options = UNAuthorizationOptionAlert | UNAuthorizationOptionSound | UNAuthorizationOptionBadge;
if (@available(iOS 12.0, *)) {
options = options | UNAuthorizationOptionProvisional;
}
[center requestAuthorizationWithOptions:options
completionHandler:^(BOOL granted, NSError * _Nullable error) {
[[Appboy sharedInstance] pushAuthorizationFromUserNotificationCenter:granted];
}];
[[UIApplication sharedApplication] registerForRemoteNotifications];
} else {
UIUserNotificationSettings *settings = [UIUserNotificationSettings settingsForTypes:(UIUserNotificationTypeBadge | UIUserNotificationTypeAlert | UIUserNotificationTypeSound) categories:nil];
[[UIApplication sharedApplication] registerForRemoteNotifications];
[[UIApplication sharedApplication] registerUserNotificationSettings:settings];
}
```
```swift
if #available(iOS 10, *) {
let center = UNUserNotificationCenter.current()
center.delegate = self as? UNUserNotificationCenterDelegate
var options: UNAuthorizationOptions = [.alert, .sound, .badge]
if #available(iOS 12.0, *) {
options = UNAuthorizationOptions(rawValue: options.rawValue | UNAuthorizationOptions.provisional.rawValue)
}
center.requestAuthorization(options: options) { (granted, error) in
Appboy.sharedInstance()?.pushAuthorization(fromUserNotificationCenter: granted)
}
UIApplication.shared.registerForRemoteNotifications()
} else {
let types : UIUserNotificationType = [.alert, .badge, .sound]
let setting : UIUserNotificationSettings = UIUserNotificationSettings(types:types, categories:nil)
UIApplication.shared.registerUserNotificationSettings(setting)
UIApplication.shared.registerForRemoteNotifications()
}
```
**Warning:**
Você deve atribuir seu objeto delegado usando `center.delegate = self` de forma síncrona antes que seu app termine de iniciar, de preferência em `application:didFinishLaunchingWithOptions:`. Se não fizer isso, seu app pode perder notificações por push recebidas. Consulte a documentação da Apple [`UNUserNotificationCenterDelegate`](https://developer.apple.com/documentation/usernotifications/unusernotificationcenterdelegate) para saber mais.
### Sem o framework UserNotifications {#without-usernotifications-framework}
Se não estiver usando o framework `UserNotifications`, adicione o seguinte código ao método `application:didFinishLaunchingWithOptions:` do delegado do seu app:
```objc
UIUserNotificationSettings *settings = [UIUserNotificationSettings settingsForTypes:(UIUserNotificationTypeBadge | UIUserNotificationTypeAlert | UIUserNotificationTypeSound) categories:nil];
[[UIApplication sharedApplication] registerForRemoteNotifications];
[[UIApplication sharedApplication] registerUserNotificationSettings:settings];
```
```swift
let types : UIUserNotificationType = UIUserNotificationType.Badge | UIUserNotificationType.Sound | UIUserNotificationType.Alert
var setting : UIUserNotificationSettings = UIUserNotificationSettings(forTypes: types, categories: nil)
UIApplication.shared.registerUserNotificationSettings(setting)
UIApplication.shared.registerForRemoteNotifications()
```
## Etapa 4: Registrar tokens por push na Braze {#step-4-register-push-tokens-with-braze}
Quando o registro de APNs estiver concluído, o método a seguir deverá ser alterado para passar o `deviceToken` resultante para a Braze, de modo que o usuário fique habilitado para notificações por push:
Adicione o seguinte código ao seu método `application:didRegisterForRemoteNotificationsWithDeviceToken:`:
```objc
[[Appboy sharedInstance] registerDeviceToken:deviceToken];
```
Adicione o seguinte código ao método `application(_:didRegisterForRemoteNotificationsWithDeviceToken:)` do seu app:
```swift
Appboy.sharedInstance()?.registerDeviceToken(deviceToken)
```
**Important:**
O método delegado `application:didRegisterForRemoteNotificationsWithDeviceToken:` é chamado toda vez depois que `[[UIApplication sharedApplication] registerForRemoteNotifications]` é chamado. Se você estiver migrando para a Braze de outro serviço de push e o dispositivo do seu usuário já estiver registrado no APNs, este método coletará tokens de registros existentes na próxima vez que for chamado, e os usuários não precisarão aceitar novamente o push.
## Etapa 5: Ativar o tratamento de push {#step-5-enable-push-handling}
O código a seguir passa as notificações por push recebidas para a Braze e é necessário para o registro da análise de dados por push e o tratamento de links. Certifique-se de chamar todo o código de integração push na thread principal do seu aplicativo.
### iOS 10+
Ao desenvolver para iOS 10 ou posteriores, recomendamos integrar o framework `UserNotifications` e fazer o seguinte:
Adicione o seguinte código ao método `application:didReceiveRemoteNotification:fetchCompletionHandler:` do seu aplicativo:
```objc
[[Appboy sharedInstance] registerApplication:application
didReceiveRemoteNotification:userInfo
fetchCompletionHandler:completionHandler];
```
Em seguida, adicione o seguinte código ao método `(void)userNotificationCenter:didReceiveNotificationResponse:withCompletionHandler:` do seu app:
```objc
[[Appboy sharedInstance] userNotificationCenter:center
didReceiveNotificationResponse:response
withCompletionHandler:completionHandler];
```
**Tratamento de push em primeiro plano**
Para exibir uma notificação por push enquanto o app estiver em primeiro plano, implemente `userNotificationCenter:willPresentNotification:withCompletionHandler:`:
```objc
- (void)userNotificationCenter:(UNUserNotificationCenter *)center
willPresentNotification:(UNNotification *)notification
withCompletionHandler:(void (^)(UNNotificationPresentationOptions options))completionHandler {
if (@available(iOS 14.0, *)) {
completionHandler(UNNotificationPresentationOptionList | UNNotificationPresentationOptionBanner);
} else {
completionHandler(UNNotificationPresentationOptionAlert);
}
}
```
Se a notificação em primeiro plano for clicada, o delegado de push do iOS 10 `userNotificationCenter:didReceiveNotificationResponse:withCompletionHandler:` será chamado, e a Braze registrará um evento de clique de push.
Adicione o seguinte código ao método `application(_:didReceiveRemoteNotification:fetchCompletionHandler:)` do seu app:
```swift
Appboy.sharedInstance()?.register(application,
didReceiveRemoteNotification: userInfo,
fetchCompletionHandler: completionHandler)
```
Em seguida, adicione o seguinte código ao método `userNotificationCenter(_:didReceive:withCompletionHandler:)` do seu app:
```swift
Appboy.sharedInstance()?.userNotificationCenter(center,
didReceive: response,
withCompletionHandler: completionHandler)
```
**Tratamento de push em primeiro plano**
Para exibir uma notificação por push enquanto o app estiver em primeiro plano, implemente `userNotificationCenter(_:willPresent:withCompletionHandler:)`:
```swift
func userNotificationCenter(_ center: UNUserNotificationCenter,
willPresent notification: UNNotification,
withCompletionHandler completionHandler: @escaping (UNNotificationPresentationOptions) -> Void) {
if #available(iOS 14.0, *) {
completionHandler([.list, .banner]);
} else {
completionHandler([.alert]);
}
}
```
Se a notificação em primeiro plano for clicada, o delegado de push do iOS 10 `userNotificationCenter(_:didReceive:withCompletionHandler:)` será chamado, e a Braze registrará um evento de clique de push.
### Pré-iOS 10 {#pre-ios-10}
O iOS 10 atualizou o comportamento de modo que não chama mais `application:didReceiveRemoteNotification:fetchCompletionHandler:` quando um push é clicado. Por isso, se você não atualizar o desenvolvimento para o iOS 10 e posteriores e usar o framework `UserNotifications`, terá que chamar a Braze a partir de ambos os delegados de estilo antigo, o que é uma ruptura com a nossa integração anterior.
Para apps que utilizam SDKs < iOS 10, use as seguintes instruções:
Para ativar o rastreamento de abertura nas notificações por push, adicione o seguinte código ao método `application:didReceiveRemoteNotification:fetchCompletionHandler:` do seu app:
```objc
[[Appboy sharedInstance] registerApplication:application
didReceiveRemoteNotification:userInfo
fetchCompletionHandler:completionHandler];
```
Para dar suporte à análise de dados por push no iOS 10, você também deve adicionar o seguinte código ao método delegado `application:didReceiveRemoteNotification:` do seu app:
```objc
[[Appboy sharedInstance] registerApplication:application
didReceiveRemoteNotification:userInfo];
```
Para ativar o rastreamento de abertura nas notificações por push, adicione o seguinte código ao método `application(_:didReceiveRemoteNotification:fetchCompletionHandler:)` do seu app:
```swift
Appboy.sharedInstance()?.register(application,
didReceiveRemoteNotification: userInfo,
fetchCompletionHandler: completionHandler)
```
Para dar suporte à análise de dados por push no iOS 10, você também deve adicionar o seguinte código ao método delegado `application(_:didReceiveRemoteNotification:)` do seu app:
```swift
Appboy.sharedInstance()?.register(application,
didReceiveRemoteNotification: userInfo)
```
## Etapa 6: Deep linking {#step-6-deep-linking}
O deep linking de um push para o app é tratado automaticamente por meio da nossa documentação padrão de integração de push. Se quiser saber mais sobre como adicionar deep links a locais específicos em seu app, consulte nossos [casos de uso avançados](https://www.braze.com/docs/pt-br/pt-br/developer_guide/platform_integration_guides/ios/advanced_use_cases/linking/#linking-implementation).
## Etapa 7: Testes de unidade (opcional) {#step-7-unit-tests-optional}
Para adicionar cobertura de teste para as etapas de integração que você acabou de seguir, implemente [testes unitários de push](https://www.braze.com/docs/pt-br/pt-br/developer_guide/platforms/legacy_sdks/ios/push_notifications/unit_tests/).
# Personalização do push do iOS
Source: /docs/pt-br/developer_guide/platforms/legacy_sdks/ios/push_notifications/customization/index.md
# Botões de ação por push para iOS
Source: /docs/pt-br/developer_guide/platforms/legacy_sdks/ios/push_notifications/customization/action_buttons/index.md
**Warning:**
[AppboyKit](https://github.com/Appboy/appboy-ios-sdk) (also known as the Objective-C SDK) is no longer supported and has been replaced by the [Swift SDK](https://www.braze.com/docs/pt-br/pt-br/developer_guide/sdk_integration/?sdktab=swift). It will no longer receive new features, bug fixes, security updates, or technical support—however, messaging and analytics will continue to function as normal. To learn more, see [Introducing the New Braze Swift SDK](https://www.braze.com/resources/articles/introducing-the-new-braze-swift-sdk).
# Botões de ação {#push-action-buttons-integration}
O Braze iOS SDK aceita categorias de push padrão, incluindo suporte de manuseio de URL para cada botão de ação por push. Atualmente, as categorias padrão têm quatro conjuntos de botões de ação por push: `Accept`/`Decline`, `Yes`/`No`, `Confirm`/`Cancel` e `More`.

Para registrar nossas categorias de push padrão, siga as instruções de integração:
## Etapa 1: Adicionando categorias de push padrão do Braze
Use o código a seguir para se registrar em nossas categorias push padrão ao se [registrar no push](https://www.braze.com/docs/pt-br/pt-br/developer_guide/platform_integration_guides/ios/push_notifications/integration/#step-4-register-push-tokens-with-braze):
```objc
// For UserNotification.framework (iOS 10+ only)
NSSet *appboyCategories = [ABKPushUtils getAppboyUNNotificationCategorySet];
[[UNUserNotificationCenter currentNotificationCenter] setNotificationCategories:appboyCategories];
// For UIUserNotificationSettings (before iOS 10)
NSSet *appboyCategories = [ABKPushUtils getAppboyUIUserNotificationCategorySet];
UIUserNotificationSettings *settings = [UIUserNotificationSettings settingsForTypes:UIUserNotificationTypeBadge
categories:appboyCategories];
[[UIApplication sharedApplication] registerUserNotificationSettings:settings];
```
```swift
// For UserNotification.framework (iOS 10+ only)
let appboyCategories = ABKPushUtils.getAppboyUNNotificationCategorySet()
UNUserNotificationCenter.current().setNotificationCategories(appboyCategories)
// For UIUserNotificationSettings (before iOS 10)
let appboyCategories = ABKPushUtils.getAppboyUIUserNotificationCategorySet()
let settings = UIUserNotificationSettings.init(types: .badge, categories: appboyCategories)
UIApplication.shared.registerUserNotificationSettings(settings)
```
Clicar nos botões de ação por push com o modo de ativação em segundo plano apenas descartará a notificação e não abrirá o app. Na próxima vez que o usuário abrir o app, a análise de dados do clique do botão para essas ações será enviada para o servidor.
Se você quiser criar suas próprias categorias de notificação personalizadas, consulte [personalização do botão de ação](https://www.braze.com/docs/pt-br/pt-br/developer_guide/platform_integration_guides/ios/push_notifications/customization/action_buttons/#push-category-customization).
## Etapa 2: Ativar o manuseio interativo de push
Se você usa a estrutura `UNNotification` e implementou [delegados](https://www.braze.com/docs/pt-br/pt-br/developer_guide/platform_integration_guides/ios/push_notifications/integration/#step-5-enable-push-handling) do Braze, já deve ter esse método integrado.
Para ativar a manipulação de nossos botões de ação por push, incluindo análise de dados de cliques e roteamento de URL, adicione o seguinte código ao método delegado `(void)userNotificationCenter:didReceiveNotificationResponse:withCompletionHandler:` do seu app:
```objc
[[Appboy sharedInstance] userNotificationCenter:center
didReceiveNotificationResponse:response
withCompletionHandler:completionHandler];
```
```swift
Appboy.sharedInstance()?.userNotificationCenter(center,
didReceive: response,
withCompletionHandler: completionHandler)
```
Se você não estiver usando o UNNotification Framework, precisará adicionar o seguinte código ao `application:handleActionWithIdentifier:forRemoteNotification:completionHandler:` do seu app para ativar o manuseio do nosso botão de ação por push:
```objc
[[Appboy sharedInstance] getActionWithIdentifier:identifier
forRemoteNotification:userInfo
completionHandler:completionHandler];
```
```swift
Appboy.sharedInstance()?.getActionWithIdentifier(identifier,
forRemoteNotification: userInfo,,
completionHandler: completionHandler)
```
**Important:**
Recomendamos fortemente que as pessoas que usam `handleActionWithIdentifier` comecem a usar o framework `UNNotification`. Recomendamos isso devido à descontinuação de [`handleActionWithIdentifier`](https://developer.apple.com/documentation/uikit/uiapplicationdelegate/1623068-application?language=objc).
## Personalização da categoria push
Além de fornecer um conjunto de [categorias de notificação por push padrão](https://www.braze.com/docs/pt-br/pt-br/developer_guide/platforms/legacy_sdks/ios/push_notifications/customization/action_buttons/), o Braze oferece suporte a categorias e ações de notificação personalizadas. Depois de registrar categorias em seu aplicativo, você pode usar o dashboard da Braze para enviar categorias de notificação aos seus usuários.
Se não estiver usando a estrutura `UserNotifications`, consulte a documentação sobre [categorias alternativas](https://developer.apple.com/documentation/usernotifications/unnotificationcategory).
Essas categorias podem ser atribuídas a notificações por push por meio de nosso dashboard para disparar as configurações do botão de ação de seu design. Aqui está um exemplo que aproveita o endereço `LIKE_CATEGORY` exibido no dispositivo:

# Sons personalizados de notificações por push para iOS
Source: /docs/pt-br/developer_guide/platforms/legacy_sdks/ios/push_notifications/customization/custom_sounds/index.md
**Warning:**
[AppboyKit](https://github.com/Appboy/appboy-ios-sdk) (also known as the Objective-C SDK) is no longer supported and has been replaced by the [Swift SDK](https://www.braze.com/docs/pt-br/pt-br/developer_guide/sdk_integration/?sdktab=swift). It will no longer receive new features, bug fixes, security updates, or technical support—however, messaging and analytics will continue to function as normal. To learn more, see [Introducing the New Braze Swift SDK](https://www.braze.com/resources/articles/introducing-the-new-braze-swift-sdk).
# Sons personalizados
## Etapa 1: Hospedagem do som no app
Os sons de notificação por push personalizados devem ser hospedados localmente no pacote principal do aplicativo cliente. São aceitos os seguintes formatos de dados de áudio:
- PCM linear
- MA4
- µLaw
- aLaw
É possível empacotar os dados de áudio em um arquivo AIFF, WAV ou CAF. No Xcode, adicione o arquivo de som ao seu projeto como um recurso não localizado do pacote de aplicativos.
Você pode usar a ferramenta afconvert para converter sons. Por exemplo, para converter o som do sistema PCM linear de 16 bits Submarine.aiff para áudio IMA4 em um arquivo CAF, use o seguinte comando no terminal:
```bash
afconvert /System/Library/Sounds/Submarine.aiff ~/Desktop/sub.caf -d ima4 -f caff -v
```
Você pode inspecionar um som para determinar seu formato de dados abrindo-o no QuickTime Player e escolhendo **Mostrar Inspetor de Filme** no menu **Filme**.
Os sons personalizados devem ter menos de 30 segundos quando reproduzidos. Se um som personalizado estiver acima desse limite, o som padrão do sistema será reproduzido.
## Etapa 2: Fornecimento ao dashboard de um URL de protocolo para o som
Seu som deve ser hospedado localmente no app. Você deve especificar um URL de protocolo que direcione para o local do arquivo de som no app dentro do campo **Sound (Som** ) no criador do push. Especificar "padrão" neste campo reproduzirá o som de notificação padrão no dispositivo. Isso pode ser especificado por meio de nossa [API de envio de mensagens](https://www.braze.com/docs/pt-br/pt-br/api/endpoints/messaging/) ou de nosso dashboard em **Configurações** no criador de push, conforme ilustrado na captura de tela a seguir:

Se o arquivo de som especificado não existir ou se a palavra-chave “default” for inserida, a Braze usará o som de alerta padrão do dispositivo. Além de nosso dashboard, o som também pode ser configurado por meio de nossa [API de envio de mensagens](https://www.braze.com/docs/pt-br/pt-br/api/endpoints/messaging/). Consulte a documentação para desenvolvedores da Apple sobre a [preparação de sons de alerta personalizados](https://developer.apple.com/library/content/documentation/NetworkingInternet/Conceptual/RemoteNotificationsPG/SupportingNotificationsinYourApp.html) para obter informações adicionais.
# Notificações por push avançadas para iOS
Source: /docs/pt-br/developer_guide/platforms/legacy_sdks/ios/push_notifications/customization/rich_notifications/index.md
**Warning:**
[AppboyKit](https://github.com/Appboy/appboy-ios-sdk) (also known as the Objective-C SDK) is no longer supported and has been replaced by the [Swift SDK](https://www.braze.com/docs/pt-br/pt-br/developer_guide/sdk_integration/?sdktab=swift). It will no longer receive new features, bug fixes, security updates, or technical support—however, messaging and analytics will continue to function as normal. To learn more, see [Introducing the New Braze Swift SDK](https://www.braze.com/resources/articles/introducing-the-new-braze-swift-sdk).
# notificações ricas do iOS 10
O iOS 10 introduz a capacidade de enviar notificações por push com imagens, GIFs e vídeos. Para habilitar essa funcionalidade, os clientes devem criar um `Service Extension`, um novo tipo de extensão que ativa a modificação de uma carga útil push antes de ser exibida.
## Criação de uma extensão de serviço
Para criar uma [`Notification Service Extension`](https://developer.apple.com/reference/usernotifications/unnotificationserviceextension), acesse **File > New > Target** no Xcode e selecione **Notification Service Extension**.
{: style="max-width:90%"}
Certifique-se de que **Embed In Application** esteja definido para incorporar a extensão em seu aplicativo.
## Configuração da extensão de serviço
O `Notification Service Extension` é um binário próprio que acompanha seu app. Ele deve ser configurado no [Portal Apple Developer](https://developer.apple.com) com seu próprio ID de app e perfil de provisionamento.
O ID do pacote do `Notification Service Extension` deve ser diferente do ID do pacote do direcionamento do seu aplicativo principal. Por exemplo, se o ID do pacote do seu app for `com.company.appname`, você poderá usar `com.company.appname.AppNameServiceExtension` para a extensão do serviço.
### Configurar a extensão de serviço para funcionar com o Braze
A Braze envia uma carga útil de anexo no payload de APNs sob a chave `ab` que usamos para configurar, baixar e exibir conteúdo avançado. Por exemplo:
```json
{
"ab" :
{
...
"att" :
{
"url" : "http://mysite.com/myimage.jpg",
"type" : "jpg"
}
},
"aps" :
{
...
}
}
```
Os valores relevantes da carga útil são:
```objc
// The Braze dictionary key
static NSString *const AppboyAPNSDictionaryKey = @"ab";
// The attachment dictionary
static NSString *const AppboyAPNSDictionaryAttachmentKey = @"att";
// The attachment URL
static NSString *const AppboyAPNSDictionaryAttachmentURLKey = @"url";
// The type of the attachment - a suffix for the file you save
static NSString *const AppboyAPNSDictionaryAttachmentTypeKey = @"type";
```
Para exibir manualmente a notificação por push com uma carga útil do Braze, baixe o conteúdo do valor em `AppboyAPNSDictionaryAttachmentURLKey`, salve-o como um arquivo com o tipo de arquivo armazenado na chave `AppboyAPNSDictionaryAttachmentTypeKey` e adicione-o aos anexos da notificação.
### Exemplo de código
Você pode escrever a extensão de serviço em Objective C ou Swift.
Para usar nosso código de exemplo em Objective C, substitua o conteúdo do direcionamento `Notification Service Extension` gerado automaticamente por `NotificationService.m` pelo conteúdo do Appboy [`NotificationService.m`](https://github.com/Appboy/appboy-ios-sdk/blob/master/Example/StopwatchNotificationService/NotificationService.m).
Para usar nosso código de amostra do Swift, substitua o conteúdo do `Notification Service Extension` direcionamento gerado automaticamente pelo `NotificationService.swift` pelo conteúdo do Appboy [`NotificationService.swift`](https://github.com/Appboy/appboy-ios-sdk/blob/master/HelloSwift/HelloSwiftNotificationExtension/NotificationService.swift).
## Criação de uma notificação Rich em seu dashboard
Para criar uma notificação Rich em seu dashboard do Braze, crie um push do iOS, anexe uma imagem ou GIF ou forneça um URL que hospede uma imagem, GIF ou vídeo. Note que os ativos são baixados no recebimento de notificações por push, portanto, planeje-se para grandes picos síncronos de solicitações se estiver hospedando seu conteúdo.
Consulte [`unnotificationattachment`](https://developer.apple.com/reference/usernotifications/unnotificationattachment) para obter uma lista dos tipos e tamanhos de arquivos suportados.
# Contagens de emblemas de notificação por push para iOS
Source: /docs/pt-br/developer_guide/platforms/legacy_sdks/ios/push_notifications/customization/badges/index.md
**Warning:**
[AppboyKit](https://github.com/Appboy/appboy-ios-sdk) (also known as the Objective-C SDK) is no longer supported and has been replaced by the [Swift SDK](https://www.braze.com/docs/pt-br/pt-br/developer_guide/sdk_integration/?sdktab=swift). It will no longer receive new features, bug fixes, security updates, or technical support—however, messaging and analytics will continue to function as normal. To learn more, see [Introducing the New Braze Swift SDK](https://www.braze.com/resources/articles/introducing-the-new-braze-swift-sdk).
# Emblemas
Você pode especificar a contagem de emblemas desejada ao compor uma notificação por push através do dashboard do Braze. Você também pode atualizar a contagem de seu emblema manualmente através da propriedade [`applicationIconBadgeNumber`](https://developer.apple.com/library/ios/documentation/UIKit/Reference/UIApplication_Class/index.html#//apple_ref/occ/instp/UIApplication/applicationIconBadgeNumber) do seu aplicativo ou da [carga útil de notificação remota](https://developer.apple.com/library/content/documentation/NetworkingInternet/Conceptual/RemoteNotificationsPG/CreatingtheNotificationPayload.html#//apple_ref/doc/uid/TP40008194-CH10-SW1). A Braze também zerará a contagem de emblemas quando uma notificação da Braze for recebida enquanto o app estiver em primeiro plano.
Se você não tiver um plano para limpar os crachás como parte da operação normal do aplicativo ou enviando pushs que limpem o crachá, deverá limpar o crachá quando o aplicativo se tornar ativo, adicionando o seguinte código ao método delegado `applicationDidBecomeActive:` do seu aplicativo:
```objc
// For iOS 16.0+
UNUserNotificationCenter *center = [UNUserNotificationCenter currentNotificationCenter];
[center setBadgeCount:0 withCompletionHandler:^(NSError * _Nullable error) {
if (error != nil) {
// Handle errors
}
}];
// Prior to iOS 16. Deprecated in iOS 17+.
[UIApplication sharedApplication].applicationIconBadgeNumber = 0;
```
```swift
// For iOS 16.0+
let center = UNUserNotificationCenter.current()
do {
try await center.setBadgeCount(0)
} catch {
// Handle errors
}
// Prior to iOS 16. Deprecated in iOS 17+.
UIApplication.shared.applicationIconBadgeNumber = 0
```
Vale lembrar que zerar o número de emblemas também limpará as notificações na central de notificações. Portanto, mesmo que você não defina o número do badge nas cargas úteis de push, ainda poderá definir o número do badge como 0 para remover a(s) notificação(ões) por push na central de notificações após os usuários clicarem no push.
# Ignorar notificações push internas do Braze para iOS
Source: /docs/pt-br/developer_guide/platforms/legacy_sdks/ios/push_notifications/customization/ignoring_internal_push/index.md
**Warning:**
[AppboyKit](https://github.com/Appboy/appboy-ios-sdk) (also known as the Objective-C SDK) is no longer supported and has been replaced by the [Swift SDK](https://www.braze.com/docs/pt-br/pt-br/developer_guide/sdk_integration/?sdktab=swift). It will no longer receive new features, bug fixes, security updates, or technical support—however, messaging and analytics will continue to function as normal. To learn more, see [Introducing the New Braze Swift SDK](https://www.braze.com/resources/articles/introducing-the-new-braze-swift-sdk).
# Ignorar notificações push internas do Braze
A Braze usa notificações por push silenciosas para a implementação interna de determinados recursos avançados. Para a maioria das integrações, isso não requer alterações em nome do seu app. No entanto, se você integrar um recurso do Braze que dependa de notificações por push internas (por exemplo, rastreamento de desinstalação ou geofences), convém atualizar seu app para ignorar nossos pushes internos.
Se o seu app executa ações automáticas em inicializações de aplicativos ou push em segundo plano, considere a possibilidade de bloquear essa atividade para que ela não seja disparada por notificações por push internas. Por exemplo, se você tem uma lógica que chama seus servidores para obter novo conteúdo a cada push em segundo plano ou lançamento de aplicativo, provavelmente não gostaria que nossos pushes internos disparassem isso, pois haveria tráfego de rede desnecessário. Além disso, como o Braze envia certos tipos de pushes internos para todos os usuários aproximadamente ao mesmo tempo, não bloquear as chamadas de rede no lançamento de pushes internos poderia introduzir uma carga significativa no servidor.
## Verificação de ações automáticas em seu app
Você deve verificar se há ações automáticas em seu aplicativo nos seguintes locais e atualizar seu código para ignorar nossos pushes internos:
1. **Receptores push.** As notificações por push em segundo plano chamarão `application:didReceiveRemoteNotification:fetchCompletionHandler:` no site `UIApplicationDelegate`.
2. **Delegado do app.** Os push em segundo plano podem iniciar apps [suspensos](https://developer.apple.com/library/ios/documentation/iPhone/Conceptual/iPhoneOSProgrammingGuide/TheAppLifeCycle/TheAppLifeCycle.html#//apple_ref/doc/uid/TP40007072-CH2-SW3) em segundo plano, disparando os métodos `application:willFinishLaunchingWithOptions:` e `application:didFinishLaunchingWithOptions:` em seu `UIApplicationDelegate`. Você pode verificar o site `launchOptions` desses métodos para determinar se o aplicativo foi iniciado a partir de um push em segundo plano.
## Uso de métodos utilitários push internos do Braze
Você pode usar os métodos utilitários em `ABKPushUtils` para verificar se o seu app recebeu ou foi iniciado por uma notificação por push interna do Braze. `isAppboyInternalRemoteNotification:` retornará `YES` em todas as notificações por push internas do Braze, enquanto `isUninstallTrackingRemoteNotification:` e `isGeofencesSyncRemoteNotification:` retornarão `YES` para rastreamento de desinstalação e notificações de sincronização de geofences, respectivamente. Consulte [`ABKPushUtils.h`](https://github.com/Appboy/appboy-ios-sdk/blob/master/AppboyKit/include/ABKPushUtils.h) para declarações de métodos.
## Exemplo de implementação {#internal-push-implementation-example}
```objc
- (BOOL)application:(UIApplication *)application didFinishLaunchingWithOptions:(NSDictionary *)launchOptions {
NSDictionary *pushDictionary = launchOptions[UIApplicationLaunchOptionsRemoteNotificationKey];
BOOL launchedFromAppboyInternalPush = pushDictionary && [ABKPushUtils isAppboyInternalRemoteNotification:pushDictionary];
if (!launchedFromAppboyInternalPush) {
// ... Gated logic here (such as pinging your server to download content) ...
}
}
```
```objc
- (void)application:(UIApplication *)application didReceiveRemoteNotification:(NSDictionary *)userInfo fetchCompletionHandler:(void (^)(UIBackgroundFetchResult result))completionHandler {
if (![ABKPushUtils isAppboyInternalRemoteNotification:userInfo]) {
// ... Gated logic here (such as pinging server for content) ...
}
}
```
```swift
func application(_ application: UIApplication, didFinishLaunchingWithOptions launchOptions: [UIApplicationLaunchOptionsKey : Any]? = nil) -> Bool {
let pushDictionary = launchOptions?[UIApplicationLaunchOptionsKey.remoteNotification] as? NSDictionary as? [AnyHashable : Any] ?? [:]
let launchedFromAppboyInternalPush = ABKPushUtils.isAppboyInternalRemoteNotification(pushDictionary)
if (!launchedFromAppboyInternalPush) {
// ... Gated logic here (such as pinging your server to download content) ...
}
}
```
```swift
func application(_ application: UIApplication,
didReceiveRemoteNotification userInfo: [AnyHashable : Any],
fetchCompletionHandler completionHandler: @escaping (UIBackgroundFetchResult) -> Void) {
if (!ABKPushUtils.isAppboyInternalRemoteNotification(userInfo)) {
// ... Gated logic here (such as pinging server for content) ...
}
}
```
# Configurações avançadas de push
Source: /docs/pt-br/developer_guide/platforms/legacy_sdks/ios/push_notifications/customization/advanced_settings/index.md
**Warning:**
[AppboyKit](https://github.com/Appboy/appboy-ios-sdk) (also known as the Objective-C SDK) is no longer supported and has been replaced by the [Swift SDK](https://www.braze.com/docs/pt-br/pt-br/developer_guide/sdk_integration/?sdktab=swift). It will no longer receive new features, bug fixes, security updates, or technical support—however, messaging and analytics will continue to function as normal. To learn more, see [Introducing the New Braze Swift SDK](https://www.braze.com/resources/articles/introducing-the-new-braze-swift-sdk).
# Configurações avançadas {#advanced-settings}
Ao criar uma campanha de push, na etapa de composição, selecione **Settings** para visualizar as configurações avançadas disponíveis.

## Extração de dados de pares de valores-chave push {#extracting-data-from-push-key-value-pairs}
A Braze permite que você envie pares de valores de string personalizados, conhecidos como `extras`, juntamente com uma notificação por push para o seu aplicativo. Os extras podem ser definidos por meio do dashboard ou da API e estarão disponíveis como pares de valores-chave no dicionário `notification` passado para suas implementações de delegados push.
## Opções de alerta {#alert-options}
Marque a caixa de seleção **Alert Options** para ver um menu suspenso de valores-chave disponíveis para ajustar como a notificação aparece nos dispositivos.
## Adição do sinalizador content-available {#adding-content-available-flag}
Marque a caixa de seleção **Add Content-Available Flag** para instruir os dispositivos a baixar novos conteúdos em segundo plano. Geralmente, isso pode ser marcado se você estiver interessado em enviar [notificações silenciosas](https://www.braze.com/docs/pt-br/pt-br/developer_guide/platforms/legacy_sdks/ios/push_notifications/silent_push_notifications/).
## Adição do sinalizador de conteúdo mutável {#adding-mutable-content-flag}
Marque a caixa de seleção **Add Mutable-Content Flag** para ativar a personalização avançada do receptor em dispositivos iOS 10+. Esse sinalizador será enviado automaticamente ao criar uma [notificação Rich](https://www.braze.com/docs/pt-br/pt-br/developer_guide/platforms/legacy_sdks/ios/push_notifications/customization/rich_notifications/), independentemente do valor dessa caixa de seleção.
## Atualizar o contador de badges do app {#update-app-badge-count}
Digite o número para o qual deseja atualizar a contagem de badges ou use a sintaxe Liquid para definir suas condições personalizadas. Você também pode atualizar a contagem de badges manualmente por meio da propriedade `applicationIconBadgeNumber` do seu aplicativo ou da carga útil da notificação por push. Para saber mais, consulte nosso artigo dedicado à [contagem de badges](https://www.braze.com/docs/pt-br/pt-br/developer_guide/platforms/legacy_sdks/ios/push_notifications/customization/badges/).
## Sons {#sounds}
Aqui você pode inserir um caminho para um arquivo de som no pacote do seu app para especificar um som a ser reproduzido quando a mensagem push for recebida. Se o arquivo de som especificado não existir ou se a palavra-chave "default" for inserida, a Braze usará o som de alerta padrão do dispositivo. Para obter mais informações sobre personalização, consulte nosso artigo dedicado a [sons personalizados](https://www.braze.com/docs/pt-br/pt-br/developer_guide/platforms/legacy_sdks/ios/push_notifications/customization/custom_sounds/).
## ID de recolhimento {#collapse-id}
Especifique um ID de recolhimento para agrupar notificações semelhantes. Se você enviar várias notificações com o mesmo ID de recolhimento, o dispositivo mostrará apenas a notificação recebida mais recentemente. Consulte a documentação da Apple sobre [notificações agrupadas](https://developer.apple.com/library/content/documentation/NetworkingInternet/Conceptual/RemoteNotificationsPG/APNSOverview.html#//apple_ref/doc/uid/TP40008194-CH8-SW1).
## Vencimento {#expiry}
Ao marcar a caixa de seleção **Expiry**, você poderá definir um tempo de vencimento para sua mensagem. Se o dispositivo de um usuário perder a conectividade, a Braze continuará tentando enviar a mensagem até o horário especificado. Se isso não for definido, a plataforma terá como padrão um vencimento de 30 dias. Observe que as notificações por push que expiram antes da entrega não são consideradas falhas e não serão registradas como bounce.
# Notificações por push silenciosas para iOS
Source: /docs/pt-br/developer_guide/platforms/legacy_sdks/ios/push_notifications/silent_push_notifications/index.md
**Warning:**
[AppboyKit](https://github.com/Appboy/appboy-ios-sdk) (also known as the Objective-C SDK) is no longer supported and has been replaced by the [Swift SDK](https://www.braze.com/docs/pt-br/pt-br/developer_guide/sdk_integration/?sdktab=swift). It will no longer receive new features, bug fixes, security updates, or technical support—however, messaging and analytics will continue to function as normal. To learn more, see [Introducing the New Braze Swift SDK](https://www.braze.com/resources/articles/introducing-the-new-braze-swift-sdk).
# Notificações por push silenciosas {#silent-push-notifications}
As notificações por push permitem que você notifique seu app quando ocorrerem eventos importantes. Você pode enviar uma notificação por push quando tiver novas mensagens instantâneas para entregar, alertas de notícias de última hora para enviar ou o último episódio do programa de TV favorito do usuário pronto para ser baixado para visualização off-line. As notificações por push também podem ser silenciosas, não contendo nenhuma mensagem de alerta ou som, sendo usadas apenas para atualizar a interface do app ou disparar o trabalho em segundo plano.
As notificações por push são ótimas para conteúdo esporádico mas imediatamente importante, em que a postergação entre as buscas em segundo plano pode não ser aceitável. As notificações por push também podem ser muito mais eficientes do que a busca em segundo plano, pois seu aplicativo só é iniciado quando necessário.
As notificações por push têm limite de frequência, portanto, não tenha medo de enviar quantas forem necessárias para o seu aplicativo. O iOS e os servidores APNs controlarão a frequência com que elas são entregues, e você não terá problemas por enviar muitas. Se suas notificações por push forem limitadas, elas poderão sofrer postergação até a próxima vez que o dispositivo enviar um pacote keep-alive ou receber outra notificação.
## Envio de notificações por push silenciosas {#sending-silent-push-notifications}
Para enviar uma notificação por push silenciosa, defina o sinalizador `content-available` como `1` em uma carga útil de notificação por push. Ao enviar uma notificação por push silenciosa, talvez você também queira incluir alguns dados na carga útil da notificação, para que seu aplicativo possa fazer referência ao evento. Isso pode economizar algumas solicitações de rede e aumentar a capacidade de resposta do seu app.
**Warning:**
Anexar tanto um título quanto um corpo de texto com `content-available=1` não é recomendado porque pode levar a um comportamento indefinido. Para garantir que uma notificação seja realmente silenciosa, exclua tanto o título quanto o corpo de texto ao definir o sinalizador `content-available` para `1.` Para mais detalhes, consulte a [documentação oficial da Apple sobre atualizações em segundo plano](https://developer.apple.com/documentation/usernotifications/setting_up_a_remote_notification_server/pushing_background_updates_to_your_app).
O sinalizador `content-available` pode ser definido no dashboard da Braze, bem como em nosso [objeto Apple push](https://www.braze.com/docs/pt-br/pt-br/api/objects_filters/messaging/apple_object/) na [API de envio de mensagens](https://www.braze.com/docs/pt-br/pt-br/api/endpoints/messaging/).

## Use notificações por push silenciosas para disparar o trabalho em segundo plano {#use-silent-push-notifications-to-trigger-background-work}
As notificações por push silenciosas podem despertar seu app de um estado "Suspenso" ou "Não em execução" para atualizar o conteúdo ou executar determinadas tarefas sem notificar os usuários.
Para usar notificações por push silenciosas para disparar o trabalho em segundo plano, configure o sinalizador `content-available` seguindo as instruções anteriores sem nenhuma mensagem ou som. Configure o modo de segundo plano do seu app para ativar `remote notifications` na guia **Capabilities** das configurações do projeto. Uma notificação remota é apenas uma notificação por push normal com o sinalizador `content-available` definido.

A ativação do modo em segundo plano para notificações remotas é necessária para o [rastreamento de desinstalação](https://www.braze.com/docs/pt-br/pt-br/developer_guide/analytics/tracking_uninstalls/?sdktab=swift).
Mesmo com o modo de segundo plano para notificações remotas ativado, o sistema não iniciará seu app em segundo plano se o usuário tiver forçado o encerramento do aplicativo. O usuário deve iniciar explicitamente o aplicativo ou reiniciar o dispositivo antes que o app possa ser lançado automaticamente em segundo plano pelo sistema.
Para saber mais, consulte [pushing background updates](https://developer.apple.com/documentation/usernotifications/setting_up_a_remote_notification_server/pushing_background_updates_to_your_app?language=objc) e [`application:didReceiveRemoteNotification:fetchCompletionHandler:`](https://developer.apple.com/library/ios/documentation/UIKit/Reference/UIApplicationDelegate_Protocol/index.html#//apple_ref/occ/intfm/UIApplicationDelegate/application:didReceiveRemoteNotification:fetchCompletionHandler:).
## Limitações de notificações silenciosas do iOS {#ios-silent-notifications-limitations}
O sistema operacional iOS pode bloquear notificações para alguns recursos. Note que, se estiver tendo dificuldades com esses recursos, o bloqueio de notificações silenciosas do iOS pode ser a causa.
A Braze tem vários recursos que dependem de notificações por push silenciosas do iOS:
| Recurso | Experiência do usuário |
|---|---|
| Rastreamento de desinstalação | O usuário recebe um push silencioso e noturno de rastreamento de desinstalação. |
| Geofences | Sincronização silenciosa de geofences do servidor para o dispositivo. |
{: .reset-td-br-1 .reset-td-br-2 role="presentation" }
Consulte a documentação sobre o [método de instância](https://developer.apple.com/documentation/uikit/uiapplicationdelegate/1623013-application) e as [notificações não recebidas](https://developer.apple.com/library/content/technotes/tn2265/_index.html#//apple_ref/doc/uid/DTS40010376-CH1-TNTAG23) da Apple para obter mais detalhes.
[8]:https://developer.apple.com/library/content/technotes/tn2265/_index.html#//apple_ref/doc/uid/DTS40010376-CH1-TNTAG23
# Manual do Push para iOS
Source: /docs/pt-br/developer_guide/platforms/legacy_sdks/ios/push_notifications/push_primer/index.md
**Warning:**
[AppboyKit](https://github.com/Appboy/appboy-ios-sdk) (also known as the Objective-C SDK) is no longer supported and has been replaced by the [Swift SDK](https://www.braze.com/docs/pt-br/pt-br/developer_guide/sdk_integration/?sdktab=swift). It will no longer receive new features, bug fixes, security updates, or technical support—however, messaging and analytics will continue to function as normal. To learn more, see [Introducing the New Braze Swift SDK](https://www.braze.com/resources/articles/introducing-the-new-braze-swift-sdk).
# Integração do push primer
Campanhas de push primer incentivam os usuários a ativar os pushes do seu app nos dispositivos deles. Obter a permissão dos usuários para enviar mensagens diretamente para seus dispositivos pode ser complexo, mas nossos guias podem ajudar! Este guia mostra as etapas que os desenvolvedores devem seguir para integrar push primers.
## Etapa 1: Adicionar snippet no arquivo AppDelegate.m
Adicione a seguinte linha de código ao seu arquivo `AppDelegate.m` no lugar da integração padrão:
```objc
- (BOOL)application:(UIApplication *)application didFinishLaunchingWithOptions:(NSDictionary *)launchOptions {
...
if (@available(iOS 10.0, *)) {
UNUserNotificationCenter *center = [UNUserNotificationCenter currentNotificationCenter];
[center getNotificationSettingsWithCompletionHandler:^(UNNotificationSettings * _Nonnull settings) {
if (settings.authorizationStatus != UNAuthorizationStatusNotDetermined) {
// authorization has already been requested, need to follow usual steps
[center requestAuthorizationWithOptions:(UNAuthorizationOptionAlert | UNAuthorizationOptionSound | UNAuthorizationOptionBadge) completionHandler:^(BOOL granted, NSError * _Nullable error) {
[[Appboy sharedInstance] pushAuthorizationFromUserNotificationCenter:granted];
}];
center.delegate = self;
[center setNotificationCategories:[ABKPushUtils getAppboyUNNotificationCategorySet]];
[[UIApplication sharedApplication] registerForRemoteNotifications];
}
}];
} else {
UIApplication *sharedApplication = [UIApplication sharedApplication];
UIUserNotificationSettings *notificationSettings = [sharedApplication currentUserNotificationSettings];
if (notificationSettings.types) {
UIUserNotificationSettings *settings = [UIUserNotificationSettings settingsForTypes:(UIUserNotificationTypeBadge | UIUserNotificationTypeAlert | UIUserNotificationTypeSound) categories:[ABKPushUtils getAppboyUIUserNotificationCategorySet]];
[sharedApplication registerUserNotificationSettings:settings];
[sharedApplication registerForRemoteNotifications];
}
}
```
```swift
if #available(iOS 10, *) {
let center = UNUserNotificationCenter.current()
center.getNotificationSettings(completionHandler: { (settings) in
if settings.authorizationStatus != .notDetermined {
// authorization has already been requested, need to follow usual steps
center.requestAuthorization(options: [.alert, .sound, .badge]) { (granted, error) in
Appboy.sharedInstance()?.pushAuthorization(fromUserNotificationCenter: granted)
}
center.delegate = self as? UNUserNotificationCenterDelegate
center.setNotificationCategories(ABKPushUtils.getAppboyUNNotificationCategorySet())
UIApplication.shared.registerForRemoteNotifications()
}
})
} else {
let notificationSettiings = UIApplication.shared.currentUserNotificationSettings
if notificationSettiings?.types != nil {
let setting = UIUserNotificationSettings(types: [.alert, .badge, .sound], categories:nil)
UIApplication.shared.registerUserNotificationSettings(setting)
UIApplication.shared.registerForRemoteNotifications()
}
}
```
## Etapa 2: Anexar o verificador de eventos personalizado ao arquivo AppDelegate.m
O seguinte trecho de código verifica se um evento personalizado precisa ser disparado. Adicione a seguinte linha de código em seu site `AppDelegate.m`.
```objc
if (@available(iOS 10.0, *)) {
UNUserNotificationCenter *center = [UNUserNotificationCenter currentNotificationCenter];
[center getNotificationSettingsWithCompletionHandler:^(UNNotificationSettings * _Nonnull settings) {
if (settings.authorizationStatus == UNAuthorizationStatusNotDetermined) {
// ...
// fire custom event
// ...
}
}];
} else {
UIUserNotificationSettings *notificationSettings = [[UIApplication sharedApplication] currentUserNotificationSettings];
if (!notificationSettings.types) {
// …
// fire custom event
// ...
}
}
```
```swift
if #available(iOS 10, *) {
let center = UNUserNotificationCenter.current()
center.getNotificationSettings(completionHandler: { (settings) in
if settings.authorizationStatus == .notDetermined {
// ...
// fire custom event
// ...
}
})
} else {
let notificationSettiings = UIApplication.shared.currentUserNotificationSettings
if notificationSettiings?.types != nil {
// ...
// fire custom event
// ...
}
}
```
## Etapa 3: Configurar um manipulador de deep links
Coloque o seguinte trecho de código em seu código de manipulação de deep links. Você só deve executar esse código de deep link para a mensagem no app do seu push primer.
Para saber mais sobre deep links, consulte a [personalização do manuseio de links](https://www.braze.com/docs/pt-br/pt-br/developer_guide/platform_integration_guides/ios/advanced_use_cases/linking/#linking-handling-customization).
```objc
// ...
// check that this deep link relates to the push prompt
// ...
if (@available(iOS 10.0, *)) {
UNUserNotificationCenter *center = [UNUserNotificationCenter currentNotificationCenter];
[center requestAuthorizationWithOptions:(UNAuthorizationOptionAlert | UNAuthorizationOptionSound | UNAuthorizationOptionBadge) completionHandler:^(BOOL granted, NSError * _Nullable error) {
[[Appboy sharedInstance] pushAuthorizationFromUserNotificationCenter:granted];
}];
center.delegate = self;
[center setNotificationCategories:[ABKPushUtils getAppboyUNNotificationCategorySet]];
[[UIApplication sharedApplication] registerForRemoteNotifications];
} else {
UIUserNotificationSettings *settings = [UIUserNotificationSettings settingsForTypes:(UIUserNotificationTypeBadge | UIUserNotificationTypeAlert | UIUserNotificationTypeSound) categories:[ABKPushUtils getAppboyUIUserNotificationCategorySet]];
UIApplication *sharedApplication = [UIApplication sharedApplication];
[sharedApplication registerUserNotificationSettings:settings];
[sharedApplication registerForRemoteNotifications];
}
```
```swift
// ...
// check that this deep link relates to the push prompt
// ...
if #available(iOS 10, *) {
let center = UNUserNotificationCenter.current()
center.delegate = self as? UNUserNotificationCenterDelegate
center.requestAuthorization(options: [.alert, .sound, .badge]) { (granted, error) in
Appboy.sharedInstance()?.pushAuthorization(fromUserNotificationCenter: granted)
}
UIApplication.shared.registerForRemoteNotifications()
} else {
let setting = UIUserNotificationSettings(types: [.alert, .badge, .sound], categories:nil)
UIApplication.shared.registerUserNotificationSettings(setting)
UIApplication.shared.registerForRemoteNotifications()
}
```
# Push Stories para iOS
Source: /docs/pt-br/developer_guide/platforms/legacy_sdks/ios/push_notifications/push_story/index.md
**Warning:**
[AppboyKit](https://github.com/Appboy/appboy-ios-sdk) (also known as the Objective-C SDK) is no longer supported and has been replaced by the [Swift SDK](https://www.braze.com/docs/pt-br/pt-br/developer_guide/sdk_integration/?sdktab=swift). It will no longer receive new features, bug fixes, security updates, or technical support—however, messaging and analytics will continue to function as normal. To learn more, see [Introducing the New Braze Swift SDK](https://www.braze.com/resources/articles/introducing-the-new-braze-swift-sdk).
# Configuração do story por push
O recurso Push Story requer o framework `UNNotification` e o iOS 10. O recurso só está disponível a partir da versão 3.2.1 do SDK do iOS.
## Etapa 1: Ative o push em seu aplicativo
Siga a [integração de notificações por push](https://www.braze.com/docs/pt-br/pt-br/developer_guide/platforms/legacy_sdks/ios/push_notifications/integration/) para ativar o push em seu app.
## Etapa 2: Adição do direcionamento da extensão de conteúdo de notificação
Em seu projeto de app, acesse o menu **File > New > Target...** (Arquivo > Novo > Direcionamento...) e adicione um novo direcionamento `Notification Content Extension` e ative-o.

O Xcode deve gerar um novo alvo e criar arquivos automaticamente para você, incluindo:
- `NotificationViewController.h`
- `NotificationViewController.m`
- `MainInterface.storyboard`
- `NotificationViewController.swift`
- `MainInterface.storyboard`
## Etapa 3: Ativar recursos
O recurso Push Story requer o modo em segundo plano na seção **Recursos** do direcionamento do aplicativo principal. Depois de ativar os modos em segundo plano, selecione **Background fetch** (Recuperação em segundo plano) e **Remote notifications** (Notificações remotas).

### Adicionando um grupo de app
Você também precisa adicionar `Capability App Groups`. Se você não tiver nenhum grupo de app em seu aplicativo, acesse o **recurso** do direcionamento do aplicativo principal, ative o `App Groups` e clique no botão **+**. Use o ID do pacote de seu aplicativo para criar o grupo de app. Por exemplo, se o ID do pacote do seu app for `com.company.appname`, você poderá nomear o grupo do app como `group.com.company.appname.xyz`. Você precisa ativar o `App Groups` para os destinos do app principal e da extensão de conteúdo.
**Important:**
`App Groups` neste contexto, refere-se ao [direito de grupos de aplicativos](https://developer.apple.com/documentation/bundleresources/entitlements/com_apple_security_application-groups) da Apple e não à sua ID do espaço de trabalho Braze (anteriormente grupo de app).
Se você não adicionar seu app a um grupo de apps, seu aplicativo poderá não preencher determinados campos da carga útil do push e não funcionará totalmente como esperado.
## Etapa 4: Adição do framework Push Story ao seu app
Depois de seguir o [guia de integração do Swift Package Manager](https://www.braze.com/docs/pt-br/pt-br/developer_guide/platforms/legacy_sdks/ios/initial_sdk_setup/installation_methods/swift_package_manager/), adicione `AppboyPushStory` ao seu `Notification Content Extension`:


Adicione a seguinte linha ao seu Podfile:
```ruby
target 'YourContentExtensionTarget' do
pod 'Appboy-Push-Story'
end
```
Depois de atualizar o Podfile, navegue até o diretório do seu projeto de app do Xcode no terminal e execute `pod install`.
Baixe a versão mais recente do `AppboyPushStory.zip` na [página de lançamento do GitHub](https://github.com/Appboy/appboy-ios-sdk/releases), extraia-a e adicione os seguintes arquivos ao `Notification Content Extension` do seu projeto:
- `Resources/ABKPageView.nib`
- `AppboyPushStory.xcframework`

**Important:**
Certifique-se de que **Não Incorporar** esteja selecionado para **AppboyPushStory.xcframework** na coluna **Incorporar**.
Adicione o sinalizador `-ObjC` ao `Notification Content Extension` do seu projeto em **Build Settings > Other Linker Flags **.
## Etapa 5: Atualização do Notification View Controller
Em seu site `NotificationViewController.h`, adicione as seguintes linhas para adicionar novas propriedades e importar os arquivos de cabeçalho:
```objc
#import
```
```objc
@property (nonatomic) IBOutlet ABKStoriesView *storiesView;
@property (nonatomic) ABKStoriesViewDataSource *dataSource;
```
Em `NotificationViewController.m`, remova a implementação padrão e adicione o seguinte código:
```objc
@implementation NotificationViewController
- (void)didReceiveNotification:(UNNotification *)notification {
self.dataSource = [[ABKStoriesViewDataSource alloc] initWithNotification:notification
storiesView:self.storiesView
appGroup:@"YOUR-APP-GROUP-IDENTIFIER"];
}
- (void)didReceiveNotificationResponse:(UNNotificationResponse *)response
completionHandler:(void (^)(UNNotificationContentExtensionResponseOption option))completion {
UNNotificationContentExtensionResponseOption option = [self.dataSource didReceiveNotificationResponse:response];
completion(option);
}
- (void)viewWillDisappear:(BOOL)animated {
[self.dataSource viewWillDisappear];
[super viewWillDisappear:animated];
}
@end
```
Em `NotificationViewController.swift`, adicione a seguinte linha para importar os arquivos de cabeçalho:
```swift
import AppboyPushStory
```
Em seguida, remova a implementação padrão e adicione o seguinte código:
```swift
class NotificationViewController: UIViewController, UNNotificationContentExtension {
@IBOutlet weak var storiesView: ABKStoriesView!
var dataSource: ABKStoriesViewDataSource?
func didReceive(_ notification: UNNotification) {
dataSource = ABKStoriesViewDataSource(notification: notification, storiesView: storiesView, appGroup: "YOUR-APP-GROUP-IDENTIFIER")
}
func didReceive(_ response: UNNotificationResponse, completionHandler completion: @escaping (UNNotificationContentExtensionResponseOption) -> Void) {
if dataSource != nil {
let option: UNNotificationContentExtensionResponseOption = dataSource!.didReceive(response)
completion(option)
}
}
override func viewWillDisappear(_ animated: Bool) {
dataSource?.viewWillDisappear()
super.viewWillDisappear(animated)
}
}
```
## Etapa 6: Definir o storyboard da extensão do conteúdo da notificação
Abra o storyboard `Notification Content Extension` e coloque um novo `UIView` no notification view controller. Renomeie a classe para `ABKStoriesView`. Faça com que a largura e a altura da exibição sejam redimensionáveis automaticamente, de acordo com o quadro de exibição principal do controlador de exibição de notificação.


Em seguida, vincule o IBOutlet `storiesView` do notification view controller ao `ABKStoriesView` adicionado.

## Etapa 7: Definir o plist de extensão do conteúdo da notificação
Abra o arquivo `Info.plist` do `Notification Content Extension` e adicione e altere as seguintes chaves em `NSExtension \ NSExtensionAttributes`:
`UNNotificationExtensionCategory` = `ab_cat_push_story_v2` ( tipo`String` )
`UNNotificationExtensionDefaultContentHidden` = `YES` ( tipo`Boolean` )
`UNNotificationExtensionInitialContentSizeRatio` = `0.65` ( tipo`Number` )

## Etapa 8: Atualização da integração do Braze em seu app principal
##### Opção 1: Tempo de execução
No dicionário `appboyOptions` usado para configurar sua instância da Braze, adicione uma entrada `ABKPushStoryAppGroupKey` e defina o valor como seu identificador de API do espaço de trabalho.
```objc
NSMutableDictionary *appboyOptions = [NSMutableDictionary dictionary];
appboyOptions[ABKPushStoryAppGroupKey] = @"YOUR-APP-GROUP-IDENTIFIER";
[Appboy startWithApiKey:@"YOUR-API-KEY"
inApplication:application
withLaunchOptions:launchOptions
withAppboyOptions:appboyOptions];
```
```swift
let appboyOptions: [AnyHashable: Any] = [
ABKPushStoryAppGroupKey : "YOUR-APP-GROUP-IDENTIFIER"
]
Appboy.start(withApiKey: "YOUR-API-KEY", in:application, withLaunchOptions:launchOptions, withAppboyOptions:appboyOptions)
```
##### Opção 2: Info.plist
Como alternativa, para configurar o espaço de trabalho do Story por push a partir do arquivo `Info.plist`, adicione um dicionário chamado `Braze` ao arquivo `Info.plist`. No dicionário `Braze`, adicione uma subentrada `PushStoryAppGroup` do tipo string e defina o valor como seu identificador de espaço de trabalho. Observe que antes do Braze iOS SDK v4.0.2, a chave do dicionário `Appboy` deve ser usada no lugar de `Braze`.
## Próximas etapas
Em seguida, consulte as etapas para integrar [os botões de ação](https://www.braze.com/docs/pt-br/pt-br/developer_guide/platforms/legacy_sdks/ios/push_notifications/customization/action_buttons/), o que é necessário para que os botões sejam exibidos em uma mensagem de story por push.
# Implementação avançada de notificações por push para iOS (opcional)
Source: /docs/pt-br/developer_guide/platforms/legacy_sdks/ios/push_notifications/implementation_guide/index.md
**Warning:**
[AppboyKit](https://github.com/Appboy/appboy-ios-sdk) (also known as the Objective-C SDK) is no longer supported and has been replaced by the [Swift SDK](https://www.braze.com/docs/pt-br/pt-br/developer_guide/sdk_integration/?sdktab=swift). It will no longer receive new features, bug fixes, security updates, or technical support—however, messaging and analytics will continue to function as normal. To learn more, see [Introducing the New Braze Swift SDK](https://www.braze.com/resources/articles/introducing-the-new-braze-swift-sdk).
**Important:**
Está procurando o guia básico de integração de desenvolvedores de notificações por push? Encontre [aqui](https://www.braze.com/docs/pt-br/pt-br/developer_guide/platforms/legacy_sdks/ios/push_notifications/integration/).
# Guia de implementação de notificações por push {#push-notification-implementation-guide}
> Este guia de implementação opcional e avançado aborda maneiras de aproveitar as extensões de app de conteúdo de notificação por push para obter o máximo de suas mensagens push. Incluídos estão três casos de uso personalizados criados por nossa equipe, trechos de código de acompanhamento e orientações sobre o registro de análise de dados. Consulte nosso Repositório de Demonstrações da Braze [aqui](https://github.com/braze-inc/braze-growth-shares-ios-demo-app)! Note que este guia de implementação está centrado em uma implementação Swift, mas são fornecidos trechos em Objective-C para os interessados.
## Extensões de app de conteúdo de notificação {#notification-content-app-extensions}
{: style="max-width:65%;border:0;margin-top:10px"}
Notificações por push, embora aparentemente padrão em diferentes plataformas, oferecem imensas opções de personalização além do que é normalmente implementado na interface padrão. Quando uma notificação por push é expandida, as extensões de conteúdo de notificação ativam uma visualização personalizada da notificação por push expandida.
As notificações por push podem ser expandidas de três maneiras diferentes: - Manter o banner de push pressionado - Deslizar para baixo no banner de push - Deslizar o banner para a esquerda e selecionar "Exibir"
Essas visualizações personalizadas oferecem maneiras inteligentes de engajar os clientes, permitindo que você exiba muitos tipos distintos de conteúdo, incluindo notificações interativas, notificações preenchidas com dados de usuários e até mensagens push que podem capturar informações como números de telefone e e-mail. Embora implementar push dessa maneira possa ser desconhecido para alguns, um dos nossos recursos bem conhecidos na Braze, [Push Stories](https://www.braze.com/docs/pt-br/pt-br/user_guide/channels/push/create_a_push_message/push_stories/), é um exemplo perfeito de como pode ser uma visualização personalizada para uma extensão de app de conteúdo de notificação!
#### Requisitos {#requirements}
{: style="float:right;max-width:50%;margin-left:10px; border:0;margin-top:10px"}
- [Notificações por push](https://www.braze.com/docs/pt-br/pt-br/developer_guide/platforms/legacy_sdks/ios/push_notifications/integration/) integradas com sucesso em seu app
- iOS 10 ou superior
- Os seguintes arquivos gerados pelo Xcode com base na sua linguagem de codificação:
Swift
- `NotificationViewController.swift`
- `MainInterface.storyboard`
Objective-C
- `NotificationViewController.h`
- `NotificationViewController.m`
- `MainInterface.storyboard`
### Configuração de categoria personalizada {#custom-category-configuration}
Para configurar uma visualização personalizada no dashboard, você deve ativar os botões de notificação e inserir sua categoria personalizada. A categoria iOS personalizada pré-registrada que você fornece é então verificada em relação ao `UNNotificationExtensionCategory` no `.plist` do seu Alvo de Extensão de Conteúdo de Notificação. O valor fornecido aqui deve corresponder ao que está definido no dashboard da Braze.
{: style="max-width:75%;border:0;margin-top:10px"}
{: style="max-width:75%;border:0;margin-top:10px"}
**Tip:**
Como as notificações por push com extensões de conteúdo nem sempre são aparentes, é recomendável incluir um call to action para incentivar seus usuários a expandirem suas notificações por push.
## Caso de uso e passo a passo de implementação {#use-case-and-implementation-walkthrough}
Existem três tipos de extensão de app de conteúdo de notificação por push fornecidos. Cada tipo tem uma explicação do conceito, casos de uso potenciais e uma visão de como as variáveis de notificação por push podem parecer e ser usadas no dashboard da Braze:
- [Notificação por push interativa](#interactive-push-notification)
- [Notificações por push personalizadas](#personalized-push-notifications)
- [Notificação por push de captura de informações](#information-capture-push-notification)
### Notificação por push interativa {#interactive-push-notification}
Notificações por push podem responder às ações do usuário dentro de uma extensão de conteúdo. Para usuários com iOS 12 ou posterior, isso significa que você pode transformar suas mensagens push em notificações por push totalmente interativas! Essa interatividade oferece muitas possibilidades para engajar seus usuários em suas notificações. O exemplo a seguir mostra um push onde os usuários podem jogar um jogo de correspondência dentro da notificação expandida.
{: style="border:0"}
#### Configuração do dashboard {#dashboard-configuration}
Para configurar uma visualização personalizada no dashboard, nas configurações do botão de notificação, insira a categoria específica que você deseja exibir. Em seguida, no `.plist` da sua Extensão de Conteúdo de Notificação, você também deve definir a categoria personalizada para o atributo `UNNotificationExtensionCategory`. O valor fornecido aqui deve corresponder ao que está definido no dashboard da Braze. Por fim, para ativar as interações do usuário em uma notificação por push, defina a chave `UNNotificationExtensionInteractionEnabled` como true.
{: style="float:right;max-width:45%;"}
{: style="max-width:50%;"}
#### Outros casos de uso {#other-use-cases}
Extensões de conteúdo push são uma opção empolgante para introduzir interatividade às suas promoções e aplicativos. Alguns exemplos incluem um jogo para os usuários jogarem, uma roleta de descontos ou um botão de "curtir" para salvar uma lista ou música.
##### Pronto para registrar análise de dados? {#ready-to-log-analytics}
Consulte a [seção a seguir](#logging-analytics) para entender melhor como o fluxo de dados deve ser.
### Notificações por push personalizadas {#personalized-push-notifications}
{: style="float:right;max-width:40%;margin-left:15px;border:0"}
As notificações por push podem exibir informações específicas do usuário dentro de uma extensão de conteúdo. O exemplo à direita mostra uma notificação por push após um usuário ter concluído uma tarefa específica (curso do Braze Learning) e agora é incentivado a expandir essa notificação para verificar seu progresso. As informações fornecidas aqui são específicas do usuário e podem ser disparadas quando uma sessão é concluída ou quando uma ação específica do usuário é realizada, aproveitando um disparo da API.
#### Configuração do dashboard {#dashboard-configuration}
Para configurar um push personalizado no dashboard, você deve registrar a categoria específica que deseja exibir e, em seguida, dentro dos pares chave-valor usando Liquid padrão, definir os atributos de usuário apropriados que você deseja que a mensagem mostre. Essas visualizações podem ser personalizadas com base em atributos específicos de um perfil de usuário específico.
{: style="max-width:60%;"}
#### Manuseio de pares chave-valor {#handling-key-value-pairs}
O método `didReceive` é chamado quando a extensão de conteúdo recebe uma notificação e pode ser encontrado em `NotificationViewController`. Os pares chave-valor fornecidos no dashboard são representados no código através do uso de um dicionário `userInfo`.
**Analisando pares chave-valor de notificações por push**
``` swift
func didReceive(_ notification: UNNotification) {
let userInfo = notification.request.content.userInfo
guard let value = userInfo["YOUR-KEY-VALUE-PAIR"] as? String,
let otherValue = userInfo["YOUR-OTHER-KEY-VALUE-PAIR"] as? String,
else { fatalError("Key-Value Pairs are incorrect.")}
...
}
```
```objc
- (void)didReceiveNotification:(nonnull UNNotification *)notification {
NSDictionary *userInfo = notification.request.content.userInfo;
if (userInfo[@"YOUR-KEY-VALUE-PAIR"] && userInfo[@"YOUR-OTHER-KEY-VALUE-PAIR"]) {
...
} else {
[NSException raise:NSGenericException format:@"Key-Value Pairs are incorrect"];
}
}
```
#### Outros casos de uso {#other-use-cases}
As ideias para extensões de conteúdo push baseadas em progresso e focadas no usuário são infinitas. Alguns exemplos incluem adicionar a opção de compartilhar seu progresso em diferentes plataformas, expressar conquistas desbloqueadas, cartões de fidelidade ou até mesmo listas de verificação de integração.
##### Pronto para registrar análise de dados? {#ready-to-log-analytics}
Consulte a [seção a seguir](#logging-analytics) para entender melhor como o fluxo de dados deve ser.
### Notificação por push de captura de informações {#information-capture-push-notification}
Notificações por push podem capturar informações do usuário dentro de uma extensão de conteúdo, permitindo que você amplie os limites do que é possível com um push. Examinando o fluxo a seguir, a visualização é capaz de responder às mudanças de estado. Esses componentes de mudança de estado estão representados em cada imagem.
1. O usuário recebe uma notificação por push.
2. O push é aberto e solicita informações ao usuário.
3. As informações são fornecidas e, se forem válidas, o botão de registro é exibido.
3. A visualização de confirmação é exibida e o push é dispensado.
Note que as informações solicitadas aqui podem ser variadas, como captura de número de SMS; não precisam ser específicas para e-mail.
#### Configuração do dashboard {#dashboard-configuration}
Para configurar um push capaz de capturar informações no dashboard, você deve registrar e definir sua categoria personalizada e fornecer os pares chave-valor necessários. Como visto no exemplo, você também pode incluir uma imagem em seu push. Para fazer isso, você deve integrar [notificações Rich](https://www.braze.com/docs/pt-br/pt-br/developer_guide/platforms/legacy_sdks/ios/push_notifications/customization/rich_notifications/), definir o estilo da notificação em sua campanha como notificação Rich e incluir uma imagem de push Rich.

#### Manipulação de ações de botões {#handling-button-actions}
Cada botão de ação é identificado de forma exclusiva. O código verifica se o identificador da resposta é igual ao `actionIdentifier` e, em caso afirmativo, sabe que o usuário clicou no botão de ação.
**Manipulação de respostas de botões de ação de notificações por push**
``` swift
func didReceive(_ response: UNNotificationResponse, completionHandler completion: @escaping (UNNotificationContentExtensionResponseOption) -> Void) {
if response.actionIdentifier == "YOUR-REGISTER-IDENTIFIER" {
// do something
} else {
// do something else
}
}
```
```objc
- (void)didReceiveNotificationResponse:(UNNotificationResponse *)response completionHandler:(void (^)(UNNotificationContentExtensionResponseOption))completion {
if ([response.actionIdentifier isEqualToString:@"YOUR-REGISTER-IDENTIFIER"]) {
completion(UNNotificationContentExtensionResponseOptionDismiss);
} else {
completion(UNNotificationContentExtensionResponseOptionDoNotDismiss);
}
}
```
##### Dispensando pushes {#dismissing-pushes}
As notificações por push podem ser automaticamente descartadas ao pressionar um botão de ação. Recomendamos três opções pré-definidas para descarte de push:
1. `completion(.dismiss)` - Dispensa a notificação
2. `completion(.doNotDismiss)` - A notificação permanece aberta
3. `completion(.dismissAndForward)` - O push é descartado e o usuário é encaminhado para o aplicativo.
#### Outros casos de uso {#other-use-cases}
Solicitar a entrada do usuário por meio de notificações por push é uma oportunidade empolgante que muitas empresas não aproveitam. Nessas mensagens push, você pode não apenas solicitar informações básicas como nome, e-mail ou número, mas também pode solicitar que os usuários completem um perfil de usuário se estiver incompleto, ou até mesmo enviem feedback.
##### Pronto para registrar análise de dados? {#ready-to-log-analytics}
Consulte a [seção a seguir](#logging-analytics) para entender melhor como o fluxo de dados deve ser.
## Registro de análise de dados {#logging-analytics}
### Registro com a API da Braze (recomendado) {#logging-with-the-braze-api-recommended}
O registro de análise de dados só pode ser feito em tempo real com a ajuda do servidor do cliente acessando nosso [endpoint `/users/track`](https://www.braze.com/docs/pt-br/pt-br/api/endpoints/user_data/post_user_track/). Para registrar análise de dados, envie o valor `braze_id` no campo de pares chave-valor (como visto na captura de tela a seguir) para identificar qual perfil de usuário deve ser atualizado.
{: style="max-width:80%;"}
### Registro manual {#logging-manually}
O registro manual exigirá primeiro a configuração dos grupos de apps no Xcode e, em seguida, a criação, o salvamento e a recuperação da análise de dados. Isso exigirá algum trabalho de desenvolvimento personalizado da sua parte. Os trechos de código a seguir ajudarão a resolver isso.
Também é importante notar que a análise de dados não é enviada à Braze até que o aplicativo móvel seja iniciado posteriormente. Isso significa que, dependendo das configurações de dispensa, muitas vezes existe um período indeterminado de tempo entre o momento em que uma notificação por push é dispensada e o aplicativo móvel é iniciado e a análise de dados é recuperada. Embora esse intervalo de tempo possa não afetar todos os casos de uso, os usuários devem considerar o impacto e, se necessário, ajustar sua jornada do usuário para incluir a abertura do aplicativo para resolver essa questão.

#### Etapa 1: Configurar grupos de apps no Xcode {#step-1-configure-app-groups-within-xcode}
Adicione a capacidade `App Groups`. Se você não tiver nenhum grupo de app no seu app, acesse a capacidade do alvo principal do app, ative o `App Groups` e clique no "+". Use o ID do pacote do seu app para criar o grupo de app. Por exemplo, se o ID do pacote do seu app for `com.company.appname`, você poderá nomear o grupo do app como `group.com.company.appname.xyz`. Certifique-se de que o `App Groups` esteja ativado tanto para o alvo principal do app quanto para o alvo da extensão de conteúdo.

#### Etapa 2: Integrar trechos de código {#step-2-integrate-code-snippets}
Os trechos de código a seguir são uma referência útil sobre como salvar e enviar eventos personalizados, atributos personalizados e atributos de usuário. Este guia falará em termos de UserDefaults, mas a representação do código será feita na forma do arquivo auxiliar `RemoteStorage`. Há arquivos auxiliares adicionais, `UserAttributes` e `EventName Dictionary`, que são usados ao enviar e salvar atributos do usuário. Todos os arquivos auxiliares podem ser encontrados no final deste guia.
##### Salvando eventos personalizados {#saving-custom-events}
Para salvar eventos personalizados, você deve criar a análise de dados do zero. Isso é feito criando um dicionário, preenchendo-o com metadados e salvando os dados através do uso de um arquivo auxiliar.
1. Inicializar um dicionário com metadados de eventos
2. Inicializar `userDefaults` para recuperar e armazenar os dados do evento
3. Se houver um array existente, acrescentar novos dados ao array existente e salvar
4. Se não houver um array existente, salvar o novo array em `userDefaults`
``` swift
func saveCustomEvent(with properties: [String: Any]? = nil) {
// 1
let customEventDictionary = Dictionary(eventName: "YOUR-EVENT-NAME", properties: properties)
// 2
let remoteStorage = RemoteStorage(storageType: .suite)
// 3
if var pendingEvents = remoteStorage.retrieve(forKey: .pendingCustomEvents) as? [[String: Any]] {
pendingEvents.append(contentsOf: [customEventDictionary])
remoteStorage.store(pendingEvents, forKey: .pendingCustomEvents)
} else {
// 4
remoteStorage.store([customEventDictionary], forKey: .pendingCustomEvents)
}
}
```
```objc
- (void)saveCustomEvent:(NSDictionary *)properties {
// 1
NSDictionary *customEventDictionary = [[NSDictionary alloc] initWithEventName:@"YOUR-EVENT-NAME" properties:properties];
// 2
RemoteStorage *remoteStorage = [[RemoteStorage alloc] initWithStorageType:StorageTypeSuite];
NSMutableArray *pendingEvents = [[remoteStorage retrieveForKey:RemoteStorageKeyPendingCustomEvents] mutableCopy];
// 3
if (pendingEvents) {
[pendingEvents addObject:customEventDictionary];
[remoteStorage store:pendingEvents forKey:RemoteStorageKeyPendingCustomAttributes];
} else {
// 4
[remoteStorage store:@[ customEventDictionary ] forKey:RemoteStorageKeyPendingCustomAttributes];
}
}
```
##### Enviando eventos personalizados para a Braze {#sending-custom-events-to-braze}
O melhor momento para registrar qualquer análise de dados salva de uma extensão de app de conteúdo de notificação é logo após a inicialização do SDK. Isso pode ser feito percorrendo quaisquer eventos pendentes, verificando a chave "Event Name", definindo os valores apropriados na Braze e, em seguida, limpando o armazenamento para a próxima vez que essa função for necessária.
1. Percorrer o array de eventos pendentes
2. Percorrer cada par chave-valor no dicionário `pendingEvents`
3. Verificar explicitamente a chave "Event Name" para definir o valor de acordo
4. Todos os outros pares chave-valor serão adicionados ao dicionário `properties`
5. Registrar eventos personalizados individuais
6. Remover todos os eventos pendentes do armazenamento
``` swift
func logPendingCustomEventsIfNecessary() {
let remoteStorage = RemoteStorage(storageType: .suite)
guard let pendingEvents = remoteStorage.retrieve(forKey: .pendingCustomEvents) as? [[String: Any]] else { return }
// 1
for event in pendingEvents {
var eventName: String?
var properties: [AnyHashable: Any] = [:]
// 2
for (key, value) in event {
if key == PushNotificationKey.eventName.rawValue {
// 3
if let eventNameValue = value as? String {
eventName = eventNameValue
} else {
print("Invalid type for event_name key")
}
} else {
// 4
properties[key] = value
}
}
// 5
if let eventName = eventName {
logCustomEvent(eventName, withProperties: properties)
}
}
// 6
remoteStorage.removeObject(forKey: .pendingCustomEvents)
}
```
```objc
- (void)logPendingEventsIfNecessary {
RemoteStorage *remoteStorage = [[RemoteStorage alloc] initWithStorageType:StorageTypeSuite];
NSArray *pendingEvents = [remoteStorage retrieveForKey:RemoteStorageKeyPendingCustomEvents];
// 1
for (NSDictionary *event in pendingEvents) {
NSString *eventName = nil;
NSMutableDictionary *properties = [NSMutableDictionary dictionary];
// 2
for (NSString* key in event) {
if ([key isEqualToString:@"event_name"]) {
// 3
if ([[event objectForKey:key] isKindOfClass:[NSString class]]) {
eventName = [event objectForKey:key];
} else {
NSLog(@"Invalid type for event_name key");
}
} else {
// 4
properties[key] = event[key];
}
}
// 5
if (eventName != nil) {
[[Appboy sharednstance] logCustomEvent:eventName withProperties:properties];
}
}
// 6
[remoteStorage removeObjectForKey:RemoteStorageKeyPendingCustomEvents];
}
```
##### Salvando atributos personalizados {#saving-custom-attributes}
Para salvar atributos personalizados, você deve criar a análise de dados do zero. Isso é feito criando um dicionário, preenchendo-o com metadados e salvando os dados através do uso de um arquivo auxiliar.
1. Inicializar um dicionário com metadados de atributos
2. Inicializar `userDefaults` para recuperar e armazenar os dados de atributos
3. Se houver um array existente, acrescentar novos dados ao array existente e salvar
4. Se não houver um array existente, salvar o novo array em `userDefaults`
``` swift
func saveCustomAttribute() {
// 1
let customAttributeDictionary: [String: Any] = ["YOUR-CUSTOM-ATTRIBUTE-KEY": "YOUR-CUSTOM-ATTRIBUTE-VALUE"]
// 2
let remoteStorage = RemoteStorage(storageType: .suite)
// 3
if var pendingAttributes = remoteStorage.retrieve(forKey: .pendingCustomAttributes) as? [[String: Any]] {
pendingAttributes.append(contentsOf: [customAttributeDictionary])
remoteStorage.store(pendingAttributes, forKey: .pendingCustomAttributes)
} else {
// 4
remoteStorage.store([customAttributeDictionary], forKey: .pendingCustomAttributes)
}
}
```
``` objc
- (void)saveCustomAttribute {
// 1
NSDictionary *customAttributeDictionary = @{ @"YOUR-CUSTOM-ATTRIBUTE-KEY": @"YOUR-CUSTOM-ATTRIBUTE-VALUE" };
// 2
RemoteStorage *remoteStorage = [[RemoteStorage alloc] initWithStorageType:StorageTypeSuite];
NSMutableArray *pendingAttributes = [[remoteStorage retrieveForKey:RemoteStorageKeyPendingCustomAttributes] mutableCopy];
// 3
if (pendingAttributes) {
[pendingAttributes addObject:customAttributeDictionary];
[remoteStorage store:pendingAttributes forKey:RemoteStorageKeyPendingCustomAttributes];
} else {
// 4
[remoteStorage store:@[ customAttributeDictionary ] forKey:RemoteStorageKeyPendingCustomAttributes];
}
}
```
##### Enviando atributos personalizados para a Braze {#sending-custom-attributes-to-braze}
O melhor momento para registrar qualquer análise de dados salva de uma extensão de app de conteúdo de notificação é logo após a inicialização do SDK. Isso pode ser feito percorrendo os atributos pendentes, definindo o atributo personalizado apropriado na Braze e, em seguida, limpando o armazenamento para a próxima vez que essa função for necessária.
1. Percorrer o array de atributos pendentes
2. Percorrer cada par chave-valor no dicionário `pendingAttributes`
3. Registrar o atributo personalizado individual com a chave e o valor correspondentes
4. Remover todos os atributos pendentes do armazenamento
``` swift
func logPendingCustomAttributesIfNecessary() {
let remoteStorage = RemoteStorage(storageType: .suite)
guard let pendingAttributes = remoteStorage.retrieve(forKey: .pendingCustomAttributes) as? [[String: Any]] else { return }
// 1
pendingAttributes.forEach { setCustomAttributesWith(keysAndValues: $0) }
// 4
remoteStorage.removeObject(forKey: .pendingCustomAttributes)
}
func setCustomAttributesWith(keysAndValues: [String: Any]) {
// 2
for (key, value) in keysAndValues {
// 3
if let value = value as? [String] {
setCustomAttributeArrayWithKey(key, andValue: value)
} else {
setCustomAttributeWithKey(key, andValue: value)
}
}
}
```
```objc
- (void)logPendingCustomAttributesIfNecessary {
RemoteStorage *remoteStorage = [[RemoteStorage alloc] initWithStorageType:StorageTypeSuite];
NSArray *pendingAttributes = [remoteStorage retrieveForKey:RemoteStorageKeyPendingCustomAttributes];
// 1
for (NSDictionary *attribute in pendingAttributes) {
[self setCustomAttributeWith:attribute];
}
// 4
[remoteStorage removeObjectForKey:RemoteStorageKeyPendingCustomAttributes];
}
- (void)setCustomAttributeWith:(NSDictionary *)keysAndValues {
// 2
for (NSString *key in keysAndValues) {
// 3
[self setCustomAttributeWith:key andValue:[keysAndValues objectForKey:key]];
}
}
```
##### Salvando atributos do usuário {#saving-user-attributes}
Ao salvar atributos de usuário, é recomendável criar um objeto personalizado para decifrar que tipo de atributo está sendo atualizado (`email`, `first_name`, `phone_number`, etc.). O objeto deve ser compatível com o armazenamento/recuperação de `UserDefaults`. Consulte o arquivo auxiliar `UserAttribute` para obter um exemplo de como fazer isso.
1. Inicializar um objeto `UserAttribute` codificado com o tipo correspondente
2. Inicializar `userDefaults` para recuperar e armazenar os dados do evento
3. Se houver um array existente, acrescentar novos dados ao array existente e salvar
4. Se não houver um array existente, salvar o novo array em `userDefaults`
``` swift
func saveUserAttribute() {
// 1
guard let data = try? PropertyListEncoder().encode(UserAttribute.userAttributeType("USER-ATTRIBUTE-VALUE")) else { return }
// 2
let remoteStorage = RemoteStorage(storageType: .suite)
// 3
if var pendingAttributes = remoteStorage.retrieve(forKey: .pendingUserAttributes) as? [Data] {
pendingAttributes.append(contentsOf: [data])
remoteStorage.store(pendingAttributes, forKey: .pendingUserAttributes)
} else {
// 4
remoteStorage.store([data], forKey: .pendingUserAttributes)
}
}
```
```objc
- (void)saveUserAttribute {
// 1
UserAttribute *userAttribute = [[UserAttribute alloc] initWithUserField:@"USER-ATTRIBUTE-VALUE" attributeType:UserAttributeTypeEmail];
NSError *error;
NSData *data = [NSKeyedArchiver archivedDataWithRootObject:userAttribute requiringSecureCoding:YES error:&error];
if (error != nil) {
// log error
}
// 2
RemoteStorage *remoteStorage = [[RemoteStorage alloc] initWithStorageType:StorageTypeSuite];
NSMutableArray *pendingAttributes = [[remoteStorage retrieveForKey:RemoteStorageKeyPendingUserAttributes] mutableCopy];
// 3
if (pendingAttributes) {
[pendingAttributes addObject:data];
[remoteStorage store:pendingAttributes forKey:RemoteStorageKeyPendingUserAttributes];
} else {
// 4
[remoteStorage store:@[data] forKey:RemoteStorageKeyPendingUserAttributes];
}
}
```
##### Enviando atributos do usuário para a Braze {#sending-user-attributes-to-braze}
O melhor momento para registrar qualquer análise de dados salva de uma extensão de app de conteúdo de notificação é logo após a inicialização do SDK. Isso pode ser feito percorrendo os atributos pendentes, definindo o atributo personalizado apropriado na Braze e, em seguida, limpando o armazenamento para a próxima vez que essa função for necessária.
1. Percorrer o array de dados `pendingAttributes`
2. Inicializar um objeto `UserAttribute` codificado a partir dos dados de atributos
3. Definir um campo de usuário específico com base no tipo de atributo do usuário (e-mail)
4. Remover todos os atributos de usuário pendentes do armazenamento
``` swift
func logPendingUserAttributesIfNecessary() {
let remoteStorage = RemoteStorage(storageType: .suite)
guard let pendingAttributes = remoteStorage.retrieve(forKey: .pendingUserAttributes) as? [Data] else { return }
// 1
for attributeData in pendingAttributes {
// 2
guard let userAttribute = try? PropertyListDecoder().decode(UserAttribute.self, from: attributeData) else { continue }
// 3
switch userAttribute {
case .email(let email):
user?.email = email
}
}
// 4
remoteStorage.removeObject(forKey: .pendingUserAttributes)
}
```
```objc
- (void)logPendingUserAttributesIfNecessary {
RemoteStorage *remoteStorage = [[RemoteStorage alloc] initWithStorageType:StorageTypeSuite];
NSArray *pendingAttributes = [remoteStorage retrieveForKey:RemoteStorageKeyPendingUserAttributes];
// 1
for (NSData *attributeData in pendingAttributes) {
NSError *error;
// 2
UserAttribute *userAttribute = [NSKeyedUnarchiver unarchivedObjectOfClass:[UserAttribute class] fromData:attributeData error:&error];
if (error != nil) {
// log error
}
// 3
if (userAttribute) {
switch (userAttribute.attributeType) {
case UserAttributeTypeEmail:
[self user].email = userAttribute.userField;
break;
}
}
}
// 4
[remoteStorage removeObjectForKey:RemoteStorageKeyPendingUserAttributes];
}
```
##### Arquivos auxiliares {#helper-files}
**RemoteStorage Helper File**
```swift
enum RemoteStorageKey: String, CaseIterable {
// MARK: - Notification Content Extension Analytics
case pendingCustomEvents = "pending_custom_events"
case pendingCustomAttributes = "pending_custom_attributes"
case pendingUserAttributes = "pending_user_attributes"
}
enum RemoteStorageType {
case standard
case suite
}
class RemoteStorage: NSObject {
private var storageType: RemoteStorageType = .standard
private lazy var defaults: UserDefaults = {
switch storageType {
case .standard:
return .standard
case .suite:
return UserDefaults(suiteName: "YOUR-DOMAIN-IDENTIFIER")!
}
}()
init(storageType: RemoteStorageType = .standard) {
self.storageType = storageType
}
func store(_ value: Any, forKey key: RemoteStorageKey) {
defaults.set(value, forKey: key.rawValue)
}
func retrieve(forKey key: RemoteStorageKey) -> Any? {
return defaults.object(forKey: key.rawValue)
}
func removeObject(forKey key: RemoteStorageKey) {
defaults.removeObject(forKey: key.rawValue)
}
func resetStorageKeys() {
for key in RemoteStorageKey.allCases {
defaults.removeObject(forKey: key.rawValue)
}
}
}
```
```objc
@interface RemoteStorage ()
@property (nonatomic) StorageType storageType;
@property (nonatomic, strong) NSUserDefaults *defaults;
@end
@implementation RemoteStorage
- (id)initWithStorageType:(StorageType)storageType {
if (self = [super init]) {
self.storageType = storageType;
}
return self;
}
- (void)store:(id)value forKey:(RemoteStorageKey)key {
[[self defaults] setValue:value forKey:[self rawValueForKey:key]];
}
- (id)retrieveForKey:(RemoteStorageKey)key {
return [[self defaults] objectForKey:[self rawValueForKey:key]];
}
- (void)removeObjectForKey:(RemoteStorageKey)key {
[[self defaults] removeObjectForKey:[self rawValueForKey:key]];
}
- (void)resetStorageKeys {
[[self defaults] removeObjectForKey:[self rawValueForKey:RemoteStorageKeyPendingCustomEvents]];
[[self defaults] removeObjectForKey:[self rawValueForKey:RemoteStorageKeyPendingCustomAttributes]];
[[self defaults] removeObjectForKey:[self rawValueForKey:RemoteStorageKeyPendingUserAttributes]];
}
- (NSUserDefaults *)defaults {
if (!self.defaults) {
switch (self.storageType) {
case StorageTypeStandard:
return [NSUserDefaults standardUserDefaults];
break;
case StorageTypeSuite:
return [[NSUserDefaults alloc] initWithSuiteName:@"YOUR-DOMAIN-IDENTIFIER"];
}
} else {
return self.defaults;
}
}
- (NSString*)rawValueForKey:(RemoteStorageKey)remoteStorageKey {
switch(remoteStorageKey) {
case RemoteStorageKeyPendingCustomEvents:
return @"pending_custom_events";
case RemoteStorageKeyPendingCustomAttributes:
return @"pending_custom_attributes";
case RemoteStorageKeyPendingUserAttributes:
return @"pending_user_attributes";
default:
[NSException raise:NSGenericException format:@"Unexpected FormatType."];
}
}
```
**UserAttribute Helper File**
```swift
enum UserAttribute: Hashable {
case email(String?)
}
// MARK: - Codable
extension UserAttribute: Codable {
private enum CodingKeys: String, CodingKey {
case email
}
func encode(to encoder: Encoder) throws {
var values = encoder.container(keyedBy: CodingKeys.self)
switch self {
case .email(let email):
try values.encode(email, forKey: .email)
}
}
init(from decoder: Decoder) throws {
let values = try decoder.container(keyedBy: CodingKeys.self)
let email = try values.decode(String.self, forKey: .email)
self = .email(email)
}
}
```
```objc
@implementation UserAttribute
- (id)initWithUserField:(NSString *)userField attributeType:(UserAttributeType)attributeType {
if (self = [super init]) {
self.userField = userField;
self.attributeType = attributeType;
}
return self;
}
- (void)encodeWithCoder:(NSCoder *)encoder {
[encoder encodeObject:self.userField forKey:@"userField"];
[encoder encodeInteger:self.attributeType forKey:@"attributeType"];
}
- (id)initWithCoder:(NSCoder *)decoder {
if (self = [super init]) {
self.userField = [decoder decodeObjectForKey:@"userField"];
NSInteger attributeRawValue = [decoder decodeIntegerForKey:@"attributeType"];
self.attributeType = (UserAttributeType) attributeRawValue;
}
return self;
}
@end
```
**EventName Dictionary Helper File**
```swift
extension Dictionary where Key == String, Value == Any {
init(eventName: String, properties: [String: Any]? = nil) {
self.init()
self[PushNotificationKey.eventName.rawValue] = eventName
if let properties = properties {
for (key, value) in properties {
self[key] = value
}
}
}
}
```
```objc
@implementation NSDictionary (Helper)
- (id)initWithEventName:(NSString *)eventName properties:(NSDictionary *)properties {
self = [self init];
if (self) {
dict[@"event_name"] = eventName;
for(id key in properties) {
dict[key] = properties[key];
}
}
return self;
}
@end
```
# Testando notificação por push para iOS
Source: /docs/pt-br/developer_guide/platforms/legacy_sdks/ios/push_notifications/testing/index.md
**Warning:**
[AppboyKit](https://github.com/Appboy/appboy-ios-sdk) (also known as the Objective-C SDK) is no longer supported and has been replaced by the [Swift SDK](https://www.braze.com/docs/pt-br/pt-br/developer_guide/sdk_integration/?sdktab=swift). It will no longer receive new features, bug fixes, security updates, or technical support—however, messaging and analytics will continue to function as normal. To learn more, see [Introducing the New Braze Swift SDK](https://www.braze.com/resources/articles/introducing-the-new-braze-swift-sdk).
# Testando {#push-testing}
Se você quiser testar notificações no app e notificações por push via a linha de comando, você pode enviar uma única notificação através do terminal via CURL e a [API de envio de mensagens](https://www.braze.com/docs/pt-br/pt-br/api/endpoints/messaging/). Você precisará substituir os seguintes campos pelos valores corretos para o seu caso de teste:
Campos obrigatórios:
- `YOUR-API-KEY-HERE` - disponível em **Configurações** > **Chaves de API**. Confira se a chave está autorizada a enviar mensagens através do endpoint `/messages/send` REST API.
- `EXTERNAL_USER_ID` - disponível na página **Pesquisar Usuários**.
- `REST_API_ENDPOINT_URL` - listado no Braze [Instâncias](https://www.braze.com/docs/pt-br/pt-br/api/basics/#endpoints. Certifique-se de que o endpoint corresponde à instância do Braze em que seu espaço de trabalho está.
Campos opcionais:
- `YOUR_KEY1` (opcional)
- `YOUR_VALUE1` (opcional)
```bash
curl -X POST -H "Content-Type: application/json" -H "Authorization: Bearer YOUR-API-KEY-HERE" -d '{
"external_user_ids":["EXTERNAL_USER_ID"],
"messages": {
"apple_push": {
"alert":"Test push",
"extra": {
"YOUR_KEY1":"YOUR_VALUE1"
}
}
}
}' https://{REST_API_ENDPOINT_URL}/messages/send
```
# Testes de unidade de notificações por push para iOS
Source: /docs/pt-br/developer_guide/platforms/legacy_sdks/ios/push_notifications/unit_tests/index.md
**Warning:**
[AppboyKit](https://github.com/Appboy/appboy-ios-sdk) (also known as the Objective-C SDK) is no longer supported and has been replaced by the [Swift SDK](https://www.braze.com/docs/pt-br/pt-br/developer_guide/sdk_integration/?sdktab=swift). It will no longer receive new features, bug fixes, security updates, or technical support—however, messaging and analytics will continue to function as normal. To learn more, see [Introducing the New Braze Swift SDK](https://www.braze.com/resources/articles/introducing-the-new-braze-swift-sdk).
# Testes unitários {#unit-tests}
Este guia opcional descreve como implementar alguns testes de unidade que verificarão se o app delegate segue corretamente as etapas descritas em nossas [instruções de integração push](https://www.braze.com/docs/pt-br/pt-br/developer_guide/platforms/legacy_sdks/ios/push_notifications/integration/).
Se todos os testes forem aprovados, em geral, isso significa que a parte baseada em código de sua configuração push está funcionando. Se um teste falhar, isso pode significar que você seguiu incorretamente uma etapa ou pode ser resultado de uma personalização válida que não se alinha precisamente com nossas instruções padrão.
De qualquer forma, essa pode ser uma abordagem útil para verificar se você seguiu as etapas de integração e para ajudar a monitorar quaisquer regressões.
## Etapa 1: Criação de um direcionamento de testes de unidade
Pule esta etapa se o projeto do seu app no Xcode já contiver um pacote de teste de unidade.
Em seu projeto de app, acesse o menu **Arquivo > Novo > Direcionamento** e adicione um novo "Pacote de teste de unidade". Esse pacote pode usar Objective C ou Swift e ter qualquer nome. Defina o "Target to be Tested" (Alvo a ser testado) como o alvo principal de seu app.
## Etapa 2: Adicione o SDK do Braze aos seus testes unitários
Usando o mesmo método que você usou inicialmente para [instalar o SDK da Braze](https://www.braze.com/docs/pt-br/pt-br/developer_guide/platforms/legacy_sdks/ios/initial_sdk_setup/overview/), confira se a mesma instalação do SDK também está disponível para o direcionamento de seus testes de unidade. Por exemplo, usando o CocoaPods:
```
target 'YourAppTarget' do
pod 'Appboy-iOS-SDK'
target 'YourAppTargetTests' do
inherit! :search_paths
end
end
```
## Etapa 3: Adicione o OCMock aos seus testes unitários
Adicione o [OCMock](https://ocmock.org/) ao seu direcionamento de teste por meio do CocoaPods, do Carthage ou de sua biblioteca estática. Por exemplo, usando o CocoaPods:
```
target 'YourAppTarget' do
pod 'Appboy-iOS-SDK'
target 'YourAppTargetTests' do
inherit! :search_paths
pod 'OCMock'
end
end
```
## Etapa 4: Concluir a instalação das bibliotecas adicionadas
Conclua a instalação do SDK da Braze e do OCMock. Por exemplo, usando o CocoaPods, navegue até o diretório do seu projeto de app do Xcode no terminal e execute o seguinte comando:
```
pod install
```
Nesse ponto, você deve conseguir abrir o espaço de trabalho do projeto Xcode criado pelo CocoaPods.
## Etapa 5: Adição de testes push
Crie um novo arquivo Objective C em seu direcionamento de testes unitários.
Se o direcionamento dos testes de unidade estiver em Swift, o Xcode poderá perguntar: "Você gostaria de configurar um cabeçalho de ponte Objective C?" O cabeçalho de ponte é opcional, portanto, você pode clicar em **Não criar** e ainda assim executar esses testes de unidade com êxito.
Adicione o conteúdo do aplicativo de amostra HelloSwift [`AppboyPushUnitTests.m`](https://github.com/Appboy/appboy-ios-sdk/blob/master/HelloSwift/HelloSwiftTests/AppboyPushUnitTests.m) ao novo arquivo.
## Etapa 6: Executar o conjunto de testes
Execute os testes de unidade de seu app. Essa pode ser uma etapa de verificação única ou pode ser incluída indefinidamente em seu conjunto de testes para ajudar a detectar quaisquer regressões.
# Solução de problemas de notificação por push para iOS
Source: /docs/pt-br/developer_guide/platforms/legacy_sdks/ios/push_notifications/troubleshooting/index.md
**Warning:**
[AppboyKit](https://github.com/Appboy/appboy-ios-sdk) (also known as the Objective-C SDK) is no longer supported and has been replaced by the [Swift SDK](https://www.braze.com/docs/pt-br/pt-br/developer_guide/sdk_integration/?sdktab=swift). It will no longer receive new features, bug fixes, security updates, or technical support—however, messaging and analytics will continue to function as normal. To learn more, see [Introducing the New Braze Swift SDK](https://www.braze.com/resources/articles/introducing-the-new-braze-swift-sdk).
# Solução de problemas {#push-troubleshooting}
## Noções básicas sobre o fluxo de trabalho Braze/APNs {#understanding-the-brazeapns-workflow}
O serviço de Notificações por Push da Apple (APNs) é a infraestrutura da Apple para o envio de notificações por push para aplicativos iOS e OS X. Aqui está a estrutura simplificada de como as notificações por push são ativadas para os dispositivos dos seus usuários e como a Braze pode enviar notificações por push para eles:
1. Você configura o certificado de push e o perfil de provisionamento
2. Os dispositivos se registram no APNs e fornecem à Braze os tokens de push
3. Você lança uma Campaign de push da Braze
4. A Braze remove tokens inválidos
#### Etapa 1: Configuração de certificado de push e perfil de provisionamento {#step-1-configuring-the-push-certificate-and-provisioning-profile}
Ao desenvolver seu app, você precisará criar um certificado SSL para ativar notificações por push. Este certificado será incluído no perfil de provisionamento com o qual seu app é construído e também precisará ser enviado para o dashboard da Braze. O certificado permite que a Braze informe ao APNs que estamos autorizados a enviar notificações por push em seu nome.
Há dois tipos de [perfis de provisionamento](https://developer.apple.com/library/content/documentation/IDEs/Conceptual/AppDistributionGuide/MaintainingProfiles/MaintainingProfiles.html) e certificados: desenvolvimento e distribuição. Recomendamos usar apenas perfis de distribuição e certificados para evitar qualquer confusão. Se você optar por usar perfis e certificados diferentes para desenvolvimento e distribuição, certifique-se de que o certificado enviado para o dashboard corresponda ao perfil de provisionamento que você está usando no momento.
**Warning:**
Não altere o ambiente do certificado de push (desenvolvimento versus produção). Alterar o certificado de push para o ambiente errado pode levar a que os seus usuários tenham o token por push removido acidentalmente, tornando-os inalcançáveis por push.
#### Etapa 2: Os dispositivos se registram no APNs e fornecem à Braze os tokens de push {#step-2-devices-register-for-apns-and-provide-braze-with-push-tokens}
Quando os usuários abrirem seu app, eles serão solicitados a aceitar notificações por push. Se aceitarem este prompt, o APNs gerará um token por push para aquele dispositivo específico. O SDK do iOS enviará imediatamente e de forma assíncrona o token por push para os apps que usam a [política de descarga automática](https://www.braze.com/docs/pt-br/pt-br/developer_guide/platform_integration_guides/ios/advanced_use_cases/fine_network_traffic_control/#automatic-request-processing) padrão. Depois que tivermos um token por push associado a um usuário, ele aparecerá como "Push Registrado" no dashboard em seu perfil de usuário na guia **Engajamento** e será elegível para receber notificações por push das Campaigns da Braze.
**Note:**
A partir do Xcode 14, você pode testar notificações por push remotas em um simulador de iOS.
#### Etapa 3: Lançamento de uma Campaign de push da Braze {#step-3-launching-a-braze-push-campaign}
Quando uma Campaign de push for lançada, a Braze fará solicitações ao APNs para entregar sua mensagem. A Braze usará o certificado push SSL carregado no dashboard para autenticar e verificar que temos permissão para enviar notificações por push para os tokens de push fornecidos. Se um dispositivo estiver online, a notificação deve ser recebida logo após o envio da Campaign. Note que a Braze define a [data de expiração](https://developer.apple.com/documentation/usernotifications/setting_up_a_remote_notification_server/sending_notification_requests_to_apns#2947607) padrão do APNs para notificações como 30 dias.
#### Etapa 4: Remoção de tokens inválidos {#step-4-removing-invalid-tokens}
Se o [APNs](https://developer.apple.com/library/content/documentation/NetworkingInternet/Conceptual/RemoteNotificationsPG/APNSOverview.html#//apple_ref/doc/uid/TP40008194-CH8-SW1) nos informar que qualquer um dos tokens por push para os quais estávamos tentando enviar uma mensagem é inválido, removeremos esses tokens dos perfis de usuário aos quais eles estavam associados.
## Utilização dos registros de erros do push {#utilizing-the-push-error-logs}
A Braze fornece um registro de erros de notificação por push dentro do **Registro de atividades de envio de mensagem**. Este registro de erros fornece uma variedade de avisos que podem ser muito úteis para identificar por que suas Campaigns não estão funcionando como esperado. Clicar em uma mensagem de erro irá redirecioná-lo para a documentação relevante para ajudá-lo a solucionar um incidente específico.

Os erros comuns que podem ser vistos aqui incluem notificações específicas do usuário, como ["Received Unregistered Sending to Push Token"](#received-unregistered-sending).
Além disso, a Braze também apresenta um changelog de push no perfil do usuário na guia **Engajamento**. Esse changelog contém insights sobre o comportamento de registro de push, como invalidação de token, erros de registro de push, tokens transferidos para novos usuários, etc.
{: style="max-width:50%;" }
## Problemas de registro de push {#push-registration-issues}
Para adicionar verificação à lógica de registro de push do seu aplicativo, implemente [testes unitários de push](https://www.braze.com/docs/pt-br/pt-br/developer_guide/platforms/legacy_sdks/ios/push_notifications/unit_tests/).
#### Nenhum prompt de registro de push {#no-push-registration-prompt}
Se o aplicativo não solicitar que você se registre para notificações por push, provavelmente há um problema com a integração do seu registro de push. Certifique-se de ter seguido nossa [documentação](https://www.braze.com/docs/pt-br/pt-br/developer_guide/platforms/legacy_sdks/ios/push_notifications/integration/) e integrado corretamente nosso registro de push. Você também pode definir pontos de interrupção em seu código para garantir que o código de registro de push esteja em execução.
#### Nenhum usuário "push registrado" exibido no dashboard {#no-push-registered-users-showing-in-the-dashboard}
- Verifique se o seu app está solicitando permissão para notificações por push. Normalmente, este prompt aparecerá na primeira vez que você abrir o app, mas pode ser programado para aparecer em outro momento. Se não aparecer onde deveria, o problema provavelmente está na configuração básica das capacidades de push do seu app.
- Verifique se as etapas da [integração push](https://www.braze.com/docs/pt-br/pt-br/developer_guide/platforms/legacy_sdks/ios/push_notifications/integration/) foram concluídas com êxito.
- Verifique se o perfil de provisionamento com o qual seu app foi criado inclui permissões para push. Certifique-se de que está baixando todos os perfis de provisionamento disponíveis da sua conta de desenvolvedor Apple. Para confirmar isso, faça o seguinte:
1. No Xcode, acesse **Preferences > Accounts** (ou use o atalho de teclado Command+,).
2. Selecione o ID Apple que você usa para sua conta de desenvolvedor e clique em **View Details**.
3. Na próxima página, clique em ** Refresh** e confirme que você está baixando todos os perfis de provisionamento disponíveis.
- Verifique se você [ativou corretamente a capacidade de push](https://www.braze.com/docs/pt-br/pt-br/developer_guide/platform_integration_guides/ios/push_notifications/integration/#step-2-enable-push-capabilities) em seu app.
- Verifique se o seu perfil de provisionamento de push corresponde ao ambiente em que você está testando. Os certificados universais podem ser configurados no dashboard da Braze para enviar para o ambiente APNs de desenvolvimento ou produção. Usar um certificado de desenvolvimento para um app de produção ou um certificado de produção para um app de desenvolvimento não funcionará.
- Verifique se você está chamando nosso método `registerPushToken` definindo um ponto de interrupção no código.
- Verifique se você está em um dispositivo (push não funcionará em um simulador) e se tem uma boa conectividade de rede.
## Dispositivos não estão recebendo notificações por push {#devices-not-receiving-push-notifications}
#### Usuários não estão mais "registrados para push" após o envio de uma notificação por push {#users-no-longer-push-registered-after-sending-a-push-notification}
Provavelmente indica que o usuário tinha um token por push inválido. Isso pode acontecer por várias razões:
##### Incompatibilidade entre o certificado do dashboard e do app {#dashboard-and-app-certificate-mismatch}
Se o certificado de push que você carregou no dashboard não for o mesmo no perfil de provisionamento com o qual seu app foi desenvolvido, o APNs rejeitará o token. Verifique se você carregou o certificado correto e completou outra sessão no app antes de tentar outra notificação de teste.
##### Desinstalações {#uninstalls}
Se um usuário desinstalou seu aplicativo, seu token por push será inválido e removido no próximo envio.
##### Regenerando seu perfil de provisionamento {#regenerating-your-provisioning-profile}
Como último recurso, começar do zero e criar um novo perfil de provisionamento pode resolver erros de configuração que surgem ao trabalhar com vários ambientes, perfis e aplicativos ao mesmo tempo. Existem muitos fatores na configuração de notificações por push para apps iOS, então, às vezes, é melhor tentar novamente desde o início. Isso também ajudará a isolar o problema se você precisar continuar solucionando problemas.
#### Usuários ainda estão "registrados para push" após o envio de uma notificação por push {#users-still-push-registered-after-sending-a-push-notification}
##### App está em primeiro plano {#app-is-foregrounded}
Nas versões do iOS que não integram push via o framework `UserNotifications`, se o app estiver em primeiro plano quando a mensagem push for recebida, ela não será exibida. Você deve colocar o app em segundo plano nos seus dispositivos de teste antes de enviar mensagens de teste.
##### Notificação de teste agendada incorretamente {#test-notification-scheduled-incorrectly}
Verifique a programação que você definiu para sua mensagem de teste. Se estiver definida para entrega no fuso horário local ou [Intelligent Timing](https://www.braze.com/docs/pt-br/pt-br/user_guide/brazeai/intelligence_suite/intelligent_timing/), você pode simplesmente não ter recebido a mensagem ainda (ou ter o app em primeiro plano quando foi recebida).
#### Usuário não "registrado para push" para o app que está sendo testado {#user-not-push-registered-for-the-app-being-tested}
Verifique o perfil do usuário para o qual você está tentando enviar uma mensagem de teste. Na guia **Engajamento**, deve haver uma lista de "apps que aceitam push". Verifique se o app para o qual você está tentando enviar mensagens de teste está nesta lista. Os usuários aparecerão como "Push Registrado" se tiverem um token por push para qualquer app no seu espaço de trabalho, então isso pode ser algo como um falso positivo.
O seguinte indicaria um problema com o registro de push ou que o token do usuário foi retornado à Braze como inválido pelo APNs após o envio:
{: style="max-width:50%"}
## As mensagens push não estão sendo enviadas {#push-messages-not-sending}
Para solucionar problemas de notificações por push que não estão sendo enviadas, consulte [Solução de problemas de push](https://www.braze.com/docs/pt-br/pt-br/user_guide/channels/push/troubleshooting/).
## Erros do registro de atividade de mensagens {#message-activity-log-errors}
#### Recebido envio não registrado para token por push {#received-unregistered-sending}
- Certifique-se de que o token por push enviado para a Braze a partir do método `[[Appboy sharedInstance] registerPushToken:]` seja válido. Consulte o **Registro de atividades de envio de mensagem** para ver o token por push. Deve parecer algo como `6e407a9be8d07f0cdeb9e724733a89445f57a89ec890d63867c482a483506fa6`, uma longa string contendo uma mistura de letras e números. Se seu token por push parecer diferente, verifique seu [código](https://www.braze.com/docs/pt-br/pt-br/developer_guide/platform_integration_guides/ios/push_notifications/integration/#step-4-register-push-tokens-with-braze) para enviar os tokens por push à Braze.
- Verifique se o seu perfil de provisionamento de push corresponde ao ambiente que está testando. Os certificados universais podem ser configurados no dashboard da Braze para enviar para o ambiente APNs de desenvolvimento ou produção. Usar um certificado de desenvolvimento para um app de produção ou um certificado de produção para um app de desenvolvimento não funcionará.
- Verifique se o token por push que você enviou para a Braze corresponde ao perfil de provisionamento que você usou para desenvolver o app de onde você enviou o token por push.
#### Token de dispositivo não para tópico {#device-token-not-for-topic}
Este erro indica que o certificado de push do seu app e o ID do pacote não correspondem. Verifique se o certificado de push que você enviou para a Braze corresponde ao perfil de provisionamento usado para construir o app do qual o token por push foi enviado.
#### Envio de BadDeviceToken para token por push {#baddevicetoken-sending-to-push-token}
O `BadDeviceToken` é um código de erro do APNs e não se origina da Braze. Pode haver várias razões para essa resposta ser retornada, incluindo as seguintes:
- O app recebeu um token por push que era inválido para as credenciais enviadas para o dashboard.
- Push foi desativado para este espaço de trabalho.
- O usuário optou por não receber push.
- O app foi desinstalado.
- A Apple atualizou o token por push, o que invalidou o token antigo.
- O app foi construído para um ambiente de produção, mas as credenciais de push carregadas na Braze estão configuradas para um ambiente de desenvolvimento (ou vice-versa).
## Problemas após a entrega do push {#issues-after-push-delivery}
Para adicionar verificação ao tratamento de push do seu aplicativo, implemente [testes unitários de push](https://www.braze.com/docs/pt-br/pt-br/developer_guide/platforms/legacy_sdks/ios/push_notifications/unit_tests/).
#### Cliques de push não registrados {#push-clicks-not-logged}
- Se isso estiver ocorrendo apenas no iOS 10, certifique-se de ter seguido as etapas de integração push para o [iOS 10](https://www.braze.com/docs/pt-br/pt-br/developer_guide/platform_integration_guides/ios/push_notifications/integration/#step-5-enable-push-handling).
- A Braze não gerencia notificações por push recebidas silenciosamente em primeiro plano (por exemplo, comportamento padrão de push em primeiro plano antes do framework `UserNotifications`). Isso significa que os links não serão abertos e os cliques de push não serão registrados. Se seu app ainda não estiver integrado com o framework `UserNotifications`, a Braze não gerenciará as notificações por push quando o estado do app for `UIApplicationStateActive`. Certifique-se de que o seu app não atrase as chamadas para os nossos [métodos de tratamento de push](https://www.braze.com/docs/pt-br/pt-br/developer_guide/platform_integration_guides/ios/push_notifications/integration/#step-5-enable-push-handling); caso contrário, o SDK do iOS poderá tratar as notificações por push como eventos push silenciosos em primeiro plano e não as processará.
#### Links da web não abrem com cliques em push {#web-links-from-push-clicks-not-opening}
O iOS 9 e posteriores exigem que os links estejam em conformidade com o ATS para serem abertos em visualizações da web. Certifique-se de que seus links da web usem HTTPS. Consulte nosso artigo sobre [conformidade com ATS](https://www.braze.com/docs/pt-br/pt-br/developer_guide/platform_integration_guides/ios/advanced_use_cases/linking/#app-transport-security-ats) para saber mais.
#### Deep links de cliques push não abrem {#deep-links-from-push-clicks-not-opening}
A maior parte do código que lida com deep links também lida com aberturas de push. Primeiro, confira se as aberturas do push estão sendo registradas. Caso contrário, [corrija esse problema](#push-clicks-not-logged) (já que a correção geralmente corrige o tratamento de links).
Se as aberturas estiverem sendo registradas, verifique se é um problema com o deep link em geral ou com o tratamento do clique de push com deep linking. Para fazer isso, teste para ver se um deep link de um clique de mensagem no app funciona.
#### Poucas ou nenhuma abertura direta {#few-or-no-direct-opens}
Se pelo menos um usuário abrir a notificação por push do iOS, mas poucas ou nenhuma _abertura direta_ for registrada na Braze, pode haver um problema com a [integração do SDK](https://www.braze.com/docs/pt-br/pt-br/developer_guide/platforms/legacy_sdks/ios/initial_sdk_setup/overview/). Lembre-se de que _as aberturas diretas_ não são registradas para envios de teste ou notificações por push silenciosas.
- Certifique-se de que as mensagens não estejam sendo enviadas como [notificações por push silenciosas](https://www.braze.com/docs/pt-br/pt-br/developer_guide/platform_integration_guides/swift/push_notifications/silent_push_notifications/#sending-silent-push-notifications). A mensagem deve ter texto no título ou no corpo para não ser considerada silenciosa.
- Verifique novamente as seguintes etapas do [guia de integração push](https://www.braze.com/docs/pt-br/pt-br/developer_guide/platforms/legacy_sdks/ios/push_notifications/integration/):
- [Registre-se para push](https://www.braze.com/docs/pt-br/pt-br/developer_guide/platform_integration_guides/swift/push_notifications/integration/#step-1-register-for-push-notifications-with-apns): Em cada lançamento de app, de preferência em `application:didFinishLaunchingWithOptions:`, o código da etapa 3 precisa ocorrer. A propriedade delegate de `UNUserNotificationCenter.current()` precisa ser atribuída a um objeto que implemente `UNUserNotificationCenterDelegate` e contenha o método `(void)userNotificationCenter:didReceiveNotificationResponse:withCompletionHandler:`.
- [Ativar o tratamento de push](https://www.braze.com/docs/pt-br/pt-br/developer_guide/platform_integration_guides/legacy_sdks/ios/push_notifications/integration/#step-5-enable-push-handling): Verifique se o método `(void)userNotificationCenter:didReceiveNotificationResponse:withCompletionHandler:` foi implementado.
# Visão geral das mensagens no app para iOS
Source: /docs/pt-br/developer_guide/platforms/legacy_sdks/ios/in-app_messaging/overview/index.md
**Warning:**
[AppboyKit](https://github.com/Appboy/appboy-ios-sdk) (also known as the Objective-C SDK) is no longer supported and has been replaced by the [Swift SDK](https://www.braze.com/docs/pt-br/pt-br/developer_guide/sdk_integration/?sdktab=swift). It will no longer receive new features, bug fixes, security updates, or technical support—however, messaging and analytics will continue to function as normal. To learn more, see [Introducing the New Braze Swift SDK](https://www.braze.com/resources/articles/introducing-the-new-braze-swift-sdk).
# Mensagens no app {#in-app-messages}
[As mensagens no app](https://www.braze.com/docs/pt-br/pt-br/user_guide/channels/in_app_messages/) ajudam a levar o conteúdo ao usuário sem interromper o dia dele com uma notificação por push. Mensagens no app personalizadas e sob medida aprimoram a experiência do usuário e ajudam o público a obter o máximo valor do seu app. Com uma variedade de layouts e ferramentas de personalização para escolher, as mensagens no app engajam seus usuários mais do que nunca.
Confira nossos [estudos de caso](https://www.braze.com/customers) para ver exemplos de mensagens no app.
## Tipos de mensagens no app {#in-app-message-types}
Atualmente, a Braze oferece os seguintes tipos de mensagens padrão no app:
- `Slideup`
- `Modal`
- `Full`
- `HTML Full`
Cada tipo de mensagem no app é altamente personalizável em termos de conteúdo, imagens, ícones, ações de clique, análise de dados, exibição e entrega.
Todas as mensagens no app são subclasses do `ABKInAppMessage`, que define o comportamento básico e as características de todas as mensagens no app. As estruturas de classe das mensagens no app são as seguintes:

**Important:**
Por padrão, as mensagens no app são ativadas após a conclusão da integração padrão do SDK, incluindo o suporte a GIF.
Note que a integração do `SDWebImage` é necessária se você planeja usar nossa Braze UI para exibir imagens em mensagens no app do iOS ou em Content Cards.
### Comportamentos esperados por tipos de mensagens {#expected-behaviors-by-message-types}
É assim que seus usuários abrem um dos nossos tipos de mensagem no app padrão.
As mensagens no app [`Slideup`](https://appboy.github.io/appboy-ios-sdk/docs/interface_a_b_k_in_app_message_slideup.html) são assim chamadas porque "deslizam para cima" ou "deslizam para baixo" a partir da parte superior ou inferior da tela. Elas cobrem uma pequena parte da tela e fornecem um recurso de envio de mensagens eficaz e não intrusivo.
{: style="border:0px;"}
As mensagens no app [`Modal`](https://appboy.github.io/appboy-ios-sdk/docs/interface_a_b_k_in_app_message_modal.html) aparecem no centro da tela e são emolduradas por um painel translúcido. Úteis para o envio de mensagens mais críticas, elas podem ser equipadas com até dois botões habilitados para ação de clique e análise de dados.
{: style="border:0px;"}
As mensagens no app [`Full`](https://appboy.github.io/appboy-ios-sdk/docs/interface_a_b_k_in_app_message_full.html) são úteis para maximizar o conteúdo e o impacto da sua comunicação com o usuário. A metade superior de uma mensagem no app `full` contém uma imagem, e a metade inferior exibe texto e até dois botões habilitados para ação de clique e análise de dados.
{: style="border:0px;"}
As mensagens no app [`HTML Full`](https://appboy.github.io/appboy-ios-sdk/docs/interface_a_b_k_in_app_message_h_t_m_l_full.html) são úteis para criar conteúdo totalmente personalizado para o usuário. O conteúdo completo da mensagem no app em HTML definido pelo usuário é exibido em um `WKWebView` e pode, opcionalmente, conter outros conteúdos avançados, como imagens e fontes, permitindo controle total sobre a aparência e a funcionalidade da mensagem.
As mensagens no app do iOS suportam uma interface JavaScript `brazeBridge` para chamar métodos no Braze Web SDK a partir do seu HTML; consulte nossas [práticas recomendadas](https://www.braze.com/docs/pt-br/pt-br/user_guide/channels/in_app_messages/best_practices/) para obter mais detalhes.
O exemplo a seguir mostra uma mensagem no app paginada em HTML Full:

O conteúdo completo da mensagem no app é exibido em um `WKWebView` e pode, opcionalmente, conter outros conteúdos avançados, como imagens e fontes, permitindo controle total sobre a aparência e a funcionalidade da mensagem. Note que atualmente não oferecemos suporte à exibição de mensagens no app em HTML personalizado em um iFrame nas plataformas iOS e Android.
**Note:**
A partir da versão 3.19.0 do SDK do iOS, os seguintes métodos JavaScript são no-ops em mensagens HTML no app: `alert`, `confirm`, `prompt`.
# Personalização de mensagens no app do iOS
Source: /docs/pt-br/developer_guide/platforms/legacy_sdks/ios/in-app_messaging/customization/index.md
# Definir delegados de mensagem no app para iOS
Source: /docs/pt-br/developer_guide/platforms/legacy_sdks/ios/in-app_messaging/customization/setting_delegates/index.md
**Warning:**
[AppboyKit](https://github.com/Appboy/appboy-ios-sdk) (also known as the Objective-C SDK) is no longer supported and has been replaced by the [Swift SDK](https://www.braze.com/docs/pt-br/pt-br/developer_guide/sdk_integration/?sdktab=swift). It will no longer receive new features, bug fixes, security updates, or technical support—however, messaging and analytics will continue to function as normal. To learn more, see [Introducing the New Braze Swift SDK](https://www.braze.com/resources/articles/introducing-the-new-braze-swift-sdk).
# Definir delegados
A exibição e a entrega de mensagem no app podem ser personalizadas no código configurando nossos delegados opcionais.
## Delegado de mensagens no app
O [`ABKInAppMessageUIDelegate`](https://github.com/Appboy/appboy-ios-sdk/blob/master/AppboyUI/ABKInAppMessage/ABKInAppMessageUIDelegate.h) delegado pode ser usado para receber cargas úteis de mensagens no app acionadas para processamento adicional, receber eventos do ciclo de vida de exibição e controlar o tempo de exibição.
Defina seu objeto delegado `ABKInAppMessageUIDelegate` na instância da Braze chamando:
```objc
[[Appboy sharedInstance].inAppMessageController.inAppMessageUIController setInAppMessageUIDelegate:self];
```
```swift
Appboy.sharedInstance()?.inAppMessageController.inAppMessageUIController?.setInAppMessageUIDelegate?(self)
```
Confira um exemplo na nossa mensagem no [app de exemplo](https://github.com/Appboy/appboy-ios-sdk/blob/master/Samples/InAppMessage/BrazeInAppMessageSample/BrazeInAppMessageSample/ViewController.m). Nota que se você não estiver incluindo a biblioteca de interface do usuário Braze em seu projeto (incomum), este delegado não estará disponível.
## Delegado principal de mensagem no app
Se você não estiver incluindo a biblioteca de interface do usuário do Braze em seu projeto e quiser receber cargas úteis de mensagens no app acionadas para processamento adicional ou exibição personalizada no seu app, implemente o [`ABKInAppMessageControllerDelegate`](https://www.braze.com/docs/pt-br/pt-br/developer_guide/platforms/legacy_sdks/ios/in-app_messaging/customization/setting_delegates/) protocolo.
Defina seu objeto delegado `ABKInAppMessageControllerDelegate` na instância da Braze chamando:
```objc
[Appboy sharedInstance].inAppMessageController.delegate = self;
```
```swift
Appboy.sharedInstance()?.inAppMessageController.delegate = self
```
Você também pode definir seu delegado principal de mensagem no app no momento da inicialização via `appboyOptions` usando a chave `ABKInAppMessageControllerDelegateKey`:
```objc
[Appboy startWithApiKey:@"YOUR-API_KEY"
inApplication:application
withLaunchOptions:options
withAppboyOptions:@{ ABKInAppMessageControllerDelegateKey : self }];
```
```swift
Appboy.start(withApiKey: "YOUR-API-KEY",
in:application,
withLaunchOptions:launchOptions,
withAppboyOptions:[ ABKInAppMessageControllerDelegateKey : self ])
```
## Declarações de métodos
Para saber mais, consulte os seguintes arquivos de cabeçalho:
- [`ABKInAppMessage.h`](https://github.com/Appboy/appboy-ios-sdk/blob/master/AppboyKit/include/ABKInAppMessage.h)
- [`ABKInAppMessageControllerDelegate.h`](https://github.com/Appboy/appboy-ios-sdk/blob/master/AppboyKit/include/ABKInAppMessageControllerDelegate.h)
## Amostras de implementação
Veja um [`ViewController.m`](https://github.com/Appboy/appboy-ios-sdk/blob/master/Samples/InAppMessage/BrazeInAppMessageSample/BrazeInAppMessageSample/ViewController.m) na mensagem no app de amostra.
# Personalizar a orientação da mensagem no app para iOS
Source: /docs/pt-br/developer_guide/platforms/legacy_sdks/ios/in-app_messaging/customization/customizing_orientation/index.md
**Warning:**
[AppboyKit](https://github.com/Appboy/appboy-ios-sdk) (also known as the Objective-C SDK) is no longer supported and has been replaced by the [Swift SDK](https://www.braze.com/docs/pt-br/pt-br/developer_guide/sdk_integration/?sdktab=swift). It will no longer receive new features, bug fixes, security updates, or technical support—however, messaging and analytics will continue to function as normal. To learn more, see [Introducing the New Braze Swift SDK](https://www.braze.com/resources/articles/introducing-the-new-braze-swift-sdk).
# Personalizar orientação
## Definindo a orientação para todas as mensagens no app
Para definir uma orientação fixa para todas as mensagens no app, você pode definir a propriedade `supportedOrientationMask` em `ABKInAppMessageUIController`. Adicione o seguinte código após a chamada do seu app para `startWithApiKey:inApplication:withLaunchOptions:`:
```objc
// Set fixed in-app message orientation to portrait.
// Use UIInterfaceOrientationMaskLandscape to display in-app messages in landscape
id inAppMessageUIController = [Appboy sharedInstance].inAppMessageController.inAppMessageUIController;
((ABKInAppMessageUIController *)inAppMessageUIController).supportedOrientationMask = UIInterfaceOrientationMaskPortrait;
```
```swift
// Set fixed in-app message orientation to portrait
// Use .landscape to display in-app messages in landscape
if let controller = Appboy.sharedInstance()?.inAppMessageController.inAppMessageUIController as? ABKInAppMessageUIController {
controller.supportedOrientationMask = .portrait
}
```
A seguir, todas as mensagens no app serão exibidas na orientação suportada, independentemente da orientação do dispositivo. Nota que a orientação do dispositivo também deve ser suportada pela propriedade `orientation` da mensagem no app para que a mensagem seja exibida.
## Como definir a orientação por mensagem no app
Você também pode definir a orientação por mensagem. Para fazer isso, defina um [delegado de mensagem no app](https://www.braze.com/docs/pt-br/pt-br/developer_guide/platforms/legacy_sdks/ios/in-app_messaging/customization/setting_delegates/). Em seguida, no seu método de delegado `beforeInAppMessageDisplayed:`, defina a propriedade `orientation` no `ABKInAppMessage`:
```objc
// Set inAppMessage orientation to portrait
inAppMessage.orientation = ABKInAppMessageOrientationPortrait;
// Set inAppMessage orientation to landscape
inAppMessage.orientation = ABKInAppMessageOrientationLandscape;
```
```swift
// Set inAppMessage orientation to portrait
inAppMessage.orientation = ABKInAppMessageOrientation.portrait
// Set inAppMessage orientation to landscape
inAppMessage.orientation = ABKInAppMessageOrientation.landscape
```
Mensagens no app não serão exibidas se a orientação do dispositivo não corresponder à propriedade `orientation` na mensagem no app.
**Note:**
Para iPads, as mensagens no app aparecerão no estilo de orientação preferido do usuário, independentemente da orientação real da tela.
## Declarações de métodos
Para saber mais, consulte o seguinte arquivo de cabeçalho:
- [`ABKInAppMessage.h`](https://github.com/Appboy/appboy-ios-sdk/blob/master/AppboyKit/include/ABKInAppMessage.h)
# Personalize a manipulação de exibição de mensagens no app para iOS
Source: /docs/pt-br/developer_guide/platforms/legacy_sdks/ios/in-app_messaging/customization/handling_in_app_display/index.md
**Warning:**
[AppboyKit](https://github.com/Appboy/appboy-ios-sdk) (also known as the Objective-C SDK) is no longer supported and has been replaced by the [Swift SDK](https://www.braze.com/docs/pt-br/pt-br/developer_guide/sdk_integration/?sdktab=swift). It will no longer receive new features, bug fixes, security updates, or technical support—however, messaging and analytics will continue to function as normal. To learn more, see [Introducing the New Braze Swift SDK](https://www.braze.com/resources/articles/introducing-the-new-braze-swift-sdk).
# Exibição personalizada de mensagens no app {#custom-handling-in-app-message-display}
Quando o [`ABKInAppMessageControllerDelegate`](https://github.com/Appboy/appboy-ios-sdk/blob/master/AppboyKit/include/ABKInAppMessageControllerDelegate.h) é definido, o método delegado a seguir será chamado antes que as mensagens no app sejam exibidas:
```objc
- (ABKInAppMessageDisplayChoice) beforeInAppMessageDisplayed:(ABKInAppMessage *)inAppMessage;
```
```swift
func beforeInAppMessageDisplayed(inAppMessage: ABKInAppMessage!) -> ABKInAppMessageDisplayChoice
```
Se você tiver implementado apenas o [`ABKInAppMessageUIDelegate`](https://github.com/Appboy/appboy-ios-sdk/blob/master/AppboyUI/ABKInAppMessage/ABKInAppMessageUIDelegate.h), o método delegado da interface do usuário a seguir será chamado em seu lugar:
```objc
- (ABKInAppMessageDisplayChoice) beforeInAppMessageDisplayed:(ABKInAppMessage *)inAppMessage withKeyboardIsUp:(BOOL)keyboardIsUp;
```
```swift
func beforeInAppMessageDisplayed(inAppMessage: ABKInAppMessage!, withKeyboardIsUp keyboardIsUp: Bool) -> ABKInAppMessageDisplayChoice
```
Você pode personalizar o tratamento de mensagens no app implementando esse método delegado e retornando um dos seguintes valores para `ABKInAppMessageDisplayChoice`:
| `ABKInAppMessageDisplayChoice` | Comportamento |
| -------------------------- | -------- |
| Objective-C: `ABKDisplayInAppMessageNow` Swift: `displayInAppMessageNow` | A mensagem será exibida imediatamente. |
| Objective-C: `ABKDisplayInAppMessageLater` Swift: `displayInAppMessageLater` | A mensagem não será exibida e será colocada de volta no topo da pilha. |
| Objective-C: `ABKDiscardInAppMessage` Swift: `discardInAppMessage` | A mensagem será descartada e não será exibida. |
{: .reset-td-br-1 .reset-td-br-2 aria-label="Custom handling in-app message display" }
Você pode usar o método delegado `beforeInAppMessageDisplayed:` para adicionar lógica de exibição de mensagens no app, personalizar mensagens no app antes que a Braze as exiba ou optar por não usar a lógica e a interface de exibição de mensagens no app da Braze.
Confira nosso [aplicativo de amostra](https://github.com/Appboy/appboy-ios-sdk/blob/master/Samples/InAppMessage/BrazeInAppMessageSample/BrazeInAppMessageSample/AppDelegate.m) para obter um exemplo de implementação.
## Substituição de mensagens no app antes da exibição {#overriding-in-app-messages-before-display}
Se quiser alterar o comportamento de exibição das mensagens no app, adicione qualquer lógica de exibição necessária ao método delegado `beforeInAppMessageDisplayed:`. Por exemplo, você pode querer exibir a mensagem no app na parte superior da tela se o teclado estiver sendo exibido no momento, ou pegar o modelo de dados da mensagem no app e exibir a mensagem no app você mesmo.
Se a campanha de mensagens no app não estiver sendo exibida quando a sessão for iniciada, verifique se a lógica de exibição necessária foi adicionada ao método delegado `beforeInAppMessageDisplayed:`. Isso permite que a campanha de mensagens no app seja exibida na parte superior da tela, mesmo que o teclado esteja sendo exibido.
## Desativando o modo escuro {#disabling-dark-mode}
Para evitar que as mensagens no app adotem o estilo do modo escuro quando o dispositivo do usuário tiver o modo escuro ativado, use a propriedade [`ABKInAppMessage.enableDarkTheme`](https://appboy.github.io/appboy-ios-sdk/docs/interface_a_b_k_in_app_message.html#ae89df6090bed623099ab0ecc0a74ad5d). No método `ABKInAppMessageControllerDelegate.beforeInAppMessageDisplayed:` ou `ABKInAppMessageUIDelegate.beforeInAppMessageDisplayed:`, defina a propriedade `enableDarkTheme` do parâmetro `inAppMessage` do método como `NO`.
```objc
// ABKInAppMessageControllerDelegate
- (ABKInAppMessageDisplayChoice)beforeInAppMessageDisplayed:(ABKInAppMessage *)inAppMessage {
...
inAppMessage.enableDarkTheme = NO;
...
return ABKDisplayInAppMessageNow;
}
// ABKInAppMessageUIDelegate
- (ABKInAppMessageDisplayChoice)beforeInAppMesssageDisplayed:(ABKInAppMessage *)inAppMessage
withKeyboardIsUp:(BOOL)keyboardIsUp {
...
inAppMessage.enableDarkTheme = NO;
...
return ABKDisplayInAppMessageNow;
}
```
```swift
// ABKInAppMessageControllerDelegate
func before(inAppMessageDisplayed inAppMessage: ABKInAppMessage) -> ABKInAppMessageDisplayChoice {
...
inAppMessage.enableDarkTheme = false
...
return ABKInAppMessageDisplayChoice.displayInAppMessageNow
}
// ABKInAppMessageUIDelegate
func before(inAppMessageDisplayed inAppMessage: ABKInAppMessage, withKeyboardIsUp keyboardIsUp: Bool) -> ABKInAppMessageDisplayChoice {
...
inAppMessage.enableDarkTheme = false
...
return ABKInAppMessageDisplayChoice.displayInAppMessageNow
}
```
## Ocultação da barra de status durante a exibição {#hiding-the-status-bar-during-display}
Para mensagens no app `Full` e `HTML`, o SDK tentará colocar a mensagem sobre a barra de status por padrão. No entanto, em alguns casos, a barra de status ainda pode aparecer na parte superior da mensagem no app. A partir da versão [3.21.1](https://github.com/Appboy/appboy-ios-sdk/blob/master/CHANGELOG.md#3211) do SDK do iOS, é possível forçar a ocultação da barra de status ao exibir mensagens no app `Full` e `HTML`, definindo `ABKInAppMessageHideStatusBarKey` como `YES` dentro do `appboyOptions` passado para `startWithApiKey:`.
## Registro de impressões e cliques {#logging-impressions-and-clicks}
O registro de impressões e cliques em mensagens no app não é automático quando você implementa um tratamento totalmente personalizado (por exemplo, você contorna a exibição de mensagens no app da Braze retornando `ABKDiscardInAppMessage` no seu `beforeInAppMessageDisplayed:`). Se você optar por implementar sua própria interface do usuário usando nossos modelos de mensagem no app, deverá registrar a análise de dados com os seguintes métodos na classe `ABKInAppMessage`:
```objc
// Registers that a user has viewed an in-app message with the Braze server.
- (void) logInAppMessageImpression;
// Registers that a user has clicked on an in-app message with the Braze server.
- (void) logInAppMessageClicked;
```
```swift
// Registers that a user has viewed an in-app message with the Braze server.
func logInAppMessageImpression()
// Registers that a user has clicked on an in-app message with the Braze server.
func logInAppMessageClicked()
```
Além disso, você deve registrar os cliques em botões nas subclasses de `ABKInAppMessageImmersive` (*i.e*., `Modal` e mensagens no app `Full`):
```objc
// Logs button click analytics
- (void)logInAppMessageClickedWithButtonID:(NSInteger)buttonID;
```
```swift
// Logs button click analytics
func logInAppMessageClickedWithButtonID(buttonId: NSInteger)
```
## Declarações de métodos {#method-declarations}
Para saber mais, consulte os seguintes arquivos de cabeçalho:
- [`ABKInAppMessage.h`](https://github.com/Appboy/appboy-ios-sdk/blob/master/AppboyKit/include/ABKInAppMessage.h)
- [`ABKInAppMessageControllerDelegate.h`](https://github.com/Appboy/appboy-ios-sdk/blob/master/AppboyKit/include/ABKInAppMessageControllerDelegate.h)
## Amostras de implementação {#implementation-samples}
Veja o aplicativo de amostra de mensagem no app [`AppDelegate.m`](https://github.com/Appboy/appboy-ios-sdk/blob/master/Samples/InAppMessage/BrazeInAppMessageSample/BrazeInAppMessageSample/AppDelegate.m).
# Personalize o comportamento da mensagem no app ao clicar para iOS
Source: /docs/pt-br/developer_guide/platforms/legacy_sdks/ios/in-app_messaging/customization/behavior_on_click/index.md
**Warning:**
[AppboyKit](https://github.com/Appboy/appboy-ios-sdk) (also known as the Objective-C SDK) is no longer supported and has been replaced by the [Swift SDK](https://www.braze.com/docs/pt-br/pt-br/developer_guide/sdk_integration/?sdktab=swift). It will no longer receive new features, bug fixes, security updates, or technical support—however, messaging and analytics will continue to function as normal. To learn more, see [Introducing the New Braze Swift SDK](https://www.braze.com/resources/articles/introducing-the-new-braze-swift-sdk).
# Personalize o comportamento da mensagem no app ao clicar {#customize-in-app-message-behavior-on-click}
A propriedade `inAppMessageClickActionType` no `ABKInAppMessage` define o comportamento da ação depois que a mensagem no app é clicada. Essa propriedade é somente leitura. Se quiser alterar o comportamento ao clicar na mensagem no app, você poderá chamar o seguinte método em `ABKInAppMessage`:
```objc
[inAppMessage setInAppMessageClickAction:clickActionType withURI:uri];
```
```swift
inAppMessage.setInAppMessageClickAction(clickActionType: clickActionType, withURI: uri)
```
O `inAppMessageClickActionType` pode ser definido como um dos seguintes valores:
| `ABKInAppMessageClickActionType` | Comportamento ao clicar |
| -------------------------- | -------- |
| `ABKInAppMessageRedirectToURI` | O URI fornecido será exibido quando a mensagem for clicada, e a mensagem será descartada. Note que o parâmetro `uri` não pode ser nulo. |
| `ABKInAppMessageNoneClickAction` | A mensagem será descartada quando for clicada. Note que o parâmetro `uri` será ignorado e a propriedade `uri` no `ABKInAppMessage` será definida como nula. |
{: .reset-td-br-1 .reset-td-br-2 aria-label="Customize in-app message behavior on click" }
**Important:**
Para mensagens no app contendo botões, a mensagem `clickAction` também será incluída na carga útil final se a ação de clique for adicionada antes de adicionar o texto do botão.
## Personalização de cliques no corpo de mensagens no app {#customizing-in-app-message-body-clicks}
O seguinte método delegado [`ABKInAppMessageUIDelegate`](https://github.com/Appboy/appboy-ios-sdk/blob/master/AppboyUI/ABKInAppMessage/ABKInAppMessageUIDelegate.h) é chamado quando uma mensagem no app é clicada:
```objc
- (BOOL) onInAppMessageClicked:(ABKInAppMessage *)inAppMessage;
```
```swift
func onInAppMessageClicked(inAppMessage: ABKInAppMessage!) -> Bool
```
## Personalização de cliques no botão de mensagens no app {#customizing-in-app-message-button-clicks}
Para cliques em botões de mensagens no app e botões de mensagens HTML no app (como links), [`ABKInAppMessageUIDelegate`](https://github.com/Appboy/appboy-ios-sdk/blob/master/AppboyUI/ABKInAppMessage/ABKInAppMessageUIDelegate.h) inclui os seguintes métodos delegados:
```objc
- (BOOL)onInAppMessageButtonClicked:(ABKInAppMessageImmersive *)inAppMessage
button:(ABKInAppMessageButton *)button;
- (BOOL)onInAppMessageHTMLButtonClicked:(ABKInAppMessageHTML *)inAppMessage
clickedURL:(nullable NSURL *)clickedURL
buttonID:(NSString *)buttonID;
```
```swift
func onInAppMessageButtonClicked(inAppMessage: ABKInAppMessageImmersive!,
button: ABKInAppMessageButton) -> Bool
func onInAppMessageHTMLButtonClicked(inAppMessage: ABKInAppMessageHTML!,
clickedURL: URL, buttonID: String) -> Bool
```
Cada método retorna um valor `BOOL` para indicar se a Braze deve continuar a executar a ação de clique.
Para acessar o tipo de ação de clique de um botão em um método delegado, você pode usar o seguinte código:
```objc
if ([inAppMessage isKindOfClass:[ABKInAppMessageImmersive class]]) {
ABKInAppMessageImmersive *immersiveIAM = (ABKInAppMessageImmersive *)inAppMessage;
NSArray *buttons = immersiveIAM.buttons;
for (ABKInAppMessageButton *button in buttons) {
// Button action type is accessible via button.buttonClickActionType
}
}
```
```swift
if inAppMessage is ABKInAppMessageImmersive {
let immersiveIAM = inAppMessage as! ABKInAppMessageImmersive;
for button in inAppMessage.buttons as! [ABKInAppMessageButton]{
// Button action type is accessible via button.buttonClickActionType
}
}
```
Quando uma mensagem no app tem botões, as únicas ações de clique que serão executadas são as do modelo `ABKInAppMessageButton`. O corpo da mensagem no app não será clicável, mesmo que o modelo `ABKInAppMessage` tenha a ação de clique padrão atribuída.
## Declarações de métodos {#method-declarations}
Para saber mais, consulte os seguintes arquivos de cabeçalho:
- [`ABKInAppMessage.h`](https://github.com/Appboy/appboy-ios-sdk/blob/master/AppboyKit/include/ABKInAppMessage.h)
# Personalize o disparo de mensagens no app para iOS
Source: /docs/pt-br/developer_guide/platforms/legacy_sdks/ios/in-app_messaging/customization/custom_triggering/index.md
**Warning:**
[AppboyKit](https://github.com/Appboy/appboy-ios-sdk) (also known as the Objective-C SDK) is no longer supported and has been replaced by the [Swift SDK](https://www.braze.com/docs/pt-br/pt-br/developer_guide/sdk_integration/?sdktab=swift). It will no longer receive new features, bug fixes, security updates, or technical support—however, messaging and analytics will continue to function as normal. To learn more, see [Introducing the New Braze Swift SDK](https://www.braze.com/resources/articles/introducing-the-new-braze-swift-sdk).
# Disparo de mensagem personalizada no app
Por padrão, mensagens no app são acionadas por tipos de eventos registrados pelo SDK. Se você quiser disparar mensagens no app por eventos enviados pelo servidor, também é possível.
Para ativar esse recurso, você enviaria um push silencioso para o dispositivo, o que permite que o dispositivo registre um evento baseado em SDK. Este evento do SDK, por sua vez, dispararia a mensagem no app voltada para o usuário.
## Etapa 1: Lidar com push silencioso e pares chave-valor
Adicione o seguinte código dentro do método `application(_:didReceiveRemoteNotification:fetchCompletionHandler:)`:
```objc
- (void)handleExtrasFromPush:(NSDictionary *)userInfo {
NSLog(@"A push was received.");
if (userInfo !=nil && userInfo[@"IS_SERVER_EVENT"] !=nil && userInfo[@"CAMPAIGN_NAME"]!=nil) {
[[Appboy sharedInstance] logCustomEvent:@"IAM Trigger" withProperties:@{@"campaign_name": userInfo[@"CAMPAIGN_NAME"]}];
}
};
```
```swift
func handleExtras(userInfo: [AnyHashable : Any]) {
NSLog("A push was received");
if userInfo != nil && (userInfo["IS_SERVER_EVENT"] as? String) != nil && (userInfo["CAMPAIGN_NAME"] as? String) != nil {
Appboy.sharedInstance()?.logCustomEvent("IAM Trigger", withProperties: ["campaign_name": userInfo["CAMPAIGN_NAME"]])
}
}
```
Quando o push silencioso é recebido, um evento registrado pelo SDK "disparar mensagem no app" será registrado no perfil do usuário. Note que essas mensagens no app só serão disparadas se o push silencioso for recebido enquanto o aplicativo estiver em primeiro plano.
## Etapa 2: Criar uma campanha push
Crie uma campanha de push silenciosa que é acionada via o evento enviado pelo servidor. Para saber como criar uma campanha de push silenciosa, consulte [notificações por push silenciosas](https://www.braze.com/docs/pt-br/pt-br/developer_guide/platforms/legacy_sdks/ios/push_notifications/silent_push_notifications/).

A campanha de push precisa incluir extras de pares chave-valor, que indicam que esta campanha de push é enviada para registrar um evento personalizado do SDK. Este evento será usado para disparar a mensagem no app:

O código dentro do método `application(_:didReceiveRemoteNotification:fetchCompletionHandler:)` verifica a chave `IS_SERVER_EVENT` e registra um evento personalizado do SDK se estiver presente.
Você pode alterar o nome do evento ou as propriedades do evento enviando o valor desejado dentro do par chave-valor extras da carga útil push. Ao registrar o evento personalizado, esses extras podem ser usados como parâmetro do nome do evento ou como uma propriedade do evento.
## Etapa 3: Crie uma campanha de mensagem no app
Crie sua campanha de mensagem no app visível para o usuário no dashboard da Braze. Esta campanha deve ter uma entrega baseada em ação e ser acionada a partir do evento personalizado registrado dentro do método `application(_:didReceiveRemoteNotification:fetchCompletionHandler:)`.
No exemplo a seguir, a mensagem no app específica a ser acionada foi configurada enviando a propriedade do evento como parte do push silencioso inicial.

Devido a uma push message ser usada para registrar um evento personalizado registrado pelo SDK, a Braze precisará armazenar um token por push para cada usuário para ativar essa solução. Para iOS e Android, a Braze só armazenará um token a partir do momento em que um usuário tiver recebido o prompt de push do sistema operacional. Antes disso, o usuário não estará acessível usando push, e a solução anterior não será possível.
# mensagem no app em um controlador de visualização personalizado para iOS
Source: /docs/pt-br/developer_guide/platforms/legacy_sdks/ios/in-app_messaging/customization/custom_view_controller/index.md
**Warning:**
[AppboyKit](https://github.com/Appboy/appboy-ios-sdk) (also known as the Objective-C SDK) is no longer supported and has been replaced by the [Swift SDK](https://www.braze.com/docs/pt-br/pt-br/developer_guide/sdk_integration/?sdktab=swift). It will no longer receive new features, bug fixes, security updates, or technical support—however, messaging and analytics will continue to function as normal. To learn more, see [Introducing the New Braze Swift SDK](https://www.braze.com/resources/articles/introducing-the-new-braze-swift-sdk).
# Exibir mensagens no app em um controlador de visualização personalizado
Mensagens no app também podem ser exibidas em um controlador de visualização personalizado, que você passa para a Braze. Braze animará a mensagem no app personalizada para dentro e para fora e lidará com a análise de dados da mensagem no app. O controlador de visualização deve atender aos seguintes requisitos:
- Deve ser uma subclasse ou uma instância de `ABKInAppMessageViewController`.
- A visão do view controller retornado deve ser uma instância de `ABKInAppMessageView` ou sua subclasse.
O seguinte método de delegado de UI é chamado toda vez que uma mensagem no app é oferecida a `ABKInAppMessageViewController` para permitir que o app passe um controlador de visualização personalizado para a Braze exibir a mensagem no app:
```objc
- (ABKInAppMessageViewController *)inAppMessageViewControllerWithInAppMessage:(ABKInAppMessage *)inAppMessage;
```
```swift
func inAppMessageViewControllerWithInAppMessage(inAppMessage: ABKInAppMessage!) -> ABKInAppMessageViewController!
```
Nossos [controladores de visualização de mensagem no app](https://github.com/Appboy/appboy-ios-sdk/tree/master/AppboyUI/ABKInAppMessage/ViewControllers) são personalizáveis. Você pode usar subclasses ou categorias para personalizar a exibição ou o comportamento das mensagens no app.
## Declarações de métodos
Para saber mais, consulte os seguintes arquivos de cabeçalho:
- [`ABKInAppMessage.h`](https://github.com/Appboy/appboy-ios-sdk/blob/master/AppboyKit/include/ABKInAppMessage.h)
## Amostras de implementação
Veja um [`ViewController.m`](https://github.com/Appboy/appboy-ios-sdk/blob/master/Samples/InAppMessage/BrazeInAppMessageSample/BrazeInAppMessageSample/ViewController.m) e [`CustomInAppMessageViewController.m`](https://github.com/Appboy/appboy-ios-sdk/blob/master/Samples/InAppMessage/BrazeInAppMessageSample/BrazeInAppMessageSample/) na mensagem no app de amostra.
# Dispensa de modais de mensagens no app para iOS
Source: /docs/pt-br/developer_guide/platforms/legacy_sdks/ios/in-app_messaging/customization/modal_dismissal/index.md
**Warning:**
[AppboyKit](https://github.com/Appboy/appboy-ios-sdk) (also known as the Objective-C SDK) is no longer supported and has been replaced by the [Swift SDK](https://www.braze.com/docs/pt-br/pt-br/developer_guide/sdk_integration/?sdktab=swift). It will no longer receive new features, bug fixes, security updates, or technical support—however, messaging and analytics will continue to function as normal. To learn more, see [Introducing the New Braze Swift SDK](https://www.braze.com/resources/articles/introducing-the-new-braze-swift-sdk).
# Dispensa com toque fora do modal {#dismiss-modal-on-outside-tap}
O valor padrão é `NO`. Isso determina se a mensagem no app em formato modal será descartada quando o usuário tocar fora da mensagem no app.
Para ativar as dispensas com toque fora do modal, adicione um dicionário chamado `Braze` ao seu arquivo `Info.plist`. No dicionário `Braze`, adicione a subentrada booleana `DismissModalOnOutsideTap` e defina o valor como `YES`, conforme mostrado no seguinte trecho de código. Note que, antes do SDK da Braze para iOS v4.0.2, a chave do dicionário `Appboy` deve ser usada no lugar de `Braze`.
```
BrazeDismissModalOnOutsideTapYES
```
Você também pode ativar o recurso em tempo de execução, definindo `ABKEnableDismissModalOnOutsideTapKey` como `YES` em `appboyOptions`.
| `DismissModalOnOutsideTap` | Descrição |
|----------|-------------|
| `YES` | As mensagens no app em formato modal serão descartadas com um toque externo. |
| `NO` | Padrão: as mensagens no app em formato modal não serão descartadas com um toque externo. |
{: .reset-td-br-1 .reset-td-br-2 aria-label="Dispensa com toque fora do modal" }
# Pares de valores-chave de mensagens no app para iOS
Source: /docs/pt-br/developer_guide/platforms/legacy_sdks/ios/in-app_messaging/customization/key_value_pairs/index.md
**Warning:**
[AppboyKit](https://github.com/Appboy/appboy-ios-sdk) (also known as the Objective-C SDK) is no longer supported and has been replaced by the [Swift SDK](https://www.braze.com/docs/pt-br/pt-br/developer_guide/sdk_integration/?sdktab=swift). It will no longer receive new features, bug fixes, security updates, or technical support—however, messaging and analytics will continue to function as normal. To learn more, see [Introducing the New Braze Swift SDK](https://www.braze.com/resources/articles/introducing-the-new-braze-swift-sdk).
# Extras de pares de valores chave
`ABKInAppMessage` Os objetos podem conter pares de valores-chave como `extras`. Elas são especificadas no dashboard ao criar uma campanha. Os pares chave-valor podem ser usados para enviar dados para baixo com uma mensagem no app para posterior envio de mensagens pelo seu aplicativo.
# Envio de mensagens no app para iOS
Source: /docs/pt-br/developer_guide/platforms/legacy_sdks/ios/in-app_messaging/in-app_message_delivery/index.md
**Warning:**
[AppboyKit](https://github.com/Appboy/appboy-ios-sdk) (also known as the Objective-C SDK) is no longer supported and has been replaced by the [Swift SDK](https://www.braze.com/docs/pt-br/pt-br/developer_guide/sdk_integration/?sdktab=swift). It will no longer receive new features, bug fixes, security updates, or technical support—however, messaging and analytics will continue to function as normal. To learn more, see [Introducing the New Braze Swift SDK](https://www.braze.com/resources/articles/introducing-the-new-braze-swift-sdk).
# Envio de mensagens no app
## Tipos de disparo
Nosso produto de mensagens no app permite disparar a exibição de mensagens no app como resultado de vários tipos de eventos diferentes: `Any Purchase`, `Specific Purchase`, `Session Start`, `Custom Event` e `Push Click`. Além disso, os disparos `Specific Purchase` e `Custom Event` contêm filtros de propriedade robustos.
**Note:**
As mensagens no app disparadas só funcionam com eventos personalizados registrados por meio do SDK da Braze. As mensagens no app não podem ser disparadas por meio da API ou por eventos da API (como eventos de compra). Se estiver trabalhando com iOS, visite nosso artigo sobre [rastreamento de eventos personalizados](https://www.braze.com/docs/pt-br/pt-br/developer_guide/analytics/logging_events/?tab=swift) para saber mais.
## Semântica de entrega
Todas as mensagens no app para as quais um usuário é elegível são entregues ao dispositivo do usuário no início da sessão. No caso de duas mensagens no app serem disparadas por um evento, será mostrada a mensagem no app com a prioridade mais alta. Para saber mais sobre a semântica de início de sessão do SDK, leia sobre nosso [ciclo de vida de sessão](https://www.braze.com/docs/pt-br/pt-br/developer_guide/platform_integration_guides/ios/analytics/tracking_sessions/#session-lifecycle). Após a entrega, o SDK fará a pré-busca de ativos para que estejam disponíveis imediatamente no momento do disparo, minimizando a latência da exibição.
Quando um evento de gatilho tiver mais de uma mensagem no app elegível associada a ele, só será entregue a mensagem no app com a prioridade mais alta.
Pode haver alguma latência para mensagens no app que são exibidas imediatamente após a entrega (início da sessão, push click) devido ao fato de os ativos não serem pré-processados.
## Intervalo de tempo mínimo entre disparos
Por padrão, limitamos a frequência das mensagens no app para uma vez a cada 30 segundos para facilitar uma experiência de usuário de qualidade.
Você pode alterar esse valor em `ABKMinimumTriggerTimeIntervalKey` no parâmetro `appboyOptions` passado para `startWithApiKey:inApplication:withLaunchOptions:withAppboyOptions:`. Defina `ABKMinimumTriggerTimeIntervalKey` como o valor inteiro que deseja como tempo mínimo em segundos entre mensagens no app:
```objc
// Sets the minimum trigger time interval to 5 seconds
[Appboy startWithApiKey:@"YOUR-API-KEY"
inApplication:application
withLaunchOptions:options
withAppboyOptions:@{ ABKMinimumTriggerTimeIntervalKey : @(5) }];
```
```swift
Appboy.start(withApiKey: "YOUR-API-KEY", in:application, withLaunchOptions:launchOptions, withAppboyOptions:[ABKMinimumTriggerTimeIntervalKey : 5])
```
## Falha ao encontrar um disparador correspondente
Quando a Braze não conseguir encontrar um gatilho correspondente para um determinado evento, ela chamará o método [noMatchingTriggerForEvent:name:](https://appboy.github.io/appboy-ios-sdk/docs/protocol_a_b_k_in_app_message_controller_delegate-p.html#ab4d57b13c51545d487227945a37d4ab8) de [`ABKInAppMessageControllerDelegate`](https://appboy.github.io/appboy-ios-sdk/docs/protocol_a_b_k_in_app_message_controller_delegate-p.html). Implemente esse método em sua classe adotando o protocolo de delegação para lidar com esse cenário.
## Envio local de mensagens no app
### A pilha de mensagens no app
#### Exibição de mensagens no app
Quando um usuário for elegível para receber uma mensagem no app, `ABKInAppMessageController` receberá a mensagem no app mais recente da pilha de mensagens no app. A pilha só mantém na memória as mensagens no app armazenadas e é limpa entre as inicializações do app a partir do modo suspenso.
**Important:**
Não exiba mensagens no app quando o teclado for exibido na tela, pois a renderização é indefinida nessa circunstância.
#### Adição de mensagens no app à pilha
Os usuários são elegíveis para receber uma mensagem no app nas seguintes situações:
- Um evento de gatilho de mensagem no app é disparado
- Evento de início da sessão
- O app é aberto a partir de uma notificação por push
As mensagens no app disparadas são colocadas na pilha quando o evento-gatilho é disparado. Se várias mensagens no app estiverem na pilha e aguardando para serem exibidas, o Braze exibirá primeiro a mensagem no app recebida mais recentemente (última a entrar, primeira a sair).
#### Retorno de mensagens no app à pilha
Uma mensagem no app disparada pode ser retornada à pilha nas seguintes situações:
- A mensagem no app é disparada quando o aplicativo está em segundo plano.
- Outra mensagem no app está visível no momento.
- O [método delegado de interface](https://www.braze.com/docs/pt-br/pt-br/developer_guide/platform_integration_guides/ios/in-app_messaging/customization/setting_delegates/#in-app-message-delegate) obsoleto `beforeInAppMessageDisplayed:withKeyboardIsUp:` não foi implementado, e o teclado em exibição no momento.
- O [método delegado](https://www.braze.com/docs/pt-br/pt-br/developer_guide/platform_integration_guides/ios/in-app_messaging/customization/setting_delegates/#core-in-app-message-delegate) `beforeInAppMessageDisplayed:` ou o [método delegado de interface](https://www.braze.com/docs/pt-br/pt-br/developer_guide/platform_integration_guides/ios/in-app_messaging/customization/setting_delegates/#in-app-message-delegate) `beforeInAppMessageDisplayed:withKeyboardIsUp:` obsoleto retornou `ABKDisplayInAppMessageLater`.
#### Descarte de mensagens no app
Uma mensagem no app disparada será descartada nas seguintes situações:
- O [método delegado](https://www.braze.com/docs/pt-br/pt-br/developer_guide/platform_integration_guides/ios/in-app_messaging/customization/setting_delegates/#core-in-app-message-delegate) `beforeInAppMessageDisplayed:` ou o [método delegado de interface](https://www.braze.com/docs/pt-br/pt-br/developer_guide/platform_integration_guides/ios/in-app_messaging/customization/setting_delegates/#in-app-message-delegate) `beforeInAppMessageDisplayed:withKeyboardIsUp:` obsoleto retornou `ABKDiscardInAppMessage`.
- O ativo (imagem ou arquivo ZIP) da mensagem no app não foi baixado.
- A mensagem no app está pronta para ser exibida, mas ultrapassou o tempo limite.
- A orientação do dispositivo não corresponde à orientação da mensagem no app disparada.
- A mensagem no app é uma mensagem no app completa, mas não tem imagem.
- A mensagem no app é uma mensagem modal no app somente de imagem, mas não tem imagem.
#### Enfileirar manualmente a exibição de mensagens no app
Para exibir uma mensagem no app em outros momentos no app, você poderá exibir manualmente a mensagem no app que estiver mais à frente na pilha chamando o método a seguir:
```objc
[[Appboy sharedInstance].inAppMessageController displayNextInAppMessage];
```
```swift
Appboy.sharedInstance()!.inAppMessageController.displayNextInAppMessage()
```
### Criação e exibição de mensagens no app em tempo real
As mensagens no app também podem ser criadas localmente no aplicativo e exibidas via Braze. Isso é particularmente útil para exibir mensagens que você deseja disparar no app em tempo real. A Braze não é compatível com a análise de dados em mensagens no app criadas localmente.
```objc
ABKInAppMessageSlideup *customInAppMessage = [[ABKInAppMessageSlideup alloc] init];
customInAppMessage.message = @"YOUR_CUSTOM_SLIDEUP_MESSAGE";
customInAppMessage.duration = 2.5;
customInAppMessage.extras = @{@"key" : @"value"};
[[Appboy sharedInstance].inAppMessageController addInAppMessage:customInAppMessage];
```
```swift
let customInAppMessage = ABKInAppMessageSlideup.init()
customInAppMessage.message = "YOUR_CUSTOM_SLIDEUP_MESSAGE"
customInAppMessage.duration = 2.5
customInAppMessage.extras = ["key": "value"]
Appboy.sharedInstance()!.inAppMessageController.add(customInAppMessage)
```
# Solicitação de revisão personalizada da App Store
Source: /docs/pt-br/developer_guide/platforms/legacy_sdks/ios/in-app_messaging/custom_app_store_review_prompt/index.md
**Warning:**
[AppboyKit](https://github.com/Appboy/appboy-ios-sdk) (also known as the Objective-C SDK) is no longer supported and has been replaced by the [Swift SDK](https://www.braze.com/docs/pt-br/pt-br/developer_guide/sdk_integration/?sdktab=swift). It will no longer receive new features, bug fixes, security updates, or technical support—however, messaging and analytics will continue to function as normal. To learn more, see [Introducing the New Braze Swift SDK](https://www.braze.com/resources/articles/introducing-the-new-braze-swift-sdk).
# Solicitação de revisão personalizada da App Store {#custom-app-store-review-prompt}
**Note:**
Depois de implementar esse prompt, a Braze deixará de rastrear automaticamente as impressões e você deverá registrar sua própria [análise de dados](https://www.braze.com/docs/pt-br/pt-br/developer_guide/platform_integration_guides/ios/in-app_messaging/customization/handing_in_app_display/#logging-impressions-and-clicks).
Criar uma campanha para pedir aos usuários uma avaliação da App Store é um uso popular de mensagens no app.
Comece definindo o [delegado de mensagens no app](#in-app-message-controller-delegate) em seu aplicativo. Em seguida, implemente o seguinte método delegado para desativar a mensagem padrão de avaliação da App Store:
```objc
- (ABKInAppMessageDisplayChoice)beforeInAppMessageDisplayed:(ABKInAppMessage *)inAppMessage {
if (inAppMessage.extras != nil && inAppMessage.extras[@"Appstore Review"] != nil) {
[[UIApplication sharedApplication] openURL:inAppMessage.uri options:@{} completionHandler:nil];
return ABKDiscardInAppMessage;
} else {
return ABKDisplayInAppMessageNow;
}
}
```
```swift
func before(inAppMessageDisplayed inAppMessage: ABKInAppMessage) -> ABKInAppMessageDisplayChoice {
if inAppMessage.extras?["Appstore Review"] != nil && inAppMessage.uri != nil {
UIApplication.shared.open(inAppMessage.uri!, options: [:], completionHandler: nil)
return ABKInAppMessageDisplayChoice.discardInAppMessage
} else {
return ABKInAppMessageDisplayChoice.displayInAppMessageNow
}
}
```
No código de tratamento do deep link, adicione o seguinte código para processar o deep link `{YOUR-APP-SCHEME}:appstore-review`. Note que você precisará importar `StoreKit` para usar `SKStoreReviewController`:
```objc
- (BOOL)application:(UIApplication *)app openURL:(NSURL *)url options:(NSDictionary *)options {
NSString *urlString = url.absoluteString.stringByRemovingPercentEncoding;
if ([urlString isEqualToString:@"{YOUR-APP-SCHEME}:appstore-review"]) {
[SKStoreReviewController requestReview];
return YES;
}
// Other deep link handling code…
}
```
```swift
func application(_ app: UIApplication, open url: URL, options: [UIApplicationOpenURLOptionsKey : Any] = [:]) -> Bool {
let urlString = url.absoluteString.removingPercentEncoding
if (urlString == "{YOUR-APP-SCHEME}:appstore-review") {
SKStoreReviewController.requestReview()
return true;
}
// Other deep link handling code…
}
```
Em seguida, crie uma campanha de mensagem no app com o seguinte:
- O par chave-valor `"Appstore Review" : "true"`
- O comportamento ao clicar definido como "Deep Link Into App", utilizando o deep link `{YOUR-APP-SCHEME}:appstore-review`.
**Tip:**
A Apple limita as solicitações de revisão da App Store a um máximo de três (3) vezes por ano para cada usuário, portanto, sua campanha deve ter [limite de frequência](https://www.braze.com/docs/pt-br/pt-br/user_guide/messaging/messaging_fundamentals/frequency_capping/) de três vezes por ano por usuário.
Os usuários podem desativar os avisos de revisão da App Store. Como resultado, seu prompt de avaliação personalizado não deve prometer que um prompt de avaliação nativo da App Store aparecerá ou solicitar diretamente uma avaliação.
# Guia de implementação de mensagens no app para iOS (opcional)
Source: /docs/pt-br/developer_guide/platforms/legacy_sdks/ios/in-app_messaging/implementation_guide/index.md
**Warning:**
[AppboyKit](https://github.com/Appboy/appboy-ios-sdk) (also known as the Objective-C SDK) is no longer supported and has been replaced by the [Swift SDK](https://www.braze.com/docs/pt-br/pt-br/developer_guide/sdk_integration/?sdktab=swift). It will no longer receive new features, bug fixes, security updates, or technical support—however, messaging and analytics will continue to function as normal. To learn more, see [Introducing the New Braze Swift SDK](https://www.braze.com/resources/articles/introducing-the-new-braze-swift-sdk).
**Important:**
Está procurando o guia básico para desenvolvedores de integração de mensagens no app? Encontre [here](https://www.braze.com/docs/pt-br/pt-br/developer_guide/platforms/legacy_sdks/ios/in-app_messaging/overview/).
# Guia de implementação de envio de mensagens no app
> Este guia de implementação opcional e avançado aborda considerações sobre o código de mensagens no app, três casos de uso personalizados criados por nossa equipe e os trechos de código que os acompanham. Visite nosso repositório de demonstrações do Braze [aqui](https://github.com/braze-inc/braze-growth-shares-ios-demo-app)! Este guia de implementação está centrado em uma implementação Swift, mas são fornecidos trechos em Objective C para os interessados. Procurando implementações em HTML? Dê uma olhada em nosso [repositório de modelos HTML](https://github.com/braze-inc/in-app-message-templates)!
## Considerações de código
O guia a seguir oferece uma integração de desenvolvedor personalizada opcional para ser usada além das mensagens no app padrão. Os controladores de exibição personalizados estão incluídos em cada caso de uso, oferecendo exemplos para ampliar a funcionalidade e personalizar nativamente a aparência de suas mensagens no app.
### Subclasses de ABKInAppMessage
O trecho de código a seguir é um método delegado de interface do usuário do SDK do Braze que determina com qual visualização de subclasse você deseja preencher sua mensagem no app. Neste guia, abordamos uma implementação básica e mostramos como as subclasses completa, deslizante e modal podem ser implementadas de maneiras cativantes. Observe que, se quiser configurar seu view controller personalizado, você deverá configurar todas as outras subclasses de mensagens no app. Depois que você tiver uma sólida compreensão dos conceitos por trás da subclasse, confira nossos [casos de uso](#sample-use-cases) para começar a implementar subclasses de mensagens no app.
**Subclasses de ABKInAppMessage**
```swift
extension AppboyManager: ABKInAppMessageUIDelegate {
func inAppMessageViewControllerWith(_ inAppMessage: ABKInAppMessage) -> ABKInAppMessageViewController {
switch inAppMessage {
case is ABKInAppMessageSlideup:
return slideupViewController(inAppMessage: inAppMessage) //Custom Method
case is ABKInAppMessageModal:
return modalViewController(inAppMessage: inAppMessage) //Custom Method
case is ABKInAppMessageFull:
return fullViewController(inAppMessage: inAppMessage) //Custom Method
case is ABKInAppMessageHTML:
return ABKInAppMessageHTMLViewController(inAppMessage: inAppMessage)
default:
return ABKInAppMessageViewController(inAppMessage: inAppMessage)
}
}
}
```
**Subclasses de ABKInAppMessage**
```objc
- (ABKInAppMessageViewController *)inAppMessageViewControllerWithInAppMessage:(ABKInAppMessage *)inAppMessage {
if ([inAppMessage isKindOfClass:[ABKInAppMessageSlideup class]]) {
return [self slideupViewControllerWithInAppMessage:inAppMessage]; //Custom Method
} else if ([inAppMessage isKindOfClass:[ABKInAppMessageModal class]]) {
return [self modalViewControllerWithInAppMessage:inAppMessage]; //Custom Method
} else if ([inAppMessage isKindOfClass:[ABKInAppMessageFull class]]) {
return [self fullViewControllerWithInAppMessage:inAppMessage]; //Custom Method
} else if ([inAppMessage isKindOfClass:[ABKInAppMessageHTML class]]) {
return [[ABKInAppMessageHTMLViewController alloc] initWithInAppMessage:inAppMessage];
} else {
return [[ABKInAppMessageViewController alloc] initWithInAppMessage:inAppMessage];
}
}
```
## Casos de uso
Fornecemos três casos de uso abaixo. Cada caso de uso oferece uma explicação detalhada, trechos de código relevantes e uma visão de como as mensagens no app podem parecer e ser usadas no dashboard do Braze:
- [Mensagem no app com slide personalizado](#custom-slide-up-in-app-message)
- [Mensagem modal personalizada no app](#custom-modal-in-app-message)
- [Mensagem no app completa personalizada](#custom-full-in-app-message)
### Mensagem no app com slide personalizado
{: style="float:right;max-width:45%;margin-left:15px;border:0;"}
Ao criar sua mensagem no app com slide-up, você pode perceber que não é possível modificar o posicionamento da mensagem usando os métodos padrão. Modificações como essa são possíveis ao criar uma subclasse de `ABKInAppMessageSlideupViewController` e substituir a variável `offset` por sua própria variável personalizada. A imagem à direita mostra um exemplo de como isso pode ser usado para ajustar suas mensagens deslizantes no app.
Visite o site [`SlideFromBottomViewController`](https://github.com/braze-inc/braze-growth-shares-ios-demo-app/blob/master/Braze-Demo/ViewController/In-App-Messages/SlideFromBottomViewController.swift) para começar.
#### Adição de comportamento adicional à nossa UI padrão
**Atualizar a variável `offset`**
Atualize a variável `offset` e defina seu próprio deslocamento de acordo com suas necessidades.
```swift
func setSlideConstraint() {
offset = 0
}
```
```swift
override var offset: CGFloat {
get {
return super.offset
}
set {
super.offset = newValue + adjustedOffset
}
}
```
**Version 3.34.0 or earlier**
**Atualizar a variável `slideConstraint`**
A variável pública `slideConstraint` vem da superclasse `ABKInAppMessageSlideupViewController`.
```swift
func setSlideConstraint() {
slideConstraint?.constant = bottomSpacing
}
```
```swift
private var bottomSpacing: CGFloat {
return AppboyManager.shared.activeApplicationViewController.topMostViewController().view.safeAreaInsets.bottom
}
```
Acesse o repositório de demonstrações da Braze para obter a função [`topMostViewController()`](https://github.com/braze-inc/braze-growth-shares-ios-demo-app/blob/master/Braze-Demo/Utils/UIViewController_Util.swift#L17).
**Atualizar a variável `offset`**
Atualize a variável `offset` e defina seu próprio deslocamento de acordo com suas necessidades.
```objc
- (void)setOffset {
self.offset = 0;
}
```
```objc
- (CGFloat)offset {
return [super offset];
}
- (void)setOffset:(CGFloat)offset {
[super setOffset:offset + [self adjustedOffset]];
}
```
**Version 3.34.0 or earlier**
**Atualizar a variável `slideConstraint`**
A variável pública `slideConstraint` vem da superclasse `ABKInAppMessageSlideupViewController`.
```objc
- (void)self.setSlideConstraint:(NSLayoutConstraint *)slideConstraint {
slideConstraint.constant = bottomSpacing;
}
```
```objc
- (CGFloat)bottomSpacing {
return [AppboyManager shared].activeApplicationViewController.topMostViewController.view.safeAreaInsets.bottom;
}
```
**Substituir e definir restrições personalizadas**
Substitua `beforeMoveInAppMessageViewOnScreen()` e defina seu próprio valor de restrição personalizado para atender às suas necessidades. O valor original é definido na superclasse.
```swift
override func beforeMoveInAppMessageViewOnScreen() {
super.beforeMoveInAppMessageViewOnScreen()
setOffset()
}
```
**Version 3.34.0 or earlier**
```swift
override func beforeMoveInAppMessageViewOnScreen() {
setSlideConstraint()
}
```
**Substituir e definir restrições personalizadas**
Substitua `beforeMoveInAppMessageViewOnScreen()` e defina seu próprio valor de restrição personalizado para atender às suas necessidades. O valor original é definido na superclasse.
```objc
- (void)beforeMoveInAppMessageViewOnScreen {
[super beforeMoveInAppMessageViewOnScreen];
[self setOffset];
}
```
**Version 3.34.0 or earlier**
```objc
- (void)beforeMoveInAppMessageViewOnScreen {
[self setSlideConstraint:self.slideConstraint];
}
```
**Ajustar a restrição para a orientação do dispositivo**
Ajuste o respectivo valor em `viewWillTransition()` porque a subclasse assume a responsabilidade de manter a restrição sincronizada durante as alterações de layout.
### Mensagem modal personalizada no app
{: style="float:right;max-width:23%;margin-left:15px;border:0;"}
Um `ABKInAppMessageModalViewController` pode ser subclassificado para aproveitar um `UIPickerView` que oferece maneiras engajadas de coletar valiosas atribuições do usuário. A mensagem modal personalizada no app permite que você use o Connected Content ou qualquer lista disponível para exibir e capturar atribuições de uma lista dinâmica de itens.
Você pode interpor suas próprias exibições em mensagens no app de subclasse. Este exemplo mostra como um `UIPickerView` pode ser utilizado para ampliar a funcionalidade de um `ABKModalInAppMessageViewController`.
Visite o [ModalPickerViewController](https://github.com/braze-inc/braze-growth-shares-ios-demo-app/blob/master/Braze-Demo/ViewController/In-App-Messages/ModalPickerViewController/ModalPickerViewController.swift) para começar.
#### Configuração do dashboard
Para configurar uma mensagem modal no app no dashboard, você deve fornecer uma lista de itens formatada como uma string separada por vírgulas. Em nosso exemplo, usamos o conteúdo conectado para extrair uma lista JSON de nomes de equipes e formatá-los adequadamente.

Nos pares de chave-valor, forneça um `attribute_key`; essa chave, juntamente com o valor selecionado pelo usuário, será salva em seu perfil de usuário como um atributo personalizado. Sua lógica de visualização personalizada deve lidar com os atributos do usuário enviados ao Braze.
O dicionário `extras` no objeto `ABKInAppMessage` permite que você consulte uma chave `view_type` (se houver) que sinalize a exibição correta. É importante notar que as mensagens no app são configuradas por mensagem, de modo que as exibições modais personalizadas e padrão podem funcionar harmoniosamente.
{: style="max-width:65%;"}
**Uso de `view_type` para comportamento de exibição da interface do usuário**
Consulte o dicionário `extras` de `view_type` para carregar o view controller subclasse desejado.
```swift
func modalViewController(inAppMessage: ABKInAppMessage) -> ABKInAppMessageModalViewController {
switch inAppMessage.extras?[InAppMessageKey.viewType.rawValue] as? String {
case InAppMessageViewType.picker.rawValue:
return ModalPickerViewController(inAppMessage: inAppMessage)
default:
return ABKInAppMessageModalViewController(inAppMessage: inAppMessage)
}
}
```
**Uso de `view_type` para comportamento de exibição da interface do usuário**
Consulte o dicionário `extras` de `view_type` para carregar o view controller subclasse desejado.
```objc
- (ABKInAppMessageModalViewController *)modalViewControllerWithInAppMessage:(ABKInAppMessage *)inAppMessage {
InAppMessageData *inAppMessageData = [[InAppMessageData alloc] init];
NSString *key = [inAppMessageData rawValueForInAppMessageKey:InAppMessageKeyViewType];
NSString *viewType = [inAppMessageData rawValueForInAppMessageViewType:InAppMessageViewTypePicker];
if ([inAppMessage.extras objectForKey:key] && [inAppMessage.extras[key] isEqualToString:viewType]) {
return [[ModalViewController alloc] initWithInAppMessage:inAppMessage];
} else {
return [[ABKInAppMessageModalViewController alloc] initWithInAppMessage:inAppMessage];
}
}
```
**Substituir e fornecer visualização personalizada**
Substitua o site `loadView()` e defina sua própria exibição personalizada para atender às suas necessidades.
```swift
override var nibname: String{
return "ModalPickerViewController"
}
override func loadView() {
Bundle.main.loadNibNamed(nibName, owner: self, options: nil)
}
```
**Substituir e fornecer visualização personalizada**
Substitua o site `loadView()` e defina sua própria exibição personalizada para atender às suas necessidades.
```objc
- (void)loadView {
NSString *nibName = @"ModalPickerViewController";
[[NSBundle mainBundle] loadNibNamed:nibName owner:self options:nil];
}
```
**Formatar variáveis para uma lista dinâmica**
Antes de recarregar os componentes do site `UIPickerView`, a variável de mensagem `inAppMessage` é emitida como um _String_. Essa mensagem deve ser formatada como uma matriz de itens para ser exibida corretamente. Por exemplo, isso pode ser feito usando [`components(separatedBy: ", ")`](https://developer.apple.com/documentation/foundation/nsstring/1413214-components).
```swift
override func viewDidLoad() {
super.viewDidLoad()
items = inAppMessage.message.separatedByCommaSpaceValue
pickerView.reloadAllComponents()
}
```
**Variáveis de formato para o PickerView**
Antes de recarregar os componentes do site `UIPickerView`, a variável de mensagem `inAppMessage` é emitida como um _String_. Essa mensagem deve ser formatada como uma matriz de itens para ser exibida corretamente. Por exemplo, isso pode ser feito usando [`componentsSeparatedByString`](https://developer.apple.com/documentation/foundation/nsstring/1413214-componentsseparatedbystring?language=objc).
```objc
- (void)viewDidLoad {
[super viewDidLoad];
self.items = [[NSArray alloc] initWithArray:[self.inAppMessage.message componentsSeparatedByString:@", "]];
[self.pickerView reloadAllComponents];
}
```
**atribuir atributo personalizado**
Usando a subclasse, depois que um usuário pressionar enviar, passe a atribuição com o valor selecionado correspondente para a Braze.
```swift
@IBAction func primaryButtonTapped(_ sender: Any) {
guard let item = selectedItem, !item.isEmpty, let attributeKey = inAppMessage.extras?[InAppMessageKey.attributeKey.rawValue] as? String else { return }
AppboyManager.shared.setCustomAttributeWithKey(attributeKey, andStringValue: item)
}
```
**atribuir atributo personalizado**
Usando a subclasse, depois que um usuário pressionar enviar, passe a atribuição com o valor selecionado correspondente para a Braze.
```objc
- (IBAction)primaryButtonTapped:(id)sender {
InAppMessageData *inAppMessageData = [[InAppMessageData alloc] init];
NSString *key = [inAppMessageData rawValueForInAppMessageKey:InAppMessageKeyAttributeKey];
if (self.selectedItem.length > 0 && [self.inAppMessage.extras objectForKey:key]) {
[[AppboyManager shared] setCustomAttributeWithKey:self.inAppMessage.extras[key] andStringValue:self.selectedItem];
}
}
```
**Tip:**
Tem interesse em aproveitar nossas mensagens modais personalizadas no app para compartilhar vídeos no FaceTime? Confira nosso [guia de implementação](https://www.braze.com/docs/pt-br/pt-br/developer_guide/platforms/legacy_sdks/ios/in-app_messaging/implementation_guide/shareplay/) de mensagens no app SharePlay.
### Mensagem completa e personalizada no app
{: style="float:right;max-width:23%;margin-left:15px;border:0;"}
Use mensagens completas e personalizadas no app para criar prompts interativos e fáceis de usar para coletar dados valiosos de clientes. O exemplo à direita mostra uma implementação da mensagem no app personalizada e completa, reimaginada como um primer push interativo com preferências de notificação.
Visite o site [`FullListViewController`](https://github.com/braze-inc/braze-growth-shares-ios-demo-app/blob/master/Braze-Demo/ViewController/In-App-Messages/FullListViewController/FullListViewController.swift) para começar.
#### Configuração do dashboard
Para configurar uma mensagem completa e personalizada no app no dashboard, você deve fornecer uma lista de suas tags formatadas como uma string separada por vírgulas.
Nos pares de chave-valor, forneça um `attribute_key`; essa chave, juntamente com os valores selecionados pelo usuário, será salva em seu perfil de usuário como um atributo personalizado. Sua lógica de visualização personalizada deve lidar com os atributos do usuário enviados ao Braze.
{: style="max-width:65%;"}
#### Interceptação de toques em mensagens no app
{: style="float:right;max-width:30%;margin-left:10px;border:0"}
A interceptação de toques de mensagens no app é crucial para que os botões personalizados de mensagens completas no app funcionem corretamente. Por padrão, o `ABKInAppMessageImmersive` adiciona um reconhecedor de gestos de toque à mensagem, para que os usuários possam descartar mensagens sem botões. Ao adicionar um `UISwitch` ou botão à hierarquia da visualização `UITableViewCell`, os toques agora são tratados pela nossa visualização personalizada. A partir do iOS 6, os botões e outros controles têm precedência ao trabalhar com reconhecedores de gestos, fazendo com que nossa mensagem completa personalizada no app funcione como deveria.
# Guia avançado de implementação de mensagens no app – SharePlay
Source: /docs/pt-br/developer_guide/platforms/legacy_sdks/ios/in-app_messaging/implementation_guide/shareplay/index.md
**Warning:**
[AppboyKit](https://github.com/Appboy/appboy-ios-sdk) (also known as the Objective-C SDK) is no longer supported and has been replaced by the [Swift SDK](https://www.braze.com/docs/pt-br/pt-br/developer_guide/sdk_integration/?sdktab=swift). It will no longer receive new features, bug fixes, security updates, or technical support—however, messaging and analytics will continue to function as normal. To learn more, see [Introducing the New Braze Swift SDK](https://www.braze.com/resources/articles/introducing-the-new-braze-swift-sdk).
# Guia de implementação de mensagem no app do SharePlay {#shareplay-in-app-message-implementation-guide}
> O SharePlay é um recurso recém-lançado no iOS 15, que proporciona aos usuários do FaceTime uma experiência de compartilhamento de mídias entre seus dispositivos, com sincronização de áudio e vídeo em tempo real. O SharePlay é uma ótima maneira para os usuários experimentarem conteúdo com amigos e familiares, oferecendo aos clientes da Braze uma via adicional para conteúdo de vídeo e oportunidades para apresentar novos usuários ao seu aplicativo.
{: style="border:0;margin-top:10px;"}
## Visão geral {#overview}
O novo framework `GroupActivities` lançado pela Apple como parte da atualização do iOS 15 permite que você aproveite o FaceTime integrando o SharePlay em seus apps com a ajuda de mensagens no app da Braze.
{: style="float:right;max-width:30%;margin-left:15px;margin-top:10px;"}
Quando os usuários iniciam um vídeo do SharePlay em uma chamada FaceTime, um botão "Abrir" aparecerá no topo da tela de todos. Quando aberto, áudio e vídeo serão sincronizados em todos os dispositivos compatíveis, permitindo que os usuários assistam a vídeos juntos em tempo real. Aqueles que não tiverem o app baixado serão redirecionados para a App Store.
**Reprodução de mídia sincronizada**
Com a reprodução de mídia sincronizada, se uma pessoa pausar o vídeo do SharePlay, ele será pausado em todos os dispositivos.
{: style="border:0"}
## Integração {#integration}
A mensagem no app usada nesta integração é um controlador modal de subclasse de visualização de mensagens no app. Consulte instruções de configuração no [guia de implementação](https://www.braze.com/docs/pt-br/pt-br/developer_guide/platforms/legacy_sdks/ios/in-app_messaging/implementation_guide/), na seção sobre o caso de uso avançado de mensagens no app do iOS. Antes de fazer a integração, adicione a permissão `GroupActivities` ao seu projeto do Xcode.
**Important:**
Recomendamos abrir a [documentação do Apple SharePlay](https://developer.apple.com/documentation/avfoundation/media_playback_and_selection/supporting_coordinated_media_playback) lado a lado com este guia para concluir a integração.
### Etapa 1: Substituição e carregamento do XIB {#step-1-overriding-and-loading-xib}
```swift
override var nibName: String {
return "ModalVideoViewController"
}
/// Overriding loadView() from ABKInAppMessageModalViewController to provide our own view for the in-app message
override func loadView() {
Bundle.main.loadNibNamed(nibName, owner: self, options: nil)
}
```
### Etapa 2: Configurar AVPlayer para mensagens no app {#step-2-configure-avplayer-for-in-app-messages}
As mensagens no app podem reproduzir vídeos de forma nativa com um trabalho leve de desenvolvimento. Ao fazer isso, você tem acesso a todos os recursos do `AVPlayerVideoController`, como o SharePlay. A mensagem no app usada para este exemplo é uma subclasse `ABKInAppMessageModalViewController` que tem uma visualização personalizada para incorporar um reprodutor de vídeo nativo.
```swift
func configureVideoPlayer() {
guard let urlString = inAppMessage.extras?["video_url"] as? String,
let url = URL(string: urlString) else { return }
let videoTitle = inAppMessage.extras?["video_title"] as? String
mediaItem = MediaItem(title: videoTitle ?? "Video Content", url: url)
let asset = AVAsset(url: url)
let playerItem = AVPlayerItem(asset: asset)
player.replaceCurrentItem(with: playerItem)
playerViewController.player = player
addChild(playerViewController)
videoPlayerContainer.addSubview(playerViewController.view)
playerViewController.didMove(toParent: self)
}
```
#### Configuração do dashboard {#dashboard-configuration}
**Pares de chave-valor**: O arquivo de vídeo deve ser configurado nos pares de chave-valor na mensagem no app e não pode ser anexado ao item de mídia em si. Você também pode adicionar a verificação de validade de URL em `beforeInAppMessageDisplayed` como uma proteção antes de exibir o conteúdo.
**Disparo**: A mensagem no app deve ser elegível para todos os usuários com re-elegibilidade ativada. Isso pode ser feito configurando dois gatilhos: um gatilho padrão para disparar a mensagem e outro para disparar a mensagem quando iniciada pelo SharePlay. Usuários que não estiverem no iOS 15 só poderão visualizar as mensagens localmente.
**Important:**
Esteja atento a quaisquer outras mensagens no app disparadas no início da sessão que possam entrar em conflito umas com as outras.
### Etapa 3: Criar atividade de assistir em grupo {#step-3-create-group-watching-activity}
Crie um objeto que esteja em conformidade com o protocolo `GroupActivity`. O objeto será os metadados do `GroupSession` compartilhados ao longo do ciclo de vida do SharePlay.
```swift
struct MediaItem: Hashable, Codable {
let title: String
let url: URL
}
@available(iOS 15, *)
struct MediaItemActivity: GroupActivity {
static let activityIdentifier = "com.book-demo.GroupWatching"
let mediaItem: MediaItem
var metadata: GroupActivityMetadata {
var metadata = GroupActivityMetadata()
metadata.type = .watchTogether
metadata.title = mediaItem.title
metadata.fallbackURL = mediaItem.url
return metadata
}
}
```
#### Preparação para a reprodução {#prepare-to-play}
Na preparação para reproduzir o item de mídia, cada atividade em grupo tem três estados de `prepareForActivation()`:
- `.activationDisabled` - visualizando individualmente
- `.activationPreferred` - assistindo juntos
- `.cancelled` - ignorar e prosseguir com naturalidade
Quando o estado retornar como `activationPreferred`, esse é o seu sinal para ativar o restante do ciclo de vida da atividade em grupo.
{: style="border:0;"}
### Etapa 4: Abrir a mensagem no app a partir da API do SharePlay {#step-4-launch-in-app-message-from-shareplay-api}
A API `GroupActivities` determina se há um vídeo presente. Se houver, você deve disparar o evento personalizado para lançar sua mensagem no app compatível com SharePlay. O `CoordinationManager` é responsável pelas mudanças de estado do SharePlay, como a entrada e a saída de usuários na chamada.
```swift
private var subscriptions = Set()
private var selectedMediaItem: MediaItem? {
didSet {
// Ensure the UI selection always represents the currently playing media.
guard let _ = selectedMediaItem else { return }
if !BrazeManager.shared.inAppMessageCurrentlyVisible {
BrazeManager.shared.logCustomEvent("SharePlay Event")
}
}
}
private func launchVideoPlayerIfNecessary() {
CoordinationManager.shared.$enqueuedMediaItem
.receive(on: DispatchQueue.main)
.compactMap { $0 }
.assign(to: \.selectedMediaItem, on: self)
.store(in: &subscriptions)
}
```
### Etapa 5: Saída de uma sessão em grupo ao dispensar a mensagem no app {#step-5-leaving-a-group-session-on-in-app-message-dismissal}
A dispensa da mensagem no app é um bom momento para sair da sessão do SharePlay e descartar o objeto da sessão.
```swift
override func viewDidDisappear(_ animated: Bool) {
super.viewDidDisappear(animated)
groupSession?.leave()
CoordinationManager.shared.leave()
}
class CoordinationManager() {
...
// Published values that the player, and other UI items, observe.
@Published var enqueuedMediaItem: MediaItem?
@Published var groupSession: GroupSession?
// Clear activity when the user leaves
func leave() {
groupSession = nil
enqueuedMediaItem = nil
}
...
}
```
### Configurar a visibilidade do botão SharePlay {#configure-shareplay-button-visibility}
É uma prática recomendada ocultar ou exibir dinamicamente qualquer indicador do SharePlay. Use a variável `isEligibleForGroupSession` para observar se o usuário está em uma chamada FaceTime ou não. Se estiver em uma chamada FaceTime, um botão deve ficar visível para compartilhar o vídeo entre os dispositivos compatíveis no chat. Na primeira vez que o usuário iniciar o SharePlay, um prompt aparecerá no dispositivo original solicitando a seleção das opções. Um prompt subsequente aparecerá então nos dispositivos dos usuários compartilhados para interagir com o conteúdo.
```swift
private var isEligibleForSharePlay: Bool = false {
didSet {
sharePlayButton.isHidden = !isEligibleForSharePlay
}
}
override func viewDidLoad() {
super.viewDidLoad()
// SharePlay button eligibility
groupStateObserver.$isEligibleForGroupSession
.receive(on: DispatchQueue.main)
.assign(to: \.isEligibleForSharePlay, on: self)
.store(in: &subscriptions)
}
```
# Solução de problemas de envio de mensagens no app para iOS
Source: /docs/pt-br/developer_guide/platforms/legacy_sdks/ios/in-app_messaging/troubleshooting/index.md
**Warning:**
[AppboyKit](https://github.com/Appboy/appboy-ios-sdk) (also known as the Objective-C SDK) is no longer supported and has been replaced by the [Swift SDK](https://www.braze.com/docs/pt-br/pt-br/developer_guide/sdk_integration/?sdktab=swift). It will no longer receive new features, bug fixes, security updates, or technical support—however, messaging and analytics will continue to function as normal. To learn more, see [Introducing the New Braze Swift SDK](https://www.braze.com/resources/articles/introducing-the-new-braze-swift-sdk).
# Solução de problemas em mensagens no app {#troubleshoot-in-app-messages}
## Impressões {#impressions}
#### A análise de dados de impressões ou cliques não está sendo registrada {#impression-or-click-analytics-arent-being-logged}
Se você definiu um delegado de mensagem no app para lidar manualmente com a exibição da mensagem ou com as ações de clique, será necessário registrar manualmente os cliques e as impressões na mensagem no app.
#### As impressões são menores do que o esperado {#impressions-are-lower-than-expected}
Os disparos levam tempo para serem sincronizados com o dispositivo no início da sessão, portanto, pode haver uma condição de corrida se os usuários registrarem um evento ou uma compra logo após iniciarem uma sessão. Uma possível solução alternativa seria alterar a campanha para disparar a partir do início da sessão e, em seguida, segmentar pelo evento ou compra desejada. Note que isso entregaria a mensagem no app no próximo início de sessão após a ocorrência do evento.
## A mensagem no app esperada não foi exibida {#expected-in-app-message-did-not-display}
A maioria dos problemas com mensagens no app pode ser dividida em duas categorias principais: entrega e exibição. Para solucionar o problema de não exibição de uma mensagem no app esperada no dispositivo, primeiro certifique-se de que a [mensagem no app foi entregue ao dispositivo](#troubleshooting-in-app-message-delivery) e, em seguida, [solucione o problema de exibição da mensagem](#troubleshooting-in-app-message-display).
### Entrega de mensagens no app {#troubleshooting-in-app-message-delivery}
O SDK solicita mensagens no app dos servidores da Braze no início da sessão. Para verificar se as mensagens no app estão sendo entregues ao seu dispositivo, você precisará garantir que as mensagens no app estejam sendo solicitadas pelo SDK e retornadas pelos servidores da Braze.
#### Verificar se as mensagens são solicitadas e retornadas {#check-if-messages-are-requested-and-returned}
1. Adicione-se como um [usuário teste](https://www.braze.com/docs/pt-br/pt-br/user_guide/administrative/app_settings/developer_console/internal_groups_tab/#adding-test-users) no dashboard.
2. Configure uma campanha de mensagens no app direcionada ao seu usuário.
3. Confira se uma nova sessão está ocorrendo em seu aplicativo.
4. Use os [registros de usuários de eventos](https://www.braze.com/docs/pt-br/pt-br/user_guide/administrative/app_settings/developer_console/event_user_log_tab/#event-user-log-tab) para verificar se o seu dispositivo está solicitando mensagens no app no início da sessão. Encontre a solicitação do SDK associada ao evento de início de sessão do usuário teste.
- Se o seu app foi projetado para solicitar mensagens no app disparadas, você deverá ver `trigger` no campo **Requested Responses** em **Response Data**.
- Se o seu app foi projetado para solicitar mensagens originais no app, você deverá ver `in_app` no campo **Requested Responses** em **Response Data**.
5. Use os [registros de usuários de eventos](https://www.braze.com/docs/pt-br/pt-br/user_guide/administrative/app_settings/developer_console/event_user_log_tab/#event-user-log-tab) para verificar se as mensagens corretas no app estão sendo retornadas nos dados da resposta. 
#### Solução de problemas de mensagens que não estão sendo solicitadas {#troubleshoot-messages-not-being-requested}
Se suas mensagens no app não estiverem sendo solicitadas, seu app pode não estar rastreando as sessões corretamente, pois as mensagens no app são atualizadas no início da sessão. Além disso, certifique-se de que o seu app esteja realmente iniciando uma sessão com base na semântica de tempo limite da sessão do seu app:

### Solução de problemas de mensagens que não estão sendo retornadas {#troubleshoot-messages-not-being-returned}
Se suas mensagens no app não estiverem sendo retornadas, é provável que haja um problema de direcionamento de campanha:
- Seu segmento não contém seu usuário.
- Verifique a guia [**Engajamento**](https://www.braze.com/docs/pt-br/pt-br/user_guide/audience/manage_audience/user_profiles/#engagement-tab) do seu usuário para ver se o segmento correto aparece em **Segments**.
- Seu usuário já recebeu anteriormente a mensagem no app e não era elegível para recebê-la novamente.
- Verifique as [configurações de re-eligibilidade da campanha](https://www.braze.com/docs/pt-br/pt-br/user_guide/engagement_tools/campaigns/building_campaigns/delivery_types/reeligibility/) na etapa **Delivery** do **Campaign Composer** e certifique-se de que as configurações de re-eligibilidade estão alinhadas com sua configuração de teste.
- Seu usuário atingiu o limite de frequência da campanha.
- Verifique as [configurações de limite de frequência da campanha](https://www.braze.com/docs/pt-br/pt-br/user_guide/engagement_tools/campaigns/building_campaigns/rate-limiting/#frequency-capping) e assegure-se de que estão alinhadas com sua configuração de teste.
- Se havia um grupo de controle na campanha, seu usuário pode ter caído no grupo de controle.
- É possível verificar se isso aconteceu criando um segmento com um filtro de variante de campanha recebida, em que a variante de campanha está definida como **Controle**, e verificando se o usuário se enquadra nesse segmento.
- Ao criar campanhas para fins de teste de integração, é importante não aceitar a adição de um grupo de controle.
### Exibição de mensagens no app {#troubleshooting-in-app-message-display}
Se o seu app estiver solicitando e recebendo mensagens no app com êxito, mas elas não estiverem sendo exibidas, alguma lógica do lado do dispositivo pode estar impedindo a exibição:
- As mensagens no app disparadas são limitadas com base no [intervalo de tempo mínimo entre os disparos](https://www.braze.com/docs/pt-br/pt-br/developer_guide/platform_integration_guides/ios/in-app_messaging/in-app_message_delivery/#minimum-time-interval-between-triggers), cujo padrão é de 30 segundos.
- Se você definiu um delegado para personalizar o tratamento de mensagens no app, verifique se o delegado não está afetando a exibição de mensagens no app.
- A falha no download de imagens impedirá a exibição de mensagens no app com imagens. Os downloads de imagens sempre falharão se o framework `SDWebImage` não estiver integrado corretamente. Verifique os registros do dispositivo para garantir que os downloads de imagens não estejam falhando.
- Se a orientação do dispositivo não corresponder à orientação especificada pela mensagem no app, a mensagem no app não será exibida. Certifique-se de que o dispositivo esteja na orientação correta.
# Integração do controlador de visualização de Content Cards para iOS
Source: /docs/pt-br/developer_guide/platforms/legacy_sdks/ios/content_cards/integration/index.md
**Warning:**
[AppboyKit](https://github.com/Appboy/appboy-ios-sdk) (also known as the Objective-C SDK) is no longer supported and has been replaced by the [Swift SDK](https://www.braze.com/docs/pt-br/pt-br/developer_guide/sdk_integration/?sdktab=swift). It will no longer receive new features, bug fixes, security updates, or technical support—however, messaging and analytics will continue to function as normal. To learn more, see [Introducing the New Braze Swift SDK](https://www.braze.com/resources/articles/introducing-the-new-braze-swift-sdk).
# Integração de Content Cards {#content-card-integration}
## Modelo de dados de Content Cards {#content-cards-data-model}
O modelo de dados de Content Cards está disponível no SDK para iOS.
### Obtenção dos dados {#getting-the-data}
Para acessar o modelo de dados de Content Cards, inscreva-se nos eventos de atualização de Content Cards:
```objc
// Subscribe to Content Cards updates
// Note: you should remove the observer where appropriate
[[NSNotificationCenter defaultCenter] addObserver:self
selector:@selector(contentCardsUpdated:)
name:ABKContentCardsProcessedNotification
object:nil];
```
```objc
// Called when Content Cards are refreshed (via `requestContentCardsRefresh`)
- (void)contentCardsUpdated:(NSNotification *)notification {
BOOL updateIsSuccessful = [notification.userInfo[ABKContentCardsProcessedIsSuccessfulKey] boolValue];
if (updateIsSuccessful) {
// get the cards using [[Appboy sharedInstance].contentCardsController getContentCards];
}
}
```
```swift
// Subscribe to content card updates
// Note: you should remove the observer where appropriate
NotificationCenter.default.addObserver(self, selector:
#selector(contentCardsUpdated),
name:NSNotification.Name.ABKContentCardsProcessed, object: nil)
```
```swift
// Called when the Content Cards are refreshed (via `requestContentCardsRefresh`)
@objc private func contentCardsUpdated(_ notification: Notification) {
if let updateIsSuccessful = notification.userInfo?[ABKContentCardsProcessedIsSuccessfulKey] as? Bool {
if (updateIsSuccessful) {
// get the cards using Appboy.sharedInstance()?.contentCardsController.contentCards
}
}
}
```
Se você quiser alterar os dados do cartão depois de enviados pela Braze, recomendamos armazenar uma cópia profunda dos dados do cartão localmente, atualizar os dados e exibi-los você mesmo. Os cartões são acessíveis via [`ABKContentCardsController`](https://appboy.github.io/appboy-ios-sdk/docs/interface_a_b_k_content_cards_controller.html).
## Modelo de Content Card {#content-card-model}
A Braze oferece três tipos de Content Cards: banner, imagem legendada e clássico. Cada tipo herda propriedades comuns de uma classe base `ABKContentCard` e possui as seguintes propriedades adicionais.
### Propriedades do modelo de Content Card base - ABKContentCard {#base-content-card-model-properties-abkcontentcard}
| Propriedade | Descrição |
|---|---|
| `idString` | (Somente leitura) O ID do cartão definido pela Braze. |
| `viewed` | Essa propriedade reflete se o usuário visualizou o cartão ou não. |
| `created` | (Somente leitura) Essa propriedade é o timestamp unix do horário de criação do cartão na Braze. |
| `expiresAt` | (Somente leitura) Essa propriedade é o timestamp unix do tempo de expiração do cartão. |
| `dismissible` | Essa propriedade reflete se o usuário pode descartar o cartão. |
| `pinned` | Essa propriedade reflete se o cartão foi configurado como "fixado" no dashboard. |
| `dismissed` | Essa propriedade reflete se o usuário descartou o cartão. |
| `url` | A URL que será aberta após o cartão ser clicado. Pode ser uma URL HTTP(s) ou uma URL de protocolo. |
| `openURLInWebView` | Essa propriedade determina se a URL será aberta dentro do app ou em um navegador web externo. |
| `extras` | Um `NSDictionary` opcional de valores `NSString`. |
{: .reset-td-br-1 .reset-td-br-2 aria-label="Base Content Card model properties - ABKContentCard" }
### Propriedades do Content Card de banner - ABKBannerContentCard {#banner-content-card-properties-abkbannercontentcard}
| Propriedade | Descrição |
|---|---|
| `image` | Essa propriedade é a URL da imagem do cartão. |
| `imageAspectRatio` | Essa propriedade é a proporção da imagem do cartão e serve como uma dica antes que o carregamento da imagem seja concluído. Observe que a propriedade pode não ser fornecida em certas circunstâncias. |
{: .reset-td-br-1 .reset-td-br-2 aria-label="Banner Content Card properties - ABKBannerContentCard" }
### Propriedades do Content Card de imagem legendada - ABKCaptionedImageCard {#captioned-image-content-card-properties-abkcaptionedimagecard}
| Propriedade | Descrição |
|---|---|
| `image` | Essa propriedade é a URL da imagem do cartão. |
| `imageAspectRatio` | Essa propriedade é a proporção da imagem do cartão. |
| `title` | O texto do título do cartão. |
| `cardDescription` | O texto do corpo do cartão. |
| `domain` | O texto do link para a URL da propriedade, como @"blog.braze.com". Pode ser exibido na interface do cartão para indicar a ação/direção ao clicar no cartão. |
{: .reset-td-br-1 .reset-td-br-2 aria-label="Captioned image Content Card properties - ABKCaptionedImageCard" }
### Propriedades do Content Card clássico - ABKClassicContentCard {#classic-content-card-properties-abkclassiccontentcard}
| Propriedade | Descrição |
|---|---|
| `image` | (Opcional) Essa propriedade é a URL da imagem do cartão. |
| `title` | O texto do título do cartão. |
| `cardDescription` | O texto do corpo do cartão. |
| `domain` | O texto do link para a URL da propriedade, como @"blog.braze.com". Pode ser exibido na interface do cartão para indicar a ação e a direção ao clicar no cartão. |
{: .reset-td-br-1 .reset-td-br-2 aria-label="Classic Content Card properties - ABKClassicContentCard" }
## Métodos do cartão {#card-methods}
| Método | Descrição |
|---|---|
| `logContentCardImpression` | Registre manualmente uma impressão na Braze para um determinado cartão. |
| `logContentCardClicked` | Registre manualmente um clique na Braze para um determinado cartão. O SDK só registrará um clique no cartão quando o cartão tiver a propriedade `url` com um valor válido. |
| `logContentCardDismissed` | Registre manualmente um descarte na Braze para um cartão específico. O SDK só registrará um descarte de cartão se a propriedade `dismissed` do cartão ainda não estiver definida como `true`. |
| `isControlCard` | Determine se um cartão é o cartão de Controle para um teste A/B. |
{: .reset-td-br-1 .reset-td-br-2 aria-label="Card methods" }
Para saber mais, consulte a [documentação de referência da classe](https://appboy.github.io/appboy-ios-sdk/docs/interface_a_b_k_content_card.html).
## Integração do controlador de visualização de Content Cards {#content-cards-view-controller-integration}
Content Cards podem ser integrados com dois contextos de controlador de visualização: navegação ou modal.
### Contexto de navegação {#navigation-context}
Exemplo de como inserir uma instância `ABKContentCardsTableViewController` em um controlador de navegação:
```objc
ABKContentCardsTableViewController *contentCards = [[ABKContentCardsTableViewController alloc] init];
contentCards.title = @"Content Cards Title";
contentCards.disableUnreadIndicator = YES;
[self.navigationController pushViewController:contentCards animated:YES];
```
```swift
let contentCards = ABKContentCardsTableViewController()
contentCards.title = "Content Cards Title"
contentCards.disableUnreadIndicator = true
navigationController?.pushViewController(contentCards, animated: true)
```
**Note:**
Para personalizar o título da barra de navegação, defina a propriedade title do `navigationItem` da instância `ABKContentCardsTableViewController`.
### Contexto modal {#modal-context}
Este modal é usado para apresentar o controlador de visualização em uma visualização modal, com uma barra de navegação no topo e um botão **Done** na lateral da barra.
```objc
ABKContentCardsViewController *contentCards = [[ABKContentCardsViewController alloc] init];
contentCards.contentCardsViewController.title = @"Content Cards Title";
contentCards.contentCardsViewController.disableUnreadIndicator = YES;
[self.navigationController presentViewController:contentCards animated:YES completion:nil];
```
```swift
let contentCards = ABKContentCardsViewController()
contentCards.contentCardsViewController.title = "Content Cards Title"
contentCards.contentCardsViewController.disableUnreadIndicator = true
self.present(contentCards, animated: true, completion: nil)
```
Para exemplos de controlador de visualização, confira o [app de exemplo de Content Cards](https://github.com/Appboy/appboy-ios-sdk/tree/master/Samples/ContentCards/BrazeContentCardsSampleApp).
**Note:**
Para personalizar o cabeçalho, defina a propriedade title do `navigationItem` pertencente à instância `ABKContentCardsTableViewController` incorporada na instância pai `ABKContentCardsViewController`.
# Personalização de cartão de conteúdo do iOS
Source: /docs/pt-br/developer_guide/platforms/legacy_sdks/ios/content_cards/customization/index.md
# Estilo de Cartão de Conteúdo Personalizado para iOS
Source: /docs/pt-br/developer_guide/platforms/legacy_sdks/ios/content_cards/customization/custom_styling/index.md
**Warning:**
[AppboyKit](https://github.com/Appboy/appboy-ios-sdk) (also known as the Objective-C SDK) is no longer supported and has been replaced by the [Swift SDK](https://www.braze.com/docs/pt-br/pt-br/developer_guide/sdk_integration/?sdktab=swift). It will no longer receive new features, bug fixes, security updates, or technical support—however, messaging and analytics will continue to function as normal. To learn more, see [Introducing the New Braze Swift SDK](https://www.braze.com/resources/articles/introducing-the-new-braze-swift-sdk).
# Estilo Personalizado
## Substituição de imagens padrão
**Important:**
A integração de `SDWebImage` é necessária se você planeja usar nossa UI do Braze para exibir imagens em mensagens no aplicativo iOS ou Cartões de Conteúdo.
Braze permite que os clientes substituam as imagens padrão existentes por suas próprias imagens personalizadas. Para realizar isso, crie um novo arquivo `png` com a imagem personalizada e adicione-o ao pacote de imagens do app. Em seguida, renomeie o arquivo com o nome da imagem para substituir a imagem padrão em nossa biblioteca. Além disso, faça o upload das versões `@2x` e `@3x` das imagens para acomodar diferentes tamanhos de telefone. Imagens disponíveis para substituição em Cartões de Conteúdo incluem:
- Imagem de espaço reservado: `appboy_cc_noimage_lrg`
- Imagem do ícone fixado: `appboy_cc_icon_pinned`
Como os Cartões de Conteúdo têm um tamanho máximo de 2 KB para o conteúdo que você insere no dashboard (incluindo texto da mensagem, URLs de imagens, links e todos os pares chave-valor), verifique o tamanho antes de enviar. Exceder esse valor impedirá o cartão de enviar.
**Important:**
Substituir imagens padrão atualmente não é suportado na nossa integração .NET MAUI iOS.
## Desativação do modo escuro
Para evitar que a interface do cartão de conteúdo adote o estilo do tema escuro quando o dispositivo do usuário estiver com o modo escuro ativado, defina a propriedade `ABKContentCardsTableViewController.enableDarkTheme`. Você pode acessar a propriedade `enableDarkTheme` diretamente em uma instância `ABKContentCardsTableViewController` ou através da propriedade `ABKContentCardsViewController.contentCardsViewController` para melhor atender à sua própria interface de usuário.
```objc
// Accessing enableDarkTheme via ABKContentCardsViewController.contentCardsViewController.
- (IBAction)presentModalContentCards:(id)sender {
ABKContentCardsViewController *contentCardsVC = [ABKContentCardsViewController new];
contentCardsVC.contentCardsViewController.enableDarkTheme = NO;
...
[self.navigationController presentViewController:contentCardsVC animated:YES completion:nil];
}
// Accessing enableDarkTheme directly.
- (IBAction)presentNavigationContentCards:(id)sender {
ABKContentCardsTableViewController *contentCardsTableVC = [[ABKContentCardsTableViewController alloc] init];
contentCardsTableVC.enableDarkTheme = NO;
...
[self.navigationController pushViewController:contentCardsTableVC animated:YES];
}
```
```swift
// Accessing enableDarkTheme via ABKContentCardsViewController.contentCardsViewController.
@IBAction func presentModalContentCards(_ sender: Any) {
let contentCardsVC = ABKContentCardsViewController()
contentCardsVC.contentCardsViewController.enableDarkTheme = false
...
self.navigationController?.present(contentCardsVC, animated: true, completion: nil)
}
// Accessing enableDarkTheme directly.
@IBAction func presentNavigationContentCards(_ sender: Any) {
let contentCardsTableVC = ABKContentCardsTableViewController()
contentCardsTableVC.enableDarkTheme = false
...
self.navigationController?.present(contentCardsTableVC, animated: true, completion: nil)
}
```
# Personalizando o feed do cartão de conteúdo para iOS
Source: /docs/pt-br/developer_guide/platforms/legacy_sdks/ios/content_cards/customization/customizing_feed/index.md
**Warning:**
[AppboyKit](https://github.com/Appboy/appboy-ios-sdk) (also known as the Objective-C SDK) is no longer supported and has been replaced by the [Swift SDK](https://www.braze.com/docs/pt-br/pt-br/developer_guide/sdk_integration/?sdktab=swift). It will no longer receive new features, bug fixes, security updates, or technical support—however, messaging and analytics will continue to function as normal. To learn more, see [Introducing the New Braze Swift SDK](https://www.braze.com/resources/articles/introducing-the-new-braze-swift-sdk).
# Personalizar o feed dos Cartões de Conteúdo
Você pode criar sua própria interface de Cartões de Conteúdo estendendo `ABKContentCardsTableViewController` para personalizar todos os elementos da interface do usuário e o comportamento dos Cartões de Conteúdo. As células do cartão de conteúdo também podem ser subclassificadas e, em seguida, usadas programaticamente ou introduzindo um storyboard personalizado que registra as novas classes. Confira o [app de exemplo](https://github.com/Appboy/appboy-ios-sdk/tree/master/Samples/ContentCards/BrazeContentCardsSampleApp) de Cartões de Conteúdo para um exemplo completo.
Também é importante considerar se você deve usar uma estratégia de subclasse versus um controlador de visualização completamente personalizado e [inscrever-se para atualizações de dados](https://www.braze.com/docs/pt-br/pt-br/developer_guide/platforms/legacy_sdks/ios/content_cards/integration/). Por exemplo, se você criar uma subclasse do `ABKContentCardsTableViewController`, pode usar o método [`populateContentCards`](#overriding-populated-content-cards) para filtrar e ordenar cartões (recomendado). No entanto, se você usar uma personalização completa do controlador de visualização, terá mais controle sobre o comportamento do cartão—como exibir em um carrossel ou adicionar elementos interativos—mas, então, terá que contar com um observador para implementar a lógica de ordenação e filtragem. Você também deve implementar os respectivos métodos de análise de dados para registrar adequadamente as impressões, eventos de rejeição e cliques.
## Personalizando a IU
Os trechos de código a seguir mostram como estilizar e alterar os Cartões de Conteúdo para atender às suas necessidades de interface do usuário usando métodos fornecidos pelo SDK. Esses métodos permitem que você personalize todos os aspectos da UI do cartão de conteúdo, incluindo fontes personalizadas, componentes de cores personalizadas, texto personalizado e mais.
Existem duas maneiras distintas de personalizar a interface do usuário do cartão de conteúdo:
- Método dinâmico: atualizar a interface do usuário do cartão em uma base por cartão
- Método estático: atualizar a interface do usuário em todos os cartões
### Interface dinâmica
O método cartão de conteúdo `applyCard` pode referenciar o objeto cartão e passar pares chave-valor que serão usados para atualizar a interface do usuário:
```objc
- (void)applyCard:(ABKCaptionedImageContentCard *)captionedImageCard {
[super applyCard:captionedImageCard];
if ([card.extras objectForKey:ContentCardKeyBackgroundColorValue]) {
NSString *backgroundColor = [card.extras objectForKey:ContentCardKeyBackgroundColor];
if ([backgroundColor colorValue]) {
self.rootView.backgroundColor = [backgroundColor colorValue];
} else {
self.rootView.backgroundColor = [UIColor lightGray];
}
} else {
self.rootView.backgroundColor = [UIColor lightGray];
}
}
```
```swift
override func apply(_ captionedImageCard: ABKCaptionedImageContentCard!) {
super.apply(captionedImageCard)
if let backgroundColor = card.extras?[ContentCardKey.backgroundColor.rawValue] as? String,
let backgroundColorValue = backgroundColor.colorValue() {
rootView.backgroundColor = backgroundColorValue
} else {
rootView.backgroundColor = .lightGray
}
}
```
### Interface de Usuário Estática
O método `setUpUI` pode atribuir valores aos componentes estáticos do cartão de conteúdo em todos os cartões:
```objc
#import "CustomClassicContentCardCell.h"
@implementation CustomClassicContentCardCell
- (void)setUpUI {
[super setUpUI];
self.rootView.backgroundColor = [UIColor lightGrayColor];
self.rootView.layer.borderColor = [UIColor purpleColor].CGColor;
self.unviewedLineView.backgroundColor = [UIColor redColor];
self.titleLabel.font = [UIFont italicSystemFontOfSize:20];
}
```
```swift
override func setUpUI() {
super.setUpUI()
rootView.backgroundColor = .lightGray
rootView.layer.borderColor = UIColor.purple.cgColor
unviewedLineViewColor = .red
titleLabel.font = .italicSystemFont(ofSize: 20)
}
```
## Fornecendo interfaces personalizadas
Interfaces personalizadas podem ser fornecidas registrando classes personalizadas para cada tipo de cartão desejado.
{: style="max-width:35%;margin-left:15px;"}
{: style="max-width:25%;margin-left:15px;"}
{: style="max-width:18%;margin-left:15px;"}
Braze fornece três modelos de cartão de conteúdo (banner, imagem legendada e clássico). Como alternativa, se você quiser fornecer suas próprias interfaces personalizadas, consulte os seguintes trechos de código:
```objc
- (void)registerTableViewCellClasses {
[super registerTableViewCellClasses];
// Replace the default class registrations with custom classes for these two types of cards
[self.tableView registerClass:[CustomCaptionedImageContentCardCell class] forCellReuseIdentifier:@"ABKCaptionedImageContentCardCell"];
[self.tableView registerClass:[CustomClassicContentCardCell class] forCellReuseIdentifier:@"ABKClassicCardCell"];
}
```
```swift
override func registerTableViewCellClasses() {
super.registerTableViewCellClasses()
// Replace the default class registrations with custom classes
tableView.register(CustomCaptionedImageContentCardCell.self, forCellReuseIdentifier: "ABKCaptionedImageContentCardCell")
tableView.register(CustomBannerContentCardCell.self, forCellReuseIdentifier: "ABKBannerContentCardCell")
tableView.register(CustomClassicImageContentCardCell.self, forCellReuseIdentifier: "ABKClassicImageCardCell")
tableView.register(CustomClassicContentCardCell.self, forCellReuseIdentifier: "ABKClassicCardCell")
}
```
## Substituindo Cartões de Conteúdo Populados
Os Cartões de Conteúdo podem ser alterados programaticamente usando o método `populateContentCards`:
```objc
- (void)populateContentCards {
NSMutableArray *cards = [NSMutableArray arrayWithArray:[Appboy.sharedInstance.contentCardsController getContentCards]];
for (ABKContentCard *card in cards) {
// Replaces the card description for all Classic Content Cards
if ([card isKindOfClass:[ABKClassicContentCard class]]) {
((ABKClassicContentCard *)card).cardDescription = @"Custom Feed Override title [classic cards only]!";
}
}
super.cards = cards;
}
```
```swift
override func populateContentCards() {
guard let cards = Appboy.sharedInstance()?.contentCardsController.contentCards else { return }
for card in cards {
// Replaces the card description for all Classic Content Cards
if let classicCard = card as? ABKClassicContentCard {
classicCard.cardDescription = "Custom Feed Override title [classic cards only]!"
}
}
super.cards = (cards as NSArray).mutableCopy() as? NSMutableArray
}
```
# Gerenciar cliques no cartão de conteúdo manualmente para iOS
Source: /docs/pt-br/developer_guide/platforms/legacy_sdks/ios/content_cards/customization/handling_clicks_manually/index.md
**Warning:**
[AppboyKit](https://github.com/Appboy/appboy-ios-sdk) (also known as the Objective-C SDK) is no longer supported and has been replaced by the [Swift SDK](https://www.braze.com/docs/pt-br/pt-br/developer_guide/sdk_integration/?sdktab=swift). It will no longer receive new features, bug fixes, security updates, or technical support—however, messaging and analytics will continue to function as normal. To learn more, see [Introducing the New Braze Swift SDK](https://www.braze.com/resources/articles/introducing-the-new-braze-swift-sdk).
# Gerenciar cliques manualmente
Você pode tratar manualmente os cliques no content card implementando o protocolo [`ABKContentCardsTableViewControllerDelegate`](https://appboy.github.io/appboy-ios-sdk/docs/protocol_a_b_k_content_cards_table_view_controller_delegate-p.html) e definindo seu objeto delegado como a propriedade `delegate` do `ABKContentCardsTableViewController`. Consulte o [app de amostra de content cards](https://github.com/Appboy/appboy-ios-sdk/tree/master/Samples/ContentCards/BrazeContentCardsSampleApp) para obter um exemplo.
```objc
contentCardsTableViewController.delegate = delegate;
// Methods to implement in delegate
- (BOOL)contentCardTableViewController:(ABKContentCardsTableViewController *)viewController
shouldHandleCardClick:(NSURL *)url {
if ([[url.host lowercaseString] isEqualToString:@"my-domain.com"]) {
// Custom handle link here
NSLog(@"Manually handling Content Card click with URL %@", url.absoluteString);
return NO;
}
// Let the Braze SDK handle the click action
return YES;
}
- (void)contentCardTableViewController:(ABKContentCardsTableViewController *)viewController
didHandleCardClick:(NSURL *)url {
NSLog(@"Braze SDK handled Content Card click with URL %@", url.absoluteString);
}
```
```swift
contentCardsTableViewController.delegate = delegate
// Methods to implement in delegate
func contentCardTableViewController(_ viewController: ABKContentCardsTableViewController!,
shouldHandleCardClick url: URL!) -> Bool {
if (url.host?.lowercased() == "my-domain.com") {
// Custom handle link here
NSLog("Manually handling Content Card click with URL %@", url.absoluteString)
return false
}
// Let the Braze SDK handle the click action
return true
}
func contentCardTableViewController(_ viewController: ABKContentCardsTableViewController!,
didHandleCardClick url: URL!) {
NSLog("Braze SDK handled Content Card click with URL %@", url.absoluteString)
}
```
**Important:**
Se você substituir o método `handleCardClick:` em `ABKContentCardsTableViewController`, esses métodos delegados poderão não ser chamados.
# Indicadores de lido e não lido do cartão de conteúdo para iOS
Source: /docs/pt-br/developer_guide/platforms/legacy_sdks/ios/content_cards/customization/read_unread_indicators/index.md
**Warning:**
[AppboyKit](https://github.com/Appboy/appboy-ios-sdk) (also known as the Objective-C SDK) is no longer supported and has been replaced by the [Swift SDK](https://www.braze.com/docs/pt-br/pt-br/developer_guide/sdk_integration/?sdktab=swift). It will no longer receive new features, bug fixes, security updates, or technical support—however, messaging and analytics will continue to function as normal. To learn more, see [Introducing the New Braze Swift SDK](https://www.braze.com/resources/articles/introducing-the-new-braze-swift-sdk).
# Indicadores de lido e não lido
## Desativando o indicador de não visualizado
{: style="max-width:80%"}
Você pode optar por desativar a linha azul na parte inferior do cartão, que indica se o cartão foi visualizado ou não, configurando a propriedade `disableUnviewedIndicator` em `ABKContentCardsTableViewController` para `YES`.
## Personalizando o indicador de não visualizado
O indicador de não visualizado pode ser acessado através da propriedade `unviewedLineView` da classe `ABKBaseContentCardCell`. Se você usar implementações de `UITableViewCell`, acesse a propriedade antes que a célula seja desenhada.
Por exemplo, para definir a cor do indicador de não visualizado como vermelho:
```objc
((ABKBaseContentCardCell *)cell).unviewedLineView.backgroundColor = [UIColor redColor];
```
```swift
(card as? ABKBaseContentCardCell).unviewedLineView.backgroundColor = UIColor.red
```
# Crachás de cartão de conteúdo para iOS
Source: /docs/pt-br/developer_guide/platforms/legacy_sdks/ios/content_cards/customization/badges/index.md
**Warning:**
[AppboyKit](https://github.com/Appboy/appboy-ios-sdk) (also known as the Objective-C SDK) is no longer supported and has been replaced by the [Swift SDK](https://www.braze.com/docs/pt-br/pt-br/developer_guide/sdk_integration/?sdktab=swift). It will no longer receive new features, bug fixes, security updates, or technical support—however, messaging and analytics will continue to function as normal. To learn more, see [Introducing the New Braze Swift SDK](https://www.braze.com/resources/articles/introducing-the-new-braze-swift-sdk).
# Emblemas
## Solicitação de contagem de cartões de conteúdo não lidos
Se quiser exibir o número de cartões de conteúdo não lidos que seu usuário tem, sugerimos que solicite uma contagem de cartões e a represente com um emblema. Os emblemas são uma ótima maneira de chamar a atenção para novos conteúdos que aguardam seus usuários nos cartões de conteúdo. Se quiser adicionar um emblema aos seus cartões de conteúdo, o SDK da Braze oferece métodos para consultar o seguinte:
- Cartões de conteúdo não visualizados para o usuário atual
- Total de cartões de conteúdo visualizável para o usuário atual
As seguintes declarações de método em [`ABKContentCardsController`](https://appboy.github.io/appboy-ios-sdk/docs/interface_a_b_k_content_cards_controller.html) descrevem isso em detalhes:
```objc
- (NSInteger)unviewedContentCardCount;
/*
This method returns the number of currently active Content Cards that have not been viewed.
A "view" happens when a card becomes visible in the Content Cards view. This differentiates between cards that are off-screen in the scrolling view and those which are on-screen; when a card scrolls onto the screen, it's counted as viewed.
Cards are counted as viewed only once -- if a card scrolls off the screen and back on, it's not re-counted.
Cards are counted only once, even if they appear in multiple Content Cards views or across multiple devices.
*/
- (NSInteger)contentCardCount;
/*
This method returns the total number of currently active Content Cards. Cards are counted only once even if they appear in multiple Content Cards views.
*/
```
## Exibição do número de cartões de conteúdo não visualizados na contagem do emblema do app
Além de servir como lembretes de notificação por push para um app, os emblemas também podem ser utilizados para indicar itens não visualizados no feed de cartões de conteúdo do usuário. A atualização da contagem de emblemas com base nas atualizações dos cartões de conteúdo não visualizados pode ser valiosa para atrair os usuários de volta ao seu app e aumentar as sessões.
Esse método registra a contagem de emblemas depois que o app é fechado e a sessão do usuário termina:
```objc
(void)applicationDidEnterBackground:(UIApplication *)application
```
Nesse método, implemente o seguinte código, que atualiza ativamente a contagem de emblemas enquanto o usuário visualiza os cartões durante uma determinada sessão:
```objc
[UIApplication sharedApplication].applicationIconBadgeNumber = [[Appboy sharedInstance].contentCardsController unviewedContentCardCount];
```
```swift
func applicationDidEnterBackground(_ application: UIApplication)
```
Nesse método, implemente o seguinte código, que atualiza ativamente a contagem de emblemas enquanto o usuário visualiza os cartões durante uma determinada sessão:
```swift
UIApplication.shared.applicationIconBadgeNumber =
Appboy.sharedInstance()?.contentCardsController.unviewedContentCardCount() ?? 0
```
Para saber mais, consulte o [arquivo de cabeçalho](https://github.com/Appboy/appboy-ios-sdk/blob/master/AppboyKit/include/Appboy.h) `Appboy.h`.
# Visualização de carrossel de cartão de conteúdo para iOS
Source: /docs/pt-br/developer_guide/platforms/legacy_sdks/ios/content_cards/customization/use_cases/carousel_view/index.md
**Warning:**
[AppboyKit](https://github.com/Appboy/appboy-ios-sdk) (also known as the Objective-C SDK) is no longer supported and has been replaced by the [Swift SDK](https://www.braze.com/docs/pt-br/pt-br/developer_guide/sdk_integration/?sdktab=swift). It will no longer receive new features, bug fixes, security updates, or technical support—however, messaging and analytics will continue to function as normal. To learn more, see [Introducing the New Braze Swift SDK](https://www.braze.com/resources/articles/introducing-the-new-braze-swift-sdk).
# Caso de uso: Visualização do carrossel
{: style="max-width:35%;float:right;margin-left:15px;border:none;"}
Esta seção aborda como implementar um feed de carrossel com vários cartões, em que o usuário pode deslizar horizontalmente para ver os cartões adicionais em destaque. Para integrar uma exibição de carrossel, você precisará usar uma implementação de cartão de conteúdo totalmente personalizado - a fase de "execução" da [abordagem crawl, walk, run](https://www.braze.com/docs/pt-br/pt-br/user_guide/message_building_by_channel/content_cards/customize/#customization-approaches).
Com essa abordagem, você não usará as exibições do Braze e a lógica padrão, mas, em vez disso, exibirá os cartões de conteúdo de maneira totalmente personalizada, usando suas próprias exibições preenchidas com dados dos modelos do Braze.
Em termos de nível de esforço de desenvolvimento, as principais diferenças entre a implementação básica e a implementação do carrossel incluem:
- Criando suas próprias visualizações
- Registro da análise de dados do cartão de conteúdo
- Introdução de lógica adicional no lado do cliente para determinar quantos e quais cartões serão exibidos no carrossel
## Implementação
### Etapa 1: Criar um controlador de visualizações personalizado
Para criar o carrossel de cartões de conteúdo, crie seu próprio controlador de visualização personalizado (como `UICollectionViewController`) e [assine as atualizações de dados](https://www.braze.com/docs/pt-br/pt-br/developer_guide/platform_integration_guides/legacy_sdks/ios/content_cards/integration/#getting-the-data). Note que você não poderá estender ou criar uma subclasse do nosso `ABKContentCardTableViewController` padrão, pois ele só é capaz de lidar com nossos tipos de cartão de conteúdo padrão.
### Etapa 2: Implementar análise de dados
Ao criar um controlador de visualização totalmente personalizado, as impressões, os cliques e os descartes de cartão de conteúdo não são registrados automaticamente. É necessário implementar os respectivos métodos de análise de dados para garantir que as impressões, os eventos de demissão e os cliques sejam registrados corretamente na análise do dashboard do Braze.
Para obter informações sobre os métodos de análise de dados, consulte [Métodos de cartão](https://www.braze.com/docs/pt-br/pt-br/developer_guide/platform_integration_guides/legacy_sdks/ios/content_cards/integration/#card-methods).
**Note:**
A mesma página também detalha as diferentes propriedades herdadas de nossa classe genérica de modelo de cartão de conteúdo, que podem ser úteis durante a implementação da visualização.
### Etapa 3: Criar um observador de cartão de conteúdo
Crie um [observador de cartão de](https://www.braze.com/docs/pt-br/pt-br/developer_guide/platform_integration_guides/ios/content_cards/multiple_feeds/#step-2-set-up-a-content-card-listener) conteúdo que seja responsável por lidar com a chegada de cartões de conteúdo e implemente a lógica condicional para exibir um número específico de cartões no carrossel a qualquer momento. Por padrão, os cartões de conteúdo são classificados por data de criação (o mais recente primeiro), e o usuário vê todos os cartões para os quais é elegível.
Dito isso, você pode solicitar e aplicar lógica de exibição adicional de várias maneiras. Por exemplo, você pode selecionar os cinco primeiros objetos do cartão de conteúdo do vetor ou introduzir pares de valores-chave (a propriedade `extras` no modelo de dados) para criar uma lógica condicional.
Se estiver implementando um carrossel como um feed secundário de cartões de conteúdo, consulte [Uso de vários feeds de cartão de conteúdo](https://www.braze.com/docs/pt-br/pt-br/developer_guide/platforms/legacy_sdks/ios/content_cards/multiple_feeds/) para garantir que você classifique os cartões no feed correto com base em pares de valores-chave.
**Important:**
É importante garantir que as equipes de marketing e de desenvolvimento coordenem os pares de valores-chave que serão usados (por exemplo, `feed_type = brand_homepage`), pois todos os pares de valores-chave que os profissionais de marketing inserirem no dashboard do Braze devem corresponder exatamente aos pares de valores-chave que os desenvolvedores criam na lógica do app.
Para obter a documentação do desenvolvedor específica do iOS sobre a classe, os métodos e as atribuições dos cartões de conteúdo, consulte a referência de classe do iOS [`ABKContentCard`.](https://appboy.github.io/appboy-ios-sdk/docs/interface_a_b_k_content_card.html)
## Considerações
- Ao usar exibições totalmente personalizadas, você não poderá estender ou criar subclasses dos métodos usados em `ABKContentCardsController`. Em vez disso, você mesmo precisará integrar os métodos e as propriedades do modelo de dados.
- A lógica e a implementação da visualização de carrossel não são um tipo padrão de cartão de conteúdo no Braze e, portanto, a lógica para alcançar o caso de uso deve ser fornecida e suportada pela sua equipe de desenvolvimento.
- Você precisará implementar a lógica do lado do cliente para exibir um número específico de cartões no carrossel a qualquer momento.
# Atualize o Feed do Cartão de Conteúdo para iOS
Source: /docs/pt-br/developer_guide/platforms/legacy_sdks/ios/content_cards/refreshing_the_feed/index.md
**Warning:**
[AppboyKit](https://github.com/Appboy/appboy-ios-sdk) (also known as the Objective-C SDK) is no longer supported and has been replaced by the [Swift SDK](https://www.braze.com/docs/pt-br/pt-br/developer_guide/sdk_integration/?sdktab=swift). It will no longer receive new features, bug fixes, security updates, or technical support—however, messaging and analytics will continue to function as normal. To learn more, see [Introducing the New Braze Swift SDK](https://www.braze.com/resources/articles/introducing-the-new-braze-swift-sdk).
# Atualize o feed
## Atualizando os cartões de conteúdo
Você pode solicitar manualmente que o Braze atualize os cartões de conteúdo do usuário usando o método `requestContentCardsRefresh:` na interface `Appboy`:
```objc
[[Appboy sharedInstance] requestContentCardsRefresh];
```
```swift
Appboy.sharedInstance()?.requestContentCardsRefresh()
```
Para saber mais, consulte o [arquivo de cabeçalho](https://github.com/Appboy/appboy-ios-sdk/blob/master/AppboyKit/include/Appboy.h) `Appboy.h`.
# Use Múltiplos Fluxos de Cartões de Conteúdo para iOS
Source: /docs/pt-br/developer_guide/platforms/legacy_sdks/ios/content_cards/multiple_feeds/index.md
**Warning:**
[AppboyKit](https://github.com/Appboy/appboy-ios-sdk) (also known as the Objective-C SDK) is no longer supported and has been replaced by the [Swift SDK](https://www.braze.com/docs/pt-br/pt-br/developer_guide/sdk_integration/?sdktab=swift). It will no longer receive new features, bug fixes, security updates, or technical support—however, messaging and analytics will continue to function as normal. To learn more, see [Introducing the New Braze Swift SDK](https://www.braze.com/resources/articles/introducing-the-new-braze-swift-sdk).
# Uso de vários feeds de cartão de conteúdo
Os cartões de conteúdo podem ser filtrados no app para exibir apenas cartões específicos, ativando a capacitação para ter vários feeds de cartão de conteúdo para diferentes casos de uso (como ter um feed transacional versus um feed de marketing).
A documentação a seguir demonstra um exemplo de implementação que pode ser alterado para se adequar à sua integração específica.
## Etapa 1: Definição de pares de valores-chave em cartões
Ao criar uma campanha de cartão de conteúdo, os dados do par chave-valor podem ser definidos em cada cartão. Nossa lógica de filtragem usará esses dados do par chave-valor para categorizar os cartões.
Para este exemplo, definiremos um par valor-chave com a chave `feed_type` que designará qual feed do cartão de conteúdo o cartão deve ser exibido. O valor será o valor de seus feeds personalizados, como `Transactional`, `Marketing`, etc.
## Etapa 2: Configurar um ouvinte de cartão de conteúdo
Use o seguinte trecho de código para adicionar um observador para ouvir as atualizações do cartão de conteúdo.
```objc
[[NSNotificationCenter defaultCenter] addObserver:self
selector:@selector(contentCardsUpdatedNotificationReceived:)
name:ABKContentCardsProcessedNotification
object:nil];
```
```swift
NotificationCenter.default.addObserver(self, selector:
#selector(contentCardsUpdated),
name:NSNotification.Name.ABKContentCardsProcessed, object: nil)
```
Adicione os seguintes métodos para responder às atualizações do observador e filtrar os cartões retornados por tipo.
O primeiro método, `contentCardsUpdatedNotificationReceived:`, lida com as atualizações do observador. Ele chama o segundo método, `getCardsForFeedType:`, com o tipo de feed desejado, nesse caso, `Transactional`.
```objc
- (void)contentCardsUpdatedNotificationReceived:(NSNotification *)notification {
BOOL updateIsSuccessful = [notification.userInfo[ABKContentCardsProcessedIsSuccessfulKey] boolValue];
if (updateIsSuccessful) {
// Get an array containing only cards that have the "Transactional" feed type set in their extras.
NSArray *filteredArray = [self getCardsForFeedType:@"Transactional"];
NSLog(@"Got filtered array of length: %lu", [filteredArray count]);
// Pass filteredArray to your UI layer for display.
}
}
- (NSArray *)getCardsForFeedType:(NSString *)type {
NSArray *cards = [Appboy.sharedInstance.contentCardsController getContentCards];
NSArray *filteredArray = [cards filteredArrayUsingPredicate:[NSPredicate predicateWithBlock:^BOOL(ABKContentCard * card, NSDictionary *bindings) {
NSDictionary *extras = [card extras];
if (extras != nil && [extras objectForKey:@"feed_type"] != nil && [[extras objectForKey:@"feed_type"] isEqualToString:type]) {
NSLog(@"Got card: %@ ", card.idString);
return YES;
}
return NO;
}]];
return filteredArray;
}
```
```swift
@objc private func contentCardsUpdatedNotificationReceived(notification: NSNotification) {
guard let updateSuccessful = notification.userInfo?[ABKContentCardsProcessedIsSuccessfulKey] as? Bool else { return }
if updateSuccessful {
// Get an array containing only cards that have the "Transactional" feed type set in their extras.
let filteredArray = getCards(forFeedType: "Transactional")
NSLog("Got filtered array of length: %@",filteredArray?.count ?? 0)
// Pass filteredArray to your UI layer for display.
}
}
func getCards(forFeedType type: String) -> [ABKContentCard]? {
guard let allCards = Appboy.sharedInstance()?.contentCardsController.contentCards as? [ABKContentCard] else { return nil }
// return filtered cards
return allCards.filter {
if $0.extras?["feed_type"] as? String == type {
NSLog("%@","Got card: \($0.idString)")
return true
} else {
return false
}
}
}
```
# Guia de implementação de Content Cards para iOS (opcional)
Source: /docs/pt-br/developer_guide/platforms/legacy_sdks/ios/content_cards/implementation_guide/index.md
**Warning:**
[AppboyKit](https://github.com/Appboy/appboy-ios-sdk) (also known as the Objective-C SDK) is no longer supported and has been replaced by the [Swift SDK](https://www.braze.com/docs/pt-br/pt-br/developer_guide/sdk_integration/?sdktab=swift). It will no longer receive new features, bug fixes, security updates, or technical support—however, messaging and analytics will continue to function as normal. To learn more, see [Introducing the New Braze Swift SDK](https://www.braze.com/resources/articles/introducing-the-new-braze-swift-sdk).
**Important:**
Está procurando o guia básico de integração de Content Cards para desenvolvedores? Encontre [aqui](https://www.braze.com/docs/pt-br/pt-br/developer_guide/platforms/legacy_sdks/ios/content_cards/integration/).
# Guia de implementação de Content Cards {#content-card-implementation-guide}
> Este guia de implementação opcional e avançado aborda considerações sobre o código de Content Cards, três casos de uso personalizados criados por nossa equipe, trechos de código que os acompanham e orientações sobre o registro de impressões, cliques e descartes. Visite nosso repositório de demonstrações da Braze [aqui](https://github.com/braze-inc/braze-growth-shares-ios-demo-app)! Este guia de implementação está centrado em uma implementação Swift, mas são fornecidos trechos em Objective-C para os interessados.
## Considerações sobre o código {#code-considerations}
### Content Cards como objetos personalizados {#content-cards-as-custom-objects}
Assim como um foguete que adiciona um propulsor, seus próprios objetos personalizados podem ser estendidos para funcionar como Content Cards. Superfícies de API limitadas como essa oferecem flexibilidade para trabalhar com diferentes back-ends de dados de forma intercambiável. Isso pode ser feito em conformidade com o protocolo `ContentCardable` e implementando o inicializador (como visto nos trechos de código a seguir) e, por meio do uso da struct `ContentCardData`, permite acessar os dados `ABKContentCard`. A carga útil `ABKContentCard` será usada para inicializar a struct `ContentCardData` e o próprio objeto personalizado, tudo a partir de um tipo `Dictionary` por meio do inicializador fornecido com o protocolo.
O inicializador também inclui um enum `ContentCardClassType`. Esse enum é usado para decidir qual objeto será inicializado. Por meio do uso de pares chave-valor no dashboard da Braze, você pode definir uma chave `class_type` explícita que será usada para determinar qual objeto inicializar. Esses pares chave-valor para Content Cards são exibidos na variável `extras` do `ABKContentCard`. Outro componente central do inicializador é o parâmetro de dicionário `metaData`. O `metaData` inclui tudo do `ABKContentCard` analisado em uma série de chaves e valores. Depois que os cartões relevantes forem analisados e convertidos em seus objetos personalizados, o app estará pronto para começar a trabalhar com eles como se tivessem sido instanciados a partir de JSON ou de qualquer outra fonte.
Depois de entender bem essas considerações de código, confira nossos [casos de uso](#sample-use-cases) para começar a implementar seus objetos personalizados.
**Protocolo ContentCardable**
Um objeto `ContentCardData` que representa os dados `ABKContentCard` junto com um enum `ContentCardClassType`. Um inicializador usado para instanciar objetos personalizados com metadados do `ABKContentCard`.
```swift
protocol ContentCardable {
var contentCardData: ContentCardData? { get }
init?(metaData: [ContentCardKey: Any], classType contentCardClassType: ContentCardClassType)
}
extension ContentCardable {
var isContentCard: Bool {
return contentCardData != nil
}
func logContentCardClicked() {
BrazeManager.shared.logContentCardClicked(idString: contentCardData?.contentCardId)
}
func logContentCardDismissed() {
BrazeManager.shared.logContentCardDismissed(idString: contentCardData?.contentCardId)
}
func logContentCardImpression() {
BrazeManager.shared.logContentCardImpression(idString: contentCardData?.contentCardId)
}
}
```
**Struct de dados do Content Card**
`ContentCardData` representa os valores analisados de um `ABKContentCard`.
```swift
struct ContentCardData: Hashable {
let contentCardId: String
let contentCardClassType: ContentCardClassType
let createdAt: Double
let isDismissable: Bool
...
// other Content Card properties such as expiresAt, pinned, etc.
}
extension ContentCardData: Equatable {
static func ==(lhs: ContentCardData, rhs: ContentCardData) -> Bool {
return lhs.contentCardId == rhs.contentCardId
}
}
```
**Protocolo ContentCardable**
Um objeto `ContentCardData` que representa os dados `ABKContentCard` juntamente com um enum `ContentCardClassType`, um inicializador usado para instanciar objetos personalizados com metadados do `ABKContentCard`.
```objc
@protocol ContentCardable
@property (nonatomic, strong) ContentCardData *contentCardData;
- (instancetype __nullable)initWithMetaData:(NSDictionary *)metaData
classType:(enum ContentCardClassType)classType;
- (BOOL)isContentCard;
- (void)logContentCardImpression;
- (void)logContentCardClicked;
- (void)logContentCardDismissed;
@end
```
**Struct de dados do Content Card**
`ContentCardData` representa os valores analisados de um `ABKContentCard`.
```objc
@interface ContentCardData : NSObject
+ (ContentCardClassType)contentCardClassTypeForString:(NSString *)rawValue;
- (instancetype)initWithIdString:(NSString *)idString
classType:(ContentCardClassType)classType
createdAt:(double)createdAt isDismissible:(BOOL)isDismissible;
@property (nonatomic, readonly) NSString *contentCardId;
@property (nonatomic) ContentCardClassType classType;
@property (nonatomic, readonly) double *createdAt;
@property (nonatomic, readonly) BOOL isDismissible;
...
// other Content Card properties such as expiresAt, pinned, etc.
@end
```
**Inicializador de objeto personalizado**
Os metadados de um `ABKContentCard` são usados para preencher as variáveis do seu objeto. Os pares chave-valor configurados no dashboard da Braze são representados no dicionário "extras".
```swift
extension CustomObject: ContentCardable {
init?(metaData: [ContentCardKey: Any], classType contentCardClassType: ContentCardClassType) {
guard let idString = metaData[.idString] as? String,
let createdAt = metaData[.created] as? Double,
let isDismissable = metaData[.dismissable] as? Bool,
let extras = metaData[.extras] as? [AnyHashable: Any],
else { return nil }
let contentCardData = ContentCardData(contentCardId: idString, contentCardClassType: contentCardClassType, createdAt: createdAt, isDismissable: isDismissable)
let customObjectProperty = extras["YOUR-CUSTOM-OBJECT-PROPERTY"] as? String
self.init(contentCardData: contentCardData, property: customObjectProperty)
}
}
```
**Identificação de tipos**
O enum `ContentCardClassType` representa o valor `class_type` no dashboard da Braze. Esse valor também é usado como um identificador de filtro para exibir Content Cards em diferentes lugares.
```swift
enum ContentCardClassType: Hashable {
case yourValue
case yourOtherValue
...
case none
init(rawType: String?) {
switch rawType?.lowercased() {
case "your_value": // these values much match the value set in the Braze dashboard
self = .yourValue
case "your_other_value": // these values much match the value set in the Braze dashboard
self = .yourOtherValue
...
default:
self = .none
}
}
}
```
**Inicializador de objeto personalizado**
Os metadados de um `ABKContentCard` são usados para preencher as variáveis do seu objeto. Os pares chave-valor configurados no dashboard da Braze são representados no dicionário "extras".
```objc
- (id _Nullable)initWithMetaData:(nonnull NSDictionary *)metaData classType:(enum ContentCardClassType)classType {
self = [super init];
if (self) {
if ([metaData objectForKey:ContentCardKeyIdString] && [metaData objectForKey:ContentCardKeyCreated] && [metaData objectForKey:ContentCardKeyDismissible] && [metaData objectForKey:ContentCardKeyExtras]) {
NSDictionary *extras = metaData[ContentCardKeyExtras];
NSString *idString = metaData[ContentCardKeyIdString];
double createdAt = [metaData[ContentCardKeyCreated] doubleValue];
BOOL isDismissible = metaData[ContentCardKeyDismissible];
if ([extras objectForKey: @"YOUR-CUSTOM-PROPERTY")
_customObjectProperty = extras[@"YOUR-CUSTOM-OBJECT-PROPERTY"];
self.contentCardData = [[ContentCardData alloc] initWithIdString:idString classType:classType createdAt:createdAt isDismissible:isDismissible];
return self;
}
}
return nil;
}
```
**Identificação de tipos**
O enum `ContentCardClassType` representa o valor `class_type` no dashboard da Braze. Esse valor também é usado como um identificador de filtro para exibir Content Cards em diferentes lugares.
```objc
typedef NS_ENUM(NSInteger, ContentCardClassType) {
ContentCardClassTypeNone = 0,
ContentCardClassTypeYourValue,
ContentCardClassTypeYourOtherValue,
...
};
+ (NSArray *)contentCardClassTypeArray {
return @[ @"", @"your_value", @"your_other_value" ];
}
+ (ContentCardClassType)contentCardClassTypeForString:(NSString*)rawValue {
if ([[self contentCardClassTypeArray] indexOfObject:rawValue] == NSNotFound) {
return ContentCardClassTypeNone;
} else {
NSInteger value = [[self contentCardClassTypeArray] indexOfObject:rawValue];
return (ContentCardClassType) value;
}
}
```
**Solicitação de Content Cards**
Desde que o observador ainda esteja retido na memória, o retorno de chamada de notificação do SDK da Braze pode ser esperado.
```swift
func loadContentCards() {
BrazeManager.shared.addObserverForContentCards(observer: self, selector: #selector(contentCardsUpdated))
BrazeManager.shared.requestContentCardsRefresh()
}
```
**Manipulação do retorno de chamada do SDK de Content Cards**
Encaminhe o retorno de chamada da notificação para o arquivo auxiliar para analisar os dados de carga útil do(s) seu(s) objeto(s) personalizado(s).
```swift
@objc func contentCardsUpdated(_ notification: Notification) {
guard let contentCards = BrazeManager.shared.handleContentCardsUpdated(notification, for: [.yourValue]) as? [CustomObject],!contentCards.isEmpty else { return }
// do something with your array of custom objects
}
```
**Trabalhando com Content Cards**
O `class_type` é passado como um filtro para retornar apenas Content Cards que tenham um `class_type` correspondente.
```swift
func handleContentCardsUpdated(_ notification: Notification, for classTypes: [ContentCardClassType]) -> [ContentCardable] {
guard let updateIsSuccessful = notification.userInfo?[ABKContentCardsProcessedIsSuccessfulKey] as? Bool, updateIsSuccessful, let cards = contentCards else { return [] }
return convertContentCards(cards, for: classTypes)
}
```
**Solicitação de Content Cards**
Desde que o observador ainda esteja retido na memória, o retorno de chamada de notificação do SDK da Braze pode ser esperado.
```objc
- (void)loadContentCards {
[[BrazeManager shared] addObserverForContentCards:self selector:@selector(contentCardsUpdated:)];
[[BrazeManager shared] requestContentCardsRefresh];
}
```
**Manipulação do retorno de chamada do SDK de Content Cards**
Encaminhe o retorno de chamada da notificação para o arquivo auxiliar para analisar os dados de carga útil do(s) seu(s) objeto(s) personalizado(s).
```objc
- (void)contentCardsUpdated:(NSNotification *)notification {
NSArray *classTypes = @[@(ContentCardClassTypeYourValue)];
NSArray *contentCards = [[BrazeManager shared] handleContentCardsUpdated:notification forClassTypes:classTypes];
// do something with your array of custom objects
}
```
**Trabalhando com Content Cards**
O `class_type` é passado como um filtro para retornar apenas Content Cards que tenham um `class_type` correspondente.
```objc
- (NSArray *)handleContentCardsUpdated:(NSNotification *)notification forClassType:(ContentCardClassType)classType {
BOOL updateIsSuccessful = [notification.userInfo[ABKContentCardsProcessedIsSuccessfulKey] boolValue];
if (updateIsSuccessful) {
return [self convertContentCards:self.contentCards forClassType:classType];
} else {
return @[];
}
}
```
**Trabalhando com dados de carga útil**
Percorre o array de Content Cards e analisa apenas os cartões com um `class_type` correspondente. A carga útil de um ABKContentCard é analisada em um `Dictionary`.
```swift
func convertContentCards(_ cards: [ABKContentCard], for classTypes: [ContentCardClassType]) -> [ContentCardable] {
var contentCardables: [ContentCardable] = []
for card in cards {
let classTypeString = card.extras?[ContentCardKey.classType.rawValue] as? String
let classType = ContentCardClassType(rawType: classTypeString)
guard classTypes.contains(classType) else { continue }
var metaData: [ContentCardKey: Any] = [:]
switch card {
case let banner as ABKBannerContentCard:
metaData[.image] = banner.image
case let captioned as ABKCaptionedImageContentCard:
metaData[.title] = captioned.title
metaData[.cardDescription] = captioned.cardDescription
metaData[.image] = captioned.image
case let classic as ABKClassicContentCard:
metaData[.title] = classic.title
metaData[.cardDescription] = classic.cardDescription
default:
break
}
metaData[.idString] = card.idString
metaData[.created] = card.created
metaData[.dismissible] = card.dismissible
metaData[.urlString] = card.urlString
metaData[.extras] = card.extras
...
// other Content Card properties such as expiresAt, pinned, etc.
if let contentCardable = contentCardable(with: metaData, for: classType) {
contentCardables.append(contentCardable)
}
}
return contentCardables
}
```
**Inicializando seus objetos personalizados a partir dos dados de carga útil do Content Card**
O `class_type` é usado para determinar quais dos seus objetos personalizados serão inicializados a partir dos dados de carga útil.
```swift
func contentCardable(with metaData: [ContentCardKey: Any], for classType: ContentCardClassType) -> ContentCardable? {
switch classType {
case .yourValue:
return CustomObject(metaData: metaData, classType: classType)
case .yourOtherValue:
return OtherCustomObject(metaData: metaData, classType: classType)
...
default:
return nil
}
}
```
**Trabalhando com dados de carga útil**
Percorre o array de Content Cards e analisa apenas os cartões com um `class_type` correspondente. A carga útil de um ABKContentCard é analisada em um `Dictionary`.
```objc
- (NSArray *)convertContentCards:(NSArray *)cards forClassType:(ContentCardClassType)classType {
NSMutableArray *contentCardables = [[NSMutableArray alloc] init]; for (ABKContentCard *card in cards) {
NSString *classTypeString = [card.extras objectForKey:ContentCardKeyClassType];
ContentCardClassType cardClassType = [ContentCardData contentCardClassTypeForString: classTypeString];
if (cardClassType != classType) { continue; }
NSMutableDictionary *metaData = [[NSMutableDictionary alloc] init];
if ([card isKindOfClass:[ABKBannerContentCard class]]) {
ABKBannerContentCard *banner = (ABKBannerContentCard *)card;
metaData[ContentCardKeyImage] = banner.image;
} else if ([card isKindOfClass:[ABKCaptionedImageContentCard class]]) {
ABKCaptionedImageContentCard *captioned = (ABKCaptionedImageContentCard *)card;
metaData[ContentCardKeyTitle] = captioned.title;
metaData[ContentCardKeyCardDescription] = captioned.cardDescription;
metaData[ContentCardKeyImage] = captioned.image;
} else if ([card isKindOfClass:[ABKClassicContentCard class]]) {
ABKClassicContentCard *classic = (ABKClassicContentCard *)card;
metaData[ContentCardKeyCardDescription] = classic.title;
metaData[ContentCardKeyImage] = classic.image;
}
metaData[ContentCardKeyIdString] = card.idString;
metaData[ContentCardKeyCreated] = [NSNumber numberWithDouble:card.created];
metaData[ContentCardKeyDismissible] = [NSNumber numberWithBool:card.dismissible];
metaData[ContentCardKeyUrlString] = card.urlString;
metaData[ContentCardKeyExtras] = card.extras;
...
// other Content Card properties such as expiresAt, pinned, etc.
id contentCardable = [self contentCardableWithMetaData:metaData forClassType:classType];
if (contentCardable) {
[contentCardables addObject:contentCardable];
}
}
return contentCardables;
}
```
**Inicializando seus objetos personalizados a partir dos dados de carga útil do Content Card**
O `class_type` é usado para determinar quais dos seus objetos personalizados serão inicializados a partir dos dados de carga útil.
```obj-c
- (id)contentCardableWithMetaData:(NSDictionary *)metaData forClassType:(ContentCardClassType)classType {
switch (classType) {
case ContentCardClassTypeYourValue:
return [[CustomObject alloc] initWithMetaData:metaData classType:classType];
case ContentCardClassTypeYourOtherValue:
return nil;
...
default:
return nil;
}
}
```
## Casos de uso {#sample-use-cases}
Fornecemos três casos de uso abaixo. Cada caso de uso oferece uma explicação detalhada, trechos de código relevantes e uma visão de como as variáveis do Content Card podem parecer e ser usadas no dashboard da Braze:
- [Content Cards como conteúdo suplementar](#content-cards-as-supplemental-content)
- [Content Cards em um centro de mensagens](#content-cards-in-a-message-center)
- [Content Cards interativos](#interactive-content-cards)
### Content Cards como conteúdo suplementar {#content-cards-as-supplemental-content}
{: style="float:right;max-width:25%;margin-left:15px;border:0;"}
Você pode combinar perfeitamente Content Cards em um feed existente, permitindo que os dados de vários feeds sejam carregados simultaneamente. Isso cria uma experiência coesa e harmoniosa com Content Cards da Braze e o conteúdo de feed existente.
O exemplo à direita mostra uma `UICollectionView` com uma lista híbrida de itens que são preenchidos por meio de dados locais e Content Cards fornecidos pela Braze. Com isso, os Content Cards podem ser indistinguíveis do conteúdo existente.
#### Configuração do dashboard {#dashboard-configuration}
Esse Content Card é entregue por uma Campaign disparada por API com pares chave-valor disparados por API. Isso é ideal para Campaigns em que os valores do cartão dependem de fatores externos para determinar o conteúdo a ser exibido ao usuário. Note que `class_type` deve ser conhecido no momento da configuração.
{: style="max-width:60%;"}
##### Pronto para registrar a análise de dados? {#ready-to-log-analytics}
Visite a [seção a seguir](#logging-impressions-clicks-and-dismissals) para entender melhor como deve ser o fluxo de dados.
### Content Cards em um centro de mensagens {#content-cards-in-a-message-center}
Content Cards podem ser usados em um formato de centro de mensagens em que cada mensagem é seu próprio cartão. Cada mensagem no centro de mensagens é preenchida por meio de uma carga útil de Content Card, e cada cartão contém pares chave-valor adicionais que potencializam a UI/UX ao clicar. No exemplo a seguir, uma mensagem direciona você para uma visualização personalizada arbitrária, enquanto outra abre uma webview que exibe HTML personalizado.
{: style="border:0;"}{: style="max-width:80%;border:0"}
#### Configuração do dashboard {#dashboard-configuration}
Para os seguintes tipos de mensagens, o par chave-valor `class_type` deve ser adicionado à configuração do seu dashboard. Os valores atribuídos aqui são arbitrários, mas devem ser distinguíveis entre os tipos de classe. Esses pares chave-valor são os identificadores-chave que o aplicativo examina ao decidir para onde ir quando o usuário clica em uma mensagem resumida da caixa de entrada.
Os pares chave-valor para esse caso de uso incluem:
- `message_header` definido como `Full Page`
- `class_type` definido como `message_full_page`
{: style="max-width:60%;"}
Os pares chave-valor para esse caso de uso incluem:
- `message_header` definido como `HTML`
- `class_type` definido como `message_webview`
- `message_title`
Essa mensagem também procura um par chave-valor HTML, mas se você estiver trabalhando com um domínio web, um par chave-valor de URL também é válido.
{: style="max-width:60%;"}
#### Explicação adicional {#further-explanation}
A lógica do centro de mensagens é orientada pelo `contentCardClassType`, que é fornecido pelos pares chave-valor da Braze. Usando o método `addContentCardToView`, você pode filtrar e identificar esses tipos de classe.
**Usando `class_type` para comportamento ao clicar**
Quando uma mensagem é clicada, o `ContentCardClassType` determina como a próxima tela deve ser preenchida.
```swift
func addContentCardToView(with message: Message) {
switch message.contentCardData?.contentCardClassType {
case .message(.fullPage):
loadContentCardFullPageView(with: message as! FullPageMessage)
case .message(.webView):
loadContentCardWebView(with: message as! WebViewMessage)
default:
break
}
}
```
**Usando `class_type` para comportamento ao clicar**
Quando uma mensagem é clicada, o `ContentCardClassType` determina como a próxima tela deve ser preenchida.
```objc
- (void)addContentCardToView:(Message *)message {
switch (message.contentCardData.classType) {
case ContentCardClassTypeMessageFullPage:
[self loadContentCardFullPageView:(FullPageMessage *)message];
break;
case ContentCardClassTypeMessageWebview:
[self loadContentCardWebView:(WebViewMessage *)message];
break;
default:
break;
}
}
```
##### Pronto para registrar a análise de dados? {#ready-to-log-analytics}
Visite a [seção a seguir](#logging-impressions-clicks-and-dismissals) para entender melhor como deve ser o fluxo de dados.
{: style="border:0;"}{: style="float:right;max-width:45%;border:0;margin-left:15px;"}
### Content Cards interativos {#interactive-content-cards}
Content Cards podem ser aproveitados para criar experiências dinâmicas e interativas para seus usuários. No exemplo à direita, temos um pop-up de Content Card que aparece no checkout, oferecendo aos usuários promoções de última hora.
Cartões bem posicionados como esse são uma ótima maneira de dar aos usuários um "empurrãozinho" em direção a ações específicas.
#### Configuração do dashboard {#dashboard-configuration}
A configuração do dashboard para Content Cards interativos é simples. Os pares chave-valor para esse caso de uso incluem `discount_percentage` definido como o valor do desconto desejado e `class_type` definido como `coupon_code`. Esses pares chave-valor são como os Content Cards específicos por tipo são filtrados e exibidos na tela de checkout.
{: style="max-width:70%;"}
##### Pronto para registrar a análise de dados? {#ready-to-log-analytics}
Visite a [seção a seguir](#logging-impressions-clicks-and-dismissals) para entender melhor como deve ser o fluxo de dados.
## Personalização do modo escuro {#dark-mode-customization}
Por padrão, as visualizações de Content Cards responderão automaticamente às alterações do modo escuro no dispositivo com um conjunto de cores temáticas.
Esse comportamento pode ser substituído conforme detalhado em nosso [guia de estilo personalizado](https://www.braze.com/docs/pt-br/pt-br/developer_guide/platform_integration_guides/ios/content_cards/customization/custom_styling/#disabling-dark-mode).
## Registro de impressões, cliques e descartes {#logging-impressions-clicks-and-dismissals}
Depois de estender seus objetos personalizados para funcionarem como Content Cards, o registro de métricas valiosas como impressões, cliques e descartes é rápido. Isso pode ser feito usando um protocolo `ContentCardable` que faz referência e fornece dados a um arquivo auxiliar para ser registrado pelo SDK da Braze.
#### Componentes de implementação
{#implementation-components}
**Registrando análise de dados**
Os métodos de registro podem ser chamados diretamente de objetos em conformidade com o protocolo `ContentCardable`.
```swift
customObject.logContentCardImpression()
customObject.logContentCardClicked()
customObject.logContentCardDismissed()
```
**Recuperando o `ABKContentCard`**
O `idString` passado do seu objeto personalizado é usado para identificar o Content Card associado para registrar a análise de dados.
```swift
extension BrazeManager {
func logContentCardImpression(idString: String?) {
guard let contentCard = getContentCard(forString: idString) else { return }
contentCard.logContentCardImpression()
}
private func getContentCard(forString idString: String?) -> ABKContentCard? {
return contentCards?.first(where: { $0.idString == idString })
}
}
```
**Registrando análise de dados**
Os métodos de registro podem ser chamados diretamente de objetos em conformidade com o protocolo `ContentCardable`.
```objc
[customObject logContentCardImpression];
[customObject logContentCardClicked];
[customObject logContentCardDismissed];
```
**Recuperando o `ABKContentCard`**
O `idString` passado do seu objeto personalizado é usado para identificar o Content Card associado para registrar a análise de dados.
```objc
- (void)logContentCardImpression:(NSString *)idString {
ABKContentCard *contentCard = [self getContentCard:idString];
[contentCard logContentCardImpression];
}
- (ABKContentCard *)getContentCard:(NSString *)idString {
NSPredicate *predicate = [NSPredicate predicateWithFormat:@"self.idString == %@", idString];
NSArray *filteredArray = [self.contentCards filteredArrayUsingPredicate:predicate];
return filteredArray.firstObject;
}
```
**Important:**
Para uma variante de controle de Content Card, um objeto personalizado ainda deve ser instanciado, e a lógica da interface do usuário deve definir a visualização correspondente do objeto como oculta. O objeto pode então registrar uma impressão para informar nossa análise de dados sobre quando um usuário teria visto o cartão de controle.
## Arquivos auxiliares {#helper-files}
**Arquivo auxiliar ContentCardKey**
```swift
enum ContentCardKey: String {
case idString
case created
case classType = "class_type"
case dismissible
case extras
...
}
```
```objc
static NSString *const ContentCardKeyIdString = @"idString";
static NSString *const ContentCardKeyCreated = @"created";
static NSString *const ContentCardKeyClassType = @"class_type";
static NSString *const ContentCardKeyDismissible = @"dismissible";
static NSString *const ContentCardKeyExtras = @"extras";
...
```
# Rastrear Sessões para iOS
Source: /docs/pt-br/developer_guide/platforms/legacy_sdks/ios/analytics/tracking_sessions/index.md
**Warning:**
[AppboyKit](https://github.com/Appboy/appboy-ios-sdk) (also known as the Objective-C SDK) is no longer supported and has been replaced by the [Swift SDK](https://www.braze.com/docs/pt-br/pt-br/developer_guide/sdk_integration/?sdktab=swift). It will no longer receive new features, bug fixes, security updates, or technical support—however, messaging and analytics will continue to function as normal. To learn more, see [Introducing the New Braze Swift SDK](https://www.braze.com/resources/articles/introducing-the-new-braze-swift-sdk).
# Rastreamento de sessão para iOS
O Braze SDK informa os dados da sessão usados pelo dashboard do Braze para calcular o engajamento do usuário e outras análises essenciais para entender seus usuários. Nosso SDK gera pontos de dados de "início de sessão" e "encerramento de sessão" que contabilizam a duração da sessão e a contagem de sessões visualizáveis no dashboard do Braze com base na seguinte semântica de sessão.
## Ciclo de vida da sessão
Uma sessão é iniciada quando você chama `[[Appboy sharedInstance]` `startWithApiKey:inApplication:withLaunchOptions:withAppboyOptions]`, após o que, por padrão, as sessões começam quando a notificação `UIApplicationWillEnterForegroundNotification` é disparada (por exemplo, quando o aplicativo entra em primeiro plano) e terminam quando o aplicativo sai do primeiro plano (por exemplo, quando a notificação `UIApplicationDidEnterBackgroundNotification` é disparada ou quando o aplicativo morre).
**Note:**
Se precisar forçar uma nova sessão, basta mudar de usuário.
## Personalização do tempo limite da sessão
A partir do SDK da Braze para iOS v3.14.1, você pode definir o tempo limite da sessão usando o arquivo Info.plist. Adicione o dicionário `Braze` ao seu arquivo `Info.plist`. No dicionário `Braze`, adicione a subentrada `SessionTimeout` number e defina o valor como seu tempo limite de sessão personalizado. Note que, antes do SDK da Braze para iOS v4.0.2, a chave do dicionário `Appboy` deve ser usada no lugar de `Braze`.
Como alternativa, você pode definir a chave `ABKSessionTimeoutKey` como o valor inteiro desejado em seu objeto `appboyOptions` passado para [`startWithApiKey`](https://appboy.github.io/appboy-ios-sdk/docs/interface_appboy.html#afd911d60dfe7e5361afbfb364f5d20f9).
```objc
// Sets the session timeout to 60 seconds
[Appboy startWithApiKey:@"YOUR-API_KEY"
inApplication:application
withLaunchOptions:options
withAppboyOptions:@{ ABKSessionTimeoutKey : @(60) }];
```
```swift
// Sets the session timeout to 60 seconds
Appboy.start(withApiKey: "YOUR-API-KEY",
in:application,
withLaunchOptions:launchOptions,
withAppboyOptions:[ ABKSessionTimeoutKey : 60 ])
```
Se você tiver definido um tempo limite da sessão, a semântica da sessão se estenderá até esse tempo limite personalizado.
**Note:**
O valor mínimo para `sessionTimeoutInSeconds` é 1 segundo. O valor padrão é 10 segundos.
## Teste de rastreamento de sessão
Para detectar sessões por meio de seu usuário, localize-o no dashboard e navegue até **App Usage (Uso do aplicativo** ) no perfil do usuário. Você pode confirmar que o rastreamento de sessões está funcionando verificando se a métrica "Sessões" aumenta quando você espera que isso aconteça.

# Definir IDs de usuário para iOS
Source: /docs/pt-br/developer_guide/platforms/legacy_sdks/ios/analytics/setting_user_ids/index.md
**Warning:**
[AppboyKit](https://github.com/Appboy/appboy-ios-sdk) (also known as the Objective-C SDK) is no longer supported and has been replaced by the [Swift SDK](https://www.braze.com/docs/pt-br/pt-br/developer_guide/sdk_integration/?sdktab=swift). It will no longer receive new features, bug fixes, security updates, or technical support—however, messaging and analytics will continue to function as normal. To learn more, see [Introducing the New Braze Swift SDK](https://www.braze.com/resources/articles/introducing-the-new-braze-swift-sdk).
# Definir IDs de usuário para iOS
User IDs should be set for each of your users. These should be unchanging and accessible when a user opens the app. Naming your user IDs correctly from the start is one of the most **crucial** steps when setting up user IDs. We strongly suggest using the Braze standard of UUIDs and GUIDs (detailed below). We also strongly recommend providing this identifier as it will allow you to:
- Track your users across devices and platforms, improving the quality of your behavioral and demographic data.
- Import data about your users using our [user data API](https://www.braze.com/docs/pt-br/pt-br/developer_guide/rest_api/user_data/#user-data).
- Target specific users with our [messaging API](https://www.braze.com/docs/pt-br/pt-br/api/endpoints/messaging/) for both general and transactional messages.
**Note:**
If such an identifier is not available, Braze will assign a unique identifier to your users, but you will lack the capabilities listed for user IDs. You should avoid setting user IDs for users for whom you lack a unique identifier that is tied to them as an individual. Passing a device identifier offers no benefit versus the automatic anonymous user tracking Braze offers by default.
**Warning:**
If you want to include an identifiable value as your user ID, for additional security, we **strongly recommend** adding our [SDK authentication](https://www.braze.com/docs/pt-br/pt-br/developer_guide/authentication/) feature to prevent user impersonation.
## Sugestão de convenção de nomenclatura de ID de usuário
At Braze, we **strongly recommend** naming user IDs, also referred to as external IDs, in a [UUIDs and GUIDs](https://en.wikipedia.org/wiki/Universally_unique_identifier) format. UUIDs and GUIDs are universally unique identifiers that consist of a 128-bit number used to identify information in computer systems. This means that these UUIDs are long, random and well distributed. If you choose a different method in which to name your user IDs, they must also be long, random and well distributed. It is also important to note, that user IDs are **case sensitive**. For example, "Abcdef" is a different user from "abcdef".
If you find your user IDs include names, email addresses, timestamps, or incrementors, we suggest using a new naming method that is more secure so that your user IDs are not as easy to guess or impersonate. If you choose to include this in your user IDs, we **strongly recommend** adding our [SDK authentication](https://www.braze.com/docs/pt-br/pt-br/developer_guide/authentication/) feature to prevent user impersonation.
Providing this information to others may allow people outside your organization to glean information on how your user IDs are structured, opening up your organization to potentially malicious updates or removal of information. Choosing the correct naming convention from the start is one of the most important steps in setting up user IDs. However, a migration is possible using our [external ID migration endpoint](https://www.braze.com/docs/pt-br/pt-br/api/endpoints/user_data/external_id_migration/).
| User ID Naming |
| Recommended | Not Recommended |
| ------------ | ----------- |
| 123e4567-e89b-12d3-a456-836199333115 | JonDoe829525552 |
| 8c0b3728-7fa7-4c68-a32e-12de1d3ed2d5 | Anna@email.com |
| f0a9b506-3c5b-4d86-b16a-94fc4fc3f7b0 | CompanyName-1-2-19 |
| 2d9e96a1-8f15-4eaf-bf7b-eb8c34e25962 | jon-doe-1-2-19 |
{: .reset-td-br-1 .reset-td-br-2 aria-label="Table" }
## Atribuindo uma ID de usuário
A seguinte chamada deve ser feita assim que o usuário for identificado (geralmente após o registro) para definir o ID do usuário:
```objc
[[Appboy sharedInstance] changeUser:@"YOUR_USER_ID_STRING"];
```
```swift
Appboy.sharedInstance()?.changeUser("YOUR_USER_ID")
```
**Warning:**
**Não chame `changeUser()` quando um usuário fizer logout. `changeUser()` só deve ser chamado quando o usuário fizer o registro no aplicativo.** A definição de [`changeUser()`](https://appboy.github.io/appboy-ios-sdk/docs/interface_appboy.html#ac8b369b40e15860b0ec18c0f4b46ac69%20%22changeuser%22) para um valor padrão estático associará TODAS as atividades do usuário a esse "usuário" padrão até que o usuário se registre novamente.
Certifique-se de chamar esse método na thread principal do aplicativo. Chamar o método de forma assíncrona pode levar a um comportamento indefinido.
Além disso, recomendamos não alterar o ID do usuário quando um usuário se desconecta, pois isso impede o direcionamento de campanhas de reengajamento para o usuário conectado anteriormente. Se você antecipar vários usuários no mesmo dispositivo, mas quiser direcionar apenas um deles quando o aplicativo estiver em um estado de logout, recomendamos acompanhar separadamente o ID de usuário que deseja direcionar enquanto estiver desconectado e voltar para esse ID de usuário como parte do processo de logout do app.
## Práticas recomendadas e notas para integração de ID do usuário
### Automatic preservation of anonymous user history
| Identification Context | Preservation Behavior |
| ---------------------- | -------------------------- |
| User **has not** been previously identified | Anonymous history **is merged** with user profile upon identification. |
| User **has been** previously identified in-app or via API | Anonymous history **is not merged** with user profile upon identification. |
{: .reset-td-br-1 .reset-td-br-2 aria-label="Automatic preservation of anonymous user history" }
Refer to [Identified user profiles](https://www.braze.com/docs/pt-br/pt-br/user_guide/data_and_analytics/user_data_collection/user_profile_lifecycle/#identified-user-profiles) for more information on what occurs when you identify anonymous users.
### Additional notes and best practices
Note the following:
- If your app is used by multiple people, you can assign each user a unique identifier to track them.
- After a user ID has been set, you cannot revert that user to an anonymous profile.
- Do not change the user ID when a user logs out as this can separate the device from the user profile.
- As a result, you won't be able to target the previously logged out user with re-engagement messages. If you anticipate multiple users on the same device, but only want to target one of them when your app is in a logged-out state, we recommend separately keeping track of the user ID you want to target while logged out and switching back to that user ID as part of your app's logout process. By default, only the last user that was logged in will receive push notifications from your app.
- Switching from one identified user to another is a relatively costly operation.
- When you request the user switch, the current session for the previous user is automatically closed and a new session is started. Braze will automatically make a data refresh request for in-app messages and other Braze resources for the new user.
**Tip:**
If you opt to use a hash of a unique identifier as your user ID, be sure that you're normalizing the input to your hashing function. For example, if you're going to use a hash of an email address, confirm that you're stripping leading and trailing whitespace from the input, and taking localization into account.
## Aliasing de usuários
A [user alias](https://www.braze.com/docs/pt-br/pt-br/user_guide/data_and_analytics/user_data_collection/user_profile_lifecycle/#user-aliases) serves as an alternative unique user identifier. You can use aliases to identify users along different dimensions than your core user ID:
* Set a consistent identifier for analytics that will follow a given user both before and after they have logged in to a mobile app or website.
* Add the identifiers used by a third-party vendor to your company users in order to more easily reconcile your data externally.
Each alias consists of two parts: a name for the identifier itself, and a label indicating the type of alias. Users can have multiple aliases with different labels, but only one name per label.
For more information on setting user aliases against a user profile, refer to [User aliases](https://www.braze.com/docs/pt-br/pt-br/user_guide/data_and_analytics/user_data_collection/user_profile_lifecycle/#user-aliases).
# Rastrear eventos personalizados para iOS
Source: /docs/pt-br/developer_guide/platforms/legacy_sdks/ios/analytics/tracking_custom_events/index.md
**Warning:**
[AppboyKit](https://github.com/Appboy/appboy-ios-sdk) (also known as the Objective-C SDK) is no longer supported and has been replaced by the [Swift SDK](https://www.braze.com/docs/pt-br/pt-br/developer_guide/sdk_integration/?sdktab=swift). It will no longer receive new features, bug fixes, security updates, or technical support—however, messaging and analytics will continue to function as normal. To learn more, see [Introducing the New Braze Swift SDK](https://www.braze.com/resources/articles/introducing-the-new-braze-swift-sdk).
# Rastrear eventos personalizados para iOS {#track-custom-events-for-ios}
Você pode registrar eventos personalizados na Braze para saber mais sobre os padrões de uso do seu app e segmentar seus usuários por suas ações no dashboard.
Antes da implementação, não deixe de analisar exemplos das opções de segmentação oferecidas por eventos personalizados, atributos personalizados e eventos de compra em nossas [melhores práticas](https://www.braze.com/docs/pt-br/pt-br/developer_guide/platform_wide/analytics_overview/#user-data-collection), bem como nossas notas sobre [convenções de nomenclatura de eventos](https://www.braze.com/docs/pt-br/pt-br/user_guide/data/activation/events/event_naming_conventions/).
## Adição de um evento personalizado {#adding-a-custom-event}
```objc
[[Appboy sharedInstance] logCustomEvent:@"YOUR_EVENT_NAME"];
```
```swift
Appboy.sharedInstance()?.logCustomEvent("YOUR_EVENT_NAME")
```
### Adição de propriedades {#adding-properties}
Você pode adicionar metadados sobre eventos personalizados passando um `NSDictionary` preenchido com valores `NSNumber`, `NSString` ou `NSDate`.
```objc
[[Appboy sharedInstance] logCustomEvent:@"YOUR-EVENT-NAME"
withProperties:@{
@"you": @"can",
@"pass": @(NO),
@"orNumbers": @42,
@"orDates": [NSDate date],
@"or": @[@"any", @"array", @"here"],
@"andEven": @{
@"deeply": @[@"nested", @"json"]
}
}];
```
```swift
Appboy.sharedInstance()?.logCustomEvent(
"YOUR-EVENT-NAME",
withProperties: [
"you": "can",
"pass": false,
"orNumbers": 42,
"orDates": Date(),
"or": ["any", "array", "here"],
"andEven": [
"deeply": ["nested", "json"]
]
]
)
```
Consulte nossa [documentação de classe](http://appboy.github.io/appboy-ios-sdk/docs/interface_appboy.html#a4f0051d73d85cb37f63c232248124c79) para saber mais.
### Chaves reservadas {#event-reserved-keys}
As seguintes chaves são reservadas e não podem ser usadas como propriedades de evento personalizado:
- `time`
- `event_name`
## Recursos adicionais {#additional-resources}
- Consulte a declaração do método no [arquivo](https://github.com/Appboy/appboy-ios-sdk/blob/master/AppboyKit/include/Appboy.h) `Appboy.h`.
- Consulte a documentação de [`logCustomEvent`](http://appboy.github.io/appboy-ios-sdk/docs/interface_appboy.html#ad80c39e8c96482a77562a5b1a1d387aa) para saber mais.
# Definir atributos personalizados para iOS
Source: /docs/pt-br/developer_guide/platforms/legacy_sdks/ios/analytics/setting_custom_attributes/index.md
**Warning:**
[AppboyKit](https://github.com/Appboy/appboy-ios-sdk) (also known as the Objective-C SDK) is no longer supported and has been replaced by the [Swift SDK](https://www.braze.com/docs/pt-br/pt-br/developer_guide/sdk_integration/?sdktab=swift). It will no longer receive new features, bug fixes, security updates, or technical support—however, messaging and analytics will continue to function as normal. To learn more, see [Introducing the New Braze Swift SDK](https://www.braze.com/resources/articles/introducing-the-new-braze-swift-sdk).
# Definir atributos personalizados para iOS {#set-custom-attributes-for-ios}
A Braze fornece métodos para atribuir atributos aos usuários. Você poderá filtrar e segmentar seus usuários de acordo com esses atributos no dashboard.
Antes da implementação, certifique-se de revisar exemplos das opções de segmentação oferecidas por eventos personalizados, atributos personalizados e eventos de compra em nossas [melhores práticas](https://www.braze.com/docs/pt-br/pt-br/developer_guide/platform_wide/analytics_overview/#user-data-collection), bem como nossas notas sobre [convenções de nomenclatura de eventos](https://www.braze.com/docs/pt-br/pt-br/user_guide/data/activation/events/event_naming_conventions/).
## Atribuindo atributos de usuário padrão {#assigning-default-user-attributes}
Para atribuir atributos de usuário, você precisa definir o campo apropriado no objeto compartilhado `ABKUser`.
A seguir está um exemplo de configuração do atributo nome:
```objc
[Appboy sharedInstance].user.firstName = @"first_name";
```
```swift
Appboy.sharedInstance()?.user.firstName = "first_name"
```
Os seguintes atributos devem ser definidos no objeto `ABKUser`:
- `firstName`
- `lastName`
- `email`
- `dateOfBirth`
- `country`
- `language`
- `homeCity`
- `phone`
- `userID`
- `gender`
## Atribuindo atributos personalizados ao usuário {#assigning-custom-user-attributes}
Além dos atributos de usuário padrão, a Braze também permite definir atributos personalizados usando vários tipos de dados diferentes. Consulte nossa [coleta de dados de usuários](https://www.braze.com/docs/pt-br/pt-br/developer_guide/analytics/) para saber mais sobre as opções de segmentação que cada um desses atributos oferece.
### Atributo personalizado com um valor da string {#custom-attribute-with-a-string-value}
```objc
[[Appboy sharedInstance].user setCustomAttributeWithKey:@"your_attribute_key" andStringValue:"your_attribute_value"];
```
```swift
Appboy.sharedInstance()?.user.setCustomAttributeWithKey("your_attribute_key", andStringValue: "your_attribute_value")
```
### Atributo personalizado com um valor inteiro {#custom-attribute-with-an-integer-value}
```objc
[[Appboy sharedInstance].user setCustomAttributeWithKey:@"your_attribute_key" andIntegerValue:yourIntegerValue];
```
```swift
Appboy.sharedInstance()?.user.setCustomAttributeWithKey("your_attribute_key", andIntegerValue: yourIntegerValue)
```
### Atributo personalizado com um valor double {#custom-attribute-with-a-double-value}
A Braze trata os valores `float` e `double` da mesma forma no banco de dados.
```objc
[[Appboy sharedInstance].user setCustomAttributeWithKey:@"your_attribute_key" andDoubleValue:yourDoubleValue];
```
```swift
Appboy.sharedInstance()?.user.setCustomAttributeWithKey("your_attribute_key", andDoubleValue: yourDoubleValue)
```
### Atributo personalizado com um valor booleano {#custom-attribute-with-a-boolean-value}
```objc
[[Appboy sharedInstance].user setCustomAttributeWithKey:@"your_attribute_key" andBOOLValue:yourBOOLValue];
```
```swift
Appboy.sharedInstance()?.user.setCustomAttributeWithKey("your_attribute_key", andBOOLValue: yourBoolValue)
```
### Atributo personalizado com um valor de data {#custom-attribute-with-a-date-value}
As datas passadas para a Braze com esse método devem estar no formato [ISO 8601](http://en.wikipedia.org/wiki/ISO_8601) (por exemplo, `2013-07-16T19:20:30+01:00`) ou no formato `yyyy-MM-dd'T'HH:mm:ss:SSSZ` (`2016-12-14T13:32:31.601-0800`).
```objc
[[Appboy sharedInstance].user setCustomAttributeWithKey:@"your_attribute_key" andDateValue:yourDateValue];
```
```swift
Appboy.sharedInstance()?.user.setCustomAttributeWithKey("your_attribute_key", andDateValue:yourDateValue)
```
### Atributo personalizado com um valor de array {#custom-attribute-with-an-array-value}
O número máximo de elementos padrão em um array é 500. Você pode atualizar o número máximo de arrays no dashboard da Braze, em **Configurações de dados** > **Atributos personalizados**. Arrays que excedem o número máximo de elementos são truncados para conter o número máximo de elementos.
```objc
// Setting a custom attribute with an array value
[[Appboy sharedInstance].user setCustomAttributeArrayWithKey:@"array_name" array:@[@"value1", @"value2"]];
// Adding to a custom attribute with an array value
[[Appboy sharedInstance].user addToCustomAttributeArrayWithKey:@"array_name" value:@"value3"];
// Removing a value from an array type custom attribute
[[Appboy sharedInstance].user removeFromCustomAttributeArrayWithKey:@"array_name" value:@"value2"];
// Removing an entire array and key
[[Appboy sharedInstance].user setCustomAttributeArrayWithKey:@"array_name" array:nil];
```
```swift
// Setting a custom attribute with an array value
Appboy.sharedInstance()?.user.setCustomAttributeArrayWithKey("array_name", array: ["value1", "value2"])
// Adding to a custom attribute with an array value
Appboy.sharedInstance()?.user.addToCustomAttributeArrayWithKey("array_name", value: "value3")
// Removing a value from an array type custom attribute
Appboy.sharedInstance()?.user.removeFromCustomAttributeArrayWithKey("array_name", value: "value2")
```
### Removendo um atributo personalizado {#unsetting-a-custom-attribute}
Atributos personalizados também podem ser removidos usando o seguinte método:
```objc
[[Appboy sharedInstance].user unsetCustomAttributeWithKey:@"your_attribute_key"];
```
```swift
Appboy.sharedInstance()?.user.unsetCustomAttributeWithKey("your_attribute_key")
```
### Incrementando/decrementando atributos personalizados {#incrementingdecrementing-custom-attributes}
Este código é um exemplo de um atributo personalizado de incremento. Você pode incrementar o valor de um atributo personalizado por qualquer valor inteiro ou longo positivo ou negativo:
```objc
[[Appboy sharedInstance].user incrementCustomUserAttribute:@"your_attribute_key" by:incrementIntegerValue];
```
```swift
Appboy.sharedInstance()?.user.incrementCustomUserAttribute("your_attribute_key", by: incrementIntegerValue)
```
### Definindo um atributo personalizado por meio da REST API {#setting-a-custom-attribute-via-the-rest-api}
Você também pode usar nossa REST API para definir atributos de usuário. Consulte a [documentação da API de usuários](https://www.braze.com/docs/pt-br/pt-br/developer_guide/rest_api/user_data/#user-data) para obter detalhes.
### Limites de valores de atributos personalizados {#custom-attribute-value-limits}
Os valores de atributos personalizados têm um comprimento máximo de 255 caracteres; valores mais longos serão truncados.
#### Informações adicionais {#additional-information}
- Mais detalhes podem ser encontrados no [arquivo `ABKUser.h`](https://github.com/Appboy/appboy-ios-sdk/blob/master/AppboyKit/include/Appboy.h).
- Consulte a [documentação `ABKUser`](http://appboy.github.io/appboy-ios-sdk/docs/interface_a_b_k_user.html) para saber mais.
## Configurando inscrições de usuários {#setting-up-user-subscriptions}
Para configurar uma inscrição para seus usuários (e-mail ou push), chame as funções `setEmailNotificationSubscriptionType` ou `setPushNotificationSubscriptionType`, respectivamente. Ambas as funções usam o tipo de enum `ABKNotificationSubscriptionType` como argumentos. Esse tipo tem três estados diferentes:
| Status da inscrição | Definição |
| ------------------- | ---------- |
| `ABKOptedin` | Inscrito, com aceitação explícita |
| `ABKSubscribed` | Inscrito, mas sem aceitação explícita |
| `ABKUnsubscribed` | Inscrição cancelada e/ou recusa explícita |
{: .reset-td-br-1 .reset-td-br-2 role="presentation" aria-label="Configurando inscrições de usuários" }
Os usuários que concedem permissão para um app enviar notificações por push têm o status padrão de `ABKOptedin`, pois o iOS exige uma aceitação explícita.
Os usuários serão configurados como `ABKSubscribed` automaticamente após o recebimento de um endereço de e-mail válido; no entanto, sugerimos que você estabeleça um processo de aceitação explícita e defina esse valor para `OptedIn` após o recebimento do consentimento explícito do seu usuário. Para saber mais, consulte [Gerenciar inscrições de usuários](https://www.braze.com/docs/pt-br/pt-br/user_guide/channels/email/subscriptions/).
### Configurando inscrições de e-mail {#setting-email-subscriptions}
```objc
[[Appboy sharedInstance].user setEmailNotificationSubscriptionType: ABKNotificationSubscriptionType]
```
```swift
Appboy.sharedInstance()?.user.setEmailNotificationSubscriptionType(ABKNotificationSubscriptionType)
```
### Configurando inscrições de notificação por push {#setting-push-notification-subscriptions}
```objc
[[Appboy sharedInstance].user setPushNotificationSubscriptionType: ABKNotificationSubscriptionType]
```
```swift
Appboy.sharedInstance()?.user.setPushNotificationSubscriptionType(ABKNotificationSubscriptionType)
```
Para saber mais, consulte [Gerenciar inscrições de usuários](https://www.braze.com/docs/pt-br/pt-br/user_guide/channels/email/subscriptions/).
# Registrar compras para iOS
Source: /docs/pt-br/developer_guide/platforms/legacy_sdks/ios/analytics/logging_purchases/index.md
**Warning:**
[AppboyKit](https://github.com/Appboy/appboy-ios-sdk) (also known as the Objective-C SDK) is no longer supported and has been replaced by the [Swift SDK](https://www.braze.com/docs/pt-br/pt-br/developer_guide/sdk_integration/?sdktab=swift). It will no longer receive new features, bug fixes, security updates, or technical support—however, messaging and analytics will continue to function as normal. To learn more, see [Introducing the New Braze Swift SDK](https://www.braze.com/resources/articles/introducing-the-new-braze-swift-sdk).
# Registrar compras para iOS {#log-purchases-for-ios}
Registre as compras no app para poder rastrear sua receita ao longo do tempo e entre as fontes de receita, bem como segmentar seus usuários pelo valor do tempo de vida deles.
A Braze oferece suporte a compras em várias moedas. As compras informadas em uma moeda diferente do dólar americano serão mostradas no dashboard em dólares americanos com base na taxa de câmbio na data em que foram informadas.
Antes da implementação, não deixe de analisar exemplos das opções de segmentação oferecidas por eventos personalizados, atributos personalizados e eventos de compra em nossas [práticas recomendadas](https://www.braze.com/docs/pt-br/pt-br/developer_guide/platform_wide/analytics_overview/#user-data-collection), bem como nossas notas sobre [convenções de nomenclatura de eventos](https://www.braze.com/docs/pt-br/pt-br/user_guide/data/activation/events/event_naming_conventions/).
## Rastreamento de compras e receitas {#tracking-purchases-and-revenue}
Para usar esse recurso, adicione essa chamada de método após uma compra bem-sucedida em seu app:
```objc
[[Appboy sharedInstance] logPurchase:@"your product ID"
inCurrency:@"USD"
atPrice:[[[NSDecimalNumber alloc] initWithString:@"0.99"] autorelease]];
```
```swift
Appboy.sharedInstance()?.logPurchase("your product ID", inCurrency: "USD", atPrice: NSDecimalNumber(string: "0.99"))
```
- Os símbolos de moeda compatíveis incluem: USD, CAD, EUR, GBP, JPY, AUD, CHF, NOK, MXN, NZD, CNY, RUB, TRY, INR, IDR, ILS, SAR, ZAR, AED, SEK, HKD, SPD, DKK e muito mais.
- Qualquer outro símbolo de moeda fornecido resultará em um aviso registrado e nenhuma outra ação será realizada pelo SDK.
- A ID do produto pode ter no máximo 255 caracteres.
- Note que, se o identificador do produto estiver vazio, a compra não será registrada na Braze.
### Adição de propriedades {#properties-purchases}
Você pode adicionar metadados sobre as compras transmitindo uma [matriz de propriedades de eventos](https://www.braze.com/docs/pt-br/pt-br/user_guide/data_and_analytics/custom_data/custom_events/#nested-objects) ou transmitindo um `NSDictionary` preenchido com os valores `NSNumber`, `NSString` ou `NSDate`.
Consulte a [documentação da classe iOS](http://appboy.github.io/appboy-ios-sdk/docs/interface_appboy.html#aaca4b885a8f61ac9fad3936b091448cc) para obter mais detalhes.
### Adição de quantidade {#adding-quantity}
Você pode adicionar uma quantidade às suas compras se os clientes fizerem a mesma compra várias vezes em um único checkout. Você pode fazer isso passando um `NSUInteger` para a quantidade.
* Uma entrada de quantidade deve estar na faixa de [0, 100] para o SDK registrar uma compra.
* Os métodos sem uma entrada de quantidade terão um valor de quantidade padrão de 1.
* Os métodos com uma entrada de quantidade não têm valor padrão e **devem** receber uma entrada de quantidade para que o SDK registre uma compra.
Consulte a [documentação da classe iOS](http://appboy.github.io/appboy-ios-sdk/docs/interface_appboy.html#ab50403068be47c0acba9943583e259fa) para obter mais detalhes.
```objc
[[Appboy sharedInstance] logPurchase:@"your product ID"
inCurrency:@"USD"
atPrice:[[[NSDecimalNumber alloc] initWithString:@"0.99"] autorelease]
withProperties:@{@"key1":"value1"}];
```
```swift
Appboy.sharedInstance()?.logPurchase("your product ID", inCurrency: "USD", atPrice: NSDecimalNumber(string: "0.99"), withProperties: ["key1":"value1"])
```
**Tip:**
Se você passar um valor de 10 dólares e uma quantidade de 3, isso será registrado no perfil do usuário como três compras de 10 dólares, totalizando 30 dólares.
### Registre as compras no nível do pedido {#log-purchases-at-the-order-level}
Se quiser registrar as compras no nível do pedido em vez de no nível do produto, você pode usar o nome do pedido ou a categoria do pedido como `product_id`. Consulte nossa [especificação de objeto de compra](https://www.braze.com/docs/pt-br/pt-br/api/objects_filters/purchase_object/#product-id-naming-conventions) para saber mais.
### Chaves reservadas {#reserved-keys}
As seguintes chaves são reservadas e não podem ser usadas como propriedades de compra:
- `time`
- `product_id`
- `quantity`
- `event_name`
- `price`
- `currency`
### REST API
Também é possível usar nossa REST API para registrar compras. Consulte a [documentação da API do usuário](https://www.braze.com/docs/pt-br/pt-br/developer_guide/rest_api/user_data/#user-data) para obter detalhes.
# Monitoramento de localização para iOS
Source: /docs/pt-br/developer_guide/platforms/legacy_sdks/ios/analytics/location_tracking/index.md
**Warning:**
[AppboyKit](https://github.com/Appboy/appboy-ios-sdk) (also known as the Objective-C SDK) is no longer supported and has been replaced by the [Swift SDK](https://www.braze.com/docs/pt-br/pt-br/developer_guide/sdk_integration/?sdktab=swift). It will no longer receive new features, bug fixes, security updates, or technical support—however, messaging and analytics will continue to function as normal. To learn more, see [Introducing the New Braze Swift SDK](https://www.braze.com/resources/articles/introducing-the-new-braze-swift-sdk).
# Monitoramento de localização para iOS
Por padrão, a Braze desativa o monitoramento de localização. Ativamos o monitoramento de localização depois que o aplicativo host aceita o rastreamento de localização e obtém permissão do usuário. Desde que os usuários tenham aceitado o monitoramento de localização, o Braze registrará um único local para cada usuário no início da sessão.
**Important:**
Para que o monitoramento de localização funcione de forma confiável no iOS 14 para usuários que dão permissão de localização aproximada, é necessário atualizar a versão do SDK para, pelo menos, `3.26.1`.
## Ativação do monitoramento automático de localização
A partir do SDK da Braze para iOS `v3.17.0`, o monitoramento de localização é desativado por padrão. É possível ativar o monitoramento automático de localização usando o arquivo `Info.plist`. Adicione o dicionário `Braze` ao seu arquivo `Info.plist`. No dicionário `Braze`, adicione a subentrada booleana `EnableAutomaticLocationCollection` e defina o valor como `YES`. Note que, antes do SDK da Braze para iOS v4.0.2, a chave do dicionário `Appboy` deve ser usada no lugar de `Braze`.
Você também pode ativar o monitoramento automático de localização no momento da inicialização do app por meio do método [`startWithApiKey:inApplication:withLaunchOptions:withAppboyOptions`](https://appboy.github.io/appboy-ios-sdk/docs/interface_appboy.html#aa9f1bd9e4a5c082133dd9cc344108b24) método. No dicionário `appboyOptions`, defina `ABKEnableAutomaticLocationCollectionKey` como `YES`. Por exemplo:
```objc
[Appboy startWithApiKey:@"YOUR-API_KEY"
inApplication:application
withLaunchOptions:options
withAppboyOptions:@{ ABKEnableAutomaticLocationCollectionKey : @(YES) }];
```
```swift
Appboy.start(withApiKey: "YOUR-API-KEY",
in:application,
withLaunchOptions:launchOptions,
withAppboyOptions:[ ABKEnableAutomaticLocationCollectionKey : true ])
```
### Passagem de dados de localização para a Braze
Os dois métodos a seguir podem ser usados para definir manualmente o último local conhecido do usuário.
```objc
[[Appboy sharedInstance].user setLastKnownLocationWithLatitude:latitude
longitude:longitude
horizontalAccuracy:horizontalAccuracy];
```
```objc
[[Appboy sharedInstance].user setLastKnownLocationWithLatitude:latitude
longitude:longitude
horizontalAccuracy:horizontalAccuracy
altitude:altitude
verticalAccuracy:verticalAccuracy];
```
```swift
Appboy.sharedInstance()?.user.setLastKnownLocationWithLatitude(latitude: latitude, longitude: longitude, horizontalAccuracy: horizontalAccuracy)
```
```swift
Appboy.sharedInstance()?.user.setLastKnownLocationWithLatitude(latitude: latitude, longitude: longitude, horizontalAccuracy: horizontalAccuracy, altitude: altitude, verticalAccuracy: verticalAccuracy)
```
Consulte [`ABKUser.h`](https://github.com/Appboy/appboy-ios-sdk/blob/master/AppboyKit/include/ABKUser.h) Para saber mais.
# Rastreamento de desinstalação para iOS
Source: /docs/pt-br/developer_guide/platforms/legacy_sdks/ios/analytics/uninstall_tracking/index.md
**Warning:**
[AppboyKit](https://github.com/Appboy/appboy-ios-sdk) (also known as the Objective-C SDK) is no longer supported and has been replaced by the [Swift SDK](https://www.braze.com/docs/pt-br/pt-br/developer_guide/sdk_integration/?sdktab=swift). It will no longer receive new features, bug fixes, security updates, or technical support—however, messaging and analytics will continue to function as normal. To learn more, see [Introducing the New Braze Swift SDK](https://www.braze.com/resources/articles/introducing-the-new-braze-swift-sdk).
# Rastreamento de desinstalação para iOS {#uninstall-tracking-for-ios}
> Este artigo aborda como configurar o rastreamento de desinstalação para seu aplicativo iOS e como testar para que seu app não execute nenhuma ação automática indesejada ao receber um push de rastreamento de desinstalação da Braze.
O rastreamento de desinstalação utiliza notificações por push em segundo plano com um sinalizador da Braze na carga útil. Para saber mais, consulte o [rastreamento de desinstalação](https://www.braze.com/docs/pt-br/pt-br/user_guide/data_and_analytics/tracking/uninstall_tracking/#uninstall-tracking) em nosso guia do usuário.
## Etapa 1: Ativando o push em segundo plano {#step-1-enabling-background-push}
Certifique-se de ter ativado a opção **Remote notifications** na seção **Background Modes** da guia **Capabilities** do seu projeto Xcode. Consulte nossa documentação sobre [notificações por push silenciosas](https://www.braze.com/docs/pt-br/pt-br/developer_guide/platforms/legacy_sdks/ios/push_notifications/silent_push_notifications/) para obter mais detalhes.
## Etapa 2: Verificação do push em segundo plano da Braze {#step-2-checking-for-braze-background-push}
A Braze usa notificações por push em segundo plano para coletar análises de dados de rastreamento de desinstalação. Certifique-se de que seu aplicativo [não execute nenhuma ação indesejada](https://www.braze.com/docs/pt-br/pt-br/developer_guide/platforms/legacy_sdks/ios/push_notifications/customization/ignoring_internal_push/) ao receber nossas notificações de rastreamento de desinstalação.
## Etapa 3: Teste no dashboard {#step-3-test-from-the-dashboard}
Em seguida, envie a si mesmo um push de teste a partir do dashboard. Esse push de teste não atualizará seu perfil de usuário.
1. Na página **Campaigns**, crie uma campanha de notificação por push e selecione **iOS push** como sua plataforma.
2. Na página **Settings**, adicione a chave `appboy_uninstall_tracking` com o valor correspondente `true` e marque **Add Content-Available Flag**.
3. Use a página **Preview** para enviar a si mesmo um push de rastreamento de desinstalação de teste.
4. Verifique se o seu app não executa nenhuma ação automática indesejada ao receber o push.
**Important:**
Essas etapas de teste são um proxy para o envio de um push de rastreamento de desinstalação da Braze. Se você tiver a contagem de badges ativada, um número de badge será enviado junto com o push de teste, mas os pushes de rastreamento de desinstalação da Braze não definirão um número de badge em seu aplicativo.
## Etapa 4: Ativar o rastreamento de desinstalação {#step-4-enable-uninstall-tracking}
Siga as instruções para [ativar o rastreamento de desinstalação](https://www.braze.com/docs/pt-br/pt-br/user_guide/data_and_analytics/tracking/uninstall_tracking/#uninstall-tracking).
# Desativar o rastreamento do SDK para iOS
Source: /docs/pt-br/developer_guide/platforms/legacy_sdks/ios/analytics/disabling_tracking/index.md
**Warning:**
[AppboyKit](https://github.com/Appboy/appboy-ios-sdk) (also known as the Objective-C SDK) is no longer supported and has been replaced by the [Swift SDK](https://www.braze.com/docs/pt-br/pt-br/developer_guide/sdk_integration/?sdktab=swift). It will no longer receive new features, bug fixes, security updates, or technical support—however, messaging and analytics will continue to function as normal. To learn more, see [Introducing the New Braze Swift SDK](https://www.braze.com/resources/articles/introducing-the-new-braze-swift-sdk).
# Desativar a coleta de dados para iOS
Para cumprir as normas de privacidade de dados, a atividade de rastreamento de dados no SDK do iOS pode ser interrompida completamente usando o método [`disableSDK`](http://appboy.github.io/appboy-ios-sdk/docs/interface_appboy.html#a8d3b78a98420713d8590ed63c9172733). Esse método fará com que todas as conexões de rede sejam canceladas, e o SDK da Braze não passará nenhum dado para os servidores da Braze. Para retomar a coleta de dados, use o método [`requestEnableSDKOnNextAppRun`](http://appboy.github.io/appboy-ios-sdk/docs/interface_appboy.html#a781078a40a3db0de64ac82dcae3b595b).
Além disso, você pode usar o método [`wipeDataAndDisableForAppRun`](http://appboy.github.io/appboy-ios-sdk/docs/interface_appboy.html#ac8d580f60ec0608cd91240a8a3aa23a3) para limpar completamente todos os dados do lado do cliente armazenados no dispositivo.
A menos que um usuário desinstale todos os aplicativos de um fornecedor em um determinado dispositivo, a próxima execução do Braze SDK e do app após chamar `wipeDataAndDisableForAppRun()` resultará na reidentificação desse usuário pelo nosso servidor por meio do identificador do dispositivo (IDFV). Para remover totalmente todos os dados de usuários, você deve combinar uma chamada para `wipeDataAndDisableForAppRun` com uma solicitação para excluir dados no servidor por meio da [API REST](https://www.braze.com/docs/pt-br/pt-br/developer_guide/rest_api/user_data/#user-delete-endpoint) do Braze.
## iOS SDK v5.7.0+
Para dispositivos que usam o iOS SDK v5.7.0 e superior, ao [desativar a coleta de IDFV](https://www.braze.com/docs/pt-br/pt-br/developer_guide/platform_integration_guides/legacy_sdks/ios/initial_sdk_setup/other_sdk_customizations/#optional-idfv-collection---swift/), chamar [`wipeData`](https://braze-inc.github.io/braze-swift-sdk/documentation/brazekit/braze/wipedata()) não fará com que nosso servidor reidentifique o usuário por meio do identificador do dispositivo (IDFV).
# Deep linking para iOS
Source: /docs/pt-br/developer_guide/platforms/legacy_sdks/ios/advanced_use_cases/linking/index.md
**Warning:**
[AppboyKit](https://github.com/Appboy/appboy-ios-sdk) (also known as the Objective-C SDK) is no longer supported and has been replaced by the [Swift SDK](https://www.braze.com/docs/pt-br/pt-br/developer_guide/sdk_integration/?sdktab=swift). It will no longer receive new features, bug fixes, security updates, or technical support—however, messaging and analytics will continue to function as normal. To learn more, see [Introducing the New Braze Swift SDK](https://www.braze.com/resources/articles/introducing-the-new-braze-swift-sdk).
# Deep linking para iOS {#deep-linking-for-ios}
Para obter informações introdutórias sobre deep links, consulte nosso [artigo do Guia do Usuário](https://www.braze.com/docs/pt-br/pt-br/user_guide/messaging/design_and_edit/personalize/actions_and_media_urls/#what-is-deep-linking). Se você está procurando implementar deep links pela primeira vez no seu app da Braze, as etapas abaixo te ajudarão a começar.
## Etapa 1: Registrar um esquema {#step-1-register-a-scheme}
Você deve declarar um esquema personalizado no arquivo `Info.plist`. A estrutura de navegação é definida por um array de dicionários. Cada um desses dicionários contém um array de strings.
Use o Xcode para editar seu arquivo `Info.plist`:
1. Adicione uma nova chave, `URL types`. O Xcode fará automaticamente disso um array contendo um dicionário chamado `Item 0`.
2. Dentro de `Item 0`, adicione uma chave `URL identifier`. Defina o valor para seu esquema personalizado.
3. Dentro de `Item 0`, adicione uma chave `URL Schemes`. Isso será automaticamente um array contendo uma string `Item 0`.
4. Defina `URL Schemes` >> `Item 0` para seu esquema personalizado.
Alternativamente, se você deseja editar seu arquivo `Info.plist` diretamente, siga esta especificação:
```html
CFBundleURLTypesCFBundleURLName{YOUR.SCHEME}CFBundleURLSchemes{YOUR.SCHEME}
```
## Etapa 2: Adicionar o esquema personalizado à lista de permissões (iOS 9+) {#step-2-allowlist-the-custom-scheme-ios-9}
A partir do iOS 9, os apps devem ter uma lista de permissões de esquemas personalizados que o app tem permissão para abrir. Tentar chamar esquemas fora desta lista fará com que o sistema registre um erro nos logs do dispositivo, e o deep link não abrirá. Um exemplo desse erro se parece com isto:
```
: -canOpenURL: failed for URL: "yourapp://deeplink" – error: "This app is not allowed to query for scheme yourapp"
```
Por exemplo, se uma mensagem no app deve abrir o app do Facebook quando tocada, o app precisa ter o esquema personalizado do Facebook (`fb`) na lista de permissões. Caso contrário, o sistema rejeitará o deep link. Deep links que direcionam para uma página ou visualização dentro do seu próprio app ainda exigem que o esquema personalizado do seu app esteja listado no `Info.plist` do seu app.
Você deve adicionar todos os esquemas que o app precisa para fazer deep linking em uma lista de permissões no `Info.plist` do seu app com a chave `LSApplicationQueriesSchemes`. Por exemplo:
```html
LSApplicationQueriesSchemesmyappfacebooktwitter
```
Para saber mais, consulte a [documentação da Apple](https://developer.apple.com/library/content/documentation/General/Reference/InfoPlistKeyReference/Articles/LaunchServicesKeys.html#//apple_ref/doc/uid/TP40009250-SW14) sobre a chave `LSApplicationQueriesSchemes`.
## Etapa 3: Implementar um handler {#step-3-implement-a-handler}
Depois de ativar seu app, o iOS chamará o método [`application:openURL:options:`](https://developer.apple.com/reference/uikit/uiapplicationdelegate/1623112-application?language=objc). O argumento importante é o objeto [NSURL](https://developer.apple.com/library/ios/DOCUMENTATION/Cocoa/Reference/Foundation/Classes/NSURL_Class/Reference/Reference.html#//apple_ref/doc/c_ref/NSURL).
```objc
- (BOOL)application:(UIApplication *)app openURL:(NSURL *)url options:(NSDictionary *)options {
NSString *path = [url path];
NSString *query = [url query];
// Here you should insert code to take some action based upon the path and query.
return YES;
}
```
```swift
func application(_ app: UIApplication, open url: URL, options: [UIApplication.OpenURLOptionsKey : Any] = [:]) -> Bool {
let path = url.path
let query = url.query
// Here you should insert code to take some action based upon the path and query.
return true
}
```

# Links universais {#universal-links}
Para usar links universais, certifique-se de que você adicionou um domínio registrado às capacidades do seu app e fez upload de um arquivo `apple-app-site-association`. Em seguida, implemente o método `application:continueUserActivity:restorationHandler:` no seu `AppDelegate`. Por exemplo:
```objc
- (BOOL)application:(UIApplication *)application
continueUserActivity:(NSUserActivity *)userActivity
restorationHandler:(void (^)(NSArray *restorableObjects))restorationHandler {
if ([userActivity.activityType isEqualToString:NSUserActivityTypeBrowsingWeb]) {
NSURL *url = userActivity.webpageURL;
// Handle url
}
return YES;
}
```
```swift
func application(_ application: UIApplication, continue userActivity: NSUserActivity, restorationHandler: @escaping ([UIUserActivityRestoring]?) -> Void) -> Bool {
if (userActivity.activityType == NSUserActivityTypeBrowsingWeb) {
let url = userActivity.webpageURL
// Handle url
}
return true
}
```
Para saber mais, consulte a [Apple](https://developer.apple.com/library/content/documentation/General/Conceptual/AppSearch/UniversalLinks.html).
**Note:**
A integração de link universal padrão não é compatível com notificações por push da Braze ou mensagens no app. Consulte [personalização do tratamento de links](#linking-handling-customization) para lidar com links universais dentro do seu aplicativo. Alternativamente, recomendamos o uso de [deep links baseados em esquema](#step-1-registering-a-scheme) com notificações por push e mensagens no app.
## App Transport Security (ATS)
O iOS 9 introduziu uma mudança significativa que afeta URLs da web incorporadas em mensagens no app e notificações por push.
### Requisitos do ATS {#ats-requirements}
Da [documentação da Apple](https://developer.apple.com/library/prerelease/ios/releasenotes/General/WhatsNewIniOS/Articles/iOS9.html#//apple_ref/doc/uid/TP40016198-SW14): "O App Transport Security é um recurso que melhora a segurança das conexões entre um app e os serviços da web. O recurso consiste em requisitos de conexão padrão que estão em conformidade com as melhores práticas para conexões seguras. Os apps podem substituir esse comportamento padrão e desativar a segurança de transporte."
O ATS é aplicado por padrão no iOS 9+. Ele requer que todas as conexões usem HTTPS e sejam criptografadas usando TLS 1.2 com forward secrecy. Consulte [Requisitos para Conexão Usando ATS](https://developer.apple.com/library/ios/documentation/General/Reference/InfoPlistKeyReference/Articles/CocoaKeys.html#//apple_ref/doc/uid/TP40009251-SW35) para saber mais. Todas as imagens servidas pela Braze para dispositivos finais são gerenciadas por uma rede de entrega de conteúdo ("CDN") que suporta TLS 1.2 e é compatível com ATS.
A menos que sejam especificadas como exceções no `Info.plist` do seu aplicativo, as conexões que não seguirem esses requisitos falharão com erros parecidos com isto:
```
CFNetwork SSLHandshake failed (-9801)
Error Domain=NSURLErrorDomain Code=-1200 "An SSL error has occurred, and a secure connection to the server cannot be made."
```
```
NSURLSession/NSURLConnection HTTP load failed (kCFStreamErrorDomainSSL, -9802)
```
A conformidade com ATS é aplicada para links abertos dentro do app móvel (nosso tratamento padrão de links clicados) e não se aplica a sites abertos externamente por meio de um navegador da web.
### Atendendo aos requisitos do ATS {#handling-ats-requirements}
Você pode lidar com o ATS de uma das três maneiras a seguir:
#### Confirme se todos os links estão em conformidade com o ATS (recomendado) {#confirm-all-links-are-ats-compliant-recommended}
Sua integração com a Braze pode atender aos requisitos do ATS garantindo que quaisquer links existentes que você direcione os usuários (através de mensagens no app e Campaigns de push) atendam aos requisitos do ATS. Embora existam maneiras de contornar as restrições do ATS, recomendamos verificar se todos os URLs vinculados estão em conformidade com o ATS. Dada a ênfase crescente da Apple na segurança de aplicativos, as seguintes abordagens para permitir exceções do ATS não têm garantia de suporte pela Apple.
Uma ferramenta SSL pode ajudar a identificar problemas de segurança do servidor web. Este [teste de servidor SSL](https://www.ssllabs.com/ssltest/index.html) da Qualys, Inc. fornece um item de linha especificamente para a conformidade com o Apple ATS 9 e o iOS 9.
#### Desativar parcialmente o ATS {#partially-disable-ats}
Você pode permitir que um subconjunto de links com determinados domínios ou esquemas sejam tratados como exceções às regras do ATS. Sua integração com a Braze atenderá aos requisitos do ATS se cada link que você usar em um canal de envio de mensagens da Braze for compatível com o ATS ou tratado por uma exceção.
Para adicionar um domínio como exceção do ATS, adicione o seguinte ao arquivo `Info.plist` do seu app:
```html
NSAppTransportSecurityNSAllowsArbitraryLoadsNSExceptionDomainsexample.comNSExceptionAllowsInsecureHTTPLoadsNSIncludesSubdomains
```
Consulte o artigo da Apple sobre [chaves de App Transport Security](https://developer.apple.com/library/ios/documentation/General/Reference/InfoPlistKeyReference/Articles/CocoaKeys.html#//apple_ref/doc/uid/TP40009251-SW33) para saber mais.
#### Desativar totalmente o ATS {#disable-ats-entirely}
Você pode desativar o ATS completamente. Note que isso não é uma prática recomendada, devido tanto à perda de proteções de segurança quanto à compatibilidade futura com o iOS. Para desativar o ATS, insira o seguinte no arquivo `Info.plist` do seu app:
```html
NSAppTransportSecurityNSAllowsArbitraryLoads
```
Consulte [Shipping an App With App Transport Security](http://timekl.com/blog/2015/08/21/shipping-an-app-with-app-transport-security/?utm_campaign=iOS+Dev+Weekly&utm_medium=email&utm_source=iOS_Dev_Weekly_Issue_213) para mais informações sobre como depurar falhas de ATS.
## Codificação de URL {#url-encoding}
A partir do SDK da Braze para iOS v2.21.0, o SDK codifica percentualmente os links para criar `NSURL`s válidos. Todos os caracteres de link que não são permitidos em um URL devidamente formado, como caracteres Unicode, serão escapados por porcentagem.
Para decodificar um link codificado, use o método `NSString` [`stringByRemovingPercentEncoding`](https://developer.apple.com/library/ios/documentation/Cocoa/Reference/Foundation/Classes/NSString_Class/index.html#//apple_ref/occ/instm/NSString/stringByRemovingPercentEncoding). Note que você também precisa retornar `YES` no `ABKURLDelegate` e que uma chamada para ação é necessária para disparar o tratamento do URL pelo app. Por exemplo:
```objc
- (BOOL)application:(UIApplication *)application openURL:(NSURL *)url options:(NSDictionary *)options {
NSString *urlString = url.absoluteString.stringByRemovingPercentEncoding;
// Handle urlString
return YES;
}
```
```swift
func application(_ app: UIApplication, open url: URL, options: [UIApplication.OpenURLOptionsKey : Any] = [:]) -> Bool {
let urlString = url.absoluteString.removingPercentEncoding
// Handle urlString
return true
}
```
## Personalização {#linking-customization}
### Personalização padrão do WebView {#default-webview-customization}
A classe personalizável `ABKModalWebViewController` exibe URLs da web abertas pelo SDK, normalmente quando "Abrir URL da Web Dentro do App" é selecionado para um deep link da web.
Você pode declarar uma categoria para, ou modificar diretamente, a classe `ABKModalWebViewController` para aplicar a personalização à visualização da web. Verifique o [arquivo .h](https://github.com/Appboy/appboy-ios-sdk/blob/master/AppboyKit/include/ABKModalWebViewController.h) e o [arquivo .m](https://github.com/Appboy/appboy-ios-sdk/blob/master/AppboyKit/ABKModalWebViewController.m) da classe para mais detalhes.
### Personalização do tratamento de links {#linking-handling-customization}
O protocolo `ABKURLDelegate` pode ser usado para personalizar o tratamento de URLs, como deep links, URLs da web e links universais. Para definir o delegado durante a inicialização da Braze, passe um objeto delegado para o `ABKURLDelegateKey` no `appboyOptions` de [`startWithApiKey:inApplication:withAppboyOptions:`](https://appboy.github.io/appboy-ios-sdk/docs/interface_appboy.html#aa9f1bd9e4a5c082133dd9cc344108b24). A Braze chamará a implementação do seu delegado de `handleAppboyURL:fromChannel:withExtras:` antes de tratar qualquer URI.
#### Exemplo de integração: ABKURLDelegate {#integration-example-abkurldelegate}
```objc
- (BOOL)handleAppboyURL:(NSURL *)url fromChannel:(ABKChannel)channel withExtras:(NSDictionary *)extras {
if ([[url.host lowercaseString] isEqualToString:@"MY-DOMAIN.com"]) {
// Custom handle link here
return YES;
}
// Let Braze handle links otherwise
return NO;
}
```
```swift
func handleAppboyURL(_ url: URL?, from channel: ABKChannel, withExtras extras: [AnyHashable : Any]?) -> Bool {
if (url.host == "MY-DOMAIN.com") {
// Custom handle link here
return true;
}
// Let Braze handle links otherwise
return false;
}
```
**Important:**
Quando `handleAppboyURL:fromChannel:withExtras:` retorna `YES`, a Braze assume que seu app está tratando o URL e não o abrirá. Se você estiver tratando links universais, deve rotear explicitamente o URL para o handler de links universais do seu app, como chamando `application:continueUserActivity:restorationHandler:` por conta própria. Retornar `YES` sem tratar o URL fará com que a mensagem no app ou o cartão de conteúdo seja dispensado sem nenhuma ação visível.
Retorne `NO` se quiser que a Braze trate o URL usando seu comportamento padrão.
Para saber mais, consulte [`ABKURLDelegate.h`](https://github.com/Appboy/appboy-ios-sdk/blob/master/AppboyKit/include/ABKURLDelegate.h).
## Casos de uso frequentes {#frequent-use-cases}
### Deep linking para as configurações do app {#deep-linking-to-app-settings}
O iOS pode levar os usuários do seu app para a sua página no aplicativo de configurações do iOS. Você pode aproveitar `UIApplicationOpenSettingsURLString` para fazer deep link de usuários para as configurações a partir de notificações por push e mensagens no app.
1. Primeiro, confira se o seu aplicativo está configurado para [deep links baseados em esquema](#deep-links) ou [links universais](#universal-links).
2. Decida um URI para deep linking para a página de **Configurações** (por exemplo, `myapp://settings` ou `https://www.braze.com/settings`).
3. Se você estiver usando deep links baseados em esquemas personalizados, adicione o seguinte código ao seu método `application:openURL:options:`:
```objc
- (BOOL)application:(UIApplication *)app
openURL:(NSURL *)url
options:(NSDictionary *)options {
NSString *path = [url path];
if ([path isEqualToString:@"settings"]) {
NSURL *settingsURL = [NSURL URLWithString:UIApplicationOpenSettingsURLString];
[[UIApplication sharedApplication] openURL:settingsURL];
}
return YES;
}
```
```swift
func application(_ app: UIApplication, open url: URL, options: [UIApplicationOpenURLOptionsKey : Any] = [:]) -> Bool {
let path = url.path
if (path == "settings") {
UIApplication.shared.openURL(URL(string:UIApplicationOpenSettingsURLString)!)
}
return true
}
```
# Controle de tráfego de rede fina para iOS
Source: /docs/pt-br/developer_guide/platforms/legacy_sdks/ios/advanced_use_cases/fine_network_traffic_control/index.md
**Warning:**
[AppboyKit](https://github.com/Appboy/appboy-ios-sdk) (also known as the Objective-C SDK) is no longer supported and has been replaced by the [Swift SDK](https://www.braze.com/docs/pt-br/pt-br/developer_guide/sdk_integration/?sdktab=swift). It will no longer receive new features, bug fixes, security updates, or technical support—however, messaging and analytics will continue to function as normal. To learn more, see [Introducing the New Braze Swift SDK](https://www.braze.com/resources/articles/introducing-the-new-braze-swift-sdk).
# Controle fino do tráfego de rede
## Políticas de processamento de solicitações
A Braze permite que o usuário tenha a opção de controlar o tráfego de rede usando os seguintes protocolos:
### Processamento automático de solicitações
***`ABKRequestProcessingPolicy` valor do enum: `ABKAutomaticRequestProcessing`***
- Esse é o valor **padrão da política de solicitação**.
- O SDK da Braze tratará automaticamente de toda a comunicação com o servidor, incluindo:
- Envio de eventos personalizados e dados de atributos para os servidores Braze
- Atualização de cartões de conteúdo e geofences
- Solicitação de novas mensagens no app
- As solicitações imediatas do servidor são realizadas quando os dados voltados para o usuário são necessários para os recursos do Braze, como mensagens no app.
- Para minimizar a carga do servidor, a Braze realiza descargas periódicas de novos dados de usuários a cada poucos segundos.
Os dados podem ser transferidos manualmente para os servidores Braze a qualquer momento usando o seguinte método:
```objc
[[Appboy sharedInstance] flushDataAndProcessRequestQueue];
```
```swift
Appboy.sharedInstance()?.flushDataAndProcessRequestQueue()
```
### Processamento manual de solicitações
***`ABKRequestProcessingPolicy` valor do enum: `ABKManualRequestProcessing`***
- Esse protocolo é o mesmo que o processamento automático de solicitações, exceto:
- Os atributos personalizados e os dados de eventos personalizados não são automaticamente enviados ao servidor durante a sessão do usuário.
- A Braze ainda realizará solicitações automáticas de rede para recursos internos, como solicitação de mensagens no app, modelos Liquid em mensagens no app, geofences e monitoramento de localização. Para saber mais, consulte a declaração `ABKRequestProcessingPolicy` em [`Appboy.h`](https://github.com/Appboy/appboy-ios-sdk/blob/master/AppboyKit/include/Appboy.h). Quando essas solicitações internas são feitas, os atributos personalizados armazenados localmente e os dados de eventos personalizados podem ser enviados para o servidor Braze, dependendo do tipo de solicitação.
Os dados podem ser transferidos manualmente para os servidores Braze a qualquer momento usando o seguinte método:
```objc
[[Appboy sharedInstance] flushDataAndProcessRequestQueue];
```
```swift
Appboy.sharedInstance()?.flushDataAndProcessRequestQueue()
```
## Definição da política de processamento de solicitações
### Definir política de solicitação na inicialização
Essas políticas podem ser definidas no momento da inicialização do app a partir do método [`startWithApiKey:inApplication:withLaunchOptions:withAppboyOptions`](https://appboy.github.io/appboy-ios-sdk/docs/interface_appboy.html#aa9f1bd9e4a5c082133dd9cc344108b24). No dicionário `appboyOptions`, defina `ABKRequestProcessingPolicyOptionKey` conforme mostrado no seguinte snippet:
```objc
NSDictionary *appboyOptions = @{
// Other entries
ABKRequestProcessingPolicyOptionKey : @(ABKAutomaticRequestProcessing)
};
```
```swift
let appboyOptions: [AnyHashable: Any] = [
// Other entries
ABKRequestProcessingPolicyOptionKey: ABKRequestProcessingPolicy.automaticRequestProcessing.rawValue
]
```
### Definir política de solicitação em tempo de execução
A política de processamento de solicitações também pode ser definida durante o tempo de execução por meio da propriedade `requestProcessingPolicy` em `Appboy`:
```objc
// Sets the request processing policy to automatic (the default value)
[Appboy sharedInstance].requestProcessingPolicy = ABKAutomaticRequestProcessing;
```
```swift
// Sets the request processing policy to automatic (the default value)
Appboy.sharedInstance()?.requestProcessingPolicy = ABKRequestProcessingPolicy.automaticRequestProcessing
```
## Desligamento manual da comunicação com o servidor em voo
Se, a qualquer momento, uma comunicação de servidor "em curso" precisar ser interrompida, você deverá chamar o seguinte método:
```objc
[[Appboy sharedInstance] shutdownServerCommunication];
```
```swift
Appboy.sharedInstance()?.shutdownServerCommunication();
```
Depois de chamar esse método, você deve redefinir o modo de processamento de solicitações para automático. Por isso, recomendamos chamar esse recurso somente se o sistema operacional estiver forçando a interrupção de tarefas em segundo plano ou algo semelhante.
# Localização para iOS
Source: /docs/pt-br/developer_guide/platforms/legacy_sdks/ios/advanced_use_cases/localization/index.md
**Warning:**
[AppboyKit](https://github.com/Appboy/appboy-ios-sdk) (also known as the Objective-C SDK) is no longer supported and has been replaced by the [Swift SDK](https://www.braze.com/docs/pt-br/pt-br/developer_guide/sdk_integration/?sdktab=swift). It will no longer receive new features, bug fixes, security updates, or technical support—however, messaging and analytics will continue to function as normal. To learn more, see [Introducing the New Braze Swift SDK](https://www.braze.com/resources/articles/introducing-the-new-braze-swift-sdk).
# Localização {#localization}
A localização é suportada no SDK iOS da Braze. Além do inglês, a Braze oferece suporte a vários idiomas para as mensagens integradas do SDK. Essas mensagens se referem às mensagens padrão exibidas em aplicativos integrados com a Braze, como locais no app quando há problemas de conectividade (por exemplo, "Não é possível estabelecer conexão de rede. Por favor, tente novamente mais tarde."). Se o idioma do telefone estiver configurado para um dos idiomas suportados, qualquer uma das strings padrão da Braze acionadas em um aplicativo integrado aparecerá automaticamente nesse idioma.
Se estiver procurando uma lista completa dos idiomas suportados que podem ser atribuídos aos seus usuários nos perfis deles, consulte nossa [lista de idiomas do usuário](https://www.braze.com/docs/pt-br/pt-br/user_guide/data/unification/user_data/language_codes/).
## Idiomas suportados {#languages-supported}
- Árabe
- Birmanês
- Catalão
- Chinês
- Tcheco
- Dinamarquês
- Neerlandês
- Inglês
- Esperanto
- Estoniano
- Ewe
- Filipino
- Finlandês
- Francês
- Georgiano
- Alemão
- Grego
- Hebraico
- Híndi
- Húngaro
- Indonésio
- Irlandês
- Italiano
- Japonês
- Coreano
- Malaio
- Norueguês
- Nynorsk
- Polonês
- Português
- Russo
- Espanhol
- Sueco
- Tailandês
- Ucraniano
- Vietnamita
Para saber mais, consulte nosso artigo sobre [localização da Apple](https://developer.apple.com/library/ios/documentation/CoreFoundation/Reference/CFLocaleRef/), bem como a [lista de idiomas padrão LOC](http://www.loc.gov/standards/iso639-2/php/English_list.php).
# Integração de beacon para iOS
Source: /docs/pt-br/developer_guide/platforms/legacy_sdks/ios/advanced_use_cases/beacon_integration/index.md
**Warning:**
[AppboyKit](https://github.com/Appboy/appboy-ios-sdk) (also known as the Objective-C SDK) is no longer supported and has been replaced by the [Swift SDK](https://www.braze.com/docs/pt-br/pt-br/developer_guide/sdk_integration/?sdktab=swift). It will no longer receive new features, bug fixes, security updates, or technical support—however, messaging and analytics will continue to function as normal. To learn more, see [Introducing the New Braze Swift SDK](https://www.braze.com/resources/articles/introducing-the-new-braze-swift-sdk).
# Integração de beacons {#beacon-integration}
Aqui, veremos como integrar tipos específicos de beacons com a Braze para permitir a segmentação e o envio de mensagens.
## Beacons Infillion {#infillion-beacons}
Uma vez que você tenha seus Beacons Infillion configurados e integrados ao seu app, você pode registrar eventos personalizados, como o início ou o fim de uma visita ou um beacon sendo avistado. Também é possível registrar propriedades para esses eventos, como o nome do local ou o tempo de permanência.
Para registrar um evento personalizado quando um usuário entrar em um local, insira este código no método `didBeginVisit`:
```objc
[[Appboy sharedInstance] logCustomEvent:@"Entered %@", visit.place.name];
[[Appboy sharedInstance] flushDataAndProcessRequestQueue];
```
```swift
Appboy.sharedInstance()?.logCustomEvent("Entered %@", visit.place.name)
Appboy.sharedInstance()?.flushDataAndProcessRequestQueue()
```
O `flushDataAndProcessRequestQueue` confirma que seu evento será registrado mesmo que o app esteja em segundo plano, e o mesmo processo pode ser implementado para sair de um local. Note que isso criará e incrementará um evento personalizado exclusivo para cada novo local em que o usuário entrar. Se você prevê a criação de mais de 50 locais, recomendamos que crie um evento personalizado genérico "Place Entered" e inclua o nome do local como uma propriedade do evento.
# Local e Geofences para iOS
Source: /docs/pt-br/developer_guide/platforms/legacy_sdks/ios/advanced_use_cases/locations_and_geofences/index.md
**Warning:**
[AppboyKit](https://github.com/Appboy/appboy-ios-sdk) (also known as the Objective-C SDK) is no longer supported and has been replaced by the [Swift SDK](https://www.braze.com/docs/pt-br/pt-br/developer_guide/sdk_integration/?sdktab=swift). It will no longer receive new features, bug fixes, security updates, or technical support—however, messaging and analytics will continue to function as normal. To learn more, see [Introducing the New Braze Swift SDK](https://www.braze.com/resources/articles/introducing-the-new-braze-swift-sdk).
# Locais e geofences
Para oferecer geofences para iOS:
1. Sua integração deve suportar notificações por push em segundo plano.
2. [É preciso ativar](https://www.braze.com/docs/pt-br/pt-br/developer_guide/platform_integration_guides/swift/analytics/location_tracking/#enabling-automatic-location-tracking) as geofences da Braze pelo SDK, seja implicitamente (com a ativação da coleta de local) ou explicitamente (com a ativação da coleta de geofence). Elas não estão ativadas por padrão.
**Important:**
A partir do iOS 14, as geofences têm funcionamento instável para os usuários que optam por dar permissão de localização aproximada.
## Etapa 1: ativar push em segundo plano
Para usar completamente nossa estratégia de sincronização de geofences, você deve ter [push em segundo plano](https://www.braze.com/docs/pt-br/pt-br/developer_guide/platform_integration_guides/ios/push_notifications/silent_push_notifications/#use-silent-remote-notifications-to-trigger-background-work) ativado, além de completar a integração padrão de push.
## Etapa 2: ativar geofences
Por padrão, as geofences são ativadas se a coleta automática de localização estiver ativada. Você pode ativar geofences usando o arquivo `Info.plist`. Adicione o dicionário `Braze` ao seu arquivo `Info.plist`. No dicionário `Braze`, adicione a subentrada booleana `EnableGeofences` e defina o valor como `YES`. Note que, antes do SDK da Braze para iOS v4.0.2, a chave do dicionário `Appboy` deve ser usada no lugar de `Braze`.
Você também pode ativar geofences no momento da inicialização do app usando o método [`startWithApiKey:inApplication:withLaunchOptions:withAppboyOptions`](https://appboy.github.io/appboy-ios-sdk/docs/interface_appboy.html#aa9f1bd9e4a5c082133dd9cc344108b24). No dicionário `appboyOptions`, defina `ABKEnableGeofencesKey` como `YES`. Por exemplo:
```objc
[Appboy startWithApiKey:@"YOUR-API_KEY"
inApplication:application
withLaunchOptions:options
withAppboyOptions:@{ ABKEnableGeofencesKey : @(YES) }];
```
```swift
Appboy.start(withApiKey: "YOUR-API-KEY",
in:application,
withLaunchOptions:launchOptions,
withAppboyOptions:[ ABKEnableGeofencesKey : true ])
```
## Etapa 3: verificar o push em segundo plano da Braze
A Braze sincroniza geofences com dispositivos usando notificações por push em segundo plano. Siga o artigo de [personalização do iOS](https://www.braze.com/docs/pt-br/pt-br/developer_guide/platforms/legacy_sdks/ios/push_notifications/customization/ignoring_internal_push/) para garantir que seu aplicativo não tome nenhuma ação indesejada ao receber notificações de sincronização de geofence da Braze.
## Etapa 4: adicionar NSLocationAlwaysUsageDescription ao seu Info.plist
Adicione a chave `NSLocationAlwaysUsageDescription` e `NSLocationAlwaysAndWhenInUseUsageDescription` ao seu `info.plist` com um valor `String` que tenha uma descrição do motivo pelo qual seu app precisa rastrear a localização. Ambas as chaves são exigidas pelo iOS 11 ou posterior.
Esta descrição será exibida quando o prompt de localização do sistema solicitar autorização e deve explicar claramente os benefícios do monitoramento de localização para seus usuários.
## Etapa 5: solicitar autorização do usuário
O recurso de geofences só funciona enquanto a autorização de localização `Always` for concedida.
Para solicitar autorização de localização `Always`, use o seguinte código:
```objc
CLLocationManager *locationManager = [[CLLocationManager alloc] init];
[locationManager requestAlwaysAuthorization];
```
```swift
var locationManager = CLLocationManager()
locationManager.requestAlwaysAuthorization()
```
## Etapa 6: ativar geofences no dashboard
O iOS permite armazenar até 20 geofences para um determinado app. O uso das localizações consumirá alguns desses 20 slots de geofence disponíveis. Para evitar interrupções acidentais ou indesejadas em outras funcionalidades relacionadas a geofence no seu app, os geofences de local devem ser ativados para apps individuais no dashboard.
Para que as localizações funcionem corretamente, confira também se seu app não está usando todos os slots de geofence disponíveis.
### Ativar geofences na página de locais:

### Ativar geofences na página de configurações:

## Desativando solicitações automáticas de geofence
A partir da versão 3.21.3 do SDK do iOS, é possível desativar as geofences para que não sejam solicitadas automaticamente. Você pode fazer isso usando o arquivo `Info.plist`. Adicione o dicionário `Braze` ao seu arquivo `Info.plist`. No dicionário `Braze`, adicione a subentrada booleana `DisableAutomaticGeofenceRequests` e defina o valor como `YES`.
Você também pode desativar solicitações automáticas de geofence na inicialização do app pelo método [`startWithApiKey:inApplication:withLaunchOptions:withAppboyOptions`](https://appboy.github.io/appboy-ios-sdk/docs/interface_appboy.html#aa9f1bd9e4a5c082133dd9cc344108b24). No dicionário `appboyOptions`, defina `ABKDisableAutomaticGeofenceRequestsKey` como `YES`. Por exemplo:
```objc
[Appboy startWithApiKey:@"YOUR-API_KEY"
inApplication:application
withLaunchOptions:options
withAppboyOptions:@{ ABKDisableAutomaticGeofenceRequestsKey : @(YES) }];
```
```swift
Appboy.start(withApiKey: "YOUR-API-KEY",
in:application,
withLaunchOptions:launchOptions,
withAppboyOptions:[ ABKDisableAutomaticGeofenceRequestsKey : true ])
```
Se você optar por usar essa opção, será necessário solicitar manualmente as geofences para que o recurso funcione.
## Solicitação manual de geofences
Quando o SDK da Braze solicita geofences para monitorar do backend, ele relata a localização atual do usuário e recebe geofences que são determinadas como sendo otimamente relevantes com base na localização relatada. Há um limite de taxa de uma atualização de geofence por sessão.
Para controlar o local que o SDK relata para fins de receber as geofences mais relevantes, a partir da versão 3.21.3 do SDK do iOS, é possível solicitar manualmente as geofences informando a latitude e longitude de um local. Recomenda-se desativar solicitações automáticas de geofence ao usar esse método. Para fazer isso, use o seguinte código:
```objc
[[Appboy sharedInstance] requestGeofencesWithLongitude:longitude
latitude:latitude];
```
```swift
Appboy.sharedInstance()?.requestGeofences(withLongitude: longitude, latitude: latitude)
```
# Google Tag Manager para iOS
Source: /docs/pt-br/developer_guide/platforms/legacy_sdks/ios/advanced_use_cases/google_tag_manager/index.md
**Warning:**
[AppboyKit](https://github.com/Appboy/appboy-ios-sdk) (also known as the Objective-C SDK) is no longer supported and has been replaced by the [Swift SDK](https://www.braze.com/docs/pt-br/pt-br/developer_guide/sdk_integration/?sdktab=swift). It will no longer receive new features, bug fixes, security updates, or technical support—however, messaging and analytics will continue to function as normal. To learn more, see [Introducing the New Braze Swift SDK](https://www.braze.com/resources/articles/introducing-the-new-braze-swift-sdk).
# Google Tag Manager para iOS
## Inicialização do SDK {#initializing-ios-google-tag-provider}
O SDK iOS do Braze pode ser inicializado e controlado por tags configuradas dentro do [Google Tag Manager](https://tagmanager.google.com/).
Antes de usar o Google Tag Manager, certifique-se de seguir nossa [configuração inicial do SDK](https://www.braze.com/docs/pt-br/pt-br/developer_guide/platforms/legacy_sdks/ios/initial_sdk_setup/overview/).
## Configuração do Google Tag Manager {#configuring-ios-google-tag-manager}
Neste exemplo, vamos fingir que somos um app de streaming de música que deseja fazer o registro de diferentes eventos à medida que os usuários ouvem as músicas. Usando o Google Tag Manager para iOS, podemos controlar quais de nossos fornecedores terceirizados recebem esse evento e criar tags específicas para o Braze.
### Eventos personalizados
Os eventos personalizados são registrados com `actionType` definido como `logEvent`. O provedor de tag personalizada do Braze em nosso exemplo está esperando que o nome do evento personalizado seja definido usando `eventName`.
Para começar, crie um disparador que procure um "Nome do evento" igual a `played song`

Em seguida, crie uma nova tag ("Function Call") e insira a jornada da classe de seu [provedor de tag personalizado](#adding-ios-google-tag-provider) descrito mais adiante neste artigo.
Essa tag será disparada quando for registrado o evento `played song` que acabamos de criar.
Nos parâmetros personalizados (pares de valores-chave) da nossa tag de exemplo, definimos `eventName` como `played song` \- que será o nome do evento personalizado registrado no Braze.
**Important:**
Ao enviar um evento personalizado, defina `actionType` como `logEvent` e defina um valor para `eventName`, conforme mostrado no exemplo a seguir.
O provedor de tag personalizado em nosso exemplo usará essas chaves para determinar qual ação tomar e qual nome de evento enviar à Braze quando receber dados do Google Tag Manager.

Você também pode incluir argumentos adicionais de pares de valores-chave na tag, que serão enviados como propriedades de eventos personalizados para o Braze. `eventName` e `actionType` não serão ignorados nas propriedades de eventos personalizados. No exemplo de tag a seguir, passaremos `genre`, que foi definido usando uma variável de tag no Google Tag Manager, proveniente do evento personalizado que registramos em nosso app.
A propriedade do evento `genre` é enviada ao Google Tag Manager como uma variável "Firebase - Event Parameter", pois o Google Tag Manager para iOS usa o Firebase como camada de dados.

Por fim, quando um usuário reproduzir uma música em nosso app, registraremos um evento por meio do Firebase e do Google Tag Manager usando o nome do evento de análise de dados do Firebase que corresponde ao nome do disparo da nossa tag, `played song`:
```obj-c
NSDictionary *parameters = @{@"genre" : @"pop",
@"number of times listened" : @42};
[FIRAnalytics logEventWithName:@"played song" parameters:parameters];
```
### Registro de atributos personalizados
Os atributos personalizados são definidos por meio de um `actionType` definido como `customAttribute`. O provedor de tag personalizada da Braze está esperando que o atributo personalizado chave-valor seja definido por meio de `customAttributeKey` e `customAttributeValue`:
```obj-c
NSDictionary *parameters = @{@"customAttributeKey" : @"favorite song",
@"customAttributeValue" : @"Private Eyes"};
[FIRAnalytics logEventWithName:@"customAttribute" parameters:parameters];
```
### Chamada de changeUser
As chamadas para `changeUser()` são feitas por meio de um `actionType` definido como `changeUser`. O provedor de tags personalizadas do Braze espera que o ID de usuário do Braze seja definido por meio de um par de valores-chave `externalUserId` dentro da sua tag:
```obj-c
NSDictionary *parameters = @{@"externalUserId" : userId};
[FIRAnalytics logEventWithName:@"changeUser" parameters:parameters];
```
## Provedor de tags personalizadas do Braze SDK {#adding-ios-google-tag-provider}
Com as tags e os disparadores configurados, você também precisará implementar o Google Tag Manager em seu app para iOS, o que pode ser encontrado na [documentação](https://developers.google.com/tag-manager/ios/v5/) do Google.
Depois que o Google Tag Manager estiver instalado em seu app, adicione um provedor de tag personalizado para chamar os métodos do Braze SDK com base nas tags que você configurou no Google Tag Manager.
Certifique-se de anotar o "Caminho da Classe" para o arquivo - é isso que você irá inserir ao configurar uma tag no console do [Google Tag Manager](https://tagmanager.google.com/).
Este exemplo mostra uma das muitas maneiras de estruturar seu provedor de tag personalizado, em que determinamos qual método do Braze SDK deve ser chamado com base no par de valores-chave `actionType` enviado pela tag GTM.
Os `actionType` suportados em nosso exemplo são `logEvent`, `customAttribute` e `changeUser`, mas você pode preferir alterar a forma como seu provedor de tag trata os dados do Google Tag Manager.
Adicione o seguinte código ao seu arquivo `BrazeGTMTagManager.h`:
```obj-c
@import Firebase;
@import GoogleTagManager;
@interface BrazeGTMTagManager : NSObject
@end
```
E adicione o seguinte código ao seu arquivo `BrazeGTMTagManager.m`:
```obj-c
#import
#import "BrazeGTMTagManager.h"
#import "Appboy-iOS-SDK/AppboyKit.h"
static NSString *const ActionTypeKey = @"actionType";
// Custom Events
static NSString *const LogEventActionType = @"logEvent";
static NSString *const LogEventEventName = @"eventName";
// Custom Attributes
static NSString *const CustomAttributeActionType = @"customAttribute";
static NSString *const CustomAttributeKey = @"customAttributeKey";
static NSString *const CustomAttributeValueKey = @"customAttributeValue";
// Change User
static NSString *const ChangeUserActionType = @"changeUser";
static NSString *const ChangeUserExternalUserId = @"externalUserId";
@implementation BrazeGTMTagManager
- (NSObject *)executeWithParameters:(NSDictionary *)parameters {
NSMutableDictionary *mutableParameters = [parameters mutableCopy];
NSString *actionType = mutableParameters[ActionTypeKey];
if (!actionType) {
NSLog(@"There is no Braze action type key in this call. Doing nothing.", nil);
return nil;
}
[mutableParameters removeObjectForKey:ActionTypeKey];
if ([actionType isEqualToString:LogEventActionType]) {
[self logEvent:mutableParameters];
} else if ([actionType isEqualToString:CustomAttributeActionType]) {
[self logCustomAttribute:mutableParameters];
} else if ([actionType isEqualToString:ChangeUserActionType]) {
[self changeUser:mutableParameters];
} else {
NSLog(@"Invalid action type. Doing nothing.");
}
return nil;
}
- (void)logEvent:(NSMutableDictionary *)parameters {
NSString *eventName = parameters[LogEventEventName];
[parameters removeObjectForKey:LogEventEventName];
[[Appboy sharedInstance] logCustomEvent:eventName withProperties:parameters];
}
- (void)logCustomAttribute:(NSMutableDictionary *)parameters {
NSString *customAttributeKey = parameters[CustomAttributeKey];
id customAttributeValue = parameters[CustomAttributeValueKey];
if ([customAttributeValue isKindOfClass:[NSString class]]) {
[[Appboy sharedInstance].user setCustomAttributeWithKey:customAttributeKey
andStringValue:customAttributeValue];
} else if ([customAttributeValue isKindOfClass:[NSDate class]]) {
[[Appboy sharedInstance].user setCustomAttributeWithKey:customAttributeKey
andDateValue:customAttributeValue];
} else if ([customAttributeValue isKindOfClass:[NSNumber class]]) {
if (strcmp([customAttributeValue objCType], [@(YES) objCType]) == 0) {
[[Appboy sharedInstance].user setCustomAttributeWithKey:customAttributeKey
andBOOLValue:[(NSNumber *)customAttributeValue boolValue]];
} else if (strcmp([customAttributeValue objCType], @encode(short)) == 0 ||
strcmp([customAttributeValue objCType], @encode(int)) == 0 ||
strcmp([customAttributeValue objCType], @encode(long)) == 0) {
[[Appboy sharedInstance].user setCustomAttributeWithKey:customAttributeKey
andIntegerValue:[(NSNumber *)customAttributeValue integerValue]];
} else if (strcmp([customAttributeValue objCType], @encode(float)) == 0 ||
strcmp([customAttributeValue objCType], @encode(double)) == 0) {
[[Appboy sharedInstance].user setCustomAttributeWithKey:customAttributeKey
andDoubleValue:[(NSNumber *)customAttributeValue doubleValue]];
} else {
NSLog(@"Could not map NSNumber value to Appboy custom attribute:%@", customAttributeValue);
}
} else if ([customAttributeValue isKindOfClass:[NSArray class]]) {
[[Appboy sharedInstance].user setCustomAttributeArrayWithKey:customAttributeKey
array:customAttributeValue];
}
}
- (void)changeUser:(NSMutableDictionary *)parameters {
NSString *userId = parameters[ChangeUserExternalUserId];
[[Appboy sharedInstance] changeUser:userId];
}
@end
```
# Armazenamento para iOS
Source: /docs/pt-br/developer_guide/platforms/legacy_sdks/ios/storage/index.md
**Warning:**
[AppboyKit](https://github.com/Appboy/appboy-ios-sdk) (also known as the Objective-C SDK) is no longer supported and has been replaced by the [Swift SDK](https://www.braze.com/docs/pt-br/pt-br/developer_guide/sdk_integration/?sdktab=swift). It will no longer receive new features, bug fixes, security updates, or technical support—however, messaging and analytics will continue to function as normal. To learn more, see [Introducing the New Braze Swift SDK](https://www.braze.com/resources/articles/introducing-the-new-braze-swift-sdk).
# Armazenamento {#storage}
Este artigo descreve as diferentes propriedades no nível de dispositivo capturadas ao usar o Braze iOS SDK.
## Propriedades do dispositivo {#device-properties}
Por padrão, a Braze coletará as seguintes [propriedades no nível do dispositivo](https://github.com/Appboy/appboy-ios-sdk/blob/16e893f2677af7de905b927505d4101c6fb2091d/AppboyKit/headers/AppboyKitLibrary/Appboy.h#L181) para permitir a personalização de mensagens com base no dispositivo, no idioma e no fuso horário:
* Resolução do dispositivo
* Operadora do dispositivo
* Localidade do dispositivo
* Modelo do dispositivo
* Versão do sistema operacional do dispositivo
* IDFV (opcional com [iOS SDK v5.7.0+](https://github.com/braze-inc/braze-swift-sdk))
* Push ativado
* Fuso horário do dispositivo
* Status da autorização push
* Rastreamento de anúncios ativado
**Note:**
O SDK da Braze não coleta o IDFA automaticamente. Os apps podem, opcionalmente, passar o IDFA para a Braze implementando nosso protocolo `ABKIDFADelegate`. Os apps devem obter a aceitação explícita do usuário final para rastreamento por meio do framework de transparência de rastreamento de apps antes de passar o IDFA para a Braze.
Os campos configuráveis do dispositivo são definidos no enum [`ABKDeviceOptions`](https://github.com/Appboy/appboy-ios-sdk/blob/4390e9eac8401bccdb81b053fa54eb87b1f6fcaa/Appboy-tvOS-SDK/AppboyTVOSKit.framework/Headers/Appboy.h#L179). Para desativar ou especificar o campo do dispositivo que você gostaria de incluir na lista de permissões, atribua o bitwise `OR` dos campos desejados a [`ABKDeviceAllowlistKey`](https://github.com/Appboy/appboy-ios-sdk/blob/fed071000722673754da288cace15c1ff8aca432/AppboyKit/include/Appboy.h#L148) no `appboyOptions` de `startWithApiKey:inApplication:withAppboyOptions:`.
Por exemplo, para especificar o fuso horário e a localidade a serem incluídos na lista de permissões, defina:
```
appboyOptions[ABKDeviceAllowlistKey] = @(ABKDeviceOptionTimezone | ABKDeviceOptionLocale);
```
Por padrão, todos os campos estão ativados. Observe que, sem algumas propriedades, nem todos os recursos funcionarão corretamente. Por exemplo, a entrega no horário local não funcionará sem o fuso horário.
Para saber mais sobre as propriedades do dispositivo coletadas automaticamente, visite nossa [coleta de dados do SDK](https://www.braze.com/docs/pt-br/pt-br/user_guide/data/unification/user_data/sdk_data_collection/).
# Exemplos de aplicativos para iOS
Source: /docs/pt-br/developer_guide/platforms/legacy_sdks/ios/sample_apps/index.md
**Warning:**
[AppboyKit](https://github.com/Appboy/appboy-ios-sdk) (also known as the Objective-C SDK) is no longer supported and has been replaced by the [Swift SDK](https://www.braze.com/docs/pt-br/pt-br/developer_guide/sdk_integration/?sdktab=swift). It will no longer receive new features, bug fixes, security updates, or technical support—however, messaging and analytics will continue to function as normal. To learn more, see [Introducing the New Braze Swift SDK](https://www.braze.com/resources/articles/introducing-the-new-braze-swift-sdk).
# Exemplos de aplicativos {#sample-apps}
Os SDKs da Braze vêm com aplicativos de amostra no repositório para sua conveniência. Cada um desses apps é totalmente compilável, portanto, você pode testar os recursos da Braze e implementá-los em seus próprios aplicativos. Testar o comportamento em seu próprio aplicativo em comparação com o comportamento esperado e as jornadas de código nos aplicativos de amostra é uma excelente maneira de depurar quaisquer problemas que você possa encontrar.
## Criação de aplicativos de teste {#building-test-applications}
Vários aplicativos de teste estão disponíveis no [repositório do GitHub do SDK do iOS](https://github.com/appboy/appboy-ios-sdk). Siga estas instruções para criar e executar nossos aplicativos de teste.
1. Crie um novo [espaço de trabalho](https://www.braze.com/docs/pt-br/pt-br/developer_guide/platform_wide/app_group_configuration/#creating-your-app-group-in-my-apps) e note a chave de API do identificador do app.
2. Coloque sua chave de API no campo apropriado do arquivo `AppDelegate.m`.
As notificações por push para o aplicativo de teste do iOS exigem configuração adicional. Consulte nossa [integração de push do iOS](https://www.braze.com/docs/pt-br/pt-br/developer_guide/platforms/legacy_sdks/ios/push_notifications/integration/) para obter detalhes.
# Changelog do iOS Swift SDK
Source: /docs/pt-br/developer_guide/platforms/legacy_sdks/ios/changelog/swift_changelog/index.md
**Warning:**
[AppboyKit](https://github.com/Appboy/appboy-ios-sdk) (also known as the Objective-C SDK) is no longer supported and has been replaced by the [Swift SDK](https://www.braze.com/docs/pt-br/pt-br/developer_guide/sdk_integration/?sdktab=swift). It will no longer receive new features, bug fixes, security updates, or technical support—however, messaging and analytics will continue to function as normal. To learn more, see [Introducing the New Braze Swift SDK](https://www.braze.com/resources/articles/introducing-the-new-braze-swift-sdk).
# Changelog do SDK do Swift para iOS
16.0.0
Breaking
Updates to Content Cards behavior and reliability
braze.contentCards.cards is now immediately updated after a card is marked as viewed, dismissed, or clicked via its context.
Previously, these mutations were only visible in braze.contentCards.cards after the next server sync.
Disabling Content Cards via Braze.Configuration now immediately clears braze.contentCards.cards and notifies subscribeToUpdates subscribers with an empty list.
Previously, braze.contentCards.cards retained its last value and subscribers were not notified.
Added
Adds Braze.FeatureFlags.getAllFeatureFlags(_:) — an asynchronous, callback-based getter that delivers cached feature flags on the main thread without blocking the calling thread.
15.2.0
Added
Adds optional subtotalValue, tax, and shipping fields to Braze.Ecommerce.OrderPlacedEvent, all Braze.Ecommerce.CartUpdated variants (Replace / Add / Remove), and Braze.Ecommerce.CheckoutStartedEvent.
Available in Objective-C on BRZEcommerceOrderPlacedEvent, BRZEcommerceCartUpdatedEvent, and BRZEcommerceCheckoutStartedEvent.
Fixed
Fixes a video player configuration error for embedded YouTube videos in HTML in-app messages.
15.1.0
Added
Adds dismiss() to Braze.Banner.Context and dismiss(using:) to Braze.Banner to dismiss a banner when using a custom UI.
Recommended to use Braze.Banner.Context.dismiss.
Both methods must be called from the main thread.
Calling either method fires the onDismiss callback on any registered BrazeBannerPlacement for that placement ID.
Available in Objective-C as -[BRZBannerContext dismiss] and -[BRZBanner dismissUsing:].
Adds example implementations for building a custom UI with banners.
Adds Braze.ContentCards.getCachedContentCards(_:), Braze.ContentCards.getUnviewedCards(_:), and Braze.ContentCards.getLastUpdate(_:) — asynchronous, callback-based getters that deliver on the main thread.
Fixed
Fixes a bug in the default Content Cards UI that would prevent image loading if multiple cards contained the same remote image URL. (#176)
If multiple cards contained the same image URL, only the first card to finish loading would display the image, whereas all others would indefinitely display the loading spinner.
15.0.1
Fixed
Improves the stability of the SDK’s internal state management, resolving a crash that would occur under low memory conditions.
getBanner now returns the cached banner immediately even when the SDK is rate limited.
15.0.0
Breaking
Banners: onDismiss now receives Braze/BannerDismissalEvent instead of Braze/Banner.
Raises the Xcode version to 26.0 (17A324).
Raises the minimum Mac Catalyst deployment target from iOS 13 (macOS 10.15 Catalina) to iOS 16 (macOS 13 Ventura).
Mac Catalyst users on macOS 12 Monterey or earlier are no longer supported.
Removes the ability to control whether the SDK prevents showing in-app messages to different users in certain edge cases.
Removes the option to configure through Braze.Configuration.preventInAppMessageDisplayForDifferentUser.
The SDK will now always behave as if this configuration option were set to true.
Updates the Braze.WebViewBridge.ScriptMessageHandler and Braze.WebViewBridge.SchemeHandler init to have non-optional channel parameter.
Added
Logs configuration validation messages when Braze.Configuration.devicePropertyAllowList omits pushEnabled or pushAuthStatus.
Both are required for push token registration and for push notifications to behave correctly.
Adds the following API: Braze.logEcommerceEvent(_:)
Adds Objective-C compatible APIs:
-[Braze logEcommerceProductViewed:]
-[Braze logEcommerceCartUpdated:]
-[Braze logEcommerceCheckoutStarted:]
-[Braze logEcommerceOrderPlaced:]
Fixed
Fixes a rare race condition where the app would become unresponsive when calling changeUser or wipeData while an HTML in-app message or banner was in the middle of displaying.
14.2.1
Fixed
Improves the reliability of resuming the SDK’s tracking of Live Activities when there are multiple active activity types.
This improves the tracking of Live Activities when relaunching the app after it has been terminated.
Fixes a compilation issue introduced in 14.2.0 on Mac Catalyst targets caused by ActivityKit imports.
14.2.0
Added
Adds methods to observe all key events and errors in the ActivityKit API, enabling observation of real-time state and error events from the SDK’s Live Activity lifecycle.
Adds Braze.LiveActivities.UpdateEvent, a new enum covering activity and token lifecycle events (e.g. started, active, dismissed, stale, ended, contentUpdated, pushTokenUpdated) as well as Braze SDK operation events (trackingStarted, trackingResumed, pushTokenFlushed).
Adds Braze.LiveActivities.ErrorEvent, a new enum covering observation failures, token registration failures (with isTransient for retry logic), activityNotFound, and invalidPushTokenTag.
Adds subscribeToStateUpdates(_:) and subscribeToErrors(_:) methods on Braze.LiveActivities to register callbacks for the above events. Both return a Braze.Cancellable to remove the subscription.
Improves reliability of Live Activity push token updates during app background and foreground transitions, including cold start scenarios where push-to-start activities may not have received token updates.
Content cards now filter out invalid cards so users can still view remaining valid cards.
Previously, if any of the cards were invalid in the content card sync, the entire sync would be dropped and no cards would be added.
This update brings parity with the behavior on Android and Web.
Improves the robustness of the SDK’s internal state management.
This release includes an internal refactor intended to make SDK behavior more consistent. No external API changes.
Adds error logging for Banners operations, providing actionable diagnostics for persistence failures and invalid banner states.
Fixed
Improves robustness around push notification and deep link handling during delayed SDK initialization.
Fixes an issue where Braze.FeatureFlags.subscribeToUpdates would not trigger the update closure upon all refresh completions.
All refresh completions, regardless of a success or error result, will now trigger the update closure. This change brings parity with the Android and Web SDKs.
Previously, the update closure would not always trigger upon the completion of a refresh request, depending on whether the cached data had previously been reported.
14.0.4
Fixed
Fixes an issue where the configuration of push notification automation would be dropped upon every other re-initialization of the Braze instance.
14.0.3
Fixed
Push Stories now filter out invalid pages so users can still navigate through remaining valid pages.
14.0.2
Fixed
Fixes the SwiftUI implementation of BannerView to update Banner contents in-place whenever a refresh has succeeded.
Re-exposes the public initializer of BrazeInAppMessageUI.HtmlView as a designated init instead of a convenience init, which was introduced in version 14.0.0
This allows subclasses of HtmlView to access the public initializer.
Improves robustness of internal SDK logic around dictionary access to prevent potential crashes.
14.0.1
Fixed
Resolves an issue where the handling of universal links defaulted to the UIApplicationDelegate implementation instead of the UISceneDelegate implementation when the app was not in foreground.
This would occur even if there was no UIApplicationDelegate implementation, resulting in dropped universal link handling under such scenarios.
Fixes a memory leak where base64-encoded tracking IDs in in-app messages would accumulate on background threads.
Resolves an issue where in-app messages were not dismissed when the user is changed, resulting in the user seeing incorrect content.
This change also adds changeUser dismissal reason for in-app messages.
14.0.0
Breaking
Removes News Feed.
This fully removes all UI elements, data models, and actions associated with News Feed.
Added
Remote configuration now automatically refetches after SDK upgrades, keeping server defaults in sync and improving reliability after version changes.
Fixed
Resolves an issue where long text in in-app message buttons would wrap to multiple lines.
These messages will now match the dashboard preview behavior of truncating long text.
Push Stories now fail gracefully when receiving null/empty deeplink values.
Previously, an invalid deeplink would cause the Push Story’s content to appear blank.
StoryPage safely trims and percent-encodes deeplink strings, dropping invalid values instead of throwing an error.
StoryView only scrolls when pages exist, preventing the “Next” action from crashing when the carousel is empty.
HTML in-app messages now reuse cached payloads to mitigate app hangs that occur in rare situations during presentation.
Templated in-app messages with delayed presentation will now request templated values only after completion of the delay.
This ensures that templated values are most up-to-date with the display of the message.
Previously, the request for templated values would occur at trigger time, prior to the delay.
13.3.0
Added
Improves reliability when sending the push token and push authorization status to the backend.
This change ensures that push authorization status changes will be flushed immediately as soon as they are read.
13.2.1
Fixed
Resolves an issue where an accumulation of Banners pending requests could cause the host application to hang at app startup.
This fix performs additional cleanup to any existing requests that were accumulated from previous versions, so you do not need to do any manual cleanup.
13.2.0
Added
Adds support for compilation with Xcode 26.0 and its corresponding operating system runtimes on all platforms supported by the Braze Swift SDK.
13.1.0
Added
Adds support for Banner properties via new public methods on Braze.Banner instances.
banner.stringProperty(key:) for accessing String properties.
banner.numberProperty(key:) for accessing Double properties.
banner.timestampProperty(key:) for accessing Int Unix millisecond timestamp properties.
banner.booleanProperty(key:) for accessing Bool properties.
banner.imageProperty(key:) for accessing image URL properties as Strings.
banner.jsonProperty(key:) for accessing JSON properties as [String:Any] dictionaries.
banner.jsonProperty<T: Decodable>(key:type:decoder:) for accessing JSON properties as values of any custom Decodable type.
The default client-side rate limiting values for Banners refresh has been increased. For more information on SDK rate limiting, please refer to the Braze Developer Guide
Fixed
Improves the behavior of VoiceOver for assets that are missing an imageAltText for Content Card and In-App Message campaigns created via the Traditional editor.
These assets will no longer be selectable or narrated by VoiceOver. Previously, the asset would be selectable and VoiceOver would read gibberish.
Drag-and-drop campaigns are not affected by this issue.
Campaigns created using the Traditional editor should always have the Alt text field populated for accessible users.
13.0.0
Breaking
Extends the functionality of BrazeSDKAuthDelegate.braze(_:sdkAuthenticationFailedWithError:) to be triggered for “Optional” authentication errors.
The delegate method BrazeSDKAuthDelegate.braze(_:sdkAuthenticationFailedWithError:) will now be triggered for both “Required” and “Optional” authentication errors.
If you want to only handle “Required” SDK authentication errors, add a check ensuring that BrazeSDKAuthError.optional is false inside your implementation of this delegate method.
Fixes the usage of Braze.Configuration.sdkAuthentication to take effect when enabled.
Previously, the value of this configuration was not consumed by the SDK and the token was always attached to requests if it was present.
Now, the SDK will only attach the SDK authentication token to outgoing network requests when this configuration is enabled.
The setters for all properties of Braze.FeatureFlag and all properties of Braze.Banner have been made private. The properties of these classes are now read-only.
Removes the banner.id property, which was deprecated in version 11.4.0.
Instead, use banner.trackingId to read a banner’s campaign tracking ID.
Added
Adds the boolean field optional to BrazeSDKAuthError to indicate if it is an optional authentication error.
12.1.0
Added
Adds optional imageAltText and language fields to UI classes and structs associated with Content Card and In-App Message campaigns for improved accessibility.
The imageAltText field contains the image accessibility alt text (if any) for the image or icon in a given campaign. The SDK’s default UI will use this field to inform how VoiceOver narrates the image portion of a campaign
The optional language field is a BCP 47 tag. If it is present, VoiceOver will use the corresponding language narrator when reading the campaign. Otherwise, the user system default settings will be used.
These are the classes and structs with imageAltText and language:
Braze.ContentCard.ClassicImage
Braze.ContentCard.ImageOnly
Braze.ContentCard.CaptionedImage
Braze.ContentCardRaw (BRZContentCardRaw in Objective-C)
Braze.InAppMessage.Slideup
Braze.InAppMessage.Modal
Braze.InAppMessage.ModalImage
Braze.InAppMessage.Full
Braze.InAppMessage.FullImage
Braze.InAppMessageRaw (BRZInAppMessageRaw in Objective-C)
Braze.ContentCard.Classic has the language field only
Full support will be added to the main repository closer to the public release of Xcode 26.
For any compatibility issues discovered while using the Xcode 26 Beta, submit a GitHub issue on the main repository.
12.0.3
Fixed
Fixes the Banner rendering incompatibility with iOS 18.5+ while maintaining the correct URL redirect behavior.
Banners can now successfully render on iOS 18.5+ without compromising click action functionality.
See the changelog entries for versions 12.0.1 and 12.0.2 for further details.
12.0.2
⚠️ Important: This version has a known issue preventing Banners from rendering on iOS 18.5+.
Fixed
Reverts Banners to the behavior found in versions 12.0.0 and prior.
Banners remain unusable on iOS 18.5+. A future release will address this issue.
12.0.1
⚠️ Important: This version has a known issue in Drag-and-Drop in-app messages and Banners, preventing certain URLs from redirecting properly. Update to a newer version if you are using this feature.
Fixed
Fixes an issue where setting configuration.forwardUniversalLinks = true would not properly forward universal links to the system APIs in some cases.
The SDK now verifies that the system APIs are implemented (either in your UIApplicationDelegate or SceneDelegate) before forwarding the universal link.
When multiple implementations are found, the SDK favors the SceneDelegate implementation over the UIApplicationDelegate implementation.
Fixes an issue when configuring Braze.Configuration.Push.Automation.authorizationOptions with the .provisional option.
Previously, the .provisional option was also applied for push primer in-app messages. This resulted in no push notification permission prompt being shown to the user.
With this change, push primer in-app messages will request push notification permissions using only the .alert, .badge, and .sound options, ensuring that the system prompt is presented to the user.
Fixes an incompatibility with iOS 18.5 where Banners would not render.
Previously, the Banner view would be added to the view hierarchy with a height of 0 but never successfully load the HTML content.
Banner views will no longer trigger superfluous about:blank URLs upon initial load.
12.0.0
Breaking
The distributed static XCFrameworks now include their resources directly instead of relying on external resources bundles.
When manually integrating the static XCFrameworks, you must select the Embed & Sign option for each XCFramework in the Frameworks, Libraries, and Embedded Content section of your target’s General settings.
No changes are required for Swift Package Manager or CocoaPods integrations.
Fixed
Fixes an App Store validation issue where Braze’s libraries privacy manifests would fail to be detected when integrating the SDK as static XCFrameworks.
Fixes BrazeKitCompatABKContentCard.expiresAt to return the correct expiration date.
Previously, ABKContentCard.expiresAt would always return 0.
Fixes an issue where the Braze.FeatureFlags.subscribeToUpdates(_:) update closure was being called immediately after calling changeUser(userId:) instead of waiting for the next feature flags sync result.
Fixes an issue where Braze.ContentCards.subscribeToUpdates(_:) would not call the update closure whenever a sync occurred without any changes in the Content Cards data.
Previously, the update closure would only be called when the sync resulted in a change.
Fixes the Braze.User.set(dateOfBirth:) method to report dates using the Gregorian calendar instead of the device’s current calendar setting.
Previously, the SDK would override input dates and formats if the device’s calendar settings were non-Gregorian.
With this change, you will still need to ensure that dates provided to set(dateOfBirth:) are generated with the Gregorian calendar, but the Braze SDK will no longer override their formats inadvertently.
Enhances the braze.wipeData() function to send a final update to all registered channel subscribers, notifying them of the data wipe.
This update ensures that any UI components utilizing the channel’s data are properly dismissed and cleaned up.
For instance, if an in-app message is currently displaying as braze.wipeData() is called, the message will be removed from display.
Fixes braze.user.id not resetting to nil after calling braze.wipeData().
Internally, the user identifier was properly reset, but the public braze.user.id property was not updated to reflect this change.
Added
Adds the BrazeInAppMessagePresenter.dismiss(reason:) optional protocol method.
This method enables the SDK to inform the in-app message presenter when an in-app message should be dismissed due to an internal SDK state change.
Currently, this method is triggered only by calling braze.wipeData().
BrazeInAppMessageUI implements this optional method and dismisses the in-app message when triggered.
Adds dSYM files to the dynamic and mergeable variants of the Braze SDK XCFrameworks.
This addresses an App Store submission validation warning when using Xcode 16.0 or later.
Fixed
The SDK Debugger tool will now capture logs even when Braze.configuration.logger.level is .disabled and no SDK logging occurs locally.
This aligns the Braze Swift SDK Debugger Tool behavior with that of the Debugger Tool on the Braze Android SDK.
Sets the default background of BannerUIView to be transparent.
Renames the VisibilityTracker.displayLinkTick method to VisibilityTracker.brazeDisplayLinkTick in BrazeUI to avoid potential naming conflicts with private system methods.
11.8.0
Added
Network requests made by the SDK to the Braze Live Activities /push_token_tag endpoint will now be retried in the case of a request failure.
Expands customizability options of custom endpoints passed when initializing a Braze instance.
You can now specify a base path to be used for SDK network requests (i.e. “example.com/mockServer”).
http schemes are now supported for use by custom endpoints (i.e. http://example.com). Previously, only https schemes were supported.
Fixed
Fixes an issue where in-app messages would not always be triggered when sending Braze requests to the tracking endpoint. This occurred when both of the following conditions are true:
The Braze.Configuration.Api.trackingPropertyAllowList did not include the .everything type.
All other Braze.Configuration.TrackingProperty types were manually listed in the trackingPropertyAllowList.
Improves the rendering behavior of Banner Cards embedded in a scroll view on hybrid development frameworks.
Fixes the Banner Card view to prevent drag gestures from exposing the background of the HTML content.
Fixes an issue on the Braze web view bridge where numeric values of 1 or 0 would be incorrectly reported as true or false, respectively.
11.7.0
Added
Adds the ability for a banner container to resize when the banner content changes height.
11.6.1
Fixed
Improves the reliability of collecting Live Activity push-to-start tokens on calling registerPushToStart:
Push-to-start tokens will now flush to the server immediately as soon as they are retrieved.
Push-to-start tokens will now be read immediately from the pushToStartToken property as soon as registerPushToStart is called, in addition to the existing behavior where an observable is set up to monitor new tokens.
Resolves issues with the SDK’s internal state for devices that were previously affected after restoring from another device’s iCloud or iTunes backup.
Previously, these devices would incorrectly inherit the device ID from the original device.
With this update, the SDK now generates a unique device ID for each restored device, ensuring proper identification and functionality.
This update follows up on the 11.6.0 fix, which prevented the issue from occurring on future backups.
11.6.0
Fixed
Fixes the behavior in the Braze-provided UI for Banner Cards where content would not automatically be cleared from the UI when changing to a user that was not eligible for that campaign.
Changes the behavior of Braze.Banners.subscribeToUpdates(_:) to match behavior of the corresponding API on the Braze Android SDK.
Upon calling Braze.Banners.subscribeToUpdates(_:), the update handler closure will only be called if a banners sync has succeeded during the current user session.
Previously, calling Braze.Banners.subscribeToUpdates(_:) would always result in the update handler being called one time immediately.
Upon successfully completing a banners sync, Braze.Banners.subscribeToUpdates(_:) will call its registered update handler even if the sync result is identical to the last successful sync.
Changes the behavior of Braze.Banners.bannersStream to match behavior of the corresponding API on the Braze Android SDK.
Braze.Banners.bannersStream will now only emit an update immediately upon access if a banners sync has succeeded during the current user session.
Previously, accessing Braze.Banners.bannersStream would always emit one update immediately.
Upon successfully completing a banners sync, Braze.Banners.bannersStream will emit an update even if the sync result is identical to the last successful sync.
JavaScript bridge methods expecting number arguments now also accept string representations of numbers.
This change aligns the behavior of the Swift SDK with the behavior of the Web SDK.
Added
Adds an optional method removeBannerContent to the BrazeBannerPlacement protocol.
Locally persisted Braze SDK data will no longer transfer during OS backups. This resolves an issue introduced in 6.2.0.
11.5.0
Fixed
Braze.banners.getBanner(for:_:) now successfully returns a cached Banner object for the requested placement ID as long as a Banner Cards sync has ever succeeded for the current user.
Previously, it would log a warning and pass nil to the completion handler if a Banner Cards sync had not been completed for the current user during the current session specifically.
This change aligns behavior with the Android SDK.
Fixes an issue where images with the "JPEG" image type would sometimes not display in Push Stories.
Fixes an issue where an in-app message in a Braze-provided UI can be displayed for an ineligible user under rare conditions.
This may occur if the in-app message was in the process of being displayed in the UI at the same time that the user was changed to a different user.
Added
Adds Braze.User.id to access the current user identifier synchronously.
Deprecates Braze.User.id() async and Braze.User.id(queue:completion:) in favor of Braze.User.id.
These methods will be removed fully in a future update.
Adds the optional parameter userIDMatchBehavior to the initializers of Braze.InAppMessageRaw.Context. This determines the behavior in the UI when the current identified user is different from the one that triggered the in-app message.
The default for Braze-provided UIs (.enforce) will enforce that the user ID matches the user ID that triggered the in-app message. If there is a mismatch, the in-app message will not be displayed.
For custom UIs, the default is .ignore and a mismatch will still display the in-app message.
11.4.0
Fixed
Fixes an issue where the SDK could hang during initialization if previous sessions generated a large number of geofence refreshes. This hang could sometimes lead to a crash by blocking the main thread for an extended period.
Fixes an issue where the triggering of in-app messages could be delayed in cases where requests for updated in-app message triggers are also delayed due to rate limiting.
Adds additional safeguards to ensure that ongoing network requests are dropped when changing users mid-flight.
Added
When Content Cards, Feature Flags, or Banner Cards go from enabled to disabled, the stored data is removed from cache.
Fixes the Objective-C Braze.delegate declaration to be weak like the Swift variant.
Added
Braze.prepareForDelayedInitialization now takes an optional parameter analyticsBehavior: PushEnqueueBehavior.
Braze uses this value to determine whether any Braze push payloads received before initialization should be processed once initialization is complete.
PushEnqueueBehavior.queue will enqueue received push payloads to be processed upon initialization. This option is selected by default.
PushEnqueueBehavior.drop will drop received push payloads, ignoring them.
Adds configuration properties to customize the lineSpacing, maxLineHeight, minLineHeight, and lineHeightMultiple for the header and message texts in full and modal in-app messages.
Updates BrazeContentCardUI.ViewController.Attributes.defaults to be a var to allow directly editing the property for convenience.
11.1.1
Fixed
Fixes an issue introduced in 11.0.0 where the push subscription status would be sent to the backend with an inaccurate value at startup, causing an unexpected subscription state. The SDK now sends up the accurate subscription status at each startup.
11.1.0
⚠️ Important: This version has a known issue related to push subscription status. Upgrade to version 11.1.1 instead.
Fixed
Fixes an issue introduced in 11.0.0 where the push token status would not always be reported in all circumstances.
Fixes a display bug where an in-app message would appear truncated after certain keyboard dismissal scenarios.
Fixes a reference cycle in Braze.NewsFeedCard.Context that could prevent the card from being deallocated.
Added
Adds a public initializer for Braze.Notifications.Payload.
11.0.1
Fixed
Fixes an issue introduced in 11.0.0 where the push subscription status would be sent to the backend with an inaccurate value at startup, causing an unexpected subscription state. The SDK now sends up the accurate subscription status at each startup.
11.0.0
⚠️ Important: This version has a known issue related to push subscription status. Upgrade to version 11.1.1 instead.
Relevant public Braze classes and data types now conform to the Sendable protocol and can be safely used across concurrency contexts.
Main thread-only APIs are now marked with the @MainActor attribute.
We recommend using Xcode 16.0 or later to take advantage of these features while minimizing the number of warnings generated by the compiler. Previous versions of Xcode may still be used, but some features may generate warnings.
When integrating push notification support manually, you may need to update the UNUserNotificationCenterDelegate conformance to use the @preconcurrency attribute to prevent warnings.
Applying the @preconcurrency attribute on protocol conformance is only available in Xcode 16.0 or later. Reference our sample integration code here.
As of Xcode 16.0, Apple has not yet audited the UNUserNotificationCenterDelegate protocol for Swift concurrency.
1
2
3
extensionAppDelegate:@preconcurrencyUNUserNotificationCenterDelegate{// Your existing implementation}
Updates the SDWebImage dependency in BrazeUICompat and sample apps to 5.19.7+ to support Swift 6 strict concurrency checking.
Fixed
Fixes the push authorization status reporting to display the proper push token status on the Dashboard when a user has not explicitly accepted or declined push permissions.
10.3.1
Fixed
Improves the reliability of sending updates to Live Activities that were launched via a push-to-start notification to an app in the terminated state.
10.3.0
Fixed
Fixes the in-app message orientation validation logic, which prevented certain device classes from displaying messages under certain orientation configurations.
Fixes the default behavior on full-screen in-app messages to display as modals only on tablet screen sizes.
Previously, full-screen messages would erroneously default to modal presentations on some larger phones.
Fixes a crash when dismissing a slideup in-app message before it has finished presenting.
Fixes an issue on iOS 18.0+ where the in-app message UI would persist on the screen when attempting to dismiss the message before it has finished presenting.
Updates custom attribute value, custom event, and purchase string validation to use a 255 character maximum instead of a 255 byte maximum.
Adds additional safeguards to Braze.Notifications.subscribeToUpdates to ensure the same Push notification can’t trigger the update closure multiple times.
10.2.0
Fixed
Updates the content card image background color to be clear.
Added
Adds support for an upcoming Braze SDK Debugging tool.
10.1.0
Fixed
Fixes an issue affecting the Objective-C variants of BrazeDelegate, BrazeContentCardUIViewControllerDelegate and BrazeInAppMessageUIDelegate.
When setting these delegates in Objective-C a second time, the delegate would end up being set to nil.
This issue has been resolved and the delegates can now be set multiple times without issue.
Added
Adds support for delayed SDK initialization, allowing you to create the Braze instance outside of application(_:didFinishLaunchingWithOptions:).
The SDK can now be initialized asynchronously, while conserving the ability to process incoming Braze push notifications.
The update closure will now be triggered by both “Push Opened” and “Push Received” events by default. Previously, it would only be triggered by “Push Opened” events.
To continue subscribing only to “Push Opened” events, pass in [.opened] for the parameter payloadTypes. Alternatively, implement your update closure to check that the type from the Braze.Notifications.Payload is .opened.
When receiving a push notification with content-available: true, the Braze.Notifications.Payload.type will now be .received instead of .opened.
Marks the following deprecated APIs as unavailable:
Removes the deprecated BrazeLocation class in favor of BrazeLocationProvider.
Fixed
Fixes a crash when handling a scheme-based deep link containing a registered applink domain (e.g. applinks:example.com with a deep link to app://example.com/path).
The following notifications will trigger this subscription:
Notifications received in the foreground
Notifications with the field content-available: true received in the foreground or background
The following notifications will not trigger this subscription:
Notifications received while terminated
Notifications received in the background without the field content-available: true
The new parameter payloadTypes will allow you to subscribe to “Push Opened” events, “Push Received” events, or both. If the parameter is omitted, it will subscribe to both by default.
If you are using manual push integration, you will need to first implement UNUserNotificationCenter.userNotificationCenter(_:willPresent:withCompletionHandler:), and make sure to call Braze.Notifications.handleForegroundNotification(notification:) within your implementation. Then, use subscribeToUpdates as noted above. See our guide on push notification integration for more info.
Fixes an issue where the Braze.FeatureFlag.subscribeToUpdates(_:) callback was not triggered at app launch when the cached feature flags matched the remote feature flags.
Fixes an issue in Objective-C projects where the return value of Braze.FeatureFlag.jsonProperty(key:) would incorrectly encode any entry value equal to null under certain conditions.
[String: Any] dictionaries returned by the Swift API will now drop null values.
NSDictionary objects returned by the Objective-C API will now encode null values as NSNull.
Customization of ViewAttributes via the attributes property is not available in the Objective-C version of PresentationContextRaw.
Adds Braze.FeatureFlag.jsonProperty(key:type:decoder:) to decode jsonobject type Feature Flag properties into custom Decodable types.
Deprecates the existing Feature Flag APIs, to be removed in a future version:
Braze.FeatureFlag.jsonStringProperty(key:) has been deprecated.
Braze.FeatureFlag.jsonObjectProperty(key:) has been deprecated in favor of Braze.FeatureFlag.jsonProperty(key:).
Fixed
Fixes an issue where the preferredOrientation on the presentation context of an in-app message would not be respected.
9.2.0
Added
Adds the openNewWindowLinksInBrowser configuration (default: false) to Braze.ModalContext.
Set this value in the braze(_:willPresentModalWithContext:) method of your BrazeDelegate to specify whether to launch the device browser to open web view hyperlinks that normally open a new tab or window.
Fixed
Fixes an issue with the automatic push integration feature that could cause the SDK not to send the device token to Braze.
Fixes an issue that prevented external links, which open in a new tab, from being activated in presented web views.
9.1.0
Added
Adds support for 3 new Feature Flag property types and various APIs for accessing them:
Braze.FeatureFlag.timestampProperty(key:) for accessing Int Unix millisecond timestamps.
Braze.FeatureFlag.imageProperty(key:) for accessing image URLs as Strings.
Braze.FeatureFlag.jsonObjectProperty(key:) for accessing JSONs as [String:Any] dictionaries.
Braze.FeatureFlag.jsonStringProperty(key:) for accessing JSONs as Strings.
Adds safeguards when reading the device model.
Fixed
Fixes the duplicate symbols compilation errors and runtime warnings that may occur under specific conditions when integrating BrazeKit and either BrazeNotificationService or BrazePushStory via CocoaPods.
9.0.0
Breaking
Removes the default privacy tracking domains from the BrazeKit privacy manifest.
If you are using the Braze data tracking features, you will need to manually add your tracking endpoint to your app-level privacy manifest.
Refer to the updated tutorial for integration guidance.
Removes the deprecated BrazeDelegate.braze(_:sdkAuthenticationFailedWithError) method in favor of BrazeSDKAuthDelegate.braze(_:sdkAuthenticationFailedWithError).
This method was originally deprecated in release 5.14.0.
Failing to switch to the new delegate method will not trigger a compiler error; instead, the BrazeDelegate.braze(_:sdkAuthenticationFailedWithError) method you define will simply not be called.
Fixed
Adds the missing NSPrivacyCollectedDataTypes key to the BrazePushStory privacy manifest.
8.4.0
Added
Expands Geofences behavior in the background while “When In Use” authorization is selected:
Adds the Braze.Location.Configuration.allowBackgroundGeofenceUpdates property to toggle whether geofences should be updated in the background.
When using this setting, verify that you have enabled the Location updates background mode.
Adds the Braze.Location.Configuration.distanceFilter property to configure the minimum distance sensitivity for triggering a location update.
Adds support for the message_extras Liquid tag for in-app messages.
8.3.0
Added
Adds early access for a third alternative repository which provides all Braze modules as mergeable XCFrameworks. For instructions on how to leverage it, refer to the repository README:
Adds a missing privacy manifest for BrazePushStory.
Fixes an invalid privacy manifest warning in BrazeLocation when submitting to the App Store as a dynamic XCFramework.
Fixes an issue where already enqueued in-app messages would not be removed from the stack after subsequent .reenqueue and .discard display actions.
Fixes an issue preventing retried requests from using an updated SDK authentication token until a new request was scheduled for processing.
Purchases, custom events, and nested custom user attributes can now include properties with values of any type conforming to BinaryInteger (Int64, UInt16, etc).
All values will be cast to Int before being logged.
This resolves an issue with a bugfix in 7.6.0.
8.2.1
Fixed
Fixes App Store validation issues when archiving with Xcode 15.3.
8.2.0
Added
Adds support for remotely starting Live Activities via push notifications.
Adds the following methods to the liveActivities module:
Adds public APIs to access BrazeKit, BrazeLocation and BrazeUI resources bundles:
Braze.Resources.bundle
BrazeLocationResources.bundle
BrazeUIResources.bundle
BrazeKit.overrideResourceBundle and BrazeUI.overrideResourceBundle have been deprecated in favor of BrazeKit.overrideResourcesBundle and BrazeUI.overrideResourcesBundle.
Re-enables visionOS sample apps requiring SDWebImage in Examples-CocoaPods.xcworkspace. SDWebImage for visionOS is now supported when using CocoaPods.
Updated SDWebImage dependency in BrazeUICompat to 5.19.0+.
Fixed
Fixes multiple issues on visionOS:
Sessions now properly start as expected.
The click behavior Open Web URL Inside App now properly opens the URL in a modal web view. Previously, the URL would always be opened using the default web browser.
[BrazeDelegate.braze(:willPresentModalWithContext:)](https://braze-inc.github.io/braze-swift-sdk/documentation/brazekit/brazedelegate/braze(:willpresentmodalwithcontext:)-1fj41) now has a default implementation.
Handling network requests and persisting data properly extend the lifetime of the application for processing.
Removes crash data from the BrazeKit privacy manifest. This data type is not collected by Braze.
8.0.0
⚠️ Warning
This release reports the SDK version as 7.7.0 instead of 8.0.0.
Breaking
Compiles the SDK using Xcode version 15.2 (15C500b).
This also raises the minimum deployment targets to iOS 12.0 and tvOS 12.0.
The BrazeLocation class is now marked as unavailable. It was previously deprecated in favor of BrazeLocationProvider in 5.8.1.
Added
Adds support for visionOS 1.0.
⚠️ Rich push notifications and Push Stories may not display as expected on visionOS 1.0. We are monitoring the latest versions for potential fixes.
⚠️ CocoaPods is not yet supported by SDWebImage for visionOS. visionOS sample apps requiring SDWebImage have been disabled in the Examples-CocoaPods.xcworkspace. Refer to the SwiftPM or manual integration Xcode project instead.
7.7.0
Added
Updates the prebuilt release assets to include the privacy manifest for manual integrations of SDWebImage.
Follow the manual integration guide to add the SDWebImage.bundle to your project for static XCFrameworks.
Enhances support for language localizations.
Introduces a localization for Azerbaijani strings.
Updates Ukrainian localization strings for accuracy.
Fixed
Fixes the default button placement for full in-app message views.
Fixes an issue where setting Braze.Configuration.Api.endpoint to a URL with invalid characters could cause a crash.
If the SDK is given an invalid endpoint, it will no longer attempt to make network requests and will instead log an error.
Fixes an issue preventing BrazeLocation from working correctly when using the dynamic XCFrameworks.
7.6.0
Added
Adds the Braze.InAppMessage.Data.isTestSend property, which indicates whether an in-app message was triggered as part of a test send.
Adds logic to separate Braze data into tracking and non-tracking requests.
Adds the following methods to set and edit the allow list for properties that will be used for tracking:
Braze.Configuration.Api.trackingPropertyAllowList: Set the initial allow list before initializing Braze.
Braze.updateTrackingAllowList(adding:removing:): Update the existing allow list during runtime.
For full usage details on these configurations, refer to our tutorial here.
Fixed
Adds safeguards to prevent a rare race condition occuring in the SDK network layer.
Prevents in-app message test sends from attempting re-display after being discarded by a custom in-app message UI delegate.
Fixes an issue in the default Braze in-app message UI where some messages were not being removed from the stack after display.
Fixes the compilation of BrazeKitCompat and BrazeUICompat in Objective-C++ projects.
Fixes an issue in BrazeUICompat where the header text in Full or Modal in-app messages would be duplicated in place of the body text under certain conditions.
Fixes the encoding of values of types Float, Int8, Int16, Int32, Int64, UInt, UInt8, UInt16, UInt32 and UInt64. Those types were previously not supported in custom events and purchase properties.
Fixes an issue preventing purchase events from being logged when the product identifier has a leading dollar sign.
Fixes an issue preventing custom attributes from being logged when the attribute key has a leading dollar sign.
7.5.0
Added
Adds privacy manifests for BrazeKit and BrazeLocation to describe Braze’s data collection policies. For more details, refer to Apple’s documentation on privacy manifests.
More fine-tuned configurations to manage your data collection practices will be made available in a future release.
Adds the optInWhenPushAuthorized configuration property to specify whether a user’s notification subscription state should automatically be set to optedIn when updating push permissions to authorized.
The WebKit Inspector developer tool is now enabled by default for all instances of BrazeInAppMessagesUI.HtmlView. It can be disabled by setting BrazeInAppMessagesUI.HtmlView.Attributes.allowInspector to false.
Fixed
Fixes an issue with the code signatures of XCFrameworks introduced in 7.1.0.
Fixes a crash on tvOS devices running versions below 16.0, caused by the absence of the UIApplication.openNotificationSettingsURLString symbol in those OS versions.
Fixes an issue where a content card would not display if the value under “Redirect to Web URL” was an empty string.
Fixes incorrect behavior in BrazeUI where tapping the body of a Full or Modal in-app message with buttons and an “Image Only” layout would dismiss that message and process the button’s click action.
Tapping the body will now be a no-op, bringing parity with other platforms.
7.4.0
Added
Adds two alternative repositories to support specialized integration options. For instructions on how to leverage them, refer to their respective READMEs:
In-App Message assets from URLs containing the query parameter cache=false will not be prefetched.
Additionally, when presented as a part of In-App Messages or Content Cards, those URLs will be fetched using the URLRequest.CachePolicy.reloadIgnoringLocalAndRemoteCacheData caching policy, which always requests a fresh version from the source and ignores any cached versions.
Fixed
Fixes XCFrameworks headers to use the #import syntax instead of @import for compatibility with Objective-C++ contexts.
Fixes the push token tag validation during Live Activity registration, accepting strings up to 256 bytes instead of 255 bytes.
Braze.ContentCards.unviewedCards no longer includes Control cards to bring parity with Android and Web.
Fixes an Objective-C metaclass crash that occurs when initializing a custom subclass of certain BrazeUI views.
7.3.0
Added
Adds support for Expo Notifications event listeners when using the automatic push integration.
Fixed
Fixes a rare concurrency issue that might result in duplicated events when logging large amount of events.
Fixes an issue where user.set(dateOfBirth:) was not setting the date of birth accurately due to variations in the device’s timezone.
7.2.0
Added
Exposes the BrazePushStory.NotificationViewController.didReceive methods for custom handling of push story notification events.
Fixed
Resolves an issue for in-app messages with buttons where tapping on the body would incorrectly execute the button’s click action.
Now, when you tap on the body of an in-app message with buttons, no event should occur.
Resolves a potential deadlock under rare circumstances in BrazeUI’s In-App messages presentation.
Refactors some text layout logic in BrazeUI into a new Braze.ModalTextView class.
Updates the behavior for Feature Flags methods.
FeatureFlags.featureFlag(id:) now returns nil for an ID that does not exist.
FeatureFlags.subscribeToUpdates(:) will trigger the callback when any refresh request completes with a success or failure.
The callback will also trigger immediately upon initial subscription if previously cached data exists from the current session.
Fixed
Fixes compiler warnings about Swift 6 when compiling BrazeUI while using Xcode 15.
Exposes public imports for ABKClassicImageContentCardCell.h and ABKControlTableViewCell.h for use in the BrazeUICompat layer.
Adds additional safeguards around invalid constraint values for BrazeInAppMessageUI.SlideupView.
Resolves a Content Cards feed UI issue displaying a placeholder image in Classic cards without an attached image.
Added
Adds the enableDarkTheme property to BrazeContentCardUI.ViewController.Attributes.
Set this field to false to prevent the Content Cards feed UI from adopting dark theme styling when the device is in dark mode.
This field is true by default.
6.6.2
Fixed
Fixes an issue preventing purchase events from being logged when the product identifier has a leading dollar sign ($).
Fixes an issue preventing custom attributes from being logged when the attribute key has a leading dollar sign ($).
6.6.1
Fixed
Fixes a crash in the geofences feature that could occur when the number of monitored regions exceeded the maximum count.
Fixes an issue introduced in 6.3.1 that would always update a user’s push subscription status to optedIn on app launch if push permissions were authorized on the device settings.
The SDK now will only send the subscription status at app launch if the device notification settings goes from denied to authorized.
Braze.ContentCard.logClick(using braze: Braze) will now log a click regardless of whether the ContentCard has a ClickAction.
This behavior differs from the default API Braze.ContentCard.Context.logClick(), which has the safeguard of requiring a ClickAction to log a click.
6.6.0
Fixed
Fixes an issue in HTML in-app messages where custom event and purchase properties would always convert values for 1 and 0 to become true and false, respectively.
These property values will now respect their original form in the HTML.
Prevents the default Braze UI from displaying in-app messages underneath the keyboard when Stage Manager is in use.
When enabled, the SDK will automatically implement the necessary system delegate methods for handling push notifications.
Compatibility with other push providers, whether first or third party, is maintained. The SDK will automatically handle only Braze push notifications, while original system delegate methods will be executed for all other push notifications.
Each automation step can be independently enabled or disabled. For example, configuration.push.automation.requestAuthorizationAtLaunch = false can be used to prevent the automatic request for push permissions at launch.
Adds the Braze.Configuration.forwardUniversalLinks configuration. When enabled, the SDK will redirect universal links from Braze campaigns to the appropriate system methods.
Fixes an issue preventing text fields from being selected in HTML IAMs for iOS 15.
Fixes an issue where the device model was inaccurately reported as iPad on macOS (Mac Catalyst and Designed for iPad configurations).
Fixes an issue where custom event and purchase properties would not accept an entry if its value was an empty string.
Fixes a crash that occurred in the default UI for Content Cards when encountering a zero-value aspect ratio.
Fixes an issue introduced in 6.0.0 where images in in-app messages would appear smaller than expected when using the compatibility UI (BrazeUICompat).
Added
Adds the unviewedCards convenience property to the Braze.ContentCards class to get the unviewed content cards for the current user.
6.3.1
Fixed
Fixes an issue where the previous user’s data would not be flushed after calling changeUser(userId:sdkAuthSignature:) when the SDK authentication feature is enabled.
A content card impression can now be logged once per session. Previously, the Braze-provided Content Cards UI would limit to a single impression per card at maximum, irrespective of sessions.
Fixes an issue that previously caused push notification URLs with percent-encoded characters to fail during decoding.
Fixes a behavior to automatically set a user’s push subscription state to optedIn after push permissions have explicitly been authorized via the Settings app.
Correctly hides shadows on in-app messages that are configured with a transparent background.
Fixes a rare crash occurring when deinitializing the Braze instance.
Added
Adds additional logging for network-related decoding errors.
6.3.0
Fixed
“Confirm” and “Cancel” notification categories now show the correct titles on the action buttons.
Added
Adds a new SDKMetadata option .reactnativenewarch for the React Native New Architecture.
Fixes a crash introduced in 6.0.0 when displaying an HTML in-app message using the BrazeUICompat module.
Removed a system call that is known to be slow on older versions of macOS. This resolves the SDK hanging during initialization on Mac Catalyst when running on affected macOS versions.
Added
Adds support for target attributes on anchor tags in HTML in-app messages (e.g. <a href="..." target="_blank"></a>).
Adding the target attribute to links will allow them to open in a new webview without dismissing the current in-app message.
This behavior can be disabled via the linkTargetSupport property of the BrazeInAppMessageUI.HtmlView.Attributes struct.
Fixes an issue that led to disproportionately large close buttons on in-app messages when the user has set a large font size in the device settings.
Fixes an issue that would lock the screen in a specific orientation after the dismissal of an in-app message customized to be presented in that orientation.
Renames User.setCustomAttributeArray(key: String, array: [String]?) to setCustomAttribute(…) to align it with other custom attribute setters, and adds “string” to the addTo and removeFrom attribute array methods to clarify which custom attributes they’re used for.
6.0.0
Breaking
The in-app message data models sent to BrazeInAppMessagePresenter.present(message:) now contain remote asset URLs. Previously, these data models would contain local asset URLs.
This change is only breaking in two situations:
When implementing a custom BrazeInAppMessagePresenter.
VoiceOver now correctly focuses on in-app message views when they are presented.
Fixes an issue causing in-app messages with re-eligibility disabled to display multiple times under certain conditions.
Fixes an issue where modal and full in-app message headers were truncated on devices running iOS versions lower than 16 when displaying non-ASCII characters.
The dynamic variant of BrazeUI.framework in the release artifact braze-swift-sdk-prebuilt.zip is now an actual dynamic framework. Previously, this specific framework was mistakenly distributed as a static framework.
Added
Adds the BrazeSDKAuthDelegate protocol as a separate protocol from BrazeDelegate, allowing for more flexible integrations.
Apps implementing BrazeDelegate.braze(_:sdkAuthenticationFailedWithError:) should migrate to use BrazeSDKAuthDelegate and remove the old implementation. The BrazeDelegate method will be removed in a future major release.
5.13.0
Fixed
Fixes an issue where the SDK would automatically track body clicks on non-legacy HTML in-app messages.
Added
Adds the synchronous deviceId property on the Braze instance.
deviceId(queue:completion:) is now deprecated.
deviceId() async is now deprecated.
Adds the automaticBodyClicks property to the HTML in-app message view attributes. This property can be used to enable automatic body clicks tracking on non-legacy HTML in-app messages.
This property is false by default.
This property is ignored for legacy HTML in-app messages.
Adds json() and decoding(json:) public methods to the Feature Flag model object for JSON encoding/decoding.
5.11.2
Fixed
Fixes a crash occurring when the SDK is configured with a flush interval of 0 and network connectivity is poor.
5.11.1
Fixed
Fixes an issue preventing the correct calculation of the delay when retrying failed requests. This led to a more aggressive retry schedule than intended.
Improves the performance of Live Activity tracking by de-duping push token tag requests.
Fixes an issue in logClick(using:) where it would incorrectly open the url field in addition to logging a click for metrics. It now only logs a click for metrics.
This applies to the associated APIs for content cards, in-app messages, and news feed cards.
It is still recommended to use the associated Context object to log interactions instead of these APIs.
Adds support for News Feed data models and analytics.
News Feed UI is not supported by the Swift SDK. See the migration guide for instructions on using the compatibility UI.
5.7.0
Fixed
Fixes an issue where modal image in-app messages would not respect the aspect ratio of the image when the height of the image is larger than its width.
Changed
Changes modal, modal image, full, and full image in-app message view attributes to use the ViewDimension type for their minWidth, maxWidth and maxHeight attributes.
The ViewDimension type enables providing different values for regular and large size-classes.
Added
Adds a configuration to use a randomly generated UUID instead of IDFV as the device ID: useUUIDAsDeviceId.
This configuration defaults to false. To opt in to this feature, set this value to true.
Enabling this value will only affect new devices. Existing devices will use the device identifier that was previously registered.
5.6.4
Fixed
Fixes an issue preventing the execution of BrazeDelegate methods when setting the delegate using Objective-C.
Fixes an issue where triggering an in-app message twice with the same event did not place the message on the in-app message stack under certain conditions.
Added
Adds the public id field to Braze.InAppMessage.Data.
Adds logImpression(using:) and logClick(buttonId:using:) to both in-app messages and content cards, and adds logDismissed(using:) to content cards.
It is recommended to continue using the associated Context to log impressions, clicks, and dismissals for the majority of use cases.
Adds Swift concurrency to support async/await versions of the following public methods. These methods can be used as alternatives to their corresponding counterparts that use completion handlers:
The applyAttributes() method for BrazeContentCardUI views now take the attributes explicitly as a parameter.
5.5.1
Fixed
Fixes an issue where content cards would not be properly removed when stopping a content card campaign on the dashboard and selecting the option Remove card after the next sync (e.g. session start).
5.5.0
Added
Adds support for host apps written in Objective-C.
Braze Objective-C types start either with BRZ or Braze, e.g.:
Renamed ClickAction.uri(_:useWebView:) to ClickAction.url(_:useWebView:).
5.4.0
Fixed
Fixes an issue where brazeBridge.logClick(button_id) would incorrectly accept invalid button_id values like "", [], or {}.
Added
Adds support for Braze Action Deeplink Click Actions.
5.3.2
Fixed
Fixes an issue preventing compilation when importing BrazeUI via SwiftPM in specific cases.
Lowers BrazeUI minimum deployment target to iOS 10.0.
5.3.1
Fixed
Fixes an HTML in-app message issue where clicking a link in an iFrame would launch a separate webview and close the message, instead of redirecting within the iFrame.
Fixes the rounding of In-App Message modal view top corners.
Fixes the display of modals and full screen in-app messages on iPads in landscape mode.
Added
Adds two Example schemes:
InAppMessage-Custom-UI:
Demonstrates how to implement your own custom In-App Message UI.
Available on iOS and tvOS.
ContentCards-Custom-UI:
Demonstrates how to implement your own custom Content Card UI.
# Changelog para o SDK Objective-C do iOS
Source: /docs/pt-br/developer_guide/platforms/legacy_sdks/ios/changelog/objc_changelog/index.md
**Warning:**
[AppboyKit](https://github.com/Appboy/appboy-ios-sdk) (also known as the Objective-C SDK) is no longer supported and has been replaced by the [Swift SDK](https://www.braze.com/docs/pt-br/pt-br/developer_guide/sdk_integration/?sdktab=swift). It will no longer receive new features, bug fixes, security updates, or technical support—however, messaging and analytics will continue to function as normal. To learn more, see [Introducing the New Braze Swift SDK](https://www.braze.com/resources/articles/introducing-the-new-braze-swift-sdk).
# Changelog do SDK Objective-C do iOS
Improves resilience when triggering in-app messages with date property filters.
Added
Adds a new option ABKReenqueueInAppMessage to enum ABKInAppMessageDisplayChoice.
Return this option in beforeInAppMessageDisplayed: of an ABKInAppMessageControllerDelegate to ensure that an in-app message is not displayed and becomes eligible to trigger again.
This option will reset any trigger times and re-eligibility rules as if it was never triggered. It will not add the message to the in-app message stack.
4.5.4
Fixed
Improves reliability of custom event property type validation.
Fixes an issue where the status bar would not restore to its original state after a full in-app message was dismissed.
4.5.3
Fixed
Fixes a crash that occurs when receiving custom event properties of numeric types under certain conditions.
Fixes UI responsiveness warnings when requesting location authorization status.
4.5.2
Fixed
Improves reliability when validating trigger properties.
Improves the NSURLSessionConfiguration disk and memory cache capacities for file downloads. This change enables larger file downloads to be cached if needed.
4.5.1
Fixed
Improves eligibility checks around the minimum trigger timeout for in-app messages by now checking at trigger time in addition to display time.
Fixes an issue where purchases would not trigger certain templated in-app messages.
Added
Adds the delegate method noMatchingTriggerForEvent:name: to ABKInAppMessageControllerDelegate, which is called if no Braze in-app message was triggered for a given event.
4.5.0
Added
Adds support for Content Cards to evaluate Retry-After headers.
4.4.4
Fixed
Calling appboyBridge.closeMessage() or brazeBridge.closeMessage() from an HTML in-app message now correctly triggers ABKInAppMessageUIDelegate.onInAppMessageDismissed: when implemented.
Fixes an issue in 4.4.3 where the tvOS SDK incorrectly referenced an older SDK version.
4.4.3
Fixed
Fixes an issue introduced in 4.4.0 which prevented custom events or purchases with an empty dictionary of properties from being logged.
Improves handling of ABKInAppMessageWindow’s dismissal to promptly remove it from the view hierarchy.
Fixes the position of the pinned indicator for Captioned Image Content Cards when using the default UI.
Fixes an issue introduced in 4.3.2 and limited to users of Appboy-tvOS-SDK, which prevented custom events with properties or purchases with properties from being logged.
Added
Adds a padding property to ABKCaptionedImageContentCardCell to support modifying the default value.
4.4.2
Fixed
Fixes a bug for HTML in-app messages using the HTML Upload with Preview option to improve the reliability of in-app message display.
Fixes a bug preventing integration via Swift Package Manager in specific contexts.
Fixes an issue in the default Content Cards UI where the empty feed label was truncated if it was too large for the screen, for example due to accessibility or localization.
Fixes an issue where Slideup in-app messages would be automatically dismissed after multiple interaction with the app’s main window.
Changed
If changeUser:sdkAuthSignature: is called with the current user’s ID, but with a new and valid SDK Authentication signature, the new signature will be used.
Improves push tracking accuracy for apps making use of UISceneDelegate (UIKit) or Scene (SwiftUI).
4.4.1
Fixed
Fixes an issue in which input elements with type="date" in HTML in-app messages do not respond to some user interactions on iOS 14 and iOS 15.
Fixes ABKSdkMetadata availability when using the dynamic variant of the SDK.
Fixes an issue in which the default content cards UI’s empty feed label does not wrap properly when the device is using Larger Accessibility Sizes for its text size.
Changed
Changed ABKInAppMessageUIDelegate.inAppMessageViewControllerWithInAppMessage: to accept a nil return value.
Added
Adds support for the playsinline attribute on HTML <video> elements within webpages that are opened in the app by Braze.
Adds XCFramework support for the Core integration via Carthage. Please follow the Carthage migration guide when transitioning to the new artifact.
4.4.0
Breaking
Adds XCFramework support to Carthage. This allows projects integrated via Carthage to support Apple Silicon simulators and Mac Catalyst.
To continue using the original Full .framework file, include the Cartfile lines above but reference appboy_ios_sdk_full.json. Then, run carthage update.
For those using the Thin integration, use the same Cartfile above but exclude the line with SDWebImage.
The Core integration does not support XCFrameworks, and you can use the original .framework files as before.
Added
Adds a new attachment to the release called Appboy_iOS_SDK.xcframework.zip.
This artifact has the all-in-one XCFramework containing the full SDK code including all of the assets.
When importing this code manually, drag-and-drop the XCFramework into your project and select Embed & Sign. Then, add -ObjC under Build Settings > Other Linker Flags in your app’s target.
Adds localization support for the close button’s accessibility label in modal and full in-app messages.
Adds the ability to set the SDK’s log level at runtime by setting ABKLogLevelKey to an integer in appboyOptions. Descriptions of the available log levels can be found here.
Adds Appboy.addSdkMetadata: to allow self reporting of SDK Metadata fields via the ABKSdkMetadata enum.
4.3.4
This release requires Xcode 13.
Fixed
Fixes an issue in which the pinned indicator for a Banner Content Card would not display in the default Content Cards UI.
Fixes an issue which prevented custom events and purchases with properties larger than 50 KB to be properly discarded.
4.3.3
Fixed
Fixes a race-condition occasionally preventing HTML in-app messages with assets from being displayed from a test push.
Fixes an issue which prevented HTML in-app messages from opening sms:, mailto:, tel:, facetime: and facetime-audio: urls.
Previously, those urls would fail to open silently.
Fixes an issue where ABKContentCardsTableViewController was not displaying the “no update” label after the last card was deleted from the feed.
Added
Adds methods addToSubscriptionGroupWithGroupId: and removeFromSubscriptionGroupWithGroupId: to ABKUser to manage SMS/Email Subscription Groups.
Also adds appboyBridge.getUser().addToSubscriptionGroup(groupId) and appboyBridge.getUser().removeFromSubscriptionGroup(groupId) to the javascript interface for HTML in-app messages.
4.3.2
Fixed
Iframes embedded in an HTML in-app message are now displayed as part of the same in-app message. Previously, iframes would be loaded in a separate webview.
Added
Adds support for navigation bar transparency changes introduced in iOS 15. Apps using Braze default UIs for Content Cards, the News Feed, and the modal WebView should upgrade to this version as soon as possible ahead of iOS 15’s release.
4.3.1
Fixed
The sdkAuthenticationDelegate now works as expected when setting the property directly.
VoiceOver no longer reads content beneath the displayed in-app message.
Changed
The number of unviewed Content Cards in ABKContentCardsController’s unviewedContentCardCount now excludes control cards.
The default Content Cards UI now allows swipe-to-refresh gestures when empty.
Deprecates ABKInAppMessageController’s method displayNextInAppMessageWithDelegate: in favor of displayNextInAppMessage.
Added
Custom events and purchases now support nested properties.
In addition to integers, floats, booleans, dates, or strings, a JSON object can be provided containing dictionaries of arrays or nested dictionaries. All properties combined can be up to 50 KB in total length.
4.3.0
Breaking
Refined Content Cards UI public api changes introduced in 4.2.0.
Fixed
Fixes an issue introduced in 4.2.0 that caused Content Card type ABKClassicImageContentCardCell to crash on display when not using Storyboard.
4.2.0
⚠️ Known Issues
This release contains a known issue with the Content Cards default UI on iOS, where showing a “Classic” type card with an image causes a crash. If you are using the default Content Cards UI, do not upgrade to this version.
Breaking
Content Cards and News Feed are now more extensible!
Class level API methods have changed to instance methods to make subclassing easier, however getNavigationContentCardsViewController and getNavigationFeedViewController are left in as class methods for backwards compatibility.
Fixes an issue with Dynamic Type support introduced in 3.34.0 to be compatible with iOS 9.
Added
Adds support for new SDK Authentication feature.
Exposes window.brazeBridge in HTML in-app messages which replaces window.appboyBridge. appboyBridge is deprecated and will be removed in a future version of the SDK.
Changed
Makes in-app message window handling more resilient:
The in-app message window tries to display up to 10 times when another window competes for visibility. If the in-app message is not guaranteed visibility, it is dismissed and an error is logged.
Improves Appboy’s wipeDataAndDisableForAppRun and disableSDK to handle additional use cases.
Deprecates flushDataAndProcessRequestQueue in favor of requestImmediateDataFlush.
4.1.0
Breaking
ABKURLDelegate method handleAppboyURL:fromChannel:withExtras: is now invoked for all urls.
Previously, this delegate method was not invoked for urls opened in a WebView or the default browser when originating from the News Feed or Content Cards.
Removes ABKUIURLUtils method openURLWithSystem:fromChannel:. Use openURLWithSystem: as a replacement.
Fixed
Fixes a case where the ABKURLDelegate method handleAppboyURL:fromChannel:withExtras: was being called twice when opening a push notification with an url.
Changed
Deprecates ABKUnknownChannel.
4.0.2
Fixed
Fixes a double redirection bug in Push Stories when the app is in a terminated state and application:didReceiveRemoteNotification:fetchCompletionHandler: is not implemented.
Changed
Improves the Swift Package Manager bundle lookup to be more flexible.
Added
Adds support to use a dictionary named Braze instead of Appboy when adding customization in the Info.plist. After adding the Braze dictionary, please remove the previous Appboy dictionary.
4.0.1
Fixed
Sets CFBundleSupportedPlatforms in .plist files to the correct non-simulator value.
Removes the Dynamic Type support warnings.
4.0.0
Breaking
AppboyKit is now distributed as an XCFramework when integrating with Cocoapods. Cocoapods 1.10.0+ is required.
This removes the need for integrators to exclude the arm64 architecture when building for the simulator. Please undo any of the changes that may have been made when upgrading to 3.27.0 (Integrators will now be required to exclude …).
Fixed
Fixes the Swift Package Manager cleanup script to remove only the necessary files.
Added
Adds Mac Catalyst support for apps integrating with Cocoapods.
3.34.0
Breaking
Replaces ABKInAppMessageSlideupViewController’s slideConstraint by offset.
Added
Adds a new Github repo to optimize import speeds for applications integrating with Swift Package Manager.
To use this repo, follow these steps:
Remove the existing package in your application that points to the url: https://github.com/Appboy/Appboy-ios-sdk.
Add a new package using the new url: https://github.com/braze-inc/braze-ios-sdk.
Adds support for Right-to-Left languages in the News Feed.
Adds support for scaling fonts automatically with Dynamic Type for in-app messages and the News Feed.
Changed
Improves accessibility handling for modal and full in-app messages.
Improves Slideup in-app message animations.
3.33.1
Fixed
Fixes Swift Package Manager integration.
In Xcode, select File ▸ Swift Packages ▸ Update to Latest Package Versions to update.
Fixes Push Story integration via CocoaPods for applications that have use_frameworks! in their Podfile.
3.33.0
Breaking
Changed Push Story integration to use XCFrameworks for Cocoapods and manual integration. Applications currently integrating Push Stories via Cocoapods or manual integration must follow these steps when updating:
In your Notification Content Extension target:
Remove AppboyPushStory.framework from Frameworks and Libraries under the General tab.
In your application target:
Delete the Copy File build phase copying the AppboyPushStory.framework to the Frameworks destination.
Delete the Run Script build phase that starts with:
1
2
3
4
APP_PATH="${TARGET_BUILD_DIR}/${WRAPPER_NAME}"

find "$APP_PATH" -name 'AppboyPushStory.framework' -type d | while read -r FRAMEWORK
...
Fixes a double redirection bug in Push Stories when the app is in a terminated state and the UNUserNotificationCenter delegate is not the AppDelegate.
3.32.0
Added
Adds Mac Catalyst support for apps integrating with Swift Package Manager (SPM).
Please follow the instructions here to import the SDK with SPM. The SDK does not currently support Mac Catalyst when integrated through Cocoapods or Carthage.
Fixes the formatting of Full and Slideup in-app messages when displaying on iPhone 12 mini.
Changed
Improves Push Story click tracking handling.
3.31.1
Breaking
Removes the method getSDWebImageProxyClass from ABKUIUtils.
You can access the public class ABKSDWebImageProxy directly by importing ABKSDWebImageProxy.h.
Fixed
Fixes a bug in the Cocoapods integration that would lead to SDK localizations being embedded for languages not explicitly supported in the app.
Fixes a rare crash that would occur when no windows exist at UIWindowLevelNormal while an in-app message is being displayed and UIKit requests UI updates (orientation change, etc.).
Fixes a bug in modal in-app messages where some languages (such as Burmese) may have clipped text.
3.31.0
Breaking
For apps that have previously integrated through Swift Package Manager, please perform the following steps:
In the Xcode menu, click Product > Scheme > Edit Scheme...
Click the expand ▶️ next to Build and select Post-actions. Press + and select New Run Script Action.
In the dropdown next to Provide build settings from, select your app’s target.
If you are updating from 3.29.0 or 3.29.1, remove the Run Script Action previously specified in the 3.29.0 section of this changelog.
Added
Adds Push Stories support for apps integrating with Swift Package Manager.
In your app content extension’s target, under Build Settings > Other Linker Flags, add the -ObjC linker flag.
Changed
Updates the email validation on the SDK to be more lenient in favor of more accurate validation by the Braze backend. Valid emails with uncommon patterns or international characters that were previously rejected will now be accepted.
Deprecates ABKDeviceWhitelistKey in favor of ABKDeviceAllowlistKey.
Fixed
Fixes a bug in HTML in-app messages where some native WebKit UI elements could be unresponsive.
3.30.0
Breaking
Body click analytics will no longer automatically be collected for HTML in-app messages created using the HTML Upload with Preview option in the platform.
To continue to receive body click analytics, you must log body clicks explicitly from your message via Javascript using appboyBridge.logClick().
Fixed
Fixes a bug with Full in-app messages where the button positions did not match the preview on the Braze dashboard.
Fixes a bug where in-app messages would be displayed below the application window under specific conditions.
Apps that set up their window asynchronously at startup could accidentally hide the in-app message window if one was being displayed (e.g. as a result of clicking on a test in-app message notification).
Added
Adds support for custom endpoints with a scheme included (https, http, etc.). For example, http://localhost:3001 will no longer result in https://http://localhost:3001 as the resolved endpoint.
3.29.1
Added
Adds improved support for in-app message display on iPhone 12 models.
3.29.0
Added
Adds initial support for Swift Package Manager. There are 2 new packages that have been added: AppboyKit for the core SDK and AppboyUI for the full SDK (including UI elements), which correspond to the Appboy-iOS-SDK/Core and Appboy-iOS-SDK pods, respectively.
Note that tvOS support is not available via Swift Package Manager for this release. Push Stories is only available through a side-by-side integration with Cocoapods.
To add the package to your project follow these steps:
Select File > Swift Packages > Add Package Dependency.
In the search bar, enter https://github.com/Appboy/Appboy-ios-sdk.
Select one of AppboyKit or AppboyUI. Note that AppboyUI includes AppboyKit automatically.
In your app’s target, under Build Settings > Other Linker Flags, add the -ObjC linker flag.
In the Xcode menu, click Product > Scheme > Edit Scheme...
Click the expand ▶️ next to Build and select Post-actions. Press + and select New Run Script Action.
In the dropdown next to Provide build settings from, select your app’s target.
Removes userNotificationWasSentFromAppboy: and pushNotificationWasSentFromAppboy: on Appboy. Use isAppboyUserNotification: and isAppboyRemoteNotification: in ABKPushUtils instead.
Updates ABKURLDelegate’s method signature for handleAppboyURL:fromChannel:withExtras: to include nullability annotations required for proper Swift support.
Fixed
Fixes a race condition in Appboy method wipeDataAndDisableForAppRun where certain persisted fields would still be available immediately after calling the method. These fields now are removed synchronously.
Changed
Updated SDWebImage to use version 5.9.x.
3.27.0
Breaking
Adds support for iOS 14. Requires Xcode 12.
Removes the ABK_ENABLE_IDFA_COLLECTION preprocessor macro from the SDK.
Updates the ABKIDFADelegate protocol by renaming isAdvertisingTrackingEnabled to isAdvertisingTrackingEnabledOrATTAuthorized to reflect the addition of the AppTrackingTransparency framework in iOS 14.
If you use the Ad Tracking Enabled segment filter on the Braze dashboard or are implementing AppTrackingTransparency, you must update your integration to use AppTrackingTransparency to read the correct user status. Please see our sample app for implementation details.
If you do not use the Ad Tracking Enabled segment filter and are not implementing AppTrackingTransparency yet, your implementation of isAdvertisingTrackingEnabledOrATTAuthorized may temporarily continue to use isAdvertisingTrackingEnabled. However, the returned value will always be NO in iOS 14, regardless of actual IDFA availability.
Note that Apple announced that they will delay the enforcement of upcoming IDFA changes until early 2021. Please reference our iOS 14 upgrade guide for more details.
Updates the minimum required version of SDWebImage from 5.0 to 5.8.2.
Integrators will now be required to exclude the arm64 simulator slice in their entire project.
This is done automatically when integrating via Cocoapods.
For other cases:
If you are using xcconfig files to build your app, please set:
For iOS targets: EXCLUDED_ARCHS[sdk=iphonesimulator*] = arm64
For tvOS targets: EXCLUDED_ARCHS[sdk=appletvsimulator*] = arm64
If you are using the Xcode Build Settings panel, enable Build Active Architecture Only for the configuration you use to run your app on the simulator. (ONLY_ACTIVE_ARCH = YES)
3.26.1
Changed
Deprecates the compilation macro ABK_ENABLE_IDFA_COLLECTION in favor of the ABKIDFADelegate implementation.
ABK_ENABLE_IDFA_COLLECTION will not function properly in iOS 14. To continue collecting IDFA on iOS 14 devices, please upgrade to Xcode 12 and implement App Tracking Transparency and Braze’s ABKIDFADelegate (see the iOS 14 upgrade guide for more information).
Added
Adds improved support for iOS 14 Approximate Location tracking.
3.26.0
Breaking
Removed readonly property overrideApplicationStatusBarHiddenState in ABKInAppMessageViewController.h.
Fixed
Fixes an issue with in-app messages not respecting the application’s status bar style when View controller-based status bar appearance (UIViewControllerBasedStatusBarAppearance) is set to YES in the Info.plist.
Fixes an issue which can lead to text being cut off in Content Cards for specific iPhone models.
Fixes an issue preventing test Content Cards from displaying under specific conditions.
Changed
Added Binary Project Specification file for more efficient Carthage integration of the full SDK.
Update your Cartfile to use binary "https://raw.githubusercontent.com/Appboy/appboy-ios-sdk/master/appboy_ios_sdk_full.json"
Support for this integration method was added starting with version 3.24.0 of the SDK.
Added
Adds support for specifying PushStoryAppGroup in the Appboy dictionary in your app’s Info.plist. This Apple App Group will share the Braze Push Story information such as Campaign IDs between applications from a single Apple Developer account.
Adds appboyBridge.getUser().addAlias(alias, label) to the javascript interface for HTML in-app messages.
Adds the property overrideUserInterfaceStyle to ABKInAppMessage that allows forcing Light or Dark mode in the same way as Apple’s UIViewController.overrideUserInterfaceStyle.
Adds the ability to dismiss modal in-app messages when the user clicks outside of the in-app message.
This feature is disabled by default.
You can enable the feature by adding the Appboy dictionary to your Info.plist file. Inside the Appboy dictionary, add the DismissModalOnOutsideTap boolean subentry and set the value to YES.
You can also enable the feature at runtime by setting ABKEnableDismissModalOnOutsideTapKey to YES in appboyOptions.
3.25.0
Breaking
Removes the arm64e architecture when building with Cocoapods.
Removes the deprecated property appWindow from ABKInAppMessageWindowController.
3.24.2
Fixed
Fixes an issue with post-dismissal view hierarchy restoration for in-app messages under specific conditions.
Fixes an issue introduced in 3.24.0 breaking the SDK compatibility with Cocoapods.
3.24.0
Important This release is not compatible with Cocoapods. Do not upgrade to this version and upgrade to 3.24.1 and above instead.
Breaking
Renames ABKInAppMessageWindow’s catchClicksOutsideInAppMessage to handleAllTouchEvents.
Fixed
Fixes an issue where the unread indicator on a Content Card would persist even after being read.
Fixes an issue preventing long texts from displaying correctly in Full in-app messages.
Fixes an issue where appboyBridge would not work in an Ajax callback within HTML In-App Messages.
Changed
Changes the manual integration steps for versions 3.24.0 and newer. Please follow the updated integration steps here.
Added
Adds support for JavaScript functions window.alert(), window.confirm() and window.prompt() in HTML in-app messages.
Adds the ABKContentCardsTableViewControllerDelegate protocol to more intricately handle Content Card clicks using the methods contentCardTableViewController:shouldHandleCardClick: and contentCardTableViewController:didHandleCardClick:.
3.23.0
Fixed
Fixes an issue with regex based event property triggers not working as expected. Previously on iOS they had to match the entire string, now they will search for matches as expected.
Improves resiliency when handling multiple background requests.
Added
Adds support for upcoming HTML In-App Message templates.
Adds support for applications using scenes (UIWindowSceneDelegate). In-app messages are now properly displayed in that context.
3.22.0
Breaking
Removes the key ABKInAppMessageHideStatusBarKey from appboyOptions and the property forceHideStatusBar from ABKInAppMessageController. Full screen in-app messages are now always displayed with the status bar hidden.
Adds Dark Mode support to Content Cards. This feature is enabled by default and can be disabled by setting enableDarkTheme property to NO on ABKContentCardsTableViewController before the view controller is presented.
Fixed
Fixes an issue in HTML in-app messages where button clicks weren’t correctly being attributed for mailto: and tel: links.
Fixes an issue in HTML in-app messages where videos would be displayed underneath the in-app message when full screen playback was enabled. The in-app message UIWindow’s windowLevel is now set to UIWindowLevelNormal instead of being above UIWindowLevelStatusBar.
Fixes an issue in Content Cards where ABKURLDelegate was not being respected when opening links.
Added
Adds appboyBridge.logClick(id), appboyBridge.logClick() and appboyBridge.getUser().setCustomLocationAttribute(key, latitude, longitude) to the javascript interface for HTML in-app messages.
Adds Czech and Ukrainian language support for Braze UI elements.
Adds the ability to unset the current user’s email attribute by setting the email property of the current ABKUser instance to nil (e.g. [Appboy sharedInstance].user.email = nil;).
Adds Dark Mode support to Push Stories.
Adds the ability to set maximum width of Content Cards by using the maxContentCardWidth property of ABKContentCardsTableViewController.
3.21.3
Added
Adds an option to disable automatic geofence requests.
You can do this in the plist by adding the Appboy dictionary to your Info.plist file. Inside the Appboy dictionary, add the DisableAutomaticGeofenceRequests boolean subentry and set the value to YES.
You can also disable automatic geofence requests at runtime by setting ABKDisableAutomaticGeofenceRequestsKey to YES in appboyOptions.
Adds the method requestGeofencesWithLongitude:latitude: to Appboy.h. This method can be called whenever you explicitly want Braze to send a request for updated Geofences information. This call is rate limited to once per user session.
3.21.2
Fixed
Fixes an issue in HTML in-app messages where, during display, the viewport would shift down if the keyboard was opened but not shift back up when the keyboard was closed.
Fixes an issue introduced in 3.17.0 where the SDK would give precedence to the endpoint passed in Info.plist if given both an endpoint from the Info.plist and appboyOptions.
Added
Adds the ability to set a custom WKWebViewConfiguration for HTML in-app messages. You can set it using the method setCustomWKWebViewConfiguration in ABKInAppMessageUIDelegate.
Changed
Removes calls to deprecated APIs statusBarOrientation and statusBarFrame.
Un-deprecates the following push utility methods: isUninstallTrackingUserNotification:, isUninstallTrackingRemoteNotification:, isGeofencesSyncUserNotification:, isGeofencesSyncRemoteNotification:, and isPushStoryRemoteNotification: from ABKPushUtils. These APIs were originally deprecated in 3.16.0.
3.21.1
Fixed
Fixes an issue for Modal and Full in-app messages where the opacity value of the close X button was not being respected.
Changed
ABKContentCard.m will now log a click event when logContentCardClicked is called and no URL field is populated.
Added
Adds the ability to force the status bar to hide when a Full or HTML in-app message is being actively displayed. To opt in to this feature, set ABKInAppMessageHideStatusBarKey to YES in appboyOptions.
3.21.0
Breaking
Requires XCode 11.
Fixed
Fixes an issue in the animate-in behavior of HTML in-app messages that could cause a brief flicker before the message displayed on older devices and simulators.
Fixes an issue with Slideup in-app messages where they would cover part of the status bar when animating from the top on non-notched devices.
Fixes an issue introduced in 3.14.1 where boolean-typed event properties would be improperly cast to numbers.
Changed
Updates the logging format for debug, warn, and error ABKLogger messages to now print their log level.
Added
Adds support for the upcoming feature, in-app messages with Dark Mode support.
Dark Mode enabled messages must be created from the dashboard. Braze does not dynamically theme in-app messages for Dark Mode.
This feature is enabled by default for all new ABKInAppMessage instances. To prevent Braze from automatically applying a Dark Theme when the fields are available on Braze’s servers, set the enableDarkTheme flag on ABKInAppMessage to NO in the beforeInAppMessageDisplayed: method of your ABKInAppMessageControllerDelegate delegate implementation.
Adds the ability to reference the Braze iOS SDK API from Swift when using the Appboy-tvOS-SDK pod. Adding import AppboyTVOSKit to the top of your Swift file while using the Appboy-tvOS-SDK pod will give you equivalent behavior to adding import Appboy_iOS_SDK while using the Appboy-iOS-SDK pod.
Adds the populateContentCards: method and the cards property to ABKContentCardsTableViewController’s public interface. By setting the cards property from within populateContentCards:, you may manipulate ABKContentCard field data and/or control which ABKContentCard instances are displayed from the context of a custom ABKContentCardsTableViewController subclass.
3.20.4
Fixed
Fixed an issue with Content Cards where the header and description text fields would appear to be missing in Dark Mode.
Added
Adds a TEALIUM SDK flavor option.
3.20.3
Added
If Automatic Braze location collection is enabled, the SDK now submits a session start location request if location hasn’t already been sent up for the session after any affirmative location permission prompt. This also applies to the new “Allow Once” option in iOS 13.
3.20.2
Important If you are on Braze iOS SDK 3.19.0 or below, we recommend upgrading to this version immediately to ensure uninterrupted collection of new push tokens as users upgrade to iOS 13.
In application:didRegisterForRemoteNotificationsWithDeviceToken:, replace
If you are on Braze iOS SDK 3.19.0 or below and unable to upgrade, you must ensure your [Appboy registerPushToken] implementation does not rely on stringWithFormat or description for parsing the deviceToken passed in from application:didRegisterForRemoteNotificationsWithDeviceToken:. Please reach out to your Customer Success Manager for more information.
Important In Braze iOS SDK 3.19.0, we updated our HTML in-app message container from UIWebview to WKWebView, however, the initial releases have known issues displaying HTML in-app messages. If you are currently using 3.19.0, 3.20.0, or 3.20.1, you are strongly encouraged to upgrade if you make use of HTML in-app messages. Please see the following for more important information about the transition to WKWebView:
If you are utilizing customization for HTML in-app messages (such as customizing ABKInAppMessageHTMLFullViewController or ABKInAppMessageHTMLViewController), we strongly recommend testing to ensure your in-app messages continue to display correctly and interactions function as intended.
The following javascript methods are now no-ops: alert, confirm, prompt.
Deep links without schemes are no longer supported. Ensure that your in-app message deep links contain schemes.
Fixed
Fixes an issue introduced in 3.19.0 where HTML in-app messages would not register user clicks when the .xib failed to load.
Fixes an issue introduced in 3.19.0 where HTML in-app messages with select special characters and an assets zip would cause display irregularities.
Changed
Updates the WKWebView which displays HTML in-app messages with the following attributes:
suppressesIncrementalRendering is set to true
mediaTypesRequiringUserActionForPlayback is set to WKAudiovisualMediaTypeAll
Updates the background color of the WKWebView which displays HTML in-app messages from [[UIColor blackColor] colorWithAlphaComponent:.3] to [UIColor clearColor].
3.20.1
Important This release has known issues displaying HTML in-app messages. Do not upgrade to this version and upgrade to 3.20.2 and above instead. If you are using this version, you are strongly encouraged to upgrade to 3.20.2 or above if you make use of HTML in-app messages.
Fixed
Fixes an issue introduced in 3.19.0 which changed the background of HTML in-app messages to a non-transparent color.
Improves the robustness of push token collection code for iOS 13 introduced in 3.20.0.
3.20.0
Important This release has known issues displaying HTML in-app messages and a known issue with push token collection. Do not upgrade to this version and upgrade to 3.20.2 and above instead. If you are using this version, you are strongly encouraged to upgrade to 3.20.2 or above if you make use of HTML in-app messages.
Breaking
Introduced a signature change for push token collection methods:
Important This release has known issues displaying HTML in-app messages. Do not upgrade to this version and upgrade to 3.20.2 and above instead. If you are using this version, you are strongly encouraged to upgrade to 3.20.2 or above if you make use of HTML in-app messages.
Breaking
Replaces UIWebView with WKWebView for HTML in-app messages.
If you are utilizing customization for HTML in-app messages (such as customizing ABKInAppMessageHTMLFullViewController or ABKInAppMessageHTMLViewController), you must test to ensure your in-app messages continue to display correctly and interactions function as intended.
The following javascript methods are now no-ops: alert, confirm, prompt.
Deep links without schemes are no longer supported. Please ensure that your in-app message deep links contain schemes.
3.18.0
Breaking
Automatic Braze location collection is now disabled by default. If you choose to use our location collection, you must explicitly enable location collection.
You can do this in the plist by adding the Appboy dictionary to your Info.plist file. Inside the Appboy dictionary, add the EnableAutomaticLocationCollection boolean subentry and set the value to YES.
You can also enable location at runtime by setting ABKEnableAutomaticLocationCollectionKey to YES in appboyOptions.
Removes the Feedback feature from the SDK. The Feedback subspec and all Feedback methods on the SDK, including [[Appboy sharedInstance] submitFeedback] and [[Appboy sharedInstance] logFeedbackDisplayed], are removed.
Changed
Improves support for in-app messages on “notched” devices (for example, iPhone X, Pixel 3XL). Full-screen messages now expand to fill the entire screen of any phone, while covering the status bar.
Added
Adds the ability to enable Braze Geofences without enabling Braze location collection. You can set this in the plist by adding the Appboy dictionary to your Info.plist file. Inside the Appboy dictionary, add the EnableGeofences boolean subentry and set the value to YES to enable Braze Geofences. You can also enable geofences at runtime by setting ABKEnableGeofencesKey to YES in appboyOptions.
If this key is not set, it will default to the status of automatic location collection (see breaking change above).
Note that Braze Geofences will continue to work on existing integrations if location collection is enabled and this new configuration is not present. This new configuration is intended for integrations that want Braze Geofences, but not location collection enabled as well.
3.17.0
Breaking
Removes ABKAppboyEndpointDelegate.
You can now set the endpoint at runtime by setting the value of ABKEndpointKey in appboyOptions to your custom endpoint (ex. sdk.api.braze.eu) at initialization.
3.16.0
Important: If you are using ABKAppboyEndpointDelegate, you will need to replace dev.appboy.com with sdk.iad-01.braze.com in the getApiEndpoint method.
Breaking
Removes the methods: allowRequestWhenInUseLocationPermission and allowRequestAlwaysPermission from ABKLocationManager.
To request when in use location permission, use the following code:
The preprocessor macro ABK_DISABLE_LOCATION_SERVICES is no longer needed.
Important: Configuring geofences to request always location permissions remotely from the Braze dashboard is no longer supported. If you are using Geofences, you will need to ensure that your app requests always location permission from your users manually.
ABKAutomaticRequestProcessingExceptForDataFlush is deprecated. Users using ABKAutomaticRequestProcessingExceptForDataFlush should switch to ABKManualRequestProcessing, as the new behavior of ABKManualRequestProcessing is identical to the previous behavior of ABKAutomaticRequestProcessingExceptForDataFlush
Changed
Deprecates the push utility methods: isUninstallTrackingUserNotification:, isUninstallTrackingRemoteNotification:, isGeofencesSyncUserNotification:, isGeofencesSyncRemoteNotification:, and isPushStoryRemoteNotification: from ABKPushUtils. Please use the function isAppboyInternalRemoteNotification:.
Minor changes to the logic of ABKManualRequestProcessing. The original ABKManualRequestProcessing had specific exceptions and behaved more like ABKAutomaticRequestProcessingExceptForDataFlush in practice. As a result, the two policies have been merged into ABKManualRequestProcessing. Note that the new definition of ABKManualRequestProcessing is that periodic automatic data flushes are disabled. Other requests important to basic Braze functionality will still occur.
3.15.0
Important: If you are using ABKAppboyEndpointDelegate, you will need to replace dev.appboy.com with sdk.iad-01.braze.com in the getApiEndpoint method.
Breaking
Adds support for SDWebImage version 5.0.
Note that upgrading to SDWebImage 5.0 also removed the FLAnimatedImage transitive dependency from the SDK.
3.14.1
Important: If you are using ABKAppboyEndpointDelegate, you will need to replace dev.appboy.com with sdk.iad-01.braze.com in the getApiEndpoint method.
Changed
Changed in-app message trigger behavior to not perform trigger events until after any pending trigger sync requests to the server have finished.
Fixed
Fixed a serialization issue that could cause improper type conversions for certain decimal values.
Fixed a behavior introduced in 3.12.0 which caused in-app messages to not be considered triggered locally if ABKDiscardInAppMessage was returned by the host app in beforeInAppMessageDisplayed:.
Added
Added the ability to set the session timeout via the Info.plist.
Add the Appboy dictionary to your Info.plist file. Inside the Appboy Dictionary, add the SessionTimeout Number subentry and set the value to your session timeout.
Added the ability to disable location tracking via the Info.plist.
Add the Appboy dictionary to your Info.plist file. Inside the Appboy Dictionary, add the DisableAutomaticLocation Boolean subentry and set the value to YES.
Added dynamic cell resizing for Content Cards cells with templated images in our default Content Cards UI.
Added validation to the local filename’s canonical path during zip file extraction.
3.14.0
Important: If you are using ABKAppboyEndpointDelegate and plan to upgrade to 3.14.1, you will need to replace dev.appboy.com with sdk.iad-01.braze.com in the getApiEndpoint method.
Added
Improves the look and feel of In-App Messages to adhere to the latest UX and UI best practices. Changes affect font sizes, padding, and responsiveness across all message types. Now supports button border styling.
3.13.0
Breaking
Upgrades the delivery mechanism of Push Stories to allow delivery even after a user’s app has been force closed..
Required: Please change your integration to use ab_cat_push_story_v2 instead of ab_cat_push_story for the UNNotificationExtensionCategory in your content extension. See documentation for more details.
Changed
Improves in-app message triggering logic to fall back to lower priority messages when the Braze server aborts templating (e.g. from a Connected Content abort in the message body, or because the user is no longer in the correct Segment for the message).
Updates German translations to improve formatting.
3.12.0
Breaking
Drops support for iOS 8.
Adds support for the arm64e architecture when building with Cocoapods. Requires Xcode 10.1.
Fixed
Fixes bitcode support for the Push Story framework when using Xcode 10.
Cross-Promotion cards have also been removed as a card model and will thus no longer be returned.
3.11.0
Added
Adds the ability to set or remove custom location attributes for a specific user from within HTML IAMs.
Updates the SDK to report users who disable banner notifications but are still opted-in to push notifications as push enabled. Note this change does not affect provisionally authorized users on iOS 12, who were considered push enabled before this release regardless of their banner notification settings.
Adds Carthage Core support which allows for integration with the core Braze SDK without any UI components. To implement the core SDK, add binary "https://raw.githubusercontent.com/Appboy/appboy-ios-sdk/master/appboy_ios_sdk_core.json" to your Cartfile.
Changed
Deprecates the Feedback feature.
Fixed
Fixes an issue with the JS bridge when trying to set a custom attribute with the character ‘&’.
3.10.0
Added
Adds the ability to specify a whitelist for device fields that are collected by the Braze SDK.
Configurable device fields are defined in the ABKDeviceOptions enum.
To specify whitelisted device fields, assign the bitwise OR of desired fields to ABKDeviceWhitelistKey in the appboyOptions of startWithApiKey:inApplication:withAppboyOptions:.
For example, to specify timezone and locale collection to be whitelisted, set appboyOptions[ABKDeviceWhitelistKey] = @(ABKDeviceOptionTimezone | ABKDeviceOptionLocale);.
To turn off all fields, set appboyOptions[ABKDeviceWhitelistKey] = @(ABKDeviceOptionNone);.
By default, all fields are enabled.
Added the clicked property to ABKContentCard. Clicks made through [ABKContentCard logContentCardClicked] are now saved locally on the device.
Breaking
Removes ABKSignificantChangeCollectionEnabledOptionKey, ABKSignificantChangeCollectionDistanceFilterOptionKey, and ABKSignificantChangeCollectionTimeFilterOptionKey from the Appboy interface.
Removed
Removes the ability to optionally track locations in the background.
Fixed
Fixes an issue where Slideup and Full In-App Message content could be obscured by the notch on iPhone XR and iPhone XS Max.
3.9.0
Breaking
Adds support for iOS 12. Requires Xcode 10.
Fixed
Fixes minor issues with subclassing ABKInAppMessageModalViewController and News Feed request timeouts.
Thanks @datkinnguyen for your contribution.
3.8.4
Fixed
Fixes a regression introduced in version 3.8.3 that caused background tasks to extend beyond execution time.
3.8.3
Fixed
Fixes an issue where ABKContentCardsController unviewedContentCardCount would always return 0.
Changed
Updates the Content Cards UI with minor layout improvements.
3.8.2
Fixed
Fixes an issue with possible build failure when using Content Cards related to duplicate image names in Content Cards and News Feed pods. Please use this version if integrating Content Cards.
Changed
Updates the Content Cards UI with minor layout improvements.
3.8.1
Fixed
Important: Fixes an issue with Content Cards syncing. Note: As additional fixes were added in later versions, please use Braze iOS SDK version 3.8.2 or above if integrating Content Cards.
3.8.0
Added
In ABKUser class, addLocationCustomAttributeWithKey:latitude:longitude: and removeLocationCustomAttributeWithKey: methods are added to manage location custom attributes.
Introduces support for the upcoming Content Cards feature, which will eventually replace the existing News Feed feature and adds significant capability. This feature is currently in closed beta testing; if you’re interested in joining the beta, please reach out to your Customer Success Manager or Account Manager.
Changed
Status bar is not obscured when displaying a full screen in-app message.
3.7.1
Changed
Improves data handling immediately following a user change to bring behavioral parity with the Android and Web SDKs.
3.7.0
Breaking
In ABKInAppMessageUIControlling protocol, getCurrentDisplayChoiceForControlInAppMessage method is added to define whether the control in-app message impression should be logged now, later or discarded.
In ABKInAppMessageControllerDelegate protocol, beforeControlMessageImpressionLogged method is added to define whether the control in-app message impression should be logged now, later or discarded.
Added
CLLocationManager authorization requests can now be prevented from compiling by setting a Preprocessor flag ABK_DISABLE_LOCATION_SERVICES.
Fixed
Fixes an issue where in-app messages triggered on session start could potentially be templated with the old user’s attributes.
3.6.0
Breaking
In ABKSDWebImageProxy.h, renames removeImageForKey to removeSDWebImageForKey and clearCache to clearSDWebImageCache to avoid conflicts with internal Apple API. Important: We have received reports of sporadic App Store rejection stemming from Apple’s static checks mistaking our APIs for an invalid usage of the internal Apple API. We recommend new App Store submissions integrating the Braze iOS SDK ship with this version or above to decrease the likelihood of rejection.
Added
Exposes handleCardClick on ABKNewsFeedTableViewController.h to enable custom handling via subclassing.
Improves News Feed image handling on iPad.
3.5.1
Fixed
Fixes an issue with integrating the NewsFeed subspec in Swift projects via Cocoapods.
3.5.0
Breaking
Open sources the News Feed UI code and moves it into a new subspec named “NewsFeed”.
Manual integrators must now add the AppboyUI folder of this repository to their projects as a group, in addition to AppboyKit.
The “NewsFeed” subspec contains the Braze News Feed UI and the Core SDK. It does not include the Feedback or In-App Message UI.
The “UI” subspec contains all Braze UI and the Core SDK subpsec.
ABKFeedViewControllerDelegate was removed.
To integrate a navigation context News Feed, use the following code:
Removes NUI support for Feedback, In-App Messages, and the News Feed.
All customization can now be done by using categories or by extending our open sourced view controllers.
Removes deprecated ABKPushURIDelegate from the SDK. Use ABKURLDelegate instead.
3.4.0
Breaking
Adds preferredOrientation to ABKInAppMessageUIController and ABKInAppMessageWindowController.
Removes supportedOrientations from ABKInAppMessageUIController and ABKInAppMessageWindowController.
Renames supportedOrientationMasks to supportedOrientationMask in ABKInAppMessageUIController and ABKInAppMessageWindowController.
Fixed
Fixes an issue that caused GIFs to not animate on SDWebImage versions above or equal to 4.3.0
3.3.4
Added
Adds the ability to view verbose logs from the SDK for debugging.
To enable verbose logging, add a dictionary named Appboy to your Info.plist file. Inside the Appboy Dictionary, add the LogLevel String subentry and set the value to “0”.
3.3.3
Added
Adds wipeDataAndDisableForAppRun: on the Appboy interface to support wiping all customer data created by the Braze SDK.
Adds disableSDK: and requestEnableSDKOnNextAppRun: to the Appboy interface to disable and re-enable the Braze SDK.
Fixed
Fixes an issue where events setting custom attribute arrays to nil would persist on the SDK beyond their useful life.
3.3.2
Changed
Updates the SDK with internal, non-functional improvements.
3.3.1
Added
Adds Other, Unknown, Not Applicable, and Prefer not to Say options for user gender.
Adds umbrella header files AppboyFeedback.h and AppboyInAppMessage.h for the Feedback and InAppMessage subspecs.
Fixed
Fixes an issue where the method beforeInAppMessageDisplayed: in class ABKInAppMessageControllerDelegate is not called when the host app is using the Core subspec.
3.3.0
Breaking
Open sources the In-App Message UI code and moves it into a new subspec named “InAppMessage”.
Manual integrators must now add the AppboyUI folder of this repository to their projects as a group, in addition to AppboyKit.
The “InAppMessage” subspec contains the Braze In-App Message UI and the Core SDK. It does not include Feedback or the News Feed UI.
The “UI” subspec contains all Braze UI and the Core SDK subpsec.
The open-sourced In-App Message view controllers offer backward compatible NUI support, although we recommend using categories or subclassing the In-App Message view controllers for customization as the NUI library isn’t actively maintained any more. Support for NUI customization will be removed in a future release.
Most delegate customization methods are moved from ABKInAppMessageControllerDelegate to ABKInAppMessageUIDelegate.
Fixes an issue introduced in version 3.0.0 which caused detailed device model information to not be collected by the SDK.
Fixes an issue where Braze’s Carthage framework did not support simulators.
3.2.2
Fixed
Fixes an issue where Slideup and Full In-App Message content could be obscured by the notch on iPhone X.
3.2.1
Fixed
Fixes an issue where Push Story Framework did not support bitcode.
3.2.0
Added
Adds Push Stories, a new push type that uses UNNotificationContentExtension to display multiple images in a single notification.
This feature requires iOS 10 and above.
Fixed
Fixes an issue where tvOS SDK did not support bitcode.
3.1.1
Added
Adds a new property language to ABKUser to allow explicit control over the user’s language in the Braze dashboard. Note that this is separate and independent from the language settings on the user’s device.
Adds an Objective-C sample app for the Core subspec of the SDK. See Samples/Core/ObjCSample.
Fixed
Fixes a bug introduced in version 2.30 where crashes could occur if the SDK was directed to handle a custom scheme deep link inside a WebView.
Fixes a bug introduced in version 3.0 where new custom attributes were not being flushed if custom attributes had been previously flushed in the same foregrounded session.
Fixes a bug introduced in version 3.0 where previously flushed custom attributes were being re-sent.
Fixes an issue where slow image fetching blocked image-only modal in-app messages from displaying.
Adds the ability to set a custom API endpoint via the Info.plist.
Add the Appboy dictionary to your Info.plist file. Inside the Appboy Dictionary, add the Endpoint String subentry and set the value to your custom endpoint (e.g., sdk.api.braze.eu).
Fixed
Fixes an issue where changing the IDFA settings through a third party wrapper could cause a crash.
3.0.1
Fixed
Fixes an issue where calling incrementCustomUserAttribute: on ABKUser could cause a crash.
3.0.0
Breaking
Removes the deprecated foursquareAccessToken property from ABKUser. To associate a Foursquare access token with a user profile, use setCustomAttributeWithKey:andStringValue: instead.
Note: Braze iOS SDK version 3.0.0 will only support downgrading to iOS SDK version 2.31.0. Downgrading to versions prior to 2.31.0 may result in app crashes.
Added
Adds a major performance upgrade that reduces CPU usage, memory footprint, and network traffic.
2.31.0
Breaking
Open sources the Feedback view controllers and moves them into a new subspec “Feedback”.
The “Feedback” subspec has the Braze Feedback UI and the Core SDK. It will not include in-app messages or News Feed UI.
Removes the popover context for Feedback due to the deprecation of UIPopoverViewController in iOS.
Renames the ABKFeedbackViewControllerModalContext and ABKFeedbackViewControllerNavigationContext class to ABKModalFeedbackViewController and ABKNavigationFeedbackViewController.
The open-sourced Feedback view controllers offer backward compatible NUI support, although we recommend using categories or subclassing the Feedback view controllers for customization as NUI library isn’t actively maintained any more. See here for customization details.
Adds user aliasing capability. Aliases can be used in the API and dashboard to identify users in addition to their ID. See the addAlias:withLabel: method on ABKUser for more information.
Changed
Updates the AppboyKit.h to include all the public header files in the SDK.
2.30.0
Breaking
Open sources the ABKModalWebViewController class, which is used to display the web URLs from push or in-app message clicks.
Drops NUI customization support for the navigation bar and navigation bar button item on ABKModalWebViewController. To customize the UI, create an ABKModalWebViewController category and override the corresponding method(s) exposed.
Open sources the ABKNoConnectionLocalization class, which provides Braze’s default localized string for “No Connection” error.
You can customize the localization by adding Appboy.no-connection.message as the key in your Localizable.strings files.
Removes the Appboy.bundle from the Core subspec of the SDK.
If you use the Core subspec, the in-app messages will not display, and trying to display Braze’s News Feed and Feedback UI will lead to unpredictable behavior.
2.29.1
Added
Adds a new property buttonTextFont to ABKInAppMessageButton. It allows clients to set customized fonts on in-app message buttons before the in-app message is displayed.
Fixed
Makes class ABKInAppMessageWindowController.h public.
Fixes an issue where device information was not flushed for a new user when server requests were queued for two or more users.
Changed
Removes the warnings in ABKSDWebImageProxy.
2.29.0
Breaking
Drops support for iOS 7.
Removes the shouldOpenURIExternally field from ABKInAppMessage.
Requires XCode 8.3.
Changes the behavior of the onCardClicked:feedViewController: method in ABKFeedViewControllerDelegate to let Braze handle the card click action if the delegate method returns NO.
Previously, Braze would handle the card click action if onCardClicked:feedViewController: returned YES.
This change standardizes delegate behavior with ABKInAppMessageControllerDelegate and ABKURLDelegate.
Added
Adds the property openUrlInWebView to ABKInAppMessage, ABKInAppMessageButton and ABKCard. This property determines if the URL associated with the object will be opened in a UIWebView.
Adds a Javascript interface to HTML in-app messages with ability to log custom events, log purchases, set user attributes, navigate users, and close the message.
Adds an abDeepLink query field to HTML in-app messages, which defaults to false. To prevent the SDK from opening deep links in a UIWebView, specify abDeepLink=true in your link (e.g., https://www.braze.com?abDeepLink=true).
Adds the ABKURLDelegate protocol for customizing URL handling across channels. Set the ABKURLDelegate by passing a delegate object to the ABKURLDelegateKey in the appboyOptions of startWithApiKey:inApplication:withAppboyOptions:. See our Stopwatch sample application for a Universal Link implementation sample.
Adds the following utility methods to ABKPushUtils for detecting if a push notification was sent by Braze for internal feature purposes:
These methods can be used to ensure that your app does not take any undesired or unnecessary actions upon receiving Braze’s internal content-available notifications (e.g., pinging your server for content).
Changed
Deprecates ABKPushURIDelegate. If you were previously using ABKPushURIDelegate, use ABKURLDelegate instead.
Deprecates userNotificationWasSentFromAppboy: and pushNotificationWasSentFromAppboy: on Appboy. Use isAppboyUserNotification: and isAppboyRemoteNotification: on ABKPushUtils instead.
Deprecates shouldFetchTestTriggersFlagContainedInPayload: on ABKPushUtils.
2.28.0
Breaking:
Removes support for watchOS 1, including Braze WatchKit SDK and all public APIs for watchOS in Braze iOS SDK.
Added
Adds ABKSDWebImageProxy to access the SDWebImage framework. This will prevent the Core subspec of the SDK from calling any SDWebImage methods directly.
2.27.0
Breaking
Removes the following deprecated items: the bio field of ABKUser, the setIsSubscribedToEmails: method of ABKUser, and the getResourceEndpoint: method of the ABKAppboyEndpointDelegate protocol.
Added
Adds support for registering geofences and messaging on geofence events. Please reach out to success@braze.com for more information about this feature.
Adds Braze default push categories which can be fetched from ABKPushUtils.
To use the Braze default push categories, you need to manually add the Braze categories when you register for push. You can get the Braze categories from [ABKPushUtils getAppboyUNNotificationCategorySet] or [ABKPushUtils getAppboyUIUserNotificationCategorySet].
In this version, we add four sets of push action buttons: accept/decline, yes/no, confirm/cancel, more. These will be available as button sets on the dashboard when creating an iOS push campaign.
All Braze push action buttons support localization.
Adds support for web link and deep link handling of push action buttons.
Fixed
Fixes the issue where the combination of the Core subspec of the SDK and a non-supported version of SDWebImage framework can cause apps to crash.
HTML in-app messages now log body click analytics on all links that are not appboy://customEvent and do not include the abButtonId query field. Previously, no body click analytics were logged.
Removed
Removes deprecated method - (NSString *)getResourceEndpoint:(NSString *)appboyResourceEndpoint from ABKAppboyEndpointDelegate.
Removes deprecated property bio and deprecated method - (BOOL)setIsSubscribedToEmails:(BOOL)subscribed from ABKUser.
2.26.0
Breaking
Adds support for SDWebImage version 4.0.0 with GIF support. SDWebImage version 3.x will not be supported from this version on. Please make sure you are using the correct version of SDWebImage.framework. Note: SDWebImage 4.0.0 relies on FLAnimatedImage - users integrating in ways besides CocoaPods should ensure they link the FLAnimatedImage framework if they want GIF support.
Removes the url property from subclasses of ABKCard. This property has been renamed to urlString and moved onto the ABKCard superclass.
Added
Adds Cocoapods subspecs “Core” and “UI”.
The “UI” subspsec has the full feature set of the current SDK. This is the default subspec when no subspec is specified in the Podfile.
The “Core” subspec removes the SDWebImage framework dependency. This is for apps who do not use any Braze UI that leverages images (News Feed, in-app messages). If you use the “Core” subspec, in-app messages with images will not display, and the News Feed will render with plain white images.
Makes ABKThemableFeedNavigationBar.h and ABKNavigationBar.h public.
Adds ABKIDFADelegate protocol that can be used to create a delegate to pass Braze the IDFA in startWithApiKey: in the appboyOptions dictionary under the ABKIDFADelegateKey key. Alternative to existing ABKIdentifierForAdvertisingProvider compile flag solution.
Changed
Disables the -webkit-touch-callout property on HTML in-app messages. Long presses and 3D Touch on links will no longer display pop-ups with additional link information.
2.25.0
Added
Adds the ability to set the ABKInAppMessageControllerDelegate when the SDK starts by passing a delegate object to the ABKInAppMessageControllerDelegateKey in the appboyOptions of startWithApiKey:inApplication:withAppboyOptions:.
This is the recommended way to set the ABKInAppMessageControllerDelegate and circumvents a potential race condition where in-app messages can be shown before the delegate has been set.
Exposes the ABKFeedback object and adds a new method - (void)submitFeedback:(ABKFeedback *)feedback withCompletionHandler:(nullable void (^)(ABKFeedbackSentResult feedbackSentResult))completionHandler; in Appboy. The new method accepts a completion handler which receives an ABKFeedbackSentResult enum as feedback sending result.
The possible feedback sending results are: invalid feedback object(ABKInvalidFeedback), fail to send feedback(ABKNetworkIssue), and feedback sent successfully(ABKFeedbackSentSuccessfully).
Adds the utility method - (BOOL)userNotificationWasSentFromAppboy:(UNNotificationResponse *)response; to Appboy. This method is compatible with the UserNotifications framework and returns whether a push notification was sent from Braze’s server.
Those using - (BOOL)pushNotificationWasSentFromAppboy:(NSDictionary *)options; who have integrated the UserNotifications framework should use this method instead.
Fixed
Changes the ABKInAppMessageButton from a UIButton object to a pure data model class in NSObject.
This resolves the issue https://github.com/Appboy/appboy-ios-sdk/issues/97.
Changed
Adds more protection around triggered in-app message display.
2.24.5
Fixed
Fixes an issue where in-app messages triggered off of push clicks wouldn’t fire when the push click happened before the in-app message configuration was synced to the device.
Changed
Updates push registration to flush the token to the server immediately.
Improves the accessibility of in-app messages and news feed cards.
When in voiceOver mode, the SDK auto-focuses on in-app messages when they appear and resets focus on dismissal.
VoiceOver no longer reads Braze internal labels.
News feed cards are enhanced to be more accessible.
2.24.4
Added
Adds protection around in-app message UI code to avoid displaying in-app messages with corrupted images.
Fixed
Fixes the iOS version number in the deprecation warnings in Appboy.h.
2.24.3
Breaking
Update REQUIRED for apps using Braze SDK 2.24.0, 2.24.1 or 2.24.2 with UserNotifications.framework
Fixed
Fixes an issue where a user’s foreground push enabled status could erroneously be marked as disabled.
This issue can occur when opening the app from suspended mode. At that time, the foreground push enabled status was defaulted to disabled until the UserNotifications.framework returned the user’s push authorization status. If the user closed the app within a few seconds, the SDK would not flush the updated push status and the user would mistakenly be marked as “push disabled”.
This issue only affected apps using UserNotifications.framework to register for push notifications.
The updated code stores the push authorization status on disk to fix the issue.
Fixes an issue where triggered in-app messages with event property templating did not respect re-eligibility settings.
Changed
Updates the Podspecs for iOS and tvOS SDK.
Updates deprecation warnings to specify iOS version.
Updates the ABKFeedController with more generic nullability.
Disables all data detectors on HTML in-app messages. Phone numbers, web URLs, addresses and calendar events will no longer be automatically converted.
Disables scrolling bounces on HTML in-app messages.
2.24.2
Fixed
Fixes an issue where HTML in-app messages loaded JavaScript more than once.
Fixes the Appboy.inAppMessage.webview.done-button.title string in the French localization file, which was named incorrectly and wasn’t being found.
2.24.1
Added
Adds nullability annotation for the completionHandler in userNotificationCenter :didReceiveNotificationResponse:withCompletionHandler.
2.24.0
Breaking
Updates the SDK to require XCode 8.
iOS 10 changes behavior of application:didReceiveRemoteNotification:fetchCompletionHandler and subsequently breaks open tracking and deep link handling on most existing Braze iOS integrations. If you don’t currently implement application:didReceiveRemoteNotification: you need to modify your integration, and we recommend that all users update.
Added
Updates the iOS and tvOS SDKs to support iOS 10.
Adds a new method - (void)userNotificationCenter:(UNUserNotificationCenter *)center didReceiveNotificationResponse:(UNNotificationResponse *)response withCompletionHandler:(void (^)())completionHandler. This method supports the new delegate method for push notification handling in UserNotification framework.
Changed
Deprecates two push delegate methods:
- (void)registerApplication:(UIApplication *)application didReceiveRemoteNotification:(NSDictionary *)notification and
- (void)getActionWithIdentifier:(NSString *)identifier forRemoteNotification:(NSDictionary *)userInfo completionHandler:(nullable void (^)())completionHandler.
2.23.0
Added
Adds support for upgraded in-app messages including image-only messages, improved image sizing/cropping, text scrolling, text alignment, configurable orientation, and configurable frame color.
Adds support for in-app messages triggered on custom event properties, purchase properties, and in-app message clicks.
Adds support for templating event properties within in-app messages.
Removed
Removes the deprecated method logSocialShare from Appboy class.
2.22.1
Changed
Updates tvOS bitcode support, patching an error introduced by an Xcode bug.
2.22.0
Added
Adds tvOS support for logging analytics; adds sample applications for tvOS and TVML.
Adds Hebrew localization support.
2.21.0
Breaking
Drops support for iOS 6.
Added
Adds support for deep links with non-URL-encoded characters. The SDK will encode unencoded url strings to create valid deep link NSURLs.
Fixed
Fixes a bug where the background of a slideup in-app message remained transparent when configured with 100% opacity.
Changed
Updates the podspec SDWebImage dependency to fetch the latest version.
Replaces SDK usage of NSURLConnection with NSURLSession.
Updates the SDK to always call canOpenURL: before opening a deep link. After this change, the SDK will only direct deep links whose schemes are whitelisted.
Updates push registration to immediately, asynchronously send up the push token.
2.20.1
Fixed
Fixes an issue where in certain conditions NSUserDefault blocking would cause custom events logged in the main thread to result in UI freezing.
Changed
Implements an optimization in push handling to not prefetch the News Feed when a push arrives and the app is in the background.
2.20.0
Added
Adds Carthage support.
Fixed
Fixes a multithreading issue where logging custom events from different threads would sporadically cause errors.
Fixes the issue where a close button’s color on modal and full in-app messages didn’t respect the opacity value.
Fixes an issue where failure to download HTML in-app message assets mid-download resulted in display without assets.
Changed
Now the onInAppMessageHTMLButtonClicked:clickedURL:buttonID: delegate method will be called every time a URL is clicked. The method used to be only called when there was a button ID in the URL link.
Updates the feedback element to reject messages that contain only whitespace.
Updates remote push handling to call the completion handler passed in every time (a code path previously existed that would return without calling it).
Removed
Removes the delegate method onInAppMessageHTMLButtonClicked:buttonID: from ABKInAppMessageControllerDelegate protocol.
2.19.3
Added
Adds a new feature allowing manual control of deep link handling in push notications. To use this, add a ABKPushURIDelegate value for the ABKPushURIDelegate key in the appboyOptions dictionary of startWithApiKey:inApplication:inApplication:withAppboyOptions:. Also updates the ABKPushURIDelegate integration to be initialized through that integration point.
Adds guarding against a possible crash caused by a user’s offline state being corrupted and not including an active session when a network request
occurred.
Fixed
Fixes an issue where duplicate data could be recorded when a force quit or crash occurs after a network request completed successfully, but before any other activity (such as leaving the app, putting it to sleep, updating an attribute or firing some other event or purchase) occurred.
2.19.2
Added
Adds warning when messaging doesn’t succeed because SDWebImage is not integrated.
Fixed
Fixes a bug where users who went from being eligible for triggered messages to not being eligible for any triggered messages didn’t see their local triggers configuration get updated. This has already been fixed with a server-side update for affected versions; this update fixes the issue client-side.
Changed
Updates headers to be compatible with Swift 2.2.
2.19.1
Added
Adds sample code for a universal link in Stopwatch.
Fixed
Fixes the benign issue that caused the log message *** -[NSKeyedUnarchiver initForReadingWithData:]: data is NULL.
Fixes an issue where NULL campaign IDs in push messages (e.g. from a REST API push message without a specified campaign id) resulted in push-clicked triggers for triggered in-app messages not firing.
Fixes an issue where calling changeUser between identified users caused the read/unread state of the news feed cards of the old user to be set as the new user’s read/unread states.
Fixes an issue where a user attribute value that had been set to multiple different values created a state that would not let you set the original value again. The bug was introduced in version 2.17.1.
Changed
Analytics are now logged for in-app messages and in-app message buttons with ‘ABKInAppMessageNoneClickAction’ click actions. ABKInAppMessageNoneClickAction is set when an in-app message on the dashboard has a click action that only closes the in-app message; formerly this did not count as a click.
2.19.0
Added
Adds support for action-based, locally triggered in-app messages. In-app messages are now sent to the device at session start with associated trigger events. The SDK will display in-app messages in near real-time when the trigger event associated with a message occurs. Trigger events can be app opens, push opens, purchases, and custom events.
Changed
Deprecates the old system of requesting in-app message display, now collectively known as ‘original’ in-app messaging, where messages were limited to displaying at app start.
2.18.4
Fixed
Fixes a Cocoapods issue that emerged during the release of 2.8.13.
2.18.3
Changed
Makes an internal update to provide functionality for SDKs that embed this library.
2.18.2
Added
Adds warning logging if [Appboy sharedInstance] is called while in an uninitialized state.
Changed
Deprecates the delegate method getResourceEndpoint: in ABKAppboyEndpointDelegate. The SDK will no longer call this delegate method.
2.18.1
Fixed
Fixes the nullability annotation warnings in the public header files.
Changed
Updates HelloSwift sample app to adopt swift 2.0.
2.18
Added
Adds nullability annotations to all Braze public APIs.
Adds a new delegate method to support custom push URI handle. For more detail, please see ABKPushURIDelegate.h;
Changed
Updates to auto-dismiss the Braze web view when a user returns to the app after following a link out of the app from an Braze web view.
Removed
Removes the deprecated method requestSlideupRefresh from Braze class.
2.17.1
Fixed
Fixes a bug where in certain conditions the SDK would resend user attributes that had already synced with the server.
2.17
Added
Adds a new button clicked delegate method for HTML in-app message. The new delegate method also passes the URL of the clicked button.
Fixed
Fixes the crash caused by inserting a nil object into an NSDictionary when parsing an event object.
Changed
Makes the WebView background for HTML in-app messages transparent. Ensure HTML in-app messages you send to the device are created expecting a transparent background.
Applies the Braze endpoint delegate methods to in-app messages’ resource(zip and image) fetching.
Removed
Removes the Facebook button from Feedback page.
2.16.1
Added
Adds the ability to log a custom event from an HTML in-app message. To log a custom event from an HTML in-app message, navigate a user to a url of the form appboy://customEvent?name=customEventName&p1=v2, where the name URL parameter is the name of the event, and the remaining parameters are logged as String properties on the event.
Adds the support for customization of the background color of modal in-app messages.
Fixed
Fixes an issue where daylight savings changes were not reflected in the user profile timezone.
Changed
Enables users to input text into HTML in-app messages by allowing HTML in-app messages to be displayed with a keyboard on screen. For all other in-app messages, the in-app message will be dismissed when a keyboard is displayed.
2.16
Added
Adds HTML In-App Message types.
HTML In-App Messages consist of HTML and a url of a zipped archive of assets (e.g. images, css) to download locally which the HTML can reference. See InAppMessageUIViewController in our Stopwatch sample app for an example for the callbacks on the actions inside the WebView hosting the HTML In-App Message.
Changed
Deprecates the method - (void) logSocialShare:(ABKSocialNetwork)socialNetwork and enum ABKSocialNetwork in the Appboy class. If you use logSocialShare: to track user’s social account sharing, you can use logCustomEvent: instead.
Deprecates the property bio in the ABKUser class.
2.15.1
Fixed
Fixes the warning “full bitcode bundle could not be generated because XXX was built only with bitcode marker”.
2.15
Changed
Updates the SDK to support iOS 9. In iOS9, previous versions of the SDK: 1) did not have bitcode support, 2) had a minor UI issue in in-app messages where the slideup messages were not docked on the bottom of the screen if they had one line of text, 3) failed to localize for zh-HK and zh-TW.
2.14
Breaking
Migrates the SDK to ARC. If you are using our Apple Watch Extension and not using ARC, you must apply -fobjc-arc to the extension files.
Added
Adds configurable session timeout feature.
Adds feedbackViewControllerBeforeFeedbackSent method to the feedback delegate protocols, which can be used to modify the feedback message before it’s sent to Braze.
Adds a setAttributionData method to ABKUser that sets an ABKAttributionData object for the user. To be used with attribution provider SDKs when attribution events are fired.
2.13.2
Changed
Increases the number of supported currency codes from 22 to 171. All common currency codes are now supported. The full list of supported codes is available at Appboy.h.
2.13.1
Changed
Updates the isUninstallTrackingNotification method in ABKPushUtils to return the correct value.
2.13
Added
Adds an open-source Watch SDK to support data analytics on watchKit apps. You can use the Appboy-WatchKit SDK by downloading and adding the “Appboy-WatchKit” folder in your watchKit extension target. For more detail, please refer to ABWKUser.h and AppboyWatchKit.h.
Adds an opt-in location service that logs background location events; adds ABKLocationManager with methods for allowing Braze to request location permission on your behalf and logging the current location. More information on the background location capabilities will be made available when dashboard support is released.
Adds client side blocking of blacklisted attributes and events.
Adds ABKPushUtils with method + (BOOL) isUninstallTrackingNotification:(NSDictionary *)userInfo; that can be used to detect if a content-available push is from Braze uninstall tracking (and shouldn’t be acted upon).
Adds a new property expiresAt in class ABKCard. The property is the unix timestamp of the card’s expiration time. For more detail, please refer to ABKCard.h.
Changed
Stops collecting user’s Twitter data automatically. You can pass a user’s Twitter information to Braze by initialzing a ABKTwitterUser object with the twitter data, and setting it to [Appboy sharedInstance].user.twitterUser. For more information, please refer to ABKUser.h and ABKTwitterUser.h.
Stops logging foreground push as a push open as it is not delivered by the system.
Removed
Removes the feature of prompting a user to connect his/her social account. You can refer to the method promptUserToConnectTwitterAccountOnDeviceAndFetchAccountData in TwitterViewController.m to continue prompting the user to connect the Twitter account.
2.12.2
Fixed
Fixes the slideup in-app message display issue. When the host app sets the launch screen file, slideup in-app message from bottom sometimes didn’t dock at the bottom of the screen on iPhone 6 and iPhone 6 Plus.
2.12.1
Added
Adds font and font size customization to all in-app message’s header and message text through NUI. You can customize in-app message’s font by adding ABKInAppMessageSlideupMessageLabel, ABKInAppMessageeModalHeaderLabel,ABKInAppMessageModalMessageLabel, ABKInAppMessageFullHeaderLabel, ABKInAppMessageFullMessageLabel to your NUI nss style sheet.
Fixed
Fixes news feed issue where no news feed cards resulted in the loading spinner remaining on screen.
Changed
Cleans up the console logging in Class ABKIdentifierForAdvertisingProvider.
2.12.0
Fixed
Fixes the incorrect path runtime error for users who integrate our pod as a dynamic framework. For SDK versions before 2.12, when you integrate Braze with use_frameworks! in the Podfile, the library is integrated as a dynamic framework and the Appboy.bundle is stored in a different path.
Changed
Changes HelloSwift sample app to integrate Braze SDK as a dynamic framework.
Removed
Removes the subspecs from the podspec. This fixes the duplicate symbol error https://github.com/Appboy/appboy-ios-sdk/issues/24. If you are still using subspec like pod 'Appboy-iOS-SDK/AppboyKit' in your podfile, please make sure to change it to pod 'Appboy-iOS-SDK'.
2.11.3
Added
Adds the ability to send and retrieve extra key-value pairs via a News Feed card.
Adds the ability to define custom key-value properties on a custom event or purchase. Property keys are strings and values may be NSString, NSDate, or NSNumber objects.
Added the fix for an edge case when there are extra UIWindows at the time in-app message is going to display, the in-app message would have issue during dismissing.
2.11.2
Changed
Updates the serialize and deserialize methods for in-app message classes. This is for use by wrappers such as Braze’s Unity SDK for iOS.
2.11.1
Fixed
Fixes a UI issue in modal in-app messages displayed on iPads running iOS 6/7.
2.11
Added
Adds support for modal and full screen style in-app messages. Also adds support for including fontawesome icons and images with in-app messages, changing colors on in-app message UI elements, expanded customization options, and message resizing for tablets. Please visit our documentation for more information.
Changed
Updates the completionHandler signature in getActionWithIdentifier:forRemoteNotification:completionHandler: to match the comletionHandler passed by the system in method - (void) application:(UIApplication *)application handleActionWithIdentifier:(NSString *)identifier forRemoteNotification:(NSDictionary *)userInfo completionHandler:(void (^)())completionHandler.
2.10.2
Added
Adds the fix for an edge case when there are extra UIWindows at the time in-app message is going to display, the in-app message would have issue during dismissing.
2.10.1
Fixed
Fixes a bug which would cause the host app to crash when a deep link was launched from a push notification. In versions 2.10.0 and 2.9.4, if the host app used [[Appboy sharedInstance] registerApplication: didReceiveRemoteNotification:]; instead of [[Appboy sharedInstance] registerApplication: didReceiveRemoteNotification: fetchCompletionHandler:];, opening a push with a deep link would crash the host app in some circumstances.
2.10.0
Changed
Updates the minimum deployment targets of Braze iOS SDK to iOS 6.0. For apps supporting lower iOS versions, please continue to use 2.9.+ versions of the Braze SDK.
Stops collecting user’s Facebook data automatically. You can pass a user’s Facebook information to Braze by initializing a ABKFacebookUser object with the facebook data, and set it to [Appboy sharedInstance].user.facebookUser. For more information, please refer to ABKUser.h and ABKFacebookUser.h.
Removed
Removes Facebook SDK dependent builds. Now there is a single library - AppboyKit - and a single Pod without functional subspecs - Appboy-iOS-SDK (note we now have both the subspecs pointing at the same library). Please update your Podfile to pod 'Appboy-iOS-SDK if you are integrating Braze with Cocoapods.
Removes the feature of prompting a user to connect his/her Facebook account. You can refer to the method promptUserToConnectFacebookAccountOnDeviceAndFetchAccountData in FacebookViewController.m to continue prompting the user to connect the Facebook account.
2.9.6
Added
Adds the fix for an edge case when there are extra UIWindows at the time in-app message is going to display, the in-app message would have issue during dismissing.
2.9.5
Fixed
Fixes a bug which would cause the host app to crash when a deep link was launched from a push notification. In versions 2.9.4, if the host app used [[Appboy sharedInstance] registerApplication: didReceiveRemoteNotification:]; instead of [[Appboy sharedInstance] registerApplication: didReceiveRemoteNotification: fetchCompletionHandler:];, opening a push with a deep link would crash the host app in some circumstances.
2.9.4
Added
Adds a major performance upgrade that reduces CPU usage, memory footprint, and network traffic.
Adds 26 additional languages to localization support for Braze UI elements.
Adds support for deep linking from APNS push notification clicks.
Adds ability to customize the font of Feedback text using NUI with NUI class name ABKFeedbackTextView.
Fixed
Fixes the feedback page UI issues in iOS 8: when the device’s orientation is UIInterfaceOrientationPortraitUpsideDown, the contact info bar was off.
Fixes in-app messages to display correctly in landscape mode in iOS 8.
Changed
Updates the SDK to adopt the latest SDWebImage protocol methods.
Removed
Removes the “required” labels on the feedback page.
2.9.3
Added
Adds a new method - (void) registerApplication:(UIApplication *)application didReceiveRemoteNotification:(NSDictionary *)notification fetchCompletionHandler:(void (^)(UIBackgroundFetchResult))completionHandler to support push with background fetch. This method should be called in - (void) application:(UIApplication *)application didReceiveRemoteNotification:(NSDictionary *)userInfo fetchCompletionHandler:(void (^)(UIBackgroundFetchResult))completionHandler. For more details, please refer to Appboy.h.
Adds a HelloSwift sample app to demo how to use Braze in a swift app.
Adds a new NSString property “displayPrice” in ABKCrossPromotionCard to enable server side price localization.
Fixed
Fixes a bug of when sessions were being created when the app opened in the background.
Fixes a bug where requesting the news feed with a news feed open led to card impressions not updating until the next feed refresh.
2.9.2
Added
Adds the ability to turn off Braze’s automatic location collection by setting the ABKDisableAutomaticLocationCollectionKey boolean in AppboyOptions in startWithApiKey:inApplication:inApplication:withAppboyOptions:.
Adds the ability to send location tracking events to Braze manually using setLastKnownLocationWithLatitude:longitude:horizontalAccuracy: and setLastKnownLocationWithLatitude:longitude:horizontalAccuracy:altitude:verticalAccuracy: on the ABKUser. this is intended to be used with ABKDisableAutomaticLocationCollectionKey set to true in the AppboyOptions so that locations are only being recorded from a single source.
Fixed
Fixes a news feed bug: sometimes the spinner keeps spinning on the screen even after the news feed card image is displayed.
Changed
Updates sample app core location fetching code based on the changes in iOS 8.
2.9.1
Fixed
Fixes a news feed bug: When a user refreshed the news feed by swiping down, if the total number of cards in the feed was going to be reduced by the refresh, the app would crash.
2.9.0
Fixed
Fixes an App Store validation error introduced when the App Store started accepting submissions for iOS8. This was done by changing the packaging of the Braze framework to include a universal binary and a resource bundle (instead of combining them both together in a universal framework). Due to this change, Cocoapod integration is even more highly recommended than before to fully automate integration.
2.8.1
Added
Adds a new method - (void) getActionWithIdentifier:(NSString *)identifier forRemoteNotification:(NSDictionary *)userInfo to collect analytics data for push actions in iOS 8. It should be called in the UIApplication delegate method - (void) application:(UIApplication *)application handleActionWithIdentifier:(NSString *)identifier forRemoteNotification:(NSDictionary *)userInfo completionHandler:(void (^)())completionHandler. For more details, please refer to Appboy.h.
New Custom Attribute Data Type (Array): Braze now supports custom attributes which contain an array of string elements. In addition, we also provide methods for adding or removing an string element from an array type custom attribute. For more information, please refer to ABKUser.h.
Users can now pull down on the Braze Newsfeed to refresh the content on iOS version 6.0 or later.
Changed
Restricts product identifier string to 255 characters for method - (void) logPurchase:(NSString *)productIdentifier inCurrency:(NSString *)currencyCode atPrice:(NSDecimalNumber *)price and - (void) logPurchase:(NSString *)productIdentifier inCurrency:(NSString *)currencyCode atPrice:(NSDecimalNumber *)price withQuantity:(NSUInteger)quantity.
News feed card now can update the card height and display a full image based on the image ratio. Card image ratio used to be a fix number and images were aspect stretched to fit in the views.
The right and left margins in the news feed are now touchable areas for scrolling.
Card titles have been improved and will now truncate with “…” when they are more than 2 lines.
2.8
Breaking
Renames the class names of news feed cards to match the names on dashboard:
v2.8
v2.7
ABKBannerCard
ABKCardBanner
ABKCaptionedImageCard
ABKCardCaptionedMessage
ABKCrossPromotionCard
ABKCardCrossPromotionSmall
ABKClassicCard
ABKCardNews
ABKTextAnnouncementCard
ABKCardTextAnnouncement
Added
Adds email and push notification subscription types for a user. Subscription types are explicitly opted in, subscribed, and unsubscribed. The previous email boolean subscribe method has been deprecated.
Adds custom slideup orientation support. You can now ask the slideup to only support certain orientations. For more details on slideup custom orientation support, please refer to ABKSlideupController.h.
Adds quantity parameter as an option when logging purchase. The quanlity should be an unsigned interger greater than 0 and no larger than 100. For more information, please refer to Appboy.h.
Adds a class method in ABKCard to deserialize a given dictionary to a card. This is for use by wrappers such as Braze’s Unity SDK for iOS. Please refer to ABKCard.h for more information.
2.7
News Feed Update
Exposes raw card data in ABKFeedController
Developers can use the raw card data to creat custom user interfaces for the news feed. For more details on the card data, please refer to ABKFeedController.h.
Addes support for categories on cards and news feed view controllers.
Categories include Announcement, Advertising, Social, News and No Category. You can get cards of certain categories from ABKFeedController, or you can make ABKFeedViewController only display certain categories of cards.
Uses SDWebImage to handle images downloading and caching in the news feed, display a spinner while downloading images and show a default image when no image available.
Adds support for asynchronous image downloading in the news feed, asynchronous memory and disk image caching with automatic cache expiration handling.
Adds news feed view controller delegate to support custom handling of card clicks on news feed.
The app can customize click actions from the feed and display any card link in their own user interface.
Slideup Changes
Updates ABKSlideupControllerDelegate method onSlideupClicked to return a BOOL value to indicate if Braze should continue to execute the click action.
Stops logging slideup click when the slideup click action is ABKSlideupNoneClickAction.
Feedback Changes
Updates the ABKFeedbackViewControllerPopoverContext so now it should be used in all cases where the feedback page displayed in a popover, including the case that the feedback is push on a navigation controller in a popover.
Fixes the ABKFeedbackVIewControllerModalContext cancel button delegate issue.
Fixes the form sheet style ABKFeedbackViewControllerModalContext layout issue.
Other Changes
Adds API to request feed and slideup refresh.
Adds API to log news feed displayed and feedback displayed.
Allows updating analytics data even using customized news feed or feedback user interfaces.
Updates badge count policy to only update when app is foreground.
Adds clearTwitterDataWhenNoDataOfTwitterIdentifier to ABKUser, allowing developer to clear user data when a user disconnectes their twitter accounts.
Updates custom key and string value for custom attributes to automatically trim.
2.6.3
Changed
Updates the SDK to authenticate with the Twitter API using SSL.
2.6.2
Fixed
Fixes a news feed card click tracking issue.
Changed
Updates data flush time interval.
2.6.1
Fixed
Fixes a minor display problem that affected news items with no image or link for version 2.6.
2.6
Breaking
Braze iOS SDK now supports 64 bit as well. The minimum deployment targets that Braze iOS SDK supports is iOS 5.1.1.
The Braze iOS SDK will now allow function with 64-bit apps. This version of the SDK only supports iOS 5.1.1+. Legacy iOS apps should continue to use version 2.5 of the SDK.
You can install legacy versions of our SDK via CocoaPods by following changing the podfile to include something like the following example pod 'Appboy-iOS-SDK/AppboyKit', '~> 2.5'.
2.5.1
Fixed
Fixes a minor display problem that affected news items with no image or link for version 2.5.
2.5
Localization
Localization is now supported in version 2.5 of the Braze SDK. We have provided .string files for English, Simplified Chinese and Traditional Chinese. You can also optionally override our Braze’s default LocalizedAppboyUIString.strings right within your app’s Localizable.Strings file in much the same way you would do an override in CSS. To do so, copy the key and string pair into your Localizable.Strings file and edit the string as you so desire.
For your convenience our CocoaPod integrates the LocalizedAppboyUIString.strings files for the three aforementioned languages. If you do not wish to use one or more of these languages, you can feel free to delete these files from your project.
Slideup Upgrade
Braze version 2.5 provides a substantial upgrade to the slideup code and reorganization for better flexibility moving forward, but at the expense of a number of breaking changes. We’ve detailed the changes in this changelog and hope that you’ll love the added power, increased flexibility, and improved UI that the new Braze slideup provides. If you have any trouble with these changes, feel free to reach out to success@braze.com for help, but most migrations to the new code structure should be relatively painless.
New Slideup Controller
The property slideupController has been added to the Braze object. Please see ABKSlideupController.h for details.
The delegate property allows you to specify a delegate for the slideup.
This replaces slideupDelegate which has been removed.
The displayNextSlideupWithDelegate: method displays the next available slideup with the specified delegate.
This replaces provideSlideupToDelegate: which has been removed from Braze.
The slideupsRemainingOnStack method returns the number of slideups that are waiting locally to be displayed.
The addSlideup: method allows you to display a slideup object with custom content. This is useful in testing or if you want to use the Braze slideup’s UI/UX with another notification system that you are using.
Clicks and impressions of slideups added by this method will not be collected by Braze.
hideCurrentSlideup: method will remove any slideup currently on screen, with or without animation.
New Slideup Properties and Methods in ABKSlideup.h
The following properties and methods all belong to the ABKSlideup object. Please see ABKSlideup.h for more information.
New Properties
The extras property carries additional data within key value pairs that have been defined on the dashboard, just like a push notification. Braze does nothing with the extras property, any additional behavior is at your discretion.
The slideupAnchor property defines whether the slideup originates from the top or the bottom of the screen.
The slideupDismissType property controls whether the slideup will dismiss automatically after a period of time has lapsed, or if it will wait for interaction with the user before disappearing.
The slideup will be dismissed automatically after the number of seconds defined by the newly added duration property if the slideup’s slideupDismissType is ABKSlideupDismissAutomatically.
The slideupClickActionType property defines the action behavior after the slideup is clicked: displaying a news feed, redirect to a uri, or nothing but dismissing the slideup. This property is read only. If you want to change the slideup’s click behavior, you can call one of the following method: setSlideupClickActionToNewsFeed, setSlideupClickActionToUri: or setSlideupClickActionToNone.
The uri property defines the uri string that the slide up will open when the slideupClickActionType is ABKSlideupRedirectToURI. This is a read only property, you can call setSlideupClickActionToUri: to change it’s value.
New Methods
logSlideupImpression and logSlideupClicked have been added to allow you to report user interactions with the slideup in the case that you’ve fully customized the slideup experience and Braze is not handling the interactions.
setSlideupClickActionToNewsFeed, setSlideupClickActionToUri: and setSlideupClickActionToNone have been added to allow you to change the slideup’s click action behavior. setSlideupClickActionToUri: accepts a uri string as parameter and required the given uri string is valid.
Delegate Method Changes
All former Braze slideup delegate methods have been depreciated and removed. In their place Braze has added new slideup delegate methods within ABKSlideupControllerDelegate.h.
onSlideupReceived: is called when slideup objects are received from the Braze server.
beforeSlideupDisplayed:withKeyboardIsUp: is called before slideup objects are displayed, the return value determines whether the slideup will be displayed, queued or discarded.
slideupViewControllerWithSlideup: This delegate method allows you to specify custom view controllers in which your slideups will be displayed.
The custom view controller should be a subclass of ABKSlideupViewController.
Alternatively, it can also be an instance of ABKSlideupViewController.
The view of the returned view controller should be an instance of ABKSlideupView or its subclass.
For integration examples of a custom slideup view controller, see the CustomSlideupViewController class in Braze’s sample app Stopwatch.
onSlideupClicked: is called when a user clicks on a slideup. We recommend that you specify behavior on click via the dashboard, but you can additionally specify behavior on click by defining this delegate method.
onSlideupDismissed: is called whenever the slideup is dismissed regardless of whether the dismissal occurs automatically or via swipe. This method is not called if the user clicks on the slideup. If the user clicks or taps on the slideup, onSlideupClicked is called instead.
New Options on the Dashboard
Slideup behavior on click can now be set within the dashboard to open a modal news feed, open a URI within a modal, or do nothing.
The following properties can be set remotely from the Braze Dashboard:
extras
slideupAnchor
slideupDismissType
slideupClickActionType
uri
News Feed Changes
News feed items are now cached in offline storage, allowing the news feed to render even when no internet connectivity is available. Braze will still automatically try to pull down a new news feed when a session opens, even if an offline feed is available.
Each card now has a maximum height of no more than 2009 points to avoid any performance issues as recommended by iOS developer guidelines.
The entirety of captioned image cards are now clickable. Formerly, only the link itself was clickable.
When the news feed is brought to the foreground, it will now automatically check for new content if the cached version of the feed was received more than 60 seconds ago.
— The width of news feed cards as well as the minimum margin between any card and the left & right edges of the view controller can now be customized. These values can be set separately for both iPad and iPhone. This allows for a larger news feed to render on larger screen sizes. All card images will scale proportionally. Please see ABKFeedViewControllerContext.h and ABKFeedViewController.h for more information.
Other Changes
Various internal and news feed display optimizations.
2.4
IDFA Collection is now optional.
By default, IDFA collection is now disabled by the Braze SDK.
There will be no loss of continuity on user profiles or loss of functionality whatsoever as a result of this change.
If you’re using advertising elsewhere in the app or through our in-app news feed, we recommend continuing to collect the IDFA through Braze. You should be able to do so safely without fear of rejection from the iOS App Store.
The future availability of IDFAs will enable functionality like integrating with other third-party systems, including your own servers, and enabling re-targeting of existing users outside of Braze. If you continue to record them we will store IDFAs free of charge so you can take advantage of these options immediately when they are released without additional development work.
Necessary Project Changes
ABKIdentifierForAdvertisingProvider.m and ABKIdentifierForAdvertisingProvider.h must be added to your project regardless of whether or not you enable collection. This occurs automatically if you integrate/update via the CocoaPod.
Enabling Braze IDFA Collection
IDFA collection can be enabled via adding the following PreProcessor Macro to the Build Settings of your app:
ABK_ENABLE_IDFA_COLLECTION
2.3.1
The Braze SDK for iOS now has two versions, one for use with apps which incorporate the official Facebook SDK and one for those which do not. In November of 2013, the App Store Validation Process started generating warnings about the usage of isOpen and setActiveSession in the Braze SDK. These selectors were being sent to instances of classes in the Facebook SDK and are generally able to be used without generating warnings. However because of the way that the classes were initialized in Braze (a result of building a single Braze binary to fully support apps with and without the Facebook SDK), the App Store Validation Process started generating warnings the Facebook SDK methods share a name with private selectors elsewhere in iOS. Although none of our customers have been denied App Store approval yet, to protect against potential validation policy changes by Apple, Braze now provides two versions of its SDK, neither of which generate warnings. Going forward, the appboy-ios-sdk repository will provide both versions of the SDK in the folders ‘AppboySDK’ (as before) and ‘AppboySDKWithoutFacebookSupport’. The ‘AppboySDKWithoutFacebookSupport’ does not require the host app to include the Facebook SDK, but as a result does not include all of the Braze features for Facebook data fetching. More information is available here within the Braze documentation.
Fixed a bug that repeatedly updated the push token of some users unnecessarily.
The “Reporting an Issue?” box within the UI layout of the Feedback Page has been moved to the left side of the label away from the “Send” button. This change was made to reduce the number of misclicks of the “Send” button. The “Reporting an Issue?” label is now clickable as well.
Cross Promotion Cards for apps with long titles will now render appropriately in iOS5. Before the title would render abnormally large on these devices.
Fixed a bug where view recycling would cause incorrect card images to appear for newly rendered cards (until the image for that card finished downloading). Card images for newly rendered cards will now remain empty until the correct image is downloaded.
Internal changes to enable future support for a 64 bit library release.
Improvements to the Braze Sample App.
Internal code structure and performance improvements including the move of more offline caching to background tasks.
2.3
BREAKING CHANGE: The ABKSlideupControllerDelegate interface has been changed to work with ABKSlideup objects instead of simply the slideup message. This provides you with more control over the click actions and display of slideups and is also being made in anticipation of the augmentation of the ABKSlideup object with more data properties in future releases. To access the message previously sent to shouldDisplaySlideup, simply access the message property on the provided ABKSlideup argument.
displayNextAvailableSlideup has been deprecated and will be removed in the next minor release, it has been replaced by provideSlideupToDelegate, see Appboy.h documentation for more information.
provideSlideupToDelegate has been added to Braze to allow for more fine grained control over slideup display.
Fixes a bug where the slideupDelegate property getter on Braze would always return nil.
Changes the slideupDelegate property on Braze to be retained, instead of assigned.
2.2.1
Adds a startup option to appboyOptions to control the automatic capture of social network data. See the documentation on ABKSocialAccountAcquisitionPolicy in Appboy.h for more information.
Changes a table cell’s default background color to clear, from the white value that became default in iOS7.
Adds support for developer to send up image_url for user avatars, allowing for custom images to be included in user profiles on the dashboard.
2.2
Adds support for new banner and captioned image card types.
Adds support for submitting feedback programmatically through an Appboy.h method without using Braze feedback form. This allows you to create your own feedback form.
Fixes an issue where the the news feed’s web view would display “Connection Error” when a user came back into the app after a card had directed him or her to a protocol URL. Now when users come back from a redirected protocol URL, the feed is properly displayed.
Fixes an issue where the SDK might have incorrectly sent both read and write Facebook permissions at the same time, instead preferring to request only those read permissions that Braze is interested in and have already been requested by the incorporating app.
Fixes a corner case where card impressions could be miscounted when the feed view controller is the master view controller of a split view.
Makes cards truncate properly at two lines.
2.1.1
URGENT BUGFIX: This fixes an issue which exists in all previous versions of the v2 SDK which is causing crashes on the just release iPhone 5c and iPhone 5s. All users of v2 are recommended to upgrade the Braze SDK to 2.1.1 immediately and re-submit to the app store.
2.1.0
Adds support for iOS 7. You will need to use Xcode 5 to use this and future versions of the Braze iOS SDK.
Updates internal usage of NUI. If you’re using NUI, please ensure that you are at least using version 0.3.3 (the most up to date as of this writing is 0.3.4).
Removes support for iOS 4.3.
Optimizes news feed rendering for faster start up times and smoother scrolling of long feeds.
Removes the deprecated - (void) logPurchase:(NSString *)productId priceInCents:(NSUInteger)price method in favor of the new multi-currency tracking method. Conversion of old method calls is straightforward. [[Appboy sharedInstance] logPurchase:@"powerups" priceInCents:99]; should turn into [[Appboy sharedInstance] logPurchase:@"powerups" inCurrency:@"USD" atPrice:[[[NSDecimalNumber alloc] initWithFloat:.99f] autorelease]];
Any references to the delegate property of ABKFeedbackViewControllerModalContext should be updated to the new property name feedbackDelegate.
Following the removal of support for 4.3, removes SBJson parsing and uses built-in parsing added in iOS5 to improve performance and lower the SDK footprint.
2.0.4
Adds support for reporting purchases in multiple currencies. Also, changes the price reporting object type to NSDecimalNumber for consistency with StoreKit.
Adds additional space savings optimizations to image assets.
Minor fix to orientation change handling in the example app code.
2.0.3
Adds the ability to assign a Foursquare access token for each user. Doing so will cause the Braze backend to make Foursquare data available in user profiles on the dasbhard.
Adds more fine grained control options for Braze’s network activity. See Appboy.h for more information.
2.0.2
Fixes a bug where Braze might reopen a Facebook read session when a publish session already exists
2.0.1
UI Improvements
Fixed a bug when using the nav context feedback in a popover window that would cause the email bar to disappear
Updated news feed’s close button when opened from a slide up
Added a loading spinner on the feedback page when fetching email address from Facebook
Fixed the bug where the modal context feed page’s navigation bar would not adhere to NUI theming
Improved the look of the popover content feedback page
Enabled resizable webpages when clicking on to a web URL through a card
API updates
Updated custom user attribute setting methods to return a boolean value indicating if the setting is successful
Added methods for incrementing custom user attributes
Added support for device push tokens as NSData when registering the token to Braze
More detailed error messages logged in console
Removed the enable/disable Braze methods from Appboy.h
2.0
Initial release
# Configuração inicial do SDK para MacOS
Source: /docs/pt-br/developer_guide/platforms/legacy_sdks/macOS/initial_sdk_setup/index.md
**Warning:**
[AppboyKit](https://github.com/Appboy/appboy-ios-sdk) (also known as the Objective-C SDK) is no longer supported and has been replaced by the [Swift SDK](https://www.braze.com/docs/pt-br/pt-br/developer_guide/sdk_integration/?sdktab=swift). It will no longer receive new features, bug fixes, security updates, or technical support—however, messaging and analytics will continue to function as normal. To learn more, see [Introducing the New Braze Swift SDK](https://www.braze.com/resources/articles/introducing-the-new-braze-swift-sdk).
# Configuração inicial do SDK {#initial-sdk-setup}
> Este artigo de referência ensina como instalar o SDK da Braze para macOS.
A partir da versão [3.32.0](https://github.com/Appboy/appboy-ios-sdk/releases/tag/3.32.0), o SDK da Braze é compatível com macOS para apps que usam [Mac Catalyst](https://developer.apple.com/mac-catalyst/) com integração pelo Swift Package Manager. No momento, o SDK não é compatível com o Mac Catalyst ao usar CocoaPods ou Carthage.
**Note:**
Para criar seu app com o Mac Catalyst, consulte a documentação da Apple.
Depois que seu app for compatível com o Catalyst, siga [estas instruções para usar o Swift Package Manager](https://www.braze.com/docs/pt-br/pt-br/developer_guide/platform_integration_guides/swift/sdk_integration/?tab=swift%20package%20manager/) para importar o SDK da Braze para o seu app.
## Recursos compatíveis {#supported-features}
A Braze oferece suporte a [notificações por push](https://www.braze.com/docs/pt-br/pt-br/developer_guide/push_notifications/?sdktab=swift), [Content Cards](https://www.braze.com/docs/pt-br/pt-br/developer_guide/platforms/swift/content_cards/#content-cards-data-model), [mensagens no app](https://www.braze.com/docs/pt-br/pt-br/developer_guide/analytics/tracking_location/?sdktab=swift) e [coleta automática de localização](https://www.braze.com/docs/pt-br/pt-br/developer_guide/analytics/tracking_location/?sdktab=swift) quando executada no Mac Catalyst.
Vale ressaltar que Push Stories, rich push e geofences não são compatíveis com o macOS.
[1]:https://github.com/Appboy/appboy-ios-sdk/releases/tag/3.32.0
[2]:https://developer.apple.com/mac-catalyst/
# Configuração inicial do SDK para tvOS
Source: /docs/pt-br/developer_guide/platforms/legacy_sdks/tvos/initial_sdk_setup/index.md
**Warning:**
[AppboyKit](https://github.com/Appboy/appboy-ios-sdk) (also known as the Objective-C SDK) is no longer supported and has been replaced by the [Swift SDK](https://www.braze.com/docs/pt-br/pt-br/developer_guide/sdk_integration/?sdktab=swift). It will no longer receive new features, bug fixes, security updates, or technical support—however, messaging and analytics will continue to function as normal. To learn more, see [Introducing the New Braze Swift SDK](https://www.braze.com/resources/articles/introducing-the-new-braze-swift-sdk).
# Configuração inicial do SDK {#initial-sdk-setup}
> Este artigo de referência aborda como instalar o SDK da Braze para tvOS. A instalação do SDK da Braze fornecerá a funcionalidade básica de análise de dados.
**Note:**
Nosso SDK do tvOS atualmente oferece suporte à funcionalidade de análise de dados. Para adicionar um app para tvOS em seu dashboard, abra um [tíquete de suporte](https://www.braze.com/docs/pt-br/pt-br/braze_support/).
O SDK da Braze para tvOS deve ser instalado ou atualizado usando o [CocoaPods](http://cocoapods.org/), um gerenciador de dependências para projetos Objective-C e Swift. O CocoaPods oferece mais simplicidade para integração e atualização.
## Integração do SDK do tvOS com o CocoaPods {#tvos-sdk-cocoapods-integration}
### Etapa 1: Instalar o CocoaPods {#step-1-install-cocoapods}
A instalação do SDK por meio do tvOS [CocoaPods](http://cocoapods.org/) automatiza a maior parte do processo de instalação para você. Antes de iniciar esse processo, verifique se você está usando a [versão 2.0.0 ou superior do Ruby](https://www.ruby-lang.org/en/installation/).
Execute o seguinte comando para começar:
```bash
$ sudo gem install cocoapods
```
- Se o sistema pedir que você substitua o executável `rake`, consulte [Getting Started](http://guides.cocoapods.org/using/getting-started.html) em CocoaPods.org para obter mais detalhes.
- Se você tiver problemas relacionados ao CocoaPods, consulte o [guia de solução de problemas do CocoaPods](http://guides.cocoapods.org/using/troubleshooting.html).
### Etapa 2: Construindo o Podfile {#step-2-constructing-the-podfile}
Agora que você instalou o CocoaPods Ruby Gem, precisará criar um arquivo no diretório do projeto Xcode chamado `Podfile`.
Adicione a seguinte linha ao seu Podfile:
```
target 'YourAppTarget' do
pod 'Appboy-tvOS-SDK'
end
```
Sugerimos que você versione a Braze para que as atualizações do pod capturem automaticamente qualquer coisa menor que uma atualização de versão secundária. Isso se parece com `pod 'Appboy-tvOS-SDK' ~> Major.Minor.Build`. Se quiser integrar automaticamente a versão mais recente do SDK da Braze, mesmo com grandes alterações, você poderá usar `pod 'Appboy-tvOS-SDK'` em seu Podfile.
### Etapa 3: Instalação do SDK da Braze {#step-3-installing-the-braze-sdk}
Para instalar o SDK da Braze via CocoaPods, navegue até o diretório do seu projeto de app do Xcode em seu terminal e execute o seguinte comando:
```
pod install
```
Nesse ponto, você deve conseguir abrir o novo espaço de trabalho do projeto Xcode criado pelo CocoaPods. Use esse espaço de trabalho do Xcode em vez do seu projeto do Xcode.

### Etapa 4: Atualização do delegate do seu app {#step-4-updating-your-app-delegate}
Adicione a seguinte linha de código ao seu arquivo `AppDelegate.m`:
```objc
#import
```
No arquivo `AppDelegate.m`, adicione o seguinte snippet no método `application:didFinishLaunchingWithOptions`:
```objc
[Appboy startWithApiKey:@"YOUR-API-KEY"
inApplication:application
withLaunchOptions:launchOptions];
```
Por fim, atualize `YOUR-API-KEY` com o valor correto na sua página **Gerenciar configurações**.
Se estiver integrando o SDK da Braze com o CocoaPods ou o Carthage, adicione a seguinte linha de código ao seu arquivo `AppDelegate.swift`:
```swift
import AppboyTVOSKit
```
Para saber mais sobre o uso de código Objective-C em projetos Swift, consulte os [documentos para desenvolvedores da Apple](https://developer.apple.com/library/ios/documentation/swift/conceptual/buildingcocoaapps/MixandMatch.html).
Em `AppDelegate.swift`, adicione o seguinte snippet ao seu `application(application: UIApplication, didFinishLaunchingWithOptions launchOptions: [NSObject: AnyObject]?) -> Bool`:
```swift
Appboy.start(withApiKey: "YOUR-API-KEY", in:application, withLaunchOptions:launchOptions)
```
Em seguida, atualize `YOUR-API-KEY` com o valor correto na sua página **Gerenciar configurações**.
Nosso singleton `sharedInstance` será nulo antes de `startWithApiKey:` ser chamado, pois esse é um pré-requisito para usar qualquer funcionalidade da Braze.
**Warning:**
Não se esqueça de inicializar a Braze na thread principal do seu aplicativo. A inicialização de forma assíncrona pode levar a uma funcionalidade interrompida.
### Etapa 5: Especifique seu endpoint personalizado ou cluster de dados {#step-5-specify-your-custom-endpoint-or-data-cluster}
**Note:**
A partir de dezembro de 2019, os endpoints personalizados não serão mais fornecidos. Se você tiver um endpoint personalizado pré-existente, poderá continuar a usá-lo. Para saber mais, consulte nossa lista de endpoints disponíveis.
Seu representante da Braze já deve ter lhe informado sobre o [endpoint correto](https://www.braze.com/docs/pt-br/pt-br/user_guide/administrative/access_braze/sdk_endpoints/).
#### Configuração do endpoint em tempo de compilação (recomendado) {#compile-time-endpoint-configuration-recommended}
Se for fornecido um endpoint personalizado pré-existente:
- A partir do SDK da Braze para iOS v3.0.2, você pode definir um endpoint personalizado usando o arquivo `Info.plist`. Adicione o dicionário `Appboy` ao seu arquivo Info.plist. Dentro do dicionário `Appboy`, adicione a subentrada de string `Endpoint` e defina o valor para a autoridade dos seus URLs de endpoint personalizados (por exemplo, `sdk.iad-01.braze.com`, não `https://sdk.iad-01.braze.com`).
#### Configuração do endpoint em tempo de execução {#runtime-endpoint-configuration}
Se for fornecido um endpoint personalizado pré-existente:
- A partir do SDK da Braze para iOS v3.17.0+, você pode substituir a definição do seu endpoint por meio do `ABKEndpointKey` dentro do parâmetro `appboyOptions` passado para `startWithApiKey:inApplication:withLaunchOptions:withAppboyOptions:`. Defina o valor como a autoridade do URL do seu endpoint personalizado (por exemplo, `sdk.iad-01.braze.com`, não `https://sdk.iad-01.braze.com`).
**Note:**
O suporte à configuração de endpoints em tempo de execução usando `ABKAppboyEndpointDelegate` foi removido no SDK da Braze para iOS v3.17.0. Se você já usa `ABKAppboyEndpointDelegate`, note que nas versões v3.14.1 a v3.16.0 do SDK da Braze para iOS, qualquer referência a `dev.appboy.com` em seu método `getApiEndpoint()` deve ser substituída por uma referência a `sdk.iad-01.braze.com`.
### Integração do SDK concluída {#sdk-integration-complete}
Agora, a Braze está coletando dados do seu aplicativo e sua integração básica está concluída. Note que, ao compilar seu app para tvOS e quaisquer outras bibliotecas de terceiros, o Bitcode deve ser ativado.
### Atualizando o SDK da Braze via CocoaPods {#updating-the-braze-sdk-via-cocoapods}
Para atualizar um CocoaPod, basta executar o seguinte comando no diretório do projeto:
```
pod update
```
## Personalização da Braze na inicialização {#customizing-braze-on-startup}
Se desejar personalizar a Braze na inicialização, você poderá usar o método de inicialização da Braze `startWithApiKey:inApplication:withLaunchOptions:withAppboyOptions` e passar um `NSDictionary` opcional de chaves de inicialização da Braze.
Em seu arquivo `AppDelegate.m`, no método `application:didFinishLaunchingWithOptions`, adicione o seguinte método da Braze:
```objc
[Appboy startWithApiKey:@"YOUR-API-KEY"
inApplication:application
withLaunchOptions:launchOptions
withAppboyOptions:appboyOptions];
```
Em `AppDelegate.swift`, no método `application(application: UIApplication, didFinishLaunchingWithOptions launchOptions: [NSObject: AnyObject]?) -> Bool`, adicione o seguinte método da Braze:
```swift
Appboy.start(withApiKey: "YOUR-API-KEY",
in:application,
withLaunchOptions:launchOptions,
withAppboyOptions:appboyOptions)
```
em que `appboyOptions` é um `Dictionary` de valores de configuração de inicialização.
Esse método substituiria o método de inicialização `startWithApiKey:inApplication:withLaunchOptions:` e é chamado com os seguintes parâmetros:
- `YOUR-API-KEY`: A chave de API do seu aplicativo pode ser encontrada em **Gerenciar configurações** no dashboard da Braze.
- `application`: O app atual.
- `launchOptions`: As opções `NSDictionary` que você obtém em `application:didFinishLaunchingWithOptions:`.
- `appboyOptions`: Um `NSDictionary` opcional com valores de configuração de inicialização para a Braze.
Veja [Appboy.h](https://github.com/Appboy/appboy-ios-sdk/blob/master/AppboyKit/include/Appboy.h) para obter uma lista das chaves de inicialização da Braze.
## Appboy.sharedInstance() e a anulabilidade do Swift {#appboysharedinstance-and-swift-nullability}
Diferentemente da prática comum, o singleton `Appboy.sharedInstance()` é opcional. Isso ocorre porque `sharedInstance` é `nil` antes da chamada de `startWithApiKey:`, e há algumas implementações não padronizadas, mas ainda válidas, nas quais uma inicialização postergada pode ser utilizada.
Se você chamar `startWithApiKey:` em seu delegado `didFinishLaunchingWithOptions:` antes de qualquer acesso ao `sharedInstance` do Appboy (a implementação padrão), poderá usar o encadeamento opcional, como `Appboy.sharedInstance()?.changeUser("testUser")`, para evitar verificações complicadas. Isso terá paridade com uma implementação em Objective-C que assume um `sharedInstance` não nulo.
## Opções de integração manual {#manual-integration-options}
Você também pode integrar nosso SDK do tvOS manualmente — basta obter o framework do nosso [repositório público](https://github.com/appboy/appboy-ios-sdk) e inicializar a Braze conforme descrito nas seções anteriores.
## Identificação de usuários e análise de dados {#identifying-users-and-reporting-analytics}
Consulte nossa [documentação do iOS](https://www.braze.com/docs/pt-br/pt-br/developer_guide/analytics/setting_user_ids/?tab=swift) para obter informações sobre a definição de IDs de usuário, registro de eventos personalizados e definição de atributos de usuário. Recomendamos também que você se familiarize com nossas [convenções de nomenclatura de eventos](https://www.braze.com/docs/pt-br/pt-br/user_guide/data/activation/events/event_naming_conventions/).
# Sobre Banners
Source: /docs/pt-br/developer_guide/banners/index.md
# Banners
> With Banners, you can create personalized messaging for your users, all while extending the reach of your other channels, such as email or push notifications. You can embed Banners directly in your app or website, which lets you engage with users through an experience that feels natural.
## Prerequisites
Banners availability depends on your Braze package. Contact your account manager or customer success manager to get started.
Before you start, make sure you have [Banner placements](https://www.braze.com/docs/pt-br/pt-br/developer_guide/banners/placements/) created in your app or website.

## Why use Banners?
Banners allow marketing and product teams to personalize app or website content dynamically, reflecting real-time user eligibility and behavior. They persistently display messages inline, providing non-intrusive, contextually relevant experiences that can be refreshed at the start of a session or mid-session when your app or website explicitly requests it.
After Banners are integrated into an app or website, marketers can design and launch Banners using a simple drag-and-drop editor, eliminating the need for ongoing developer assistance, reducing complexity, and improving efficiency.
| Use case | Explanation |
| --- | --- |
| Announcements | Keep announcements like upcoming events or policy changes at the forefront of your app experience. |
| Personalizing offers | Show personalized promotions and incentives based on each user’s browsing history, cart content, subscription tier, and loyalty status. |
| Targeting new user engagement | Guide new users through onboarding flows and account setup. |
| Sales and promotions | Highlight featured content, trending products, and ongoing brand campaigns persistently and directly on your homepage without disrupting the user experience. |
{: .reset-td-br-1 .reset-td-br-2 aria-label="Why use Banners?" }
## Features
Features for Banners include:
- **Easy content building:** Create and preview your Banner using a visual, drag-and-drop editor with support for images, text, buttons, email capture forms, custom code, and more.
- **Flexible placements:** Define multiple locations within your application or website where Banners can appear, enabling precise targeting to specific contexts or user experiences.
- **Dynamic personalization:** Banners can only be refreshed at the start of a new session or mid-session if you explicitly request the refresh. Banners don't update automatically on a new session. If you don't request the refresh, the Banner won't update.
- **Native prioritization:** Set the display priority for when multiple Banners target the same placement, ensuring the right message reaches users at the right time.
- **Custom Code editor block:** Use the Custom Code editor block to add custom HTML for advanced customization or seamless integration with your existing web styles.
## About Banners {#about-banners}
### Placement IDs {#placement-id}
Banner placements are specific locations in your app or website [you create with the Braze SDK](https://www.braze.com/docs/pt-br/pt-br/developer_guide/banners/placements/) that designate where Banners can appear.
Common locations include the top of your homepage, product detail pages, and checkout flows. After placements are created, Banners can be [assigned in your Banner campaign](https://www.braze.com/docs/pt-br/pt-br/user_guide/channels/banners/create_a_banner/).
There is no fixed limit on the number of placements you can create per workspace, and you can create as many placement IDs as your experience requires. Each placement must be unique within a workspace. A single placement ID can be referenced by up to 25 active messages at the same time.
**Important:**
Avoid modifying placement IDs after launching a Banner campaign.
### Banner priority {#priority}
When multiple Banner messages reference the same placement ID, Banners are displayed in order of priority: high, medium, or low. By default, Banners are set to medium, but you can [manually set the priority](https://www.braze.com/docs/pt-br/pt-br/user_guide/channels/banners/create_a_banner/#set-banner-priority-optional) when you create or edit your Banner campaign.
If multiple Banners are set to the same priority, the newest Banner that the user is eligible for is displayed first.
### Placement requests {#requests}
When you [create placements in your app or website](https://www.braze.com/docs/pt-br/pt-br/developer_guide/banners/placements/#requestBannersRefresh), your app sends a request to Braze to fetch Banner messages for each placement.
- You can request up to **10 placements per refresh request**.
- For each placement, Braze returns the **highest-priority Banner** the user is eligible to receive.
- If more than 10 placements are requested in a refresh, only the first 10 are returned; the rest are dropped.
For example, an app might request three placements in a refresh request: `homepage_promo`, `cart_abandonment`, and `seasonal_offer`. Each request returns the most relevant Banner for that placement.
#### Rate limiting for refresh requests
If you're on older SDK versions (before Swift 13.1.0, Android 38.0.0, Web 6.1.0, React Native 17.0.0, and Flutter 15.0.0), only one refresh request is permitted per user session.
If you're on newer minimum SDK versions (Swift 13.1.0+, Android 38.0.0+, Web 6.1.0+, React Native 17.0.0+, and Flutter 15.0.0+), refresh requests are controlled by a token bucket algorithm to prevent excessive polling:
- Each user session begins with five refresh tokens.
- Tokens refill at a rate of one token every 180 seconds (3 minutes).
Each explicit call to `requestBannersRefresh` consumes one token. The automatic refresh that occurs at the start of a new session or when `changeUser` is called does not consume a token, as this refresh is a publishing of the last cached Banner for that user. If you attempt a refresh when no tokens are available, the SDK doesn't make the request and logs an error until a token refills. This is important for mid-session and event-triggered updates. To implement dynamic updates (for example, after a user completes an action on the same page), call the refresh method after the custom event is logged, but note the necessary delay for Braze to ingest and process the event before the user qualifies for a different Banner campaign.
### Message delivery
Banner messages are delivered to your app or website as HTML content, typically rendered inside an iframe. This ensures that your Banners render consistently across devices, and helps you keep their styles and scripts separate from the rest of your code.
Iframes allow for dynamic and personalized content updates that don't require changes to your codebase. Each iframe retrieves and displays the HTML for each user session using campaign targeting and personalization logic.
### Dimensions and sizing
Here's what you need to know about Banner dimensions and sizing:
- While the composer allows you to preview Banners in different dimensions, that information isn't saved or sent to the SDK.
- The HTML takes up the full width of the container it's rendered in.
- We recommend making a fixed dimension element and testing those dimensions in composer.
## Limitations
Each workspace can support up to 200 active Banner campaigns. If this limit is reached, you'll need to [archive or deactivate](https://www.braze.com/docs/pt-br/pt-br/user_guide/messaging/governance/statuses/#changing-the-status) an existing campaign before creating a new one.
Additionally, Banner messages do not support the following features:
- API-triggered and action-based campaigns
- Connected Content
- Promotional codes
- `catalog_items` using the [`:rerender` tag](https://www.braze.com/docs/pt-br/pt-br/user_guide/data/activation/catalogs/using_catalogs/#using-liquid)
## Next steps
- [Create Banner placements in your app or website](https://www.braze.com/docs/pt-br/pt-br/developer_guide/banners/placements/)
- [Create a Banner campaign in Braze](https://www.braze.com/docs/pt-br/pt-br/user_guide/channels/banners/create_a_banner/)
- [Tutorial: Displaying a Banner by Placement ID](https://www.braze.com/docs/pt-br/pt-br/developer_guide/banners/tutorial_displaying_banners)
**Tip:**
Want to help prioritize what's next? Contact [banners-feedback@braze.com](mailto:banners-feedback@braze.com).
# Gerenciar posicionamentos de Banner para o SDK da Braze
Source: /docs/pt-br/developer_guide/banners/placements/index.md
# Gerenciar posicionamentos de Banner {#manage-banner-placements}
> Aprenda como criar e gerenciar posicionamentos de Banner no SDK da Braze, incluindo o acesso às suas propriedades exclusivas e o registro de impressões. Para mais informações gerais, veja [Sobre Banners](https://www.braze.com/docs/pt-br/pt-br/developer_guide/banners/).
## Sobre solicitações de posicionamento {#requests}
When you [create placements in your app or website](https://www.braze.com/docs/pt-br/pt-br/developer_guide/banners/placements/#requestBannersRefresh), your app sends a request to Braze to fetch Banner messages for each placement.
- You can request up to **10 placements per refresh request**.
- For each placement, Braze returns the **highest-priority Banner** the user is eligible to receive.
- If more than 10 placements are requested in a refresh, only the first 10 are returned; the rest are dropped.
For example, an app might request three placements in a refresh request: `homepage_promo`, `cart_abandonment`, and `seasonal_offer`. Each request returns the most relevant Banner for that placement.
#### Rate limiting for refresh requests
If you're on older SDK versions (before Swift 13.1.0, Android 38.0.0, Web 6.1.0, React Native 17.0.0, and Flutter 15.0.0), only one refresh request is permitted per user session.
If you're on newer minimum SDK versions (Swift 13.1.0+, Android 38.0.0+, Web 6.1.0+, React Native 17.0.0+, and Flutter 15.0.0+), refresh requests are controlled by a token bucket algorithm to prevent excessive polling:
- Each user session begins with five refresh tokens.
- Tokens refill at a rate of one token every 180 seconds (3 minutes).
Each explicit call to `requestBannersRefresh` consumes one token. The automatic refresh that occurs at the start of a new session or when `changeUser` is called does not consume a token, as this refresh is a publishing of the last cached Banner for that user. If you attempt a refresh when no tokens are available, the SDK doesn't make the request and logs an error until a token refills. This is important for mid-session and event-triggered updates. To implement dynamic updates (for example, after a user completes an action on the same page), call the refresh method after the custom event is logged, but note the necessary delay for Braze to ingest and process the event before the user qualifies for a different Banner campaign.
## Criar um posicionamento {#create-a-placement}
### Pré-requisitos {#prerequisites}
Estas são as versões mínimas do SDK necessárias para criar posicionamentos de Banner:
### Step 1: Create placements in Braze
If you haven't already, you'll need to create Banner placements in Braze that are used to define the locations in your app or site can display Banners. To create a placement, go to **Settings** > **Banners Placements**, then select **Create Placement**.

Give your placement a name and assign a **Placement ID**. Be sure you consult other teams before assigning an ID, as it'll be used throughout the card's lifecycle and shouldn't be changed later. For more information, see [Placement IDs].

### Etapa 2: Atualize os posicionamentos no seu app {#requestBannersRefresh}
Os posicionamentos podem ser atualizados chamando os métodos de atualização descritos abaixo. Se `subscribeToBannersUpdates` estiver ativo, o SDK republica automaticamente os IDs de posicionamento em cache no início de cada nova sessão e quando você chama `changeUser`. Essa atualização automática não consome um token de limite de taxa.
**Tip:**
Atualize os posicionamentos o mais rápido possível para evitar atrasos no download ou na exibição dos Banners.
```javascript
import * as braze from "@braze/web-sdk";
braze.requestBannersRefresh(["global_banner", "navigation_square_banner"]);
```
```swift
AppDelegate.braze?.banners.requestRefresh(placementIds: ["global_banner", "navigation_square_banner"])
```
```java
ArrayList listOfBanners = new ArrayList<>();
listOfBanners.add("global_banner");
listOfBanners.add("navigation_square_banner");
Braze.getInstance(context).requestBannersRefresh(listOfBanners);
```
```kotlin
Braze.getInstance(context).requestBannersRefresh(listOf("global_banner", "navigation_square_banner"))
```
```javascript
Braze.requestBannersRefresh(["global_banner", "navigation_square_banner"]);
```
```csharp
This feature is not currently supported on Unity.
```
```javascript
This feature is not currently supported on Cordova.
```
```dart
braze.requestBannersRefresh(["global_banner", "navigation_square_banner"]);
```
```brightscript
This feature is not currently supported on Roku.
```
### Etapa 3: Ouça as atualizações {#subscribeToBannersUpdates}
**Tip:**
Se você inserir Banners usando os métodos do SDK neste guia, todos os eventos de análise de dados (como impressões e cliques) serão tratados automaticamente, e as impressões só serão registradas quando o banner estiver visível.
Se você estiver usando JavaScript puro com o SDK Web da Braze, use [`subscribeToBannersUpdates`](https://js.appboycdn.com/web-sdk/latest/doc/modules/braze.html#subscribetobannersupdates) para ouvir atualizações de posicionamento e, em seguida, chame [`requestBannersRefresh`](https://js.appboycdn.com/web-sdk/latest/doc/modules/braze.html#requestbannersrefresh) para buscá-las.
```javascript
import * as braze from "@braze/web-sdk";
braze.subscribeToBannersUpdates((banners) => {
console.log("Banners were updated");
});
// always refresh after your subscriber function has been registered
braze.requestBannersRefresh(["global_banner", "navigation_square_banner"]);
```
Se você estiver usando React com o SDK Web da Braze, configure [`subscribeToBannersUpdates`](https://js.appboycdn.com/web-sdk/latest/doc/modules/braze.html#subscribetobannersupdates) dentro de um hook `useEffect` e chame [`requestBannersRefresh`](https://js.appboycdn.com/web-sdk/latest/doc/modules/braze.html#requestbannersrefresh) após registrar seu ouvinte.
```typescript
import * as braze from "@braze/web-sdk";
useEffect(() => {
const subscriptionId = braze.subscribeToBannersUpdates((banners) => {
console.log("Banners were updated");
});
// always refresh after your subscriber function has been registered
braze.requestBannersRefresh(["global_banner", "navigation_square_banner"]);
// cleanup listeners
return () => {
braze.removeSubscription(subscriptionId);
}
}, []);
```
**Note:**
O ouvinte de atualização de banner reflete o estado do banner na memória do SDK. Uma única atualização pode incluir posicionamentos que já estavam em cache (por exemplo, de uma atualização anterior, outra tela ou trabalho automático do SDK), não apenas os IDs de posicionamento da sua chamada `requestRefresh` mais recente. Se você se importa apenas com determinados posicionamentos, verifique o ID de posicionamento de cada banner no seu ouvinte e ignore o restante. Quando tiver registrado seu ouvinte, chame `requestRefresh` para os posicionamentos que deseja sincronizar da Braze.
```swift
let placementIds = ["global_banner", "navigation_square_banner"]
let cancellable = brazeClient.braze()?.banners.subscribeToUpdates { banners in
banners.forEach { placementId, banner in
print("Received banner: \(banner) with placement ID: \(placementId)")
}
}
// Always refresh after your subscriber is registered
brazeClient.braze()?.banners.requestRefresh(placementIds: placementIds)
```
**Note:**
O ouvinte de atualização de banner reflete o estado do banner na memória do SDK. Uma única atualização pode incluir posicionamentos que já estavam em cache (por exemplo, de uma atualização anterior, outra tela ou trabalho automático do SDK), não apenas os IDs de posicionamento da sua chamada `requestBannersRefresh` mais recente. Se você se importa apenas com determinados posicionamentos, verifique o ID de posicionamento de cada banner no seu ouvinte e ignore o restante. Quando tiver registrado seu ouvinte, chame `requestBannersRefresh` para os posicionamentos que deseja sincronizar da Braze.
```java
ArrayList placementIds = new ArrayList<>();
placementIds.add("global_banner");
placementIds.add("navigation_square_banner");
Braze.getInstance(context).subscribeToBannersUpdates(banners -> {
for (Banner banner : banners.getBanners()) {
Log.d(TAG, "Received banner: " + banner.getPlacementId());
}
});
// Always refresh after your subscriber is registered
Braze.getInstance(context).requestBannersRefresh(placementIds);
```
```kotlin
val placementIds = listOf("global_banner", "navigation_square_banner")
Braze.getInstance(context).subscribeToBannersUpdates { update ->
for (banner in update.banners) {
Log.d(TAG, "Received banner: " + banner.placementId)
}
}
// Always refresh after your subscriber is registered
Braze.getInstance(context).requestBannersRefresh(placementIds)
```
```javascript
const bannerCardsSubscription = Braze.addListener(
Braze.Events.BANNER_CARDS_UPDATED,
(data) => {
const banners = data.banners;
console.log(
`Received ${banners.length} Banner Cards with placement IDs:`,
banners.map((banner) => banner.placementId)
);
}
);
```
```csharp
This feature is not currently supported on Unity.
```
```javascript
This feature is not currently supported on Cordova.
```
```dart
StreamSubscription bannerStreamSubscription = braze.subscribeToBanners((List banners) {
for (final banner in banners) {
print("Received banner: " + banner.toString());
}
});
```
```brightscript
This feature is not currently supported on Roku.
```
### Etapa 4: Inserir usando o ID do posicionamento {#insertBanner}
**Tip:**
Para um tutorial completo passo a passo, confira [Exibindo um Banner por ID de posicionamento](https://www.braze.com/docs/pt-br/pt-br/developer_guide/banners/tutorial_displaying_banners/).
Crie um elemento contêiner para o Banner. Certifique-se de definir sua largura e altura.
```html
```
Se você estiver usando JavaScript puro com o SDK Web da Braze, chame o método [`insertBanner`](https://js.appboycdn.com/web-sdk/latest/doc/modules/braze.html#insertbanner) para substituir o HTML interno do elemento contêiner.
```javascript
import * as braze from "@braze/web-sdk";
braze.initialize("sdk-api-key", {
baseUrl: "sdk-base-url",
allowUserSuppliedJavascript: true, // banners require you to opt-in to user-supplied javascript
});
braze.subscribeToBannersUpdates((banners) => {
// get this placement's banner. If it's `null` the user did not qualify for one.
const globalBanner = braze.getBanner("global_banner");
if (!globalBanner) {
return;
}
// choose where in the DOM you want to insert the banner HTML
const container = document.getElementById("global-banner-container");
// Insert the banner which replaces the innerHTML of that container
braze.insertBanner(globalBanner, container);
// Special handling if the user is part of a Control Variant
if (globalBanner.isControl) {
// hide or collapse the container
container.style.display = "none";
}
});
braze.requestBannersRefresh(["global_banner", "navigation_square_banner"]);
```
Se você estiver usando React com o SDK Web da Braze, chame o método [`insertBanner`](https://js.appboycdn.com/web-sdk/latest/doc/modules/braze.html#insertbanner) com um `ref` para substituir o HTML interno do elemento contêiner.
```tsx
import { useRef } from 'react';
import * as braze from "@braze/web-sdk";
export default function App() {
const bannerRef = useRef(null);
useEffect(() => {
const globalBanner = braze.getBanner("global_banner");
if (!globalBanner || globalBanner.isControl) {
// hide the container
} else {
// insert the banner to the container node
braze.insertBanner(globalBanner, bannerRef.current);
}
}, []);
return
}
```
**Tip:**
Para rastrear impressões, certifique-se de chamar `insertBanner` para `isControl`. Você pode então ocultar ou colapsar seu contêiner depois.
```swift
// To get access to the Banner model object:
let globalBanner: Braze.Banner?
AppDelegate.braze?.banners.getBanner(for: "global_banner", { banner in
self.globalBanner = banner
})
// UIKit implementation:
// If you simply want the Banner view, initialize a `UIView` with the placement ID:
if let braze = AppDelegate.braze {
let bannerUIView = BrazeBannerUI.BannerUIView(
placementId: "global_banner",
braze: braze,
// iOS does not perform automatic resizing or visibility changes.
// Use the `processContentUpdates` parameter to adjust the size and visibility of your Banner according to your use case.
processContentUpdates: { result in
switch result {
case .success(let updates):
if let height = updates.height {
// Adjust the visibility and/or height.
}
case .failure(let error):
// Handle the error.
}
}
)
}
// SwiftUI implementation:
// Similarly, if you want a Banner view in SwiftUI, use the corresponding `BannerView` initializer:
if let braze = AppDelegate.braze {
let bannerView = BrazeBannerUI.BannerView(
placementId: "global_banner",
braze: braze,
// iOS does not perform automatic resizing or visibility changes.
// Use the `processContentUpdates` parameter to adjust the size and visibility of your Banner according to your use case.
processContentUpdates: { result in
switch result {
case .success(let updates):
if let height = updates.height {
// Adjust the visibility and/or height according to your parent controller.
}
case .failure(let error):
// Handle the error.
}
}
)
}
```
Para obter o Banner no código Java, use:
```java
Banner globalBanner = Braze.getInstance(context).getBanner("global_banner");
```
Você pode criar Banners no layout das suas views Android incluindo este XML:
```xml
```
Se estiver usando Android Views, use este XML:
```xml
```
Para usar Jetpack Compose, adicione o artefato `com.braze:android-sdk-jetpack-compose` ao módulo do seu app. Use a mesma versão das suas outras dependências do SDK Android da Braze. Esse módulo é separado do `android-sdk-ui` e inclui o composable [`Banner`](https://braze-inc.github.io/braze-android-sdk/kdoc/braze-android-sdk/com.braze.jetpackcompose.banners/-banner.html) em `com.braze.jetpackcompose.banners`.
**Note:**
Algumas bibliotecas de UI do Compose definem seu próprio composable `Banner`. Importe `com.braze.jetpackcompose.banners.Banner` explicitamente para garantir que você está chamando a API da Braze.
```kotlin
import com.braze.jetpackcompose.banners.Banner
@Composable
fun myBannerSlot() {
Banner(placementId = "global_banner")
}
```
Opcionalmente, passe `heightCallback` para receber a altura renderizada em dp quando o tamanho do banner mudar. Para referência, consulte a [documentação KDoc do `Banner`](https://braze-inc.github.io/braze-android-sdk/kdoc/braze-android-sdk/com.braze.jetpackcompose.banners/-banner.html).
Se você não adicionar o módulo Jetpack Compose, envolva [`BannerView`](https://braze-inc.github.io/braze-android-sdk/kdoc/braze-android-sdk/com.braze.ui.banners/-banner-view/index.html) em [`AndroidView`](https://developer.android.com/reference/kotlin/androidx/compose/ui/viewinterop/AndroidView):
```kotlin
import android.view.ViewGroup
import androidx.compose.runtime.Composable
import androidx.compose.ui.viewinterop.AndroidView
import com.braze.ui.banners.BannerView
@Composable
fun myBannerSlot() {
AndroidView(
factory = { context ->
BannerView(context, "global_banner").apply {
layoutParams = ViewGroup.LayoutParams(
ViewGroup.LayoutParams.MATCH_PARENT,
ViewGroup.LayoutParams.WRAP_CONTENT
)
}
},
update = { it.placementId = "global_banner" }
)
}
```
Para obter o Banner em Kotlin, use:
```kotlin
val banner = Braze.getInstance(context).getBanner("global_banner")
```
Se você estiver usando a [Nova Arquitetura do React Native](https://reactnative.dev/architecture/landing-page), será necessário registrar `BrazeBannerView` como um componente Fabric no seu `AppDelegate.mm`.
```swift
#ifdef RCT_NEW_ARCH_ENABLED
/// Register the `BrazeBannerView` for use as a Fabric component.
- (NSDictionary> *)thirdPartyFabricComponents {
NSMutableDictionary * dictionary = [super thirdPartyFabricComponents].mutableCopy;
dictionary[@"BrazeBannerView"] = [BrazeBannerView class];
return dictionary;
}
#endif
```
Para a integração mais simples, adicione o seguinte trecho de JavaScript XML (JSX) na sua hierarquia de views, fornecendo apenas o ID do posicionamento.
```javascript
```
Para obter o modelo de dados do Banner no React Native, ou para verificar a presença desse posicionamento no cache do seu usuário, use:
```javascript
const banner = await Braze.getBanner("global_banner");
```
```csharp
This feature is not currently supported on Unity.
```
```javascript
This feature is not currently supported on Cordova.
```
Para a integração mais simples, adicione o seguinte widget na sua hierarquia de views, fornecendo apenas o ID do posicionamento.
```dart
BrazeBannerView(
placementId: "global_banner",
),
To get the Banner's data model in Flutter, use:
```
Você pode usar o método `getBanner` para verificar a presença desse posicionamento no cache do seu usuário.
```dart
braze.getBanner("global_banner").then((banner) {
if (banner == null) {
// Handle null cases.
} else {
print(banner.toString());
}
});
```
```brightscript
This feature is not currently supported on Roku.
```
### Etapa 5: Envie um Banner de teste (opcional) {#handling-test-cards}
Antes de lançar uma Campaign de Banner, você pode [enviar um Banner de teste](https://www.braze.com/docs/pt-br/pt-br/user_guide/messaging/messaging_fundamentals/sending_test_messages/?tab=banners) para verificar sua integração. Banners de teste são armazenados em um cache separado na memória e não persistem entre reinicializações do app. Embora nenhuma configuração extra seja necessária, seu dispositivo de teste deve ser capaz de receber notificações por push em primeiro plano para que possa exibir o teste.
**Note:**
Banners de teste são como qualquer outro banner, exceto que são removidos na próxima sessão do app.
## Registrar impressões {#log-impressions}
A Braze registra automaticamente impressões para Banners que estão visíveis quando você usa métodos do SDK para inserir um Banner—portanto, não há necessidade de rastrear impressões manualmente.
## Registrar cliques {#logging-clicks}
O método usado para registrar cliques em Banners depende de como seu Banner é renderizado e onde seu manipulador de cliques está localizado.
### Conteúdo padrão do Banner (automático) {#standard-banner-content-automatic}
Se você estiver usando métodos padrão do SDK, prontos para uso, para inserir Banners, e seu Banner usar componentes padrão do editor (imagens, botões, texto), os cliques são rastreados automaticamente. O SDK anexa ouvintes de cliques a esses elementos, e nenhum código adicional é necessário.
### Blocos de código personalizado {#custom-code-blocks}
Se seu Banner usar o bloco de editor **Custom Code** no dashboard da Braze, você deve usar `brazeBridge.logClick()` para registrar cliques a partir desse HTML personalizado. Isso se aplica mesmo ao usar métodos do SDK para renderizar o Banner, porque o SDK não pode anexar ouvintes automaticamente a elementos dentro do seu código personalizado.
```html
```
Para a referência completa, veja [Código personalizado e ponte JavaScript para Banners](https://www.braze.com/docs/pt-br/pt-br/user_guide/channels/banners/create_a_banner/#custom-code). O `brazeBridge` fornece uma camada de comunicação entre o HTML interno do Banner e o SDK da Braze pai.
### Implementações de UI personalizadas (headless) {#custom-ui-implementations-headless}
Se você estiver construindo uma UI totalmente personalizada usando as [propriedades personalizadas](#custom-properties) do Banner em vez de renderizar o HTML do Banner, você deve registrar manualmente cliques e impressões a partir do código do seu aplicativo. Como o SDK não está renderizando o Banner, ele não tem como rastrear automaticamente as interações com seus elementos de UI personalizados.
Para assinaturas de métodos e detalhes completos, consulte a [documentação de referência do SDK da Braze](https://www.braze.com/docs/pt-br/pt-br/developer_guide/references/).
#### Registrar impressões {#logging-impressions}
Chame o método de impressão de Banner da plataforma quando sua UI personalizada considerar o Banner como "visualizado". Construa uma lógica robusta para o que conta como uma impressão, a fim de evitar eventos duplicados — por exemplo, registre apenas quando o Banner entrar na viewport (ou equivalente), e não registre novamente quando o mesmo Banner voltar a aparecer na tela ao rolar ou quando seu componente re-renderizar sem um novo evento de visualização.
```javascript
import * as braze from "@braze/web-sdk";
// Log impression when your custom UI considers the banner viewed (for example, once when it enters viewport)
const banner = braze.getBanner("placement_id_homepage_top");
if (banner) {
braze.logBannerImpressions([banner]);
}
```
[Referência do SDK Web](https://js.appboycdn.com/web-sdk/latest/doc/modules/braze.html#logbannerimpressions)
```kotlin
// Log impression when your custom UI considers the banner viewed (for example, once when it enters viewport)
Braze.getInstance(context).logBannerImpression("placement_id_homepage_top")
```
```java
// Log impression when your custom UI considers the banner viewed (for example, once when it enters viewport)
Braze.getInstance(context).logBannerImpression("placement_id_homepage_top");
```
[Referência do SDK Android](https://braze-inc.github.io/braze-android-sdk/kdoc/braze-android-sdk/com.braze/-i-braze/log-banner-impression.html)
```swift
// Retrieve a banner and log an impression on it (for example, once when it enters viewport)
braze.banners.getBanner(for: "placement_id_homepage_top") { banner in
banner?.context.logImpression()
}
```
[Referência do SDK Swift](https://braze-inc.github.io/braze-swift-sdk/documentation/brazekit/braze/banner/context-swift.class/logimpression())
```javascript
// Log impression when your custom UI considers the banner viewed (for example, once when it enters viewport)
Braze.logBannerImpression("placement_id_homepage_top");
```
Consulte o [repositório do SDK React Native](https://github.com/braze-inc/braze-react-native-sdk) para as assinaturas de métodos mais recentes.
```dart
// Log impression when your custom UI considers the banner viewed (for example, once when it enters viewport)
braze.logBannerImpression("placement_id_homepage_top");
```
[Referência do SDK Flutter](https://pub.dev/documentation/braze_plugin/latest/braze_plugin/BrazePlugin/logBannerImpression.html)
#### Registrar cliques
Chame o método de clique de Banner da plataforma quando o usuário tocar no seu Banner personalizado (ou em um botão específico). Passe o `buttonId` opcional quando o clique for em um botão específico, para que a análise de dados possa atribuir o clique corretamente.
```javascript
import * as braze from "@braze/web-sdk";
// Log click
braze.logBannerClick("placement_id_homepage_top", buttonId); // buttonID is optional
```
[Referência do SDK Web](https://js.appboycdn.com/web-sdk/latest/doc/modules/braze.html#logbannerclick)
```kotlin
// Log click
Braze.getInstance(context).logBannerClick("placement_id_homepage_top", buttonId) // buttonID parameter can be null
```
```java
// Log click
Braze.getInstance(context).logBannerClick("placement_id_homepage_top", buttonId); // buttonID parameter can be null
```
[Referência do SDK Android](https://braze-inc.github.io/braze-android-sdk/kdoc/braze-android-sdk/com.braze/-i-braze/log-banner-click.html)
```swift
// Retrieve a banner and log a click on it
braze.banners.getBanner(for: "placement_id_homepage_top") { banner in
banner?.context.logClick(buttonId: buttonId) // buttonID is optional
}
```
[Referência do SDK Swift](https://braze-inc.github.io/braze-swift-sdk/documentation/brazekit/braze/banner/context-swift.class/logclick(buttonid:))
```javascript
// Log click
Braze.logBannerClick("placement_id_homepage_top", buttonId); // buttonID is optional
```
Consulte o [repositório do SDK React Native](https://github.com/braze-inc/braze-react-native-sdk) para as assinaturas de métodos mais recentes.
```dart
// Log click
braze.logBannerClicked("placement_id_homepage_top", buttonId); // buttonID parameter can be null
```
[Referência do SDK Flutter](https://pub.dev/documentation/braze_plugin/latest/braze_plugin/BrazePlugin/logBannerClicked.html)
## Registrar dispensas {#log-dismissals}
As dispensas de Banner removem programaticamente um Banner de um posicionamento quando um usuário o dispensa ativamente. Uma vez dispensado, o Banner é suprimido para aquele usuário. Na próxima vez que a lista de posicionamentos for atualizada, um novo banner será retornado se o usuário for elegível para um.
### Pré-requisitos
Estas são as versões mínimas do SDK necessárias para registrar dispensas de Banner:
### Integrações {#integrations}
#### Integrações padrão de Banner (editor de arrastar e soltar) {#standard-banner-integrations-drag-and-drop-editor}
Se seu Banner usar o editor de arrastar e soltar e incluir um componente de botão de dispensa, nenhum código adicional é necessário. Quando um usuário clicar no botão de dispensa, a mensagem será ocultada, uma dispensa será acionada e um evento de dispensa será registrado para análise de dados.
#### Blocos de código personalizado
Se seu Banner usar o bloco de editor **Custom Code**, você pode acionar uma dispensa diretamente de dentro do HTML do Banner usando `brazeBridge.closeMessage()`.
```html
```
### Registrar análise de dados personalizada na dispensa do banner {#log-custom-analytics-on-banner-dismissal}
Para executar lógica adicional, como registrar análise de dados personalizada ao dispensar um banner, sobrescreva o retorno de chamada opcional `onDismiss` na sua view de banner. Por padrão, esse retorno de chamada está vazio.
O SDK Web não possui um retorno de chamada `onDismiss` dedicado em `insertBanner`. Em vez disso, use `subscribeToBannersUpdates` para detectar quando um banner foi dispensado, verificando se ele não está mais presente no mapa de banners atualizado.
```javascript
import * as braze from "@braze/web-sdk";
braze.subscribeToBannersUpdates((banners) => {
const globalBanner = banners["global_banner"];
if (!globalBanner) {
// The banner was dismissed or the user is no longer eligible.
// Run any custom analytics here.
console.log("Banner was dismissed");
return;
}
});
braze.requestBannersRefresh(["global_banner"]);
```
```typescript
import { useEffect } from "react";
import * as braze from "@braze/web-sdk";
useEffect(() => {
const subscriptionId = braze.subscribeToBannersUpdates((banners) => {
const globalBanner = banners["global_banner"];
if (!globalBanner) {
// The banner was dismissed or the user is no longer eligible.
// Run any custom analytics here.
console.log("Banner was dismissed");
return;
}
});
braze.requestBannersRefresh(["global_banner"]);
return () => {
braze.removeSubscription(subscriptionId);
};
}, []);
```
Defina a propriedade opcional [`onDismissCallback`](https://braze-inc.github.io/braze-android-sdk/kdoc/braze-android-sdk/com.braze.ui.banners/-banner-view/on-dismiss-callback.html) em [`BannerView`](https://braze-inc.github.io/braze-android-sdk/kdoc/braze-android-sdk/com.braze.ui.banners/-banner-view/index.html).
```java
import android.util.Log;
import com.braze.ui.banners.BannerView;
import kotlin.Unit;
// After obtaining your BannerView instance (for example from XML via findViewById, or `new BannerView(context, "global_banner")`)
bannerView.setOnDismissCallback(() -> {
Log.d(TAG, "Successfully dismissed banner with placementId: " + bannerView.getPlacementId());
// Run any custom logic here, such as logging custom analytics
return Unit.INSTANCE;
});
```
```kotlin
import android.util.Log
import com.braze.ui.banners.BannerView
// After obtaining your BannerView instance (for example via findViewById or `BannerView(context, "global_banner")`)
bannerView.onDismissCallback = {
Log.d(TAG, "Successfully dismissed banner with placementId: ${bannerView.placementId}")
// Run any custom logic here, such as logging custom analytics
}
```
```swift
// After initializing your banner view instance using UIKit or SwiftUI
bannerView.onDismiss = { dismissedBanner in
print("Successfully dismissed banner with placementId: \(dismissedBanner.placementId)")
// Run any custom logic here, such as logging custom analytics
}
```
### Limite de armazenamento de dispensas pendentes {#pending-dismissal-storage-cap}
Os eventos de dispensa são armazenados localmente como entradas pendentes até que possam ser sincronizados com o servidor da Braze na próxima chamada de `requestBannersRefresh`.
**Warning:**
Em casos raros em que um grande número de dispensas se acumula sem uma sincronização bem-sucedida, dispensas pendentes mais antigas podem ser descartadas. Se isso ocorrer, Banners previamente dispensados podem reaparecer até que a próxima sincronização seja concluída com sucesso. Para minimizar esse risco, chame `requestBannersRefresh` sempre que seu app recuperar a conectividade de rede.
## Dimensões e tamanhos {#dimensions-and-sizing}
Aqui está o que você precisa saber sobre dimensões e tamanhos do Banner:
- Embora o criador permita que você visualize Banners em diferentes dimensões, essa informação não é salva ou enviada para o SDK.
- O HTML ocupará toda a largura do contêiner em que for renderizado.
- Recomendamos criar um elemento de dimensão fixa e testar essas dimensões no criador.
## Propriedades personalizadas {#custom-properties}
Você pode usar propriedades personalizadas da sua Campaign de Banner para recuperar dados chave-valor através do SDK e modificar o comportamento ou a aparência do seu app. Por exemplo, você poderia:
- Enviar metadados para suas análises de terceiros ou integrações.
- Usar metadados como um `timestamp` ou objeto JSON para acionar lógica condicional.
- Controlar o comportamento de um banner com base em metadados incluídos como `ratio` ou `format`.
### Pré-requisitos
Você precisará [adicionar propriedades personalizadas](https://www.braze.com/docs/pt-br/pt-br/user_guide/channels/banners/create_a_banner/#custom-properties) à sua Campaign de Banner. Além disso, estas são as versões mínimas do SDK necessárias para acessar propriedades personalizadas:
### Acessar propriedades personalizadas {#access-custom-properties}
Para acessar as propriedades personalizadas de um banner, use um dos seguintes métodos com base no tipo da propriedade definido no dashboard. Se a chave não corresponder a uma propriedade desse tipo ou não existir, o método retorna `null`.
```javascript
// Returns the Banner instance
const banner = braze.getBanner("placement_id_homepage_top");
// banner may be undefined or null
if (banner) {
// Returns the string property
const stringProperty = banner.getStringProperty("color");
// Returns the boolean property
const booleanProperty = banner.getBooleanProperty("expanded");
// Returns the number property
const numberProperty = banner.getNumberProperty("height");
// Returns the timestamp property (as a number)
const timestampProperty = banner.getTimestampProperty("account_start");
// Returns the image URL property as a string of the URL
const imageProperty = banner.getImageProperty("homepage_icon");
// Returns the JSON object property
const jsonObjectProperty = banner.getJsonProperty("footer_settings");
}
```
```swift
// Passes the specified banner to the completion handler
AppDelegate.braze?.banners.getBanner(for: "placement_id_homepage_top") { banner in
// Returns the string property
let stringProperty: String? = banner.stringProperty(key: "color")
// Returns the boolean property
let booleanProperty: Bool? = banner.boolProperty(key: "expanded")
// Returns the number property as a double
let numberProperty: Double? = banner.numberProperty(key: "height")
// Returns the Unix UTC millisecond timestamp property as an integer
let timestampProperty: Int? = banner.timestampProperty(key: "account_start")
// Returns the image property as a String of the image URL
let imageProperty: String? = banner.imageProperty(key: "homepage_icon")
// Returns the JSON object property as a [String: Any] dictionary
let jsonObjectProperty: [String: Any]? = banner.jsonObjectProperty(key: "footer_settings")
}
```
```java
// Returns the Banner instance
Banner banner = Braze.getInstance(context).getBanner("placement_id_homepage_top");
// banner may be undefined or null
if (banner != null) {
// Returns the string property
String stringProperty = banner.getStringProperty("color");
// Returns the boolean property
Boolean booleanProperty = banner.getBooleanProperty("expanded");
// Returns the number property
Number numberProperty = banner.getNumberProperty("height");
// Returns the timestamp property (as a Long)
Long timestampProperty = banner.getTimestampProperty("account_start");
// Returns the image URL property as a String of the URL
String imageProperty = banner.getImageProperty("homepage_icon");
// Returns the JSON object property as a JSONObject
JSONObject jsonObjectProperty = banner.getJSONProperty("footer_settings");
}
```
```kotlin
// Returns the Banner instance
val banner: Banner = Braze.getInstance(context).getBanner("placement_id_homepage_top") ?: return
// Returns the string property
val stringProperty: String? = banner.getStringProperty("color")
// Returns the boolean property
val booleanProperty: Boolean? = banner.getBooleanProperty("expanded")
// Returns the number property
val numberProperty: Number? = banner.getNumberProperty("height")
// Returns the timestamp property (as a Long)
val timestampProperty: Long? = banner.getTimestampProperty("account_start")
// Returns the image URL property as a String of the URL
val imageProperty: String? = banner.getImageProperty("homepage_icon")
// Returns the JSON object property as a JSONObject
val jsonObjectProperty: JSONObject? = banner.getJSONProperty("footer_settings")
```
```javascript
// Get the Banner instance
const banner = await Braze.getBanner('placement_id_homepage_top');
if (!banner) return;
// Get the string property
const stringProperty = banner.getStringProperty('color');
// Get the boolean property
const booleanProperty = banner.getBooleanProperty('expanded');
// Get the number property
const numberProperty = banner.getNumberProperty('height');
// Get the timestamp property (as a number)
const timestampProperty = banner.getTimestampProperty('account_start');
// Get the image URL property as a string
const imageProperty = banner.getImageProperty('homepage_icon');
// Get the JSON object property
const jsonObjectProperty = banner.getJSONProperty('footer_settings');
```
```dart
// Fetch the banner asynchronously
_braze.getBanner(placementId).then(('placement_id_homepage_top') {
// Get the string property
final String? stringProperty = banner?.getStringProperty('color');
// Get the boolean property
final bool? booleanProperty = banner?.getBooleanProperty('expanded');
// Get the number property
final num? numberProperty = banner?.getNumberProperty('height');
// Get the timestamp property
final int? timestampProperty = banner?.getTimestampProperty('account_start');
// Get the image URL property
final String? imageProperty = banner?.getImageProperty('homepage_icon');
// Get the JSON object property
final Map? jsonObjectProperty = banner?.getJSONProperty('footer_settings');
// Use these properties as needed in your UI or logic
});
```
# Testes de Banners
Source: /docs/pt-br/developer_guide/banners/testing/index.md
# Testes de Banners {#test-banners}
> Aprenda como testar a mensagem do seu Banner antes de lançar sua campanha para garantir que todas as mídias, textos, personalização e atributos personalizados sejam exibidos corretamente. Para mais informações gerais, veja [Sobre Banners](https://www.braze.com/docs/pt-br/pt-br/developer_guide/banners/).
## Pré-requisitos {#prerequisites}
Antes de testar mensagens de Banner na Braze, você precisará criar uma [Campaign de Banner na Braze](https://www.braze.com/docs/pt-br/pt-br/user_guide/channels/banners/create_a_banner/). Além disso, verifique se o posicionamento que você deseja testar já está [inserido no seu app ou site](https://www.braze.com/docs/pt-br/pt-br/developer_guide/banners/placements/).
Para enviar um teste para [grupos de teste de conteúdo](https://www.braze.com/docs/pt-br/pt-br/user_guide/administrative/app_settings/developer_console/internal_groups_tab/#content-test-groups) ou usuários individuais, o push deve estar ativado nos dispositivos de teste com tokens por push válidos registrados para o usuário teste antes do envio.
## Teste um Banner {#test-a-banner}
**Preview** to you preview your Banner or send a test message.
{: style="max-width:50%;"}
Keep in mind, your preview may not be identical to the final render on a user's device due to differences across hardware.
To send a test message, add either a content test group or one or more individual users as **Test Recipients**, then select **Send Test**. You'll be able to view your test message on the device for up to 5 minutes. You can then select **Copy preview link** to generate and copy a shareable preview link that shows what the banner will look like for a random user. The link will last for seven days before it needs to be regenerated.

While reviewing your test Banner, verify the following:
- Is your Banner campaign assigned to a placement?
- Do the images and media show up and act as expected on your targeted device types and screen sizes?
- Do your links and buttons direct the user to where they should go?
- Does the Liquid function as expected? Have you accounted for a default attribute value in the event that the Liquid returns no information?
- Is your copy clear, concise, and correct?
For more information, see [Send test messages](https://www.braze.com/docs/pt-br/pt-br/user_guide/messaging/messaging_fundamentals/sending_test_messages/).
# Análise de dados do Banner
Source: /docs/pt-br/developer_guide/banners/analytics/index.md
# Análise de dados do Banner
> Saiba como revisar a análise de dados dos seus Banners, que inclui detalhes da campanha, desempenho da mensagem e desempenho histórico. Para mais informações gerais, veja [Sobre Banners](https://www.braze.com/docs/pt-br/pt-br/developer_guide/banners).
## Viewing analytics
Once you've launched your campaign, you can return to the details page for that campaign to view key metrics. Navigate to the **Campaigns** page and select your campaign to open the details page. For sent in Canvas, refer to [Canvas analytics](https://www.braze.com/docs/pt-br/pt-br/user_guide/engagement_tools/canvas/testing_canvases/measuring_and_testing_with_canvas_analytics/).
**Tip:**
Looking for definitions for the terms and metrics listed in your report? Refer to our
From the **Campaign Analytics** tab, you can view your reports in a series of panels. You may see more or less than those listed in the sections below, but each has its own useful purpose.
### Time range
By default, the time range for **Campaign Analytics** will display the last 90 days from the current time. This means that if the campaign was launched more than 90 days ago, the analytics will display as "0" for the given time range. To view all analytics for older campaigns, adjust the reporting time range.
### Campaign details
The **Campaign Details** panel shows a high-level overview of the entire performance for your
Review this panel to see overall metrics such as the number of messages sent to the number of recipients, the primary conversion rate, and the total revenue generated by this message. You can also review delivery, audience, and conversion settings from this page.
**Note:**
Analytics numbers in the dashboard and Snowflake may differ slightly. Braze measures numbers in the dashboard and records rows to Snowflake separately. Snowflake is the more precise data source, so if you see discrepancies between these sources, we recommend referring to Snowflake data.
#### Estimated Audience and Current Audience
Depending on how large your workspace is, the **Campaign Details** panel may label audience statistics **Estimated Audience** or **Current Audience**.
The following table summarizes what each label means.
| Footer label | When it is used |
| --- | --- |
| **Estimated Audience** | Braze does not run a full-database count by default. Audience size is estimated from a sample and extrapolated, similar to the **Reachable users** range in the segment builder. Margins of error are expected, especially for large workspaces or small segments as a share of the workspace. |
| **Current Audience** | Braze can compute the default statistic with a full scan of workspace profiles, so the displayed audience size is a current, unsampled count (still subject to channel reachability, subscription rules, and other targeting options). |
{: .reset-td-br-1 .reset-td-br-2 aria-label="Estimated Audience and Current Audience" }
For details on sampling behavior, **Calculate exact statistics**, and segmenting **Reachable users**, see [Measure segment size](https://www.braze.com/docs/pt-br/pt-br/user_guide/audience/segments/measuring_segment_size/).
#### Changes Since Last Viewed
The number of updates to the campaign from other members of your team is tracked by the *Changes Since Last Viewed* metric on the campaign overview page. Select **Changes Since Last Viewed** to view a changelog of updates to the campaign's name, schedule, tags, message, audience, approval status, or team access configuration. For each update, you can see who performed the update and when. You can use this changelog to audit changes to your campaign.
If you want to simplify your view, click **Add/Remove Columns** and clear any metrics as desired. By default, all metrics are displayed.
### Historical performance
The **Historical Performance** panel allows you to view the metrics from the **Message Performance** panel as a graph over time. Use the filters at the top of the panel to modify the stats and channels shown in the graph. The time range of this graph will always mirror the time range specified at the top of the page.
To get a day-by-day breakdown, click the hamburger menu and select **Download CSV** to receive a CSV export of the report.

### Conversion event details
The **Conversion Event Details** panel shows you the performance of your conversion events for your campaign. For more information, refer to [Conversion Events](https://www.braze.com/docs/pt-br/pt-br/user_guide/engagement_tools/campaigns/building_campaigns/conversion_events/#step-3-view-results).

### Conversion correlation
The **Conversion Correlation** panel gives you insight into what user attributes and behaviors help or hurt the outcomes you set for campaigns. For more information, refer to [Conversion correlation](https://www.braze.com/docs/pt-br/pt-br/user_guide/engagement_tools/testing/conversion_correlation/).

## Retention report
Retention reports show you the rates at which your users have performed a selected retention event over time periods in a specific campaign or Canvas. For more information, refer to [Retention reports](https://www.braze.com/docs/pt-br/pt-br/user_guide/analytics/reporting/retention_reports/).
## Funnel report
Funnel reporting offers a visual report that allows you to analyze the journeys your customers take after receiving a campaign or Canvas. If your campaign or Canvas uses a control group or multiple variants, you will be able to understand how the different variants have impacted the conversion funnel at a more granular level and optimize based on this data.
For more information, refer to [Funnel reports](https://www.braze.com/docs/pt-br/pt-br/user_guide/analytics/reporting/funnel_reports/).
# Migrar de Content Cards para Banners
Source: /docs/pt-br/developer_guide/banners/migrating_from_content_cards/index.md
# Migrar de Content Cards para Banners {#migrate-from-content-cards-to-banners}
> Este guia ajuda você a migrar de Content Cards para Banners para casos de uso de envio de mensagens em estilo banner. Banners são ideais para mensagens inline e persistentes no app e na web que aparecem em locais específicos na sua aplicação.
## Por que migrar para Banners? {#why-migrate-to-banners}
- Se sua equipe de engenharia está construindo ou mantendo Content Cards personalizados, migrar para Banners pode reduzir esse investimento contínuo. Banners permitem que os profissionais de marketing controlem a interface do usuário diretamente, liberando os desenvolvedores para outros trabalhos.
- Se você está lançando novas mensagens na página inicial, fluxos de integração ou anúncios persistentes, comece com Banners em vez de construir sobre Content Cards. Você pode se beneficiar de personalização em tempo real, sem expiração de 30 dias, sem limite de tamanho e priorização nativa desde o primeiro dia.
- Se você está lidando com o limite de expiração de 30 dias, gerenciando lógica de reelegibilidade complexa ou frustrado com personalização desatualizada, Banners resolvem esses problemas de forma nativa.
Banners oferecem várias vantagens sobre Content Cards para envio de mensagens em estilo banner:
### Produção acelerada {#accelerated-production}
- **Suporte de engenharia contínuo reduzido**: Os profissionais de marketing podem criar mensagens personalizadas usando um editor de arrastar e soltar e HTML personalizado sem precisar de assistência de desenvolvedores para personalização
- **Opções de personalização flexíveis**: Desenhe diretamente no editor, use HTML ou aproveite modelos de dados existentes com propriedades personalizadas
### Melhor experiência do usuário {#better-ux}
- **Atualizações de conteúdo dinâmico**: Banners atualizam a lógica Liquid e a elegibilidade a cada atualização, garantindo que os usuários vejam sempre o conteúdo mais relevante
- **Suporte de posicionamento nativo**: As mensagens aparecem em contextos específicos em vez de um feed, proporcionando melhor relevância contextual
- **Priorização nativa**: Controle sobre a ordem de exibição sem lógica personalizada, facilitando a gestão da hierarquia das mensagens
### Persistência {#persistence}
- **Sem limite de expiração**: Campaigns de banner não têm um limite de expiração de 30 dias como os Content Cards, permitindo a verdadeira persistência das mensagens
## Quando migrar {#when-to-migrate}
Considere migrar para Banners se você estiver usando Content Cards para:
- Destaques da página inicial, promoções de página de produto, ofertas de checkout
- Anúncios de navegação persistente ou mensagens na barra lateral
- Mensagens sempre ativas que duram mais de 30 dias
- Mensagens onde você deseja personalização em tempo real e elegibilidade
## Quando manter os Content Cards {#when-to-keep-content-cards}
Continue usando os Content Cards se você precisar de:
- **Experiências de feed:** Qualquer caso de uso envolvendo várias mensagens roláveis ou uma "Caixa de Entrada" baseada em cartões.
- **Recursos específicos:** Mensagens que requerem Conteúdo conectado ou códigos promocionais, pois os Banners não suportam isso nativamente.
- **Entrega disparada:** Casos de uso que exigem estritamente entrega disparada por API ou entrega baseada em ação. Embora os Banners não suportem entrega disparada por API ou entrega baseada em ação, a avaliação de elegibilidade em tempo real significa que os usuários se qualificam ou desqualificam instantaneamente com base na associação ao segmento a cada atualização.
## Guia de migração {#migration-guide}
### Pré-requisitos {#prerequisites}
Antes de migrar, certifique-se de que seu SDK da Braze atende aos requisitos mínimos de versão:
### Inscrever-se para receber atualizações {#subscribe-to-updates}
#### Abordagem de Content Cards {#content-cards-approach}
```javascript
import * as braze from "@braze/web-sdk";
braze.subscribeToContentCardsUpdates((cards) => {
// Handle array of cards
cards.forEach(card => {
console.log("Card:", card.id);
});
});
```
```kotlin
Braze.getInstance(context).subscribeToContentCardsUpdates { cards ->
// Handle array of cards
cards.forEach { card ->
Log.d(TAG, "Card: ${card.id}")
}
}
```
```swift
braze.contentCards.subscribeToUpdates { cards in
// Handle array of cards
for card in cards {
print("Card: \(card.id)")
}
}
```
```javascript
Braze.addListener(Braze.Events.CONTENT_CARDS_UPDATED, (update) => {
const cards = update.cards;
// Handle array of cards
cards.forEach(card => {
console.log("Card:", card.id);
});
});
```
```dart
StreamSubscription contentCardsStreamSubscription = braze.subscribeToContentCards((List contentCards) {
// Handle array of cards
for (final card in contentCards) {
print("Card: ${card.id}");
}
});
```
#### Abordagem de Banners {#banners-approach}
```javascript
import * as braze from "@braze/web-sdk";
braze.subscribeToBannersUpdates((banners) => {
// Get banner for specific placement
const banner = braze.getBanner("sample_placement_id");
if (banner) {
console.log("Banner received for placement:", banner.placementId);
}
});
```
```kotlin
Braze.getInstance(context).subscribeToBannersUpdates { update ->
// Get banner for specific placement
val banner = Braze.getInstance(context).getBanner("sample_placement_id")
if (banner != null) {
Log.d(TAG, "Banner received for placement: ${banner.placementId}")
}
}
```
```swift
braze.banners.subscribeToUpdates { banners in
// Get banner for specific placement
braze.banners.getBanner(for: "sample_placement_id") { banner in
guard let banner = banner else { return }
print("Banner received for placement: \(banner.placementId)")
}
}
```
```javascript
Braze.addListener(Braze.Events.BANNER_CARDS_UPDATED, (data) => {
const banners = data.banners;
// Get banner for specific placement
Braze.getBanner("sample_placement_id").then(banner => {
if (banner) {
console.log("Banner received for placement:", banner.placementId);
}
});
});
```
```dart
StreamSubscription bannerStreamSubscription = braze.subscribeToBanners((List banners) {
// Get banner for specific placement
braze.getBanner("sample_placement_id").then((banner) {
if (banner != null) {
print("Banner received for placement: ${banner.placementId}");
}
});
});
```
### Exibir conteúdo {#display-content}
**Note:**
Os Content Cards podem ser renderizados manualmente com lógica de UI personalizada, enquanto os Banners só podem ser renderizados com os métodos padrão do SDK.
#### Abordagem de Content Cards
```javascript
// Show default feed UI
braze.showContentCards(document.getElementById("feed"));
// Or manually render cards
const cards = braze.getCachedContentCards();
cards.forEach(card => {
// Custom rendering logic
if (card instanceof braze.ClassicCard) {
// Render classic card
}
});
```
```kotlin
// Using default fragment
val fragment = ContentCardsFragment()
supportFragmentManager.beginTransaction()
.replace(R.id.content_cards_container, fragment)
.commit()
// Or manually render cards
val cards = Braze.getInstance(context).getCachedContentCards()
cards.forEach { card ->
when (card) {
is ClassicCard -> {
// Render classic card
}
}
}
```
```swift
// Using default view controller
let contentCardsController = BrazeContentCardUI.ViewController(braze: braze)
navigationController?.pushViewController(contentCardsController, animated: true)
// Or manually render cards
let cards = braze.contentCards.cards
for card in cards {
switch card {
case let card as Braze.ContentCard.Classic:
// Render classic card
default:
break
}
}
```
```javascript
// Launch default feed
Braze.launchContentCards();
// Or manually render cards
const cards = await Braze.getContentCards();
cards.forEach(card => {
if (card.type === 'CLASSIC') {
// Render classic card
}
});
```
```dart
// Launch default feed
braze.launchContentCards();
// Or manually render cards
final cards = await braze.getContentCards();
for (final card in cards) {
if (card.type == 'CLASSIC') {
// Render classic card
}
}
```
#### Abordagem de Banners
```javascript
braze.subscribeToBannersUpdates((banners) => {
const banner = braze.getBanner("sample_placement_id");
if (!banner) {
return;
}
const container = document.getElementById("global-banner-container");
braze.insertBanner(banner, container);
if (banner.isControl) {
container.style.display = "none";
}
});
braze.requestBannersRefresh(["sample_placement_id"]);
```
```kotlin
// Using BannerView in XML
//
// Or programmatically
val bannerView = BannerView(context).apply {
placementId = "sample_placement_id"
}
container.addView(bannerView)
Braze.getInstance(context).requestBannersRefresh(listOf("sample_placement_id"))
```
```swift
// Using BannerUIView
let bannerView = BrazeBannerUI.BannerUIView(
placementId: "sample_placement_id",
braze: braze,
processContentUpdates: { result in
switch result {
case .success(let updates):
if let height = updates.height {
// Update height constraint
}
case .failure:
break
}
}
)
view.addSubview(bannerView)
braze.banners.requestBannersRefresh(placementIds: ["sample_placement_id"])
```
```javascript
// Using BrazeBannerView component
// Or get banner data
const banner = await Braze.getBanner("sample_placement_id");
if (banner) {
// Render custom banner UI
}
Braze.requestBannersRefresh(["sample_placement_id"]);
```
```dart
// Using BrazeBannerView widget
BrazeBannerView(
placementId: "sample_placement_id",
)
// Or get banner data
final banner = await braze.getBanner("sample_placement_id");
if (banner != null) {
// Render custom banner UI
}
braze.requestBannersRefresh(["sample_placement_id"]);
```
### Registrar análise de dados (implementações personalizadas) {#log-analytics-custom-implementations}
**Note:**
Tanto os Content Cards quanto os Banners rastreiam automaticamente a análise de dados ao usar seus componentes de UI padrão. Os exemplos abaixo são para implementações personalizadas onde você está construindo sua própria UI.
#### Abordagem de Content Cards
```javascript
// Manual impression logging required for custom implementations
cards.forEach(card => {
braze.logContentCardImpressions([card]);
});
// Manual click logging required for custom implementations
card.logClick();
```
```kotlin
// Manual impression logging required for custom implementations
cards.forEach { card ->
card.logImpression()
}
// Manual click logging required for custom implementations
card.logClick()
```
```swift
// Manual impression logging required for custom implementations
for card in cards {
card.context?.logImpression()
}
// Manual click logging required for custom implementations
card.context?.logClick()
```
```javascript
// Manual impression logging required for custom implementations
cards.forEach(card => {
Braze.logContentCardImpression(card.id);
});
// Manual click logging required for custom implementations
Braze.logContentCardClicked(card.id);
```
```dart
// Manual impression logging required for custom implementations
for (final card in cards) {
braze.logContentCardImpression(card);
}
// Manual click logging required for custom implementations
braze.logContentCardClicked(card);
```
#### Abordagem de Banners
**Important:**
A análise de dados é rastreada automaticamente ao usar `insertBanner()`. O registro manual não deve ser usado ao usar `insertBanner()`.
```javascript
// Analytics are automatically tracked when using insertBanner()
// Manual logging should not be used when using insertBanner()
// For custom implementations, use manual logging methods:
// Log impression
braze.logBannerImpressions([banner]);
// Log click (with optional buttonId)
braze.logBannerClick("sample_placement_id", buttonId);
```
**Important:**
A análise de dados é rastreada automaticamente ao usar BannerView. O registro manual não deve ser usado ao usar BannerView.
```kotlin
// Analytics are automatically tracked when using BannerView
// Manual logging should not be used for default BannerView
// For custom implementations, use manual logging methods:
// Log impression
Braze.getInstance(context).logBannerImpression("sample_placement_id");
// Log click (with optional buttonId)
Braze.getInstance(context).logBannerClick("sample_placement_id", buttonId);
```
**Important:**
A análise de dados é rastreada automaticamente ao usar BannerUIView. O registro manual não deve ser usado para o BannerUIView padrão.
```swift
// Analytics are automatically tracked when using BannerUIView
// Manual logging should not be used for default BannerUIView
// For custom implementations, use manual logging methods:
// Get banner for specific placement
braze.banners.getBanner(for: "sample_placement_id") { banner in
guard let banner = banner else { return }
// Log impression
banner.context?.logImpression()
// Log click (with optional buttonId)
banner.context?.logClick(buttonId: buttonId)
}
// Control groups are automatically handled by BannerUIView
```
**Important:**
A análise de dados é rastreada automaticamente ao usar BrazeBannerView. Nenhum registro manual é necessário.
```javascript
// Analytics are automatically tracked when using BrazeBannerView
// No manual logging required
// Note: Manual logging methods for Banners are not yet supported in React Native
// Control groups are automatically handled by BrazeBannerView
```
**Important:**
A análise de dados é rastreada automaticamente ao usar BrazeBannerView. Nenhum registro manual é necessário.
```dart
// Analytics are automatically tracked when using BrazeBannerView
// No manual logging required
// Note: Manual logging methods for Banners are not yet supported in Flutter
// Control groups are automatically handled by BrazeBannerView
```
### Obtendo propriedades {#getting-properties}
#### Abordagem de Content Cards
```javascript
cards.forEach(card => {
console.log("Card id:", card.id, "Extras:", card.extras);
});
```
```kotlin
cards.forEach { card ->
Log.d(TAG, "Card id: ${card.id} Extras: ${card.extras}")
}
```
```swift
for card in cards {
print("Card id: \(card.id) Extras: \(card.extras)")
}
```
```javascript
cards.forEach(card => {
console.log("Card id:", card.id, "Extras:", card.extras);
});
```
```dart
for (final card in cards) {
print("Card id: ${card.id} Extras: ${card.extras}");
}
```
#### Abordagem de Banners
```javascript
const banner = braze.getBanner("sample_placement_id");
if (!banner) {
return;
}
console.log("Banner placement:", banner.placementId, "Properties:", banner.properties);
```
```kotlin
val banner = Braze.getInstance(context).getBanner("sample_placement_id")
if (banner != null) {
Log.d(TAG, "Banner placement: ${banner.placementId} Properties: ${banner.properties}")
}
```
```swift
braze.banners.getBanner(for: "sample_placement_id") { banner in
guard let banner = banner else { return }
print("Banner placement: \(banner.placementId) Properties: \(banner.properties)")
}
```
```javascript
const banner = await Braze.getBanner("sample_placement_id");
if (banner) {
console.log("Banner placement:", banner.placementId, "Properties:", banner.properties);
}
```
```dart
final banner = await braze.getBanner("sample_placement_id");
if (banner != null) {
print("Banner placement: ${banner.placementId} Properties: ${banner.properties}");
}
```
### Tratamento de grupos de controle {#handling-control-groups}
#### Abordagem de Content Cards
```javascript
cards.forEach(card => {
if (card.isControl) {
// Logic for control cards ie. don't display but log analytics
} else {
// Logic for cards ie. render card
}
});
```
```kotlin
cards.forEach { card ->
if (card.isControl) {
// Logic for control cards ie. don't display but log analytics
} else {
// Logic for cards ie. render card
}
}
```
```swift
for card in cards {
if card.isControl {
// Logic for control cards ie. don't display but log analytics
} else {
// Logic for cards ie. render card
}
}
```
```javascript
cards.forEach(card => {
if (card.isControl) {
// Logic for control cards ie. don't display but log analytics
} else {
// Logic for cards ie. render card
}
});
```
```dart
for (final card in cards) {
if (card.isControl) {
// Logic for control cards ie. don't display but log analytics
} else {
// Logic for cards ie. render card
}
}
```
#### Abordagem de Banners
```javascript
braze.subscribeToBannersUpdates((banners) => {
const banner = braze.getBanner("sample_placement_id");
if (!banner) {
return;
}
const container = document.getElementById("global-banner-container");
// Always call insertBanner to track impression (including control)
braze.insertBanner(banner, container);
// Hide if control group
if (banner.isControl) {
container.style.display = "none";
}
});
```
```kotlin
// BannerView automatically handles control groups
// No additional code needed
val bannerView = BannerView(context).apply {
placementId = "sample_placement_id"
}
```
```swift
// BannerUIView automatically handles control groups
// No additional code needed
let bannerView = BrazeBannerUI.BannerUIView(
placementId: "sample_placement_id",
braze: braze
)
```
```javascript
// BrazeBannerView automatically handles control groups
// No additional code needed
```
```dart
// BrazeBannerView automatically handles control groups
// No additional code needed
BrazeBannerView(
placementId: "sample_placement_id",
)
```
## Limitações {#limitations}
Ao migrar de Content Cards para Banners, esteja ciente das seguintes limitações:
### Migrando mensagens disparadas {#migrating-triggered-messages}
Banners suportam apenas Campaigns de entrega agendada. Para migrar uma mensagem que era anteriormente disparada por API ou baseada em ação, converta-a para direcionamento baseado em segmento:
- **Exemplo:** Em vez de disparar um cartão "Completar Perfil" com a API, crie um segmento para usuários que se inscreveram nos últimos 7 dias, mas não completaram seu perfil.
- **Elegibilidade em tempo real:** Os usuários se qualificam ou desqualificam para o Banner instantaneamente a cada atualização com base na associação ao segmento.
### Diferenças de recursos {#feature-differences}
| Recurso | Content Cards | Banners |
|---------|--------------|---------|
| **Estrutura de conteúdo** |
| Múltiplos cartões no feed | ✅ Suportado | ✅ É possível criar múltiplos posicionamentos para alcançar uma implementação semelhante a carrossel. Apenas um banner é retornado por posicionamento. |
| Múltiplos posicionamentos | N/D | ✅ Múltiplos posicionamentos suportados |
| Tipos de cartões (Clássico, Com legenda, Apenas imagem) | ✅ Múltiplos tipos predefinidos | ✅ Banner único baseado em HTML (mais flexível) |
| **Gerenciamento de conteúdo** |
| Editor de arrastar e soltar | ❌ Requer desenvolvedor para personalização | ✅ Profissionais de marketing podem criar/atualizar sem engenharia |
| HTML/CSS personalizado | ❌ Limitado à estrutura do cartão | ✅ Suporte total a HTML/CSS |
| Pares chave-valor para personalização | ✅ Necessário para personalização avançada | ✅ Pares chave-valor fortemente tipados chamados "propriedades" para personalização avançada |
| **Persistência e expiração** |
| Expiração do cartão | ✅ Suportado (limite de 30 dias) | ✅ Suportado (sem limite de expiração) |
| Persistência verdadeira | ❌ Máximo de 30 dias | ✅ Persistência ilimitada |
| **Exibição e direcionamento** |
| Interface do feed | ✅ Feed padrão disponível | ❌ Apenas baseado em posicionamento |
| Posicionamento específico de contexto | ❌ Baseado em feed | ✅ Suporte nativo a posicionamento |
| Priorização nativa | ❌ Requer lógica personalizada | ✅ Priorização integrada |
| **Interação do usuário** |
| Descarte manual | ✅ Suportado | ❌ Não suportado |
| Cartões fixados | ✅ Suportado | N/D |
| **Analytics** |
| Análise automática (UI padrão) | ✅ Suportado | ✅ Suportado |
| Classificação por prioridade | ❌ Não suportado | ✅ Suportado |
| **Atualizações de conteúdo** |
| Atualização de template Liquid | ❌ Uma vez por cartão ao enviar/lançar | ✅ Atualiza a cada atualização |
| Atualização de elegibilidade | ❌ Uma vez por cartão ao enviar/lançar | ✅ Atualiza a cada sessão |
{: .reset-td-br-1 .reset-td-br-2 .reset-td-br-3 aria-label="Diferenças de recursos" }
### Limitações do produto {#product-limitations}
- Até 25 mensagens ativas por posicionamento.
- Até 10 IDs de posicionamento por solicitação de atualização; solicitações além disso são truncadas.
### Limitações do SDK {#sdk-limitations}
- Banners não são atualmente suportados em .NET MAUI (Xamarin), Cordova, Unity, Vega ou plataformas de TV.
- Certifique-se de que está usando as versões mínimas do SDK listadas nos pré-requisitos.
## Artigos relacionados {#related-articles}
- [Posicionamentos de banner](https://www.braze.com/docs/pt-br/pt-br/developer_guide/banners/placements/)
- [Tutorial: Exibindo um banner pelo ID de posicionamento](https://www.braze.com/docs/pt-br/pt-br/developer_guide/banners/tutorial_displaying_banners/)
- [Análise de dados de banner](https://www.braze.com/docs/pt-br/pt-br/developer_guide/banners/analytics/)
- [Perguntas frequentes sobre banners](https://www.braze.com/docs/pt-br/pt-br/developer_guide/banners/faq/)
# Tutorial: Exibindo um Banner pelo ID de Colocação
Source: /docs/pt-br/developer_guide/banners/tutorial_displaying_banners/index.md
# Tutorial: Exibindo um Banner pelo ID de Colocação
> Siga o código de exemplo neste tutorial para exibir Banners usando seu ID de colocação. Para mais informações gerais, veja [Banners](https://www.braze.com/docs/pt-br/pt-br/developer_guide/banners/).
## Prerequisites
Before you can start this tutorial, verify that your Braze SDK meets the minimum version requirements:
## Displaying banners for the Web SDK
**Important:**
We're piloting this new tutorial format. [Tell us what you think](https://docs.google.com/forms/d/e/1FAIpQLSe_5uhWM7eXXk9F_gviO_pvA4rkYO3WA9B6tNJZ3TY91md5bw/viewform?usp=pp_url&entry.569173304=General+Feedback) — your feedback helps us improve future guides.
```js file=index.js
import * as braze from "@braze/web-sdk";
braze.initialize("YOUR-API-KEY", {
baseUrl: "YOUR-ENDPOINT",
enableLogging: true,
});
braze.subscribeToBannersUpdates((banners) => {
// Get this placement's banner. If it's `null`, the user did not qualify for any banners.
const globalBanner = braze.getBanner("global_banner");
if (!globalBanner) {
return;
}
const container = document.getElementById("global-banner-container");
braze.insertBanner(globalBanner, container);
if (globalBanner.isControl) {
// Hide or collapse the container
container.style.display = "none";
}
});
braze.requestBannersRefresh(["global_banner", "navigation_square_banner"]);
```
```html file=main.html
```
!!step
lines-index.js=5
#### 1. Enable debugging (optional)
To make troubleshooting easier while developing, consider enabling debugging.
!!step
lines-index.js=8-23
#### 2. Subscribe to Banner updates
Use `subscribeToBannersUpdates()` to register a handler that runs whenever a Banner is updated. Inside the handler, call `braze.getBanner("global_banner")` to get the latest placement.
!!step
lines-index.js=15-22
#### 3. Insert the Banner and handle control groups
Use `braze.insertBanner(banner, container)` to insert a Banner when it's returned. To ensure keep your layout clean, hide or collapse Banners that are apart of a control group (for example, when `isControl` is `true`).
!!step
lines-index.js=25
#### 4. Refresh your Banners
After initializing the SDK, call `requestBannersRefresh(["global_banner", ...])` to ensure that Banners are refreshed at the start of each session.
You can also call this function at any time to refresh Banner placements later.
!!step
lines-main.html=3
#### 5. Add a container for your Banner
In your HTML, add a new `
` element and give it a short, Banner-related `id`, such as `global-banner-container`. Braze will use this `
` to insert your Banner into the page.
## Prerequisites
Before you can start this tutorial, verify that your Braze SDK meets the minimum version requirements:
## Displaying banners for the Android SDK
**Important:**
We're piloting this new tutorial format. [Tell us what you think](https://docs.google.com/forms/d/e/1FAIpQLSe_5uhWM7eXXk9F_gviO_pvA4rkYO3WA9B6tNJZ3TY91md5bw/viewform?usp=pp_url&entry.569173304=General+Feedback) — your feedback helps us improve future guides.
```kotlin file=MainApplication.kt
import android.app.Application
import android.util.Log
import com.braze.Braze
import com.braze.configuration.BrazeConfig
import com.braze.support.BrazeLogger
public class MainApplication : Application() {
override fun onCreate() {
super.onCreate()
// Turn on verbose Braze logging
BrazeLogger.logLevel = Log.VERBOSE
// Configure Braze with your SDK key and endpoint
val config = BrazeConfig.Builder()
.setApiKey("YOUR-API-KEY")
.setCustomEndpoint("YOUR-ENDPOINT")
.build()
Braze.configure(this, config)
// Subscribe to Banner updates
Braze.getInstance(this)
.subscribeToBannersUpdates { update ->
for (banner in update.banners) {
Log.d("brazeBanners", "Received banner for placement: ${banner.placementId}")
// Add any custom banner logic you'd like
}
}
}
}
```
```kotlin file=MainActivity.kt
import android.os.Bundle
import androidx.activity.ComponentActivity
class MainActivity : ComponentActivity() {
override fun onCreate(savedInstanceState: Bundle?) {
super.onCreate(savedInstanceState)
// Inflate the XML layout
setContentView(R.layout.banners)
// Refresh placements
Braze.getInstance(this)
.requestBannersRefresh(
listOf("top-1")
)
}
}
```
```xml file=banners.xml
```
!!step
lines-MainApplication.kt=12
#### 1. Enable debugging (optional)
To make troubleshooting easier while developing, consider enabling debugging.
!!step
lines-MainApplication.kt=21-28
#### 2. Subscribe to Banner updates
Use `subscribeToBannersUpdates()` to register a handler that runs whenever a Banner is updated.
!!step
lines-MainActivity.kt=10-14
#### 3. Refresh your placements
After initializing the Braze SDK, call `requestBannersRefresh(["PLACEMENT_ID"])` to fetch the latest Banner content for that placement.
!!step
lines-banners.xml=15-19
#### 4. Define `BannerView` in your `banners.xml`
In `banners.xml`, declare a `` element with `app:placementId="PLACEMENT_ID"`. Braze will use this element to insert your Banner into your UI.
## Prerequisites
Before you can start this tutorial, verify that your Braze SDK meets the minimum version requirements:
## Displaying banners for the Swift SDK
**Important:**
We're piloting this new tutorial format. [Tell us what you think](https://docs.google.com/forms/d/e/1FAIpQLSe_5uhWM7eXXk9F_gviO_pvA4rkYO3WA9B6tNJZ3TY91md5bw/viewform?usp=pp_url&entry.569173304=General+Feedback) — your feedback helps us improve future guides.
```swift file=AppDelegate.swift
import UIKit
import BrazeKit
import BrazeUI
class AppDelegate: UIResponder, UIApplicationDelegate {
static var braze: Braze? = nil
func application(
_ application: UIApplication,
didFinishLaunchingWithOptions launchOptions: [UIApplication.LaunchOptionsKey: Any]?
) -> Bool {
// Braze configuration with your SDK API key and endpoint
let configuration = Braze.Configuration(apiKey: "YOUR-API-TOKEN", endpoint: "YOUR-ENDPOINT")
configuration.logger.level = .debug
// Initialize Braze SDK instance
AppDelegate.braze = Braze(configuration: configuration)
// Request a banners refresh
AppDelegate.braze?.banners.requestBannersRefresh(placementIds: ["top-1"])
return true
}
}
```
```swift file=SampleApp.swift
import SwiftUI
@main
struct SampleApp: App {
// Bind the AppDelegate into the SwiftUI lifecycle
@UIApplicationDelegateAdaptor(AppDelegate.self) var delegate
var body: some Scene {
WindowGroup {
ContentView()
}
}
}
```
```swift file=BannerViewController.swift
import UIKit
import BrazeKit
import BrazeUI
final class BannerViewController: UIViewController {
static let bannerPlacementID = "top-1"
var bannerHeightConstraints: NSLayoutConstraint?
lazy var contentView: UILabel = {
let contentView = UILabel()
contentView.text = "Your Content Here"
contentView.textAlignment = .center
contentView.translatesAutoresizingMaskIntoConstraints = false
return contentView
}()
lazy var bannerView: BrazeBannerUI.BannerUIView = {
var bannerView = BrazeBannerUI.BannerUIView(
placementId: BannerViewController.bannerPlacementID,
braze: AppDelegate.braze!,
processContentUpdates: { [weak self] result in
// Update layout properties when banner content has finished loading.
DispatchQueue.main.async {
guard let self else { return }
switch result {
case .success(let updates):
if let height = updates.height {
self.bannerView.isHidden = false
self.bannerHeightConstraint?.constant = min(height, 80)
}
case .failure(let error):
return
}
}
}
)
bannerView.translatesAutoresizingMaskIntoConstraints = false
bannerView.isHidden = true
return bannerView
}()
override func viewDidLoad() {
super.viewDidLoad()
self.view.addSubview(contentView)
self.view.addSubview(bannerView)
bannerHeightConstraint = bannerView.heightAnchor.constraint(equalToConstant: 0)
NSLayoutConstraint.activate([
contentView.topAnchor.constraint(equalTo: self.view.safeAreaLayoutGuide.topAnchor),
contentView.leadingAnchor.constraint(equalTo: self.view.safeAreaLayoutGuide.leadingAnchor),
contentView.trailingAnchor.constraint(equalTo: self.view.safeAreaLayoutGuide.trailingAnchor),
bannerView.topAnchor.constraint(equalTo: self.contentView.bottomAnchor),
bannerView.leadingAnchor.constraint(equalTo: self.view.safeAreaLayoutGuide.leadingAnchor),
bannerView.trailingAnchor.constraint(equalTo: self.view.safeAreaLayoutGuide.trailingAnchor),
bannerView.bottomAnchor.constraint(equalTo: self.view.safeAreaLayoutGuide.bottomAnchor),
bannerHeightConstraint!,
])
}
}
```
!!step
lines-AppDelegate.swift=14
#### 1. Enable debugging (optional)
To make troubleshooting easier while developing, consider enabling debugging.
!!step
lines-AppDelegate.swift=20
#### 2. Refresh your placements
After initializing the Braze SDK, `call requestBannersRefresh(placementIds: ["PLACEMENT_ID"])` to refresh Banner content at the start of each session.
!!step
lines-BannerViewController.swift=19-37
#### 3. Initialize the Banner and provide a callback
Create a `BrazeBannerUI.BannerUIView` instance with your Braze object and placement ID, and provide a `processContentUpdates` callback to unhide the Banner and update its height constraint based on the provided content height.
!!step
lines-BannerViewController.swift=38-40
#### 4. Enable Auto Layout constraints
Hide the Banner view by default, then disable autoresizing mask translation to enable Auto Layout constraints.
!!step
lines-BannerViewController.swift=43-58
#### 5. Anchor content and set height constraints
Anchor your main content to the top using Auto Layout, and place the Banner view directly below it. Pin the Banner’s leading, trailing, and bottom edges to the safe area, and set an initial height constraint of `0` that will be updated when content loads.
```swift file=AppDelegate.swift
import BrazeKit
import BrazeUI
class AppDelegate: UIResponder, UIApplicationDelegate {
static var braze: Braze? = nil
func application(
_ application: UIApplication,
didFinishLaunchingWithOptions launchOptions: [UIApplication.LaunchOptionsKey: Any]?
) -> Bool {
// Braze configuration with your SDK API key and endpoint
let configuration = Braze.Configuration(apiKey: "YOUR-API-TOKEN", endpoint: "YOUR-ENDPOINT")
configuration.logger.level = .debug
// Initialize Braze SDK instance
AppDelegate.braze = Braze(configuration: configuration)
// Request a banners refresh
AppDelegate.braze?.banners.requestBannersRefresh(placementIds: ["top-1"])
return true
}
}
```
```swift file=SampleApp.swift
import SwiftUI
@main
struct SampleApp: App {
// Bind the AppDelegate into the SwiftUI lifecycle
@UIApplicationDelegateAdaptor(AppDelegate.self) var delegate
var body: some Scene {
WindowGroup {
BannerSwiftUIView()
}
}
}
```
```swift file=BannerSwiftUIView.swift
import BrazeKit
import BrazeUI
import SwiftUI
@available(iOS 13.0, *)
struct BannerSwiftUIView: View {
static let bannerPlacementID = "top-1"
@State var hasBannerForPlacement: Bool = false
@State var contentHeight: CGFloat = 0
var body: some View {
VStack {
Text("Your Content Here")
.frame(maxWidth: .infinity, maxHeight: .infinity)
if let braze = AppDelegate.braze,
hasBannerForPlacement
{
BrazeBannerUI.BannerView(
placementId: BannerSwiftUIView.bannerPlacementID,
braze: braze,
processContentUpdates: { result in
switch result {
case .success(let updates):
if let height = updates.height {
self.contentHeight = height
}
case .failure:
return
}
}
)
.frame(height: min(contentHeight, 80))
}
}.onAppear {
AppDelegate.braze?.banners.getBanner(
for: BannerSwiftUIView.bannerPlacementID,
{ banner in
hasBannerForPlacement = banner != nil
}
)
}
}
}
```
!!step
lines-AppDelegate.swift=13
#### 1. Enable debugging (optional)
To make troubleshooting easier while developing, consider enabling debugging.
!!step
lines-AppDelegate.swift=19
#### 2. Refresh your placements
After initializing the Braze SDK, call `requestBannersRefresh(placementIds: ["PLACEMENT_ID"])` to refresh Banner content at the start of each session.
!!step
lines-BannerSwiftUIView.swift=1-46
#### 3. Create a view component
Create a reusable SwiftUI view component that displays available Banners and contains your main app content if needed.
!!step
lines-BannerSwiftUIView.swift=36-43
#### 4. Only display available Banners
Only attempt to show `BrazeBannerUI.BannerView` if the SDK is initialized and Banner content exists for that user. In `.onAppear`, call `getBanner(for:placementID)` to set the state of `hasBannerForPlacement`.
!!step
lines-BannerSwiftUIView.swift=17-32
#### 5. Only show `BannerView` after it loads
To avoid blank space in your UI, only show `BrazeBannerUI.BannerView` if a Banner is present and the SDK is initialized.
!!step
lines-BannerSwiftUIView.swift=23-32
#### 6. Dynamically update Banner height
Use the `processContentUpdates` callback to fetch the Banner’s content height as soon as it loads. Update your SwiftUI state (`contentHeight`) and apply a `.frame(height:)` constraint using the provided height.
!!step
lines-BannerSwiftUIView.swift=34
#### 7. Limit the Banner height
To ensure your Banner never exceeds the maximum height, apply a `.frame(height: min(contentHeight, 80))` modifier. This will keep your UI visually balanced regardless of the Banner's content.
# Banners: Perguntas frequentes
Source: /docs/pt-br/developer_guide/banners/faq/index.md
# Frequently asked questions
> These are answers to frequently asked questions about Banners in Braze. For more general information, see [About Banners]().
## When do Banner updates appear for users?
Banners are refreshed with their latest data whenever you call the refresh method—there's no need to resend or update your Banner campaign.
## How many placements can I request in a session?
In a single refresh request, you can request a maximum of 10 placements. For each one you request, Braze will return the highest-priority Banner a user is eligible for. Additional requests will return an error.
For more information, see [Placement requests]().
## How many Banner campaigns can be active simultaneously?
Each workspace can support up to 200 active Banner campaigns. If this limit is reached, you'll need to [archive or deactivate](https://www.braze.com/docs/pt-br/pt-br/user_guide/engagement_tools/messaging_fundamentals/about_statuses/#changing-the-status) an existing campaign before creating a new one.
## For campaigns sharing a placement, which Banner is displayed first?
If a user qualifies for multiple Banner campaigns that share the same placement, the Banner with the highest priority will be displayed. For more information, see [Banner priority]().
## Can I use Banners in my existing Content Card feed?
Banners are different from Content Cards, meaning you can’t use Banners and Content Cards in the same feed. To replace existing Content Card feeds with Banners, you’ll need to [create placements in your app or website](https://www.braze.com/docs/pt-br/pt-br/developer_guide/banners/placements/).
## Can Banners include video?
The standard Banner composer supports images, text, and buttons. To include a video in a Banner, you could use a **Custom Code** block and render a video or embedded player in your app or website.
## Can I trigger a banner based on user actions?
While Banners do not support [action-based delivery](https://www.braze.com/docs/pt-br/pt-br/user_guide/engagement_tools/campaigns/building_campaigns/delivery_types/triggered_delivery), you can target users based on their past actions using segmentation and priority.
For example, to show a special Banner only to users who have completed a `purchase` event:
1. **Targeting:** In your campaign, target a segment of users who have performed the custom event `purchase` at least once.
2. **Priority:** If you have a general Banner for all users and this specific Banner for purchasers targeting the same placement, set the specific Banner's priority to **High** and the general Banner to **Medium** or **Low**.
When the user starts a new session or refreshes Banners after performing the action, Braze evaluates their eligibility. If they match the "Purchase" segment, the high-priority Banner will be displayed.
## Can users dismiss a Banner?
Yes. You can allow users to manually dismiss a Banner by turning on dismissal behavior in the Banner composer. See [Configure dismissal behavior](https://www.braze.com/docs/pt-br/pt-br/user_guide/channels/banners/create_a_banner/#dismiss-behavior) for details on turning on dismissal and customizing the dismiss button.
Users can manually dismiss Banners only if dismissal behavior is enabled. If dismissal isn't enabled, you can control Banner visibility by managing user segment eligibility. When a user no longer meets the targeting criteria for a Banner campaign, they won't see it again on their next session.
When a user dismisses a Banner, they're ineligible for that campaign by default. To let dismissed users see the Banner again, [configure re-eligibility](https://www.braze.com/docs/pt-br/pt-br/user_guide/channels/banners/create_a_banner/#re-eligibility) in the campaign's **Delivery Controls** step. Canvas Banner steps use Canvas re-entry settings to control re-eligibility instead.
For example, if you display a promotional Banner until a user makes a purchase, logging an event such as `purchase_completed` can remove that user from the targeted segment, effectively hiding the Banner in subsequent sessions.
## Can I export Banners campaign analytics using the Braze API?
Yes. You can use the [`/campaigns/data_series` endpoint](https://www.braze.com/docs/pt-br/pt-br/api/endpoints/export/campaigns/get_campaign_analytics/) to get data on how many Banner campaigns were viewed, clicked, or converted.
## When are users segmented?
Users are segmented at the beginning of the session. If a campaign's targeted segments depend on custom attributes, custom events, or other targeting attributes, they must be present on the user at the beginning of the session.
## How can I compose Banners to ensure the lowest latency?
The simpler the messaging in your Banner, the faster it will render. It’s best to test your Banner campaign against the expected latency for your use case. For example, be sure to test Liquid attributes like `catalog_items`.
## Are all Liquid tags supported?
No. However, most Liquid tags are supported for Banner messages, except for `catalog_items` that are re-rendered using the [`:rerender` tag](https://www.braze.com/docs/pt-br/pt-br/user_guide/data/activation/catalogs/using_catalogs/#using-liquid).
## Can I capture click events?
Yes. How click events are captured depends on how your Banner is rendered:
- **Standard editor components:** If your Banner uses standard editor components (images, buttons, text), clicks are tracked automatically when using the SDK's insertion methods.
- **Custom Code Blocks:** If you want to track clicks for elements within a Custom Code editor block, you must call `brazeBridge.logClick()` from within your custom HTML to track clicks. This applies even when using the SDK methods to insert and render the Banner. For the full reference, see [Custom code and JavaScript bridge for Banners](https://www.braze.com/docs/pt-br/pt-br/user_guide/message_building_by_channel/banners/custom_code/#javascript-bridge).
- **Custom UI (headless):** If you're building a fully custom UI using the Banner's custom properties instead of rendering the Banner HTML, call `logClick()` on the Banner object from your application code.
For more information, see [Logging clicks](https://www.braze.com/docs/pt-br/pt-br/developer_guide/banners/placements/#logging-clicks).
# Cartões de Conteúdo no SDK do Braze
Source: /docs/pt-br/developer_guide/content_cards/index.md
# Cartões de conteúdo
> Saiba mais sobre os Cartões de Conteúdo para o SDK do Braze, incluindo os diferentes modelos de dados e propriedades específicas de cartões disponíveis para seu aplicativo.
**Tip:**
Using Content Cards for banner-style messages? Try out [Banners](https://www.braze.com/docs/pt-br/pt-br/user_guide/message_building_by_channel/banners/)— perfect for inline, persistent in-app and web messages.
**Note:**
This guide uses code samples from the Braze Web SDK 4.0.0+. To upgrade to the latest Web SDK version, see [SDK Upgrade Guide](https://github.com/braze-inc/braze-web-sdk/blob/master/UPGRADE_GUIDE.md).
## Prerequisites
Before you can use Content Cards, you'll need to [integrate the Braze Web SDK](https://www.braze.com/docs/pt-br/pt-br/developer_guide/sdk_integration/?sdktab=web) into your app. However, no additional setup is required. To build your own UI instead, see [Content Card Customization Guide](https://www.braze.com/docs/pt-br/pt-br/developer_guide/content_cards/).
**Note:**
Some ad blockers and browser privacy extensions can block the Braze Web SDK script or related network requests, which can prevent Content Cards from loading. If you're using the CDN integration method, consider switching to the [NPM integration method](https://www.braze.com/docs/pt-br/pt-br/developer_guide/sdk_integration/?subtab=package%20manager&sdktab=web), which stores SDK libraries locally on your website and can avoid some ad-blocker-related issues.
## Standard feed UI
To use the included Content Cards UI, you'll need to specify where to show the feed on your website.
In this example, we have a `` in which we want to place the Content Cards feed. We'll use three buttons to hide, show, or toggle (hide or show based on its current state) the feed.
```html
```
When using the `toggleContentCards(parentNode, filterFunction)` and `showContentCards(parentNode, filterFunction)` methods, if no arguments are provided, all Content Cards will be shown in a fixed-position sidebar on the right-hand side of the page. Otherwise, the feed will be placed in the specified `parentNode` option.
|Parameters | Description |
|---|---|
|`parentNode` | The HTML node to render the Content Cards into. If the parent node already has a Braze Content Cards view as a direct descendant, the existing Content Cards will be replaced. For example, you should pass in `document.querySelector(".my-container")`.|
|`filterFunction` | A filter or sort function for cards displayed in this view. Invoked with the array of `Card` objects, sorted by `{pinned, date}`. Expected to return an array of sorted `Card` objects to render for this user. If omitted, all cards will be displayed. |
{: .reset-td-br-1 .reset-td-br-2 aria-label="Standard feed UI" }
[See the SDK reference docs](https://js.appboycdn.com/web-sdk/latest/doc/modules/braze.html#togglecontentcards) for more information on Content Card toggling.
## Testing Content Cards on the web
You can test your Content Cards integration using your browser's developer tools.
1. Create a Content Card campaign and target your test user.
2. Log in to the website that has your Web SDK integration.
3. Open your browser console. For Chrome, right-click the page, select **Inspect**, then select the **Console** tab.
4. Run these commands in the console:
- `window.braze.getCachedContentCards()`
- `window.braze.toggleContentCards()`
## Card types and properties
The Content Cards data model is available in the Web SDK and offers the following Content Card types: [ImageOnly](https://js.appboycdn.com/web-sdk/latest/doc/classes/braze.imageonly.html), [CaptionedImage](https://js.appboycdn.com/web-sdk/latest/doc/classes/braze.captionedimage.html), and [ClassicCard](https://js.appboycdn.com/web-sdk/latest/doc/classes/braze.classiccard.html). Each type inherits common properties from a base model [Card](https://js.appboycdn.com/web-sdk/latest/doc/classes/braze.card.html) and has the following additional properties.
**Tip:**
To log Content Card data, see [Logging analytics](https://www.braze.com/docs/pt-br/pt-br/developer_guide/content_cards/logging_analytics/).
### Base card model
All Content Cards have these shared properties:
|Property|Description|
|---|---|
| `expiresAt` | The UNIX timestamp of the card's expiration time.|
| `extras`| (Optional) Key-value pair data formatted as a string object with a value string. |
| `id` | (Optional) The id of the card. This will be reported back to Braze with events for analytics purposes. |
| `pinned` | This property reflects if the card was set up as "pinned" in the dashboard.|
| `updated` | The UNIX timestamp of when this card was last modified. |
| `viewed` | This property reflects whether the user viewed the card or not.|
| `isControl` | This property is `true` when a card is a "control" group within an A/B test.|
{: .reset-td-br-1 .reset-td-br-2 aria-label="Base card model" }
### Image only
[ImageOnly](https://js.appboycdn.com/web-sdk/latest/doc/classes/braze.imageonly.html) cards are clickable full-sized images.
|Property|Description|
|---|---|
| `aspectRatio` | The aspect ratio of the card's image and serves as a hint before image loading completes. Note that the property may not be supplied in certain circumstances. |
| `categories` | This property is purely for organization in your custom implementation; these categories can be set in the dashboard composer. |
| `clicked` | This property indicates whether this card has ever been clicked on this device. |
| `created` | The UNIX timestamp of the card's creation time from Braze. |
| `dismissed` | This property indicates if this card has been dismissed. |
| `dismissible` | This property reflects if the user can dismiss the card, removing it from view. |
| `imageUrl` | The URL of the card's image.|
| `linkText` | The display text for the URL. |
| `url` | The URL that will be opened after the card is clicked on. |
{: .reset-td-br-1 .reset-td-br-2 aria-label="Image only" }
### Captioned image
[CaptionedImage](https://js.appboycdn.com/web-sdk/latest/doc/classes/braze.captionedimage.html) cards are clickable, full-sized images with accompanying descriptive text.
|Property|Description|
|---|---|
| `aspectRatio` | The aspect ratio of the card's image and serves as a hint before image loading completes. Note that the property may not be supplied in certain circumstances. |
| `categories` | This property is purely for organization in your custom implementation; these categories can be set in the dashboard composer. |
| `clicked` | This property indicates whether this card has ever been clicked on this device. |
| `created` | The UNIX timestamp of the card's creation time from Braze. |
| `dismissed` | This property indicates if this card has been dismissed. |
| `dismissible` | This property reflects if the user can dismiss the card, removing it from view. |
| `imageUrl` | The URL of the card's image.|
| `linkText` | The display text for the URL. |
| `title` | The title text for this card. |
| `url` | The URL that will be opened after the card is clicked on. |
{: .reset-td-br-1 .reset-td-br-2 aria-label="Captioned image" }
### Classic
The [ClassicCard](https://js.appboycdn.com/web-sdk/latest/doc/classes/braze.classiccard.html) model can contain an image with no text or a text with image.
|Property|Description|
|---|---|
| `aspectRatio` | The aspect ratio of the card's image and serves as a hint before image loading completes. Note that the property may not be supplied in certain circumstances. |
| `categories` | This property is purely for organization in your custom implementation; these categories can be set in the dashboard composer. |
| `clicked` | This property indicates whether this card has ever been clicked on this device. |
| `created` | The UNIX timestamp of the card's creation time from Braze. |
| `description` | The body text for this card. |
| `dismissed` | This property indicates if this card has been dismissed. |
| `dismissible` | This property reflects if the user can dismiss the card, removing it from view. |
| `imageUrl` | The URL of the card's image.|
| `linkText` | The display text for the URL. |
| `title` | The title text for this card. |
| `url` | The URL that will be opened after the card is clicked on. |
{: .reset-td-br-1 .reset-td-br-2 aria-label="Classic" }
## Control group
If you use the default Content Cards feed, impressions and clicks will be automatically tracked.
If you use a custom integration for Content Cards, you need need [log impressions](https://www.braze.com/docs/pt-br/pt-br/developer_guide/content_cards/logging_analytics/) when a Control Card would have been seen. As part of this effort, make sure to handle Control cards when logging impressions in an A/B test. These cards are blank, and while they aren’t seen by users, you should still log impressions in order to compare how they perform against non-Control cards.
To determine if a Content Card is in the Control group for an A/B test, check the `card.isControl` property (Web SDK v4.5.0+) or check if the card is a `ControlCard` instance (`card instanceof braze.ControlCard`).
## Card methods
### Default feed methods
Use these methods when displaying Content Cards using the Braze default feed UI:
|Method | Description |
|---|---|
|[`showContentCards`](https://js.appboycdn.com/web-sdk/latest/doc/modules/braze.html#showcontentcards)| Displays the default Content Cards feed. Renders cards into a provided `parentNode` HTML element, or as a fixed-position sidebar on the right side of the page if no element is given. Accepts an optional `filterFunction` to sort or filter cards before display. |
|[`hideContentCards`](https://js.appboycdn.com/web-sdk/latest/doc/modules/braze.html#hidecontentcards)| Hides the default Content Cards feed if it is currently showing. |
|[`toggleContentCards`](https://js.appboycdn.com/web-sdk/latest/doc/modules/braze.html#togglecontentcards)| Shows the default Content Cards feed if it is hidden, or hides it if it is visible. If you need to display multiple Content Card feeds simultaneously, use `showContentCards` and `hideContentCards` instead. |
{: .reset-td-br-1 .reset-td-br-2 aria-label="Default feed methods" }
### Custom feed methods
Use these methods when building your own Content Card UI:
|Method | Description |
|---|---|
|[`subscribeToContentCardsUpdates`](https://js.appboycdn.com/web-sdk/latest/doc/modules/braze.html#subscribetocontentcardsupdates)| Registers a callback function that is invoked whenever Content Cards are updated for the current user, such as on session start. Use this as the primary way to receive card data for your custom feed. Must be called before `openSession()` to receive updates on the initial session. |
|[`getCachedContentCards`](https://js.appboycdn.com/web-sdk/latest/doc/modules/braze.html#getcachedcontentcards)| Returns all currently available cards from the most recent Content Cards refresh. Use this to immediately display cards on page load without waiting for a new server request, such as when the user returns to a page during an active session. |
|[`requestContentCardsRefresh`](https://js.appboycdn.com/web-sdk/latest/doc/modules/braze.html#requestcontentcardsrefresh)| Requests an immediate refresh of Content Cards from Braze servers. By default, cards refresh on session start and when the default feed is reopened. Use this to force a refresh at other times, such as after a specific user action. Be aware of [rate limits](https://www.braze.com/docs/pt-br/pt-br/developer_guide/content_cards/customizing_cards/feed/#rate-limit). |
|[`logContentCardImpressions`](https://js.appboycdn.com/web-sdk/latest/doc/modules/braze.html#logcontentcardimpressions)| Logs impression events for an array of cards. Call this when cards are rendered and visible to the user. Required for accurate campaign reporting when using a custom UI, as impressions are not tracked automatically outside the default feed. |
|[`logContentCardClick`](https://js.appboycdn.com/web-sdk/latest/doc/modules/braze.html#logcontentcardclick)| Logs a click event for a single card. Call this when a user interacts with a card in your custom UI. Required for accurate campaign reporting, as clicks are not tracked automatically outside the default feed. |
|[`handleBrazeAction`](https://js.appboycdn.com/web-sdk/latest/doc/modules/braze.html#handlebrazeaction)| Processes a card's URL and executes the configured on-click action, including Braze actions (`brazeActions://` URLs) and standard URL navigation. Call this in your card click handler to ensure on-click behaviors configured in the Braze dashboard are executed. |
|[`dismissCard`](https://js.appboycdn.com/web-sdk/latest/doc/classes/braze.card.html#dismisscard)| Programmatically dismisses a card, removing it from the user's feed. Use this to allow users to dismiss cards in your custom UI. |
{: .reset-td-br-1 .reset-td-br-2 aria-label="Custom feed methods" }
For more details, refer to the [SDK reference documentation](https://js.appboycdn.com/web-sdk/latest/doc/modules/braze.html).
## Best practices
### Call methods in the correct order
For custom feeds, Content Cards refresh only on session start if `subscribeToContentCardsUpdates()` is called before `openSession()`. Call your Braze methods in this order:
```javascript
import * as braze from "@braze/web-sdk";
// Step 1: Initialize the SDK
braze.initialize("YOUR-API-KEY", { baseUrl: "YOUR-SDK-ENDPOINT" });
// Step 2: Subscribe to card updates
braze.subscribeToContentCardsUpdates((updates) => {
const cards = updates.cards;
renderCards(cards);
});
// Step 3: Identify the user
braze.changeUser("USER_ID");
// Step 4: Start the session
braze.openSession();
```
### Use cached cards to persist content across page loads
Because `subscribeToContentCardsUpdates()` invokes only its callback when there are new updates (such as on session start), cards can disappear from your custom feed if a user refreshes the page mid-session. To prevent this, use `getCachedContentCards()` to immediately render cards from the local cache, alongside your subscription for new updates:
```javascript
import * as braze from "@braze/web-sdk";
function renderCards(cards) {
const container = document.getElementById("content-cards");
container.textContent = "";
const displayedCards = [];
cards.forEach(card => {
if (card instanceof braze.ClassicCard || card instanceof braze.CaptionedImage) {
const cardElement = document.createElement("div");
const h3 = document.createElement("h3");
h3.textContent = card.title || "";
cardElement.appendChild(h3);
const p = document.createElement("p");
p.textContent = card.description || "";
cardElement.appendChild(p);
if (card.imageUrl) {
const img = document.createElement("img");
img.src = card.imageUrl;
img.alt = card.title || "";
cardElement.appendChild(img);
}
if (card.url) {
cardElement.addEventListener("click", () => {
braze.logContentCardClick(card);
braze.handleBrazeAction(card.url);
});
}
container.appendChild(cardElement);
displayedCards.push(card);
}
});
if (displayedCards.length > 0) {
braze.logContentCardImpressions(displayedCards);
}
}
// Display cached cards immediately
const cached = braze.getCachedContentCards();
if (cached && cached.cards.length > 0) {
renderCards(cached.cards);
}
// Subscribe to future updates
braze.subscribeToContentCardsUpdates((updates) => {
renderCards(updates.cards);
});
```
### Log analytics for custom feeds
When using a custom UI, impressions, clicks, and dismissals are not tracked automatically. You must log each event manually:
- **Impressions:** Call `logContentCardImpressions([card1, card2, ...])` with an array of card objects when cards become visible to the user.
- **Clicks:** Call `logContentCardClick(card)` when a user interacts with a card.
- **On-click behavior:** Call `handleBrazeAction(card.url)` to execute the card's configured on-click action (such as navigating to a URL or logging a custom event).
**Warning:**
The argument passed to `logContentCardClick()` must be an original Braze `Card` object. If you transform or reconstruct the card data (for example, by serializing and deserializing), clicks are not logged and you see the error: "card must be a Card object."
## Using Google Tag Manager
Google Tag Manager works by injecting the [Braze CDN](https://www.braze.com/docs/pt-br/pt-br/developer_guide/platform_integration_guides/web/initial_sdk_setup#install-cdn) (a version of our Web SDK) directly into your website code, which means that all SDK methods are available just as if you had integrated the SDK without Google Tag Manager, except when implementing Content Cards.
### Setting up Content Cards
For a standard integration of the Content Card feed, you can use a **Custom HTML** tag in Google Tag Manager. Add the following to your Custom HTML tag, which will activate the standard Content Card feed:
```html
```

For more freedom over customizing the appearance of Content Cards and their feed, you can directly integrate Content Cards into your native website. There are two approaches you can take with this: using the standard feed UI or creating a custom feed UI.
When implementing the [standard feed UI](https://www.braze.com/docs/pt-br/pt-br/developer_guide/platform_integration_guides/web/content_cards/integration/#standard-feed-ui), Braze methods must have `window.` added to the start of the method. For example, `braze.showContentCards` should instead be `window.braze.showContentCards`.
For [custom feed](https://www.braze.com/docs/pt-br/pt-br/developer_guide/content_cards/creating_cards/) styling, the steps are the same as if you had integrated the SDK without GTM. For example, if you want to customize the width of the Content Card feed, you can paste the following into your CSS file:
```css
body .ab-feed {
width: 800px;
}
```
### Upgrading templates {#upgrading}
To upgrade to the latest version of the Braze Web SDK, take the following three steps in your Google Tag Manager dashboard:
1. **Update tag template** Go to the **Templates** page within your workspace. Here you should see an icon indicating an update is available.

Click that icon and after reviewing the change, click to **Accept Update**.

2. **Update version number** Once your tag template has been updated, edit the Braze Initialization Tag, and update the SDK version to the most recent `major.minor` version. For example, if the latest version is `4.1.2`, enter `4.1`. You can view a list of SDK versions in our [changelog](https://github.com/braze-inc/braze-web-sdk/blob/master/CHANGELOG.md).

3. **QA and publish** Verify the new SDK version is working using Google Tag Manager's [debugging tool](https://support.google.com/tagmanager/answer/6107056?hl=en) prior to publishing an update to your tag container.
### Troubleshooting {#troubleshooting}
#### Enable tag debugging {#debugging}
Each Braze tag template has an optional **GTM Tag Debugging** checkbox which can be used to log debug messages to your web page's JavaScript console.

#### Enter debug mode
Another way to help debug your Google Tag Manager integration is using Google's [Preview mode](https://support.google.com/tagmanager/answer/6107056) feature.
This will help identify what values are being sent from your web page's data layer to each triggered Braze tag and will also explain which tags were or were not triggered.

#### Verify tag sequencing for custom events {#tag-sequencing}
If custom events or other actions aren't logging in Braze, a common cause is a race condition where an action tag (such as **Custom Event** or **Purchase**) fires before the **Braze Initialization** tag has completed. To fix this, configure [tag sequencing](https://support.google.com/tagmanager/answer/6238868) in GTM:
1. Open the action tag that isn't logging correctly.
2. Under **Advanced Settings** > **Tag Sequencing**, select **A tag that fires before \[this tag\]**.
3. Choose your **Braze Initialization** tag as the setup tag.
This ensures the SDK is fully initialized before any action tags attempt to send data to Braze.
#### Enable verbose logging
To capture detailed logs for troubleshooting, you can enable verbose logging on your Google Tag Manager integration. These logs will appear in the **Console** tab of your browser's [developer tools](https://developer.mozilla.org/en-US/docs/Learn/Common_questions/What_are_browser_developer_tools).
In your Google Tag Manager integration, navigate to your Braze Initialization Tag and select **Enable Web SDK Logging**.

[changelog]: https://github.com/braze-inc/braze-web-sdk/blob/master/CHANGELOG.md
## Prerequisites
Before you can use Braze Content Cards, you'll need to integrate the [Braze Android SDK](https://www.braze.com/docs/pt-br/pt-br/developer_guide/sdk_integration/?sdktab=android) into your app. However, no additional setup is required.
## Google fragments
In Android, the Content Cards feed is implemented as a [fragment](https://developer.android.com/guide/components/fragments.html) available in the Braze Android UI project. The [`ContentCardsFragment`](https://braze-inc.github.io/braze-android-sdk/kdoc/braze-android-sdk/com.braze.ui.contentcards/-content-cards-fragment/index.html) class will automatically refresh and display the contents of the Content Cards and log usage analytics. The cards that can appear in a user's `ContentCards` are created on the Braze dashboard.
To learn how to add a fragment to an activity, see [Google's fragments documentation](https://developer.android.com/guide/fragments#Adding).
## Card types and properties
The Content Cards data model is available in the Android SDK and offers the following unique Content Card types. Each type shares a base model, which allows them to inherit common properties from the base model, in addition to having their own unique properties. For full reference documentation, see [`com.braze.models.cards`](https://braze-inc.github.io/braze-android-sdk/kdoc/braze-android-sdk/com.braze.models.cards/index.html).
### Base card model {#base-card-for-android}
The [base card](https://braze-inc.github.io/braze-android-sdk/kdoc/braze-android-sdk/com.braze.models.cards/-card/index.html) model provides foundational behavior for all cards.
|Property | Description |
|---|---|
|`getId()` | Returns the card's ID set by Braze.|
|`getViewed()` | Returns a boolean reflects if the card is read or unread by the user.|
|`getExtras()` | Returns a map of key-value extras for this card.|
|`getCreated()` | Returns the unix timestamp of the card's creation time from Braze.|
|`isPinned` | Returns a boolean that reflects whether the card is pinned.|
|`getOpenUriInWebView()` | Returns a boolean that reflects whether Uris for this card should be opened in the Braze WebView or not.|
|`getExpiredAt()` | Gets the expiration date of the card.|
|`isRemoved()` | Returns a boolean that reflects whether the end user has dismissed this card.|
|`isDismissibleByUser()` | Returns a boolean that reflects whether the card is dismissible by the user.|
|`isClicked()` | Returns a boolean that reflects the clicked state of this card.|
|`isDismissed` | Returns a boolean that reflects whether the card has been dismissed. Set to `true` to mark the card as dismissed. If a card is already marked as dismissed, it cannot be marked as dismissed again.|
|`isControl()` | Returns a boolean if this card is a control card and should not be rendered.|
{: .reset-td-br-1 .reset-td-br-2 aria-label="Base card model #base-card-for-android" }
### Image only {#banner-image-card-for-android}
[Image only cards](https://braze-inc.github.io/braze-android-sdk/kdoc/braze-android-sdk/com.braze.models.cards/-image-only-card/index.html) are clickable full-sized images.
|Property | Description |
|---|---|
|`getImageUrl()` | Returns the URL of the card's image.|
|`getUrl()` | Returns the URL that will be opened after the card is clicked. It can be a HTTP(s) URL or a protocol URL.|
|`getDomain()` | Returns link text for the property URL.|
{: .reset-td-br-1 .reset-td-br-2 aria-label="Image only #banner-image-card-for-android" }
### Captioned image {#captioned-image-card-for-android}
[Captioned image cards](https://braze-inc.github.io/braze-android-sdk/kdoc/braze-android-sdk/com.braze.models.cards/-captioned-image-card/index.html) are clickable, full-sized images with accompanying descriptive text.
|Property | Description |
|---|---|
|`getImageUrl()` | Returns the URL of the card's image.|
|`getTitle()` | Returns the title text for the card.|
|`getDescription()` | Returns the body text for the card.|
|`getUrl()` | Returns the URL that will be opened after the card is clicked. It can be a HTTP(s) URL or a protocol URL.|
|`getDomain()` | Returns the link text for the property URL. |
{: .reset-td-br-1 .reset-td-br-2 aria-label="Captioned image #captioned-image-card-for-android" }
### Classic {#text-Announcement-card-for-android}
A classic card without an image included will result in a [text announcement card](https://braze-inc.github.io/braze-android-sdk/kdoc/braze-android-sdk/com.braze.models.cards/-text-announcement-card/index.html). If an image is included, you will receive a [short news card](https://braze-inc.github.io/braze-android-sdk/kdoc/braze-android-sdk/com.braze.models.cards/-short-news-card/index.html).
|Property | Description |
|---|---|
|`getTitle()` | Returns the title text for the card. |
|`getDescription()` | Returns the body text for the card. |
|`getUrl()` | Returns the URL that will be opened after the card is clicked. It can be a HTTP(s) URL or a protocol URL. |
|`getDomain()` | Returns the link text for the property URL. |
|`getImageUrl()` | Returns the URL of the card's image, applies only to the classic Short News Card. |
|`isDismissed` | Returns a boolean that reflects whether the card has been dismissed. Set to `true` to mark the card as dismissed. If a card is already marked as dismissed, it cannot be marked as dismissed again. |
{: .reset-td-br-1 .reset-td-br-2 aria-label="Classic #text-Announcement-card-for-android" }
## Card methods
All [`Card`](https://braze-inc.github.io/braze-android-sdk/kdoc/braze-android-sdk/com.braze.models.cards/index.html) data model objects offer the following analytics methods for logging user events to Braze servers.
|Method | Description |
|---|---|
|`logImpression()` | Manually log an impression to Braze for a particular card. |
|`logClick()` | Manually log a click to Braze for a particular card. |
{: .reset-td-br-1 .reset-td-br-2 aria-label="Card methods" }
## Prerequisites
Before you can use Content Cards, you'll need to integrate the [Braze Swift SDK](https://www.braze.com/docs/pt-br/pt-br/developer_guide/sdk_integration/?sdktab=swift) into your app. However, no additional setup is required.
## View controller contexts
The default Content Cards UI can be integrated from the `BrazeUI` library of the Braze SDK. Create the Content Cards view controller using the `braze` instance. If you wish to intercept and react to the Content Card UI lifecycle, implement [`BrazeContentCardUIViewControllerDelegate`](https://braze-inc.github.io/braze-swift-sdk/documentation/brazeui/brazecontentcarduiviewcontrollerdelegate) as the delegate for your `BrazeContentCardUI.ViewController`.
**Note:**
For more information about iOS view controller options, refer to the [Apple developer documentation](https://developer.apple.com/documentation/uikit/view_controllers/showing_and_hiding_view_controllers).
The `BrazeUI` library of the Swift SDK provides two default view controller contexts: [navigation](#swift_navigation) or [modal](#swift_modal). This means you can integrate Content Cards in these contexts by adding a few lines of code to your app or site. Both views offer customization and styling options as described in the [customization guide](https://www.braze.com/docs/pt-br/pt-br/developer_guide/customization_guides/content_cards/customizing_styles/?tab=ios). You can also create a custom Content Card view controller instead of using the standard Braze one for even more customization options—refer to the [Content Cards UI tutorial](https://braze-inc.github.io/braze-swift-sdk/tutorials/braze/c2-contentcardsui/) for an example.
**Important:**
To handle control variant Content Cards in your custom UI, pass in your [`Braze.ContentCard.Control`](https://braze-inc.github.io/braze-swift-sdk/documentation/brazekit/braze/contentcard/control(_:)) object, then call the `logImpression` method as you would with any other Content Card type. The object will implicitly log a control impression to inform our analytics of when a user would have seen the control card.
### Navigation
A navigation controller is a view controller that manages one or more child view controllers in a navigation interface. Here is an example of pushing a `BrazeContentCardUI.ViewController` instance into a navigation controller:
```swift
func pushViewController() {
guard let braze = AppDelegate.braze else { return }
let contentCardsController = BrazeContentCardUI.ViewController(braze: braze)
// Implement and set `BrazeContentCardUIViewControllerDelegate` if you wish to intercept click actions.
contentCardsController.delegate = self
self.navigationController?.pushViewController(contentCardsController, animated: true)
}
```
```objc
- (void)pushViewController {
BRZContentCardUIViewController *contentCardsController = [[BRZContentCardUIViewController alloc] initWithBraze:self.braze];
// Implement and set `BrazeContentCardUIViewControllerDelegate` if you wish to intercept click actions.
[contentCardsController setDelegate:self];
[self.navigationController pushViewController:contentCardsController animated:YES];
}
```
### Modal
Use modal presentations to create temporary interruptions in your app’s workflow, such as prompting the user for important information. This model view has a navigation bar on top and a **Done** button on the side of the bar. Here is an example of pushing a `BrazeContentCard.ViewController` instance into a modal controller:
```swift
func presentModalViewController() {
guard let braze = AppDelegate.braze else { return }
let contentCardsModal = BrazeContentCardUI.ModalViewController(braze: braze)
// Implement and set `BrazeContentCardUIViewControllerDelegate` if you wish to intercept click actions.
contentCardsModal.viewController.delegate = self
self.navigationController?.present(contentCardsModal, animated: true, completion: nil)
}
```
```objc
- (void)presentModalViewController {
BRZContentCardUIModalViewController *contentCardsModal = [[BRZContentCardUIModalViewController alloc] initWithBraze:AppDelegate.braze];
// Implement and set `BrazeContentCardUIViewControllerDelegate` if you wish to intercept click actions.
[contentCardsModal.viewController setDelegate:self];
[self.navigationController presentViewController:contentCardsModal animated:YES completion:nil];
}
```
For example usage of `BrazeUI` view controllers, check out the corresponding Content Cards UI samples in our [Examples app](https://github.com/braze-inc/braze-swift-sdk/tree/main/Examples).
## Base card model
The Content Cards data model is available in the `BrazeKit` module of the Braze Swift SDK. This module contains the following Content Card types, which are an implementation of the `Braze.ContentCard` type. For a full list of Content Card properties and their usage, see [`ContentCard` class](https://braze-inc.github.io/braze-swift-sdk/documentation/brazekit/braze/contentcard).
- Image only
- Captioned image
- Classic
- Classic image
- Control
To access the Content Cards data model, call `contentCards.cards` on your `braze` instance. See [Logging analytics](https://www.braze.com/docs/pt-br/pt-br/developer_guide/content_cards/logging_analytics/) for more information on subscribing to card data.
**Note:**
Keep in mind, `BrazeKit` offers an alternative [`ContentCardRaw`](https://braze-inc.github.io/braze-swift-sdk/documentation/brazekit/braze/contentcardraw) class for Objective-C compatibility.
## Card methods
Each card is initialized with a `Context` object, which contains various methods for managing your card's state. Call these methods when you want to modify the corresponding state property on a particular card object.
| Method | Description |
|--------------------------------------|------------------------------------------------------------------------------------------------------------------------------------------|
| `card.context?.logImpression()` | Log the content card impression event. |
| `card.context?.logClick()` | Log the content card click event. |
| `card.context?.processClickAction()` | Process a given [`ClickAction`](https://braze-inc.github.io/braze-swift-sdk/documentation/brazekit/braze/contentcard/clickaction) input. |
| `card.context?.logDismissed()` | Log the content card dismissed event. |
| `card.context?.logError()` | Log an error related to the content card. |
| `card.context?.loadImage()` | Load a given content card image from a URL. This method can be nil when the content card does not have an image. |
{: .reset-td-br-1 .reset-td-br-2 aria-label="Card methods" }
For more details, refer to the [`Context` class documentation](https://braze-inc.github.io/braze-swift-sdk/documentation/brazekit/braze/contentcardraw/context-swift.class)
## Prerequisites
Before you can use this feature, you'll need to [integrate the Cordova Braze SDK](https://www.braze.com/docs/pt-br/pt-br/developer_guide/sdk_integration/?sdktab=cordova).
## Card Feeds
The Braze SDK includes a default card feed. To show the default card feed, you can use the `launchContentCards()` method. This method handles all analytics tracking, dismissals, and rendering for a user's Content Cards.
## Content Cards
You can use these additional methods to build a custom Content Cards Feed within your app:
|Method | Description |
|---|---|
|`requestContentCardsRefresh()`|Sends a background request to request the latest Content Cards from the Braze SDK server.|
|`getContentCardsFromServer(successCallback, errorCallback)`|Retrieves Content Cards from the Braze SDK. This will request the latest Content Cards from the server and return the list of cards upon completion.|
|`getContentCardsFromCache(successCallback, errorCallback)`|Retrieves Content Cards from the Braze SDK. This will return the latest list of cards from the local cache, which was updated at the last refresh.|
|`logContentCardClicked(cardId)`|Logs a click for the given Content Card ID.|
|`logContentCardImpression(cardId)`|Logs an impression for the given Content Card ID.|
|`logContentCardDismissed(cardId)`|Logs a dismissal for the given Content Card ID.|
{: .reset-td-br-1 .reset-td-br-2 aria-label="Content Cards" }
## About Flutter Content Cards
The Braze SDK includes a default card feed to get you started with Content Cards. To show the card feed, you can use the `braze.launchContentCards()` method. The default card feed included with the Braze SDK will handle all analytics tracking, dismissals, and rendering for a user's Content Cards.
## Prerequisites
Before you can use this feature, you'll need to [integrate the Flutter Braze SDK](https://www.braze.com/docs/pt-br/pt-br/developer_guide/sdk_integration/?sdktab=flutter).
## Card methods
You can use these additional methods to build a custom Content Cards Feed within your app by using the following methods available on the [plugin public interface](https://github.com/braze-inc/braze-flutter-sdk/blob/master/lib/braze_plugin.dart):
| Method | Description |
| ---------------------------------------------- | ------------------------------------------------------------------------------------------------------ |
| `braze.requestContentCardsRefresh()` | Requests the latest Content Cards from the Braze SDK server. |
| `braze.logContentCardClicked(contentCard)` | Logs a click for the given Content Card object. |
| `braze.logContentCardImpression(contentCard)` | Logs an impression for the given Content Card object. |
| `braze.logContentCardDismissed(contentCard)` | Logs a dismissal for the given Content Card object. |
{: .reset-td-br-1 .reset-td-br-2 aria-label="Card methods" }
## Receiving Content Card data
To receive Content Card data in your Flutter app, the `BrazePlugin` supports sending Content Card data by using [Dart Streams](https://dart.dev/tutorials/language/streams).
The `BrazeContentCard` [object](https://pub.dev/documentation/braze_plugin/latest/braze_plugin/BrazeContentCard-class.html) supports a subset of fields available in the native model objects, including `description`, `title`, `image`, `url`, `extras`, and more.
### Listen for Content Card data in the Dart layer
To receive Content Card data in the Dart layer, use the code below to create a `StreamSubscription` and call `braze.subscribeToContentCards()`. Remember to `cancel()` the stream subscription when it is no longer needed.
```dart
// Create stream subscription
StreamSubscription contentCardsStreamSubscription;
contentCardsStreamSubscription = braze.subscribeToContentCards((List contentCards) {
// Handle Content Cards
}
// Cancel stream subscription
contentCardsStreamSubscription.cancel();
```
For an example, see [main.dart](https://github.com/braze-inc/braze-flutter-sdk/blob/master/example/lib/main.dart) in the Braze Flutter SDK sample application.
### Forward Content Card data from the native iOS layer
Content Card data is automatically forwarded from both the Android and iOS native layers. No additional setup is required.
If you're using Flutter SDK 17.1.0 or earlier, Content Card data forwarding from the iOS native layer requires manual setup. Your application likely contains a `contentCards.subscribeToUpdates` callback that calls `BrazePlugin.processContentCards(contentCards)`. To migrate to Flutter SDK 18.0.0, remove the `BrazePlugin.processContentCards(_:)` call—data forwarding is now handled automatically.
For an example, see [AppDelegate.swift](https://github.com/braze-inc/braze-flutter-sdk/blob/master/example/ios/Runner/AppDelegate.swift) in the Braze Flutter SDK sample application.
#### Replaying the callback for Content Cards
To store any Content Cards triggered before the callback is available and replay them after it is set, add the following entry to the `customConfigs` map when initializing the `BrazePlugin`:
```dart
BrazePlugin braze = new BrazePlugin(customConfigs: {replayCallbacksConfigKey: true});
```
## About React Native Content Cards
The Braze SDKs include a default card feed to get you started with Content Cards. To show the card feed, you can use the `Braze.launchContentCards()` method. The default card feed included with the Braze SDK will handle all analytics tracking, dismissals, and rendering for a user's Content Cards.
## Prerequisites
Before you can use this feature, you'll need to [integrate the React Native Braze SDK](https://www.braze.com/docs/pt-br/pt-br/developer_guide/sdk_integration/?sdktab=react%20native).
## Cards methods
To build your own UI, you can get a list of available cards, and listen for updates to cards:
```javascript
// Set initial cards
const [cards, setCards] = useState([]);
// Listen for updates as a result of card refreshes, such as:
// a new session, a manual refresh with `requestContentCardsRefresh()`, or after the timeout period
Braze.addListener(Braze.Events.CONTENT_CARDS_UPDATED, async (update) => {
setCards(update.cards);
});
// Manually trigger a refresh of cards
Braze.requestContentCardsRefresh();
```
**Important:**
If you choose to build your own UI to display cards, you must call `logContentCardImpression` in order to receive analytics for those cards. This includes `control` cards, which must be tracked even though they are not displayed to the user.
You can use these additional methods to build a custom Content Cards Feed within your app:
| Method | Description |
| ---------------------------------------- | ------------------------------------------------------------------------------------------------------ |
| `launchContentCards()` | Launches the Content Cards UI element. |
| `requestContentCardsRefresh()` | Requests the latest Content Cards from the Braze SDK server. The resulting list of cards is passed to each of the previously registered [content card event listeners](#reactnative_cards-methods). |
| `getContentCards()` | Retrieves Content Cards from the Braze SDK. This returns a promise that resolves with the latest list of cards from the server. |
| `getCachedContentCards()` | Returns the most recent Content Cards array from the cache. |
| `logContentCardClicked(cardId)` | Logs a click for the given Content Card ID. This method is used only for analytics. To execute the click action, call `processContentCardClickAction(cardId)` in addition. |
| `logContentCardImpression(cardId)` | Logs an impression for the given Content Card ID. |
| `logContentCardDismissed(cardId)` | Logs a dismissal for the given Content Card ID. |
| `processContentCardClickAction(cardId)` | Perform the action of a particular card. |
{: .reset-td-br-1 .reset-td-br-2 aria-label="Cards methods" }
## Card types and properties
The Content Cards data model is available in the React Native SDK and offers the following Content Cards card types: [Image Only](#image-only), [Captioned Image](#captioned-image), and [Classic](#classic). There's also a special [Control](#control) card type, which is returned to users that are in the control group for a given card. Each type inherits common properties from a base model in addition to its own unique properties.
**Tip:**
For a full reference of the Content Card data model, see the [Android](https://braze-inc.github.io/braze-android-sdk/kdoc/braze-android-sdk/com.braze.models.cards/index.html) and [iOS](https://braze-inc.github.io/braze-swift-sdk/documentation/brazekit/braze/contentcard) documentation.
### Base card model
The base card model provides foundational behavior for all cards.
|Property | Description |
|--------------|------------------------------------------------------------------------------------------------------------------------|
|`id` | The card's ID set by Braze. |
|`created` | The UNIX timestamp of the card's creation time from Braze. |
|`expiresAt` | The UNIX timestamp of the card's expiration time. When the value is less than 0, it means the card never expires. |
|`viewed` | Whether the card is read or unread by the user. This does not log analytics. |
|`clicked` | Whether the card has been clicked by the user. |
|`pinned` | Whether the card is pinned. |
|`dismissed` | Whether the user has dismissed this card. Marking a card as dismissed that has already been dismissed will be a no-op. |
|`dismissible` | Whether the card is dismissible by the user. |
|`url` | (Optional) The URL string associated with the card click action. |
|`openURLInWebView` | Whether URLs for this card should be opened in the Braze WebView or not. |
|`isControl` | Whether this card is a control card. Control cards should not be displayed to the user. |
|`extras` | The map of key-value extras for this card. |
{: .reset-td-br-1 .reset-td-br-2 aria-label="Base card model" }
For a full reference of the base card, see the [Android](https://braze-inc.github.io/braze-android-sdk/kdoc/braze-android-sdk/com.braze.models.cards/-card/index.html) and [iOS](https://braze-inc.github.io/braze-swift-sdk/documentation/brazekit/braze/contentcard/data-swift.struct) documentation.
### Image only
Image only cards are clickable, full-sized images.
|Property | Description |
|-------------------|-------------------------------------------------------------------------------------------------------------------|
|`type` | The Content Card type, `IMAGE_ONLY`. |
|`image` | The URL of the card's image. |
|`imageAspectRatio` | The aspect ratio of the card's image. It is meant to serve as a hint before image loading completes. Note that the property may not be supplied in certain circumstances. |
{: .reset-td-br-1 .reset-td-br-2 aria-label="Image only" }
For a full reference of the image only card, see the [Android](https://braze-inc.github.io/braze-android-sdk/kdoc/braze-android-sdk/com.braze.models.cards/-image-only-card/index.html) and [iOS](https://braze-inc.github.io/braze-swift-sdk/documentation/brazekit/braze/contentcard/imageonly-swift.struct) documentation.
### Captioned image
Captioned image cards are clickable, full-sized images with accompanying descriptive text.
|Property | Description |
|-------------------|-------------------------------------------------------------------------------------------------------------------|
|`type` | The Content Card type, `CAPTIONED`. |
|`image` | The URL of the card's image. |
|`imageAspectRatio` | The aspect ratio of the card's image. It is meant to serve as a hint before image loading completes. Note that the property may not be supplied in certain circumstances. |
|`title` | The title text for the card. |
|`cardDescription` | The description text for the card. |
|`domain` | (Optional) The link text for the property URL, for example, `"braze.com/resources/"`. It can be displayed on the card's UI to indicate the action/direction of clicking on the card. |
{: .reset-td-br-1 .reset-td-br-2 aria-label="Captioned image" }
For a full reference of the captioned image card, see the [Android](https://braze-inc.github.io/braze-android-sdk/kdoc/braze-android-sdk/com.braze.models.cards/-captioned-image-card/index.html) and [iOS](https://braze-inc.github.io/braze-swift-sdk/documentation/brazekit/braze/contentcard/captionedimage-swift.struct) documentation.
### Classic
Classic cards have a title, description, and an optional image on the left of the text.
|Property | Description |
|-------------------|-------------------------------------------------------------------------------------------------------------------|
|`type` | The Content Card type, `CLASSIC`. |
|`image` | (Optional) The URL of the card's image. |
|`title` | The title text for the card. |
|`cardDescription` | The description text for the card. |
|`domain` | (Optional) The link text for the property URL, for example, `"braze.com/resources/"`. It can be displayed on the card's UI to indicate the action/direction of clicking on the card. |
{: .reset-td-br-1 .reset-td-br-2 aria-label="Classic" }
For a full reference of the classic (text announcement) Content Card, see the [Android](https://braze-inc.github.io/braze-android-sdk/kdoc/braze-android-sdk/com.braze.models.cards/-text-announcement-card/index.html) and [iOS](https://braze-inc.github.io/braze-swift-sdk/documentation/brazekit/braze/contentcard/classic-swift.struct) documentation. For the classic image (short news) card, see the [Android](https://braze-inc.github.io/braze-android-sdk/kdoc/braze-android-sdk/com.braze.models.cards/-short-news-card/index.html) and [iOS](https://braze-inc.github.io/braze-swift-sdk/documentation/brazekit/braze/contentcard/classicimage-swift.struct) documentation.
### Control
Control cards include all of the base properties, with a few important differences. Most importantly:
- The `isControl` property is guaranteed to be `true`.
- The `extras` property is guaranteed to be empty.
For a full reference of the control card, see the [Android](https://braze-inc.github.io/braze-android-sdk/kdoc/braze-android-sdk/com.braze.models.cards/-control-card/index.html) and [iOS](https://braze-inc.github.io/braze-swift-sdk/documentation/brazekit/braze/contentcard/control-swift.struct) documentation.
## Prerequisites
Before you can use Content Cards, you'll need to integrate the [Braze Swift SDK](https://www.braze.com/docs/pt-br/pt-br/developer_guide/sdk_integration/?sdktab=swift) into your app. Then you'll need to complete the steps for setting up your tvOS app.
**Important:**
Keep in mind, you'll need to implement your own custom UI since Content Cards are supported via headless UI using the Swift SDK—which does not include any default UI or views for tvOS.
## Setting up your tvOS app
### Step 1: Create a new iOS app
In Braze, select **Settings** > **App Settings**, then select **Add App**. Enter a name for your tvOS app, select **iOS**—_not tvOS_—then select **Add App**.
{: style="width:70%"}
**Warning:**
If you select the **tvOS** checkbox, you will not be able to customize Content Cards for tvOS.
### Step 2: Get your app's API key
In your app settings, select your new tvOS app then take note of your app's API key. You'll use this key to configure your app in Xcode.
{: style="width:70%"}
### Step 3: Integrate BrazeKit
Use your app's API key to integrate the [Braze Swift SDK](https://github.com/braze-inc/braze-swift-sdk) into your tvOS project in Xcode. You only need to integrate BrazeKit from the Braze Swift SDK.
### Step 4: Create your custom UI
Because Braze doesn't provide a default UI for content cards on tvOS, you'll need to customize it yourself. For a full walkthrough, see our step-by-step tutorial: [Customizing content cards for tvOS](https://braze-inc.github.io/braze-swift-sdk/documentation/braze/content-cards-customization/). For a sample project, see [Braze Swift SDK samples](https://github.com/braze-inc/braze-swift-sdk/tree/main/Examples#contentcards-custom-ui).
## Prerequisites
Before you can use this feature, you'll need to [integrate the Unity Braze SDK](https://www.braze.com/docs/pt-br/pt-br/developer_guide/sdk_integration/?sdktab=unity).
## Displaying Content Cards natively {#unity-content-cards-native-ui}
You can display the default UI for Content Cards using the following call:
```csharp
Appboy.AppboyBinding.DisplayContentCards();
```
## Receiving Content Card data in Unity
You may register Unity game objects to be notified of incoming Content Cards. We recommend setting game object listeners from the Braze configuration editor.
If you need to configure your game object listener at runtime, use `AppboyBinding.ConfigureListener()` and specify `BrazeUnityMessageType.CONTENT_CARDS_UPDATED`.
Note, you will additionally need to make a call to `AppboyBinding.RequestContentCardsRefresh()` to start receiving data in your game object listener on iOS.
## Parsing Content Cards
Incoming `string` messages received in your Content Cards game object callback can be parsed into our pre-supplied [`ContentCard`](https://github.com/braze-inc/braze-unity-sdk/blob/master/Assets/Plugins/Appboy/Models/Cards/ContentCard.cs) model object for convenience.
Parsing Content Cards requires JSON parsing, see the following example for details:
##### Example Content Cards callback
```csharp
void ExampleCallback(string message) {
try {
JSONClass json = (JSONClass)JSON.Parse(message);
// Content Card data is contained in the `mContentCards` field of the top level object.
if (json["mContentCards"] != null) {
JSONArray jsonArray = (JSONArray)JSON.Parse(json["mContentCards"].ToString());
Debug.Log(String.Format("Parsed content cards array with {0} cards", jsonArray.Count));
// Iterate over the card array to parse individual cards.
for (int i = 0; i < jsonArray.Count; i++) {
JSONClass cardJson = jsonArray[i].AsObject;
try {
ContentCard card = new ContentCard(cardJson);
Debug.Log(String.Format("Created card object for card: {0}", card));
// Example of logging Content Card analytics on the ContentCard object
card.LogImpression();
card.LogClick();
} catch {
Debug.Log(String.Format("Unable to create and log analytics for card {0}", cardJson));
}
}
}
} catch {
throw new ArgumentException("Could not parse content card JSON message.");
}
}
```
## Refreshing Content Cards
To refresh Content Cards from Braze, call either of the following methods:
```csharp
// results in a network request to Braze
AppboyBinding.RequestContentCardsRefresh()
AppboyBinding.RequestContentCardsRefreshFromCache()
```
## Analytics
Clicks and impressions must be manually logged for Content Cards not displayed directly by Braze.
Use `LogClick()` and `LogImpression()` on [ContentCard](https://github.com/braze-inc/braze-unity-sdk/blob/master/Assets/Plugins/Appboy/Models/Cards/ContentCard.cs) to log clicks and impressions for specific cards.
## About .NET MAUI Content Cards
The Braze .NET MAUI (formerly Xamarin) SDK includes a default card feed to get you started with Content Cards. The default card feed included with the Braze SDK will handle all analytics tracking, dismissals, and rendering for a user’s Content Cards.
## Prerequisites
Before you can use this feature, you'll need to [integrate the .NET MAUI Braze SDK](https://www.braze.com/docs/pt-br/pt-br/developer_guide/sdk_integration/?sdktab=.net%20maui%20(xamarin)).
## Card types and properties
The Braze .NET MAUI SDK has three unique Content Cards card types that share a base model: [Banner](#xamarin_banner), [Captioned Image](#xamarin_captioned-image), and [Classic](#xamarin_classic). Each type inherits common properties from a base model and has the following additional properties.
### Base card model
|Property | Description |
|-------------------|------------------------------------------------------------------------------------------------------------------------|
|`idString` | The card's ID set by Braze. |
|`created` | The UNIX timestamp of the card's creation time from Braze. |
|`expiresAt` | The UNIX timestamp of the card's expiration time. When the value is less than 0, it means the card never expires. |
|`viewed` | Whether the card is read or unread by the user. This does not log analytics. |
|`clicked` | Whether the card has been clicked by the user. |
|`pinned` | Whether the card is pinned. |
|`dismissed` | Whether the user has dismissed this card. Marking a card as dismissed that has already been dismissed will be a no-op. |
|`dismissible` | Whether the card is dismissible by the user. |
|`urlString` | (Optional) The URL string associated with the card click action. |
|`openUrlInWebView` | Whether URLs for this card should be opened in the Braze WebView or not. |
|`isControlCard` | Whether this card is a control card. Control cards should not be displayed to the user. |
|`extras` | The map of key-value extras for this card. |
|`isTest` | Whether this card is a test card. |
{: .reset-td-br-1 .reset-td-br-2 aria-label="Base card model" }
For a full reference of the base card, see the [Android](https://braze-inc.github.io/braze-android-sdk/kdoc/braze-android-sdk/com.braze.models.cards/-card/index.html) and [iOS](https://braze-inc.github.io/braze-swift-sdk/documentation/brazekit/braze/contentcard/data-swift.struct) documentation.
### Banner
Banner cards are clickable, full-sized images.
|Property | Description |
|-------------------|-------------------------------------------------------------------------------------------------------------------|
|`image` | The URL of the card's image. |
|`imageAspectRatio` | The aspect ratio of the card's image. It is meant to serve as a hint before image loading completes. Note that the property may not be supplied in certain circumstances. |
{: .reset-td-br-1 .reset-td-br-2 aria-label="Banner" }
For a full reference of the banner card, see the [Android](https://braze-inc.github.io/braze-android-sdk/kdoc/braze-android-sdk/com.braze.models.cards/-image-only-card/index.html) and [iOS](https://braze-inc.github.io/braze-swift-sdk/documentation/brazekit/braze/contentcard/imageonly-swift.struct) documentation (now renamed to image only).
### Captioned image
Captioned image cards are clickable, full-sized images with accompanying descriptive text.
|Property | Description |
|-------------------|-------------------------------------------------------------------------------------------------------------------|
|`image` | The URL of the card's image. |
|`imageAspectRatio` | The aspect ratio of the card's image. It is meant to serve as a hint before image loading completes. Note that the property may not be supplied in certain circumstances. |
|`title` | The title text for the card. |
|`cardDescription` | The description text for the card. |
|`domain` | (Optional) The link text for the property URL, for example, `"braze.com/resources/"`. It can be displayed on the card's UI to indicate the action/direction of clicking on the card. |
{: .reset-td-br-1 .reset-td-br-2 aria-label="Captioned image" }
For a full reference of the captioned image card, see the [Android](https://braze-inc.github.io/braze-android-sdk/kdoc/braze-android-sdk/com.braze.models.cards/-captioned-image-card/index.html) and [iOS](https://braze-inc.github.io/braze-swift-sdk/documentation/brazekit/braze/contentcard/captionedimage-swift.struct) documentation.
### Classic
Classic cards have a title, description, and an optional image on the left of the text.
|Property | Description |
|-------------------|-------------------------------------------------------------------------------------------------------------------|
|`image` | (Optional) The URL of the card's image. |
|`title` | The title text for the card. |
|`cardDescription` | The description text for the card. |
|`domain` | (Optional) The link text for the property URL, for example, `"braze.com/resources/"`. It can be displayed on the card's UI to indicate the action/direction of clicking on the card. |
{: .reset-td-br-1 .reset-td-br-2 aria-label="Classic" }
For a full reference of the classic (text announcement) Content Card, see the [Android](https://braze-inc.github.io/braze-android-sdk/kdoc/braze-android-sdk/com.braze.models.cards/-text-announcement-card/index.html) and [iOS](https://braze-inc.github.io/braze-swift-sdk/documentation/brazekit/braze/contentcard/classic-swift.struct) documentation. For a full reference of the classic image (short news) card, see the [Android](https://braze-inc.github.io/braze-android-sdk/kdoc/braze-android-sdk/com.braze.models.cards/-short-news-card/index.html) and [iOS](https://braze-inc.github.io/braze-swift-sdk/documentation/brazekit/braze/contentcard/classicimage-swift.struct) documentation.
## Card methods
You can use these additional methods to build a custom Content Cards Feed within your app:
| Method | Description |
| ---------------------------------------- | ------------------------------------------------------------------------------------------------------ |
| `requestContentCardsRefresh()` | Requests the latest Content Cards from the Braze SDK server. |
| `getContentCards()` | Retrieves Content Cards from the Braze SDK. This will return the latest list of cards from the server. |
| `logContentCardClicked(cardId)` | Logs a click for the given Content Card ID. This method is used only for analytics. |
| `logContentCardImpression(cardId)` | Logs an impression for the given Content Card ID. |
| `logContentCardDismissed(cardId)` | Logs a dismissal for the given Content Card ID. |
{: .reset-td-br-1 .reset-td-br-2 aria-label="Card methods" }
# Criar Content Cards
Source: /docs/pt-br/developer_guide/content_cards/creating_cards/index.md
# Criar Content Cards {#create-content-cards}
> Este artigo discute a abordagem básica que você usará ao implementar Content Cards personalizados, bem como três casos de uso comuns. Ele pressupõe que você já tenha lido os outros artigos do guia de personalização de Content Cards para entender o que pode ser feito por padrão e o que requer código personalizado. É especialmente útil entender como [registrar análise de dados](https://www.braze.com/docs/pt-br/pt-br/developer_guide/content_cards/logging_analytics/) para seus Content Cards personalizados.
**Tip:**
Using Content Cards for banner-style messages? Try out [Banners](https://www.braze.com/docs/pt-br/pt-br/user_guide/message_building_by_channel/banners/)— perfect for inline, persistent in-app and web messages.
## Criando um cartão {#creating-a-card}
### Etapa 1: Criar uma interface de usuário personalizada {#step-1-create-a-custom-ui}
Primeiro, crie seu componente HTML personalizado que será usado para renderizar os cartões.
Primeiro, crie seu próprio fragmento personalizado. O [`ContentCardsFragment`](https://braze-inc.github.io/braze-android-sdk/kdoc/braze-android-sdk/com.braze.ui.contentcards/-content-cards-fragment/index.html) padrão foi projetado apenas para lidar com nossos tipos de Content Cards padrão, mas é um bom ponto de partida.
Primeiro, crie seu próprio componente personalizado de view controller. O [`BrazeContentCardUI.ViewController`](https://braze-inc.github.io/braze-swift-sdk/documentation/brazeui/brazecontentcardui/viewcontroller) padrão foi projetado apenas para lidar com nossos tipos de Content Cards padrão, mas é um bom ponto de partida.
### Etapa 2: Assine as atualizações do cartão {#step-2-subscribe-to-card-updates}
Registre uma função de retorno de chamada para se inscrever em atualizações de dados quando os cartões forem atualizados. Você pode analisar os objetos de Content Cards e extrair os dados da carga útil, como `title`, `cardDescription` e `imageUrl`, e então usar os dados do modelo resultante para preencher sua interface personalizada.
Para obter os modelos de dados de Content Cards, inscreva-se nas atualizações de Content Cards. Preste atenção especial às seguintes propriedades:
* **`id`:** Representa a string de ID do Content Card. Este é o identificador único usado para registrar análise de dados de Content Cards personalizados.
* **`extras`:** Engloba todos os pares de valores-chave do dashboard da Braze.
Todas as propriedades fora de `id` e `extras` são opcionais para análise em Content Cards personalizados. Para saber mais sobre o modelo de dados, consulte o artigo de integração de cada plataforma: [Android](https://www.braze.com/docs/pt-br/pt-br/developer_guide/content_cards/?sdktab=android), [iOS](https://www.braze.com/docs/pt-br/pt-br/developer_guide/content_cards/?sdktab=swift), [Web](https://www.braze.com/docs/pt-br/pt-br/developer_guide/content_cards/?sdktab=web).
```javascript
import * as braze from "@braze/web-sdk";
braze.subscribeToContentCardsUpdates((updates) => {
const cards = updates.cards;
// For example:
cards.forEach(card => {
if (card.isControl) {
// Do not display the control card, but remember to call `logContentCardImpressions([card])`
}
else if (card instanceof braze.ClassicCard || card instanceof braze.CaptionedImage) {
// Use `card.title`, `card.imageUrl`, etc.
}
else if (card instanceof braze.ImageOnly) {
// Use `card.imageUrl`, etc.
}
})
});
braze.openSession();
```
**Note:**
Os Content Cards só são atualizados no início da sessão se `subscribeToContentCardsUpdates()` for chamado antes de `openSession()`. Você também pode [atualizar o feed manualmente](https://www.braze.com/docs/pt-br/pt-br/developer_guide/content_cards/customizing_cards/feed/) a qualquer momento.
#### Etapa 2a: Criar uma variável privada de assinante {#step-2a-create-a-private-subscriber-variable}
Para se inscrever nas atualizações do cartão, primeiro declare uma variável privada na sua classe personalizada para armazenar seu assinante:
```java
// subscriber variable
private IEventSubscriber mContentCardsUpdatedSubscriber;
```
#### Etapa 2b: Inscrever-se nas atualizações {#step-2b-subscribe-to-updates}
Adicione o seguinte código para se inscrever nas atualizações de Content Cards da Braze, normalmente dentro do `Activity.onCreate()` da sua atividade personalizada de Content Cards:
```java
// Remove the previous subscriber before rebuilding a new one with our new activity.
Braze.getInstance(context).removeSingleSubscription(mContentCardsUpdatedSubscriber, ContentCardsUpdatedEvent.class);
mContentCardsUpdatedSubscriber = new IEventSubscriber() {
@Override
public void trigger(ContentCardsUpdatedEvent event) {
// List of all Content Cards
List allCards = event.getAllCards();
// Your logic below
}
};
Braze.getInstance(context).subscribeToContentCardsUpdates(mContentCardsUpdatedSubscriber);
Braze.getInstance(context).requestContentCardsRefresh();
```
#### Etapa 2c: Cancelar inscrição {#step-2c-unsubscribe}
Cancele a inscrição quando sua atividade personalizada sair da visualização. Adicione o seguinte código ao método de ciclo de vida `onDestroy()` da sua atividade:
```java
Braze.getInstance(context).removeSingleSubscription(mContentCardsUpdatedSubscriber, ContentCardsUpdatedEvent.class);
```
#### Etapa 2a: Criar uma variável privada de assinante
Para se inscrever nas atualizações do cartão, primeiro declare uma variável privada na sua classe personalizada para armazenar seu assinante:
```kotlin
private var contentCardsUpdatedSubscriber: IEventSubscriber? = null
```
#### Etapa 2b: Inscrever-se nas atualizações
Adicione o seguinte código para se inscrever nas atualizações de Content Cards da Braze, normalmente dentro do `Activity.onCreate()` da sua atividade personalizada de Content Cards:
```kotlin
// Remove the previous subscriber before rebuilding a new one with our new activity.
Braze.getInstance(context).subscribeToContentCardsUpdates(contentCardsUpdatedSubscriber)
Braze.getInstance(context).requestContentCardsRefresh()
// List of all Content Cards
val allCards = event.allCards
// Your logic below
}
Braze.getInstance(context).subscribeToContentCardsUpdates(mContentCardsUpdatedSubscriber)
Braze.getInstance(context).requestContentCardsRefresh(true)
```
#### Etapa 2c: Cancelar inscrição
Cancele a inscrição quando sua atividade personalizada sair da visualização. Adicione o seguinte código ao método de ciclo de vida `onDestroy()` da sua atividade:
```kotlin
Braze.getInstance(context).removeSingleSubscription(contentCardsUpdatedSubscriber, ContentCardsUpdatedEvent::class.java)
```
Para acessar o modelo de dados de Content Cards, chame [`contentCards.cards`](https://braze-inc.github.io/braze-swift-sdk/documentation/brazekit/braze/contentcards-swift.class/cards) na sua instância `braze`.
```swift
let cards: [Braze.ContentCard] = AppDelegate.braze?.contentCards.cards
```
Além disso, você pode manter uma inscrição para observar alterações nos seus Content Cards. Você pode fazer isso de duas maneiras:
1. Mantendo um cancellable; ou
2. Mantendo um `AsyncStream`.
##### Cancellable {#cancellable}
```swift
// This subscription is maintained through a Braze cancellable, which will observe for changes until the subscription is cancelled.
// You must keep a strong reference to the cancellable to keep the subscription active.
// The subscription is canceled either when the cancellable is deinitialized or when you call its `.cancel()` method.
let cancellable = AppDelegate.braze?.contentCards.subscribeToUpdates { [weak self] contentCards in
// Implement your completion handler to respond to updates in `contentCards`.
}
```
##### AsyncStream
```swift
let stream: AsyncStream<[Braze.ContentCard]> = AppDelegate.braze?.contentCards.cardsStream
```
```objc
NSArray *contentCards = AppDelegate.braze.contentCards.cards;
```
Além disso, se você quiser manter uma inscrição nos seus Content Cards, pode chamar [`subscribeToUpdates`](https://braze-inc.github.io/braze-swift-sdk/documentation/brazekit/braze/contentcards-swift.class/subscribetoupdates(_:)):
```objc
// This subscription is maintained through Braze cancellable, which will continue to observe for changes until the subscription is cancelled.
BRZCancellable *cancellable = [self.braze.contentCards subscribeToUpdates:^(NSArray *contentCards) {
// Implement your completion handler to respond to updates in `contentCards`.
}];
```
### Etapa 3: Implementar análise de dados {#step-3-implement-analytics}
As impressões, os cliques e os descartes de Content Cards não são registrados automaticamente na sua visualização personalizada. É necessário [implementar cada método respectivo](https://www.braze.com/docs/pt-br/pt-br/developer_guide/content_cards/logging_analytics/) para registrar adequadamente todas as métricas na análise de dados do dashboard da Braze.
### Etapa 4: Teste seu cartão (opcional) {#step-4-test-your-card-optional}
Para testar seu Content Card:
1. Defina um usuário ativo no seu app chamando o método [`changeUser()`](https://js.appboycdn.com/web-sdk/latest/doc/modules/braze.html#changeuser).
2. Na Braze, acesse **Campaigns** e [crie uma nova campanha de Content Card](https://www.braze.com/docs/pt-br/pt-br/user_guide/channels/content_cards/create_a_content_card/).
3. Na sua campanha, selecione **Test** e insira o `user-id` do usuário teste. Quando estiver pronto, selecione **Send Test**. Você poderá lançar um Content Card no seu dispositivo em breve.

## Posicionamentos de Content Cards {#content-card-placements}
Os Content Cards podem ser usados de muitas maneiras diferentes. Três implementações comuns são usá-los como centro de mensagens, anúncio de imagem dinâmico ou carrossel de imagens. Para cada um desses posicionamentos, você atribuirá [pares de valores-chave](https://www.braze.com/docs/pt-br/pt-br/developer_guide/customization_guides/content_cards/customizing_behavior/#key-value-pairs) (a propriedade `extras` no modelo de dados) aos seus Content Cards e, com base nos valores, ajustará dinamicamente o comportamento, a aparência ou a funcionalidade do cartão durante o tempo de execução.
{: style="border:0px;"}
### Caixa de entrada de mensagens {#message-inbox}
Os Content Cards podem ser usados para simular um centro de mensagens. Nesse formato, cada mensagem é seu próprio cartão que contém [pares de valores-chave](https://www.braze.com/docs/pt-br/pt-br/developer_guide/customization_guides/content_cards/customizing_behavior/#key-value-pairs) que acionam eventos de clique. Esses pares de valores-chave são os identificadores-chave que o app analisa ao decidir para onde ir quando o usuário clica em uma mensagem da caixa de entrada. Os valores dos pares de valores-chave são arbitrários.
#### Exemplo {#example}
Por exemplo, você pode querer criar dois cartões de mensagem: um chamado à ação para os usuários ativarem recomendações de leitura e um código de cupom dado ao seu novo segmento de assinantes.
Chaves como `body`, `title` e `buttonText` podem ter valores simples de string que seus profissionais de marketing podem definir. Chaves como `terms` podem ter valores que fornecem uma pequena coleção de frases aprovadas pelo seu departamento jurídico. Chaves como `style` e `class_type` têm valores de string que você pode definir para determinar como seu cartão é exibido no seu app ou site.
Pares de valores-chave para o cartão de recomendação de leitura:
| Chave | Valor |
|------------|----------------------------------------------------------------------|
| `body` | Adicione seus interesses ao seu perfil do Politer Weekly para obter recomendações pessoais de leitura. |
| `style` | info |
| `class_type` | notification_center |
| `card_priority` | 1 |
{: .reset-td-br-1 .reset-td-br-2 role="presentation" }
Pares de valores-chave para um novo cupom de assinante:
| Chave | Valor |
|------------|------------------------------------------------------------------|
| `title` | Assine para obter jogos ilimitados |
| `body` | Especial de fim de verão - 10% de desconto nos jogos Politer |
| `buttonText` | Assine agora |
| `style` | promo |
| `class_type` | notification_center |
| `card_priority` | 2 |
| `terms` | new_subscribers_only |
{: .reset-td-br-1 .reset-td-br-2 role="presentation" }
**Informações adicionais para Android**
No SDK do Android e do FireOS, a lógica do centro de mensagens é orientada pelo valor `class_type`, que é fornecido pelos pares de valores-chave da Braze. Usando o método [`createContentCardable`](https://www.braze.com/docs/pt-br/pt-br/developer_guide/content_cards/), você pode filtrar e identificar esses tipos de classe.
**Usando `class_type` para comportamento ao clicar**
Quando inflamos os dados de Content Cards em nossas classes personalizadas, usamos a propriedade `ContentCardClass` dos dados para determinar qual subclasse concreta deve ser usada para armazenar os dados.
```kotlin
private fun createContentCardable(metadata: Map, type: ContentCardClass?): ContentCardable?{
return when(type){
ContentCardClass.AD -> Ad(metadata)
ContentCardClass.MESSAGE_WEB_VIEW -> WebViewMessage(metadata)
ContentCardClass.NOTIFICATION_CENTER -> FullPageMessage(metadata)
ContentCardClass.ITEM_GROUP -> Group(metadata)
ContentCardClass.ITEM_TILE -> Tile(metadata)
ContentCardClass.COUPON -> Coupon(metadata)
else -> null
}
}
```
Então, ao lidar com a interação do usuário com a lista de mensagens, podemos usar o tipo de mensagem para determinar qual visualização será exibida ao usuário.
```kotlin
override fun onCreate(savedInstanceState: Bundle?) {
super.onCreate(savedInstanceState)
//...
listView.onItemClickListener = AdapterView.OnItemClickListener { parent, view, position, id ->
when (val card = dataProvider[position]){
is WebViewMessage -> {
val intent = Intent(this, WebViewActivity::class.java)
val bundle = Bundle()
bundle.putString(WebViewActivity.INTENT_PAYLOAD, card.contentString)
intent.putExtras(bundle)
startActivity(intent)
}
is FullPageMessage -> {
val intent = Intent(this, FullPageContentCard::class.java)
val bundle = Bundle()
bundle.putString(FullPageContentCard.CONTENT_CARD_IMAGE, card.icon)
bundle.putString(FullPageContentCard.CONTENT_CARD_TITLE, card.messageTitle)
bundle.putString(FullPageContentCard.CONTENT_CARD_DESCRIPTION, card.cardDescription)
intent.putExtras(bundle)
startActivity(intent)
}
}
}
}
```
**Usando `class_type` para comportamento ao clicar**
Quando inflamos os dados de Content Cards em nossas classes personalizadas, usamos a propriedade `ContentCardClass` dos dados para determinar qual subclasse concreta deve ser usada para armazenar os dados.
```java
private ContentCardable createContentCardable(Map metadata, ContentCardClass type){
switch(type){
case ContentCardClass.AD:{
return new Ad(metadata);
}
case ContentCardClass.MESSAGE_WEB_VIEW:{
return new WebViewMessage(metadata);
}
case ContentCardClass.NOTIFICATION_CENTER:{
return new FullPageMessage(metadata);
}
case ContentCardClass.ITEM_GROUP:{
return new Group(metadata);
}
case ContentCardClass.ITEM_TILE:{
return new Tile(metadata);
}
case ContentCardClass.COUPON:{
return new Coupon(metadata);
}
default:{
return null;
}
}
}
```
Então, ao lidar com a interação do usuário com a lista de mensagens, podemos usar o tipo de mensagem para determinar qual visualização será exibida ao usuário.
```java
@Override
protected void onCreate(Bundle savedInstanceState) {
super.onCreate(savedInstanceState)
//...
listView.setOnItemClickListener(new AdapterView.OnItemClickListener() {
@Override
public void onItemClick(AdapterView parent, View view, int position, long id){
ContentCardable card = dataProvider.get(position);
if (card instanceof WebViewMessage){
Bundle intent = new Intent(this, WebViewActivity.class);
Bundle bundle = new Bundle();
bundle.putString(WebViewActivity.INTENT_PAYLOAD, card.getContentString());
intent.putExtras(bundle);
startActivity(intent);
}
else if (card instanceof FullPageMessage){
Intent intent = new Intent(this, FullPageContentCard.class);
Bundle bundle = Bundle();
bundle.putString(FullPageContentCard.CONTENT_CARD_IMAGE, card.getIcon());
bundle.putString(FullPageContentCard.CONTENT_CARD_TITLE, card.getMessageTitle());
bundle.putString(FullPageContentCard.CONTENT_CARD_DESCRIPTION, card.getCardDescription());
intent.putExtras(bundle)
startActivity(intent)
}
}
});
}
```
### Carrossel {#carousel}
É possível definir Content Cards em seu feed de carrossel totalmente personalizado, permitindo que os usuários deslizem e visualizem cartões adicionais em destaque. Por padrão, os Content Cards são classificados por data de criação (o mais recente primeiro), e seus usuários verão todos os cartões para os quais são elegíveis.
Para implementar um carrossel de Content Cards:
1. Crie uma lógica personalizada que observe as [alterações nos seus Content Cards](https://www.braze.com/docs/pt-br/pt-br/developer_guide/customization_guides/content_cards/customizing_feed/#refreshing-the-feed) e lide com a chegada de Content Cards.
2. Crie uma lógica personalizada no lado do cliente para exibir um número específico de cartões no carrossel em um determinado momento. Por exemplo, você pode selecionar os cinco primeiros objetos de Content Cards do array ou introduzir pares de valores-chave para criar uma lógica condicional.
**Tip:**
Se estiver implementando um carrossel como um feed secundário de Content Cards, certifique-se de [classificar os cartões no feed correto usando pares de valores-chave](https://www.braze.com/docs/pt-br/pt-br/developer_guide/customization_guides/content_cards/customizing_feed/#multiple-feeds).
### Apenas imagem {#image-only}
Os Content Cards não precisam se parecer com "cartões". Por exemplo, os Content Cards podem aparecer como uma imagem dinâmica que é exibida persistentemente na sua página inicial ou no topo de páginas designadas.
Para isso, seus profissionais de marketing criarão uma Campaign ou etapa do Canvas com um tipo de Content Card **Apenas Imagem**. Em seguida, defina os pares de valores-chave apropriados para usar [os Content Cards como conteúdo suplementar](https://www.braze.com/docs/pt-br/pt-br/developer_guide/customization_guides/content_cards/customizing_behavior/#content-cards-as-supplemental-content).
# Personalizar cartões
Source: /docs/pt-br/developer_guide/content_cards/customizing_cards/index.md
**Tip:**
Using Content Cards for banner-style messages? Try out [Banners](https://www.braze.com/docs/pt-br/pt-br/user_guide/message_building_by_channel/banners/)— perfect for inline, persistent in-app and web messages.
# Personalize o estilo dos Content Cards
Source: /docs/pt-br/developer_guide/content_cards/customizing_cards/style/index.md
# Personalize o estilo dos Content Cards {#customize-the-style-of-content-cards}
> Os Content Cards da Braze vêm com uma aparência padrão. Este artigo cobre opções de estilo para seus Content Cards para ajudar você a manter a identidade da sua marca. Para a lista completa de tipos de cartões de conteúdo, veja [Sobre os Content Cards](https://www.braze.com/docs/pt-br/pt-br/developer_guide/content_cards/).
## Criando um estilo personalizado {#creating-a-custom-style}
A interface padrão dos Content Cards é importada da camada de interface do SDK da Braze. A partir daí, você pode ajustar certas partes do estilo do cartão, a ordem em que os cartões são exibidos e como o feed é mostrado aos seus usuários.

**Note:**
Propriedades do cartão de conteúdo, como `title`, `cardDescription`, `imageUrl`, etc., são editáveis diretamente por meio do [dashboard](https://www.braze.com/docs/pt-br/pt-br/user_guide/channels/content_cards/creative_details/), que é o método preferido para alterar esses detalhes.
Os estilos padrão da Braze são definidos em CSS no SDK da Braze. Ao sobrescrever estilos selecionados no seu aplicativo, você pode personalizar nosso feed padrão com suas próprias imagens de fundo, famílias de fontes, estilos, tamanhos, animações e mais. Por exemplo, a seguir temos um exemplo de sobrescrita que faz com que os Content Cards apareçam com 800 px de largura:
``` css
body .ab-feed {
width: 800px;
}
```
Para a lista completa de propriedades que você pode modificar, veja as [opções de configuração do SDK da Braze](https://js.appboycdn.com/web-sdk/latest/doc/modules/braze.html)
Por padrão, os Content Cards do SDK do Android e do FireOS seguem as diretrizes padrão de interface do Android para proporcionar uma experiência integrada. Você pode ver esses estilos padrão no arquivo [`res/values/styles.xml`](https://github.com/braze-inc/braze-android-sdk/blob/master/android-sdk-ui/src/main/res/values/styles.xml) na distribuição do SDK da Braze:
```xml
```
Para personalizar o estilo do seu cartão de conteúdo, sobrescreva este estilo padrão. Para sobrescrever um estilo, copie-o na íntegra para o arquivo `styles.xml` do seu projeto e faça as modificações. O estilo inteiro deve ser copiado para o seu arquivo `styles.xml` local para que todos os atributos sejam configurados corretamente.
```xml
```
```xml
```
Por padrão, os Content Cards do SDK do Android e do FireOS seguem as diretrizes padrão de interface do Android para proporcionar uma experiência integrada.
Você pode aplicar estilo de duas maneiras. A primeira é passar um [`ContentCardListStyling`](https://braze-inc.github.io/braze-android-sdk/kdoc/braze-android-sdk/com.braze.jetpackcompose.contentcards.styling/-content-card-list-styling/index.html) e [`ContentCardStyling`](https://braze-inc.github.io/braze-android-sdk/kdoc/braze-android-sdk/com.braze.jetpackcompose.contentcards.styling/-content-card-styling/index.html) para [`ContentCardsList`](https://braze-inc.github.io/braze-android-sdk/kdoc/braze-android-sdk/com.braze.jetpackcompose.contentcards/-content-cards-list.html), como no exemplo a seguir:
```kotlin
ContentCardsList(
style = ContentCardListStyling(listBackgroundColor = Color.Red),
cardStyle = ContentCardStyling(
titleTextStyle = TextStyle(
fontFamily = fontFamily,
fontSize = 25.sp
),
shadowRadius = 10.dp,
shortNewsContentCardStyle = BrazeShortNewsContentCardStyling(
shadowRadius = 15.dp
)
)
)
```
A segunda é usar [`BrazeStyle`](https://braze-inc.github.io/braze-android-sdk/kdoc/braze-android-sdk/com.braze.jetpackcompose/-braze-style.html) para criar um estilo global para os componentes da Braze, como no exemplo a seguir:
```kotlin
BrazeStyle(
contentCardStyle = ContentCardStyling(
textAnnouncementContentCardStyle = BrazeTextAnnouncementContentCardStyling(
cardBackgroundColor = Color.Red,
descriptionTextStyle = TextStyle(
fontFamily = fontFamily,
fontSize = 25.sp,
)
),
titleTextColor = Color.Magenta
)
) {
// Your app here, including any ContentCardsList() in it
}
```
O view controller de Content Cards permite que você personalize a aparência e o comportamento de todas as células por meio da struct [`BrazeContentCardUI.ViewController.Attributes`](https://braze-inc.github.io/braze-swift-sdk/documentation/brazeui/brazecontentcardui/viewcontroller/attributes-swift.struct). Configurar Content Cards usando `Attributes` é uma opção simples, permitindo que você lance sua interface de Content Cards com configuração mínima.
**Important:**
A personalização via `Attributes` está disponível apenas em Swift.
**Modificando `Attributes.default`**
Personalize a aparência de todas as instâncias do view controller de interface de Content Cards da Braze modificando diretamente a variável estática [`Attributes.defaults`](https://braze-inc.github.io/braze-swift-sdk/documentation/brazeui/brazecontentcardui/viewcontroller/attributes-swift.struct/defaults).
Por exemplo, para alterar o tamanho padrão da imagem e o raio do canto para todas as células:
```swift
BrazeContentCardUI.ViewController.Attributes.defaults.cellAttributes.cornerRadius = 20
BrazeContentCardUI.ViewController.Attributes.defaults.cellAttributes.classicImageSize = CGSize(width: 65, height: 65)
```
**Inicializando o view controller com Attributes**
Se você deseja modificar apenas uma instância específica do view controller de interface de Content Cards da Braze, use o inicializador [`init(braze:attributes:)`](https://braze-inc.github.io/braze-swift-sdk/documentation/brazeui/brazecontentcardui/viewcontroller/init(braze:attributes:)/) para passar uma struct `Attributes` personalizada para o view controller.
Por exemplo, você pode alterar o tamanho da imagem e o raio do canto para uma instância específica do view controller:
```swift
var attributes = BrazeContentCardUI.ViewController.Attributes.defaults
attributes.cellAttributes.cornerRadius = 20
attributes.cellAttributes.classicImageSize = CGSize(width: 65, height: 65)
let viewController = BrazeContentCardUI.ViewController(braze: AppDelegate.braze, attributes: attributes)
```
**Personalizando células por subclasse**
Como alternativa, você pode criar interfaces personalizadas registrando classes personalizadas para cada tipo de cartão desejado. Para usar sua subclasse em vez da célula padrão, modifique a propriedade [`cells`](https://braze-inc.github.io/braze-swift-sdk/documentation/brazeui/brazecontentcardui/viewcontroller/attributes-swift.struct/cells) na struct `Attributes`. Por exemplo:
```swift
var attributes = BrazeContentCardUI.ViewController.Attributes.defaults
// Register your own custom cell
attributes.cells[BrazeContentCardUI.ClassicImageCell.identifier] = CustomClassicImageCell.self
let viewController = BrazeContentCardUI.ViewController(braze: AppDelegate.braze, attributes: attributes)
```
**Modificando Content Cards programaticamente**
Você pode alterar os Content Cards programaticamente atribuindo o closure [`transform`](https://braze-inc.github.io/braze-swift-sdk/documentation/brazeui/brazecontentcardui/viewcontroller/attributes-swift.struct/transform) na sua struct `Attributes`. O exemplo abaixo modifica o `title` e o `description` de cartões compatíveis:
```swift
var attributes = BrazeContentCardUI.ViewController.Attributes.defaults
attributes.transform = { cards in
cards.map { card in
var card = card
if let title = card.title {
card.title = "[modified] \(title)"
}
if let description = card.description {
card.description = "[modified] \(description)"
}
return card
}
}
let viewController = BrazeContentCardUI.ViewController(braze: AppDelegate.braze, attributes: attributes)
```
Confira o [app de exemplo Examples](https://github.com/braze-inc/braze-swift-sdk/tree/main/Examples/Swift) para um exemplo completo.
A personalização de Content Cards por meio de `Attributes` não é compatível com Objective-C.
## Exemplos de personalização {#customization-examples}
### Fonte personalizada {#custom-font}
Personalizar a fonte usada nos seus Content Cards permite que você mantenha a identidade da sua marca e crie uma experiência visualmente atraente para seus usuários. Use estas receitas para definir a fonte de todos os Content Cards programaticamente.
Assim como qualquer outro elemento web, você pode personalizar facilmente a aparência dos Content Cards por meio de CSS. No seu arquivo CSS ou em estilos inline, use a propriedade `font-family` e especifique o nome da fonte desejada ou a pilha de fontes.
```css
/* CSS selector targeting the Content Card element */
.card-element {
font-family: "Helvetica Neue", Arial, sans-serif;
}
```
Para alterar a fonte padrão programaticamente, defina um estilo para os cartões e use o atributo `fontFamily` para instruir a Braze a usar sua família de fontes personalizada.
Por exemplo, para atualizar a fonte em todos os títulos de cartões de imagem com legenda, sobrescreva o estilo `Braze.ContentCards.CaptionedImage.Title` e faça referência à sua família de fontes personalizada. O valor do atributo deve apontar para uma família de fontes no seu diretório `res/font`.
Aqui está um exemplo resumido com uma família de fontes personalizada, `my_custom_font_family`, referenciada na última linha:
```xml
```
Para saber mais sobre a personalização de fontes no SDK do Android, consulte o [guia de famílias de fontes](https://www.braze.com/docs/pt-br/pt-br/developer_guide/platform_integration_guides/android/advanced_use_cases/font_customization/#font-customization).
Para alterar a fonte padrão programaticamente, você pode definir o [`titleTextStyle`](https://braze-inc.github.io/braze-android-sdk/kdoc/braze-android-sdk/com.braze.jetpackcompose.contentcards.styling/-content-card-styling/index.html#715371549%2FProperties%2F-1725759721) de `ContentCardStyling`.
Você também pode definir `titleTextStyle` para um tipo de cartão específico configurando-o em [`BrazeShortNewsContentCardStyling`](https://braze-inc.github.io/braze-android-sdk/kdoc/braze-android-sdk/com.braze.jetpackcompose.contentcards.styling/-braze-short-news-content-card-styling/index.html) e passando-o para o [`shortNewsContentCardStyle`](https://braze-inc.github.io/braze-android-sdk/kdoc/braze-android-sdk/com.braze.jetpackcompose.contentcards.styling/-content-card-styling/index.html#8580250%2FProperties%2F-1725759721) de `ContentCardStyling`.
```kotlin
val fontFamily = FontFamily(
Font(R.font.sailec_bold)
)
ContentCardStyling(
titleTextStyle = TextStyle(
fontFamily = fontFamily
)
)
```
Personalize suas fontes ajustando os `Attributes` da propriedade de instância [`cellAttributes`](https://braze-inc.github.io/braze-swift-sdk/documentation/brazeui/brazecontentcardui/viewcontroller/attributes-swift.struct/cellattributes/). Por exemplo:
```swift
var attributes = BrazeContentCardUI.ViewController.Attributes.defaults
attributes.cellAttributes.titleFont = .preferredFont(textStyle: .callout, weight: .bold)
attributes.cellAttributes.descriptionFont = .preferredFont(textStyle: .footnote, weight: .regular)
attributes.cellAttributes.domainFont = .preferredFont(textStyle: .footnote, weight: .medium)
let viewController = BrazeContentCardUI.ViewController.init(braze: braze, attributes: attributes)
```
A personalização de fontes via `Attributes` não é compatível com Objective-C.
Confira o [app de exemplo Examples](https://github.com/braze-inc/braze-swift-sdk/blob/main/Examples/ObjC/Sources/ContentCards-Custom-UI/CardsInfoViewController.m#L97) para um exemplo de como criar sua própria interface com fontes personalizadas.
### Ícones fixados personalizados {#custom-pinned-icons}
Ao criar um Content Card, os profissionais de marketing têm a opção de fixar o cartão. Um cartão fixado é exibido no topo do feed do usuário, e o usuário não pode descartá-lo. À medida que você personaliza os estilos dos seus cartões, pode alterar a aparência do ícone fixado.
{:style="border:none"}
A estrutura do ícone fixado do Content Card é:
```css
```
Se você quiser usar um ícone diferente do FontAwesome, basta substituir o nome da classe do elemento `i` pelo nome da classe do ícone desejado.
Se você quiser trocar o ícone completamente, remova o elemento `i` e adicione o ícone personalizado como filho de `ab-pinned-indicator`. Existem várias maneiras de alterar o ícone, mas um método simples é usar `replaceChildren()` no elemento `ab-pinned-indicator`.
Por exemplo:
```javascript
// Get the parent element
const pinnedIndicator = document.querySelector('.ab-pinned-indicator');
// Create a new custom icon element
const customIcon = document.createElement('span');
customIcon.classList.add('customIcon');
// Replace the existing icon with the custom icon
pinnedIndicator.replaceChildren(customIcon);
```
Para definir um ícone fixado personalizado, sobrescreva o estilo `Braze.ContentCards.PinnedIcon`. Seu ativo de imagem personalizado deve ser declarado no elemento `android:src`. Por exemplo:
```xml
```
Para alterar o ícone fixado padrão, você pode definir o [`pinnedResourceId`](https://braze-inc.github.io/braze-android-sdk/kdoc/braze-android-sdk/com.braze.jetpackcompose.contentcards.styling/-content-card-styling/index.html#794044424%2FProperties%2F-1725759721) de `ContentCardStyling`. Por exemplo:
```kotlin
ContentCardStyling(
pinnedResourceId = R.drawable.pushpin,
pinnedImageAlignment = Alignment.TopCenter
)
```
Você também pode especificar um Composable em [`pinnedComposable`](https://braze-inc.github.io/braze-android-sdk/kdoc/braze-android-sdk/com.braze.jetpackcompose.contentcards.styling/-content-card-styling/index.html#1460938052%2FProperties%2F-1725759721) de `ContentCardStyling`. Se `pinnedComposable` for especificado, ele sobrescreve o valor de `pinnedResourceId`.
```kotlin
ContentCardStyling(
pinnedComposable = {
Box(Modifier.fillMaxWidth()) {
Text(
modifier = Modifier
.align(Alignment.Center)
.width(50.dp),
text = "This message is not read. Please read it."
)
}
}
)
```
Personalize o ícone de fixação modificando as propriedades `pinIndicatorColor` e `pinIndicatorImage` da propriedade de instância [`cellAttributes`](https://braze-inc.github.io/braze-swift-sdk/documentation/brazeui/brazecontentcardui/viewcontroller/attributes-swift.struct/cellattributes/). Por exemplo:
```swift
var attributes = BrazeContentCardUI.ViewController.Attributes.defaults
attributes.cellAttributes.pinIndicatorColor = .red
attributes.cellAttributes.pinIndicatorImage = UIImage(named: "my-image")
let viewController = BrazeContentCardUI.ViewController.init(braze: braze, attributes: attributes)
```
Você também pode usar subclasse para criar sua própria versão personalizada de `BrazeContentCardUI.Cell`, que inclui o indicador de fixação. Por exemplo:
```swift
var attributes = BrazeContentCardUI.ViewController.Attributes.defaults
attributes.cells[BrazeContentCardUI.ClassicImageCell.identifier] = CustomClassicImageCell.self
let viewController = BrazeContentCardUI.ViewController(braze: AppDelegate.braze, attributes: attributes)
```
A personalização do indicador de fixação via `Attributes` não é compatível com Objective-C.
### Alterando a cor do indicador de não lido {#changing-the-unread-indicator-color}
Os Content Cards contêm uma linha azul na parte inferior do cartão que indica se o cartão foi visualizado ou não.

Para alterar a cor do indicador de não lido de um cartão, adicione CSS personalizado à sua página web. Por exemplo, para definir a cor do indicador não visualizado como verde:
```css
.ab-unread-indicator { background-color: green; }
```
Altere a cor da barra indicadora de não lido modificando o valor de `com_braze_content_cards_unread_bar_color` no seu arquivo `colors.xml`:
```xml
#1676d0
```
Para alterar a cor da barra do indicador de não lido, modifique o valor de [`unreadIndicatorColor`](https://braze-inc.github.io/braze-android-sdk/kdoc/braze-android-sdk/com.braze.jetpackcompose.contentcards.styling/-content-card-styling/index.html#-1669590042%2FProperties%2F-1725759721) em `ContentCardStyling`:
```kotlin
ContentCardStyling(
unreadIndicatorColor = Color.Red
)
```
Altere a cor da barra indicadora de não lido atribuindo um valor à cor de tonalidade da sua instância `BrazeContentCardUI.ViewController`:
```swift
let viewController = BrazeContentCardUI.ViewController(braze: AppDelegate.braze)
viewController.view.tintColor = .systemGreen
```
No entanto, se você quiser modificar apenas o indicador não visualizado, pode acessar a propriedade `unviewedIndicatorColor` da sua struct `BrazeContentCardUI.ViewController.Attributes`. Se você usar implementações de `UITableViewCell` da Braze, acesse a propriedade antes que a célula seja desenhada.
Por exemplo, para definir a cor do indicador não visualizado como vermelho:
```swift
var attributes = BrazeContentCardUI.ViewController.Attributes.defaults
attributes.cellAttributes.unviewedIndicatorColor = .red
let viewController = BrazeContentCardUI.ViewController(braze: AppDelegate.braze, attributes: attributes)
```
Confira o [app de exemplo Examples](https://github.com/braze-inc/braze-swift-sdk/tree/main/Examples/Swift) para um exemplo completo.
Altere a cor da barra indicadora de não lido atribuindo um valor à cor de tonalidade do seu `BRZContentCardUIViewController`:
```objc
BRZContentCardUIViewController *viewController = [[BRZContentCardUIViewController alloc] initWithBraze:AppDelegate.braze];
[viewController.view setTintColor:[UIColor systemGreenColor]];
```
A personalização apenas do indicador não visualizado via `Attributes` não é compatível com Objective-C.
### Modo escuro {#dark-mode}
Para exibir imagens ou estilos diferentes com base no modo escuro ou claro do dispositivo, use [pares de chave-valor](https://www.braze.com/docs/pt-br/pt-br/user_guide/message_building_by_channel/content_cards/creative_details/#key-value-pairs) na mensagem do seu Content Card. Por exemplo, adicione um par de chave-valor como `dark_mode_image` com a URL do seu ativo de imagem para modo escuro. Em seguida, no seu app, adicione lógica personalizada para verificar o modo de aparência atual do dispositivo e exibir a imagem apropriada.
```swift
if let darkImageUrl = card.extras["dark_mode_image"],
view.traitCollection.userInterfaceStyle == .dark {
// Use darkImageUrl for the image
}
```
```kotlin
val darkModeImage = card.extras["dark_mode_image"]
val isDarkMode = (resources.configuration.uiMode and Configuration.UI_MODE_NIGHT_MASK) == Configuration.UI_MODE_NIGHT_YES
if (isDarkMode && darkModeImage != null) {
// Use darkModeImage for the image
}
```
```javascript
const darkModeImage = card.extras?.dark_mode_image;
const isDarkMode = window.matchMedia("(prefers-color-scheme: dark)").matches;
if (isDarkMode && darkModeImage) {
// Use darkModeImage for the image
}
```
Esse padrão funciona para qualquer conteúdo que dependa da aparência, incluindo texto, cores ou layouts. Faça upload dos seus ativos de imagem para modo escuro na [Biblioteca de mídia](https://www.braze.com/docs/pt-br/pt-br/user_guide/messaging/design_and_edit/media_library/image_specifications/) e, em seguida, referencie-os em um par de chave-valor.
### Desativando o indicador de não lido {#disabling-unread-indicator}
Oculte a barra indicadora de não lido adicionando o seguinte estilo ao seu `css`:
```css
.ab-unread-indicator { display: none; }
```
Oculte a barra indicadora de não lido configurando [`setUnreadBarVisible`](https://braze-inc.github.io/braze-android-sdk/kdoc/braze-android-sdk/com.braze.ui.contentcards.view/-content-card-view-holder/set-unread-bar-visible.html?query=fun%20setUnreadBarVisible(isVisible:%20Boolean)) em `ContentCardViewHolder` como `false`.
Desativar o indicador de não lido não é compatível com Jetpack Compose.
Oculte a barra indicadora de não lido definindo a propriedade `attributes.cellAttributes.unviewedIndicatorColor` na sua struct `Attributes` como `.clear`.
A personalização apenas do indicador não visualizado via `Attributes` não é compatível com Objective-C.
# Personalize o comportamento dos Content Cards
Source: /docs/pt-br/developer_guide/content_cards/customizing_cards/behavior/index.md
# Personalize o comportamento dos Content Cards {#customize-the-behavior-of-content-cards}
> Este guia de implementação aborda a alteração do comportamento dos Content Cards, a adição de extras como pares de chave-valor à sua carga útil e receitas de personalizações comuns. Para a lista completa de tipos de cartões de conteúdo, consulte [Sobre os Content Cards](https://www.braze.com/docs/pt-br/pt-br/developer_guide/content_cards/).
## Pares de chave-valor {#key-value-pairs}
A Braze permite que você envie cargas úteis de dados extras por meio de Content Cards para os dispositivos dos usuários usando pares de chave-valor. Eles podem ajudar a rastrear métricas internas, atualizar o conteúdo do app e personalizar propriedades. [Adicione pares de chave-valor usando o dashboard](https://www.braze.com/docs/pt-br/pt-br/user_guide/message_building_by_channel/content_cards/create/#step-4-configure-additional-settings-optional).
**Note:**
Não recomendamos o envio de valores JSON aninhados como pares de chave-valor. Em vez disso, achate o JSON antes de enviá-lo.
Os pares de chave-valor são armazenados em objetos `card` como `extras`. Eles podem ser usados para enviar dados junto com um cartão para tratamento posterior pelo aplicativo. Chame `card.extras` para acessar esses valores.
Os pares de chave-valor são armazenados em objetos `card` como `extras`. Eles podem ser usados para enviar dados junto com um cartão para tratamento posterior pelo aplicativo. Chame `card.extras` para acessar esses valores.
Os pares de chave-valor são armazenados em objetos `card` como `extras`. Eles podem ser usados para enviar dados junto com um cartão para tratamento posterior pelo aplicativo. Chame `card.extras` para acessar esses valores.
**Tip:**
É importante que suas equipes de marketing e de desenvolvimento coordenem quais pares de chave-valor serão usados (por exemplo, `feed_type = brand_homepage`), pois todos os pares de chave-valor que os profissionais de marketing inserirem no dashboard da Braze devem corresponder exatamente aos pares de chave-valor que os desenvolvedores criam na lógica do app.
## Content Cards como conteúdo suplementar {#content-cards-as-supplemental-content}
{: style="float:right;max-width:25%;margin-left:15px;border:0;"}
Você pode combinar perfeitamente os Content Cards em um feed existente, permitindo que os dados de vários feeds sejam carregados simultaneamente. Isso cria uma experiência coesa e harmoniosa com os Content Cards da Braze e o conteúdo de feed existente.
O exemplo à direita mostra um feed com uma lista híbrida de itens que são preenchidos por meio de dados locais e Content Cards fornecidos pela Braze. Com isso, os Content Cards podem ser indistinguíveis do conteúdo existente.
### Pares de chave-valor disparados por API {#api-triggered-key-value-pairs}
As [Campaigns disparadas por API](https://www.braze.com/docs/pt-br/pt-br/user_guide/messaging/campaigns/schedule_your_campaign/api_triggered_delivery/) são uma boa estratégia a ser empregada quando os valores de um cartão dependem de fatores externos para determinar o conteúdo a ser exibido para o usuário. Por exemplo, para exibir conteúdo suplementar, defina pares de chave-valor usando Liquid. Note que o `class_type` deve ser conhecido no momento da configuração.
{: style="max-width:60%;"}
## Content Cards como conteúdo interativo {#content-cards-as-interactive-content}
{: style="border:0;"}{: style="float:right;max-width:45%;border:0;margin-left:15px;"}
Os Content Cards podem ser aproveitados para criar experiências dinâmicas e interativas para seus usuários. No exemplo à direita, temos um pop-up de Content Card que aparece no checkout, oferecendo aos usuários promoções de última hora. Cartões bem posicionados como esse são uma ótima maneira de dar aos usuários um "empurrãozinho" em direção a ações específicas.
Os pares de chave-valor para esse caso de uso incluem `discount_percentage` definido como o valor do desconto desejado e `class_type` definido como `coupon_code`. Esses pares de chave-valor permitem filtrar e exibir Content Cards específicos por tipo na tela de checkout. Para saber mais sobre o uso de pares de chave-valor para gerenciar vários feeds, consulte [Personalização do feed padrão de Content Cards](https://www.braze.com/docs/pt-br/pt-br/developer_guide/customization_guides/content_cards/customizing_feed/#multiple-feeds).
{: style="max-width:80%;"}
## Emblemas de Content Cards {#content-card-badges}
{: style="max-width:35%;float:right;margin-left:15px;border:none;"}
Os emblemas são ícones pequenos, ideais para chamar a atenção do usuário. O uso de emblemas para alertar o usuário sobre novos conteúdos de Content Cards pode atrair os usuários de volta ao seu app e aumentar as sessões.
### Exibir o número de Content Cards não lidos como um emblema {#displaying-the-number-of-unread-content-cards-as-a-badge}
Você pode exibir o número de Content Cards não lidos que seu usuário tem como um emblema no ícone do seu app.
Você pode solicitar o número de cartões não lidos a qualquer momento chamando:
```javascript
braze.getCachedContentCards().getUnviewedCardCount();
```
Em seguida, você pode usar essas informações para exibir um emblema que indica quantos Content Cards não lidos existem. Para saber mais, consulte a documentação de referência do SDK.
Você pode solicitar o número de cartões não lidos a qualquer momento chamando:
```java
Braze.getInstance(context).getContentCardUnviewedCount();
```
```kotlin
Braze.getInstance(context).contentCardUnviewedCount
```
Em seguida, você pode usar essas informações para exibir um emblema que indica quantos Content Cards não lidos existem. Para saber mais, consulte a documentação de referência do SDK.
O exemplo a seguir usa `braze.contentCards` para solicitar e exibir o número de Content Cards não lidos. Depois que o app é fechado e a sessão do usuário termina, esse código solicita uma contagem de cartões, filtrando o número de cartões com base na propriedade `viewed`.
```swift
func applicationDidEnterBackground(_ application: UIApplication)
```
Nesse método, implemente o seguinte código, que atualiza ativamente a contagem de emblemas enquanto o usuário visualiza os cartões durante uma determinada sessão:
```swift
let unreadCards = AppDelegate.braze?.contentCards.cards.filter { $0.viewed == false }
UIApplication.shared.applicationIconBadgeNumber = unreadCards?.count ?? 0
```
```objc
(void)applicationDidEnterBackground:(UIApplication *)application
```
Nesse método, implemente o seguinte código, que atualiza ativamente a contagem de emblemas enquanto o usuário visualiza os cartões durante uma determinada sessão:
```objc
NSInteger unreadCardCount = 0;
for (BRZContentCardRaw *card in AppDelegate.braze.contentCards.cards) {
if (card.viewed == NO) {
unreadCardCount += 1;
}
}
[UIApplication sharedApplication].applicationIconBadgeNumber = unreadCardCount;
```
# Personalize o feed para Content Cards
Source: /docs/pt-br/developer_guide/content_cards/customizing_cards/feed/index.md
# Personalize o feed para Content Cards {#customize-the-feed-for-content-cards}
> Um feed de cartão de conteúdo é a sequência de Content Cards nos seus aplicativos móveis ou da web. Este artigo aborda a configuração de quando o feed é atualizado, a ordem dos cartões, o gerenciamento de vários feeds e as mensagens de erro de "feed vazio". Para a lista completa de tipos de cartões de conteúdo, consulte [Sobre Content Cards](https://www.braze.com/docs/pt-br/pt-br/developer_guide/content_cards/).
## About the session lifecycle
A session refers to the period of time the Braze SDK tracks user activity in your app after it's launched. You can also force a new session by [calling the `changeUser()` method](https://www.braze.com/docs/pt-br/pt-br/developer_guide/analytics/setting_user_ids/#setting-a-user-id).
By default, a session starts when you first call `braze.openSession()`. The session will remain active for up to `30` minutes of inactivity (unless you [change the default session timeout](https://www.braze.com/docs/pt-br/pt-br/developer_guide/analytics/tracking_sessions/?tab=web#change-session-timeout) or the user closes the app.
**Note:**
If you've set up the [activity lifecycle callback](https://www.braze.com/docs/pt-br/pt-br/developer_guide/platform_integration_guides/android/initial_sdk_setup/android_sdk_integration/#step-4-tracking-user-sessions-in-android) for Android, Braze will automatically call [`openSession()`](https://braze-inc.github.io/braze-android-sdk/kdoc/braze-android-sdk/com.braze/-i-braze/open-session.html) and [`closeSession()`](https://braze-inc.github.io/braze-android-sdk/kdoc/braze-android-sdk/com.braze/-i-braze/close-session.html) for each activity in your app.
By default, a session starts when `openSession()` is first called. If your app goes to the background and then returns to the foreground, the SDK will check if more than 10 seconds have passed since the session started (unless you [change the default session timeout](https://www.braze.com/docs/pt-br/pt-br/developer_guide/analytics/tracking_sessions/?tab=android#change-session-timeout)). If so, a new session will begin. Keep in mind that if the user closes your app while it's in the background, session data may not be sent to Braze until they reopen the app.
Calling `closeSession()` will not immediately end the session. Instead, it will end the session after 10 seconds if `openSession()` isn't called again by the user starting another activity.
By default, a session starts when you call `Braze.init(configuration:)`. This occurs when the `UIApplicationWillEnterForegroundNotification` notification is triggered, meaning the app has entered the foreground.
If your app goes to the background, `UIApplicationDidEnterBackgroundNotification` is triggered. The app does not remain in an active session while in the background. When your app returns to the foreground, the SDK compares the time elapsed since the session started against the session timeout (unless you [change the default session timeout](https://www.braze.com/docs/pt-br/pt-br/developer_guide/analytics/tracking_sessions/?tab=swift#change-session-timeout)). If the time since the session started exceeds the timeout period, a new session begins.
## Atualizar o feed {#refreshing-the-feed}
### Atualização automática {#automatic-refresh}
Por padrão, o feed de Content Cards será atualizado automaticamente quando:
- Uma nova sessão é iniciada
- O feed padrão de Content Cards é fechado e reaberto após mais de 60 segundos desde a última atualização.
**Tip:**
Para mostrar dinamicamente Content Cards atualizados sem atualizar manualmente, selecione **At first impression** durante a criação do cartão. Esses cartões serão atualizados quando estiverem disponíveis.
### Atualização manual {#manual-refresh}
Para atualizar manualmente o feed em um horário específico:
Solicite uma atualização manual dos Content Cards da Braze a partir do SDK para web a qualquer momento, chamando [`requestContentCardsRefresh()`](https://js.appboycdn.com/web-sdk/latest/doc/modules/braze.html#requestcontentcardsrefresh).
Você também pode chamar [`getCachedContentCards`](https://js.appboycdn.com/web-sdk/latest/doc/modules/braze.html#getcachedcontentcards) para obter todos os cartões disponíveis no momento a partir da última atualização dos Content Cards.
```javascript
import * as braze from "@braze/web-sdk";
function refresh() {
braze.requestContentCardsRefresh();
}
```
Para abrir links de Content Cards em uma nova aba do navegador em vez da mesma aba, defina `openCardsInNewTab: true` nas opções de inicialização do SDK para web. Para saber mais sobre as opções de inicialização, consulte o [guia do repositório do SDK para web](https://www.braze.com/docs/pt-br/pt-br/developer_guide/sdk_repository_guides/web/).
Solicite uma atualização manual dos Content Cards da Braze a partir do SDK do Android a qualquer momento, chamando [`requestContentCardsRefresh`](https://braze-inc.github.io/braze-android-sdk/kdoc/braze-android-sdk/com.braze/-i-braze/request-content-cards-refresh.html).
```java
Braze.getInstance(context).requestContentCardsRefresh();
```
```kotlin
Braze.getInstance(context).requestContentCardsRefresh()
```
Solicite uma atualização manual dos Content Cards da Braze a partir do SDK Swift a qualquer momento, chamando o método [`requestRefresh`](https://braze-inc.github.io/braze-swift-sdk/documentation/brazekit/braze/contentcards-swift.class/requestrefresh(_:)) na classe [`Braze.ContentCards`](https://braze-inc.github.io/braze-swift-sdk/documentation/brazekit/braze/contentcards-swift.class):
No Swift, os Content Cards podem ser atualizados com um completion handler opcional ou com um retorno assíncrono usando as APIs de concorrência nativas do Swift.
#### Completion handler {#completion-handler}
```swift
AppDelegate.braze?.contentCards.requestRefresh { result in
// Implement completion handler
}
```
#### Async/Await
```swift
let contentCards = await AppDelegate.braze?.contentCards.requestRefresh()
```
```objc
[AppDelegate.braze.contentCards requestRefreshWithCompletion:^(NSArray * contentCards, NSError * error) {
// Implement completion handler
}];
```
### Sincronização completa vs. sincronização parcial {#full-sync-vs-partial-sync}
O SDK da Braze usa dois tipos de sincronização ao recuperar Content Cards do servidor:
- **Sincronização completa:** Baixa todos os Content Cards para os quais o usuário é elegível. As sincronizações completas ocorrem automaticamente a cada 7 dias ou sempre que `changeUser()` é chamado.
- **Sincronização parcial:** Baixa apenas os novos Content Cards desde a última solicitação. Se o usuário não for elegível para nenhum cartão novo, a resposta retorna zero cartões. As sincronizações parciais ocorrem cada vez que `requestContentCardsRefresh()` é chamado (a menos que 7 dias tenham se passado desde a última sincronização completa, caso em que uma sincronização completa é acionada).
As sincronizações parciais reduzem a carga do servidor e o consumo de bateria do dispositivo. Os Content Cards que já foram recebidos são armazenados localmente no SDK, então os usuários continuarão vendo seus cartões disponíveis mesmo quando uma sincronização parcial retornar zero cartões novos.
### Limite de taxa {#rate-limit}
A Braze usa um algoritmo de token bucket para impor os seguintes limites de taxa:
- Até 5 chamadas de atualização por dispositivo, compartilhadas entre usuários e chamadas para `openSession()`
- Após atingir o limite, uma nova chamada fica disponível a cada 180 segundos (3 minutos)
- O sistema mantém até cinco chamadas para você usar a qualquer momento
- `subscribeToContentCards()` ainda retornará cartões em cache mesmo quando o limite de taxa for atingido
**Important:**
O SDK da Braze também aplica limites de taxa para desempenho e confiabilidade. Tenha isso em mente ao executar testes automatizados ou realizar QA manual. Para saber mais, consulte [Limites de taxa do SDK da Braze](https://www.braze.com/docs/pt-br/pt-br/developer_guide/sdk_integration/rate_limits/).
## Personalização da ordem dos cartões exibidos {#customizing-displayed-card-order}
Você pode alterar a ordem em que seus Content Cards são exibidos. Isso permite ajustar a experiência do usuário priorizando determinados tipos de conteúdo, como promoções sensíveis ao tempo.
Personalize a ordem de exibição dos Content Cards no seu feed usando o parâmetro [`filterFunction`](https://js.appboycdn.com/web-sdk/latest/doc/modules/braze.html#showcontentcards) de `showContentCards():`. Por exemplo:
```javascript
braze.showContentCards(null, (cards) => {
return sortBrazeCards(cards); // Where sortBrazeCards is your sorting function that returns the sorted card array
});
```
O [`ContentCardsFragment`](https://braze-inc.github.io/braze-android-sdk/kdoc/braze-android-sdk/com.braze.ui.contentcards/-content-cards-fragment/index.html) se baseia em um [`IContentCardsUpdateHandler`](https://braze-inc.github.io/braze-android-sdk/kdoc/braze-android-sdk/com.braze.ui.contentcards.handlers/-i-content-cards-update-handler/index.html) para lidar com qualquer classificação ou modificação dos Content Cards antes que eles sejam exibidos no feed. Um manipulador de atualização personalizado pode ser definido por meio de [`setContentCardUpdateHandler`](https://braze-inc.github.io/braze-android-sdk/kdoc/braze-android-sdk/com.braze.ui.contentcards/-content-cards-fragment/set-content-card-update-handler.html) no seu `ContentCardsFragment`.
A seguir está o `IContentCardsUpdateHandler` padrão, que pode ser usado como ponto de partida para a personalização:
**Mostrar exemplo em Java**
```java
public class DefaultContentCardsUpdateHandler implements IContentCardsUpdateHandler {
// Interface that must be implemented and provided as a public CREATOR
// field that generates instances of your Parcelable class from a Parcel.
public static final Parcelable.Creator CREATOR = new Parcelable.Creator() {
public DefaultContentCardsUpdateHandler createFromParcel(Parcel in) {
return new DefaultContentCardsUpdateHandler();
}
public DefaultContentCardsUpdateHandler[] newArray(int size) {
return new DefaultContentCardsUpdateHandler[size];
}
};
@Override
public List handleCardUpdate(ContentCardsUpdatedEvent event) {
List sortedCards = event.getAllCards();
// Sort by pinned, then by the 'updated' timestamp descending
// Pinned before non-pinned
Collections.sort(sortedCards, new Comparator() {
@Override
public int compare(Card cardA, Card cardB) {
// A displays above B
if (cardA.getIsPinned() && !cardB.getIsPinned()) {
return -1;
}
// B displays above A
if (!cardA.getIsPinned() && cardB.getIsPinned()) {
return 1;
}
// At this point, both A & B are pinned or both A & B are non-pinned
// A displays above B since A is newer
if (cardA.getUpdated() > cardB.getUpdated()) {
return -1;
}
// B displays above A since A is newer
if (cardA.getUpdated() < cardB.getUpdated()) {
return 1;
}
// At this point, every sortable field matches so keep the natural ordering
return 0;
}
});
return sortedCards;
}
// Parcelable interface method
@Override
public int describeContents() {
return 0;
}
// Parcelable interface method
@Override
public void writeToParcel(Parcel dest, int flags) {
// No state is kept in this class so the parcel is left unmodified
}
}
```
**Mostrar exemplo em Kotlin**
```kotlin
class DefaultContentCardsUpdateHandler : IContentCardsUpdateHandler {
override fun handleCardUpdate(event: ContentCardsUpdatedEvent): List {
val sortedCards = event.allCards
// Sort by pinned, then by the 'updated' timestamp descending
// Pinned before non-pinned
sortedCards.sortWith(Comparator sort@{ cardA: Card, cardB: Card ->
// A displays above B
if (cardA.isPinned && !cardB.isPinned) {
return@sort -1
}
// B displays above A
if (!cardA.isPinned && cardB.isPinned) {
return@sort 1
}
// At this point, both A & B are pinned or both A & B are non-pinned
// A displays above B since A is newer
if (cardA.updated > cardB.updated) {
return@sort -1
}
// B displays above A since A is newer
if (cardA.updated < cardB.updated) {
return@sort 1
}
0
})
return sortedCards
}
// Parcelable interface method
override fun describeContents(): Int {
return 0
}
// Parcelable interface method
override fun writeToParcel(dest: Parcel, flags: Int) {
// No state is kept in this class so the parcel is left unmodified
}
companion object {
// Interface that must be implemented and provided as a public CREATOR
// field that generates instances of your Parcelable class from a Parcel.
val CREATOR: Parcelable.Creator = object : Parcelable.Creator {
override fun createFromParcel(`in`: Parcel): DefaultContentCardsUpdateHandler? {
return DefaultContentCardsUpdateHandler()
}
override fun newArray(size: Int): Array {
return arrayOfNulls(size)
}
}
}
}
```
**Tip:**
O código-fonte do `ContentCardsFragment` pode ser encontrado no [GitHub](https://github.com/braze-inc/braze-android-sdk/blob/master/android-sdk-ui/src/main/java/com/braze/ui/contentcards/ContentCardsFragment.kt).
Para filtrar e classificar os Content Cards no Jetpack Compose, defina o parâmetro `cardUpdateHandler`. Por exemplo:
```kotlin
ContentCardsList(
cardUpdateHandler = {
it.sortedWith { cardA, cardB ->
// A displays above B
if (cardA.isPinned && !cardB.isPinned) {
return@sortedWith -1
}
// B displays above A
if (!cardA.isPinned && cardB.isPinned) {
return@sortedWith 1
}
// At this point, both A & B are pinned or both A & B are non-pinned
// A displays above B since A is newer
if (cardA.updated > cardB.updated) {
return@sortedWith -1
}
// B displays above A since A is newer
if (cardA.updated < cardB.updated) {
return@sortedWith 1
}
0
}
}
)
```
Personalize a ordem do feed de cartões modificando diretamente a variável estática [`Attributes.defaults`](https://braze-inc.github.io/braze-swift-sdk/documentation/brazeui/brazecontentcardui/viewcontroller/attributes-swift.struct/defaults).
```swift
var attributes = BrazeContentCardUI.ViewController.Attributes.defaults
attributes.transform = { cards in
cards.sorted {
if $0.pinned && !$1.pinned {
return true
} else if !$0.pinned && $1.pinned {
return false
} else {
return $0.createdAt > $1.createdAt
}
}
}
let viewController = BrazeContentCardUI.ViewController(braze: AppDelegate.braze, attributes: attributes)
```
A personalização via `BrazeContentCardUI.ViewController.Attributes` não está disponível em Objective-C.
## Personalização da mensagem de "feed vazio" {#customizing-empty-feed-message}
Quando um usuário não se qualifica para nenhum Content Card, o SDK exibe uma mensagem de erro de "feed vazio" informando: "Não temos atualizações. Por favor, verifique novamente mais tarde." Você pode personalizar essa mensagem de erro de "feed vazio" de forma semelhante à seguinte:

O SDK para web não oferece suporte à substituição programática do texto de "feed vazio". Você pode optar por substituí-lo sempre que o feed for exibido, mas isso não é recomendado porque o feed pode levar algum tempo para ser atualizado e o texto de feed vazio não será exibido imediatamente.
Se o [`ContentCardsFragment`](https://braze-inc.github.io/braze-android-sdk/kdoc/braze-android-sdk/com.braze.ui.contentcards/-content-cards-fragment/index.html) determinar que o usuário não se qualifica para nenhum Content Card, ele exibirá a mensagem de erro de feed vazio.
Um adaptador especial, o [`EmptyContentCardsAdapter`](https://github.com/braze-inc/braze-android-sdk/blob/master/android-sdk-ui/src/main/java/com/braze/ui/contentcards/adapters/EmptyContentCardsAdapter.kt), substitui o adaptador padrão [`ContentCardAdapter`](https://github.com/braze-inc/braze-android-sdk/blob/master/android-sdk-ui/src/main/java/com/braze/ui/contentcards/adapters/ContentCardAdapter.kt) para exibir essa mensagem de erro. Para definir a mensagem personalizada, substitua o recurso de string `com_braze_feed_empty`.
O estilo usado para exibir essa mensagem pode ser encontrado em [`Braze.ContentCardsDisplay.Empty`](https://github.com/braze-inc/braze-android-sdk/blob/2e386dfa59a87bfc24ef7cb6ff5adf6b16f44d24/android-sdk-ui/src/main/res/values/styles.xml#L522-L530) e é reproduzido no trecho de código a seguir:
```xml
```
Para saber mais sobre como personalizar os elementos de estilo dos Content Cards, consulte [Personalização de estilo](https://www.braze.com/docs/pt-br/pt-br/developer_guide/content_cards/customizing_cards/style/).
Para personalizar a mensagem de erro de "feed vazio" com Jetpack Compose, você pode passar um `emptyString` para [`ContentCardsList`](https://braze-inc.github.io/braze-android-sdk/kdoc/braze-android-sdk/com.braze.jetpackcompose.contentcards/-content-cards-list.html). Você também pode passar [`emptyTextStyle`](https://braze-inc.github.io/braze-android-sdk/kdoc/braze-android-sdk/com.braze.jetpackcompose.contentcards.styling/-content-card-list-styling/index.html#1193499348%2FProperties%2F-1725759721) para `ContentCardListStyling` para personalizar ainda mais essa mensagem.
```kotlin
ContentCardsList(
emptyString = "No messages today",
style = ContentCardListStyling(
emptyTextStyle = TextStyle(...)
)
)
```
Se você tiver um Composable que gostaria de exibir no lugar, pode passar `emptyComposable` para [`ContentCardsList`](https://braze-inc.github.io/braze-android-sdk/kdoc/braze-android-sdk/com.braze.jetpackcompose.contentcards/-content-cards-list.html). Se `emptyComposable` for especificado, o `emptyString` não será usado.
```kotlin
ContentCardsList(
emptyComposable = {
Image(
painter = painterResource(id = R.drawable.noMessages),
contentDescription = "No messages"
)
}
)
```
Personalize o estado vazio do view controller configurando as opções relacionadas em [`Attributes`](https://braze-inc.github.io/braze-swift-sdk/documentation/brazeui/brazecontentcardui/viewcontroller/attributes-swift.struct/defaults).
```swift
var attributes = BrazeContentCardUI.ViewController.Attributes.defaults
attributes.emptyStateMessage = "This is a custom empty state message"
attributes.emptyStateMessageFont = .preferredFont(forTextStyle: .title1)
attributes.emptyStateMessageColor = .secondaryLabel
```
Altere o texto que aparece automaticamente nos feeds vazios de Content Cards redefinindo as strings localizáveis do cartão de conteúdo no arquivo [`ContentCardsLocalizable.strings`](https://github.com/braze-inc/braze-swift-sdk/tree/main/Sources/BrazeUI/Resources/Localization/en.lproj) do seu app.
**Note:**
Se você quiser atualizar essa mensagem em diferentes idiomas de localização, localize o idioma correspondente na [estrutura da pasta Resources](https://github.com/braze-inc/braze-swift-sdk/tree/main/Sources/BrazeUI/Resources/Localization) com a string `ContentCardsLocalizable.strings`.
## Implementando múltiplos feeds {#implementing-multiple-feeds}
Os Content Cards podem ser filtrados no seu app para que apenas cartões específicos sejam exibidos, permitindo que você tenha vários feeds de Content Cards para diferentes casos de uso. Por exemplo, você pode manter um feed transacional e um feed de marketing. Para isso, crie diferentes categorias de Content Cards definindo pares de valores-chave no dashboard da Braze. Em seguida, crie feeds no seu app ou site que tratem esses tipos de Content Cards de forma diferente, filtrando alguns tipos e exibindo outros.
### Etapa 1: Definir pares de valores-chave nos cartões {#step-1-set-key-value-pairs-on-cards}
Ao criar uma Campaign de cartão de conteúdo, defina [os dados do par chave-valor](https://www.braze.com/docs/pt-br/pt-br/developer_guide/content_cards/customizing_cards/behavior/) em cada cartão. Você usará esse par chave-valor para categorizar os cartões. Os pares de valores-chave são armazenados na propriedade `extras` no modelo de dados do cartão.
Para este exemplo, definiremos um par de valores-chave com a chave `feed_type` que designará em qual feed de Content Card o cartão deve ser exibido. O valor será o que seus feeds personalizados representam, como `home_screen` ou `marketing`.
### Etapa 2: Filtrar Content Cards {#step-2-filter-content-cards}
Depois que os pares de valores-chave tiverem sido atribuídos, crie um feed com lógica que exibirá os cartões desejados e filtrará cartões de outros tipos. Neste exemplo, exibiremos apenas os cartões com um par de valores-chave correspondente a `feed_type: "Transactional"`.
O exemplo a seguir mostrará o feed de Content Cards para cartões do tipo `Transactional`:
```javascript
/**
* @param {String} feed_type - value of the "feed_type" KVP to filter
*/
function showCardsByFeedType(feed_type) {
braze.showContentCards(null, function(cards) {
return cards.filter((card) => card.extras["feed_type"] === feed_type);
});
}
```
Em seguida, você pode configurar um botão de alternância para seu feed personalizado:
```javascript
// show the "Transactional" feed when this button is clicked
document.getElementById("show-transactional-feed").onclick = function() {
showCardsByFeedType("Transactional");
};
```
Para saber mais, consulte a [documentação do método do SDK](https://js.appboycdn.com/web-sdk/latest/doc/modules/braze.html#showcontentcards).
Por padrão, o feed de Content Cards é exibido em um [`ContentCardsFragment`](https://braze-inc.github.io/braze-android-sdk/kdoc/braze-android-sdk/com.braze.ui.contentcards/-content-cards-fragment/index.html) e [`IContentCardsUpdateHandler`](https://braze-inc.github.io/braze-android-sdk/kdoc/braze-android-sdk/com.braze.ui.contentcards.handlers/-i-content-cards-update-handler/index.html) retorna uma lista de cartões para exibir após receber um [`ContentCardsUpdatedEvent`](https://braze-inc.github.io/braze-android-sdk/kdoc/braze-android-sdk/com.braze.events/-content-cards-updated-event/index.html) do SDK da Braze. No entanto, ele apenas classifica os cartões e não lida com nenhum filtro diretamente.
#### Etapa 2.1: Criar um manipulador personalizado {#step-21-create-a-custom-handler}
Você pode filtrar Content Cards implementando um [`IContentCardsUpdateHandler`](https://braze-inc.github.io/braze-android-sdk/kdoc/braze-android-sdk/com.braze.ui.contentcards.handlers/-i-content-cards-update-handler/index.html) personalizado usando os pares chave-valor definidos por [`Card.getExtras()`](https://braze-inc.github.io/braze-android-sdk/kdoc/braze-android-sdk/com.braze.models.cards/-card/extras.html) no dashboard, e então modificá-lo para remover quaisquer cartões da lista que não correspondam ao valor de `feed_type` que você definiu anteriormente.
**Mostrar exemplo em Java**
```java
private IContentCardsUpdateHandler getUpdateHandlerForFeedType(final String desiredFeedType) {
return new IContentCardsUpdateHandler() {
@Override
public List handleCardUpdate(ContentCardsUpdatedEvent event) {
// Use the default card update handler for a first
// pass at sorting the cards. This is not required
// but is done for convenience.
final List cards = new DefaultContentCardsUpdateHandler().handleCardUpdate(event);
final Iterator cardIterator = cards.iterator();
while (cardIterator.hasNext()) {
final Card card = cardIterator.next();
// Make sure the card has our custom KVP
// from the dashboard with the key "feed_type"
if (card.getExtras().containsKey("feed_type")) {
final String feedType = card.getExtras().get("feed_type");
if (!desiredFeedType.equals(feedType)) {
// The card has a feed type, but it doesn't match
// our desired feed type, remove it.
cardIterator.remove();
}
} else {
// The card doesn't have a feed
// type at all, remove it
cardIterator.remove();
}
}
// At this point, all of the cards in this list have
// a feed type that explicitly matches the value we put
// in the dashboard.
return cards;
}
};
}
```
**Mostrar exemplo em Kotlin**
```kotlin
private fun getUpdateHandlerForFeedType(desiredFeedType: String): IContentCardsUpdateHandler {
return IContentCardsUpdateHandler { event ->
// Use the default card update handler for a first
// pass at sorting the cards. This is not required
// but is done for convenience.
val cards = DefaultContentCardsUpdateHandler().handleCardUpdate(event)
val cardIterator = cards.iterator()
while (cardIterator.hasNext()) {
val card = cardIterator.next()
// Make sure the card has our custom KVP
// from the dashboard with the key "feed_type"
if (card.extras.containsKey("feed_type")) {
val feedType = card.extras["feed_type"]
if (desiredFeedType != feedType) {
// The card has a feed type, but it doesn't match
// our desired feed type, remove it.
cardIterator.remove()
}
} else {
// The card doesn't have a feed
// type at all, remove it
cardIterator.remove()
}
}
// At this point, all of the cards in this list have
// a feed type that explicitly matches the value we put
// in the dashboard.
cards
}
}
```
#### Etapa 2.2: Adicionar a um fragmento {#step-22-add-it-to-a-fragment}
Depois de criar um [`IContentCardsUpdateHandler`](https://braze-inc.github.io/braze-android-sdk/kdoc/braze-android-sdk/com.braze.ui.contentcards.handlers/-i-content-cards-update-handler/index.html), crie um [`ContentCardsFragment`](https://braze-inc.github.io/braze-android-sdk/kdoc/braze-android-sdk/com.braze.ui.contentcards/-content-cards-fragment/index.html) que o utilize. Esse feed personalizado pode ser usado como qualquer outro `ContentCardsFragment`. Nas diferentes partes do seu app, exiba diferentes feeds de Content Cards com base na chave fornecida no dashboard. Cada feed do `ContentCardsFragment` terá um conjunto exclusivo de cartões exibidos graças ao `IContentCardsUpdateHandler` personalizado em cada fragmento.
**Mostrar exemplo em Java**
```java
// We want a Content Cards feed that only shows "Transactional" cards.
ContentCardsFragment customContentCardsFragment = new ContentCardsFragment();
customContentCardsFragment.setContentCardUpdateHandler(getUpdateHandlerForFeedType("Transactional"));
```
**Mostrar exemplo em Kotlin**
```kotlin
// We want a Content Cards feed that only shows "Transactional" cards.
val customContentCardsFragment = ContentCardsFragment()
customContentCardsFragment.contentCardUpdateHandler = getUpdateHandlerForFeedType("Transactional")
```
Para filtrar quais Content Cards são mostrados nesse feed, use `cardUpdateHandler`. Por exemplo:
```kotlin
ContentCardsList(
cardUpdateHandler = {
it.filter { card ->
card.extras["feed_type"] == "Transactional"
}
}
)
```
The following example will show the Content Cards feed for `Transactional` type cards:
```swift
// Filter cards by the `Transactional` feed type based on your key-value pair.
let transactionalCards = cards.filter { $0.extras["feed_type"] as? String == "Transactional" }
```
Para ir além, os cartões apresentados no view controller podem ser filtrados definindo a propriedade `transform` na sua estrutura `Attributes` para exibir apenas os cartões filtrados pelos seus critérios.
```swift
var attributes = BrazeContentCardUI.ViewController.Attributes.defaults
attributes.transform = { cards in
cards.filter { $0.extras["feed_type"] as? String == "Transactional" }
}
// Pass your attributes containing the transformed cards to the Content Card UI.
let viewController = BrazeContentCardUI.ViewController(braze: AppDelegate.braze, attributes: attributes)
```
```objc
// Filter cards by the `Transactional` feed type based on your key-value pair.
NSMutableArray *transactionalCards = [[NSMutableArray alloc] init];
for (BRZContentCardRaw *card in AppDelegate.braze.contentCards.cards) {
if ([card.extras[@"feed_type"] isEqualToString:@"Transactional"]) {
[transactionalCards addObject:card];
}
}
```
# Registro de análise de dados
Source: /docs/pt-br/developer_guide/content_cards/logging_analytics/index.md
# Registro de análise de dados {#log-analytics}
> When building a custom UI for Content Cards, you must manually log analytics like impressions, clicks, and dismissals, as this is only handled automatically for default card models. Logging these events is a standard part of a Content Card integration and is essential for accurate campaign reporting and billing. To do this, populate your custom UI with data from the Braze data models and then manually log the events. Once you understand how to log analytics, you can see common ways Braze customers [create custom Content Cards](https://www.braze.com/docs/pt-br/pt-br/developer_guide/content_cards/creating_cards/).
## Logging analytics
When implementing your custom Content Cards, you can parse the Content Card objects and extract their payload data such as `title`, `cardDescription`, and `imageUrl`. Then, you can use the resulting model data to populate your custom UI.
To obtain the Content Card data models, subscribe to Content Card updates. There are two properties to pay particular attention to:
* **`id`**: Represents the Content Card ID string. This is the unique identifier used to log analytics from custom Content Cards.
* **`extras`**: Encompasses all the key-value pairs from the Braze dashboard.
All properties outside of `id` and `extras` are optional to parse for custom Content Cards. For more information on the data model, see each platform's integration article: [Android](https://www.braze.com/docs/pt-br/pt-br/developer_guide/content_cards/?sdktab=android), [iOS](https://www.braze.com/docs/pt-br/pt-br/developer_guide/content_cards/?sdktab=swift), [Web](https://www.braze.com/docs/pt-br/pt-br/developer_guide/content_cards/?sdktab=web).
Register a callback function to subscribe for updates when cards are refreshed.
```javascript
import * as braze from "@braze/web-sdk";
braze.subscribeToContentCardsUpdates((updates) => {
const cards = updates.cards;
// For example:
cards.forEach(card => {
if (card.isControl) {
// Do not display the control card, but remember to call `logContentCardImpressions([card])`
}
else if (card instanceof braze.ClassicCard || card instanceof braze.CaptionedImage) {
// Use `card.title`, `card.imageUrl`, etc.
}
else if (card instanceof braze.ImageOnly) {
// Use `card.imageUrl`, etc.
}
})
});
braze.openSession();
```
**Note:**
Content Cards will only refresh on session start if a subscribe request is called before `openSession()`. You can always choose to [manually refresh the feed](https://www.braze.com/docs/pt-br/pt-br/developer_guide/content_cards/customizing_cards/feed/) as well.
### Step 1: Create a private subscriber variable
To subscribe to card updates, first declare a private variable in your custom class to hold your subscriber:
```java
// subscriber variable
private IEventSubscriber mContentCardsUpdatedSubscriber;
```
### Step 2: Subscribe to updates
Next, add the following code to subscribe to Content Card updates from Braze, typically inside of your custom Content Cards activity's `Activity.onCreate()`:
```java
// Remove the previous subscriber before rebuilding a new one with our new activity.
Braze.getInstance(context).removeSingleSubscription(mContentCardsUpdatedSubscriber, ContentCardsUpdatedEvent.class);
mContentCardsUpdatedSubscriber = new IEventSubscriber() {
@Override
public void trigger(ContentCardsUpdatedEvent event) {
// List of all Content Cards
List allCards = event.getAllCards();
// Your logic below
}
};
Braze.getInstance(context).subscribeToContentCardsUpdates(mContentCardsUpdatedSubscriber);
Braze.getInstance(context).requestContentCardsRefresh();
```
### Step 3: Unsubscribe
We also recommend unsubscribing when your custom activity moves out of view. Add the following code to your activity's `onDestroy()` lifecycle method:
```java
Braze.getInstance(context).removeSingleSubscription(mContentCardsUpdatedSubscriber, ContentCardsUpdatedEvent.class);
```
### Step 1: Create a private subscriber variable
To subscribe to card updates, first declare a private variable in your custom class to hold your subscriber:
```kotlin
private var contentCardsUpdatedSubscriber: IEventSubscriber? = null
```
### Step 2: Subscribe to updates
Next, add the following code to subscribe to Content Card updates from Braze, typically inside of your custom Content Cards activity's `Activity.onCreate()`:
```kotlin
// Remove the previous subscriber before rebuilding a new one with our new activity.
Braze.getInstance(context).removeSingleSubscription(contentCardsUpdatedSubscriber, ContentCardsUpdatedEvent::class.java)
contentCardsUpdatedSubscriber = IEventSubscriber { event ->
// List of all Content Cards
val allCards = event.allCards
// Your logic below
}
Braze.getInstance(context).subscribeToContentCardsUpdates(contentCardsUpdatedSubscriber)
Braze.getInstance(context).requestContentCardsRefresh(true)
```
### Step 3: Unsubscribe
We also recommend unsubscribing when your custom activity moves out of view. Add the following code to your activity's `onDestroy()` lifecycle method:
```kotlin
Braze.getInstance(context).removeSingleSubscription(contentCardsUpdatedSubscriber, ContentCardsUpdatedEvent::class.java)
```
To access the Content Cards data model, call [`contentCards.cards`](https://braze-inc.github.io/braze-swift-sdk/documentation/brazekit/braze/contentcards-swift.class/cards) on your `braze` instance.
```swift
let cards: [Braze.ContentCard] = AppDelegate.braze?.contentCards.cards
```
Additionally, you can also maintain a subscription to observe for changes in your Content Cards. You can do so in one of two ways:
1. Maintaining a cancellable; or
2. Maintaining an `AsyncStream`.
### Cancellable
```swift
// This subscription is maintained through a Braze cancellable, which will observe for changes until the subscription is cancelled.
// You must keep a strong reference to the cancellable to keep the subscription active.
// The subscription is canceled either when the cancellable is deinitialized or when you call its `.cancel()` method.
let cancellable = AppDelegate.braze?.contentCards.subscribeToUpdates { [weak self] contentCards in
// Implement your completion handler to respond to updates in `contentCards`.
}
```
### AsyncStream
```swift
let stream: AsyncStream<[Braze.ContentCard]> = AppDelegate.braze?.contentCards.cardsStream
```
```objc
NSArray *contentCards = AppDelegate.braze.contentCards.cards;
```
Additionally, if you wish to maintain a subscription to your content cards, you can call [`subscribeToUpdates`](https://braze-inc.github.io/braze-swift-sdk/documentation/brazekit/braze/contentcards-swift.class/subscribetoupdates(_:)):
```objc
// This subscription is maintained through Braze cancellable, which will continue to observe for changes until the subscription is cancelled.
BRZCancellable *cancellable = [self.braze.contentCards subscribeToUpdates:^(NSArray *contentCards) {
// Implement your completion handler to respond to updates in `contentCards`.
}];
```
To get the Content Card data, use the `getContentCards` method:
```javascript
import Braze from "@braze/react-native-sdk";
const cards = await Braze.getContentCards();
```
To listen for updates, subscribe to Content Card update events:
```javascript
const subscription = Braze.addListener(Braze.Events.CONTENT_CARDS_UPDATED, (update) => {
const cards = update.cards;
cards.forEach(card => {
if (card.isControl) {
// Do not display the control card, but remember to log an impression
} else {
// Use card.title, card.cardDescription, card.image, etc.
}
});
});
```
To request a manual refresh of Content Cards from Braze servers:
```javascript
Braze.requestContentCardsRefresh();
```
To get cached Content Cards without a network request:
```javascript
const cachedCards = await Braze.getCachedContentCards();
```
## Logging events
Logging valuable metrics like impressions, clicks, and dismissals is quick and simple. Set a custom click listener to manually handle these analytics.
Log impression events when cards are viewed by users using [`logContentCardImpressions`](https://js.appboycdn.com/web-sdk/latest/doc/modules/braze.html#logcontentcardimpressions):
```javascript
import * as braze from "@braze/web-sdk";
braze.logContentCardImpressions([card1, card2, card3]);
```
Log card click events when users interact with a card using [`logContentCardClick`](https://js.appboycdn.com/web-sdk/latest/doc/modules/braze.html#logcontentcardclick):
```javascript
import * as braze from "@braze/web-sdk";
braze.logContentCardClick(card);
```
The [`BrazeManager`](https://github.com/braze-inc/braze-growth-shares-android-demo-app/blob/main/app/src/main/java/com/braze/advancedsamples/BrazeManager.kt) can reference Braze SDK dependencies such as the Content Card objects array list to get the [`Card`](https://braze-inc.github.io/braze-android-sdk/kdoc/braze-android-sdk/com.braze.models.cards/-card/index.html) to call the Braze logging methods. Use the `ContentCardable` base class to easily reference and provide data to the `BrazeManager`.
To log an impression or click on a card, call [`Card.logClick()`](https://braze-inc.github.io/braze-android-sdk/kdoc/braze-android-sdk/com.braze.models.cards/-card/log-click.html) or [`Card.logImpression()`](https://braze-inc.github.io/braze-android-sdk/kdoc/braze-android-sdk/com.braze.models.cards/-card/log-impression.html) respectively.
You can manually log or set a Content Card as "dismissed" to Braze for a particular card with [`isDismissed`](https://braze-inc.github.io/braze-android-sdk/kdoc/braze-android-sdk/com.braze.models.cards/-card/is-dismissed.html). If a card is already marked as dismissed, it cannot be marked as dismissed again.
To create a custom click listener, create a class that implements [`IContentCardsActionListener`](https://braze-inc.github.io/braze-android-sdk/kdoc/braze-android-sdk/com.braze.ui.contentcards.listeners/-i-content-cards-action-listener/index.html) and register it with [`BrazeContentCardsManager`](https://braze-inc.github.io/braze-android-sdk/kdoc/braze-android-sdk/com.braze.ui.contentcards.managers/-braze-content-cards-manager/index.html). Implement the [`onContentCardClicked()`](https://braze-inc.github.io/braze-android-sdk/kdoc/braze-android-sdk/com.braze.ui.contentcards.listeners/-i-content-cards-action-listener/on-content-card-clicked.html) method, which will be called when the user clicks a Content Card. Then, instruct Braze to use your Content Card click listener.
For example:
```java
BrazeContentCardsManager.getInstance().setContentCardsActionListener(new IContentCardsActionListener() {
@Override
public boolean onContentCardClicked(Context context, Card card, IAction cardAction) {
return false;
}
@Override
public void onContentCardDismissed(Context context, Card card) {
}
});
```
For example:
```kotlin
BrazeContentCardsManager.getInstance().contentCardsActionListener = object : IContentCardsActionListener {
override fun onContentCardClicked(context: Context, card: Card, cardAction: IAction): Boolean {
return false
}
override fun onContentCardDismissed(context: Context, card: Card) {
}
}
```
**Important:**
To handle control variant Content Cards in your custom UI, pass in your [`com.braze.models.cards.Card`](https://braze-inc.github.io/braze-android-sdk/kdoc/braze-android-sdk/com.braze.models.cards/-card/index.html) object, then call the `logImpression` method as you would with any other Content Card type. The object will implicitly log a control impression to inform our analytics of when a user would have seen the control card.
Implement the [`BrazeContentCardUIViewControllerDelegate`](https://braze-inc.github.io/braze-swift-sdk/documentation/brazeui/brazecontentcarduiviewcontrollerdelegate) protocol and set your delegate object as the `delegate` property of your `BrazeContentCardUI.ViewController`. This delegate will handle passing the data of your custom object back to Braze to be logged. For an example, see [Content Cards UI tutorial](https://braze-inc.github.io/braze-swift-sdk/tutorials/braze/c2-contentcardsui/).
```swift
// Set the delegate when creating the Content Cards controller
contentCardsController.delegate = delegate
// Method to implement in delegate
func contentCard(
_ controller: BrazeContentCardUI.ViewController,
shouldProcess clickAction: Braze.ContentCard.ClickAction,
card: Braze.ContentCard
) -> Bool {
// Intercept the content card click action here.
return true
}
```
```objc
// Set the delegate when creating the Content Cards controller
contentCardsController.delegate = delegate;
// Method to implement in delegate
- (BOOL)contentCardController:(BRZContentCardUIViewController *)controller
shouldProcess:(NSURL *)url
card:(BRZContentCardRaw *)card {
// Intercept the content card click action here.
return YES;
}
```
**Important:**
To handle control variant Content Cards in your custom UI, pass in your [`Braze.ContentCard.Control`](https://braze-inc.github.io/braze-swift-sdk/documentation/brazekit/braze/contentcard/control(_:)) object, then call the `logImpression` method as you would with any other Content Card type. The object will implicitly log a control impression to inform our analytics of when a user would have seen the control card.
Log impression events when cards are viewed by users:
```javascript
Braze.logContentCardImpression(card.id);
```
Log card click events when users interact with a card:
```javascript
Braze.logContentCardClicked(card.id);
```
Log dismissal events when a user dismisses a card:
```javascript
Braze.logContentCardDismissed(card.id);
```
## Handling on-click behavior
When a user clicks a Content Card in a custom feed, the on-click behavior (such as navigating to a URL, deep linking, or logging a custom event) is not handled automatically. Use [`handleBrazeAction`](https://js.appboycdn.com/web-sdk/latest/doc/modules/braze.html#handlebrazeaction) to process the card's URL and execute the configured on-click action, including Braze actions (`brazeActions://` URLs).
```javascript
import * as braze from "@braze/web-sdk";
// In your card click handler
function onCardClick(card) {
// Log the click
braze.logContentCardClick(card);
// Handle the on-click behavior
if (card.url) {
braze.handleBrazeAction(card.url);
}
}
```
| Parameter | Description |
|---|---|
| `url` | A valid URL, or a valid Braze action URL with the scheme `brazeActions://`. |
| `openLinkInNewTab` | (Optional) Whether the URL should open in a new tab. Defaults to `false`. |
{: .reset-td-br-1 .reset-td-br-2 aria-label="Handling on-click behavior" }
**Important:**
If you don't call `handleBrazeAction()`, on-click behaviors configured in the Braze dashboard (such as "Log Custom Event" or "Navigate to URL") won't execute for cards displayed in a custom feed.
On-click behavior is handled automatically by the default Content Cards UI. For custom implementations, use the [`IContentCardsActionListener`](https://braze-inc.github.io/braze-android-sdk/kdoc/braze-android-sdk/com.braze.ui.contentcards.listeners/-i-content-cards-action-listener/index.html) interface described in the [Logging analytics](#logging-analytics) section above.
On-click behavior is handled automatically by the default Content Cards UI. For custom implementations, use the [`BrazeContentCardUIViewControllerDelegate`](https://braze-inc.github.io/braze-swift-sdk/documentation/brazeui/brazecontentcarduiviewcontrollerdelegate) protocol described in the [Logging analytics](#logging-analytics) section above.
## Dispensas únicas maiores que impressões únicas {#unique-dismissals-higher-than-unique-impressions}
Se *Dispensas únicas* excede *Impressões únicas*, sua integração personalizada de Content Cards registrou dispensas sem registrar impressões para esses mesmos cartões. A interface padrão de Content Cards da Braze registra ambos automaticamente, então essa discrepância aparece apenas quando você usa uma interface personalizada.
Registre uma impressão cada vez que exibir um cartão e registre uma dispensa quando o usuário dispensá-lo. Para nomes de métodos e exemplos, consulte as seções de plataforma abaixo.
## Análise de dados ausente nos Content Cards {#missing-content-cards-analytics}
Se os Content Cards aparecem corretamente no seu app, mas você não recebe nenhuma análise de dados de forma consistente (impressões, cliques etc.), provavelmente trata-se de um problema de integração de SDK.
- **Visualizações personalizadas de Content Cards (Android, iOS, Web):** A interface padrão da Braze registra impressões e cliques automaticamente em todas as plataformas. Se você está usando uma visualização ou implementação personalizada de Content Cards, é necessário chamar os métodos de registro apropriados explicitamente dentro do seu aplicativo. Consulte [Registro de análise de dados](https://www.braze.com/docs/pt-br/pt-br/developer_guide/content_cards/logging_analytics/) para a sua plataforma. Para implementações Web personalizadas especificamente, verifique se o SDK Web da Braze está carregado, confira o console do navegador em busca de erros e confirme que os dados dos cartões estão sendo recebidos.
- **Inicialização do SDK e identificação do usuário:** Certifique-se de que o SDK esteja totalmente inicializado antes de exibir os cartões. Os eventos são descartados silenciosamente (não enfileirados) se o SDK não estiver inicializado, estiver em modo de inicialização com postergação ou desabilitado por GDPR. O SDK registra análise de dados para usuários anônimos, mas métricas do dashboard como "impressões diárias únicas" exigem uma identidade de usuário resolvida, então chame `changeUser` antes de exibir os cartões sempre que possível.
## ID do Content Card {#content-card-id}
Cada envio de Campaign para um destinatário gera um novo ID de Content Card. Se o mesmo usuário receber a Campaign novamente em um envio posterior, a Braze atribui um novo ID. Faça referência ao `id` do cartão ao registrar impressões, cliques e dispensas em implementações personalizadas.
# Deep linking em Content Cards
Source: /docs/pt-br/developer_guide/content_cards/deep_linking/index.md
# Deep linking em Content Cards {#deep-linking-in-content-cards}
> Aprenda como fazer deep link dentro de um Content Card usando o SDK da Braze. Para saber mais sobre deep links, confira [O que é deep linking?](https://www.braze.com/docs/pt-br/pt-br/user_guide/messaging/design_and_edit/personalize/actions_and_media_urls/#what-is-deep-linking).
Neste momento, deep links de Content Cards não são suportados para o SDK Web da Braze.
## Prerequisites
Before you can use this feature, you'll need to [integrate the Android Braze SDK](https://www.braze.com/docs/pt-br/pt-br/developer_guide/sdk_integration/?sdktab=android).
## Creating a universal delegate
The Android SDK provides the ability to set a single delegate object to custom handle all deep links opened by Braze across Content Cards, in-app messages, and push notifications.
Your delegate object should implement the [`IBrazeDeeplinkHandler`](https://braze-inc.github.io/braze-android-sdk/kdoc/braze-android-sdk/com.braze.ui/-braze-deeplink-handler/index.html) interface and be set using [`BrazeDeeplinkHandler.setBrazeDeeplinkHandler()`](https://braze-inc.github.io/braze-android-sdk/kdoc/braze-android-sdk/com.braze.ui/-braze-deeplink-handler/-companion/set-braze-deeplink-handler.html). In most cases, the delegate should be set in your app's `Application.onCreate()`.
The following is an example of overriding the default [`UriAction`](https://braze-inc.github.io/braze-android-sdk/kdoc/braze-android-sdk/com.braze.ui.actions/-uri-action/index.html) behavior with custom intent flags and custom behavior for YouTube URLs:
```java
public class CustomDeeplinkHandler implements IBrazeDeeplinkHandler {
private static final String TAG = BrazeLogger.getBrazeLogTag(CustomDeeplinkHandler.class);
@Override
public void gotoUri(Context context, UriAction uriAction) {
String uri = uriAction.getUri().toString();
// Open YouTube URLs in the YouTube app and not our app
if (!StringUtils.isNullOrBlank(uri) && uri.contains("youtube.com")) {
uriAction.setUseWebView(false);
}
CustomUriAction customUriAction = new CustomUriAction(uriAction);
customUriAction.execute(context);
}
public static class CustomUriAction extends UriAction {
public CustomUriAction(@NonNull UriAction uriAction) {
super(uriAction);
}
@Override
protected void openUriWithActionView(Context context, Uri uri, Bundle extras) {
Intent intent = getActionViewIntent(context, uri, extras);
intent.setFlags(Intent.FLAG_ACTIVITY_NEW_TASK | Intent.FLAG_ACTIVITY_CLEAR_TOP | Intent.FLAG_ACTIVITY_SINGLE_TOP);
if (intent.resolveActivity(context.getPackageManager()) != null) {
context.startActivity(intent);
} else {
BrazeLogger.w(TAG, "Could not find appropriate activity to open for deep link " + uri + ".");
}
}
}
}
```
```kotlin
class CustomDeeplinkHandler : IBrazeDeeplinkHandler {
override fun gotoUri(context: Context, uriAction: UriAction) {
val uri = uriAction.uri.toString()
// Open YouTube URLs in the YouTube app and not our app
if (!StringUtils.isNullOrBlank(uri) && uri.contains("youtube.com")) {
uriAction.useWebView = false
}
val customUriAction = CustomUriAction(uriAction)
customUriAction.execute(context)
}
class CustomUriAction(uriAction: UriAction) : UriAction(uriAction) {
override fun openUriWithActionView(context: Context, uri: Uri, extras: Bundle) {
val intent = getActionViewIntent(context, uri, extras)
intent.flags = Intent.FLAG_ACTIVITY_NEW_TASK or Intent.FLAG_ACTIVITY_CLEAR_TOP or Intent.FLAG_ACTIVITY_SINGLE_TOP
if (intent.resolveActivity(context.packageManager) != null) {
context.startActivity(intent)
} else {
BrazeLogger.w(TAG, "Could not find appropriate activity to open for deep link $uri.")
}
}
}
companion object {
private val TAG = BrazeLogger.getBrazeLogTag(CustomDeeplinkHandler::class.java)
}
}
```
## Deep linking to app settings
To allow deep links to directly open your app's settings, you'll need a custom `BrazeDeeplinkHandler`. In the following example, the presence of a custom key-value pair called `open_notification_page` will make the deep link open the app's settings page:
```java
BrazeDeeplinkHandler.setBrazeDeeplinkHandler(new IBrazeDeeplinkHandler() {
@Override
public void gotoUri(Context context, UriAction uriAction) {
final Bundle extras = uriAction.getExtras();
if (extras.containsKey("open_notification_page")) {
Intent intent = new Intent();
intent.setAction("android.settings.APP_NOTIFICATION_SETTINGS");
intent.setFlags(Intent.FLAG_ACTIVITY_NEW_TASK);
//for Android 5-7
intent.putExtra("app_package", context.getPackageName());
intent.putExtra("app_uid", context.getApplicationInfo().uid);
// for Android 8 and later
intent.putExtra("android.provider.extra.APP_PACKAGE", context.getPackageName());
context.startActivity(intent);
}
}
});
```
```kotlin
BrazeDeeplinkHandler.setBrazeDeeplinkHandler(object : IBrazeDeeplinkHandler {
override fun gotoUri(context: Context, uriAction: UriAction) {
val extras = uriAction.extras
if (extras.containsKey("open_notification_page")) {
val intent = Intent()
intent.action = "android.settings.APP_NOTIFICATION_SETTINGS"
intent.flags = Intent.FLAG_ACTIVITY_NEW_TASK
//for Android 5-7
intent.putExtra("app_package", context.packageName)
intent.putExtra("app_uid", context.applicationInfo.uid)
// for Android 8 and later
intent.putExtra("android.provider.extra.APP_PACKAGE", context.packageName)
context.startActivity(intent)
}
}
})
```
## Customizing WebView activity {#Custom_Webview_Activity}
When Braze opens website deeplinks inside the app, the deeplinks are handled by [`BrazeWebViewActivity`](https://braze-inc.github.io/braze-android-sdk/kdoc/braze-android-sdk/com.braze.ui/-braze-web-view-activity/index.html).
**Note:**
For custom HTML in-app messages, links configured with `target="_blank"` open in the device's default web browser and are not handled by `BrazeWebViewActivity`.
To change this:
1. Create a new Activity that handles the target URL from `Intent.getExtras()` with the key `com.braze.Constants.BRAZE_WEBVIEW_URL_EXTRA`. For an example, see [`BrazeWebViewActivity.kt`](https://github.com/braze-inc/braze-android-sdk/blob/master/android-sdk-ui/src/main/java/com/braze/ui/BrazeWebViewActivity.kt).
2. Add that activity to `AndroidManifest.xml` and set `exported` to `false`.
```xml
```
3. Set your custom Activity in a `BrazeConfig` [builder object](https://braze-inc.github.io/braze-android-sdk/kdoc/braze-android-sdk/com.braze.configuration/-braze-config/-builder/set-custom-web-view-activity-class.html). Build the builder and pass it to [`Braze.configure()`](https://braze-inc.github.io/braze-android-sdk/kdoc/braze-android-sdk/com.braze/-braze/-companion/configure.html) in your [`Application.onCreate()`](https://developer.android.com/reference/android/app/Application.html#onCreate()).
```java
BrazeConfig brazeConfig = new BrazeConfig.Builder()
.setCustomWebViewActivityClass(MyCustomWebViewActivity::class)
...
.build();
Braze.configure(this, brazeConfig);
```
```kotlin
val brazeConfig = BrazeConfig.Builder()
.setCustomWebViewActivityClass(MyCustomWebViewActivity::class.java)
...
.build()
Braze.configure(this, brazeConfig)
```
## Troubleshooting
If deep links from push notifications aren't working on Android, try the following steps:
1. **Test the deep link outside of Braze.** Open the deep link URL from another app, such as email or a browser. If it doesn't open your app, the deep link may not be configured correctly in your `AndroidManifest.xml`. For more information, see Android's [Create Deep Links](https://developer.android.com/training/app-links/deep-linking) documentation.
2. **Check that automatic deep link handling is enabled.** Verify that `com_braze_handle_push_deep_links_automatically` is set to `true` in `braze.xml`, or set this option through [runtime configuration](https://www.braze.com/docs/pt-br/pt-br/developer_guide/sdk_initalization/?sdktab=android). Without this setting, Braze doesn't automatically open your app and deep link destination when someone taps a push notification.
3. **Verify your deep link handler delegate.** If you set a custom `IBrazeDeeplinkHandler`, confirm that your `gotoUri` implementation handles the URI and doesn't drop it.
4. **Test across channels.** If the same deep link works in an in-app message but not from push, the issue is likely in your push deep link handling, not in the deep link itself.
## Using Jetpack Compose
To handle deeplinks when using Jetpack Compose with NavHost:
1. Ensure that the activity handling your deeplink is registered in the Android Manifest.
```xml
```
2. In NavHost, specify which deeplinks you want it to handle.
```kotlin
composableWithCompositionLocal(
route = "YOUR_ROUTE_HERE",
deepLinks = listOf(navDeepLink {
uriPattern = "myapp://articles/{${MainDestinations.ARTICLE_ID_KEY}}"
}),
arguments = listOf(
navArgument(MainDestinations.ARTICLE_ID_KEY) {
type = NavType.LongType
}
),
) { backStackEntry ->
val arguments = requireNotNull(backStackEntry.arguments)
val articleId = arguments.getLong(MainDestinations.ARTICLE_ID_KEY)
ArticleDetail(
articleId
)
}
```
3. Depending on your app architecture, you may need to handle the new intent that's sent to your current activity as well.
```kotlin
DisposableEffect(Unit) {
val listener = Consumer {
navHostController.handleDeepLink(it)
}
addOnNewIntentListener(listener)
onDispose { removeOnNewIntentListener(listener) }
}
```
## Prerequisites
Before you can use this feature, you'll need to [integrate the Swift Braze SDK](https://www.braze.com/docs/pt-br/pt-br/developer_guide/sdk_integration/?sdktab=swift).
**Tip:**
For help choosing between custom scheme deep links, universal links, and "Open Web URL Inside App," see [iOS deep linking guide](https://www.braze.com/docs/pt-br/pt-br/developer_guide/push_notifications/ios_deep_linking_guide). For troubleshooting, see [Deep linking troubleshooting](https://www.braze.com/docs/pt-br/pt-br/developer_guide/push_notifications/deep_linking_troubleshooting).
## Handling deep links
### Step 1: Register a scheme {#register-a-scheme}
To handle deep linking, a custom scheme must be stated in your `Info.plist` file. The navigation structure is defined by an array of dictionaries. Each of those dictionaries contains an array of strings.
Use Xcode to edit your `Info.plist` file:
1. Add a new key, `URL types`. Xcode will automatically make this an array containing a dictionary called `Item 0`.
2. Within `Item 0`, add a key `URL identifier`. Set the value to your custom scheme.
3. Within `Item 0`, add a key `URL Schemes`. This will automatically be an array containing a `Item 0` string.
4. Set `URL Schemes` >> `Item 0` to your custom scheme.
Alternatively, if you wish to edit your `Info.plist` file directly, you can follow this spec:
```html
CFBundleURLTypesCFBundleURLNameYOUR.SCHEMECFBundleURLSchemesYOUR.SCHEME
```
### Step 2: Add a scheme allowlist
You must declare the URL schemes you wish to pass to `canOpenURL(_:)` by adding the `LSApplicationQueriesSchemes` key to your app's Info.plist file. Attempting to call schemes outside this allowlist will cause the system to record an error in the device's logs, and the deep link will not open. An example of this error will look like this:
```
: -canOpenURL: failed for URL: "yourapp://deeplink" – error: "This app is not allowed to query for scheme yourapp"
```
For example, if an in-app message should open the Facebook app when tapped, the app has to have the Facebook custom scheme (`fb`) in your allowlist. Otherwise, the system will reject the deep link. Deep links that direct to a page or view inside your own app still require that your app's custom scheme be listed in your app's `Info.plist`.
Your example allowlist might look something like:
```html
LSApplicationQueriesSchemesmyappfbtwitter
```
For more information, refer to [Apple's documentation](https://developer.apple.com/library/content/documentation/General/Reference/InfoPlistKeyReference/Articles/LaunchServicesKeys.html#//apple_ref/doc/uid/TP40009250-SW14) on the `LSApplicationQueriesSchemes` key.
### Step 3: Implement a handler
After activating your app, iOS will call the method [`application:openURL:options:`](https://developer.apple.com/reference/uikit/uiapplicationdelegate/1623112-application?language=objc). The important argument is the [NSURL](https://developer.apple.com/library/ios/DOCUMENTATION/Cocoa/Reference/Foundation/Classes/NSURL_Class/Reference/Reference.html#//apple_ref/doc/c_ref/NSURL) object.
```swift
func application(_ app: UIApplication, open url: URL, options: [UIApplication.OpenURLOptionsKey : Any] = [:]) -> Bool {
let path = url.path
let query = url.query
// Insert your code here to take some action based upon the path and query.
return true
}
```
```objc
- (BOOL)application:(UIApplication *)app openURL:(NSURL *)url options:(NSDictionary *)options {
NSString *path = [url path];
NSString *query = [url query];
// Insert your code here to take some action based upon the path and query.
return YES;
}
```
## App Transport Security (ATS)
As defined by [Apple](https://developer.apple.com/library/prerelease/ios/releasenotes/General/WhatsNewIniOS/Articles/iOS9.html#//apple_ref/doc/uid/TP40016198-SW14), "App Transport Security is a feature that improves the security of connections between an app and web services. The feature consists of default connection requirements that conform to best practices for secure connections. Apps can override this default behavior and turn off transport security."
ATS is applied by default. It requires that all connections use HTTPS and are encrypted using TLS 1.2 with forward secrecy. Refer to [Requirements for Connecting Using ATS](https://developer.apple.com/library/ios/documentation/General/Reference/InfoPlistKeyReference/Articles/CocoaKeys.html#//apple_ref/doc/uid/TP40009251-SW35) for more information. All images served by Braze to end devices are handled by a content delivery network ("CDN") that supports TLS 1.2 and is compatible with ATS.
Unless they are specified as exceptions in your application's `Info.plist`, connections that do not follow these requirements will fail with errors that are similar to the following.
**Example Error 1:**
```bash
CFNetwork SSLHandshake failed (-9801)
Error Domain=NSURLErrorDomain Code=-1200 "An SSL error has occurred, and a secure connection to the server cannot be made."
```
**Example Error 2:**
```bash
NSURLSession/NSURLConnection HTTP load failed (kCFStreamErrorDomainSSL, -9802)
```
ATS compliance is enforced for links opened within the mobile app (our default handling of clicked links) and does not apply to sites opened externally via a web browser.
### Working with ATS
You can handle ATS in either of the following ways, but we recommend **complying with ATS requirements**.
Your Braze integration can satisfy ATS requirements by ensuring that any existing links you drive users to (for example, though in-app message and push campaigns) satisfy ATS requirements. While there are ways to bypass ATS restrictions, our recommendation is to ensure that all linked URLs are ATS-compliant. Given Apple's increasing emphasis on application security, the following approaches to allowing ATS exceptions are not guaranteed to be supported by Apple.
You can allow a subset of links with certain domains or schemes to be treated as exceptions to the ATS rules. Your Braze integration will satisfy ATS requirements if every link you use in a Braze messaging channel is either ATS compliant or handled by an exception.
To add a domain as an exception of the ATS, add following to your app's `Info.plist` file:
```html
NSAppTransportSecurityNSAllowsArbitraryLoadsNSExceptionDomainsexample.comNSExceptionAllowsInsecureHTTPLoadsNSIncludesSubdomains
```
Refer to Apple's article on [app transport security keys](https://developer.apple.com/library/ios/documentation/General/Reference/InfoPlistKeyReference/Articles/CocoaKeys.html#//apple_ref/doc/uid/TP40009251-SW33) for more information.
You can turn off ATS entirely. Note that this is not recommended practice, due to both lost security protections and future iOS compatibility. To disable ATS, insert the following in your app's `Info.plist` file:
```html
NSAppTransportSecurityNSAllowsArbitraryLoads
```
## Decoding URLs
The SDK percent-encodes links to create valid `URL`s. All link characters that are not allowed in a properly formed URL, such as Unicode characters, will be percent escaped.
To decode an encoded link, use the `String` property [`removingPercentEncoding`](https://developer.apple.com/documentation/swift/stringprotocol/removingpercentencoding). You must also return `true` in the `BrazeDelegate.braze(_:shouldOpenURL:)`. A call to action is required to trigger the handling of the URL by your app. For example:
```swift
func application(_ app: UIApplication, open url: URL, options: [UIApplication.OpenURLOptionsKey : Any] = [:]) -> Bool {
let urlString = url.absoluteString.removingPercentEncoding
// Handle urlString
return true
}
```
```objc
- (BOOL)application:(UIApplication *)application openURL:(NSURL *)url options:(NSDictionary *)options {
NSString *urlString = [url.absoluteString stringByRemovingPercentEncoding];
// Handle urlString
return YES;
}
```
## Deep linking to app settings
You can take advantage of `UIApplicationOpenSettingsURLString` to deep link users to your app's settings from Braze push notifications and in-app messages.
To take users from your app into the iOS settings:
1. First, make sure your application is set up for either [scheme-based deep links](#swift_register-a-scheme) or [universal links](#swift_universal-links).
2. Decide on a URI for deep linking to the **Settings** page (for example, `myapp://settings` or `https://www.braze.com/settings`).
3. If you are using custom scheme-based deep links, add the following code to your `application:openURL:options:` method:
```swift
func application(_ app: UIApplication, open url: URL, options: [UIApplicationOpenURLOptionsKey : Any] = [:]) -> Bool {
let path = url.path
if (path == "settings") {
UIApplication.shared.openURL(URL(string:UIApplication.openSettingsURLString)!)
}
return true
}
```
```objc
- (BOOL)application:(UIApplication *)app
openURL:(NSURL *)url
options:(NSDictionary *)options {
NSString *path = [url path];
if ([path isEqualToString:@"settings"]) {
NSURL *settingsURL = [NSURL URLWithString:UIApplicationOpenSettingsURLString];
[[UIApplication sharedApplication] openURL:settingsURL];
}
return YES;
}
```
## Customization options {#customization-options}
### Default WebView customization
The `Braze.WebViewController` class displays web URLs opened by the SDK, typically when "Open Web URL Inside App" is selected for a web deep link.
You can customize the `Braze.WebViewController` via the [`BrazeDelegate.braze(_:willPresentModalWithContext:)`](https://braze-inc.github.io/braze-swift-sdk/documentation/brazekit/brazedelegate/braze(_:willpresentmodalwithcontext:)-12sqy/) delegate method.
### Linking handling customization
The `BrazeDelegate` protocol can be used to customize the handling of URLs such as deep links, web URLs, and universal links. To set the delegate during Braze initialization, set a delegate object on the `Braze` instance. Braze will then call your delegate's implementation of `shouldOpenURL` before handling any URIs.
When a push notification or in-app message uses **Open web URL inside mobile app**, Braze passes `context.useWebView == true` on [`Braze.URLContext`](https://braze-inc.github.io/braze-swift-sdk/documentation/brazekit/braze/urlcontext). When the message opens the URL in the system browser instead, `useWebView` is `false`. Inspect `context.useWebView` in `braze(_:shouldOpenURL:)` to branch your custom handling—for example, to open an in-app `WebViewController` only when the campaign requested in-app display.
#### Universal links {#universal-links}
Braze supports universal links in push notifications, in-app messages, and Content Cards. To enable universal link support, [`configuration.forwardUniversalLinks`](https://braze-inc.github.io/braze-swift-sdk/documentation/brazekit/braze/configuration-swift.class/forwarduniversallinks) must be set to `true`.
When enabled, Braze will forward universal links to your app's `AppDelegate` via the [`application:continueUserActivity:restorationHandler:`](https://developer.apple.com/documentation/uikit/uiapplicationdelegate/1623072-application) method.
Your application also needs to be set up to handle universal links. Refer to [Apple's documentation](https://developer.apple.com/documentation/xcode/supporting-universal-links-in-your-app) to ensure your application is configured correctly for universal links.
**Warning:**
Universal link forwarding requires access to the application entitlements. When running the application in a simulator, these entitlements are not directly available and universal links are not forwarded to the system handlers.
To add support to simulator builds, you can add the application `.entitlements` file to the _Copy Bundle Resources_ build phase. See [`forwardUniversalLinks`](https://braze-inc.github.io/braze-swift-sdk/documentation/brazekit/braze/configuration-swift.class/forwarduniversallinks) documentation for more details.
**Note:**
The SDK does not query your domains' `apple-app-site-association` file. It performs the differentiation between universal links and regular URLs by looking at the domain name only. As a result, the SDK does not respect any exclusion rule defined in the `apple-app-site-association` per [Supporting associated domains](https://developer.apple.com/documentation/xcode/supporting-associated-domains).
## Examples
### BrazeDelegate
Here's an example using `BrazeDelegate`. For more information, see [Braze Swift SDK reference](https://braze-inc.github.io/braze-swift-sdk/documentation/brazekit/brazedelegate).
```swift
func braze(_ braze: Braze, shouldOpenURL context: Braze.URLContext) -> Bool {
if context.url.host == "MY-DOMAIN.com" {
// Custom handle link here
return false
}
// Let Braze handle links otherwise
return true
}
```
```objc
- (BOOL)braze:(Braze *)braze shouldOpenURL:(BRZURLContext *)context {
if ([[context.url.host lowercaseString] isEqualToString:@"MY-DOMAIN.com"]) {
// Custom handle link here
return NO;
}
// Let Braze handle links otherwise
return YES;
}
```
# Incorporar GIFs em Cartões de Conteúdo
Source: /docs/pt-br/developer_guide/content_cards/embedding_gifs/index.md
# Incorporar GIFs em Cartões de Conteúdo
> Aprenda como incorporar GIFs em Cartões de Conteúdo usando o SDK do Braze.
**Note:**
Para SDKs wrapper não listados, use o método nativo relevante do Android ou Swift. Lembre-se de que os SDKs do Braze para Android e Swift não suportam GIFs animados nativamente, então você implementará GIFs em Cartões de Conteúdo usando ferramentas de terceiros.
O suporte a GIF está incluído por padrão na integração do SDK Web.
## About GIFs
Braze offers the ability to use a custom image library to display animated GIFs. Although the example below uses [Glide](https://bumptech.github.io/glide/), any image library that supports GIFs is compatible.
## Integrating a custom image library
### Step 1: Creating the image loader delegate
The Image Loader delegate must implement the following methods:
* [`getInAppMessageBitmapFromUrl()`](https://braze-inc.github.io/braze-android-sdk/kdoc/braze-android-sdk/com.braze.images/-i-braze-image-loader/get-in-app-message-bitmap-from-url.html)
* [`getPushBitmapFromUrl()`](https://braze-inc.github.io/braze-android-sdk/kdoc/braze-android-sdk/com.braze.images/-i-braze-image-loader/get-push-bitmap-from-url.html)
* [`renderUrlIntoCardView()`](https://braze-inc.github.io/braze-android-sdk/kdoc/braze-android-sdk/com.braze.images/-i-braze-image-loader/render-url-into-card-view.html)
* [`renderUrlIntoInAppMessageView()`](https://braze-inc.github.io/braze-android-sdk/kdoc/braze-android-sdk/com.braze.images/-i-braze-image-loader/render-url-into-in-app-message-view.html)
* [`setOffline()`](https://braze-inc.github.io/braze-android-sdk/kdoc/braze-android-sdk/com.braze.images/-i-braze-image-loader/set-offline.html)
The integration example below is taken from the [Glide integration sample app](https://github.com/braze-inc/braze-android-sdk/tree/master/samples/glide-image-integration) included with the Braze Android SDK.
```java
import com.braze.support.BrazeLogger;
import com.bumptech.glide.load.resource.gif.GifDrawable;
import android.graphics.drawable.Drawable;
public class GlideBrazeImageLoader implements IBrazeImageLoader {
private static final String TAG = GlideBrazeImageLoader.class.getName();
private RequestOptions mRequestOptions = new RequestOptions();
@Override
public void renderUrlIntoCardView(Context context, Card card, String imageUrl, ImageView imageView, BrazeViewBounds viewBounds) {
renderUrlIntoView(context, imageUrl, imageView);
}
@Override
public void renderUrlIntoInAppMessageView(Context context, IInAppMessage inAppMessage, String imageUrl, ImageView imageView, BrazeViewBounds viewBounds) {
renderUrlIntoView(context, imageUrl, imageView);
}
@Override
public Bitmap getPushBitmapFromUrl(Context context, Bundle extras, String imageUrl, BrazeViewBounds viewBounds) {
return getBitmapFromUrl(context, imageUrl, viewBounds);
}
@Override
public Bitmap getInAppMessageBitmapFromUrl(Context context, IInAppMessage inAppMessage, String imageUrl, BrazeViewBounds viewBounds) {
return getBitmapFromUrl(context, imageUrl, viewBounds);
}
private void renderUrlIntoView(Context context, String imageUrl, ImageView imageView) {
try {
final Drawable drawable = Glide.with(context)
.load(imageUrl)
.apply(mRequestOptions)
.submit()
.get();
imageView.post(() -> {
imageView.setImageDrawable(drawable);
if (drawable instanceof GifDrawable) {
((GifDrawable) drawable).start();
}
});
} catch (Exception e) {
BrazeLogger.e(TAG, "Failed to render URL into view: " + imageUrl, e);
}
}
private Bitmap getBitmapFromUrl(Context context, String imageUrl, BrazeViewBounds viewBounds) {
try {
return Glide.with(context)
.asBitmap()
.apply(mRequestOptions)
.load(imageUrl).submit().get();
} catch (Exception e) {
Log.e(TAG, "Failed to retrieve bitmap at url: " + imageUrl, e);
}
return null;
}
@Override
public void setOffline(boolean isOffline) {
// If the loader is offline, then we should only be retrieving from the cache
mRequestOptions = mRequestOptions.onlyRetrieveFromCache(isOffline);
}
}
```
```kotlin
import com.braze.support.BrazeLogger
import com.bumptech.glide.load.resource.gif.GifDrawable
class GlideBrazeImageLoader : IBrazeImageLoader {
companion object {
private val TAG = GlideBrazeImageLoader::class.qualifiedName
}
private var mRequestOptions = RequestOptions()
override fun renderUrlIntoCardView(context: Context, card: Card, imageUrl: String, imageView: ImageView, viewBounds: BrazeViewBounds) {
renderUrlIntoView(context, imageUrl, imageView)
}
override fun renderUrlIntoInAppMessageView(context: Context, inAppMessage: IInAppMessage, imageUrl: String, imageView: ImageView, viewBounds: BrazeViewBounds) {
renderUrlIntoView(context, imageUrl, imageView)
}
override fun getPushBitmapFromUrl(context: Context, extras: Bundle, imageUrl: String, viewBounds: BrazeViewBounds): Bitmap? {
return getBitmapFromUrl(context, imageUrl, viewBounds)
}
override fun getInAppMessageBitmapFromUrl(context: Context, inAppMessage: IInAppMessage, imageUrl: String, viewBounds: BrazeViewBounds): Bitmap? {
return getBitmapFromUrl(context, imageUrl, viewBounds)
}
private fun renderUrlIntoView(context: Context, imageUrl: String, imageView: ImageView) {
try {
val drawable = Glide.with(context)
.load(imageUrl)
.apply(mRequestOptions)
.submit()
.get()
imageView.post {
imageView.setImageDrawable(drawable)
if (drawable is GifDrawable) {
drawable.start()
}
}
} catch (e: Exception) {
BrazeLogger.e(TAG, "Failed to render URL into view: $imageUrl", e)
}
}
private fun getBitmapFromUrl(context: Context, imageUrl: String, viewBounds: BrazeViewBounds): Bitmap? {
try {
return Glide.with(context)
.asBitmap()
.apply(mRequestOptions)
.load(imageUrl).submit().get()
} catch (e: Exception) {
Log.e(TAG, "Failed to retrieve bitmap at url: $imageUrl", e)
}
return null
}
override fun setOffline(isOffline: Boolean) {
// If the loader is offline, then we should only be retrieving from the cache
mRequestOptions = mRequestOptions.onlyRetrieveFromCache(isOffline)
}
}
```
### Fixing image loading for Android SDK 36.0.0 and later
In Android SDK 36.0.0 and later, `displayInAppMessage()` is a `suspend` function. This means `renderUrlIntoInAppMessageView()` runs on a background thread instead of the main thread.
If your custom image loader calls `Glide.into(imageView)` in `renderUrlIntoInAppMessageView()`, your app can fail with "You must call this method on the main thread."
To avoid this:
1. Load the image on the background thread with `submit().get()`.
2. Post the UI update to the main thread with `imageView.post { ... }`.
3. If the loaded result is a GIF drawable, start the animation after setting it on the view.
This separates image loading from UI rendering, and keeps your custom image loader compatible with Android SDK 36.0.0 and later.
This guidance applies to Android custom image loaders. Web in-app messages support GIFs out of the box.
The following Kotlin sample uses placeholder values to show this pattern:
```kotlin
private const val TAG = "SampleGlideLoader"
private const val glideBrazeImageLoaderTag = "sample-loader"
private fun renderUrlIntoView(
context: Context,
imageUrl: String,
imageView: ImageView
) {
try {
val drawable: Drawable = Glide.with(context)
.load(imageUrl)
.apply(mRequestOptions)
.submit()
.get()
imageView.post {
imageView.setImageDrawable(drawable)
if (drawable is GifDrawable) {
drawable.start()
}
}
} catch (e: Exception) {
Log.e(TAG, "$glideBrazeImageLoaderTag renderUrlIntoView failed: url=$imageUrl", e)
}
}
```
### Step 2: Setting the image loader delegate
The Braze SDK will use any custom image loader set with [`IBrazeImageLoader`](https://braze-inc.github.io/braze-android-sdk/kdoc/braze-android-sdk/com.braze.images/-i-braze-image-loader/index.html). We recommend setting the custom image loader in a custom application subclass:
```java
public class GlideIntegrationApplication extends Application {
@Override
public void onCreate() {
super.onCreate();
Braze.getInstance(context).setImageLoader(new GlideBrazeImageLoader());
}
}
```
```kotlin
class GlideIntegrationApplication : Application() {
override fun onCreate() {
super.onCreate()
Braze.getInstance(context).imageLoader = GlideBrazeImageLoader()
}
}
```
## Custom Image Loading with Jetpack Compose
To override image loading with Jetpack Compose, you can pass in a value to [`imageComposable`](https://braze-inc.github.io/braze-android-sdk/kdoc/braze-android-sdk/com.braze.jetpackcompose.contentcards.styling/-content-card-styling/index.html#-808910455%2FProperties%2F-1725759721). This function will take a `Card` and render the image and the modifiers needed. Alternatively, you can use `customCardComposer` of `ContentCardsList` to render the entire card.
In the following example, Glide's Compose library is used for the cards listed in the `imageComposable` function:
```kotlin
ContentCardsList(
cardStyle = ContentCardStyling(
imageComposable = { card ->
when (card.cardType) {
CardType.CAPTIONED_IMAGE -> {
val captionedImageCard = card as CaptionedImageCard
GlideImage(
modifier = Modifier
.fillMaxWidth()
.wrapContentHeight()
.run {
if (captionedImageCard.aspectRatio > 0) {
aspectRatio(captionedImageCard.aspectRatio)
} else {
this
}
},
contentScale = ContentScale.Crop,
model = captionedImageCard.url,
loading = placeholder(R.drawable.pushpin),
contentDescription = ""
)
}
CardType.IMAGE -> {
val imageOnlyCard = card as ImageOnlyCard
GlideImage(
modifier = Modifier
.fillMaxWidth()
.run {
if (imageOnlyCard.aspectRatio > 0) {
aspectRatio(imageOnlyCard.aspectRatio)
} else {
this
}
},
contentScale = ContentScale.Crop,
model = imageOnlyCard.url,
loading = placeholder(R.drawable.pushpin),
contentDescription = ""
)
}
CardType.SHORT_NEWS -> {
val shortNews = card as ShortNewsCard
GlideImage(
modifier = Modifier
.width(100.dp)
.height(100.dp),
model = shortNews.url,
loading = placeholder(R.drawable.pushpin),
contentDescription = ""
)
}
else -> Unit
}
}
)
)
```
## Prerequisites
Before you can use this feature, you'll need to [integrate the Swift Braze SDK](https://www.braze.com/docs/pt-br/pt-br/developer_guide/sdk_integration/?sdktab=swift).
## Integrating a custom image library
### Step 1: Integrate SDWebImage
Integrate the [SDWebImage repository](https://github.com/SDWebImage/SDWebImage) into your Xcode project.
### Step 2: Create a new Swift file
In your Xcode project, create a new file named `SDWebImageGIFViewProvider.swift` and import the following:
```swift
import UIKit
import BrazeUI
import SDWebImage
```
### Step 3: Add `GIFViewProvider`
Next, add our sample SDWebImage [`GIFViewProvider`](https://braze-inc.github.io/braze-swift-sdk/documentation/brazeui/gifviewprovider/). Your file should be similar to the following:
```swift
import UIKit
import BrazeUI
import SDWebImage
extension GIFViewProvider {
/// A GIF view provider using [SDWebImage](https://github.com/SDWebImage/SDWebImage) as a
/// rendering library.
public static let sdWebImage = Self(
view: { SDAnimatedImageView(image: image(for: $0)) },
updateView: { ($0 as? SDAnimatedImageView)?.image = image(for: $1) }
)
private static func image(for url: URL?) -> UIImage? {
guard let url else { return nil }
return url.pathExtension == "gif"
? SDAnimatedImage(contentsOfFile: url.path)
: UIImage(contentsOfFile: url.path)
}
}
```
### Step 4: Modify your `AppDelegate.swift`
In your project's `AppDelegate.swift`, add GIF support to your `BrazeUI` components using `GIFViewProvider`. Your file should be similar to the following:
```swift
import UIKit
import BrazeKit
import BrazeUI
@main
class AppDelegate: UIResponder, UIApplicationDelegate {
static var braze: Braze? = nil
func application(
_ application: UIApplication,
didFinishLaunchingWithOptions launchOptions: [UIApplication.LaunchOptionsKey: Any]?
) -> Bool {
/* ... */
GIFViewProvider.shared = .sdWebImage
return true
}
}
```
# Tutorial: Criando uma Caixa de Entrada com Cartões de Conteúdo
Source: /docs/pt-br/developer_guide/content_cards/content_card_inbox/index.md
# Tutorial: Criando uma Caixa de Entrada com Cartões de Conteúdo
> Siga o código de exemplo neste tutorial para construir uma caixa de entrada com Cartões de Conteúdo Braze.
## Prerequisites
Before you can use this feature, you'll need to [integrate the Android Braze SDK](https://www.braze.com/docs/pt-br/pt-br/developer_guide/sdk_integration/?sdktab=android).
## Criando uma caixa de entrada com Cartões de Conteúdo para Android (Compose)
**Important:**
We're piloting this new tutorial format. [Tell us what you think](https://docs.google.com/forms/d/e/1FAIpQLSe_5uhWM7eXXk9F_gviO_pvA4rkYO3WA9B6tNJZ3TY91md5bw/viewform?usp=pp_url&entry.569173304=General+Feedback) — your feedback helps us improve future guides.
```kotlin file=MainApplication.kt
import android.app.Application
import com.braze.Braze
import com.braze.support.BrazeLogger
import com.braze.configuration.BrazeConfig
import android.util.Log
class ContentCardsApplication : Application() {
override fun onCreate() {
super.onCreate()
// Turn on verbose Braze logging
BrazeLogger.enableVerboseLogging()
// Configure Braze with your SDK key & endpoint
val config = BrazeConfig.Builder()
.setApiKey("YOUR_API_KEY")
.setCustomEndpoint("YOUR_API_ENDPOINT")
.build()
Braze.configure(this, config)
}
}
```
```kotlin file=ContentCardsInboxScreen.kt
import android.content.Intent
import android.net.Uri
import androidx.compose.foundation.clickable
import androidx.compose.foundation.layout.*
import androidx.compose.foundation.lazy.LazyColumn
import androidx.compose.foundation.lazy.items
import androidx.compose.material3.*
import androidx.compose.runtime.*
import androidx.compose.ui.Modifier
import androidx.compose.ui.platform.LocalContext
import androidx.compose.ui.text.font.FontWeight
import androidx.compose.ui.unit.dp
import androidx.compose.ui.unit.sp
import com.braze.Braze
import com.braze.events.ContentCardsUpdatedEvent
import com.braze.events.IEventSubscriber
import com.braze.models.cards.*
@Composable
fun ContentCardInboxScreen() {
val context = LocalContext.current
var cards by remember { mutableStateOf>(emptyList()) }
val loggedImpressions = remember { mutableSetOf() }
DisposableEffect(Unit) {
val subscriber = IEventSubscriber { event ->
cards = event.allCards.filter { !it.isControl }
}
Braze.getInstance(context).subscribeToContentCardsUpdates(subscriber)
Braze.getInstance(context).requestContentCardsRefresh(false)
onDispose {
Braze.getInstance(context)
.removeSingleSubscription(subscriber, ContentCardsUpdatedEvent::class.java)
}
}
Column(modifier = Modifier.fillMaxSize()) {
Text(
text = "Message Inbox",
fontSize = 20.sp,
fontWeight = FontWeight.Bold,
modifier = Modifier.padding(start = 16.dp, end = 16.dp, top = 12.dp, bottom = 8.dp)
)
LazyColumn(
modifier = Modifier
.fillMaxSize()
.padding(horizontal = 16.dp)
) {
items(cards, key = { it.id }) { card ->
ContentCardItem(
card = card,
onImpression = {
if (!loggedImpressions.contains(card.id)) {
card.logImpression()
loggedImpressions.add(card.id)
}
},
onClick = {
card.logClick()
card.url?.let {
context.startActivity(Intent(Intent.ACTION_VIEW, Uri.parse(it)))
}
}
)
}
}
}
}
@Composable
fun ContentCardItem(
card: Card,
onImpression: () -> Unit,
onClick: () -> Unit
) {
// Log impression when the card becomes visible
LaunchedEffect(card.id) {
onImpression()
}
val title = when (card) {
is CaptionedImageCard -> card.title
is ShortNewsCard -> card.title
is TextAnnouncementCard -> card.title
else -> null
}
val description = when (card) {
is CaptionedImageCard -> card.description
is ShortNewsCard -> card.description
is TextAnnouncementCard -> card.description
else -> null
}
Card(
modifier = Modifier
.fillMaxWidth()
.padding(vertical = 4.dp)
.clickable { onClick() }
) {
Column(modifier = Modifier.padding(16.dp)) {
title?.let {
Text(
text = it,
fontWeight = FontWeight.Bold,
fontSize = 16.sp
)
}
description?.let {
Spacer(modifier = Modifier.height(4.dp))
Text(
text = it,
fontSize = 14.sp
)
}
}
}
}
```
!!etapa
linhas-MainApplication.kt=12
#### 1\. Ativar depuração (opcional)
Para facilitar a solução de problemas durante o desenvolvimento, considere ativar a depuração.
!!etapa
linhas-ContentCardsInboxScreen.kt=47-69
#### 2\. Construa uma visualização de UI
Para Jetpack Compose, use um [`LazyColumn`]() para exibir Cartões de Conteúdo em uma lista rolável.
!!etapa
linhas-ContentCardsInboxScreen.kt=25-37
#### 3\. Inscreva-se para atualizações de Cartões de Conteúdo
Use um [`DisposableEffect`]() para gerenciar o ciclo de vida da inscrição, garantindo a limpeza adequada quando o composable sai da composição.
!!etapa
linhas-ContentCardsInboxScreen.kt=84-95
#### 4\. Construa uma UI de caixa de entrada personalizada
Usar o [atributos]() do cartão de conteúdo, como `title`, `description` e `url`, permite que você construa Cartões de Conteúdo que atendam aos seus requisitos específicos de UI. Neste caso, estamos construindo uma caixa de entrada com os composables `Card` e `Column` do Jetpack Compose.
!!etapa
linhas-ContentCardsInboxScreen.kt=57,62
#### 5\. Rastrear impressões e cliques
Você pode registrar impressões e cliques usando os métodos [`logImpressions`]() e [`logClick`]() disponíveis para Cartões de Conteúdo.
Impressões devem ser registradas apenas uma vez quando um cartão é visualizado pelo usuário. Use `LaunchedEffect` para registrar impressões quando um cartão se torna visível. Observe que você pode precisar considerar o ciclo de vida da visualização do seu app, assim como o caso de uso, para garantir que as impressões sejam registradas corretamente.
## Criando uma caixa de entrada com Cartões de Conteúdo para Android (RecyclerView)
```kotlin file=MainApplication.kt
import android.app.Application
import com.braze.Braze
import com.braze.support.BrazeLogger
import com.braze.configuration.BrazeConfig
import android.util.Log
class ContentCardsApplication : Application() {
override fun onCreate() {
super.onCreate()
// Turn on verbose Braze logging
BrazeLogger.enableVerboseLogging()
// Configure Braze with your SDK key & endpoint
val config = BrazeConfig.Builder()
.setApiKey("YOUR_API_KEY")
.setCustomEndpoint("YOUR_API_ENDPOINT")
.build()
Braze.configure(this, config)
}
}
```
```kotlin file=ContentCardInboxActivity.kt
import android.content.Intent
import android.net.Uri
import android.os.Bundle
import androidx.activity.ComponentActivity
import androidx.recyclerview.widget.LinearLayoutManager
import androidx.recyclerview.widget.RecyclerView
import android.view.*
import android.widget.TextView
import com.braze.Braze
import com.braze.events.ContentCardsUpdatedEvent
import com.braze.events.IEventSubscriber
import com.braze.models.cards.*
class ContentCardsActivity : ComponentActivity() {
private val cards = mutableListOf()
private var subscriber: IEventSubscriber? = null
private lateinit var recyclerView: RecyclerView
private val adapter = ContentCardAdapter()
override fun onCreate(savedInstanceState: Bundle?) {
super.onCreate(savedInstanceState)
setContentView(R.layout.content_card_inbox)
recyclerView = findViewById(R.id.contentCardsRecyclerView)
recyclerView.layoutManager = LinearLayoutManager(this)
recyclerView.adapter = adapter
// Prepare the subscriber (attach/detach in onStart/onStop)
subscriber = IEventSubscriber { event ->
runOnUiThread {
cards.clear()
cards.addAll(event.allCards.filter { !it.isControl })
adapter.notifyDataSetChanged()
}
}
}
override fun onStart() {
super.onStart()
subscriber?.let {
Braze.getInstance(this).subscribeToContentCardsUpdates(it)
}
// Fetch fresh cards
Braze.getInstance(this).requestContentCardsRefresh(false)
}
override fun onStop() {
// Avoid leaks by removing the subscription when not visible
Braze.getInstance(this)
.removeSingleSubscription(subscriber, ContentCardsUpdatedEvent::class.java)
super.onStop()
}
inner class ContentCardAdapter :
RecyclerView.Adapter() {
inner class CardViewHolder(v: View) : RecyclerView.ViewHolder(v) {
val title: TextView = v.findViewById(android.R.id.text1)
val description: TextView = v.findViewById(android.R.id.text2)
}
override fun onCreateViewHolder(parent: ViewGroup, viewType: Int): CardViewHolder {
val view = LayoutInflater.from(parent.context)
.inflate(android.R.layout.simple_list_item_2, parent, false)
return CardViewHolder(view)
}
override fun getItemCount() = cards.size
override fun onBindViewHolder(holder: CardViewHolder, position: Int) {
val card = cards[position]
val title = when (card) {
is CaptionedImageCard -> card.title
is ShortNewsCard -> card.title
is TextAnnouncementCard -> card.title
else -> null
}
val description = when (card) {
is CaptionedImageCard -> card.description
is ShortNewsCard -> card.description
is TextAnnouncementCard -> card.description
else -> null
}
holder.title.text = title.orEmpty()
holder.description.text = description.orEmpty()
// Naive impression guard: only log the first time we bind a not-yet-viewed card.
if (!card.viewed) card.logImpression()
holder.itemView.setOnClickListener {
card.logClick()
card.url?.let { startActivity(Intent(Intent.ACTION_VIEW, Uri.parse(it))) }
}
}
}
}
```
```xml file=content_card_inbox.xml
```
!!etapa
linhas-MainApplication.kt=12
#### 1\. Ativar depuração (opcional)
Para facilitar a solução de problemas durante o desenvolvimento, considere ativar a depuração.
!!etapa
lines-content_card_inbox.xml=1-24
#### 2\. Construa uma visualização de UI
Neste tutorial, usamos o [`RecyclerView`]() do Android para exibir Cartões de Conteúdo, mas recomendamos construir uma interface com classes e componentes que se adequem ao seu caso de uso. Braze fornece a interface por padrão, mas este tutorial orienta você a criar uma visualização personalizada para personalizar a aparência e o comportamento.
!!etapa
linhas-ContentCardInboxActivity.kt=29-35,40-42,44
#### 3\. Inscreva-se para atualizações de Cartões de Conteúdo
Use [`subscribeToContentCardsUpdates`]() para permitir que sua interface responda quando novos Cartões de Conteúdo estiverem disponíveis. Aqui, os assinantes são registrados e removidos dentro dos ganchos do ciclo de vida da atividade.
!!etapa
linhas-ContentCardInboxActivity.kt=73-84
#### 4\. Construa uma UI de caixa de entrada personalizada
Usar o [atributos]() do Cartão de Conteúdo, como `title`, `description` e `url`, permite que você construa Cartões de Conteúdo que correspondam aos seus requisitos específicos de interface. Neste caso, estamos construindo uma caixa de entrada com o `RecyclerView` nativo do Android.
!!etapa
linhas-ContentCardInboxActivity.kt=90,93
#### 5\. Rastrear impressões e cliques
Você pode registrar impressões e cliques usando os métodos [`logImpressions`]() e [`logClick`]() disponíveis para Cartões de Conteúdo.
Impressões devem ser registradas apenas uma vez quando um cartão é visualizado pelo usuário. Aqui, usamos um mecanismo ingênuo para proteger contra registros duplicados com uma flag por cartão. Observe que você pode precisar considerar o ciclo de vida da visualização do seu app, assim como o caso de uso, para garantir que as impressões sejam registradas corretamente.
## Prerequisites
Before you can use this feature, you'll need to [integrate the Swift Braze SDK](https://www.braze.com/docs/pt-br/pt-br/developer_guide/sdk_integration/?sdktab=swift). Você também precisará [ativar mensagens no app para SWIFT](https://www.braze.com/docs/pt-br/pt-br/developer_guide/in_app_messages/?sdktab=swift#swift_enabling-in-app-messages).
## Criando uma caixa de entrada com Cartões de Conteúdo para SWIFT
**Important:**
We're piloting this new tutorial format. [Tell us what you think](https://docs.google.com/forms/d/e/1FAIpQLSe_5uhWM7eXXk9F_gviO_pvA4rkYO3WA9B6tNJZ3TY91md5bw/viewform?usp=pp_url&entry.569173304=General+Feedback) — your feedback helps us improve future guides.
```swift file=AppDelegate.swift
import SwiftUI
import BrazeKit
import BrazeUI
class AppDelegate: UIResponder, UIApplicationDelegate {
static var braze: Braze!
func application(
_ application: UIApplication,
didFinishLaunchingWithOptions launchOptions: [UIApplication.LaunchOptionsKey: Any]?
) -> Bool {
// Braze configuration with your SDK API key and endpoint
let configuration = Braze.Configuration(apiKey: "YOUR_API_ENDPOINT", endpoint: "YOUR_API_KEY")
configuration.logger.level = .debug
// Initialize Braze SDK instance
AppDelegate.braze = Braze(configuration: configuration)
return true
}
}
struct InboxViewControllerRepresentable: UIViewControllerRepresentable {
func makeUIViewController(context: Context) -> UINavigationController {
let vc = BrazeInboxViewController(style: .plain)
return UINavigationController(rootViewController: vc)
}
func updateUIViewController(_ uiViewController: UINavigationController, context: Context) {}
}
struct ContentView: View {
var body: some View {
NavigationView {
InboxViewControllerRepresentable()
.navigationTitle("Message Inbox")
}
}
}
```
```swift file=SampleApp.swift
import SwiftUI
@main
struct SampleApp: App {
@UIApplicationDelegateAdaptor(AppDelegate.self) var delegate
var body: some Scene {
WindowGroup {
ContentView()
}
}
}
```
```swift file=BrazeInboxView.swift
import SwiftUI
import UIKit
import BrazeKit
class BrazeInboxViewController: UITableViewController {
private var cards: [Braze.ContentCard] = []
private var subscription: Any?
private var loggedImpressions = Set()
override func viewDidLoad() {
super.viewDidLoad()
tableView.register(UITableViewCell.self, forCellReuseIdentifier: "CardCell")
tableView.rowHeight = 100
subscription = AppDelegate.braze.contentCards.subscribeToUpdates { [weak self] updatedCards in
self?.cards = updatedCards
self?.tableView.reloadData()
}
AppDelegate.braze.contentCards.requestRefresh()
}
override func numberOfSections(in tableView: UITableView) -> Int { 1 }
override func tableView(_ tableView: UITableView, numberOfRowsInSection section: Int) -> Int {
cards.count
}
override func tableView(_ tableView: UITableView, cellForRowAt indexPath: IndexPath) -> UITableViewCell {
let card = cards[indexPath.row]
let cell = tableView.dequeueReusableCell(withIdentifier: "CardCell", for: indexPath)
// Work with the content card's title and description
cell.textLabel?.numberOfLines = 2
cell.textLabel?.text = [card.title, card.description].compactMap { $0 }.joined(separator: "\n")
return cell
}
override func tableView(_ tableView: UITableView, didSelectRowAt indexPath: IndexPath) {
let card = cards[indexPath.row]
card.logClick(using: AppDelegate.braze)
if let url = card.clickAction?.url {
UIApplication.shared.open(url, options: [:], completionHandler: nil)
}
tableView.deselectRow(at: indexPath, animated: true)
}
override func tableView(_ tableView: UITableView,
willDisplay cell: UITableViewCell,
forRowAt indexPath: IndexPath) {
let card = cards[indexPath.row]
if !loggedImpressions.contains(card.id) {
card.logImpression(using: AppDelegate.braze)
}
}
}
```
!!etapa
linhas-AppDelegate.swift=15
#### 1\. Ativar depuração (opcional)
Para facilitar a solução de problemas durante o desenvolvimento, considere ativar a depuração.
!!etapa
linhas-BrazeInboxView.swift=5
#### 2\. Construa uma visualização de interface
Neste tutorial, usamos o [`UITableViewController`](https://developer.apple.com/documentation/uikit/uitableviewcontroller) do Swift, mas recomendamos construir uma interface com classes e componentes que se adequem ao seu caso de uso.
!!etapa
linhas-BrazeInboxView.swift=15-20
#### 3\. Inscreva-se para atualizações de Cartões de Conteúdo
Inscreva-se no ouvinte de Cartões de Conteúdo para receber as últimas atualizações e, em seguida, chame `requestRefresh()` para solicitar os últimos Cartões de Conteúdo para esse usuário.
!!etapa
linhas-BrazeInboxView.swift=34-35
#### 4\. Construa uma UI de caixa de entrada personalizada
Usar o Cartão de Conteúdo [`attributes`](https://braze-inc.github.io/braze-swift-sdk/documentation/brazekit/braze/contentcard), como `title`, `description` e `imageUrl`, permite que você construa Cartões de Conteúdo que correspondam aos seus requisitos específicos de interface. Neste caso, estamos construindo uma caixa de entrada com as APIs de tabela nativas do Swift.
!!etapa
linhas-BrazeInboxView.swift=8,43,49-56
#### 5\. Rastrear impressões e cliques
Você pode registrar impressões e cliques usando os métodos [`logClick(using:)`]() e [`logImpression(using:)`]() disponíveis para um cartão de conteúdo.
Além disso, você pode usar [`logDismissed(using:)`]() para dispensas.
Impressões devem ser registradas apenas uma vez quando visualizadas pelo usuário. Aqui, um mecanismo ingênuo usando um `Set` e `willDisplay` é usado para alcançar isso. Observe que você pode precisar considerar o ciclo de vida da interface do seu app, bem como o caso de uso, para garantir que as impressões sejam registradas corretamente.
## Prerequisites
Before you can use this feature, you'll need to [integrate the Web Braze SDK](https://www.braze.com/docs/pt-br/pt-br/developer_guide/sdk_integration/?sdktab=web). No entanto, nenhuma configuração adicional é necessária.
## Criando uma caixa de entrada com Cartões de Conteúdo para Web
**Important:**
We're piloting this new tutorial format. [Tell us what you think](https://docs.google.com/forms/d/e/1FAIpQLSe_5uhWM7eXXk9F_gviO_pvA4rkYO3WA9B6tNJZ3TY91md5bw/viewform?usp=pp_url&entry.569173304=General+Feedback) — your feedback helps us improve future guides.
```js file=main.js
import * as braze from "@braze/web-sdk";
// Uncomment this if you'd like to run braze web SDK methods in the console
// window.braze = braze;
// initialize the Braze SDK
braze.initialize("YOUR_API_KEY", {
baseUrl: "YOUR_API_ENDPOINT",
enableLogging: true,
});
braze.openSession();
// --- DOM refs ---
const listEl = document.getElementById("cards-list");
// --- State for impression de-duping & lookup ---
const loggedImpressions = new Set();
const idToCard = new Map();
let observer = null;
// Utility: clean observer between renders
function resetObserver() {
if (observer) observer.disconnect();
observer = new IntersectionObserver(onIntersect, { threshold: 0.6 });
}
// Intersection callback: logs impression once when ≥60% visible
function onIntersect(entries) {
entries.forEach((entry) => {
if (!entry.isIntersecting) return;
const id = entry.target.dataset.cardId;
if (!id || loggedImpressions.has(id)) return;
const card = idToCard.get(id);
if (!card) return;
// Log a single-card impression and stop observing this element
braze.logContentCardImpressions([card]);
loggedImpressions.add(id);
observer.unobserve(entry.target);
});
}
// Renders cards into the DOM, sets up click + visibility tracking
function renderCards(cards) {
// Rebuild lookup and observer each render
idToCard.clear();
resetObserver();
listEl.textContent = ""; // clear list
cards.forEach((card) => {
// Skip control-group cards in UI; (optional) you could log impressions for them elsewhere
if (card.isControl) return;
idToCard.set(card.id, card);
const item = document.createElement("article");
item.className = "card-item";
item.dataset.cardId = card.id;
const h3 = document.createElement("h3");
h3.textContent = card.title || "";
const p = document.createElement("p");
p.textContent = card.description || "";
let img = undefined;
if (card.imageUrl) {
img = document.createElement("img");
img.src = card.imageUrl;
item.append(img);
}
const children = [h3, p];
if (img) {
children.push(img);
}
item.append(...children);
// Click tracking + action
item.addEventListener("click", (e) => {
braze.logContentCardClick(card);
if (card.url) {
// any url-handling logic for your use case
}
});
listEl.appendChild(item);
observer.observe(item);
});
}
// Subscribe to updates *then* ask for a refresh
braze.subscribeToContentCardsUpdates((updates) => {
const cards = updates.cards || [];
renderCards(cards);
});
braze.requestContentCardsRefresh();
```
```html file=index.html
Message Inbox
```
!!etapa
linhas-main.js=3-4,9
#### 1\. Ativar depuração (opcional)
Para facilitar a solução de problemas durante o desenvolvimento, considere ativar a depuração. Opcionalmente, você também pode executar métodos do Braze Web SDK no console.
!!etapa
linhas-index.html=1-44
#### 2\. Construa a interface
Crie uma interface para a página da caixa de entrada. Aqui, estamos construindo uma página HTML básica, que inclui um `div` com o id `cards-list`. Isso é usado como o contêiner de destino para renderizar cartões de conteúdo.
!!etapa
linhas-main.js=96-99,101
#### 3\. Inscreva-se para atualizações de Cartões de Conteúdo
Inscreva-se no ouvinte de cartões de conteúdo para receber as últimas atualizações e, em seguida, chame [`requestContentCardsRefresh()`]() para solicitar os últimos cartões de conteúdo para esse usuário. Alternativamente, chame o assinante antes de `openSession()` para uma atualização automática no início da sessão.
!!etapa
linhas-main.js=64,67,70-74
#### 4\. Construa os elementos da caixa de entrada
Usar o cartão de conteúdo [atributos]() como `title`, `description` e `url` permite que você exiba cartões de conteúdo que correspondam aos seus requisitos específicos de UI.
!!etapa
linhas-main.js=22-25,28-43,84,91
#### 5\. Rastrear impressões e cliques
Você pode registrar impressões e cliques usando os métodos [`logContentCardImpressions`]() e [`logContentCardClick`]() disponíveis para Cartões de Conteúdo.
Além disso, você pode usar [`logCardDismissal`]() para dispensas.
Impressões devem ser registradas apenas uma vez quando visualizadas pelo usuário. Aqui, um `IntersectionObserver` mais um `Set` indexado por `card.id` impede logs duplicados. Observe que você pode precisar considerar o ciclo de vida da interface do seu app, bem como o caso de uso, para garantir que as impressões sejam registradas corretamente.
# Mensagens no aplicativo para o SDK Braze
Source: /docs/pt-br/developer_guide/in_app_messages/index.md
# Mensagem no app
> Saiba mais sobre mensagens no aplicativo e como configurá-las para o SDK Braze.
## Prerequisites
Before you can use this feature, you'll need to [integrate the Web Braze SDK](https://www.braze.com/docs/pt-br/pt-br/developer_guide/sdk_integration/?sdktab=web). However, no additional setup is required.
## Message types
All in-app messages inherit their prototype from [`InAppMessage`](https://js.appboycdn.com/web-sdk/latest/doc/classes/braze.inappmessage.html), which defines basic behavior and traits for all in-app messages. The prototypical subclasses are [`SlideUpMessage`](https://js.appboycdn.com/web-sdk/latest/doc/classes/braze.slideupmessage.html), [`ModalMessage`](https://js.appboycdn.com/web-sdk/latest/doc/classes/braze.modalmessage.html), [`FullScreenMessage`](https://js.appboycdn.com/web-sdk/latest/doc/classes/braze.fullscreenmessage.html), and [`HtmlMessage`](https://js.appboycdn.com/web-sdk/latest/doc/classes/braze.htmlmessage.html).
Each in-app message type is customizable across content, images, icons, click actions, analytics, display, and delivery.
[`SlideUp`](https://js.appboycdn.com/web-sdk/latest/doc/classes/braze.slideupmessage.html) in-app messages are so-named because traditionally on mobile platforms, they "slide up" or "slide down" from the top or bottom of the screen. In the Braze Web SDK, these messages are displayed as more of a Growl or Toast style notification to align with the web's dominant paradigm. They cover a small portion of the screen and provide an effective and non-intrusive messaging capability.
{: style="border:0px;"}
[`Modal`](https://js.appboycdn.com/web-sdk/latest/doc/classes/braze.modalmessage.html) in-app messages appear in the center of the screen and are framed by a translucent panel. Useful for more critical messaging, they can be equipped with up to two click action and analytics-enabled buttons.
{: style="border:0px;"}
[`Full`](https://js.appboycdn.com/web-sdk/latest/doc/classes/braze.fullscreenmessage.html) in-app messages are useful for maximizing the content and impact of your user communication. On narrow browser windows (for example, the mobile web), `full` in-app messages take up the entire browser window. On larger browser windows, `full` in-app messages appear similarly to `modal` in-app messages. The upper half of a `full` in-app message contains an image, and the lower half allows up to eight lines of text as well as up to two click action, and analytics-enabled buttons
{: style="border:0px;"}
[`HTML`](https://js.appboycdn.com/web-sdk/latest/doc/classes/braze.htmlmessage.html) in-app messages are useful for creating fully customized user content. User-defined HTML is displayed in an iFrame and may contain rich content, such as images, fonts, videos, and interactive elements, allowing for full control over message appearance and functionality. These support a JavaScript `brazeBridge` interface to call methods on the Braze Web SDK from within your HTML, see our [best practices](https://www.braze.com/docs/pt-br/pt-br/user_guide/message_building_by_channel/in-app_messages/best_practices/) for more details.
**Important:**
To enable HTML in-app messages through the Web SDK, you **must** supply the `allowUserSuppliedJavascript` initialization option to Braze, for example, `braze.initialize('YOUR-API_KEY', {allowUserSuppliedJavascript: true})`. This is for security reasons. HTML in-app messages can execute JavaScript, so we require a site maintainer to enable them.
The following example shows a paginated HTML in-app message:

## Prerequisites
Before you can use this feature, you'll need to [integrate the Android Braze SDK](https://www.braze.com/docs/pt-br/pt-br/developer_guide/sdk_integration/?sdktab=android). You'll also need to enable in-app messages.
## Message types
Braze offers several default in-app message types, each customizable with messages, images, [Font Awesome](https://fontawesome.com/icons?d=gallery&p=2) icons, click actions, analytics, color schemes, and more.
Their basic behavior and traits are defined by the [`IInAppMessage`](https://braze-inc.github.io/braze-android-sdk/kdoc/braze-android-sdk/com.braze.models.inappmessage/-i-in-app-message/index.html) interface, in a subclass called [`InAppMessageBase`](https://braze-inc.github.io/braze-android-sdk/kdoc/braze-android-sdk/com.braze.models.inappmessage/-in-app-message-base/index.html). `IInAppMessage` also includes a subinterface, [`IInAppMessageImmersive`](https://braze-inc.github.io/braze-android-sdk/kdoc/braze-android-sdk/com.braze.models.inappmessage/-i-in-app-message-immersive/index.html), which lets you add close, click-action, and analytics [buttons](https://braze-inc.github.io/braze-android-sdk/kdoc/braze-android-sdk/com.braze.models.inappmessage/-message-button/index.html) to your app.
**Important:**
Keep in mind, in-app messages containing buttons will include the `clickAction` message in the final payload if the click action is added prior to adding the button text.
[`slideup`](https://braze-inc.github.io/braze-android-sdk/kdoc/braze-android-sdk/com.braze.models.inappmessage/-in-app-message-slideup/index.html) in-app messages are so-named because they "slide up" or "slide down" from the top or bottom of the screen. They cover a small portion of the screen and provide an effective and non-intrusive messaging capability.
The `slideup` in-app message object extends [`InAppMessageBase`](https://braze-inc.github.io/braze-android-sdk/kdoc/braze-android-sdk/com.braze.models.inappmessage/-in-app-message-base/index.html).
{: style="border:0px;"}
[`modal`](https://braze-inc.github.io/braze-android-sdk/kdoc/braze-android-sdk/com.braze.models.inappmessage/-in-app-message-modal/index.html) in-app messages appear in the center of the screen and are framed by a translucent panel. Useful for more critical messaging, they can be equipped with two click-action and analytics-enabled buttons.
This message type is a subclass of [`InAppMessageImmersiveBase`](https://braze-inc.github.io/braze-android-sdk/kdoc/braze-android-sdk/com.braze.models.inappmessage/-in-app-message-immersive-base/index.html), an abstract class that implements `IInAppMessageImmersive`, giving you the option to add custom functionality to your locally generated in-app messages.
{: style="border:0px;"}
[`full`](https://braze-inc.github.io/braze-android-sdk/kdoc/braze-android-sdk/com.braze.models.inappmessage/-in-app-message-full/index.html) in-app messages are useful for maximizing the content and impact of your user communication. The upper half of a `full` in-app message contains an image, and the lower half displays text and up to two click action and analytics-enabled buttons.
This message type extends [`InAppMessageImmersiveBase`](https://braze-inc.github.io/braze-android-sdk/kdoc/braze-android-sdk/com.braze.models.inappmessage/-in-app-message-immersive-base/index.html), giving you the option to add custom functionality to your locally generated in-app messages.

[`HTML`](https://braze-inc.github.io/braze-android-sdk/kdoc/braze-android-sdk/com.braze.models.inappmessage/-in-app-message-html/index.html) in-app messages are useful for creating fully customized user content. User-defined HTML in-app message content is displayed in a `WebView` and may optionally contain other rich content, such as images and fonts, allowing for full control over message appearance and functionality.
This message type implements [`IInAppMessageHtml`](https://braze-inc.github.io/braze-android-sdk/kdoc/braze-android-sdk/com.braze.models.inappmessage/-i-in-app-message-html/index.html), which is a subclass of [`IInAppMessage`](https://braze-inc.github.io/braze-android-sdk/kdoc/braze-android-sdk/com.braze.models.inappmessage/-i-in-app-message/index.html).
**Note:**
On Android, links configured with `target="_blank"` in custom HTML in-app messages open in the device's default web browser.
Android in-app messages support a JavaScript `brazeBridge` interface to call methods on the Braze Android SDK from within your HTML, see our JavaScript bridge page for more details.
{: style="border:0px;"}
**Important:**
We currently do not support the display of custom HTML in-app messages in an iFrame on the iOS and Android platforms.
**Tip:**
You can also define custom in-app message views for your app. For a full walkthrough, see [Setting custom factories](https://www.braze.com/docs/pt-br/pt-br/developer_guide/in_app_messages/customization#android_setting-custom-factories).
## Enabling in-app messages
### Step 1: Register `BrazeInAppMessageManager`
In-app message display is managed by the [`BrazeInAppMessageManager`](https://braze-inc.github.io/braze-android-sdk/kdoc/braze-android-sdk/com.braze.ui.inappmessage/-braze-in-app-message-manager/index.html) class. Every activity in your app must be registered with the `BrazeInAppMessageManager` to allow it to add in-app message views to the view hierarchy. There are two ways to accomplish this:
The [activity lifecycle callback integration](https://www.braze.com/docs/pt-br/pt-br/developer_guide/sdk_integration#android_step-4-enable-user-session-tracking) handles in-app message registration automatically; no extra integration is required. This is the recommended method for handling in-app message registration.
**Warning:**
If you're using activity lifecycle callback for automatic registration, do not complete this step.
In your [`Application.onCreate()`](https://developer.android.com/reference/android/app/Application.html#onCreate()), call [`ensureSubscribedToInAppMessageEvents()`](https://braze-inc.github.io/braze-android-sdk/kdoc/braze-android-sdk/com.braze.ui.inappmessage/-braze-in-app-message-manager/ensure-subscribed-to-in-app-message-events.html):
```java
BrazeInAppMessageManager.getInstance().ensureSubscribedToInAppMessageEvents(context);
```
```kotlin
BrazeInAppMessageManager.getInstance().ensureSubscribedToInAppMessageEvents(context)
```
In every activity where in-app messages can be shown, call [`registerInAppMessageManager()`](https://braze-inc.github.io/braze-android-sdk/kdoc/braze-android-sdk/com.braze.ui.inappmessage/-braze-in-app-message-manager/register-in-app-message-manager.html) in that activity's `onResume()`:
```java
@Override
public void onResume() {
super.onResume();
// Registers the BrazeInAppMessageManager for the current Activity. This Activity will now listen for
// in-app messages from Braze.
BrazeInAppMessageManager.getInstance().registerInAppMessageManager(activity);
}
```
```kotlin
public override fun onResume() {
super.onResume()
// Registers the BrazeInAppMessageManager for the current Activity. This Activity will now listen for
// in-app messages from Braze.
BrazeInAppMessageManager.getInstance().registerInAppMessageManager(this)
}
```
In every activity where [`registerInAppMessageManager()`](https://braze-inc.github.io/braze-android-sdk/kdoc/braze-android-sdk/com.braze.ui.inappmessage/-braze-in-app-message-manager/register-in-app-message-manager.html) was called, call [`unregisterInAppMessageManager()`](https://braze-inc.github.io/braze-android-sdk/kdoc/braze-android-sdk/com.braze.ui.inappmessage/-braze-in-app-message-manager/unregister-in-app-message-manager.html) in that activity's `onPause()`:
```java
@Override
public void onPause() {
super.onPause();
// Unregisters the BrazeInAppMessageManager for the current Activity.
BrazeInAppMessageManager.getInstance().unregisterInAppMessageManager(activity);
}
```
```kotlin
public override fun onPause() {
super.onPause()
// Unregisters the BrazeInAppMessageManager.
BrazeInAppMessageManager.getInstance().unregisterInAppMessageManager(this)
}
```
### Step 2: Update the manager's blocklist (optional)
In your integration, you may require that certain activities in your app should not show in-app messages. The [activity lifecycle callback integration](https://www.braze.com/docs/pt-br/pt-br/developer_guide/sdk_integration#android_step-4-enable-user-session-tracking) provides an easy way to accomplish this.
The following sample code adds two activities to the in-app message registration blocklist, `SplashActivity` and `SettingsActivity`:
```java
public class MyApplication extends Application {
@Override
public void onCreate() {
super.onCreate();
Set inAppMessageBlocklist = new HashSet<>();
inAppMessageBlocklist.add(SplashActivity.class);
inAppMessageBlocklist.add(SettingsActivity.class);
registerActivityLifecycleCallbacks(new BrazeActivityLifecycleCallbackListener(inAppMessageBlocklist));
}
}
```
```kotlin
class MyApplication : Application() {
override fun onCreate() {
super.onCreate()
val inAppMessageBlocklist = HashSet>()
inAppMessageBlocklist.add(SplashActivity::class.java)
inAppMessageBlocklist.add(SettingsActivity::class.java)
registerActivityLifecycleCallbacks(BrazeActivityLifecycleCallbackListener(inAppMessageBlocklist))
}
}
```
## Prerequisites
Before you can use this feature, you'll need to [integrate the Swift Braze SDK](https://www.braze.com/docs/pt-br/pt-br/developer_guide/sdk_integration/?sdktab=swift). You'll also need to enable in-app messages.
## Message types
Each in-app message type is highly customizable across content, images, icons, click actions, analytics, display, and delivery. They are enumerated types of `Braze.InAppMessage`, which defines basic behavior and traits for all in-app messages. For the full list of in-app message properties and usage, see the [`InAppMessage` class](https://braze-inc.github.io/braze-swift-sdk/documentation/brazekit/braze/inappmessage).
These are the available in-app message types in Braze and how they will look like for end-users.
[`Slideup`](https://braze-inc.github.io/braze-swift-sdk/documentation/brazekit/braze/inappmessage/slideup-swift.struct) in-app messages are given this name because they "slide up" or "slide down" from the top or bottom of the screen. They cover a small portion of the screen and provide an effective and non-intrusive messaging capability.
{: style="max-width:35%;border:none;"}
[`Modal`](https://braze-inc.github.io/braze-swift-sdk/documentation/brazekit/braze/inappmessage/modal-swift.struct) in-app messages appear in the center of the screen and are framed by a translucent panel. Useful for more critical messaging, they can be equipped with up to two analytics-enabled buttons.
{: style="max-width:35%;border:none;"}
[`Modal Image`](https://braze-inc.github.io/braze-swift-sdk/documentation/brazekit/braze/inappmessage/modalimage-swift.struct) in-app messages appear in the center of the screen and are framed by a translucent panel. These messages are similar to the `Modal` type except without header or message text. Useful for more critical messaging, they can be equipped with up to two analytics-enabled buttons.
{: style="max-width:35%;border:none;"}
[`Full`](https://braze-inc.github.io/braze-swift-sdk/documentation/brazekit/braze/inappmessage/full-swift.struct) in-app messages are useful for maximizing the content and impact of your user communication. The upper half of a `Full` in-app message contains an image, and the lower half displays text and up to two analytics-enabled buttons.
{: style="max-width:35%;border:none;"}
[`Full Image`](https://braze-inc.github.io/braze-swift-sdk/documentation/brazekit/braze/inappmessage/fullimage-swift.struct) in-app messages are similar to `Full` in-app messages except without header or message text. This message type is useful for maximizing the content and impact of your user communication. A `Full Image` in-app message contains an image spanning the entire screen, with the option to display up to two analytics-enabled buttons.
{: style="max-width:35%;border:none;"}
[`HTML`](https://braze-inc.github.io/braze-swift-sdk/documentation/brazekit/braze/inappmessage/html-swift.struct) in-app messages are useful for creating fully customized user content. User-defined HTML Full in-app message content is displayed in a `WKWebView`and may optionally contain other rich content, such as images and fonts, allowing for full control over message appearance and functionality.
iOS in-app messages support a JavaScript `brazeBridge` interface to call methods on the Braze Web SDK from within your HTML, see our [best practices](https://www.braze.com/docs/pt-br/pt-br/user_guide/message_building_by_channel/in-app_messages/best_practices/) for more details.
The following example shows a paginated HTML Full in-app message:

Note that we currently do not support the display of custom HTML in-app messages in an iFrame on the iOS and Android platforms.
[`Control`](https://braze-inc.github.io/braze-swift-sdk/documentation/brazekit/braze/inappmessage/control-swift.struct) in-app messages do not contain a UI component and are used primarily for analytics purposes. This type is used to verify receipt of an in-app message sent to a control group.
For further details about Intelligent Selection and control groups, refer to [Intelligent Selection](https://www.braze.com/docs/pt-br/pt-br/user_guide/brazeai/intelligence/intelligent_selection/).
## Enabling in-app messages
### Step 1: Create an implementation of `BrazeInAppMessagePresenter`
To let Braze display in-app messages, create an implementation of the `BrazeInAppMessagePresenter` protocol and assign it to the optional `inAppMessagePresenter` on your Braze instance. You can also use the default Braze UI presenter by instantiating a `BrazeInAppMessageUI` object.
Note that you will need to import the `BrazeUI` library to access the `BrazeInAppMessageUI` class.
```swift
AppDelegate.braze?.inAppMessagePresenter = BrazeInAppMessageUI()
```
```objc
AppDelegate.braze.inAppMessagePresenter = [[BrazeInAppMessageUI alloc] init];
```
### Step 2: Handle no matching triggers
Implement [`BrazeDelegate.(_:noMatchingTriggerForEvent)`](https://braze-inc.github.io/braze-swift-sdk/documentation/brazekit/brazedelegate/braze(_:nomatchingtriggerforevent:)-8rt7y/) within the relevant `BrazeDelegate` class. When Braze fails to find a matching trigger for a particular event, it will call this method automatically.
## Prerequisites
Before you can use this feature, you'll need to [integrate the Android Braze SDK](https://www.braze.com/docs/pt-br/pt-br/developer_guide/sdk_integration/?sdktab=android).
## About TV and OTT support
The Android Braze SDK natively supports displaying in-app messages on OTT devices like Android TV or Fire Stick. However, there's some key differences between native Android and OTT in-app messages. For OTT devices:
- In-app messages that require touch mode, such as slideup, are disabled on OTT.
- The currently selected or focused item, such as a button or close button, will be highlighted.
- Body clicks on the in-app message itself, such as not on a button, are not supported.
## Prerequisites
Before you can use this feature, you'll need to [integrate the Cordova Braze SDK](https://www.braze.com/docs/pt-br/pt-br/developer_guide/sdk_integration/?sdktab=cordova).
## Message types
Braze offers several default in-app message types, each customizable with messages, images, [Font Awesome](https://fontawesome.com/icons?d=gallery&p=2) icons, click actions, analytics, color schemes, and more.
Their basic behavior and traits are defined by the [`IInAppMessage`](https://braze-inc.github.io/braze-android-sdk/kdoc/braze-android-sdk/com.braze.models.inappmessage/-i-in-app-message/index.html) interface, in a subclass called [`InAppMessageBase`](https://braze-inc.github.io/braze-android-sdk/kdoc/braze-android-sdk/com.braze.models.inappmessage/-in-app-message-base/index.html). `IInAppMessage` also includes a subinterface, [`IInAppMessageImmersive`](https://braze-inc.github.io/braze-android-sdk/kdoc/braze-android-sdk/com.braze.models.inappmessage/-i-in-app-message-immersive/index.html), which lets you add close, click-action, and analytics [buttons](https://braze-inc.github.io/braze-android-sdk/kdoc/braze-android-sdk/com.braze.models.inappmessage/-message-button/index.html) to your app.
**Important:**
Keep in mind, in-app messages containing buttons will include the `clickAction` message in the final payload if the click action is added prior to adding the button text.
[`slideup`](https://braze-inc.github.io/braze-android-sdk/kdoc/braze-android-sdk/com.braze.models.inappmessage/-in-app-message-slideup/index.html) in-app messages are so-named because they "slide up" or "slide down" from the top or bottom of the screen. They cover a small portion of the screen and provide an effective and non-intrusive messaging capability.
The `slideup` in-app message object extends [`InAppMessageBase`](https://braze-inc.github.io/braze-android-sdk/kdoc/braze-android-sdk/com.braze.models.inappmessage/-in-app-message-base/index.html).
{: style="border:0px;"}
[`modal`](https://braze-inc.github.io/braze-android-sdk/kdoc/braze-android-sdk/com.braze.models.inappmessage/-in-app-message-modal/index.html) in-app messages appear in the center of the screen and are framed by a translucent panel. Useful for more critical messaging, they can be equipped with two click-action and analytics-enabled buttons.
This message type is a subclass of [`InAppMessageImmersiveBase`](https://braze-inc.github.io/braze-android-sdk/kdoc/braze-android-sdk/com.braze.models.inappmessage/-in-app-message-immersive-base/index.html), an abstract class that implements `IInAppMessageImmersive`, giving you the option to add custom functionality to your locally generated in-app messages.
{: style="border:0px;"}
[`full`](https://braze-inc.github.io/braze-android-sdk/kdoc/braze-android-sdk/com.braze.models.inappmessage/-in-app-message-full/index.html) in-app messages are useful for maximizing the content and impact of your user communication. The upper half of a `full` in-app message contains an image, and the lower half displays text and up to two click action and analytics-enabled buttons.
This message type extends [`InAppMessageImmersiveBase`](https://braze-inc.github.io/braze-android-sdk/kdoc/braze-android-sdk/com.braze.models.inappmessage/-in-app-message-immersive-base/index.html), giving you the option to add custom functionality to your locally generated in-app messages.

[`HTML`](https://braze-inc.github.io/braze-android-sdk/kdoc/braze-android-sdk/com.braze.models.inappmessage/-in-app-message-html/index.html) in-app messages are useful for creating fully customized user content. User-defined HTML in-app message content is displayed in a `WebView` and may optionally contain other rich content, such as images and fonts, allowing for full control over message appearance and functionality.
This message type implements [`IInAppMessageHtml`](https://braze-inc.github.io/braze-android-sdk/kdoc/braze-android-sdk/com.braze.models.inappmessage/-i-in-app-message-html/index.html), which is a subclass of [`IInAppMessage`](https://braze-inc.github.io/braze-android-sdk/kdoc/braze-android-sdk/com.braze.models.inappmessage/-i-in-app-message/index.html).
**Note:**
On Android, links configured with `target="_blank"` in custom HTML in-app messages open in the device's default web browser.
Android in-app messages support a JavaScript `brazeBridge` interface to call methods on the Braze Android SDK from within your HTML, see our JavaScript bridge page for more details.
{: style="border:0px;"}
**Important:**
We currently do not support the display of custom HTML in-app messages in an iFrame on the iOS and Android platforms.
**Tip:**
You can also define custom in-app message views for your app. For a full walkthrough, see [Setting custom factories](https://www.braze.com/docs/pt-br/pt-br/developer_guide/in_app_messages/customization#android_setting-custom-factories).
Each in-app message type is highly customizable across content, images, icons, click actions, analytics, display, and delivery. They are enumerated types of `Braze.InAppMessage`, which defines basic behavior and traits for all in-app messages. For the full list of in-app message properties and usage, see the [`InAppMessage` class](https://braze-inc.github.io/braze-swift-sdk/documentation/brazekit/braze/inappmessage).
These are the available in-app message types in Braze and how they will look like for end-users.
[`Slideup`](https://braze-inc.github.io/braze-swift-sdk/documentation/brazekit/braze/inappmessage/slideup-swift.struct) in-app messages are given this name because they "slide up" or "slide down" from the top or bottom of the screen. They cover a small portion of the screen and provide an effective and non-intrusive messaging capability.
{: style="max-width:35%;border:none;"}
[`Modal`](https://braze-inc.github.io/braze-swift-sdk/documentation/brazekit/braze/inappmessage/modal-swift.struct) in-app messages appear in the center of the screen and are framed by a translucent panel. Useful for more critical messaging, they can be equipped with up to two analytics-enabled buttons.
{: style="max-width:35%;border:none;"}
[`Modal Image`](https://braze-inc.github.io/braze-swift-sdk/documentation/brazekit/braze/inappmessage/modalimage-swift.struct) in-app messages appear in the center of the screen and are framed by a translucent panel. These messages are similar to the `Modal` type except without header or message text. Useful for more critical messaging, they can be equipped with up to two analytics-enabled buttons.
{: style="max-width:35%;border:none;"}
[`Full`](https://braze-inc.github.io/braze-swift-sdk/documentation/brazekit/braze/inappmessage/full-swift.struct) in-app messages are useful for maximizing the content and impact of your user communication. The upper half of a `Full` in-app message contains an image, and the lower half displays text and up to two analytics-enabled buttons.
{: style="max-width:35%;border:none;"}
[`Full Image`](https://braze-inc.github.io/braze-swift-sdk/documentation/brazekit/braze/inappmessage/fullimage-swift.struct) in-app messages are similar to `Full` in-app messages except without header or message text. This message type is useful for maximizing the content and impact of your user communication. A `Full Image` in-app message contains an image spanning the entire screen, with the option to display up to two analytics-enabled buttons.
{: style="max-width:35%;border:none;"}
[`HTML`](https://braze-inc.github.io/braze-swift-sdk/documentation/brazekit/braze/inappmessage/html-swift.struct) in-app messages are useful for creating fully customized user content. User-defined HTML Full in-app message content is displayed in a `WKWebView`and may optionally contain other rich content, such as images and fonts, allowing for full control over message appearance and functionality.
iOS in-app messages support a JavaScript `brazeBridge` interface to call methods on the Braze Web SDK from within your HTML, see our [best practices](https://www.braze.com/docs/pt-br/pt-br/user_guide/message_building_by_channel/in-app_messages/best_practices/) for more details.
The following example shows a paginated HTML Full in-app message:

Note that we currently do not support the display of custom HTML in-app messages in an iFrame on the iOS and Android platforms.
[`Control`](https://braze-inc.github.io/braze-swift-sdk/documentation/brazekit/braze/inappmessage/control-swift.struct) in-app messages do not contain a UI component and are used primarily for analytics purposes. This type is used to verify receipt of an in-app message sent to a control group.
For further details about Intelligent Selection and control groups, refer to [Intelligent Selection](https://www.braze.com/docs/pt-br/pt-br/user_guide/brazeai/intelligence/intelligent_selection/).
## Prerequisites
Before you can use this feature, you'll need to [integrate the Flutter Braze SDK](https://www.braze.com/docs/pt-br/pt-br/developer_guide/sdk_integration/?sdktab=flutter).
## Message types
Braze offers several default in-app message types, each customizable with messages, images, [Font Awesome](https://fontawesome.com/icons?d=gallery&p=2) icons, click actions, analytics, color schemes, and more.
Their basic behavior and traits are defined by the [`IInAppMessage`](https://braze-inc.github.io/braze-android-sdk/kdoc/braze-android-sdk/com.braze.models.inappmessage/-i-in-app-message/index.html) interface, in a subclass called [`InAppMessageBase`](https://braze-inc.github.io/braze-android-sdk/kdoc/braze-android-sdk/com.braze.models.inappmessage/-in-app-message-base/index.html). `IInAppMessage` also includes a subinterface, [`IInAppMessageImmersive`](https://braze-inc.github.io/braze-android-sdk/kdoc/braze-android-sdk/com.braze.models.inappmessage/-i-in-app-message-immersive/index.html), which lets you add close, click-action, and analytics [buttons](https://braze-inc.github.io/braze-android-sdk/kdoc/braze-android-sdk/com.braze.models.inappmessage/-message-button/index.html) to your app.
**Important:**
Keep in mind, in-app messages containing buttons will include the `clickAction` message in the final payload if the click action is added prior to adding the button text.
[`slideup`](https://braze-inc.github.io/braze-android-sdk/kdoc/braze-android-sdk/com.braze.models.inappmessage/-in-app-message-slideup/index.html) in-app messages are so-named because they "slide up" or "slide down" from the top or bottom of the screen. They cover a small portion of the screen and provide an effective and non-intrusive messaging capability.
The `slideup` in-app message object extends [`InAppMessageBase`](https://braze-inc.github.io/braze-android-sdk/kdoc/braze-android-sdk/com.braze.models.inappmessage/-in-app-message-base/index.html).
{: style="border:0px;"}
[`modal`](https://braze-inc.github.io/braze-android-sdk/kdoc/braze-android-sdk/com.braze.models.inappmessage/-in-app-message-modal/index.html) in-app messages appear in the center of the screen and are framed by a translucent panel. Useful for more critical messaging, they can be equipped with two click-action and analytics-enabled buttons.
This message type is a subclass of [`InAppMessageImmersiveBase`](https://braze-inc.github.io/braze-android-sdk/kdoc/braze-android-sdk/com.braze.models.inappmessage/-in-app-message-immersive-base/index.html), an abstract class that implements `IInAppMessageImmersive`, giving you the option to add custom functionality to your locally generated in-app messages.
{: style="border:0px;"}
[`full`](https://braze-inc.github.io/braze-android-sdk/kdoc/braze-android-sdk/com.braze.models.inappmessage/-in-app-message-full/index.html) in-app messages are useful for maximizing the content and impact of your user communication. The upper half of a `full` in-app message contains an image, and the lower half displays text and up to two click action and analytics-enabled buttons.
This message type extends [`InAppMessageImmersiveBase`](https://braze-inc.github.io/braze-android-sdk/kdoc/braze-android-sdk/com.braze.models.inappmessage/-in-app-message-immersive-base/index.html), giving you the option to add custom functionality to your locally generated in-app messages.

[`HTML`](https://braze-inc.github.io/braze-android-sdk/kdoc/braze-android-sdk/com.braze.models.inappmessage/-in-app-message-html/index.html) in-app messages are useful for creating fully customized user content. User-defined HTML in-app message content is displayed in a `WebView` and may optionally contain other rich content, such as images and fonts, allowing for full control over message appearance and functionality.
This message type implements [`IInAppMessageHtml`](https://braze-inc.github.io/braze-android-sdk/kdoc/braze-android-sdk/com.braze.models.inappmessage/-i-in-app-message-html/index.html), which is a subclass of [`IInAppMessage`](https://braze-inc.github.io/braze-android-sdk/kdoc/braze-android-sdk/com.braze.models.inappmessage/-i-in-app-message/index.html).
**Note:**
On Android, links configured with `target="_blank"` in custom HTML in-app messages open in the device's default web browser.
Android in-app messages support a JavaScript `brazeBridge` interface to call methods on the Braze Android SDK from within your HTML, see our JavaScript bridge page for more details.
{: style="border:0px;"}
**Important:**
We currently do not support the display of custom HTML in-app messages in an iFrame on the iOS and Android platforms.
**Tip:**
You can also define custom in-app message views for your app. For a full walkthrough, see [Setting custom factories](https://www.braze.com/docs/pt-br/pt-br/developer_guide/in_app_messages/customization#android_setting-custom-factories).
Each in-app message type is highly customizable across content, images, icons, click actions, analytics, display, and delivery. They are enumerated types of `Braze.InAppMessage`, which defines basic behavior and traits for all in-app messages. For the full list of in-app message properties and usage, see the [`InAppMessage` class](https://braze-inc.github.io/braze-swift-sdk/documentation/brazekit/braze/inappmessage).
These are the available in-app message types in Braze and how they will look like for end-users.
[`Slideup`](https://braze-inc.github.io/braze-swift-sdk/documentation/brazekit/braze/inappmessage/slideup-swift.struct) in-app messages are given this name because they "slide up" or "slide down" from the top or bottom of the screen. They cover a small portion of the screen and provide an effective and non-intrusive messaging capability.
{: style="max-width:35%;border:none;"}
[`Modal`](https://braze-inc.github.io/braze-swift-sdk/documentation/brazekit/braze/inappmessage/modal-swift.struct) in-app messages appear in the center of the screen and are framed by a translucent panel. Useful for more critical messaging, they can be equipped with up to two analytics-enabled buttons.
{: style="max-width:35%;border:none;"}
[`Modal Image`](https://braze-inc.github.io/braze-swift-sdk/documentation/brazekit/braze/inappmessage/modalimage-swift.struct) in-app messages appear in the center of the screen and are framed by a translucent panel. These messages are similar to the `Modal` type except without header or message text. Useful for more critical messaging, they can be equipped with up to two analytics-enabled buttons.
{: style="max-width:35%;border:none;"}
[`Full`](https://braze-inc.github.io/braze-swift-sdk/documentation/brazekit/braze/inappmessage/full-swift.struct) in-app messages are useful for maximizing the content and impact of your user communication. The upper half of a `Full` in-app message contains an image, and the lower half displays text and up to two analytics-enabled buttons.
{: style="max-width:35%;border:none;"}
[`Full Image`](https://braze-inc.github.io/braze-swift-sdk/documentation/brazekit/braze/inappmessage/fullimage-swift.struct) in-app messages are similar to `Full` in-app messages except without header or message text. This message type is useful for maximizing the content and impact of your user communication. A `Full Image` in-app message contains an image spanning the entire screen, with the option to display up to two analytics-enabled buttons.
{: style="max-width:35%;border:none;"}
[`HTML`](https://braze-inc.github.io/braze-swift-sdk/documentation/brazekit/braze/inappmessage/html-swift.struct) in-app messages are useful for creating fully customized user content. User-defined HTML Full in-app message content is displayed in a `WKWebView`and may optionally contain other rich content, such as images and fonts, allowing for full control over message appearance and functionality.
iOS in-app messages support a JavaScript `brazeBridge` interface to call methods on the Braze Web SDK from within your HTML, see our [best practices](https://www.braze.com/docs/pt-br/pt-br/user_guide/message_building_by_channel/in-app_messages/best_practices/) for more details.
The following example shows a paginated HTML Full in-app message:

Note that we currently do not support the display of custom HTML in-app messages in an iFrame on the iOS and Android platforms.
[`Control`](https://braze-inc.github.io/braze-swift-sdk/documentation/brazekit/braze/inappmessage/control-swift.struct) in-app messages do not contain a UI component and are used primarily for analytics purposes. This type is used to verify receipt of an in-app message sent to a control group.
For further details about Intelligent Selection and control groups, refer to [Intelligent Selection](https://www.braze.com/docs/pt-br/pt-br/user_guide/brazeai/intelligence/intelligent_selection/).
## Enabling in-app messages
The Braze Flutter SDK automatically sets up the default in-app message presenter on both Android and iOS. In-app messages are displayed and forwarded to the Dart layer without additional setup.
### Customizing the in-app message presenter on iOS
To override the default in-app message presenter on iOS, use the `postInitialization` closure in `BrazePlugin.configure(_:postInitialization:)`. Your custom presenter must call `BrazePlugin.processInAppMessage(message)` to forward in-app message data to the Dart layer.
```swift
import BrazeUI
BrazePlugin.configure(
{ configuration in
// Set non-API-key configurations here.
},
postInitialization: { braze in
let customPresenter = CustomInAppMessagePresenter()
braze.inAppMessagePresenter = customPresenter
}
)
```
In the custom presenter class, call `BrazePlugin.processInAppMessage(message)` and `super.present(message: message)` to forward data to Dart and display the default UI.
```swift
class CustomInAppMessagePresenter: BrazeInAppMessageUI {
override func present(message: Braze.InAppMessage) {
BrazePlugin.processInAppMessage(message)
super.present(message: message)
}
}
```
**Note:**
This step is for iOS only. The default implementation for in-app messages is already set up on Android.
To set up the default presenter for in-app messages on iOS, create an implementation of the `BrazeInAppMessagePresenter` protocol and assign it to the optional `inAppMessagePresenter` on your Braze instance. You can also use the default Braze UI presenter by instantiating a `BrazeInAppMessageUI` object.
You must import the `BrazeUI` library to access the `BrazeInAppMessageUI` class.
```swift
import BrazeUI
override func application(
_ application: UIApplication,
didFinishLaunchingWithOptions launchOptions: [UIApplication.LaunchOptionsKey : Any]? = nil
) -> Bool {
...
let braze = BrazePlugin.initBraze(configuration)
braze.inAppMessagePresenter = BrazeInAppMessageUI()
AppDelegate.braze = braze
return true
}
```
```objc
@import BrazeUI;
- (BOOL)application:(UIApplication *)application
didFinishLaunchingWithOptions:(NSDictionary *)launchOptions {
...
Braze *braze = [BrazePlugin initBraze:configuration];
braze.inAppMessagePresenter = [[BrazeInAppMessageUI alloc] init];
AppDelegate.braze = braze;
[self.window makeKeyAndVisible];
return YES;
}
```
For more information about accessing in-app message data, refer to [Logging in-app message data](https://www.braze.com/docs/pt-br/pt-br/developer_guide/in_app_messages/logging_message_data?sdktab=flutter).
## Prerequisites
Before you can use this feature, you'll need to [integrate the React Native Braze SDK](https://www.braze.com/docs/pt-br/pt-br/developer_guide/sdk_integration/?sdktab=react%20native).
## Message types
Braze offers several default in-app message types, each customizable with messages, images, [Font Awesome](https://fontawesome.com/icons?d=gallery&p=2) icons, click actions, analytics, color schemes, and more.
Their basic behavior and traits are defined by the [`IInAppMessage`](https://braze-inc.github.io/braze-android-sdk/kdoc/braze-android-sdk/com.braze.models.inappmessage/-i-in-app-message/index.html) interface, in a subclass called [`InAppMessageBase`](https://braze-inc.github.io/braze-android-sdk/kdoc/braze-android-sdk/com.braze.models.inappmessage/-in-app-message-base/index.html). `IInAppMessage` also includes a subinterface, [`IInAppMessageImmersive`](https://braze-inc.github.io/braze-android-sdk/kdoc/braze-android-sdk/com.braze.models.inappmessage/-i-in-app-message-immersive/index.html), which lets you add close, click-action, and analytics [buttons](https://braze-inc.github.io/braze-android-sdk/kdoc/braze-android-sdk/com.braze.models.inappmessage/-message-button/index.html) to your app.
**Important:**
Keep in mind, in-app messages containing buttons will include the `clickAction` message in the final payload if the click action is added prior to adding the button text.
[`slideup`](https://braze-inc.github.io/braze-android-sdk/kdoc/braze-android-sdk/com.braze.models.inappmessage/-in-app-message-slideup/index.html) in-app messages are so-named because they "slide up" or "slide down" from the top or bottom of the screen. They cover a small portion of the screen and provide an effective and non-intrusive messaging capability.
The `slideup` in-app message object extends [`InAppMessageBase`](https://braze-inc.github.io/braze-android-sdk/kdoc/braze-android-sdk/com.braze.models.inappmessage/-in-app-message-base/index.html).
{: style="border:0px;"}
[`modal`](https://braze-inc.github.io/braze-android-sdk/kdoc/braze-android-sdk/com.braze.models.inappmessage/-in-app-message-modal/index.html) in-app messages appear in the center of the screen and are framed by a translucent panel. Useful for more critical messaging, they can be equipped with two click-action and analytics-enabled buttons.
This message type is a subclass of [`InAppMessageImmersiveBase`](https://braze-inc.github.io/braze-android-sdk/kdoc/braze-android-sdk/com.braze.models.inappmessage/-in-app-message-immersive-base/index.html), an abstract class that implements `IInAppMessageImmersive`, giving you the option to add custom functionality to your locally generated in-app messages.
{: style="border:0px;"}
[`full`](https://braze-inc.github.io/braze-android-sdk/kdoc/braze-android-sdk/com.braze.models.inappmessage/-in-app-message-full/index.html) in-app messages are useful for maximizing the content and impact of your user communication. The upper half of a `full` in-app message contains an image, and the lower half displays text and up to two click action and analytics-enabled buttons.
This message type extends [`InAppMessageImmersiveBase`](https://braze-inc.github.io/braze-android-sdk/kdoc/braze-android-sdk/com.braze.models.inappmessage/-in-app-message-immersive-base/index.html), giving you the option to add custom functionality to your locally generated in-app messages.

[`HTML`](https://braze-inc.github.io/braze-android-sdk/kdoc/braze-android-sdk/com.braze.models.inappmessage/-in-app-message-html/index.html) in-app messages are useful for creating fully customized user content. User-defined HTML in-app message content is displayed in a `WebView` and may optionally contain other rich content, such as images and fonts, allowing for full control over message appearance and functionality.
This message type implements [`IInAppMessageHtml`](https://braze-inc.github.io/braze-android-sdk/kdoc/braze-android-sdk/com.braze.models.inappmessage/-i-in-app-message-html/index.html), which is a subclass of [`IInAppMessage`](https://braze-inc.github.io/braze-android-sdk/kdoc/braze-android-sdk/com.braze.models.inappmessage/-i-in-app-message/index.html).
**Note:**
On Android, links configured with `target="_blank"` in custom HTML in-app messages open in the device's default web browser.
Android in-app messages support a JavaScript `brazeBridge` interface to call methods on the Braze Android SDK from within your HTML, see our JavaScript bridge page for more details.
{: style="border:0px;"}
**Important:**
We currently do not support the display of custom HTML in-app messages in an iFrame on the iOS and Android platforms.
**Tip:**
You can also define custom in-app message views for your app. For a full walkthrough, see [Setting custom factories](https://www.braze.com/docs/pt-br/pt-br/developer_guide/in_app_messages/customization#android_setting-custom-factories).
Each in-app message type is highly customizable across content, images, icons, click actions, analytics, display, and delivery. They are enumerated types of `Braze.InAppMessage`, which defines basic behavior and traits for all in-app messages. For the full list of in-app message properties and usage, see the [`InAppMessage` class](https://braze-inc.github.io/braze-swift-sdk/documentation/brazekit/braze/inappmessage).
These are the available in-app message types in Braze and how they will look like for end-users.
[`Slideup`](https://braze-inc.github.io/braze-swift-sdk/documentation/brazekit/braze/inappmessage/slideup-swift.struct) in-app messages are given this name because they "slide up" or "slide down" from the top or bottom of the screen. They cover a small portion of the screen and provide an effective and non-intrusive messaging capability.
{: style="max-width:35%;border:none;"}
[`Modal`](https://braze-inc.github.io/braze-swift-sdk/documentation/brazekit/braze/inappmessage/modal-swift.struct) in-app messages appear in the center of the screen and are framed by a translucent panel. Useful for more critical messaging, they can be equipped with up to two analytics-enabled buttons.
{: style="max-width:35%;border:none;"}
[`Modal Image`](https://braze-inc.github.io/braze-swift-sdk/documentation/brazekit/braze/inappmessage/modalimage-swift.struct) in-app messages appear in the center of the screen and are framed by a translucent panel. These messages are similar to the `Modal` type except without header or message text. Useful for more critical messaging, they can be equipped with up to two analytics-enabled buttons.
{: style="max-width:35%;border:none;"}
[`Full`](https://braze-inc.github.io/braze-swift-sdk/documentation/brazekit/braze/inappmessage/full-swift.struct) in-app messages are useful for maximizing the content and impact of your user communication. The upper half of a `Full` in-app message contains an image, and the lower half displays text and up to two analytics-enabled buttons.
{: style="max-width:35%;border:none;"}
[`Full Image`](https://braze-inc.github.io/braze-swift-sdk/documentation/brazekit/braze/inappmessage/fullimage-swift.struct) in-app messages are similar to `Full` in-app messages except without header or message text. This message type is useful for maximizing the content and impact of your user communication. A `Full Image` in-app message contains an image spanning the entire screen, with the option to display up to two analytics-enabled buttons.
{: style="max-width:35%;border:none;"}
[`HTML`](https://braze-inc.github.io/braze-swift-sdk/documentation/brazekit/braze/inappmessage/html-swift.struct) in-app messages are useful for creating fully customized user content. User-defined HTML Full in-app message content is displayed in a `WKWebView`and may optionally contain other rich content, such as images and fonts, allowing for full control over message appearance and functionality.
iOS in-app messages support a JavaScript `brazeBridge` interface to call methods on the Braze Web SDK from within your HTML, see our [best practices](https://www.braze.com/docs/pt-br/pt-br/user_guide/message_building_by_channel/in-app_messages/best_practices/) for more details.
The following example shows a paginated HTML Full in-app message:

Note that we currently do not support the display of custom HTML in-app messages in an iFrame on the iOS and Android platforms.
[`Control`](https://braze-inc.github.io/braze-swift-sdk/documentation/brazekit/braze/inappmessage/control-swift.struct) in-app messages do not contain a UI component and are used primarily for analytics purposes. This type is used to verify receipt of an in-app message sent to a control group.
For further details about Intelligent Selection and control groups, refer to [Intelligent Selection](https://www.braze.com/docs/pt-br/pt-br/user_guide/brazeai/intelligence/intelligent_selection/).
## Data model
The in-app message model is available in the React Native SDK. Braze has four in-app message types that share the same data model: **slideup**, **modal**, **full** and **HTML full**.
### Messages
The in-app message model provides the base for all in-app messages.
|Property | Description |
|------------------|------------------------------------------------------------------------------------------------------------------------|
|`inAppMessageJsonString` | The message JSON representation. |
|`message` | The message text. |
|`header` | The message header. |
|`uri` | The URI associated with the button click action. |
|`imageUrl` | The message image URL. |
|`zippedAssetsUrl` | The zipped assets prepared to display HTML content. |
|`useWebView` | Indicates whether the button click action should redirect using a web view. |
|`duration` | The message display duration. |
|`clickAction` | The button click action type. The types are: `URI`, and `NONE`. |
|`dismissType` | The message close type. The two types are: `SWIPE` and `AUTO_DISMISS`. |
|`messageType` | The in-app message type supported by the SDK. The four types are: `SLIDEUP`, `MODAL`, `FULL` and `HTML_FULL`. |
|`extras` | The message extras dictionary. Default value: `[:]`. |
|`buttons` | The list of buttons on the in-app message. |
|`toString()` | The message as a String representation. |
{: .reset-td-br-1 .reset-td-br-2 aria-label="Messages" }
For a full reference of the in-app message model, see the [Android](https://braze-inc.github.io/braze-android-sdk/kdoc/braze-android-sdk/com.braze.models.inappmessage/index.html) and [iOS](https://braze-inc.github.io/braze-swift-sdk/documentation/brazekit/braze/inappmessage) documentation.
### Buttons
Buttons can be added to in-app messages to perform actions and log analytics. The button model provides the base for all in-app message buttons.
|Property | Description |
|------------------|-----------------------------------------------------------------------------------------------------------------------------|
|`text` | The text on the button. |
|`uri` | The URI associated with the button click action. |
|`useWebView` | Indicates whether the button click action should redirect using a web view. |
|`clickAction` | The type of click action processed when the user clicks on the button. The types are: `URI`, and `NONE`. |
|`id` | The button ID on the message. |
|`toString()` | The button as a String representation. |
{: .reset-td-br-1 .reset-td-br-2 aria-label="Buttons" }
For a full reference of button model, see the [Android](https://braze-inc.github.io/braze-android-sdk/kdoc/braze-android-sdk/com.braze.models.inappmessage/-message-button/index.html) and [iOS](https://braze-inc.github.io/braze-swift-sdk/documentation/brazekit/braze/inappmessage/button) documentation.
## Prerequisites
Before you can use this feature, you'll need to [integrate the Roku Braze SDK](https://www.braze.com/docs/pt-br/pt-br/developer_guide/sdk_integration/?sdktab=roku).
Additionally, in-app messages will only be sent to Roku devices running the minimum supported SDK version:
## Message types
Braze offers several default in-app message types, each customizable with messages, images, [Font Awesome](https://fontawesome.com/icons?d=gallery&p=2) icons, click actions, analytics, color schemes, and more.
Their basic behavior and traits are defined by the [`IInAppMessage`](https://braze-inc.github.io/braze-android-sdk/kdoc/braze-android-sdk/com.braze.models.inappmessage/-i-in-app-message/index.html) interface, in a subclass called [`InAppMessageBase`](https://braze-inc.github.io/braze-android-sdk/kdoc/braze-android-sdk/com.braze.models.inappmessage/-in-app-message-base/index.html). `IInAppMessage` also includes a subinterface, [`IInAppMessageImmersive`](https://braze-inc.github.io/braze-android-sdk/kdoc/braze-android-sdk/com.braze.models.inappmessage/-i-in-app-message-immersive/index.html), which lets you add close, click-action, and analytics [buttons](https://braze-inc.github.io/braze-android-sdk/kdoc/braze-android-sdk/com.braze.models.inappmessage/-message-button/index.html) to your app.
**Important:**
Keep in mind, in-app messages containing buttons will include the `clickAction` message in the final payload if the click action is added prior to adding the button text.
[`slideup`](https://braze-inc.github.io/braze-android-sdk/kdoc/braze-android-sdk/com.braze.models.inappmessage/-in-app-message-slideup/index.html) in-app messages are so-named because they "slide up" or "slide down" from the top or bottom of the screen. They cover a small portion of the screen and provide an effective and non-intrusive messaging capability.
The `slideup` in-app message object extends [`InAppMessageBase`](https://braze-inc.github.io/braze-android-sdk/kdoc/braze-android-sdk/com.braze.models.inappmessage/-in-app-message-base/index.html).
{: style="border:0px;"}
[`modal`](https://braze-inc.github.io/braze-android-sdk/kdoc/braze-android-sdk/com.braze.models.inappmessage/-in-app-message-modal/index.html) in-app messages appear in the center of the screen and are framed by a translucent panel. Useful for more critical messaging, they can be equipped with two click-action and analytics-enabled buttons.
This message type is a subclass of [`InAppMessageImmersiveBase`](https://braze-inc.github.io/braze-android-sdk/kdoc/braze-android-sdk/com.braze.models.inappmessage/-in-app-message-immersive-base/index.html), an abstract class that implements `IInAppMessageImmersive`, giving you the option to add custom functionality to your locally generated in-app messages.
{: style="border:0px;"}
[`full`](https://braze-inc.github.io/braze-android-sdk/kdoc/braze-android-sdk/com.braze.models.inappmessage/-in-app-message-full/index.html) in-app messages are useful for maximizing the content and impact of your user communication. The upper half of a `full` in-app message contains an image, and the lower half displays text and up to two click action and analytics-enabled buttons.
This message type extends [`InAppMessageImmersiveBase`](https://braze-inc.github.io/braze-android-sdk/kdoc/braze-android-sdk/com.braze.models.inappmessage/-in-app-message-immersive-base/index.html), giving you the option to add custom functionality to your locally generated in-app messages.

[`HTML`](https://braze-inc.github.io/braze-android-sdk/kdoc/braze-android-sdk/com.braze.models.inappmessage/-in-app-message-html/index.html) in-app messages are useful for creating fully customized user content. User-defined HTML in-app message content is displayed in a `WebView` and may optionally contain other rich content, such as images and fonts, allowing for full control over message appearance and functionality.
This message type implements [`IInAppMessageHtml`](https://braze-inc.github.io/braze-android-sdk/kdoc/braze-android-sdk/com.braze.models.inappmessage/-i-in-app-message-html/index.html), which is a subclass of [`IInAppMessage`](https://braze-inc.github.io/braze-android-sdk/kdoc/braze-android-sdk/com.braze.models.inappmessage/-i-in-app-message/index.html).
**Note:**
On Android, links configured with `target="_blank"` in custom HTML in-app messages open in the device's default web browser.
Android in-app messages support a JavaScript `brazeBridge` interface to call methods on the Braze Android SDK from within your HTML, see our JavaScript bridge page for more details.
{: style="border:0px;"}
**Important:**
We currently do not support the display of custom HTML in-app messages in an iFrame on the iOS and Android platforms.
**Tip:**
You can also define custom in-app message views for your app. For a full walkthrough, see [Setting custom factories](https://www.braze.com/docs/pt-br/pt-br/developer_guide/in_app_messages/customization#android_setting-custom-factories).
Each in-app message type is highly customizable across content, images, icons, click actions, analytics, display, and delivery. They are enumerated types of `Braze.InAppMessage`, which defines basic behavior and traits for all in-app messages. For the full list of in-app message properties and usage, see the [`InAppMessage` class](https://braze-inc.github.io/braze-swift-sdk/documentation/brazekit/braze/inappmessage).
These are the available in-app message types in Braze and how they will look like for end-users.
[`Slideup`](https://braze-inc.github.io/braze-swift-sdk/documentation/brazekit/braze/inappmessage/slideup-swift.struct) in-app messages are given this name because they "slide up" or "slide down" from the top or bottom of the screen. They cover a small portion of the screen and provide an effective and non-intrusive messaging capability.
{: style="max-width:35%;border:none;"}
[`Modal`](https://braze-inc.github.io/braze-swift-sdk/documentation/brazekit/braze/inappmessage/modal-swift.struct) in-app messages appear in the center of the screen and are framed by a translucent panel. Useful for more critical messaging, they can be equipped with up to two analytics-enabled buttons.
{: style="max-width:35%;border:none;"}
[`Modal Image`](https://braze-inc.github.io/braze-swift-sdk/documentation/brazekit/braze/inappmessage/modalimage-swift.struct) in-app messages appear in the center of the screen and are framed by a translucent panel. These messages are similar to the `Modal` type except without header or message text. Useful for more critical messaging, they can be equipped with up to two analytics-enabled buttons.
{: style="max-width:35%;border:none;"}
[`Full`](https://braze-inc.github.io/braze-swift-sdk/documentation/brazekit/braze/inappmessage/full-swift.struct) in-app messages are useful for maximizing the content and impact of your user communication. The upper half of a `Full` in-app message contains an image, and the lower half displays text and up to two analytics-enabled buttons.
{: style="max-width:35%;border:none;"}
[`Full Image`](https://braze-inc.github.io/braze-swift-sdk/documentation/brazekit/braze/inappmessage/fullimage-swift.struct) in-app messages are similar to `Full` in-app messages except without header or message text. This message type is useful for maximizing the content and impact of your user communication. A `Full Image` in-app message contains an image spanning the entire screen, with the option to display up to two analytics-enabled buttons.
{: style="max-width:35%;border:none;"}
[`HTML`](https://braze-inc.github.io/braze-swift-sdk/documentation/brazekit/braze/inappmessage/html-swift.struct) in-app messages are useful for creating fully customized user content. User-defined HTML Full in-app message content is displayed in a `WKWebView`and may optionally contain other rich content, such as images and fonts, allowing for full control over message appearance and functionality.
iOS in-app messages support a JavaScript `brazeBridge` interface to call methods on the Braze Web SDK from within your HTML, see our [best practices](https://www.braze.com/docs/pt-br/pt-br/user_guide/message_building_by_channel/in-app_messages/best_practices/) for more details.
The following example shows a paginated HTML Full in-app message:

Note that we currently do not support the display of custom HTML in-app messages in an iFrame on the iOS and Android platforms.
[`Control`](https://braze-inc.github.io/braze-swift-sdk/documentation/brazekit/braze/inappmessage/control-swift.struct) in-app messages do not contain a UI component and are used primarily for analytics purposes. This type is used to verify receipt of an in-app message sent to a control group.
For further details about Intelligent Selection and control groups, refer to [Intelligent Selection](https://www.braze.com/docs/pt-br/pt-br/user_guide/brazeai/intelligence/intelligent_selection/).
## Enabling in-app messages
### Step 1: Add an observer
To process in-app messages, you can add an observer on `BrazeTask.BrazeInAppMessage`:
```brightscript
m.BrazeTask.observeField("BrazeInAppMessage", "onInAppMessageReceived")
```
### Step 2: Access triggered messages
Then within your handler, you have access to the highest in-app message that your campaigns have triggered:
```brightscript
sub onInAppMessageReceived()
in_app_message = m.BrazeTask.BrazeInAppMessage
...
end sub
```
## Message fields
### Handling
The following lists the fields you will need to handle your in-app messages:
| Fields | Description |
| ------ | ----------- |
| `buttons` | List of buttons (could be an empty list). |
| `click_action` | `"URI"` or `"NONE"`. Use this field to indicate whether the in-app message should open to a URI link or close the message when clicked. When there are no buttons, this should happen when the user clicks "OK" when the in-app message is displayed. |
| `dismiss_type` | `"AUTO_DISMISS"` or `"SWIPE"`. Use this field to indicate whether your in-app message will auto dismiss or require a swipe to dismiss. |
| `display_delay` | How long (seconds) to wait until displaying the in-app message. |
| `duration` | How long (milliseconds) the message should be displayed when `dismiss_type` is set to `"AUTO_DISMISS"`. |
| `extras` | Key-value pairs. |
| `header` | The header text. |
| `id` | The ID used to log impressions or clicks. |
| `image_url` | In-app message image URL. |
| `message` | Message body text. |
| `uri` | Your URI users will be sent to based on your `click_action`. This field must be included when `click_action` is `"URI"`. |
{: .reset-td-br-1 .reset-td-br-2 aria-label="Handling" }
**Important:**
For in-app messages containing buttons, the message `click_action` will also be included in the final payload if the click action is added prior to adding the button text.
### Styling
There are also various styling fields that you could choose to use from the dashboard:
| Fields | Description |
| ------ | ----------- |
| `bg_color` | Background color. |
| `close_button_color` | Close button color. |
| `frame_color` | The color of the background screen overlay. |
| `header_text_color` | Header text color. |
| `message_text_color` | Message text color. |
| `text_align` | "START", "CENTER", or "END". Your selected text alignment. |
{: .reset-td-br-1 .reset-td-br-2 aria-label="Styling" }
Alternatively, you could implement the in-app message and style it within your Roku application using a standard palette:
### Buttons
| Fields | Description |
| ------ | ----------- |
| `click_action` | `"URI"` or `"NONE"`. Use this field to indicate whether the in-app message should open to a URI link or close the message when clicked. |
| `id` | The ID value of the button itself. |
| `text` | The text to display on the button. |
| `uri` | Your URI users will be sent to based on your `click_action`. This field must be included when `click_action` is `"URI"`. |
{: .reset-td-br-1 .reset-td-br-2 aria-label="Buttons" }
**Important:**
Keep in mind, you'll need to implement your own custom UI since in-app messaging is supported via headless UI using the Swift SDK—which does not include any default UI or views for tvOS.
## Prerequisites
Before you can use this feature, you'll need to [integrate the Swift Braze SDK](https://www.braze.com/docs/pt-br/pt-br/developer_guide/sdk_integration/?sdktab=swift).
## Enabling in-app messages
### Step 1: Create a new iOS app
In Braze, select **Settings** > **App Settings**, then select **Add App**. Enter a name for your tvOS app, select **iOS**—_not tvOS_—then select **Add App**.
{: style="width:70%"}
**Warning:**
If you select the **tvOS** checkbox, you will not be able to customize in-app messages for tvOS.
### Step 2: Get your app's API key
In your app settings, select your new tvOS app then take note of your app's API key. You'll use this key to configure your app in Xcode.
{: style="width:70%"}
### Step 3: Integrate BrazeKit
Use your app's API key to integrate the [Braze Swift SDK](https://github.com/braze-inc/braze-swift-sdk) into your tvOS project in Xcode. You only need to integrate BrazeKit from the Braze Swift SDK.
### Step 4: Create your custom UI
Because Braze doesn't provide a default UI for in-app messages on tvOS, you'll need to customize it yourself. For a full walkthrough, see our step-by-step tutorial: [Customizing in-app messages for tvOS](https://braze-inc.github.io/braze-swift-sdk/documentation/braze/in-app-message-customization). For a sample project, see [Braze Swift SDK samples](https://github.com/braze-inc/braze-swift-sdk/tree/main/Examples#inappmessages-custom-ui).
## Prerequisites
Before you can use this feature, you'll need to [integrate the Unity Braze SDK](https://www.braze.com/docs/pt-br/pt-br/developer_guide/sdk_integration/?sdktab=unity).
## Message types
Braze offers several default in-app message types, each customizable with messages, images, [Font Awesome](https://fontawesome.com/icons?d=gallery&p=2) icons, click actions, analytics, color schemes, and more.
Their basic behavior and traits are defined by the [`IInAppMessage`](https://braze-inc.github.io/braze-android-sdk/kdoc/braze-android-sdk/com.braze.models.inappmessage/-i-in-app-message/index.html) interface, in a subclass called [`InAppMessageBase`](https://braze-inc.github.io/braze-android-sdk/kdoc/braze-android-sdk/com.braze.models.inappmessage/-in-app-message-base/index.html). `IInAppMessage` also includes a subinterface, [`IInAppMessageImmersive`](https://braze-inc.github.io/braze-android-sdk/kdoc/braze-android-sdk/com.braze.models.inappmessage/-i-in-app-message-immersive/index.html), which lets you add close, click-action, and analytics [buttons](https://braze-inc.github.io/braze-android-sdk/kdoc/braze-android-sdk/com.braze.models.inappmessage/-message-button/index.html) to your app.
**Important:**
Keep in mind, in-app messages containing buttons will include the `clickAction` message in the final payload if the click action is added prior to adding the button text.
[`slideup`](https://braze-inc.github.io/braze-android-sdk/kdoc/braze-android-sdk/com.braze.models.inappmessage/-in-app-message-slideup/index.html) in-app messages are so-named because they "slide up" or "slide down" from the top or bottom of the screen. They cover a small portion of the screen and provide an effective and non-intrusive messaging capability.
The `slideup` in-app message object extends [`InAppMessageBase`](https://braze-inc.github.io/braze-android-sdk/kdoc/braze-android-sdk/com.braze.models.inappmessage/-in-app-message-base/index.html).
{: style="border:0px;"}
[`modal`](https://braze-inc.github.io/braze-android-sdk/kdoc/braze-android-sdk/com.braze.models.inappmessage/-in-app-message-modal/index.html) in-app messages appear in the center of the screen and are framed by a translucent panel. Useful for more critical messaging, they can be equipped with two click-action and analytics-enabled buttons.
This message type is a subclass of [`InAppMessageImmersiveBase`](https://braze-inc.github.io/braze-android-sdk/kdoc/braze-android-sdk/com.braze.models.inappmessage/-in-app-message-immersive-base/index.html), an abstract class that implements `IInAppMessageImmersive`, giving you the option to add custom functionality to your locally generated in-app messages.
{: style="border:0px;"}
[`full`](https://braze-inc.github.io/braze-android-sdk/kdoc/braze-android-sdk/com.braze.models.inappmessage/-in-app-message-full/index.html) in-app messages are useful for maximizing the content and impact of your user communication. The upper half of a `full` in-app message contains an image, and the lower half displays text and up to two click action and analytics-enabled buttons.
This message type extends [`InAppMessageImmersiveBase`](https://braze-inc.github.io/braze-android-sdk/kdoc/braze-android-sdk/com.braze.models.inappmessage/-in-app-message-immersive-base/index.html), giving you the option to add custom functionality to your locally generated in-app messages.

[`HTML`](https://braze-inc.github.io/braze-android-sdk/kdoc/braze-android-sdk/com.braze.models.inappmessage/-in-app-message-html/index.html) in-app messages are useful for creating fully customized user content. User-defined HTML in-app message content is displayed in a `WebView` and may optionally contain other rich content, such as images and fonts, allowing for full control over message appearance and functionality.
This message type implements [`IInAppMessageHtml`](https://braze-inc.github.io/braze-android-sdk/kdoc/braze-android-sdk/com.braze.models.inappmessage/-i-in-app-message-html/index.html), which is a subclass of [`IInAppMessage`](https://braze-inc.github.io/braze-android-sdk/kdoc/braze-android-sdk/com.braze.models.inappmessage/-i-in-app-message/index.html).
**Note:**
On Android, links configured with `target="_blank"` in custom HTML in-app messages open in the device's default web browser.
Android in-app messages support a JavaScript `brazeBridge` interface to call methods on the Braze Android SDK from within your HTML, see our JavaScript bridge page for more details.
{: style="border:0px;"}
**Important:**
We currently do not support the display of custom HTML in-app messages in an iFrame on the iOS and Android platforms.
**Tip:**
You can also define custom in-app message views for your app. For a full walkthrough, see [Setting custom factories](https://www.braze.com/docs/pt-br/pt-br/developer_guide/in_app_messages/customization#android_setting-custom-factories).
Each in-app message type is highly customizable across content, images, icons, click actions, analytics, display, and delivery. They are enumerated types of `Braze.InAppMessage`, which defines basic behavior and traits for all in-app messages. For the full list of in-app message properties and usage, see the [`InAppMessage` class](https://braze-inc.github.io/braze-swift-sdk/documentation/brazekit/braze/inappmessage).
These are the available in-app message types in Braze and how they will look like for end-users.
[`Slideup`](https://braze-inc.github.io/braze-swift-sdk/documentation/brazekit/braze/inappmessage/slideup-swift.struct) in-app messages are given this name because they "slide up" or "slide down" from the top or bottom of the screen. They cover a small portion of the screen and provide an effective and non-intrusive messaging capability.
{: style="max-width:35%;border:none;"}
[`Modal`](https://braze-inc.github.io/braze-swift-sdk/documentation/brazekit/braze/inappmessage/modal-swift.struct) in-app messages appear in the center of the screen and are framed by a translucent panel. Useful for more critical messaging, they can be equipped with up to two analytics-enabled buttons.
{: style="max-width:35%;border:none;"}
[`Modal Image`](https://braze-inc.github.io/braze-swift-sdk/documentation/brazekit/braze/inappmessage/modalimage-swift.struct) in-app messages appear in the center of the screen and are framed by a translucent panel. These messages are similar to the `Modal` type except without header or message text. Useful for more critical messaging, they can be equipped with up to two analytics-enabled buttons.
{: style="max-width:35%;border:none;"}
[`Full`](https://braze-inc.github.io/braze-swift-sdk/documentation/brazekit/braze/inappmessage/full-swift.struct) in-app messages are useful for maximizing the content and impact of your user communication. The upper half of a `Full` in-app message contains an image, and the lower half displays text and up to two analytics-enabled buttons.
{: style="max-width:35%;border:none;"}
[`Full Image`](https://braze-inc.github.io/braze-swift-sdk/documentation/brazekit/braze/inappmessage/fullimage-swift.struct) in-app messages are similar to `Full` in-app messages except without header or message text. This message type is useful for maximizing the content and impact of your user communication. A `Full Image` in-app message contains an image spanning the entire screen, with the option to display up to two analytics-enabled buttons.
{: style="max-width:35%;border:none;"}
[`HTML`](https://braze-inc.github.io/braze-swift-sdk/documentation/brazekit/braze/inappmessage/html-swift.struct) in-app messages are useful for creating fully customized user content. User-defined HTML Full in-app message content is displayed in a `WKWebView`and may optionally contain other rich content, such as images and fonts, allowing for full control over message appearance and functionality.
iOS in-app messages support a JavaScript `brazeBridge` interface to call methods on the Braze Web SDK from within your HTML, see our [best practices](https://www.braze.com/docs/pt-br/pt-br/user_guide/message_building_by_channel/in-app_messages/best_practices/) for more details.
The following example shows a paginated HTML Full in-app message:

Note that we currently do not support the display of custom HTML in-app messages in an iFrame on the iOS and Android platforms.
[`Control`](https://braze-inc.github.io/braze-swift-sdk/documentation/brazekit/braze/inappmessage/control-swift.struct) in-app messages do not contain a UI component and are used primarily for analytics purposes. This type is used to verify receipt of an in-app message sent to a control group.
For further details about Intelligent Selection and control groups, refer to [Intelligent Selection](https://www.braze.com/docs/pt-br/pt-br/user_guide/brazeai/intelligence/intelligent_selection/).
## Prerequisites
Before you can use this feature, you'll need to [integrate the .NET MAUI Braze SDK](https://www.braze.com/docs/pt-br/pt-br/developer_guide/sdk_integration/?sdktab=.net%20maui%20(xamarin)).
## Message types
Braze offers several default in-app message types, each customizable with messages, images, [Font Awesome](https://fontawesome.com/icons?d=gallery&p=2) icons, click actions, analytics, color schemes, and more.
Their basic behavior and traits are defined by the [`IInAppMessage`](https://braze-inc.github.io/braze-android-sdk/kdoc/braze-android-sdk/com.braze.models.inappmessage/-i-in-app-message/index.html) interface, in a subclass called [`InAppMessageBase`](https://braze-inc.github.io/braze-android-sdk/kdoc/braze-android-sdk/com.braze.models.inappmessage/-in-app-message-base/index.html). `IInAppMessage` also includes a subinterface, [`IInAppMessageImmersive`](https://braze-inc.github.io/braze-android-sdk/kdoc/braze-android-sdk/com.braze.models.inappmessage/-i-in-app-message-immersive/index.html), which lets you add close, click-action, and analytics [buttons](https://braze-inc.github.io/braze-android-sdk/kdoc/braze-android-sdk/com.braze.models.inappmessage/-message-button/index.html) to your app.
**Important:**
Keep in mind, in-app messages containing buttons will include the `clickAction` message in the final payload if the click action is added prior to adding the button text.
[`slideup`](https://braze-inc.github.io/braze-android-sdk/kdoc/braze-android-sdk/com.braze.models.inappmessage/-in-app-message-slideup/index.html) in-app messages are so-named because they "slide up" or "slide down" from the top or bottom of the screen. They cover a small portion of the screen and provide an effective and non-intrusive messaging capability.
The `slideup` in-app message object extends [`InAppMessageBase`](https://braze-inc.github.io/braze-android-sdk/kdoc/braze-android-sdk/com.braze.models.inappmessage/-in-app-message-base/index.html).
{: style="border:0px;"}
[`modal`](https://braze-inc.github.io/braze-android-sdk/kdoc/braze-android-sdk/com.braze.models.inappmessage/-in-app-message-modal/index.html) in-app messages appear in the center of the screen and are framed by a translucent panel. Useful for more critical messaging, they can be equipped with two click-action and analytics-enabled buttons.
This message type is a subclass of [`InAppMessageImmersiveBase`](https://braze-inc.github.io/braze-android-sdk/kdoc/braze-android-sdk/com.braze.models.inappmessage/-in-app-message-immersive-base/index.html), an abstract class that implements `IInAppMessageImmersive`, giving you the option to add custom functionality to your locally generated in-app messages.
{: style="border:0px;"}
[`full`](https://braze-inc.github.io/braze-android-sdk/kdoc/braze-android-sdk/com.braze.models.inappmessage/-in-app-message-full/index.html) in-app messages are useful for maximizing the content and impact of your user communication. The upper half of a `full` in-app message contains an image, and the lower half displays text and up to two click action and analytics-enabled buttons.
This message type extends [`InAppMessageImmersiveBase`](https://braze-inc.github.io/braze-android-sdk/kdoc/braze-android-sdk/com.braze.models.inappmessage/-in-app-message-immersive-base/index.html), giving you the option to add custom functionality to your locally generated in-app messages.

[`HTML`](https://braze-inc.github.io/braze-android-sdk/kdoc/braze-android-sdk/com.braze.models.inappmessage/-in-app-message-html/index.html) in-app messages are useful for creating fully customized user content. User-defined HTML in-app message content is displayed in a `WebView` and may optionally contain other rich content, such as images and fonts, allowing for full control over message appearance and functionality.
This message type implements [`IInAppMessageHtml`](https://braze-inc.github.io/braze-android-sdk/kdoc/braze-android-sdk/com.braze.models.inappmessage/-i-in-app-message-html/index.html), which is a subclass of [`IInAppMessage`](https://braze-inc.github.io/braze-android-sdk/kdoc/braze-android-sdk/com.braze.models.inappmessage/-i-in-app-message/index.html).
**Note:**
On Android, links configured with `target="_blank"` in custom HTML in-app messages open in the device's default web browser.
Android in-app messages support a JavaScript `brazeBridge` interface to call methods on the Braze Android SDK from within your HTML, see our JavaScript bridge page for more details.
{: style="border:0px;"}
**Important:**
We currently do not support the display of custom HTML in-app messages in an iFrame on the iOS and Android platforms.
**Tip:**
You can also define custom in-app message views for your app. For a full walkthrough, see [Setting custom factories](https://www.braze.com/docs/pt-br/pt-br/developer_guide/in_app_messages/customization#android_setting-custom-factories).
Each in-app message type is highly customizable across content, images, icons, click actions, analytics, display, and delivery. They are enumerated types of `Braze.InAppMessage`, which defines basic behavior and traits for all in-app messages. For the full list of in-app message properties and usage, see the [`InAppMessage` class](https://braze-inc.github.io/braze-swift-sdk/documentation/brazekit/braze/inappmessage).
These are the available in-app message types in Braze and how they will look like for end-users.
[`Slideup`](https://braze-inc.github.io/braze-swift-sdk/documentation/brazekit/braze/inappmessage/slideup-swift.struct) in-app messages are given this name because they "slide up" or "slide down" from the top or bottom of the screen. They cover a small portion of the screen and provide an effective and non-intrusive messaging capability.
{: style="max-width:35%;border:none;"}
[`Modal`](https://braze-inc.github.io/braze-swift-sdk/documentation/brazekit/braze/inappmessage/modal-swift.struct) in-app messages appear in the center of the screen and are framed by a translucent panel. Useful for more critical messaging, they can be equipped with up to two analytics-enabled buttons.
{: style="max-width:35%;border:none;"}
[`Modal Image`](https://braze-inc.github.io/braze-swift-sdk/documentation/brazekit/braze/inappmessage/modalimage-swift.struct) in-app messages appear in the center of the screen and are framed by a translucent panel. These messages are similar to the `Modal` type except without header or message text. Useful for more critical messaging, they can be equipped with up to two analytics-enabled buttons.
{: style="max-width:35%;border:none;"}
[`Full`](https://braze-inc.github.io/braze-swift-sdk/documentation/brazekit/braze/inappmessage/full-swift.struct) in-app messages are useful for maximizing the content and impact of your user communication. The upper half of a `Full` in-app message contains an image, and the lower half displays text and up to two analytics-enabled buttons.
{: style="max-width:35%;border:none;"}
[`Full Image`](https://braze-inc.github.io/braze-swift-sdk/documentation/brazekit/braze/inappmessage/fullimage-swift.struct) in-app messages are similar to `Full` in-app messages except without header or message text. This message type is useful for maximizing the content and impact of your user communication. A `Full Image` in-app message contains an image spanning the entire screen, with the option to display up to two analytics-enabled buttons.
{: style="max-width:35%;border:none;"}
[`HTML`](https://braze-inc.github.io/braze-swift-sdk/documentation/brazekit/braze/inappmessage/html-swift.struct) in-app messages are useful for creating fully customized user content. User-defined HTML Full in-app message content is displayed in a `WKWebView`and may optionally contain other rich content, such as images and fonts, allowing for full control over message appearance and functionality.
iOS in-app messages support a JavaScript `brazeBridge` interface to call methods on the Braze Web SDK from within your HTML, see our [best practices](https://www.braze.com/docs/pt-br/pt-br/user_guide/message_building_by_channel/in-app_messages/best_practices/) for more details.
The following example shows a paginated HTML Full in-app message:

Note that we currently do not support the display of custom HTML in-app messages in an iFrame on the iOS and Android platforms.
[`Control`](https://braze-inc.github.io/braze-swift-sdk/documentation/brazekit/braze/inappmessage/control-swift.struct) in-app messages do not contain a UI component and are used primarily for analytics purposes. This type is used to verify receipt of an in-app message sent to a control group.
For further details about Intelligent Selection and control groups, refer to [Intelligent Selection](https://www.braze.com/docs/pt-br/pt-br/user_guide/brazeai/intelligence/intelligent_selection/).
## Próximos passos
Pronto para se aprofundar? Confira estes tutoriais passo a passo:
- Ajuste o tempo de entrega das mensagens [adiando e restaurando mensagens acionadas](https://www.braze.com/docs/pt-br/pt-br/developer_guide/in_app_messages/tutorials/deferring_triggered_messages).
- Refine o direcionamento das mensagens [definindo regras de exibição condicionais](https://www.braze.com/docs/pt-br/pt-br/developer_guide/in_app_messages/tutorials/conditionally_displaying_messages).
- Combine a aparência da sua marca [personalizando o estilo das mensagens com pares chave-valor](https://www.braze.com/docs/pt-br/pt-br/developer_guide/in_app_messages/tutorials/customizing_message_styling).
# Personalize mensagens no aplicativo para o SDK do Braze
Source: /docs/pt-br/developer_guide/in_app_messages/customization/index.md
# Personalize mensagens no aplicativo
> Aprenda como personalizar mensagens no aplicativo para o SDK do Braze. Para técnicas avançadas de estilo, confira nosso tutorial sobre [personalização de estilo de mensagens usando pares chave-valor](https://www.braze.com/docs/pt-br/pt-br/developer_guide/in_app_messages/tutorials/customizing_message_styling).
## Prerequisites
Before you can use this feature, you'll need to [integrate the Web Braze SDK](https://www.braze.com/docs/pt-br/pt-br/developer_guide/sdk_integration/?sdktab=web).
## Custom styles
Braze UI elements come with a default look and feel that create a neutral in-app message experience and aim for consistency with other Braze mobile platforms. The default Braze styles are defined in CSS within the Braze SDK.
### Setting a default style
By overriding selected styles in your application, you can customize our standard in-app message types with your own background images, font families, styles, sizes, animations, and more.
For instance, the following is an example override that will cause an in-app message's headers to appear italicized:
```css
body .ab-in-app-message .ab-message-header {
font-style: italic;
}
```
See the [JSDocs](https://js.appboycdn.com/web-sdk/latest/doc/classes/braze.inappmessage.html) for more information.
### Customizing the z-index
By default, in-app messages are displayed using `z-index: 9001`. This is configurable using the `inAppMessageZIndex ` [initialization option](https://js.appboycdn.com/web-sdk/latest/doc/modules/braze.html#initializationoptions) in the scenario that your website styles elements with higher values than that.
```javascript
braze.initialize("YOUR-API-KEY", {
baseUrl: "YOUR-API-ENDPOINT",
inAppMessageZIndex: 12000
});
```
**Important:**
This feature is only available for Web Braze SDK v3.3.0 and later.
## Customizing message dismissals
By default, when an in-app message is showing, pressing the escape button or a click on the grayed-out background of the page will dismiss the message. Configure the `requireExplicitInAppMessageDismissal` [initialization option](https://js.appboycdn.com/web-sdk/latest/doc/modules/braze.html#initializationoptions) to `true` to prevent this behavior and require an explicit button click to dismiss messages.
```javascript
import * as braze from "@braze/web-sdk";
braze.initialize("YOUR-API-KEY", {
baseUrl: "YOUR-API-ENDPOINT",
requireExplicitInAppMessageDismissal: true
});
```
## Customizing display timing
To override the default display timing, remove calls to `braze.automaticallyShowInAppMessages()` and handle messages in `braze.subscribeToInAppMessage()`. Register your callback before `braze.openSession()`, so you can intercept session-start messages and decide whether to display or defer each message.
By default, Braze displays in-app messages when they are triggered and eligible to display. If you need different behavior for your app experience, use a custom callback to defer or display messages based on your own logic.
The following example shows how to subscribe to triggered in-app messages, defer selected messages, and display deferred messages later:
```javascript
import * as braze from "@braze/web-sdk";
braze.initialize("YOUR-API-KEY", {
baseUrl: "YOUR-API-ENDPOINT"
});
braze.subscribeToInAppMessage(function (message) {
// Control-group messages should always be "shown" to log analytics.
if (message.isControl || message instanceof braze.ControlMessage) {
braze.showInAppMessage(message);
return;
}
const shouldDefer = true; // Replace with your own display logic
if (shouldDefer) {
braze.deferInAppMessage(message);
return;
}
braze.showInAppMessage(message);
});
braze.openSession();
// Later, when your app is ready to display a deferred message:
const deferredMessage = braze.getDeferredInAppMessage();
if (deferredMessage) {
braze.showInAppMessage(deferredMessage);
}
```
For related delivery customization guidance, see:
- [Web `deferInAppMessage` reference](https://js.appboycdn.com/web-sdk/latest/doc/modules/braze.html#deferinappmessage)
- [Web `subscribeToInAppMessage` reference](https://js.appboycdn.com/web-sdk/latest/doc/modules/braze.html#subscribetoinappmessage)
## Opening links in a new tab
To set your in-app message links to open in a new tab, set the `openInAppMessagesInNewTab` option to `true` to force all links from in-app message clicks open in a new tab or window.
```javascript
braze.initialize('api-key', { openInAppMessagesInNewTab: true} );
```
## Prerequisites
Before you can use this feature, you'll need to [integrate the Android Braze SDK](https://www.braze.com/docs/pt-br/pt-br/developer_guide/sdk_integration/?sdktab=android). You'll also need to [set up in-app messages](https://www.braze.com/docs/pt-br/pt-br/developer_guide/in_app_messages).
## Setting custom manager listeners
While the `BrazeInAppMessageManager` listener can automatically handle the display and lifecycle of in-app messages, you'll need to implement a custom manager listener if you'd like to fully customize your messages.
The Braze SDK has a default `DefaultHtmlInAppMessageActionListener` class that is used if no custom listener is defined and takes appropriate action automatically. If you require more control over how a user interacts with different buttons inside a custom HTML in-app message, implement a custom `IHtmlInAppMessageActionListener` class.
This listener applies to __both__ messages built with custom HTML and messages created using the Drag-and-Drop (DnD) editor. It does not apply to traditional IAMs. Traditional IAMs are Braze's built-in, SDK-rendered message types (for example, slideup, modal, and full) created in the original in-app message composer using predefined layouts. Unlike custom HTML and DnD IAMs, they do not run through the HTML action listener flow.
If you set a custom `IHtmlInAppMessageActionListener`, its logic will override the default click behavior for _all_ DnD messages. Please ensure your marketing team is aware of this, as it may affect their campaigns in unexpected ways.
### Step 1: Implement the custom manager listener
#### Step 1.1: Implement `IInAppMessageManagerListener`
Create a class that implements [`IInAppMessageManagerListener`](https://braze-inc.github.io/braze-android-sdk/kdoc/braze-android-sdk/com.braze.ui.inappmessage.listeners/-i-in-app-message-manager-listener/index.html).
The callbacks in your `IInAppMessageManagerListener` will also be called at various points in the in-app message lifecycle. For example, if you set a custom manager listener when an in-app message is received from Braze, the [`beforeInAppMessageDisplayed()`](https://braze-inc.github.io/braze-android-sdk/kdoc/braze-android-sdk/com.braze.ui.inappmessage.listeners/-i-in-app-message-manager-listener/before-in-app-message-displayed.html) method will be called. If your implementation of this method returns [`InAppMessageOperation.DISCARD`](https://braze-inc.github.io/braze-android-sdk/kdoc/braze-android-sdk/com.braze.ui.inappmessage/-in-app-message-operation/-d-i-s-c-a-r-d/index.html), that signals to Braze that the in-app message will be handled by the host app and should not be displayed by Braze. If [`InAppMessageOperation.DISPLAY_NOW`](https://braze-inc.github.io/braze-android-sdk/kdoc/braze-android-sdk/com.braze.ui.inappmessage/-in-app-message-operation/-d-i-s-p-l-a-y_-n-o-w/index.html) is returned, Braze will attempt to display the in-app message. This method should be used if you choose to display the in-app message in a customized manner.
`IInAppMessageManagerListener` also includes delegate methods for message clicks and buttons, which can be used in cases like intercepting a message when a button or message is clicked for further processing.
#### Step 1.2: Hook into IAM view lifecycle methods (optional)
The [`IInAppMessageManagerListener`](https://braze-inc.github.io/braze-android-sdk/kdoc/braze-android-sdk/com.braze.ui.inappmessage.listeners/-i-in-app-message-manager-listener/index.html) interface has in-app message view methods called at distinct points in the in-app message view lifecycle. These methods are called in the following order:
1. [`beforeInAppMessageViewOpened`](https://braze-inc.github.io/braze-android-sdk/kdoc/braze-android-sdk/com.braze.ui.inappmessage.listeners/-i-in-app-message-manager-listener/before-in-app-message-view-opened.html): Called just before the in-app message is added to the activity's view. The in-app message is not yet visible to the user at this time.
2. [`afterInAppMessageViewOpened`](https://braze-inc.github.io/braze-android-sdk/kdoc/braze-android-sdk/com.braze.ui.inappmessage.listeners/-i-in-app-message-manager-listener/after-in-app-message-view-opened.html): Called just after the in-app message is added to the activity's view. The in-app message is now visible to the user at this time.
3. [`beforeInAppMessageViewClosed`](https://braze-inc.github.io/braze-android-sdk/kdoc/braze-android-sdk/com.braze.ui.inappmessage.listeners/-i-in-app-message-manager-listener/before-in-app-message-view-closed.html): Called just before the in-app message is removed from the activity's view. The in-app message is still visible to the user at this time.
4. [`afterInAppMessageViewClosed`](https://braze-inc.github.io/braze-android-sdk/kdoc/braze-android-sdk/com.braze.ui.inappmessage.listeners/-i-in-app-message-manager-listener/after-in-app-message-view-closed.html): Called just after the in-app message is removed from the activity's view. The in-app message is no longer visible to the user at this time.
Note that the time between [`afterInAppMessageViewOpened`](https://braze-inc.github.io/braze-android-sdk/kdoc/braze-android-sdk/com.braze.ui.inappmessage.listeners/-i-in-app-message-manager-listener/after-in-app-message-view-opened.html) and [`beforeInAppMessageViewClosed`](https://braze-inc.github.io/braze-android-sdk/kdoc/braze-android-sdk/com.braze.ui.inappmessage.listeners/-i-in-app-message-manager-listener/before-in-app-message-view-closed.html) is when the in-app message view is on screen, visible to the user.
**Note:**
Implementation of these methods is not required. They're only provided to track and inform the in-app message view lifecycle. You can leave these method implementations empty.
Create a class that implements [`IHtmlInAppMessageActionListener`](https://braze-inc.github.io/braze-android-sdk/kdoc/braze-android-sdk/com.braze.ui.inappmessage.listeners/-i-html-in-app-message-action-listener/index.html).
The callbacks in your `IHtmlInAppMessageActionListener` will be called whenever the user initiates any of the following actions inside the HTML in-app message:
- Clicks on the close button
- Fires a custom event
- Clicks on a URL inside HTML in-app message
```java
public class CustomHtmlInAppMessageActionListener implements IHtmlInAppMessageActionListener {
private final Context mContext;
public CustomHtmlInAppMessageActionListener(Context context) {
mContext = context;
}
@Override
public void onCloseClicked(IInAppMessage inAppMessage, String url, Bundle queryBundle) {
Toast.makeText(mContext, "HTML In App Message closed", Toast.LENGTH_LONG).show();
BrazeInAppMessageManager.getInstance().hideCurrentlyDisplayingInAppMessage(false);
}
@Override
public boolean onCustomEventFired(IInAppMessage inAppMessage, String url, Bundle queryBundle) {
Toast.makeText(mContext, "Custom event fired. Ignoring.", Toast.LENGTH_LONG).show();
return true;
}
@Override
public boolean onOtherUrlAction(IInAppMessage inAppMessage, String url, Bundle queryBundle) {
Toast.makeText(mContext, "Custom url pressed: " + url + " . Ignoring", Toast.LENGTH_LONG).show();
BrazeInAppMessageManager.getInstance().hideCurrentlyDisplayingInAppMessage(false);
return true;
}
}
```
```kotlin
class CustomHtmlInAppMessageActionListener(private val mContext: Context) : IHtmlInAppMessageActionListener {
override fun onCloseClicked(inAppMessage: IInAppMessage, url: String, queryBundle: Bundle) {
Toast.makeText(mContext, "HTML In App Message closed", Toast.LENGTH_LONG).show()
BrazeInAppMessageManager.getInstance().hideCurrentlyDisplayingInAppMessage(false)
}
override fun onCustomEventFired(inAppMessage: IInAppMessage, url: String, queryBundle: Bundle): Boolean {
Toast.makeText(mContext, "Custom event fired. Ignoring.", Toast.LENGTH_LONG).show()
return true
}
override fun onOtherUrlAction(inAppMessage: IInAppMessage, url: String, queryBundle: Bundle): Boolean {
Toast.makeText(mContext, "Custom url pressed: $url . Ignoring", Toast.LENGTH_LONG).show()
BrazeInAppMessageManager.getInstance().hideCurrentlyDisplayingInAppMessage(false)
return true
}
}
```
### Step 2: Instruct Braze to use the custom manager listener
After you create `IInAppMessageManagerListener`, call `BrazeInAppMessageManager.getInstance().setCustomInAppMessageManagerListener()` to instruct `BrazeInAppMessageManager`
to use your custom `IInAppMessageManagerListener` instead of the default listener. Do this in your [`Application.onCreate()`](https://developer.android.com/reference/android/app/Application.html#onCreate()) before any other calls to Braze, so the custom listener is set before any in-app messages are displayed.
#### Altering in-app messages before display
When a new in-app message is received, and there is already an in-app message being displayed, the new message will be put onto the top of the stack and can be displayed at a later time.
However, if there is no in-app message being displayed, the following delegate method in `IInAppMessageManagerListener` will be called:
```java
@Override
public InAppMessageOperation beforeInAppMessageDisplayed(IInAppMessage inAppMessage) {
return InAppMessageOperation.DISPLAY_NOW;
}
```
```kotlin
override fun beforeInAppMessageDisplayed(inAppMessage: IInAppMessage): InAppMessageOperation {
return InAppMessageOperation.DISPLAY_NOW
}
```
The `InAppMessageOperation()` return value can control when the message should be displayed. The suggested usage of this method would be to delay messages in certain parts of the app by returning `DISPLAY_LATER` when in-app messages would be distracting to the user's app experience.
| `InAppMessageOperation` return value | Behavior |
| -------------------------- | -------- |
| `DISPLAY_NOW` | The message will be displayed |
| `DISPLAY_LATER` | The message will be returned to the stack and displayed at the next available opportunity |
| `DISCARD` | The message will be discarded |
| `null` | The message will be ignored. This method should **NOT** return `null` |
{: .reset-td-br-1 .reset-td-br-2 .reset-td-br-3 aria-label="Altering in-app messages before display" }
See [`InAppMessageOperation`](https://braze-inc.github.io/braze-android-sdk/kdoc/braze-android-sdk/com.braze.ui.inappmessage/-in-app-message-operation/index.html) for more details.
**Tip:**
If you choose to `DISCARD` the in-app message and replace it with your in-app message view, you will need to log in-app message clicks and impressions manually.
On Android, this is done by calling `logClick` and `logImpression` on in-app messages and `logButtonClick` on immersive in-app messages.
**Tip:**
Once an in-app message has been placed on the stack, you can request for it to be retrieved and displayed at any time by calling [`BrazeInAppMessageManager.getInstance().requestDisplayInAppMessage()`](https://braze-inc.github.io/braze-android-sdk/kdoc/braze-android-sdk/com.braze.ui.inappmessage/-braze-in-app-message-manager/request-display-in-app-message.html). This method requests Braze to display the next available in-app message from the stack.
After your `IHtmlInAppMessageActionListener` is created, call `BrazeInAppMessageManager.getInstance().setCustomHtmlInAppMessageActionListener()` to instruct `BrazeInAppMessageManager` to use your custom `IHtmlInAppMessageActionListener` instead of the default action listener.
We recommend setting your `IHtmlInAppMessageActionListener` in your [`Application.onCreate()`](https://developer.android.com/reference/android/app/Application.html#onCreate()) before any other calls to Braze. This will set the custom action listener before any in-app message is displayed:
```java
BrazeInAppMessageManager.getInstance().setCustomHtmlInAppMessageActionListener(new CustomHtmlInAppMessageActionListener(context));
```
```kotlin
BrazeInAppMessageManager.getInstance().setCustomHtmlInAppMessageActionListener(CustomHtmlInAppMessageActionListener(context))
```
## Setting custom factories
You can override a number of defaults through custom factory objects. These can be registered with the Braze SDK as needed to achieve the desired results. However, if you decide to override a factory, you'll likely need to explicitly defer to the default or reimplement the functionality provided by the Braze default. The following code snippet illustrates how to supply custom implementations of the `IInAppMessageViewFactory` and the `IInAppMessageViewWrapperFactory` interfaces.
**In-app message types**
```kotlin
class BrazeDemoApplication : Application(){
override fun onCreate() {
super.onCreate()
registerActivityLifecycleCallbacks(BrazeActivityLifecycleCallbackListener(true, true))
BrazeInAppMessageManager.getInstance().setCustomInAppMessageViewWrapperFactory(CustomInAppMessageViewWrapperFactory())
BrazeInAppMessageManager.getInstance().setCustomInAppMessageViewFactory(CustomInAppMessageViewFactory())
}
}
```
**In-app message types**
```java
public class BrazeDemoApplication extends Application {
@Override
public void onCreate{
super.onCreate();
registerActivityLifecycleCallbacks(new BrazeActivityLifecycleCallbackListener(true, true));
BrazeInAppMessageManager.getInstance().setCustomInAppMessageViewWrapperFactory(new CustomInAppMessageViewWrapperFactory());
BrazeInAppMessageManager.getInstance().setCustomInAppMessageViewFactory(new CustomInAppMessageViewFactory());
}
}
```
Braze in-app message types are versatile enough to cover most custom use cases. However, if you want to fully define the visual appearance of your in-app messages instead of using a default type, Braze makes this possible by setting a custom view factory.
The `BrazeInAppMessageManager` automatically handles placing the in-app message model into the existing activity view hierarchy by default using [`DefaultInAppMessageViewWrapper`](https://braze-inc.github.io/braze-android-sdk/kdoc/braze-android-sdk/com.braze.ui.inappmessage/-default-in-app-message-view-wrapper/index.html). If you need to customize how in-app messages are placed into the view hierarchy, you should use a custom [`IInAppMessageViewWrapperFactory`](https://braze-inc.github.io/braze-android-sdk/kdoc/braze-android-sdk/com.braze.ui.inappmessage/-i-in-app-message-view-wrapper-factory/index.html).
In-app messages have preset animation behavior. `Slideup` messages slide into the screen; `full` and `modal` messages fade in and out. If you want to define custom animation behaviors for your in-app messages, Braze makes this possible by setting up a custom animation factory.
### Step 1: Implement the factory
Create a class that implements [`IInAppMessageViewFactory`](https://braze-inc.github.io/braze-android-sdk/kdoc/braze-android-sdk/com.braze.ui.inappmessage/-i-in-app-message-view-factory/index.html):
```java
public class CustomInAppMessageViewFactory implements IInAppMessageViewFactory {
@Override
public View createInAppMessageView(Activity activity, IInAppMessage inAppMessage) {
// Uses a custom view for slideups, modals, and full in-app messages.
// HTML in-app messages and any other types will use the Braze default in-app message view factories
switch (inAppMessage.getMessageType()) {
case SLIDEUP:
case MODAL:
case FULL:
// Use a custom view of your choosing
return createMyCustomInAppMessageView();
default:
// Use the default in-app message factories
final IInAppMessageViewFactory defaultInAppMessageViewFactory = BrazeInAppMessageManager.getInstance().getDefaultInAppMessageViewFactory(inAppMessage);
return defaultInAppMessageViewFactory.createInAppMessageView(activity, inAppMessage);
}
}
}
```
```kotlin
class CustomInAppMessageViewFactory : IInAppMessageViewFactory {
override fun createInAppMessageView(activity: Activity, inAppMessage: IInAppMessage): View {
// Uses a custom view for slideups, modals, and full in-app messages.
// HTML in-app messages and any other types will use the Braze default in-app message view factories
when (inAppMessage.messageType) {
MessageType.SLIDEUP, MessageType.MODAL, MessageType.FULL ->
// Use a custom view of your choosing
return createMyCustomInAppMessageView()
else -> {
// Use the default in-app message factories
val defaultInAppMessageViewFactory = BrazeInAppMessageManager.getInstance().getDefaultInAppMessageViewFactory(inAppMessage)
return defaultInAppMessageViewFactory!!.createInAppMessageView(activity, inAppMessage)
}
}
}
}
```
Create a class that implements [`IInAppMessageViewWrapperFactory`](https://braze-inc.github.io/braze-android-sdk/kdoc/braze-android-sdk/com.braze.ui.inappmessage/-i-in-app-message-view-wrapper-factory/index.html) and returns an [`IInAppMessageViewWrapper`](https://braze-inc.github.io/braze-android-sdk/kdoc/braze-android-sdk/com.braze.ui.inappmessage/-i-in-app-message-view-wrapper/index.html).
This factory is called immediately after the in-app message view is created. The easiest way to implement a custom [`IInAppMessageViewWrapper`](https://braze-inc.github.io/braze-android-sdk/kdoc/braze-android-sdk/com.braze.ui.inappmessage/-i-in-app-message-view-wrapper/index.html) is just to extend the default [`DefaultInAppMessageViewWrapper`](https://braze-inc.github.io/braze-android-sdk/kdoc/braze-android-sdk/com.braze.ui.inappmessage/-default-in-app-message-view-wrapper/index.html):
```java
public class CustomInAppMessageViewWrapper extends DefaultInAppMessageViewWrapper {
public CustomInAppMessageViewWrapper(View inAppMessageView,
IInAppMessage inAppMessage,
IInAppMessageViewLifecycleListener inAppMessageViewLifecycleListener,
BrazeConfigurationProvider brazeConfigurationProvider,
Animation openingAnimation,
Animation closingAnimation, View clickableInAppMessageView) {
super(inAppMessageView,
inAppMessage,
inAppMessageViewLifecycleListener,
brazeConfigurationProvider,
openingAnimation,
closingAnimation,
clickableInAppMessageView);
}
@Override
public void open(@NonNull Activity activity) {
super.open(activity);
Toast.makeText(activity.getApplicationContext(), "Opened in-app message", Toast.LENGTH_SHORT).show();
}
@Override
public void close() {
super.close();
Toast.makeText(mInAppMessageView.getContext().getApplicationContext(), "Closed in-app message", Toast.LENGTH_SHORT).show();
}
}
```
```kotlin
class CustomInAppMessageViewWrapper(inAppMessageView: View,
inAppMessage: IInAppMessage,
inAppMessageViewLifecycleListener: IInAppMessageViewLifecycleListener,
brazeConfigurationProvider: BrazeConfigurationProvider,
openingAnimation: Animation,
closingAnimation: Animation, clickableInAppMessageView: View) :
DefaultInAppMessageViewWrapper(inAppMessageView,
inAppMessage,
inAppMessageViewLifecycleListener,
brazeConfigurationProvider,
openingAnimation,
closingAnimation,
clickableInAppMessageView) {
override fun open(activity: Activity) {
super.open(activity)
Toast.makeText(activity.applicationContext, "Opened in-app message", Toast.LENGTH_SHORT).show()
}
override fun close() {
super.close()
Toast.makeText(mInAppMessageView.context.applicationContext, "Closed in-app message", Toast.LENGTH_SHORT).show()
}
}
```
Create a class that implements [`IInAppMessageAnimationFactory`](https://braze-inc.github.io/braze-android-sdk/kdoc/braze-android-sdk/com.braze.ui.inappmessage/-i-in-app-message-animation-factory/index.html):
```java
public class CustomInAppMessageAnimationFactory implements IInAppMessageAnimationFactory {
@Override
public Animation getOpeningAnimation(IInAppMessage inAppMessage) {
Animation animation = new AlphaAnimation(0, 1);
animation.setInterpolator(new AccelerateInterpolator());
animation.setDuration(2000L);
return animation;
}
@Override
public Animation getClosingAnimation(IInAppMessage inAppMessage) {
Animation animation = new AlphaAnimation(1, 0);
animation.setInterpolator(new DecelerateInterpolator());
animation.setDuration(2000L);
return animation;
}
}
```
```kotlin
class CustomInAppMessageAnimationFactory : IInAppMessageAnimationFactory {
override fun getOpeningAnimation(inAppMessage: IInAppMessage): Animation {
val animation: Animation = AlphaAnimation(0, 1)
animation.interpolator = AccelerateInterpolator()
animation.duration = 2000L
return animation
}
override fun getClosingAnimation(inAppMessage: IInAppMessage): Animation {
val animation: Animation = AlphaAnimation(1, 0)
animation.interpolator = DecelerateInterpolator()
animation.duration = 2000L
return animation
}
}
```
### Step 2: Instruct Braze to use the factory
After your `IInAppMessageViewFactory` is created, call `BrazeInAppMessageManager.getInstance().setCustomInAppMessageViewFactory()` to instruct `BrazeInAppMessageManager`
to use your custom `IInAppMessageViewFactory` instead of the default view factory.
**Tip:**
We recommend setting your `IInAppMessageViewFactory` in your `Application.onCreate()` before any other calls to Braze. This will set the custom view factory before any in-app message is displayed.
#### How it works
The `slideup` in-app message view implements [`IInAppMessageView`](https://braze-inc.github.io/braze-android-sdk/kdoc/braze-android-sdk/com.braze.ui.inappmessage.views/-i-in-app-message-view/index.html). The `full` and `modal` type message views implement [`IInAppMessageImmersiveView`](https://braze-inc.github.io/braze-android-sdk/kdoc/braze-android-sdk/com.braze.ui.inappmessage.views/-i-in-app-message-immersive-view/index.html). Implementing one of these classes allows Braze to add click listeners to your custom view where appropriate. All Braze view classes extend Android's [`View`](http://developer.android.com/reference/android/view/View.html) class.
Implementing `IInAppMessageView` allows you to define a certain portion of your custom view as clickable. Implementing [`IInAppMessageImmersiveView`](https://braze-inc.github.io/braze-android-sdk/kdoc/braze-android-sdk/com.braze.ui.inappmessage.views/-i-in-app-message-immersive-view/index.html) allows you to define message button views and a close button view.
After your [`IInAppMessageViewWrapper`](https://braze-inc.github.io/braze-android-sdk/kdoc/braze-android-sdk/com.braze.ui.inappmessage/-i-in-app-message-view-wrapper/index.html) is created, call [`BrazeInAppMessageManager.getInstance().setCustomInAppMessageViewWrapperFactory()`](https://braze-inc.github.io/braze-android-sdk/kdoc/braze-android-sdk/com.braze.ui.inappmessage/-in-app-message-manager-base/set-custom-in-app-message-view-factory.html) to instruct `BrazeInAppMessageManager` to use your custom [`IInAppMessageViewWrapperFactory`](https://braze-inc.github.io/braze-android-sdk/kdoc/braze-android-sdk/com.braze.ui.inappmessage/-i-in-app-message-view-wrapper-factory/index.html) instead of the default view wrapper factory.
We recommend setting your [`IInAppMessageViewWrapperFactory`](https://braze-inc.github.io/braze-android-sdk/kdoc/braze-android-sdk/com.braze.ui.inappmessage/-i-in-app-message-view-wrapper-factory/index.html) in your [`Application.onCreate()`](https://developer.android.com/reference/android/app/Application.html#onCreate()) before any other calls to Braze. This will set the custom view wrapper factory before any in-app message is displayed:
```java
BrazeInAppMessageManager.getInstance().setCustomInAppMessageViewWrapperFactory(new CustomInAppMessageViewWrapper());
```
```kotlin
BrazeInAppMessageManager.getInstance().setCustomInAppMessageViewWrapperFactory(CustomInAppMessageViewWrapper())
```
Once your `IInAppMessageAnimationFactory` is created, call `BrazeInAppMessageManager.getInstance().setCustomInAppMessageAnimationFactory()` to instruct `BrazeInAppMessageManager`
to use your custom `IInAppMessageAnimationFactory` instead of the default animation factory.
We recommend setting your `IInAppMessageAnimationFactory` in your [`Application.onCreate()`](https://developer.android.com/reference/android/app/Application.html#onCreate()) before any other calls to Braze. This will set the custom animation factory before any in-app message is displayed.
## Custom styles
Braze UI elements come with a default look and feel that matches the Android standard UI guidelines and provides a seamless experience. This reference article covers custom in-app messaging styling for your Android or FireOS application.
### Setting a default style
You can see default styles in the Braze SDK's [`styles.xml`](https://github.com/braze-inc/braze-android-sdk/blob/master/android-sdk-ui/src/main/res/values/styles.xml) file:
```xml
```
If you would prefer, you can override these styles to create a look and feel that better suits your app.
To override a style, copy it in its entirety to the `styles.xml` file in your project and make modifications. The whole style must be copied over to your local `styles.xml` file for all attributes to be correctly set. Note that these custom styles are for changes to individual UI elements, not wholesale changes to layouts. Layout-level changes need to be handled with custom views.
**Note:**
You can customize some colors directly in your Braze campaign without modifying the XML. Keep in mind, colors set in the Braze dashboard will override colors you set anywhere else.
### Customizing the font
You can set a custom font by locating the typeface in the `res/font` directory. To use it, override the style for message text, headers, and button text and use the `fontFamily` attribute to instruct Braze to use your custom font family.
For example, to update the font on your in-app message button text, override the `Braze.InAppMessage.Button` style and reference your custom font family. The attribute value should point to a font family in your `res/font` directory.
Here is a truncated example with a custom font family, `my_custom_font_family`, referenced on the last line:
```xml
```
Aside from the `Braze.InAppMessage.Button` style for button text, the style for message text is `Braze.InAppMessage.Message` and the style for message headers is `Braze.InAppMessage.Header`. If you want to use your custom font family across all possible in-app message text, you can set your font family on the `Braze.InAppMessage` style, which is the parent style for all in-app messages.
**Important:**
As with other custom styles, the entire style must be copied over to your local `styles.xml` file for all attributes to be correctly set.
## Message dismissals
### Swiping to dismiss slideup messages
By default, slideup in-app messages can be dismissed with a swipe gesture. The direction of the swipe depends on the slideup position:
- **Left or right swipe:** Dismisses the slideup regardless of its position.
- **Slideup from the bottom:** Swiping from top to bottom dismisses the message. Swiping from bottom to top does not dismiss it.
- **Slideup from the top:** Swiping from bottom to top dismisses the message. Swiping from top to bottom does not dismiss it.
This swipe behavior is built into the default [`DefaultInAppMessageViewWrapper`](https://braze-inc.github.io/braze-android-sdk/kdoc/braze-android-sdk/com.braze.ui.inappmessage/-default-in-app-message-view-wrapper/index.html) and applies only to slideup in-app messages. Modal and full in-app messages don't support swipe-to-dismiss. To customize this behavior, you can implement a [custom view wrapper factory](#android_setting-custom-factories).
**Note:**
Tapping outside of a slideup message does not dismiss it by default. This behavior differs from modal messages, which can be configured for outside tap dismissal. For slideups, use the swipe gesture or the close button to dismiss the message.
### Disabling back button dismissals
By default, the hardware back button dismisses Braze in-app messages. This behavior can be disabled on a per-message basis via [`BrazeInAppMessageManager.setBackButtonDismissesInAppMessageView()`](https://braze-inc.github.io/braze-android-sdk/kdoc/braze-android-sdk/com.braze.ui.inappmessage/-in-app-message-manager-base/set-back-button-dismisses-in-app-message-view.html).
In the following example, `disable_back_button` is a custom key-value pair set on the in-app message that signifies whether the message should allow for the back button to dismiss the message:
```java
BrazeInAppMessageManager.getInstance().setCustomInAppMessageManagerListener(new DefaultInAppMessageManagerListener() {
@Override
public void beforeInAppMessageViewOpened(View inAppMessageView, IInAppMessage inAppMessage) {
super.beforeInAppMessageViewOpened(inAppMessageView, inAppMessage);
final Map extras = inAppMessage.getExtras();
if (extras != null && extras.containsKey("disable_back_button")) {
BrazeInAppMessageManager.getInstance().setBackButtonDismissesInAppMessageView(false);
}
}
@Override
public void afterInAppMessageViewClosed(IInAppMessage inAppMessage) {
super.afterInAppMessageViewClosed(inAppMessage);
BrazeInAppMessageManager.getInstance().setBackButtonDismissesInAppMessageView(true);
}
});
```
```kotlin
BrazeInAppMessageManager.getInstance().setCustomInAppMessageManagerListener(object : DefaultInAppMessageManagerListener() {
override fun beforeInAppMessageViewOpened(inAppMessageView: View, inAppMessage: IInAppMessage) {
super.beforeInAppMessageViewOpened(inAppMessageView, inAppMessage)
val extras = inAppMessage.extras
if (extras != null && extras.containsKey("disable_back_button")) {
BrazeInAppMessageManager.getInstance().setBackButtonDismissesInAppMessageView(false)
}
}
override fun afterInAppMessageViewClosed(inAppMessage: IInAppMessage) {
super.afterInAppMessageViewClosed(inAppMessage)
BrazeInAppMessageManager.getInstance().setBackButtonDismissesInAppMessageView(true)
}
})
```
**Note:**
Note that if this functionality is disabled, the host activity's hardware back button default behavior will be used instead. This may lead to the back button closing the application instead of the displayed in-app message.
### Enabling outside tap dismissals
By default, dismissing the modal using an outside tap is set to `false`. Setting this value to `true` will result in the modal in-app message being dismissed when the user taps outside of the in-app message. This behavior can be toggled on by calling:
```java
BrazeInAppMessageManager.getInstance().setClickOutsideModalViewDismissInAppMessageView(true)
```
## Customizing the orientation
To set a fixed orientation for an in-app message, first [set a custom in-app message manager listener](https://www.braze.com/docs/pt-br/pt-br/developer_guide/in_app_messages/customization/?sdktab=android#android_setting-custom-manager-listeners). Then, update the orientation on the `IInAppMessage` object in the `beforeInAppMessageDisplayed()` delegate method:
```java
public InAppMessageOperation beforeInAppMessageDisplayed(IInAppMessage inAppMessage) {
// Set the orientation to portrait
inAppMessage.setOrientation(Orientation.PORTRAIT);
return InAppMessageOperation.DISPLAY_NOW;
}
```
```kotlin
override fun beforeInAppMessageDisplayed(inAppMessage: IInAppMessage): InAppMessageOperation {
// Set the orientation to portrait
inAppMessage.orientation = Orientation.PORTRAIT
return InAppMessageOperation.DISPLAY_NOW
}
```
For tablet devices, in-app messages will appear in the user's preferred orientation style regardless of actual screen orientation.
## Disabling dark theme {#android-in-app-message-dark-theme-customization}
By default, `IInAppMessageManagerListener`'s `beforeInAppMessageDisplayed()` checks the system settings and conditionally enables dark theme styling on the message with the following code:
```java
@Override
public InAppMessageOperation beforeInAppMessageDisplayed(IInAppMessage inAppMessage) {
if (inAppMessage instanceof IInAppMessageThemeable && ViewUtils.isDeviceInNightMode(BrazeInAppMessageManager.getInstance().getApplicationContext())) {
((IInAppMessageThemeable) inAppMessage).enableDarkTheme();
}
return InAppMessageOperation.DISPLAY_NOW;
}
```
```kotlin
override fun beforeInAppMessageDisplayed(inAppMessage: IInAppMessage): InAppMessageOperation {
if (inAppMessage is IInAppMessageThemeable && ViewUtils.isDeviceInNightMode(BrazeInAppMessageManager.getInstance().applicationContext!!)) {
(inAppMessage as IInAppMessageThemeable).enableDarkTheme()
}
return InAppMessageOperation.DISPLAY_NOW
}
```
To change this, you can call [`enableDarkTheme`](https://braze-inc.github.io/braze-android-sdk/kdoc/braze-android-sdk/com.braze.models.inappmessage/-i-in-app-message-themeable/enable-dark-theme.html) at any step in the pre-display process to implement your own conditional logic.
## Customizing the Google Play review prompt
Due to the limitations and restrictions set by Google, custom Google Play review prompts are not currently supported by Braze. While some users have been able to integrate these prompts successfully, others have shown low success rates due to [Google Play quotas](https://developer.android.com/guide/playcore/in-app-review#quotas). Integrate at your own risk. Refer to documentation on [Google Play in-app review prompts](https://developer.android.com/guide/playcore/in-app-review).
## Prerequisites
Before you can use this feature, you'll need to [integrate the Swift Braze SDK](https://www.braze.com/docs/pt-br/pt-br/developer_guide/sdk_integration/?sdktab=swift).
## Setting up the UI delegate (required)
To customize the presentation of in-app messages and react to various lifecycle events, you'll need to set up [`BrazeInAppMessageUIDelegate`](https://braze-inc.github.io/braze-swift-sdk/documentation/brazeui/brazeinappmessageuidelegate). This is a delegate protocol used for receiving and processing triggered in-app message payloads, receiving display lifecycle events, and controlling display timing. To use `BrazeInAppMessageUIDelegate`, you must:
- Use the default [`BrazeInAppMessageUI`](https://braze-inc.github.io/braze-swift-sdk/documentation/brazeui/brazeinappmessageui) implementation as your `inAppMessagePresenter`.
- Include the `BrazeUI` library in your project.
### Step 1: Implement the `BrazeInAppMessageUIDelegate` protocol
First, implement the `BrazeInAppMessageUIDelegate` protocol and any corresponding methods you wish. In our example below, we are implementing this protocol in our application's `AppDelegate` class.
```swift
extension AppDelegate: BrazeInAppMessageUIDelegate {
// Implement your protocol methods here.
}
```
```objc
@interface AppDelegate ()
@end
@implementation AppDelegate
// Implement your protocol methods here.
@end
```
### Step 2: Assign the `delegate` object
Assign the `delegate` object on the `BrazeInAppMessageUI` instance before assigning this in-app message UI as your `inAppMessagePresenter`.
```swift
let inAppMessageUI = BrazeInAppMessageUI()
inAppMessageUI.delegate = self
AppDelegate.braze?.inAppMessagePresenter = inAppMessageUI
```
```objc
BrazeInAppMessageUI *inAppMessageUI = [[BrazeInAppMessageUI alloc] init];
inAppMessageUI.delegate = self;
AppDelegate.braze.inAppMessagePresenter = inAppMessageUI;
```
**Important:**
Not all delegate methods are available in Objective-C due to the incompatibility of their parameters with the language runtime.
**Tip:**
For a step-by-step implementation of the in-app message UI delegate, refer to this [tutorial](https://braze-inc.github.io/braze-swift-sdk/tutorials/braze/c1-inappmessageui).
## On-click behavior
Each `Braze.InAppMessage` object contains a corresponding [`ClickAction`](https://braze-inc.github.io/braze-swift-sdk/documentation/brazekit/braze/inappmessage/clickaction), which defines the behavior upon clicking.
### Click action types
The `clickAction` property on your `Braze.InAppMessage` defaults to `.none` but can be set to one of the following values:
| `ClickAction` | On-Click Behavior |
| -------------------------- | -------- |
| `.url(URL, useWebView: Bool)` | Opens the given URL in an external browser. If `useWebView` is set to `true`, it will open in a web view. |
| `.none` | The message will be dismissed when clicked. |
{: .reset-td-br-1 .reset-td-br-2 aria-label="Click action types" }
**Important:**
For in-app messages containing buttons, the message `clickAction` will also be included in the final payload if the click action is added prior to adding the button text.
### Customizing on-click behavior
To customize this behavior, you may modify the `clickAction` property by referring to the following sample:
```swift
func inAppMessage(
_ ui: BrazeInAppMessageUI,
prepareWith context: inout BrazeInAppMessageUI.PresentationContext
) {
if let newUrl = URL(string: "{your-url}") {
context.message.clickAction = .url(newUrl, useWebView: true)
}
}
```
The `inAppMessage(_:prepareWith:)` method is not available in Objective-C.
### Handling the custom behavior
The following [`BrazeInAppMessageUIDelegate`](https://braze-inc.github.io/braze-swift-sdk/documentation/brazeui/brazeinappmessageuidelegate) delegate method is called when a user clicks an in-app message. This callback is triggered for user-initiated clicks on in-app message buttons and HTML in-app message buttons (links), and a button ID is provided as an optional parameter for these interactions. This callback is not invoked for programmatic clicks triggered through `brazeBridge.logClick()`.
```swift
func inAppMessage(
_ ui: BrazeInAppMessageUI,
shouldProcess clickAction: Braze.InAppMessage.ClickAction,
buttonId: String?,
message: Braze.InAppMessage,
view: InAppMessageView
) -> Bool
```
```objc
- (BOOL)inAppMessage:(BrazeInAppMessageUI *)ui
shouldProcess:(enum BRZInAppMessageRawClickAction)clickAction
url:(NSURL *)uri
buttonId:(NSString *)buttonId
message:(BRZInAppMessageRaw *)message
view:(UIView *)view;
```
This method returns a boolean value to indicate if Braze should continue to execute the click action.
```swift
func inAppMessage(
_ ui: BrazeInAppMessageUI, shouldProcess clickAction: Braze.InAppMessage.ClickAction,
buttonId: String?, message: Braze.InAppMessage, view: InAppMessageView
) -> Bool {
guard let buttonId,
let idInt = Int(buttonId)
else { return true }
var button: BrazeKit.Braze.InAppMessage.Button? = nil
switch message {
case .modal(let modal):
button = modal.buttons[idInt]
case .modalImage(let modalImage):
button = modalImage.buttons[idInt]
case .full(let full):
button = full.buttons[idInt]
case .fullImage(let fullImage):
button = fullImage.buttons[idInt]
default:
break
}
print(button?.id)
print(button?.text)
print(button?.clickAction)
return true
}
```
```objc
- (BOOL)inAppMessage:(BrazeInAppMessageUI *)ui
shouldProcess:(enum BRZInAppMessageRawClickAction)clickAction
url:(NSURL *)uri
buttonId:(NSString *)buttonId
message:(BRZInAppMessageRaw *)message
view:(UIView *)view {
NSInteger buttonInt = [buttonId integerValue];
if (message.type == BRZInAppMessageRawTypeFull || message.type == BRZInAppMessageRawTypeModal) {
BRZInAppMessageRawButton *button = message.buttons[buttonInt];
NSLog(@"%ld", (long)button.identifier);
NSLog(@"%@", button.text);
NSLog(@"%ld", (long)button.clickAction);
}
return YES;
}
```
## Swiping to dismiss slideup messages
By default, slideup in-app messages can be dismissed with a swipe gesture. The direction of the swipe depends on the slideup position:
- **Left or right swipe:** Dismisses the slideup regardless of its position.
- **Slideup from the bottom:** Swiping from top to bottom dismisses the message. Swiping from bottom to top does not dismiss it.
- **Slideup from the top:** Swiping from bottom to top dismisses the message. Swiping from top to bottom does not dismiss it.
This swipe behavior is built into the default `BrazeInAppMessageUI` [`SlideupView`](https://braze-inc.github.io/braze-swift-sdk/documentation/brazeui/brazeinappmessageui/slideupview) and applies only to slideup in-app messages. Modal and full in-app messages don't support swipe-to-dismiss. To further customize the slideup view, including swipe behavior, you can modify the [`SlideupView.Attributes`](https://braze-inc.github.io/braze-swift-sdk/documentation/brazeui/brazeinappmessageui/slideupview/attributes-swift.struct) or provide a custom view via subclassing.
**Note:**
Tapping outside of a slideup message does not dismiss it. For modal or full in-app messages, you can enable outside tap dismissals using the `dismissOnBackgroundTap` attribute described below.
## Customizing modal dismissals
To enable outside tap dismissals, you can modify the `dismissOnBackgroundTap` property on the `Attributes` struct of the in-app message type you wish to customize.
For example, if you wish to enable this feature for modal image in-app messages, you can configure the following:
```swift
BrazeInAppMessageUI.ModalImageView.Attributes.defaults.dismissOnBackgroundTap = true
```
Customization via `Attributes` is not available in Objective-C.
The default value is `false`. This determines if the modal in-app message will be dismissed when the user taps outside of the in-app message.
| `DismissModalOnOutsideTap` | Description |
|----------|-------------|
| `true` | Modal in-app messages will be dismissed on outside tap. |
| `false` | Default, modal in-app messages will not be dismissed on outside tap. |
{: .reset-td-br-1 .reset-td-br-2 aria-label="Customizing modal dismissals" }
For more details on in-app message customization, refer to this [article](https://braze-inc.github.io/braze-swift-sdk/documentation/braze/in-app-message-customization).
## Customizing message orientation
You can customize the orientation of your in-app messages. You can set a new default orientation for all messages or set a custom orientation for a single message.
To choose a default orientation for all in-app messages, use the [`inAppMessage(_:prepareWith:)`](https://braze-inc.github.io/braze-swift-sdk/documentation/brazeui/brazeinappmessageuidelegate/inappmessage(_:preparewith:)-11fog) method to set the `preferredOrientation` property on the `PresentationContext`.
For example, to set portrait as the default orientation:
```swift
func inAppMessage(
_ ui: BrazeInAppMessageUI,
prepareWith context: inout BrazeInAppMessageUI.PresentationContext
) {
context.preferredOrientation = .portrait
}
```
```objc
- (void)inAppMessage:(BrazeInAppMessageUI *)ui
prepareWith:(BrazeInAppMessageUIPresentationContextRaw *)context {
context.preferredOrientation = BRZInAppMessageRawOrientationPortrait;
}
```
To set the orientation for a single message, modify the `orientation` property of `Braze.InAppMessage`:
```swift
// Set inAppMessage orientation to support any configuration
inAppMessage.orientation = .any
// Set inAppMessage orientation to only display in portrait
inAppMessage.orientation = .portrait
// Set inAppMessage orientation to only display in landscape
inAppMessage.orientation = .landscape
```
```objc
// Set inAppMessage orientation to support any configuration
inAppMessage.orientation = BRZInAppMessageRawOrientationAny;
// Set inAppMessage orientation to only display in portrait
inAppMessage.orientation = BRZInAppMessageRawOrientationPortrait;
// Set inAppMessage orientation to only display in landscape
inAppMessage.orientation = BRZInAppMessageRawOrientationLandscape;
```
After the in-app message is displayed, any device orientation changes while the message is still being displayed will cause the message to rotate with the device (provided it's supported by the message's `orientation` configuration).
The device orientation must also be supported by the in-app message's `orientation` property for the message to display. Additionally, the `preferredOrientation` setting will only be respected if it is included in your application's supported interface orientations under the **Deployment Info** section of your target's settings in Xcode.

**Note:**
The orientation is applied only for the presentation of the message. After the device changes orientation, the message view adopts one of the orientations it supports. On smaller devices (iPhones, iPod Touch), setting a landscape orientation for a modal or full in-app message may lead to truncated content.
## Customizing display timing
You can control if an available in-app message will display during certain points of your user experience. If there are situations where you would not want the in-app message to appear, such as during a fullscreen game or on a loading screen, you can delay or discard pending in-app message messages. To control the timing of in-app message, use the `inAppMessage(_:displayChoiceForMessage:)` [delegate method](https://braze-inc.github.io/braze-swift-sdk/documentation/brazeui/brazeinappmessageuidelegate/inappmessage(_:displaychoiceformessage:)-9w1nb) to set the `BrazeInAppMessageUI.DisplayChoice` property.
```swift
func inAppMessage(
_ ui: BrazeInAppMessageUI,
displayChoiceForMessage message: Braze.InAppMessage
) -> BrazeInAppMessageUI.DisplayChoice
```
```objc
- (enum BRZInAppMessageUIDisplayChoice)inAppMessage:(BrazeInAppMessageUI *)ui displayChoiceForMessage:(BRZInAppMessageRaw *)message
```
Configure `BrazeInAppMessageUI.DisplayChoice` to return one of the following values:
| Display Choice | Behavior |
| ----------------------------------- | --------------------------------------------------------------------------------------------------------------------------- |
| `.now` | The message will be displayed immediately. This is the default value. |
| `.reenqueue` | The message will be not be displayed and will be placed back on the top of the stack. |
| `.later` | The message will be not be displayed and will be placed back on the top of the stack. (Deprecated, please use `.reenqueue`) |
| `.discard` | The message will be discarded and will not be displayed. |
{: .reset-td-br-1 .reset-td-br-2 aria-label="Customizing display timing" }
**Tip:**
For a sample of `InAppMessageUI`, check out our [Swift Braze SDK repository](https://github.com/braze-inc/braze-swift-sdk/tree/main/Examples/Swift/Sources/InAppMessageUI) and [Objective-C](https://github.com/braze-inc/braze-swift-sdk/tree/main/Examples/ObjC/Sources/InAppMessageUI).
## Hiding the status bar
For `Full`, `FullImage` and `HTML` in-app messages, the SDK will hide the status bar by default. For other types of in-app messages, the status bar is left untouched. To configure this behavior, use the `inAppMessage(_:prepareWith:)` [delegate method](https://braze-inc.github.io/braze-swift-sdk/documentation/brazeui/brazeinappmessageuidelegate/inappmessage(_:preparewith:)-11fog) to set the `statusBarHideBehavior` property on the `PresentationContext`. This field takes one of the following values:
| Status Bar Hide Behavior | Description |
| ----------------------------------- | ------------------------------------------------------------------------------------- |
| `.auto` | The message view decides the status bar hidden state. |
| `.hidden` | Always hide the status bar. |
| `.visible` | Always display the status bar. |
{: .reset-td-br-1 .reset-td-br-2 aria-label="Hiding the status bar" }
## Disabling dark mode
To prevent in-app messages from adopting dark mode styling when the user device has dark mode enabled, implement the `inAppMessage(_:prepareWith:)` [delegate method](https://braze-inc.github.io/braze-swift-sdk/documentation/brazeui/brazeinappmessageuidelegate/inappmessage(_:preparewith:)-11fog) method. The `PresentationContext` passed to the method contains a reference to the `InAppMessage` object to be presented. Each `InAppMessage` has a `themes` property containing a `dark` and `light` mode theme. If you set the `themes.dark` property to `nil`, Braze will automatically present the in-app message using its light theme.
In-app message types with buttons have an additional `themes` object on their `buttons` property. To prevent buttons from adopting dark mode styling, you can use [`map(_:)`](https://developer.apple.com/documentation/swift/array/map(_:)-87c4d) to create a new array of buttons with a `light` theme and no `dark` theme.
```swift
func inAppMessage(
_ ui: BrazeInAppMessageUI,
prepareWith context: inout BrazeInAppMessageUI.PresentationContext
) {
switch context.message {
case .slideup:
guard var slideup = context.message.slideup else { return }
slideup.themes.dark = nil
context.message.slideup = slideup
case .modal:
guard var modal = context.message.modal else { return }
modal.themes.dark = nil
modal.buttons = modal.buttons.map {
var newButton = $0
newButton.themes = .init(themes: ["light": $0.themes.light])
return newButton
}
context.message.modal = modal
case .modalImage:
guard var modalImage = context.message.modalImage else { return }
modalImage.themes.dark = nil
modalImage.buttons = modalImage.buttons.map {
var newButton = $0
newButton.themes = .init(themes: ["light": $0.themes.light])
return newButton
}
context.message.modalImage = modalImage
case .full:
guard var full = context.message.full else { return }
full.themes.dark = nil
full.buttons = full.buttons.map {
var newButton = $0
newButton.themes = .init(themes: ["light": $0.themes.light])
return newButton
}
context.message.full = full
case .fullImage:
guard var fullImage = context.message.fullImage else { return }
fullImage.themes.dark = nil
fullImage.buttons = fullImage.buttons.map {
var newButton = $0
newButton.themes = .init(themes: ["light": $0.themes.light])
return newButton
}
context.message.fullImage = fullImage
default:
break
}
}
```
```objc
- (void)inAppMessage:(BrazeInAppMessageUI *)ui
prepareWith:(BrazeInAppMessageUIPresentationContextRaw *)context {
switch (context.message.type) {
case BRZInAppMessageRawTypeSlideup: {
NSMutableDictionary *updatedThemes = [context.message.themes mutableCopy];
[updatedThemes removeObjectForKey:@"dark"];
context.message.themes = updatedThemes;
break;
}
case BRZInAppMessageRawTypeModal:
case BRZInAppMessageRawTypeFull:
{
NSMutableDictionary *updatedThemes = [context.message.themes mutableCopy];
[updatedThemes removeObjectForKey:@"dark"];
context.message.themes = updatedThemes;
NSMutableArray *updatedButtons = [NSMutableArray arrayWithCapacity:context.message.buttons.count];
for (BRZInAppMessageRawButton *button in context.message.buttons) {
BRZInAppMessageRawButtonTheme *lightTheme = BRZInAppMessageRawButtonTheme.defaultLight;
BRZInAppMessageRawButton *newButton = [button mutableCopy];
newButton.textColor = lightTheme.textColor;
newButton.backgroundColor = lightTheme.backgroundColor;
newButton.borderColor = lightTheme.borderColor;
[updatedButtons addObject:newButton];
}
context.message.buttons = updatedButtons;
break;
}
default:
break;
}
}
```
## Customizing the app store review prompt
You can use in-app messages in a campaign to ask users for an App Store review.
**Note:**
Because this example prompt overrides default behavior of Braze, we cannot automatically track impressions if it is implemented. You must [log your own analytics](https://www.braze.com/docs/pt-br/pt-br/developer_guide/analytics/).
### Step 1: Set the in-app message delegate
First, set the [`BrazeInAppMessageUIDelegate`](https://www.braze.com/docs/pt-br/pt-br/developer_guide/in_app_messages/customization/#swift_setting-up-the-ui-delegate-required) in your app.
### Step 2: Disable the default App Store review message
Next, implement the `inAppMessage(_:displayChoiceForMessage:)` [delegate method](https://braze-inc.github.io/braze-swift-sdk/documentation/brazeui/brazeinappmessageuidelegate/inappmessage(_:displaychoiceformessage:)-9w1nb) to disable the default App Store review message.
```swift
func inAppMessage(_ ui: BrazeInAppMessageUI, displayChoiceForMessage message: Braze.InAppMessage) -> BrazeInAppMessageUI.DisplayChoice {
if message.extras["AppStore Review"] != nil,
let messageUrl = message.clickAction.url {
UIApplication.shared.open(messageUrl, options: [:], completionHandler: nil)
return .discard
} else {
return .now
}
}
```
```objc
- (enum BRZInAppMessageUIDisplayChoice)inAppMessage:(BrazeInAppMessageUI *)ui
displayChoiceForMessage:(BRZInAppMessageRaw *)message {
if (message.extras != nil && message.extras[@"AppStore Review"] != nil) {
[[UIApplication sharedApplication] openURL:message.url options:@{} completionHandler:nil];
return BRZInAppMessageUIDisplayChoiceDiscard;
} else {
return BRZInAppMessageUIDisplayChoiceNow;
}
}
```
### Step 3: Create a deep link
In your deep link handling code, add the following code to process the `{YOUR-APP-SCHEME}:app-store-review` deep link. Note that you will need to import `StoreKit` to use `SKStoreReviewController`:
```swift
func application(_ app: UIApplication, open url: URL, options: [UIApplicationOpenURLOptionsKey : Any] = [:]) -> Bool {
let urlString = url.absoluteString.removingPercentEncoding
if (urlString == "{YOUR-APP-SCHEME}:app-store-review") {
SKStoreReviewController.requestReview()
return true;
}
// Other deep link handling code…
}
```
```objc
- (BOOL)application:(UIApplication *)app openURL:(NSURL *)url options:(NSDictionary *)options {
NSString *urlString = url.absoluteString.stringByRemovingPercentEncoding;
if ([urlString isEqualToString:@"{YOUR-APP-SCHEME}:app-store-review"]) {
[SKStoreReviewController requestReview];
return YES;
}
// Other deep link handling code…
}
```
### Step 4: Set custom on-click behavior
Next, create an in-app messaging campaign with the following:
- The key-value pair `"AppStore Review" : "true"`
- The on-click behavior set to "Deep Link Into App", using the deep link `{YOUR-APP-SCHEME}:app-store-review`.
**Tip:**
Apple limits App Store review prompts to a maximum of three times per year for each user, so your campaign should be [rate-limited](https://www.braze.com/docs/pt-br/pt-br/user_guide/engagement_tools/campaigns/building_campaigns/rate-limiting/) to three times per year per user.
Users may turn off App Store review prompts. As a result, your custom review prompt should not promise that a native App Store review prompt will appear or directly ask for a review.
## Prerequisites
Before you can use this feature, you'll need to [integrate the React Native Braze SDK](https://www.braze.com/docs/pt-br/pt-br/developer_guide/sdk_integration/?sdktab=react%20native).
## Methods for logging
You can use these methods by passing your `BrazeInAppMessage` instance to log analytics and perform actions:
| Method | Description |
| --------------------------------------------------------- | ------------------------------------------------------------------------------------- |
| `logInAppMessageClicked(inAppMessage)` | Logs a click for the provided in-app message data. |
| `logInAppMessageImpression(inAppMessage)` | Logs an impression for the provided in-app message data. |
| `logInAppMessageButtonClicked(inAppMessage, buttonId)` | Logs a button click for the provided in-app message data and button ID. |
| `hideCurrentInAppMessage()` | Dismisses the currently displayed in-app message. |
| `performInAppMessageAction(inAppMessage)` | Performs the action for an in-app message. |
| `performInAppMessageButtonAction(inAppMessage, buttonId)` | Performs the action for an in-app message button. |
{: .reset-td-br-1 .reset-td-br-2 aria-label="Methods for logging" }
## Handling message data
In most cases, you can use the `Braze.addListener` method to register event listeners to handle data coming from in-app messages.
Additionally, you can access the in-app message data in the JavaScript layer by calling the `Braze.subscribeToInAppMessage` method to have the SDKs publish an `inAppMessageReceived` event when an in-app message is triggered. Pass a callback to this method to execute your own code when the in-app message is triggered and received by the listener.
To customize how message data is handled, refer to the following implementation examples:
To enhance the default behavior, or if you don't have access to customize the native iOS or Android code, we recommend that you disable the default UI while still receiving in-app message events from Braze. To disable the default UI, pass `false` to the `Braze.subscribeToInAppMessage` method and use the in-app message data to construct your own message in JavaScript. Note that you will need to manually log analytics on your messages if you choose to disable the default UI.
```javascript
import Braze from "@braze/react-native-sdk";
// Option 1: Listen for the event directly via `Braze.addListener`.
//
// You may use this method to accomplish the same thing if you don't
// wish to make any changes to the default Braze UI.
Braze.addListener(Braze.Events.IN_APP_MESSAGE_RECEIVED, (event) => {
console.log(event.inAppMessage);
});
// Option 2: Call `subscribeToInAppMessage`.
//
// Pass in `false` to disable the automatic display of in-app messages.
Braze.subscribeToInAppMessage(false, (event) => {
console.log(event.inAppMessage);
// Use `event.inAppMessage` to construct your own custom message UI.
});
```
To include more advanced logic to determine whether or not to show an in-app message using the built-in UI, implement in-app messages through the native layer.
**Warning:**
Since this is an advanced customization option, note that overriding the default Braze implementation will also nullify the logic to emit in-app message events to your JavaScript listeners. If you wish to still use `Braze.subscribeToInAppMessage` or `Braze.addListener` as described in [Accessing in-app message data](#accessing-in-app-message-data), you will need to handle publishing the events yourself.
Implement the `IInAppMessageManagerListener` as described in our Android article on [Custom Manager Listener](https://www.braze.com/docs/pt-br/pt-br/developer_guide/in_app_messages/customization/?sdktab=android#android_setting-custom-manager-listeners). In your `beforeInAppMessageDisplayed` implementation, you can access the `inAppMessage` data, send it to the JavaScript layer, and decide to show or not show the native message based on the return value.
For more on these values, see our [Android documentation](https://www.braze.com/docs/pt-br/pt-br/developer_guide/in_app_messages/).
```java
// In-app messaging
@Override
public InAppMessageOperation beforeInAppMessageDisplayed(IInAppMessage inAppMessage) {
WritableMap parameters = new WritableNativeMap();
parameters.putString("inAppMessage", inAppMessage.forJsonPut().toString());
getReactNativeHost()
.getReactInstanceManager()
.getCurrentReactContext()
.getJSModule(DeviceEventManagerModule.RCTDeviceEventEmitter.class)
.emit("inAppMessageReceived", parameters);
// Note: return InAppMessageOperation.DISCARD if you would like
// to prevent the Braze SDK from displaying the message natively.
return InAppMessageOperation.DISPLAY_NOW;
}
```
### Overriding the default UI delegate
By default, [`BrazeInAppMessageUI`](https://braze-inc.github.io/braze-swift-sdk/documentation/brazeui/brazeinappmessageui/) is created and assigned when you initialize the `braze` instance. `BrazeInAppMessageUI` is an implementation of the [`BrazeInAppMessagePresenter`](https://braze-inc.github.io/braze-swift-sdk/documentation/brazekit/brazeinappmessagepresenter) protocol and comes with a `delegate` property that can be used to customize the handling of in-app messages that have been received.
1. Implement the `BrazeInAppMessageUIDelegate` delegate as described in [our iOS article here](https://braze-inc.github.io/braze-swift-sdk/tutorials/braze/c1-inappmessageui).
2. In the `inAppMessage(_:displayChoiceForMessage:)` delegate method, you can access the `inAppMessage` data, send it to the JavaScript layer, and decide to show or not show the native message based on the return value.
For more details on these values, see our [iOS documentation](https://braze-inc.github.io/braze-swift-sdk/documentation/brazeui/brazeinappmessageuidelegate/).
```objc
- (enum BRZInAppMessageUIDisplayChoice)inAppMessage:(BrazeInAppMessageUI *)ui
displayChoiceForMessage:(BRZInAppMessageRaw *)message {
// Convert the message to a JavaScript representation.
NSData *inAppMessageData = [message json];
NSString *inAppMessageString = [[NSString alloc] initWithData:inAppMessageData encoding:NSUTF8StringEncoding];
NSDictionary *arguments = @{
@"inAppMessage" : inAppMessageString
};
// Send to JavaScript.
[self sendEventWithName:@"inAppMessageReceived" body:arguments];
// Note: Return `BRZInAppMessageUIDisplayChoiceDiscard` if you would like
// to prevent the Braze SDK from displaying the message natively.
return BRZInAppMessageUIDisplayChoiceNow;
}
```
To use this delegate, assign it to `brazeInAppMessagePresenter.delegate` after initializing the `braze` instance.
**Note:**
`BrazeUI` can only be imported in Objective-C or Swift. If you are using Objective-C++, you will need to handle this in a separate file.
```objc
@import BrazeUI;
- (BOOL)application:(UIApplication *)application didFinishLaunchingWithOptions:(NSDictionary *)launchOptions {
BRZConfiguration *configuration = [[BRZConfiguration alloc] initWithApiKey:apiKey endpoint:endpoint];
Braze *braze = [BrazeReactBridge initBraze:configuration];
((BrazeInAppMessageUI *)braze.inAppMessagePresenter).delegate = [[CustomDelegate alloc] init];
AppDelegate.braze = braze;
}
```
### Overriding the default native UI
If you wish to fully customize the presentation of your in-app messages at the native iOS layer, conform to the [`BrazeInAppMessagePresenter`](https://braze-inc.github.io/braze-swift-sdk/documentation/brazekit/brazeinappmessagepresenter) protocol and assign your custom presenter following the sample below:
```objc
BRZConfiguration *configuration = [[BRZConfiguration alloc] initWithApiKey:apiKey endpoint:endpoint];
Braze *braze = [BrazeReactBridge initBraze:configuration];
braze.inAppMessagePresenter = [[MyCustomPresenter alloc] init];
AppDelegate.braze = braze;
```
## Customizing the display behavior
You can change the display behavior of in-app messages at runtime via the following:
```csharp
// Sets in-app messages to display immediately when triggered.
Appboy.AppboyBinding.SetInAppMessageDisplayAction(BrazeUnityInAppMessageDisplayActionType.IAM_DISPLAY_NOW);
// Sets in-app messages to display at a later time and be saved in a stack.
Appboy.AppboyBinding.SetInAppMessageDisplayAction(BrazeUnityInAppMessageDisplayActionType.IAM_DISPLAY_LATER);
// Sets in-app messages to be discarded after being triggered.
Appboy.AppboyBinding.SetInAppMessageDisplayAction(BrazeUnityInAppMessageDisplayActionType.IAM_DISCARD);
```
## Setting a custom listener
If you require more control over how a user interacts with in-app messages, use a `BrazeInAppMessageListener` and assign it to `Appboy.AppboyBinding.inAppMessageListener`. For any delegates you don't want to use, you can simply leave them as `null`.
```csharp
BrazeInAppMessageListener listener = new BrazeInAppMessageListener() {
BeforeInAppMessageDisplayed = BeforeInAppMessageDisplayed,
OnInAppMessageButtonClicked = OnInAppMessageButtonClicked,
OnInAppMessageClicked = OnInAppMessageClicked,
OnInAppMessageHTMLClicked = OnInAppMessageHTMLClicked,
OnInAppMessageDismissed = OnInAppMessageDismissed,
};
Appboy.AppboyBinding.inAppMessageListener = listener;
public void BeforeInAppMessageDisplayed(IInAppMessage inAppMessage) {
// Executed before an in-app message is displayed.
}
public void OnInAppMessageButtonClicked(IInAppMessage inAppMessage, InAppMessageButton inAppMessageButton) {
// Executed whenever an in-app message button is clicked.
}
public void OnInAppMessageClicked(IInAppMessage inAppMessage) {
// Executed whenever an in-app message is clicked.
}
public void OnInAppMessageHTMLClicked(IInAppMessage inAppMessage, Uri uri) {
// Executed whenever an HTML in-app message is clicked.
}
public void OnInAppMessageDismissed(IInAppMessage inAppMessage) {
// Executed whenever an in-app message is dismissed without a click.
}
```
# Dispare mensagens no app através do SDK da Braze
Source: /docs/pt-br/developer_guide/in_app_messages/triggering_messages/index.md
# Dispare mensagens no app {#trigger-in-app-messages}
> Aprenda como disparar mensagens no app através do SDK da Braze.
## Gatilhos de mensagem e entrega {#message-triggers-and-delivery}
As mensagens no app são disparadas quando o SDK registra um dos seguintes tipos de eventos personalizados: `Session Start`, `Push Click`, `Any Purchase`, `Specific Purchase` e `Custom Event` (os dois últimos contendo filtros de propriedade robustos).
No início da sessão de um usuário, a Braze entregará todas as mensagens no app elegíveis para seu dispositivo, enquanto simultaneamente pré-carrega ativos para minimizar a latência de exibição. Se o evento de gatilho tiver mais de uma mensagem no app elegível, apenas a mensagem com a maior prioridade será entregue. Para saber mais, veja [Ciclo de vida da sessão](https://www.braze.com/docs/pt-br/pt-br/developer_guide/analytics/tracking_sessions/#about-the-session-lifecycle).
**Note:**
Mensagens no app não podem ser disparadas através da API ou por eventos da API—apenas eventos personalizados registrados pelo SDK. Para saber mais sobre registro, veja [Registro de eventos personalizados](https://www.braze.com/docs/pt-br/pt-br/developer_guide/analytics/logging_events/).
## Tipos de mensagens no app {#types-of-in-app-messages}
A Braze envia os seguintes tipos de mensagens no app para os dispositivos dos usuários no início da sessão: `inapp` e `templated_iam`. Como usuário do dashboard, você não vê os diferentes tipos, mas a Braze os trata de forma diferente dependendo da configuração e do conteúdo.
### `inapp` (padrão) {#inapp-standard}
Uma mensagem no app `inapp` (ou "[padrão](https://www.braze.com/docs/pt-br/pt-br/user_guide/message_building_by_channel/in-app_messages/#standard-message-types)") já vem com o modelo preenchido com as informações necessárias, como atributos personalizados que a Braze já conhece. Geralmente, quando a mensagem no app é baixada para o dispositivo, o evento de gatilho faz com que o SDK exiba a mensagem no app `inapp` mesmo quando o dispositivo está offline ou em modo avião.
### `templated_iam` (com modelo) {#templated_iam-templated}
Uma mensagem no app `templated_iam` (ou "com modelo") ainda não tem o modelo preenchido com as informações necessárias. A Braze precisa fazer outra solicitação para obter as informações antes que a mensagem possa aparecer.
In-app messages are delivered as templated in-app messages when **Re-evaluate campaign eligibility before displaying** is selected or if any of the following Liquid tags exist in the message:
- `canvas_entry_properties`
- `connected_content`
- SMS variables such as `{sms.${*}}`
- `catalog_items`
- `catalog_selection_items`
- `event_properties`
This means that during session start, the device will receive the trigger of that in-app message instead of the entire message. When the user triggers the in-app message, the user's device will make a network request to fetch the actual message.
**Note:**
The message will not be delivered if the device doesn't have access to the internet. The message might not be delivered if the Liquid logic takes too long to resolve.
## Pares de chave-valor {#key-value-pairs}
Quando você cria uma Campaign na Braze, pode definir pares de chave-valor como `extras`, que o objeto de mensagens no app pode usar para enviar dados para seu app.
```javascript
import * as braze from "@braze/web-sdk";
braze.subscribeToInAppMessage(function(inAppMessage) {
// control group messages should always be "shown"
// this will log an impression and not show a visible message
if (inAppMessage instanceof braze.ControlMessage) {
return braze.showInAppMessage(inAppMessage);
}
if (inAppMessage instanceof braze.InAppMessage) {
const extras = inAppMessage.extras;
if (extras) {
for (const key in extras) {
console.log("key: " + key + ", value: " + extras[key]);
}
}
}
braze.showInAppMessage(inAppMessage);
});
```
```java
Map getExtras()
```
```kotlin
extras: Map
```
**Tip:**
Para saber mais, consulte o [KDoc](https://braze-inc.github.io/braze-android-sdk/kdoc/braze-android-sdk/com.braze.models.inappmessage/-i-in-app-message/index.html#1498425856%2FProperties%2F-1725759721).
O seguinte exemplo usa lógica personalizada para definir a apresentação de uma mensagem no app com base em seus pares de chave-valor em `extras`. Para um exemplo completo de personalização, confira [nosso app de exemplo](https://github.com/braze-inc/braze-swift-sdk/tree/main/Examples).
```swift
let customization = message.extras["custom-display"] as? String
if customization == "colorful-slideup" {
// Perform your custom logic.
}
```
```objc
if ([message.extras[@"custom-display"] isKindOfClass:[NSString class]]) {
NSString *customization = message.extras[@"custom-display"];
if ([customization isEqualToString:@"colorful-slideup"]) {
// Perform your custom logic.
}
}
```
## Desabilitando gatilhos automáticos {#disabling-automatic-triggers}
Por padrão, as mensagens no app são disparadas automaticamente. Para desabilitar isso:
Remova a chamada para `braze.automaticallyShowInAppMessages()` dentro do seu snippet de carregamento e crie uma lógica personalizada para lidar com a exibição ou não de uma mensagem no app.
```javascript
braze.subscribeToInAppMessage(function(inAppMessage) {
// control group messages should always be "shown"
// this will log an impression and not show a visible message
if (inAppMessage.isControl) { // v4.5.0+, otherwise use `inAppMessage instanceof braze.ControlMessage`
return braze.showInAppMessage(inAppMessage);
}
// Display the in-app message. You could defer display here by pushing this message to code within your own application.
// If you don't want to use the display capabilities in Braze, you could alternatively pass the in-app message to your own display code here.
if ( should_show_the_message_according_to_your_custom_logic ) {
braze.showInAppMessage(inAppMessage);
} else {
// do nothing
}
});
```
**Important:**
Se você chamar `braze.showInAppMessage` sem remover `braze.automaticallyShowInAppMessages()`, as mensagens podem ser exibidas duas vezes.
Para um controle mais avançado sobre o tempo das mensagens, incluindo adiamento e restauração de mensagens disparadas, consulte nosso [Tutorial: Adiar e restaurar mensagens disparadas](https://www.braze.com/docs/pt-br/pt-br/developer_guide/in_app_messages/tutorials/deferring_triggered_messages/).
1. Implemente o [`IInAppMessageManagerListener`](https://www.braze.com/docs/pt-br/pt-br/developer_guide/in_app_messages/customization/?sdktab=android&tab=global%20listener#android_step-1-implement-the-custom-manager-listener) para definir um ouvinte personalizado.
2. Atualize seu método [`beforeInAppMessageDisplayed()`](https://braze-inc.github.io/braze-android-sdk/kdoc/braze-android-sdk/com.braze.ui.inappmessage.listeners/-i-in-app-message-manager-listener/before-in-app-message-displayed.html) para retornar [`InAppMessageOperation.DISCARD`](https://braze-inc.github.io/braze-android-sdk/kdoc/braze-android-sdk/com.braze.ui.inappmessage/-in-app-message-operation/-d-i-s-c-a-r-d/index.html).
Para um controle mais avançado sobre o tempo das mensagens, incluindo exibições posteriores e reenfileiramento, consulte nossa página [Personalizando mensagens](https://www.braze.com/docs/pt-br/pt-br/developer_guide/in_app_messages/customization/?tab=global%20listener&subtab=kotlin#android_step-2-instruct-braze-to-use-the-custom-manager-listener).
1. Implemente o delegado `BrazeInAppMessageUIDelegate` em seu app. Para um guia completo, consulte [Tutorial: UI de mensagem no app](https://braze-inc.github.io/braze-swift-sdk/tutorials/braze/c1-inappmessageui).
2. Atualize seu método delegado `inAppMessage(_:displayChoiceForMessage:)` para retornar `.discard`.
Para um controle mais avançado sobre o tempo das mensagens, incluindo adiamento e restauração de mensagens disparadas, consulte nosso [Tutorial: Adiar e restaurar mensagens disparadas](https://www.braze.com/docs/pt-br/pt-br/developer_guide/in_app_messages/tutorials/deferring_triggered_messages/).
1. Verifique se você está usando o inicializador de integração automática, que está ativado por padrão nas versões `2.2.0` e posteriores.
2. Defina o padrão da operação de mensagem no app como `DISCARD` adicionando a seguinte linha ao seu arquivo `braze.xml`.
```xml
DISCARD
```
Para Android, desmarque **Automatically Display In-App Messages** no editor de configuração da Braze. Alternativamente, você pode definir `com_braze_inapp_show_inapp_messages_automatically` como `false` no `braze.xml` do seu projeto Unity.
A operação inicial de exibição de mensagens no app pode ser configurada na Braze usando a "In App Message Manager Initial Display Operation".
Para iOS, defina ouvintes de objetos de jogo no editor de configuração da Braze e certifique-se de que **Braze Displays In-App Messages** não esteja selecionado.
A operação inicial de exibição de mensagens no app pode ser configurada na Braze usando a "In App Message Manager Initial Display Operation".
## Encadeando duas mensagens no app em uma sessão {#chaining-two-in-app-messages-in-one-session}
Você pode disparar uma mensagem no app no início da sessão e, em seguida, disparar uma segunda mensagem no app após um botão ser pressionado na primeira. Para fazer isso, registre um evento personalizado para o clique do botão que disparará a segunda mensagem. O gatilho para a segunda mensagem já deve estar no dispositivo (o usuário já deve ser elegível para a segunda mensagem) e deve ocorrer no lado do dispositivo (o SDK da Braze não detectará alterações de atributos personalizados que ocorrem nos servidores da Braze). O cooldown padrão de 30 segundos entre gatilhos de mensagens no app deve ser alterado para exibir várias mensagens no app em rápida sucessão. Para configuração específica por plataforma, veja [Substituindo o limite de frequência padrão](#overriding-the-default-rate-limit).
## Substituindo o limite de frequência padrão {#overriding-the-default-rate-limit}
Por padrão, o SDK limita a frequência de mensagens no app disparadas para uma vez a cada 30 segundos. Para substituir isso, adicione a seguinte propriedade ao seu arquivo de configuração antes que a instância da Braze seja inicializada. Esse valor será usado como o novo limite de frequência em segundos.
Para apps em produção, não defina esse valor abaixo de 10 segundos, para que os usuários não sejam sobrecarregados com mensagens no app consecutivas. Para testes e fluxos de apps de exemplo, 5 segundos é uma configuração comum.
Você pode definir esse intervalo como `0` para testes. No entanto, um intervalo de `0` segundos não força várias mensagens no app a aparecerem ao mesmo tempo. Se uma mensagem no app já estiver visível, outra mensagem disparada não será exibida até que a mensagem atual seja dispensada.
```javascript
// Sets the minimum time interval between triggered in-app messages to 5 seconds instead of the default 30
braze.initialize('YOUR-API-KEY', { minimumIntervalBetweenTriggerActionsInSeconds: 5 })
```
```xml
5
```
```swift
let configuration = Braze.Configuration(
apiKey: "YOUR-APP-IDENTIFIER-API-KEY",
endpoint: "YOUR-BRAZE-ENDPOINT"
)
// Sets the minimum trigger time interval to 5 seconds
configuration.triggerMinimumTimeInterval = 5
let braze = Braze(configuration: configuration)
AppDelegate.braze = braze
```
```objc
BRZConfiguration *configuration =
[[BRZConfiguration alloc] initWithApiKey:@""
endpoint:@""];
// Sets the minimum trigger time interval to 5 seconds
configuration.triggerMinimumTimeInterval = 5;
Braze *braze = [BrazePlugin initBraze:configuration];
AppDelegate.braze = braze;
```
## Disparando mensagens manualmente {#manually-triggering-messages}
Por padrão, mensagens no app são disparadas automaticamente quando o SDK registra um evento personalizado. No entanto, além disso, você pode disparar mensagens manualmente usando os seguintes métodos.
### Usando um evento do lado do servidor {#using-a-server-side-event}
Neste momento, o SDK Web da Braze não suporta o disparo manual de mensagens usando eventos do lado do servidor.
Para disparar uma mensagem no app usando um evento enviado pelo servidor, envie uma notificação por push silenciosa para o dispositivo, que permite um retorno de chamada personalizado para registrar um evento baseado no SDK. Esse evento então disparará a mensagem no app voltada para o usuário.
#### Etapa 1: Crie um retorno de chamada push para receber o push silencioso {#step-1-create-a-push-callback-to-receive-the-silent-push}
Registre seu retorno de chamada de push personalizado para ouvir uma notificação por push silenciosa específica. Para saber mais, consulte [Configuração de notificações por push](https://www.braze.com/docs/pt-br/pt-br/developer_guide/push_notifications/#android_setting-up-push-notifications).
Dois eventos serão registrados para que a mensagem no app seja entregue, um pelo servidor e outro de dentro do seu retorno de chamada push personalizado. Para garantir que o mesmo evento não seja duplicado, o evento registrado a partir do seu retorno de chamada push deve seguir uma convenção de nomenclatura genérica, por exemplo, "evento de gatilho de mensagem no app", e não o mesmo nome do evento enviado pelo servidor. Se isso não for feito, a segmentação e os dados de usuários podem ser afetados por eventos duplicados sendo registrados para uma única ação do usuário.
```java
Braze.getInstance(context).subscribeToPushNotificationEvents(event -> {
final Bundle kvps = event.getNotificationPayload().getBrazeExtras();
if (kvps.containsKey("IS_SERVER_EVENT")) {
BrazeProperties eventProperties = new BrazeProperties();
// The campaign name is a string extra that clients can include in the push
String campaignName = kvps.getString("CAMPAIGN_NAME");
eventProperties.addProperty("campaign_name", campaignName);
Braze.getInstance(context).logCustomEvent("IAM Trigger", eventProperties);
}
});
```
```kotlin
Braze.getInstance(applicationContext).subscribeToPushNotificationEvents { event ->
val kvps = event.notificationPayload.brazeExtras
if (kvps.containsKey("IS_SERVER_EVENT")) {
val eventProperties = BrazeProperties()
// The campaign name is a string extra that clients can include in the push
val campaignName = kvps.getString("CAMPAIGN_NAME")
eventProperties.addProperty("campaign_name", campaignName)
Braze.getInstance(applicationContext).logCustomEvent("IAM Trigger", eventProperties)
}
}
```
#### Etapa 2: Crie uma Campaign de push silenciosa {#step-2-create-a-push-campaign}
Crie uma [Campaign de push silenciosa](https://www.braze.com/docs/pt-br/pt-br/developer_guide/push_notifications/silent/?sdktab=android) acionada pelo evento enviado pelo servidor.

A Campaign de push deve incluir extras de pares de chave-valor que indiquem que esta Campaign de push é enviada para registrar um evento personalizado do SDK. Esse evento será usado para disparar a mensagem no app.
{: style="max-width:70%;" }
O código de exemplo de retorno de chamada push anterior reconhece os pares de chave-valor e registra o evento personalizado apropriado do SDK.
Caso você queira incluir alguma propriedade de evento para anexar ao seu evento "disparar mensagem no app", passe-as nos pares de chave-valor da carga útil do push. Neste exemplo, foi incluído o nome da Campaign da mensagem no app subsequente. Seu retorno de chamada de push personalizado pode então passar o valor como o parâmetro da propriedade do evento ao registrar o evento personalizado.
#### Etapa 3: Crie uma Campaign de mensagem no app {#step-3-create-an-in-app-message-campaign}
Crie sua Campaign de mensagem no app visível para o usuário no dashboard da Braze. Essa Campaign deve ter uma entrega baseada em ação e ser acionada a partir do evento personalizado registrado dentro do seu retorno de chamada push personalizado.
No exemplo a seguir, a mensagem no app específica a ser acionada foi configurada enviando a propriedade do evento como parte do push silencioso inicial.

Se um evento enviado pelo servidor for registrado enquanto o app não estiver em primeiro plano, o evento será registrado, mas a mensagem no app não será exibida. Caso você queira que o evento seja postergado até que o aplicativo esteja em primeiro plano, uma verificação deve ser incluída no seu receptor de push personalizado para dispensar ou postergar o evento até que o app tenha entrado em primeiro plano.
#### Etapa 1: Lidar com push silencioso e pares de chave-valor {#step-1-handle-silent-push-and-key-value-pairs}
Implemente a seguinte função e chame-a dentro do método [`application(_:didReceiveRemoteNotification:fetchCompletionHandler:)`](https://developer.apple.com/documentation/uikit/uiapplicationdelegate/1623013-application/):
```swift
func handleExtras(userInfo: [AnyHashable : Any]) {
print("A push was received")
if userInfo != nil && (userInfo["IS_SERVER_EVENT"] as? String) != nil && (userInfo["CAMPAIGN_NAME"] as? String) != nil {
AppDelegate.braze?.logCustomEvent("IAM Trigger", properties: ["campaign_name": userInfo["CAMPAIGN_NAME"]])
}
}
```
```objc
- (void)handleExtrasFromPush:(NSDictionary *)userInfo {
NSLog(@"A push was received.");
if (userInfo !=nil && userInfo[@"IS_SERVER_EVENT"] !=nil && userInfo[@"CAMPAIGN_NAME"]!=nil) {
[AppDelegate.braze logCustomEvent:@"IAM Trigger" properties:@{@"campaign_name": userInfo[@"CAMPAIGN_NAME"]}];
}
};
```
Quando o push silencioso é recebido, um evento registrado pelo SDK "disparar mensagem no app" será registrado no perfil do usuário.
**Important:**
Devido a uma mensagem por push ser usada para registrar um evento personalizado registrado pelo SDK, a Braze precisará armazenar um token por push para cada usuário para ativar essa solução. Para usuários de iOS, a Braze só armazenará um token a partir do momento em que o usuário receber o prompt de push do sistema operacional. Antes disso, o usuário não estará acessível usando push, e a solução anterior não será possível.
#### Etapa 2: Crie uma Campaign de push silenciosa {#step-2-create-a-silent-push-campaign}
Crie uma [Campaign de push silenciosa](https://www.braze.com/docs/pt-br/pt-br/developer_guide/push_notifications/silent/?sdktab=swift) que é disparada pelo evento enviado pelo servidor.

A Campaign de push precisa incluir extras de pares de chave-valor, que indicam que esta Campaign de push é enviada para registrar um evento personalizado do SDK. Esse evento será usado para disparar a mensagem no app.

O código dentro do método `application(_:didReceiveRemoteNotification:fetchCompletionHandler:)` verifica a chave `IS_SERVER_EVENT` e registra um evento personalizado do SDK se estiver presente.
Você pode alterar o nome do evento ou as propriedades do evento enviando o valor desejado dentro dos extras de pares de chave-valor da carga útil push. Ao registrar o evento personalizado, esses extras podem ser usados como parâmetro do nome do evento ou como uma propriedade do evento.
#### Etapa 3: Crie uma Campaign de mensagem no app
Crie sua Campaign de mensagem no app visível para o usuário no dashboard da Braze. Essa Campaign deve ter uma entrega baseada em ação e ser acionada a partir do evento personalizado registrado dentro do método `application(_:didReceiveRemoteNotification:fetchCompletionHandler:)`.
No exemplo a seguir, a mensagem no app específica a ser acionada foi configurada enviando a propriedade do evento como parte do push silencioso inicial.

**Note:**
Essas mensagens no app só serão disparadas se o push silencioso for recebido enquanto o aplicativo estiver em primeiro plano.
### Exibindo uma mensagem pré-definida {#displaying-a-pre-defined-message}
Para exibir manualmente uma mensagem no app pré-definida, use o seguinte método:
Para o SDK Web, use `braze.showInAppMessage(inAppMessage)` para exibir qualquer mensagem no app. Para detalhes e um exemplo, veja [Exibindo uma mensagem em tempo real](#displaying-a-message-in-real-time).
```java
BrazeInAppMessageManager.getInstance().addInAppMessage(inAppMessage);
```
```kotlin
BrazeInAppMessageManager.getInstance().addInAppMessage(inAppMessage)
```
```swift
if let inAppMessage = AppDelegate.braze?.inAppMessagePresenter?.nextAvailableMessage() {
AppDelegate.braze?.inAppMessagePresenter?.present(message: inAppMessage)
}
```
### Exibindo uma mensagem em tempo real {#displaying-a-message-in-real-time}
Você também pode criar e exibir mensagens locais no app em tempo real, usando as mesmas opções de personalização disponíveis no dashboard. Para fazer isso:
```javascript
// Displays a slideup type in-app message.
var message = new braze.SlideUpMessage("Welcome to Braze! This is an in-app message.");
message.slideFrom = braze.InAppMessage.SlideFrom.TOP;
braze.showInAppMessage(message);
```
```java
// Initializes a new slideup type in-app message and specifies its message.
InAppMessageSlideup inAppMessage = new InAppMessageSlideup();
inAppMessage.setMessage("Welcome to Braze! This is a slideup in-app message.");
```
```kotlin
// Initializes a new slideup type in-app message and specifies its message.
val inAppMessage = InAppMessageSlideup()
inAppMessage.message = "Welcome to Braze! This is a slideup in-app message."
```
**Important:**
Não exiba mensagens no app quando o teclado virtual estiver exibido na tela, pois a renderização é indefinida nessa circunstância.
Chame manualmente o método [`present(message:)`](https://braze-inc.github.io/braze-swift-sdk/documentation/brazekit/brazeinappmessagepresenter/present(message:)) no seu `inAppMessagePresenter`. Por exemplo:
```swift
let customInAppMessage = Braze.InAppMessage.slideup(
.init(message: "YOUR_CUSTOM_SLIDEUP_MESSAGE", slideFrom: .bottom, themes: .defaults)
)
AppDelegate.braze?.inAppMessagePresenter?.present(message: customInAppMessage)
```
```objc
BRZInAppMessageRaw *customInAppMessage = [[BRZInAppMessageRaw alloc] init];
customInAppMessage.type = BRZInAppMessageRawTypeSlideup;
customInAppMessage.message = @"YOUR_CUSTOM_SLIDEUP_MESSAGE";
customInAppMessage.slideFrom = BRZInAppMessageRawSlideFromBottom;
customInAppMessage.themes = @{
@"light": BRZInAppMessageRawTheme.defaultLight,
@"dark": BRZInAppMessageRawTheme.defaultDark
};
[AppDelegate.braze.inAppMessagePresenter presentMessage:customInAppMessage];
```
**Note:**
Ao criar sua própria mensagem no app, você opta por não participar de qualquer rastreamento de análise de dados e terá que gerenciar manualmente o registro de cliques e impressões usando seu `message.context`.
Para exibir a próxima mensagem na pilha, use o método `DisplayNextInAppMessage()`. As mensagens serão salvas nesta pilha se `DISPLAY_LATER` ou `BrazeUnityInAppMessageDisplayActionType.IAM_DISPLAY_LATER` forem escolhidos como a ação de exibição da mensagem no app.
```csharp
Appboy.AppboyBinding.DisplayNextInAppMessage();
```
## Causas de atrasos em mensagens no app {#causes-of-in-app-message-delays}
Se você receber uma Campaign de mensagem no app alguns segundos após o início da sessão, o atraso pode ter sido causado por:
- Um atraso no gatilho da Campaign
- Personalizações
- O evento de gatilho sendo registrado mais tarde do que o esperado (como com um `templated_iam`)
## Mensagens de intenção de saída para a Web {#exit-intent-messages-for-web}
Mensagens de intenção de saída são mensagens no app não disruptivas usadas para comunicar informações importantes aos visitantes antes que eles deixem seu site.
Para configurar gatilhos para esses tipos de mensagens no SDK Web, implemente uma biblioteca de intenção de saída em seu site (como [a biblioteca de código aberto do ouibounce](https://github.com/carlsednaoui/ouibounce)) e use o seguinte código para registrar `'exit intent'` como um evento personalizado na Braze. Agora suas futuras Campaigns de mensagens no app podem usar esse tipo de mensagem como um gatilho de evento personalizado.
```javascript
var _ouibounce = ouibounce(false, {
callback: function() { braze.logCustomEvent('exit intent'); }
});
```
# Mensagens no app em HTML
Source: /docs/pt-br/developer_guide/in_app_messages/html_messages/index.md
# Mensagens no app em HTML {#html-in-app-messages}
> Aprenda como adicionar a interface JavaScript da Braze ao seu app, para que você possa usar a API da Braze para criar [mensagens HTML no app](https://www.braze.com/docs/pt-br/pt-br/user_guide/channels/in_app_messages/message_types/custom_html/) em suas WebViews personalizadas.
## Prerequisites
Before you can use this feature, you'll need to [integrate the Android Braze SDK](https://www.braze.com/docs/pt-br/pt-br/developer_guide/sdk_integration/?sdktab=android).
## About HTML messages
With the Braze JavaScript interface, you can leverage Braze inside the custom WebViews within your app. The [`InAppMessageJavascriptInterface`](https://braze-inc.github.io/braze-android-sdk/kdoc/braze-android-sdk/com.braze.ui.inappmessage.jsinterface/-in-app-message-javascript-interface/index.html) is responsible for:
1. Injecting the Braze JavaScript bridge into your WebView, as outlined in [User Guide: HTML in-app messages](https://www.braze.com/docs/pt-br/pt-br/user_guide/message_building_by_channel/in-app_messages/customize/#custom-html-messages).
2. Passing the bridge methods received from your WebView to the [Braze Android SDK](https://github.com/braze-inc/braze-android-sdk).
## Adding the interface to a WebView
Using Braze functionality from a WebView in your app can be done by adding the Braze JavaScript interface to your WebView. After the interface has been added, the same API available for [User Guide: HTML in-app messages](https://www.braze.com/docs/pt-br/pt-br/user_guide/message_building_by_channel/in-app_messages/customize/#custom-html-messages) will be available within your custom WebView.
```java
String javascriptString = BrazeFileUtils.getAssetFileStringContents(context.getAssets(), "braze-html-bridge.js");
myWebView.loadUrl("javascript:" + javascriptString);
final InAppMessageJavascriptInterface javascriptInterface = new InAppMessageJavascriptInterface(context, inAppMessage);
myWebView.addJavascriptInterface(javascriptInterface, "brazeInternalBridge");
```
```kotlin
val javascriptString = context.assets.getAssetFileStringContents("braze-html-bridge.js")
myWebView.loadUrl("javascript:" + javascriptString!!)
val javascriptInterface = InAppMessageJavascriptInterface(context, inAppMessage)
myWebView.addJavascriptInterface(javascriptInterface, "brazeInternalBridge")
```
## Embedding YouTube content
YouTube and other HTML5 content can play in HTML in-app messages. This requires hardware acceleration to be enabled in the activity where the in-app message is being displayed; see the [Android developer guide](https://developer.android.com/guide/topics/graphics/hardware-accel.html#controlling) for more details. Hardware acceleration is only available on Android API versions 11 and later.
The following is an example of an embedded YouTube video in an HTML snippet:
```html
```
## Using deep links
When using deep links or external links in Android HTML in-app messages, **do not** call `brazeBridge.closeMessage()` in your JavaScript. The SDK's internal logic automatically closes the in-app message when it redirects to a link. Calling `brazeBridge.closeMessage()` interferes with this process and may cause the message to become unresponsive when users return to your app.
The following is an example of a deep link in a code snippet:
```javascript
```
## Prerequisites
Before you can use this feature, you'll need to [integrate the Swift Braze SDK](https://www.braze.com/docs/pt-br/pt-br/developer_guide/sdk_integration/?sdktab=swift).
## About HTML messages
With the Braze JavaScript interface, you can leverage Braze inside the custom WebViews within your app. The interface's [`ScriptMessageHandler`](https://braze-inc.github.io/braze-swift-sdk/documentation/brazekit/braze/webviewbridge/scriptmessagehandler) is responsible for:
1. Injecting the Braze JavaScript bridge into your WebView, as outlined in [User Guide: HTML in-app messages](https://www.braze.com/docs/pt-br/pt-br/user_guide/message_building_by_channel/in-app_messages/customize/#custom-html-messages).
2. Passing the bridge methods received from your WebView to the [Braze Swift SDK](https://github.com/braze-inc/braze-swift-sdk).
## Adding the interface to a WebView
First, add the [`ScriptMessageHandler`](https://braze-inc.github.io/braze-swift-sdk/documentation/brazekit/braze/webviewbridge/scriptmessagehandler) from `WebViewBridge` to your app.
```swift
let scriptMessageHandler = Braze.WebViewBridge.ScriptMessageHandler(braze: braze)
```
Add the initialized `scriptMessageHandler` to a WkWebView's `userContentController`.
```swift
configuration.userContentController.add(
scriptMessageHandler,
name: Braze.WebViewBridge.ScriptMessageHandler.name
)
```
Then create the WebView using your configuration.
```swift
let webView = WKWebView(frame: .zero, configuration: configuration)
```
When you're finished, your code should be similar to the following:
```swift
// Create the script message handler using your initialized Braze instance.
let scriptMessageHandler = Braze.WebViewBridge.ScriptMessageHandler(braze: braze)
// Create a web view configuration and setup the script message handler.
let configuration = WKWebViewConfiguration()
configuration.userContentController.addUserScript(
Braze.WebViewBridge.ScriptMessageHandler.script
)
configuration.userContentController.add(
scriptMessageHandler,
name: Braze.WebViewBridge.ScriptMessageHandler.name
)
// Create the webview using the configuration
let webView = WKWebView(frame: .zero, configuration: configuration)
```
## Example: Logging a custom event
In the following example, `BrazeBridge` logs a custom event from existing web content to the Braze Swift SDK.
```javascript
Logging data via BrazeBridge Example
```
# Deep linking em mensagens no app para o SDK da Braze
Source: /docs/pt-br/developer_guide/in_app_messages/deep_linking/index.md
# Deep linking em mensagens no app {#in-app-message-deep-linking}
> Aprenda como fazer deep link dentro de uma mensagem no app usando o SDK da Braze.
## Prerequisites
Before you can use this feature, you'll need to [integrate the Android Braze SDK](https://www.braze.com/docs/pt-br/pt-br/developer_guide/sdk_integration/?sdktab=android).
## Creating a universal delegate
The Android SDK provides the ability to set a single delegate object to custom handle all deep links opened by Braze across Content Cards, in-app messages, and push notifications.
Your delegate object should implement the [`IBrazeDeeplinkHandler`](https://braze-inc.github.io/braze-android-sdk/kdoc/braze-android-sdk/com.braze.ui/-braze-deeplink-handler/index.html) interface and be set using [`BrazeDeeplinkHandler.setBrazeDeeplinkHandler()`](https://braze-inc.github.io/braze-android-sdk/kdoc/braze-android-sdk/com.braze.ui/-braze-deeplink-handler/-companion/set-braze-deeplink-handler.html). In most cases, the delegate should be set in your app's `Application.onCreate()`.
The following is an example of overriding the default [`UriAction`](https://braze-inc.github.io/braze-android-sdk/kdoc/braze-android-sdk/com.braze.ui.actions/-uri-action/index.html) behavior with custom intent flags and custom behavior for YouTube URLs:
```java
public class CustomDeeplinkHandler implements IBrazeDeeplinkHandler {
private static final String TAG = BrazeLogger.getBrazeLogTag(CustomDeeplinkHandler.class);
@Override
public void gotoUri(Context context, UriAction uriAction) {
String uri = uriAction.getUri().toString();
// Open YouTube URLs in the YouTube app and not our app
if (!StringUtils.isNullOrBlank(uri) && uri.contains("youtube.com")) {
uriAction.setUseWebView(false);
}
CustomUriAction customUriAction = new CustomUriAction(uriAction);
customUriAction.execute(context);
}
public static class CustomUriAction extends UriAction {
public CustomUriAction(@NonNull UriAction uriAction) {
super(uriAction);
}
@Override
protected void openUriWithActionView(Context context, Uri uri, Bundle extras) {
Intent intent = getActionViewIntent(context, uri, extras);
intent.setFlags(Intent.FLAG_ACTIVITY_NEW_TASK | Intent.FLAG_ACTIVITY_CLEAR_TOP | Intent.FLAG_ACTIVITY_SINGLE_TOP);
if (intent.resolveActivity(context.getPackageManager()) != null) {
context.startActivity(intent);
} else {
BrazeLogger.w(TAG, "Could not find appropriate activity to open for deep link " + uri + ".");
}
}
}
}
```
```kotlin
class CustomDeeplinkHandler : IBrazeDeeplinkHandler {
override fun gotoUri(context: Context, uriAction: UriAction) {
val uri = uriAction.uri.toString()
// Open YouTube URLs in the YouTube app and not our app
if (!StringUtils.isNullOrBlank(uri) && uri.contains("youtube.com")) {
uriAction.useWebView = false
}
val customUriAction = CustomUriAction(uriAction)
customUriAction.execute(context)
}
class CustomUriAction(uriAction: UriAction) : UriAction(uriAction) {
override fun openUriWithActionView(context: Context, uri: Uri, extras: Bundle) {
val intent = getActionViewIntent(context, uri, extras)
intent.flags = Intent.FLAG_ACTIVITY_NEW_TASK or Intent.FLAG_ACTIVITY_CLEAR_TOP or Intent.FLAG_ACTIVITY_SINGLE_TOP
if (intent.resolveActivity(context.packageManager) != null) {
context.startActivity(intent)
} else {
BrazeLogger.w(TAG, "Could not find appropriate activity to open for deep link $uri.")
}
}
}
companion object {
private val TAG = BrazeLogger.getBrazeLogTag(CustomDeeplinkHandler::class.java)
}
}
```
## Deep linking to app settings
To allow deep links to directly open your app's settings, you'll need a custom `BrazeDeeplinkHandler`. In the following example, the presence of a custom key-value pair called `open_notification_page` will make the deep link open the app's settings page:
```java
BrazeDeeplinkHandler.setBrazeDeeplinkHandler(new IBrazeDeeplinkHandler() {
@Override
public void gotoUri(Context context, UriAction uriAction) {
final Bundle extras = uriAction.getExtras();
if (extras.containsKey("open_notification_page")) {
Intent intent = new Intent();
intent.setAction("android.settings.APP_NOTIFICATION_SETTINGS");
intent.setFlags(Intent.FLAG_ACTIVITY_NEW_TASK);
//for Android 5-7
intent.putExtra("app_package", context.getPackageName());
intent.putExtra("app_uid", context.getApplicationInfo().uid);
// for Android 8 and later
intent.putExtra("android.provider.extra.APP_PACKAGE", context.getPackageName());
context.startActivity(intent);
}
}
});
```
```kotlin
BrazeDeeplinkHandler.setBrazeDeeplinkHandler(object : IBrazeDeeplinkHandler {
override fun gotoUri(context: Context, uriAction: UriAction) {
val extras = uriAction.extras
if (extras.containsKey("open_notification_page")) {
val intent = Intent()
intent.action = "android.settings.APP_NOTIFICATION_SETTINGS"
intent.flags = Intent.FLAG_ACTIVITY_NEW_TASK
//for Android 5-7
intent.putExtra("app_package", context.packageName)
intent.putExtra("app_uid", context.applicationInfo.uid)
// for Android 8 and later
intent.putExtra("android.provider.extra.APP_PACKAGE", context.packageName)
context.startActivity(intent)
}
}
})
```
## Customizing WebView activity {#Custom_Webview_Activity}
When Braze opens website deeplinks inside the app, the deeplinks are handled by [`BrazeWebViewActivity`](https://braze-inc.github.io/braze-android-sdk/kdoc/braze-android-sdk/com.braze.ui/-braze-web-view-activity/index.html).
**Note:**
For custom HTML in-app messages, links configured with `target="_blank"` open in the device's default web browser and are not handled by `BrazeWebViewActivity`.
To change this:
1. Create a new Activity that handles the target URL from `Intent.getExtras()` with the key `com.braze.Constants.BRAZE_WEBVIEW_URL_EXTRA`. For an example, see [`BrazeWebViewActivity.kt`](https://github.com/braze-inc/braze-android-sdk/blob/master/android-sdk-ui/src/main/java/com/braze/ui/BrazeWebViewActivity.kt).
2. Add that activity to `AndroidManifest.xml` and set `exported` to `false`.
```xml
```
3. Set your custom Activity in a `BrazeConfig` [builder object](https://braze-inc.github.io/braze-android-sdk/kdoc/braze-android-sdk/com.braze.configuration/-braze-config/-builder/set-custom-web-view-activity-class.html). Build the builder and pass it to [`Braze.configure()`](https://braze-inc.github.io/braze-android-sdk/kdoc/braze-android-sdk/com.braze/-braze/-companion/configure.html) in your [`Application.onCreate()`](https://developer.android.com/reference/android/app/Application.html#onCreate()).
```java
BrazeConfig brazeConfig = new BrazeConfig.Builder()
.setCustomWebViewActivityClass(MyCustomWebViewActivity::class)
...
.build();
Braze.configure(this, brazeConfig);
```
```kotlin
val brazeConfig = BrazeConfig.Builder()
.setCustomWebViewActivityClass(MyCustomWebViewActivity::class.java)
...
.build()
Braze.configure(this, brazeConfig)
```
## Troubleshooting
If deep links from push notifications aren't working on Android, try the following steps:
1. **Test the deep link outside of Braze.** Open the deep link URL from another app, such as email or a browser. If it doesn't open your app, the deep link may not be configured correctly in your `AndroidManifest.xml`. For more information, see Android's [Create Deep Links](https://developer.android.com/training/app-links/deep-linking) documentation.
2. **Check that automatic deep link handling is enabled.** Verify that `com_braze_handle_push_deep_links_automatically` is set to `true` in `braze.xml`, or set this option through [runtime configuration](https://www.braze.com/docs/pt-br/pt-br/developer_guide/sdk_initalization/?sdktab=android). Without this setting, Braze doesn't automatically open your app and deep link destination when someone taps a push notification.
3. **Verify your deep link handler delegate.** If you set a custom `IBrazeDeeplinkHandler`, confirm that your `gotoUri` implementation handles the URI and doesn't drop it.
4. **Test across channels.** If the same deep link works in an in-app message but not from push, the issue is likely in your push deep link handling, not in the deep link itself.
## Using Jetpack Compose
To handle deeplinks when using Jetpack Compose with NavHost:
1. Ensure that the activity handling your deeplink is registered in the Android Manifest.
```xml
```
2. In NavHost, specify which deeplinks you want it to handle.
```kotlin
composableWithCompositionLocal(
route = "YOUR_ROUTE_HERE",
deepLinks = listOf(navDeepLink {
uriPattern = "myapp://articles/{${MainDestinations.ARTICLE_ID_KEY}}"
}),
arguments = listOf(
navArgument(MainDestinations.ARTICLE_ID_KEY) {
type = NavType.LongType
}
),
) { backStackEntry ->
val arguments = requireNotNull(backStackEntry.arguments)
val articleId = arguments.getLong(MainDestinations.ARTICLE_ID_KEY)
ArticleDetail(
articleId
)
}
```
3. Depending on your app architecture, you may need to handle the new intent that's sent to your current activity as well.
```kotlin
DisposableEffect(Unit) {
val listener = Consumer {
navHostController.handleDeepLink(it)
}
addOnNewIntentListener(listener)
onDispose { removeOnNewIntentListener(listener) }
}
```
## Prerequisites
Before you can use this feature, you'll need to [integrate the Swift Braze SDK](https://www.braze.com/docs/pt-br/pt-br/developer_guide/sdk_integration/?sdktab=swift).
**Tip:**
For help choosing between custom scheme deep links, universal links, and "Open Web URL Inside App," see [iOS deep linking guide](https://www.braze.com/docs/pt-br/pt-br/developer_guide/push_notifications/ios_deep_linking_guide). For troubleshooting, see [Deep linking troubleshooting](https://www.braze.com/docs/pt-br/pt-br/developer_guide/push_notifications/deep_linking_troubleshooting).
## Handling deep links
### Step 1: Register a scheme {#register-a-scheme}
To handle deep linking, a custom scheme must be stated in your `Info.plist` file. The navigation structure is defined by an array of dictionaries. Each of those dictionaries contains an array of strings.
Use Xcode to edit your `Info.plist` file:
1. Add a new key, `URL types`. Xcode will automatically make this an array containing a dictionary called `Item 0`.
2. Within `Item 0`, add a key `URL identifier`. Set the value to your custom scheme.
3. Within `Item 0`, add a key `URL Schemes`. This will automatically be an array containing a `Item 0` string.
4. Set `URL Schemes` >> `Item 0` to your custom scheme.
Alternatively, if you wish to edit your `Info.plist` file directly, you can follow this spec:
```html
CFBundleURLTypesCFBundleURLNameYOUR.SCHEMECFBundleURLSchemesYOUR.SCHEME
```
### Step 2: Add a scheme allowlist
You must declare the URL schemes you wish to pass to `canOpenURL(_:)` by adding the `LSApplicationQueriesSchemes` key to your app's Info.plist file. Attempting to call schemes outside this allowlist will cause the system to record an error in the device's logs, and the deep link will not open. An example of this error will look like this:
```
: -canOpenURL: failed for URL: "yourapp://deeplink" – error: "This app is not allowed to query for scheme yourapp"
```
For example, if an in-app message should open the Facebook app when tapped, the app has to have the Facebook custom scheme (`fb`) in your allowlist. Otherwise, the system will reject the deep link. Deep links that direct to a page or view inside your own app still require that your app's custom scheme be listed in your app's `Info.plist`.
Your example allowlist might look something like:
```html
LSApplicationQueriesSchemesmyappfbtwitter
```
For more information, refer to [Apple's documentation](https://developer.apple.com/library/content/documentation/General/Reference/InfoPlistKeyReference/Articles/LaunchServicesKeys.html#//apple_ref/doc/uid/TP40009250-SW14) on the `LSApplicationQueriesSchemes` key.
### Step 3: Implement a handler
After activating your app, iOS will call the method [`application:openURL:options:`](https://developer.apple.com/reference/uikit/uiapplicationdelegate/1623112-application?language=objc). The important argument is the [NSURL](https://developer.apple.com/library/ios/DOCUMENTATION/Cocoa/Reference/Foundation/Classes/NSURL_Class/Reference/Reference.html#//apple_ref/doc/c_ref/NSURL) object.
```swift
func application(_ app: UIApplication, open url: URL, options: [UIApplication.OpenURLOptionsKey : Any] = [:]) -> Bool {
let path = url.path
let query = url.query
// Insert your code here to take some action based upon the path and query.
return true
}
```
```objc
- (BOOL)application:(UIApplication *)app openURL:(NSURL *)url options:(NSDictionary *)options {
NSString *path = [url path];
NSString *query = [url query];
// Insert your code here to take some action based upon the path and query.
return YES;
}
```
## App Transport Security (ATS)
As defined by [Apple](https://developer.apple.com/library/prerelease/ios/releasenotes/General/WhatsNewIniOS/Articles/iOS9.html#//apple_ref/doc/uid/TP40016198-SW14), "App Transport Security is a feature that improves the security of connections between an app and web services. The feature consists of default connection requirements that conform to best practices for secure connections. Apps can override this default behavior and turn off transport security."
ATS is applied by default. It requires that all connections use HTTPS and are encrypted using TLS 1.2 with forward secrecy. Refer to [Requirements for Connecting Using ATS](https://developer.apple.com/library/ios/documentation/General/Reference/InfoPlistKeyReference/Articles/CocoaKeys.html#//apple_ref/doc/uid/TP40009251-SW35) for more information. All images served by Braze to end devices are handled by a content delivery network ("CDN") that supports TLS 1.2 and is compatible with ATS.
Unless they are specified as exceptions in your application's `Info.plist`, connections that do not follow these requirements will fail with errors that are similar to the following.
**Example Error 1:**
```bash
CFNetwork SSLHandshake failed (-9801)
Error Domain=NSURLErrorDomain Code=-1200 "An SSL error has occurred, and a secure connection to the server cannot be made."
```
**Example Error 2:**
```bash
NSURLSession/NSURLConnection HTTP load failed (kCFStreamErrorDomainSSL, -9802)
```
ATS compliance is enforced for links opened within the mobile app (our default handling of clicked links) and does not apply to sites opened externally via a web browser.
### Working with ATS
You can handle ATS in either of the following ways, but we recommend **complying with ATS requirements**.
Your Braze integration can satisfy ATS requirements by ensuring that any existing links you drive users to (for example, though in-app message and push campaigns) satisfy ATS requirements. While there are ways to bypass ATS restrictions, our recommendation is to ensure that all linked URLs are ATS-compliant. Given Apple's increasing emphasis on application security, the following approaches to allowing ATS exceptions are not guaranteed to be supported by Apple.
You can allow a subset of links with certain domains or schemes to be treated as exceptions to the ATS rules. Your Braze integration will satisfy ATS requirements if every link you use in a Braze messaging channel is either ATS compliant or handled by an exception.
To add a domain as an exception of the ATS, add following to your app's `Info.plist` file:
```html
NSAppTransportSecurityNSAllowsArbitraryLoadsNSExceptionDomainsexample.comNSExceptionAllowsInsecureHTTPLoadsNSIncludesSubdomains
```
Refer to Apple's article on [app transport security keys](https://developer.apple.com/library/ios/documentation/General/Reference/InfoPlistKeyReference/Articles/CocoaKeys.html#//apple_ref/doc/uid/TP40009251-SW33) for more information.
You can turn off ATS entirely. Note that this is not recommended practice, due to both lost security protections and future iOS compatibility. To disable ATS, insert the following in your app's `Info.plist` file:
```html
NSAppTransportSecurityNSAllowsArbitraryLoads
```
## Decoding URLs
The SDK percent-encodes links to create valid `URL`s. All link characters that are not allowed in a properly formed URL, such as Unicode characters, will be percent escaped.
To decode an encoded link, use the `String` property [`removingPercentEncoding`](https://developer.apple.com/documentation/swift/stringprotocol/removingpercentencoding). You must also return `true` in the `BrazeDelegate.braze(_:shouldOpenURL:)`. A call to action is required to trigger the handling of the URL by your app. For example:
```swift
func application(_ app: UIApplication, open url: URL, options: [UIApplication.OpenURLOptionsKey : Any] = [:]) -> Bool {
let urlString = url.absoluteString.removingPercentEncoding
// Handle urlString
return true
}
```
```objc
- (BOOL)application:(UIApplication *)application openURL:(NSURL *)url options:(NSDictionary *)options {
NSString *urlString = [url.absoluteString stringByRemovingPercentEncoding];
// Handle urlString
return YES;
}
```
## Deep linking to app settings
You can take advantage of `UIApplicationOpenSettingsURLString` to deep link users to your app's settings from Braze push notifications and in-app messages.
To take users from your app into the iOS settings:
1. First, make sure your application is set up for either [scheme-based deep links](#swift_register-a-scheme) or [universal links](#swift_universal-links).
2. Decide on a URI for deep linking to the **Settings** page (for example, `myapp://settings` or `https://www.braze.com/settings`).
3. If you are using custom scheme-based deep links, add the following code to your `application:openURL:options:` method:
```swift
func application(_ app: UIApplication, open url: URL, options: [UIApplicationOpenURLOptionsKey : Any] = [:]) -> Bool {
let path = url.path
if (path == "settings") {
UIApplication.shared.openURL(URL(string:UIApplication.openSettingsURLString)!)
}
return true
}
```
```objc
- (BOOL)application:(UIApplication *)app
openURL:(NSURL *)url
options:(NSDictionary *)options {
NSString *path = [url path];
if ([path isEqualToString:@"settings"]) {
NSURL *settingsURL = [NSURL URLWithString:UIApplicationOpenSettingsURLString];
[[UIApplication sharedApplication] openURL:settingsURL];
}
return YES;
}
```
## Customization options {#customization-options}
### Default WebView customization
The `Braze.WebViewController` class displays web URLs opened by the SDK, typically when "Open Web URL Inside App" is selected for a web deep link.
You can customize the `Braze.WebViewController` via the [`BrazeDelegate.braze(_:willPresentModalWithContext:)`](https://braze-inc.github.io/braze-swift-sdk/documentation/brazekit/brazedelegate/braze(_:willpresentmodalwithcontext:)-12sqy/) delegate method.
### Linking handling customization
The `BrazeDelegate` protocol can be used to customize the handling of URLs such as deep links, web URLs, and universal links. To set the delegate during Braze initialization, set a delegate object on the `Braze` instance. Braze will then call your delegate's implementation of `shouldOpenURL` before handling any URIs.
When a push notification or in-app message uses **Open web URL inside mobile app**, Braze passes `context.useWebView == true` on [`Braze.URLContext`](https://braze-inc.github.io/braze-swift-sdk/documentation/brazekit/braze/urlcontext). When the message opens the URL in the system browser instead, `useWebView` is `false`. Inspect `context.useWebView` in `braze(_:shouldOpenURL:)` to branch your custom handling—for example, to open an in-app `WebViewController` only when the campaign requested in-app display.
#### Universal links {#universal-links}
Braze supports universal links in push notifications, in-app messages, and Content Cards. To enable universal link support, [`configuration.forwardUniversalLinks`](https://braze-inc.github.io/braze-swift-sdk/documentation/brazekit/braze/configuration-swift.class/forwarduniversallinks) must be set to `true`.
When enabled, Braze will forward universal links to your app's `AppDelegate` via the [`application:continueUserActivity:restorationHandler:`](https://developer.apple.com/documentation/uikit/uiapplicationdelegate/1623072-application) method.
Your application also needs to be set up to handle universal links. Refer to [Apple's documentation](https://developer.apple.com/documentation/xcode/supporting-universal-links-in-your-app) to ensure your application is configured correctly for universal links.
**Warning:**
Universal link forwarding requires access to the application entitlements. When running the application in a simulator, these entitlements are not directly available and universal links are not forwarded to the system handlers.
To add support to simulator builds, you can add the application `.entitlements` file to the _Copy Bundle Resources_ build phase. See [`forwardUniversalLinks`](https://braze-inc.github.io/braze-swift-sdk/documentation/brazekit/braze/configuration-swift.class/forwarduniversallinks) documentation for more details.
**Note:**
The SDK does not query your domains' `apple-app-site-association` file. It performs the differentiation between universal links and regular URLs by looking at the domain name only. As a result, the SDK does not respect any exclusion rule defined in the `apple-app-site-association` per [Supporting associated domains](https://developer.apple.com/documentation/xcode/supporting-associated-domains).
## Examples
### BrazeDelegate
Here's an example using `BrazeDelegate`. For more information, see [Braze Swift SDK reference](https://braze-inc.github.io/braze-swift-sdk/documentation/brazekit/brazedelegate).
```swift
func braze(_ braze: Braze, shouldOpenURL context: Braze.URLContext) -> Bool {
if context.url.host == "MY-DOMAIN.com" {
// Custom handle link here
return false
}
// Let Braze handle links otherwise
return true
}
```
```objc
- (BOOL)braze:(Braze *)braze shouldOpenURL:(BRZURLContext *)context {
if ([[context.url.host lowercaseString] isEqualToString:@"MY-DOMAIN.com"]) {
// Custom handle link here
return NO;
}
// Let Braze handle links otherwise
return YES;
}
```
# Incorporar GIFs em mensagens no aplicativo para o SDK do Braze
Source: /docs/pt-br/developer_guide/in_app_messages/gifs/index.md
# Incorporar GIFs em mensagens no aplicativo
> Aprenda como incorporar GIFs em mensagens no aplicativo para o SDK do Braze.
## About GIFs
Braze offers the ability to use a custom image library to display animated GIFs. Although the example below uses [Glide](https://bumptech.github.io/glide/), any image library that supports GIFs is compatible.
## Integrating a custom image library
### Step 1: Creating the image loader delegate
The Image Loader delegate must implement the following methods:
* [`getInAppMessageBitmapFromUrl()`](https://braze-inc.github.io/braze-android-sdk/kdoc/braze-android-sdk/com.braze.images/-i-braze-image-loader/get-in-app-message-bitmap-from-url.html)
* [`getPushBitmapFromUrl()`](https://braze-inc.github.io/braze-android-sdk/kdoc/braze-android-sdk/com.braze.images/-i-braze-image-loader/get-push-bitmap-from-url.html)
* [`renderUrlIntoCardView()`](https://braze-inc.github.io/braze-android-sdk/kdoc/braze-android-sdk/com.braze.images/-i-braze-image-loader/render-url-into-card-view.html)
* [`renderUrlIntoInAppMessageView()`](https://braze-inc.github.io/braze-android-sdk/kdoc/braze-android-sdk/com.braze.images/-i-braze-image-loader/render-url-into-in-app-message-view.html)
* [`setOffline()`](https://braze-inc.github.io/braze-android-sdk/kdoc/braze-android-sdk/com.braze.images/-i-braze-image-loader/set-offline.html)
The integration example below is taken from the [Glide integration sample app](https://github.com/braze-inc/braze-android-sdk/tree/master/samples/glide-image-integration) included with the Braze Android SDK.
```java
import com.braze.support.BrazeLogger;
import com.bumptech.glide.load.resource.gif.GifDrawable;
import android.graphics.drawable.Drawable;
public class GlideBrazeImageLoader implements IBrazeImageLoader {
private static final String TAG = GlideBrazeImageLoader.class.getName();
private RequestOptions mRequestOptions = new RequestOptions();
@Override
public void renderUrlIntoCardView(Context context, Card card, String imageUrl, ImageView imageView, BrazeViewBounds viewBounds) {
renderUrlIntoView(context, imageUrl, imageView);
}
@Override
public void renderUrlIntoInAppMessageView(Context context, IInAppMessage inAppMessage, String imageUrl, ImageView imageView, BrazeViewBounds viewBounds) {
renderUrlIntoView(context, imageUrl, imageView);
}
@Override
public Bitmap getPushBitmapFromUrl(Context context, Bundle extras, String imageUrl, BrazeViewBounds viewBounds) {
return getBitmapFromUrl(context, imageUrl, viewBounds);
}
@Override
public Bitmap getInAppMessageBitmapFromUrl(Context context, IInAppMessage inAppMessage, String imageUrl, BrazeViewBounds viewBounds) {
return getBitmapFromUrl(context, imageUrl, viewBounds);
}
private void renderUrlIntoView(Context context, String imageUrl, ImageView imageView) {
try {
final Drawable drawable = Glide.with(context)
.load(imageUrl)
.apply(mRequestOptions)
.submit()
.get();
imageView.post(() -> {
imageView.setImageDrawable(drawable);
if (drawable instanceof GifDrawable) {
((GifDrawable) drawable).start();
}
});
} catch (Exception e) {
BrazeLogger.e(TAG, "Failed to render URL into view: " + imageUrl, e);
}
}
private Bitmap getBitmapFromUrl(Context context, String imageUrl, BrazeViewBounds viewBounds) {
try {
return Glide.with(context)
.asBitmap()
.apply(mRequestOptions)
.load(imageUrl).submit().get();
} catch (Exception e) {
Log.e(TAG, "Failed to retrieve bitmap at url: " + imageUrl, e);
}
return null;
}
@Override
public void setOffline(boolean isOffline) {
// If the loader is offline, then we should only be retrieving from the cache
mRequestOptions = mRequestOptions.onlyRetrieveFromCache(isOffline);
}
}
```
```kotlin
import com.braze.support.BrazeLogger
import com.bumptech.glide.load.resource.gif.GifDrawable
class GlideBrazeImageLoader : IBrazeImageLoader {
companion object {
private val TAG = GlideBrazeImageLoader::class.qualifiedName
}
private var mRequestOptions = RequestOptions()
override fun renderUrlIntoCardView(context: Context, card: Card, imageUrl: String, imageView: ImageView, viewBounds: BrazeViewBounds) {
renderUrlIntoView(context, imageUrl, imageView)
}
override fun renderUrlIntoInAppMessageView(context: Context, inAppMessage: IInAppMessage, imageUrl: String, imageView: ImageView, viewBounds: BrazeViewBounds) {
renderUrlIntoView(context, imageUrl, imageView)
}
override fun getPushBitmapFromUrl(context: Context, extras: Bundle, imageUrl: String, viewBounds: BrazeViewBounds): Bitmap? {
return getBitmapFromUrl(context, imageUrl, viewBounds)
}
override fun getInAppMessageBitmapFromUrl(context: Context, inAppMessage: IInAppMessage, imageUrl: String, viewBounds: BrazeViewBounds): Bitmap? {
return getBitmapFromUrl(context, imageUrl, viewBounds)
}
private fun renderUrlIntoView(context: Context, imageUrl: String, imageView: ImageView) {
try {
val drawable = Glide.with(context)
.load(imageUrl)
.apply(mRequestOptions)
.submit()
.get()
imageView.post {
imageView.setImageDrawable(drawable)
if (drawable is GifDrawable) {
drawable.start()
}
}
} catch (e: Exception) {
BrazeLogger.e(TAG, "Failed to render URL into view: $imageUrl", e)
}
}
private fun getBitmapFromUrl(context: Context, imageUrl: String, viewBounds: BrazeViewBounds): Bitmap? {
try {
return Glide.with(context)
.asBitmap()
.apply(mRequestOptions)
.load(imageUrl).submit().get()
} catch (e: Exception) {
Log.e(TAG, "Failed to retrieve bitmap at url: $imageUrl", e)
}
return null
}
override fun setOffline(isOffline: Boolean) {
// If the loader is offline, then we should only be retrieving from the cache
mRequestOptions = mRequestOptions.onlyRetrieveFromCache(isOffline)
}
}
```
### Fixing image loading for Android SDK 36.0.0 and later
In Android SDK 36.0.0 and later, `displayInAppMessage()` is a `suspend` function. This means `renderUrlIntoInAppMessageView()` runs on a background thread instead of the main thread.
If your custom image loader calls `Glide.into(imageView)` in `renderUrlIntoInAppMessageView()`, your app can fail with "You must call this method on the main thread."
To avoid this:
1. Load the image on the background thread with `submit().get()`.
2. Post the UI update to the main thread with `imageView.post { ... }`.
3. If the loaded result is a GIF drawable, start the animation after setting it on the view.
This separates image loading from UI rendering, and keeps your custom image loader compatible with Android SDK 36.0.0 and later.
This guidance applies to Android custom image loaders. Web in-app messages support GIFs out of the box.
The following Kotlin sample uses placeholder values to show this pattern:
```kotlin
private const val TAG = "SampleGlideLoader"
private const val glideBrazeImageLoaderTag = "sample-loader"
private fun renderUrlIntoView(
context: Context,
imageUrl: String,
imageView: ImageView
) {
try {
val drawable: Drawable = Glide.with(context)
.load(imageUrl)
.apply(mRequestOptions)
.submit()
.get()
imageView.post {
imageView.setImageDrawable(drawable)
if (drawable is GifDrawable) {
drawable.start()
}
}
} catch (e: Exception) {
Log.e(TAG, "$glideBrazeImageLoaderTag renderUrlIntoView failed: url=$imageUrl", e)
}
}
```
### Step 2: Setting the image loader delegate
The Braze SDK will use any custom image loader set with [`IBrazeImageLoader`](https://braze-inc.github.io/braze-android-sdk/kdoc/braze-android-sdk/com.braze.images/-i-braze-image-loader/index.html). We recommend setting the custom image loader in a custom application subclass:
```java
public class GlideIntegrationApplication extends Application {
@Override
public void onCreate() {
super.onCreate();
Braze.getInstance(context).setImageLoader(new GlideBrazeImageLoader());
}
}
```
```kotlin
class GlideIntegrationApplication : Application() {
override fun onCreate() {
super.onCreate()
Braze.getInstance(context).imageLoader = GlideBrazeImageLoader()
}
}
```
## Custom Image Loading with Jetpack Compose
To override image loading with Jetpack Compose, you can pass in a value to [`imageComposable`](https://braze-inc.github.io/braze-android-sdk/kdoc/braze-android-sdk/com.braze.jetpackcompose.contentcards.styling/-content-card-styling/index.html#-808910455%2FProperties%2F-1725759721). This function will take a `Card` and render the image and the modifiers needed. Alternatively, you can use `customCardComposer` of `ContentCardsList` to render the entire card.
In the following example, Glide's Compose library is used for the cards listed in the `imageComposable` function:
```kotlin
ContentCardsList(
cardStyle = ContentCardStyling(
imageComposable = { card ->
when (card.cardType) {
CardType.CAPTIONED_IMAGE -> {
val captionedImageCard = card as CaptionedImageCard
GlideImage(
modifier = Modifier
.fillMaxWidth()
.wrapContentHeight()
.run {
if (captionedImageCard.aspectRatio > 0) {
aspectRatio(captionedImageCard.aspectRatio)
} else {
this
}
},
contentScale = ContentScale.Crop,
model = captionedImageCard.url,
loading = placeholder(R.drawable.pushpin),
contentDescription = ""
)
}
CardType.IMAGE -> {
val imageOnlyCard = card as ImageOnlyCard
GlideImage(
modifier = Modifier
.fillMaxWidth()
.run {
if (imageOnlyCard.aspectRatio > 0) {
aspectRatio(imageOnlyCard.aspectRatio)
} else {
this
}
},
contentScale = ContentScale.Crop,
model = imageOnlyCard.url,
loading = placeholder(R.drawable.pushpin),
contentDescription = ""
)
}
CardType.SHORT_NEWS -> {
val shortNews = card as ShortNewsCard
GlideImage(
modifier = Modifier
.width(100.dp)
.height(100.dp),
model = shortNews.url,
loading = placeholder(R.drawable.pushpin),
contentDescription = ""
)
}
else -> Unit
}
}
)
)
```
## Prerequisites
Before you can use this feature, you'll need to [integrate the Swift Braze SDK](https://www.braze.com/docs/pt-br/pt-br/developer_guide/sdk_integration/?sdktab=swift).
## Integrating a custom image library
### Step 1: Integrate SDWebImage
Integrate the [SDWebImage repository](https://github.com/SDWebImage/SDWebImage) into your Xcode project.
### Step 2: Create a new Swift file
In your Xcode project, create a new file named `SDWebImageGIFViewProvider.swift` and import the following:
```swift
import UIKit
import BrazeUI
import SDWebImage
```
### Step 3: Add `GIFViewProvider`
Next, add our sample SDWebImage [`GIFViewProvider`](https://braze-inc.github.io/braze-swift-sdk/documentation/brazeui/gifviewprovider/). Your file should be similar to the following:
```swift
import UIKit
import BrazeUI
import SDWebImage
extension GIFViewProvider {
/// A GIF view provider using [SDWebImage](https://github.com/SDWebImage/SDWebImage) as a
/// rendering library.
public static let sdWebImage = Self(
view: { SDAnimatedImageView(image: image(for: $0)) },
updateView: { ($0 as? SDAnimatedImageView)?.image = image(for: $1) }
)
private static func image(for url: URL?) -> UIImage? {
guard let url else { return nil }
return url.pathExtension == "gif"
? SDAnimatedImage(contentsOfFile: url.path)
: UIImage(contentsOfFile: url.path)
}
}
```
### Step 4: Modify your `AppDelegate.swift`
In your project's `AppDelegate.swift`, add GIF support to your `BrazeUI` components using `GIFViewProvider`. Your file should be similar to the following:
```swift
import UIKit
import BrazeKit
import BrazeUI
@main
class AppDelegate: UIResponder, UIApplicationDelegate {
static var braze: Braze? = nil
func application(
_ application: UIApplication,
didFinishLaunchingWithOptions launchOptions: [UIApplication.LaunchOptionsKey: Any]?
) -> Bool {
/* ... */
GIFViewProvider.shared = .sdWebImage
return true
}
}
```
# Registrar dados da mensagem no app através do SDK Braze
Source: /docs/pt-br/developer_guide/in_app_messages/logging_message_data/index.md
# Registrar dados da mensagem no app
> Aprenda como registrar dados de mensagem no app (IAM) através do SDK Braze.
## Prerequisites
Before you can use this feature, you'll need to [integrate the Web Braze SDK](https://www.braze.com/docs/pt-br/pt-br/developer_guide/sdk_integration/?sdktab=web).
## Logging message data
Logging in-app message [impressions](https://js.appboycdn.com/web-sdk/latest/doc/modules/braze.html#loginappmessageimpression) and [clicks](https://js.appboycdn.com/web-sdk/latest/doc/modules/braze.html#loginappmessagebuttonclick) is performed automatically when you use the `showInAppMessage` or `automaticallyShowInAppMessage` method.
If you do not use either method and opt to manually display the message using your own UI code, use the following methods to log analytics:
```javascript
// Registers that a user has viewed an in-app message with the Braze server.
braze.logInAppMessageImpression(inAppMessage);
// Registers that a user has clicked on the specified in-app message with the Braze server.
braze.logInAppMessageClick(inAppMessage);
// Registers that a user has clicked a specified in-app message button with the Braze server.
braze.logInAppMessageButtonClick(button, inAppMessage);
// Registers that a user has clicked on a link in an HTML in-app message with the Braze server.
braze.logInAppMessageHtmlClick(inAppMessage, buttonId?, url?)
```
## Prerequisites
Before you can use this feature, you'll need to [integrate the Flutter Braze SDK](https://www.braze.com/docs/pt-br/pt-br/developer_guide/sdk_integration/?sdktab=flutter).
## Logging message data
To log analytics using your `BrazeInAppMessage`, pass the instance into the desired analytics function:
- `logInAppMessageClicked`
- `logInAppMessageImpression`
- `logInAppMessageButtonClicked` (along with the button index)
For example:
```dart
// Log a click
braze.logInAppMessageClicked(inAppMessage);
// Log an impression
braze.logInAppMessageImpression(inAppMessage);
// Log button index `0` being clicked
braze.logInAppMessageButtonClicked(inAppMessage, 0);
```
## Accessing message data
To access in-app message data in your Flutter app, the `BrazePlugin` supports sending in-app message data using [Dart Streams](https://dart.dev/tutorials/language/streams).
The `BrazeInAppMessage` object supports a subset of fields available in the native model objects, including `uri`, `message`, `header`, `buttons`, `extras`, and more.
### Listen for in-app message data in the Dart layer
To receive in-app message data in the Dart layer, use the code below to create a `StreamSubscription` and call `braze.subscribeToInAppMessages()`. Remember to `cancel()` the stream subscription when it is no longer needed.
```dart
// Create stream subscription
StreamSubscription inAppMessageStreamSubscription;
inAppMessageStreamSubscription = braze.subscribeToInAppMessages((BrazeInAppMessage inAppMessage) {
// Handle in-app messages
}
// Cancel stream subscription
inAppMessageStreamSubscription.cancel();
```
For an example, see [main.dart](https://github.com/braze-inc/braze-flutter-sdk/blob/master/example/lib/main.dart) in the Braze Flutter SDK sample application.
### Forward in-app message data from the native layer
In-app message data is automatically forwarded from both the Android and iOS native layers. No additional setup is required.
If you're using Flutter SDK 17.1.0 or earlier, in-app message data forwarding from the iOS native layer requires manual setup. Your application likely contains one of the following. To migrate to Flutter SDK 18.0.0, remove the `BrazePlugin.processInAppMessage(_:)` call—data forwarding is now handled automatically.
Remove the `BrazePlugin.processInAppMessage(_:)` call from your [`willPresent` delegate implementation](https://braze-inc.github.io/braze-swift-sdk/documentation/brazeui/brazeinappmessageuidelegate/inappmessage(_:willpresent:view:)-4pzvv).
Remove the `BrazePlugin.processInAppMessage(message)` call from your custom presenter's [`present(message:)`](https://braze-inc.github.io/braze-swift-sdk/documentation/brazeui/brazeinappmessageui/present(message:)-f2ra) implementation:
```swift
class CustomInAppMessagePresenter: BrazeInAppMessageUI {
override func present(message: Braze.InAppMessage) {
// Pass in-app message data to the Dart layer.
BrazePlugin.processInAppMessage(message)
// If you want the default UI to display the in-app message.
super.present(message: message)
}
}
```
### Replaying the callback for in-app messages (optional)
To store any in-app messages triggered before the callback is available and replay them after it is set, add the following entry to the `customConfigs` map when initializing the `BrazePlugin`:
```dart
BrazePlugin braze = new BrazePlugin(customConfigs: {replayCallbacksConfigKey: true});
```
## Prerequisites
Before you can use this feature, you'll need to [integrate the React Native Braze SDK](https://www.braze.com/docs/pt-br/pt-br/developer_guide/sdk_integration/?sdktab=react%20native).
## Methods for logging
You can use these methods by passing your `BrazeInAppMessage` instance to log analytics and perform actions:
| Method | Description |
| --------------------------------------------------------- | ------------------------------------------------------------------------------------- |
| `logInAppMessageClicked(inAppMessage)` | Logs a click for the provided in-app message data. |
| `logInAppMessageImpression(inAppMessage)` | Logs an impression for the provided in-app message data. |
| `logInAppMessageButtonClicked(inAppMessage, buttonId)` | Logs a button click for the provided in-app message data and button ID. |
| `hideCurrentInAppMessage()` | Dismisses the currently displayed in-app message. |
| `performInAppMessageAction(inAppMessage)` | Performs the action for an in-app message. |
| `performInAppMessageButtonAction(inAppMessage, buttonId)` | Performs the action for an in-app message button. |
{: .reset-td-br-1 .reset-td-br-2 aria-label="Methods for logging" }
## Handling message data
In most cases, you can use the `Braze.addListener` method to register event listeners to handle data coming from in-app messages.
Additionally, you can access the in-app message data in the JavaScript layer by calling the `Braze.subscribeToInAppMessage` method to have the SDKs publish an `inAppMessageReceived` event when an in-app message is triggered. Pass a callback to this method to execute your own code when the in-app message is triggered and received by the listener.
To customize how message data is handled, refer to the following implementation examples:
To enhance the default behavior, or if you don't have access to customize the native iOS or Android code, we recommend that you disable the default UI while still receiving in-app message events from Braze. To disable the default UI, pass `false` to the `Braze.subscribeToInAppMessage` method and use the in-app message data to construct your own message in JavaScript. Note that you will need to manually log analytics on your messages if you choose to disable the default UI.
```javascript
import Braze from "@braze/react-native-sdk";
// Option 1: Listen for the event directly via `Braze.addListener`.
//
// You may use this method to accomplish the same thing if you don't
// wish to make any changes to the default Braze UI.
Braze.addListener(Braze.Events.IN_APP_MESSAGE_RECEIVED, (event) => {
console.log(event.inAppMessage);
});
// Option 2: Call `subscribeToInAppMessage`.
//
// Pass in `false` to disable the automatic display of in-app messages.
Braze.subscribeToInAppMessage(false, (event) => {
console.log(event.inAppMessage);
// Use `event.inAppMessage` to construct your own custom message UI.
});
```
To include more advanced logic to determine whether or not to show an in-app message using the built-in UI, implement in-app messages through the native layer.
**Warning:**
Since this is an advanced customization option, note that overriding the default Braze implementation will also nullify the logic to emit in-app message events to your JavaScript listeners. If you wish to still use `Braze.subscribeToInAppMessage` or `Braze.addListener` as described in [Accessing in-app message data](#accessing-in-app-message-data), you will need to handle publishing the events yourself.
Implement the `IInAppMessageManagerListener` as described in our Android article on [Custom Manager Listener](https://www.braze.com/docs/pt-br/pt-br/developer_guide/in_app_messages/customization/?sdktab=android#android_setting-custom-manager-listeners). In your `beforeInAppMessageDisplayed` implementation, you can access the `inAppMessage` data, send it to the JavaScript layer, and decide to show or not show the native message based on the return value.
For more on these values, see our [Android documentation](https://www.braze.com/docs/pt-br/pt-br/developer_guide/in_app_messages/).
```java
// In-app messaging
@Override
public InAppMessageOperation beforeInAppMessageDisplayed(IInAppMessage inAppMessage) {
WritableMap parameters = new WritableNativeMap();
parameters.putString("inAppMessage", inAppMessage.forJsonPut().toString());
getReactNativeHost()
.getReactInstanceManager()
.getCurrentReactContext()
.getJSModule(DeviceEventManagerModule.RCTDeviceEventEmitter.class)
.emit("inAppMessageReceived", parameters);
// Note: return InAppMessageOperation.DISCARD if you would like
// to prevent the Braze SDK from displaying the message natively.
return InAppMessageOperation.DISPLAY_NOW;
}
```
### Overriding the default UI delegate
By default, [`BrazeInAppMessageUI`](https://braze-inc.github.io/braze-swift-sdk/documentation/brazeui/brazeinappmessageui/) is created and assigned when you initialize the `braze` instance. `BrazeInAppMessageUI` is an implementation of the [`BrazeInAppMessagePresenter`](https://braze-inc.github.io/braze-swift-sdk/documentation/brazekit/brazeinappmessagepresenter) protocol and comes with a `delegate` property that can be used to customize the handling of in-app messages that have been received.
1. Implement the `BrazeInAppMessageUIDelegate` delegate as described in [our iOS article here](https://braze-inc.github.io/braze-swift-sdk/tutorials/braze/c1-inappmessageui).
2. In the `inAppMessage(_:displayChoiceForMessage:)` delegate method, you can access the `inAppMessage` data, send it to the JavaScript layer, and decide to show or not show the native message based on the return value.
For more details on these values, see our [iOS documentation](https://braze-inc.github.io/braze-swift-sdk/documentation/brazeui/brazeinappmessageuidelegate/).
```objc
- (enum BRZInAppMessageUIDisplayChoice)inAppMessage:(BrazeInAppMessageUI *)ui
displayChoiceForMessage:(BRZInAppMessageRaw *)message {
// Convert the message to a JavaScript representation.
NSData *inAppMessageData = [message json];
NSString *inAppMessageString = [[NSString alloc] initWithData:inAppMessageData encoding:NSUTF8StringEncoding];
NSDictionary *arguments = @{
@"inAppMessage" : inAppMessageString
};
// Send to JavaScript.
[self sendEventWithName:@"inAppMessageReceived" body:arguments];
// Note: Return `BRZInAppMessageUIDisplayChoiceDiscard` if you would like
// to prevent the Braze SDK from displaying the message natively.
return BRZInAppMessageUIDisplayChoiceNow;
}
```
To use this delegate, assign it to `brazeInAppMessagePresenter.delegate` after initializing the `braze` instance.
**Note:**
`BrazeUI` can only be imported in Objective-C or Swift. If you are using Objective-C++, you will need to handle this in a separate file.
```objc
@import BrazeUI;
- (BOOL)application:(UIApplication *)application didFinishLaunchingWithOptions:(NSDictionary *)launchOptions {
BRZConfiguration *configuration = [[BRZConfiguration alloc] initWithApiKey:apiKey endpoint:endpoint];
Braze *braze = [BrazeReactBridge initBraze:configuration];
((BrazeInAppMessageUI *)braze.inAppMessagePresenter).delegate = [[CustomDelegate alloc] init];
AppDelegate.braze = braze;
}
```
### Overriding the default native UI
If you wish to fully customize the presentation of your in-app messages at the native iOS layer, conform to the [`BrazeInAppMessagePresenter`](https://braze-inc.github.io/braze-swift-sdk/documentation/brazekit/brazeinappmessagepresenter) protocol and assign your custom presenter following the sample below:
```objc
BRZConfiguration *configuration = [[BRZConfiguration alloc] initWithApiKey:apiKey endpoint:endpoint];
Braze *braze = [BrazeReactBridge initBraze:configuration];
braze.inAppMessagePresenter = [[MyCustomPresenter alloc] init];
AppDelegate.braze = braze;
```
## Prerequisites
Before you can use this feature, you'll need to [integrate the Android Braze SDK](https://www.braze.com/docs/pt-br/pt-br/developer_guide/sdk_integration/?sdktab=android).
## Logging message data
You will need to make sure certain functions are called to handle the analytics for your campaign.
### Displayed messages
When a message is displayed or seen, log an impression:
```brightscript
LogInAppMessageImpression(in_app_message.id, brazetask)
```
### Clicked messages
Once a user clicks on the message, log a click and then process `in_app_message.click_action`:
```brightscript
LogInAppMessageClick(in_app_message.id, brazetask)
```
### Clicked buttons
If the user clicks on a button, log the button click and then process `inappmessage.buttons[selected].click_action`:
```brightscript
LogInAppMessageButtonClick(inappmessage.id, inappmessage.buttons[selected].id, brazetask)
```
### After processing a message
After processing an in-app message, you should clear the field:
```brightscript
m.BrazeTask.BrazeInAppMessage = invalid
```
## Subscribing to in-app messages
You may register Unity game objects to be notified of incoming in-app messages. We recommend setting game object listeners from the Braze configuration editor. In the configuration editor, listeners must be set separately for Android and iOS.
If you need to configure your game object listener at runtime, use `AppboyBinding.ConfigureListener()` and specify `BrazeUnityMessageType.IN_APP_MESSAGE`.
## Parsing messages
Incoming `string` messages received in your in-app message game object callback can be parsed into our pre-supplied model objects for convenience.
Use `InAppMessageFactory.BuildInAppMessage()` to parse your in-app message. The resulting object will either be an instance of [`IInAppMessage.cs`](https://github.com/braze-inc/braze-unity-sdk/blob/18cb8ee89f1841c576eb954793edb6e06f9130b4/Assets/Plugins/Appboy/Models/InAppMessage/IInAppMessage.cs) or [`IInAppMessageImmersive.cs`](https://github.com/braze-inc/braze-unity-sdk/blob/18cb8ee89f1841c576eb954793edb6e06f9130b4/Assets/Plugins/Appboy/Models/InAppMessage/IInAppMessageImmersive.cs) depending on its type.
```csharp
// Automatically logs a button click, if present.
void InAppMessageReceivedCallback(string message) {
IInAppMessage inApp = InAppMessageFactory.BuildInAppMessage(message);
if (inApp is IInAppMessageImmersive) {
IInAppMessageImmersive inAppImmersive = inApp as IInAppMessageImmersive;
if (inAppImmersive.Buttons != null && inAppImmersive.Buttons.Count > 0) {
inAppImmersive.LogButtonClicked(inAppImmersive.Buttons[0].ButtonID);
}
}
}
```
## Logging message data
Clicks and impressions must be manually logged for in-app messages not displayed directly by Braze.
Use `LogClicked()` and `LogImpression()` on [`IInAppMessage`](https://github.com/braze-inc/braze-unity-sdk/blob/18cb8ee89f1841c576eb954793edb6e06f9130b4/Assets/Plugins/Appboy/Models/InAppMessage/IInAppMessage.cs) to log clicks and impressions on your message.
Use `LogButtonClicked(int buttonID)` on [`IInAppMessageImmersive`](https://github.com/braze-inc/braze-unity-sdk/blob/18cb8ee89f1841c576eb954793edb6e06f9130b4/Assets/Plugins/Appboy/Models/InAppMessage/IInAppMessageImmersive.cs) to log button clicks. Note that buttons are represented as lists of[`InAppMessageButton`](https://github.com/braze-inc/braze-unity-sdk/blob/18cb8ee89f1841c576eb954793edb6e06f9130b4/Assets/Plugins/Appboy/Models/InAppMessage/InAppMessageButton.cs) instances, each of which contains a `ButtonID`.
# Envie uma mensagem de teste para o SDK do Braze
Source: /docs/pt-br/developer_guide/in_app_messages/sending_test_messages/index.md
# Sending test messages
> Before sending out a messaging campaign to your users, you may want to test it to make sure it looks right and operates in the intended manner. You can use the dashboard to create and send test messages with push notifications, in-app messages (IAM), or email.
## Sending a test message
### Step 1: Create a designated test segment
After you set up a test segment, you can use it to test any of your Braze messaging channels. When set up correctly, this only needs to be done a single time.
To set up a test segment, go to **Segments** and create a new segment. Select **Add Filter**, then choose a one of the test filters.

With test filters, you can ensure that only users with a specific email address or [external user ID](https://www.braze.com/docs/pt-br/pt-br/developer_guide/platform_integration_guides/swift/analytics/setting_user_ids/#setting-user-ids) are sent the test message.

Both email address and external user ID filters offer the following options:
| Operator | Description |
|------------------|--------------------------------------------------------------------------------------------------------------------------------|
| `equals` | This will look for an exact match of the email or user ID that you provide. Use this if you only want to send the test campaigns to devices associated with a single email or user ID. |
| `does not equal` | Use this if you want to exclude a particular email or user ID from test campaigns. |
| `matches` | This will find users that have email addresses or user IDs that match part of the search term you provide. You could use this to find only the users that have an `@yourcompany.com` address, allowing you to send messages to everyone on your team. |
{: .reset-td-br-1 .reset-td-br-2 aria-label="Step 1: Create a designated test segment a class="margin-fix" name="test-segment"/a" }
You can select multiple specific emails using the "`matches`" option and separating the email addresses with a | character. For example: "`matches`" "`email1@braze.com` | `email2@braze.com`". You can also combine multiple operators together. For example, the test segment could include an email address filter that "`matches`" "`@braze.com`" and another filter that "`does not equal`" "`sales@braze.com`".
After adding the testing filters to your test segment, you can verify it's working by selecting **Preview** or by selecting **Settings** > **CSV Export All User Data** to export that segment's user data to a CSV file.

**Note:**
Exporting the segment's User Data to a CSV file is the most accurate verification method, as the preview will only show a sample of your users and may not include all users.
### Step 2: Send the message
You can send a message using the Braze dashboard or the command line.
To send test push notifications or in-app messages, you need to target your previously created test segment. Begin by creating your campaign and following the usual steps. When you reach the **Target Audiences** step, select your test segment from the dropdown menu.

Confirm your campaign and launch it to test your push notification and in-app messages.
**Note:**
Be sure to select **Allow users to become re-eligible to receive campaign** under the **Schedule** portion of the campaign composer if you intend to use a single campaign to send a test message to yourself more than once.
If you're only testing email messages, you do not necessarily have to set up a test segment. In the first step of the campaign composer where you compose your campaign's email message, click **Send Test** and enter the email address to which you wish to send a test email.

**Tip:**
You can also enable or disable [TEST (or SEED)](https://www.braze.com/docs/pt-br/pt-br/user_guide/administrative/app_settings/email_settings/#append-email-subject-lines) being appended on your test messages.
Alternatively, you can send a single notification using cURL and the [Braze Messaging API](https://www.braze.com/docs/pt-br/pt-br/api/endpoints/messaging/). Note that these examples make a request using the `US-01` instance. To find out yours, refer to [API endpoints](https://www.braze.com/docs/pt-br/pt-br/api/basics/#endpoints).
```bash
curl -X POST -H "Content-Type: application/json" -H "Authorization: Bearer {BRAZE_API_KEY}" -d '{
"external_user_ids":["EXTERNAL_USER_ID"],
"messages": {
"android_push": {
"title":"Test push title",
"alert":"Test push",
"extra":{
"CUSTOM_KEY":"CUSTOM_VALUE"
}
}
}
}' https://rest.iad-01.braze.com/messages/send
```
```bash
curl -X POST -H "Content-Type: application/json" -H "Authorization: Bearer {BRAZE_API_KEY}" -d '{
"external_user_ids":["EXTERNAL_USER_ID"],
"messages": {
"apple_push": {
"alert": "Test push",
"extra": {
"CUSTOM_KEY" :"CUSTOM_VALUE"
}
}
}
}' https://rest.iad-01.braze.com/messages/send
```
```bash
curl -X POST -H "Content-Type: application/json" -H "Authorization: Bearer {BRAZE_API_KEY}" -d '{
"external_user_ids":["EXTERNAL_USER_ID"],
"messages": {
"kindle_push": {
"title":"Test push title",
"alert":"Test push",
"extra":{
"CUSTOM_KEY":"CUSTOM_VALUE"
}
}
}
}' https://rest.iad-01.braze.com/messages/send
```
Replace the following:
| Placeholder | Description |
|---------------------|-----------------------------------------------------------|
| `BRAZE_API_KEY` | Your Braze API key used for authentication. In Braze, go to **Settings** > **API Keys** to locate your key. |
| `EXTERNAL_USER_ID` | The external user ID used to send your message to a specific user. In Braze, go to **Audience** > **Search users**, then search for a user. |
| `CUSTOM_KEY` | (Optional) A custom key for additional data. |
| `CUSTOM_VALUE` | (Optional) A custom value assigned to your custom key. |
{: .reset-td-br-1 .reset-td-br-2 aria-label="Step 2: Send the message" }
## Test limitations
There are a few situations where test messages don't have complete feature parity with launching a campaign or Canvas to a real set of users. In these instances, to validate this behavior, you should launch the campaign or Canvas to a limited set of test users.
- Viewing the Braze [preference center](https://www.braze.com/docs/pt-br/pt-br/user_guide/message_building_by_channel/email/managing_user_subscriptions/#subscription-groups) from **Test Messages** will cause the submit button to be grayed out.
- The list-unsubscribe header is not included in emails sent by the test message functionality.
- For in-app messages and Content Cards, the target user must have a push token for the target device.
# Tutoriais
Source: /docs/pt-br/developer_guide/in_app_messages/tutorials/index.md
# Tutorial: Exibindo mensagens no app condicionalmente
Source: /docs/pt-br/developer_guide/in_app_messages/tutorials/conditionally_displaying_messages/index.md
# Tutorial: Exibindo mensagens no app condicionalmente
> Siga o exemplo de código neste tutorial para exibir mensagens no app condicionalmente usando o SDK do Braze.
## Prerequisites
Before you can use this feature, you'll need to [integrate the Web Braze SDK](https://www.braze.com/docs/pt-br/pt-br/developer_guide/sdk_integration/?sdktab=web). No entanto, nenhuma configuração adicional é necessária.
## Exibindo mensagens no app condicionalmente para Web
**Important:**
We're piloting this new tutorial format. [Tell us what you think](https://docs.google.com/forms/d/e/1FAIpQLSe_5uhWM7eXXk9F_gviO_pvA4rkYO3WA9B6tNJZ3TY91md5bw/viewform?usp=pp_url&entry.569173304=General+Feedback) — your feedback helps us improve future guides.
```js file=index.js
import * as braze from "@braze/web-sdk";
// Remove any calls to `braze.automaticallyShowInAppMessages()`
braze.initialize("YOUR-API-KEY", {
baseUrl: "YOUR-ENDPOINT",
enableLogging: true,
});
braze.subscribeToInAppMessage(function (message) {
if (
location.pathname === "/checkout" ||
document.getElementById("#checkout")
) {
// do not show the message
} else {
braze.showInAppMessage(message);
}
});
```
!!etapa
linhas-index.js=2
#### 1\. Remover chamadas para `automaticallyShowInAppMessages()`
Remova qualquer chamada para [`automaticallyShowInAppMessages()`](https://js.appboycdn.com/web-sdk/latest/doc/modules/braze.html#automaticallyshowinappmessages), pois elas substituirão qualquer lógica personalizada que você implemente depois.
!!etapa
linhas-index.js=6
#### 2\. Ativar depuração (opcional)
Para facilitar a solução de problemas durante o desenvolvimento, considere ativar a depuração.
!!etapa
linhas-index.js=9-18
#### 3\. Inscreva-se para atualizações de mensagens no app
Registre um retorno de chamada com [`subscribeToInAppMessage(callback)`](https://js.appboycdn.com/web-sdk/latest/doc/modules/braze.html#subscribetoinappmessage) para receber um `message` sempre que uma mensagem no app for acionada.
!!etapa
linhas-index.js=10-13
#### 4\. Criar lógica condicional
Crie lógica personalizada para controlar quando as mensagens são exibidas. Neste exemplo, a lógica verifica se a URL contém `"checkout"` ou se um elemento `#checkout` existe na página.
!!etapa
linhas-index.js=16
#### 5\. Exibir mensagens com `showInAppMessage`
Para exibir a mensagem, chame [`showInAppMessage(message)`](https://js.appboycdn.com/web-sdk/latest/doc/modules/braze.html#showinappmessage). Se omitido, a mensagem será ignorada.
## Prerequisites
Before you can use this feature, you'll need to [integrate the Android Braze SDK](https://www.braze.com/docs/pt-br/pt-br/developer_guide/sdk_integration/?sdktab=android). Você também precisará [ativar mensagens no app para Android](https://www.braze.com/docs/pt-br/pt-br/developer_guide/in_app_messages/?sdktab=android#android_enabling-in-app-messages).
## Exibição condicional de mensagens no app para Android
**Important:**
We're piloting this new tutorial format. [Tell us what you think](https://docs.google.com/forms/d/e/1FAIpQLSe_5uhWM7eXXk9F_gviO_pvA4rkYO3WA9B6tNJZ3TY91md5bw/viewform?usp=pp_url&entry.569173304=General+Feedback) — your feedback helps us improve future guides.
```kotlin file=MainApplication.kt
import android.app.Application
import com.braze.Braze
import com.braze.support.BrazeLogger
import com.braze.configuration.BrazeConfig
import com.braze.ui.inappmessage.BrazeInAppMessageManager
import com.braze.BrazeActivityLifecycleCallbackListener
import com.braze.ui.inappmessage.listeners.IInAppMessageManagerListener
import com.braze.models.inappmessage.IInAppMessage
import com.braze.ui.inappmessage.InAppMessageOperation
import android.util.Log
class MyApplication : Application() {
override fun onCreate() {
super.onCreate()
// Enable verbose Braze SDK logs
BrazeLogger.logLevel = Log.VERBOSE
// Initialize Braze
val brazeConfig = BrazeConfig.Builder()
.setApiKey("YOUR-API-KEY")
.setCustomEndpoint("YOUR-ENDPOINT")
.build()
Braze.configure(this, brazeConfig)
registerActivityLifecycleCallbacks(
BrazeActivityLifecycleCallbackListener()
)
// Set up in-app message listener
BrazeInAppMessageManager.getInstance().setCustomInAppMessageManagerListener(object : IInAppMessageManagerListener {
override fun beforeInAppMessageDisplayed(inAppMessage: IInAppMessage): InAppMessageOperation {
// Check if we should show the message
val shouldShow = inAppMessage.extras["should_display_message"] == "true"
return if (shouldShow) {
// Show the message using Braze's UI
InAppMessageOperation.DISPLAY_NOW
} else {
// Discard the message (or we could also create our own UI using KVP values)
InAppMessageOperation.DISCARD
}
}
})
}
}
```
!!etapa
linhas-MainApplication.kt=17
#### 1\. Ativar depuração (opcional)
Para facilitar a solução de problemas durante o desenvolvimento, considere ativar a depuração.
!!etapa
linhas-MainApplication.kt=26-28
#### 2\. Registrar retornos de chamada do ciclo de vida da atividade
Registre o listener padrão do Braze para gerenciar o ciclo de vida da mensagem no app.
!!etapa
linhas-MainApplication.kt=30-44
#### 3\. Configure um listener de mensagem no app
Use `BrazeInAppMessageManager` para definir um listener personalizado que intercepta mensagens antes de serem exibidas.
!!etapa
linhas-MainApplication.kt=34-42
#### 4\. Criar lógica condicional
Use lógica personalizada para controlar o tempo de exibição da mensagem. Neste exemplo, a lógica personalizada verifica se o extra `should_display_message` está definido como `"true"`.
!!etapa
linhas-MainApplication.kt=38,41
#### 5\. Retorne ou descarte a mensagem
Retorne um `InAppMessageOperation` com `DISPLAY_NOW` para exibir a mensagem, ou com `DISCARD` para suprimir.
## Prerequisites
Before you can use this feature, you'll need to [integrate the Swift Braze SDK](https://www.braze.com/docs/pt-br/pt-br/developer_guide/sdk_integration/?sdktab=swift). Você também precisará [ativar mensagens no app para Swift](https://www.braze.com/docs/pt-br/pt-br/developer_guide/in_app_messages/?sdktab=swift#swift_enabling-in-app-messages).
## Exibição condicional de mensagens no app para Swift
**Important:**
We're piloting this new tutorial format. [Tell us what you think](https://docs.google.com/forms/d/e/1FAIpQLSe_5uhWM7eXXk9F_gviO_pvA4rkYO3WA9B6tNJZ3TY91md5bw/viewform?usp=pp_url&entry.569173304=General+Feedback) — your feedback helps us improve future guides.
```swift file=AppDelegate.swift
import SwiftUI
import BrazeKit
import BrazeUI
class AppDelegate: NSObject, UIApplicationDelegate, BrazeInAppMessageUIDelegate {
static var braze: Braze?
func application(_ application: UIApplication,
didFinishLaunchingWithOptions launchOptions: [UIApplication.LaunchOptionsKey: Any]? = nil) -> Bool {
// 1. Braze configuration with your SDK API key and endpoint
let configuration = Braze.Configuration(apiKey: "YOUR_API_ENDPOINT", endpoint: "YOUR_API_KEY")
configuration.logger.level = .debug
// 2. Initialize Braze SDK instance
let brazeInstance = Braze(configuration: configuration)
AppDelegate.braze = brazeInstance
// 3. Set up Braze In-App Message UI and delegate
let inAppMessageUI = BrazeInAppMessageUI()
inAppMessageUI.delegate = self
brazeInstance.inAppMessagePresenter = inAppMessageUI
return true
}
func inAppMessage(_ ui: BrazeInAppMessageUI,
displayChoiceForMessage message: Braze.InAppMessage) -> BrazeInAppMessageUI.DisplayChoice {
if let showFlag = message.extras["should_display_message"] as? String, showFlag == "true" {
return .now
} else {
return .discard
}
}
}
```
```swift file=SampleApp.swift
import SwiftUI
@main
struct SampleApp: App {
@UIApplicationDelegateAdaptor(AppDelegate.self) var appDelegate
var body: some Scene {
WindowGroup {
YourView()
}
}
}
```
!!etapa
linhas-AppDelegate.swift=5
#### 1\. Implemente o `BrazeInAppMessageUIDelegate`
Na sua classe AppDelegate, implemente o [`BrazeInAppMessageUIDelegate`](https://braze-inc.github.io/braze-swift-sdk/documentation/brazeui/brazeinappmessageui/delegate) para que você possa substituir seu método `inAppMessage` mais tarde.
!!etapa
linhas-AppDelegate.swift=12
#### 2\. Ativar depuração (opcional)
Para facilitar a solução de problemas durante o desenvolvimento, considere ativar a depuração.
!!etapa
linhas-AppDelegate.swift=19-21
#### 3\. Configure sua interface Braze e delegado
`BrazeInAppMessageUI()` renderiza mensagens no aplicativo por padrão. Ao atribuir `self` como seu delegado, você pode interceptar e manipular mensagens antes que sejam exibidas.
!!etapa
linhas-AppDelegate.swift=26-33
#### 4\. Substitua `DisplayChoice` com lógica condicional
Substitua [`inAppMessage(_:displayChoiceForMessage:)`](https://braze-inc.github.io/braze-swift-sdk/documentation/brazeui/brazeinappmessageuidelegate/inappmessage(_:displaychoiceformessage:)-9w1nb) para decidir se uma mensagem deve ser exibida. Retorne `.now` para exibir a mensagem ou `.discard` para suprimir.
# Tutorial: Personalizando o estilo usando pares chave-valor
Source: /docs/pt-br/developer_guide/in_app_messages/tutorials/customizing_message_styling/index.md
# Tutorial: Personalizando o estilo da mensagem usando pares chave-valor
> Siga o código de exemplo neste tutorial para personalizar o estilo da sua mensagem no app usando pares chave-valor no SDK do Braze.
## Prerequisites
Before you can use this feature, you'll need to [integrate the Web Braze SDK](https://www.braze.com/docs/pt-br/pt-br/developer_guide/sdk_integration/?sdktab=web). No entanto, nenhuma configuração adicional é necessária.
## Personalizando o estilo da mensagem usando pares chave-valor para Web
**Important:**
We're piloting this new tutorial format. [Tell us what you think](https://docs.google.com/forms/d/e/1FAIpQLSe_5uhWM7eXXk9F_gviO_pvA4rkYO3WA9B6tNJZ3TY91md5bw/viewform?usp=pp_url&entry.569173304=General+Feedback) — your feedback helps us improve future guides.
```js file=index.js
import * as braze from "@braze/web-sdk";
// Remove any calls to `braze.automaticallyShowInAppMessages()`
braze.initialize("YOUR-API-KEY", {
baseUrl: "YOUR-ENDPOINT",
enableLogging: true,
});
braze.subscribeToInAppMessage(function (message) {
const extras = message.extras;
const customTemplateType = extras["custom-template"] || "";
const customColor = extras["custom-color"] || "";
const customMessageId = extras["message-id"] || "";
if (customTemplateType) {
// add your own custom code to render this message
} else {
// otherwise, use Braze built-in UI
braze.showInAppMessage(message);
}
});
```
!!etapa
linhas-index.js=2
#### 1\. Remover chamadas para `automaticallyShowInAppMessages()`
Remova qualquer chamada para [`automaticallyShowInAppMessages()`](https://js.appboycdn.com/web-sdk/latest/doc/modules/braze.html#automaticallyshowinappmessages), pois elas substituirão qualquer lógica personalizada que você implemente depois.
!!etapa
linhas-index.js=6
#### 2\. Ativar depuração (opcional)
Para facilitar a solução de problemas durante o desenvolvimento, considere ativar a depuração.
!!etapa
linhas-index.js=9-21
#### 3\. Inscreva-se no manipulador de retorno de chamada da mensagem no app
Registre um retorno de chamada com [`subscribeToInAppMessage(callback)`](https://js.appboycdn.com/web-sdk/latest/doc/modules/braze.html#subscribetoinappmessage) para receber uma mensagem sempre que uma mensagem no app for acionada.
!!etapa
linhas-index.js=10-13
#### 4\. Acesse a propriedade `message.extras`
Use `message.extras` para acessar tipos de personalização, atributos de estilo ou quaisquer outros valores definidos no dashboard. Todos os valores são retornados como strings.
!!etapa
linhas-index.js=19
#### 5\. Chame condicionalmente `showInAppMessage`
Para exibir a mensagem, chame [`showInAppMessage(message)`](https://js.appboycdn.com/web-sdk/latest/doc/modules/braze.html#showinappmessage). Caso contrário, use quaisquer propriedades personalizadas conforme necessário.
## Prerequisites
Before you can use this feature, you'll need to [integrate the Android Braze SDK](https://www.braze.com/docs/pt-br/pt-br/developer_guide/sdk_integration/?sdktab=android). Você também precisará [ativar mensagens no app para Android](https://www.braze.com/docs/pt-br/pt-br/developer_guide/in_app_messages/?sdktab=android#android_enabling-in-app-messages).
## Personalizando o estilo da mensagem usando pares chave-valor para Android
**Important:**
We're piloting this new tutorial format. [Tell us what you think](https://docs.google.com/forms/d/e/1FAIpQLSe_5uhWM7eXXk9F_gviO_pvA4rkYO3WA9B6tNJZ3TY91md5bw/viewform?usp=pp_url&entry.569173304=General+Feedback) — your feedback helps us improve future guides.
```kotlin file=MainApplication.kt
package com.example.brazedevlab
import android.app.Application
import com.braze.Braze
import com.braze.support.BrazeLogger
import com.braze.configuration.BrazeConfig
import com.braze.ui.inappmessage.BrazeInAppMessageManager
import com.braze.BrazeActivityLifecycleCallbackListener
import com.braze.ui.inappmessage.listeners.IInAppMessageManagerListener
import com.braze.models.inappmessage.IInAppMessage
import com.braze.ui.inappmessage.InAppMessageOperation
import android.util.Log
class MyApplication : Application() {
override fun onCreate() {
super.onCreate()
// Enable verbose Braze SDK logs
BrazeLogger.logLevel = Log.VERBOSE
// Initialize Braze
val brazeConfig = BrazeConfig.Builder()
.setApiKey("YOUR-API-KEY")
.setCustomEndpoint("YOUR-ENDPOINT")
.build()
Braze.configure(this, brazeConfig)
registerActivityLifecycleCallbacks(
BrazeActivityLifecycleCallbackListener()
)
// Set up custom in-app message view factory
BrazeInAppMessageManager.getInstance()
.setCustomInAppMessageViewFactory(CustomInAppMessageViewFactory())
}
}
```
```kotlin file=CustomInAppMessageViewFactory.kt
import android.app.Activity
import android.graphics.Color
import android.view.View
import com.braze.models.inappmessage.IInAppMessage
import com.braze.ui.inappmessage.BrazeInAppMessageManager
import com.braze.ui.inappmessage.IInAppMessageViewFactory
class CustomInAppMessageViewFactory : IInAppMessageViewFactory {
override fun createInAppMessageView(
activity: Activity,
inAppMessage: IInAppMessage
): View {
// 1) Obtain Braze’s default view factory for this message type
val defaultFactory =
BrazeInAppMessageManager.getInstance()
.getDefaultInAppMessageViewFactory(inAppMessage)
?: throw IllegalStateException(
"Braze default IAM view factory is missing"
)
// 2) Inflate the default view
val iamView = defaultFactory
.createInAppMessageView(activity, inAppMessage)
?: throw IllegalStateException(
"Braze default IAM view is null"
)
// 3) Get your KVP extras
val extras = inAppMessage.extras ?: emptyMap()
val customization = extras["customization"]
val overrideColor = extras["custom-color"]
// 4) Style your root view
if (customization == "slideup-attributes" && overrideColor != null) {
try {
iamView.setBackgroundColor(Color.parseColor(overrideColor))
} catch (_: IllegalArgumentException) {
// ignore bad styling
}
}
return iamView
}
}
```
!!etapa
linhas-MainApplication.kt=19
#### 1\. Ativar depuração (opcional)
Para facilitar a solução de problemas durante o desenvolvimento, considere ativar a depuração.
!!etapa
linhas-MainApplication.kt=28-30
#### 2\. Registrar retornos de chamada do ciclo de vida da atividade
Registre o listener padrão do Braze para gerenciar o ciclo de vida da mensagem no app.
!!etapa
linhas-CustomInAppMessageViewFactory.kt=8
#### 3\. Crie sua classe de fábrica de visualização personalizada
Certifique-se de que sua classe esteja em conformidade com [`IInAppMessageViewFactory`](https://braze-inc.github.io/braze-android-sdk/kdoc/braze-android-sdk/com.braze.ui.inappmessage/-i-in-app-message-view-factory/index.html) para que possa construir e retornar visualizações de mensagens personalizadas.
!!etapa
linhas-CustomInAppMessageViewFactory.kt=15-20
#### 4\. Delegar à fábrica padrão do Braze
Delegue à fábrica padrão para manter o estilo embutido do Braze antes de aplicar suas próprias alterações condicionais.
!!etapa
linhas-CustomInAppMessageViewFactory.kt=30-32,35-41
#### 5\. Acesse pares chave-valor de `inAppMessage.extras`
Use `inAppMessage.extras` para acessar tipos de personalização, atributos de estilo ou quaisquer outros valores definidos no dashboard. Aplique substituições de estilo antes de retornar a visualização.
!!etapa
linhas-MainApplication.kt=33-34
#### 6\. Implemente um `IInAppMessageViewFactory` personalizado
Implemente [`IInAppMessageViewFactory`](https://braze-inc.github.io/braze-android-sdk/kdoc/braze-android-sdk/com.braze.ui.inappmessage/-i-in-app-message-view-factory/index.html) em sua classe personalizada para construir e renderizar visualizações de mensagens no app.
## Prerequisites
Before you can use this feature, you'll need to [integrate the Swift Braze SDK](https://www.braze.com/docs/pt-br/pt-br/developer_guide/sdk_integration/?sdktab=swift). Você também precisará [ativar mensagens no app para SWIFT](https://www.braze.com/docs/pt-br/pt-br/developer_guide/in_app_messages/?sdktab=swift#swift_enabling-in-app-messages).
## Personalizando o estilo da mensagem usando pares chave-valor para SWIFT
**Important:**
We're piloting this new tutorial format. [Tell us what you think](https://docs.google.com/forms/d/e/1FAIpQLSe_5uhWM7eXXk9F_gviO_pvA4rkYO3WA9B6tNJZ3TY91md5bw/viewform?usp=pp_url&entry.569173304=General+Feedback) — your feedback helps us improve future guides.
```swift file=AppDelegate.swift
import UIKit
import BrazeKit
import BrazeUI
class AppDelegate: UIResponder, UIApplicationDelegate, BrazeInAppMessageUIDelegate {
var window: UIWindow?
static var braze: Braze?
func application(
_ application: UIApplication,
didFinishLaunchingWithOptions launchOptions: [UIApplication.LaunchOptionsKey: Any]?
) -> Bool {
let configuration = Braze.Configuration(
apiKey: "YOUR-API-KEY",
endpoint: "YOUR-ENDPOINT"
)
configuration.logger.level = .debug
let braze = Braze(configuration: configuration)
AppDelegate.braze = braze
// Set up Braze In-App Message UI and delegate
let inAppMessageUI = BrazeInAppMessageUI()
inAppMessageUI.delegate = self
brazeInstance.inAppMessagePresenter = inAppMessageUI
return true
}
func inAppMessage(
_ ui: BrazeInAppMessageUI,
prepareWith context: inout BrazeInAppMessageUI.PresentationContext
) {
let customization = context.message.extras["customization"] as? String
if customization == "slideup-attributes" {
// Create a new attributes object and make customizations.
var attributes = context.attributes?.slideup
attributes?.font = UIFont(name: "Chalkduster", size: 17)!
attributes?.imageSize = CGSize(width: 65, height: 65)
attributes?.cornerRadius = 20
attributes?.imageCornerRadius = 10
if #available(iOS 13.0, *) {
attributes?.cornerCurve = .continuous
attributes?.imageCornerCurve = .continuous
}
context.attributes?.slideup = attributes
}
}
}
```
```swift file=SampleApp.swift
import SwiftUI
@main
struct SampleApp: App {
@UIApplicationDelegateAdaptor(AppDelegate.self) var appDelegate
var body: some Scene {
WindowGroup {
YourView()
}
}
}
```
!!etapa
linhas-AppDelegate.swift=5
#### 1\. Implemente `BrazeInAppMessageUIDelegate`
Na sua `AppDelegate` classe, implemente [`BrazeInAppMessageUIDelegate`](https://braze-inc.github.io/braze-swift-sdk/documentation/brazeui/brazeinappmessageui/delegate) para que você possa substituir seu método `inAppMessage` mais tarde.
!!etapa
linhas-AppDelegate.swift=17
#### 2\. Ativar depuração (opcional)
Para facilitar a solução de problemas durante o desenvolvimento, considere ativar a depuração.
!!etapa
linhas-AppDelegate.swift=30-50
#### 3\. Prepare as mensagens antes que sejam exibidas
Braze chama `inAppMessage(_:prepareWith:)` durante a preparação da mensagem. Use isso para personalizar o estilo ou aplicar lógica com base em pares chave-valor.
!!etapa
linhas-AppDelegate.swift=34
#### 4\. Acesse pares chave-valor de `message.extras`
Use `message.extras` para acessar tipos de personalização, atributos de estilo ou quaisquer outros valores definidos no dashboard.
!!etapa
linhas-AppDelegate.swift=38-46
#### 5\. Atualize os atributos de estilo da mensagem
Use [`inAppMessage(_:prepareWith:)`](https://braze-inc.github.io/braze-swift-sdk/documentation/brazeui/brazeinappmessageuidelegate/inappmessage(_:preparewith:)-11fog) para acessar o `PresentationContext` para que você possa modificar os atributos de estilo diretamente. Cada tipo de mensagem no app expõe atributos diferentes.
# Tutorial: Adiar e restaurar mensagens acionadas
Source: /docs/pt-br/developer_guide/in_app_messages/tutorials/deferring_triggered_messages/index.md
# Tutorial: Adiar e restaurar mensagens acionadas
> Siga o código de exemplo neste tutorial para adiar e restaurar mensagens no app acionadas usando o SDK do Braze.
## Prerequisites
Before you can use this feature, you'll need to [integrate the Web Braze SDK](https://www.braze.com/docs/pt-br/pt-br/developer_guide/sdk_integration/?sdktab=web). No entanto, nenhuma configuração adicional é necessária.
## Adiar e restaurar mensagens acionadas para Web
**Important:**
We're piloting this new tutorial format. [Tell us what you think](https://docs.google.com/forms/d/e/1FAIpQLSe_5uhWM7eXXk9F_gviO_pvA4rkYO3WA9B6tNJZ3TY91md5bw/viewform?usp=pp_url&entry.569173304=General+Feedback) — your feedback helps us improve future guides.
```js file=index.js
import * as braze from "@braze/web-sdk";
// Remove any calls to `braze.automaticallyShowInAppMessages()`
braze.initialize("YOUR-API-KEY", {
baseUrl: "YOUR-ENDPOINT",
enableLogging: true,
});
braze.subscribeToInAppMessage(function (message) {
const shouldDefer = true; // customize for your own logic
if (shouldDefer) {
braze.deferInAppMessage(message);
} else {
braze.showInAppMessage(message);
}
});
// elsewhere in your app
document.getElementById("button").onclick = function () {
const deferredMessage = braze.getDeferredInAppMessage();
if (deferredMessage) {
braze.showInAppMessage(deferredMessage);
}
};
```
!!etapa
linhas-index.js=2
#### 1\. Remover chamadas para `automaticallyShowInAppMessages()`
Remova qualquer chamada para [`automaticallyShowInAppMessages()`](https://js.appboycdn.com/web-sdk/latest/doc/modules/braze.html#automaticallyshowinappmessages), pois elas substituirão qualquer lógica personalizada que você implemente mais tarde.
!!etapa
linhas-index.js=6
#### 2\. Ativar depuração (opcional)
Para facilitar a solução de problemas durante o desenvolvimento, considere ativar a depuração.
!!etapa
linhas-index.js=9-16
#### 3\. Inscreva-se no manipulador de retorno de chamada da mensagem no app
Registre um retorno de chamada com [`subscribeToInAppMessage(callback)`](https://js.appboycdn.com/web-sdk/latest/doc/modules/braze.html#subscribetoinappmessage) para receber uma mensagem sempre que uma mensagem no app for acionada.
!!etapa
linhas-index.js=11-12
#### 4\. Adiar a instância `message`
Para adiar a mensagem, chame [`deferInAppMessage(message)`](https://js.appboycdn.com/web-sdk/latest/doc/modules/braze.html#deferinappmessage). O Braze irá serializar e salvar esta mensagem para que você possa exibi-la em um carregamento de página futuro.
!!etapa
linhas-index.js=18-24
#### 5\. Recuperar uma mensagem previamente adiada
Para recuperar qualquer mensagem previamente adiada, chame [`getDeferredInAppMessage()`](https://js.appboycdn.com/web-sdk/latest/doc/modules/braze.html#getdeferredinappmessage).
!!etapa
linhas-index.js=21-23
#### 6\. Exibir a mensagem adiada
Após recuperar uma mensagem adiada, exiba-a passando-a para [`showInAppMessage(message)`](https://js.appboycdn.com/web-sdk/latest/doc/modules/braze.html#showinappmessage).
!!etapa
linhas-index.js=13-15
#### 7\. Exibir uma mensagem imediatamente
Para mostrar uma mensagem em vez de adiá-la, chame [`showInAppMessage(message)`](https://js.appboycdn.com/web-sdk/latest/doc/modules/braze.html#showinappmessage) diretamente no seu `subscribeToInAppMessage` retorno de chamada.
## Prerequisites
Before you can use this feature, you'll need to [integrate the Android Braze SDK](https://www.braze.com/docs/pt-br/pt-br/developer_guide/sdk_integration/?sdktab=android). Você também precisará [ativar mensagens no app para Android](https://www.braze.com/docs/pt-br/pt-br/developer_guide/in_app_messages/?sdktab=android#android_enabling-in-app-messages).
## Adiar e restaurar mensagens acionadas para Android
**Important:**
We're piloting this new tutorial format. [Tell us what you think](https://docs.google.com/forms/d/e/1FAIpQLSe_5uhWM7eXXk9F_gviO_pvA4rkYO3WA9B6tNJZ3TY91md5bw/viewform?usp=pp_url&entry.569173304=General+Feedback) — your feedback helps us improve future guides.
```kotlin file=MainApplication.kt
import android.app.Application
import com.braze.Braze
import com.braze.support.BrazeLogger
import com.braze.configuration.BrazeConfig
import com.braze.ui.inappmessage.BrazeInAppMessageManager
import com.braze.BrazeActivityLifecycleCallbackListener
import com.braze.ui.inappmessage.listeners.IInAppMessageManagerListener
import com.braze.models.inappmessage.IInAppMessage
import com.braze.ui.inappmessage.InAppMessageOperation
import android.util.Log
class MyApplication : Application() {
companion object {
private var instance: MyApplication? = null
fun getInstance(): MyApplication = instance!!
}
private var showMessage = false
override fun onCreate() {
super.onCreate()
instance = this
// Enable verbose Braze SDK logs
BrazeLogger.logLevel = Log.VERBOSE
// Initialize Braze
val brazeConfig = BrazeConfig.Builder()
.setApiKey("YOUR-API-KEY")
.setCustomEndpoint("YOUR-ENDPOINT")
.build()
Braze.configure(this, brazeConfig)
registerActivityLifecycleCallbacks(
BrazeActivityLifecycleCallbackListener()
)
// Set up in-app message listener
BrazeInAppMessageManager.getInstance().setCustomInAppMessageManagerListener(object : IInAppMessageManagerListener {
override fun beforeInAppMessageDisplayed(inAppMessage: IInAppMessage): InAppMessageOperation {
return if (showMessage) {
// Show the message using Braze's UI
InAppMessageOperation.DISPLAY_NOW
} else {
// Re-enqueue the message for later
InAppMessageOperation.DISPLAY_LATER
}
}
})
}
fun showDeferredMessage(show: Boolean) {
showMessage = show
BrazeInAppMessageManager.getInstance().requestDisplayInAppMessage()
}
}
```
```kotlin file=MainActivity.kt
import android.os.Bundle
import androidx.activity.ComponentActivity
import androidx.activity.compose.setContent
import androidx.compose.foundation.layout.*
import androidx.compose.material.Button
import androidx.compose.material.Text
import androidx.compose.runtime.Composable
import androidx.compose.ui.Modifier
import androidx.compose.ui.unit.dp
class MainActivity : ComponentActivity() {
override fun onCreate(savedInstanceState: Bundle?) {
super.onCreate(savedInstanceState)
setContent {
ContentView()
}
}
}
@Composable
fun ContentView() {
Column(
modifier = Modifier.padding(16.dp),
verticalArrangement = Arrangement.spacedBy(20.dp)
) {
// ... your UI
Button(onClick = {
MyApplication.getInstance().showDeferredMessage(true)
}) {
Text("Show Deferred IAM")
}
}
}
```
!!etapa
linhas-MainApplication.kt=13-16
#### 1\. Criar uma instância `Application` singleton
Use um objeto acompanhante para expor sua classe `Application` como um singleton para que possa ser acessada mais tarde no seu código.
!!etapa
linhas-MainApplication.kt=25
#### 2\. Ativar depuração (opcional)
Para facilitar a solução de problemas durante o desenvolvimento, considere ativar a depuração.
!!etapa
linhas-MainApplication.kt=34-36
#### 3\. Registrar retornos de chamada do ciclo de vida da atividade
Registrar o ouvinte padrão da Braze para gerenciar o ciclo de vida da mensagem no app.
!!etapa
linhas-MainApplication.kt=39-49
#### 4\. Configurar um ouvinte de mensagem no app
Use `BrazeInAppMessageManager` para definir um ouvinte personalizado que intercepta mensagens antes de serem exibidas.
!!etapa
linhas-MainApplication.kt=43,46
#### 5\. Crie lógica condicional
Use a flag `showMessage` para controlar o tempo—retorne `DISPLAY_NOW` para exibir a mensagem agora ou `DISPLAY_LATER` para adiá-la.
!!etapa
linhas-MainApplication.kt=52-55
#### 6\. Crie um método para exibir mensagens adiadas
Use `showDeferredMessage` para disparar a próxima mensagem no app. Quando `showMessage` estiver `true`, o ouvinte retornará `DISPLAY_NOW`.
!!etapa
linhas-MainActivity.kt=29
#### 7\. Dispare o método a partir da sua interface de usuário
Para exibir a mensagem que foi adiada anteriormente, chame `showDeferredMessage(true)` a partir da sua interface de usuário, como um botão ou toque.
## Prerequisites
Before you can use this feature, you'll need to [integrate the Swift Braze SDK](https://www.braze.com/docs/pt-br/pt-br/developer_guide/sdk_integration/?sdktab=swift). Você também precisará [ativar mensagens no app para Swift](https://www.braze.com/docs/pt-br/pt-br/developer_guide/in_app_messages/?sdktab=swift#swift_enabling-in-app-messages).
## Adiar e restaurar mensagens disparadas para Swift
**Important:**
We're piloting this new tutorial format. [Tell us what you think](https://docs.google.com/forms/d/e/1FAIpQLSe_5uhWM7eXXk9F_gviO_pvA4rkYO3WA9B6tNJZ3TY91md5bw/viewform?usp=pp_url&entry.569173304=General+Feedback) — your feedback helps us improve future guides.
```swift file=AppDelegate.swift
import SwiftUI
import BrazeKit
import BrazeUI
class AppDelegate: UIResponder, UIApplicationDelegate, BrazeInAppMessageUIDelegate {
static private(set) var shared: AppDelegate!
private var braze: Braze!
public var showMessage: Bool = false
func application(
_ application: UIApplication,
didFinishLaunchingWithOptions launchOptions: [UIApplication.LaunchOptionsKey: Any]?
) -> Bool {
AppDelegate.shared = self
// 1. Braze configuration with your SDK API key and endpoint
let configuration = Braze.Configuration(apiKey: "a1fc095b-ae3d-40f4-bb33-3fb5176562c0", endpoint: "sondheim.braze.com")
configuration.logger.level = .debug
// 2. Initialize Braze SDK instance
braze = Braze(configuration: configuration)
// 3. Set up Braze In-App Message UI and delegate
let ui = BrazeInAppMessageUI()
ui.delegate = self
braze.inAppMessagePresenter = ui
return true
}
func inAppMessage(
_ ui: BrazeInAppMessageUI,
displayChoiceForMessage message: Braze.InAppMessage
) -> BrazeInAppMessageUI.DisplayChoice {
if !showMessage {
return .reenqueue
}
return .now
}
func showDeferredMessage(showMessage: Bool) {
self.showMessage = showMessage
(braze.inAppMessagePresenter as? BrazeInAppMessageUI)?.presentNext()
}
}
```
```swift file=SampleApp.swift
import SwiftUI
@main
struct IAMDeferApp: App {
@UIApplicationDelegateAdaptor(AppDelegate.self) var delegate
var body: some Scene {
WindowGroup {
ContentView()
}
}
}
```
```swift file=ContentView.swift
import SwiftUI
struct ContentView: View {
var body: some View {
VStack(spacing: 20) {
// ...your UI
Button("Show Deferred IAM") {
AppDelegate.shared.showDeferredMessage(showMessage: true)
}
}
.padding()
}
}
```
!!etapa
linhas-AppDelegate.swift=5
#### 1\. Implemente o `BrazeInAppMessageUIDelegate`
Na sua classe `AppDelegate`, implemente o [`BrazeInAppMessageUIDelegate`](https://braze-inc.github.io/braze-swift-sdk/documentation/brazeui/brazeinappmessageuidelegate) para que você possa sobrescrever seu método `inAppMessage` mais tarde.
!!etapa
linhas-AppDelegate.swift=19
#### 2\. Ativar depuração (opcional)
Para facilitar a solução de problemas durante o desenvolvimento, considere ativar a depuração.
!!etapa
linhas-AppDelegate.swift=25-27
#### 3\. Configure sua interface Braze e delegado
`BrazeInAppMessageUI()` renderiza mensagens no app por padrão. Ao atribuir `self` como seu delegado, você pode interceptar e lidar com mensagens antes que sejam exibidas. Certifique-se de salvar a instância, pois você precisará dela mais tarde para restaurar mensagens adiadas.
!!etapa
linhas-AppDelegate.swift=32-41
#### 4\. Substitua `DisplayChoice` por lógica condicional
Substitua [`inAppMessage(_:displayChoiceForMessage:)`](https://braze-inc.github.io/braze-swift-sdk/documentation/brazeui/brazeinappmessageuidelegate/inappmessage(_:displaychoiceformessage:)-9w1nb) para determinar quando uma mensagem deve ser exibida. Retorne `.now` para mostrá-la imediatamente, ou `.reenqueue` para adiá-la para depois.
!!etapa
linhas-AppDelegate.swift=43-46
#### 5\. Crie um método para mostrar mensagens adiadas
Crie um método que chama `showDeferredMessage(true)` para exibir a próxima mensagem adiada na pilha. Quando chamado, `showMessage` é definido como `true`, fazendo com que o delegado retorne `.now`.
!!etapa
linhas-ContentView.swift=1-14
#### 5\. Dispare o método a partir da sua interface de usuário
Para exibir a mensagem que foi adiada anteriormente, chame `showDeferredMessage(true)` a partir da sua interface de usuário, como um botão ou toque.
# Solução de problemas de mensagens no app para o SDK da Braze
Source: /docs/pt-br/developer_guide/in_app_messages/troubleshooting/index.md
# Solução de problemas de mensagens no app {#troubleshoot-in-app-messages}
> Use esta página para diagnosticar por que mensagens no app não estão sendo entregues ou exibidas em um dispositivo. Para configuração no dashboard (prioridade, gatilhos, Segments e reelegibilidade), consulte as [Perguntas frequentes sobre mensagens no app](https://www.braze.com/docs/pt-br/pt-br/user_guide/channels/in_app_messages/faq/).
Antes de depurar, adicione-se como [usuário teste](https://www.braze.com/docs/pt-br/pt-br/user_guide/administer/global/user_management/internal_groups/#adding-test-users) e revise [Envio de mensagens de teste](https://www.braze.com/docs/pt-br/pt-br/developer_guide/in_app_messages/sending_test_messages/).
## Comece aqui: identifique seu sintoma {#start-here-match-your-symptom}
| Sintoma | Acesse |
| --- | --- |
| A mensagem no app não apareceu para um usuário | [Um usuário](#in-app-message-not-shown-for-one-user) |
| A mensagem no app não apareceu em uma plataforma (Android, iOS ou Web) | [Uma plataforma](#in-app-message-not-shown-on-one-platform) |
| A mensagem no app de uma etapa do **Canvas** não apareceu | [Mensagens no app do Canvas](#canvas-in-app-messages) |
| A mensagem no app apareceu com atraso ou após uma postergação | [Tempo e exibição atrasada](#timing-and-delayed-display) |
| Impressões ou cliques parecem incorretos | [Impressões e análise de dados](#impressions-and-analytics) |
| `triggers` ausentes ou vazios nos registros de usuários de eventos | [Solução de problemas de entrega](#delivery-troubleshooting) |
| Gatilhos retornados, mas nada é exibido no dispositivo | [Solução de problemas de exibição por plataforma](#platform-specific-display-troubleshooting) |
| Falha ao carregar ativos da mensagem no app (iOS, `NSURLError` -1008) | [Carregamento de ativos (guia Swift)](https://www.braze.com/docs/pt-br/pt-br/developer_guide/in_app_messages/troubleshooting/?sdktab=swift#asset-loading) |
{: .reset-td-br-1 .reset-td-br-2 aria-label="Sintoma de mensagem no app" }
## Caminho de investigação padrão {#standard-investigation-path}
Use este fluxo de trabalho para cada incidente. Comece na etapa 1.
1. Confirme que um **início de sessão** foi registrado para o dispositivo de teste. Mensagens no app são solicitadas no início da sessão.
2. Abra os [registros de usuários de eventos](https://www.braze.com/docs/pt-br/pt-br/user_guide/administer/global/workspace_settings/logs_and_alerts/event_user_log/) e encontre a solicitação do SDK para o início da sessão. Em **Response Data**:
- No JSON bruto, confirme que `respond_with` inclui `"triggers": true`.
- A linha **Requested Responses** deve incluir **`triggers`**.
- As linhas **Trigger In-App Message** listam cada mensagem no app retornada para essa solicitação.
- Se não houver a chave `triggers` ou linhas **Trigger In-App Message**, acesse [Solução de problemas: mensagens não estão sendo solicitadas](#troubleshoot-messages-not-being-requested).
- Se `triggers` estiver presente, mas vazio (`[]`), acesse [Solução de problemas: mensagens não estão sendo retornadas](#troubleshoot-messages-not-being-returned).
- Se as linhas **Trigger In-App Message** estiverem presentes, mas nada for exibido, acesse [Solução de problemas de exibição por plataforma](#platform-specific-display-troubleshooting).
- Cada payload de gatilho inclui um `type`: `inapp` (padrão) ou `templated_iam` (requer uma solicitação de modelo antes da exibição). Consulte [Tipos de mensagens no app](https://www.braze.com/docs/pt-br/pt-br/developer_guide/in_app_messages/triggering_messages/#types-of-in-app-messages).
3. Para elegibilidade no dashboard (Segment, reelegibilidade, limites de frequência, prioridade, grupos de controle), consulte [Solução de problemas de entrega](#delivery-troubleshooting) e as [Perguntas frequentes sobre mensagens no app](https://www.braze.com/docs/pt-br/pt-br/user_guide/channels/in_app_messages/faq/).
4. Para problemas de exibição no dispositivo (delegates, limites de taxa, orientação, tempo limite de sessão), selecione a guia do seu SDK em [Solução de problemas de exibição por plataforma](#platform-specific-display-troubleshooting).
## Mensagens no app do Canvas {#canvas-in-app-messages}
**Sintoma:** Um usuário entrou em uma etapa de mensagem no app do Canvas, mas não viu a mensagem quando esperado.
Três comportamentos são responsáveis pela maioria dos chamados sobre Canvas e mensagens no app:
1. **Exibição na próxima sessão:** Mensagens no app do Canvas ficam elegíveis no *próximo* início de sessão após a etapa ser processada — não imediatamente durante a sessão. Consulte [Quando as mensagens no app do Canvas são enviadas?](https://www.braze.com/docs/pt-br/pt-br/user_guide/messaging/canvas/faqs/#when-are-in-app-messages-in-canvas-sent) nas Perguntas frequentes do Canvas.
2. **Validações de entrega na entrada da etapa:** Se **Validar público no envio da mensagem** estiver ativado na etapa de Mensagem, a associação ao Segment e os limites de frequência são avaliados quando o usuário **entra na etapa**, não no momento da exibição. Consulte [Validações de entrega](https://www.braze.com/docs/pt-br/pt-br/user_guide/messaging/canvas/canvas_components/message_step/#delivery-validations).
3. **Postergação e tempo limite de sessão:** Se um usuário entrar em uma etapa de postergação mais longa que o tempo limite de sessão do SDK, ele pode iniciar uma nova sessão antes da etapa de mensagem no app. A mensagem pode não ser buscada no início da sessão quando você espera que ela seja exibida.
Para janelas de disponibilidade, expiração e zero _Envios_ na análise de dados do Canvas, consulte [Mensagens no app e entrega](https://www.braze.com/docs/pt-br/pt-br/user_guide/messaging/canvas/faqs/#messages-and-delivery) nas Perguntas frequentes do Canvas.
**Important:**
Mensagens no app do Canvas só podem ser disparadas por eventos enviados pelo SDK, não pela REST API.
## A mensagem no app não apareceu para um usuário {#in-app-message-not-shown-for-one-user}
**Sintoma:** Um usuário não recebeu uma mensagem no app esperada; outros usuários podem não ter sido afetados.
Verifique o seguinte:
- O usuário estava no Segment no **início da sessão**, quando o SDK solicita novas mensagens no app?
- O usuário estava elegível ou reelegível de acordo com as regras de direcionamento da Campaign ou do Canvas? Consulte [Reelegibilidade para Campaigns e Canvas](https://www.braze.com/docs/pt-br/pt-br/user_guide/messaging/messaging_fundamentals/re_eligibility/).
- Um [limite de frequência](https://www.braze.com/docs/pt-br/pt-br/user_guide/messaging/messaging_fundamentals/frequency_capping/) foi aplicado?
- O usuário estava em um grupo de controle da Campaign? Verifique se a Campaign está configurada para testes A/B.
- Uma mensagem no app de maior prioridade foi exibida no lugar? Consulte [Várias mensagens no app podem ser exibidas na mesma sessão?](https://www.braze.com/docs/pt-br/pt-br/user_guide/channels/in_app_messages/faq/#can-multiple-in-app-messages-display-in-the-same-session) nas Perguntas frequentes sobre mensagens no app.
- O dispositivo estava na orientação especificada pela Campaign?
- A mensagem foi suprimida pelo intervalo mínimo padrão de 30 segundos entre gatilhos? Consulte [Substituindo o limite de taxa padrão](https://www.braze.com/docs/pt-br/pt-br/developer_guide/in_app_messages/triggering_messages/#overriding-the-default-rate-limit).
Em seguida, siga o [caminho de investigação padrão](#standard-investigation-path).
## A mensagem no app não apareceu em uma plataforma {#in-app-message-not-shown-on-one-platform}
**Sintoma:** Mensagens no app não aparecem no Android, iOS ou Web, mas podem funcionar em outras plataformas.
| Causa provável | O que verificar |
| --- | --- |
| Alvo de **Enviar para** incorreto | Confirme se a Campaign ou etapa do Canvas direciona para **Apps móveis** ou **Navegadores Web** conforme apropriado. Uma Campaign somente para Web não será enviada para dispositivos Android. |
| UI personalizada ou handler suprime a exibição | Revise os delegates (mobile) ou [`braze.subscribeToInAppMessage`](https://js.appboycdn.com/web-sdk/latest/doc/modules/braze.html#subscribetoinappmessage) (Web). Consulte [Personalização](https://www.braze.com/docs/pt-br/pt-br/developer_guide/in_app_messages/customization/) e a guia do seu SDK abaixo. |
| A integração nunca funcionou nesta plataforma | Confirme se esta plataforma e versão do app já exibiram mensagens no app anteriormente. |
| O gatilho não disparou no dispositivo | O gatilho deve ocorrer localmente pelo SDK. Uma chamada da REST API não pode disparar uma mensagem no app no SDK. Consulte [Disparando mensagens](https://www.braze.com/docs/pt-br/pt-br/developer_guide/in_app_messages/triggering_messages/). |
| `triggers` vazio nos registros de usuários de eventos | Segment, reelegibilidade, limite de frequência ou grupo de controle. Consulte [Solução de problemas: mensagens não estão sendo retornadas](#troubleshoot-messages-not-being-returned). |
{: .reset-td-br-1 .reset-td-br-2 aria-label="Causa do sintoma por plataforma" }
## A mensagem no app não apareceu para nenhum usuário {#in-app-message-not-shown-for-all-users}
**Sintoma:** Nenhum usuário ou menos usuários do que o esperado receberam a mensagem no app.
Verifique o seguinte:
- A ação-gatilho está configurada corretamente no dashboard e na integração do app?
- Uma mensagem no app de maior prioridade interceptou a Campaign? Consulte as [Perguntas frequentes sobre mensagens no app](https://www.braze.com/docs/pt-br/pt-br/user_guide/channels/in_app_messages/faq/#can-multiple-in-app-messages-display-in-the-same-session).
- Você está usando uma versão recente do SDK? Alguns tipos de mensagem no app têm requisitos mínimos de SDK.
- As sessões estão integradas corretamente? Confirme se a análise de dados de sessão funciona para este app.
- Uma biblioteca de UI personalizada está interferindo na exibição? Consulte [Personalização](https://www.braze.com/docs/pt-br/pt-br/developer_guide/in_app_messages/customization/).
Em seguida, siga o [caminho de investigação padrão](#standard-investigation-path).
## Tempo e exibição atrasada {#timing-and-delayed-display}
**Sintoma:** A mensagem no app apareceu mais tarde do que o esperado ou somente em uma nova sessão.
Causas comuns:
- **Pré-busca de Campaign no início da sessão:** Mensagens no app são armazenadas em cache no início da sessão e exibidas quando o gatilho dispara. Um gatilho que ocorre antes do próximo início de sessão não será exibido até essa sessão. Consulte [Disparando mensagens](https://www.braze.com/docs/pt-br/pt-br/developer_guide/in_app_messages/triggering_messages/).
- **Comportamento de próxima sessão do Canvas:** Consulte [Mensagens no app do Canvas](#canvas-in-app-messages).
- **Postergação agendada no dashboard:** Confirme se uma postergação está configurada na Campaign ou etapa.
- **Condição de corrida na sincronização de gatilhos:** Se os usuários registram um evento imediatamente após o início da sessão, os gatilhos podem ainda não estar sincronizados. Considere disparar pelo início de sessão e segmentar pelo evento pretendido, para que a entrega ocorra na próxima sessão após o evento.
- **Mensagens no app sequenciais:** Se você está adiando ou restaurando mensagens em um tour, consulte [Adiando mensagens no app disparadas](https://www.braze.com/docs/pt-br/pt-br/developer_guide/in_app_messages/tutorials/deferring_triggered_messages/).
- **Ativos grandes ou CDN lento:** Otimize imagens e vídeos para mensagens no app em HTML. Em dispositivos móveis, as imagens podem ser baixadas antes da exibição em redes lentas — selecione a guia do seu SDK abaixo para notas específicas da plataforma.
**Note:**
Se sua mensagem no app é disparada pelo início de sessão e você definiu um tempo limite de sessão estendido, fechar e reabrir o app dentro dessa janela não atualizará a sessão. Por exemplo, com um tempo limite de 300 segundos, uma mensagem no app disparada pelo início de sessão não será exibida até que a sessão seja realmente atualizada. Ajuste o tempo limite de sessão ou o tipo de gatilho se isso afetar seu teste.
## Solução de problemas de entrega {#delivery-troubleshooting}
A maioria dos problemas com mensagens no app é de **entrega** (o dispositivo não recebeu os gatilhos) ou de **exibição** (os gatilhos chegaram, mas não foram exibidos). Confirme a [entrega](#troubleshooting-in-app-message-delivery) primeiro e depois verifique a [exibição](#platform-specific-display-troubleshooting).
### Solução de problemas de entrega {#troubleshooting-in-app-message-delivery}
O SDK solicita mensagens no app dos servidores da Braze no início da sessão. Confirme se o SDK está solicitando gatilhos e se a Braze está retornando-os.
#### Verifique se as mensagens estão sendo solicitadas e retornadas {#check-if-messages-are-requested-and-returned}
1. Adicione-se como [usuário teste](https://www.braze.com/docs/pt-br/pt-br/user_guide/administer/global/user_management/internal_groups/#adding-test-users).
2. Configure uma Campaign de mensagem no app direcionada ao seu usuário.
3. Inicie uma nova sessão no seu aplicativo.
4. Nos [registros de usuários de eventos](https://www.braze.com/docs/pt-br/pt-br/user_guide/administer/global/workspace_settings/logs_and_alerts/event_user_log/), encontre a solicitação do SDK para o evento de início de sessão. Em **Response Data**:
- No JSON bruto, confirme que `respond_with` inclui `"triggers": true`.
- A linha **Requested Responses** lista as chaves de nível superior na resposta. Para mensagens no app, espere **`triggers`**.
- As linhas **Trigger In-App Message** listam cada mensagem no app retornada para essa solicitação.
Em seguida, faça a triagem:
- Se não houver a chave `triggers` ou linhas **Trigger In-App Message**, consulte [Solução de problemas: mensagens não estão sendo solicitadas](#troubleshoot-messages-not-being-requested).
- Se `triggers` estiver presente, mas vazio (`[]`), consulte [Solução de problemas: mensagens não estão sendo retornadas](#troubleshoot-messages-not-being-returned).
- Se as linhas **Trigger In-App Message** estiverem presentes, mas nada for exibido no dispositivo, consulte [Solução de problemas de exibição por plataforma](#platform-specific-display-troubleshooting).
- Cada payload de gatilho inclui um `type`: `inapp` (padrão) ou `templated_iam` (requer uma solicitação de modelo antes da exibição). Consulte [Tipos de mensagens no app](https://www.braze.com/docs/pt-br/pt-br/developer_guide/in_app_messages/triggering_messages/#types-of-in-app-messages).
5. Confirme se as mensagens no app corretas aparecem nos dados de resposta.

##### Solução de problemas: mensagens não estão sendo solicitadas {#troubleshoot-messages-not-being-requested}
Se as mensagens no app não estão sendo solicitadas, seu app pode não estar rastreando sessões corretamente — mensagens no app são atualizadas no início da sessão. Confirme se o app está iniciando uma sessão com base na semântica de tempo limite de sessão:

##### Solução de problemas: mensagens não estão sendo retornadas {#troubleshoot-messages-not-being-returned}
Se as mensagens no app não estão sendo retornadas, provavelmente há um problema de direcionamento ou elegibilidade:
1. Seu Segment não contém seu usuário.
- Verifique a guia [**Engajamento**](https://www.braze.com/docs/pt-br/pt-br/user_guide/audience/manage_audience/user_profiles/#engagement-tab) do usuário para o Segment esperado.
2. Seu usuário já recebeu a mensagem e não estava reelegível.
- Verifique as [configurações de reelegibilidade](https://www.braze.com/docs/pt-br/pt-br/user_guide/messaging/messaging_fundamentals/re_eligibility/) e as [Perguntas frequentes sobre mensagens no app](https://www.braze.com/docs/pt-br/pt-br/user_guide/channels/in_app_messages/faq/#campaigns).
3. Seu usuário atingiu o limite de frequência.
- Verifique as [configurações de limite de frequência](https://www.braze.com/docs/pt-br/pt-br/user_guide/messaging/messaging_fundamentals/frequency_capping/).
4. Seu usuário caiu em um grupo de controle.
- Crie um Segment com um filtro **Recebeu variante de campanha** definido como **Controle**, ou desative os grupos de controle durante os testes de integração.
5. Uma mensagem no app de maior prioridade teve precedência. Consulte as [Perguntas frequentes sobre mensagens no app](https://www.braze.com/docs/pt-br/pt-br/user_guide/channels/in_app_messages/faq/#can-multiple-in-app-messages-display-in-the-same-session).
Para Campaigns arquivadas, configuração de gatilhos e horário de silêncio, consulte as [Perguntas frequentes sobre mensagens no app](https://www.braze.com/docs/pt-br/pt-br/user_guide/channels/in_app_messages/faq/).
## Impressões e análise de dados {#impressions-and-analytics}
**Sintoma:** As contagens de impressões ou cliques não correspondem às expectativas.
- **_Impressões_ maiores que _Impressões únicas_:** Esperado quando os usuários têm vários dispositivos ou quando uma postergação agendada faz com que o mesmo usuário se qualifique mais de uma vez. Consulte [Reelegibilidade para Campaigns e Canvas](https://www.braze.com/docs/pt-br/pt-br/user_guide/messaging/messaging_fundamentals/re_eligibility/).
- **Impressões menores que o esperado:** Os usuários podem não ter visualizado a mensagem (impressões são registradas na exibição), várias mensagens de alta prioridade podem interceptar umas às outras, ou condições de corrida na sincronização de gatilhos podem se aplicar. Para mensagens no app do Canvas, consulte [Mensagens no app do Canvas](#canvas-in-app-messages). Para definições completas de métricas, consulte [Relatórios de mensagens no app](https://www.braze.com/docs/pt-br/pt-br/user_guide/channels/in_app_messages/reporting/) e as [Perguntas frequentes sobre mensagens no app](https://www.braze.com/docs/pt-br/pt-br/user_guide/channels/in_app_messages/faq/).
- **Impressões menores que antes:** Revise os changelogs do Segment e da Campaign. Confirme se você não reutilizou o mesmo evento de gatilho em uma Campaign de maior prioridade.

Se você usa um delegate ou handler personalizado para exibir mensagens no app manualmente, é necessário registrar impressões e cliques por conta própria. Consulte a guia do seu SDK em [Solução de problemas de exibição por plataforma](#platform-specific-display-troubleshooting) para detalhes sobre Swift e Android, ou [Registrar dados de mensagens no app](https://www.braze.com/docs/pt-br/pt-br/developer_guide/in_app_messages/logging_message_data/) para Web.
## Solução de problemas de exibição por plataforma {#platform-specific-display-troubleshooting}
Se as linhas **Trigger In-App Message** aparecem nos registros de usuários de eventos, mas nada é exibido no dispositivo, selecione a guia do seu SDK para verificações de exibição (delegates, limites de taxa, orientação e handlers personalizados).
### Troubleshooting display {#troubleshooting-in-app-message-display}
If your app is requesting and receiving in-app messages but they aren't showing, device-side logic may be preventing display:
1. Is the trigger event firing as expected? To test, configure the message to trigger on a different action (such as session start) and verify whether it displays.
3. Failed image downloads prevent in-app messages with images from displaying. Check device logs for download failures. Try removing the image temporarily to see if the message displays.
### Troubleshooting asset loading (`NSURLError` code `-1008`) {#asset-loading}
When integrating Braze alongside third-party network logging libraries, developers can commonly run into an `NSURLError` with the domain code `-1008`. This error indicates that assets like images and fonts could not be retrieved or failed to cache. To work around such cases, you must register Braze CDN URLs to the list of domains that should be ignored by these libraries.
#### Domains
The full list of CDN domains is as listed below:
* `"appboy-images.com"`
* `"braze-images.com"`
* `"cdn.braze.eu"`
* `"cdn.braze.com"`
#### Examples
Below are libraries that are known to conflict with Braze asset caching, along with example code to work around the issue. If your project uses a library that causes an unavailable resource error and is not listed below, consult the documentation of that library for similar usage APIs.
##### Netfox
```swift
NFX.sharedInstance().ignoreURLs(["https://cdn.braze.com"])
```
```objc
[NFX.sharedInstance ignoreURLs:@[@"https://cdn.braze.com"]];
```
##### NetGuard
```swift
NetGuard.blackListHosts.append(contentsOf: ["cdn.braze.com"])
```
```objc
NSMutableArray *blackListHosts = [NetGuard.blackListHosts mutableCopy];
[blackListHosts addObject:@"cdn.braze.com"];
NetGuard.blackListHosts = blackListHosts;
```
##### XNLogger
```swift
let brazeAssetsHostFilter = XNHostFilter(host: "https://cdn.braze.com")
XNLogger.shared.addFilters([brazeAssetsHostFilter])
```
```objc
XNHostFilter *brazeAssetsHostFilter = [[XNHostFilter alloc] initWithHost: @"https://cdn.braze.com"];
[XNLogger.shared addFilters:@[brazeAssetsHostFilter]];
```
# Notificações por push para o SDK Braze
Source: /docs/pt-br/developer_guide/push_notifications/index.md
# Notificações por push {#push-notifications}
> As [notificações por push](https://www.braze.com/docs/pt-br/pt-br/user_guide/channels/push/) permitem que você envie notificações do seu app quando eventos importantes ocorrerem. Você pode enviar uma notificação por push quando tiver novas mensagens instantâneas para entregar, alertas de notícias de última hora para enviar ou o episódio mais recente do programa de TV favorito do seu usuário pronto para ele baixar para visualização offline. Elas também são mais eficientes do que a busca em segundo plano, já que seu aplicativo só é iniciado quando necessário.
**Note:**
Se **Redirect to web URL** com **Open web URL inside app** não estiver selecionado, mas o link ainda abrir dentro do app, o app pode estar tratando a URL (por exemplo, com universal links no iOS ou App Links no Android). Para abrir o link no navegador, confirme que seu app delega a URL ao navegador do sistema quando o usuário toca na notificação, ou ajuste o tratamento de URLs do seu app para que a ação de clique corresponda à configuração do dashboard da Braze. Consulte a documentação de push da sua plataforma para saber como as ações de clique e o tratamento de URLs são configurados.
**Note:**
This guide uses code samples from the Braze Web SDK 4.0.0+. To upgrade to the latest Web SDK version, see [SDK Upgrade Guide](https://github.com/braze-inc/braze-web-sdk/blob/master/UPGRADE_GUIDE.md).
## Prerequisites
Before you can use this feature, you'll need to [integrate the Web Braze SDK](https://www.braze.com/docs/pt-br/pt-br/developer_guide/sdk_integration/?sdktab=web).
## Push protocols
Web push notifications are implemented using the [W3C push standard](http://www.w3.org/TR/push-api/), which most major browsers support. For more information on specific push protocol standards and browser support, you can review resources from [Apple](https://developer.apple.com/notifications/safari-push-notifications/) [Mozilla](https://developer.mozilla.org/en-us/docs/web/api/push_api#browser_compatibility) and [Microsoft](https://developer.microsoft.com/en-us/microsoft-edge/status/pushapi/).
## Setting up push notifications
### Step 1: Configure your service worker
In your project's `service-worker.js` file, add the following snippet and set the [`manageServiceWorkerExternally`](https://js.appboycdn.com/web-sdk/latest/doc/modules/braze.html#initialize) initialization option to `true` when initializing the Web SDK.
**Important:**
Your web server must return a `Content-Type: application/javascript` when serving your service worker file. Additionally, if your service worker file is not `service-worker.js` named, you'll need to use the `serviceWorkerLocation` [initialization option](https://js.appboycdn.com/web-sdk/latest/doc/modules/braze.html#initializationoptions).
### Step 2: Register the browser
To immediately request push permissions from a user so their browser can receive push notifications, call `braze.requestPushPermission()`. To test if push is supported in their browser first, call `braze.isPushSupported()`.
You can also [send a soft push prompt](https://www.braze.com/docs/pt-br/pt-br/developer_guide/push_notifications/soft_push_prompts/?sdktab=web) to the user before requesting push permission to show your own push-related UI.
**Important:**
On macOS, both **Google Chrome** and **Google Chrome Helper (Alerts)** must be enabled by the end-user in **System Settings > Notifications** before push notifications can be displayed—even if permissions are granted.
### Step 3: Disable `skipWaiting` (optional)
The Braze service worker file will automatically call `skipWaiting` upon install. If you'd like to disable this functionality, add the following code to your service worker file, after importing Braze:
## Unsubscribing a user
To unsubscribe a user, call `braze.unregisterPush()`.
**Important:**
Recent versions of Safari and Firefox require that you call this method from a short-lived event handler (such as from a button-click handler or soft push prompt). This is consistent with [Chrome's user experience best practices](https://docs.google.com/document/d/1WNPIS_2F0eyDm5SS2E6LZ_75tk6XtBSnR1xNjWJ_DPE) for push registration.
## Alternate domains
To integrate web push, your domain must be [secure](https://w3c.github.io/webappsec-secure-contexts/), which generally means `https`, `localhost`, and other exceptions as defined in the [W3C push standard](https://www.w3.org/TR/service-workers/#security-considerations). You'll also need to be able to register a Service Worker at the root of your domain, or at least be able to control the HTTP headers for that file. This article covers how to integrate Braze Web Push on an alternate domain.
### Use cases
If you can't meet all of the criteria outlined in the [W3C push standard](https://www.w3.org/TR/service-workers/#security-considerations), you can use this method to add a push prompt dialog to your website instead. This can be helpful if you want to let your users opt-in from an `http` website or a browser extension popup that's preventing your push prompt from displaying.
### Considerations
Keep in mind, like many workarounds on the web, browsers continually evolve, and this method may not be viable in the future. Before continuing, ensure that:
- You own a separate secure domain (`https://`) and permissions to register a Service Worker on that domain.
- Users are logged in to your website which ensures push tokens are match to the correct profile.
**Important:**
You cannot use this method to implement push notifications for Shopify. Shopify will automatically remove the headers need to deliver push this way.
### Setting up an alternate push domain
To make the following example clear, we'll use use `http://insecure.com` and `https://secure.com` as our two domains with the goal of getting visitors to register for push on `http://insecure.com`. This example could also be applied to a `chrome-extension://` scheme for a browser extension's popup page.
#### Step 1: Initiate prompting flow
On `insecure.com`, open a new window to your secure domain using a URL parameter to pass the currently logged-in user's Braze external ID.
**http://insecure.com**
```html
```
#### Step 2: Register for push
At this point, `secure.com` will open a popup window in which you can initialize the Braze Web SDK for the same user ID and request the user's permission for Web push.
**https://secure.com/push-registration.html**
#### Step 3: Communicate between domains (optional)
Now that users can opt-in from this workflow originating on `insecure.com`, you may want to modify your site based on if the user is already opted-in or not. There's no point in asking the user to register for push if they already are.
You can use iFrames and the [`postMessage`](https://developer.mozilla.org/en-US/docs/Web/API/Window/postMessage) API to communicate between your two domains.
**insecure.com**
On our `insecure.com` domain, we will ask the secure domain (where push is _actually_ registered) for information on the current user's push registration:
```html
```
**secure.com/push-status.html**
## Frequently Asked Questions (FAQ)
### Service workers
#### What if I can't register a service worker in the root directory?
By default, a service worker can only be used within the same directory it is registered in. For example, if your service worker file exists in `/assets/service-worker.js`, it would only be possible to register it within `example.com/assets/*` or a subdirectory of the `assets` folder, but not on your homepage (`example.com/`). For this reason, it is recommended to host and register the service worker in the root directory (such as `https://example.com/service-worker.js`).
If you cannot register a service worker in your root domain, an alternative approach is to use the [`Service-Worker-Allowed`](https://w3c.github.io/ServiceWorker/#service-worker-script-response) HTTP header when serving your service worker file. By configuring your server to return `Service-Worker-Allowed: /` in the response for the service worker, this will instruct the browser to broaden the scope and allow it to be used from within a different directory.
#### Can I create a service worker using a Tag Manager?
No, service workers must be hosted on your website's server and can't be loaded via Tag Manager.
### Site security
#### Is HTTPS required?
Yes. Web standards require that the domain requesting push notification permission be secure.
#### When is a site considered "secure"?
A site is considered secure if it matches one of the following secure-origin patterns. Braze Web push notifications are built on this open standard, so man-in-the-middle attacks are prevented.
- `(https, , *)`
- `(wss, *, *)`
- `(, localhost, )`
- `(, .localhost, *)`
- `(, 127/8, )`
- `(, ::1/128, *)`
- `(file, *, —)`
- `(chrome-extension, *, —)`
#### What if a secure site is not available?
While industry best practice is to make your whole site secure, customers who cannot secure their site domain can work around the requirement by using a secure modal. Read more in our guide to using [Alternate push domain](https://www.braze.com/docs/pt-br/pt-br/developer_guide/platform_integration_guides/web/push_notifications/alternate_push_domain) or view a [working demo](http://appboyj.com/modal-test.html).
## Prerequisites
Before you can use this feature, you'll need to [integrate the Android Braze SDK](https://www.braze.com/docs/pt-br/pt-br/developer_guide/sdk_integration/?sdktab=android).
## Built-in features
The following features are built into the Braze Android SDK. To use any other push notification features, you will need to [set up push notifications](#android_setting-up-push-notifications) for your app.
|Feature|Description|
|-------|-----------|
|Push Stories|Android Push Stories are built into the Braze Android SDK by default. To learn more, see [Push Stories](https://www.braze.com/docs/pt-br/pt-br/user_guide/message_building_by_channel/push/advanced_push_options/push_stories/).|
|Push Primers|Push primer campaigns encourage your users to enable push notifications on their device for your app. This can be done without SDK customization using our [no code push primer](https://www.braze.com/docs/pt-br/pt-br/user_guide/message_building_by_channel/push/best_practices/push_primer_messages/).|
{: .reset-td-br-1 .reset-td-br-2 aria-label="Built-in features" }
## About the push notification lifecycle {#push-notification-lifecycle}
The following flowchart shows how Braze handles the push notification lifecycle, such as permission prompts, token generation, and message delivery.
```mermaid
---
config:
theme: neutral
---
flowchart TD
%% Permission flow
subgraph Permission[Push Permissions]
B{Android version of the device?}
B -->|Android 13+| C["requestPushPermissionPrompt() called"]
B -->|Android 12 and earlier| D[No permissions required]
%% Connect Android 12 path to Braze state
D --> H3[Braze: user subscription state]
H3 --> J3[Defaults to 'subscribed' when user profile created]
C --> E{Did the user grant push permission?}
E -->|Yes| F[POST_NOTIFICATIONS permission granted]
E -->|No| G[POST_NOTIFICATIONS permission denied]
%% Braze subscription state updates
F --> H1[Braze: user subscription state]
G --> H2[Braze: user subscription state]
H1 --> I1{Automatically opt in after permission granted?}
I1 -->|true| J1[Set to 'opted-in']
I1 -->|false| J2[Remains 'subscribed']
H2 --> K1[Remains 'subscribed' or 'unsubscribed']
%% Subscription state legend
subgraph BrazeStates[Braze subscription states]
L1['Subscribed' - default state when user profile created]
L2['Opted-in' - user explicitly wants push notifications]
L3['Unsubscribed' - user explicitly opted out of push]
end
%% Note about user-level states
note1[Note: These states are user-level and apply across all devices for the user]
%% Connect states to legend
J1 -.-> L2
J2 -.-> L1
J3 -.-> L1
K1 -.-> L3
note1 -.-> BrazeStates
end
%% Styling
classDef permissionClass fill:#e3f2fd,stroke:#1565c0,stroke-width:2px
classDef tokenClass fill:#e8f5e9,stroke:#2e7d32,stroke-width:2px
classDef sdkClass fill:#fff3e0,stroke:#e65100,stroke-width:2px
classDef configClass fill:#f3e5f5,stroke:#7b1fa2,stroke-width:2px
classDef displayClass fill:#ffebee,stroke:#c62828,stroke-width:2px
classDef deliveryClass fill:#fce4ec,stroke:#c2185b,stroke-width:2px
classDef brazeClass fill:#e8f5e9,stroke:#2e7d32,stroke-width:3px
class A,B,C,E,F,G permissionClass
class H,I tokenClass
class J,K sdkClass
class N,O,P configClass
class R,S,S1,T,U,V displayClass
class W,X,X1,X2,Y,Z deliveryClass
class H1,H2,H3,I1,J1,J2,J3,K1,L1,L2,L3,note1 brazeClass
```
```mermaid
---
config:
theme: neutral
---
flowchart TD
%% Token generation flow
subgraph Token[Token Generation]
H["Braze SDK initialized"] --> Q{Is FCM auto-registration enabled?}
Q -->|Yes| L{Is required configuration present?}
Q -->|No| M[No FCM token generated]
L -->|Yes| I[Generate FCM token]
L -->|No| M
I --> K[Register token with Braze]
%% Configuration requirements
subgraph Config[Required configuration]
N['google-services.json' file is present]
O['com.google.firebase:firebase-messaging' in gradle]
P['com.google.gms.google-services' plugin in gradle]
end
%% Connect config to check
N -.-> L
O -.-> L
P -.-> L
end
%% Styling
classDef permissionClass fill:#e3f2fd,stroke:#1565c0,stroke-width:2px
classDef tokenClass fill:#e8f5e9,stroke:#2e7d32,stroke-width:2px
classDef sdkClass fill:#fff3e0,stroke:#e65100,stroke-width:2px
classDef configClass fill:#f3e5f5,stroke:#7b1fa2,stroke-width:2px
classDef displayClass fill:#ffebee,stroke:#c62828,stroke-width:2px
classDef deliveryClass fill:#fce4ec,stroke:#c2185b,stroke-width:2px
classDef brazeClass fill:#e8f5e9,stroke:#2e7d32,stroke-width:3px
class A,B,C,E,F,G permissionClass
class H,I tokenClass
class J,K sdkClass
class N,O,P configClass
class R,S,S1,T,U,V displayClass
class W,X,X1,X2,Y,Z deliveryClass
class H1,H2,H3,I1,J1,J2,J3,K1,L1,L2,L3,note1 brazeClass
```
```mermaid
---
config:
theme: neutral
fontSize: 10
---
flowchart TD
subgraph Display[Push Display]
%% Push delivery flow
W[Push sent to FCM servers] --> X{Did FCM receive push?}
X -->|App is terminated| Y[FCM cannot deliver push to the app]
X -->|Delivery conditions met| X1[App receives push from FCM]
X1 --> X2[Braze SDK receives push]
X2 --> R[Push type?]
%% Push Display Flow
R -->|Standard push| S{Is push permission required?}
R -->|Silent push| T[Braze SDK processes silent push]
S -->|Yes| S1{Did the user grant push permission?}
S -->|No| V[Notification is shown to the user]
S1 -->|Yes| V
S1 -->|No| U[Notification is not shown to the user]
end
%% Styling
classDef permissionClass fill:#e3f2fd,stroke:#1565c0,stroke-width:2px
classDef tokenClass fill:#e8f5e9,stroke:#2e7d32,stroke-width:2px
classDef sdkClass fill:#fff3e0,stroke:#e65100,stroke-width:2px
classDef configClass fill:#f3e5f5,stroke:#7b1fa2,stroke-width:2px
classDef displayClass fill:#ffebee,stroke:#c62828,stroke-width:2px
classDef deliveryClass fill:#fce4ec,stroke:#c2185b,stroke-width:2px
classDef brazeClass fill:#e8f5e9,stroke:#2e7d32,stroke-width:3px
class A,B,C,E,F,G permissionClass
class H,I tokenClass
class J,K sdkClass
class N,O,P configClass
class R,S,S1,T,U,V displayClass
class W,X,X1,X2,Y,Z deliveryClass
class H1,H2,H3,I1,J1,J2,J3,K1,L1,L2,L3,note1 brazeClass
```
## Setting up push notifications
**Tip:**
To check out a sample app using FCM with the Braze Android SDK, see [Braze: Firebase Push Sample App](https://github.com/braze-inc/braze-android-sdk/tree/master/samples/firebase-push).
### Rate limits
Firebase Cloud Messaging (FCM) API has a default rate limit of 600,000 requests per minute. If you reach this limit, Braze will automatically try again in a few minutes. To request an increase, contact [Firebase Support](https://firebase.google.com/support).
### Step 1: Add Firebase to your project
First, add Firebase to your Android project. For step-by-step instructions, see Google's [Firebase setup guide](https://firebase.google.com/docs/android/setup).
### Step 2: Add Cloud Messaging to your dependencies
Next, add the Cloud Messaging library to your project dependencies. In your Android project, open `build.gradle`, then add the following line to your `dependencies` block.
```gradle
implementation "google.firebase:firebase-messaging:+"
```
Your dependencies should look similar to the following:
```gradle
dependencies {
implementation project(':android-sdk-ui')
implementation "com.google.firebase:firebase-messaging:+"
}
```
### Step 3: Enable the Firebase Cloud Messaging API
In Google Cloud, select the project your Android app is using, then enable the [Firebase Cloud Messaging API](https://console.cloud.google.com/apis/library/fcm.googleapis.com).
{: style="max-width:80%;"}
### Step 4: Create a service account {#service-account}
Next, create a new service account, so Braze can make authorized API calls when registering FCM tokens. In Google Cloud, go to **Service Accounts**, then choose your project. On the **Service Accounts** page, select **Create Service Account**.

Enter a service account name, ID, and description, then select **Create and continue**.
In the **Role** field, find and select **Firebase Cloud Messaging API Admin** from the list of roles. For more restrictive access, create a [custom role](https://cloud.google.com/iam/docs/creating-custom-roles) with the `cloudmessaging.messages.create` permission, then choose it from the list instead. When you're finished, select **Done**.
**Warning:**
Be sure to select **Firebase Cloud Messaging _API_ Admin**, not **Firebase Cloud Messaging Admin**.

### Step 5: Generate JSON credentials {#json}
Next, generate JSON credentials for your FCM service account. On Google Cloud IAM & Admin, go to **Service Accounts**, then choose your project. Locate the FCM service account [you created earlier](#android_service-account), then select **Actions** > **Manage Keys**.

Select **Add Key** > **Create new key**.

Choose **JSON**, then select **Create**. If you created your service account using a different Google Cloud project ID than your FCM project ID, you'll need to manually update the value assigned to the `project_id` in your JSON file.
Be sure to remember where you downloaded the key—you'll need it in the next step.
{: style="max-width:65%;"}
**Warning:**
Private keys could pose a security risk if compromised. Store your JSON credentials in a secure location for now—you'll delete your key after you upload it to Braze.
### Step 6: Upload your JSON credentials to Braze
Next, upload your JSON credentials to your Braze dashboard. In Braze, select **Settings** > **App Settings**.

Under your Android app's **Push Notification Settings**, choose **Firebase**, then select **Upload JSON File** and upload the credentials [you generated earlier](#android_json). When you're finished, select **Save**.

**Warning:**
Private keys could pose a security risk if compromised. Now that your key is uploaded to Braze, delete the file [you generated previously](#android_json).
### Step 7: Set up automatic token registration
When one of your users opt-in for push notifications, your app needs to generate an FCM token on their device before you can send them push notifications. With the Braze SDK, you can enable automatic FCM token registration for each user's device in your project's Braze configuration files.
First, go to Firebase Console, open your project, then select **Settings** > **Project settings**.

Select **Cloud Messaging**, then under **Firebase Cloud Messaging API (V1)**, copy the number in the **Sender ID** field.

Next, open your Android Studio project and use your Firebase Sender ID to enable automatic FCM token registration within your `braze.xml` or `BrazeConfig`.
To configure automatic FCM token registration, add the following lines to your `braze.xml` file:
```xml
trueFIREBASE_SENDER_ID
```
Replace `FIREBASE_SENDER_ID` with the value you copied from your Firebase project settings. Your `braze.xml` should look similar to the following:
```xml
12345ABC-6789-DEFG-0123-HIJK456789LMtrue603679405392
```
To configure automatic FCM token registration, add the following lines to your `BrazeConfig`:
```java
.setIsFirebaseCloudMessagingRegistrationEnabled(true)
.setFirebaseCloudMessagingSenderIdKey("FIREBASE_SENDER_ID")
```
```kotlin
.setIsFirebaseCloudMessagingRegistrationEnabled(true)
.setFirebaseCloudMessagingSenderIdKey("FIREBASE_SENDER_ID")
```
Replace `FIREBASE_SENDER_ID` with the value you copied from your Firebase project settings. Your `BrazeConfig` should look similar to the following:
```java
BrazeConfig brazeConfig = new BrazeConfig.Builder()
.setApiKey("12345ABC-6789-DEFG-0123-HIJK456789LM")
.setCustomEndpoint("sdk.iad-01.braze.com")
.setSessionTimeout(60)
.setHandlePushDeepLinksAutomatically(true)
.setGreatNetworkDataFlushInterval(10)
.setIsFirebaseCloudMessagingRegistrationEnabled(true)
.setFirebaseCloudMessagingSenderIdKey("603679405392")
.build();
Braze.configure(this, brazeConfig);
```
```kotlin
val brazeConfig = BrazeConfig.Builder()
.setApiKey("12345ABC-6789-DEFG-0123-HIJK456789LM")
.setCustomEndpoint("sdk.iad-01.braze.com")
.setSessionTimeout(60)
.setHandlePushDeepLinksAutomatically(true)
.setGreatNetworkDataFlushInterval(10)
.setIsFirebaseCloudMessagingRegistrationEnabled(true)
.setFirebaseCloudMessagingSenderIdKey("603679405392")
.build()
Braze.configure(this, brazeConfig)
```
**Tip:**
If you'd like manually register FCM tokens instead, you can call [`Braze.setRegisteredPushToken()`](https://braze-inc.github.io/braze-android-sdk/kdoc/braze-android-sdk/com.braze/-braze/registered-push-token.html) inside your app's [`onCreate()`](https://developer.android.com/reference/android/app/Application.html#onCreate()) method.
### Step 8: Remove automatic requests in your application class
To prevent Braze from triggering unnecessary network requests every time you send silent push notifications, remove any automatic network requests configured in your `Application` class's `onCreate()` method. For more information see, [Android Developer Reference: Application](https://developer.android.com/reference/android/app/Application).
## Displaying notifications
### Step 1: Register Braze Firebase Messaging Service
You can either create a new, existing, or non-Braze Firebase Messaging Service. Choose whichever best meets your specific needs.
Braze includes a service to handle push receipt and open intents. Our `BrazeFirebaseMessagingService` class will need to be registered in your `AndroidManifest.xml`:
```xml
```
Our notification code also uses `BrazeFirebaseMessagingService` to handle open and click action tracking. This service must be registered in the `AndroidManifest.xml` to function correctly. Also, remember that Braze prefixes notifications from our system with a unique key so that we only render notifications sent from our systems. You may register additional services separately to render notifications sent from other FCM services. See [`AndroidManifest.xml`](https://github.com/braze-inc/braze-android-sdk/blob/master/samples/firebase-push/src/main/AndroidManifest.xml) in the Firebase push sample app.
**Important:**
Before Braze SDK 3.1.1, `AppboyFcmReceiver` was used to handle FCM push. The `AppboyFcmReceiver` class should be removed from your manifest and replaced with the preceding integration.
If you already have a Firebase Messaging Service registered, you can pass [`RemoteMessage`](https://firebase.google.com/docs/reference/android/com/google/firebase/messaging/RemoteMessage) objects to Braze via [`BrazeFirebaseMessagingService.handleBrazeRemoteMessage()`](https://braze-inc.github.io/braze-android-sdk/kdoc/braze-android-sdk/com.braze.push/-braze-firebase-messaging-service/-companion/handle-braze-remote-message.html). This method will only display a notification if the [`RemoteMessage`](https://firebase.google.com/docs/reference/android/com/google/firebase/messaging/RemoteMessage) object originated from Braze and will safely ignore if not.
```java
public class MyFirebaseMessagingService extends FirebaseMessagingService {
@Override
public void onMessageReceived(RemoteMessage remoteMessage) {
super.onMessageReceived(remoteMessage);
if (BrazeFirebaseMessagingService.handleBrazeRemoteMessage(this, remoteMessage)) {
// This Remote Message originated from Braze and a push notification was displayed.
// No further action is needed.
} else {
// This Remote Message did not originate from Braze.
// No action was taken and you can safely pass this Remote Message to other handlers.
}
}
}
```
```kotlin
class MyFirebaseMessagingService : FirebaseMessagingService() {
override fun onMessageReceived(remoteMessage: RemoteMessage?) {
super.onMessageReceived(remoteMessage)
if (BrazeFirebaseMessagingService.handleBrazeRemoteMessage(this, remoteMessage)) {
// This Remote Message originated from Braze and a push notification was displayed.
// No further action is needed.
} else {
// This Remote Message did not originate from Braze.
// No action was taken and you can safely pass this Remote Message to other handlers.
}
}
}
```
If you have another Firebase Messaging Service you would also like to use, you can also specify a fallback Firebase Messaging Service to call if your application receives a push that isn't from Braze.
In your `braze.xml`, specify:
```xml
truecom.company.OurFirebaseMessagingService
```
or set via [runtime configuration:](https://www.braze.com/docs/pt-br/pt-br/developer_guide/sdk_initalization/?sdktab=android)
```java
BrazeConfig brazeConfig = new BrazeConfig.Builder()
.setFallbackFirebaseMessagingServiceEnabled(true)
.setFallbackFirebaseMessagingServiceClasspath("com.company.OurFirebaseMessagingService")
.build();
Braze.configure(this, brazeConfig);
```
```kotlin
val brazeConfig = BrazeConfig.Builder()
.setFallbackFirebaseMessagingServiceEnabled(true)
.setFallbackFirebaseMessagingServiceClasspath("com.company.OurFirebaseMessagingService")
.build()
Braze.configure(this, brazeConfig)
```
### Step 2: Conform small icons to design guidelines
For general information about Android notification icons, visit the [Notifications overview](https://developer.android.com/guide/topics/ui/notifiers/notifications).
Starting in Android N, you should update or remove small notification icon assets that involve color. The Android system (not the Braze SDK) ignores all non-alpha and transparency channels in action icons and the notification small icon. In other words, Android will convert all parts of your notification small icon to monochrome except for transparent regions.
To create a notification small icon asset that displays properly:
- Remove all colors from the image except for white.
- All other non-white regions of the asset should be transparent.
**Note:**
A common symptom of an improper asset is the small notification icon rendering as a solid monochrome square. This is due to the Android system not being able to find any transparent regions in the notification small icon asset.
The following large and small icons pictured are examples of properly designed icons:

### Step 3: Configure notification icons {#configure-icons}
#### Specifying icons in braze.xml
Braze allows you to configure your notification icons by specifying drawable resources in your `braze.xml`:
```xml
REPLACE_WITH_YOUR_ICONREPLACE_WITH_YOUR_ICON
```
Setting a small notification icon is required. **If you do not set one, Braze will default to using the application icon as the small notification icon, which may look suboptimal.**
Setting a large notification icon is optional but recommended.
#### Specifying icon accent color
The notification icon accent color can be overridden in your `braze.xml`. If the color is not specified, the default color is the same gray Lollipop uses for system notifications.
```xml
0xFFf33e3e
```
You may also optionally use a color reference:
```xml
@color/my_color_here
```
### Step 4: Add deep links
#### Enabling automatic deep link opening
To enable Braze to automatically open your app and any deep links when a push notification is clicked, set `com_braze_handle_push_deep_links_automatically` to `true`, in your `braze.xml`:
```xml
true
```
This flag can also be set via [runtime configuration](https://www.braze.com/docs/pt-br/pt-br/developer_guide/sdk_initalization/?sdktab=android):
```java
BrazeConfig brazeConfig = new BrazeConfig.Builder()
.setHandlePushDeepLinksAutomatically(true)
.build();
Braze.configure(this, brazeConfig);
```
```kotlin
val brazeConfig = BrazeConfig.Builder()
.setHandlePushDeepLinksAutomatically(true)
.build()
Braze.configure(this, brazeConfig)
```
If you want to custom handle deep links, you will need to create a push callback that listens for push received and opened intents from Braze. For more information, see [Using a callback for push events](https://www.braze.com/docs/pt-br/pt-br/developer_guide/push_notifications/customization#android_using-a-callback-for-push-events).
## Handling foreground notifications
By default, when a push notification arrives while your app is in the foreground on Android, the system displays it automatically. To have Braze process the push notification payload (for analytics tracking, deep link handling, and custom processing), route the incoming push data to Braze inside your `FirebaseMessagingService.onMessageReceived` method.
### How it works
When you call `BrazeFirebaseMessagingService.handleBrazeRemoteMessage`, Braze determines if the payload is a Braze push notification and, if so, creates and displays the notification with the `NotificationManagerCompat` method. Unlike iOS, Android displays notifications regardless of whether the app is in the foreground or background.
```java
package com.example.push;
import com.braze.push.BrazeFirebaseMessagingService;
import com.google.firebase.messaging.FirebaseMessagingService;
import com.google.firebase.messaging.RemoteMessage;
public class MyFirebaseMessagingService extends FirebaseMessagingService {
@Override
public void onMessageReceived(RemoteMessage remoteMessage) {
super.onMessageReceived(remoteMessage);
// Let Braze process the payload and display the notification
if (BrazeFirebaseMessagingService.handleBrazeRemoteMessage(this, remoteMessage)) {
// Braze successfully handled the push notification
} else {
// Handle non-Braze messages
}
}
}
```
```kotlin
package com.example.push
import com.braze.push.BrazeFirebaseMessagingService
import com.google.firebase.messaging.FirebaseMessagingService
import com.google.firebase.messaging.RemoteMessage
class MyFirebaseMessagingService : FirebaseMessagingService() {
override fun onMessageReceived(remoteMessage: RemoteMessage) {
super.onMessageReceived(remoteMessage)
// Let Braze process the payload and display the notification
if (BrazeFirebaseMessagingService.handleBrazeRemoteMessage(this, remoteMessage)) {
// Braze successfully handled the push notification
} else {
// Handle non-Braze messages
}
}
}
```
For more information, see the [Firebase integration sample](https://github.com/braze-inc/braze-android-sdk/blob/master/samples/firebase-push/src/main/java/com/braze/firebasepush/FirebaseMessagingService.kt) in the Braze Android SDK repository.
### Customizing foreground behavior
If you want custom foreground behavior, such as suppressing the system notification or showing an in-app UI instead, you can:
- Use `subscribeToPushNotificationEvents` to react to push events and handle deep links with the `BrazeNotificationUtils.routeUserWithNotificationOpenedIntent` method. For more information, see the [Firebase push sample](https://github.com/braze-inc/braze-android-sdk/blob/master/samples/firebase-push/src/main/java/com/braze/firebasepush/FirebaseApplication.kt).
- Build and post your own notification using a custom `IBrazeNotificationFactory`, or suppress the notification by not calling `notificationManager.notify` in your handling path.
For more information on customizing notifications, see [Custom notification factory](https://www.braze.com/docs/pt-br/pt-br/developer_guide/push_notifications/customization/?sdktab=android#custom-notification-factory).
#### Creating custom deep links
Follow the instructions found within the [Android developer documentation](http://developer.android.com/training/app-indexing/deep-linking.html) on deep linking if you have not already added deep links to your app. To learn more about what deep links are, see our [FAQ article](https://www.braze.com/docs/pt-br/pt-br/user_guide/messaging/design_and_edit/personalize/actions_and_media_urls/#what-is-deep-linking).
#### Adding deep links
The Braze dashboard supports setting deep links or web URLs in push notifications campaigns and Canvases that will be opened when the notification is clicked.

#### Customizing back stack behavior
The Android SDK, by default, will place your host app's main launcher activity in the back stack when following push deep links. Braze allows you to set a custom activity to open in the back stack in place of your main launcher activity or to disable the back stack altogether.
For example, to set an activity called `YourMainActivity` as the back stack activity using [runtime configuration](https://www.braze.com/docs/pt-br/pt-br/developer_guide/sdk_initalization/?sdktab=android):
```java
BrazeConfig brazeConfig = new BrazeConfig.Builder()
.setPushDeepLinkBackStackActivityEnabled(true)
.setPushDeepLinkBackStackActivityClass(YourMainActivity.class)
.build();
Braze.configure(this, brazeConfig);
```
```kotlin
val brazeConfig = BrazeConfig.Builder()
.setPushDeepLinkBackStackActivityEnabled(true)
.setPushDeepLinkBackStackActivityClass(YourMainActivity.class)
.build()
Braze.configure(this, brazeConfig)
```
See the equivalent configuration for your `braze.xml`. Note that the class name must be the same as returned by `Class.forName()`.
```xml
trueyour.package.name.YourMainActivity
```
### Step 5: Define notification channels
The Braze Android SDK supports [Android notification channels](https://developer.android.com/preview/features/notification-channels.html). If a Braze notification does not contain the ID for a notification channel or that a Braze notification contains an invalid channel ID, Braze will display the notification with the default notification channel defined in the SDK. Company users use [Android Notification Channels](https://www.braze.com/docs/pt-br/pt-br/user_guide/message_building_by_channel/push/android/notification_channels/) within the platform to group notifications.
To set the user facing name of the default Braze notification channel, use [`BrazeConfig.setDefaultNotificationChannelName()`](https://braze-inc.github.io/braze-android-sdk/kdoc/braze-android-sdk/com.braze.configuration/-braze-config/-builder/set-default-notification-channel-name.html).
To set the user facing description of the default Braze notification channel, use [`BrazeConfig.setDefaultNotificationChannelDescription()`](https://braze-inc.github.io/braze-android-sdk/kdoc/braze-android-sdk/com.braze.configuration/-braze-config/-builder/set-default-notification-channel-description.html).
Update any API campaigns with the [Android push object](https://www.braze.com/docs/pt-br/pt-br/api/objects_filters/messaging/android_object/) parameter to include the `notification_channel` field. If this field is not specified, Braze will send the notification payload with the [dashboard fallback](https://www.braze.com/docs/pt-br/pt-br/user_guide/message_building_by_channel/push/android/notification_channels/#dashboard-fallback-channel) channel ID.
Other than the default notification channel, Braze will not create any channels. All other channels must be programmatically defined by the host app and then entered into the Braze dashboard.
The default channel name and description can also be configured in `braze.xml`.
```xml
Your channel nameYour channel description
```
### Step 6: Test notification display and analytics
#### Testing display
At this point, you should be able to see notifications sent from Braze. To test this, go to the **Campaigns** page on your Braze dashboard and create a **Push Notification** campaign. Choose **Android Push** and design your message. Then click the eye icon in the composer to get the test sender. Enter the user ID or email address of your current user and click **Send Test**. You should see the push show up on your device.

For issues related to push display, see our [troubleshooting guide](https://www.braze.com/docs/pt-br/pt-br/developer_guide/push_notifications/troubleshooting/?sdktab=android).
#### Testing analytics
At this point, you should also have analytics logging for push notification opens. Clicking on the notification when it arrives should result in the **Direct Opens** on your campaign results page to increase by 1. Check out our [push reporting](https://www.braze.com/docs/pt-br/pt-br/user_guide/message_building_by_channel/push/push_reporting/) article for a break down on push analytics.
For issues related to push analytics, see our [troubleshooting guide](https://www.braze.com/docs/pt-br/pt-br/developer_guide/push_notifications/troubleshooting/?sdktab=android).
#### Testing from command line
If you'd like to test in-app and push notifications via the command-line interface, you can send a single notification through the terminal via cURL and the [messaging API](https://www.braze.com/docs/pt-br/pt-br/api/endpoints/messaging/). You will need to replace the following fields with the correct values for your test case:
- `YOUR_API_KEY` (Go to **Settings** > **API Keys**.)
- `YOUR_EXTERNAL_USER_ID` (Search for a profile on the **Search Users** page.)
- `YOUR_KEY1` (optional)
- `YOUR_VALUE1` (optional)
```bash
curl -X POST -H "Content-Type: application/json" -H "Authorization: Bearer {YOUR_API_KEY}" -d '{
"external_user_ids":["YOUR_EXTERNAL_USER_ID"],
"messages": {
"android_push": {
"title":"Test push title",
"alert":"Test push",
"extra": {
"YOUR_KEY1":"YOUR_VALUE1"
}
}
}
}' https://rest.iad-01.braze.com/messages/send
```
This example uses the `US-01` instance. If you are not on this instance, replace the `US-01` endpoint with [your endpoint](https://www.braze.com/docs/pt-br/pt-br/api/basics/#endpoints).
## Conversation push notifications
{: style="float:right;max-width:35%;margin-left:15px;border: 0;"}
The [people and conversations initiative](https://developer.android.com/guide/topics/ui/conversations) is a multi-year Android initiative that aims to elevate people and conversations in the system surfaces of the phone. This priority is based on the fact that communication and interaction with other people is still the most valued and important functional area for the majority of Android users across all demographics.
### Usage requirements
- This notification type requires the Braze Android SDK v15.0.0+ and Android 11+ devices.
- Unsupported devices or SDKs will fallback to a standard push notification.
This feature is only available over the Braze REST API. See the [Android push object](https://www.braze.com/docs/pt-br/pt-br/api/objects_filters/messaging/android_object#android-conversation-push-object) for more information.
## FCM quota exceeded errors
When your limit for Firebase Cloud Messaging (FCM) is exceeded, Google returns "quota exceeded" errors. The default limit for FCM is 600,000 requests per minute. Braze retries sending according to Google's recommended best practices. However, a large volume of these errors can prolong sending time by several minutes. To mitigate potential impact, Braze will send you an alert that the rate limit is being exceeded and steps you can take to prevent the errors.
To check your current limit, go to your **Google Cloud Console** > **APIs & Services** > **Firebase Cloud Messaging API** > **Quotas & System Limits**, or visit the [FCM API Quotas page](https://console.cloud.google.com/apis/api/fcm.googleapis.com/quotas).
### Best practices
We recommend these best practices to keep these error volumes low.
#### Request a rate limit increase from FCM
To request a rate limit increase from FCM, you can contact [Firebase Support](https://firebase.google.com/support) directly or do the following:
1. Go to the [FCM API Quotas page](https://console.cloud.google.com/apis/api/fcm.googleapis.com/quotas).
2. Locate the **Send requests per minute** quota.
3. Select **Edit Quota**.
4. Enter a new value and submit your request.
#### Apply a workspace rate limit
You can apply a workspace rate limit for Android push notifications. This can help regulate the delivery rate of your outgoing messages. For more details, see [Workspace messaging rate limits](https://www.braze.com/docs/pt-br/pt-br/user_guide/administrative/app_settings/messaging_rate_limits).
## Rate limits
Push notifications are rate-limited, so don't be afraid of sending as many as your application needs. iOS and the Apple Push Notification service (APNs) servers will control how often they are delivered, and you won't get into trouble for sending too many. If your push notifications are throttled, they might be delayed until the next time the device sends a keep-alive packet or receives another notification.
## Setting up push notifications
### Step 1: Upload your APNs token
Before you can send an iOS push notification using Braze, you need to upload your `.p8` push notification file, as described in [Apple's developer documentation](https://developer.apple.com/documentation/usernotifications/establishing-a-token-based-connection-to-apns):
1. In your Apple developer account, go to [**Certificates, Identifiers & Profiles**](https://developer.apple.com/account/ios/certificate).
2. Under **Keys**, select **All** and click the add button (+) in the upper-right corner.
3. Under **Key Description**, enter a unique name for the signing key.
4. Under **Key Services**, select the **Apple Push Notification service (APNs)** checkbox, then click **Continue**. Click **Confirm**.
5. Note the key ID. Click **Download** to generate and download the key. Make sure to save the downloaded file in a secure place, as you cannot download this more than once.
6. In Braze, go to **Settings** > **App Settings** and upload the `.p8` file under **Apple Push Certificate**. You can upload either your development or production push certificate. To test push notifications after your app is live in the App Store, its recommended to set up a separate workspace for the development version of your app.
7. When prompted, enter your app's [bundle ID](https://developer.apple.com/documentation/foundation/nsbundle/1418023-bundleidentifier), [key ID](https://developer.apple.com/help/account/manage-keys/get-a-key-identifier/), and [team ID](https://developer.apple.com/help/account/manage-your-team/locate-your-team-id). You'll also need to specify whether to send notifications to your app's development or production environment, which is defined by its provisioning profile.
8. When you're finished, select **Save**.
### Step 2: Enable push capabilities
In Xcode, go to the **Signing & Capabilities** section of the main app target and add the push notifications capability.

### Step 3: Set up push handling
You can use the Swift SDK to automate the processing of remote notifications received from Braze. This is the simplest way to handle push notifications and is the recommended handling method.
#### Step 3.1: Enable automation in the push property
To enable the automatic push integration, set the `automation` property of the `push` configuration to `true`:
```swift
let configuration = Braze.Configuration(apiKey: "{YOUR-BRAZE-API-KEY}", endpoint: "{YOUR-BRAZE-API-ENDPOINT}")
configuration.push.automation = true
```
```objc
BRZConfiguration *configuration = [[BRZConfiguration alloc] initWithApiKey:@"{YOUR-BRAZE-API-KEY}" endpoint:@"{YOUR-BRAZE-API-ENDPOINT}"];
configuration.push.automation = [[BRZConfigurationPushAutomation alloc] initEnablingAllAutomations:YES];
```
This instructs the SDK to:
- Register your application for push notification on the system.
- Request the push notification authorization/permission at initialization.
- Dynamically provide implementations for the push notification related system delegate methods.
**Note:**
The automation steps performed by the SDK are compatible with pre-existing push notification handling integrations in your codebase. The SDK only automates the processing of remote notification received from Braze. Any system handler implemented to process your own or another third party SDK remote notifications will continue to work when `automation` is enabled.
**Warning:**
The SDK must be initialized on the main thread to enable push notification automation. SDK initialization must happen before the application has finished launching or in your AppDelegate [`application(_:didFinishLaunchingWithOptions:)`](https://developer.apple.com/documentation/uikit/uiapplicationdelegate/1622921-application) implementation.
If your application requires additional setup before initializing the SDK, please refer to the [Delayed Initialization](https://www.braze.com/docs/pt-br/pt-br/developer_guide/sdk_initalization/?sdktab=swift) documentation page.
#### Step 3.2: Override individual configurations (optional)
For more granular control, each automation step can be enabled or disabled individually:
```swift
// Enable all automations and disable the automatic notification authorization request at launch.
configuration.push.automation = true
configuration.push.automation.requestAuthorizationAtLaunch = false
```
```objc
// Enable all automations and disable the automatic notification authorization request at launch.
configuration.push.automation = [[BRZConfigurationPushAutomation alloc] initEnablingAllAutomations:YES];
configuration.push.automation.requestAuthorizationAtLaunch = NO;
```
See [`Braze.Configuration.Push.Automation`](https://braze-inc.github.io/braze-swift-sdk/documentation/brazekit/braze/configuration-swift.class/push-swift.class/automation-swift.class) for all available options and [`automation`](https://braze-inc.github.io/braze-swift-sdk/documentation/brazekit/braze/configuration-swift.class/push-swift.class/automation-swift.property) for more information on the automation behavior.
**Note:**
If you rely on push notifications for additional behavior specific to your app, you may still be able to use automatic push integration instead of manual push notification integration. The [`subscribeToUpdates(_:)`](https://braze-inc.github.io/braze-swift-sdk/documentation/brazekit/braze/notifications-swift.class/subscribetoupdates(_:)) method provides a way to be notified of remote notifications processed by Braze.
#### Step 3.1: Register for push notifications with APNs
Include the appropriate code sample within your app's [`application:didFinishLaunchingWithOptions:` delegate method](https://developer.apple.com/documentation/uikit/uiapplicationdelegate/1622921-application) so that your users' devices can register with APNs. Ensure that you call all push integration code in your application's main thread.
Braze also provides default push categories for push action button support, which must be manually added to your push registration code. Refer to [push action buttons](https://www.braze.com/docs/pt-br/pt-br/developer_guide/push_notifications/customization/?sdktab=swift#swift_customizing-push-categories) for additional integration steps.
Add the following code to the `application:didFinishLaunchingWithOptions:` method of your app delegate.
**Note:**
The following code sample includes integration for provisional push authentication (lines 5 and 6). If you are not planning on using provisional authorization in your app, you can remove the lines of code that add `UNAuthorizationOptionProvisional` to the `requestAuthorization` options. Visit [iOS notification options](https://www.braze.com/docs/pt-br/pt-br/user_guide/message_building_by_channel/push/ios/notification_options/) to learn more about push provisional authentication.
```swift
application.registerForRemoteNotifications()
let center = UNUserNotificationCenter.current()
center.setNotificationCategories(Braze.Notifications.categories)
center.delegate = self
var options: UNAuthorizationOptions = [.alert, .sound, .badge]
if #available(iOS 12.0, *) {
options = UNAuthorizationOptions(rawValue: options.rawValue | UNAuthorizationOptions.provisional.rawValue)
}
center.requestAuthorization(options: options) { granted, error in
print("Notification authorization, granted: \(granted), error: \(String(describing: error))")
}
```
```objc
[application registerForRemoteNotifications];
UNUserNotificationCenter *center = UNUserNotificationCenter.currentNotificationCenter;
[center setNotificationCategories:BRZNotifications.categories];
center.delegate = self;
UNAuthorizationOptions options = UNAuthorizationOptionAlert | UNAuthorizationOptionSound | UNAuthorizationOptionBadge;
if (@available(iOS 12.0, *)) {
options = options | UNAuthorizationOptionProvisional;
}
[center requestAuthorizationWithOptions:options
completionHandler:^(BOOL granted, NSError *_Nullable error) {
NSLog(@"Notification authorization, granted: %d, "
@"error: %@)",
granted, error);
}];
```
**Warning:**
You must assign your delegate object using `center.delegate = self` synchronously before your app finishes launching, preferably in `application:didFinishLaunchingWithOptions:`. Not doing so may cause your app to miss incoming push notifications. Visit Apple's [`UNUserNotificationCenterDelegate`](https://developer.apple.com/documentation/usernotifications/unusernotificationcenterdelegate) documentation to learn more.
If your app calls `wipeData()` and later re-enables the Braze SDK in the same app run, you must call `registerForRemoteNotifications()` again to re-populate the device token used by the SDK.
#### Step 3.2: Register push tokens with Braze
Once APNs registration is complete, pass the resulting `deviceToken` to Braze to enable for push notifications for the user.
Add the following code to your app's `application(_:didRegisterForRemoteNotificationsWithDeviceToken:)` method:
```swift
AppDelegate.braze?.notifications.register(deviceToken: deviceToken)
```
Add the following code to your app's `application:didRegisterForRemoteNotificationsWithDeviceToken:` method:
```objc
[AppDelegate.braze.notifications registerDeviceToken:deviceToken];
```
**Important:**
The `application:didRegisterForRemoteNotificationsWithDeviceToken:` delegate method is called every time after `application.registerForRemoteNotifications()` is called.
If you are migrating to Braze from another push service and your user's device has already registered with APNs, this method will collect tokens from existing registrations the next time the method is called, and users will not have to re-opt-in to push.
#### Step 3.3: Enable push handling
Next, pass the received push notifications along to Braze. This step is necessary for logging push analytics and link handling. Ensure that you call all push integration code in your application's main thread.
##### Default push handling
To enable the Braze default push handling, add the following code to your app's `application(_:didReceiveRemoteNotification:fetchCompletionHandler:)` method:
```swift
if let braze = AppDelegate.braze, braze.notifications.handleBackgroundNotification(
userInfo: userInfo,
fetchCompletionHandler: completionHandler
) {
return
}
completionHandler(.noData)
```
Next, add the following to your app's `userNotificationCenter(_:didReceive:withCompletionHandler:)` method:
```swift
if let braze = AppDelegate.braze, braze.notifications.handleUserNotification(
response: response,
withCompletionHandler: completionHandler
) {
return
}
completionHandler()
```
To enable the Braze default push handling, add the following code to your application's `application:didReceiveRemoteNotification:fetchCompletionHandler:` method:
```objc
BOOL processedByBraze = AppDelegate.braze != nil && [AppDelegate.braze.notifications handleBackgroundNotificationWithUserInfo:userInfo
fetchCompletionHandler:completionHandler];
if (processedByBraze) {
return;
}
completionHandler(UIBackgroundFetchResultNoData);
```
Next, add the following code to your app's `(void)userNotificationCenter:didReceiveNotificationResponse:withCompletionHandler:` method:
```objc
BOOL processedByBraze = AppDelegate.braze != nil && [AppDelegate.braze.notifications handleUserNotificationWithResponse:response
withCompletionHandler:completionHandler];
if (processedByBraze) {
return;
}
completionHandler();
```
##### Foreground push handling
To enable foreground push notifications and let Braze recognize them when they're received, implement `UNUserNotificationCenter.userNotificationCenter(_:willPresent:withCompletionHandler:)`. If a user taps your foreground notification, the `userNotificationCenter(_:didReceive:withCompletionHandler:)` push delegate will be called and Braze will log the push click event.
```swift
func userNotificationCenter(
_ center: UNUserNotificationCenter,
willPresent notification: UNNotification,
withCompletionHandler completionHandler: @escaping (UNNotificationPresentationOptions
) -> Void) {
if let braze = AppDelegate.braze {
// Forward notification payload to Braze for processing.
braze.notifications.handleForegroundNotification(notification: notification)
}
// Configure application's foreground notification display options.
if #available(iOS 14.0, *) {
completionHandler([.list, .banner])
} else {
completionHandler([.alert])
}
}
```
To enable foreground push notifications and let Braze recognize them when they're received, implement `userNotificationCenter:willPresentNotification:withCompletionHandler:`. If a user taps your foreground notification, the `userNotificationCenter:didReceiveNotificationResponse:withCompletionHandler:` push delegate will be called and Braze will log the push click event.
```objc
- (void)userNotificationCenter:(UNUserNotificationCenter *)center
willPresentNotification:(UNNotification *)notification
withCompletionHandler:(void (^)(UNNotificationPresentationOptions options))completionHandler {
if (AppDelegate.braze != nil) {
// Forward notification payload to Braze for processing.
[AppDelegate.braze.notifications handleForegroundNotificationWithNotification:notification];
}
// Configure application's foreground notification display options.
if (@available(iOS 14.0, *)) {
completionHandler(UNNotificationPresentationOptionList | UNNotificationPresentationOptionBanner);
} else {
completionHandler(UNNotificationPresentationOptionAlert);
}
}
```
## Testing notifications {#push-testing}
If you'd like to test in-app and push notifications via the command line, you can send a single notification through the terminal via CURL and the [messaging API](https://www.braze.com/docs/pt-br/pt-br/api/endpoints/messaging/send_messages/post_send_messages/). You will need to replace the following fields with the correct values for your test case:
- `YOUR_API_KEY` - available at **Settings** > **API Keys**.
- `YOUR_EXTERNAL_USER_ID` - available on the **Search Users** page. See [assigning user IDs](https://www.braze.com/docs/pt-br/pt-br/developer_guide/platform_integration_guides/swift/analytics/setting_user_ids/#assigning-a-user-id) for more information.
- `YOUR_KEY1` (optional)
- `YOUR_VALUE1` (optional)
In the following example, the `US-01` instance is being used. If you're not on this instance, refer to our [API documentation](https://www.braze.com/docs/pt-br/pt-br/api/basics/) to see which endpoint to make requests to.
```bash
curl -X POST -H "Content-Type: application/json" -H "Authorization: Bearer {YOUR_API_KEY}" -d '{
"external_user_ids":["YOUR_EXTERNAL_USER_ID"],
"messages": {
"apple_push": {
"alert":"Test push",
"extra": {
"YOUR_KEY1":"YOUR_VALUE1"
}
}
}
}' https://rest.iad-01.braze.com/messages/send
```
## Subscribing to push notifications updates
To access the push notification payloads processed by Braze, use the [`Braze.Notifications.subscribeToUpdates(payloadTypes:_:)`](https://braze-inc.github.io/braze-swift-sdk/documentation/brazekit/braze/notifications-swift.class/subscribetoupdates(payloadtypes:_:)/) method.
You can use the `payloadTypes` parameter to specify whether you'd like to subscribe to notifications involving push open events, push received events, or both.
```swift
// This subscription is maintained through a Braze cancellable, which will observe for changes until the subscription is cancelled.
// You must keep a strong reference to the cancellable to keep the subscription active.
// The subscription is canceled either when the cancellable is deinitialized or when you call its `.cancel()` method.
let cancellable = AppDelegate.braze?.notifications.subscribeToUpdates(payloadTypes: [.open, .received]) { payload in
print("Braze processed notification with title '\(payload.title)' and body '\(payload.body)'")
}
```
**Important:**
Keep in mind, push received events will only trigger for foreground notifications and `content-available` background notifications. It will not trigger for notifications received while terminated or for background notifications without the `content-available` field.
```objc
NSInteger filtersValue = BRZNotificationsPayloadTypeFilter.opened.rawValue | BRZNotificationsPayloadTypeFilter.received.rawValue;
BRZNotificationsPayloadTypeFilter *filters = [[BRZNotificationsPayloadTypeFilter alloc] initWithRawValue: filtersValue];
BRZCancellable *cancellable = [notifications subscribeToUpdatesWithPayloadTypes:filters update:^(BRZNotificationsPayload * _Nonnull payload) {
NSLog(@"Braze processed notification with title '%@' and body '%@'", payload.title, payload.body);
}];
```
**Important:**
Keep in mind, push received events will only trigger for foreground notifications and `content-available` background notifications. It will not trigger for notifications received while terminated or for background notifications without the `content-available` field.
**Note:**
When using the automatic push integration, `subscribeToUpdates(_:)` is the only way to be notified of remote notifications processed by Braze. The `UIAppDelegate` and `UNUserNotificationCenterDelegate` system methods are not called when the notification is automatically processed by Braze.
**Tip:**
Create your push notification subscription in `application(_:didFinishLaunchingWithOptions:)` to ensure your subscription is triggered after an end-user taps a notification while your app is in a terminated state.
## Handling foreground notifications
By default, when a push notification arrives while your app is in the foreground, iOS does not display it automatically. To display push notifications in the foreground and track them with Braze analytics, call the `handleForegroundNotification(notification:)` method inside your `UNUserNotificationCenterDelegate.userNotificationCenter(_:willPresent:withCompletionHandler:)` implementation.
### How it works
When you call `handleForegroundNotification(notification:)`, Braze processes the notification payload to log analytics and handle any deep links or button actions. The actual display behavior is controlled by the `UNNotificationPresentationOptions` you pass to the completion handler.
```swift
import BrazeKit
import UserNotifications
extension AppDelegate: UNUserNotificationCenterDelegate {
func userNotificationCenter(
_ center: UNUserNotificationCenter,
willPresent notification: UNNotification,
withCompletionHandler completionHandler: @escaping (UNNotificationPresentationOptions) -> Void
) {
// Let Braze process the notification payload
if let braze = AppDelegate.braze {
braze.notifications.handleForegroundNotification(notification: notification)
}
// Control how the notification appears in the foreground
if #available(iOS 14.0, *) {
completionHandler([.banner, .list, .sound])
} else {
completionHandler([.alert, .sound])
}
}
}
```
For a complete example, see the [push notifications manual integration sample](https://github.com/braze-inc/braze-swift-sdk/blob/e31907eaa0dbd151dc2e6826de66cc494242ba60/Examples/Swift/Sources/PushNotifications-Manual/AppDelegate.swift#L1-L120) in the Braze Swift SDK repository.
## Push primers {#push-primers}
Push primer campaigns encourage your users to enable push notifications on their device for your app. This can be done without SDK customization using our [no code push primer](https://www.braze.com/docs/pt-br/pt-br/user_guide/message_building_by_channel/push/best_practices/push_primer_messages/).
## Dynamic APNs gateway management
Dynamic Apple Push Notification Service (APNs) gateway management enhances the reliability and efficiency of iOS push notifications by automatically detecting the correct APNs environment. Previously, you would manually select APNs environments (development or production) for your push notifications, which sometimes led to incorrect gateway configurations, delivery failures, and `BadDeviceToken` errors.
With dynamic APNs gateway management, you'll have:
- **Improved reliability:** Notifications are always delivered to the correct APNs environment, reducing failed deliveries.
- **Simplified configuration:** You no longer need to manually manage APNs gateway settings.
- **Error resilience:** Invalid or missing gateway values are gracefully handled, providing uninterrupted service.
### Prerequisites
Braze supports Dynamic APNs gateway management for push notifications on iOS with the following SDK version requirement:
### How it works
When an iOS app integrates with the Braze Swift SDK, it sends device-related data, including [`aps-environment`](https://developer.apple.com/documentation/bundleresources/entitlements/aps-environment) to the Braze SDK API, if available. The `apns_gateway` value indicates whether the app is using the development (`dev`) or production (`prod`) APNs environment.
Braze also stores the reported gateway value for each device. If a new, valid gateway value is received, Braze updates the stored value automatically.
When Braze sends a push notification:
- If a valid gateway value (dev or prod) is stored for the device, Braze uses it to determine the correct APNs environment.
- If no gateway value is stored, Braze defaults to the APNs environment configured in the **App Settings** page.
### Frequently asked questions
#### Why was this feature introduced?
With dynamic APNs gateway management, the correct environment is selected automatically. Previously, you had to manually configure the APNs gateway, which could lead to `BadDeviceToken` errors, token invalidation, and potential APNs rate-limiting issues.
#### How does this impact push delivery performance?
This feature improves delivery rates by always routing push tokens to the correct APNs environment, avoiding failures caused by misconfigured gateways.
#### Can I disable this feature?
Dynamic APNs Gateway Management is turned on by default and provides reliability improvements. If you have specific use cases that require manual gateway selection, contact [Braze Support](https://www.braze.com/docs/pt-br/pt-br/user_guide/administrative/access_braze/support/).
## About push notifications for Android TV
{: style="float:right;max-width:25%;margin-left:15px; border: 0"}
While not a native feature, Android TV push integration is made possible by leveraging the Braze Android SDK and Firebase Cloud Messaging to register a push token for Android TV. It is, however, necessary to build a UI to display the notification payload after it is received.
## Prerequisites
To use this feature, you'll need to complete the following:
- [Integrate the Braze Android SDK](https://www.braze.com/docs/pt-br/pt-br/developer_guide/sdk_integration/?sdktab=android)
- [Set up push notifications for the Braze Android SDK](https://www.braze.com/docs/pt-br/pt-br/developer_guide/platform_integration_guides/android/push_notifications/?tab=android)
## Setting up push notifications
To set up push notifications for Android TV:
1. Create a custom view in your app to display your notifications.
2. Create a [custom notification factory](https://www.braze.com/docs/pt-br/pt-br/developer_guide/push_notifications/customization#customization-display). This will override the default SDK behavior and allow you to manually display the notifications. By returning `null`, this will prevent the SDK from processing and will require custom code to display the notification. After these steps have been completed, you can start sending push to Android TV!
3. (Optional) To track click analytics effectively, set up click analytics tracking. This can be achieved by creating a [push callback](https://www.braze.com/docs/pt-br/pt-br/developer_guide/push_notifications/customization#push-callback) to listen for Braze push opened and received intents.
**Note:**
These notifications **will not persist** and will only be visible to the user when the device displays them. This is due to Android TV's notification center not supporting historical notifications.
## Testing Android TV push notifications
To test if your push implementation is successful, send a notification from the Braze dashboard as you would normally for an Android device.
- **If the application is closed**: The push message will display a toast notification on the screen.
- **If the application is open**: You have the opportunity to display the message in your own hosted UI. We recommend following the UI styling of our Android Mobile SDK in-app messages.
## Best practices
For marketers using Braze, launching a campaign to Android TV will be identical to launching a push to Android mobile apps. To target these devices exclusively, we recommend selecting the Android TV App in segmentation.
The delivered and clicked response returned by FCM will follow the same convention as a mobile Android device; therefore, any errors will be visible in the message activity log.
## Prerequisites
Before you can use this feature, you'll need to [integrate the Cordova Braze SDK](https://www.braze.com/docs/pt-br/pt-br/developer_guide/sdk_integration/?sdktab=cordova). After you integrate the SDK, basic push notification functionality is enabled by default. To use [rich push notifications](https://www.braze.com/docs/pt-br/pt-br/developer_guide/push_notifications/rich/?sdktab=cordova) and [push stories](https://www.braze.com/docs/pt-br/pt-br/developer_guide/push_notifications/push_stories/?sdktab=cordova), you'll need to set them up individually. To use iOS push messages, you also need to upload a valid push certificate.
**Warning:**
Anytime you add, remove, or update your Cordova plugins, Cordova will overwrite the Podfile in your iOS app's Xcode project. This means you’ll need to set these features up again anytime you modify your Cordova plugins.
## Enabling push deep linking
By default, the Braze Cordova SDK doesn't automatically handle deep links from push notifications. To enable push deep linking, follow the configuration steps in [Deep linking](https://www.braze.com/docs/pt-br/pt-br/developer_guide/cordova/deep_linking/).
For more details about these and other push configuration options, see [Optional configurations](https://www.braze.com/docs/pt-br/pt-br/developer_guide/sdk_integration?sdktab=cordova#optional).
## Disabling basic push notifications (iOS only)
After you integrate the Braze Cordova SDK for iOS, basic push notification functionality is enabled by default. To disable this functionality in your iOS app, add the following to your `config.xml` file. For more information, see [Optional configurations](https://www.braze.com/docs/pt-br/pt-br/developer_guide/sdk_integration?sdktab=cordova#optional).
```xml
```
## Prerequisites
Before you can use this feature, you'll need to [integrate the Flutter Braze SDK](https://www.braze.com/docs/pt-br/pt-br/developer_guide/sdk_integration/?sdktab=flutter).
## Setting up push notifications
### Step 1: Complete the initial setup
#### Step 1.1: Register for push
Register for push using Google’s Firebase Cloud Messaging (FCM) API. For a full walkthrough, refer to the following steps from the [Native Android push integration guide](https://www.braze.com/docs/pt-br/pt-br/developer_guide/platform_integration_guides/android/push_notifications/?tab=android/):
1. [Add Firebase to your project](https://www.braze.com/docs/pt-br/pt-br/developer_guide/platform_integration_guides/android/push_notifications/android/integration/standard_integration/#step-1-add-firebase-to-your-project).
2. [Add Cloud Messaging to your dependencies](https://www.braze.com/docs/pt-br/pt-br/developer_guide/platform_integration_guides/android/push_notifications/android/integration/standard_integration/#step-2-add-cloud-messaging-to-your-dependencies).
3. [Create a service account](https://www.braze.com/docs/pt-br/pt-br/developer_guide/platform_integration_guides/android/push_notifications/android/integration/standard_integration/#step-3-create-a-service-account).
4. [Generate JSON credentials](https://www.braze.com/docs/pt-br/pt-br/developer_guide/platform_integration_guides/android/push_notifications/android/integration/standard_integration/#step-4-generate-json-credentials).
5. [Upload your JSON credentials to Braze](https://www.braze.com/docs/pt-br/pt-br/developer_guide/platform_integration_guides/android/push_notifications/android/integration/standard_integration/#step-5-upload-your-json-credentials-to-braze).
#### Step 1.2: Get your Google Sender ID
First, go to Firebase Console, open your project, then select **Settings** > **Project settings**.

Select **Cloud Messaging**, then under **Firebase Cloud Messaging API (V1)**, copy the **Sender ID** to your clipboard.

#### Step 1.3: Update your `braze.xml`
Add the following to your `braze.xml` file. Replace `FIREBASE_SENDER_ID` with the sender ID you copied previously.
```xml
trueFIREBASE_SENDER_ID
```
#### Step 1.1: Upload APNs certificates
Generate an Apple Push Notification service (APNs) certificate and uploaded it to the Braze dashboard. For a full walkthrough, see [Uploading your APNs certificate](https://www.braze.com/docs/pt-br/pt-br/developer_guide/platform_integration_guides/swift/push_notifications/integration/#step-1-upload-your-apns-certificate).
#### Step 1.2: Add push notification support to your app
Follow the [native iOS integration guide](https://www.braze.com/docs/pt-br/pt-br/developer_guide/platform_integration_guides/swift/push_notifications/integration/?tab=objective-c#automatic-push-integration).
### Step 2: Listen for push notification events (optional)
To listen for push notification events that Braze has detected and handled, call `subscribeToPushNotificationEvents()` and pass in an argument to execute.
**Note:**
Braze push notification events are available on both Android and iOS. Due to platform differences, iOS will only detect Braze push events when a user has interacted with a notification.
```dart
// Create stream subscription
StreamSubscription pushEventsStreamSubscription;
pushEventsStreamSubscription = braze.subscribeToPushNotificationEvents((BrazePushEvent pushEvent) {
print("Push Notification event of type ${pushEvent.payloadType} seen. Title ${pushEvent.title}\n and deeplink ${pushEvent.url}");
// Handle push notification events
});
// Cancel stream subscription
pushEventsStreamSubscription.cancel();
```
##### Push notification event fields
**Note:**
Because of platform limitations on iOS, the Braze SDK can only process push payloads while the app is in the foreground. Listeners will only trigger for the `push_opened` event type on iOS after a user has interacted with a push.
For a full list of push notification fields, refer to the table below:
| Field Name | Type | Description |
| ------------------ | --------- | ----------- |
| `payloadType` | String | Specifies the notification payload type. The two values that are sent from the Braze Flutter SDK are `push_opened` and `push_received`. Only `push_opened` events are supported on iOS. |
| `url` | String | Specifies the URL that was opened by the notification. |
| `useWebview` | Boolean | If `true`, URL will open in-app in a modal webview. If `false`, the URL will open in the device browser. |
| `title` | String | Represents the title of the notification. |
| `body` | String | Represents the body or content text of the notification. |
| `summaryText` | String | Represents the summary text of the notification. This is mapped from `subtitle` on iOS. |
| `badgeCount` | Number | Represents the badge count of the notification. |
| `timestamp` | Number | Represents the time at which the payload was received by the application. |
| `isSilent` | Boolean | If `true`, the payload is received silently. For details on sending Android silent push notifications, refer to [Silent push notifications on Android](https://www.braze.com/docs/pt-br/pt-br/developer_guide/push_notifications/silent/?sdktab=android). For details on sending iOS silent push notifications, refer to [Silent push notifications on iOS](https://www.braze.com/docs/pt-br/pt-br/developer_guide/push_notifications/silent/?sdktab=swift). |
| `isBrazeInternal`| Boolean | This will be `true` if a notification payload was sent for an internal SDK feature, such as Feature Flag sync or uninstall tracking. The payload is received silently for the user. |
| `imageUrl` | String | Specifies the URL associated with the notification image. |
| `brazeProperties` | Object | Represents Braze properties associated with the campaign (key-value pairs). |
| `ios` | Object | Represents iOS-specific fields. |
| `android` | Object | Represents Android-specific fields. |
{: .reset-td-br-1 .reset-td-br-2 aria-label="Push notification event fields" }
### Step 3: Test displaying push notifications
To test your integration after configuring push notifications in the native layer:
1. Set an active user in the Flutter application. To do so, initialize your plugin by calling `braze.changeUser('your-user-id')`.
2. Head to **Campaigns** and create a new push notification campaign. Choose the platforms that you'd like to test.
3. Compose your test notification and head over to the **Test** tab. Add the same `user-id` as the test user and click **Send Test**.
4. You should receive the notification on your device shortly. You may need to check in the Notification Center or update Settings if it doesn't display.
**Tip:**
Starting with Xcode 14, you can test remote push notifications on an iOS simulator.
## Prerequisites
Before you can use this feature, you'll need to [integrate the Android Braze SDK](https://www.braze.com/docs/pt-br/pt-br/developer_guide/sdk_integration/?sdktab=android).
## Setting up push notifications
Newer phones manufactured by [Huawei](https://huaweimobileservices.com/) come equipped with Huawei Mobile Services (HMS) - a service used to deliver push instead of Google's Firebase Cloud Messaging (FCM).
### Step 1: Register for a Huawei developer account
Before getting started, you'll need to register and set up a [Huawei Developer account](https://developer.huawei.com/consumer/en/console). In your Huawei account, go to **My Projects > Project Settings > App Information**, and take note of the `App ID` and `App secret`.

### Step 2: Create a new Huawei app in the Braze dashboard
In the Braze dashboard, go to **App Settings**, listed under the **Settings** navigation.
Click **+ Add App**, provide a name (such as My Huawei App), select `Android` as the platform.
{: style="max-width:60%;"}
Once your new Braze app has been created, locate the push notification settings and select `Huawei` as the push provider. Next, provide your `Huawei Client Secret` and `Huawei App ID`.

### Step 3: Integrate the Huawei messaging SDK into your app
Huawei has provided an [Android integration codelab](https://developer.huawei.com/consumer/en/codelab/HMSPushKit/index.html) detailing integrating the Huawei Messaging Service into your application. Follow those steps to get started.
After completing the codelab, you will need to create a custom [Huawei Message Service](https://developer.huawei.com/consumer/en/doc/development/HMS-References/push-HmsMessageService-cls) to obtain push tokens and forward messages to the Braze SDK.
```java
public class CustomPushService extends HmsMessageService {
@Override
public void onNewToken(String token) {
super.onNewToken(token);
Braze.getInstance(this.getApplicationContext()).setRegisteredPushToken(token);
}
@Override
public void onMessageReceived(RemoteMessage remoteMessage) {
super.onMessageReceived(remoteMessage);
if (BrazeHuaweiPushHandler.handleHmsRemoteMessageData(this.getApplicationContext(), remoteMessage.getDataOfMap())) {
// Braze has handled the Huawei push notification
}
}
}
```
```kotlin
class CustomPushService: HmsMessageService() {
override fun onNewToken(token: String?) {
super.onNewToken(token)
Braze.getInstance(applicationContext).setRegisteredPushToken(token!!)
}
override fun onMessageReceived(hmsRemoteMessage: RemoteMessage?) {
super.onMessageReceived(hmsRemoteMessage)
if (BrazeHuaweiPushHandler.handleHmsRemoteMessageData(applicationContext, hmsRemoteMessage?.dataOfMap)) {
// Braze has handled the Huawei push notification
}
}
}
```
After adding your custom push service, add the following to your `AndroidManifest.xml`:
```xml
```
### Step 4: Handle foreground notifications
By default, when a push notification arrives while your app is in the foreground, Huawei displays it automatically. To have Braze process the push notification payload (for analytics tracking, deep link handling, and custom processing), route the incoming push data to Braze inside your `HmsMessageService.onMessageReceived` method.
When you call `BrazeHuaweiPushHandler.handleHmsRemoteMessageData`, Braze determines if the payload is a Braze push notification and, if so, creates and displays the notification. For more information, see [Handling foreground notifications](https://www.braze.com/docs/pt-br/pt-br/developer_guide/push_notifications/?sdktab=android#handling-foreground-notifications) in the Android push notifications documentation.
For a complete example, see the [Huawei handler reference](https://braze-inc.github.io/braze-android-sdk/kdoc/braze-android-sdk/com.braze.push/-braze-huawei-push-handler/index.html) in the Braze Android SDK documentation.
### Step 5: Test your push notifications (optional)
At this point, you've created a new Huawei Android app in the Braze dashboard, configured it with your Huawei developer credentials, and have integrated the Braze and Huawei SDKs into your app.
Next, we can test out the integration by testing a new push campaign in Braze.
#### Step 5.1: Create a new push notification campaign
In the **Campaigns** page, create a new campaign, and choose **Push Notification** as your message type.
After you name your campaign, choose **Android Push** as the push platform.

Next, compose your push campaign with a title and message.
#### Step 5.2: Send a test push
In the **Test** tab, enter your user ID, which you've set in your app using the [`changeUser(USER_ID_STRING)` method](https://www.braze.com/docs/pt-br/pt-br/developer_guide/platform_integration_guides/android/analytics/setting_user_ids/#assigning-a-user-id), and click **Send Test** to send a test push.

At this point, you should receive a test push notification on your Huawei (HMS) device from Braze.
#### Step 5.3: Set up Huawei segmentation (optional)
Since your Huawei app in the Braze dashboard is built upon the Android push platform, you have the flexibility to send push to all Android users (Firebase Cloud Messaging and Huawei Mobile Services), or you can choose to segment your campaign audience to specific apps.
To send push to only Huawei apps, [create a new Segment](https://www.braze.com/docs/pt-br/pt-br/user_guide/engagement_tools/segments/creating_a_segment/#step-3-choose-your-app-or-platform) and select your Huawei App within the **Apps** section.

Of course, if you want to send the same push to all Android push providers, you can choose not to specify the app which will send to all Android apps configured within the current workspace.
## Prerequisites
Before you can use this feature, you'll need to [integrate the React Native Braze SDK](https://www.braze.com/docs/pt-br/pt-br/developer_guide/sdk_integration/?sdktab=react%20native).
## Setting up push notifications {#setting-up-push-notifications}
### Step 1: Complete the initial setup
#### Prerequisites
Before you can use Expo for push notifications, you'll need to [set up the Braze Expo plugin](https://www.braze.com/docs/pt-br/pt-br/developer_guide/platform_integration_guides/react_native/sdk_integration/?tab=expo).
#### Step 1.1: Update your `app.json` file
Next update your `app.json` file for Android and iOS:
- **Android:** Add the `enableFirebaseCloudMessaging` option.
- **iOS:** Add the `enableBrazeIosPush` option.
#### Step 1.2: Add your Google Sender ID
First, go to Firebase Console, open your project, then select **Settings** > **Project settings**.

Select **Cloud Messaging**, then under **Firebase Cloud Messaging API (V1)**, copy the **Sender ID** to your clipboard.

Next, open your project's `app.json` file and set your `firebaseCloudMessagingSenderId` property to the Sender ID in your clipboard. For example:
```
"firebaseCloudMessagingSenderId": "693679403398"
```
#### Step 1.3: Add the path to your Google Services JSON
In your project's `app.json` file, add the path to your `google-services.json` file. This file is required when setting `enableFirebaseCloudMessaging: true` in your configuration.
```json
{
"expo": {
"android": {
"googleServicesFile": "PATH_TO_GOOGLE_SERVICES"
},
"plugins": [
[
"@braze/expo-plugin",
{
"androidApiKey": "YOUR-ANDROID-API-KEY",
"iosApiKey": "YOUR-IOS-API-KEY",
"enableBrazeIosPush": true,
"enableFirebaseCloudMessaging": true,
"firebaseCloudMessagingSenderId": "YOUR-FCM-SENDER-ID",
"androidHandlePushDeepLinksAutomatically": true
}
],
]
}
}
```
Note that you will need to use these settings instead of the native setup instructions if you are depending on additional push notification libraries like [Expo Notifications](https://docs.expo.dev/versions/latest/sdk/notifications/).
If you are not using the Braze Expo plugin, or would like to configure these settings natively instead, register for push by referring to the [Native Android push integration guide](https://www.braze.com/docs/pt-br/pt-br/developer_guide/platform_integration_guides/android/push_notifications/?tab=android/).
If you are not using the Braze Expo plugin, or would like to configure these settings natively instead, register for push by referring to the following steps from the [Native iOS push integration guide](https://www.braze.com/docs/pt-br/pt-br/developer_guide/push_notifications/?sdktab=swift):
#### Step 1.1: Request for push permissions
If you don't plan on requesting push permissions when the app is launched, omit the `requestAuthorizationWithOptions:completionHandler:` call in your AppDelegate. Then, skip to [Step 2](#reactnative_step-2-request-push-notifications-permission). Otherwise, follow the [native iOS integration guide](https://www.braze.com/docs/pt-br/pt-br/developer_guide/platform_integration_guides/swift/push_notifications/integration/?tab=objective-c#automatic-push-integration).
#### Step 1.2 (Optional): Migrate your push key
If you were previously using `expo-notifications` to manage your push key, run `expo fetch:ios:certs` from your application's root folder. This will download your push key (a .p8 file), which can then be uploaded to the Braze dashboard.
### Step 2: Request push notifications permission
Use the `Braze.requestPushPermission()` method (available on v1.38.0 and up) to request permission for push notifications from the user on iOS and Android 13+. For Android 12 and below, this method is a no-op.
This method takes in a required parameter that specifies which permissions the SDK should request from the user on iOS. These options have no effect on Android.
```javascript
const permissionOptions = {
alert: true,
sound: true,
badge: true,
provisional: false
};
Braze.requestPushPermission(permissionOptions);
```
#### Step 2.1: Listen for push notifications (optional)
You can additionally subscribe to events where Braze has detected and handled an incoming push notification. Use the listener key `Braze.Events.PUSH_NOTIFICATION_EVENT`.
**Important:**
iOS push received events will only trigger for foreground notifications and `content-available` background notifications. It will not trigger for notifications received while terminated or for background notifications without the `content-available` field.
```javascript
Braze.addListener(Braze.Events.PUSH_NOTIFICATION_EVENT, data => {
console.log(`Push Notification event of type ${data.payload_type} seen. Title ${data.title}\n and deeplink ${data.url}`);
console.log(JSON.stringify(data, undefined, 2));
});
```
##### Push notification event fields
For a full list of push notification fields, refer to the table below:
| Field Name | Type | Description |
| ------------------ | --------- | ----------- |
| `payload_type` | String | Specifies the notification payload type. The two values that are sent from the Braze React Native SDK are `push_opened` and `push_received`. |
| `url` | String | Specifies the URL that was opened by the notification. |
| `use_webview` | Boolean | If `true`, URL will open in-app in a modal webview. If `false`, the URL will open in the device browser. |
| `title` | String | Represents the title of the notification. |
| `body` | String | Represents the body or content text of the notification. |
| `summary_text` | String | Represents the summary text of the notification. This is mapped from `subtitle` on iOS. |
| `badge_count` | Number | Represents the badge count of the notification. |
| `timestamp` | Number | Represents the time at which the payload was received by the application. |
| `is_silent` | Boolean | If `true`, the payload is received silently. For details on sending Android silent push notifications, refer to [Silent push notifications on Android](https://www.braze.com/docs/pt-br/pt-br/developer_guide/push_notifications/silent/?sdktab=android). For details on sending iOS silent push notifications, refer to [Silent push notifications on iOS](https://www.braze.com/docs/pt-br/pt-br/developer_guide/push_notifications/silent/?sdktab=swift). |
| `is_braze_internal`| Boolean | This will be `true` if a notification payload was sent for an internal SDK feature, such as Feature Flag sync or uninstall tracking. The payload is received silently for the user. |
| `image_url` | String | Specifies the URL associated with the notification image. |
| `braze_properties` | Object | Represents Braze properties associated with the campaign (key-value pairs). |
| `ios` | Object | Represents iOS-specific fields. |
| `android` | Object | Represents Android-specific fields. |
{: .reset-td-br-1 .reset-td-br-2 aria-label="Push notification event fields" }
### Step 3: Enable deep linking (optional)
To enable Braze to handle deep links inside React components when a push notification is clicked, first implement the steps described in [React Native Linking](https://reactnative.dev/docs/linking) library, or with your solution of choice. Then, follow the additional steps below.
To learn more about what deep links are, see our [FAQ article](https://www.braze.com/docs/pt-br/pt-br/user_guide/messaging/design_and_edit/personalize/actions_and_media_urls/#what-is-deep-linking).
**Important:**
If you're migrating an existing React Native push integration, re-test deep linking after you upgrade the Braze SDK, React Native, Expo, or related libraries. Confirm that:
- [React Native Linking](https://reactnative.dev/docs/linking) is still configured and handling your deep link URLs.
- Your iOS initial push payload handling (see [Step 3.1: Store the push notification payload on app launch](#step-3-1)) is implemented and still called on app launch.
- Any native delegate or listener methods you use to handle push click events are still registered and invoked as expected.
If you're using the [Braze Expo plugin](https://www.braze.com/docs/pt-br/pt-br/developer_guide/platforms/react_native/sdk_integration/?tab=expo#step-2-choose-a-setup-option), you can handle push notification deep links automatically by setting `androidHandlePushDeepLinksAutomatically` to `true` in your `app.json`.
To handle deep links manually instead, refer to the native Android documentation: [Adding deep links](https://www.braze.com/docs/pt-br/pt-br/developer_guide/push_notifications/deep_linking).
#### Step 3.1: Store the push notification payload on app launch
**Note:**
This is supported as of React Native SDK 19.1.0.
Add `populateInitialPushPayloadFromIntent` to your main activity's `onCreate()` method. This must be called before React Native initializes to capture the initial Intent data. For example:
```kotlin
override fun onCreate(savedInstanceState: Bundle?) {
BrazeReactUtils.populateInitialPushPayloadFromIntent(intent)
super.onCreate(savedInstanceState)
}
```
#### Step 3.2: Handle deep links from a closed state
In addition to the base scenarios handled by [React Native Linking](https://reactnative.dev/docs/linking), implement the `Braze.getInitialPushPayload` method and retrieve the `url` value to account for deep links from push notifications that open your app when it isn't running. For example:
```javascript
// Handles deep links when an app is launched from a hard close via push click.
Braze.getInitialPushPayload(pushPayload => {
if (pushPayload) {
console.log('Braze.getInitialPushPayload is ' + pushPayload);
showToast('Initial URL is ' + pushPayload.url);
handleOpenUrl({ pushPayload.url });
}
});
```
**Note:**
This method requires the native setup in Step 3.1 for your platform. If you're using the Braze Expo plugin, this may be handled automatically.
**Important:**
To handle deep links from push notifications on iOS, you must also configure link handling in your native iOS layer.
This includes registering a custom URL scheme and implementing a URL handler in your `AppDelegate`. For full setup instructions, see [Handling deep links](https://www.braze.com/docs/pt-br/pt-br/developer_guide/platforms/swift/in_app_messages/deep_linking/?tab=objective-c) in the native iOS documentation.
#### Step 3.1: Store the push notification payload on app launch {#step-3-1}
**Note:**
Skip step 3.1 if you're using the Braze Expo plugin, as this functionality is handled automatically.
For iOS, add `populateInitialPayloadFromLaunchOptions` to your AppDelegate's `didFinishLaunchingWithOptions` method. For example:
```objc
- (BOOL)application:(UIApplication *)application didFinishLaunchingWithOptions:(NSDictionary *)launchOptions
{
// ... Perform regular React Native setup
BRZConfiguration *configuration = [[BRZConfiguration alloc] initWithApiKey:apiKey endpoint:endpoint];
configuration.triggerMinimumTimeInterval = 1;
configuration.logger.level = BRZLoggerLevelInfo;
Braze *braze = [BrazeReactBridge initBraze:configuration];
AppDelegate.braze = braze;
[self registerForPushNotifications];
[[BrazeReactUtils sharedInstance] populateInitialPayloadFromLaunchOptions:launchOptions];
return [super application:application didFinishLaunchingWithOptions:launchOptions];
}
```
```swift
func application(
_ application: UIApplication,
didFinishLaunchingWithOptions launchOptions: [UIApplication.LaunchOptionsKey: Any]? = nil
) -> Bool {
// ... Perform regular React Native setup
let configuration = Braze.Configuration(apiKey: apiKey, endpoint: endpoint)
configuration.triggerMinimumTimeInterval = 1
configuration.logger.level = .info
let braze = BrazeReactBridge.initBraze(configuration)
AppDelegate.braze = braze
registerForPushNotifications()
BrazeReactUtils.shared().populateInitialPayload(fromLaunchOptions: launchOptions)
return super.application(application, didFinishLaunchingWithOptions: launchOptions)
}
```
#### Step 3.2: Handle deep links from a closed state
In addition to the base scenarios handled by [React Native Linking](https://reactnative.dev/docs/linking), implement the `Braze.getInitialPushPayload` method and retrieve the `url` value to account for deep links from push notifications that open your app when it isn't running. For example:
```javascript
// Handles deep links when an app is launched from a hard close via push click.
Braze.getInitialPushPayload(pushPayload => {
if (pushPayload) {
console.log('Braze.getInitialPushPayload is ' + pushPayload);
showToast('Initial URL is ' + pushPayload.url);
handleOpenUrl({ pushPayload.url });
}
});
```
**Note:**
This method requires the native setup in Step 3.1 for your platform. If you're using the Braze Expo plugin, this may be handled automatically.
#### Step 3.3: Enable Universal Links (optional)
To enable [universal linking](https://www.braze.com/docs/pt-br/pt-br/developer_guide/push_notifications/deep_linking/?sdktab=swift#universal-links) support, implement a Braze delegate that determines whether to open a given URL, then register it with your Braze instance.
Create a `BrazeReactDelegate.swift` file in your `iOS` directory and add the following. Replace `YOUR_DOMAIN_HOST` with your actual domain.
```swift
import Foundation
import BrazeKit
import UIKit
class BrazeReactDelegate: NSObject, BrazeDelegate {
/// This delegate method determines whether to open a given URL.
/// Reference the context to get additional details about the URL payload.
func braze(_ braze: Braze, shouldOpenURL context: Braze.URLContext) -> Bool {
if let host = context.url.host,
host.caseInsensitiveCompare("YOUR_DOMAIN_HOST") == .orderedSame {
// Sample custom handling of universal links
let application = UIApplication.shared
let userActivity = NSUserActivity(activityType: NSUserActivityTypeBrowsingWeb)
userActivity.webpageURL = context.url
// Routes to the `continueUserActivity` method, which should be handled in your AppDelegate.
application.delegate?.application?(
application,
continue: userActivity,
restorationHandler: { _ in }
)
return false
}
// Let Braze handle links otherwise
return true
}
}
```
Then, create and register your `BrazeReactDelegate` in `didFinishLaunchingWithOptions` of your project's `AppDelegate.swift` file.
```swift
import BrazeKit
class AppDelegate: UIResponder, UIApplicationDelegate {
static var braze: Braze?
// Keep a strong reference to the BrazeDelegate so it is not deallocated.
private var brazeDelegate: BrazeReactDelegate?
func application(
_ application: UIApplication,
didFinishLaunchingWithOptions launchOptions: [UIApplication.LaunchOptionsKey: Any]? = nil
) -> Bool {
// Other setup code (e.g., Braze initialization)
brazeDelegate = BrazeReactDelegate()
AppDelegate.braze?.delegate = brazeDelegate
return true
}
}
```
Create a `BrazeReactDelegate.h` file in your `iOS` directory and then add the following code snippet.
```objc
#import
#import
@interface BrazeReactDelegate: NSObject
@end
```
Next, create a `BrazeReactDelegate.m` file and then add the following code snippet. Replace `YOUR_DOMAIN_HOST` with your actual domain.
```objc
#import "BrazeReactDelegate.h"
#import
@implementation BrazeReactDelegate
/// This delegate method determines whether to open a given URL.
///
/// Reference the `BRZURLContext` object to get additional details about the URL payload.
- (BOOL)braze:(Braze *)braze shouldOpenURL:(BRZURLContext *)context {
if ([[context.url.host lowercaseString] isEqualToString:@"YOUR_DOMAIN_HOST"]) {
// Sample custom handling of universal links
UIApplication *application = UIApplication.sharedApplication;
NSUserActivity* userActivity = [[NSUserActivity alloc] initWithActivityType:NSUserActivityTypeBrowsingWeb];
userActivity.webpageURL = context.url;
// Routes to the `continueUserActivity` method, which should be handled in your `AppDelegate`.
[application.delegate application:application
continueUserActivity:userActivity restorationHandler:^(NSArray> * _Nullable restorableObjects) {}];
return NO;
}
// Let Braze handle links otherwise
return YES;
}
@end
```
Then, create and register your `BrazeReactDelegate` in `didFinishLaunchingWithOptions` of your project's `AppDelegate.m` file.
```objc
#import "BrazeReactUtils.h"
#import "BrazeReactDelegate.h"
@interface AppDelegate ()
// Keep a strong reference to the BrazeDelegate to ensure it is not deallocated.
@property (nonatomic, strong) BrazeReactDelegate *brazeDelegate;
@end
- (BOOL)application:(UIApplication *)application didFinishLaunchingWithOptions:(NSDictionary *)launchOptions
{
// Other setup code
self.brazeDelegate = [[BrazeReactDelegate alloc] init];
braze.delegate = self.brazeDelegate;
}
```
For an example integration, reference our sample app [here](https://github.com/braze-inc/braze-react-native-sdk/blob/master/BrazeProject/ios/BrazeProject/AppDelegate.mm).
### Step 4: Handle foreground notifications
Foreground notification handling works differently depending on your platform and setup. Choose the approach that matches your integration:
For iOS, foreground notification handling is the same as the native Swift integration. Call `handleForegroundNotification(notification:)` inside your `UNUserNotificationCenterDelegate.userNotificationCenter(_:willPresent:withCompletionHandler:)` implementation.
For complete details and code examples, see [Handling foreground notifications](https://www.braze.com/docs/pt-br/pt-br/developer_guide/push_notifications/?sdktab=swift#handling-foreground-notifications) in the Swift push notifications documentation.
For Android, foreground notification handling is the same as the native Android integration. Call `BrazeFirebaseMessagingService.handleBrazeRemoteMessage` inside your `FirebaseMessagingService.onMessageReceived` method.
For complete details and code examples, see [Handling foreground notifications](https://www.braze.com/docs/pt-br/pt-br/developer_guide/push_notifications/?sdktab=android#handling-foreground-notifications) in the Android push notifications documentation.
In Expo-managed workflow, you don't call native notification handlers directly. Instead, use the Expo Notifications API to control foreground presentation, while the Braze Expo Plugin handles native processing automatically.
```javascript
import * as Notifications from 'expo-notifications';
import Braze from '@braze/react-native-sdk';
// Control foreground presentation in Expo
Notifications.setNotificationHandler({
handleNotification: async () => ({
shouldShowAlert: true, // Show alert while in foreground
shouldPlaySound: false,
shouldSetBadge: false,
}),
});
// React to Braze push events
const subscription = Braze.addListener('pushNotificationEvent', (event) => {
console.log('Braze push event', {
type: event.payload_type, // "push_received" | "push_opened"
title: event.title,
url: event.url,
is_silent: event.is_silent,
});
// Handle deep links, custom behavior, etc.
});
// Handle initial payload when app launches via push
Braze.getInitialPushPayload((payload) => {
if (payload) {
console.log('Initial push payload', payload);
}
});
```
**Note:**
In Expo-managed workflow, the Braze Expo Plugin handles native push processing automatically. You control foreground UI via the Expo Notifications presentation options shown above.
For bare workflow integrations, follow the native iOS and Android approaches instead.
### Step 5: Send a test push notification
At this point, you should be able to send notifications to the devices. Adhere to the following steps to test your push integration.
**Note:**
Starting in macOS 13, on certain devices, you can test iOS push notifications on an iOS 16+ simulator running on Xcode 14 or higher. For further details, refer to the [Xcode 14 Release Notes](https://developer.apple.com/documentation/xcode-release-notes/xcode-14-release-notes).
1. Set an active user in the React Native application by calling `Braze.changeUserId('your-user-id')` method.
2. Head to **Campaigns** and create a new push notification campaign. Choose the platforms that you'd like to test.
3. Compose your test notification and head over to the **Test** tab. Add the same `user-id` as the test user and click **Send Test**. You should receive the notification on your device shortly.

## Using the Expo plugin
After you [set up push notifications for Expo](#reactnative_setting-up-push-notifications), you can use it to handle the following push notifications behaviors—without needing to write any code in the native Android or iOS layers.
### Forwarding Android push to additional FMS
If you want to use an additional Firebase Messaging Service (FMS), you can specify a fallback FMS to call if your application receives a push that isn't from Braze. For example:
```json
{
"expo": {
"plugins": [
[
"@braze/expo-plugin",
{
...
"androidFirebaseMessagingFallbackServiceEnabled": true,
"androidFirebaseMessagingFallbackServiceClasspath": "com.company.OurFirebaseMessagingService"
}
]
]
}
}
```
### Using app extensions with Expo Application Services {#app-extensions}
If you are using Expo Application Services (EAS) and have enabled `enableBrazeIosRichPush` or `enableBrazeIosPushStories`, you will need to declare the corresponding bundle identifiers for each app extension in your project. There are multiple ways you can approach this step, depending on how your project is configured to manage code signing with EAS.
One approach is to use the `appExtensions` configuration in your `app.json` file by following Expo's [app extensions documentation](https://docs.expo.dev/build-reference/app-extensions/). Alternatively, you can set up the `multitarget` setting in your `credentials.json` file by following Expo's [local credentials documentation](https://docs.expo.dev/app-signing/local-credentials/#multi-target-project).
### Troubleshooting
These are common troubleshooting steps for push notification integrations with the Braze React Native SDK and Expo plugin.
#### Push notifications stopped working {#troubleshooting-stopped-working}
If push notifications through the Expo plugin have stopped working:
1. Check that the Braze SDK is still tracking sessions.
2. Check that the SDK wasn't disabled by an explicit or implicit call to `wipeData`.
3. Review any recent upgrades to Expo or it's related libraries, as there may be conflicts with your Braze configuration.
4. Review recently added project dependencies and check if they are manually overriding your existing push notification delegate methods.
**Tip:**
For iOS integrations, you can also reference our [push notification setup tutorial](https://braze-inc.github.io/braze-swift-sdk/tutorials/braze/b1-standard-push-notifications) to help you identify potential conflicts with your project dependencies.
#### Device token won't register with Braze {#troubleshooting-token-registration}
If your device token won't register with Braze, first review [Push notifications stopped working](#troubleshooting-stopped-working).
If your issue persists, there may be a separate dependency interfering with your Braze push notification configuration. You can try removing it or manually call `Braze.registerPushToken` instead.
#### Deep links from push notifications don't open {#troubleshooting-deep-links}
If deep links from push notifications stop opening after a migration, check the following:
1. Verify your [React Native Linking](https://reactnative.dev/docs/linking) setup is still valid in your upgraded app.
2. For iOS native integrations, confirm you implemented `populateInitialPayloadFromLaunchOptions` and `Braze.getInitialPushPayload` so that, when the app is launched from a terminated state, it can retrieve the initial push payload and pass its `url` into your deep link handler.
3. If you're using the Braze Expo plugin, verify `androidHandlePushDeepLinksAutomatically` is set correctly for your implementation.
4. Review recently added dependencies for overrides to notification handling or app delegate behavior.
If you've completed these checks and the issue persists, [open a support ticket](https://www.braze.com/docs/pt-br/pt-br/user_guide/administrative/access_braze/support/) and include SDK logs plus reproduction steps.
## Prerequisites
Before you can use this feature, you'll need to [integrate the Web Braze SDK](https://www.braze.com/docs/pt-br/pt-br/developer_guide/sdk_integration/?sdktab=web). You'll also need to [set up push notifications](https://www.braze.com/docs/pt-br/pt-br/developer_guide/push_notifications/?sdktab=web) for the Web SDK. Note that you can only send push notifications to iOS and iPadOS users that are using [Safari v16.4](https://developer.apple.com/documentation/safari-release-notes/safari-16_4-release-notes) or later.
## Setting up Safari push for mobile
### Step 1: Create a manifest file {#manifest}
A [Web Application Manifest](https://developer.mozilla.org/en-US/docs/Web/Manifest) is a JSON file that controls how your website is presented when installed to a user's home screen.
For example, you can set the background theme color and icon that the [App Switcher](https://support.apple.com/en-us/HT202070) uses, whether it renders as full screen to resemble a native app, or whether the app should open in landscape or portrait mode.
Create a new `manifest.json` file in your website's root directory, with the following mandatory fields.
```json
{
"name": "your app name",
"short_name": "your app name",
"display": "fullscreen",
"icons": [{
"src": "favicon.ico",
"sizes": "128x128",
}]
}
```
The full list of supported fields can be found [here](https://developer.mozilla.org/en-US/docs/Web/Manifest).
### Step 2: Link the manifest file {#manifest-link}
Add the following `` tag to your website's `` element pointing to where your manifest file is hosted.
```html
```
### Step 3: Add a service worker {#service-worker}
Your website must have a service worker file that imports the Braze service-worker library, as described in our [web push integration guide](https://www.braze.com/docs/pt-br/pt-br/developer_guide/platform_integration_guides/web/push_notifications/integration/#step-1-configure-your-sites-service-worker).
### Step 4: Add to home screen {#add-to-homescreen}
Popular browsers (such as Safari, Chrome, FireFox, and Edge) all support web push notifications in their later versions. To request push permission on iOS or iPadOS, your website must be added to the user's home screen by selecting **Share To** > **Add to Home Screen**. [Add to Homescreen](https://support.apple.com/guide/iphone/bookmark-favorite-webpages-iph42ab2f3a7/ios#iph4f9a47bbc) lets users bookmark your website, adding your icon to their valuable home screen real estate.
{: style="max-width:40%"}
### Step 5: Show the native push prompt {#push-prompt}
After the app has been added to your home screen you can now request push permission when the user takes an action (such as clicking a button). This can be done using the [`requestPushPermission`](https://js.appboycdn.com/web-sdk/latest/doc/modules/braze.html#requestpushpermission) method, or with a [no-code push primer in-app message](https://www.braze.com/docs/pt-br/pt-br/user_guide/message_building_by_channel/push/best_practices/push_primer_messages/).
**Note:**
After you accept or decline the prompt, you need to delete and reinstall the website to your home screen to be able to show the prompt again.
{: style="max-width:40%"}
For example:
```typescript
import { requestPushPermission } from "@braze/web-sdk";
button.onclick = function(){
requestPushPermission(() => {
console.log(`User accepted push prompt`);
}, (temporary) => {
console.log(`User ${temporary ? "temporarily dismissed" : "permanently denied"} push prompt`);
});
};
```
## Next steps
Next, send yourself a [test message](https://www.braze.com/docs/pt-br/pt-br/developer_guide/in_app_messages/sending_test_messages/) to validate the integration. After your integration is complete, you can use our [no-code push primer messages](https://www.braze.com/docs/pt-br/pt-br/user_guide/message_building_by_channel/push/best_practices/push_primer_messages/) to optimize your push opt-in rates.
## Prerequisites
Before you can use this feature, you'll need to [integrate the Unity Braze SDK](https://www.braze.com/docs/pt-br/pt-br/developer_guide/sdk_integration/?sdktab=unity).
## Setting up push notification
### Step 1: Set up the platform
#### Step 1.1: Enable Firebase
To get started, follow the [Firebase Unity setup documentation](https://firebase.google.com/docs/unity/setup).
**Note:**
Integrating the Firebase Unity SDK may cause your `AndroidManifest.xml` to be overridden. If that occurs, make sure to revert it to the original.
#### Step 1.2: Set your Firebase credentials
You need to input your Firebase Server Key and Sender ID into the Braze dashboard. To do this, log in to the [Firebase Developers Console](https://console.firebase.google.com/) and select your Firebase project. Next, select **Cloud Messaging** under **Settings** and copy the Server Key and Sender ID: 
In Braze, select your Android app on the **App Settings** page under **Manage Settings**. Next, enter your Firebase Server Key in the **Firebase Cloud Messaging Server Key** field and Firebase Sender ID in the **Firebase Cloud Messaging Sender** ID field.

#### Step 1.1: Verify integration method
Braze provides a native Unity solution for automating iOS push integrations. If you you'd like to set up and manage your integration manually instead, see [Swift: Push Notifications](https://www.braze.com/docs/pt-br/pt-br/developer_guide/push_notifications/?sdktab=swift).
Otherwise, continue to the next step.
**Note:**
Our automatic push notification solution takes advantage of iOS 12's Provisional Authorization feature and is not available to use with the native push prompt pop-up.
#### Step 1.1: Enable ADM
1. Create an account with the [Amazon Apps & Games Developer Portal](https://developer.amazon.com/public) if you have not already done so.
2. Obtain [OAuth credentials (Client ID and Client Secret) and an ADM API key](https://developer.amazon.com/public/apis/engage/device-messaging/tech-docs/02-obtaining-adm-credentials).
3. Enable **Automatic ADM Registration Enabled** in the Unity Braze Configuration window.
- Alternatively, you may add the following line to your `res/values/braze.xml` file to enable ADM registration:
```xml
true
```
### Step 2: Configure push notifications
#### Step 2.1: Configure push settings {#unity_step-21-configure-push-settings}
The Braze SDK can automatically handle push registration with the Firebase Cloud Messaging Servers to have devices receive push notifications. In Unity, enable **Automate Unity Android Integration**, then configure the following **Push Notification** settings.
| Setting | Description |
|----------------------------------------|----------------------------------------------------------------------------------------------------------------------------------------------------------|
| Automatic Firebase Cloud Messaging Registration Enabled | Instructs the Braze SDK to automatically retrieve and send an FCM push token for a device. |
| Firebase Cloud Messaging Sender ID | The Sender ID from your Firebase console. |
| Handle Push Deeplinks Automatically | Whether the SDK should handle opening deep links or opening the app when push notifications are clicked. |
| Small Notification Icon Drawable | Android drawable resource reference for the small icon shown when a push arrives. Enter the full reference including the `@drawable/` prefix (for example, `@drawable/hourglass_icon`). The automated integration writes this value into `braze.xml` as entered. If you leave this empty, the notification uses the application icon as the small icon. |
| Large Notification Icon Drawable | Optional large icon for notifications. Use the same `@drawable/` format as the small icon (for example, `@drawable/my_large_icon`). |
{: .reset-td-br-1 .reset-td-br-2 aria-label="Step 2.1: Configure push settings" }
**Note:**
**Small Notification Icon Drawable** and **Large Notification Icon Drawable** appear under **Push Configuration** in **Braze > Braze Configuration**. Both values are written into `braze.xml` as you enter them. Include the `@drawable/` prefix yourself—the Braze Unity integration does not add it for you (for example, `@drawable/hourglass_icon`).
#### Step 2.1: Upload your APNs token
Before you can send an iOS push notification using Braze, you need to upload your `.p8` push notification file, as described in [Apple's developer documentation](https://developer.apple.com/documentation/usernotifications/establishing-a-token-based-connection-to-apns):
1. In your Apple developer account, go to [**Certificates, Identifiers & Profiles**](https://developer.apple.com/account/ios/certificate).
2. Under **Keys**, select **All** and click the add button (+) in the upper-right corner.
3. Under **Key Description**, enter a unique name for the signing key.
4. Under **Key Services**, select the **Apple Push Notification service (APNs)** checkbox, then click **Continue**. Click **Confirm**.
5. Note the key ID. Click **Download** to generate and download the key. Make sure to save the downloaded file in a secure place, as you cannot download this more than once.
6. In Braze, go to **Settings** > **App Settings** and upload the `.p8` file under **Apple Push Certificate**. You can upload either your development or production push certificate. To test push notifications after your app is live in the App Store, its recommended to set up a separate workspace for the development version of your app.
7. When prompted, enter your app's [bundle ID](https://developer.apple.com/documentation/foundation/nsbundle/1418023-bundleidentifier), [key ID](https://developer.apple.com/help/account/manage-keys/get-a-key-identifier/), and [team ID](https://developer.apple.com/help/account/manage-your-team/locate-your-team-id). You'll also need to specify whether to send notifications to your app's development or production environment, which is defined by its provisioning profile.
8. When you're finished, select **Save**.
#### Step 2.2: Enable automatic push
Open the Braze Configuration Settings in the Unity Editor by navigating to **Braze > Braze Configuration**.
Check **Integrate Push With Braze** to automatically register users for push notifications, pass push tokens to Braze, track analytics for push opens, and take advantage of our default push notification handling.
#### Step 2.3: Enable background push (optional)
Check **Enable Background Push** if you want to enable `background mode` for push notifications. This allows the system to wake your application from the `suspended` state when a push notification arrives, enabling your application to download content in response to push notifications. Checking this option is required for our uninstall tracking functionality.

#### Step 2.4: Disable automatic registration (optional)
Users who have not yet opted-in to push notifications will automatically be authorized for push upon opening your application. To disable this feature and manually register users for push, check **Disable Automatic Push Registration**.
- If **Disable Provisional Authorization** is not checked on iOS 12 or later, the user will be provisionally (silently) authorized to receive quiet push. If checked, the user will be shown the native push prompt.
- If you need to configure exactly when the prompt is shown at runtime, disable automatic registration from the Braze configuration editor and use `AppboyBinding.PromptUserForPushPermissions()` instead.

#### Step 2.1: Update `AndroidManifest.xml`
If your app does not have an `AndroidManifest.xml`, you can use the following as a template. Otherwise, if you already have an `AndroidManifest.xml`, ensure that any of the following missing sections are added to your existing `AndroidManifest.xml`.
```xml
```
#### Step 2.2: Store your ADM API key
First, [generate an ADM API Key for your app](https://developer.amazon.com/public/apis/engage/device-messaging/tech-docs/02-obtaining-adm-credentials), then save the key to a file named `api_key.txt` and add it in your project's [`Assets/`](https://docs.unity3d.com/Manual/AndroidAARPlugins.html) directory.
**Important:**
Amazon will not recognize your key if `api_key.txt` contains any white space characters, such as a trailing line break.
Next, in your `mainTemplate.gradle` file, add the following:
```gradle
task copyAmazon(type: Copy) {
def unityProjectPath = $/file:///**DIR_UNITYPROJECT**/$.replace("\\", "/")
from unityProjectPath + '/Assets/api_key.txt'
into new File(projectDir, 'src/main/assets')
}
preBuild.dependsOn(copyAmazon)
```
#### Step 2.3: Add ADM Jar
The required ADM Jar file may be placed anywhere in your project according to the [Unity JAR documentation](https://docs.unity3d.com/Manual/AndroidJARPlugins.html).
#### Step 2.4: Add Client Secret and Client ID to your Braze dashboard
Lastly, you must add the Client Secret and Client ID you obtained in [Step 1](#unity_step-1-enable-adm) to the Braze dashboard's **Manage Settings** page.

### Step 3: Set push listeners
#### Step 3.1: Enable push received listener
The push received listener is fired when a user receives a push notification. To send the push payload to Unity, set the name of your game object and push the received listener callback method under the **Set Push Received Listener**.
#### Step 3.2: Enable push opened listener
The push opened listener is fired when a user launches the app by clicking on a push notification. To send the push payload to Unity, set the name of your game object and push opened listener callback method under the **Set Push Opened Listener**.
#### Step 3.3: Enable push deleted listener
The push deleted listener is fired when a user swipes away or dismisses a push notification. To send the push payload to Unity, set the name of your game object and push deleted listener callback method under the **Set Push Deleted Listener**.
#### Push listener example
The following example implements the `BrazeCallback` game object using a callback method name of `PushNotificationReceivedCallback`, `PushNotificationOpenedCallback`, and `PushNotificationDeletedCallback` respectively.

```csharp
public class MainMenu : MonoBehaviour {
void PushNotificationReceivedCallback(string message) {
#if UNITY_ANDROID
Debug.Log("PushNotificationReceivedCallback message: " + message);
PushNotification pushNotification = new PushNotification(message);
Debug.Log("Push Notification received: " + pushNotification);
#elif UNITY_IOS
ApplePushNotification pushNotification = new ApplePushNotification(message);
Debug.Log("Push received Notification event: " + pushNotification);
#endif
}
void PushNotificationOpenedCallback(string message) {
#if UNITY_ANDROID
Debug.Log("PushNotificationOpenedCallback message: " + message);
PushNotification pushNotification = new PushNotification(message);
Debug.Log("Push Notification opened: " + pushNotification);
#elif UNITY_IOS
ApplePushNotification pushNotification = new ApplePushNotification(message);
Debug.Log("Push opened Notification event: " + pushNotification);
#endif
}
void PushNotificationDeletedCallback(string message) {
#if UNITY_ANDROID
Debug.Log("PushNotificationDeletedCallback message: " + message);
PushNotification pushNotification = new PushNotification(message);
Debug.Log("Push Notification dismissed: " + pushNotification);
#endif
}
}
```
#### Step 3.1: Enable push received listener
The push received listener is fired when a user receives a push notification while actively using the application (such as when the app is foregrounded). Set the push received listener in the Braze configuration editor. If you need to configure your game object listener at runtime, use `AppboyBinding.ConfigureListener()` and specify `BrazeUnityMessageType.PUSH_RECEIVED`.

#### Step 3.2: Enable push opened listener
The push opened listener is fired when a user launches the app by clicking on a push notification. To send the push payload to Unity, set the name of your game object and push opened listener callback method under the **Set Push Opened Listener** option:

If you need to configure your game object listener at runtime, use `AppboyBinding.ConfigureListener()` and specify `BrazeUnityMessageType.PUSH_OPENED`.
#### Push listener example
The following example implements the `AppboyCallback` game object using a callback method name of `PushNotificationReceivedCallback` and `PushNotificationOpenedCallback`, respectively.

```csharp
public class MainMenu : MonoBehaviour {
void PushNotificationReceivedCallback(string message) {
#if UNITY_ANDROID
Debug.Log("PushNotificationReceivedCallback message: " + message);
PushNotification pushNotification = new PushNotification(message);
Debug.Log("Push Notification received: " + pushNotification);
#elif UNITY_IOS
ApplePushNotification pushNotification = new ApplePushNotification(message);
Debug.Log("Push received Notification event: " + pushNotification);
#endif
}
void PushNotificationOpenedCallback(string message) {
#if UNITY_ANDROID
Debug.Log("PushNotificationOpenedCallback message: " + message);
PushNotification pushNotification = new PushNotification(message);
Debug.Log("Push Notification opened: " + pushNotification);
#elif UNITY_IOS
ApplePushNotification pushNotification = new ApplePushNotification(message);
Debug.Log("Push opened Notification event: " + pushNotification);
#endif
}
}
```
By updating your `AndroidManifest.xml` in the [previous step](#unity_step-21-update-androidmanifestxml), push listeners were automatically set up when you added the following lines. So, no further setup is required.
```xml
```
**Note:**
To learn more about ADM push listeners, see [Amazon: Integrate Amazon Device Messaging](https://developer.amazon.com/docs/video-skills-fire-tv-apps/integrate-adm.html).
## Optional configurations
#### Deep linking to in-app resources
Although Braze can handle standard deep links (such as website URLs, Android URIs, etc.) by default, creating custom deep links requires an additional Manifest setup.
For setup guidance, visit [Deep Linking to In-App Resources](https://developer.android.com/training/app-links/deep-linking).
#### Adding Braze push notification icons
**Important:**
Do not add notification icon images under `Assets/Plugins/Android/res`. Unity [deprecated providing Android resources in that path](https://support.unity.com/hc/en-us/articles/115005875443-Providing-Android-resources-in-Assets-Plugins-Android-res-is-deprecated), which can surface build warnings or validation errors. Package your icon drawables in an [Android Archive (AAR) plug-in](https://docs.unity3d.com/Manual/AndroidAARPlugins.html) or Android library project instead so they merge into the built app's resources like any other drawable.
To add push icons to your project, create an AAR plug-in or Android library that contains the icon image files under `res/drawable*` (or density-specific folders), then reference each icon in **Braze > Braze Configuration** using the full `@drawable/` resource name (see [Step 2.1: Configure push settings](#unity_step-21-configure-push-settings)). For Unity's packaging and import steps, see [Android Library Projects and Android Archive plug-ins](https://docs.unity3d.com/Manual/AndroidAARPlugins.html).
For small icon artwork rules (alpha-only, no color), see [Android push notifications](https://www.braze.com/docs/pt-br/pt-br/developer_guide/push_notifications/?sdktab=android), Step 2: Conform small icons to design guidelines.
#### Push token callback
To receive a copy of Braze device tokens from the OS, set a delegate using `AppboyBinding.SetPushTokenReceivedFromSystemDelegate()`.
There are no optional configurations for ADM at this time.
## Prerequisites
Before you can use this feature, you'll need to [integrate the .NET MAUI Braze SDK](https://www.braze.com/docs/pt-br/pt-br/developer_guide/sdk_integration/?sdktab=.net%20maui%20(xamarin)).
## Setting up push notifications
**Tip:**
To see how namespaces change between Java and C#, check out our [Xample sample app on GitHub](https://github.com/braze-inc/braze-xamarin-sdk/tree/master/appboy-component/samples/android-net-maui/BrazeAndroidMauiSampleApp/BrazeAndroidMauiSampleApp).
To integrate push notifications for .NET MAUI (formerly Xamarin), you'll need to complete the steps for native Android push notifications. The following steps are only a summary. For a full walkthrough, see the [native push notification guide](https://www.braze.com/docs/pt-br/pt-br/developer_guide/platform_integration_guides/android/push_notifications/?tab=android/).
### Step 1: Update your project
1. Add Firebase to your Android project.
2. Add the Cloud Messaging library to your Android project's `build.gradle`:
```gradle
implementation "google.firebase:firebase-messaging:+"
```
### Step 2: Create your JSON credentials
1. In Google Cloud, enable the [Firebase Cloud Messaging API](https://console.cloud.google.com/apis/library/fcm.googleapis.com).
2. Select **Service Accounts** > your project > **Create Service Account**, then enter a service account name, ID, and description. When you're finished, select **Create and continue**.
3. In the **Role** field, find and select **Firebase Cloud Messaging API Admin** from the list of roles.
4. In **Service Accounts**, choose your project, then select **Actions** > **Manage Keys** > **Add Key** > **Create new key**. Choose **JSON**, then select **Create**.
### Step 3: Upload your JSON credentials
1. In Braze, select **Settings** > **App Settings**. Under your Android app's **Push Notification Settings**, choose **Firebase**, then select **Upload JSON File** and upload the credentials you generated earlier. When you're finished, select **Save**.
2. Enable automatic FCM token registration, by going to Firebase Console. Open your project, then select **Settings** > **Project settings**. Select **Cloud Messaging**, then under **Firebase Cloud Messaging API (V1)**, copy the number in the **Sender ID** field.
3. In your Android Studio project and the following to your `braze.xml`.
```xml
trueFIREBASE_SENDER_ID
```
**Important:**
To prevent Braze from triggering unnecessary network requests every time you send silent push notifications, remove any automatic network requests configured in your `Application` class's `onCreate()` method. For more information see, [Android Developer Reference: Application](https://developer.android.com/reference/android/app/Application).
### Step 1: Complete the initial setup
See the [Swift integration instructions](https://www.braze.com/docs/pt-br/pt-br/developer_guide/push_notifications/?sdktab=swift) for information about setting up your application with push and storing your credentials on our server. Refer to the [iOS MAUI](https://github.com/braze-inc/braze-xamarin-sdk/tree/master/appboy-component/samples/ios-net-maui/BrazeiOSMauiSampleApp) sample application for more details.
### Step 2: Request push notifications permission
Our .NET MAUI SDK now supports automatic push set up. Set up push automation and permissions by adding the following code to your Braze instance configuration:
```csharp
configuration.Push.Automation = new BRZConfigurationPushAutomation(true);
configuration.Push.Automation.RequestAuthorizationAtLaunch = false;
```
Refer to the [iOS MAUI](https://github.com/braze-inc/braze-xamarin-sdk/tree/master/appboy-component/samples/ios-net-maui/BrazeiOSMauiSampleApp) sample application for more details. For more details, see the Xamarin documentation for [Enhanced User Notifications in Xamarin.iOS](https://learn.microsoft.com/en-us/previous-versions/xamarin/ios/platform/user-notifications/enhanced-user-notifications?tabs=macos).
# Personalize notificações por push para o SDK Braze
Source: /docs/pt-br/developer_guide/push_notifications/customization/index.md
# Personalize notificações por push
> Aprenda a personalizar notificações por push para o SDK Braze.
## Prerequisites
Before you can use this feature, you'll need to [integrate the Android Braze SDK](https://www.braze.com/docs/pt-br/pt-br/developer_guide/sdk_integration/?sdktab=android). You'll also need to [set up push notifications](https://www.braze.com/docs/pt-br/pt-br/developer_guide/push_notifications/?sdktab=android).
## Using a callback for push events {#push-callback}
Braze provides a [`subscribeToPushNotificationEvents()`](https://braze-inc.github.io/braze-android-sdk/kdoc/braze-android-sdk/com.braze/-i-braze/subscribe-to-push-notification-events.html) callback for when push notifications are received, opened, or dismissed. It is recommended to place this callback in your `Application.onCreate()` in order to not miss any events occurring while your application is not running.
**Note:**
If previously using a Custom Broadcast Receiver for this functionality in your application, you can safely remove it in favor of this integration option.
```java
Braze.getInstance(context).subscribeToPushNotificationEvents(event -> {
final BrazeNotificationPayload parsedData = event.getNotificationPayload();
//
// The type of notification itself
//
final boolean isPushOpenEvent = event.getEventType() == BrazePushEventType.NOTIFICATION_OPENED;
final boolean isPushReceivedEvent = event.getEventType() == BrazePushEventType.NOTIFICATION_RECEIVED;
// Sent when a user has dismissed a notification
final boolean isPushDeletedEvent = event.getEventType() == BrazePushEventType.NOTIFICATION_DELETED;
//
// Notification data
//
final String pushTitle = parsedData.getTitleText();
final Long pushArrivalTimeMs = parsedData.getNotificationReceivedTimestampMillis();
final String deeplink = parsedData.getDeeplink();
//
// Custom KVP data
//
final String myCustomKvp1 = parsedData.getBrazeExtras().getString("my first kvp");
final String myCustomKvp2 = parsedData.getBrazeExtras().getString("my second kvp");
});
```
```kotlin
Braze.getInstance(context).subscribeToPushNotificationEvents { event ->
val parsedData = event.notificationPayload
//
// The type of notification itself
//
val isPushOpenEvent = event.eventType == BrazePushEventType.NOTIFICATION_OPENED
val isPushReceivedEvent = event.eventType == BrazePushEventType.NOTIFICATION_RECEIVED
// Sent when a user has dismissed a notification
val isPushDeletedEvent = event.eventType == BrazePushEventType.NOTIFICATION_DELETED
//
// Notification data
//
val pushTitle = parsedData.titleText
val pushArrivalTimeMs = parsedData.notificationReceivedTimestampMillis
val deeplink = parsedData.deeplink
//
// Custom KVP data
//
val myCustomKvp1 = parsedData.brazeExtras.getString("my first kvp")
val myCustomKvp2 = parsedData.brazeExtras.getString("my second kvp")
}
```
**Tip:**
With notification action buttons, `BRAZE_PUSH_INTENT_NOTIFICATION_OPENED` intents fire when buttons with `opens app` or `deep link` actions are clicked. Deep link and extras handling remains the same. Buttons with `close` actions don't fire `BRAZE_PUSH_INTENT_NOTIFICATION_OPENED` intents and dismiss the notification automatically.
**Important:**
Create your push notification listener in `Application.onCreate` to ensure your listener is triggered after an end-user taps a notification while your app is in a terminated state.
## Customizing notification display {#customization-display}
### Step 1: Create your custom notification factory
In some scenarios, you may wish to customize push notifications in ways that would be cumbersome or unavailable server side. To give you complete control of notification display, we've added the ability to define your own [`IBrazeNotificationFactory`](https://braze-inc.github.io/braze-android-sdk/kdoc/braze-android-sdk/com.braze/-i-braze-notification-factory/index.html) to create notification objects for display by Braze.
If a custom `IBrazeNotificationFactory` is set, Braze will call your factory's `createNotification()` method upon push receipt before the notification is displayed to the user. Braze will pass in a `Bundle` containing Braze push data and another `Bundle` containing custom key-value pairs sent either via the dashboard or the messaging APIs:
Braze will pass in a [`BrazeNotificationPayload`](https://braze-inc.github.io/braze-android-sdk/kdoc/braze-android-sdk/com.braze.models.push/-braze-notification-payload/index.html) containing data from the Braze push notification.
```java
// Factory method implemented in your custom IBrazeNotificationFactory
@Override
public Notification createNotification(BrazeNotificationPayload brazeNotificationPayload) {
// Example of getting notification title
String title = brazeNotificationPayload.getTitleText();
// Example of retrieving a custom KVP ("my_key" -> "my_value")
String customKvp = brazeNotificationPayload.getBrazeExtras().getString("my_key");
}
```
```kotlin
// Factory method implemented in your custom IBrazeNotificationFactory
override fun createNotification(brazeNotificationPayload: BrazeNotificationPayload): Notification {
// Example of getting notification title
val title = brazeNotificationPayload.getTitleText()
// Example of retrieving a custom KVP ("my_key" -> "my_value")
val customKvp = brazeNotificationPayload.getBrazeExtras().getString("my_key")
}
```
You can return `null` from your custom `createNotification()` method to not show the notification at all, use `BrazeNotificationFactory.getInstance().createNotification()` to obtain our default `notification` object for that data and modify it before display, or generate a completely separate `notification` object for display.
**Note:**
For documentation on Braze push data keys, refer to the [Android SDK](https://braze-inc.github.io/braze-android-sdk/kdoc/braze-android-sdk/com.braze/-constants/index.html).
### Step 2: Set your custom notification factory
To instruct Braze to use your custom notification factory, use the `setCustomBrazeNotificationFactory` method to set your [`IBrazeNotificationFactory`](https://braze-inc.github.io/braze-android-sdk/kdoc/braze-android-sdk/com.braze/-i-braze-notification-factory/index.html):
```java
setCustomBrazeNotificationFactory(IBrazeNotificationFactory brazeNotificationFactory);
```
```kotlin
setCustomBrazeNotificationFactory(brazeNotificationFactory: IBrazeNotificationFactory)
```
The recommended place to set your custom `IBrazeNotificationFactory` is in the `Application.onCreate()` application lifecycle method (not activity). This will allow the notification factory to be set correctly whenever your app process is active.
**Important:**
Creating your own notification from scratch is an advanced use case and should be done only with thorough testing and a deep understanding of the Braze push functionality. For example, you must make sure your notification logs push opens correctly.
To unset your custom [`IBrazeNotificationFactory`](https://braze-inc.github.io/braze-android-sdk/kdoc/braze-android-sdk/com.braze/-i-braze-notification-factory/index.html) and return to default Braze handling for push, pass in `null` to our custom notification factory setter:
```java
setCustomBrazeNotificationFactory(null);
```
```kotlin
setCustomBrazeNotificationFactory(null)
```
## Rendering multicolor text
In Braze SDK version 3.1.1, HTML can be sent to a device to render multicolor text in push notifications.
{: style="max-width:40%;"}
This example is rendered with the following HTML:
```html
MultiColorPush
testmessage
```
Keep in mind that, Android limits which HTML elements and tags are valid in your push notifications. For example, `marquee` is not allowed.
**Important:**
Multicolor text rendering is device-specific and may not display based on Android device or version.
To render multicolor text in a push notification, you can update your `braze.xml` or `BrazeConfig`:
Add the following in your `braze.xml`:
```xml
true
```
Add the following in your [`BrazeConfig`](https://www.braze.com/docs/pt-br/pt-br/developer_guide/platform_integration_guides/android/advanced_use_cases/runtime_configuration/#runtime-configuration):
```java
BrazeConfig brazeConfig = new BrazeConfig.Builder()
.setPushHtmlRenderingEnabled(true)
.build();
Braze.configure(this, brazeConfig);
```
```kotlin
val brazeConfig = BrazeConfig.Builder()
.setPushHtmlRenderingEnabled(true)
.build()
Braze.configure(this, brazeConfig)
```
### Supported HTML tags
Currently, Google doesn't list their supported HTML tags for Android directly in their documentation—this information can only be found in their [Git repository's `Html.java` file](https://android.googlesource.com/platform/frameworks/base/+/master/core/java/android/text/Html.java). Keep this in mind when referencing the following table, as this information was pulled from this file, and their supported HTML tags could be subject to change.
Category
HTML Tag
Description
Basic Text Styling
<b>, <strong>
Bold text
<i>, <em>
Italic text
<u>
Underline text
<s>, <strike>, <del>
Strikethrough text
<sup>
Superscript text
<sub>
Subscript text
<tt>
Monospace text
Size/Font
<big>, <small>
Relative text size changes
<font color="...">
Sets foreground color
<span> (with inline CSS)
Inline styles (e.g., color, background)
Paragraph & Block
<p>, <div>
Block-level sections
<br>
Line break
<blockquote>
Quoted block
<ul> + <li>
Unordered list with bullets
Headings
<h1> - <h6>
Headings (various sizes)
Links & Images
<a href="...">
Clickable link
<img src="...">
Inline image
Other Inline
<em>, <strong>, <dfn>, <cite>
Synonyms for italic or bold
{: .reset-td-br-1 .reset-td-br-2 .reset-td-br-3 aria-label="Supported HTML tags" }
## Rendering inline images
### How it works
You can showcase a larger image within your Android push notification using inline image push. With this design, users won't have to manually expand the push to enlarge the image. Unlike regular Android push notifications, inline image push images are in a 3:2 aspect ratio.
{: style="max-width:50%;"}
### Compatibility
While you can send inline images to any device, devices and SDKs that don't meet the minimum versions will display a standard image instead. For inline images to display properly, both the Android Braze SDK v10.0.0+ and a device running Android M+ are required. The SDK must also be enabled for the image to render.
**Note:**
Devices running Android 12 will render differently due to changes in custom push notification styles.
### Sending an inline image push
When creating an Android push message, this feature is available in the **Notification Type** dropdown.

## Settings
There are many advanced settings available for Android push notifications sent through the Braze dashboard. This article will describe these features and how to use them successfully.

### Notification ID {#notification-id}
A **Notification ID** is a unique identifier for a message category of your choosing that informs the messaging service to only respect the most recent message from that ID. Setting a notification ID allows you to send just the most recent and relevant message, rather than a stack of outdated, irrelevant ones.
### Firebase Messaging Delivery priority {#fcm-priority}
The [Firebase Messaging Delivery Priority](https://firebase.google.com/docs/cloud-messaging/android/message-priority#setting-priority-for-messages) field lets you control whether a push is sent with "normal" or "high" priority to Firebase Cloud Messaging.
### Time to live (TTL) {#ttl}
The **Time to Live** (TTL) field allows you to set a custom length of time to store messages with the push messaging service. The default values for time to live are four weeks for FCM and 31 days for ADM.
### Summary text {#summary-text}
The summary text allows you to set additional text in the expanded notification view. It also serves as a caption for notifications with images.
{: style="max-width:65%;"}
The summary text will display under the body of the message in the expanded view.
{: style="max-width:65%;"}
For push notifications that include images, the message text will be shown in the collapsed view, while the summary text will be displayed as the image caption when the notification is expanded.
### Custom URIs {#custom-uri}
The **Custom URI** feature allows you to specify a Web URL or an Android resource to navigate to when the notification is clicked. If no custom URI is specified, clicking on the notification brings users into your app. You can use the custom URI to deep link inside your app and direct users to resources that exist outside of your app. This can be specified via the [Messaging API](https://www.braze.com/docs/pt-br/pt-br/api/endpoints/messaging/) or our dashboard under **Advanced Settings** in the push composer as pictured:

### Notification display priority {#notification-priority}
**Important:**
The Notification Display Priority setting is no longer used on devices running Android O or newer. For newer devices, set the priority through [notification channel configuration](https://developer.android.com/training/notify-user/channels#importance).
The priority level of a push notification affects how your notification is displayed in the notification tray relative to other notifications. It can also affect the speed and manner of delivery, as normal and lower priority messages may be sent with slightly higher latency or batched to preserve battery life, whereas high priority messages are always sent immediately.
In Android O, notification priority became a property of notification channels. You will need to work with your developer to define the priority for a channel during its configuration and then use the dashboard to select the proper channel when sending your notification sounds. For devices running versions of Android before O, specifying a priority level for Android notifications is possible via the Braze dashboard and messaging API.
To message your full user base with a specific priority, we recommend that you indirectly specify the priority through [notification channel configuration](https://developer.android.com/training/notify-user/channels#importance) (to target O+ devices) *and* send the individual priority from the dashboard (to target <O devices).
The priority levels that you can set on Android or Fire OS push notifications are:
| Priority | Description/Intended Use | `priority` value (for API messages) |
|----------|--------------------------|-------------------------------------|
| Max | Urgent or time-critical messages | `2` |
| High | Important communication, such as a new message from a friend | `1` |
| Default | Most notifications - use if your message doesn't explicitly fall under any of the other priority types | `0` |
| Low | Information that you want users to know about but does not require immediate action | `-1` |
| Min | Contextual or background information. | `-2` |
{: .reset-td-br-1 .reset-td-br-2 .reset-td-br-3 aria-label="Notification display priority #notification-priority" }
For more information, refer to Google's [Android notification](http://developer.android.com/design/patterns/notifications.html) documentation.
### Sounds {#sounds}
In Android O, notification sounds became a property of notification channels. You will need to work with your developer to define the sound for a channel during its configuration and then use the dashboard to select the proper channel when sending your notifications.
For devices running versions of Android before O, Braze allows you to set the sound of an individual push message through the dashboard composer. You can do so by specifying a local sound resource on the device (for example, `android.resource://com.mycompany.myapp/raw/mysound`). Specifying "default" in this field will play the default notification sound on the device. This can be specified via the [Messaging API](https://www.braze.com/docs/pt-br/pt-br/api/endpoints/messaging/) or the dashboard under **Advanced Settings** in the push composer.

Enter the full sound resource URI (for example, `android.resource://com.mycompany.myapp/raw/mysound`) into the dashboard prompt.
To message your full user base with a specific sound, we recommend that you indirectly specify the sound through [notification channel configuration](https://developer.android.com/training/notify-user/channels) (to target O+ devices) *and* send the individual sound from the dashboard (to target <O devices).
## Prerequisites
Before you can use this feature, you'll need to [integrate the Swift Braze SDK](https://www.braze.com/docs/pt-br/pt-br/developer_guide/sdk_integration/?sdktab=swift). You'll also need to [set up push notifications](https://www.braze.com/docs/pt-br/pt-br/developer_guide/push_notifications/?sdktab=swift).
## Customizing action buttons {#push-action-buttons-integration}
The Braze Swift SDK provides URL handling support for push action buttons. There are four sets of default push action buttons for Braze default push categories: `Accept/Decline`, `Yes/No`, `Confirm/Cancel`, and `More`.
{: style="max-width:60%"}
### Manually registering action buttons
**Important:**
Manually registering push action buttons are not recommended.
If you [set up push notifications](https://www.braze.com/docs/pt-br/pt-br/developer_guide/push_notifications/?sdktab=swift) using the `configuration.push.automation` configuration option, Braze automatically registers the action buttons for the default push categories and handles the push action button click analytics and URL routing.
However, you can choose to manually register push action buttons instead.
#### Step 1: Adding Braze default push categories {#registering}
Use the following code to register for the default push categories when you [register for push](https://www.braze.com/docs/pt-br/pt-br/developer_guide/platform_integration_guides/swift/push_notifications/integration/#step-4-register-push-tokens-with-braze):
a
```swift
UNUserNotificationCenter.current().setNotificationCategories(Braze.Notifications.categories)
```
```objc
[[UNUserNotificationCenter currentNotificationCenter] setNotificationCategories:BRZNotifications.categories];
```
**Note:**
Clicking on push action buttons with background activation mode will only dismiss the notification and not open the app. The next time the user opens the app, the button click analytics for these actions will be flushed to the server.
#### Step 2: Enable interactive push handling {#enable-push-handling}
To enable our push action button handling, including click analytics and URL routing, add the following code to your app's `didReceive(_:completionHandler:)` delegate method:
```swift
AppDelegate.braze?.notifications.handleUserNotification(response: response, withCompletionHandler: completionHandler)
```
```objc
[AppDelegate.braze.notifications handleUserNotificationWithResponse:response
withCompletionHandler:completionHandler];
```
If you use the `UNNotification` framework and have implemented the Braze [notification methods](https://www.braze.com/docs/pt-br/pt-br/developer_guide/platform_integration_guides/swift/push_notifications/integration/#step-5-enable-push-handling), you should already have this method integrated.
## Customizing push categories {#customizing-push-categories}
In addition to providing a set of default push categories, Braze supports custom notification categories and actions. After you register categories in your application, you can use the Braze dashboard to send these custom notification categories to your users.
Here's an example that leverages the `LIKE_CATEGORY` displayed on the device:

### Step 1: Register a category
To register a category in your app, use a similar approach to the following:
```swift
Braze.Notifications.categories.insert(
.init(identifier: "LIKE_CATEGORY",
actions: [
.init(identifier: "LIKE_IDENTIFIER", title: "Like", options: [.foreground]),
.init(identifier: "UNLIKE_IDENTIFIER", title: "Unlike", options: [.foreground])
],
intentIdentifiers: []
)
)
UNUserNotificationCenter.current().setNotificationCategories(Braze.Notifications.categories)
```
```objc
NSMutableSet *categories = [BRZNotifications.categories mutableCopy];
UNNotificationAction *likeAction = [UNNotificationAction actionWithIdentifier:@"LIKE_IDENTIFIER"
title:@"Like"
options:UNNotificationActionOptionForeground];
UNNotificationAction *unlikeAction = [UNNotificationAction actionWithIdentifier:@"UNLIKE_IDENTIFIER"
title:@"Unlike"
options:UNNotificationActionOptionForeground];
UNNotificationCategory *likeCategory = [UNNotificationCategory categoryWithIdentifier:@"LIKE_CATEGORY"
actions:@[likeAction, unlikeAction]
intentIdentifiers:@[]
options:UNNotificationCategoryOptionNone];
[categories addObject:likeCategory];
[UNUserNotificationCenter.currentNotificationCenter setNotificationCategories:categories];
```
**Note:**
When you create a `UNNotificationAction`, you can specify a list of action options. For example, `.foreground` lets your users open your app after tapping the action button. This is necessary for navigational on-click behaviors, such as "Open App" and "Deep Link into Application". If you want an action button that simply dismisses the notification without opening the app, leave `.foreground` out of the action's `options` array. For more information, see [`UNNotificationActionOptions`](https://developer.apple.com/documentation/usernotifications/unnotificationactionoptions).
### Step 2: Select your categories
After you register a category, use the Braze dashboard to send notifications of that type to users.
**Tip:**
You only need to define action buttons on the Braze dashboard for behaviors that can't be created locally in your Swift code, such as deep linking into your app or redirecting to a web URL. These actions need to be configured on the dashboard so they can define what URL or deep link to open. For action buttons that simply dismiss the notification without opening the app, you don't need to configure them on the dashboard—dismissal behavior is handled automatically by iOS. Just register your custom category and its actions in your app code, then enter the matching category name on the dashboard.
1. In the Braze dashboard, select **Messaging** > **Push Notifications**, then choose your iOS [push campaign](https://www.braze.com/docs/pt-br/pt-br/user_guide/message_building_by_channel/push/creating_a_push_message).
2. Under **Compose push notification**, turn on **Action Buttons**.
3. In the **iOS Notification Category** dropdown, select **Enter pre-registered custom iOS Category**.
4. Finally, enter one of the categories you created earlier. The following example, uses the custom category: `LIKE_CATEGORY`.

### Example: Custom push category {#example-custom-push-category}
Suppose you want to create a push notification with two action buttons: **Manage**, which deep links into your app, and **Keep**, which simply dismisses the notification.
In the following example, the `MANAGE_IDENTIFIER` action includes the `.foreground` option, which opens the app when tapped—this is necessary because it will deep link into a specific part of the app. The `KEEP_IDENTIFIER` action uses an empty options array, meaning it will dismiss the notification without opening the app.
```swift
Braze.Notifications.categories.insert(
.init(identifier: "YOUR_CATEGORY",
actions: [
.init(identifier: "KEEP_IDENTIFIER", title: "Keep", options: []),
.init(identifier: "MANAGE_IDENTIFIER", title: "Manage", options: [.foreground])
],
intentIdentifiers: []
)
)
UNUserNotificationCenter.current().setNotificationCategories(Braze.Notifications.categories)
```
Because `MANAGE_IDENTIFIER` deep links into the app, you would set up that action button on the Braze dashboard with the associated deep link URL. However, you don't need to define a button on the dashboard for `KEEP_IDENTIFIER` because it only dismisses the notification. On the dashboard, you only need to enter the category name (for example, `YOUR_CATEGORY`) to match what you registered in your app code.
## Customizing badges
Badges are small icons that are ideal for getting a user's attention. You can specify a badge count in the [**Settings**](https://www.braze.com/docs/pt-br/pt-br/developer_guide/push_notifications/customization/?sdktab=swift#swift_settings) tab when you compose a push notification using the Braze dashboard. You may also update your badge count manually through your application's [`applicationIconBadgeNumber`](https://developer.apple.com/library/ios/documentation/UIKit/Reference/UIApplication_Class/index.html#//apple_ref/occ/instp/UIApplication/applicationIconBadgeNumber) property or the [remote notification payload](https://developer.apple.com/library/content/documentation/NetworkingInternet/Conceptual/RemoteNotificationsPG/CreatingtheNotificationPayload.html#//apple_ref/doc/uid/TP40008194-CH10-SW1).
Braze will automatically clear the badge count when a Braze notification is received while the app is in the foreground. Manually setting the badge number to 0 will also clear notifications in the notification center.
If you do not have a plan for clearing badges as part of normal app operation or by sending pushes that clear the badge, you should clear the badge when the app becomes active by adding the following code to your app's `applicationDidBecomeActive:` delegate method:
```swift
// For iOS 16.0+
let center = UNUserNotificationCenter.current()
do {
try await center.setBadgeCount(0)
} catch {
// Handle errors
}
// Prior to iOS 16. Deprecated in iOS 17+.
UIApplication.shared.applicationIconBadgeNumber = 0
```
```objc
// For iOS 16.0+
UNUserNotificationCenter *center = [UNUserNotificationCenter currentNotificationCenter];
[center setBadgeCount:0 withCompletionHandler:^(NSError * _Nullable error) {
if (error != nil) {
// Handle errors
}
}];
// Prior to iOS 16. Deprecated in iOS 17+.
[UIApplication sharedApplication].applicationIconBadgeNumber = 0;
```
## Customizing sounds
### Step 1: Host the sound in your app
Custom push notification sounds must be hosted locally within the main bundle of your app. The following audio data formats are accepted:
- Linear PCM
- MA4
- µLaw
- aLaw
You can package the audio data in an AIFF, WAV, or CAF file. In Xcode, add the sound file to your project as a non-localized resource of the application bundle.
**Note:**
Custom sounds must be under 30 seconds when played. If a custom sound is over that limit, the default system sound is played instead.
#### Converting sound files
You can use the afconvert tool to convert sounds. For example, to convert the 16-bit linear PCM system sound Submarine.aiff to IMA4 audio in a CAF file, use the following command in the terminal:
```bash
afconvert /System/Library/Sounds/Submarine.aiff ~/Desktop/sub.caf -d ima4 -f caff -v
```
**Tip:**
You can inspect a sound to determine its data format by opening it in QuickTime Player and choosing **Show Movie Inspector** from the **Movie** menu.
### Step 2: Provide a protocol URL for the sound
You must specify a protocol URL that directs to the location of the sound file in your app. There are two methods for doing this:
* Use the `sound` parameter of the [Apple push object](https://www.braze.com/docs/pt-br/pt-br/api/objects_filters/messaging/apple_object#apple-push-object) to pass the URL to Braze.
* Specify the URL in the dashboard. In the [push composer](https://www.braze.com/docs/pt-br/pt-br/user_guide/message_building_by_channel/push/creating_a_push_message/#step-3-select-notification-type-ios-and-android), select **Settings** and enter the protocol URL in the **Sound** field.

If the specified sound file doesn't exist or the keyword "default" is entered, Braze will use the default device alert sound. Aside from our dashboard, sound can also be configured via our [messaging API][12].
See the Apple Developer Documentation regarding [preparing custom alert sounds](https://developer.apple.com/library/content/documentation/NetworkingInternet/Conceptual/RemoteNotificationsPG/SupportingNotificationsinYourApp.html) for additional information.
## Settings
When creating a push campaign through the dashboard, click the **Settings** tab on the **Compose** step to view the advanced settings available.

### Key-value pairs
Braze allows you to send custom-defined string key-value pairs, known as `extras`, along with a push notification to your application. Extras can be defined via the dashboard or API and will be available as key-value pairs within the `notification` dictionary passed to your push delegate implementations.
### Alert options
Select the **Alert Options** checkbox to see a dropdown of key-values available to adjust how the notification appears on devices.
### Adding content-available flag
Check the **Add Content-Available Flag** checkbox to instruct devices to download new content in the background. Most commonly, this can be checked if you are interested in sending [silent notifications](https://www.braze.com/docs/pt-br/pt-br/developer_guide/push_notifications/silent/?sdktab=swift).
### Adding mutable-content flag
Check the **Add Mutable-Content Flag** checkbox to enable advanced receiver customization. This flag will automatically be sent when composing a [rich notification](https://www.braze.com/docs/pt-br/pt-br/developer_guide/push_notifications/rich/?sdktab=swift), regardless of the value of this checkbox.
### Collapse ID
Specify a collapse ID to coalesce similar notifications. If you send multiple notifications with the same collapse ID, the device will only show the most recently received notification. Refer to Apple's documentation on [coalesced notifications](https://developer.apple.com/library/content/documentation/NetworkingInternet/Conceptual/RemoteNotificationsPG/APNSOverview.html#//apple_ref/doc/uid/TP40008194-CH8-SW1).
### Expiry
Checking the **Expiry** checkbox will allow setting an expiration time for your message. Should a user's device lose connectivity, Braze will continue to try and send the message until the specified time. If this is not set, the platform will default to an expiration of 30 days. Note that push notifications that expire before delivery are not considered failed and will not be recorded as a bounce.
## Prerequisites
Before you can use this feature, you'll need to [integrate the Android Braze SDK](https://www.braze.com/docs/pt-br/pt-br/developer_guide/sdk_integration/?sdktab=android). You'll also need to [set up push notifications](https://www.braze.com/docs/pt-br/pt-br/developer_guide/push_notifications/?sdktab=android).
## Settings
There are many advanced settings available for FireOS push notifications sent through the Braze dashboard. This article will describe these features and how to use them successfully.

### Time to live (TTL) {#ttl}
The **Time to Live** (TTL) field allows you to set a custom length of time to store messages with the push messaging service. The default values for time to live are four weeks for FCM and 31 days for ADM.
### Summary text {#summary-text}
The summary text allows you to set additional text in the expanded notification view. It also serves as a caption for notifications with images.
{: style="max-width:65%;"}
The summary text will display under the body of the message in the expanded view.
{: style="max-width:65%;"}
For push notifications that include images, the message text will be shown in the collapsed view, while the summary text will be displayed as the image caption when the notification is expanded.
### Custom URIs {#custom-uri}
The **Custom URI** feature allows you to specify a Web URL or an Android resource to navigate to when the notification is clicked. If no custom URI is specified, clicking on the notification brings users into your app. You can use the custom URI to deep link inside your app and direct users to resources that exist outside of your app. This can be specified via the [Messaging API](https://www.braze.com/docs/pt-br/pt-br/api/endpoints/messaging) or our dashboard under **Advanced Settings** in the push composer as pictured:

### Notification display priority
**Important:**
The Notification Display Priority setting is no longer used on devices running Android O or newer. For newer devices, set the priority through [notification channel configuration](https://developer.android.com/training/notify-user/channels#importance).
The priority level of a push notification affects how your notification is displayed in the notification tray relative to other notifications. It can also affect the speed and manner of delivery, as normal and lower priority messages may be sent with slightly higher latency or batched to preserve battery life whereas high priority messages are always sent immediately.
In Android O, notification priority became a property of notification channels. You will need to work with your developer to define the priority for a channel during its configuration and then use the dashboard to select the proper channel when sending your notification sounds. For devices running versions of Android before O, specifying a priority level for FireOS notifications is possible via the Braze dashboard and messaging API.
To message your full user base with a specific priority, we recommend that you indirectly specify the priority through [notification channel configuration](https://developer.android.com/training/notify-user/channels#importance) (to target O+ devices) *and* send the individual priority from the dashboard (to target <O devices).
The priority levels that you can set on Fire OS push notifications are:
| Priority | Description/Intended Use | `priority` value (for API messages) |
|----------|--------------------------|-------------------------------------|
| Max | Urgent or time-critical messages | `2` |
| High | Important communication, such as a new message from a friend | `1` |
| Default | Most notifications - use if your message doesn't explicitly fall under any of the other priority types | `0` |
| Low | Information that you want users to know about but does not require immediate action | `-1` |
| Min | Contextual or background information. | `-2` |
{: .reset-td-br-1 .reset-td-br-2 .reset-td-br-3 aria-label="Notification display priority" }
For more information, refer to Google's [Android notification](http://developer.android.com/design/patterns/notifications.html) documentation.
### Sounds {#sounds}
In Android O, notification sounds became a property of notification channels. You will need to work with your developer to define the sound for a channel during its configuration and then use the dashboard to select the proper channel when sending your notifications.
For devices running versions of Android before O, Braze allows you to set the sound of an individual push message through the dashboard composer. You can do so by specifying a local sound resource on the device (for example, `android.resource://com.mycompany.myapp/raw/mysound`). Specifying "default" in this field will play the default notification sound on the device. This can be specified via the [Messaging API](https://www.braze.com/docs/pt-br/pt-br/api/endpoints/messaging) or the dashboard under **Settings** in the push composer.

Enter the full sound resource URI (for example, `android.resource://com.mycompany.myapp/raw/mysound`) into the dashboard prompt.
To message your full user base with a specific sound, we recommend that you indirectly specify the sound through [notification channel configuration](https://developer.android.com/training/notify-user/channels) (to target O+ devices) *and* send the individual sound from the dashboard (to target <O devices).
## Prerequisites
Before you can use this feature, you'll need to [integrate the React Native Braze SDK](https://www.braze.com/docs/pt-br/pt-br/developer_guide/sdk_integration/?sdktab=react%20native). You must also [set up push notifications](https://www.braze.com/docs/pt-br/pt-br/developer_guide/push_notifications/?sdktab=react%20native).
## Push customization in React Native
The Braze React Native SDK does not expose push notification customization (action buttons, categories, custom notification factories) through its JavaScript API. These features require native configuration in your iOS and Android projects.
The following table shows which features require native configuration:
| Feature | iOS | Android |
| --- | --- | --- |
| Action buttons | Configure in native Swift/Objective-C | Configure in native Java/Kotlin |
| Push categories | Configure in native Swift/Objective-C | Configure in native Java/Kotlin |
| Custom notification factory | N/A | Configure in native Java/Kotlin |
| Badge customization | Configure in native Swift/Objective-C | N/A |
| Custom sounds | Configure in native Swift/Objective-C | Configure in native Java/Kotlin |
{: .reset-td-br-1 .reset-td-br-2 .reset-td-br-3 aria-label="Push customization in React Native" }
### iOS customization
To add push action buttons, categories, badges, or custom sounds on iOS, implement the native configuration in your `AppDelegate` (Swift or Objective-C). See [Customize push notifications – Swift](https://www.braze.com/docs/pt-br/pt-br/developer_guide/push_notifications/customization/?sdktab=swift) for step-by-step instructions.
### Android customization
To add push action buttons, categories, or a custom notification factory on Android, implement the native configuration in your Android project. See [Customize push notifications – Android](https://www.braze.com/docs/pt-br/pt-br/developer_guide/push_notifications/customization/?sdktab=android) for step-by-step instructions.
# Deep linking em notificações por push para o SDK Braze
Source: /docs/pt-br/developer_guide/push_notifications/deep_linking/index.md
# Deep linking em notificações por push
> Aprenda como configurar notificações por push silenciosas para o SDK Braze.
## Prerequisites
Before you can use this feature, you'll need to [integrate the Android Braze SDK](https://www.braze.com/docs/pt-br/pt-br/developer_guide/sdk_integration/?sdktab=android).
## Creating a universal delegate
The Android SDK provides the ability to set a single delegate object to custom handle all deep links opened by Braze across Content Cards, in-app messages, and push notifications.
Your delegate object should implement the [`IBrazeDeeplinkHandler`](https://braze-inc.github.io/braze-android-sdk/kdoc/braze-android-sdk/com.braze.ui/-braze-deeplink-handler/index.html) interface and be set using [`BrazeDeeplinkHandler.setBrazeDeeplinkHandler()`](https://braze-inc.github.io/braze-android-sdk/kdoc/braze-android-sdk/com.braze.ui/-braze-deeplink-handler/-companion/set-braze-deeplink-handler.html). In most cases, the delegate should be set in your app's `Application.onCreate()`.
The following is an example of overriding the default [`UriAction`](https://braze-inc.github.io/braze-android-sdk/kdoc/braze-android-sdk/com.braze.ui.actions/-uri-action/index.html) behavior with custom intent flags and custom behavior for YouTube URLs:
```java
public class CustomDeeplinkHandler implements IBrazeDeeplinkHandler {
private static final String TAG = BrazeLogger.getBrazeLogTag(CustomDeeplinkHandler.class);
@Override
public void gotoUri(Context context, UriAction uriAction) {
String uri = uriAction.getUri().toString();
// Open YouTube URLs in the YouTube app and not our app
if (!StringUtils.isNullOrBlank(uri) && uri.contains("youtube.com")) {
uriAction.setUseWebView(false);
}
CustomUriAction customUriAction = new CustomUriAction(uriAction);
customUriAction.execute(context);
}
public static class CustomUriAction extends UriAction {
public CustomUriAction(@NonNull UriAction uriAction) {
super(uriAction);
}
@Override
protected void openUriWithActionView(Context context, Uri uri, Bundle extras) {
Intent intent = getActionViewIntent(context, uri, extras);
intent.setFlags(Intent.FLAG_ACTIVITY_NEW_TASK | Intent.FLAG_ACTIVITY_CLEAR_TOP | Intent.FLAG_ACTIVITY_SINGLE_TOP);
if (intent.resolveActivity(context.getPackageManager()) != null) {
context.startActivity(intent);
} else {
BrazeLogger.w(TAG, "Could not find appropriate activity to open for deep link " + uri + ".");
}
}
}
}
```
```kotlin
class CustomDeeplinkHandler : IBrazeDeeplinkHandler {
override fun gotoUri(context: Context, uriAction: UriAction) {
val uri = uriAction.uri.toString()
// Open YouTube URLs in the YouTube app and not our app
if (!StringUtils.isNullOrBlank(uri) && uri.contains("youtube.com")) {
uriAction.useWebView = false
}
val customUriAction = CustomUriAction(uriAction)
customUriAction.execute(context)
}
class CustomUriAction(uriAction: UriAction) : UriAction(uriAction) {
override fun openUriWithActionView(context: Context, uri: Uri, extras: Bundle) {
val intent = getActionViewIntent(context, uri, extras)
intent.flags = Intent.FLAG_ACTIVITY_NEW_TASK or Intent.FLAG_ACTIVITY_CLEAR_TOP or Intent.FLAG_ACTIVITY_SINGLE_TOP
if (intent.resolveActivity(context.packageManager) != null) {
context.startActivity(intent)
} else {
BrazeLogger.w(TAG, "Could not find appropriate activity to open for deep link $uri.")
}
}
}
companion object {
private val TAG = BrazeLogger.getBrazeLogTag(CustomDeeplinkHandler::class.java)
}
}
```
## Deep linking to app settings
To allow deep links to directly open your app's settings, you'll need a custom `BrazeDeeplinkHandler`. In the following example, the presence of a custom key-value pair called `open_notification_page` will make the deep link open the app's settings page:
```java
BrazeDeeplinkHandler.setBrazeDeeplinkHandler(new IBrazeDeeplinkHandler() {
@Override
public void gotoUri(Context context, UriAction uriAction) {
final Bundle extras = uriAction.getExtras();
if (extras.containsKey("open_notification_page")) {
Intent intent = new Intent();
intent.setAction("android.settings.APP_NOTIFICATION_SETTINGS");
intent.setFlags(Intent.FLAG_ACTIVITY_NEW_TASK);
//for Android 5-7
intent.putExtra("app_package", context.getPackageName());
intent.putExtra("app_uid", context.getApplicationInfo().uid);
// for Android 8 and later
intent.putExtra("android.provider.extra.APP_PACKAGE", context.getPackageName());
context.startActivity(intent);
}
}
});
```
```kotlin
BrazeDeeplinkHandler.setBrazeDeeplinkHandler(object : IBrazeDeeplinkHandler {
override fun gotoUri(context: Context, uriAction: UriAction) {
val extras = uriAction.extras
if (extras.containsKey("open_notification_page")) {
val intent = Intent()
intent.action = "android.settings.APP_NOTIFICATION_SETTINGS"
intent.flags = Intent.FLAG_ACTIVITY_NEW_TASK
//for Android 5-7
intent.putExtra("app_package", context.packageName)
intent.putExtra("app_uid", context.applicationInfo.uid)
// for Android 8 and later
intent.putExtra("android.provider.extra.APP_PACKAGE", context.packageName)
context.startActivity(intent)
}
}
})
```
## Customizing WebView activity {#Custom_Webview_Activity}
When Braze opens website deeplinks inside the app, the deeplinks are handled by [`BrazeWebViewActivity`](https://braze-inc.github.io/braze-android-sdk/kdoc/braze-android-sdk/com.braze.ui/-braze-web-view-activity/index.html).
**Note:**
For custom HTML in-app messages, links configured with `target="_blank"` open in the device's default web browser and are not handled by `BrazeWebViewActivity`.
To change this:
1. Create a new Activity that handles the target URL from `Intent.getExtras()` with the key `com.braze.Constants.BRAZE_WEBVIEW_URL_EXTRA`. For an example, see [`BrazeWebViewActivity.kt`](https://github.com/braze-inc/braze-android-sdk/blob/master/android-sdk-ui/src/main/java/com/braze/ui/BrazeWebViewActivity.kt).
2. Add that activity to `AndroidManifest.xml` and set `exported` to `false`.
```xml
```
3. Set your custom Activity in a `BrazeConfig` [builder object](https://braze-inc.github.io/braze-android-sdk/kdoc/braze-android-sdk/com.braze.configuration/-braze-config/-builder/set-custom-web-view-activity-class.html). Build the builder and pass it to [`Braze.configure()`](https://braze-inc.github.io/braze-android-sdk/kdoc/braze-android-sdk/com.braze/-braze/-companion/configure.html) in your [`Application.onCreate()`](https://developer.android.com/reference/android/app/Application.html#onCreate()).
```java
BrazeConfig brazeConfig = new BrazeConfig.Builder()
.setCustomWebViewActivityClass(MyCustomWebViewActivity::class)
...
.build();
Braze.configure(this, brazeConfig);
```
```kotlin
val brazeConfig = BrazeConfig.Builder()
.setCustomWebViewActivityClass(MyCustomWebViewActivity::class.java)
...
.build()
Braze.configure(this, brazeConfig)
```
## Troubleshooting
If deep links from push notifications aren't working on Android, try the following steps:
1. **Test the deep link outside of Braze.** Open the deep link URL from another app, such as email or a browser. If it doesn't open your app, the deep link may not be configured correctly in your `AndroidManifest.xml`. For more information, see Android's [Create Deep Links](https://developer.android.com/training/app-links/deep-linking) documentation.
2. **Check that automatic deep link handling is enabled.** Verify that `com_braze_handle_push_deep_links_automatically` is set to `true` in `braze.xml`, or set this option through [runtime configuration](https://www.braze.com/docs/pt-br/pt-br/developer_guide/sdk_initalization/?sdktab=android). Without this setting, Braze doesn't automatically open your app and deep link destination when someone taps a push notification.
3. **Verify your deep link handler delegate.** If you set a custom `IBrazeDeeplinkHandler`, confirm that your `gotoUri` implementation handles the URI and doesn't drop it.
4. **Test across channels.** If the same deep link works in an in-app message but not from push, the issue is likely in your push deep link handling, not in the deep link itself.
## Using Jetpack Compose
To handle deeplinks when using Jetpack Compose with NavHost:
1. Ensure that the activity handling your deeplink is registered in the Android Manifest.
```xml
```
2. In NavHost, specify which deeplinks you want it to handle.
```kotlin
composableWithCompositionLocal(
route = "YOUR_ROUTE_HERE",
deepLinks = listOf(navDeepLink {
uriPattern = "myapp://articles/{${MainDestinations.ARTICLE_ID_KEY}}"
}),
arguments = listOf(
navArgument(MainDestinations.ARTICLE_ID_KEY) {
type = NavType.LongType
}
),
) { backStackEntry ->
val arguments = requireNotNull(backStackEntry.arguments)
val articleId = arguments.getLong(MainDestinations.ARTICLE_ID_KEY)
ArticleDetail(
articleId
)
}
```
3. Depending on your app architecture, you may need to handle the new intent that's sent to your current activity as well.
```kotlin
DisposableEffect(Unit) {
val listener = Consumer {
navHostController.handleDeepLink(it)
}
addOnNewIntentListener(listener)
onDispose { removeOnNewIntentListener(listener) }
}
```
## Prerequisites
Before you can use this feature, you'll need to [integrate the Swift Braze SDK](https://www.braze.com/docs/pt-br/pt-br/developer_guide/sdk_integration/?sdktab=swift).
**Tip:**
For help choosing between custom scheme deep links, universal links, and "Open Web URL Inside App," see [iOS deep linking guide](https://www.braze.com/docs/pt-br/pt-br/developer_guide/push_notifications/ios_deep_linking_guide). For troubleshooting, see [Deep linking troubleshooting](https://www.braze.com/docs/pt-br/pt-br/developer_guide/push_notifications/deep_linking_troubleshooting).
## Handling deep links
### Step 1: Register a scheme {#register-a-scheme}
To handle deep linking, a custom scheme must be stated in your `Info.plist` file. The navigation structure is defined by an array of dictionaries. Each of those dictionaries contains an array of strings.
Use Xcode to edit your `Info.plist` file:
1. Add a new key, `URL types`. Xcode will automatically make this an array containing a dictionary called `Item 0`.
2. Within `Item 0`, add a key `URL identifier`. Set the value to your custom scheme.
3. Within `Item 0`, add a key `URL Schemes`. This will automatically be an array containing a `Item 0` string.
4. Set `URL Schemes` >> `Item 0` to your custom scheme.
Alternatively, if you wish to edit your `Info.plist` file directly, you can follow this spec:
```html
CFBundleURLTypesCFBundleURLNameYOUR.SCHEMECFBundleURLSchemesYOUR.SCHEME
```
### Step 2: Add a scheme allowlist
You must declare the URL schemes you wish to pass to `canOpenURL(_:)` by adding the `LSApplicationQueriesSchemes` key to your app's Info.plist file. Attempting to call schemes outside this allowlist will cause the system to record an error in the device's logs, and the deep link will not open. An example of this error will look like this:
```
: -canOpenURL: failed for URL: "yourapp://deeplink" – error: "This app is not allowed to query for scheme yourapp"
```
For example, if an in-app message should open the Facebook app when tapped, the app has to have the Facebook custom scheme (`fb`) in your allowlist. Otherwise, the system will reject the deep link. Deep links that direct to a page or view inside your own app still require that your app's custom scheme be listed in your app's `Info.plist`.
Your example allowlist might look something like:
```html
LSApplicationQueriesSchemesmyappfbtwitter
```
For more information, refer to [Apple's documentation](https://developer.apple.com/library/content/documentation/General/Reference/InfoPlistKeyReference/Articles/LaunchServicesKeys.html#//apple_ref/doc/uid/TP40009250-SW14) on the `LSApplicationQueriesSchemes` key.
### Step 3: Implement a handler
After activating your app, iOS will call the method [`application:openURL:options:`](https://developer.apple.com/reference/uikit/uiapplicationdelegate/1623112-application?language=objc). The important argument is the [NSURL](https://developer.apple.com/library/ios/DOCUMENTATION/Cocoa/Reference/Foundation/Classes/NSURL_Class/Reference/Reference.html#//apple_ref/doc/c_ref/NSURL) object.
```swift
func application(_ app: UIApplication, open url: URL, options: [UIApplication.OpenURLOptionsKey : Any] = [:]) -> Bool {
let path = url.path
let query = url.query
// Insert your code here to take some action based upon the path and query.
return true
}
```
```objc
- (BOOL)application:(UIApplication *)app openURL:(NSURL *)url options:(NSDictionary *)options {
NSString *path = [url path];
NSString *query = [url query];
// Insert your code here to take some action based upon the path and query.
return YES;
}
```
## App Transport Security (ATS)
As defined by [Apple](https://developer.apple.com/library/prerelease/ios/releasenotes/General/WhatsNewIniOS/Articles/iOS9.html#//apple_ref/doc/uid/TP40016198-SW14), "App Transport Security is a feature that improves the security of connections between an app and web services. The feature consists of default connection requirements that conform to best practices for secure connections. Apps can override this default behavior and turn off transport security."
ATS is applied by default. It requires that all connections use HTTPS and are encrypted using TLS 1.2 with forward secrecy. Refer to [Requirements for Connecting Using ATS](https://developer.apple.com/library/ios/documentation/General/Reference/InfoPlistKeyReference/Articles/CocoaKeys.html#//apple_ref/doc/uid/TP40009251-SW35) for more information. All images served by Braze to end devices are handled by a content delivery network ("CDN") that supports TLS 1.2 and is compatible with ATS.
Unless they are specified as exceptions in your application's `Info.plist`, connections that do not follow these requirements will fail with errors that are similar to the following.
**Example Error 1:**
```bash
CFNetwork SSLHandshake failed (-9801)
Error Domain=NSURLErrorDomain Code=-1200 "An SSL error has occurred, and a secure connection to the server cannot be made."
```
**Example Error 2:**
```bash
NSURLSession/NSURLConnection HTTP load failed (kCFStreamErrorDomainSSL, -9802)
```
ATS compliance is enforced for links opened within the mobile app (our default handling of clicked links) and does not apply to sites opened externally via a web browser.
### Working with ATS
You can handle ATS in either of the following ways, but we recommend **complying with ATS requirements**.
Your Braze integration can satisfy ATS requirements by ensuring that any existing links you drive users to (for example, though in-app message and push campaigns) satisfy ATS requirements. While there are ways to bypass ATS restrictions, our recommendation is to ensure that all linked URLs are ATS-compliant. Given Apple's increasing emphasis on application security, the following approaches to allowing ATS exceptions are not guaranteed to be supported by Apple.
You can allow a subset of links with certain domains or schemes to be treated as exceptions to the ATS rules. Your Braze integration will satisfy ATS requirements if every link you use in a Braze messaging channel is either ATS compliant or handled by an exception.
To add a domain as an exception of the ATS, add following to your app's `Info.plist` file:
```html
NSAppTransportSecurityNSAllowsArbitraryLoadsNSExceptionDomainsexample.comNSExceptionAllowsInsecureHTTPLoadsNSIncludesSubdomains
```
Refer to Apple's article on [app transport security keys](https://developer.apple.com/library/ios/documentation/General/Reference/InfoPlistKeyReference/Articles/CocoaKeys.html#//apple_ref/doc/uid/TP40009251-SW33) for more information.
You can turn off ATS entirely. Note that this is not recommended practice, due to both lost security protections and future iOS compatibility. To disable ATS, insert the following in your app's `Info.plist` file:
```html
NSAppTransportSecurityNSAllowsArbitraryLoads
```
## Decoding URLs
The SDK percent-encodes links to create valid `URL`s. All link characters that are not allowed in a properly formed URL, such as Unicode characters, will be percent escaped.
To decode an encoded link, use the `String` property [`removingPercentEncoding`](https://developer.apple.com/documentation/swift/stringprotocol/removingpercentencoding). You must also return `true` in the `BrazeDelegate.braze(_:shouldOpenURL:)`. A call to action is required to trigger the handling of the URL by your app. For example:
```swift
func application(_ app: UIApplication, open url: URL, options: [UIApplication.OpenURLOptionsKey : Any] = [:]) -> Bool {
let urlString = url.absoluteString.removingPercentEncoding
// Handle urlString
return true
}
```
```objc
- (BOOL)application:(UIApplication *)application openURL:(NSURL *)url options:(NSDictionary *)options {
NSString *urlString = [url.absoluteString stringByRemovingPercentEncoding];
// Handle urlString
return YES;
}
```
## Deep linking to app settings
You can take advantage of `UIApplicationOpenSettingsURLString` to deep link users to your app's settings from Braze push notifications and in-app messages.
To take users from your app into the iOS settings:
1. First, make sure your application is set up for either [scheme-based deep links](#swift_register-a-scheme) or [universal links](#swift_universal-links).
2. Decide on a URI for deep linking to the **Settings** page (for example, `myapp://settings` or `https://www.braze.com/settings`).
3. If you are using custom scheme-based deep links, add the following code to your `application:openURL:options:` method:
```swift
func application(_ app: UIApplication, open url: URL, options: [UIApplicationOpenURLOptionsKey : Any] = [:]) -> Bool {
let path = url.path
if (path == "settings") {
UIApplication.shared.openURL(URL(string:UIApplication.openSettingsURLString)!)
}
return true
}
```
```objc
- (BOOL)application:(UIApplication *)app
openURL:(NSURL *)url
options:(NSDictionary *)options {
NSString *path = [url path];
if ([path isEqualToString:@"settings"]) {
NSURL *settingsURL = [NSURL URLWithString:UIApplicationOpenSettingsURLString];
[[UIApplication sharedApplication] openURL:settingsURL];
}
return YES;
}
```
## Customization options {#customization-options}
### Default WebView customization
The `Braze.WebViewController` class displays web URLs opened by the SDK, typically when "Open Web URL Inside App" is selected for a web deep link.
You can customize the `Braze.WebViewController` via the [`BrazeDelegate.braze(_:willPresentModalWithContext:)`](https://braze-inc.github.io/braze-swift-sdk/documentation/brazekit/brazedelegate/braze(_:willpresentmodalwithcontext:)-12sqy/) delegate method.
### Linking handling customization
The `BrazeDelegate` protocol can be used to customize the handling of URLs such as deep links, web URLs, and universal links. To set the delegate during Braze initialization, set a delegate object on the `Braze` instance. Braze will then call your delegate's implementation of `shouldOpenURL` before handling any URIs.
When a push notification or in-app message uses **Open web URL inside mobile app**, Braze passes `context.useWebView == true` on [`Braze.URLContext`](https://braze-inc.github.io/braze-swift-sdk/documentation/brazekit/braze/urlcontext). When the message opens the URL in the system browser instead, `useWebView` is `false`. Inspect `context.useWebView` in `braze(_:shouldOpenURL:)` to branch your custom handling—for example, to open an in-app `WebViewController` only when the campaign requested in-app display.
#### Universal links {#universal-links}
Braze supports universal links in push notifications, in-app messages, and Content Cards. To enable universal link support, [`configuration.forwardUniversalLinks`](https://braze-inc.github.io/braze-swift-sdk/documentation/brazekit/braze/configuration-swift.class/forwarduniversallinks) must be set to `true`.
When enabled, Braze will forward universal links to your app's `AppDelegate` via the [`application:continueUserActivity:restorationHandler:`](https://developer.apple.com/documentation/uikit/uiapplicationdelegate/1623072-application) method.
Your application also needs to be set up to handle universal links. Refer to [Apple's documentation](https://developer.apple.com/documentation/xcode/supporting-universal-links-in-your-app) to ensure your application is configured correctly for universal links.
**Warning:**
Universal link forwarding requires access to the application entitlements. When running the application in a simulator, these entitlements are not directly available and universal links are not forwarded to the system handlers.
To add support to simulator builds, you can add the application `.entitlements` file to the _Copy Bundle Resources_ build phase. See [`forwardUniversalLinks`](https://braze-inc.github.io/braze-swift-sdk/documentation/brazekit/braze/configuration-swift.class/forwarduniversallinks) documentation for more details.
**Note:**
The SDK does not query your domains' `apple-app-site-association` file. It performs the differentiation between universal links and regular URLs by looking at the domain name only. As a result, the SDK does not respect any exclusion rule defined in the `apple-app-site-association` per [Supporting associated domains](https://developer.apple.com/documentation/xcode/supporting-associated-domains).
## Examples
### BrazeDelegate
Here's an example using `BrazeDelegate`. For more information, see [Braze Swift SDK reference](https://braze-inc.github.io/braze-swift-sdk/documentation/brazekit/brazedelegate).
```swift
func braze(_ braze: Braze, shouldOpenURL context: Braze.URLContext) -> Bool {
if context.url.host == "MY-DOMAIN.com" {
// Custom handle link here
return false
}
// Let Braze handle links otherwise
return true
}
```
```objc
- (BOOL)braze:(Braze *)braze shouldOpenURL:(BRZURLContext *)context {
if ([[context.url.host lowercaseString] isEqualToString:@"MY-DOMAIN.com"]) {
// Custom handle link here
return NO;
}
// Let Braze handle links otherwise
return YES;
}
```
## Prerequisites
Before you can implement deep linking into your Flutter iOS app, configure your URL schemes in your `Info.plist` file. For details, refer to [Deep linking for iOS](https://www.braze.com/docs/pt-br/pt-br/developer_guide/push_notifications/deep_linking/?sdktab=swift#url-schemes).
For Flutter Android, no additional native setup is required if you're handling deep links on the Dart layer. The minimal implementation shown in this article is sufficient for most Flutter apps.
If you need advanced native-layer link handling (such as custom `IBrazeDeeplinkHandler` implementations), refer to [Deep linking for Android](https://www.braze.com/docs/pt-br/pt-br/developer_guide/push_notifications/deep_linking/?sdktab=android).
## Implementing deep linking
### Step 1: Set up Flutter's built-in handling
1. In your Xcode project, open your `Info.plist` file.
2. Add a new key-value pair.
3. Set the key to `FlutterDeepLinkingEnabled`.
4. Set the type to `Boolean`.
5. Set the value to `YES`.

1. In your Android Studio project, open your `AndroidManifest.xml` file.
2. Locate `.MainActivity` in your `activity` tags.
3. Within the `activity` tag, add the following `meta-data` tag:
```xml
```
### Step 2: Forward data to the Dart layer (optional)
You can use native, first-party, or third-party link handling for complex use cases, such as sending a user to a specific location in your app, or calling a specific function.
#### Example: Deep linking to an alert dialog
**Note:**
While the following example does not rely on additional packages, you can use a similar approach to implement native, first-party, or third-party packages, such as [`go_router`](https://pub.dev/packages/go_router). Additional Dart code may be required.
First, a method channel is used in the native layer to forward the deep link's URL string data to the Dart layer.
```swift
extension AppDelegate {
// Delegate method for handling custom scheme links.
override func application(_ app: UIApplication, open url: URL, options: [UIApplication.OpenURLOptionsKey : Any] = [:]) -> Bool {
forwardURL(url)
return true
}
// Delegate method for handling universal links.
override func application(_ application: UIApplication, continue userActivity: NSUserActivity, restorationHandler: @escaping ([UIUserActivityRestoring]?) -> Void) -> Bool {
guard userActivity.activityType == NSUserActivityTypeBrowsingWeb,
let url = userActivity.webpageURL else {
return false
}
forwardURL(url)
return true
}
private func forwardURL(_ url: URL) {
guard let controller: FlutterViewController = window?.rootViewController as? FlutterViewController else { return }
let deepLinkChannel = FlutterMethodChannel(name: "deepLinkChannel", binaryMessenger: controller.binaryMessenger)
deepLinkChannel.invokeMethod("receiveDeepLink", arguments: url.absoluteString)
}
}
```
```kotlin
class MainActivity : FlutterActivity() {
override fun onCreate(savedInstanceState: Bundle?) {
super.onCreate(savedInstanceState)
handleDeepLink(intent)
}
override fun onNewIntent(intent: Intent) {
super.onNewIntent(intent)
handleDeepLink(intent)
}
private fun handleDeepLink(intent: Intent) {
val binaryMessenger = flutterEngine?.dartExecutor?.binaryMessenger
if (intent?.action == Intent.ACTION_VIEW && binaryMessenger != null) {
MethodChannel(binaryMessenger, "deepLinkChannel")
.invokeMethod("receivedDeepLink", intent?.data.toString())
}
}
}
```
Next, a callback function is used in the Dart layer to display an alert dialogue using the URL string data sent previously.
```dart
MethodChannel('deepLinkChannel').setMethodCallHandler((call) async {
deepLinkAlert(call.arguments, context);
});
void deepLinkAlert(String link, BuildContext context) {
showDialog(
context: context,
builder: (BuildContext context) {
return AlertDialog(
title: Text("Deep Link Alert"),
content: Text("Opened with deep link: $link"),
actions: [
TextButton(
child: Text("Close"),
onPressed: () {
Navigator.of(context).pop();
},
),
],
);
},
);
}
```
## Prerequisites
Before you can use this feature, you'll need to [integrate the Cordova Braze SDK](https://www.braze.com/docs/pt-br/pt-br/developer_guide/sdk_integration/?sdktab=cordova).
## Enabling push deep linking
By default, the Braze Cordova SDK doesn't automatically handle push deep linking from notifications. To enable push deep linking, add the following preferences to the `platform` element in your project's `config.xml` file.
```xml
```
```xml
```
To customize back stack behavior when deep links are followed, you can also add these optional preferences:
```xml
```
For a full list of available push configuration options, see [Optional configurations](https://www.braze.com/docs/pt-br/pt-br/developer_guide/sdk_integration?sdktab=cordova#optional).
# Guia de deep linking para iOS
Source: /docs/pt-br/developer_guide/push_notifications/ios_deep_linking_guide/index.md
# Guia de deep linking para iOS {#ios-deep-linking-guide}
> Este guia ajuda você a escolher a estratégia de deep linking certa para seu app iOS, dependendo do canal de envio de mensagens que você está usando e se você usa um provedor de links de terceiros, como o Branch.
Para detalhes de implementação, consulte [Deep linking](https://www.braze.com/docs/pt-br/pt-br/developer_guide/push_notifications/deep_linking/?sdktab=swift). Para solução de problemas, consulte [Solução de problemas de deep linking](https://www.braze.com/docs/pt-br/pt-br/developer_guide/push_notifications/deep_linking_troubleshooting/).
## Escolhendo um tipo de link {#choosing-a-link-type}
Existem três maneiras de lidar com links de mensagens da Braze em seu app iOS. Cada uma funciona de maneira diferente e é adequada para diferentes canais e casos de uso.
| Tipo de link | Exemplo | Ideal para | Abre sem o app instalado? |
|---|---|---|---|
| **Esquema personalizado** | `myapp://products/123` | Push, mensagens no app, Content Cards | Não — o link falha |
| **Link universal** | `https://myapp.com/products/123` | E-mail, SMS, canais com rastreamento de cliques | Sim — volta para a web |
| **Abrir URL da web dentro do app** | Qualquer URL `https://` | Exibir conteúdo da web em um WebView modal | N/A — exibe no WebView |
{: .reset-td-br-1 .reset-td-br-2 .reset-td-br-3 .reset-td-br-4 aria-label="Choosing a link type" }
### Deep links com esquema personalizado {#custom-scheme-deep-links}
Deep links com esquema personalizado (por exemplo, `myapp://products/123`) abrem seu app diretamente em uma tela específica. São a opção mais simples para canais em que os links não são modificados por terceiros.
**Use deep links com esquema personalizado quando:**
- Enviar notificações por push, mensagens no app ou Content Cards
- Você não precisa que o link funcione se o app não estiver instalado
- Você não precisa de rastreamento de cliques (encapsulamento de link por ESP de e-mail)
**Não use deep links com esquema personalizado quando:**
- Enviar e-mails — os ESPs encapsulam links para rastreamento de cliques, o que quebra esquemas personalizados
- Você precisa que o link volte para uma página da web se o app não estiver instalado
### Links universais {#universal-links}
Links universais (por exemplo, `https://myapp.com/products/123`) são URLs HTTPS padrão que o iOS pode encaminhar para o seu app em vez de abrir em um navegador. Eles exigem configuração no lado do servidor (um arquivo AASA) e configuração no lado do app (direito de Associated Domains).
**Use links universais quando:**
- Enviar e-mails. Seu ESP encapsula links para rastreamento de cliques, então os links devem ser HTTPS.
- Enviar SMS ou outros canais em que os links são encapsulados ou encurtados.
- Você precisa que o link volte para uma página da web quando o app não estiver instalado.
- Você está usando um provedor de links de terceiros, como Branch ou AppsFlyer.
**Não use links universais quando:**
- Você só precisa de deep links de push, mensagens no app ou Content Cards. Os esquemas personalizados são mais simples.
### "Abrir URL da web dentro do app" {#open-web-url-inside-app}
Esta opção abre uma página da web dentro de um WebView modal no seu app. É totalmente gerenciada pelo SDK da Braze usando `Braze.WebViewController` — você não precisa escrever nenhum código de tratamento de URL.
**Use "Abrir URL da web dentro do app" quando:**
- Você deseja exibir uma página da web (como uma promoção ou artigo) sem sair do seu app.
- A URL é uma página web HTTPS padrão, não um deep link para uma tela específica do app.
**Não use "Abrir URL da web dentro do app" quando:**
- Você precisa navegar para uma visualização específica no seu app. Em vez disso, use um esquema personalizado ou um link universal.
- A página da web requer autenticação ou possui cabeçalhos de Content Security Policy que bloqueiam a incorporação.
## O que você precisa para cada tipo de link {#what-you-need-for-each-link-type}
### Deep links com esquema personalizado
| Requisito | Informações |
|---|---|
| Arquivo AASA | Não é necessário |
| `Info.plist` | Registre seu esquema em `CFBundleURLTypes` e adicione-o a `LSApplicationQueriesSchemes` |
| Método delegado do app | Implemente `application(_:open:options:)` para analisar a URL e navegar |
| Configuração do SDK da Braze | Nenhuma — o SDK abre URLs de esquema personalizado por padrão |
{: .reset-td-br-1 .reset-td-br-2 aria-label="Custom scheme deep links" }
### Links universais
| Requisito | Informações |
|---|---|
| Arquivo AASA | Obrigatório — hospede em `https://yourdomain.com/.well-known/apple-app-site-association` |
| Associated Domains | Adicione `applinks:yourdomain.com` no Xcode em **Signing & Capabilities** |
| Método delegado do app | Implemente `application(_:continue:restorationHandler:)` para lidar com `NSUserActivity` |
| Configuração do SDK da Braze | Defina `configuration.forwardUniversalLinks = true` |
| BrazeDelegate (opcional) | Implemente `braze(_:shouldOpenURL:)` para roteamento personalizado (por exemplo, Branch) |
{: .reset-td-br-1 .reset-td-br-2 aria-label="Universal links" }
**Important:**
Se você enviar e-mails pela Braze, seu ESP (SendGrid, SparkPost ou Amazon SES) encapsulará os links em um domínio de rastreamento de cliques. Você também deve hospedar o arquivo AASA no seu domínio de rastreamento de cliques, não apenas no seu domínio principal. Para a configuração completa, consulte [Links universais e App Links](https://www.braze.com/docs/pt-br/pt-br/user_guide/channels/email/customize/universal_links_and_app_links/).
### "Abrir URL da web dentro do app"
| Requisito | Informações |
|---|---|
| Arquivo AASA | Não é necessário |
| Método delegado do app | Não é necessário — o SDK lida com isso automaticamente |
| Configuração do SDK da Braze | Nenhuma — selecione **Open Web URL Inside App** no criador de Campaign |
{: .reset-td-br-1 .reset-td-br-2 aria-label=""Open Web URL Inside App"" }
## Quando você precisa de um arquivo AASA {#when-aasa}
Um arquivo Apple App Site Association (AASA) só é necessário quando você usa **links universais**. Ele informa ao iOS quais URLs seu app pode processar.
Você precisa de um arquivo AASA quando:
- Você envia deep links em campanhas de e-mail (porque os ESPs encapsulam os links em URLs de rastreamento de cliques HTTPS).
- Você envia deep links em campanhas de SMS (porque os links podem ser encurtados para URLs HTTPS).
- Você usa Branch, AppsFlyer ou outro provedor de links (porque eles usam seus próprios domínios HTTPS).
- Você usa links universais de push, mensagens no app ou Content Cards (menos comum, mas possível com `forwardUniversalLinks = true`).
Você não precisa de um arquivo AASA quando:
- Você só usa deep links com esquema personalizado (por exemplo, `myapp://`) de push, mensagens no app ou Content Cards.
- Você usa a opção **Open Web URL Inside App**.
Para instruções de configuração do AASA, consulte [Links universais e App Links](https://www.braze.com/docs/pt-br/pt-br/user_guide/message_building_by_channel/email/universal_links/#setting-up-universal-links-and-app-links).
## Quando você precisa de código no app para lidar com links {#when-app-code}
O método delegado que você implementa depende do tipo de link que está usando:
| Método delegado | Processa | Quando implementar |
|---|---|---|
| `application(_:open:options:)` | Deep links com esquema personalizado (`myapp://`) | Você usa deep links com esquema personalizado de qualquer canal |
| `application(_:continue:restorationHandler:)` | Links universais (`https://`) | Você usa links universais de e-mail, SMS ou com `forwardUniversalLinks = true` |
| `BrazeDelegate.braze(_:shouldOpenURL:)` | Todas as URLs abertas pelo SDK | Você precisa de lógica de roteamento personalizada (por exemplo, Branch, tratamento condicional, análise de dados) |
{: .reset-td-br-1 .reset-td-br-2 .reset-td-br-3 aria-label="When you need app code to handle links #when-app-code" }
**Tip:**
Se você usar um provedor de links de terceiros, como o Branch, implemente `BrazeDelegate.braze(_:shouldOpenURL:)` para interceptar URLs e encaminhá-las para o SDK do provedor. Consulte [Branch para deep linking](https://www.braze.com/docs/pt-br/pt-br/partners/message_orchestration/deeplinking/branch_for_deeplinking/) para um exemplo completo.
## Usando o Branch com a Braze {#branch}
Se você usar o [Branch](https://www.braze.com/docs/pt-br/pt-br/partners/message_orchestration/deeplinking/branch_for_deeplinking/) como seu provedor de links, sua configuração exigirá algumas etapas adicionais além da configuração padrão de link universal:
1. **SDK do Branch**: Integre o SDK do Branch seguindo a [documentação do Branch](https://help.branch.io/developers-hub/docs/native-sdks-overview).
2. **Associated Domains**: Adicione seu domínio do Branch (por exemplo, `applinks:yourapp.app.link`) no Xcode em **Signing & Capabilities**.
3. **BrazeDelegate**: Implemente `braze(_:shouldOpenURL:)` para encaminhar os links do Branch para o SDK do Branch, em vez de permitir que a Braze os processe diretamente.
4. **Encaminhar links universais**: Defina `configuration.forwardUniversalLinks = true` na configuração do SDK da Braze.
Para detalhes de implementação e orientações sobre depuração, consulte [Branch para deep linking](https://www.braze.com/docs/pt-br/pt-br/partners/message_orchestration/deeplinking/branch_for_deeplinking/).
# Solução de problemas de deep linking
Source: /docs/pt-br/developer_guide/push_notifications/deep_linking_troubleshooting/index.md
# Solução de problemas de deep linking {#deep-linking-troubleshooting}
> Esta página cobre problemas comuns de deep linking no iOS e como diagnosticá-los. Para ajuda na escolha do tipo de link certo, consulte o [guia de deep linking para iOS](https://www.braze.com/docs/pt-br/pt-br/developer_guide/push_notifications/ios_deep_linking_guide/). Para detalhes de implementação, consulte [Deep linking](https://www.braze.com/docs/pt-br/pt-br/developer_guide/push_notifications/deep_linking/?sdktab=swift).
## O deep link de esquema personalizado não abre a visualização correta {#custom-scheme-deep-link-doesnt-open-the-correct-view}
Se um deep link de esquema personalizado (por exemplo, `myapp://products/123`) abrir seu app, mas não navegar para a tela pretendida:
1. **Verifique se o esquema está registrado.** No Xcode, verifique se seu esquema está listado em `CFBundleURLTypes` no `Info.plist`.
2. **Verifique seu manipulador.** Defina um ponto de interrupção em `application(_:open:options:)` para confirmar se está sendo chamado e inspecione o parâmetro `url`.
3. **Teste o link de forma independente.** Execute o seguinte comando no Terminal para testar o deep link fora da Braze:
```bash
xcrun simctl openurl booted "myapp://products/123"
```
Se o link não funcionar aqui, o problema está no tratamento de URL do seu app — não na Braze.
4. **Verifique o formato da URL.** Verifique se a URL na sua Campaign corresponde ao que seu manipulador espera. Erros comuns incluem componentes de caminho ausentes ou capitalização incorreta.
## O link universal abre no Safari em vez do app {#universal-link-opens-in-safari-instead-of-the-app}
Se um link universal (por exemplo, `https://myapp.com/products/123`) abrir no Safari em vez do seu app:
### Verifique a permissão de Associated Domains {#verify-the-associated-domains-entitlement}
No Xcode, acesse o alvo do seu app > **Signing & Capabilities** e verifique se `applinks:yourdomain.com` está listado em **Associated Domains**.
### Valide o arquivo AASA {#validate-the-aasa-file}
Seu arquivo Apple App Site Association (AASA) deve estar hospedado em um destes locais:
- `https://yourdomain.com/.well-known/apple-app-site-association`
- `https://yourdomain.com/apple-app-site-association`
Verifique o seguinte:
- O arquivo é servido via HTTPS com um certificado válido.
- O `Content-Type` é `application/json`.
- O tamanho do arquivo é inferior a 128 KB.
- O `appID` corresponde ao seu Team ID e Bundle ID (por exemplo, `ABCDE12345.com.example.myapp`).
- O array `paths` ou `components` inclui os padrões de URL que você espera.
Você pode validar seu AASA usando a [ferramenta de validação de busca da Apple](https://search.developer.apple.com/appsearch-validation-tool/) ou executando:
```bash
swcutil dl -d yourdomain.com
```
### Verifique o `AppDelegate` {#check-the-appdelegate}
Verifique se `application(_:continue:restorationHandler:)` está implementado no seu `AppDelegate` e lida com o `NSUserActivity` corretamente:
```swift
func application(_ application: UIApplication,
continue userActivity: NSUserActivity,
restorationHandler: @escaping ([UIUserActivityRestoring]?) -> Void) -> Bool {
guard userActivity.activityType == NSUserActivityTypeBrowsingWeb,
let url = userActivity.webpageURL else {
return false
}
// Handle the URL
return true
}
```
### Verifique a configuração do SDK da Braze {#verify-braze-sdk-configuration}
Se você estiver usando links universais de notificações por push entregues pela Braze, mensagens no app ou Content Cards, confirme que `forwardUniversalLinks` está ativado:
```swift
let configuration = Braze.Configuration(apiKey: "", endpoint: "")
configuration.forwardUniversalLinks = true
```
**Note:**
O encaminhamento de links universais requer acesso aos direitos do aplicativo. Ao executar em um simulador, esses direitos não estão disponíveis diretamente. Para testar em um simulador, adicione o arquivo `.entitlements` à fase de build **Copy Bundle Resources**.
### Verifique o problema do toque longo {#check-for-the-long-press-issue}
Se você tocar e segurar um link universal e selecionar **Open**, o iOS pode "quebrar" a associação do link universal para aquele domínio. Esse é um comportamento conhecido do iOS. Para redefinir, toque e segure o link novamente e selecione **Open in [App Name]**.
## O deep link do e-mail não abre o app {#deep-link-from-email-doesnt-open-the-app}
Os links de e-mail passam pelo sistema de rastreamento de cliques do seu ESP, que envolve os links em um domínio de rastreamento (por exemplo, `https://click.yourdomain.com/...`). Para que os links universais funcionem a partir do e-mail, você deve configurar o arquivo AASA no seu domínio de rastreamento de cliques — não apenas no seu domínio principal.
### Verifique o AASA do domínio de rastreamento de cliques {#verify-click-tracking-domain-aasa}
1. Identifique seu domínio de rastreamento de cliques nas configurações do seu ESP (SendGrid, SparkPost ou Amazon SES).
2. Hospede o arquivo AASA em `https://your-click-tracking-domain/.well-known/apple-app-site-association`.
3. Certifique-se de que o arquivo AASA no domínio de rastreamento de cliques inclua o mesmo `appID` e padrões de caminho válidos.
Para instruções de configuração específicas do ESP, consulte [Links universais e App Links](https://www.braze.com/docs/pt-br/pt-br/user_guide/channels/email/customize/universal_links_and_app_links/).
### Verifique a cadeia de redirecionamento {#check-the-redirect-chain}
Alguns ESPs realizam um redirecionamento da URL de rastreamento de cliques para sua URL final. Links universais só funcionam se o iOS reconhecer o domínio *inicial* (o domínio de rastreamento de cliques) como associado ao seu app. Se o redirecionamento contornar a verificação do AASA, o link será aberto no Safari.
Para testar:
1. Envie um e-mail de teste para você mesmo.
2. Toque e segure o link e inspecione a URL — essa é a URL de rastreamento de cliques.
3. Verifique se esse domínio possui um arquivo AASA válido.
## O deep link funciona a partir de push, mas não a partir de mensagens no app (ou vice-versa) {#deep-link-works-from-push-but-not-from-in-app-messages-or-vice-versa}
### Verifique o BrazeDelegate {#check-the-brazedelegate}
Se você implementar `BrazeDelegate.braze(_:shouldOpenURL:)`, verifique se ele lida com links de forma consistente entre os canais. O parâmetro `context` inclui o canal de origem. Procure lógica condicional que possa filtrar acidentalmente links de canais específicos.
### Ative o registro detalhado {#enable-verbose-logging}
[Ative o registro detalhado](https://www.braze.com/docs/pt-br/pt-br/developer_guide/sdk_integration/verbose_logging/) e reproduza o problema. Procure a entrada de registro `Opening`:
```
Opening '':
- channel:
- useWebView:
- isUniversalLink:
```
Compare a saída do registro para o canal que funciona vs. o canal que não funciona. Diferenças em `useWebView` ou `isUniversalLink` indicam como o SDK está interpretando o link de forma diferente.
### Verifique se há delegates de exibição personalizados {#check-for-custom-display-delegates}
Se você usar um delegate de exibição de mensagem no app personalizado ou um manipulador de clique de Content Card personalizado, verifique se ele passa corretamente os eventos de link para o SDK da Braze para tratamento.
## "Open Web URL Inside App" mostra uma página em branco ou quebrada {#open-web-url-inside-app-shows-a-blank-or-broken-page}
Se selecionar **Open Web URL Inside App** resultar em uma WebView em branco ou quebrada:
1. **Verifique se a URL usa HTTPS.** A WebView do SDK requer URLs compatíveis com ATS. Links HTTP falham silenciosamente.
2. **Verifique os cabeçalhos de Content Security Policy.** Se a página da web de destino definir `X-Frame-Options: DENY` ou um `Content-Security-Policy` restritivo, isso bloqueia a renderização em uma WebView.
3. **Verifique se há redirecionamentos para esquemas personalizados.** Se a página da web redirecionar para um esquema personalizado (por exemplo, `myapp://`), a WebView não consegue lidar com isso.
4. **Teste a URL no Safari.** Se a página não carregar no Safari no dispositivo, ela também não carregará na WebView.
## Solução de problemas do Branch com a Braze {#branch}
Se você usar o [Branch](https://www.braze.com/docs/pt-br/pt-br/partners/message_orchestration/deeplinking/branch_for_deeplinking/) como seu provedor de links:
### Verifique se o BrazeDelegate encaminha para o Branch {#verify-the-brazedelegate-routes-to-branch}
Seu `BrazeDelegate` deve interceptar links do Branch e passá-los para o SDK do Branch. Verifique o seguinte:
```swift
func braze(_ braze: Braze, shouldOpenURL context: Braze.URLContext) -> Bool {
if let host = context.url.host, host.contains("app.link") {
// Route to Branch SDK
Branch.getInstance.handleDeepLink(context.url)
return false
}
// Let Braze handle other links
return true
}
```
Se `shouldOpenURL` retornar `true` para links do Branch, a Braze os manipula diretamente em vez de encaminhá-los para o Branch.
### Verifique o domínio do link do Branch {#check-branch-link-domain}
Verifique se o domínio do Branch no seu `BrazeDelegate` corresponde ao seu domínio real do link do Branch. O Branch usa vários formatos de domínio:
- `yourapp.app.link` (padrão)
- `yourapp-alternate.app.link` (alternativo)
- Domínios personalizados (se configurados no dashboard do Branch)
### Ative o registro de ambos os SDKs {#enable-both-sdks-logging}
Para diagnosticar onde o link quebra na cadeia:
1. Ative o [registro detalhado da Braze](https://www.braze.com/docs/pt-br/pt-br/developer_guide/sdk_integration/verbose_logging/) — procure entradas `Opening '':` para verificar se o SDK recebeu o link.
2. Ative o [modo de teste do Branch](https://help.branch.io/developers-hub/docs/ios-basic-integration#test-deep-linking) — verifique o dashboard do Branch para eventos de clique em links.
1. Ative o [registro detalhado da Braze](https://www.braze.com/docs/pt-br/pt-br/developer_guide/sdk_integration/verbose_logging/). Procure entradas `Opening '':` para verificar se o SDK recebeu o link.
2. Ative o [modo de teste do Branch](https://help.branch.io/developers-hub/docs/ios-basic-integration#test-deep-linking). Verifique o dashboard do Branch para eventos de clique em links.
3. Se a Braze registrar o link, mas o Branch não detectar um clique, a lógica de roteamento do `BrazeDelegate` é provavelmente o problema.
### Verifique a configuração do dashboard do Branch {#check-branch-dashboard-configuration}
No dashboard do Branch, verifique:
- O **Bundle ID** e o **Team ID** do seu app correspondem ao seu projeto Xcode.
- Seus **Associated Domains** incluem o domínio do link do Branch.
- Seu arquivo AASA do Branch é válido (o Branch hospeda isso automaticamente em domínios `app.link`).
### Teste os links do Branch de forma independente {#test-branch-links-independently}
Teste o link do Branch fora da Braze para isolar o problema:
1. Abra o link do Branch no Safari no seu dispositivo. Se não abrir o app, o problema está na sua configuração do Branch ou AASA — não na Braze.
2. Cole o link do Branch no app Notas e toque nele. Links universais funcionam de forma mais confiável a partir do Notas do que da barra de endereços do Safari.
## Dicas gerais de depuração {#general-debugging-tips}
### Use o registro detalhado {#use-verbose-logging}
[Ative o registro detalhado](https://www.braze.com/docs/pt-br/pt-br/developer_guide/sdk_integration/verbose_logging/) para ver exatamente como o SDK processa os links. Entradas-chave a serem observadas:
| Entrada de registro | O que significa |
|---|---|
| `Opening '': - channel: notification` | O SDK está processando um link de uma notificação por push |
| `Opening '': - channel: inAppMessage` | O SDK está processando um link de uma mensagem no app |
| `Opening '': - channel: contentCard` | O SDK está processando um link de um Content Card |
| `useWebView: true` | O SDK abre a URL na WebView do app |
| `isUniversalLink: true` | O SDK identificou a URL como um link universal |
{: .reset-td-br-1 .reset-td-br-2 aria-label="Usar registro detalhado" }
Para mais detalhes sobre como ler esses registros, consulte [Lendo registros detalhados](https://www.braze.com/docs/pt-br/pt-br/developer_guide/sdk_integration/verbose_logging/).
### Teste links em isolamento {#test-links-in-isolation}
Antes de testar pela Braze, verifique se seu deep link ou link universal funciona por conta própria:
- **Esquema personalizado**: Execute `xcrun simctl openurl booted "myapp://path"` no Terminal.
- **Link universal**: Cole a URL no app Notas em um dispositivo físico e toque nela. Não teste a partir da barra de endereços do Safari, pois o iOS trata URLs digitadas de forma diferente de links tocados.
- **Link do Branch**: Abra o link do Branch a partir do app Notas em um dispositivo.
### Teste em um dispositivo físico {#test-on-a-physical-device}
Links universais têm suporte limitado no simulador iOS. Sempre teste em um dispositivo físico para resultados precisos. Se você precisar testar em um simulador, adicione o arquivo `.entitlements` à fase de build **Copy Bundle Resources**.
# Configure notificações por push silenciosas para o SDK Braze
Source: /docs/pt-br/developer_guide/push_notifications/silent/index.md
# Notificações por push silenciosas
> Aprenda como configurar notificações por push silenciosas para o SDK Braze.
## Prerequisites
Before you can use this feature, you'll need to [integrate the Android Braze SDK](https://www.braze.com/docs/pt-br/pt-br/developer_guide/sdk_integration/?sdktab=android). You'll also need to [set up push notifications](https://www.braze.com/docs/pt-br/pt-br/developer_guide/push_notifications/?sdktab=android).
## Setting up silent push notifications
Silent notifications are available through the Braze [Messaging API](https://www.braze.com/docs/pt-br/pt-br/api/endpoints/messaging/). To take advantage of them, you need to set the `send_to_sync` flag to `true` within the [Android push object](https://www.braze.com/docs/pt-br/pt-br/api/objects_filters/messaging/android_object/) and ensure there are no `title` or `alert` fields set as it will cause errors when used alongside `send_to_sync`—however, you can include data `extras` within the object.
## Prerequisites
Before you can use this feature, you'll need to [integrate the Swift Braze SDK](https://www.braze.com/docs/pt-br/pt-br/developer_guide/sdk_integration/?sdktab=swift). You'll also need to [set up push notifications](https://www.braze.com/docs/pt-br/pt-br/developer_guide/push_notifications/?sdktab=swift).
## iOS limitations
The iOS operating system may gate notifications for some features. Note that if you are experiencing difficulties with these features, the iOS's silent notifications gate might be the cause. For more details, refer to Apple's [instance method](https://developer.apple.com/documentation/uikit/uiapplicationdelegate/1623013-application) and [unreceived notifications](https://developer.apple.com/library/content/technotes/tn2265/_index.html#//apple_ref/doc/uid/DTS40010376-CH1-TNTAG23) documentation.
## Setting up silent push notifications
To use silent push notifications to trigger background work, you must configure your app to receive notifications even when it is in the background. To do this, add the Background Modes capability using the **Signing & Capabilities** pane to the main app target in Xcode. Select the **Remote notifications** checkbox.

Even with the remote notifications background mode enabled, the system will not launch your app into the background if the user has force-quit the application. The user must explicitly launch the application or reboot the device before the app can be automatically launched into the background by the system.
For more information, refer to [pushing background updates](https://developer.apple.com/documentation/usernotifications/setting_up_a_remote_notification_server/pushing_background_updates_to_your_app) and the `application:didReceiveRemoteNotification:fetchCompletionHandler:` [documentation](https://developer.apple.com/library/ios/documentation/UIKit/Reference/UIApplicationDelegate_Protocol/index.html#//apple_ref/occ/intfm/UIApplicationDelegate/application:didReceiveRemoteNotification:fetchCompletionHandler:).
## Sending silent push notifications
To send a silent push notification, set the `content-available` flag to `1` in a push notification payload.
**Note:**
What Apple calls a remote notification is just a normal push notification with the `content-available` flag set.
The `content-available` flag can be set in the Braze dashboard as well as within our [Apple push object](https://www.braze.com/docs/pt-br/pt-br/api/objects_filters/messaging/apple_object/) in the [messaging API](https://www.braze.com/docs/pt-br/pt-br/api/endpoints/messaging/).
**Warning:**
Attaching both a title and body with `content-available=1` is not recommended because it can lead to undefined behavior. To ensure that a notification is truly silent, exclude both the title and body when setting the `content-available` flag to `1.` For further details, refer to the official [Apple documentation on background updates](https://developer.apple.com/documentation/usernotifications/setting_up_a_remote_notification_server/pushing_background_updates_to_your_app).

When sending a silent push notification, you might also want to include some data in the notification payload, so your application can reference the event. This could save you a few networking requests and increase the responsiveness of your app.
## Ignoring internal push notifications
Braze uses silent push notifications to internally handle certain advanced features, such as uninstall tracking. If your app takes automatic actions on application launches or background pushes, consider gating that activity so it's not triggered by any internal push notifications.
For example, if you have logic that calls your servers for new content upon every background push or application launch, you may want to prevent triggering Braze’s internal pushes to avoid unnecessary network traffic. Because Braze sends certain kinds of internal pushes to all users at approximately the same time, significant server load may occur if on-launch network calls from internal pushes are not gated.
### Step 1: Check your app for automatic actions
Check your application for automatic actions in the following places and update your code to ignore Braze’s internal pushes:
1. **Push Receivers.** Background push notifications will call `application:didReceiveRemoteNotification:fetchCompletionHandler:` on the `UIApplicationDelegate`.
2. **Application Delegate.** Background pushes can launch [suspended](https://developer.apple.com/documentation/uikit/app_and_environment/managing_your_app_s_life_cycle) apps into the background, triggering the `application:willFinishLaunchingWithOptions:` and `application:didFinishLaunchingWithOptions:` methods on your `UIApplicationDelegate`. Check the `launchOptions` of these methods to determine if the application has been launched from a background push.
### Step 2: Use the internal push utility method
You can use the static utility method in `Braze.Notifications` to check if your app has received or was launched by a Braze internal push. [`Braze.Notifications.isInternalNotification(_:)`](https://braze-inc.github.io/braze-swift-sdk/documentation/brazekit/braze/notifications-swift.class/isinternalnotification(_:)) returns `true` for all Braze internal push notifications, which include uninstall tracking and [Feature flags](https://www.braze.com/docs/pt-br/pt-br/user_guide/messaging/feature_flags/) sync notifications.
For example:
```swift
func application(_ application: UIApplication,
didReceiveRemoteNotification userInfo: [AnyHashable : Any],
fetchCompletionHandler completionHandler: @escaping (UIBackgroundFetchResult) -> Void) {
if (!Braze.Notifications.isInternalNotification(userInfo)) {
// Gated logic here (for example pinging server for content)
}
}
```
```objc
- (void)application:(UIApplication *)application didReceiveRemoteNotification:(NSDictionary *)userInfo fetchCompletionHandler:(void (^)(UIBackgroundFetchResult result))completionHandler {
if (![BRZNotifications isInternalNotification:userInfo]) {
// Gated logic here (for example pinging server for content)
}
}
```
## Prerequisites
Before you can use this feature, you'll need to [integrate the Android Braze SDK](https://www.braze.com/docs/pt-br/pt-br/developer_guide/sdk_integration/?sdktab=android). You'll also need to [set up push notifications](https://www.braze.com/docs/pt-br/pt-br/developer_guide/push_notifications/?sdktab=android).
## Setting up silent push notifications
Silent notifications are available through the Braze [Messaging API](https://www.braze.com/docs/pt-br/pt-br/api/endpoints/messaging/). To take advantage of them, you need to set the `send_to_sync` flag to `true` within the [Android push object](https://www.braze.com/docs/pt-br/pt-br/api/objects_filters/messaging/android_object/) and ensure there are no `title` or `alert` fields set as it will cause errors when used alongside `send_to_sync`—however, you can include data `extras` within the object.
# Configure notificações por push ricas para o SDK Braze
Source: /docs/pt-br/developer_guide/push_notifications/rich/index.md
# Notificações de Rich push
> Aprenda como configurar notificações por push ricas para o SDK Braze.
## Prerequisites
Before you can use this feature, you'll need to [integrate the Swift Braze SDK](https://www.braze.com/docs/pt-br/pt-br/developer_guide/sdk_integration/?sdktab=swift). You'll also need to [set up push notifications](https://www.braze.com/docs/pt-br/pt-br/developer_guide/push_notifications/?sdktab=swift).
## Setting up rich push notifications
### Step 1: Creating a service extension
To create a [notification service extension](https://developer.apple.com/reference/usernotifications/unnotificationserviceextension), navigate to **File > New > Target** in Xcode and select **Notification Service Extension**.
{: style="max-width:90%"}
Ensure that **Embed In Application** is set to embed the extension in your application.
### Step 2: Setting up the notification service extension
A notification service extension is its own binary that is bundled with your app. It must be set up in the [Apple Developer Portal](https://developer.apple.com) with its own app ID and provisioning profile.
The notification service extension's bundle ID must be distinct from your main app target's bundle ID. For example, if your app's bundle ID is `com.company.appname`, you can use `com.company.appname.AppNameServiceExtension` for your service extension.
### Step 3: Adding an App Group
In Xcode, add the App Groups capability from the **Signing & Capabilities** pane to your main app target as well as the Notification Service Extension target. Then, click the **+** button. Use your app's bundle ID to create the app group. For example, if your app's bundle ID is `com.company.appname`, you can name your app group `group.com.company.appname.xyz`.
**Important:**
App Groups in this context refer to Apple's [App Groups Entitlement](https://developer.apple.com/documentation/bundleresources/entitlements/com_apple_security_application-groups) and not your Braze workspace (previously app group) ID.
You need a shared App Group so your main app and the Notification Service Extension can access shared data. If you do not add your app to an app group, your app may fail to populate certain fields from the push payload and will not work fully as expected.
### Step 4: Integrating rich push notifications
For a step-by-step guide on integrating rich push notifications with `BrazeNotificationService`, refer to our [tutorial](https://braze-inc.github.io/braze-swift-sdk/tutorials/braze/b2-rich-push-notifications).
To see a sample, refer to the usage in [`NotificationService`](https://github.com/braze-inc/braze-swift-sdk/blob/main/Examples/Swift/Sources/PushNotificationsServiceExtension/NotificationService.swift) of our Examples app.
#### Adding the rich push framework to your app
After following the [Swift Package Manager integration guide](https://www.braze.com/docs/pt-br/pt-br/developer_guide/platform_integration_guides/swift/sdk_integration/?tab=swift%20package%20manager/), add `BrazeNotificationService` to your `Notification Service Extension` by doing the following:
1. In Xcode, under frameworks and libraries, select the add icon to add a framework.

2. Select the "BrazeNotificationService" framework.

Add the following to your Podfile:
```ruby
target 'YourAppTarget' do
pod 'BrazeKit'
pod 'BrazeUI'
pod 'BrazeLocation'
end
target 'YourNotificationServiceExtensionTarget' do
pod 'BrazeNotificationService'
end
# Only include the below if you want to also integrate Push Stories
target 'YourNotificationContentExtensionTarget' do
pod 'BrazePushStory'
end
```
**Note:**
For instructions to implement Push Stories, see the [documentation](https://www.braze.com/docs/pt-br/pt-br/developer_guide/platform_integration_guides/swift/push_notifications/push_story/?tab=swift%20package%20manager).
After updating the Podfile, navigate to the directory of your Xcode app project within your terminal and run `pod install`.
To add `BrazeNotificationService.xcframework` to your `Notification Service Extension`, see [Manual integration](https://www.braze.com/docs/pt-br/pt-br/developer_guide/platform_integration_guides/swift/sdk_integration?tab=manual/).

#### Using your own UNNotificationServiceExtension
If you need to use your own UNNotificationServiceExtension, you can instead call [`brazeHandle`](https://braze-inc.github.io/braze-swift-sdk/documentation/brazenotificationservice/brazehandle(request:contenthandler:)) in your `didReceive` method.
```swift
import BrazeNotificationService
import UserNotifications
class NotificationService: UNNotificationServiceExtension {
override func didReceive(
_ request: UNNotificationRequest,
withContentHandler contentHandler: @escaping (UNNotificationContent) -> Void
) {
if brazeHandle(request: request, contentHandler: contentHandler) {
return
}
// Custom handling here
contentHandler(request.content)
}
}
```
### Step 5: Configuring the App Group in Braze
Before initializing Braze, assign the name of your app group to your Braze configuration's [`push.appGroup`](https://braze-inc.github.io/braze-swift-sdk/documentation/brazekit/braze/configuration-swift.class/push-swift.class/appgroup) property.
```swift
let configuration = Braze.Configuration(apiKey: "",
endpoint: "")
configuration.push.appGroup = "REPLACE_WITH_APPGROUP"
let braze = Braze(configuration: configuration)
```
### Step 6: Creating a rich notification in your dashboard
Your marketing team can also create rich notifications from the dashboard. Create a push notification through the push composer and attach an image or GIF, or provide a URL that hosts an image, GIF, or video. Note that assets are downloaded on the receipt of push notifications, so you should plan for large, synchronous spikes in requests if you are hosting your content.
## Prerequisites
Before you can use this feature, you'll need to [integrate the Cordova Braze SDK](https://www.braze.com/docs/pt-br/pt-br/developer_guide/sdk_integration/?sdktab=cordova). You'll also need to [set up push notifications](https://www.braze.com/docs/pt-br/pt-br/developer_guide/push_notifications/?sdktab=cordova).
## Setting up rich push notifications
### Step 1: Create a notification service extension
In your Xcode project, create a notification service extension. For a full walkthrough, see [iOS Rich Push Notifications Tutorial](https://braze-inc.github.io/braze-swift-sdk/tutorials/braze/b2-rich-push-notifications).
### Step 2: Add a new target
Open your Podfile and add `BrazeNotificationService` to the notification service extension target [you just created](#cordova_step-1-create-a-notification-service-extension). If `BrazeNotificationService` is already added to a target, remove it before continuing. To avoid duplicate symbol errors, use static linking.
```ruby
target 'NOTIFICATION_SERVICE_EXTENSION' do
use_frameworks! :linkage => :static
pod 'BrazeNotificationService'
end
```
Replace `NOTIFICATION_SERVICE_EXTENSION` with the name of your notification service extension. Your Podfile should be similar to the following:
```ruby
target 'MyAppRichNotificationService' do
use_frameworks! :linkage => :static
pod 'BrazeNotificationService'
end
```
### Step 3: Reinstall your CocoaPods dependencies
In the terminal, go to your project's iOS directory and reinstall your CocoaPod dependencies.
```bash
cd PATH_TO_PROJECT/platform/ios
pod install
```
## Prerequisites
Before you can use this feature, you'll need to [integrate the React Native Braze SDK](https://www.braze.com/docs/pt-br/pt-br/developer_guide/sdk_integration/?sdktab=react%20native). You'll also need to [set up push notifications](https://www.braze.com/docs/pt-br/pt-br/developer_guide/push_notifications/?sdktab=react%20native).
## Using Expo to enable rich push notifications
For the React Native SDK, **rich push notifications are available for Android by default**.
To enable rich push notifications on iOS using Expo, configure the `enableBrazeIosRichPush` property to `true` in your `expo.plugins` object in `app.json`:
```json
{
"expo": {
"plugins": [
[
"@braze/expo-plugin",
{
...
"enableBrazeIosRichPush": true
}
]
]
}
}
```
Lastly, add the bundle identifier for this app extension to your project's credentials configuration: `.BrazeExpoRichPush`. For further details on this process, refer to [Using app extensions with Expo Application Services](https://www.braze.com/docs/pt-br/pt-br/developer_guide/push_notifications/?sdktab=react%20native#reactnative_app-extensions).
# Configure histórias de push para o SDK do Braze
Source: /docs/pt-br/developer_guide/push_notifications/push_stories/index.md
# Stories por push
> Aprenda como configurar histórias de push para o SDK do Braze.
## Prerequisites
Before you can use this feature, you'll need to [integrate the Swift Braze SDK](https://www.braze.com/docs/pt-br/pt-br/developer_guide/sdk_integration/?sdktab=swift). You'll also need to [set up push notifications](https://www.braze.com/docs/pt-br/pt-br/developer_guide/push_notifications/?sdktab=swift), which includes implementing the `UNNotification` framework.
The following minimum SDK version is required to receive Push Stories:
## Setting up Push Stories
### Step 1: Adding the Notification Content Extension target {#notification-content-extension}
In your app project, go to menu **File > New > Target** and add a new `Notification Content Extension` target and activate it.

Xcode should generate a new target for you and create files automatically for you including:
- `NotificationViewController.swift`
- `MainInterface.storyboard`
### Step 2: Enable capabilities {#enable-capabilities}
In Xcode, add the Background Modes capability using the **Signing & Capabilities** pane to the main app target. Select both the **Background fetch** and **Remote notifications** checkboxes.

#### Adding an App Group
Additionally, from the **Signing & Capabilities** pane in Xcode, add the App Groups capability to your main app target as well as the Notification Content Extension targets. Then, click the **+** button. Use your app's bundle ID to create the app group. For example, if your app's bundle ID is `com.company.appname`, you can name your app group `group.com.company.appname.xyz`.
**Important:**
App Groups in this context refer to Apple's [App Groups Entitlement](https://developer.apple.com/documentation/bundleresources/entitlements/com_apple_security_application-groups) and not your Braze workspace (previously app group) ID.
If you do not add your app to an App Group, your app may fail to populate certain fields from the push payload and will not work fully as expected.
### Step 3: Adding the Push Story framework to your app {#enable-capabilities}
After following the [Swift Package Manager integration guide](https://www.braze.com/docs/pt-br/pt-br/developer_guide/platform_integration_guides/swift/sdk_integration/?tab=swift%20package%20manager/), add `BrazePushStory` to your `Notification Content Extension`:


Add the following line to your Podfile:
```ruby
target 'YourAppTarget' do
pod 'BrazeKit'
pod 'BrazeUI'
pod 'BrazeLocation'
end
target 'YourNotificationContentExtensionTarget' do
pod 'BrazePushStory'
end
# Only include the below if you want to also integrate Rich Push
target 'YourNotificationServiceExtensionTarget' do
pod 'BrazeNotificationService'
end
```
**Note:**
For instructions to implement Rich Push, see [Rich notifications](https://www.braze.com/docs/pt-br/pt-br/developer_guide/platform_integration_guides/swift/push_notifications/customization/rich_notifications/?tab=swift%20package%20manager).
After updating the Podfile, navigate to the directory of your Xcode app project within your terminal and run `pod install`.
Download the latest `BrazePushStory.zip` from the [GitHub release page](https://github.com/braze-inc/braze-swift-sdk/releases), extract it, and add the `BrazePushStory.xcframework` to your project's `Notification Content Extension`.

**Important:**
Make sure that **Do Not Embed** is selected for **BrazePushStory.xcframework** under the **Embed** column.
### Step 4: Updating your notification view controller {#enable-capabilities}
In `NotificationViewController.swift`, add the following line to import the header files:
```swift
import BrazePushStory
```
Next, replace the default implementation by inheriting [`BrazePushStory.NotificationViewController`](https://braze-inc.github.io/braze-swift-sdk/documentation/brazepushstory/notificationviewcontroller/):
```swift
class NotificationViewController: BrazePushStory.NotificationViewController {}
```
#### Custom handling push story events
If you want to implement your own custom logic to handle push story notification events, inherit `BrazePushStory.NotificationViewController` as above and override the [`didReceive`](https://braze-inc.github.io/braze-swift-sdk/documentation/brazepushstory/notificationviewcontroller/didreceive(_:)) methods as below.
```swift
import BrazePushStory
import UserNotifications
import UserNotificationsUI
class NotificationViewController: BrazePushStory.NotificationViewController {
override func didReceive(_ notification: UNNotification) {
super.didReceive(notification)
// Custom handling logic
}
override func didReceive(_ response: UNNotificationResponse, completionHandler completion: @escaping (UNNotificationContentExtensionResponseOption) -> Void) {
super.didReceive(response, completionHandler: completion)
// Custom handling logic
}
}
```
### Step 5: Setting the Notification Content Extension plist {#notification-content-extension}
Open the `Info.plist` file of the `Notification Content Extension`, then add and change the following keys under `NSExtension \ NSExtensionAttributes`:
| Key | Type | Value |
|--------------------------------------------------|---------|------------------------|
| `UNNotificationExtensionCategory` | String | `ab_cat_push_story_v2` |
| `UNNotificationExtensionDefaultContentHidden` | Boolean | `YES` |
| `UNNotificationExtensionInitialContentSizeRatio` | Number | `0.6` |
| `UNNotificationExtensionUserInteractionEnabled` | Boolean | `YES` |
{: .reset-td-br-1 .reset-td-br-2 .reset-td-br-3 aria-label="Step 5: Setting the Notification Content Extension plist #notification-content-extension" }
Additionally, add the following top-level `Braze` dictionary to the same `Info.plist` file, replacing `REPLACE_WITH_APPGROUP` with the App Group you created in [Step 2](#enable-capabilities):
| Key | Type | Value |
|------------------|--------|--------------------------|
| `Braze.AppGroup` | String | `REPLACE_WITH_APPGROUP` |
{: .reset-td-br-1 .reset-td-br-2 .reset-td-br-3 aria-label="Step 5: Setting the Notification Content Extension plist #notification-content-extension" }
Your `Info.plist` file should match the following image:

### Step 6: Updating the Braze integration in your main app {#update-braze}
Before initializing Braze, assign the name of your app group to your Braze configuration's [`push.appGroup`](https://braze-inc.github.io/braze-swift-sdk/documentation/brazekit/braze/configuration-swift.class/push-swift.class/appgroup) property.
```swift
let configuration = Braze.Configuration(apiKey: "",
endpoint: "")
configuration.push.appGroup = "REPLACE_WITH_APPGROUP"
let braze = Braze(configuration: configuration)
```
## Prerequisites
Before you can use this feature, you'll need to [integrate the Cordova Braze SDK](https://www.braze.com/docs/pt-br/pt-br/developer_guide/sdk_integration/?sdktab=cordova). You'll also need to [set up push notifications](https://www.braze.com/docs/pt-br/pt-br/developer_guide/push_notifications/?sdktab=cordova).
## Setting up push stories
### Step 1: Create a notification content extension
In your Xcode project, create a notification content extension. For a full walkthrough, see [iOS Push Stories Tutorial](https://braze-inc.github.io/braze-swift-sdk/tutorials/braze/b3-push-stories/).
### Step 2: Configure your push app group
In your project's `config.xml` file, configure the push app group [you just created](#cordova_step-1-create-a-notification-content-extension).
```xml
```
Replace `PUSH_APP_GROUP` with the name of your push app group. Your `config.xml` should be similar to the following:
```xml
```
### Step 3: Add a new target
Open your Podfile and add `BrazePushStory` to the notification content extension target [you created previously](#cordova_step-1-create-a-notification-content-extension). To avoid duplicate symbol errors, use static linking.
```ruby
target 'NOTIFICATION_CONTENT_EXTENSION' do
use_frameworks! :linkage => :static
pod 'BrazePushStory'
end
```
Replace `NOTIFICATION_CONTENT_EXTENSION` with the name of your notification content extension. Your Podfile should be similar to the following:
```ruby
target 'MyAppNotificationContentExtension' do
use_frameworks! :linkage => :static
pod 'BrazePushStory'
end
```
### Step 4: Reinstall your CocoaPods dependencies
In the terminal, go to your iOS directory and reinstall your CocoaPod dependencies.
```bash
cd PATH_TO_PROJECT/platform/ios
pod install
```
## Prerequisites
Before you can use this feature, you'll need to [integrate the React Native Braze SDK](https://www.braze.com/docs/pt-br/pt-br/developer_guide/sdk_integration/?sdktab=react%20native). You'll also need to [set up push notifications](https://www.braze.com/docs/pt-br/pt-br/developer_guide/push_notifications/?sdktab=react%20native).
## Enabling push stories
For the React Native SDK, **push stories are available for Android by default**.
To enable Push Stories on iOS using Expo, ensure you have an app group defined for your application. For more information, see [Adding an App Group](https://www.braze.com/docs/pt-br/pt-br/developer_guide/platform_integration_guides/swift/push_notifications/push_story/#adding-an-app-group).
Next, configure the `enableBrazeIosPushStories` property to `true` and assign your app group ID to `iosPushStoryAppGroup` in your `expo.plugins` object in `app.json`:
```json
{
"expo": {
"plugins": [
[
"@braze/expo-plugin",
{
...
"enableBrazeIosPushStories": true,
"iosPushStoryAppGroup": "group.com.company.myApp.PushStories"
}
]
]
}
}
```
Lastly, add the bundle identifier for this app extension to your project's credentials configuration: `.BrazeExpoPushStories`. For further details on this process, refer to [Using app extensions with Expo Application Services](https://www.braze.com/docs/pt-br/pt-br/developer_guide/push_notifications/?sdktab=react%20native#reactnative_app-extensions).
**Warning:**
If you are using Push Stories with Expo Application Services, be sure to use the `EXPO_NO_CAPABILITY_SYNC=1` flag when running `eas build`. There is a known issue in the command line which removes the App Groups capability from your extension's provisioning profile.
# Configure prompts de soft push para o SDK do Braze
Source: /docs/pt-br/developer_guide/push_notifications/soft_push_prompts/index.md
# Prompts de soft push para Web
> Aprenda como configurar prompts de soft push para o SDK do Braze.
## Prerequisites
Before you can use this feature, you'll need to [integrate the Web Braze SDK](https://www.braze.com/docs/pt-br/pt-br/developer_guide/sdk_integration/?sdktab=web). You'll also need to [set up push notifications](https://www.braze.com/docs/pt-br/pt-br/developer_guide/push_notifications/?sdktab=web).
If you're integrating Braze through mParticle's embedded kit on the web, see [Step 3 in mParticle's Braze Web event integration](https://docs.mparticle.com/integrations/braze/event/#web) for instructions to implement soft push prompts.
## About soft push prompts
It's often a good idea for sites to implement a "soft" push prompt where you "prime" the user and make your case for sending them push notifications before requesting push permission. This is useful because the browser throttles how often you may prompt the user directly, and if the user denies permission you can never ask them again.
Alternatively, if you would like to include special custom handling, instead of calling `requestPushPermission()` directly as described in the standard [Web push integration](https://www.braze.com/docs/pt-br/pt-br/developer_guide/platform_integration_guides/web/push_notifications/integration/#step-2-browser-registration), use our [triggered in-app messages](https://www.braze.com/docs/pt-br/pt-br/developer_guide/in_app_messages/triggering_messages/?tab=web).
**Tip:**
This can be done without SDK customization using our new [no code push primer](https://www.braze.com/docs/pt-br/pt-br/user_guide/message_building_by_channel/push/best_practices/push_primer_messages/).
## Setting up soft push prompts
**Note:**
This guide uses code samples from the Braze Web SDK 4.0.0+. To upgrade to the latest Web SDK version, see [SDK Upgrade Guide](https://github.com/braze-inc/braze-web-sdk/blob/master/UPGRADE_GUIDE.md).
### Step 1: Create a push primer campaign
First, you must create a "Prime for Push" in-app messaging campaign in the Braze dashboard:
1. Create a **Modal** in-app message with the text and styling you want.
2. Next, set the on-click behavior to **Close Message**. This behavior will be customized later.
3. Add a key-value pair to the message where the key is `msg-id`, and the value is `push-primer`.
4. Assign a custom event trigger action (such as "prime-for-push") to the message. You can create the custom event manually from the dashboard if needed.
### Step 2: Remove calls
In your Braze SDK integration, find and remove any calls to `automaticallyShowInAppMessages()` from within your loading snippet.
### Step 3: Update integration
Finally, replace the removed call with the following snippet. Call `subscribeToInAppMessage()` before calling `openSession()`. This ensures your in-app message listener is registered in time to receive the push primer message.
```javascript
import * as braze from "@braze/web-sdk";
// Be sure to remove any calls to braze.automaticallyShowInAppMessages()
braze.subscribeToInAppMessage(function(inAppMessage) {
// check if message is not a control variant
if (inAppMessage instanceof braze.inAppMessage) {
// access the key-value pairs, defined as `extras`
const keyValuePairs = inAppMessage.extras || {};
// check the value of our key `msg-id` defined in the Braze dashboard
if (keyValuePairs["msg-id"] === "push-primer") {
// We don't want to display the soft push prompt to users on browsers
// that don't support push, or if the user has already granted/blocked permission
if (
braze.isPushSupported() === false ||
braze.isPushPermissionGranted() ||
braze.isPushBlocked()
) {
// do not call `showInAppMessage`
return;
}
// user is eligible to receive the native prompt
// register a click handler on one of the two buttons
if (inAppMessage.buttons[0]) {
// Prompt the user when the first button is clicked
inAppMessage.buttons[0].subscribeToClickedEvent(function() {
braze.requestPushPermission(
function() {
// success!
},
function() {
// user declined
}
);
});
}
}
}
// show the in-app message now
braze.showInAppMessage(inAppMessage);
});
```
When you wish to display the soft push prompt to the user, call `braze.logCustomEvent` - with whatever event name triggers this in-app message.
# Análise de dados de push e registro de eventos personalizados
Source: /docs/pt-br/developer_guide/push_notifications/logging_message_data/index.md
# Análise de dados de push e registro de eventos personalizados {#push-analytics-and-custom-event-logging}
> Esta página aborda os seguintes fluxos de trabalho: análise de dados nativa de push (aberturas, aberturas por influência e relatórios de Campaign) e registro de dados personalizados (eventos personalizados e atributos) a partir de cargas úteis de push. Use este guia para identificar qual fluxo de trabalho se aplica ao seu caso de uso e siga as etapas para a sua plataforma.
## Pré-requisitos {#prerequisites}
Antes de começar, conclua a integração inicial de notificações por push para a sua plataforma:
- [Notificações por push para Android](https://www.braze.com/docs/pt-br/pt-br/developer_guide/push_notifications/?sdktab=android)
- [Notificações por push para Swift](https://www.braze.com/docs/pt-br/pt-br/developer_guide/push_notifications/?sdktab=swift)
- [Notificações por push para web](https://www.braze.com/docs/pt-br/pt-br/developer_guide/push_notifications/?sdktab=web)
## Análise de dados nativa de push vs. registro de eventos personalizados {#native-push-analytics-vs-custom-event-logging}
Os fluxos de trabalho a seguir possuem superfícies de relatório diferentes.
| Categoria de análise de dados | Descrição | Onde aparece |
| --- | --- | --- |
| Análise de dados nativa de push | Métricas de push como aberturas e aberturas por influência, vinculadas a Campaigns de push da Braze | Análise de dados de Campaigns de push, eventos de engajamento com mensagem do Currents, Criador de relatórios |
| Eventos personalizados e atributos | Análise de dados que você define e registra por meio de métodos do SDK ou do endpoint `/users/track` | Perfis de usuário, segmentação, Campaigns e Canvas baseados em ação, análise de dados de eventos personalizados |
{: .reset-td-br-1 .reset-td-br-2 .reset-td-br-3 aria-label="Análise de dados nativa de push vs. registro de eventos personalizados" }
**Important:**
Registrar um evento personalizado (como `push_notification_opened`) não é o mesmo que o rastreamento nativo de abertura de push da Braze. Eventos personalizados não preenchem as métricas nativas de abertura de Campaigns de push nem a atribuição de push.
## O que a Braze registra automaticamente {#what-braze-logs-automatically}
Quando a integração do SDK está configurada, a Braze registra automaticamente os dados principais de interação do canal, incluindo aberturas de push e aberturas por influência. Nenhum código adicional é necessário para a análise de dados padrão de push. Para uma lista completa dos dados coletados automaticamente, consulte [Coleta de dados do SDK](https://www.braze.com/docs/pt-br/pt-br/user_guide/data/unification/user_data/sdk_data_collection/).
Para saber mais, consulte:
- [Coleta de dados do SDK](https://www.braze.com/docs/pt-br/pt-br/user_guide/data/unification/user_data/sdk_data_collection/) para uma lista completa de dados coletados automaticamente e opcionais.
- [Aberturas por influência](https://www.braze.com/docs/pt-br/pt-br/user_guide/analytics/tracking/influenced_opens/) para saber como a Braze calcula as aberturas por influência.
- [Eventos de engajamento com mensagem](https://www.braze.com/docs/pt-br/pt-br/user_guide/data/distribution/braze_currents/event_glossary/message_engagement_events/) para esquemas de eventos downstream no Currents.
## Preservando a análise de dados nativa de push com tratamento personalizado de push {#preserving-native-push-analytics-with-custom-push-handling}
Você pode usar um manipulador de push personalizado quando precisa integrar vários provedores de push, processar dados adicionais da carga útil ou implementar lógica personalizada de exibição de notificações. Se você usar um manipulador de push personalizado, ainda precisará passar as cargas úteis de push para os métodos do SDK da Braze. Isso permite que a Braze extraia os dados de rastreamento incorporados e registre a análise de dados nativa de push (aberturas, aberturas por influência e métricas de entrega).
Se você tiver um `FirebaseMessagingService` personalizado, chame `BrazeFirebaseMessagingService.handleBrazeRemoteMessage(...)` dentro do seu método `onMessageReceived`. Lembre-se de que a subclasse do seu `FirebaseMessagingService` deve concluir a execução em até 9 segundos após a invocação para evitar ser [sinalizada ou encerrada](https://firebase.google.com/docs/cloud-messaging/android/receive) pelo sistema Android.
```java
public class MyFirebaseMessagingService extends FirebaseMessagingService {
@Override
public void onMessageReceived(RemoteMessage remoteMessage) {
super.onMessageReceived(remoteMessage);
if (BrazeFirebaseMessagingService.handleBrazeRemoteMessage(this, remoteMessage)) {
// Braze processed a Braze push payload.
} else {
// Non-Braze payload: pass to your other handlers.
}
}
}
```
Para um exemplo completo de implementação, consulte o [app de exemplo de push Firebase do SDK Android da Braze](https://github.com/braze-inc/braze-android-sdk/tree/master/samples/firebase-push).
Em uma integração manual de push, encaminhe os retornos de chamada de notificações em segundo plano e de notificações do usuário para a Braze.
**Notificações em segundo plano:**
```swift
if let braze = AppDelegate.braze, braze.notifications.handleBackgroundNotification(
userInfo: userInfo,
fetchCompletionHandler: completionHandler
) {
return
}
completionHandler(.noData)
```
**Respostas de notificações do usuário:**
```swift
if let braze = AppDelegate.braze, braze.notifications.handleUserNotification(
response: response,
withCompletionHandler: completionHandler
) {
return
}
completionHandler()
```
**Notificações em primeiro plano:**
```swift
func userNotificationCenter(
_ center: UNUserNotificationCenter,
willPresent notification: UNNotification,
withCompletionHandler completionHandler: @escaping (UNNotificationPresentationOptions) -> Void
) {
if let braze = AppDelegate.braze {
braze.notifications.handleForegroundNotification(notification: notification)
}
if #available(iOS 14.0, *) {
completionHandler([.banner, .list, .sound])
} else {
completionHandler([.alert, .sound])
}
}
```
Para um exemplo completo de implementação, consulte o [exemplo de push manual do SDK Swift da Braze (`AppDelegate.swift`)](https://github.com/braze-inc/braze-swift-sdk/blob/main/Examples/Swift/Sources/PushNotifications-Manual/AppDelegate.swift).
Para push na web, configure seu service worker e a inicialização do SDK conforme descrito em [Notificações por push para web](https://www.braze.com/docs/pt-br/pt-br/developer_guide/push_notifications/?sdktab=web).
Para mais exemplos de código, consulte o [repositório do SDK Web da Braze](https://github.com/braze-inc/braze-web-sdk).
## Registrando dados personalizados a partir de cargas úteis de push {#logging-custom-data-from-push-payloads}
Use esta seção quando precisar registrar dados adicionais a partir de pares chave-valor da carga útil de push, como eventos personalizados ou atributos vinculados à sua lógica de negócios.
Para saber mais sobre eventos personalizados, consulte [Eventos personalizados](https://www.braze.com/docs/pt-br/pt-br/user_guide/data/activation/events/custom_events/). Para registrar eventos personalizados por meio de métodos do SDK, consulte [Registrando eventos personalizados](https://www.braze.com/docs/pt-br/pt-br/developer_guide/analytics/logging_events/).
### Opção A: Registrar com o endpoint `/users/track` {#option-a-log-with-the-userstrack-endpoint}
Você pode registrar análise de dados em tempo real chamando o endpoint [`/users/track`](https://www.braze.com/docs/pt-br/pt-br/api/endpoints/user_data/post_user_track/).
Para identificar o perfil de usuário, inclua `braze_id` nos pares chave-valor da carga útil de push.
**Note:**
Passar `braze_id` identifica apenas o perfil. Você ainda precisa de lógica de implementação que leia os valores da carga útil e envie a requisição `/users/track` com os eventos ou atributos que deseja registrar.
### Opção B: Registrar com métodos do SDK após a inicialização do app {#option-b-log-with-sdk-methods-after-app-launch}
Você também pode salvar os dados da carga útil localmente e registrar eventos personalizados e atributos por meio de métodos do SDK após a inicialização do app. Essa abordagem é comum em fluxos de extensão de conteúdo de notificação, onde os dados de análise são persistidos primeiro e enviados na próxima inicialização do app.
**Important:**
Os dados de análise não são enviados para a Braze até que o app seja iniciado. Dependendo das suas configurações de descarte, pode haver um atraso entre o momento em que o usuário descarta a notificação e quando o app abre e envia os dados de análise.
## Registrando a partir de uma extensão de conteúdo de notificação (Swift) {#logging-from-a-notification-content-extension-swift}
As etapas a seguir descrevem como salvar e enviar eventos personalizados, atributos personalizados e atributos de usuário a partir de uma extensão de conteúdo de notificação Swift.
### Etapa 1: Configurar grupos de app no Xcode {#step-1-configure-app-groups-in-xcode}
No Xcode, adicione a capacidade `App Groups` ao target principal do seu app. Ative **App Groups** e clique em **+** para adicionar um novo grupo. Use o bundle ID do seu app para criar o identificador do grupo (por exemplo, `group.com.company.appname.xyz`). Ative **App Groups** tanto para o target principal do app quanto para o target da extensão de conteúdo.

### Etapa 2: Escolher o que registrar {#step-2-choose-what-to-log}
Antes de implementar os trechos de código, escolha qual categoria de análise de dados você deseja registrar:
- **Eventos personalizados:** Ações que os usuários realizam (por exemplo, concluir um fluxo ou tocar em um elemento específico da interface). Use eventos personalizados para gatilhos baseados em ação, segmentação e análise de dados de eventos. Para saber mais, consulte [Eventos personalizados](https://www.braze.com/docs/pt-br/pt-br/user_guide/data/activation/events/custom_events/) e [Registrando eventos personalizados](https://www.braze.com/docs/pt-br/pt-br/developer_guide/analytics/logging_events/).
- **Atributos personalizados:** Campos de perfil que você define (por exemplo, `plan_tier` ou `preferred_language`) e atualiza ao longo do tempo. Para saber mais, consulte [Atributos personalizados](https://www.braze.com/docs/pt-br/pt-br/user_guide/data/activation/custom_data/data_types/) e [Definindo atributos de usuário](https://www.braze.com/docs/pt-br/pt-br/developer_guide/analytics/setting_user_attributes/).
- **Atributos de usuário:** Campos padrão de perfil (por exemplo, e-mail, nome e número de telefone). No código de exemplo, eles são representados por um modelo tipado `UserAttribute` e então mapeados para campos de usuário da Braze.
Os arquivos auxiliares nesta seção (`RemoteStorage`, `UserAttribute` e `EventName Dictionary`) são arquivos utilitários locais usados por esta implementação de exemplo. Eles não são classes integradas do SDK. Eles armazenam dados derivados da carga útil em `UserDefaults`, definem um modelo tipado para atualizações pendentes de usuário e padronizam a construção da carga útil de eventos. Para saber mais sobre o comportamento de armazenamento local de dados, consulte [Armazenamento](https://www.braze.com/docs/pt-br/pt-br/developer_guide/storage/?tab=swift).
**Note:**
Os exemplos de arquivos auxiliares nesta seção são específicos para iOS (Swift e Objective-C). Para abordagens de Android e Web para registrar eventos personalizados e atributos, consulte [Registrando eventos personalizados](https://www.braze.com/docs/pt-br/pt-br/developer_guide/analytics/logging_events/) ([Android](https://www.braze.com/docs/pt-br/pt-br/developer_guide/analytics/logging_events/?tab=android), [Web](https://www.braze.com/docs/pt-br/pt-br/developer_guide/analytics/logging_events/?tab=web)) e [Definindo atributos de usuário](https://www.braze.com/docs/pt-br/pt-br/developer_guide/analytics/setting_user_attributes/) ([Android](https://www.braze.com/docs/pt-br/pt-br/developer_guide/analytics/setting_user_attributes/?tab=android), [Web](https://www.braze.com/docs/pt-br/pt-br/developer_guide/analytics/setting_user_attributes/?tab=web)).
#### Salvando eventos personalizados {#saving-custom-events}
Crie a carga útil de análise de dados construindo um dicionário, preenchendo os metadados e salvando com o arquivo auxiliar.
1. Inicialize um dicionário com os metadados do evento.
2. Inicialize `userDefaults` para recuperar e armazenar os dados do evento.
3. Se um array existente for encontrado, adicione e salve.
4. Se nenhum array existir, salve um novo array.
```swift
func saveCustomEvent(with properties: [String: Any]? = nil) {
// 1
let customEventDictionary = Dictionary(eventName: "YOUR-EVENT-NAME", properties: properties)
// 2
let remoteStorage = RemoteStorage(storageType: .suite)
// 3
if var pendingEvents = remoteStorage.retrieve(forKey: .pendingCustomEvents) as? [[String: Any]] {
pendingEvents.append(contentsOf: [customEventDictionary])
remoteStorage.store(pendingEvents, forKey: .pendingCustomEvents)
} else {
// 4
remoteStorage.store([customEventDictionary], forKey: .pendingCustomEvents)
}
}
```
```objc
- (void)saveCustomEvent:(NSDictionary *)properties {
// 1
NSDictionary *customEventDictionary = [[NSDictionary alloc] initWithEventName:@"YOUR-EVENT-NAME" properties:properties];
// 2
RemoteStorage *remoteStorage = [[RemoteStorage alloc] initWithStorageType:StorageTypeSuite];
NSMutableArray *pendingEvents = [[remoteStorage retrieveForKey:RemoteStorageKeyPendingCustomEvents] mutableCopy];
// 3
if (pendingEvents) {
[pendingEvents addObject:customEventDictionary];
[remoteStorage store:pendingEvents forKey:RemoteStorageKeyPendingCustomEvents];
} else {
// 4
[remoteStorage store:@[ customEventDictionary ] forKey:RemoteStorageKeyPendingCustomEvents];
}
}
```
#### Enviando eventos personalizados para a Braze {#sending-custom-events-to-braze}
Registre os dados de análise salvos logo após a inicialização do SDK.
1. Percorra os eventos pendentes.
2. Percorra os pares chave-valor em cada evento.
3. Verifique a chave `event_name`.
4. Adicione os pares chave-valor restantes ao dicionário `properties`.
5. Registre cada evento personalizado.
6. Remova os eventos pendentes do armazenamento.
```swift
func logPendingCustomEventsIfNecessary() {
let remoteStorage = RemoteStorage(storageType: .suite)
guard let pendingEvents = remoteStorage.retrieve(forKey: .pendingCustomEvents) as? [[String: Any]] else { return }
// 1
for event in pendingEvents {
var eventName: String?
var properties: [AnyHashable: Any] = [:]
// 2
for (key, value) in event {
if key == "event_name" {
// 3
if let eventNameValue = value as? String {
eventName = eventNameValue
} else {
print("Invalid type for event_name key")
}
} else {
// 4
properties[key] = value
}
}
// 5
if let eventName = eventName {
AppDelegate.braze?.logCustomEvent(name: eventName, properties: properties)
}
}
// 6
remoteStorage.removeObject(forKey: .pendingCustomEvents)
}
```
```objc
- (void)logPendingEventsIfNecessary {
RemoteStorage *remoteStorage = [[RemoteStorage alloc] initWithStorageType:StorageTypeSuite];
NSArray *pendingEvents = [remoteStorage retrieveForKey:RemoteStorageKeyPendingCustomEvents];
// 1
for (NSDictionary *event in pendingEvents) {
NSString *eventName = nil;
NSMutableDictionary *properties = [NSMutableDictionary dictionary];
// 2
for (NSString* key in event) {
if ([key isEqualToString:@"event_name"]) {
// 3
if ([[event objectForKey:key] isKindOfClass:[NSString class]]) {
eventName = [event objectForKey:key];
} else {
NSLog(@"Invalid type for event_name key");
}
} else {
// 4
properties[key] = event[key];
}
}
// 5
if (eventName != nil) {
[AppDelegate.braze logCustomEvent:eventName properties:properties];
}
}
// 6
[remoteStorage removeObjectForKey:RemoteStorageKeyPendingCustomEvents];
}
```
#### Salvando atributos personalizados {#saving-custom-attributes}
Crie o dicionário de análise de dados do zero e persista-o.
1. Inicialize um dicionário com os metadados do atributo.
2. Inicialize `userDefaults` para recuperar e armazenar os dados do atributo.
3. Se um array existente for encontrado, adicione e salve.
4. Se nenhum array existir, salve um novo array.
```swift
func saveCustomAttribute() {
// 1
let customAttributeDictionary: [String: Any] = ["YOUR-CUSTOM-ATTRIBUTE-KEY": "YOUR-CUSTOM-ATTRIBUTE-VALUE"]
// 2
let remoteStorage = RemoteStorage(storageType: .suite)
// 3
if var pendingAttributes = remoteStorage.retrieve(forKey: .pendingCustomAttributes) as? [[String: Any]] {
pendingAttributes.append(contentsOf: [customAttributeDictionary])
remoteStorage.store(pendingAttributes, forKey: .pendingCustomAttributes)
} else {
// 4
remoteStorage.store([customAttributeDictionary], forKey: .pendingCustomAttributes)
}
}
```
```objc
- (void)saveCustomAttribute {
// 1
NSDictionary *customAttributeDictionary = @{ @"YOUR-CUSTOM-ATTRIBUTE-KEY": @"YOUR-CUSTOM-ATTRIBUTE-VALUE" };
// 2
RemoteStorage *remoteStorage = [[RemoteStorage alloc] initWithStorageType:StorageTypeSuite];
NSMutableArray *pendingAttributes = [[remoteStorage retrieveForKey:RemoteStorageKeyPendingCustomAttributes] mutableCopy];
// 3
if (pendingAttributes) {
[pendingAttributes addObject:customAttributeDictionary];
[remoteStorage store:pendingAttributes forKey:RemoteStorageKeyPendingCustomAttributes];
} else {
// 4
[remoteStorage store:@[ customAttributeDictionary ] forKey:RemoteStorageKeyPendingCustomAttributes];
}
}
```
#### Enviando atributos personalizados para a Braze {#sending-custom-attributes-to-braze}
Registre os dados de análise salvos logo após a inicialização do SDK.
1. Percorra os atributos pendentes.
2. Percorra cada par chave-valor.
3. Registre cada chave e valor de atributo personalizado.
4. Remova os atributos pendentes do armazenamento.
```swift
func logPendingCustomAttributesIfNecessary() {
let remoteStorage = RemoteStorage(storageType: .suite)
guard let pendingAttributes = remoteStorage.retrieve(forKey: .pendingCustomAttributes) as? [[String: Any]] else { return }
// 1
pendingAttributes.forEach { setCustomAttributesWith(keysAndValues: $0) }
// 4
remoteStorage.removeObject(forKey: .pendingCustomAttributes)
}
func setCustomAttributesWith(keysAndValues: [String: Any]) {
// 2
for (key, value) in keysAndValues {
// 3
if let value = value as? [String] {
setCustomAttributeArrayWithKey(key, andValue: value)
} else {
setCustomAttributeWithKey(key, andValue: value)
}
}
}
```
```objc
- (void)logPendingCustomAttributesIfNecessary {
RemoteStorage *remoteStorage = [[RemoteStorage alloc] initWithStorageType:StorageTypeSuite];
NSArray *pendingAttributes = [remoteStorage retrieveForKey:RemoteStorageKeyPendingCustomAttributes];
// 1
for (NSDictionary *attribute in pendingAttributes) {
[self setCustomAttributeWith:attribute];
}
// 4
[remoteStorage removeObjectForKey:RemoteStorageKeyPendingCustomAttributes];
}
- (void)setCustomAttributeWith:(NSDictionary *)keysAndValues {
// 2
for (NSString *key in keysAndValues) {
// 3
[self setCustomAttributeWith:key andValue:[keysAndValues objectForKey:key]];
}
}
```
#### Salvando atributos de usuário {#saving-user-attributes}
Ao salvar atributos de usuário, crie um objeto personalizado para capturar qual campo de usuário está sendo atualizado (`email`, `first_name`, `phone_number` e assim por diante). O objeto deve ser compatível com armazenamento e recuperação via `UserDefaults`. Consulte o arquivo auxiliar `UserAttribute` na guia **Arquivos auxiliares** para um exemplo.
1. Inicialize um objeto `UserAttribute` codificado com o tipo correspondente.
2. Inicialize `userDefaults` para recuperar e armazenar os dados.
3. Se um array existente for encontrado, adicione e salve.
4. Se nenhum array existir, salve um novo array.
```swift
func saveUserAttribute() {
// 1
guard let data = try? PropertyListEncoder().encode(UserAttribute.email("USER-ATTRIBUTE-VALUE")) else { return }
// 2
let remoteStorage = RemoteStorage(storageType: .suite)
// 3
if var pendingAttributes = remoteStorage.retrieve(forKey: .pendingUserAttributes) as? [Data] {
pendingAttributes.append(contentsOf: [data])
remoteStorage.store(pendingAttributes, forKey: .pendingUserAttributes)
} else {
// 4
remoteStorage.store([data], forKey: .pendingUserAttributes)
}
}
```
```objc
- (void)saveUserAttribute {
// 1
UserAttribute *userAttribute = [[UserAttribute alloc] initWithUserField:@"USER-ATTRIBUTE-VALUE" attributeType:UserAttributeTypeEmail];
NSError *error;
NSData *data = [NSKeyedArchiver archivedDataWithRootObject:userAttribute requiringSecureCoding:YES error:&error];
if (error != nil) {
// log error
}
// 2
RemoteStorage *remoteStorage = [[RemoteStorage alloc] initWithStorageType:StorageTypeSuite];
NSMutableArray *pendingAttributes = [[remoteStorage retrieveForKey:RemoteStorageKeyPendingUserAttributes] mutableCopy];
// 3
if (pendingAttributes) {
[pendingAttributes addObject:data];
[remoteStorage store:pendingAttributes forKey:RemoteStorageKeyPendingUserAttributes];
} else {
// 4
[remoteStorage store:@[data] forKey:RemoteStorageKeyPendingUserAttributes];
}
}
```
#### Enviando atributos de usuário para a Braze {#sending-user-attributes-to-braze}
Registre os dados de análise salvos logo após a inicialização do SDK.
1. Percorra os dados de `pendingAttributes`.
2. Decodifique cada `UserAttribute`.
3. Defina os campos de usuário com base no tipo de atributo.
4. Remova os atributos de usuário pendentes do armazenamento.
```swift
func logPendingUserAttributesIfNecessary() {
let remoteStorage = RemoteStorage(storageType: .suite)
guard let pendingAttributes = remoteStorage.retrieve(forKey: .pendingUserAttributes) as? [Data] else { return }
// 1
for attributeData in pendingAttributes {
// 2
guard let userAttribute = try? PropertyListDecoder().decode(UserAttribute.self, from: attributeData) else { continue }
// 3
switch userAttribute {
case .email(let email):
AppDelegate.braze?.user.set(email: email)
}
}
// 4
remoteStorage.removeObject(forKey: .pendingUserAttributes)
}
```
```objc
- (void)logPendingUserAttributesIfNecessary {
RemoteStorage *remoteStorage = [[RemoteStorage alloc] initWithStorageType:StorageTypeSuite];
NSArray *pendingAttributes = [remoteStorage retrieveForKey:RemoteStorageKeyPendingUserAttributes];
// 1
for (NSData *attributeData in pendingAttributes) {
NSError *error;
// 2
UserAttribute *userAttribute = [NSKeyedUnarchiver unarchivedObjectOfClass:[UserAttribute class] fromData:attributeData error:&error];
if (error != nil) {
// log error
}
// 3
if (userAttribute) {
switch (userAttribute.attributeType) {
case UserAttributeTypeEmail:
[self user].email = userAttribute.userField;
break;
}
}
}
// 4
[remoteStorage removeObjectForKey:RemoteStorageKeyPendingUserAttributes];
}
```
#### Arquivo auxiliar RemoteStorage {#remotestorage-helper-file}
```swift
enum RemoteStorageKey: String, CaseIterable {
// MARK: - Notification Content Extension Analytics
case pendingCustomEvents = "pending_custom_events"
case pendingCustomAttributes = "pending_custom_attributes"
case pendingUserAttributes = "pending_user_attributes"
}
enum RemoteStorageType {
case standard
case suite
}
class RemoteStorage: NSObject {
private var storageType: RemoteStorageType = .standard
private lazy var defaults: UserDefaults = {
switch storageType {
case .standard:
return .standard
case .suite:
// Use the App Group identifier you created in Step 1.
return UserDefaults(suiteName: "group.com.company.appname.xyz")!
}
}()
init(storageType: RemoteStorageType = .standard) {
self.storageType = storageType
}
func store(_ value: Any, forKey key: RemoteStorageKey) {
defaults.set(value, forKey: key.rawValue)
}
func retrieve(forKey key: RemoteStorageKey) -> Any? {
return defaults.object(forKey: key.rawValue)
}
func removeObject(forKey key: RemoteStorageKey) {
defaults.removeObject(forKey: key.rawValue)
}
func resetStorageKeys() {
for key in RemoteStorageKey.allCases {
defaults.removeObject(forKey: key.rawValue)
}
}
}
```
```objc
@interface RemoteStorage ()
@property (nonatomic) StorageType storageType;
@property (nonatomic, strong) NSUserDefaults *defaults;
@end
@implementation RemoteStorage
- (id)initWithStorageType:(StorageType)storageType {
if (self = [super init]) {
self.storageType = storageType;
}
return self;
}
- (void)store:(id)value forKey:(RemoteStorageKey)key {
[[self defaults] setValue:value forKey:[self rawValueForKey:key]];
}
- (id)retrieveForKey:(RemoteStorageKey)key {
return [[self defaults] objectForKey:[self rawValueForKey:key]];
}
- (void)removeObjectForKey:(RemoteStorageKey)key {
[[self defaults] removeObjectForKey:[self rawValueForKey:key]];
}
- (void)resetStorageKeys {
[[self defaults] removeObjectForKey:[self rawValueForKey:RemoteStorageKeyPendingCustomEvents]];
[[self defaults] removeObjectForKey:[self rawValueForKey:RemoteStorageKeyPendingCustomAttributes]];
[[self defaults] removeObjectForKey:[self rawValueForKey:RemoteStorageKeyPendingUserAttributes]];
}
- (NSUserDefaults *)defaults {
if (!_defaults) {
switch (self.storageType) {
case StorageTypeStandard:
_defaults = [NSUserDefaults standardUserDefaults];
break;
case StorageTypeSuite:
_defaults = [[NSUserDefaults alloc] initWithSuiteName:@"group.com.company.appname.xyz"];
break;
}
}
return _defaults;
}
- (NSString*)rawValueForKey:(RemoteStorageKey)remoteStorageKey {
switch(remoteStorageKey) {
case RemoteStorageKeyPendingCustomEvents:
return @"pending_custom_events";
case RemoteStorageKeyPendingCustomAttributes:
return @"pending_custom_attributes";
case RemoteStorageKeyPendingUserAttributes:
return @"pending_user_attributes";
default:
[NSException raise:NSGenericException format:@"Unexpected FormatType."];
}
}
```
#### Arquivo auxiliar UserAttribute {#userattribute-helper-file}
```swift
enum UserAttribute: Hashable {
case email(String?)
}
// MARK: - Codable
extension UserAttribute: Codable {
private enum CodingKeys: String, CodingKey {
case email
}
func encode(to encoder: Encoder) throws {
var values = encoder.container(keyedBy: CodingKeys.self)
switch self {
case .email(let email):
try values.encodeIfPresent(email, forKey: .email)
}
}
init(from decoder: Decoder) throws {
let values = try decoder.container(keyedBy: CodingKeys.self)
let email = try values.decodeIfPresent(String.self, forKey: .email)
self = .email(email)
}
}
```
```objc
@implementation UserAttribute
- (id)initWithUserField:(NSString *)userField attributeType:(UserAttributeType)attributeType {
if (self = [super init]) {
self.userField = userField;
self.attributeType = attributeType;
}
return self;
}
- (void)encodeWithCoder:(NSCoder *)encoder {
[encoder encodeObject:self.userField forKey:@"userField"];
[encoder encodeInteger:self.attributeType forKey:@"attributeType"];
}
- (id)initWithCoder:(NSCoder *)decoder {
if (self = [super init]) {
self.userField = [decoder decodeObjectForKey:@"userField"];
NSInteger attributeRawValue = [decoder decodeIntegerForKey:@"attributeType"];
self.attributeType = (UserAttributeType) attributeRawValue;
}
return self;
}
@end
```
#### Arquivo auxiliar de dicionário EventName {#eventname-dictionary-helper-file}
```swift
extension Dictionary where Key == String, Value == Any {
init(eventName: String, properties: [String: Any]? = nil) {
self.init()
self[PushNotificationKey.eventName.rawValue] = eventName
if let properties = properties {
for (key, value) in properties {
self[key] = value
}
}
}
}
```
```objc
@implementation NSMutableDictionary (Helper)
+ (instancetype)dictionaryWithEventName:(NSString *)eventName
properties:(NSDictionary *)properties {
NSMutableDictionary *dict = [NSMutableDictionary dictionary];
dict[@"event_name"] = eventName;
if (properties) {
for (id key in properties) {
dict[key] = properties[key];
}
}
return dict;
}
@end
```
## Analisando resultados {#analyzing-results}
Use a superfície de relatório que corresponde à categoria de análise de dados:
| Categoria de análise de dados | Onde visualizar na Braze |
| --- | --- |
| Análise de dados nativa de push | Para visualizar as métricas de abertura de push no nível da Campaign, navegue até a página **Análise de dados da Campaign** da sua Campaign de push. Para definições de métricas, consulte [Aberturas por influência](https://www.braze.com/docs/pt-br/pt-br/user_guide/analytics/tracking/influenced_opens/). Para criar visualizações personalizadas de análise de dados, navegue até **Analytics** > **Report Builder (New)**. Para etapas de navegação, consulte [Criador de relatórios](https://www.braze.com/docs/pt-br/pt-br/user_guide/analytics/reports/report_builder/). Para esquemas de eventos em nível de data warehouse, consulte [Eventos de engajamento com mensagem](https://www.braze.com/docs/pt-br/pt-br/user_guide/data/distribution/braze_currents/event_glossary/message_engagement_events/). |
| Eventos personalizados e atributos | Para visualizar tendências de eventos personalizados, navegue até **Analytics** > **Relatório de eventos personalizados**. Para mais informações, consulte [Eventos personalizados](https://www.braze.com/docs/pt-br/pt-br/user_guide/data/activation/events/custom_events/). Para inspecionar valores no nível do usuário, navegue até a página **Pesquisar usuários** e abra um perfil. Para ver as etapas, consulte [Perfis de usuário](https://www.braze.com/docs/pt-br/pt-br/user_guide/audience/manage_audience/user_profiles/). Para filtrar públicos por esses valores, navegue até **Público** > **Segments**. Para etapas de navegação, consulte [Criar um Segment](https://www.braze.com/docs/pt-br/pt-br/user_guide/audience/segments/creating_a_segment/) e opções de filtro em [Filtros de segmentação](https://www.braze.com/docs/pt-br/pt-br/user_guide/audience/segments/segmentation_filters/). |
{: .reset-td-br-1 .reset-td-br-2 aria-label="Analisando resultados" }
Para criação de relatórios personalizados, consulte [Criador de relatórios](https://www.braze.com/docs/pt-br/pt-br/user_guide/analytics/reports/report_builder/).
## Referências relacionadas {#related-references}
- [Notificações por push](https://www.braze.com/docs/pt-br/pt-br/developer_guide/push_notifications/)
- [Registrando eventos personalizados](https://www.braze.com/docs/pt-br/pt-br/developer_guide/analytics/logging_events/)
- [Eventos personalizados](https://www.braze.com/docs/pt-br/pt-br/user_guide/data/activation/events/custom_events/)
- [Endpoint de rastreamento de usuários (`/users/track`)](https://www.braze.com/docs/pt-br/pt-br/api/endpoints/user_data/post_user_track/)
- [Repositório do SDK Android da Braze](https://github.com/braze-inc/braze-android-sdk)
- [Repositório do SDK Swift da Braze](https://github.com/braze-inc/braze-swift-sdk)
- [Repositório do SDK Web da Braze](https://github.com/braze-inc/braze-web-sdk)
# Enviar Mensagens de Teste
Source: /docs/pt-br/developer_guide/push_notifications/sending_test_messages/index.md
# Sending test messages
> Before sending out a messaging campaign to your users, you may want to test it to make sure it looks right and operates in the intended manner. You can use the dashboard to create and send test messages with push notifications, in-app messages (IAM), or email.
## Sending a test message
### Step 1: Create a designated test segment
After you set up a test segment, you can use it to test any of your Braze messaging channels. When set up correctly, this only needs to be done a single time.
To set up a test segment, go to **Segments** and create a new segment. Select **Add Filter**, then choose a one of the test filters.

With test filters, you can ensure that only users with a specific email address or [external user ID](https://www.braze.com/docs/pt-br/pt-br/developer_guide/platform_integration_guides/swift/analytics/setting_user_ids/#setting-user-ids) are sent the test message.

Both email address and external user ID filters offer the following options:
| Operator | Description |
|------------------|--------------------------------------------------------------------------------------------------------------------------------|
| `equals` | This will look for an exact match of the email or user ID that you provide. Use this if you only want to send the test campaigns to devices associated with a single email or user ID. |
| `does not equal` | Use this if you want to exclude a particular email or user ID from test campaigns. |
| `matches` | This will find users that have email addresses or user IDs that match part of the search term you provide. You could use this to find only the users that have an `@yourcompany.com` address, allowing you to send messages to everyone on your team. |
{: .reset-td-br-1 .reset-td-br-2 aria-label="Step 1: Create a designated test segment a class="margin-fix" name="test-segment"/a" }
You can select multiple specific emails using the "`matches`" option and separating the email addresses with a | character. For example: "`matches`" "`email1@braze.com` | `email2@braze.com`". You can also combine multiple operators together. For example, the test segment could include an email address filter that "`matches`" "`@braze.com`" and another filter that "`does not equal`" "`sales@braze.com`".
After adding the testing filters to your test segment, you can verify it's working by selecting **Preview** or by selecting **Settings** > **CSV Export All User Data** to export that segment's user data to a CSV file.

**Note:**
Exporting the segment's User Data to a CSV file is the most accurate verification method, as the preview will only show a sample of your users and may not include all users.
### Step 2: Send the message
You can send a message using the Braze dashboard or the command line.
To send test push notifications or in-app messages, you need to target your previously created test segment. Begin by creating your campaign and following the usual steps. When you reach the **Target Audiences** step, select your test segment from the dropdown menu.

Confirm your campaign and launch it to test your push notification and in-app messages.
**Note:**
Be sure to select **Allow users to become re-eligible to receive campaign** under the **Schedule** portion of the campaign composer if you intend to use a single campaign to send a test message to yourself more than once.
If you're only testing email messages, you do not necessarily have to set up a test segment. In the first step of the campaign composer where you compose your campaign's email message, click **Send Test** and enter the email address to which you wish to send a test email.

**Tip:**
You can also enable or disable [TEST (or SEED)](https://www.braze.com/docs/pt-br/pt-br/user_guide/administrative/app_settings/email_settings/#append-email-subject-lines) being appended on your test messages.
Alternatively, you can send a single notification using cURL and the [Braze Messaging API](https://www.braze.com/docs/pt-br/pt-br/api/endpoints/messaging/). Note that these examples make a request using the `US-01` instance. To find out yours, refer to [API endpoints](https://www.braze.com/docs/pt-br/pt-br/api/basics/#endpoints).
```bash
curl -X POST -H "Content-Type: application/json" -H "Authorization: Bearer {BRAZE_API_KEY}" -d '{
"external_user_ids":["EXTERNAL_USER_ID"],
"messages": {
"android_push": {
"title":"Test push title",
"alert":"Test push",
"extra":{
"CUSTOM_KEY":"CUSTOM_VALUE"
}
}
}
}' https://rest.iad-01.braze.com/messages/send
```
```bash
curl -X POST -H "Content-Type: application/json" -H "Authorization: Bearer {BRAZE_API_KEY}" -d '{
"external_user_ids":["EXTERNAL_USER_ID"],
"messages": {
"apple_push": {
"alert": "Test push",
"extra": {
"CUSTOM_KEY" :"CUSTOM_VALUE"
}
}
}
}' https://rest.iad-01.braze.com/messages/send
```
```bash
curl -X POST -H "Content-Type: application/json" -H "Authorization: Bearer {BRAZE_API_KEY}" -d '{
"external_user_ids":["EXTERNAL_USER_ID"],
"messages": {
"kindle_push": {
"title":"Test push title",
"alert":"Test push",
"extra":{
"CUSTOM_KEY":"CUSTOM_VALUE"
}
}
}
}' https://rest.iad-01.braze.com/messages/send
```
Replace the following:
| Placeholder | Description |
|---------------------|-----------------------------------------------------------|
| `BRAZE_API_KEY` | Your Braze API key used for authentication. In Braze, go to **Settings** > **API Keys** to locate your key. |
| `EXTERNAL_USER_ID` | The external user ID used to send your message to a specific user. In Braze, go to **Audience** > **Search users**, then search for a user. |
| `CUSTOM_KEY` | (Optional) A custom key for additional data. |
| `CUSTOM_VALUE` | (Optional) A custom value assigned to your custom key. |
{: .reset-td-br-1 .reset-td-br-2 aria-label="Step 2: Send the message" }
## Test limitations
There are a few situations where test messages don't have complete feature parity with launching a campaign or Canvas to a real set of users. In these instances, to validate this behavior, you should launch the campaign or Canvas to a limited set of test users.
- Viewing the Braze [preference center](https://www.braze.com/docs/pt-br/pt-br/user_guide/message_building_by_channel/email/managing_user_subscriptions/#subscription-groups) from **Test Messages** will cause the submit button to be grayed out.
- The list-unsubscribe header is not included in emails sent by the test message functionality.
- For in-app messages and Content Cards, the target user must have a push token for the target device.
# Exemplos avançados de notificações por push para o SDK da Braze
Source: /docs/pt-br/developer_guide/push_notifications/examples/index.md
# Exemplos avançados de notificações por push {#advanced-push-notification-examples}
> O guia a seguir cobre alguns exemplos avançados de notificações por push para o SDK da Braze.
## Prerequisites
Before you can use this feature, you'll need to [integrate the Android Braze SDK](https://www.braze.com/docs/pt-br/pt-br/developer_guide/sdk_integration/?sdktab=android). You'll also need to [set up push notifications](https://www.braze.com/docs/pt-br/pt-br/developer_guide/push_notifications/?sdktab=android).
## Custom notification layout
Braze notifications are sent as [data messages](https://firebase.google.com/docs/cloud-messaging/concept-options), which means that your application will always have a chance to respond and perform behavior accordingly, even in the background (in contrast to notification messages, which can be handled automatically by the system when your app is in the background). As such, your application will have a chance to customize the experience by, for example displaying personalized UI elements within the notification delivered to the notification tray. While implementing push in this way may be unfamiliar to some, one of our well-known features at Braze, [Push Stories](https://www.braze.com/docs/pt-br/pt-br/user_guide/message_building_by_channel/push/advanced_push_options/push_stories/), are a prime example of using custom view components to create an engaging experience!
**Important:**
Android imposes some limitations on what components can be used to implement custom notification views. Notification view layouts must _only_ contain View objects compatible with the [RemoteViews](https://developer.android.com/reference/android/widget/RemoteViews) framework.
You can use the [`IBrazeNotificationFactory`](https://braze-inc.github.io/braze-android-sdk/kdoc/braze-android-sdk/com.braze/-i-braze-notification-factory/index.html) interface to customize how Braze push notifications are displayed. By extending `BrazeNotificationFactory`, Braze will call your factory's `createNotification()` method before the notification is displayed to the user. It will then pass a payload containing custom key-value pairs sent through the Braze dashboard or REST API.
In this section, you'll partner with Superb Owl, the host of a new game show where wildlife rescue teams compete to see who can save the most owls. They're looking to leverage live updating notifications in their Android app, so they can display the status of an on-going match and make dynamic updates to the notification in realtime.
{: style="max-width:65%;"}
### Step 1: Add a custom layout
You can add one or more custom notification RemoteView layouts to your project. These are helpful for handling how notifications are displayed when collapsed or expanded. Your directory structure should be similar to the following:
```plaintext
.
├── app/
└── res/
└── layout/
├── liveupdate_collapsed.xml
└── liveupdate_expanded.xml
```
In each XML file, create a custom layout. Superb Owl created the following layouts for their collapsed and expanded RemoteView layouts:
```xml
```
**Show the sample code**
```xml
```
### Step 2: Create a custom notification factory
In your application, create a new file named `MyCustomNotificationFactory.kt` that extends [`BrazeNotificationFactory`](https://braze-inc.github.io/braze-android-sdk/kdoc/braze-android-sdk/com.braze/-i-braze-notification-factory/index.html) to handle how custom RemoteView layouts are displayed.
In the following example, Superb Owl created a custom notification factory to display a RemoteView layout for on-going matches. In the [next step](#android_step-3-map-custom-data), they'll create a new method called `getTeamInfo` to map a team's data to the activity.
**Show the sample code**
```kotlin
import android.app.Notification
import android.widget.RemoteViews
import androidx.core.app.NotificationCompat
import com.braze.models.push.BrazeNotificationPayload
import com.braze.push.BrazeNotificationFactory
import com.braze.push.BrazeNotificationUtils.getOrCreateNotificationChannelId
import com.braze.support.BrazeLogger.brazelog
class MyCustomNotificationFactory : BrazeNotificationFactory() {
override fun createNotification(payload: BrazeNotificationPayload): Notification? {
if (payload.extras.containsKey("live_update")) {
val kvp = payload.extras
val notificationChannelId = getOrCreateNotificationChannelId(payload)
val context = payload.context
if (context == null) {
brazelog { "BrazeNotificationPayload has null context. Not creating notification" }
return null
}
val team1 = kvp["team1"]
val team2 = kvp["team2"]
val score1 = kvp["score1"]
val score2 = kvp["score2"]
val time = kvp["time"]
val quarter = kvp["quarter"]
// Superb Owl will define the 'getTeamInfo' method in the next step.
val (team1name, team1icon) = getTeamInfo(team1)
val (team2name, team2icon) = getTeamInfo(team2)
// Get the layouts to use in the custom notification.
val notificationLayoutCollapsed = RemoteViews(BuildConfig.APPLICATION_ID, R.layout.liveupdate_collapsed)
val notificationLayoutExpanded = RemoteViews(BuildConfig.APPLICATION_ID, R.layout.liveupdate_expanded)
// Very simple notification for the small layout
notificationLayoutCollapsed.setTextViewText(
R.id.notification_title,
"$team1 $score1 - $score2 $team2\n$time $quarter"
)
notificationLayoutExpanded.setTextViewText(R.id.score, "$score1 - $score2")
notificationLayoutExpanded.setTextViewText(R.id.team1name, team1name)
notificationLayoutExpanded.setTextViewText(R.id.team2name, team2name)
notificationLayoutExpanded.setTextViewText(R.id.timeInfo, "$time - $quarter")
notificationLayoutExpanded.setImageViewResource(R.id.team1logo, team1icon)
notificationLayoutExpanded.setImageViewResource(R.id.team2logo, team2icon)
val customNotification = NotificationCompat.Builder(context, notificationChannelId)
.setSmallIcon(R.drawable.notification_small_icon)
.setStyle(NotificationCompat.DecoratedCustomViewStyle())
.setCustomContentView(notificationLayout)
.setCustomBigContentView(notificationLayoutExpanded)
.build()
return customNotification
} else {
// Use the BrazeNotificationFactory for all other notifications
return super.createNotification(payload)
}
}
}
```
### Step 3: Map custom data
In `MyCustomNotificationFactory.kt`, create a new method for handling data when Live Updates are displayed.
Superb Owl created the following method to map each team's name and logo to expanded Live Updates:
```kotlin
class CustomNotificationFactory : BrazeNotificationFactory() {
override fun createNotification(payload: BrazeNotificationPayload): Notification? {
// Your existing code
return super.createNotification(payload)
}
// Your new method
private fun getTeamInfo(team: String?): Pair {
return when (team) {
"WBF" -> Pair("Wild Bird Fund", R.drawable.team_wbf)
"OWL" -> Pair("Owl Rehab", R.drawable.team_owl)
else -> Pair("Unknown", R.drawable.notification_small_icon)
}
}
}
```
### Step 4: Set the custom notification factory
In your application class, use [`customBrazeNotificationFactory`](https://braze-inc.github.io/braze-android-sdk/kdoc/braze-android-sdk/com.braze/-braze/-companion/custom-braze-notification-factory.html?query=var%20customBrazeNotificationFactory:%20IBrazeNotificationFactory?)to set your custom notification factory.
```kotlin
import com.braze.Braze
class MyApplication : Application() {
override fun onCreate() {
super.onCreate()
// Tell Braze to use your custom factory for notifications
Braze.customBrazeNotificationFactory = MyCustomNotificationFactory()
}
}
```
### Step 5: Send the activity
You can use the [`/messages/send`](https://www.braze.com/docs/pt-br/pt-br/api/endpoints/messaging/send_messages/post_send_messages) REST API endpoint to send a push notification to a user's Android device.
#### Example curl command
Superb Owl sent their request using the following curl command:
```
curl -X POST "https://BRAZE_REST_ENDPOINT/messages/send" \
-H "Authorization: Bearer {REST_API_KEY}" \
-H "Content-Type: application/json" \
--data '{
"external_user_ids": ["USER_ID"],
"messages": {
"android_push": {
"title": "WBF vs OWL",
"alert": "2 to 4 1:33 Q4",
"extra": {
"live_update": "true",
"team1": "WBF",
"team2": "OWL",
"score1": "2",
"score2": "4",
"time": "1:33",
"quarter": "Q4"
},
"notification_id": "ASSIGNED_NOTIFICATION_ID"
}
}
}'
```
**Tip:**
While curl commands are helpful for testing, we recommend handling this call in your backend where you're already handling your [iOS Live Activities](https://www.braze.com/docs/pt-br/pt-br/developer_guide/push_notifications/live_notifications/?sdktab=swift).
#### Request parameters
| Key | Description |
| ----------------------------- | ------------------------------------------------------------------------------------------------------------------------------------------------------------------------------------------------------------------------------------------------ |
| `REST_API_KEY` | A Braze REST API key with `messages.send` permissions.
This can be created in the Braze dashboard from **Settings** > **API Keys**. |
| `BRAZE_REST_ENDPOINT` | Your REST endpoint URL. Your endpoint will depend on the [Braze URL for your instance](https://www.braze.com/docs/pt-br/pt-br/api/basics/#endpoints). |
| `USER_ID` | The ID of the user you are sending the notification to. |
| `messages.android_push.title` | The message's title. By default, this is not used for the custom notification factory's live notifications, but it may be used as a fallback. |
| `messages.android_push.alert` | The message's body. By default, this is not used for the custom notification factory's live notifications, but it may be used as a fallback. |
| `messages.extra` | Key-value pairs that the custom notification factory uses for live notifications. You can assign any string to this value—however, in the example above, `live_updates` is used to determine if it's a default or live push notification. |
| `ASSIGNED_NOTIFICATION_ID` | The notification ID you want to assign to the chosen user's live notification. The ID must be unique to this game, and must be used in order to [update their existing notification](#android_step-4-update-data-with-the-braze-rest-api) later. |
{: .reset-td-br-1 .reset-td-br-2 aria-label="Request parameters" }
### Step 6: Update the activity
To update the existing RemoteView notification with new data, modify the relevant key-value pairs assigned to `messages.extra`, then use the same `notification_id` and call the `/messages/send` endpoint again.
## Personalized push notifications
Push notifications can display user-specific information inside a custom view hierarchy. In the following example, an API-trigger is used to send personalized push notification to a user so they can track check their current progress after completing a specific task in the app.
{: style="max-width:65%;border:0"}
To set up a personalized push in the dashboard, register the specific category you want to be displayed, then set any relevant user attributes you'd like to display using Liquid.
{: style="max-width:60%;"}
## Prerequisites
Before you can use this feature, you'll need to [integrate the Swift Braze SDK](https://www.braze.com/docs/pt-br/pt-br/developer_guide/sdk_integration/?sdktab=swift). You'll also need to [set up push notifications](https://www.braze.com/docs/pt-br/pt-br/developer_guide/push_notifications/?sdktab=swift).
**Note:**
This implementation guide is centered around a Swift implementation, but Objective-C snippets are provided for those interested.
## Notification content app extensions
{: style="max-width:65%;border:0;margin-top:10px"}
Notification content app extensions provide you a great option for push notification customization. Notification content app extensions display a custom interface for your app’s notifications when a push notification is expanded.
Push notifications can be expanded in three different ways:
- A long press on the push banner
- Swiping down on the push banner
- Swiping the banner to the left and selecting "View"
These custom views offer smart ways to engage customers by displaying distinct types of content, including interactive notifications, notifications populated with user data, and even push messages that can capture information like phone numbers and email. One of our well-known features at Braze, [Push Stories](https://www.braze.com/docs/pt-br/pt-br/user_guide/message_building_by_channel/push/advanced_push_options/push_stories/), are a prime example of what a push notification content app extension can look like!
### Requirements
{: style="float:right;max-width:50%;margin-left:10px; border:0;margin-top:10px"}
- [Push notifications](https://www.braze.com/docs/pt-br/pt-br/developer_guide/push_notifications/?sdktab=swift) successfully integrated in your app
- The following files generated by Xcode based on your coding language:
**Swift**
- `NotificationViewController.swift`
- `MainInterface.storyboard`
**Objective-C**
- `NotificationViewController.h`
- `NotificationViewController.m`
- `MainInterface.storyboard`
## Interactive push notification
Push notifications can respond to user actions inside a content app extension. For users running iOS 12 or later, this means you can turn your push notifications into fully interactive messages! This provides an exciting option to introduce interactivity to your promotions and applications. For example, your push notification can include a game for users to play, a spin-to-win wheel for discounts, or a "like" button to save a listing or song.
The following example shows a push notification where users are able to play a match game inside the expanded notification.
{: style="border:0"}
### Dashboard configuration
To create an interactive push notification, you must set a custom view in your dashboard.
1. From the **Campaigns** page, click **Create Campaign** to start a new push notification campaign.
2. On the **Compose** tab, toggle on **Notification Buttons**.
3. Enter a custom iOS category in the **iOS Notification Category** field.
4. In the `.plist` of your Notification Content Extension Target, set the `UNNotificationExtensionCategory` attribute to your custom iOS category. The value given here must match what is set in the Braze dashboard under **iOS Notification Category**.
5. Set the `UNNotificationExtensionInteractionEnabled` key to `true` to enable user interactions in a push notification.
{: style="max-width:75%;border:0;margin-top:10px"}
{: style="max-width:75%;border:0;margin-top:10px"}
## Personalized push notifications
{: style="float:right;max-width:40%;margin-left:15px;border:0"}
Push notifications can display user-specific information inside a content extension. This allows you to create user-focused push content, such as adding the option to share your progress across different platforms, show unlocked achievements, or display onboarding checklists. This example shows a push notification displayed to a user after they have completed a specific task in the Braze Learning course. By expanding the notification, the user can see their progress through their learning path. The information provided here is user-specific and can be fired off as a session is completed or a specific user action is taken by leveraging an API trigger.
### Dashboard configuration
To create a personalized push notification, you must set a custom view in your dashboard.
1. From the **Campaigns** page, click **Create Campaign** to start a new push notification campaign.
2. On the **Compose** tab, toggle on **Notification Buttons**.
3. Enter a custom iOS category in the **iOS Notification Category** field.
4. In the **Settings** tab, create key-value pairs using standard Liquid. Set the appropriate user attributes you want the message to show. These views can be personalized based on specific user attributes of a specific user profile.
5. In the `.plist` of your Notification Content Extension Target, set the `UNNotificationExtensionCategory` attribute to your custom iOS category. The value given here must match what is set in the Braze dashboard under **iOS Notification Category**.
{: style="max-width:60%;"}
### Handling key-value pairs
The method `didReceive` is called when the notification content app extension has received a notification. This method can be found within the `NotificationViewController`. The key-value pairs provided in the dashboard are represented in the code through the use of a `userInfo` dictionary.
#### Parsing Key-Value Pairs from Push Notifications
``` swift
func didReceive(_ notification: UNNotification) {
let userInfo = notification.request.content.userInfo
guard let value = userInfo["YOUR-KEY-VALUE-PAIR"] as? String,
let otherValue = userInfo["YOUR-OTHER-KEY-VALUE-PAIR"] as? String,
else { fatalError("Key-Value Pairs are incorrect.")}
...
}
```
```objc
- (void)didReceiveNotification:(nonnull UNNotification *)notification {
NSDictionary *userInfo = notification.request.content.userInfo;
if (userInfo[@"YOUR-KEY-VALUE-PAIR"] && userInfo[@"YOUR-OTHER-KEY-VALUE-PAIR"]) {
...
} else {
[NSException raise:NSGenericException format:@"Key-Value Pairs are incorrect"];
}
}
```
## Information capture push notification
Push notifications can capture user information inside a content app extension, pushing the limits of what is possible with a push. Requesting user input through push notifications allows you to not only request basic information like name or email, but also prompt users to submit feedback or complete an unfinished user profile.
**Tip:**
For more information, see [Logging push notification data](https://www.braze.com/docs/pt-br/pt-br/developer_guide/analytics/logging_channel_data/push_notifications/).
In the following flow, the custom view is able to respond to state changes. Those state change components are represented in each image.
1. User receives a push notification.
2. Push is opened. After expanded, the push prompts the user for information. In this example, the user's email address is requested, but you could request any sort of information.
3. Information is provided, and if in the expected format, the registration button is shown.
3. Confirmation view is displayed, and push gets dismissed.
### Dashboard configuration
To create an information capture push notification, you must set a custom view in your dashboard.
1. From the **Campaigns** page, click **Create Campaign** to start a new push notification campaign.
2. On the **Compose** tab, toggle on **Notification Buttons**.
3. Enter a custom iOS category in the **iOS Notification Category** field.
4. In the **Settings** tab, create key-value pairs using standard Liquid. Set the appropriate user attributes you want the message to show.
5. In the `.plist` of your Notification Content Extension Target, set the `UNNotificationExtensionCategory` attribute to your custom iOS category. The value given here must match what is set in the Braze dashboard under **iOS Notification Category**.
As seen in the example, you may also include an image in your push notification. To do this, you must integrate [rich notifications](https://www.braze.com/docs/pt-br/pt-br/developer_guide/push_notifications/rich/?sdktab=swift), set the notification style in your campaign to Rich Notification, and include a rich push image.

### Handling button actions
Each action button is uniquely identified. The code checks if your response identifier is equal to the `actionIdentifier`, and if so, knows that the user clicked the action button.
**Handling Push Notification Action Button Responses**
``` swift
func didReceive(_ response: UNNotificationResponse, completionHandler completion: @escaping (UNNotificationContentExtensionResponseOption) -> Void) {
if response.actionIdentifier == "YOUR-REGISTER-IDENTIFIER" {
// do something
} else {
// do something else
}
}
```
```objc
- (void)didReceiveNotificationResponse:(UNNotificationResponse *)response completionHandler:(void (^)(UNNotificationContentExtensionResponseOption))completion {
if ([response.actionIdentifier isEqualToString:@"YOUR-REGISTER-IDENTIFIER"]) {
completion(UNNotificationContentExtensionResponseOptionDismiss);
} else {
completion(UNNotificationContentExtensionResponseOptionDoNotDismiss);
}
}
```
### Dismissing pushes
Push notifications can be automatically dismissed from an action button press. There are three pre-built push dismissal options that we recommend:
1. `completion(.dismiss)` - Dismisses the notification
2. `completion(.doNotDismiss)` - Notification stays open
3. `completion(.dismissAndForward)` - Push dismisses and the user gets forwarded into the application
# Sobre os estados de inscrição push
Source: /docs/pt-br/developer_guide/push_notifications/subscription_states/index.md
# Sobre os estados de inscrição push
## Push subscription states {#push-sub-states}
A "Push Subscription State" in Braze identifies a **user's** global preference for their desire to receive push notifications. Because the subscription state is user-based, it is not specific to any individual app. Subscription states become helpful flags when deciding which users to target for push notifications.
**Note:**
A user's push subscription state applies to their entire user profile, which includes all of the user's devices.
The following subscription state options exist: `Subscribed`, `Opted-In`, and `Unsubscribed`.
By default, for your user to receive your messages through push, their push subscription state must be either `Subscribed` or `Opted-In`, and they must have foreground push enabled. You can override this setting if needed when composing a message.
|Opt-in State|Description|
|---|---|
|`Subscribed`| Default push subscription state when a user profile is created in Braze. |
|`Opted-In`| A user has explicitly expressed a preference to receive push notifications. Braze automatically moves a user's opt-in state to `Opted-In` if the user accepts an OS-level push prompt.
This does not apply to Android 12 or below users.|
|`Unsubscribed`| A user explicitly unsubscribed from push through your application or other methods your brand provides. By default, Braze push campaigns target only users that are `Subscribed` or `Opted-in` for push.|
{: .reset-td-br-1 .reset-td-br-2 aria-label="Push subscription states #push-sub-states" }
**Important:**
Braze does not automatically change a user's push subscription state to `Unsubscribed`. Remember that if a user's push subscription state is `Unsubscribed`, then the user's `Foreground Push Enabled` filter in segmentation is `false`.
### Push registration and reachable users
Push subscription state reflects a user's preference, but whether they count as **reachable** for push in the dashboard also depends on [push registration](https://www.braze.com/docs/pt-br/pt-br/user_guide/channels/push/push_setup/push_token_lifecycle/)—that is, a valid foreground push token on their profile. For how Braze calculates channel-level counts, see [Measure segment size](https://www.braze.com/docs/pt-br/pt-br/user_guide/audience/segments/measuring_segment_size/).
- **Push campaigns and Canvases:** Users who aren't push registered aren't included in **Reachable users** for Android Push or iOS Push in audience statistics, even when their push subscription state is `Subscribed` or `Opted-In`.
- **Other channels:** The same users can still count as reachable for other channels they qualify for (for example, email or in-app messages).
- **Segments:** Segment membership follows your filters. Users without push registration remain in the segment unless a filter excludes them (for example, **Foreground Push Enabled**). Total segment membership can be higher than the sum of users shown in push-specific **Reachable users** rows.
A user profile can show push subscription state `Subscribed` while no push token is assigned. Those users still don't count toward **Reachable users** for Android Push or iOS Push until Braze records a valid token.
For filter definitions, see [Segmentation filters](https://www.braze.com/docs/pt-br/pt-br/user_guide/audience/segments/segmentation_filters/).
### Updating push subscription states {#update-push-subscription-state}
Review the following ways to update a user's push subscription state:
#### Automatic opt-in (default)
By default, Braze sets a user's push subscription state to `Opted-In` when they first authorize push notifications for your app. Braze also does this when a user re-enables push permissions in their system settings after previously disabling them.
To disable this default behavior, add the following property to your Android Studio project's `braze.xml` file:
```xml
false
```
On iOS, a new install typically shows push subscription state **`Subscribed`** until the user allows notifications. After the user selects **Allow** on the OS prompt, Braze sets the state to **`Opted-In`** when automatic opt-in is enabled. If the user selects **Don't Allow** and later turns push on in iOS Settings, the state updates after the user logs a session—not at the moment they change Settings.
Starting with [Braze Swift SDK version 7.5.0](https://github.com/braze-inc/braze-swift-sdk/releases/tag/7.5.0), you can disable or further customize this behavior by adding the `optInWhenPushAuthorized` configuration to your Xcode project's `AppDelegate.swift` file:
```swift
configuration.optInWhenPushAuthorized = false // disables the default behavior
let braze = Braze(configuration: configuration)
AppDelegate.braze = braze
```
#### SDK integration
You can update a user's subscription state with the Braze SDK using the `setPushNotificationSubscriptionType` method on [Web](https://js.appboycdn.com/web-sdk/latest/doc/classes/braze.user.html#setpushnotificationsubscriptiontype), [Android](https://braze-inc.github.io/braze-android-sdk/kdoc/braze-android-sdk/com.braze/-braze-user/set-push-notification-subscription-type.html), or [iOS](https://braze-inc.github.io/braze-swift-sdk/documentation/brazekit/braze/user-swift.class/set(pushnotificationsubscriptionstate:)). For example, you can use this method to create a settings page in your app where users can manually enable or disable push notifications.
#### REST API
You can update a user's subscription state with the Braze REST API using the [`/users/track` endpoint](https://www.braze.com/docs/pt-br/pt-br/api/endpoints/user_data/post_user_track/) to update their [`push_subscribe`](https://www.braze.com/docs/pt-br/pt-br/api/objects_filters/user_attributes_object) attribute.
### Differences between push enablement and push subscription status
Push enablement refers to whether a user has granted OS- or browser-level permission to receive notifications on a specific device. Push subscription state is a Braze-level setting that represents a user's global preference for receiving push across their profile.
When automatic opt-in is enabled (the default), Braze updates a user's push subscription state to `Opted-In` when they authorize push notifications for your app or re-enable permissions in their system settings (for example, on iOS, Android 13+, and supported web browsers). Otherwise, the user's push subscription state remains `Subscribed` until you explicitly change it using an SDK method or REST API call.
Braze does not automatically change a user's push subscription state to `Unsubscribed` when they opt out of notifications at the OS, browser, or app level. To update a user's push subscription state, you must update it in Braze. For example, if a user disables push from an in-app preference center, update the push subscription state to `Unsubscribed` in Braze. Braze does not update user profiles based on your preference center. To align subscription states with a user's in-app preferences, call the appropriate methods using the [SDK](https://www.braze.com/docs/pt-br/pt-br/user_guide/channels/push/push_setup/push_subscription_states/#sdk-integration) (iOS or Android) or [REST API](https://www.braze.com/docs/pt-br/pt-br/user_guide/channels/push/push_setup/push_subscription_states/#rest-api).
### Imported push tokens (iOS)
When you [import iOS push tokens](https://www.braze.com/docs/pt-br/pt-br/api/endpoints/user_data/post_user_track/#push-token-import) with `push_token_import`, the user's push subscription state is typically **`Subscribed`** until they log a session in your Braze-integrated app. After the first session, Braze may update the state to **`Opted-In`** if [automatic opt-in](#automatic-opt-in-default) applies (for example, when the user authorizes push on iOS and `optInWhenPushAuthorized` is enabled).
Review **Contact Settings** on the user's profile after import and again after the user's first in-app session to confirm the expected state.
### Checking push subscription state
{: style="float:right;max-width:35%;margin-left:15px;"}
You can check a user's push subscription state with Braze in any of the following ways:
* **User profile:** You can access individual user profiles through the Braze dashboard on the **[User Search](https://www.braze.com/docs/pt-br/pt-br/user_guide/engagement_tools/segments/user_profiles/)** page. After finding a user's profile (via email address, phone number, or external user ID), you can select the **Engagement** tab to view and manually adjust a user's subscription state.
* **REST API export:** You can export individual user profiles in JSON format using the export [Users by segment](https://www.braze.com/docs/pt-br/pt-br/api/endpoints/export/user_data/post_users_segment/) or [Users by identifier](https://www.braze.com/docs/pt-br/pt-br/api/endpoints/export/user_data/post_users_identifier/) endpoints. Braze returns a push tokens object that contains push enablement information per device.
# Solução de problemas de notificações por push para o SDK da Braze
Source: /docs/pt-br/developer_guide/push_notifications/troubleshooting/index.md
# Solução de problemas de notificações por push {#troubleshoot-push-notifications}
> Aprenda como solucionar problemas de notificações por push para o SDK da Braze.
## Troubleshooting
If you're experiencing issues after setting up push notifications, consider the following:
- Web push notifications require that your site be HTTPS.
- Not all browsers can receive push messages. Ensure that `braze.isPushSupported()` returns `true` in the browser.
- Some browsers, such as Firefox, do not display images in push notifications. For details on browser support, refer to the [MDN documentation for Notification images](https://developer.mozilla.org/en-US/docs/Web/API/Notification/image).
- If a user has denied a site push access, they won't be prompted for permission again unless they remove the denied status from their browser preferences.
## Understanding the Braze push workflow
The Firebase Cloud Messaging (FCM) service is Google's infrastructure for push notifications sent to Android applications. Here is the simplified structure of how push notifications are enabled for your users' devices and how Braze can send push notifications to them:
```mermaid
---
config:
theme: mc
---
sequenceDiagram
participant Device as User Device
participant App as Android App
participant BrazeSDK as Braze SDK
participant BrazeAPI as Braze Server
participant Firebase as Google Firebase
Note over Device, Firebase: Register Option 1 Register Automatically using `com_braze_firebase_cloud_messaging_registration_enabled` in braze.xml
App ->> Braze: App initializes Braze with the first Braze call This could be automatic session handling
BrazeSDK ->> App: Get push token from Firebase Manager
BrazeSDK ->> BrazeAPI: Send push token to Braze Server
Note right of BrazeAPI: Braze will remove push token from any other user who may have previously been logged in on the same device.
Note over Device, Firebase: Register Option 2 Manual registration.
App ->> BrazeSDK: App sets `Braze.registeredPushToken`
BrazeSDK ->> BrazeAPI: Send push token to Braze Server
Note right of BrazeAPI: Braze will remove push token from any other user who may have previously been logged in on the same device.
Note over Device, Firebase: Push permission
BrazeAPI ->> BrazeSDK: In-App Message containing push prompt
BrazeSDK -> App: In-App Message is displayed
App -> BrazeSDK: User requests permissions
BrazeSDK -> App: Displays the Push Authorization prompt
BrazeSDK -> BrazeAPI: If authorized and `com_braze_optin_when_push_authorized`, Opt-In value is sent.
Note over Device, Firebase: Push Notification Is Sent
BrazeAPI ->> Firebase: Sends push message
Firebase ->> Device: Push message sent
Device ->> App: Android will send the push to the App. This could be blocked to Do Not Disturb, Power Saving Mode, etc.
App ->> BrazeSDK: Message is sent to BrazeFirebaseMessagingService
BrazeSDK ->> Device: SDK will check if the push is from Braze. If so, push data is transformed into a Push Notification and displayed.
```
### Step 1: Configuring your Google Cloud API key
In developing your app, you'll need to provide the Braze Android SDK with your Firebase sender ID. Additionally, you'll need to provide an API Key for server applications to the Braze dashboard. Braze will use this API key to send messages to your devices. You will also need to check that FCM service is enabled in Google Developer's console.
**Note:**
A common mistake during this step is using the app identifier API key instead of the REST API key.
### Step 2: Devices register for FCM and provide Braze with push tokens
In typical integrations, the Braze Android SDK will handle registering devices for FCM capability. This will usually happen immediately upon opening the app for the first time. After registration, Braze will be provided with an FCM Registration ID, which is used to send messages to that device specifically. We will store the Registration ID for that user, and that user will become "push registered" if they previously did not have a push token for any of your apps.
### Step 3: Launching a Braze push campaign
When a push campaign is launched, Braze will make requests to FCM to deliver your message. Braze will use the API key copied in the dashboard to authenticate and verify that we can send push notifications to the push tokens provided.
### Step 4: Removing invalid tokens
If FCM informs us that any of the push tokens we were attempting to send a message to are invalid, we remove those tokens from the user profiles they were associated with. If users have no other push tokens, they will no longer show up as "Push Registered" under the **Segments** page.
For more details about FCM, visit [Cloud messaging](https://firebase.google.com/docs/cloud-messaging/).
## Utilizing the push error logs
Braze provides push notification errors within the message activity log. This error log provides a variety of warnings which can be very helpful for identifying why your campaigns aren't working as expected. Clicking on an error message will redirect you to relevant documentation to help you troubleshoot a particular incident.

## Troubleshooting scenarios
### Push isn't sending
Your push messages might not be sending because of the following situations:
- Your credentials exist in the wrong Google Cloud Platform project ID (wrong sender ID).
- Your credentials have the wrong permission scope.
- You uploaded wrong credentials to the wrong Braze workspace (wrong sender ID).
For other issues that may prevent you from sending a push message, refer to [User Guide: Troubleshooting Push Notifications](https://www.braze.com/docs/pt-br/pt-br/user_guide/message_building_by_channel/push/troubleshooting/).
### No "push registered" users showing in the Braze dashboard (prior to sending messages)
Confirm that your app is correctly configured to allow push notifications. Common failure points to check include:
#### Incorrect sender ID
Check that the correct FCM sender ID is included in the `braze.xml` file. An incorrect sender ID will lead to `MismatchSenderID` errors reported in the dashboard's message activity log.
#### Braze registration not occurring
Since FCM registration is handled outside of Braze, failure to register can only occur in two places:
1. During registration with FCM
2. When passing the FCM-generated push token to Braze
We recommend setting a breakpoint or logging to confirm that the FCM-generated push token is being sent to Braze. If a token is not generated correctly or at all, we recommend consulting the [FCM documentation](https://firebase.google.com/docs/cloud-messaging/android/client).
#### Google Play Services not present
For FCM push to work, Google Play Services must be present on the device. If Google Play Services isn't on a device, push registration will not occur.
**Note:** Google Play Services is not installed on Android emulators without Google APIs installed.
#### Device not connected to the internet
Check that your device has good internet connectivity and isn't sending network traffic through a proxy.
### Tapping push notification doesn't open the app
Check if `com_braze_handle_push_deep_links_automatically` is set to `true` or `false`. To enable Braze to automatically open the app and any deep links when a push notification is tapped, set `com_braze_handle_push_deep_links_automatically` to `true` in your `braze.xml` file.
If `com_braze_handle_push_deep_links_automatically` is set to its default of `false`, you need to use a Braze Push Callback to listen for and handle the push received and opened intents.
### Push notifications bounced
If a push notification isn't delivered, make sure it didn't bounce by looking in the [developer console](https://www.braze.com/docs/pt-br/pt-br/developer_guide/platforms/android/push_notifications/troubleshooting/#utilizing-the-push-error-logs). The following are descriptions of common errors that may be logged in the developer console:
#### Error: MismatchSenderID
`MismatchSenderID` indicates an authentication failure. Confirm your Firebase sender ID and FCM API key are correct.
#### Error: InvalidRegistration
`InvalidRegistration` can be caused by a malformed push token.
1. Make sure to pass a valid push token to Braze from [Firebase Cloud Messaging](https://firebase.google.com/docs/cloud-messaging/android/client#retrieve-the-current-registration-token).
#### Error: NotRegistered
1. `NotRegistered` typically occurs when an app has been deleted from a device. Braze uses `NotRegistered` internally to signal that an app has been uninstalled from a device.
2. `NotRegistered` may also occur when multiple registrations occur and a second registration invalidates the first token.
### Push notifications sent but not displayed on users' devices
There are a few reasons why this could be occurring:
#### Application was force quit
If you force-quit your application through your system settings, your push notifications will not be sent. Launching the app again will re-enable your device to receive push notifications.
#### BrazeFirebaseMessagingService not registered
The BrazeFirebaseMessagingService must be properly registered in `AndroidManifest.xml` for push notifications to appear:
```xml
```
#### Firewall is blocking push
If you are testing push over Wi-Fi, your firewall may be blocking ports necessary for FCM to receive messages. Confirm that ports `5228`, `5229`, and `5230` are open. Additionally, since FCM doesn't specify its IPs, you must also allow your firewall to accept outgoing connections to all IP addresses contained in the IP blocks listed in Google's ASN of `15169`.
#### Custom notification factory returning null
If you have implemented a [custom notification factory](https://www.braze.com/docs/pt-br/pt-br/developer_guide/platform_integration_guides/android/push_notifications/android/integration/standard_integration/#custom-displaying-notifications), ensure that it is not returning `null`. This will cause notifications not to be displayed.
### "Push registered" users no longer enabled after sending messages
There are a few reasons why this could be happening:
#### Application was uninstalled
Users have uninstalled the application. This will invalidate their FCM push token.
#### Invalid Firebase Cloud Messaging server key
The Firebase Cloud Messaging server key provided in the Braze dashboard is invalid. The sender ID provided should match the one referenced in your app's `braze.xml` file. The server key and sender ID are found here in your Firebase Console:

### Push clicks not logged
Braze logs push clicks automatically, so this scenario should be comparatively rare.
If push clicks are not being logged, it is possible that push click data has not been flushed to our servers yet. Braze throttles the frequency of its flushes based on the strength of the network connection. With a good network connection, push click-data should arrive at the server within a minute in most circumstances.
### Deep links not working
#### Verify deep link configuration
Deep links can be [tested with ADB](https://developer.android.com/training/app-indexing/deep-linking.html#testing-filters). We recommend testing your deep link with the following command:
`adb shell am start -W -a android.intent.action.VIEW -d "THE_DEEP_LINK" THE_PACKAGE_NAME`
If the deep link fails to work, the deep link may be misconfigured. A misconfigured deep link will not work when sent through Braze push.
#### Verify custom handling logic
If the deep link [works correctly with ADB](https://developer.android.com/training/app-indexing/deep-linking.html#testing-filters) but fails to work from Braze push, check whether any [custom push open handling](https://www.braze.com/docs/pt-br/pt-br/developer_guide/platform_integration_guides/android/push_notifications/android/integration/standard_integration/#android-push-listener-callback) has been implemented. If so, verify that the custom handling code properly handles the incoming deep link.
#### Disable back stack behavior
If the deep link [works correctly with ADB](https://developer.android.com/training/app-indexing/deep-linking.html#testing-filters) but fails to work from Braze push, try disabling [back stack](https://developer.android.com/guide/components/activities/tasks-and-back-stack). To do so, update your **braze.xml** file to include:
```xml
false
```
## Understanding the Braze/APNs workflow
The Apple Push Notification service (APNs) is the infrastructure for sending push notifications to applications running on Apple's platforms. Here is the simplified structure of how push notifications are enabled for your users' devices and how Braze can send push notifications to them:
1. You configure the push certificate and provisioning profile
2. Devices register for APNs and provide Braze with push tokens
3. You launch a Braze push campaign
4. Braze removes invalid tokens
### Step 1: Configuring the push certificate and provisioning profile
In developing your app, you'll need to create an SSL certificate to enable push notifications. This certificate will be included in the provisioning profile your app is built with and will also need to be uploaded to the Braze dashboard. The certificate allows Braze to tell APNs that we are allowed to send push notifications on your behalf.
There are two types of [provisioning profiles](https://developer.apple.com/library/content/documentation/IDEs/Conceptual/AppDistributionGuide/MaintainingProfiles/MaintainingProfiles.html) and certificates: development and distribution. We recommend just using distribution profiles and certificates to avoid any confusion. If you choose to use different profiles and certificates for development and distribution, ensure that the certificate uploaded to the dashboard matches the provisioning profile you are currently using.
**Warning:**
Do not change the push certificate environment (development versus production). Changing the push certificate to the wrong environment can lead to your users having their push token accidentally removed, making them unreachable by push.
### Step 2: Devices register for APNs and provide Braze with push tokens
When users open your app, they will be prompted to accept push notifications. If they accept this prompt, APNs will generate a push token for that particular device. The Swift SDK will immediately and asynchronously send up the push token for apps using the default [automatic flush policy](https://www.braze.com/docs/pt-br/pt-br/developer_guide/platform_integration_guides/swift/advanced_use_cases/fine_network_traffic_control/#automatic-request-processing). After we have a push token associated with a user, they will show as "Push Registered" in the dashboard on their user profile under the **Engagement** tab and will be eligible to receive push notifications from Braze campaigns.
**Note:**
Starting in macOS 13, on certain devices, you can test push notifications on an iOS 16 Simulator running on Xcode 14. For further details, refer to the [Xcode 14 Release Notes](https://developer.apple.com/documentation/xcode-release-notes/xcode-14-release-notes).
#### Considerations for push token generation
- If users install your app on another device, another token will be created and captured in the same way.
- If users reinstall your app, a new token will be generated and passed to Braze. However, the original token may still be logged as valid by APNs and Braze.
- If users uninstall your app, Braze doesn't get immediately notified of this and the token will still appear as valid until it is retired by APNs.
- At some point, APNs will retire old tokens. Braze doesn't have control or visibility of this.
### Step 3: Launching a Braze push campaign
When a push campaign is launched, Braze will make requests to APNs to deliver your message. Specifically, the requests are passed to APNs for each current valid push token unless **Send to a user's most recent device** is selected. After Braze receives a successful response from APNs, we will log a successful delivery on the user profile, though the user may not have received the actual message for reasons including:
- Their device is powered off.
- Their device isn't connected to the internet (Wi-Fi or cellular).
- They recently uninstalled the app.
Braze will use the SSL push certificate uploaded in the dashboard to authenticate and verify that we are allowed to send push notifications to the push tokens provided. If a device is online, the notification should be received shortly after the campaign has been sent. Note that Braze sets the default APNs [expiration date](https://developer.apple.com/documentation/usernotifications/setting_up_a_remote_notification_server/sending_notification_requests_to_apns#2947607) for notifications to 30 days.
### Step 4: Removing invalid tokens
If [APNs](https://developer.apple.com/library/content/documentation/NetworkingInternet/Conceptual/RemoteNotificationsPG/APNSOverview.html#//apple_ref/doc/uid/TP40008194-CH8-SW1) informs us that any of the push tokens we were attempting to send a message to are invalid, we remove those tokens from the user profiles they were associated with.
**Note:**
It's normal for APNs to initially return a success status even if a token becomes unregistered, as APNs doesn't immediately report token invalidation events. APNs intentionally delays returning a `410` status for invalid tokens on a randomized schedule, designed to protect user privacy and prevent tracking of app uninstalls. You can safely continue sending notifications to an unregistered token until APNs returns a `410` status.
## Using the push error logs
The [Message Activity Log](https://www.braze.com/docs/pt-br/pt-br/user_guide/administrative/app_settings/message_activity_log_tab/) gives you the opportunity to see any messages (especially error messages) associated with your campaigns and sends, including push notification errors. This error log provides a variety of warnings which can be very helpful for identifying why your campaigns aren't working as expected. Clicking on an error message will redirect you to relevant documentation to help you troubleshoot a particular incident.

Common errors you might see here include user-specific notifications, such as ["Received Unregistered Sending to Push Token"](#swift_received-unregistered-sending).
In addition, Braze also provides a push changelog on the user profile under the **Engagement** tab. This changelog provides insight into push registration behavior such as token invalidation, push registration errors, tokens being moved to new users, etc.
{: style="max-width:50%;" }
### Message Activity Log errors
#### Received unregistered sending to push token {#received-unregistered-sending}
- Make sure that the push token being sent to Braze from the method `AppDelegate.braze?.notifications.register(deviceToken:)` is valid. You can look in the **Message Activity Log** to see the push token. It should look something like `6e407a9be8d07f0cdeb9e724733a89445f57a89ec890d63867c482a483506fa6`, a long string containing a mix of letters and numbers. If your push token looks different, check your [code](https://www.braze.com/docs/pt-br/pt-br/developer_guide/platform_integration_guides/swift/push_notifications/integration/#step-4-register-push-tokens-with-braze) for sending Braze the push tokens.
- Ensure that your push provisioning profile matches the environment you're testing. Universal certificates may be configured in the Braze dashboard to send to either the development or production APNs environment. Using a development certificate for a production app or a production certificate for a development app will not work.
- Check that the push token you have uploaded to Braze matches the provisioning profile you used to build the app you sent the push token from.
#### Device token not for topic
APNs returns `DeviceTokenNotForTopic` (HTTP status 400) when the push token doesn't match the topic (bundle ID) configured for your credentials. Braze may surface this in **Message Activity Log** or push delivery logs as `DeviceTokenNotForTopic`.
To resolve the mismatch:
1. Confirm the app's **bundle ID** matches the **App Bundle ID** in Braze (**Settings** > **App Settings** > **Push Notification Settings**).
2. Verify the provisioning profile used to build the app includes push capability for that bundle ID.
3. Confirm the push credential uploaded to Braze matches the app's environment (development versus production).
4. For `.p8` keys, verify **Team ID** and **Key ID** in Braze match your Apple Developer account.
5. Re-upload a valid `.p8` key or `.p12` certificate if credentials were rotated or revoked.
Prefer `.p8` authentication keys when possible. For credential types and dashboard status indicators, see [Migrate to a .p8 authentication key](https://www.braze.com/docs/pt-br/pt-br/user_guide/channels/push/troubleshooting/#migrate-to-a-p8-authentication-key).
#### BadDeviceToken sending to push token
The `BadDeviceToken` is an APNs error code and does not originate from Braze. There could be a number of reasons for this response being returned, including the following:
- The app received a push token that was invalid for the credentials uploaded to the dashboard.
- Push was disabled for this workspace.
- The user has opted out of push.
- The app was uninstalled.
- Apple refreshed the push token, which invalidated the old token.
- The app was built for a production environment, but the push credentials uploaded to Braze are set for a development environment (or the other way around).
## Push registration issues
### No push registration prompt
If the application does not prompt you to register for push notifications, there is likely an issue with your push registration integration. Ensure you have followed our [documentation](https://www.braze.com/docs/pt-br/pt-br/developer_guide/push_notifications/?sdktab=swift) and correctly integrated our push registration. You can also set breakpoints in your code to ensure the push registration code is running.
### No "push registered" users showing in the dashboard (prior to sending messages)
Ensure that your app is correctly configured to allow push notifications. Common failure points to check include:
- Check that your app is prompting you to allow push notifications. Typically, this prompt will appear upon your first open of the app, but it can be programmed to appear elsewhere. If it does not appear where it should be, the problem is likely with the basic configuration of your app's push capabilities.
- Verify the steps for [push integration](https://www.braze.com/docs/pt-br/pt-br/developer_guide/push_notifications/?sdktab=swift) were successfully completed.
- Check that the provisioning profile your app was built with includes permissions for push. Make sure that you're pulling down all of the available provisioning profiles from your Apple developer account. To confirm this, perform the following steps:
1. In Xcode, navigate to **Preferences > Accounts** (or use the keyboard shortcut Command+,).
2. Select the Apple ID you use for your developer account and click **View Details**.
3. On the next page, click ** Refresh** and confirm that you're pulling all available provisioning profiles.
- Check you have [properly enabled push capability](https://www.braze.com/docs/pt-br/pt-br/developer_guide/platform_integration_guides/swift/push_notifications/integration/#step-2-enable-push-capabilities) in your app.
- Check your push provisioning profile matches the environment you're testing in. Universal certificates may be configured in the Braze dashboard to send to either the development or production APNs environment. Using a development certificate for a production app or a production certificate for a development app will not work.
- Check that you are calling our `registerPushToken` method by setting a breakpoint in your code.
- Make sure you're testing using a device (push will not work on a simulator) and have good network connectivity.
## Push notifications sent but not displayed on users’ devices
### "Push registered" users no longer enabled after sending messages
This likely indicates that the user had an invalid push token. This can happen for several reasons:
#### Dashboard and app certificate mismatch
If the push certificate you uploaded in the dashboard is not the same one in the provisioning profile that your app was built with, APNs will reject the token. Verify that you have uploaded the correct certificate and completed another session in the app before attempting another test notification.
#### Application was uninstalled
If a user has uninstalled your application, their push token will be invalid and removed upon the next send.
#### Regenerating your provisioning profile
As a last resort, starting over fresh and creating a whole new provisioning profile can clear up configuration errors that come from working with multiple environments, profiles, and apps at the same time. There are many "moving parts" in setting up push notifications, so sometimes, it is best to retry from the beginning. This will also help isolate the problem if you need to continue troubleshooting.
### Messages not delivered to "push registered" users
#### App is foregrounded
On iOS versions that do not integrate push via the `UserNotifications` framework, if the app is in the foreground when the push message is received, it will not be displayed. You should background the app on your test devices before sending test messages.
#### Test notification scheduled incorrectly
Check the schedule you set for your test message. If it is set to local time zone delivery or [Intelligent Timing](https://www.braze.com/docs/pt-br/pt-br/user_guide/brazeai/intelligence/intelligent_timing/), you may have just not received the message yet (or had the app in the foreground when it was received).
### User not "push registered" for the app being tested
Check the user profile of the user you are trying to send a test message to. Under the **Engagement** tab, there should be a list of "pushable apps." Verify the app you are trying to send test messages to is in this list. Users will show up as "Push Registered" if they have a push token for any app in your workspace, so this could be something of a false positive.
The following would indicate a problem with push registration or that the user's token had been returned to Braze as invalid by APNs after being pushed:
{: style="max-width:50%"}
## Push clicks not logged {#push-clicks-not-logged}
- Make sure you have followed the [push integration steps](https://www.braze.com/docs/pt-br/pt-br/developer_guide/platform_integration_guides/swift/push_notifications/integration/#step-5-enable-push-handling).
- Braze does not handle push notifications received silently in the foreground (default foreground push behavior prior to the `UserNotifications` framework). This means that links will not be opened, and push clicks will not be logged. If your application has not yet integrated the `UserNotifications` framework, Braze will not handle push notifications when the application state is `UIApplicationStateActive`. Ensure that your app does not delay calls to [push handling methods](https://www.braze.com/docs/pt-br/pt-br/developer_guide/platform_integration_guides/swift/push_notifications/integration/#step-5-enable-push-handling); otherwise, the Swift SDK may treat push notifications as silent foreground push events and not handle them.
## Deep links not working
For comprehensive troubleshooting across all channels—including universal links, custom schemes, email, and third-party providers like Branch—see [Deep linking troubleshooting](https://www.braze.com/docs/pt-br/pt-br/developer_guide/push_notifications/deep_linking_troubleshooting).
### Web links from push clicks not opening
Links in push notifications need to be ATS compliant to be opened in web views. Ensure that your web links use HTTPS. For more information, refer to [ATS compliance](https://www.braze.com/docs/pt-br/pt-br/developer_guide/platform_integration_guides/swift/advanced_use_cases/linking/#app-transport-security-ats).
### Deep links from push clicks not opening
Most of the code that handles deep links also handles push opens. First, ensure that push opens are being logged. If not, fix that issue (as the fix often fixes link handling).
If opens are being logged, check whether it is an issue with the deep link in general or with the deep linking push click handling. To do this, test to see if a deep link from an in-app message click works.
## Understanding the Braze push workflow
The Firebase Cloud Messaging (FCM) service is Google's infrastructure for push notifications sent to Android applications. Here is the simplified structure of how push notifications are enabled for your users' devices and how Braze can send push notifications to them:
```mermaid
---
config:
theme: mc
---
sequenceDiagram
participant Device as User Device
participant App as Android App
participant BrazeSDK as Braze SDK
participant BrazeAPI as Braze Server
participant Firebase as Google Firebase
Note over Device, Firebase: Register Option 1 Register Automatically using `com_braze_firebase_cloud_messaging_registration_enabled` in braze.xml
App ->> Braze: App initializes Braze with the first Braze call This could be automatic session handling
BrazeSDK ->> App: Get push token from Firebase Manager
BrazeSDK ->> BrazeAPI: Send push token to Braze Server
Note right of BrazeAPI: Braze will remove push token from any other user who may have previously been logged in on the same device.
Note over Device, Firebase: Register Option 2 Manual registration.
App ->> BrazeSDK: App sets `Braze.registeredPushToken`
BrazeSDK ->> BrazeAPI: Send push token to Braze Server
Note right of BrazeAPI: Braze will remove push token from any other user who may have previously been logged in on the same device.
Note over Device, Firebase: Push permission
BrazeAPI ->> BrazeSDK: In-App Message containing push prompt
BrazeSDK -> App: In-App Message is displayed
App -> BrazeSDK: User requests permissions
BrazeSDK -> App: Displays the Push Authorization prompt
BrazeSDK -> BrazeAPI: If authorized and `com_braze_optin_when_push_authorized`, Opt-In value is sent.
Note over Device, Firebase: Push Notification Is Sent
BrazeAPI ->> Firebase: Sends push message
Firebase ->> Device: Push message sent
Device ->> App: Android will send the push to the App. This could be blocked to Do Not Disturb, Power Saving Mode, etc.
App ->> BrazeSDK: Message is sent to BrazeFirebaseMessagingService
BrazeSDK ->> Device: SDK will check if the push is from Braze. If so, push data is transformed into a Push Notification and displayed.
```
### Step 1: Configuring your Google Cloud API key
In developing your app, you'll need to provide the Braze Android SDK with your Firebase sender ID. Additionally, you'll need to provide an API Key for server applications to the Braze dashboard. Braze will use this API key to send messages to your devices. You will also need to check that FCM service is enabled in Google Developer's console.
**Note:**
A common mistake during this step is using the app identifier API key instead of the REST API key.
### Step 2: Devices register for FCM and provide Braze with push tokens
In typical integrations, the Braze Android SDK will handle registering devices for FCM capability. This will usually happen immediately upon opening the app for the first time. After registration, Braze will be provided with an FCM Registration ID, which is used to send messages to that device specifically. We will store the Registration ID for that user, and that user will become "push registered" if they previously did not have a push token for any of your apps.
### Step 3: Launching a Braze push campaign
When a push campaign is launched, Braze will make requests to FCM to deliver your message. Braze will use the API key copied in the dashboard to authenticate and verify that we can send push notifications to the push tokens provided.
### Step 4: Removing invalid tokens
If FCM informs us that any of the push tokens we were attempting to send a message to are invalid, we remove those tokens from the user profiles they were associated with. If users have no other push tokens, they will no longer show up as "Push Registered" under the **Segments** page.
For more details about FCM, visit [Cloud messaging](https://firebase.google.com/docs/cloud-messaging/).
## Utilizing the push error logs
Braze provides push notification errors within the message activity log. This error log provides a variety of warnings which can be very helpful for identifying why your campaigns aren't working as expected. Clicking on an error message will redirect you to relevant documentation to help you troubleshoot a particular incident.

## Troubleshooting scenarios
### Push isn't sending
Your push messages might not be sending because of the following situations:
- Your credentials exist in the wrong Google Cloud Platform project ID (wrong sender ID).
- Your credentials have the wrong permission scope.
- You uploaded wrong credentials to the wrong Braze workspace (wrong sender ID).
For other issues that may prevent you from sending a push message, refer to [User Guide: Troubleshooting Push Notifications](https://www.braze.com/docs/pt-br/pt-br/user_guide/message_building_by_channel/push/troubleshooting/).
### No "push registered" users showing in the Braze dashboard (prior to sending messages)
Confirm that your app is correctly configured to allow push notifications. Common failure points to check include:
#### Incorrect sender ID
Check that the correct FCM sender ID is included in the `braze.xml` file. An incorrect sender ID will lead to `MismatchSenderID` errors reported in the dashboard's message activity log.
#### Braze registration not occurring
Since FCM registration is handled outside of Braze, failure to register can only occur in two places:
1. During registration with FCM
2. When passing the FCM-generated push token to Braze
We recommend setting a breakpoint or logging to confirm that the FCM-generated push token is being sent to Braze. If a token is not generated correctly or at all, we recommend consulting the [FCM documentation](https://firebase.google.com/docs/cloud-messaging/android/client).
#### Google Play Services not present
For FCM push to work, Google Play Services must be present on the device. If Google Play Services isn't on a device, push registration will not occur.
**Note:** Google Play Services is not installed on Android emulators without Google APIs installed.
#### Device not connected to the internet
Check that your device has good internet connectivity and isn't sending network traffic through a proxy.
### Tapping push notification doesn't open the app
Check if `com_braze_handle_push_deep_links_automatically` is set to `true` or `false`. To enable Braze to automatically open the app and any deep links when a push notification is tapped, set `com_braze_handle_push_deep_links_automatically` to `true` in your `braze.xml` file.
If `com_braze_handle_push_deep_links_automatically` is set to its default of `false`, you need to use a Braze Push Callback to listen for and handle the push received and opened intents.
### Push notifications bounced
If a push notification isn't delivered, make sure it didn't bounce by looking in the [developer console](https://www.braze.com/docs/pt-br/pt-br/developer_guide/platforms/android/push_notifications/troubleshooting/#utilizing-the-push-error-logs). The following are descriptions of common errors that may be logged in the developer console:
#### Error: MismatchSenderID
`MismatchSenderID` indicates an authentication failure. Confirm your Firebase sender ID and FCM API key are correct.
#### Error: InvalidRegistration
`InvalidRegistration` can be caused by a malformed push token.
1. Make sure to pass a valid push token to Braze from [Firebase Cloud Messaging](https://firebase.google.com/docs/cloud-messaging/android/client#retrieve-the-current-registration-token).
#### Error: NotRegistered
1. `NotRegistered` typically occurs when an app has been deleted from a device. Braze uses `NotRegistered` internally to signal that an app has been uninstalled from a device.
2. `NotRegistered` may also occur when multiple registrations occur and a second registration invalidates the first token.
### Push notifications sent but not displayed on users' devices
There are a few reasons why this could be occurring:
#### Application was force quit
If you force-quit your application through your system settings, your push notifications will not be sent. Launching the app again will re-enable your device to receive push notifications.
#### BrazeFirebaseMessagingService not registered
The BrazeFirebaseMessagingService must be properly registered in `AndroidManifest.xml` for push notifications to appear:
```xml
```
#### Firewall is blocking push
If you are testing push over Wi-Fi, your firewall may be blocking ports necessary for FCM to receive messages. Confirm that ports `5228`, `5229`, and `5230` are open. Additionally, since FCM doesn't specify its IPs, you must also allow your firewall to accept outgoing connections to all IP addresses contained in the IP blocks listed in Google's ASN of `15169`.
#### Custom notification factory returning null
If you have implemented a [custom notification factory](https://www.braze.com/docs/pt-br/pt-br/developer_guide/platform_integration_guides/android/push_notifications/android/integration/standard_integration/#custom-displaying-notifications), ensure that it is not returning `null`. This will cause notifications not to be displayed.
### "Push registered" users no longer enabled after sending messages
There are a few reasons why this could be happening:
#### Application was uninstalled
Users have uninstalled the application. This will invalidate their FCM push token.
#### Invalid Firebase Cloud Messaging server key
The Firebase Cloud Messaging server key provided in the Braze dashboard is invalid. The sender ID provided should match the one referenced in your app's `braze.xml` file. The server key and sender ID are found here in your Firebase Console:

### Push clicks not logged
Braze logs push clicks automatically, so this scenario should be comparatively rare.
If push clicks are not being logged, it is possible that push click data has not been flushed to our servers yet. Braze throttles the frequency of its flushes based on the strength of the network connection. With a good network connection, push click-data should arrive at the server within a minute in most circumstances.
### Deep links not working
#### Verify deep link configuration
Deep links can be [tested with ADB](https://developer.android.com/training/app-indexing/deep-linking.html#testing-filters). We recommend testing your deep link with the following command:
`adb shell am start -W -a android.intent.action.VIEW -d "THE_DEEP_LINK" THE_PACKAGE_NAME`
If the deep link fails to work, the deep link may be misconfigured. A misconfigured deep link will not work when sent through Braze push.
#### Verify custom handling logic
If the deep link [works correctly with ADB](https://developer.android.com/training/app-indexing/deep-linking.html#testing-filters) but fails to work from Braze push, check whether any [custom push open handling](https://www.braze.com/docs/pt-br/pt-br/developer_guide/platform_integration_guides/android/push_notifications/android/integration/standard_integration/#android-push-listener-callback) has been implemented. If so, verify that the custom handling code properly handles the incoming deep link.
#### Disable back stack behavior
If the deep link [works correctly with ADB](https://developer.android.com/training/app-indexing/deep-linking.html#testing-filters) but fails to work from Braze push, try disabling [back stack](https://developer.android.com/guide/components/activities/tasks-and-back-stack). To do so, update your **braze.xml** file to include:
```xml
false
```
## Troubleshooting
### Push doesn't appear after app is closed from task switcher
If you observe that push notifications no longer appear after the app is closed from the task switcher, your app is likely in Debug mode. .NET MAUI adds scaffolding in Debug mode that prevents apps from receiving push after their process is killed. If you run your app in Release Mode, you should see push even after the app is closed from the task switcher.
### Custom notification factory not being set correctly
Custom notification factories (and all delegates) must extend [`Java.Lang.Object`](https://developer.xamarin.com/api/type/Android.Runtime.IJavaObject/) to work properly across the C# and Java divide. See [Xamarin](https://developer.xamarin.com/guides/android/advanced_topics/java_integration_overview/working_with_jni/#Implementing_Interfaces) on implementing Java interfaces for more information.
## Quebras de linha em notificações por push {#push-linebreaks}
Ao redigir notificações por push com Liquid tags, as quebras de linha adjacentes às Liquid tags são automaticamente removidas antes do envio da mensagem. No [criador de notificações por push](https://www.braze.com/docs/pt-br/pt-br/user_guide/message_building_by_channel/push/creating_a_push_message/), essas quebras de linha são adicionadas novamente para que sua mensagem permaneça legível durante a edição. Se você notar quebras de linha ao redor das Liquid tags ao salvar sua mensagem, esse é o comportamento esperado.
# Atividades ao Vivo para o SDK do Braze
Source: /docs/pt-br/developer_guide/live_notifications/index.md
Atividades ao vivo
> Aprenda como enviar notificações persistentes e dinâmicas diretamente para as telas de bloqueio dos seus usuários, para que eles possam receber atualizações em tempo real sem precisar abrir seu app. Para Swift, isso é suportado nativamente.
Aprenda como enviar notificações persistentes e dinâmicas diretamente para as telas de bloqueio dos seus usuários, para que eles possam receber atualizações em tempo real sem nem mesmo abrir seu app.
Featured:
- Implementando Atividades ao Vivo para Swift
# Atualizações ao vivo para o SDK Braze do Android
Source: /docs/pt-br/developer_guide/live_notifications/live_updates/index.md
# Atualizações ao vivo para Android {#live-updates-for-android}
> Aprenda como usar atualizações ao vivo do Android no SDK da Braze, também conhecidas como [notificações centradas em progresso](https://developer.android.com/about/versions/16/features/progress-centric-notifications). Essas notificações são semelhantes às [Live Activities para o SDK Braze do Swift](https://www.braze.com/docs/pt-br/pt-br/developer_guide/live_notifications/live_activities/), permitindo que você exiba notificações interativas na tela de bloqueio. O Android 16 introduz notificações centradas em progresso para ajudar os usuários a acompanhar jornadas iniciadas pelo usuário, do início ao fim.
## Como funciona {#how-it-works}
Você pode usar a interface [`IBrazeNotificationFactory`](https://braze-inc.github.io/braze-android-sdk/kdoc/braze-android-sdk/com.braze/-i-braze-notification-factory/index.html) para personalizar como as notificações por push da Braze são exibidas. Ao estender `BrazeNotificationFactory`, a Braze chamará o método `createNotification()` da sua fábrica antes que a notificação seja exibida ao usuário. Em seguida, será passada uma carga útil contendo pares de chave-valor personalizados enviados pelo dashboard da Braze ou pela REST API.
## Exibindo uma atualização ao vivo {#displaying-a-live-update}
Nesta seção, você fará parceria com o Superb Owl, o apresentador de um novo programa de jogos onde equipes de resgate de vida selvagem competem para ver quem consegue salvar mais corujas. Eles querem aproveitar as atualizações ao vivo em seu app Android para exibir o status de uma partida em andamento e fazer atualizações dinâmicas na notificação em tempo real.
{: style="max-width:40%;"}
### Prerequisites
Before you can use this feature, you'll need to [integrate the Android Braze SDK](https://www.braze.com/docs/pt-br/pt-br/developer_guide/sdk_integration/?sdktab=android).
### Etapa 1: Criar uma fábrica de notificações personalizada {#step-1-create-a-custom-notification-factory}
No seu app, crie um novo arquivo chamado `MyCustomNotificationFactory.kt` que estenda [`BrazeNotificationFactory`](https://braze-inc.github.io/braze-android-sdk/kdoc/braze-android-sdk/com.braze/-i-braze-notification-factory/index.html) para lidar com a forma como as atualizações ao vivo da Braze são exibidas.
No exemplo a seguir, o Superb Owl criou uma fábrica de notificações personalizada para exibir uma atualização ao vivo para partidas em andamento. Na próxima etapa, você criará um novo método chamado `getTeamInfo` para mapear os dados de uma equipe para a atividade.
```kotlin
class MyCustomNotificationFactory : IBrazeNotificationFactory {
override fun createNotification(payload: BrazeNotificationPayload): Notification? {
val notificationBuilder = populateNotificationBuilder(payload)
val context = payload.context ?: return null
if (notificationBuilder == null) {
brazelog { "Notification could not be built. Returning null as created notification." }
return null
}
notificationBuilder.setContentTitle("Android Live Updates").setContentText("Ongoing updates below")
setProgressStyle(notificationBuilder, context)
return notificationBuilder.build()
}
private fun setProgressStyle(notificationBuilder: NotificationCompat.Builder, context: Context) {
val style = NotificationCompat.ProgressStyle()
.setStyledByProgress(false)
.setProgress(200)
.setProgressTrackerIcon(IconCompat.createWithResource(context, R.drawable.notification_small_icon))
.setProgressSegments(
mutableListOf(
NotificationCompat.ProgressStyle.Segment(1000).setColor(Color.GRAY),
NotificationCompat.ProgressStyle.Segment(200).setColor(Color.BLUE),
)
)
.setProgressPoints(
mutableListOf(
NotificationCompat.ProgressStyle.Point(60).setColor(Color.RED),
NotificationCompat.ProgressStyle.Point(560).setColor(Color.GREEN)
)
)
notificationBuilder.setStyle(style)
}
}
```
### Etapa 2: Mapear dados personalizados {#step-2-map-custom-data}
Em `MyCustomNotificationFactory.kt`, crie um novo método para lidar com dados quando as atualizações ao vivo forem exibidas.
O Superb Owl criou o seguinte método para mapear o nome e o logotipo de cada equipe para atualizações ao vivo expandidas:
```kotlin
class CustomNotificationFactory : BrazeNotificationFactory() {
override fun createNotification(payload: BrazeNotificationPayload): Notification? {
// Your existing code
return super.createNotification(payload)
}
// Your new method
private fun getTeamInfo(team: String?): Pair {
return when (team) {
"WBF" -> Pair("Wild Bird Fund", R.drawable.team_wbf)
"OWL" -> Pair("Owl Rehab", R.drawable.team_owl)
else -> Pair("Unknown", R.drawable.notification_small_icon)
}
}
}
```
### Etapa 3: Definir a fábrica de notificações personalizada {#step-3-set-the-custom-notification-factory}
Na sua classe de aplicativo, use [`customBrazeNotificationFactory`](https://braze-inc.github.io/braze-android-sdk/kdoc/braze-android-sdk/com.braze/-braze/-companion/custom-braze-notification-factory.html?query=var%20customBrazeNotificationFactory:%20IBrazeNotificationFactory?) para definir sua fábrica de notificações personalizada.
```kotlin
class MyApplication : Application() {
override fun onCreate() {
super.onCreate()
// Tell Braze to use your custom factory for notifications
Braze.customBrazeNotificationFactory = MyCustomNotificationFactory()
}
}
```
### Etapa 4: Enviar a atividade {#step-4-send-the-activity}
Você pode usar o endpoint da REST API [`/messages/send`](https://www.braze.com/docs/pt-br/pt-br/api/endpoints/messaging/send_messages/post_send_messages/) para enviar uma notificação por push para o dispositivo Android de um usuário.
#### Exemplo de comando curl {#example-curl-command}
O Superb Owl enviou sua solicitação usando o seguinte comando curl:
```
curl -X POST "https://BRAZE_REST_ENDPOINT/messages/send" \
-H "Authorization: Bearer {REST_API_KEY}" \
-H "Content-Type: application/json" \
--data '{
"external_user_ids": ["USER_ID"],
"messages": {
"android_push": {
"title": "WBF vs OWL",
"alert": "2 to 4 1:33 Q4",
"extra": {
"live_update": "true",
"team1": "WBF",
"team2": "OWL",
"score1": "2",
"score2": "4",
"time": "1:33",
"quarter": "Q4"
},
"notification_id": "ASSIGNED_NOTIFICATION_ID"
}
}
}'
```
**Tip:**
Embora os comandos curl sejam úteis para testes, recomendamos lidar com essa chamada no seu backend, onde você já está lidando com suas [Live Activities do iOS](https://www.braze.com/docs/pt-br/pt-br/developer_guide/push_notifications/live_notifications/?sdktab=swift).
#### Parâmetros da solicitação {#request-parameters}
| Chave | Descrição |
|------------------------------|------------|
| `REST_API_KEY` | Uma chave da API REST da Braze com permissões `messages.send`.
Ela pode ser criada no dashboard da Braze em **Configurações** > **Chaves de API**. |
| `BRAZE_REST_ENDPOINT` | A URL do seu endpoint REST. Seu endpoint dependerá da [URL da Braze para sua instância](https://www.braze.com/docs/pt-br/pt-br/api/basics/#endpoints). |
| `USER_ID` | O ID do usuário para quem você está enviando a notificação. |
| `messages.android_push.title` | O título da mensagem. Por padrão, não é usado para as notificações ao vivo da fábrica de notificações personalizada, mas pode ser usado como fallback. |
| `messages.android_push.alert` | O corpo da mensagem. Por padrão, não é usado para as notificações ao vivo da fábrica de notificações personalizada, mas pode ser usado como fallback. |
| `messages.extra` | Pares de chave-valor que a fábrica de notificações personalizada usa para notificações ao vivo. Você pode atribuir qualquer string a esse valor—no entanto, no exemplo acima, `live_updates` é usado para determinar se é uma notificação por push padrão ou ao vivo. |
| `ASSIGNED_NOTIFICATION_ID` | O ID da notificação que você deseja atribuir à notificação ao vivo do usuário escolhido. O ID deve ser exclusivo para este jogo e deve ser usado para [atualizar a notificação existente](#android_step-4-update-data-with-the-braze-rest-api) posteriormente. |
{: .reset-td-br-1 .reset-td-br-2 aria-label="Parâmetros da solicitação" }
### Etapa 5: Atualizar a atividade {#step-5-update-the-activity}
Para atualizar a atualização ao vivo existente com novos dados, modifique os pares de chave-valor relevantes atribuídos a `messages.extra`, depois use o mesmo `notification_id` e chame o endpoint `/messages/send` novamente.
# Atividades ao vivo para o SDK Swift da Braze
Source: /docs/pt-br/developer_guide/live_notifications/live_activities/index.md
# Atividades ao vivo para Swift {#live-activities-for-swift}
> Aprenda como implementar Atividades ao Vivo para o SDK Swift da Braze. Atividades ao Vivo são notificações persistentes e interativas exibidas diretamente na tela de bloqueio, permitindo que os usuários recebam atualizações dinâmicas em tempo real—sem desbloquear o dispositivo.
## Como funciona {#how-it-works}
{: style="max-width:40%;float:right;margin-left:15px;"}
As Atividades ao Vivo apresentam uma combinação de informações estáticas e dinâmicas que você atualiza. Por exemplo, você pode criar uma Atividade ao Vivo que fornece um rastreador de status para uma entrega. Essa Atividade ao Vivo teria o nome da sua empresa como informação estática, bem como um "Tempo para entrega" dinâmico que seria atualizado à medida que o motorista de entrega se aproximasse do destino.
Como desenvolvedor, você pode usar a Braze para gerenciar os ciclos de vida das suas Atividades ao Vivo, fazer chamadas para a REST API da Braze para realizar atualizações e fazer com que todos os dispositivos inscritos recebam a atualização o mais rápido possível. E, como você está gerenciando as Atividades ao Vivo por meio da Braze, pode usá-las em conjunto com seus outros canais de envio de mensagens—notificações por push, mensagens no app, Content Cards—para promover a adoção.
## Diagrama de sequência {#sequence-diagram}
**Mostrar diagrama**
```mermaid
---
config:
theme: mc
---
sequenceDiagram
participant Server as Client Server
participant Device as User Device
participant App as iOS App / Braze SDK
participant BrazeAPI as Braze API
participant APNS as Apple Push Notification Service
Note over Server, APNS: Launch Option 1 Locally Start Activities
App ->> App: Register a Live Activity using `launchActivity(pushTokenTag:activity:)`
App ->> App: Get push token from iOS
App ->> BrazeAPI: Activity ID & Push token automatically sent to Braze
Note over Server, APNS: Launch Option 2 Remotely Start Activities
Device ->> App: Call `registerPushToStart` to collect push tokens early
App ->> BrazeAPI: Push-to-start tokens sent to Braze
Server ->> BrazeAPI: POST /messages/live_activity/start
Note right of BrazeAPI: Payload includes: - push_token - activity_id - external_id - event_name - content_state (optional)
BrazeAPI ->> APNS: Live activity start request
APNS ->> Device: APNS sends activity to device
App ->> App: Get push token from iOS
App ->> BrazeAPI: Activity ID & Push token automatically sent to Braze
Note over Server, APNS: Resuming activities upon app launch
App ->> App: Call `resumeActivities(ofType:)` on each app launch
Note over Server, APNS: Updating a Live Activity
loop update a live activity
Server ->> BrazeAPI: POST /messages/live_activity/update
Note right of BrazeAPI: Payload includes changes to ContentState (dynamic variables)
BrazeAPI ->> APNS: Update sent to APNS
APNS ->> Device: APNS sends update to device
end
Note over Server, APNS: Ending a Live Activity
Server ->> BrazeAPI: POST /messages/live_activity/update
Note right of BrazeAPI: Activity can be ended via: - User manually dismisses - Times out after 12 hours - Setting `end_activity: true` on `/messages/live_activity/update`
APNS ->> Device: Live activity is dismissed
```
## Implementação de uma Atividade ao Vivo {#implementing-a-live-activity}
### Prerequisites
Before you can use this feature, you'll need to [integrate the Swift Braze SDK](https://www.braze.com/docs/pt-br/pt-br/developer_guide/sdk_integration/?sdktab=swift). Você também precisará completar o seguinte:
- Certifique-se de que seu projeto está direcionado para iOS 16.1 ou posterior.
- Adicione a autorização `Push Notification` em **Signing & Capabilities** no seu projeto Xcode.
- Certifique-se de que chaves `.p8` são usadas para enviar notificações. Não há suporte para arquivos mais antigos, como `.p12` ou `.pem`.
- A partir da versão 8.2.0 do SDK Swift da Braze, é possível [registrar remotamente uma Atividade ao Vivo](#swift_step-2-start-the-activity). Para usar esse recurso, é necessário o iOS 17.2 ou posterior.
**Note:**
Embora as Atividades ao Vivo e as notificações por push sejam semelhantes, suas permissões de sistema são separadas. Por padrão, todos os recursos de Atividade ao Vivo estão ativados, mas os usuários podem desativar esse recurso por app.
### Etapa 1: Crie uma atividade {#create-an-activity}
Primeiro, certifique-se de ter seguido o procedimento [Exibindo dados ao vivo com Live Activities](https://developer.apple.com/documentation/activitykit/displaying-live-data-with-live-activities) na documentação da Apple para configurar Atividades ao Vivo no seu aplicativo iOS. Como parte dessa tarefa, inclua `NSSupportsLiveActivities` definido como `YES` no seu `Info.plist`.
Como a natureza exata da sua Atividade ao Vivo será específica para o seu caso de negócios, você precisará configurar e inicializar os objetos [Activity](https://developer.apple.com/documentation/activitykit/activityattributes). É importante ressaltar que você definirá:
* `ActivityAttributes`: Esse protocolo define o conteúdo estático (imutável) e dinâmico (mutável) que aparecerá na sua Atividade ao Vivo.
* `ActivityAttributes.ContentState`: Esse tipo define os dados dinâmicos que serão atualizados no decorrer da atividade.
Você também usará o SwiftUI para criar a apresentação da interface do usuário da tela de bloqueio e do Dynamic Island nos dispositivos compatíveis.
Certifique-se de estar familiarizado com os [pré-requisitos e as limitações](https://developer.apple.com/documentation/activitykit/displaying-live-data-with-live-activities#Understand-constraints) da Apple para Atividades ao Vivo, pois essas restrições são independentes da Braze.
**Note:**
Se você espera enviar pushes frequentes para a mesma Atividade ao Vivo, pode evitar ser limitado pelo orçamento da Apple definindo `NSSupportsLiveActivitiesFrequentUpdates` como `YES` no arquivo `Info.plist`. Para saber mais, consulte a seção [`Determine the update frequency`](https://developer.apple.com/documentation/activitykit/updating-and-ending-your-live-activity-with-activitykit-push-notifications#Determine-the-update-frequency) na documentação do ActivityKit.
#### Exemplo {#example}
Vamos imaginar que queremos criar uma Atividade ao Vivo para fornecer aos nossos usuários atualizações sobre o show Superb Owl, em que dois resgates de animais selvagens concorrentes recebem pontos pelas corujas que têm em sua residência. Neste exemplo, criamos uma struct chamada `SportsActivityAttributes`, mas você pode usar sua própria implementação de `ActivityAttributes`.
```swift
#if canImport(ActivityKit)
import ActivityKit
#endif
@available(iOS 16.1, *)
struct SportsActivityAttributes: ActivityAttributes {
public struct ContentState: Codable, Hashable {
var teamOneScore: Int
var teamTwoScore: Int
}
var gameName: String
var gameNumber: String
}
```
### Etapa 2: Inicie a atividade {#start-the-activity}
Primeiro, escolha como deseja registrar sua atividade:
- **Remoto:** Use o método [`registerPushToStart`]() no início do ciclo de vida do usuário e antes que o token de push-to-start seja necessário, e então inicie uma atividade usando o endpoint [`/messages/live_activity/start`](https://www.braze.com/docs/pt-br/pt-br/api/endpoints/messaging/live_activity/start/).
- **Local:** Crie uma instância da sua Atividade ao Vivo e, em seguida, use o método [`launchActivity`]() para criar tokens push para a Braze gerenciar.
**Important:**
Para registrar remotamente uma Atividade ao Vivo, é necessário o iOS 17.2 ou posterior.
#### Etapa 2.1: Adicione o BrazeKit à sua extensão de widget {#step-21-add-brazekit-to-your-widget-extension}
No seu projeto Xcode, selecione o nome do aplicativo e, em seguida, **General**. Em **Frameworks and Libraries**, confirme se o `BrazeKit` está listado.

#### Etapa 2.2: Adicione o protocolo BrazeLiveActivityAttributes {#brazeActivityAttributes}
Na sua implementação de `ActivityAttributes`, adicione conformidade ao protocolo `BrazeLiveActivityAttributes` e então adicione a propriedade `brazeActivityId` ao seu modelo de atributos.
**Important:**
O iOS mapeia a propriedade `brazeActivityId` para o campo correspondente na carga útil de push-to-start da sua Atividade ao Vivo, portanto ela não deve ser renomeada nem receber nenhum outro valor.
```swift
import BrazeKit
#if canImport(ActivityKit)
import ActivityKit
#endif
@available(iOS 16.1, *)
// 1. Add the `BrazeLiveActivityAttributes` conformance to your `ActivityAttributes` struct.
struct SportsActivityAttributes: ActivityAttributes, BrazeLiveActivityAttributes {
public struct ContentState: Codable, Hashable {
var teamOneScore: Int
var teamTwoScore: Int
}
var gameName: String
var gameNumber: String
// 2. Add the `String?` property to represent the activity ID.
var brazeActivityId: String?
}
```
#### Etapa 2.3: Registre para push-to-start {#step-23-register-for-push-to-start}
Em seguida, registre o tipo de Atividade ao Vivo para que a Braze possa rastrear todos os tokens push-to-start e instâncias de Atividade ao Vivo associadas a esse tipo.
**Warning:**
O sistema operacional iOS gera tokens push-to-start somente durante a primeira instalação do app após a reinicialização do dispositivo. Para garantir que seus tokens sejam registrados de forma confiável, chame `registerPushToStart` no seu método `didFinishLaunchingWithOptions`.
###### Exemplo
No exemplo a seguir, a classe `LiveActivityManager` manipula objetos de Atividade ao Vivo. Em seguida, o método `registerPushToStart` registra `SportsActivityAttributes`:
```swift
import BrazeKit
#if canImport(ActivityKit)
import ActivityKit
#endif
class LiveActivityManager {
@available(iOS 17.2, *)
func registerActivityType() {
// This method returns a Swift background task.
// You may keep a reference to this task if you need to cancel it wherever appropriate, or ignore the return value if you wish.
let pushToStartObserver: Task = Self.braze?.liveActivities.registerPushToStart(
forType: Activity.self,
name: SportsActivityAttributes.name
)
}
}
```
#### Etapa 2.4: Envie uma notificação push-to-start {#step-24-send-a-push-to-start-notification}
Envie uma notificação push-to-start remota usando o endpoint [`/messages/live_activity/start`](https://www.braze.com/docs/pt-br/pt-br/api/endpoints/messaging/live_activity/start/).
Você pode usar o [framework ActivityKit da Apple](https://developer.apple.com/documentation/activitykit) para obter um token de push, que o SDK da Braze pode gerenciar para você. Isso permite que você atualize as Atividades ao Vivo por meio da API da Braze, pois a Braze enviará o token de push para o serviço de Notificações por Push da Apple (APNs) no back-end.
1. Crie uma instância da sua implementação de Atividade ao Vivo usando as APIs do ActivityKit da Apple.
2. Defina o parâmetro `pushType` como `.token`.
3. Passe os `ActivitiesAttributes` e `ContentState` das Atividades ao Vivo que você definiu.
4. Registre sua atividade na instância da Braze, passando-a para [`launchActivity(pushTokenTag:activity:)`](https://braze-inc.github.io/braze-swift-sdk/documentation/brazekit/braze/liveactivities-swift.class). O parâmetro `pushTokenTag` é uma string personalizada que você define. Ele deve ser exclusivo para cada Atividade ao Vivo que você criar.
Depois de registrar a Atividade ao Vivo, o SDK da Braze extrairá e observará as alterações nos tokens de push.
#### Exemplo
No nosso exemplo, criaremos uma classe chamada `LiveActivityManager` como interface para nossos objetos de Atividade ao Vivo. Em seguida, definiremos o `pushTokenTag` como `"sports-game-2024-03-15"`.
```swift
import BrazeKit
#if canImport(ActivityKit)
import ActivityKit
#endif
class LiveActivityManager {
@available(iOS 16.2, *)
func createActivity() {
let activityAttributes = SportsActivityAttributes(gameName: "Superb Owl", gameNumber: "Game 1")
let contentState = SportsActivityAttributes.ContentState(teamOneScore: "0", teamTwoScore: "0")
let activityContent = ActivityContent(state: contentState, staleDate: nil)
if let activity = try? Activity.request(attributes: activityAttributes,
content: activityContent,
// Setting your pushType as .token allows the Activity to generate push tokens for the server to watch.
pushType: .token) {
// Register your Live Activity with Braze using the pushTokenTag.
// This method returns a Swift background task.
// You may keep a reference to this task if you need to cancel it wherever appropriate, or ignore the return value if you wish.
let liveActivityObserver: Task = AppDelegate.braze?.liveActivities.launchActivity(pushTokenTag: "sports-game-2024-03-15",
activity: activity)
}
}
}
```
O widget da Atividade ao Vivo exibiria esse conteúdo inicial para os usuários.
{: style="max-width:40%;"}
### Etapa 3: Retome o rastreamento de atividades {#resume-activity-tracking}
Para garantir que a Braze rastreie sua Atividade ao Vivo na inicialização do app:
1. Abra seu arquivo `AppDelegate`.
2. Importe o módulo `ActivityKit` se ele estiver disponível.
3. Chame [`resumeActivities(ofType:)`](https://braze-inc.github.io/braze-swift-sdk/documentation/brazekit/braze/liveactivities-swift.class/resumeactivities(oftype:)) em `application(_:didFinishLaunchingWithOptions:)` para todos os tipos de `ActivityAttributes` que você registrou no seu aplicativo.
Isso permite que a Braze retome as tarefas para rastrear atualizações de tokens push para todas as Atividades ao Vivo ativas. Observe que, se um usuário tiver descartado explicitamente a Atividade ao Vivo no dispositivo, ela será considerada removida e a Braze não a rastreará mais.
###### Exemplo
```swift
import UIKit
import BrazeKit
#if canImport(ActivityKit)
import ActivityKit
#endif
@main
class AppDelegate: UIResponder, UIApplicationDelegate {
static var braze: Braze? = nil
func application(
_ application: UIApplication,
didFinishLaunchingWithOptions launchOptions: [UIApplication.LaunchOptionsKey: Any]?
) -> Bool {
if #available(iOS 16.1, *) {
Self.braze?.liveActivities.resumeActivities(
ofType: Activity.self
)
}
return true
}
}
```
### Etapa 4: Atualize a atividade {#update-the-activity}
{: style="max-width:40%;float:right;margin-left:15px;"}
O endpoint [`/messages/live_activity/update`](https://www.braze.com/docs/pt-br/pt-br/api/endpoints/messaging/live_activity/update/) permite que você atualize uma Atividade ao Vivo por meio de notificações por push enviadas pela REST API da Braze. Use esse endpoint para atualizar o `ContentState` da sua Atividade ao Vivo.
Ao atualizar o `ContentState`, o widget da Atividade ao Vivo exibirá as novas informações. Veja como seria o show Superb Owl no final do primeiro tempo.
Consulte nosso artigo sobre o [endpoint `/messages/live_activity/update`](https://www.braze.com/docs/pt-br/pt-br/api/endpoints/messaging/live_activity/update/) para obter todos os detalhes.
### Etapa 5: Encerre a atividade {#end-the-activity}
Quando uma Atividade ao Vivo está ativa, ela é exibida na tela de bloqueio do usuário e no Dynamic Island. Para encerrá-la pela Braze, use o endpoint [`/messages/live_activity/update`](https://www.braze.com/docs/pt-br/pt-br/api/endpoints/messaging/live_activity/update/) com `end_activity` definido como `true`.
Para melhorar a confiabilidade ao encerrar uma Atividade ao Vivo, siga estas etapas opcionais:
1. Opcionalmente, inclua `dismissal_date` na mesma solicitação de `update` para sugerir quando o iOS deve remover a interface da Atividade ao Vivo.
2. Verifique os resultados de entrega no [Registro de atividades de envio de mensagem](https://www.braze.com/docs/pt-br/pt-br/user_guide/administrative/app_settings/message_activity_log_tab/).
#### Organizando o descarte automático {#arranging-automatic-dismissal}
Para organizar o descarte automático, agende uma solicitação de acompanhamento para o endpoint de atualização após iniciar a Atividade ao Vivo.
1. Envie uma solicitação `/messages/live_activity/start` com um `activity_id` que você possa rastrear.
2. Armazene esse `activity_id` e o horário de encerramento desejado no agendador do seu backend.
3. No horário de encerramento desejado, envie uma solicitação `/messages/live_activity/update` com `end_activity` definido como `true`.
4. Configure a data de descarte na mesma solicitação de atualização. Para saber mais, consulte o endpoint [`/messages/live_activity/update`](https://www.braze.com/docs/pt-br/pt-br/api/endpoints/messaging/live_activity/update/).
Observe que o momento do descarte é controlado pelo iOS. Mesmo após enviar uma solicitação de encerramento válida, a remoção da tela de bloqueio ou do Dynamic Island pode ser atrasada ou se comportar de forma diferente com base em condições do sistema operacional.
Uma Atividade ao Vivo também pode ser encerrada fora da Braze:
* **Descarte pelo usuário**: Um usuário pode descartar manualmente uma Atividade ao Vivo.
* **Tempo limite**: Após um tempo padrão de oito horas, o iOS removerá a Atividade ao Vivo do Dynamic Island do usuário. Após um tempo padrão de 12 horas, o iOS removerá a Atividade ao Vivo da tela de bloqueio do usuário.
Consulte nosso artigo sobre o [endpoint `/messages/live_activity/update`](https://www.braze.com/docs/pt-br/pt-br/api/endpoints/messaging/live_activity/update/) para obter todos os detalhes.
## Rastreamento de Atividades ao Vivo {#tracking-live-activities}
Os eventos de Atividade ao Vivo estão disponíveis em Currents, Compartilhamento de dados Snowflake e Criador de consultas. Os eventos a seguir podem ajudar você a entender e monitorar o ciclo de vida das suas Atividades ao Vivo, rastrear a disponibilidade de tokens e diagnosticar problemas ou verificar status de entrega de forma independente.
- [Mudança de token push-to-start de Atividade ao Vivo](https://www.braze.com/docs/pt-br/pt-br/user_guide/data/braze_currents/event_glossary/customer_behavior_events/#live-activity-push-to-start-token-change-events): Captura quando um token push-to-start (PTS) é adicionado ou atualizado na Braze, permitindo que você rastreie registros e disponibilidade de tokens por usuário.
- [Mudança de token de atualização de Atividade ao Vivo](https://www.braze.com/docs/pt-br/pt-br/user_guide/data/braze_currents/event_glossary/customer_behavior_events/#live-activity-update-token-change-events): Rastreia a adição, atualização ou remoção de tokens de atualização de Atividade ao Vivo (LAU).
- [Envio de Atividade ao Vivo](https://www.braze.com/docs/pt-br/pt-br/user_guide/data/braze_currents/event_glossary/message_engagement_events/#live-activity-send-events): Registra cada vez que uma Atividade ao Vivo é iniciada, atualizada ou encerrada pela Braze.
- [Resultado de Atividade ao Vivo](https://www.braze.com/docs/pt-br/pt-br/user_guide/data/braze_currents/event_glossary/message_engagement_events/#live-activity-outcome-events): Indica o status final de entrega ao serviço de Notificações por Push da Apple (APNs) para cada Atividade ao Vivo enviada pela Braze.
## Observar eventos de Atividade ao Vivo (opcional) {#observe-live-activity-events}
**Important:**
Não se inscreva diretamente nesses streams do ActivityKit com a Apple, pois isso entrará em conflito com as inscrições da Braze e impedirá que as Atividades ao Vivo funcionem corretamente:
1. [`pushTokenUpdates`](https://developer.apple.com/documentation/activitykit/activity/pushtokenupdates-swift.property)
2. [`activityStateUpdates`](https://developer.apple.com/documentation/activitykit/activity/activitystateupdates-swift.property)
3. [`contentUpdates`](https://developer.apple.com/documentation/activitykit/activity/contentupdates-swift.property)
4. [`pushToStartTokenUpdates`](https://developer.apple.com/documentation/activitykit/activity/pushtostarttokenupdates)
5. [`activityUpdates`](https://developer.apple.com/documentation/activitykit/activity/activityupdates-swift.type.property)
Em vez disso, use as inscrições mencionadas abaixo.
O SDK da Braze fornece dois métodos de inscrição em `braze.liveActivities` para observar o ciclo de vida completo das Atividades ao Vivo. Para um passo a passo completo, consulte o [tutorial de Atividades ao Vivo](https://braze-inc.github.io/braze-swift-sdk/tutorials/brazekit/b4-live-activities).
- [`subscribeToStateUpdates(_:)`](#subscribe-to-state-updates): Entrega eventos de ciclo de vida tanto para o registro de tokens push-to-start quanto para instâncias de atividades em execução.
- [`subscribeToErrors(_:)`](#subscribe-to-errors): Entrega erros do SDK e do lado do servidor encontrados durante o rastreamento de Atividades ao Vivo.
**Note:**
Ambos os métodos retornam um [`Braze.Cancellable`](https://braze-inc.github.io/braze-swift-sdk/documentation/brazekit/braze/cancellable-swift.typealias). A inscrição permanece ativa enquanto o valor retornado for mantido por uma referência forte (por exemplo, armazene-o em uma propriedade com o mesmo ciclo de vida da sua instância `Braze`).
### Configurar inscrições {#set-up-subscriptions}
Configure as inscrições uma vez em `application(_:didFinishLaunchingWithOptions:)` e mantenha-as durante toda a vida útil do seu app:
```swift
class AppDelegate: UIResponder, UIApplicationDelegate {
static var braze: Braze?
var stateSubscription: Braze.Cancellable?
var errorSubscription: Braze.Cancellable?
func application(
_ application: UIApplication,
didFinishLaunchingWithOptions launchOptions: [UIApplication.LaunchOptionsKey: Any]?
) -> Bool {
let braze = Braze(configuration: config)
Self.braze = braze
if #available(iOS 16.1, *) {
stateSubscription = Self.braze?.liveActivities.subscribeToStateUpdates { event in
self.handleStateUpdate(event)
}
errorSubscription = Self.braze?.liveActivities.subscribeToErrors { error in
self.handleLiveActivityError(error)
}
}
return true
}
}
```
**Note:**
Os retornos de chamada são acionados apenas para eventos futuros de atividades ao vivo — eles não reproduzem o estado atual no momento da inscrição. Para consultar o snapshot do estado atual, use `Activity.activities`.
### subscribeToStateUpdates {#subscribe-to-state-updates}
`subscribeToStateUpdates(_:)` entrega valores `UpdateEvent` que cobrem o ciclo de vida completo das Atividades ao Vivo. Os eventos são divididos em dois escopos:
- `.activityType(ActivityType)`: Eventos em nível de tipo para registro de tokens push-to-start (iOS 17.2+). Nenhuma instância de atividade existe ainda.
- `.activityInstance(ActivityInstance)`: Eventos em nível de instância para uma atividade específica em execução.
Múltiplos assinantes são suportados — cada inscrição ativa recebe cada emissão de forma independente.
#### Eventos com escopo de tipo {#type-scoped-events}
| Evento | Quando é disparado |
| ----- | ------------- |
| `.pushToStartTokenRead(activityType:)` | Um token push-to-start foi lido do sistema operacional. A Braze agora pode iniciar remotamente uma nova atividade desse tipo. |
| `.pushToStartTokenFlushed(activityType:)` | O token foi enviado ao servidor da Braze. A Braze pode enviar notificações push-to-start para esse tipo. |
| `.pushToStartOptedOut(activityType:)` | O usuário optou por não receber push-to-start para esse tipo de atividade por meio de `optOutPushToStart(type:)`. |
| `.pushToStartOptOutFlushed(activityType:)` | A opção de não receber foi enviada ao servidor da Braze. |
{: .reset-td-br-1 .reset-td-br-2 aria-label="Eventos com escopo de tipo" }
#### Eventos com escopo de instância {#instance-scoped-events}
| Evento | Quando é disparado |
| ----- | ------------- |
| `.started(activityId:activityType:pushTokenTag:launchSource:)` | O SDK começou a rastrear essa atividade por meio de `launchActivity(pushTokenTag:activity:)`. O valor de `launchSource` é `.local` para atividades iniciadas pelo app ou `.pushToStart` para atividades iniciadas remotamente. |
| `.resumed(activityId:activityType:pushTokenTag:)` | O SDK retomou o rastreamento dessa atividade por meio de `resumeActivities(ofType:)`. |
| `.pushTokenFlushed(activityId:activityType:pushTokenTag:)` | O token de push da atividade foi aceito pelo servidor da Braze — a atividade agora pode receber atualizações remotas. |
| `.active(activityId:activityType:)` | A atividade está atualmente ativa e visível para o usuário. |
| `.stale(activityId:activityType:staleDate:)` | O conteúdo da atividade ficou desatualizado. Emitido apenas no iOS 16.2 e posterior. |
| `.dismissed(activityId:activityType:)` | O usuário descartou manualmente a atividade. |
| `.ended(activityId:activityType:)` | A atividade foi encerrada. |
| `.contentUpdated(activityId:activityType:)` | O estado do conteúdo da atividade foi atualizado (iOS 16.2+). Use lógica personalizada para buscar a `Activity` pelo ID em `Activity.activities` e acessar o estado tipado por meio de `activity.content.state`. |
| `.pushTokenUpdated(activityId:activityType:)` | O ActivityKit rotacionou o token de push da atividade. |
{: .reset-td-br-1 .reset-td-br-2 aria-label="Eventos com escopo de instância" }
###### Exemplo
```swift
func handleStateUpdate(_ event: Braze.LiveActivities.UpdateEvent) {
switch event {
// Type-scoped: push-to-start token lifecycle (iOS 17.2+)
case .activityType(.pushToStartTokenRead(let activityType)):
print("[\(activityType)] Push-to-start token read by SDK")
// ...
// Instance-scoped: SDK tracking
case .activityInstance(.started(let id, let type, let tag, let source)):
print("[\(type)] Activity \(id) started via \(source), tag: \(tag)")
// ...
// Instance-scoped: ActivityKit lifecycle
case .activityInstance(.active(let id, let type)):
print("[\(type)] Activity \(id) is active")
// ...
case .activityInstance(.ended(let id, let type)):
print("[\(type)] Activity \(id) ended")
// Instance-scoped: content updates (iOS 16.2+)
case .activityInstance(.contentUpdated(let id, let type)):
// For more advanced use cases of `contentUpdated`, see the section below
print("[\(type)] Content updated for activity \(id)")
case .activityInstance(.pushTokenUpdated(let id, let type)):
print("[\(type)] Activity \(id) push token rotated")
}
}
```
### subscribeToErrors {#subscribe-to-errors}
`subscribeToErrors(_:)` entrega valores `ErrorEvent` usando os mesmos dois escopos que `UpdateEvent`:
- `.activityType(ActivityType)`: Erros em nível de tipo para falhas de registro push-to-start.
- `.activityInstance(ActivityInstance)`: Erros em nível de instância para uma atividade em execução.
Use a flag `isTransient` para determinar se uma nova tentativa é apropriada. O SDK tenta novamente automaticamente as falhas transitórias.
#### Erros com escopo de tipo {#type-scoped-errors}
| Erro | Quando é disparado |
| ----- | ------------- |
| `.pushToStartRegistrationFailed(activityType:isTransient:reason:)` | O token push-to-start não conseguiu chegar ao servidor da Braze. |
{: .reset-td-br-1 .reset-td-br-2 aria-label="Erros com escopo de tipo" }
#### Erros com escopo de instância {#instance-scoped-errors}
| Erro | Quando é disparado |
| ----- | ------------- |
| `.registrationFailed(activityId:activityType:pushTokenTag:isTransient:reason:)` | O token de push da atividade não conseguiu se registrar na Braze. |
| `.activityNotFound(activityId:activityType:)` | `resumeActivities(ofType:)` encontrou um mapeamento armazenado para uma atividade que não está mais em execução — provavelmente ela foi encerrada enquanto o app estava fechado. |
| `.invalidPushTokenTag(activityId:activityType:tag:)` | `launchActivity(pushTokenTag:activity:)` foi chamado com uma tag inválida. As tags devem ser não vazias e ter menos de 256 bytes. |
{: .reset-td-br-1 .reset-td-br-2 aria-label="Erros com escopo de instância" }
###### Exemplo
```swift
func handleLiveActivityError(_ error: Braze.LiveActivities.ErrorEvent) {
switch error {
// Type-scoped errors
case .activityType(.pushToStartRegistrationFailed(let type, let isTransient, let reason)):
if isTransient {
print("[\(type)] Push-to-start registration failed (transient, will retry): \(reason)")
} else {
print("[\(type)] Push-to-start registration failed (permanent): \(reason)")
}
// Instance-scoped errors
case .activityInstance(.registrationFailed(let id, let type, _, let isTransient, let reason)):
if isTransient {
print("[\(type)] Activity \(id) registration failed (transient, retrying): \(reason)")
} else {
print("[\(type)] Activity \(id) registration failed (permanent): \(reason)")
}
case .activityInstance(.activityNotFound(let id, let type)):
print("[\(type)] Stored activity \(id) not found on resume")
case .activityInstance(.invalidPushTokenTag(let id, let type, let tag)):
print("[\(type)] Activity \(id) has invalid push token tag '\(tag)'")
}
}
```
### Lidar com atualizações de estado do conteúdo (opcional) {#handle-content-state}
Se você quiser usar o estado do conteúdo da instância real da Atividade ao Vivo, siga esta seção.
Quando um evento `.contentUpdated` é disparado, use lógica personalizada para buscar a `Activity` em execução pelo seu ID em `Activity.activities` e, em seguida, acesse o `ContentState` tipado por meio de `activity.content.state`.
#### Tipo de atributos único {#single-attributes-type}
```swift
case .activityInstance(.contentUpdated(let id, let type)):
#if canImport(ActivityKit)
// Add custom logic look up the Activity by ID and access your app's typed ContentState.
// In this example, `SportsActivityAttributes` is the app's custom type.
if #available(iOS 16.2, *),
let activity = findActivityInstance(id: id, as: SportsActivityAttributes.self)
{
// `activityContent` is now strongly typed as a `SportsActivityAttributes`
let activityContent = activity.content.state
print("[\(type)] Game \(id) — score: \(activityContent.teamOneScore)–\(activityContent.teamTwoScore)")
return
}
#endif
print("[\(type)] Content updated for activity \(id)")
// ...
// - MARK: Helper methods
@available(iOS 16.2, *)
func findActivityInstance