Geofences
Learn how to set up geofences for the Braze SDK. A geofence is a virtual geographic area that forms a circle around a specific global position, and is represented by combining latitude, longitude, and a radius.
Prerequisites
Before you can use this feature, you’ll need to integrate the Android Braze SDK. Additionally, you’ll need to set up silent push notifications.
Setting up geofences
Step 1: Enable in Braze
You can enable geofences for your app in one of the following places:
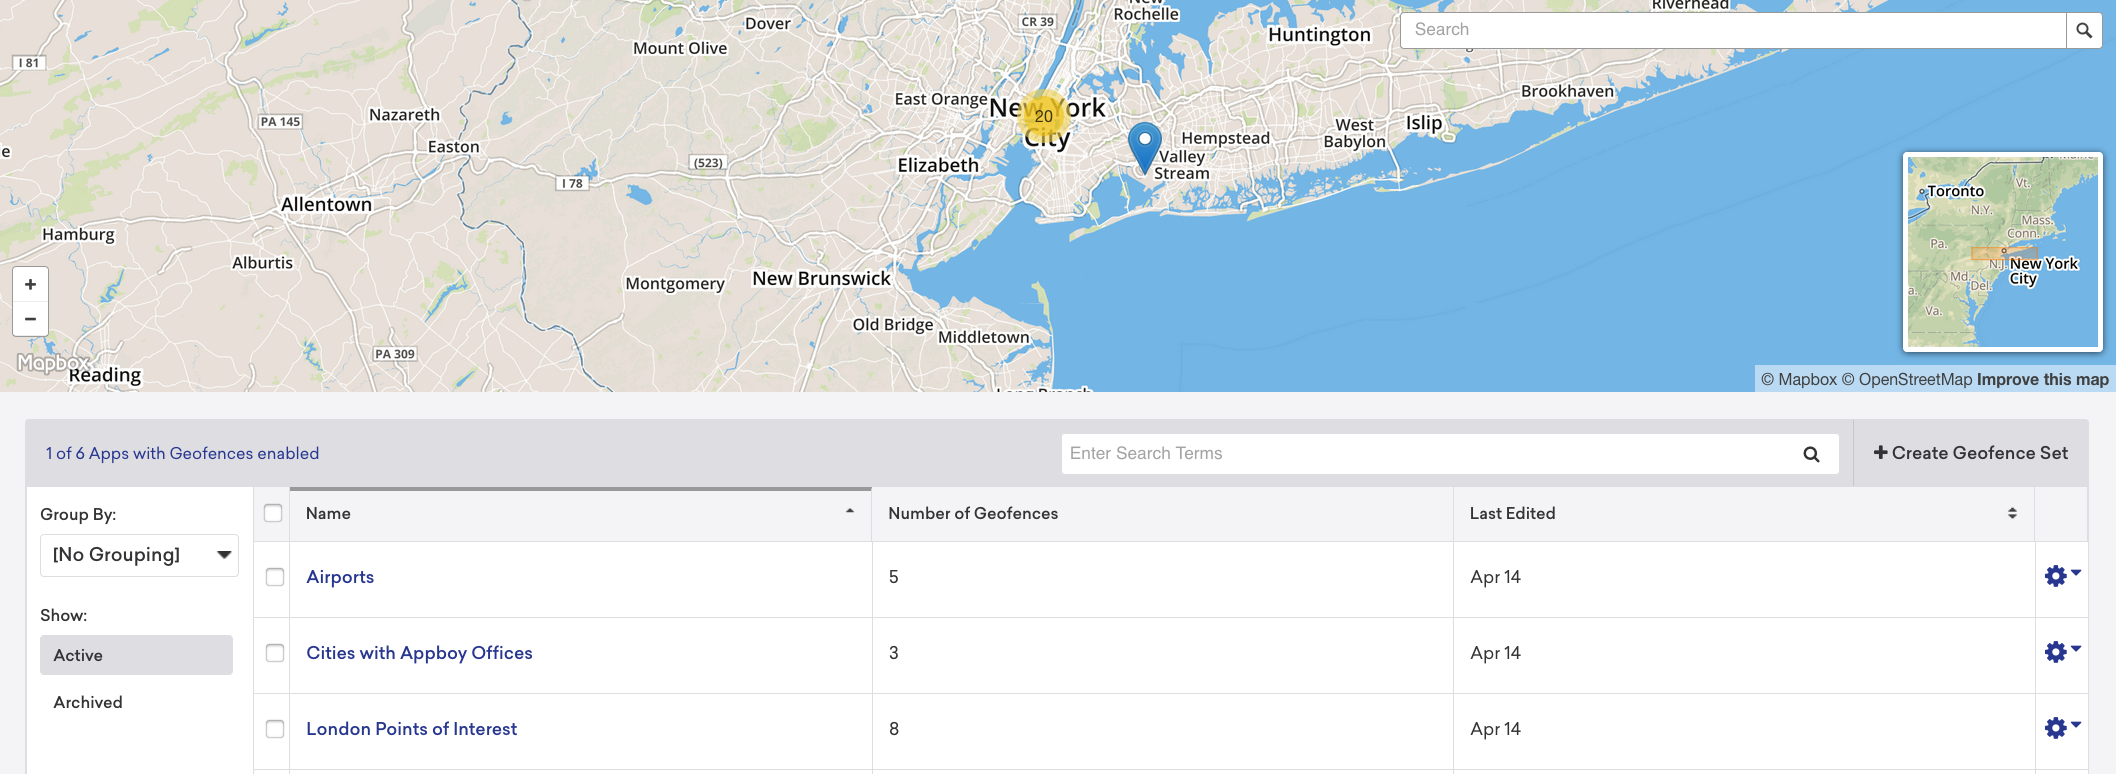
To enable geofences from the Locations page:
- In Braze, go to Audience > Locations.
- The number of apps in your workspace that have geofences enabled is listed under the map. For example, if geofences is only enabled for some of your apps, it may read: 2 of 5 Apps with Geofences enabled. To enable additional apps, select the current count under the map.
- Choose an app to enable geofences for, then select Done.
To enable geofences from the App Settings page:
- In Braze, go to Settings > App Settings.
- Select the app you’d like to enable geofences for.
- Check Geofences Enabled, then select Save.

Step 2: Update build.gradle
Add android-sdk-location to your app-level build.gradle. Also, add the Google Play Services location package using the Google Play Services setup guide:
1
2
3
4
dependencies {
  implementation "com.braze:android-sdk-location:+"
  implementation "com.google.android.gms:play-services-location:${PLAY_SERVICES_VERSION}"
}
Step 3: Update the manifest
Add boot, fine location, and background location permissions to your AndroidManifest.xml:
1
2
3
<uses-permission android:name="android.permission.RECEIVE_BOOT_COMPLETED" />
<uses-permission android:name="android.permission.ACCESS_FINE_LOCATION" />
<uses-permission android:name="android.permission.ACCESS_BACKGROUND_LOCATION" />
The background location access permission was added in Android 10 and is required for Geofences to work while the app is in the background for all Android 10+ devices.
Add the Braze boot receiver to the application element of your AndroidManifest.xml:
1
2
3
4
5
<receiver android:name="com.braze.BrazeBootReceiver">
  <intent-filter>
    <action android:name="android.intent.action.BOOT_COMPLETED" />
  </intent-filter>
</receiver>
Step 4: Enable Braze location collection
If you have not yet enabled Braze location collection, update your braze.xml file to include com_braze_enable_location_collection and confirm its value is set to true:
1
<bool name="com_braze_enable_location_collection">true</bool>
Starting with Braze Android SDK version 3.6.0, Braze location collection is disabled by default.
Braze geofences are enabled if Braze location collection is enabled. If you would like to opt-out of our default location collection but still want to use geofences, it can be enabled selectively by setting the value of key com_braze_geofences_enabled to true in braze.xml, independently of the value of com_braze_enable_location_collection:
1
<bool name="com_braze_geofences_enabled">true</bool>
Step 5: Obtain location permissions from the end user
For Android M and higher versions, you must request location permissions from the end user before gathering location information or registering geofences.
Add the following call to notify Braze when a user grants the location permission to your app:
1
Braze.getInstance(context).requestLocationInitialization();
1
Braze.getInstance(context).requestLocationInitialization()
This will cause the SDK to request geofences from Braze servers and initialize geofence tracking.
See RuntimePermissionUtils.java in our sample application for an example implementation.
1
2
3
4
5
6
7
8
9
10
11
12
13
14
15
16
17
18
19
20
21
22
23
24
25
26
27
28
29
30
31
32
public class RuntimePermissionUtils {
  private static final String TAG = BrazeLogger.getBrazeLogTag(RuntimePermissionUtils.class);
  public static final int DROIDBOY_PERMISSION_LOCATION = 40;

  public static void handleOnRequestPermissionsResult(Context context, int requestCode, int[] grantResults) {
    switch (requestCode) {
      case DROIDBOY_PERMISSION_LOCATION:
        // In Android Q, we require both FINE and BACKGROUND location permissions. Both
        // are requested simultaneously.
        if (areAllPermissionsGranted(grantResults)) {
          Log.i(TAG, "Required location permissions granted.");
          Toast.makeText(context, "Required location permissions granted.", Toast.LENGTH_SHORT).show();
          Braze.getInstance(context).requestLocationInitialization();
        } else {
          Log.i(TAG, "Required location permissions NOT granted.");
          Toast.makeText(context, "Required location permissions NOT granted.", Toast.LENGTH_SHORT).show();
        }
        break;
      default:
        break;
    }
  }

  private static boolean areAllPermissionsGranted(int[] grantResults) {
    for (int grantResult : grantResults) {
      if (grantResult != PackageManager.PERMISSION_GRANTED) {
        return false;
      }
    }
    return true;
  }
}
1
2
3
4
5
6
7
8
9
10
11
12
13
14
15
16
17
18
19
20
21
22
23
24
25
26
27
28
29
30
31
object RuntimePermissionUtils {
  private val TAG = BrazeLogger.getBrazeLogTag(RuntimePermissionUtils::class.java!!)
  val DROIDBOY_PERMISSION_LOCATION = 40

  fun handleOnRequestPermissionsResult(context: Context, requestCode: Int, grantResults: IntArray) {
    when (requestCode) {
      DROIDBOY_PERMISSION_LOCATION ->
        // In Android Q, we require both FINE and BACKGROUND location permissions. Both
        // are requested simultaneously.
        if (areAllPermissionsGranted(grantResults)) {
          Log.i(TAG, "Required location permissions granted.")
          Toast.makeText(context, "Required location permissions granted.", Toast.LENGTH_SHORT).show()
          Braze.getInstance(context).requestLocationInitialization()
        } else {
          Log.i(TAG, "Required location permissions NOT granted.")
          Toast.makeText(context, "Required location permissions NOT granted.", Toast.LENGTH_SHORT).show()
        }
      else -> {
      }
    }
  }

  private fun areAllPermissionsGranted(grantResults: IntArray): Boolean {
    for (grantResult in grantResults) {
      if (grantResult != PackageManager.PERMISSION_GRANTED) {
        return false
      }
    }
    return true
  }
}
Using the preceding sample code is done via:
1
2
3
4
5
6
7
8
9
10
11
12
13
14
15
16
17
if (Build.VERSION.SDK_INT >= Build.VERSION_CODES.M) {
  if (Build.VERSION.SDK_INT >= Build.VERSION_CODES.Q) {
    boolean hasAllPermissions = PermissionUtils.hasPermission(getApplicationContext(), Manifest.permission.ACCESS_BACKGROUND_LOCATION)
        && PermissionUtils.hasPermission(getApplicationContext(), Manifest.permission.ACCESS_FINE_LOCATION);
    if (!hasAllPermissions) {
      // Request both BACKGROUND and FINE location permissions
      requestPermissions(new String[]{android.Manifest.permission.ACCESS_FINE_LOCATION, Manifest.permission.ACCESS_BACKGROUND_LOCATION},
          RuntimePermissionUtils.DROIDBOY_PERMISSION_LOCATION);
    }
  } else {
    if (!PermissionUtils.hasPermission(getApplicationContext(), Manifest.permission.ACCESS_FINE_LOCATION)) {
      // Request only FINE location permission
      requestPermissions(new String[]{android.Manifest.permission.ACCESS_FINE_LOCATION},
          RuntimePermissionUtils.DROIDBOY_PERMISSION_LOCATION);
    }
  }
}
1
2
3
4
5
6
7
8
9
10
11
12
13
14
15
16
17
if (Build.VERSION.SDK_INT >= Build.VERSION_CODES.M) {
  if (Build.VERSION.SDK_INT >= Build.VERSION_CODES.Q) {
    val hasAllPermissions = PermissionUtils.hasPermission(applicationContext, Manifest.permission.ACCESS_BACKGROUND_LOCATION)
        && PermissionUtils.hasPermission(applicationContext, Manifest.permission.ACCESS_FINE_LOCATION)
    if (!hasAllPermissions) {
      // Request both BACKGROUND and FINE location permissions
      requestPermissions(arrayOf(android.Manifest.permission.ACCESS_FINE_LOCATION, Manifest.permission.ACCESS_BACKGROUND_LOCATION),
          RuntimePermissionUtils.DROIDBOY_PERMISSION_LOCATION)
    }
  } else {
    if (!PermissionUtils.hasPermission(applicationContext, Manifest.permission.ACCESS_FINE_LOCATION)) {
      // Request only FINE location permission
      requestPermissions(arrayOf(android.Manifest.permission.ACCESS_FINE_LOCATION),
          RuntimePermissionUtils.DROIDBOY_PERMISSION_LOCATION)
    }
  }
}
Step 6: Manually request geofence updates (optional)
By default, Braze automatically retrieves the device’s location and requests geofences based on that collected location. However, you can manually provide a GPS coordinate that will be used to retrieve proximal Braze geofences instead. To manually request Braze Geofences, you must disable automatic Braze geofence requests and provide a GPS coordinate for requests.
Step 6.1: Disable automatic geofence requests
Automatic Braze geofence requests can be disabled in your braze.xml file by setting com_braze_automatic_geofence_requests_enabled to false:
1
<bool name="com_braze_automatic_geofence_requests_enabled">false</bool>
This can additionally be done at runtime via:
1
2
3
BrazeConfig.Builder brazeConfigBuilder = new BrazeConfig.Builder()
    .setAutomaticGeofenceRequestsEnabled(false);
Braze.configure(getApplicationContext(), brazeConfigBuilder.build());
1
2
3
val brazeConfigBuilder = BrazeConfig.Builder()
    .setAutomaticGeofenceRequestsEnabled(false)
Braze.configure(applicationContext, brazeConfigBuilder.build())
Step 6.2: Manually request Braze geofence with GPS coordinate
Braze Geofences are manually requested via the requestGeofences() method:
1
Braze.getInstance(getApplicationContext()).requestGeofences(latitude, longitude);
1
Braze.getInstance(applicationContext).requestGeofences(33.078947, -116.601356)
Geofences can only be requested once per session, either automatically by the SDK or manually with this method.
Enabling push-to-sync
Note that Braze syncs geofences to devices using background push. In most cases, this will involve no code changes, as this feature requires no further integration on the part of the app.
However, note that if your application is stopped, receiving a background push will launch it in the background and its Application.onCreate() method will be called. If you have a custom Application.onCreate() implementation, you should defer automatic server calls and any other actions you would not want to be triggered by background push.
As of iOS 14, geofences do not work reliably for users who choose to only give their approximate location permission.
Prerequisites
Before you can use this feature, you’ll need to integrate the Swift Braze SDK.
Setting up geofences
Step 1: Enable in Braze
You can enable geofences for your app in one of the following places:
To enable geofences from the Locations page:
- In Braze, go to Audience > Locations.
- The number of apps in your workspace that have geofences enabled is listed under the map. For example, if geofences is only enabled for some of your apps, it may read: 2 of 5 Apps with Geofences enabled. To enable additional apps, select the current count under the map.
- Choose an app to enable geofences for, then select Done.
To enable geofences from the App Settings page:
- In Braze, go to Settings > App Settings.
- Select the app you’d like to enable geofences for.
- Check Geofences Enabled, then select Save.
Step 2: Enable your app’s location services
By default, Braze location services are not enabled. To enable them in your app, complete the following steps. For a step-by-step tutorial, see Tutorial: Braze Locations and Geofences.
Step 2.1: Add the BrazeLocation module
In Xcode, open the General tab. Under Frameworks, Libraries, and Embedded Content, add the BrazeLocation module.

Step 2.2: Update your Info.plist
In your info.plist, assign a String value to one of the following keys that describes why your application needs to track location. This string will be shown when your users are prompted for location services, so be sure to clearly explain the value of enabling this feature for your app.
NSLocationAlwaysAndWhenInUseUsageDescriptionNSLocationWhenInUseUsageDescription

Apple has deprecated NSLocationAlwaysUsageDescription. For more information, see Apple’s developer documentation.
Step 3: Enable geofences in your code
In your app’s code, enable geofences by setting location.geofencesEnabled to true on the configuration object that initializes the Braze instance. For other location configuration options, see Braze Swift SDK reference.
1
2
3
4
5
6
7
8
9
10
11
12
13
let configuration = Braze.Configuration(
  apiKey: "<BRAZE_API_KEY>",
  endpoint: "<BRAZE_ENDPOINT>"
)
configuration.location.brazeLocationProvider = BrazeLocationProvider()
configuration.location.automaticLocationCollection = true
configuration.location.geofencesEnabled = true
configuration.location.automaticGeofenceRequests = true

// Additional configuration customization...

let braze = Braze(configuration: configuration)
AppDelegate.braze = braze
1
2
3
4
5
6
7
8
9
10
11
12
13
BRZConfiguration *configuration =
    [[BRZConfiguration alloc] initWithApiKey:brazeApiKey
                                    endpoint:brazeEndpoint];
configuration.logger.level = BRZLoggerLevelInfo;
configuration.location.brazeLocationProvider = [[BrazeLocationProvider alloc] init];
configuration.location.automaticLocationCollection = YES;
configuration.location.geofencesEnabled = YES;
configuration.location.automaticGeofenceRequests = YES;

// Additional configuration customization...

Braze *braze = [[Braze alloc] initWithConfiguration:configuration];
AppDelegate.braze = braze;
Step 3.1: Enable background reporting (optional)
By default, geofence events are only monitored if your app is in the foreground or has Always authorization, which monitors all application states.
However, you can choose to also monitor geofence events if your app is in the background or has When In Use authorization.
To monitor these additional geofence events, open your Xcode project, then go to Signing & Capabilities. Under Background Modes, check Location updates.

Next, enable allowBackgroundGeofenceUpdates in your app’s code. This lets Braze extend your app’s “When In Use” status by continuously monitoring location updates. This setting only works when your app is in the background. When the app re-opens, all existing background processes are paused and foreground processes are prioritized instead.
1
2
3
4
5
6
7
8
9
10
11
12
13
14
15
let configuration = Braze.Configuration(
  apiKey: "<BRAZE_API_KEY>",
  endpoint: "<BRAZE_ENDPOINT>"
)

// Additional configuration customization...

// Enable background geofence reporting with `When In Use` authorization.
configuration.location.allowBackgroundGeofenceUpdates = true

// Determines the number of meters required to trigger a new location update.
configuration.location.distanceFilter = 8000

let braze = Braze(configuration: configuration)
AppDelegate.braze = braze
1
2
3
4
5
6
7
8
9
10
11
12
13
14
BRZConfiguration *configuration =
    [[BRZConfiguration alloc] initWithApiKey:brazeApiKey
                                    endpoint:brazeEndpoint];

// Additional configuration customization...

// Enable background geofence reporting with `When In Use` authorization.
configuration.location.allowBackgroundGeofenceUpdates = YES;

// Determines the number of meters required to trigger a new location update.
configuration.location.distanceFilter = 8000;

Braze *braze = [[Braze alloc] initWithConfiguration:configuration];
AppDelegate.braze = braze;
To prevent battery drain and rate limiting, configure distanceFilter to a value that meets your app’s specific needs. Setting distanceFilter to a higher value prevents your app from requesting your user’s location too frequently.
Step 4: Request authorization
When requesting authorization from a user, request either When In Use or Always authorization.
To request When In Use authorization, use the requestWhenInUseAuthorization() method:
1
2
var locationManager = CLLocationManager()
locationManager.requestWhenInUseAuthorization()
1
2
CLLocationManager *locationManager = [[CLLocationManager alloc] init];
[locationManager requestWhenInUseAuthorization];
By default, requestAlwaysAuthorization() only grants your app When In Use authorization and will re-prompt your user for Always authorization after some time has passed.
However, you can choose to immediately prompt your user by first calling requestWhenInUseAuthorization() and then calling requestAlwaysAuthorization() after receiving your initial When In Use authorization.
You can only immediately prompt for Always authorization a single time.
1
2
var locationManager = CLLocationManager()
locationManager.requestAlwaysAuthorization()
1
2
CLLocationManager *locationManager = [[CLLocationManager alloc] init];
[locationManager requestAlwaysAuthorization];
Step 5: Verify background push
Braze syncs geofences to devices using background push notifications. Follow these instructions to set up silent push notifications so that geofence updates from the server are properly handled.
To ensure that your application does not take any unwanted actions upon receiving Braze geofence sync notifications, follow the ignoring silent push article.
Manually request geofences
When the Braze SDK requests geofences from the backend, it reports the user’s current location and receives geofences that are determined to be optimally relevant based on the location reported.
To control the location that the SDK reports for the purposes of receiving the most relevant geofences, you can manually request geofences by providing the desired coordinates.
Step 1: Set automaticGeofenceRequests to false
You can disable automatic geofence requests in your configuration object passed to init(configuration). Set automaticGeofenceRequests to false.
1
2
3
4
5
6
7
let configuration = Braze.Configuration(
  apiKey: "{BRAZE_API_KEY}",
  endpoint: "{BRAZE_ENDPOINT}"
)
configuration.automaticGeofencesRequest = false
let braze = Braze(configuration: configuration)
AppDelegate.braze = braze
1
2
3
4
5
6
BRZConfiguration *configuration =
  [[BRZConfiguration alloc] initWithApiKey:{BRAZE_API_KEY}
                                  endpoint:{BRAZE_ENDPOINT}];
configuration.automaticGeofencesRequest = NO;
Braze *braze = [[Braze alloc] initWithConfiguration:configuration];
AppDelegate.braze = braze;
Step 2: Call requestGeofences manually
In your code, request geofences with the appropriate latitude and longitude.
1
AppDelegate.braze?.requestGeofences(latitude: latitude, longitude: longitude)
1
2
[AppDelegate.braze requestGeofencesWithLatitude:latitude
                                      longitude:longitude];
Frequently Asked Questions (FAQ)
Why am I not receiving geofences on my device?
To confirm whether or not geofences are being received on your device, first use the SDK Debugger tool to check SDK’s logs. You will then be able to see if geofences are successfully being received from the server and if there are any notable errors.
Below are other possible reasons geofences may not be received on your device:
iOS operating system limitations
The iOS operating system only allows up to 20 geofences to be stored for a given app. With geofences enabled, Braze will use up some of these 20 available slots.
To prevent accidental or unwanted disruption to other geofence-related functionality in your app, you must enable location geofences for individual apps on the dashboard. For our location services to work correctly, check that your app is not using all available geofence spots.
Rate limiting
Braze has a limit of 1 geofence refresh per session to avoid unnecessary requests.
How does it work if I am using both Braze and non-Braze geofence features?
As mentioned above, iOS allows a single app to store a maximum of 20 geofences. This storage is shared by both Braze and non-Braze geofences and is managed by CLLocationManager.
For instance, if your app contains 20 non-Braze geofences, there would be no storage to track any Braze geofences (or vice versa). In order to receive new geofences, you will need to use Apple’s location APIs to stop monitoring some of the existing geofences on the device.
Can the Geofences feature be used while a device is offline?
A device needs to be connected to the internet only when a refresh occurs. Once it has successfully received geofences from the server, it is possible to log a geofence entry or exit even if the device is offline. This is because a device’s location operates separately from its internet connectivity.
For example, say a device successfully received and registered geofences on session start and goes offline. If it then enters one of those registered geofences, it can trigger a Braze campaign.
Why are geofences not monitored when my app is backgrounded/terminated?
Without Always authorization, Apple restricts location services from running while an app is not in use. This is enforced by the operating system and is outside the control of the Braze SDK. While Braze offers separate configurations to run services while the app is in the background, there is no way to circumvent these restrictions for apps that are terminated without receiving explicit authorization from the user.
Prerequisites
Before you can use this feature, you’ll need to integrate the .NET MAUI Braze SDK. Additionally, you’ll need to set up silent push notifications.
Prerequisites
This is the minimum SDK versions needed to start using geofences:
Setting up geofences
Step 1: Enable in Braze
You can enable geofences for your app in one of the following places:
To enable geofences from the Locations page:
- In Braze, go to Audience > Locations.
- The number of apps in your workspace that have geofences enabled is listed under the map. For example, if geofences is only enabled for some of your apps, it may read: 2 of 5 Apps with Geofences enabled. To enable additional apps, select the current count under the map.
- Choose an app to enable geofences for, then select Done.
To enable geofences from the App Settings page:
- In Braze, go to Settings > App Settings.
- Select the app you’d like to enable geofences for.
- Check Geofences Enabled, then select Save.
Next, follow the platform-specific instructions below for either Android or iOS:
Step 2: Add dependencies
Add the following NuGet package reference to your project:
BrazePlatform.BrazeAndroidLocationBinding
Step 3: Update your AndroidManifest.xml
Add the following permissions to your AndroidManifest.xml:
1
2
3
<uses-permission android:name="android.permission.ACCESS_FINE_LOCATION" />
<uses-permission android:name="android.permission.ACCESS_COARSE_LOCATION" />
<uses-permission android:name="android.permission.ACCESS_BACKGROUND_LOCATION" />
The background location access permission is required for geofences to work while the app is in the background on Android 10+ devices.
Step 4: Configure Braze location collection
Ensure that location collection is enabled in your Braze configuration. If you want to enable geofences without automatic location collection, set the following in your Braze.xml:
1
2
<bool name="com_braze_enable_location_collection">true</bool>
<bool name="com_braze_geofences_enabled">true</bool>
Step 5: Request location permissions at runtime
You must request location permissions from the user before registering geofences. In your C# code, use the following pattern:
1
2
3
4
5
6
7
8
9
10
11
12
using AndroidX.Core.App;
using AndroidX.Core.Content;

private void RequestLocationPermission()
{
  // ...existing code for checking and requesting permissions...
}

public override void OnRequestPermissionsResult(int requestCode, string[] permissions, Permission[] grantResults)
{
  // ...existing code for handling permission result...
}
After permissions are granted, initialize Braze location collection:
1
Braze.GetInstance(this).RequestLocationInitialization();
Step 6: Manually request geofence updates (optional)
To manually request geofences for a specific location:
1
Braze.GetInstance(this).RequestGeofences(latitude, longitude);
Geofences can only be requested once per session, either automatically by the SDK or manually with this method.
Step 2: Add dependencies
Add the following NuGet package reference to your project:
Braze.iOS.BrazeLocation
Step 3: Configure location usage in Info.plist
Add a usage description string for location services in your Info.plist:
1
2
3
4
<key>NSLocationAlwaysAndWhenInUseUsageDescription</key>
<string>This app uses your location to enable geofences and location-based messaging.</string>
<key>NSLocationWhenInUseUsageDescription</key>
<string>This app uses your location to enable geofences and location-based messaging.</string>
Apple has deprecated NSLocationAlwaysUsageDescription. Use the keys above for iOS 14+.
Step 4: Enable geofences in your Braze configuration
In your app startup code (e.g., App.xaml.cs), configure Braze with geofences enabled:
1
2
3
4
5
6
7
8
9
10
using BrazeKit;
using BrazeLocation;

var configuration = new BRZConfiguration("<BRAZE_API_KEY>", "<BRAZE_ENDPOINT>");
configuration.Location.BrazeLocationProvider = new BrazeLocationProvider();
configuration.Location.AutomaticLocationCollection = true;
configuration.Location.GeofencesEnabled = true;
configuration.Location.AutomaticGeofenceRequests = true;
// ...other configuration...
var braze = new Braze(configuration);
Step 5: Enable background location updates (optional)
To monitor geofences in the background, enable the Location updates background mode by adding the following configuration to your Info.plist:
1
2
3
4
<key>UIBackgroundModes</key>
<array>
  <string>location</string>
</array>
Then, in your Braze configuration, set:
1
2
configuration.Location.AllowBackgroundGeofenceUpdates = true;
configuration.Location.DistanceFilter = 8000; // meters
Set DistanceFilter to a value that meets your app’s needs to avoid battery drain.
Step 6: Request location authorization
Request either When In Use or Always authorization from the user:
1
2
3
4
5
6
using CoreLocation;

var locationManager = new CLLocationManager();
locationManager.RequestWhenInUseAuthorization();
// or
locationManager.RequestAlwaysAuthorization();
Without Always authorization, iOS restricts location services from running while the app is not in use. This is enforced by the operating system and cannot be bypassed by the Braze SDK.
Geofences are supported on both iOS and Android in the React Native SDK. The requestLocationInitialization method is Android-only and is not required for iOS. The requestGeofences method is available on both platforms. By default, the SDK can automatically request and monitor geofences when location is available; you can rely on this automatic configuration or call requestGeofences to request manually.
Prerequisites
Before you can use this feature, you’ll need to integrate the React Native Braze SDK. On Android, you’ll need to set up silent push notifications for geofence sync.
Setting up geofences
Step 1: Enable in Braze
You can enable geofences for your app in one of the following places:
To enable geofences from the Locations page:
- In Braze, go to Audience > Locations.
- The number of apps in your workspace that have geofences enabled is listed under the map. For example, if geofences is only enabled for some of your apps, it may read: 2 of 5 Apps with Geofences enabled. To enable additional apps, select the current count under the map.
- Choose an app to enable geofences for, then select Done.
To enable geofences from the App Settings page:
- In Braze, go to Settings > App Settings.
- Select the app you’d like to enable geofences for.
- Check Geofences Enabled, then select Save.
Step 2: Complete native Android setup
Because the React Native SDK uses the native Braze Android SDK, complete the native Android geofence setup for your project. The iOS equivalent of these steps is covered in the native Swift SDK geofences guide (steps 2.2 to 3.1); step 2.1 (Add the BrazeLocation module) is not required for React Native because BrazeLocation is already included implicitly with the Braze React Native SDK.
- Update
build.gradle: Addandroid-sdk-locationand Google Play Services location. See Android geofences. - Update the manifest: Add location permissions and the Braze boot receiver. See Android geofences.
- Enable Braze location collection: Update your
braze.xmlfile. See Android geofences.
Step 3: Complete native iOS setup
Because the React Native SDK uses the native Braze iOS SDK, complete the native iOS geofence setup for your project by following the native Swift SDK instructions starting from step 2.2: update your Info.plist with location usage descriptions (step 2.2), and enable geofences in your Braze configuration including automaticGeofenceRequests = true (step 3); optionally enable background reporting (step 3.1). Step 2.1 (Add the BrazeLocation module) is not required—BrazeLocation is already included implicitly with the Braze React Native SDK. See iOS geofences, steps 2.2 to 3.1.
Step 4: Request geofences from JavaScript
On Android: After the user grants location permissions, call requestLocationInitialization() to initialize Braze location features and request geofences from Braze servers. This method is not supported on iOS and is not required for iOS.
On iOS: The equivalent is to enable the automaticGeofenceRequests configuration in your native Swift or Objective-C Braze configuration (see Step 3). With that enabled, the SDK automatically requests and monitors geofences when location is available; no JavaScript call equivalent to requestLocationInitialization is required.
1
2
3
4
import Braze from '@braze/react-native-sdk';

// Android only: call this after the user grants location permission
Braze.requestLocationInitialization();
Step 5: Manually request geofences (optional)
On both iOS and Android, you can manually request a geofence update for a specific GPS coordinate using requestGeofences. By default, Braze automatically retrieves the device’s location and requests geofences. To manually provide a coordinate instead:
- Disable automatic geofence requests. On Android, set
com_braze_automatic_geofence_requests_enabledtofalsein yourbraze.xml. On iOS, setautomaticGeofenceRequeststofalsein your Braze configuration. - Call
requestGeofenceswith the desired latitude and longitude:
1
2
3
import Braze from '@braze/react-native-sdk';

Braze.requestGeofences(33.078947, -116.601356);
Geofences can only be requested once per session, either automatically by the SDK or manually with this method.
 Edit this page on GitHub