Back-in-stock notifications
Using a combination of back-in-stock notifications in Braze Shopify catalogs and a Canvas, you can create and notify customers when an item is back-in-stock. Any time a customer clicks on an item in the catalog, they can be automatically subscribed to be notified when the item is replenished.
Back-in-stock notifications for Braze Shopify catalogs are currently in early access. Contact your account manager if you’re interested in participating in this early access.
How it works
Back-in-stock notifications are determined by notification rules. Subscription statuses will be observed, so if the user has not opted in to notifications, they will be filtered out and will not receive notifications.
Note that users are only subscribed for 90 days. If an item isn’t back in stock within 90 days, the user is removed from the subscription. Braze will process up to 10 item updates per minute. This means if you update 11 items in one minute, only the first 10 items will trigger the back-in-stock notification.
Setting up back-in-stock notifications
Follow these steps to set up back-in-stock notifications in a specific catalog.
- Go to your catalog and click the Settings tab.
- Select the Back in stock toggle.
- Set your notification rule. There are two options: Notify all subscribed users and Notify a certain number of users per a certain number of minutes.
Selecting Notify all subscribed users notifies all customers who are waiting when the item is back in stock. Notify a certain number of users per a certain number of minutes notifies a specified number of customers per your configured notification period. Braze will notify the specified numbers of customers in increments until there are no more customers to notify, or until the item goes out of stock. Your notification rate cannot exceed notifying 10,000 users per minute.
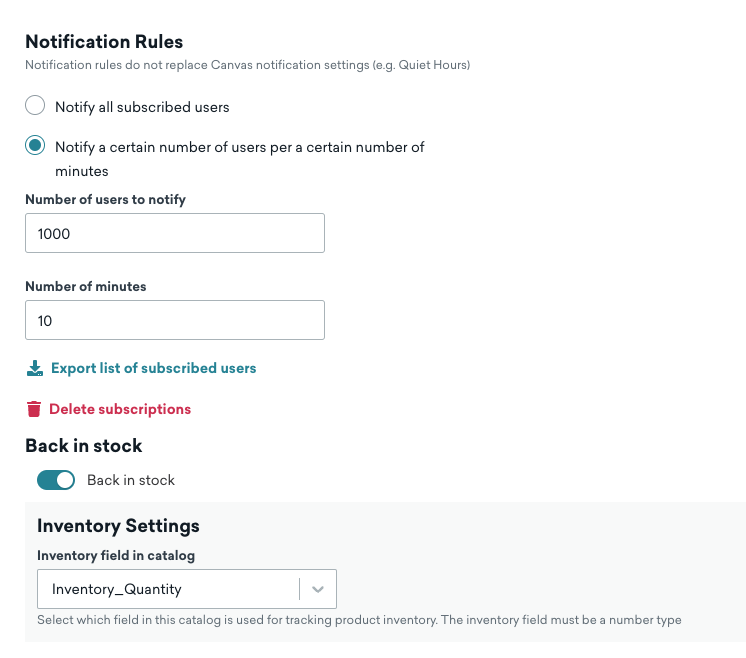
Notification rules in these settings do not replace Canvas notification settings, such as Quiet Hours.
Using back-in-stock notifications in Canvas
After setting up the back-in-stock feature in a catalog, follow these steps to use with Canvas.
- Set up an action-based Canvas.
- Select Back in stock as the trigger.
- Select the name of the catalog with the back-in-stock notifications.
- Continue setting up your Canvas as you would.
Now, your customers can be notified when an item is back in stock.
Using Liquid
To template in details about the catalog item that’s back in stock, you can use the canvas_entry_properties Liquid tag to access the item_id.
Using {{canvas_entry_properties.${catalog_update}}} will return the ID of the item that came back in stock.
Use this Liquid tag {% catalog_items <name_of_your_catalog> {{canvas_entry_properties.${catalog_update}}} %} at the top of your message, then use ``items[0].
Connecting an email capture form
If you have an email capture form to collect user interest in a specific product, you can connect the form to back-in-stock notifications and subscribe users to product updates. To do this, you’ll create a custom event after capturing a user’s email address. You’ll then use the /users/track endpoint to update the user when you send the custom event.
When you send Braze a /users/track request with only an email address, we will search for a user profile with that existing email address and subscribe the user. If we can’t find that email address, we’ll create a new user profile with only an email address so that they can receive messaging too.
Step 1: Create a custom event to subscribe a user from updates
You’ll need these custom event properties to map to the catalog attributes:
email_addressproduct_idwith a value corresponding to the catalog item. If you have a different event property name likeproduct_nameorproduct ID, you can map those names toproduct_idin the Braze platform.catalog_namewith a value corresponding to the catalog name. This is optional, but if you don’t have one you must set a default catalog for Braze to reference in the Braze platform.
Step 2: Create a custom event to remove a user from updates (optional)
If you don’t have a custom event to remove a user, users will automatically be removed after 90 days. You’ll need the same attributes in Step 1 to create this custom event.
After you create your custom event, your email capture form will subscribe users to updates for that specific product.
 Edit this page on GitHub